basic training series: color codes - storage.googleapis.com · basic training lesson 1: drawing...
TRANSCRIPT
1© 2018 Evollve Inc.
BASIC TRAINING SERIES: COLOR CODES
Grade K-2 | Computer Science | Robotics | Beginner
OVERVIEW
In this introductory lesson series, students will learn how Ozobot moves from one place to
another and how to tell Ozobot what to do using Color Codes.
GROUPING
Individual or small groups of no more than three students per bot.
DURATION
4 sessions, approximately 50 minutes each
QUESTIONS ABOUT THESE LESSONS?
Please contact us at [email protected]
TABLE OF CONTENTS
Academic Standards . . . . . . . . . . . . . . . . . . . . . . . . . . . . . . . . . . . . . . . . . . . . . . . . . . . . . . . . . . . . . . . . . . . . . . . . . 2
Basic Training: Before You Begin (for educators) . . . . . . . . . . . . . . . . . . . . . . . . . . . . . . . . . . . . . . . . . . . . . . 3
Lesson 1: Drawing Lines and Maps . . . . . . . . . . . . . . . . . . . . . . . . . . . . . . . . . . . . . . . . . . . . . . . . . . . . . . . . . . . . 5
Lesson 2: Introducing Color Codes . . . . . . . . . . . . . . . . . . . . . . . . . . . . . . . . . . . . . . . . . . . . . . . . . . . . . . . . . . . 11
Lesson 3: Drawing Color Codes . . . . . . . . . . . . . . . . . . . . . . . . . . . . . . . . . . . . . . . . . . . . . . . . . . . . . . . . . . . . . . 17
Lesson 4: Free-Drawing Color Codes . . . . . . . . . . . . . . . . . . . . . . . . . . . . . . . . . . . . . . . . . . . . . . . . . . . . . . . . 22
2 © 2018 Evollve Inc.
ACADEMIC STANDARDS
CCSS.MATH.PRACTICE.MP1 Make sense of problems and persevere in solving them.
CCSS.MATH.PRACTICE.MP5 Use appropriate tools strategically.
CCSS.MATH.PRACTICE.MP7 Look for and make use of structure
ISTE 1c Students use technology to seek feedback that informs and improves their
practice and to demonstrate their learning in a variety of ways.
ISTE 1d Students understand the fundamental concepts of technology operations, demonstrate
the ability to choose, and use and troubleshoot current technologies and are able to transfer their
knowledge to exploring emerging technologies.
ISTE 4a Students know and use a deliberate design process for generative ideas testing theories,
creating innovative artifacts, or solving authentic problems.
ISTE 4d Students exhibit a tolerance for ambiguity, perseverance, and the capacity to work with open-
ended problems.
3 © 2018 Evollve Inc.
Before You Begin
FAQ: Do I need to use Ozobot brand markers?
No. Ozobot markers are optimal for use with your bots due to the flat tips and ideal color shades, but
you can use other black, blue, green, and red markers as well. Sharpie chisel tips and Crayola markers,
have been used successfully. We have found that using light green and light blue markers works well,
as they are less likely to become too dark for Ozobot to read.
FAQ: What kind of surfaces can Ozobot be used on?
Ozobot works on plain white paper or graph paper. Dry erase boards and reflective surfaces are not
recommended.
Calibrating For Younger Students (K-2)
We, and many educators have found, that it is easiest for the instructor to calibrate the bots before
use, rather than having the students calibrate the bots themselves. This ensures enough time can
be given to important lesson content. Calibration instructions for play on paper can be found in Bot
Camp or http://files.ozobot.com/stem-education/ozobot-calibration-tips.pdf.
Handout Previews in Lesson
In the lessons that follow, the handouts that the students will use are previewed in the lesson, but
full-page files for printing are available in the attachments on the lesson description page.
Quick Guides
Before each lesson, you will find a Quick Guide. These contain an abbreviated version of the full
lesson content. It is recommended that you still read through the full lesson and use the Quick
Guide for reference during instruction.
4Basic Training Lesson 1: Drawing Lines and Maps © 2018 Evollve Inc.
Student Resources in Classroom Kit Binder
Many resources have been printed for you and are included in the classroom kit, including:
• Color Code Reference Charts
• Tips for Drawing Lines and Maps
• Tips for Drawing Color Codes
You may want to laminate or put these sheets in a sleeve to avoid having to print more out. Should
you need to print additional resources, you can find them at
https://ozobot.com/stem-education/stem-classroom-kit.
General Tips
For some students with fine motor issues, Color Code Stickers may reduce frustrations. There are
some included in the classroom kit and you can order more using the order form in your Classroom
Kit Binder.
Additionally, we have found that correcting mistakes or adding Color Codes to an area of a line
where no space was left, Avery™ Easy Peel White Inkjet Address Labels are extremely helpful.
Finally, graph paper may be helpful for students just starting out drawing Color Codes. The boxes
are the perfect size for drawing Color Code boxes, and provide the ideal width of line for Ozobot to
follow.
FAQ: Where can I find lessons and ideas when I am finished with Basic Training?
Our Lesson Library contains 150+ lessons created by us, as well as educators like you! Use the search
filter to find subject, grade, and bot-specific lessons. You can find the Lesson Library on the Educators
page of ozobot.com, or find it directly at http://portal.ozobot.com/lessons.
Pre-Reader Color Code Reference
For students who cannot read or are just beginning reading, we have a picture-based Color Code
Reference sheet found on
http://files.ozobot.com/stem-education/ozobot-coor-codes.pdf.
5Basic Training Lesson 1: Drawing Lines and Maps © 2018 Evollve Inc.
Basic Training Lesson 1: Drawing Lines and Maps
QUICK GUIDE
PREPARATION
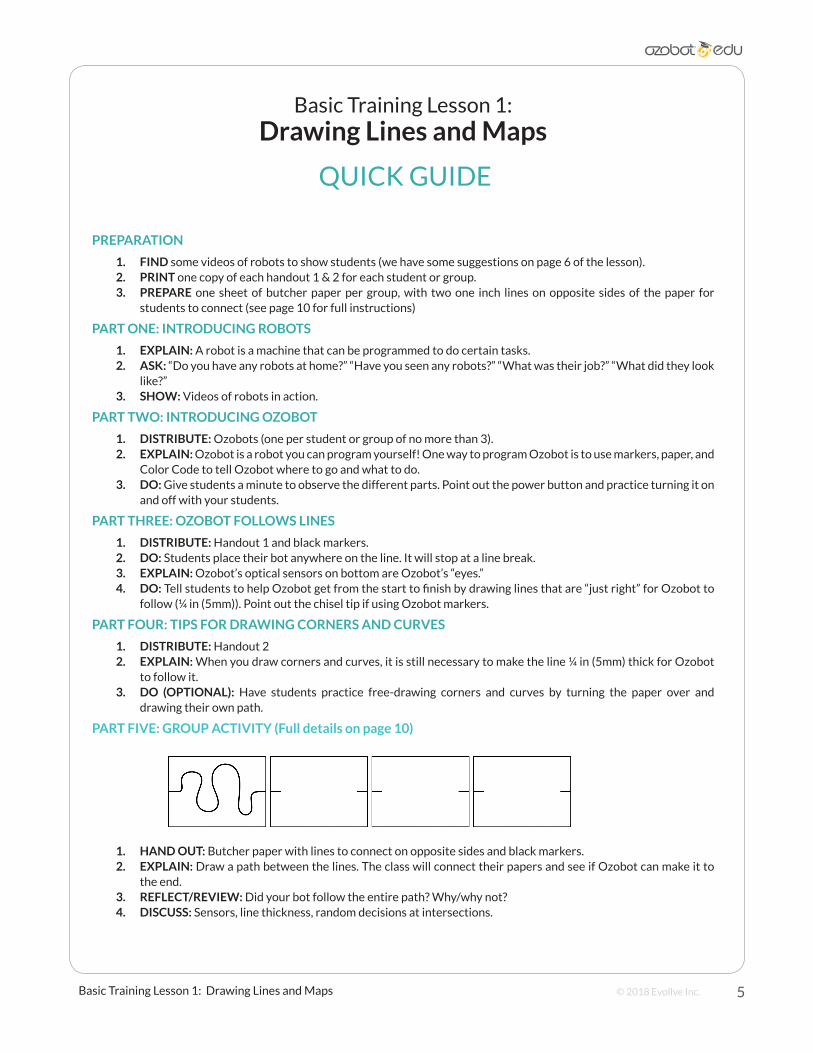
1. FIND some videos of robots to show students (we have some suggestions on page 6 of the lesson).2. PRINT one copy of each handout 1 & 2 for each student or group.3. PREPARE one sheet of butcher paper per group, with two one inch lines on opposite sides of the paper for
students to connect (see page 10 for full instructions)
PART ONE: INTRODUCING ROBOTS
1. EXPLAIN: A robot is a machine that can be programmed to do certain tasks.2. ASK: “Do you have any robots at home?” “Have you seen any robots?” “What was their job?” “What did they look
like?”3. SHOW: Videos of robots in action.
PART TWO: INTRODUCING OZOBOT
1. DISTRIBUTE: Ozobots (one per student or group of no more than 3).2. EXPLAIN: Ozobot is a robot you can program yourself! One way to program Ozobot is to use markers, paper, and
Color Code to tell Ozobot where to go and what to do.3. DO: Give students a minute to observe the different parts. Point out the power button and practice turning it on
and off with your students.
PART THREE: OZOBOT FOLLOWS LINES
1. DISTRIBUTE: Handout 1 and black markers.2. DO: Students place their bot anywhere on the line. It will stop at a line break.3. EXPLAIN: Ozobot’s optical sensors on bottom are Ozobot’s “eyes.”4. DO: Tell students to help Ozobot get from the start to finish by drawing lines that are “just right” for Ozobot to
follow (¼ in (5mm)). Point out the chisel tip if using Ozobot markers.
PART FOUR: TIPS FOR DRAWING CORNERS AND CURVES
1. DISTRIBUTE: Handout 22. EXPLAIN: When you draw corners and curves, it is still necessary to make the line ¼ in (5mm) thick for Ozobot
to follow it.3. DO (OPTIONAL): Have students practice free-drawing corners and curves by turning the paper over and
drawing their own path.
PART FIVE: GROUP ACTIVITY (Full details on page 10)
1. HAND OUT: Butcher paper with lines to connect on opposite sides and black markers.2. EXPLAIN: Draw a path between the lines. The class will connect their papers and see if Ozobot can make it to
the end.3. REFLECT/REVIEW: Did your bot follow the entire path? Why/why not?4. DISCUSS: Sensors, line thickness, random decisions at intersections.
6Basic Training Lesson 1: Drawing Lines and Maps © 2018 Evollve Inc.
BASIC TRAINING LESSON 1: DRAWING LINES AND MAPS
MATERIALS (PER GROUP)
• Black and colored markers
• Handouts 1 & 2
• Plain large white paper or white butcher paper
• 1 Bit or Evo (charged and calibrated)
• Computer/projector (to show videos)
PREPARATION
• Print a copy of each handout for each individual or group.
• Queue up some exciting robot videos for part one. Some suggestions are given, but
you may share any video you feel your class will enjoy.
• You will need to prepare one sheet of butcher paper per group with beginning and
end lines for students to create their own course (see example on page 10).
PART ONE: INTRODUCING ROBOTS
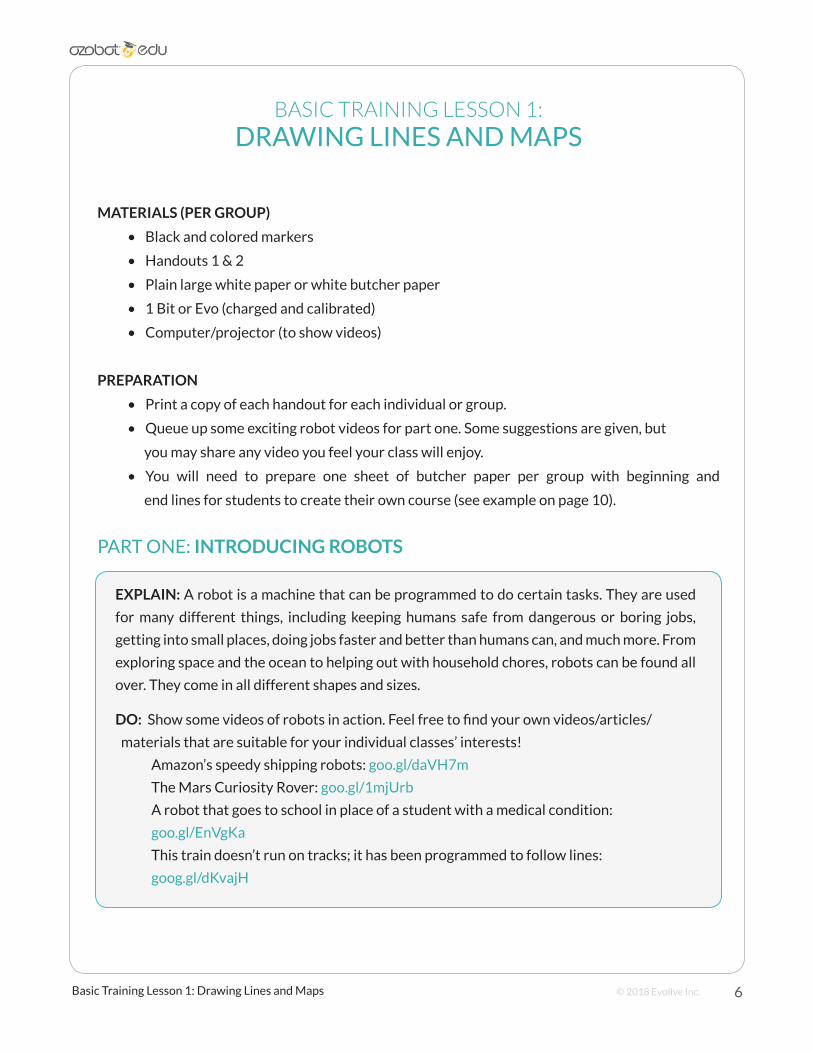
EXPLAIN: A robot is a machine that can be programmed to do certain tasks. They are used
for many different things, including keeping humans safe from dangerous or boring jobs,
getting into small places, doing jobs faster and better than humans can, and much more. From
exploring space and the ocean to helping out with household chores, robots can be found all
over. They come in all different shapes and sizes.
DO: Show some videos of robots in action. Feel free to find your own videos/articles/
materials that are suitable for your individual classes’ interests!
Amazon’s speedy shipping robots: goo.gl/daVH7m
The Mars Curiosity Rover: goo.gl/1mjUrb
A robot that goes to school in place of a student with a medical condition:
goo.gl/EnVgKa
This train doesn’t run on tracks; it has been programmed to follow lines:
goog.gl/dKvajH
7Basic Training Lesson 1: Drawing Lines and Maps © 2018 Evollve Inc.
PART TWO: INTRODUCING ROBOTS
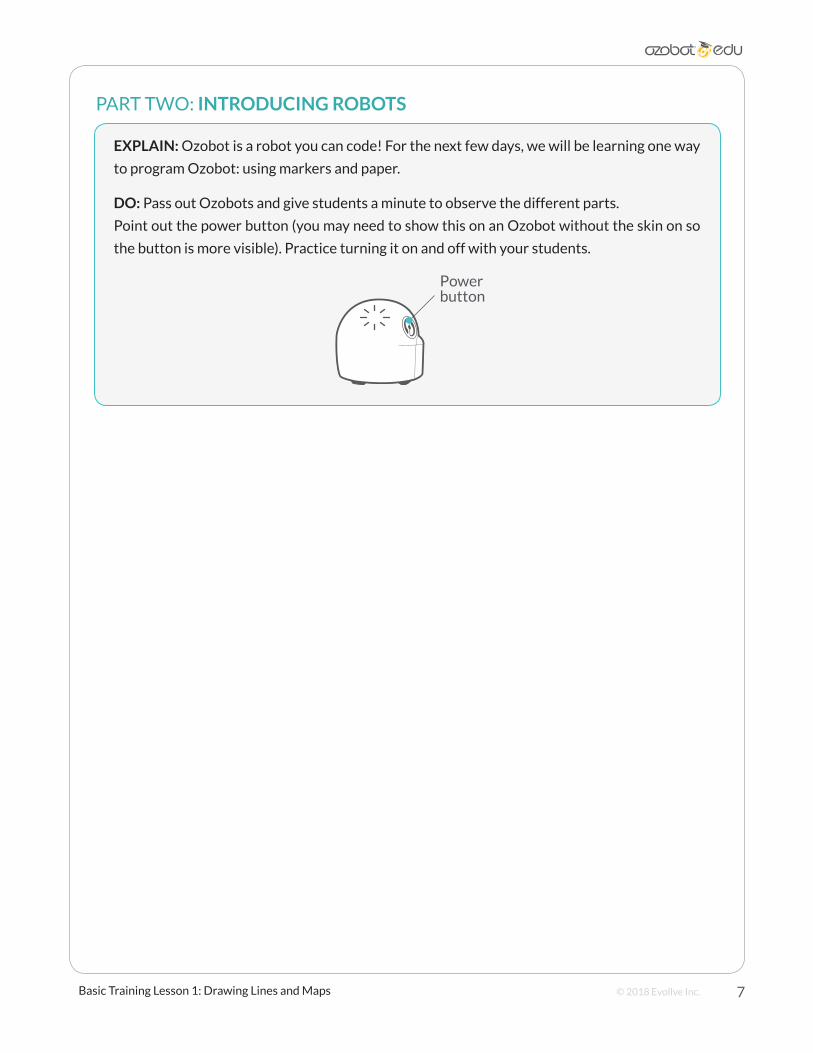
EXPLAIN: Ozobot is a robot you can code! For the next few days, we will be learning one way
to program Ozobot: using markers and paper.
DO: Pass out Ozobots and give students a minute to observe the different parts.
Point out the power button (you may need to show this on an Ozobot without the skin on so
the button is more visible). Practice turning it on and off with your students.
Powerbutton
8Basic Training Lesson 1: Drawing Lines and Maps © 2018 Evollve Inc.
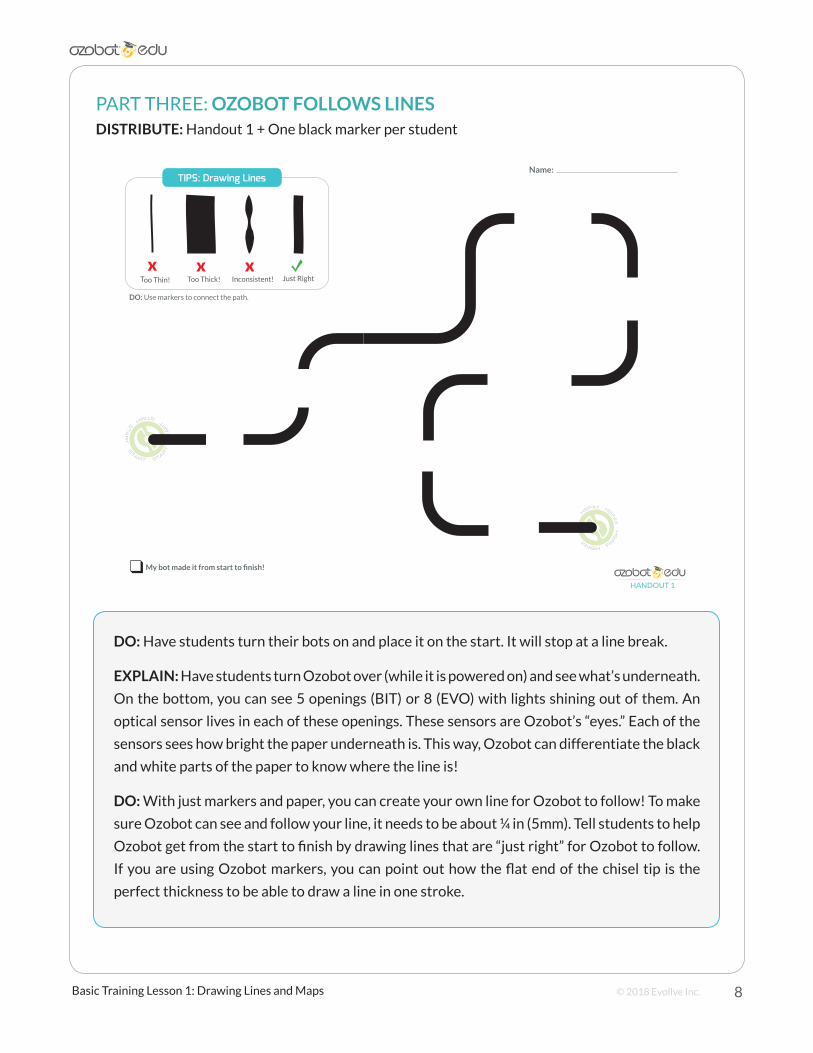
PART THREE: OZOBOT FOLLOWS LINESDISTRIBUTE: Handout 1 + One black marker per student
DO: Have students turn their bots on and place it on the start. It will stop at a line break.
EXPLAIN: Have students turn Ozobot over (while it is powered on) and see what’s underneath.
On the bottom, you can see 5 openings (BIT) or 8 (EVO) with lights shining out of them. An
optical sensor lives in each of these openings. These sensors are Ozobot’s “eyes.” Each of the
sensors sees how bright the paper underneath is. This way, Ozobot can differentiate the black
and white parts of the paper to know where the line is!
DO: With just markers and paper, you can create your own line for Ozobot to follow! To make
sure Ozobot can see and follow your line, it needs to be about ¼ in (5mm). Tell students to help
Ozobot get from the start to finish by drawing lines that are “just right” for Ozobot to follow.
If you are using Ozobot markers, you can point out how the flat end of the chisel tip is the
perfect thickness to be able to draw a line in one stroke.
FINISH FINIS
HFIN
ISH
FINISH
STA
RT
S
TART STA
RT
S
TA
R
TSTART
TIPS: Drawing Lines
Too Thin! Too Thick! Inconsistent! Just Right
DO: Use markers to connect the path.
� My bot made it from start to finish!
Name:
HANDOUT 1

9Basic Training Lesson 1: Drawing Lines and Maps © 2018 Evollve Inc.
PART FOUR: TIPS FOR DRAWING CORNERS AND CURVESDISTRIBUTE: Handout 2
EXPLAIN: When you draw corners and curves, it is still necessary to make the line ¼ in (5mm)
thick for Ozobot to follow it.
DO (OPTIONAL): Have students practice free-drawing corners and curves by turning the
handout over and drawing their own path.
Tips for Drawing Lines: Corners and Curves
Too Close! Just Right Too Sharp! Just Right Just Right
Name:
STA
RT
S
TART STA
RT
S
TA
R
T
FIN
ISH
FIN
ISH FINISH
FIN
ISH
Do: Use markers to connect the path.
HANDOUT 2
� My bot made it from start to finish!
10Basic Training Lesson 2: Introducing Color Codes © 2018 Evollve Inc.
PART FIVE (CLASS ACTIVITY): STUDENTS PRACTICE DRAWING THEIR OWN LINESDISTRIBUTE: Plain white paper or butcher paper & various colored markers.
DO: It’s the moment your students have been waiting for! At this point, allow your students
to create their own path, making it as long and curvy as they want, but having them make
sure their lines and curves are such that Ozobot can follow the whole line.
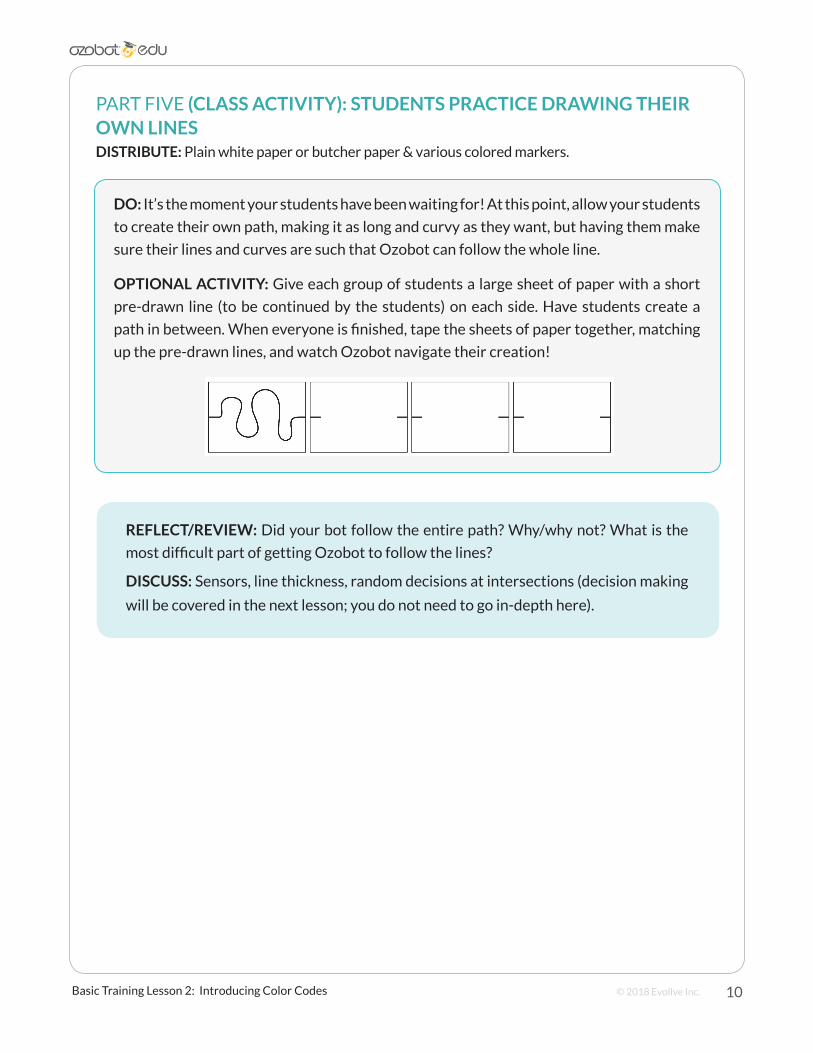
OPTIONAL ACTIVITY: Give each group of students a large sheet of paper with a short
pre-drawn line (to be continued by the students) on each side. Have students create a
path in between. When everyone is finished, tape the sheets of paper together, matching
up the pre-drawn lines, and watch Ozobot navigate their creation!
REFLECT/REVIEW: Did your bot follow the entire path? Why/why not? What is the
most difficult part of getting Ozobot to follow the lines?
DISCUSS: Sensors, line thickness, random decisions at intersections (decision making
will be covered in the next lesson; you do not need to go in-depth here).
11Basic Training Lesson 2: Introducing Color Codes © 2018 Evollve Inc.
Basic Training Lesson 2:Introducing Color Codes
QUICK GUIDE
PREPARAION1. PRINT one copy of each handout (3 and 4) for each student or group.
2. PRINT one copy of the “Tour de Ozobot” activity per student, and one copy of the Pre-Reader Color
Code Reference Chart per student or group. Optional: Project onto the board for the class.
PART ONE: OZOBOT SEES COLORS
1. DISTRIBUTE: Plain white paper and colored markers
2. DO: Allow students to spend time free-drawing paths using colored markers.
3. ASK: “How does Ozobot tell you the color it sees?”
4. EXPLAIN: The middle sensor underneath is a color sensor, and the top LED shows what color Ozobot
is seeing.
PART TWO: DISCOVER OZOBOT’S LANGUAGE
1. DISTRIBUTE: Handout 3.
2. DO: Have students fill in the color code boxes according to the instructions on the handout.
3. ASK: “What is each color code telling Ozobot to do?”
PART THREE: ORDER MATTERS
1. DISTRIBUTE: Handout 4.
2. DO: Have students fill in the color code boxes according to the instructions on the handout.
3. ASK: “Which color code does Ozobot react differently to from Start 2?
4. EXPLAIN: Some codes are symmetric (has the same meaning both ways Ozobot goes over it). Some codes,
though, are non-symmetric (have different meanings when Ozobot reads it from the opposite way).
PART FOUR (ACTIVITY): TOUR DE OZOBOT!
1. DISTRIBUTE: Tour de Ozobot and Pre-Reader Color Code Reference Chart.
2. EXPLAIN: Find the correct color codes to place in the boxes. Remember that order matters!
REFLECT/REVIEW
ASK: “What is the difference between a symmetric and non-symmetric color code?”
“What is the purpose of a color code?”
“Do you have any tips for your classmates about how to make sure Ozobot reads the color code
in the correct order?”
“Which non-symmetric color codes were similar when they were read backward and forward?
Which were the most different?”
“What is your favorite color code?”
12Basic Training Lesson 2: Introducing Color Codes © 2018 Evollve Inc.
BASIC TRAINING LESSON 2:
INTRODUCING COLOR CODES
MATERIALS (PER GROUP)
• Bit or Evo (charged and calibrated)
• Black, red, blue, and green markers
• Plain white paper
• Handouts 3 and 4
• White Avery™ mailing labels (optional- for re-do’s)
• Color Codes Reference Sheet
http://play-ozobot.com/print/guides/ozobot-color-codes-reference.pdf
PREPARATION
• You will need to print a copy of Handout 3, Handout 4, and “Tour de Ozobot”
(found in lesson attachments) for each individual or group.
PART ONE: OZOBOT SEES COLORS
DISTRIBUTE: Plain white paper and colored markers
Tip: For this activity, you can use other colors such as orange, purple, pink, etc., the bot will display
the colors.
DO: Start by allowing students to free-draw lines with colors, remembering what they learned
in the previous lesson about drawing lines that Ozobot can follow. Have students put Ozobot
at the start of the line and watch as it follows the line over the colors.
ASK: How does Ozobot tell you the color it sees? Answer: The LED light on top changes to the
color it is driving over and sensing underneath.
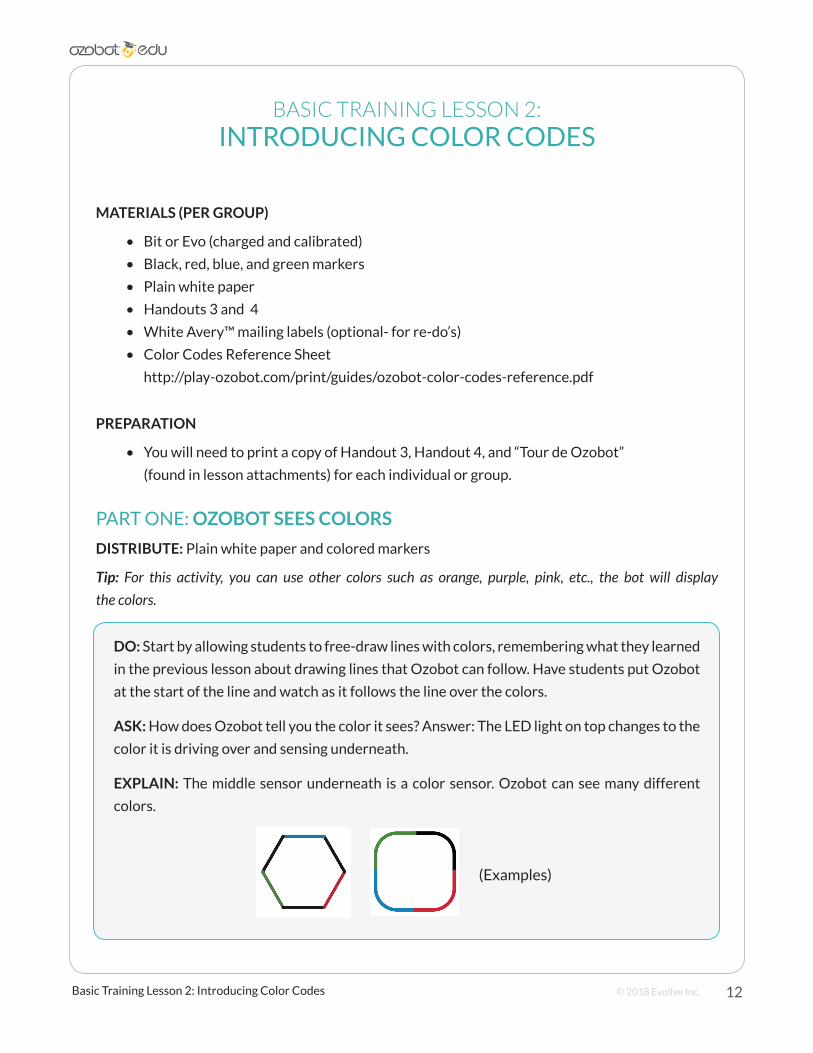
EXPLAIN: The middle sensor underneath is a color sensor. Ozobot can see many different
colors.
(Examples)
13Basic Training Lesson 2: Introducing Color Codes © 2018 Evollve Inc.
PART TWO: DISCOVER OZOBOT’S LANGUAGE
DISTRIBUTE: Handout 3
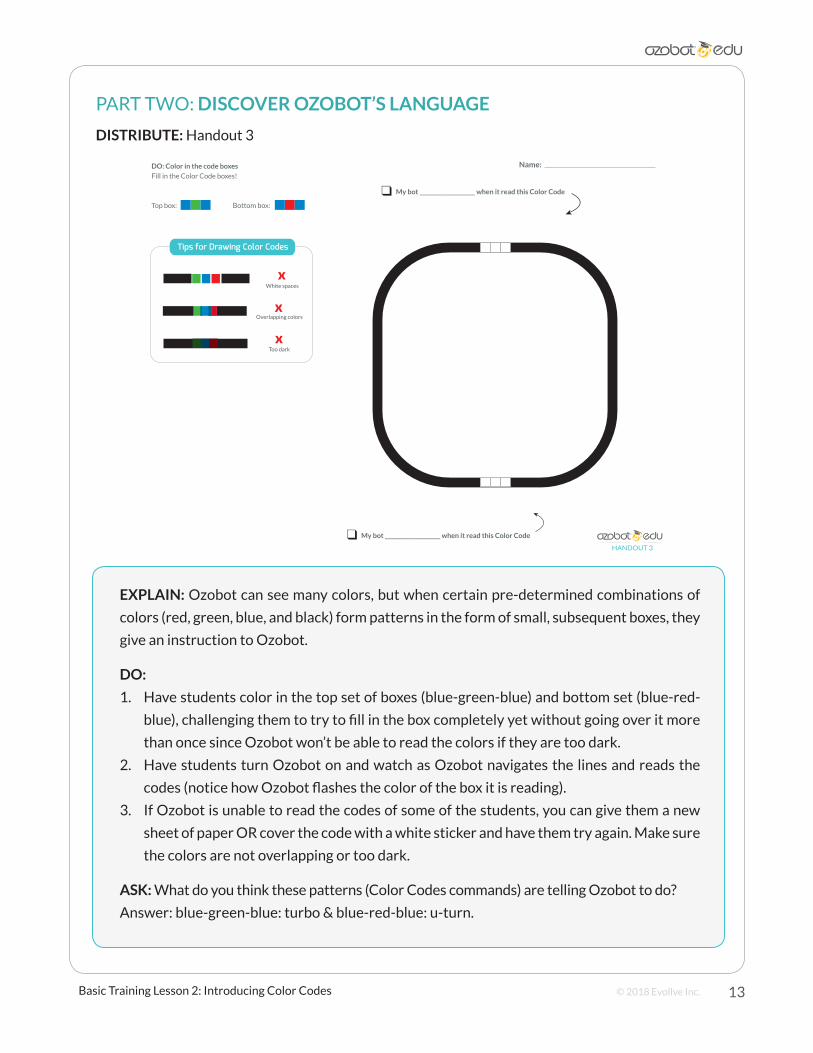
EXPLAIN: Ozobot can see many colors, but when certain pre-determined combinations of
colors (red, green, blue, and black) form patterns in the form of small, subsequent boxes, they
give an instruction to Ozobot.
DO:
1. Have students color in the top set of boxes (blue-green-blue) and bottom set (blue-red-
blue), challenging them to try to fill in the box completely yet without going over it more
than once since Ozobot won’t be able to read the colors if they are too dark.
2. Have students turn Ozobot on and watch as Ozobot navigates the lines and reads the
codes (notice how Ozobot flashes the color of the box it is reading).
3. If Ozobot is unable to read the codes of some of the students, you can give them a new
sheet of paper OR cover the code with a white sticker and have them try again. Make sure
the colors are not overlapping or too dark.
ASK: What do you think these patterns (Color Codes commands) are telling Ozobot to do?
Answer: blue-green-blue: turbo & blue-red-blue: u-turn.
DO: Color in the code boxes
Fill in the Color Code boxes!
Top box: Bottom box:
HANDOUT 3
Name:
� My bot ____________________ when it read this Color Code
� My bot ____________________ when it read this Color Code
White spaces
Overlapping colors
Too dark
Tips for Drawing Color Codes
14Basic Training Lesson 2: Introducing Color Codes © 2018 Evollve Inc.
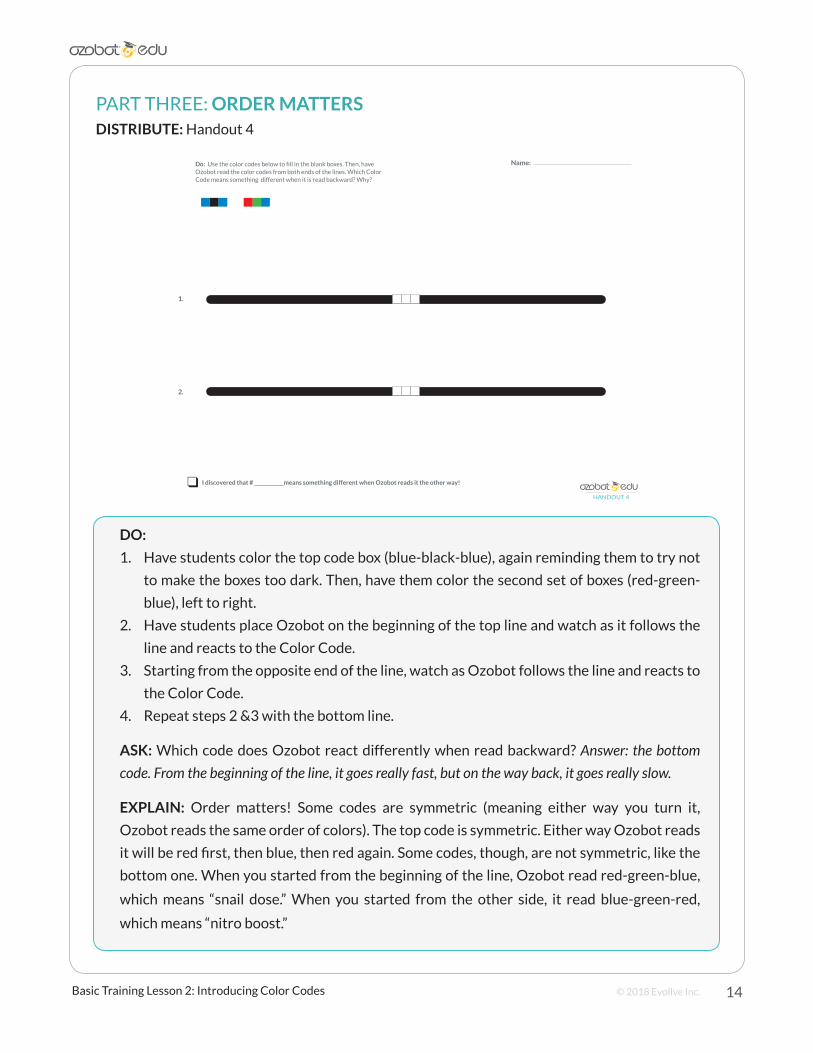
PART THREE: ORDER MATTERSDISTRIBUTE: Handout 4
DO:
1. Have students color the top code box (blue-black-blue), again reminding them to try not
to make the boxes too dark. Then, have them color the second set of boxes (red-green-
blue), left to right.
2. Have students place Ozobot on the beginning of the top line and watch as it follows the
line and reacts to the Color Code.
3. Starting from the opposite end of the line, watch as Ozobot follows the line and reacts to
the Color Code.
4. Repeat steps 2 &3 with the bottom line.
ASK: Which code does Ozobot react differently when read backward? Answer: the bottom
code. From the beginning of the line, it goes really fast, but on the way back, it goes really slow.
EXPLAIN: Order matters! Some codes are symmetric (meaning either way you turn it,
Ozobot reads the same order of colors). The top code is symmetric. Either way Ozobot reads
it will be red first, then blue, then red again. Some codes, though, are not symmetric, like the
bottom one. When you started from the beginning of the line, Ozobot read red-green-blue,
which means “snail dose.” When you started from the other side, it read blue-green-red,
which means “nitro boost.”
Do: Use the color codes below to fill in the blank boxes. Then, haveOzobot read the color codes from both ends of the lines. Which ColorCode means something different when it is read backward? Why?
Name:
HANDOUT 4
� I discovered that # ____________means something different when Ozobot reads it the other way!
1.
2.
15Basic Training Lesson 2: Introducing Color Codes © 2018 Evollve Inc.
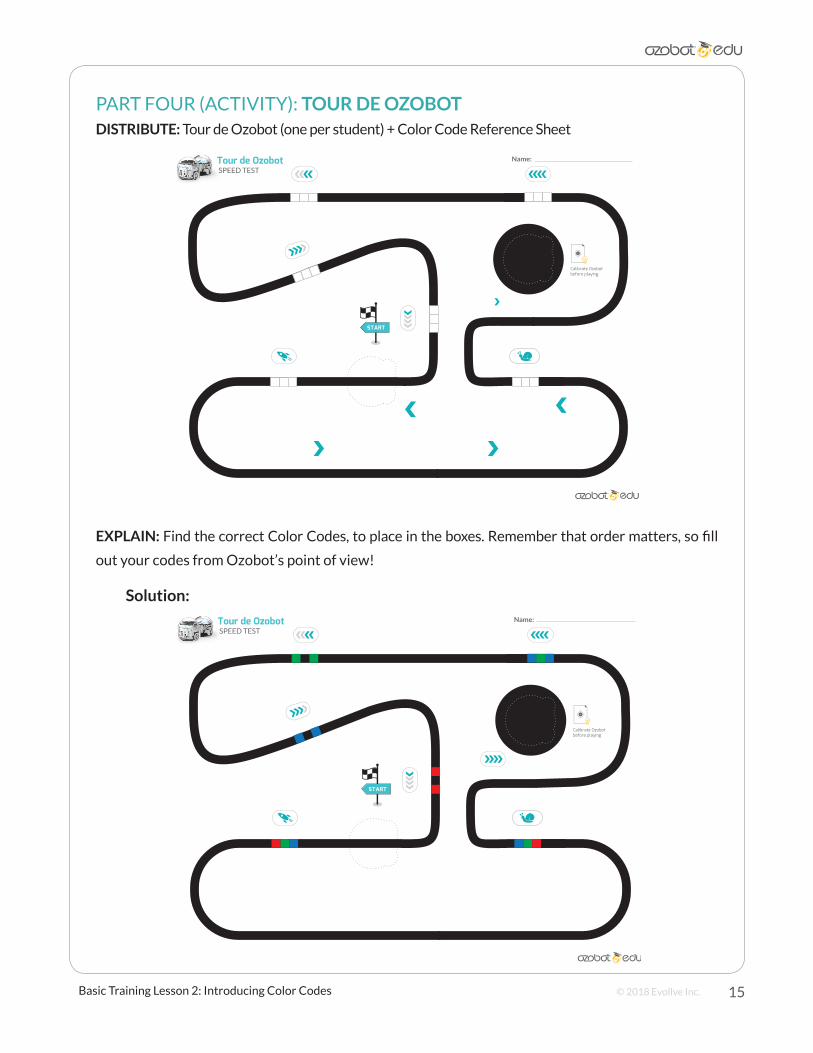
PART FOUR (ACTIVITY): TOUR DE OZOBOTDISTRIBUTE: Tour de Ozobot (one per student) + Color Code Reference Sheet
EXPLAIN: Find the correct Color Codes, to place in the boxes. Remember that order matters, so fill
out your codes from Ozobot’s point of view!
Solution:
START
Calibrate Ozobotbefore playing
Tour de OzobotSPEED TEST
Name:
START
Calibrate Ozobotbefore playing
Tour de OzobotSPEED TEST
Name:
16Basic Training Lesson 2: Introducing Color Codes © 2018 Evollve Inc.
REFLECT/REVIEW
ASK: “What is your favorite color code?”
“What is the purpose of a color code?”
“What is the difference between a symmetric and non-symmetric color code?”
“Do you have any tips for your classmates about how to make sure Ozobot
reads the color code in the correct order?”
“Which non-symmetric color codes were similar when they were read backward
and forward? Which were the most different?”
17Basic Training Lesson 3: Drawing Color Codes © 2018 Evollve Inc.
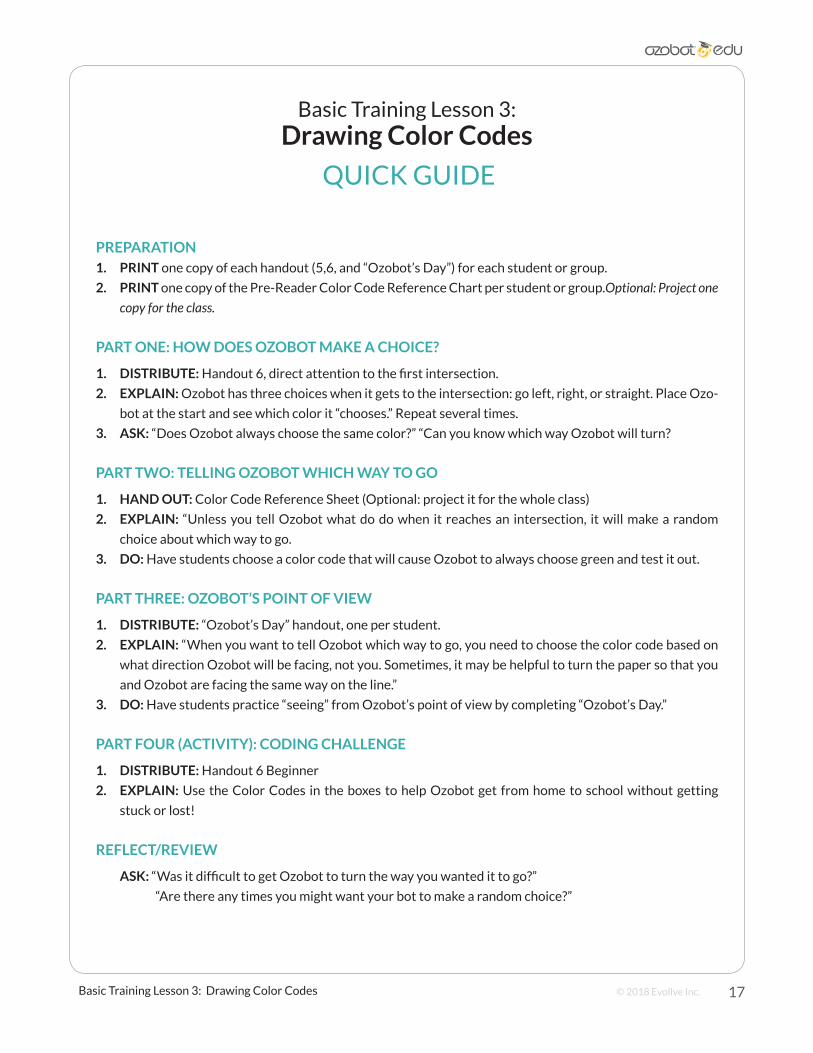
Basic Training Lesson 3:Drawing Color Codes
QUICK GUIDE
PREPARATION1. PRINT one copy of each handout (5,6, and “Ozobot’s Day”) for each student or group.
2. PRINT one copy of the Pre-Reader Color Code Reference Chart per student or group.Optional: Project one
copy for the class.
PART ONE: HOW DOES OZOBOT MAKE A CHOICE?
1. DISTRIBUTE: Handout 6, direct attention to the first intersection.
2. EXPLAIN: Ozobot has three choices when it gets to the intersection: go left, right, or straight. Place Ozo-
bot at the start and see which color it “chooses.” Repeat several times.
3. ASK: “Does Ozobot always choose the same color?” “Can you know which way Ozobot will turn?
PART TWO: TELLING OZOBOT WHICH WAY TO GO
1. HAND OUT: Color Code Reference Sheet (Optional: project it for the whole class)
2. EXPLAIN: “Unless you tell Ozobot what do do when it reaches an intersection, it will make a random
choice about which way to go.
3. DO: Have students choose a color code that will cause Ozobot to always choose green and test it out.
PART THREE: OZOBOT’S POINT OF VIEW
1. DISTRIBUTE: “Ozobot’s Day” handout, one per student.
2. EXPLAIN: “When you want to tell Ozobot which way to go, you need to choose the color code based on
what direction Ozobot will be facing, not you. Sometimes, it may be helpful to turn the paper so that you
and Ozobot are facing the same way on the line.”
3. DO: Have students practice “seeing” from Ozobot’s point of view by completing “Ozobot’s Day.”
PART FOUR (ACTIVITY): CODING CHALLENGE
1. DISTRIBUTE: Handout 6 Beginner
2. EXPLAIN: Use the Color Codes in the boxes to help Ozobot get from home to school without getting
stuck or lost!
REFLECT/REVIEW
ASK: “Was it difficult to get Ozobot to turn the way you wanted it to go?”
“Are there any times you might want your bot to make a random choice?”
18Basic Training Lesson 3: Drawing Color Codes © 2018 Evollve Inc.
BASIC TRAINING: LESSON 3
DRAWING COLOR CODES
MATERIALS (PER GROUP)
• Bit or Evo (charged and calibrated)
• Black, blue, green, and red markers
• Handouts 5, 6, Beginner and Ozobot’s Day
• Color Codes Reference Sheet
PREPARATION
• You will need to print a copy of Handout 5, Handout 6, and “Ozobot’s Day” (found in lesson
attachments) for each individual or group.
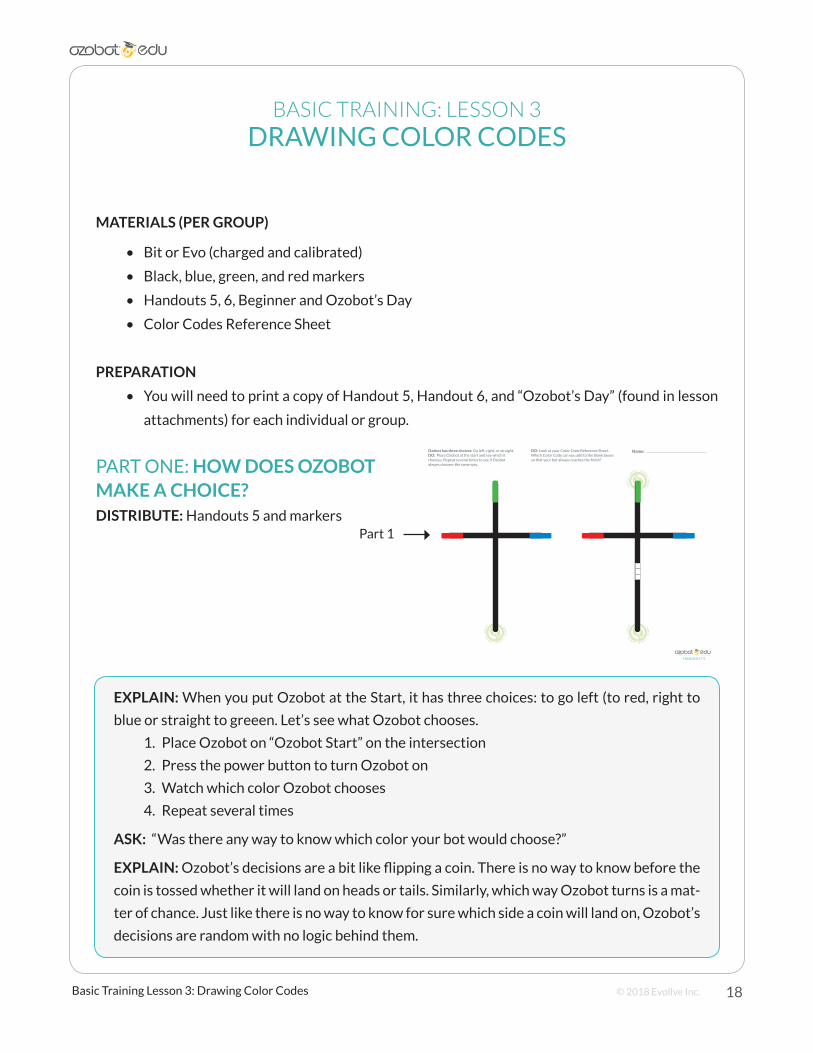
PART ONE: HOW DOES OZOBOT MAKE A CHOICE?DISTRIBUTE: Handouts 5 and markers
EXPLAIN: When you put Ozobot at the Start, it has three choices: to go left (to red, right to
blue or straight to greeen. Let’s see what Ozobot chooses.
1. Place Ozobot on “Ozobot Start” on the intersection
2. Press the power button to turn Ozobot on
3. Watch which color Ozobot chooses
4. Repeat several times
ASK: “Was there any way to know which color your bot would choose?”
EXPLAIN: Ozobot’s decisions are a bit like flipping a coin. There is no way to know before the
coin is tossed whether it will land on heads or tails. Similarly, which way Ozobot turns is a mat-
ter of chance. Just like there is no way to know for sure which side a coin will land on, Ozobot’s
decisions are random with no logic behind them.
DO: Look at your Color Code Reference Sheet.Which Color Code can you add to the blank boxesso that your bot always reaches the finish?
STA
RT
Ozobot has three choices: Go left, right, or straight.DO: Place Ozobot at the start and see which it chooses. Repeat several times to see if Ozobotalways chooses the same way.
Name:
HANDOUT 5
Part 1
19Basic Training Lesson 3: Drawing Color Codes © 2018 Evollve Inc.
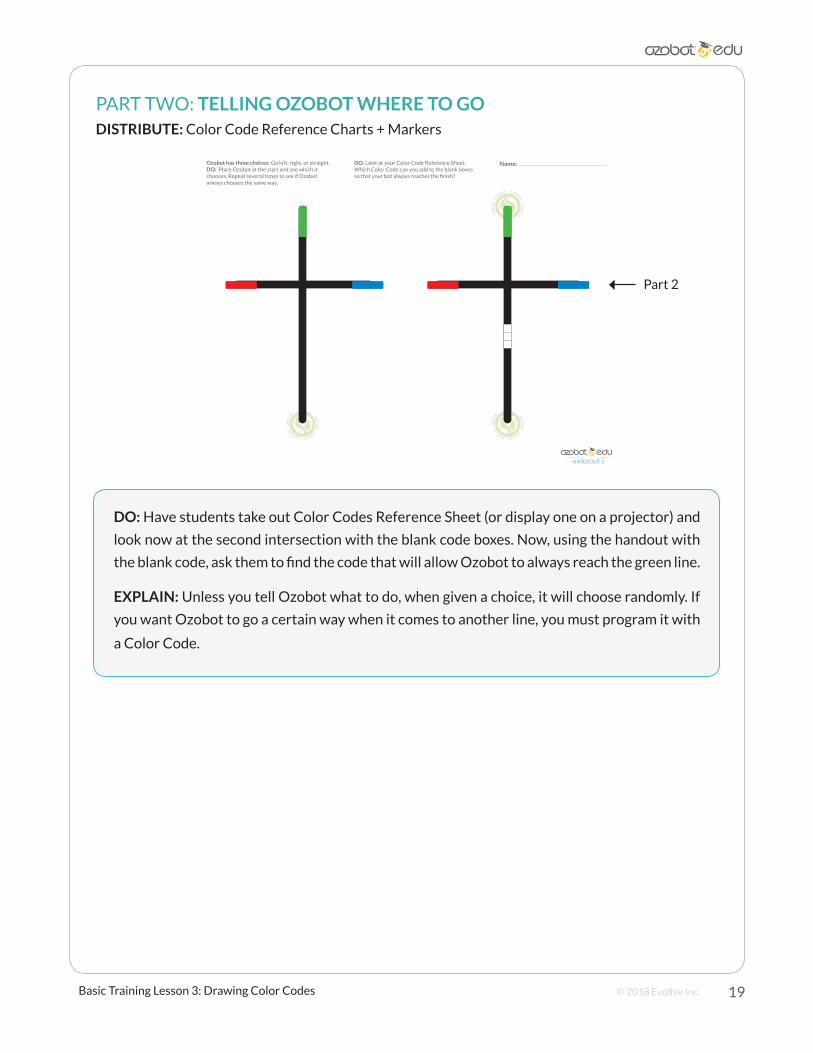
PART TWO: TELLING OZOBOT WHERE TO GODISTRIBUTE: Color Code Reference Charts + Markers
DO: Have students take out Color Codes Reference Sheet (or display one on a projector) and
look now at the second intersection with the blank code boxes. Now, using the handout with
the blank code, ask them to find the code that will allow Ozobot to always reach the green line.
EXPLAIN: Unless you tell Ozobot what to do, when given a choice, it will choose randomly. If
you want Ozobot to go a certain way when it comes to another line, you must program it with
a Color Code.
DO: Look at your Color Code Reference Sheet.Which Color Code can you add to the blank boxesso that your bot always reaches the finish?
STA
RT
Ozobot has three choices: Go left, right, or straight.DO: Place Ozobot at the start and see which it chooses. Repeat several times to see if Ozobotalways chooses the same way.
Name:
HANDOUT 5
Part 2
20Basic Training Lesson 3: Drawing Color Codes © 2018 Evollve Inc.
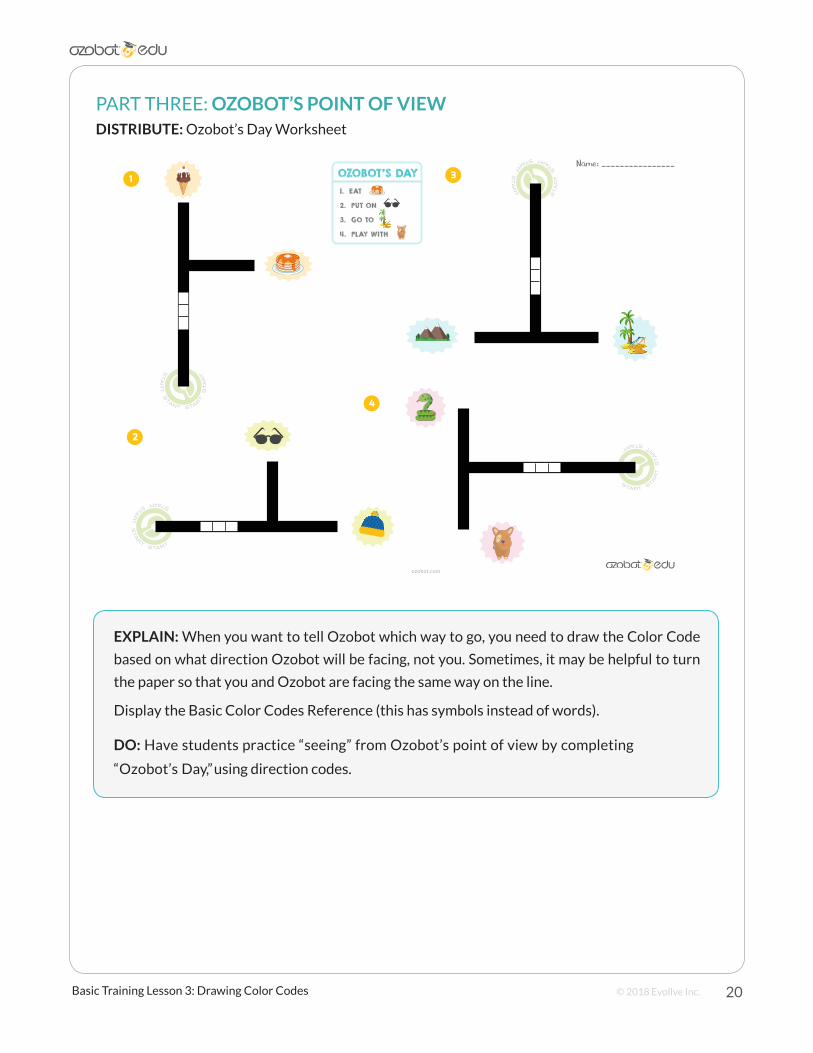
PART THREE: OZOBOT’S POINT OF VIEWDISTRIBUTE: Ozobot’s Day Worksheet
EXPLAIN: When you want to tell Ozobot which way to go, you need to draw the Color Code
based on what direction Ozobot will be facing, not you. Sometimes, it may be helpful to turn
the paper so that you and Ozobot are facing the same way on the line.
Display the Basic Color Codes Reference (this has symbols instead of words).
DO: Have students practice “seeing” from Ozobot’s point of view by completing
“Ozobot’s Day,” using direction codes.
STA
RT
START STAR
TS
TA
RT
STARTSTAR
TS
TAR
TSTART
Name: ________________
STA
RT
STA
RTSTAR
TS
TA
RT
START STAR
TS
TAR
TSTART
OZOBOT’S DAY1. EAT
2. PUT ON
3. GO TO
4. PLAY WITH
1
2
4
3
ozobot.com
21Basic Training Lesson 4: Free-Drawing Lines and Color Codes © 2018 Evollve Inc.
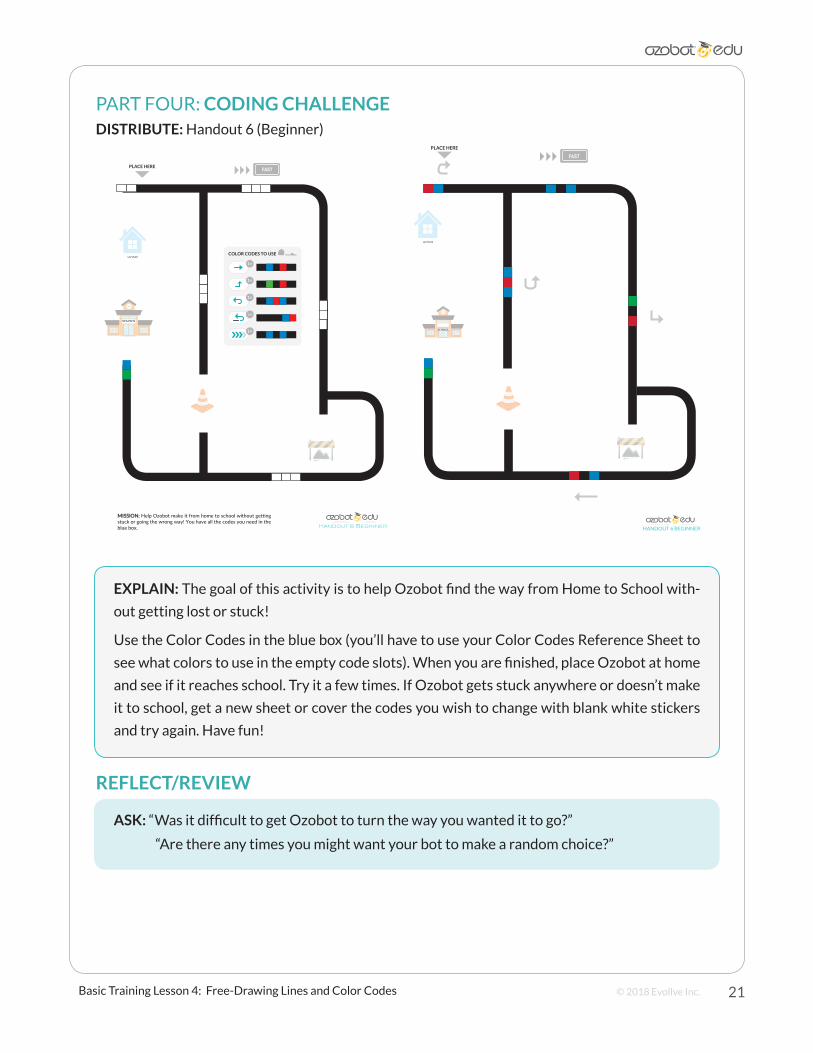
PART FOUR: CODING CHALLENGEDISTRIBUTE: Handout 6 (Beginner)
EXPLAIN: The goal of this activity is to help Ozobot find the way from Home to School with-
out getting lost or stuck!
Use the Color Codes in the blue box (you’ll have to use your Color Codes Reference Sheet to
see what colors to use in the empty code slots). When you are finished, place Ozobot at home
and see if it reaches school. Try it a few times. If Ozobot gets stuck anywhere or doesn’t make
it to school, get a new sheet or cover the codes you wish to change with blank white stickers
and try again. Have fun!
REFLECT/REVIEW
ASK: “Was it difficult to get Ozobot to turn the way you wanted it to go?”
“Are there any times you might want your bot to make a random choice?”
PLACE HERE FAST
MISSION: Help Ozobot make it from home to school without getting stuck or going the wrong way! You have all the codes you need in the blue box.
SCHOOLSCHOOL
HOMECOLOR CODES TO USE
1×
1×
1×
1×
1×
Handout 6 Beginner
HOME
SCHOOLSCHOOL
HANDOUT 6 BEGINNER
PLACE HERE
FAST
22Basic Training Lesson 4: Free-Drawing Lines and Color Codes © 2018 Evollve Inc.
Basic Training Lesson 4:Free-Drawing Lines and Color Codes
QUICK GUIDE
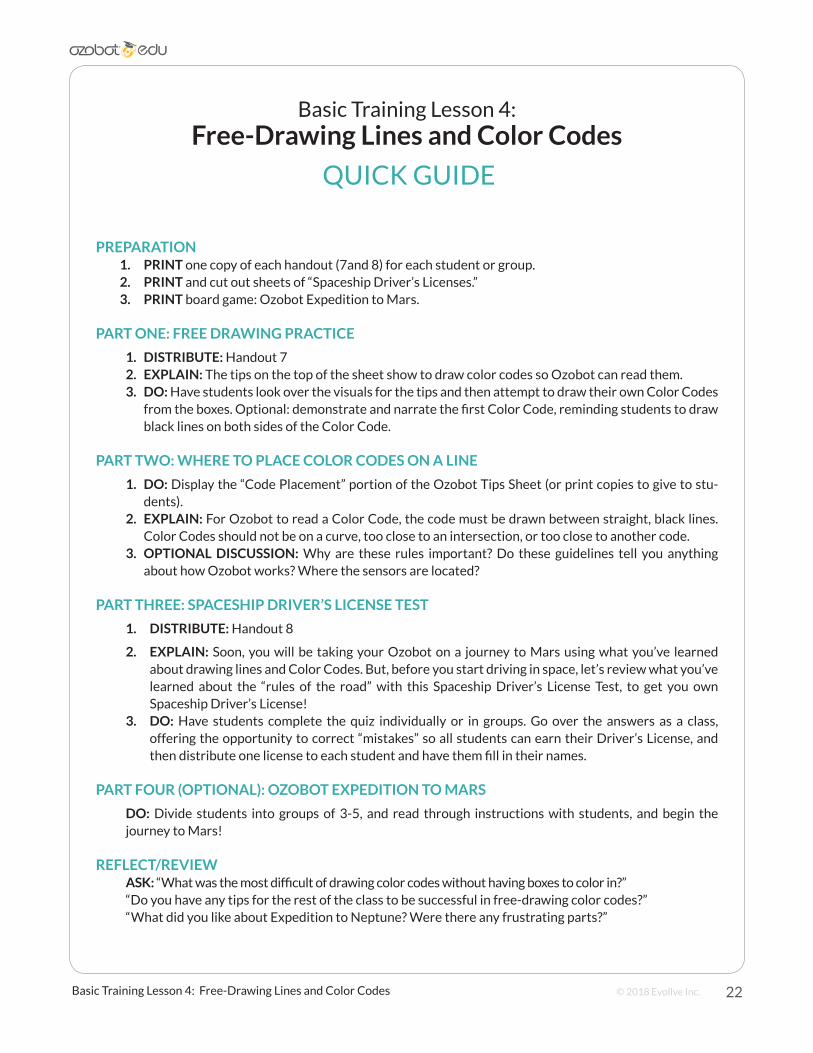
PREPARATION1. PRINT one copy of each handout (7and 8) for each student or group.2. PRINT and cut out sheets of “Spaceship Driver’s Licenses.”3. PRINT board game: Ozobot Expedition to Mars.
PART ONE: FREE DRAWING PRACTICE
1. DISTRIBUTE: Handout 72. EXPLAIN: The tips on the top of the sheet show to draw color codes so Ozobot can read them.3. DO: Have students look over the visuals for the tips and then attempt to draw their own Color Codes
from the boxes. Optional: demonstrate and narrate the first Color Code, reminding students to draw black lines on both sides of the Color Code.
PART TWO: WHERE TO PLACE COLOR CODES ON A LINE
1. DO: Display the “Code Placement” portion of the Ozobot Tips Sheet (or print copies to give to stu-dents).
2. EXPLAIN: For Ozobot to read a Color Code, the code must be drawn between straight, black lines.Color Codes should not be on a curve, too close to an intersection, or too close to another code.
3. OPTIONAL DISCUSSION: Why are these rules important? Do these guidelines tell you anythingabout how Ozobot works? Where the sensors are located?
PART THREE: SPACESHIP DRIVER’S LICENSE TEST
1. DISTRIBUTE: Handout 8
2. EXPLAIN: Soon, you will be taking your Ozobot on a journey to Mars using what you’ve learnedabout drawing lines and Color Codes. But, before you start driving in space, let’s review what you’ve learned about the “rules of the road” with this Spaceship Driver’s License Test, to get you ownSpaceship Driver’s License!
3. DO: Have students complete the quiz individually or in groups. Go over the answers as a class, offering the opportunity to correct “mistakes” so all students can earn their Driver’s License, andthen distribute one license to each student and have them fill in their names.
PART FOUR (OPTIONAL): OZOBOT EXPEDITION TO MARS
DO: Divide students into groups of 3-5, and read through instructions with students, and begin the journey to Mars!
REFLECT/REVIEWASK: “What was the most difficult of drawing color codes without having boxes to color in?”“Do you have any tips for the rest of the class to be successful in free-drawing color codes?”“What did you like about Expedition to Neptune? Were there any frustrating parts?”

23Basic Training Lesson 4: Free-Drawing Lines and Color Codes © 2018 Evollve Inc.
BASIC TRAINING LESSON 4:
FREE-DRAWING LINES AND COLOR CODES
MATERIALS
• 1 Ozobot Bit or Evo per group (charged and calibrated)
• Markers in colors black, red, light blue and light green (we recommend you use
• Ozobot markers. Alternatively, choose Sharpie’s wide chisel tip, Crayola classic,
• or Crayola pastel), per person
• Handouts 7 and 8, one per person
• Ozobot Expedition game (link below), per group
• Spaceship Driver’s Licenses
• Lots of plain white 8.5” x 11” paper, per group of 3-5
• Timer, per group
• 1 pair of scissors, per group
PREPARATION
• You will need to print a copy of Handout 7 and 8.
• Optional: Cut out game components to have them ready for students to play.Alternatively,
have each group cut out their own game components (see game instructions).
• Gather materials for game: one timer per group, a stack of 8.5x11 white paper, and scissors.
• Please note you will need one set of markers PER STUDENT playing the game.
• Print one copy of Ozobot Expedition to Mars from
https://portal.ozobot.com/lessons/detail/mission-to-mars
Note: You do have the option to increase the difficulty of this game for students by
playing Ozobot Expedition to Neptune, which incorporates “Challenge Cards,”
smaller sheets to draw on, and a longer game board. Find it here:
https://portal.ozobot.com/lessons/detail/mission-to-neptune
24Basic Training Lesson 4: Free-Drawing Lines and Color Codes © 2018 Evollve Inc.
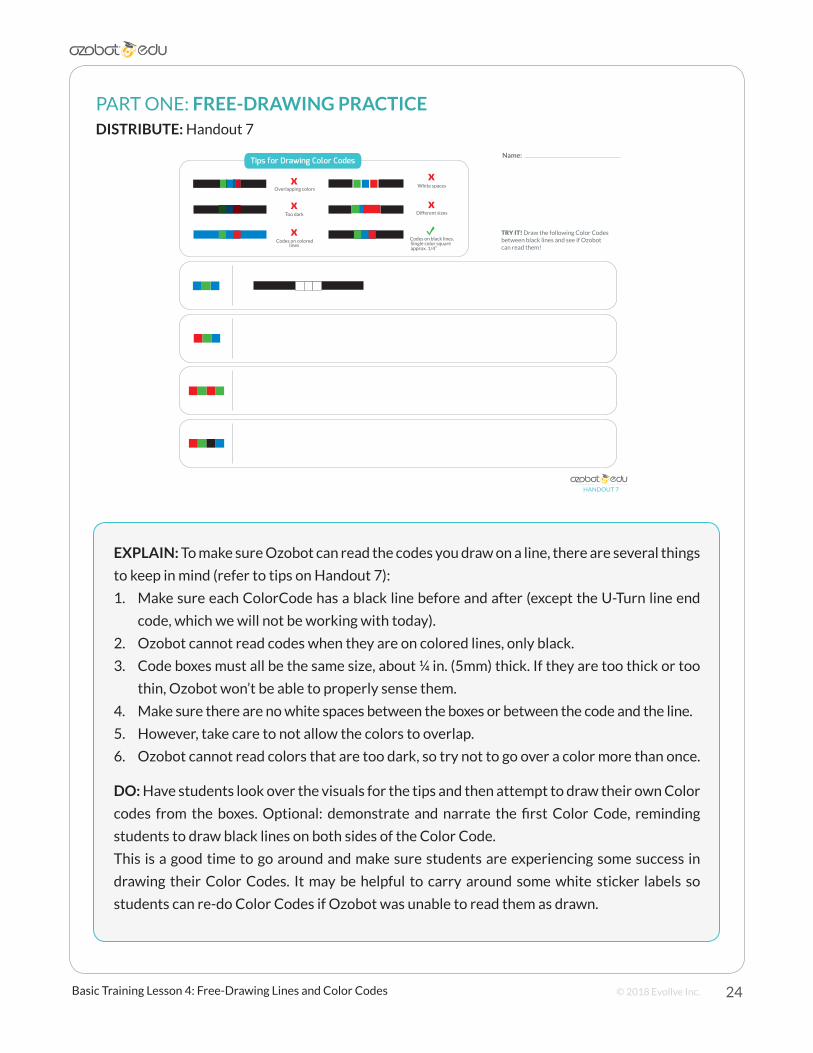
PART ONE: FREE-DRAWING PRACTICEDISTRIBUTE: Handout 7
EXPLAIN: To make sure Ozobot can read the codes you draw on a line, there are several things
to keep in mind (refer to tips on Handout 7):
1. Make sure each ColorCode has a black line before and after (except the U-Turn line end
code, which we will not be working with today).
2. Ozobot cannot read codes when they are on colored lines, only black.
3. Code boxes must all be the same size, about ¼ in. (5mm) thick. If they are too thick or too
thin, Ozobot won’t be able to properly sense them.
4. Make sure there are no white spaces between the boxes or between the code and the line.
5. However, take care to not allow the colors to overlap.
6. Ozobot cannot read colors that are too dark, so try not to go over a color more than once.
DO: Have students look over the visuals for the tips and then attempt to draw their own Color
codes from the boxes. Optional: demonstrate and narrate the first Color Code, reminding
students to draw black lines on both sides of the Color Code.
This is a good time to go around and make sure students are experiencing some success in
drawing their Color Codes. It may be helpful to carry around some white sticker labels so
students can re-do Color Codes if Ozobot was unable to read them as drawn.
TRY IT! Draw the following Color Codesbetween black lines and see if Ozobotcan read them!
White spaces
Codes on colored lines
Too dark
Overlapping colors
Different sizes
Codes on black lines.Single color squareapprox. 1/4”
Tips for Drawing Color CodesName:
HANDOUT 7
25Basic Training Lesson 4: Free-Drawing Lines and Color Codes © 2018 Evollve Inc.
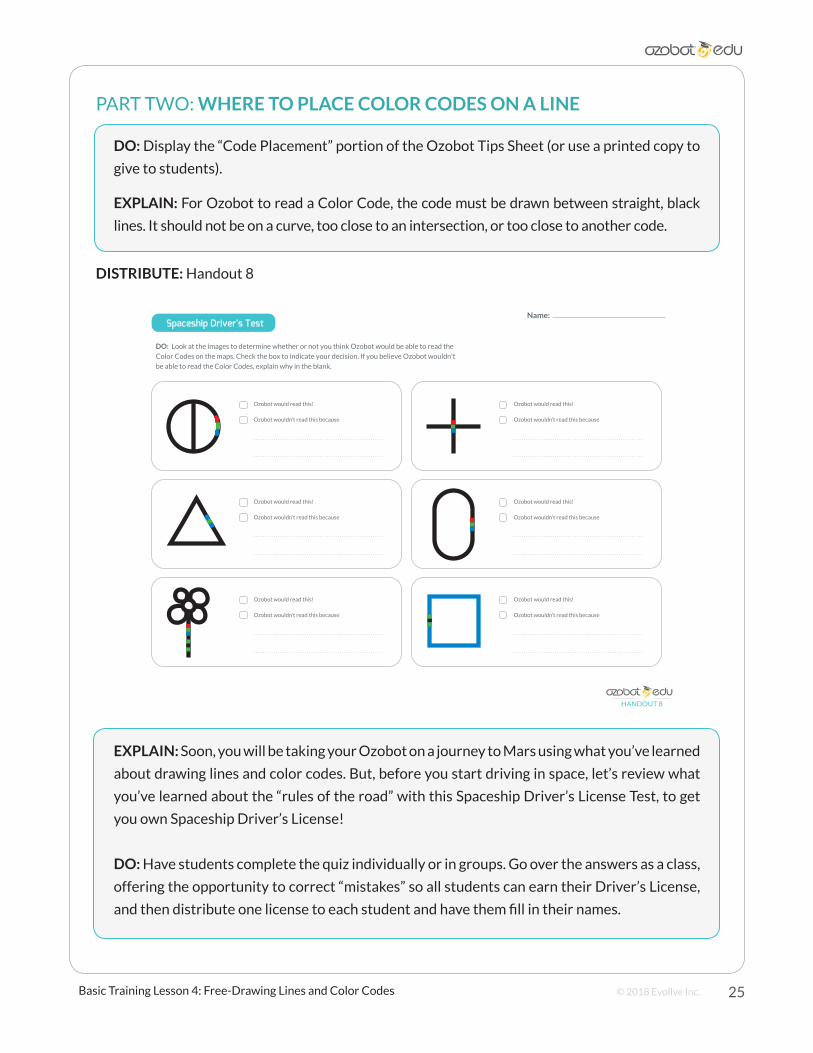
PART TWO: WHERE TO PLACE COLOR CODES ON A LINE
DO: Display the “Code Placement” portion of the Ozobot Tips Sheet (or use a printed copy to
give to students).
EXPLAIN: For Ozobot to read a Color Code, the code must be drawn between straight, black
lines. It should not be on a curve, too close to an intersection, or too close to another code.
DISTRIBUTE: Handout 8
EXPLAIN: Soon, you will be taking your Ozobot on a journey to Mars using what you’ve learned
about drawing lines and color codes. But, before you start driving in space, let’s review what
you’ve learned about the “rules of the road” with this Spaceship Driver’s License Test, to get
you own Spaceship Driver’s License!
DO: Have students complete the quiz individually or in groups. Go over the answers as a class,
offering the opportunity to correct “mistakes” so all students can earn their Driver’s License,
and then distribute one license to each student and have them fill in their names.
DO: Look at the images to determine whether or not you think Ozobot would be able to read the
Color Codes on the maps. Check the box to indicate your decision. If you believe Ozobot wouldn't
be able to read the Color Codes, explain why in the blank.
Ozobot would read this!
Ozobot wouldn’t read this because
Ozobot would read this!
Ozobot wouldn’t read this because
Ozobot would read this!
Ozobot wouldn’t read this because
Ozobot would read this!
Ozobot wouldn’t read this because
Ozobot would read this!
Ozobot wouldn’t read this because
Ozobot would read this!
Ozobot wouldn’t read this because
Spaceship Driver's TestName:
HANDOUT 8

26Basic Training Lesson 4: Free-Drawing Lines and Color Codes © 2018 Evollve Inc.
PART FOUR (OPTIONAL)DISTRIBUTE: MISSION TO MARS
(Instructions, game board, game pieces, stacks of white paper, timer, and one set of markers per
student playing)
DO: Divide students into groups of 3-5, read through instructions with students, and begin
the journey to Mars!
Note: You do have the option to increase the difficulty of this game for students by playing Ozobot
Expedition to Neptune, which incorporates “Challenge Cards,” smaller sheets to draw on, and a longer
game board. Find it here:
https://portal.ozobot.com/lessons/detail/mission-to-neptune