aws command line interface
TRANSCRIPT

AWS Command Line InterfaceUser Guide for Version 2
AWS Command Line Interface User Guide for Version 2
AWS Command Line Interface: User Guide for Version 2Copyright © Amazon Web Services, Inc. and/or its affiliates. All rights reserved.
Amazon's trademarks and trade dress may not be used in connection with any product or service that is notAmazon's, in any manner that is likely to cause confusion among customers, or in any manner that disparages ordiscredits Amazon. All other trademarks not owned by Amazon are the property of their respective owners, who mayor may not be affiliated with, connected to, or sponsored by Amazon.
AWS Command Line Interface User Guide for Version 2
Table of Contents. . . . . . . . . . . . . . . . . . . . . . . . . . . . . . . . . . . . . . . . . . . . . . . . . . . . . . . . . . . . . . . . . . . . . . . . . . . . . . . . . . . . . . . . . . . . . . . . . . . . . . . . . . . . . . . . . . . . . . . . . . . . . . . . . . . . . . . . . . . . . . . . . . . . . . vii
About the AWS CLI ... . . . . . . . . . . . . . . . . . . . . . . . . . . . . . . . . . . . . . . . . . . . . . . . . . . . . . . . . . . . . . . . . . . . . . . . . . . . . . . . . . . . . . . . . . . . . . . . . . . . . . . . . . . . . . . . . . . . . . . . . . 1About AWS CLI version 2 .... . . . . . . . . . . . . . . . . . . . . . . . . . . . . . . . . . . . . . . . . . . . . . . . . . . . . . . . . . . . . . . . . . . . . . . . . . . . . . . . . . . . . . . . . . . . . . . . . . . . . . . . . 1Maintenance and support for SDK major versions .... . . . . . . . . . . . . . . . . . . . . . . . . . . . . . . . . . . . . . . . . . . . . . . . . . . . . . . . . . . . . . . . . . . . . . . 1About Amazon Web Services .... . . . . . . . . . . . . . . . . . . . . . . . . . . . . . . . . . . . . . . . . . . . . . . . . . . . . . . . . . . . . . . . . . . . . . . . . . . . . . . . . . . . . . . . . . . . . . . . . . . . 2Using the examples .... . . . . . . . . . . . . . . . . . . . . . . . . . . . . . . . . . . . . . . . . . . . . . . . . . . . . . . . . . . . . . . . . . . . . . . . . . . . . . . . . . . . . . . . . . . . . . . . . . . . . . . . . . . . . . . . . 2Additional documentation and resources .... . . . . . . . . . . . . . . . . . . . . . . . . . . . . . . . . . . . . . . . . . . . . . . . . . . . . . . . . . . . . . . . . . . . . . . . . . . . . . . . . . . . 3
AWS CLI documentation and resources .... . . . . . . . . . . . . . . . . . . . . . . . . . . . . . . . . . . . . . . . . . . . . . . . . . . . . . . . . . . . . . . . . . . . . . . . . . . . . . 3Other AWS SDKs .... . . . . . . . . . . . . . . . . . . . . . . . . . . . . . . . . . . . . . . . . . . . . . . . . . . . . . . . . . . . . . . . . . . . . . . . . . . . . . . . . . . . . . . . . . . . . . . . . . . . . . . . . . . . . 3
Getting started .... . . . . . . . . . . . . . . . . . . . . . . . . . . . . . . . . . . . . . . . . . . . . . . . . . . . . . . . . . . . . . . . . . . . . . . . . . . . . . . . . . . . . . . . . . . . . . . . . . . . . . . . . . . . . . . . . . . . . . . . . . . . . . . 4Prerequisites ... . . . . . . . . . . . . . . . . . . . . . . . . . . . . . . . . . . . . . . . . . . . . . . . . . . . . . . . . . . . . . . . . . . . . . . . . . . . . . . . . . . . . . . . . . . . . . . . . . . . . . . . . . . . . . . . . . . . . . . . . . . . 4
Step 1: Sign up to AWS ..... . . . . . . . . . . . . . . . . . . . . . . . . . . . . . . . . . . . . . . . . . . . . . . . . . . . . . . . . . . . . . . . . . . . . . . . . . . . . . . . . . . . . . . . . . . . . . . . . . 4Step 2: Create an IAM user account .... . . . . . . . . . . . . . . . . . . . . . . . . . . . . . . . . . . . . . . . . . . . . . . . . . . . . . . . . . . . . . . . . . . . . . . . . . . . . . . . . . . 4Step 3: Create an access key ID and secret access key .... . . . . . . . . . . . . . . . . . . . . . . . . . . . . . . . . . . . . . . . . . . . . . . . . . . . . . . . . . 5Next steps .... . . . . . . . . . . . . . . . . . . . . . . . . . . . . . . . . . . . . . . . . . . . . . . . . . . . . . . . . . . . . . . . . . . . . . . . . . . . . . . . . . . . . . . . . . . . . . . . . . . . . . . . . . . . . . . . . . . . . . 6
Install/Update .... . . . . . . . . . . . . . . . . . . . . . . . . . . . . . . . . . . . . . . . . . . . . . . . . . . . . . . . . . . . . . . . . . . . . . . . . . . . . . . . . . . . . . . . . . . . . . . . . . . . . . . . . . . . . . . . . . . . . . . . . 6Next steps .... . . . . . . . . . . . . . . . . . . . . . . . . . . . . . . . . . . . . . . . . . . . . . . . . . . . . . . . . . . . . . . . . . . . . . . . . . . . . . . . . . . . . . . . . . . . . . . . . . . . . . . . . . . . . . . . . . . . 15
Past releases .... . . . . . . . . . . . . . . . . . . . . . . . . . . . . . . . . . . . . . . . . . . . . . . . . . . . . . . . . . . . . . . . . . . . . . . . . . . . . . . . . . . . . . . . . . . . . . . . . . . . . . . . . . . . . . . . . . . . . . . . . 15Next steps .... . . . . . . . . . . . . . . . . . . . . . . . . . . . . . . . . . . . . . . . . . . . . . . . . . . . . . . . . . . . . . . . . . . . . . . . . . . . . . . . . . . . . . . . . . . . . . . . . . . . . . . . . . . . . . . . . . . . 25
Docker .... . . . . . . . . . . . . . . . . . . . . . . . . . . . . . . . . . . . . . . . . . . . . . . . . . . . . . . . . . . . . . . . . . . . . . . . . . . . . . . . . . . . . . . . . . . . . . . . . . . . . . . . . . . . . . . . . . . . . . . . . . . . . . . . . 25Prerequisites ... . . . . . . . . . . . . . . . . . . . . . . . . . . . . . . . . . . . . . . . . . . . . . . . . . . . . . . . . . . . . . . . . . . . . . . . . . . . . . . . . . . . . . . . . . . . . . . . . . . . . . . . . . . . . . . . . . 25Run the official Docker image .... . . . . . . . . . . . . . . . . . . . . . . . . . . . . . . . . . . . . . . . . . . . . . . . . . . . . . . . . . . . . . . . . . . . . . . . . . . . . . . . . . . . . . . . . 25Notes on interfaces and backwards compatibility of Docker image .... . . . . . . . . . . . . . . . . . . . . . . . . . . . . . . . . . . . . . . 26Use specific versions and tags .... . . . . . . . . . . . . . . . . . . . . . . . . . . . . . . . . . . . . . . . . . . . . . . . . . . . . . . . . . . . . . . . . . . . . . . . . . . . . . . . . . . . . . . . . 26Update to the latest Docker image .... . . . . . . . . . . . . . . . . . . . . . . . . . . . . . . . . . . . . . . . . . . . . . . . . . . . . . . . . . . . . . . . . . . . . . . . . . . . . . . . . . 27Share host files, credentials, environment variables, and configuration .... . . . . . . . . . . . . . . . . . . . . . . . . . . . . . . . . 27Shorten the Docker command .... . . . . . . . . . . . . . . . . . . . . . . . . . . . . . . . . . . . . . . . . . . . . . . . . . . . . . . . . . . . . . . . . . . . . . . . . . . . . . . . . . . . . . . . 29
Add to path .... . . . . . . . . . . . . . . . . . . . . . . . . . . . . . . . . . . . . . . . . . . . . . . . . . . . . . . . . . . . . . . . . . . . . . . . . . . . . . . . . . . . . . . . . . . . . . . . . . . . . . . . . . . . . . . . . . . . . . . . . . 30Quick setup .... . . . . . . . . . . . . . . . . . . . . . . . . . . . . . . . . . . . . . . . . . . . . . . . . . . . . . . . . . . . . . . . . . . . . . . . . . . . . . . . . . . . . . . . . . . . . . . . . . . . . . . . . . . . . . . . . . . . . . . . . . 31
New configuration quick setup .... . . . . . . . . . . . . . . . . . . . . . . . . . . . . . . . . . . . . . . . . . . . . . . . . . . . . . . . . . . . . . . . . . . . . . . . . . . . . . . . . . . . . . . . 32Using existing configuration and credentials files ... . . . . . . . . . . . . . . . . . . . . . . . . . . . . . . . . . . . . . . . . . . . . . . . . . . . . . . . . . . . . . . 32
Configuring the AWS CLI ... . . . . . . . . . . . . . . . . . . . . . . . . . . . . . . . . . . . . . . . . . . . . . . . . . . . . . . . . . . . . . . . . . . . . . . . . . . . . . . . . . . . . . . . . . . . . . . . . . . . . . . . . . . . . . . . . 33Configuration basics ... . . . . . . . . . . . . . . . . . . . . . . . . . . . . . . . . . . . . . . . . . . . . . . . . . . . . . . . . . . . . . . . . . . . . . . . . . . . . . . . . . . . . . . . . . . . . . . . . . . . . . . . . . . . . . . 33
Quick configuration with aws configure . . . . . . . . . . . . . . . . . . . . . . . . . . . . . . . . . . . . . . . . . . . . . . . . . . . . . . . . . . . . . . . . . . . . . . . . . . 34Access key ID and secret access key .... . . . . . . . . . . . . . . . . . . . . . . . . . . . . . . . . . . . . . . . . . . . . . . . . . . . . . . . . . . . . . . . . . . . . . . . . . . . . . . . . 34Region .... . . . . . . . . . . . . . . . . . . . . . . . . . . . . . . . . . . . . . . . . . . . . . . . . . . . . . . . . . . . . . . . . . . . . . . . . . . . . . . . . . . . . . . . . . . . . . . . . . . . . . . . . . . . . . . . . . . . . . . . . 35Output format .... . . . . . . . . . . . . . . . . . . . . . . . . . . . . . . . . . . . . . . . . . . . . . . . . . . . . . . . . . . . . . . . . . . . . . . . . . . . . . . . . . . . . . . . . . . . . . . . . . . . . . . . . . . . . . 35Profiles .... . . . . . . . . . . . . . . . . . . . . . . . . . . . . . . . . . . . . . . . . . . . . . . . . . . . . . . . . . . . . . . . . . . . . . . . . . . . . . . . . . . . . . . . . . . . . . . . . . . . . . . . . . . . . . . . . . . . . . . . 36Configuration settings and precedence .... . . . . . . . . . . . . . . . . . . . . . . . . . . . . . . . . . . . . . . . . . . . . . . . . . . . . . . . . . . . . . . . . . . . . . . . . . . . . 36
Configuration and credential file settings .... . . . . . . . . . . . . . . . . . . . . . . . . . . . . . . . . . . . . . . . . . . . . . . . . . . . . . . . . . . . . . . . . . . . . . . . . . . . . . . . . 37Where are configuration settings stored? .... . . . . . . . . . . . . . . . . . . . . . . . . . . . . . . . . . . . . . . . . . . . . . . . . . . . . . . . . . . . . . . . . . . . . . . . . . 37Set and view configuration settings .... . . . . . . . . . . . . . . . . . . . . . . . . . . . . . . . . . . . . . . . . . . . . . . . . . . . . . . . . . . . . . . . . . . . . . . . . . . . . . . . . 38Supported config file settings .... . . . . . . . . . . . . . . . . . . . . . . . . . . . . . . . . . . . . . . . . . . . . . . . . . . . . . . . . . . . . . . . . . . . . . . . . . . . . . . . . . . . . . 39
Named profiles .... . . . . . . . . . . . . . . . . . . . . . . . . . . . . . . . . . . . . . . . . . . . . . . . . . . . . . . . . . . . . . . . . . . . . . . . . . . . . . . . . . . . . . . . . . . . . . . . . . . . . . . . . . . . . . . . . . . . . 49Creating named profiles .... . . . . . . . . . . . . . . . . . . . . . . . . . . . . . . . . . . . . . . . . . . . . . . . . . . . . . . . . . . . . . . . . . . . . . . . . . . . . . . . . . . . . . . . . . . . . . . . . 49Using named profiles .... . . . . . . . . . . . . . . . . . . . . . . . . . . . . . . . . . . . . . . . . . . . . . . . . . . . . . . . . . . . . . . . . . . . . . . . . . . . . . . . . . . . . . . . . . . . . . . . . . . . . 50
AWS Single Sign-On .... . . . . . . . . . . . . . . . . . . . . . . . . . . . . . . . . . . . . . . . . . . . . . . . . . . . . . . . . . . . . . . . . . . . . . . . . . . . . . . . . . . . . . . . . . . . . . . . . . . . . . . . . . . . . . 50Configuring a named profile to use AWS SSO ..... . . . . . . . . . . . . . . . . . . . . . . . . . . . . . . . . . . . . . . . . . . . . . . . . . . . . . . . . . . . . . . . . . 51Using an AWS SSO enabled named profile .... . . . . . . . . . . . . . . . . . . . . . . . . . . . . . . . . . . . . . . . . . . . . . . . . . . . . . . . . . . . . . . . . . . . . . . 54
Environment Variables .... . . . . . . . . . . . . . . . . . . . . . . . . . . . . . . . . . . . . . . . . . . . . . . . . . . . . . . . . . . . . . . . . . . . . . . . . . . . . . . . . . . . . . . . . . . . . . . . . . . . . . . . . . . 55How to set environment variables .... . . . . . . . . . . . . . . . . . . . . . . . . . . . . . . . . . . . . . . . . . . . . . . . . . . . . . . . . . . . . . . . . . . . . . . . . . . . . . . . . . . 56AWS CLI supported environment variables .... . . . . . . . . . . . . . . . . . . . . . . . . . . . . . . . . . . . . . . . . . . . . . . . . . . . . . . . . . . . . . . . . . . . . . . . 57
Command line options .... . . . . . . . . . . . . . . . . . . . . . . . . . . . . . . . . . . . . . . . . . . . . . . . . . . . . . . . . . . . . . . . . . . . . . . . . . . . . . . . . . . . . . . . . . . . . . . . . . . . . . . . . . . 60Command completion .... . . . . . . . . . . . . . . . . . . . . . . . . . . . . . . . . . . . . . . . . . . . . . . . . . . . . . . . . . . . . . . . . . . . . . . . . . . . . . . . . . . . . . . . . . . . . . . . . . . . . . . . . . . . 63
iii
AWS Command Line Interface User Guide for Version 2
How it works .... . . . . . . . . . . . . . . . . . . . . . . . . . . . . . . . . . . . . . . . . . . . . . . . . . . . . . . . . . . . . . . . . . . . . . . . . . . . . . . . . . . . . . . . . . . . . . . . . . . . . . . . . . . . . . . . 63Configuring command completion on Linux or macOS .... . . . . . . . . . . . . . . . . . . . . . . . . . . . . . . . . . . . . . . . . . . . . . . . . . . . . . . 64Configuring command completion on Windows .... . . . . . . . . . . . . . . . . . . . . . . . . . . . . . . . . . . . . . . . . . . . . . . . . . . . . . . . . . . . . . . . . 66
Retries ... . . . . . . . . . . . . . . . . . . . . . . . . . . . . . . . . . . . . . . . . . . . . . . . . . . . . . . . . . . . . . . . . . . . . . . . . . . . . . . . . . . . . . . . . . . . . . . . . . . . . . . . . . . . . . . . . . . . . . . . . . . . . . . . . . 67Available retry modes .... . . . . . . . . . . . . . . . . . . . . . . . . . . . . . . . . . . . . . . . . . . . . . . . . . . . . . . . . . . . . . . . . . . . . . . . . . . . . . . . . . . . . . . . . . . . . . . . . . . . 67Configuring a retry mode .... . . . . . . . . . . . . . . . . . . . . . . . . . . . . . . . . . . . . . . . . . . . . . . . . . . . . . . . . . . . . . . . . . . . . . . . . . . . . . . . . . . . . . . . . . . . . . . 69Viewing logs of retry attempts .... . . . . . . . . . . . . . . . . . . . . . . . . . . . . . . . . . . . . . . . . . . . . . . . . . . . . . . . . . . . . . . . . . . . . . . . . . . . . . . . . . . . . . . 70
External credentials ... . . . . . . . . . . . . . . . . . . . . . . . . . . . . . . . . . . . . . . . . . . . . . . . . . . . . . . . . . . . . . . . . . . . . . . . . . . . . . . . . . . . . . . . . . . . . . . . . . . . . . . . . . . . . . . . 70Using credentials for Amazon EC2 instance metadata .... . . . . . . . . . . . . . . . . . . . . . . . . . . . . . . . . . . . . . . . . . . . . . . . . . . . . . . . . . . . . . . . 72
Prerequisites ... . . . . . . . . . . . . . . . . . . . . . . . . . . . . . . . . . . . . . . . . . . . . . . . . . . . . . . . . . . . . . . . . . . . . . . . . . . . . . . . . . . . . . . . . . . . . . . . . . . . . . . . . . . . . . . . . . 72Configuring a profile for Amazon EC2 metadata .... . . . . . . . . . . . . . . . . . . . . . . . . . . . . . . . . . . . . . . . . . . . . . . . . . . . . . . . . . . . . . . . 72
Using an HTTP proxy .... . . . . . . . . . . . . . . . . . . . . . . . . . . . . . . . . . . . . . . . . . . . . . . . . . . . . . . . . . . . . . . . . . . . . . . . . . . . . . . . . . . . . . . . . . . . . . . . . . . . . . . . . . . . . 73Authenticating to a proxy .... . . . . . . . . . . . . . . . . . . . . . . . . . . . . . . . . . . . . . . . . . . . . . . . . . . . . . . . . . . . . . . . . . . . . . . . . . . . . . . . . . . . . . . . . . . . . . . 73Using a proxy on Amazon EC2 instances .... . . . . . . . . . . . . . . . . . . . . . . . . . . . . . . . . . . . . . . . . . . . . . . . . . . . . . . . . . . . . . . . . . . . . . . . . . 74
Using IAM roles .... . . . . . . . . . . . . . . . . . . . . . . . . . . . . . . . . . . . . . . . . . . . . . . . . . . . . . . . . . . . . . . . . . . . . . . . . . . . . . . . . . . . . . . . . . . . . . . . . . . . . . . . . . . . . . . . . . . . . 74Configuring and using a role .... . . . . . . . . . . . . . . . . . . . . . . . . . . . . . . . . . . . . . . . . . . . . . . . . . . . . . . . . . . . . . . . . . . . . . . . . . . . . . . . . . . . . . . . . . 75Using MFA .... . . . . . . . . . . . . . . . . . . . . . . . . . . . . . . . . . . . . . . . . . . . . . . . . . . . . . . . . . . . . . . . . . . . . . . . . . . . . . . . . . . . . . . . . . . . . . . . . . . . . . . . . . . . . . . . . . . . 77Cross-account roles and external ID .... . . . . . . . . . . . . . . . . . . . . . . . . . . . . . . . . . . . . . . . . . . . . . . . . . . . . . . . . . . . . . . . . . . . . . . . . . . . . . . . . 78Specifying a role session name for easier auditing .... . . . . . . . . . . . . . . . . . . . . . . . . . . . . . . . . . . . . . . . . . . . . . . . . . . . . . . . . . . . . 78Assume role with web identity ... . . . . . . . . . . . . . . . . . . . . . . . . . . . . . . . . . . . . . . . . . . . . . . . . . . . . . . . . . . . . . . . . . . . . . . . . . . . . . . . . . . . . . . . . 78Clearing cached credentials ... . . . . . . . . . . . . . . . . . . . . . . . . . . . . . . . . . . . . . . . . . . . . . . . . . . . . . . . . . . . . . . . . . . . . . . . . . . . . . . . . . . . . . . . . . . . . 79
Using the AWS CLI ... . . . . . . . . . . . . . . . . . . . . . . . . . . . . . . . . . . . . . . . . . . . . . . . . . . . . . . . . . . . . . . . . . . . . . . . . . . . . . . . . . . . . . . . . . . . . . . . . . . . . . . . . . . . . . . . . . . . . . . . . 81Getting Help .... . . . . . . . . . . . . . . . . . . . . . . . . . . . . . . . . . . . . . . . . . . . . . . . . . . . . . . . . . . . . . . . . . . . . . . . . . . . . . . . . . . . . . . . . . . . . . . . . . . . . . . . . . . . . . . . . . . . . . . . . 81
AWS CLI documentation .... . . . . . . . . . . . . . . . . . . . . . . . . . . . . . . . . . . . . . . . . . . . . . . . . . . . . . . . . . . . . . . . . . . . . . . . . . . . . . . . . . . . . . . . . . . . . . . . . 84API documentation .... . . . . . . . . . . . . . . . . . . . . . . . . . . . . . . . . . . . . . . . . . . . . . . . . . . . . . . . . . . . . . . . . . . . . . . . . . . . . . . . . . . . . . . . . . . . . . . . . . . . . . . . 84Additional help .... . . . . . . . . . . . . . . . . . . . . . . . . . . . . . . . . . . . . . . . . . . . . . . . . . . . . . . . . . . . . . . . . . . . . . . . . . . . . . . . . . . . . . . . . . . . . . . . . . . . . . . . . . . . . 85
Command Structure .... . . . . . . . . . . . . . . . . . . . . . . . . . . . . . . . . . . . . . . . . . . . . . . . . . . . . . . . . . . . . . . . . . . . . . . . . . . . . . . . . . . . . . . . . . . . . . . . . . . . . . . . . . . . . . 85Command structure .... . . . . . . . . . . . . . . . . . . . . . . . . . . . . . . . . . . . . . . . . . . . . . . . . . . . . . . . . . . . . . . . . . . . . . . . . . . . . . . . . . . . . . . . . . . . . . . . . . . . . . . 85Wait commands .... . . . . . . . . . . . . . . . . . . . . . . . . . . . . . . . . . . . . . . . . . . . . . . . . . . . . . . . . . . . . . . . . . . . . . . . . . . . . . . . . . . . . . . . . . . . . . . . . . . . . . . . . . . . 86
Specifying Parameter Values .... . . . . . . . . . . . . . . . . . . . . . . . . . . . . . . . . . . . . . . . . . . . . . . . . . . . . . . . . . . . . . . . . . . . . . . . . . . . . . . . . . . . . . . . . . . . . . . . . . . 87Common Parameter Types .... . . . . . . . . . . . . . . . . . . . . . . . . . . . . . . . . . . . . . . . . . . . . . . . . . . . . . . . . . . . . . . . . . . . . . . . . . . . . . . . . . . . . . . . . . . . . . 87Quotes with Strings .... . . . . . . . . . . . . . . . . . . . . . . . . . . . . . . . . . . . . . . . . . . . . . . . . . . . . . . . . . . . . . . . . . . . . . . . . . . . . . . . . . . . . . . . . . . . . . . . . . . . . . . 90Parameters from Files ... . . . . . . . . . . . . . . . . . . . . . . . . . . . . . . . . . . . . . . . . . . . . . . . . . . . . . . . . . . . . . . . . . . . . . . . . . . . . . . . . . . . . . . . . . . . . . . . . . . . . 93Generating a CLI Skeleton Template .... . . . . . . . . . . . . . . . . . . . . . . . . . . . . . . . . . . . . . . . . . . . . . . . . . . . . . . . . . . . . . . . . . . . . . . . . . . . . . . . 95Shorthand Syntax .... . . . . . . . . . . . . . . . . . . . . . . . . . . . . . . . . . . . . . . . . . . . . . . . . . . . . . . . . . . . . . . . . . . . . . . . . . . . . . . . . . . . . . . . . . . . . . . . . . . . . . . . 103
Auto-prompt .... . . . . . . . . . . . . . . . . . . . . . . . . . . . . . . . . . . . . . . . . . . . . . . . . . . . . . . . . . . . . . . . . . . . . . . . . . . . . . . . . . . . . . . . . . . . . . . . . . . . . . . . . . . . . . . . . . . . . . . 104How it works .... . . . . . . . . . . . . . . . . . . . . . . . . . . . . . . . . . . . . . . . . . . . . . . . . . . . . . . . . . . . . . . . . . . . . . . . . . . . . . . . . . . . . . . . . . . . . . . . . . . . . . . . . . . . . . 104Auto-prompt features .... . . . . . . . . . . . . . . . . . . . . . . . . . . . . . . . . . . . . . . . . . . . . . . . . . . . . . . . . . . . . . . . . . . . . . . . . . . . . . . . . . . . . . . . . . . . . . . . . . 105Auto-prompt modes .... . . . . . . . . . . . . . . . . . . . . . . . . . . . . . . . . . . . . . . . . . . . . . . . . . . . . . . . . . . . . . . . . . . . . . . . . . . . . . . . . . . . . . . . . . . . . . . . . . . . 107Configure auto-prompt .... . . . . . . . . . . . . . . . . . . . . . . . . . . . . . . . . . . . . . . . . . . . . . . . . . . . . . . . . . . . . . . . . . . . . . . . . . . . . . . . . . . . . . . . . . . . . . . . 107
Controlling Command Output .... . . . . . . . . . . . . . . . . . . . . . . . . . . . . . . . . . . . . . . . . . . . . . . . . . . . . . . . . . . . . . . . . . . . . . . . . . . . . . . . . . . . . . . . . . . . . . . 107Output Format .... . . . . . . . . . . . . . . . . . . . . . . . . . . . . . . . . . . . . . . . . . . . . . . . . . . . . . . . . . . . . . . . . . . . . . . . . . . . . . . . . . . . . . . . . . . . . . . . . . . . . . . . . . . . 107Pagination .... . . . . . . . . . . . . . . . . . . . . . . . . . . . . . . . . . . . . . . . . . . . . . . . . . . . . . . . . . . . . . . . . . . . . . . . . . . . . . . . . . . . . . . . . . . . . . . . . . . . . . . . . . . . . . . . . . 114Filtering .... . . . . . . . . . . . . . . . . . . . . . . . . . . . . . . . . . . . . . . . . . . . . . . . . . . . . . . . . . . . . . . . . . . . . . . . . . . . . . . . . . . . . . . . . . . . . . . . . . . . . . . . . . . . . . . . . . . . . . 118
Return Codes .... . . . . . . . . . . . . . . . . . . . . . . . . . . . . . . . . . . . . . . . . . . . . . . . . . . . . . . . . . . . . . . . . . . . . . . . . . . . . . . . . . . . . . . . . . . . . . . . . . . . . . . . . . . . . . . . . . . . . . 134Wizards .... . . . . . . . . . . . . . . . . . . . . . . . . . . . . . . . . . . . . . . . . . . . . . . . . . . . . . . . . . . . . . . . . . . . . . . . . . . . . . . . . . . . . . . . . . . . . . . . . . . . . . . . . . . . . . . . . . . . . . . . . . . . . . 135
How it works .... . . . . . . . . . . . . . . . . . . . . . . . . . . . . . . . . . . . . . . . . . . . . . . . . . . . . . . . . . . . . . . . . . . . . . . . . . . . . . . . . . . . . . . . . . . . . . . . . . . . . . . . . . . . . . 135Aliases .... . . . . . . . . . . . . . . . . . . . . . . . . . . . . . . . . . . . . . . . . . . . . . . . . . . . . . . . . . . . . . . . . . . . . . . . . . . . . . . . . . . . . . . . . . . . . . . . . . . . . . . . . . . . . . . . . . . . . . . . . . . . . . . . 136
Prerequisites ... . . . . . . . . . . . . . . . . . . . . . . . . . . . . . . . . . . . . . . . . . . . . . . . . . . . . . . . . . . . . . . . . . . . . . . . . . . . . . . . . . . . . . . . . . . . . . . . . . . . . . . . . . . . . . . . 136Step 1: Creating the alias file .... . . . . . . . . . . . . . . . . . . . . . . . . . . . . . . . . . . . . . . . . . . . . . . . . . . . . . . . . . . . . . . . . . . . . . . . . . . . . . . . . . . . . . . . 136Step 2: Creating an alias ... . . . . . . . . . . . . . . . . . . . . . . . . . . . . . . . . . . . . . . . . . . . . . . . . . . . . . . . . . . . . . . . . . . . . . . . . . . . . . . . . . . . . . . . . . . . . . . 137Step 3: Calling an alias ... . . . . . . . . . . . . . . . . . . . . . . . . . . . . . . . . . . . . . . . . . . . . . . . . . . . . . . . . . . . . . . . . . . . . . . . . . . . . . . . . . . . . . . . . . . . . . . . . . 138Alias repository examples .... . . . . . . . . . . . . . . . . . . . . . . . . . . . . . . . . . . . . . . . . . . . . . . . . . . . . . . . . . . . . . . . . . . . . . . . . . . . . . . . . . . . . . . . . . . . . 140Resources .... . . . . . . . . . . . . . . . . . . . . . . . . . . . . . . . . . . . . . . . . . . . . . . . . . . . . . . . . . . . . . . . . . . . . . . . . . . . . . . . . . . . . . . . . . . . . . . . . . . . . . . . . . . . . . . . . . . 140
Using the AWS CLI with AWS Services .... . . . . . . . . . . . . . . . . . . . . . . . . . . . . . . . . . . . . . . . . . . . . . . . . . . . . . . . . . . . . . . . . . . . . . . . . . . . . . . . . . . . . . . . . . . . 142DynamoDB ..... . . . . . . . . . . . . . . . . . . . . . . . . . . . . . . . . . . . . . . . . . . . . . . . . . . . . . . . . . . . . . . . . . . . . . . . . . . . . . . . . . . . . . . . . . . . . . . . . . . . . . . . . . . . . . . . . . . . . . . . . 142
Prerequisites ... . . . . . . . . . . . . . . . . . . . . . . . . . . . . . . . . . . . . . . . . . . . . . . . . . . . . . . . . . . . . . . . . . . . . . . . . . . . . . . . . . . . . . . . . . . . . . . . . . . . . . . . . . . . . . . . 143
iv
AWS Command Line Interface User Guide for Version 2
Creating and using DynamoDB tables .... . . . . . . . . . . . . . . . . . . . . . . . . . . . . . . . . . . . . . . . . . . . . . . . . . . . . . . . . . . . . . . . . . . . . . . . . . . . 143Using DynamoDB Local ... . . . . . . . . . . . . . . . . . . . . . . . . . . . . . . . . . . . . . . . . . . . . . . . . . . . . . . . . . . . . . . . . . . . . . . . . . . . . . . . . . . . . . . . . . . . . . . . . 144Resources .... . . . . . . . . . . . . . . . . . . . . . . . . . . . . . . . . . . . . . . . . . . . . . . . . . . . . . . . . . . . . . . . . . . . . . . . . . . . . . . . . . . . . . . . . . . . . . . . . . . . . . . . . . . . . . . . . . . 144
Amazon EC2 .... . . . . . . . . . . . . . . . . . . . . . . . . . . . . . . . . . . . . . . . . . . . . . . . . . . . . . . . . . . . . . . . . . . . . . . . . . . . . . . . . . . . . . . . . . . . . . . . . . . . . . . . . . . . . . . . . . . . . . . 145Amazon EC2 Key Pairs ... . . . . . . . . . . . . . . . . . . . . . . . . . . . . . . . . . . . . . . . . . . . . . . . . . . . . . . . . . . . . . . . . . . . . . . . . . . . . . . . . . . . . . . . . . . . . . . . . . 145Amazon EC2 Security Groups .... . . . . . . . . . . . . . . . . . . . . . . . . . . . . . . . . . . . . . . . . . . . . . . . . . . . . . . . . . . . . . . . . . . . . . . . . . . . . . . . . . . . . . . . 148EC2 Instances .... . . . . . . . . . . . . . . . . . . . . . . . . . . . . . . . . . . . . . . . . . . . . . . . . . . . . . . . . . . . . . . . . . . . . . . . . . . . . . . . . . . . . . . . . . . . . . . . . . . . . . . . . . . . . . 152Change EC2 type using bash scripting .... . . . . . . . . . . . . . . . . . . . . . . . . . . . . . . . . . . . . . . . . . . . . . . . . . . . . . . . . . . . . . . . . . . . . . . . . . . . 158
S3 Glacier ... . . . . . . . . . . . . . . . . . . . . . . . . . . . . . . . . . . . . . . . . . . . . . . . . . . . . . . . . . . . . . . . . . . . . . . . . . . . . . . . . . . . . . . . . . . . . . . . . . . . . . . . . . . . . . . . . . . . . . . . . . . . 160Prerequisites ... . . . . . . . . . . . . . . . . . . . . . . . . . . . . . . . . . . . . . . . . . . . . . . . . . . . . . . . . . . . . . . . . . . . . . . . . . . . . . . . . . . . . . . . . . . . . . . . . . . . . . . . . . . . . . . . 161Create an Amazon S3 Glacier vault ... . . . . . . . . . . . . . . . . . . . . . . . . . . . . . . . . . . . . . . . . . . . . . . . . . . . . . . . . . . . . . . . . . . . . . . . . . . . . . . . . 161Prepare a file for uploading .... . . . . . . . . . . . . . . . . . . . . . . . . . . . . . . . . . . . . . . . . . . . . . . . . . . . . . . . . . . . . . . . . . . . . . . . . . . . . . . . . . . . . . . . . . 161Initiate a multipart upload and upload files .... . . . . . . . . . . . . . . . . . . . . . . . . . . . . . . . . . . . . . . . . . . . . . . . . . . . . . . . . . . . . . . . . . . . 162Complete the upload .... . . . . . . . . . . . . . . . . . . . . . . . . . . . . . . . . . . . . . . . . . . . . . . . . . . . . . . . . . . . . . . . . . . . . . . . . . . . . . . . . . . . . . . . . . . . . . . . . . . 163Resources .... . . . . . . . . . . . . . . . . . . . . . . . . . . . . . . . . . . . . . . . . . . . . . . . . . . . . . . . . . . . . . . . . . . . . . . . . . . . . . . . . . . . . . . . . . . . . . . . . . . . . . . . . . . . . . . . . . . 164
IAM ..... . . . . . . . . . . . . . . . . . . . . . . . . . . . . . . . . . . . . . . . . . . . . . . . . . . . . . . . . . . . . . . . . . . . . . . . . . . . . . . . . . . . . . . . . . . . . . . . . . . . . . . . . . . . . . . . . . . . . . . . . . . . . . . . . . . 165Creating IAM users and groups .... . . . . . . . . . . . . . . . . . . . . . . . . . . . . . . . . . . . . . . . . . . . . . . . . . . . . . . . . . . . . . . . . . . . . . . . . . . . . . . . . . . . . . 165Attaching an IAM managed policy to an IAM user ... . . . . . . . . . . . . . . . . . . . . . . . . . . . . . . . . . . . . . . . . . . . . . . . . . . . . . . . . . . . . 166Setting an initial password for an IAM user ... . . . . . . . . . . . . . . . . . . . . . . . . . . . . . . . . . . . . . . . . . . . . . . . . . . . . . . . . . . . . . . . . . . . . . 167Create an access key for an IAM user ... . . . . . . . . . . . . . . . . . . . . . . . . . . . . . . . . . . . . . . . . . . . . . . . . . . . . . . . . . . . . . . . . . . . . . . . . . . . . . 167
Amazon S3 .... . . . . . . . . . . . . . . . . . . . . . . . . . . . . . . . . . . . . . . . . . . . . . . . . . . . . . . . . . . . . . . . . . . . . . . . . . . . . . . . . . . . . . . . . . . . . . . . . . . . . . . . . . . . . . . . . . . . . . . . . 168High-level (s3) commands .... . . . . . . . . . . . . . . . . . . . . . . . . . . . . . . . . . . . . . . . . . . . . . . . . . . . . . . . . . . . . . . . . . . . . . . . . . . . . . . . . . . . . . . . . . . . 168API-level (s3 api) commands .... . . . . . . . . . . . . . . . . . . . . . . . . . . . . . . . . . . . . . . . . . . . . . . . . . . . . . . . . . . . . . . . . . . . . . . . . . . . . . . . . . . . . . . . . 176Bucket lifecycle scripting example (s3api) ... . . . . . . . . . . . . . . . . . . . . . . . . . . . . . . . . . . . . . . . . . . . . . . . . . . . . . . . . . . . . . . . . . . . . . . 178
Amazon SNS .... . . . . . . . . . . . . . . . . . . . . . . . . . . . . . . . . . . . . . . . . . . . . . . . . . . . . . . . . . . . . . . . . . . . . . . . . . . . . . . . . . . . . . . . . . . . . . . . . . . . . . . . . . . . . . . . . . . . . . . 180Create a topic ... . . . . . . . . . . . . . . . . . . . . . . . . . . . . . . . . . . . . . . . . . . . . . . . . . . . . . . . . . . . . . . . . . . . . . . . . . . . . . . . . . . . . . . . . . . . . . . . . . . . . . . . . . . . . . 181Subscribe to a topic ... . . . . . . . . . . . . . . . . . . . . . . . . . . . . . . . . . . . . . . . . . . . . . . . . . . . . . . . . . . . . . . . . . . . . . . . . . . . . . . . . . . . . . . . . . . . . . . . . . . . . . 181Publish to a topic ... . . . . . . . . . . . . . . . . . . . . . . . . . . . . . . . . . . . . . . . . . . . . . . . . . . . . . . . . . . . . . . . . . . . . . . . . . . . . . . . . . . . . . . . . . . . . . . . . . . . . . . . . 182Unsubscribe from a topic ... . . . . . . . . . . . . . . . . . . . . . . . . . . . . . . . . . . . . . . . . . . . . . . . . . . . . . . . . . . . . . . . . . . . . . . . . . . . . . . . . . . . . . . . . . . . . . 182Delete a topic ... . . . . . . . . . . . . . . . . . . . . . . . . . . . . . . . . . . . . . . . . . . . . . . . . . . . . . . . . . . . . . . . . . . . . . . . . . . . . . . . . . . . . . . . . . . . . . . . . . . . . . . . . . . . . . 182
Amazon SWF .... . . . . . . . . . . . . . . . . . . . . . . . . . . . . . . . . . . . . . . . . . . . . . . . . . . . . . . . . . . . . . . . . . . . . . . . . . . . . . . . . . . . . . . . . . . . . . . . . . . . . . . . . . . . . . . . . . . . . . 182List of Amazon SWF Commands .... . . . . . . . . . . . . . . . . . . . . . . . . . . . . . . . . . . . . . . . . . . . . . . . . . . . . . . . . . . . . . . . . . . . . . . . . . . . . . . . . . . . 183Working with Amazon SWF Domains .... . . . . . . . . . . . . . . . . . . . . . . . . . . . . . . . . . . . . . . . . . . . . . . . . . . . . . . . . . . . . . . . . . . . . . . . . . . . . 185
Security ... . . . . . . . . . . . . . . . . . . . . . . . . . . . . . . . . . . . . . . . . . . . . . . . . . . . . . . . . . . . . . . . . . . . . . . . . . . . . . . . . . . . . . . . . . . . . . . . . . . . . . . . . . . . . . . . . . . . . . . . . . . . . . . . . . . . . . . 188Data Protection .... . . . . . . . . . . . . . . . . . . . . . . . . . . . . . . . . . . . . . . . . . . . . . . . . . . . . . . . . . . . . . . . . . . . . . . . . . . . . . . . . . . . . . . . . . . . . . . . . . . . . . . . . . . . . . . . . . . 188
Data encryption .... . . . . . . . . . . . . . . . . . . . . . . . . . . . . . . . . . . . . . . . . . . . . . . . . . . . . . . . . . . . . . . . . . . . . . . . . . . . . . . . . . . . . . . . . . . . . . . . . . . . . . . . . . 189Identity and Access Management .... . . . . . . . . . . . . . . . . . . . . . . . . . . . . . . . . . . . . . . . . . . . . . . . . . . . . . . . . . . . . . . . . . . . . . . . . . . . . . . . . . . . . . . . . . . 189Compliance Validation .... . . . . . . . . . . . . . . . . . . . . . . . . . . . . . . . . . . . . . . . . . . . . . . . . . . . . . . . . . . . . . . . . . . . . . . . . . . . . . . . . . . . . . . . . . . . . . . . . . . . . . . . . . 190Enforcing TLS 1.2 .... . . . . . . . . . . . . . . . . . . . . . . . . . . . . . . . . . . . . . . . . . . . . . . . . . . . . . . . . . . . . . . . . . . . . . . . . . . . . . . . . . . . . . . . . . . . . . . . . . . . . . . . . . . . . . . . 190
Troubleshooting Errors ... . . . . . . . . . . . . . . . . . . . . . . . . . . . . . . . . . . . . . . . . . . . . . . . . . . . . . . . . . . . . . . . . . . . . . . . . . . . . . . . . . . . . . . . . . . . . . . . . . . . . . . . . . . . . . . . . . 191General: Ensure you're running a recent version of the AWS CLI. .. . . . . . . . . . . . . . . . . . . . . . . . . . . . . . . . . . . . . . . . . . . . . . . . . . 191General: Use the --debug option. ... . . . . . . . . . . . . . . . . . . . . . . . . . . . . . . . . . . . . . . . . . . . . . . . . . . . . . . . . . . . . . . . . . . . . . . . . . . . . . . . . . . . . . . . . . 191I get the error "command not found" when I run aws. . . . . . . . . . . . . . . . . . . . . . . . . . . . . . . . . . . . . . . . . . . . . . . . . . . . . . . . . . . . . . . . . . 195
Possible cause: The operating system "path" was not updated during installation. ... . . . . . . . . . . . . . . . . 195I get "access denied" errors. .. . . . . . . . . . . . . . . . . . . . . . . . . . . . . . . . . . . . . . . . . . . . . . . . . . . . . . . . . . . . . . . . . . . . . . . . . . . . . . . . . . . . . . . . . . . . . . . . . . . . 195
Possible cause: The AWS CLI program file doesn't have "run" permission. ... . . . . . . . . . . . . . . . . . . . . . . . . . . . . 195Possible cause: Your IAM identity doesn't have permission to perform the operation. ... . . . . . . . . . . . . 196
I get an "invalid credentials" error. .. . . . . . . . . . . . . . . . . . . . . . . . . . . . . . . . . . . . . . . . . . . . . . . . . . . . . . . . . . . . . . . . . . . . . . . . . . . . . . . . . . . . . . . . . . . 196Possible cause: The AWS CLI is reading credentials from an unexpected location. ... . . . . . . . . . . . . . . . . . . 196Possible cause: Your computer's clock is out of sync. ... . . . . . . . . . . . . . . . . . . . . . . . . . . . . . . . . . . . . . . . . . . . . . . . . . . . . . . . . 196
I get a "signature does not match" error. .. . . . . . . . . . . . . . . . . . . . . . . . . . . . . . . . . . . . . . . . . . . . . . . . . . . . . . . . . . . . . . . . . . . . . . . . . . . . . . . . . . 197Possible cause: Your clock is out of sync with the AWS servers. .. . . . . . . . . . . . . . . . . . . . . . . . . . . . . . . . . . . . . . . . . . . . 197Possible cause: Your operating system is mishandling AWS secret keys that contain certainspecial characters. .. . . . . . . . . . . . . . . . . . . . . . . . . . . . . . . . . . . . . . . . . . . . . . . . . . . . . . . . . . . . . . . . . . . . . . . . . . . . . . . . . . . . . . . . . . . . . . . . . . . . . . . . . 197
I get a "No Windows console found. Are you running cmd.exe?" error. .. . . . . . . . . . . . . . . . . . . . . . . . . . . . . . . . . . . . . . . . . . . 198I get a "[SSL: CERTIFICATE_ VERIFY_FAILED] certificate verify failed" error. .. . . . . . . . . . . . . . . . . . . . . . . . . . . . . . . . . . . . 198Additional resources .... . . . . . . . . . . . . . . . . . . . . . . . . . . . . . . . . . . . . . . . . . . . . . . . . . . . . . . . . . . . . . . . . . . . . . . . . . . . . . . . . . . . . . . . . . . . . . . . . . . . . . . . . . . . . 198
v
AWS Command Line Interface User Guide for Version 2
Migrating/Breaking Changes .... . . . . . . . . . . . . . . . . . . . . . . . . . . . . . . . . . . . . . . . . . . . . . . . . . . . . . . . . . . . . . . . . . . . . . . . . . . . . . . . . . . . . . . . . . . . . . . . . . . . . . . . . 199File encoding environment variable .... . . . . . . . . . . . . . . . . . . . . . . . . . . . . . . . . . . . . . . . . . . . . . . . . . . . . . . . . . . . . . . . . . . . . . . . . . . . . . . . . . . . . . . 199Passing binary parameters ... . . . . . . . . . . . . . . . . . . . . . . . . . . . . . . . . . . . . . . . . . . . . . . . . . . . . . . . . . . . . . . . . . . . . . . . . . . . . . . . . . . . . . . . . . . . . . . . . . . . . 199Improved Amazon S3 property and tag handling during s3 copy operations .... . . . . . . . . . . . . . . . . . . . . . . . . . . . . . 200No automatic retrieval of webpages for parameters ... . . . . . . . . . . . . . . . . . . . . . . . . . . . . . . . . . . . . . . . . . . . . . . . . . . . . . . . . . . . . . . . . . 201Output paging .... . . . . . . . . . . . . . . . . . . . . . . . . . . . . . . . . . . . . . . . . . . . . . . . . . . . . . . . . . . . . . . . . . . . . . . . . . . . . . . . . . . . . . . . . . . . . . . . . . . . . . . . . . . . . . . . . . . . 201All date/time values in ISO 8601 format .... . . . . . . . . . . . . . . . . . . . . . . . . . . . . . . . . . . . . . . . . . . . . . . . . . . . . . . . . . . . . . . . . . . . . . . . . . . . . . . . 202Improved AWS CloudFormation deployment handling .... . . . . . . . . . . . . . . . . . . . . . . . . . . . . . . . . . . . . . . . . . . . . . . . . . . . . . . . . . . . . . 202Amazon S3 and us-east-1 Region .... . . . . . . . . . . . . . . . . . . . . . . . . . . . . . . . . . . . . . . . . . . . . . . . . . . . . . . . . . . . . . . . . . . . . . . . . . . . . . . . . . . . . . . . . . 203AWS STS and regional endpoints ... . . . . . . . . . . . . . . . . . . . . . . . . . . . . . . . . . . . . . . . . . . . . . . . . . . . . . . . . . . . . . . . . . . . . . . . . . . . . . . . . . . . . . . . . . . . 203Deprecate ecr get-login . . . . . . . . . . . . . . . . . . . . . . . . . . . . . . . . . . . . . . . . . . . . . . . . . . . . . . . . . . . . . . . . . . . . . . . . . . . . . . . . . . . . . . . . . . . . . . . . . . . . 203Changing support for [plugins] . . . . . . . . . . . . . . . . . . . . . . . . . . . . . . . . . . . . . . . . . . . . . . . . . . . . . . . . . . . . . . . . . . . . . . . . . . . . . . . . . . . . . . . . . . . . 204No hidden aliases .... . . . . . . . . . . . . . . . . . . . . . . . . . . . . . . . . . . . . . . . . . . . . . . . . . . . . . . . . . . . . . . . . . . . . . . . . . . . . . . . . . . . . . . . . . . . . . . . . . . . . . . . . . . . . . . . 204No longer supports api_versions . . . . . . . . . . . . . . . . . . . . . . . . . . . . . . . . . . . . . . . . . . . . . . . . . . . . . . . . . . . . . . . . . . . . . . . . . . . . . . . . . . . . . . . . . . 205
Uninstall .. . . . . . . . . . . . . . . . . . . . . . . . . . . . . . . . . . . . . . . . . . . . . . . . . . . . . . . . . . . . . . . . . . . . . . . . . . . . . . . . . . . . . . . . . . . . . . . . . . . . . . . . . . . . . . . . . . . . . . . . . . . . . . . . . . . . . . . 206Document History .... . . . . . . . . . . . . . . . . . . . . . . . . . . . . . . . . . . . . . . . . . . . . . . . . . . . . . . . . . . . . . . . . . . . . . . . . . . . . . . . . . . . . . . . . . . . . . . . . . . . . . . . . . . . . . . . . . . . . . . 209
vi

AWS Command Line Interface User Guide for Version 2
vii
AWS Command Line Interface User Guide for Version 2About AWS CLI version 2
What is the AWS Command LineInterface?
The AWS Command Line Interface (AWS CLI) is an open source tool that enables you to interact withAWS services using commands in your command-line shell. With minimal configuration, the AWS CLIenables you to start running commands that implement functionality equivalent to that provided by thebrowser-based AWS Management Console from the command prompt in your terminal program:
• Linux shells – Use common shell programs such as bash, zsh, and tcsh to run commands in Linux ormacOS.
• Windows command line – On Windows, run commands at the Windows command prompt or inPowerShell.
• Remotely – Run commands on Amazon Elastic Compute Cloud (Amazon EC2) instances through aremote terminal program such as PuTTY or SSH, or with AWS Systems Manager.
All IaaS (infrastructure as a service) AWS administration, management, and access functions in the AWSManagement Console are available in the AWS API and AWS CLI. New AWS IaaS features and servicesprovide full AWS Management Console functionality through the API and CLI at launch or within 180days of launch.
The AWS CLI provides direct access to the public APIs of AWS services. You can explore a service'scapabilities with the AWS CLI, and develop shell scripts to manage your resources. In addition to thelow-level, API-equivalent commands, several AWS services provide customizations for the AWS CLI.Customizations can include higher-level commands that simplify using a service with a complex API.
About AWS CLI version 2The AWS CLI version 2 is the most recent major version of the AWS CLI and supports all of the latestfeatures. Some features introduced in version 2 are not backported to version 1 and you must upgradeto access those features. There are some "breaking" changes from version 1 that might require you tochange your scripts. For a list of breaking changes in version 2, see Breaking changes – Migrating fromAWS CLI version 1 to version 2 (p. 199).
The AWS CLI version 2 is available to install only as a bundled installer. While you may find it in packagemanagers, these are unsupported and unofficial packages that are not produced or managed byAWS. We recommend that you install the AWS CLI from only the official AWS distribution points, asdocumented in this guide.
To install the AWS CLI version 2, see the section called “Install/Update” (p. 6).
For version history, see the AWS CLI version 2 Changelog on GitHub.
Maintenance and support for SDK major versionsFor information about maintenance and support for SDK major versions and their underlyingdependencies, see the following in the AWS SDKs and Tools Reference Guide:
1
AWS Command Line Interface User Guide for Version 2About Amazon Web Services
• AWS SDKs and tools maintenance policy• AWS SDKs and tools version support matrix
About Amazon Web ServicesAmazon Web Services (AWS) is a collection of digital infrastructure services that developers can leveragewhen developing their applications. The services include computing, storage, database, and applicationsynchronization (messaging and queuing). AWS uses a pay-as-you-go service model. You are chargedonly for the services that you—or your applications—use. Also, to make AWS more approachable as aplatform for prototyping and experimentation, AWS offers a free usage tier. On this tier, services are freebelow a certain level of usage. For more information about AWS costs and the Free Tier, see Test-DrivingAWS in the Free Usage Tier. To obtain an AWS account, open the AWS home page and then click Sign Up.
Using the AWS CLI examplesThe AWS Command Line Interface (AWS CLI) examples in this guide are formatted using the followingconventions:
• Prompt – The command prompt uses the Linux prompt and is displayed as ($ ). For commandsthat are Windows specific, C:\> is used as the prompt. Do not include the prompt when you typecommands.
• Directory – When commands must be executed from a specific directory, the directory name is shownbefore the prompt symbol.
• User input – Command text that you enter at the command line is formatted as user input.• Replaceable text – Variable text, including names of resources that you choose, or IDs generated by
AWS services that you must include in commands, is formatted as replaceable text. In multiple-line commands or commands where specific keyboard input is required, keyboard commands can alsobe shown as replaceable text.
• Output – Output returned by AWS services is shown under user input, and is formatted as computeroutput.
The following aws configure command example demonstrates user input, replaceable text, andoutput:
1. Enter aws configure at the command line, and then press Enter.2. The AWS CLI outputs lines of text, prompting you to enter additional information.3. Enter each of your access keys in turn, and then press Enter.4. Then, enter an AWS Region name in the format shown, press Enter, and then press Enter a final time
to skip the output format setting.5. The final Enter command is shown as replaceable text because there is no user input for that line.
$ aws configureAWS Access Key ID [None]: AKIAIOSFODNN7EXAMPLEAWS Secret Access Key [None]: wJalrXUtnFEMI/K7MDENG/bPxRfiCYEXAMPLEKEYDefault region name [None]: us-west-2Default output format [None]: ENTER
The following example shows a simple command with output. To use this example, enter the full text ofthe command (the highlighted text after the prompt), and then press Enter. The name of the securitygroup, my-sg, is replaceable to your desired security group name. The JSON document, including the
2
AWS Command Line Interface User Guide for Version 2Additional documentation and resources
curly braces, is output. If you configure your CLI to output in text or table format, the output will beformatted differently. JSON is the default output format.
$ aws ec2 create-security-group --group-name my-sg --description "My security group"{ "GroupId": "sg-903004f8"}
Additional documentation and resourcesAWS CLI documentation and resourcesIn addition to this user guide, the following are valuable online resources for the AWS CLI.
• AWS CLI version 2 reference guide• AWS CLI code examples repository• AWS CLI GitHub repository You can view and fork the source code for the AWS CLI on GitHub. Join
the community of users on GitHub to provide feedback, request features, and submit your owncontributions.
• AWS CLI alias examples repository You can view and fork AWS CLI alias examples on GitHub.• AWS CLI version 2 change notes
Other AWS SDKsDepending on your use case, you might want to choose one of the AWS SDKs or the AWS Tools forPowerShell:
• AWS Tools for PowerShell• AWS SDK for Java• AWS SDK for .NET• AWS SDK for JavaScript• AWS SDK for Ruby• AWS SDK for Python (Boto)• AWS SDK for PHP• AWS SDK for Go• AWS Mobile SDK for iOS• AWS Mobile SDK for Android
3
AWS Command Line Interface User Guide for Version 2Prerequisites
Getting started with the AWS CLIThis section provides links to information about how to get started with version 2 of the AWS CommandLine Interface (AWS CLI).
Topics• Prerequisites to use the AWS CLI version 2 (p. 4)• Installing or updating the latest version of the AWS CLI (p. 6)• Installing past releases of the AWS CLI version 2 (p. 15)• Using the official AWS CLI version 2 Docker image (p. 25)• Adding the AWS CLI to your path (p. 30)• Quick setup (p. 31)
Prerequisites to use the AWS CLI version 2To access AWS services with the AWS CLI, you need an AWS account, IAM credentials, and an IAM accesskey pair. When running AWS CLI commands, the AWS CLI needs to have access to those AWS credentials.
To increase the security of your AWS account, we recommend that you do not use your root accountcredentials. You should create an IAM user to provide access credentials to the tasks you'll be running inAWS.
Topics• Step 1: Sign up to AWS (p. 4)• Step 2: Create an IAM user account (p. 4)• Step 3: Create an access key ID and secret access key (p. 5)• Next steps (p. 6)
Step 1: Sign up to AWSIf you do not have an AWS account, complete the following steps to create one.
To sign up for an AWS account
1. Open https://portal.aws.amazon.com/billing/signup.2. Follow the online instructions.
Part of the sign-up procedure involves receiving a phone call and entering a verification code on thephone keypad.
Step 2: Create an IAM user accountTo create an administrator user for yourself and add the user to an administrators group(console)
1. Sign in to the IAM console as the account owner by choosing Root user and entering your AWSaccount email address. On the next page, enter your password.
4
AWS Command Line Interface User Guide for Version 2Step 3: Create an access key ID and secret access key
NoteWe strongly recommend that you adhere to the best practice of using the AdministratorIAM user that follows and securely lock away the root user credentials. Sign in as the rootuser only to perform a few account and service management tasks.
2. In the navigation pane, choose Users and then choose Add user.
3. For User name, enter Administrator.
4. Select the check box next to AWS Management Console access. Then select Custom password, andthen enter your new password in the text box.
5. (Optional) By default, AWS requires the new user to create a new password when first signing in. Youcan clear the check box next to User must create a new password at next sign-in to allow the newuser to reset their password after they sign in.
6. Choose Next: Permissions.
7. Under Set permissions, choose Add user to group.
8. Choose Create group.
9. In the Create group dialog box, for Group name enter Administrators.
10. Choose Filter policies, and then select AWS managed - job function to filter the table contents.
11. In the policy list, select the check box for AdministratorAccess. Then choose Create group.
NoteYou must activate IAM user and role access to Billing before you can use theAdministratorAccess permissions to access the AWS Billing and Cost Managementconsole. To do this, follow the instructions in step 1 of the tutorial about delegating accessto the billing console.
12. Back in the list of groups, select the check box for your new group. Choose Refresh if necessary tosee the group in the list.
13. Choose Next: Tags.
14. (Optional) Add metadata to the user by attaching tags as key-value pairs. For more informationabout using tags in IAM, see Tagging IAM entities in the IAM User Guide.
15. Choose Next: Review to see the list of group memberships to be added to the new user. When youare ready to proceed, choose Create user.
You can use this same process to create more groups and users and to give your users access to your AWSaccount resources. To learn about using policies that restrict user permissions to specific AWS resources,see Access management and Example policies.
Step 3: Create an access key ID and secret access keyFor CLI access, you need an access key ID and secret access key. Use IAM user access keys instead of AWSaccount root user access keys. IAM lets you securely control access to AWS services and resources in yourAWS account. For more information about creating access keys, see Understanding and getting yoursecurity credentials in the AWS General Reference.
Access keys consist of an access key ID and secret access key, which are used to sign programmaticrequests that you make to AWS. If you don't have access keys, you can create them from the AWSManagement Console. As a best practice, do not use the AWS account root user access keys for any taskwhere it's not required. Instead, create a new administrator IAM user with access keys for yourself.
The only time that you can view or download the secret access key is when you create the keys. Youcannot recover them later. However, you can create new access keys at any time. You must also havepermissions to perform the required IAM actions. For more information, see Permissions required toaccess IAM resources in the IAM User Guide.
5
AWS Command Line Interface User Guide for Version 2Next steps
To create access keys for an IAM user
1. Sign in to the AWS Management Console and open the IAM console at https://console.aws.amazon.com/iam/.
2. In the navigation pane, choose Users.
3. Choose the name of the user whose access keys you want to create, and then choose the Securitycredentials tab.
4. In the Access keys section, choose Create access key.
5. To view the new access key pair, choose Show. You will not have access to the secret access key againafter this dialog box closes. Your credentials will look something like this:
• Access key ID: AKIAIOSFODNN7EXAMPLE
• Secret access key: wJalrXUtnFEMI/K7MDENG/bPxRfiCYEXAMPLEKEY
6. To download the key pair, choose Download .csv file. Store the keys in a secure location. You willnot have access to the secret access key again after this dialog box closes.
Keep the keys confidential in order to protect your AWS account and never email them. Do not sharethem outside your organization, even if an inquiry appears to come from AWS or Amazon.com. Noone who legitimately represents Amazon will ever ask you for your secret key.
7. After you download the .csv file, choose Close. When you create an access key, the key pair is activeby default, and you can use the pair right away.
Related topics
• What is IAM? in the IAM User Guide
• AWS security credentials in AWS General Reference
Next stepsAfter creating an AWS account, IAM credentials, and an IAM access key pair, to use the AWS CLI you cando one of the following:
• Install the latest release (p. 6) of the AWS CLI version 2 on your computer.
• Install a past release (p. 15) of the AWS CLI version 2 on your computer.
• Access the AWS CLI version 2 from your computer using a Docker image. (p. 25)
• Access the AWS CLI version 2 in the AWS console from your browser using AWS CloudShell. For moreinformation see the AWS CloudShell User Guide.
Installing or updating the latest version of theAWS CLI
This topic describes how to install or update the latest release of the AWS Command Line Interface (AWSCLI) on supported operating systems. For information on the latest releases of AWS CLI, see the AWS CLIchange notes on GitHub.
To install a past release of the AWS CLI, see the section called “Past releases” (p. 15).
For uninstall instructions, see Uninstall (p. 206).
6
AWS Command Line Interface User Guide for Version 2Install/Update
ImportantAWS CLI versions 1 and 2 use the same aws command name. If you have both versions installed,your computer uses the first one found in your search path. If you previously installed AWS CLIversion 1, we recommend that you do one of the following to use AWS CLI version 2:
• Recommended – Uninstall AWS CLI version 1 and use only AWS CLI version 2. For uninstallinstructions, determine the method you used to install AWS CLI version 1 and follow theappropriate uninstall instructions for your operating system in Installing, updating, anduninstalling the AWS CLI version 1.
• Use your operating system's ability to create a symbolic link (symlink) or alias with a differentname for one of the two aws commands. For example, you can use a symbolic link or alias onLinux and macOS, or DOSKEY on Windows.
For information on breaking changes between version 1 and version 2, see Breaking changes –Migrating from AWS CLI version 1 to version 2 (p. 199).
AWS CLI installation instructions:
Linux
Installation requirements
• You must be able to extract or "unzip" the downloaded package. If your operating system doesn't havethe built-in unzip command, use an equivalent.
• The AWS CLI uses glibc, groff, and less. These are included by default in most major distributionsof Linux.
• We support the AWS CLI on 64-bit versions of recent distributions of CentOS, Fedora, Ubuntu, AmazonLinux 1, Amazon Linux 2 and Linux ARM.
• Because AWS doesn't maintain third-party repositories, we can’t guarantee that they contain the latestversion of the AWS CLI.
Installation instructions
Follow these steps from the command line to install the AWS CLI on Linux.
We provide the steps in one easy to copy and paste group based on whether you use 64-bit Linux orLinux ARM. See the descriptions of each line in the steps that follow.
Linux x86 (64-bit)
$ curl "https://awscli.amazonaws.com/awscli-exe-linux-x86_64.zip" -o "awscliv2.zip"unzip awscliv2.zipsudo ./aws/install
Linux ARM
$ curl "https://awscli.amazonaws.com/awscli-exe-linux-aarch64.zip" -o "awscliv2.zip"unzip awscliv2.zipsudo ./aws/install
1. Download the installation file in one of the following ways:
7
AWS Command Line Interface User Guide for Version 2Install/Update
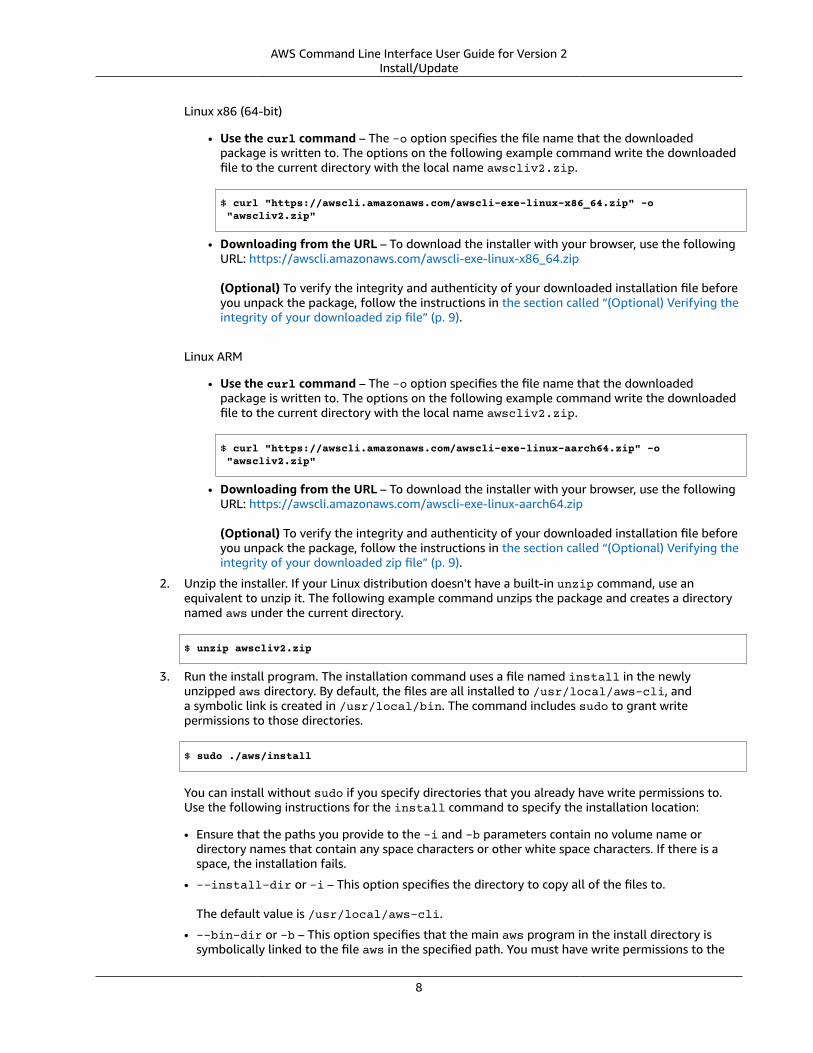
Linux x86 (64-bit)
• Use the curl command – The -o option specifies the file name that the downloadedpackage is written to. The options on the following example command write the downloadedfile to the current directory with the local name awscliv2.zip.
$ curl "https://awscli.amazonaws.com/awscli-exe-linux-x86_64.zip" -o "awscliv2.zip"
• Downloading from the URL – To download the installer with your browser, use the followingURL: https://awscli.amazonaws.com/awscli-exe-linux-x86_64.zip
(Optional) To verify the integrity and authenticity of your downloaded installation file beforeyou unpack the package, follow the instructions in the section called “(Optional) Verifying theintegrity of your downloaded zip file” (p. 9).
Linux ARM
• Use the curl command – The -o option specifies the file name that the downloadedpackage is written to. The options on the following example command write the downloadedfile to the current directory with the local name awscliv2.zip.
$ curl "https://awscli.amazonaws.com/awscli-exe-linux-aarch64.zip" -o "awscliv2.zip"
• Downloading from the URL – To download the installer with your browser, use the followingURL: https://awscli.amazonaws.com/awscli-exe-linux-aarch64.zip
(Optional) To verify the integrity and authenticity of your downloaded installation file beforeyou unpack the package, follow the instructions in the section called “(Optional) Verifying theintegrity of your downloaded zip file” (p. 9).
2. Unzip the installer. If your Linux distribution doesn't have a built-in unzip command, use anequivalent to unzip it. The following example command unzips the package and creates a directorynamed aws under the current directory.
$ unzip awscliv2.zip
3. Run the install program. The installation command uses a file named install in the newlyunzipped aws directory. By default, the files are all installed to /usr/local/aws-cli, anda symbolic link is created in /usr/local/bin. The command includes sudo to grant writepermissions to those directories.
$ sudo ./aws/install
You can install without sudo if you specify directories that you already have write permissions to.Use the following instructions for the install command to specify the installation location:
• Ensure that the paths you provide to the -i and -b parameters contain no volume name ordirectory names that contain any space characters or other white space characters. If there is aspace, the installation fails.
• --install-dir or -i – This option specifies the directory to copy all of the files to.
The default value is /usr/local/aws-cli.
• --bin-dir or -b – This option specifies that the main aws program in the install directory issymbolically linked to the file aws in the specified path. You must have write permissions to the
8
AWS Command Line Interface User Guide for Version 2Install/Update
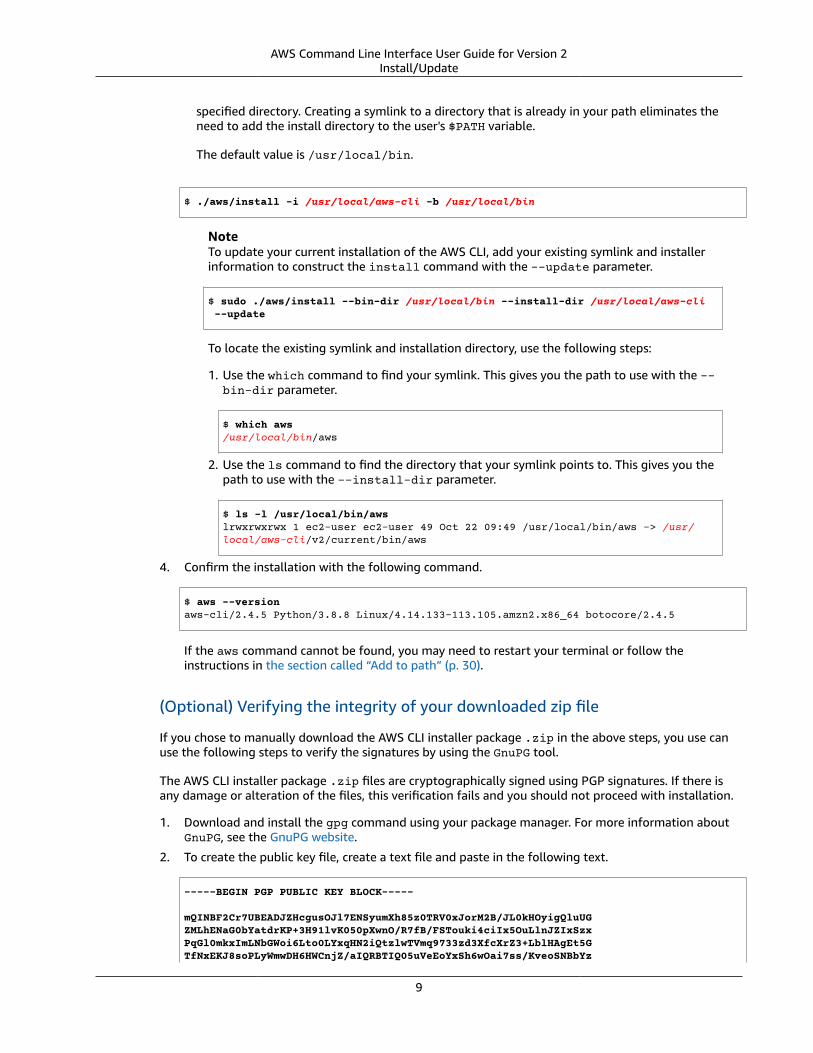
specified directory. Creating a symlink to a directory that is already in your path eliminates theneed to add the install directory to the user's $PATH variable.
The default value is /usr/local/bin.
$ ./aws/install -i /usr/local/aws-cli -b /usr/local/bin
NoteTo update your current installation of the AWS CLI, add your existing symlink and installerinformation to construct the install command with the --update parameter.
$ sudo ./aws/install --bin-dir /usr/local/bin --install-dir /usr/local/aws-cli --update
To locate the existing symlink and installation directory, use the following steps:
1. Use the which command to find your symlink. This gives you the path to use with the --bin-dir parameter.
$ which aws/usr/local/bin/aws
2. Use the ls command to find the directory that your symlink points to. This gives you thepath to use with the --install-dir parameter.
$ ls -l /usr/local/bin/awslrwxrwxrwx 1 ec2-user ec2-user 49 Oct 22 09:49 /usr/local/bin/aws -> /usr/local/aws-cli/v2/current/bin/aws
4. Confirm the installation with the following command.
$ aws --versionaws-cli/2.4.5 Python/3.8.8 Linux/4.14.133-113.105.amzn2.x86_64 botocore/2.4.5
If the aws command cannot be found, you may need to restart your terminal or follow theinstructions in the section called “Add to path” (p. 30).
(Optional) Verifying the integrity of your downloaded zip file
If you chose to manually download the AWS CLI installer package .zip in the above steps, you use canuse the following steps to verify the signatures by using the GnuPG tool.
The AWS CLI installer package .zip files are cryptographically signed using PGP signatures. If there isany damage or alteration of the files, this verification fails and you should not proceed with installation.
1. Download and install the gpg command using your package manager. For more information aboutGnuPG, see the GnuPG website.
2. To create the public key file, create a text file and paste in the following text.
-----BEGIN PGP PUBLIC KEY BLOCK-----
mQINBF2Cr7UBEADJZHcgusOJl7ENSyumXh85z0TRV0xJorM2B/JL0kHOyigQluUGZMLhENaG0bYatdrKP+3H91lvK050pXwnO/R7fB/FSTouki4ciIx5OuLlnJZIxSzxPqGl0mkxImLNbGWoi6Lto0LYxqHN2iQtzlwTVmq9733zd3XfcXrZ3+LblHAgEt5GTfNxEKJ8soPLyWmwDH6HWCnjZ/aIQRBTIQ05uVeEoYxSh6wOai7ss/KveoSNBbYz
9
AWS Command Line Interface User Guide for Version 2Install/Update
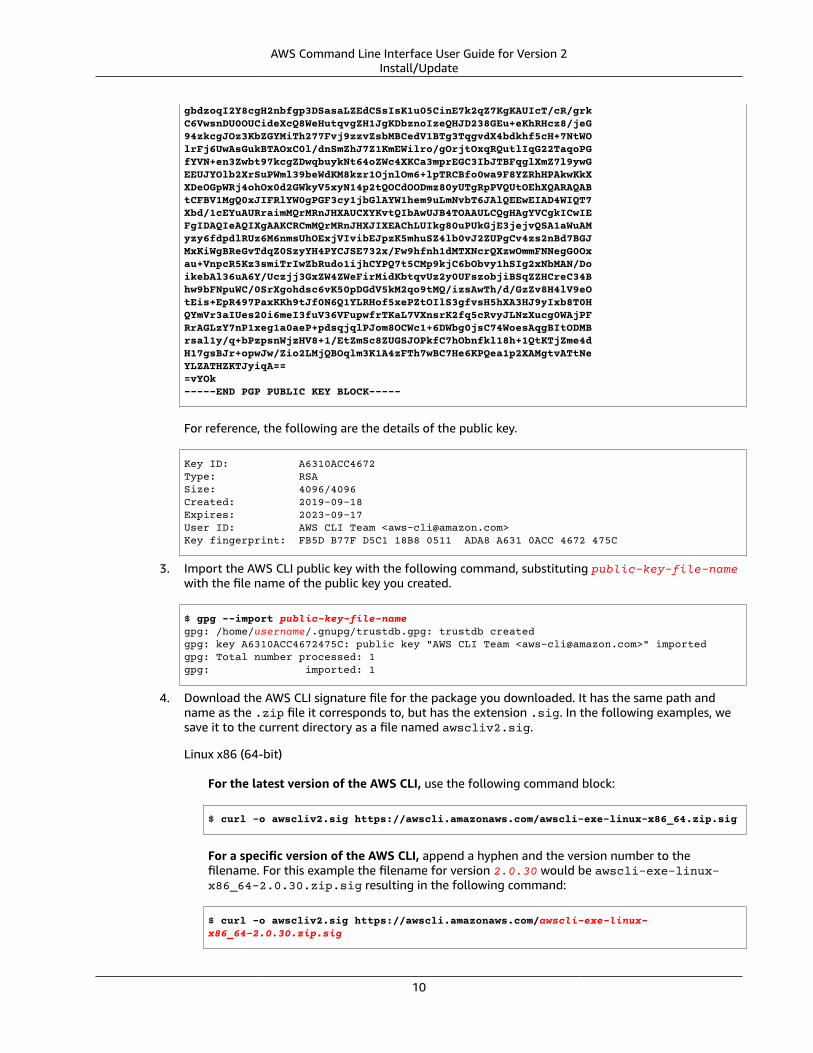
gbdzoqI2Y8cgH2nbfgp3DSasaLZEdCSsIsK1u05CinE7k2qZ7KgKAUIcT/cR/grkC6VwsnDU0OUCideXcQ8WeHutqvgZH1JgKDbznoIzeQHJD238GEu+eKhRHcz8/jeG94zkcgJOz3KbZGYMiTh277Fvj9zzvZsbMBCedV1BTg3TqgvdX4bdkhf5cH+7NtWOlrFj6UwAsGukBTAOxC0l/dnSmZhJ7Z1KmEWilro/gOrjtOxqRQutlIqG22TaqoPGfYVN+en3Zwbt97kcgZDwqbuykNt64oZWc4XKCa3mprEGC3IbJTBFqglXmZ7l9ywGEEUJYOlb2XrSuPWml39beWdKM8kzr1OjnlOm6+lpTRCBfo0wa9F8YZRhHPAkwKkXXDeOGpWRj4ohOx0d2GWkyV5xyN14p2tQOCdOODmz80yUTgRpPVQUtOEhXQARAQABtCFBV1MgQ0xJIFRlYW0gPGF3cy1jbGlAYW1hem9uLmNvbT6JAlQEEwEIAD4WIQT7Xbd/1cEYuAURraimMQrMRnJHXAUCXYKvtQIbAwUJB4TOAAULCQgHAgYVCgkICwIEFgIDAQIeAQIXgAAKCRCmMQrMRnJHXJIXEAChLUIkg80uPUkGjE3jejvQSA1aWuAMyzy6fdpdlRUz6M6nmsUhOExjVIvibEJpzK5mhuSZ4lb0vJ2ZUPgCv4zs2nBd7BGJMxKiWgBReGvTdqZ0SzyYH4PYCJSE732x/Fw9hfnh1dMTXNcrQXzwOmmFNNegG0Oxau+VnpcR5Kz3smiTrIwZbRudo1ijhCYPQ7t5CMp9kjC6bObvy1hSIg2xNbMAN/DoikebAl36uA6Y/Uczjj3GxZW4ZWeFirMidKbtqvUz2y0UFszobjiBSqZZHCreC34Bhw9bFNpuWC/0SrXgohdsc6vK50pDGdV5kM2qo9tMQ/izsAwTh/d/GzZv8H4lV9eOtEis+EpR497PaxKKh9tJf0N6Q1YLRHof5xePZtOIlS3gfvsH5hXA3HJ9yIxb8T0HQYmVr3aIUes20i6meI3fuV36VFupwfrTKaL7VXnsrK2fq5cRvyJLNzXucg0WAjPFRrAGLzY7nP1xeg1a0aeP+pdsqjqlPJom8OCWc1+6DWbg0jsC74WoesAqgBItODMBrsal1y/q+bPzpsnWjzHV8+1/EtZmSc8ZUGSJOPkfC7hObnfkl18h+1QtKTjZme4dH17gsBJr+opwJw/Zio2LMjQBOqlm3K1A4zFTh7wBC7He6KPQea1p2XAMgtvATtNeYLZATHZKTJyiqA===vYOk-----END PGP PUBLIC KEY BLOCK-----
For reference, the following are the details of the public key.
Key ID: A6310ACC4672Type: RSASize: 4096/4096Created: 2019-09-18Expires: 2023-09-17User ID: AWS CLI Team <[email protected]>Key fingerprint: FB5D B77F D5C1 18B8 0511 ADA8 A631 0ACC 4672 475C
3. Import the AWS CLI public key with the following command, substituting public-key-file-namewith the file name of the public key you created.
$ gpg --import public-key-file-namegpg: /home/username/.gnupg/trustdb.gpg: trustdb createdgpg: key A6310ACC4672475C: public key "AWS CLI Team <[email protected]>" importedgpg: Total number processed: 1gpg: imported: 1
4. Download the AWS CLI signature file for the package you downloaded. It has the same path andname as the .zip file it corresponds to, but has the extension .sig. In the following examples, wesave it to the current directory as a file named awscliv2.sig.
Linux x86 (64-bit)
For the latest version of the AWS CLI, use the following command block:
$ curl -o awscliv2.sig https://awscli.amazonaws.com/awscli-exe-linux-x86_64.zip.sig
For a specific version of the AWS CLI, append a hyphen and the version number to thefilename. For this example the filename for version 2.0.30 would be awscli-exe-linux-x86_64-2.0.30.zip.sig resulting in the following command:
$ curl -o awscliv2.sig https://awscli.amazonaws.com/awscli-exe-linux-x86_64-2.0.30.zip.sig
10
AWS Command Line Interface User Guide for Version 2Install/Update
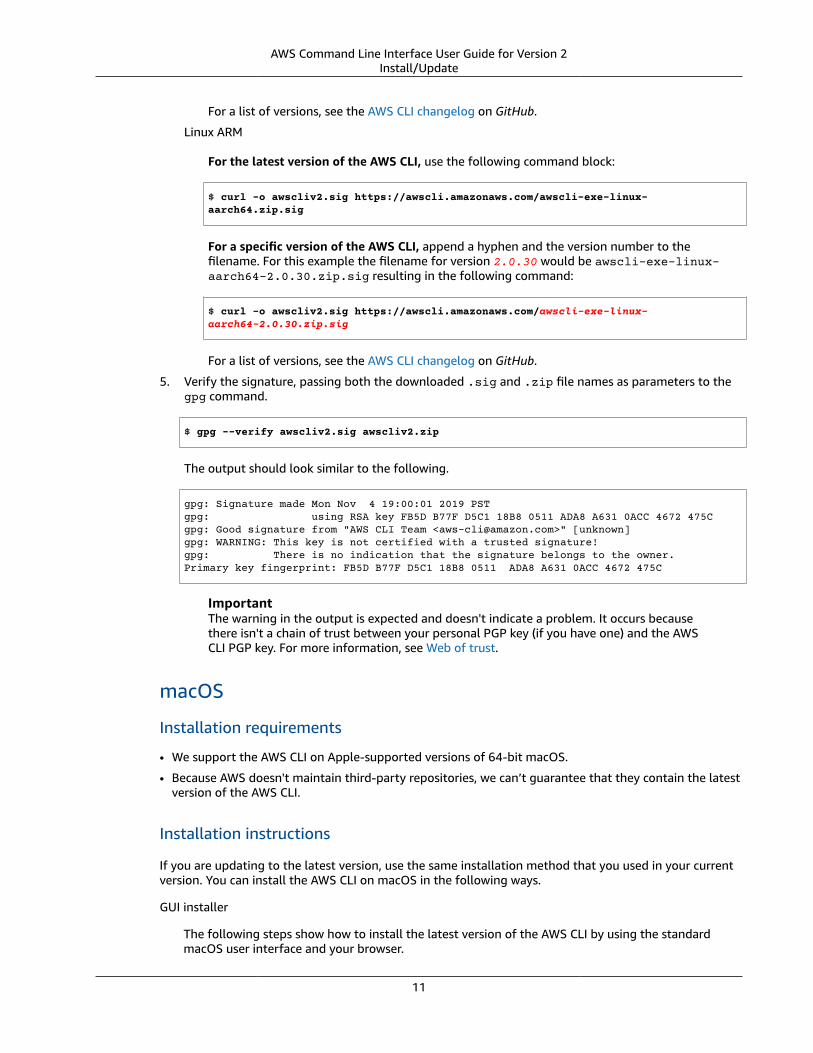
For a list of versions, see the AWS CLI changelog on GitHub.
Linux ARM
For the latest version of the AWS CLI, use the following command block:
$ curl -o awscliv2.sig https://awscli.amazonaws.com/awscli-exe-linux-aarch64.zip.sig
For a specific version of the AWS CLI, append a hyphen and the version number to thefilename. For this example the filename for version 2.0.30 would be awscli-exe-linux-aarch64-2.0.30.zip.sig resulting in the following command:
$ curl -o awscliv2.sig https://awscli.amazonaws.com/awscli-exe-linux-aarch64-2.0.30.zip.sig
For a list of versions, see the AWS CLI changelog on GitHub.
5. Verify the signature, passing both the downloaded .sig and .zip file names as parameters to thegpg command.
$ gpg --verify awscliv2.sig awscliv2.zip
The output should look similar to the following.
gpg: Signature made Mon Nov 4 19:00:01 2019 PSTgpg: using RSA key FB5D B77F D5C1 18B8 0511 ADA8 A631 0ACC 4672 475Cgpg: Good signature from "AWS CLI Team <[email protected]>" [unknown]gpg: WARNING: This key is not certified with a trusted signature!gpg: There is no indication that the signature belongs to the owner.Primary key fingerprint: FB5D B77F D5C1 18B8 0511 ADA8 A631 0ACC 4672 475C
ImportantThe warning in the output is expected and doesn't indicate a problem. It occurs becausethere isn't a chain of trust between your personal PGP key (if you have one) and the AWSCLI PGP key. For more information, see Web of trust.
macOS
Installation requirements
• We support the AWS CLI on Apple-supported versions of 64-bit macOS.
• Because AWS doesn't maintain third-party repositories, we can’t guarantee that they contain the latestversion of the AWS CLI.
Installation instructions
If you are updating to the latest version, use the same installation method that you used in your currentversion. You can install the AWS CLI on macOS in the following ways.
GUI installer
The following steps show how to install the latest version of the AWS CLI by using the standardmacOS user interface and your browser.
11
AWS Command Line Interface User Guide for Version 2Install/Update
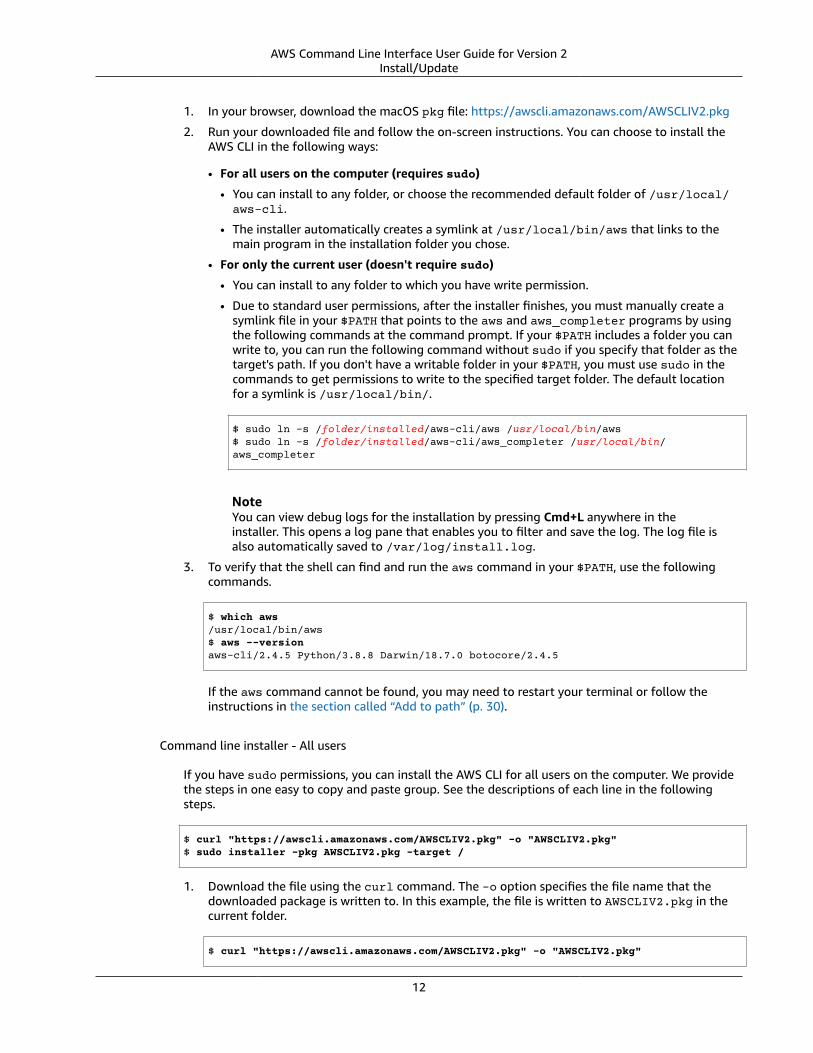
1. In your browser, download the macOS pkg file: https://awscli.amazonaws.com/AWSCLIV2.pkg
2. Run your downloaded file and follow the on-screen instructions. You can choose to install theAWS CLI in the following ways:
• For all users on the computer (requires sudo)
• You can install to any folder, or choose the recommended default folder of /usr/local/aws-cli.
• The installer automatically creates a symlink at /usr/local/bin/aws that links to themain program in the installation folder you chose.
• For only the current user (doesn't require sudo)
• You can install to any folder to which you have write permission.
• Due to standard user permissions, after the installer finishes, you must manually create asymlink file in your $PATH that points to the aws and aws_completer programs by usingthe following commands at the command prompt. If your $PATH includes a folder you canwrite to, you can run the following command without sudo if you specify that folder as thetarget's path. If you don't have a writable folder in your $PATH, you must use sudo in thecommands to get permissions to write to the specified target folder. The default locationfor a symlink is /usr/local/bin/.
$ sudo ln -s /folder/installed/aws-cli/aws /usr/local/bin/aws$ sudo ln -s /folder/installed/aws-cli/aws_completer /usr/local/bin/aws_completer
NoteYou can view debug logs for the installation by pressing Cmd+L anywhere in theinstaller. This opens a log pane that enables you to filter and save the log. The log file isalso automatically saved to /var/log/install.log.
3. To verify that the shell can find and run the aws command in your $PATH, use the followingcommands.
$ which aws/usr/local/bin/aws $ aws --versionaws-cli/2.4.5 Python/3.8.8 Darwin/18.7.0 botocore/2.4.5
If the aws command cannot be found, you may need to restart your terminal or follow theinstructions in the section called “Add to path” (p. 30).
Command line installer - All users
If you have sudo permissions, you can install the AWS CLI for all users on the computer. We providethe steps in one easy to copy and paste group. See the descriptions of each line in the followingsteps.
$ curl "https://awscli.amazonaws.com/AWSCLIV2.pkg" -o "AWSCLIV2.pkg"$ sudo installer -pkg AWSCLIV2.pkg -target /
1. Download the file using the curl command. The -o option specifies the file name that thedownloaded package is written to. In this example, the file is written to AWSCLIV2.pkg in thecurrent folder.
$ curl "https://awscli.amazonaws.com/AWSCLIV2.pkg" -o "AWSCLIV2.pkg"
12
AWS Command Line Interface User Guide for Version 2Install/Update
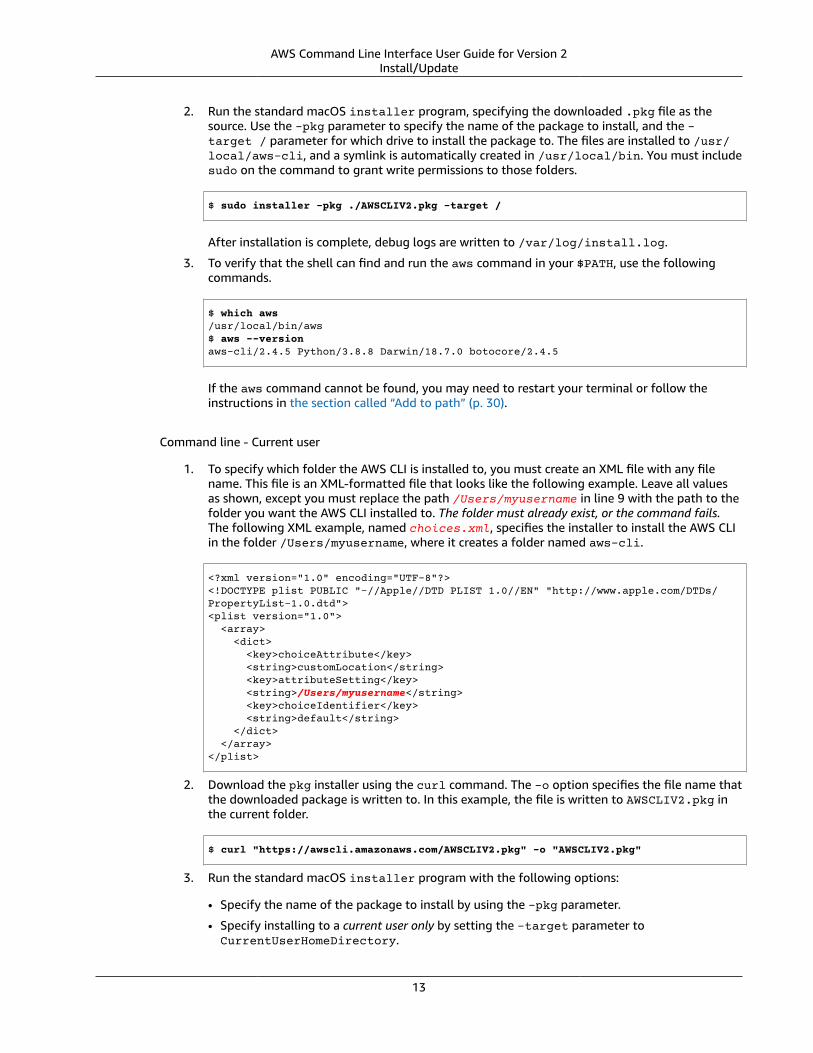
2. Run the standard macOS installer program, specifying the downloaded .pkg file as thesource. Use the -pkg parameter to specify the name of the package to install, and the -target / parameter for which drive to install the package to. The files are installed to /usr/local/aws-cli, and a symlink is automatically created in /usr/local/bin. You must includesudo on the command to grant write permissions to those folders.
$ sudo installer -pkg ./AWSCLIV2.pkg -target /
After installation is complete, debug logs are written to /var/log/install.log.
3. To verify that the shell can find and run the aws command in your $PATH, use the followingcommands.
$ which aws/usr/local/bin/aws $ aws --versionaws-cli/2.4.5 Python/3.8.8 Darwin/18.7.0 botocore/2.4.5
If the aws command cannot be found, you may need to restart your terminal or follow theinstructions in the section called “Add to path” (p. 30).
Command line - Current user
1. To specify which folder the AWS CLI is installed to, you must create an XML file with any filename. This file is an XML-formatted file that looks like the following example. Leave all valuesas shown, except you must replace the path /Users/myusername in line 9 with the path to thefolder you want the AWS CLI installed to. The folder must already exist, or the command fails.The following XML example, named choices.xml, specifies the installer to install the AWS CLIin the folder /Users/myusername, where it creates a folder named aws-cli.
<?xml version="1.0" encoding="UTF-8"?><!DOCTYPE plist PUBLIC "-//Apple//DTD PLIST 1.0//EN" "http://www.apple.com/DTDs/PropertyList-1.0.dtd"><plist version="1.0"> <array> <dict> <key>choiceAttribute</key> <string>customLocation</string> <key>attributeSetting</key> <string>/Users/myusername</string> <key>choiceIdentifier</key> <string>default</string> </dict> </array></plist>
2. Download the pkg installer using the curl command. The -o option specifies the file name thatthe downloaded package is written to. In this example, the file is written to AWSCLIV2.pkg inthe current folder.
$ curl "https://awscli.amazonaws.com/AWSCLIV2.pkg" -o "AWSCLIV2.pkg"
3. Run the standard macOS installer program with the following options:
• Specify the name of the package to install by using the -pkg parameter.
• Specify installing to a current user only by setting the -target parameter toCurrentUserHomeDirectory.
13
AWS Command Line Interface User Guide for Version 2Install/Update
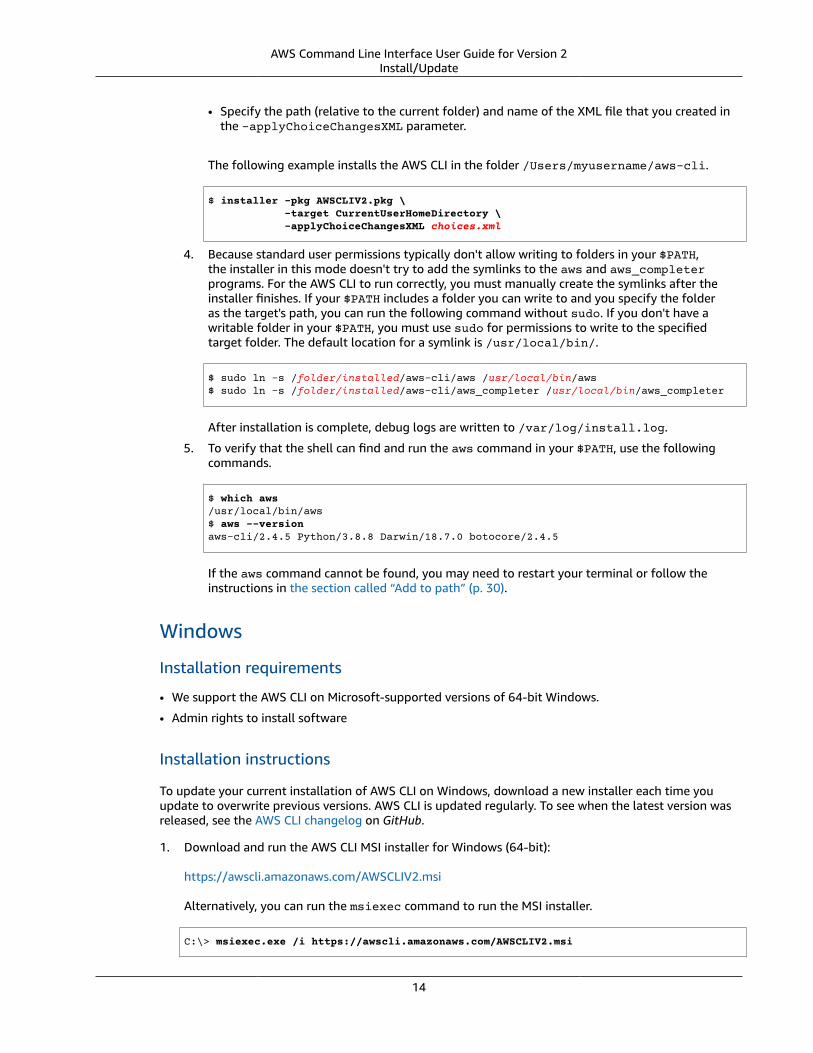
• Specify the path (relative to the current folder) and name of the XML file that you created inthe -applyChoiceChangesXML parameter.
The following example installs the AWS CLI in the folder /Users/myusername/aws-cli.
$ installer -pkg AWSCLIV2.pkg \ -target CurrentUserHomeDirectory \ -applyChoiceChangesXML choices.xml
4. Because standard user permissions typically don't allow writing to folders in your $PATH,the installer in this mode doesn't try to add the symlinks to the aws and aws_completerprograms. For the AWS CLI to run correctly, you must manually create the symlinks after theinstaller finishes. If your $PATH includes a folder you can write to and you specify the folderas the target's path, you can run the following command without sudo. If you don't have awritable folder in your $PATH, you must use sudo for permissions to write to the specifiedtarget folder. The default location for a symlink is /usr/local/bin/.
$ sudo ln -s /folder/installed/aws-cli/aws /usr/local/bin/aws$ sudo ln -s /folder/installed/aws-cli/aws_completer /usr/local/bin/aws_completer
After installation is complete, debug logs are written to /var/log/install.log.
5. To verify that the shell can find and run the aws command in your $PATH, use the followingcommands.
$ which aws/usr/local/bin/aws $ aws --versionaws-cli/2.4.5 Python/3.8.8 Darwin/18.7.0 botocore/2.4.5
If the aws command cannot be found, you may need to restart your terminal or follow theinstructions in the section called “Add to path” (p. 30).
Windows
Installation requirements
• We support the AWS CLI on Microsoft-supported versions of 64-bit Windows.
• Admin rights to install software
Installation instructions
To update your current installation of AWS CLI on Windows, download a new installer each time youupdate to overwrite previous versions. AWS CLI is updated regularly. To see when the latest version wasreleased, see the AWS CLI changelog on GitHub.
1. Download and run the AWS CLI MSI installer for Windows (64-bit):
https://awscli.amazonaws.com/AWSCLIV2.msi
Alternatively, you can run the msiexec command to run the MSI installer.
C:\> msiexec.exe /i https://awscli.amazonaws.com/AWSCLIV2.msi
14
AWS Command Line Interface User Guide for Version 2Next steps
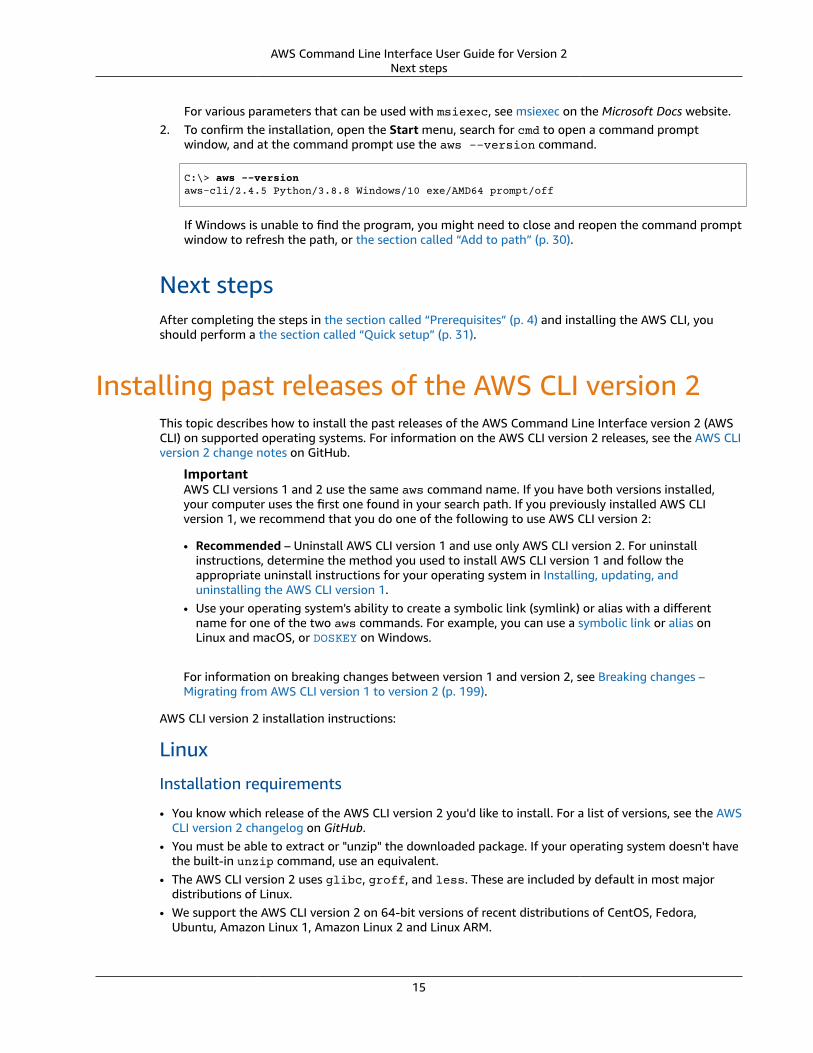
For various parameters that can be used with msiexec, see msiexec on the Microsoft Docs website.2. To confirm the installation, open the Start menu, search for cmd to open a command prompt
window, and at the command prompt use the aws --version command.
C:\> aws --versionaws-cli/2.4.5 Python/3.8.8 Windows/10 exe/AMD64 prompt/off
If Windows is unable to find the program, you might need to close and reopen the command promptwindow to refresh the path, or the section called “Add to path” (p. 30).
Next stepsAfter completing the steps in the section called “Prerequisites” (p. 4) and installing the AWS CLI, youshould perform a the section called “Quick setup” (p. 31).
Installing past releases of the AWS CLI version 2This topic describes how to install the past releases of the AWS Command Line Interface version 2 (AWSCLI) on supported operating systems. For information on the AWS CLI version 2 releases, see the AWS CLIversion 2 change notes on GitHub.
ImportantAWS CLI versions 1 and 2 use the same aws command name. If you have both versions installed,your computer uses the first one found in your search path. If you previously installed AWS CLIversion 1, we recommend that you do one of the following to use AWS CLI version 2:
• Recommended – Uninstall AWS CLI version 1 and use only AWS CLI version 2. For uninstallinstructions, determine the method you used to install AWS CLI version 1 and follow theappropriate uninstall instructions for your operating system in Installing, updating, anduninstalling the AWS CLI version 1.
• Use your operating system's ability to create a symbolic link (symlink) or alias with a differentname for one of the two aws commands. For example, you can use a symbolic link or alias onLinux and macOS, or DOSKEY on Windows.
For information on breaking changes between version 1 and version 2, see Breaking changes –Migrating from AWS CLI version 1 to version 2 (p. 199).
AWS CLI version 2 installation instructions:
Linux
Installation requirements
• You know which release of the AWS CLI version 2 you'd like to install. For a list of versions, see the AWSCLI version 2 changelog on GitHub.
• You must be able to extract or "unzip" the downloaded package. If your operating system doesn't havethe built-in unzip command, use an equivalent.
• The AWS CLI version 2 uses glibc, groff, and less. These are included by default in most majordistributions of Linux.
• We support the AWS CLI version 2 on 64-bit versions of recent distributions of CentOS, Fedora,Ubuntu, Amazon Linux 1, Amazon Linux 2 and Linux ARM.
15
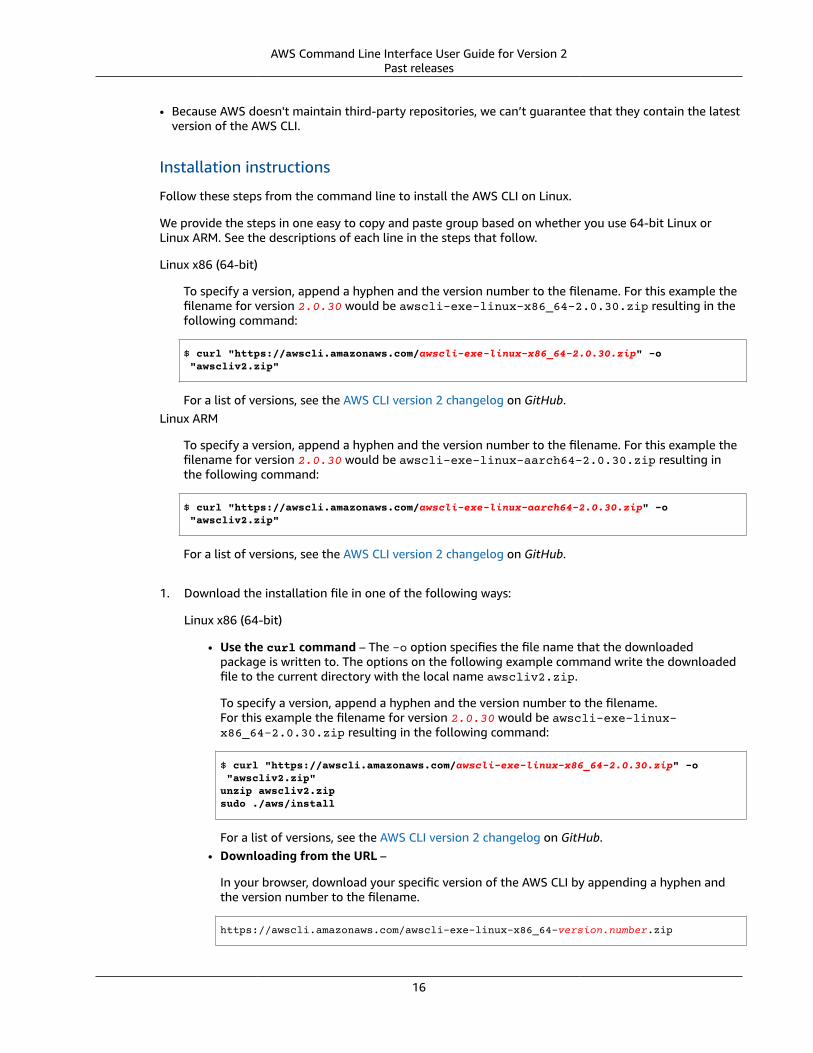
AWS Command Line Interface User Guide for Version 2Past releases
• Because AWS doesn't maintain third-party repositories, we can’t guarantee that they contain the latestversion of the AWS CLI.
Installation instructions
Follow these steps from the command line to install the AWS CLI on Linux.
We provide the steps in one easy to copy and paste group based on whether you use 64-bit Linux orLinux ARM. See the descriptions of each line in the steps that follow.
Linux x86 (64-bit)
To specify a version, append a hyphen and the version number to the filename. For this example thefilename for version 2.0.30 would be awscli-exe-linux-x86_64-2.0.30.zip resulting in thefollowing command:
$ curl "https://awscli.amazonaws.com/awscli-exe-linux-x86_64-2.0.30.zip" -o "awscliv2.zip"
For a list of versions, see the AWS CLI version 2 changelog on GitHub.Linux ARM
To specify a version, append a hyphen and the version number to the filename. For this example thefilename for version 2.0.30 would be awscli-exe-linux-aarch64-2.0.30.zip resulting inthe following command:
$ curl "https://awscli.amazonaws.com/awscli-exe-linux-aarch64-2.0.30.zip" -o "awscliv2.zip"
For a list of versions, see the AWS CLI version 2 changelog on GitHub.
1. Download the installation file in one of the following ways:
Linux x86 (64-bit)
• Use the curl command – The -o option specifies the file name that the downloadedpackage is written to. The options on the following example command write the downloadedfile to the current directory with the local name awscliv2.zip.
To specify a version, append a hyphen and the version number to the filename.For this example the filename for version 2.0.30 would be awscli-exe-linux-x86_64-2.0.30.zip resulting in the following command:
$ curl "https://awscli.amazonaws.com/awscli-exe-linux-x86_64-2.0.30.zip" -o "awscliv2.zip"unzip awscliv2.zipsudo ./aws/install
For a list of versions, see the AWS CLI version 2 changelog on GitHub.• Downloading from the URL –
In your browser, download your specific version of the AWS CLI by appending a hyphen andthe version number to the filename.
https://awscli.amazonaws.com/awscli-exe-linux-x86_64-version.number.zip
16
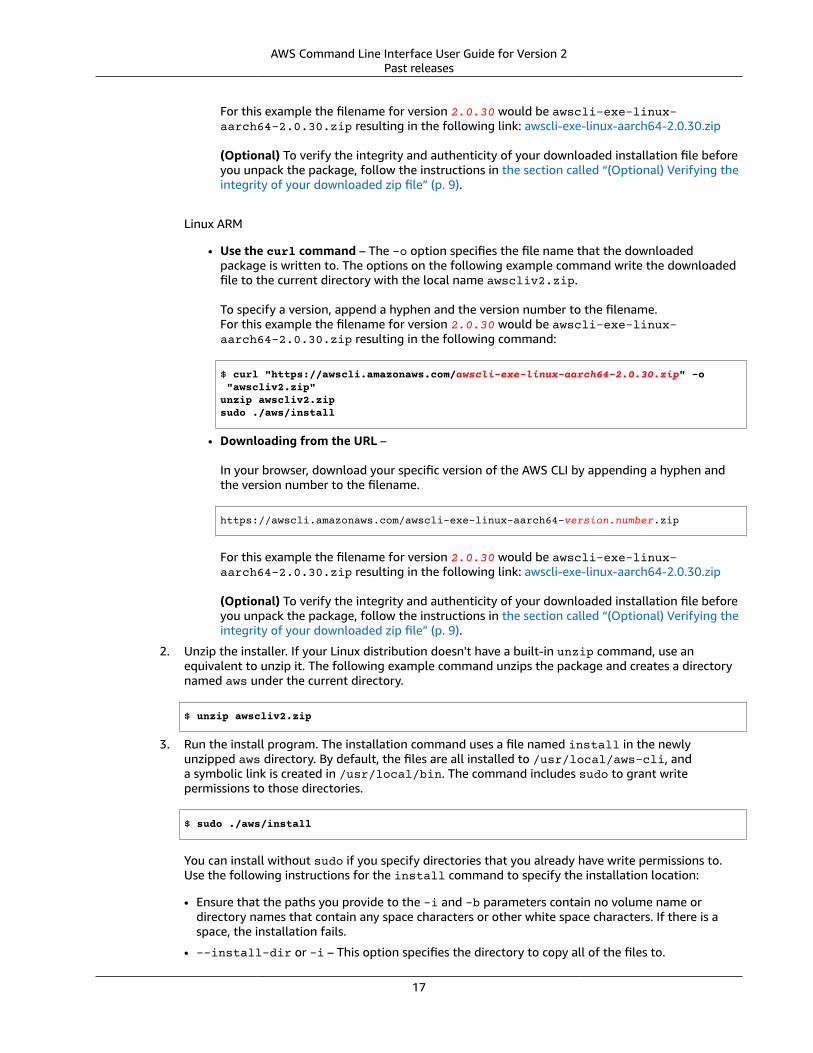
AWS Command Line Interface User Guide for Version 2Past releases
For this example the filename for version 2.0.30 would be awscli-exe-linux-aarch64-2.0.30.zip resulting in the following link: awscli-exe-linux-aarch64-2.0.30.zip
(Optional) To verify the integrity and authenticity of your downloaded installation file beforeyou unpack the package, follow the instructions in the section called “(Optional) Verifying theintegrity of your downloaded zip file” (p. 9).
Linux ARM
• Use the curl command – The -o option specifies the file name that the downloadedpackage is written to. The options on the following example command write the downloadedfile to the current directory with the local name awscliv2.zip.
To specify a version, append a hyphen and the version number to the filename.For this example the filename for version 2.0.30 would be awscli-exe-linux-aarch64-2.0.30.zip resulting in the following command:
$ curl "https://awscli.amazonaws.com/awscli-exe-linux-aarch64-2.0.30.zip" -o "awscliv2.zip"unzip awscliv2.zipsudo ./aws/install
• Downloading from the URL –
In your browser, download your specific version of the AWS CLI by appending a hyphen andthe version number to the filename.
https://awscli.amazonaws.com/awscli-exe-linux-aarch64-version.number.zip
For this example the filename for version 2.0.30 would be awscli-exe-linux-aarch64-2.0.30.zip resulting in the following link: awscli-exe-linux-aarch64-2.0.30.zip
(Optional) To verify the integrity and authenticity of your downloaded installation file beforeyou unpack the package, follow the instructions in the section called “(Optional) Verifying theintegrity of your downloaded zip file” (p. 9).
2. Unzip the installer. If your Linux distribution doesn't have a built-in unzip command, use anequivalent to unzip it. The following example command unzips the package and creates a directorynamed aws under the current directory.
$ unzip awscliv2.zip
3. Run the install program. The installation command uses a file named install in the newlyunzipped aws directory. By default, the files are all installed to /usr/local/aws-cli, anda symbolic link is created in /usr/local/bin. The command includes sudo to grant writepermissions to those directories.
$ sudo ./aws/install
You can install without sudo if you specify directories that you already have write permissions to.Use the following instructions for the install command to specify the installation location:
• Ensure that the paths you provide to the -i and -b parameters contain no volume name ordirectory names that contain any space characters or other white space characters. If there is aspace, the installation fails.
• --install-dir or -i – This option specifies the directory to copy all of the files to.
17
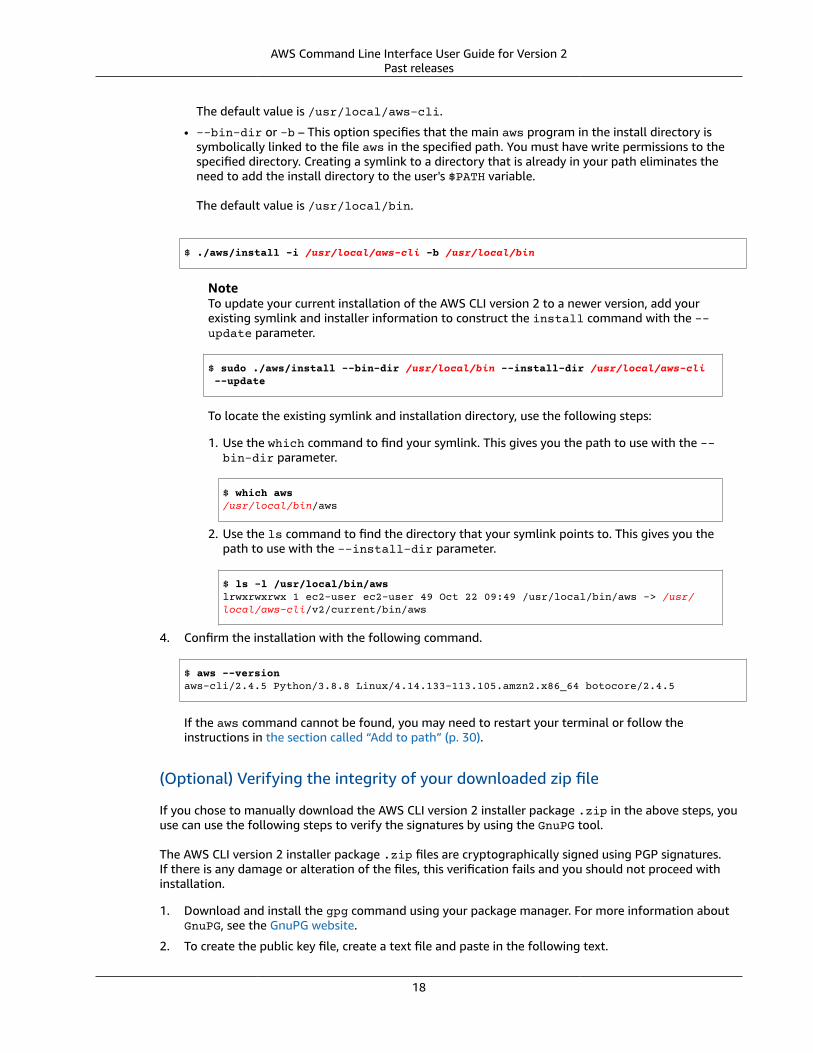
AWS Command Line Interface User Guide for Version 2Past releases
The default value is /usr/local/aws-cli.
• --bin-dir or -b – This option specifies that the main aws program in the install directory issymbolically linked to the file aws in the specified path. You must have write permissions to thespecified directory. Creating a symlink to a directory that is already in your path eliminates theneed to add the install directory to the user's $PATH variable.
The default value is /usr/local/bin.
$ ./aws/install -i /usr/local/aws-cli -b /usr/local/bin
NoteTo update your current installation of the AWS CLI version 2 to a newer version, add yourexisting symlink and installer information to construct the install command with the --update parameter.
$ sudo ./aws/install --bin-dir /usr/local/bin --install-dir /usr/local/aws-cli --update
To locate the existing symlink and installation directory, use the following steps:
1. Use the which command to find your symlink. This gives you the path to use with the --bin-dir parameter.
$ which aws/usr/local/bin/aws
2. Use the ls command to find the directory that your symlink points to. This gives you thepath to use with the --install-dir parameter.
$ ls -l /usr/local/bin/awslrwxrwxrwx 1 ec2-user ec2-user 49 Oct 22 09:49 /usr/local/bin/aws -> /usr/local/aws-cli/v2/current/bin/aws
4. Confirm the installation with the following command.
$ aws --versionaws-cli/2.4.5 Python/3.8.8 Linux/4.14.133-113.105.amzn2.x86_64 botocore/2.4.5
If the aws command cannot be found, you may need to restart your terminal or follow theinstructions in the section called “Add to path” (p. 30).
(Optional) Verifying the integrity of your downloaded zip file
If you chose to manually download the AWS CLI version 2 installer package .zip in the above steps, youuse can use the following steps to verify the signatures by using the GnuPG tool.
The AWS CLI version 2 installer package .zip files are cryptographically signed using PGP signatures.If there is any damage or alteration of the files, this verification fails and you should not proceed withinstallation.
1. Download and install the gpg command using your package manager. For more information aboutGnuPG, see the GnuPG website.
2. To create the public key file, create a text file and paste in the following text.
18
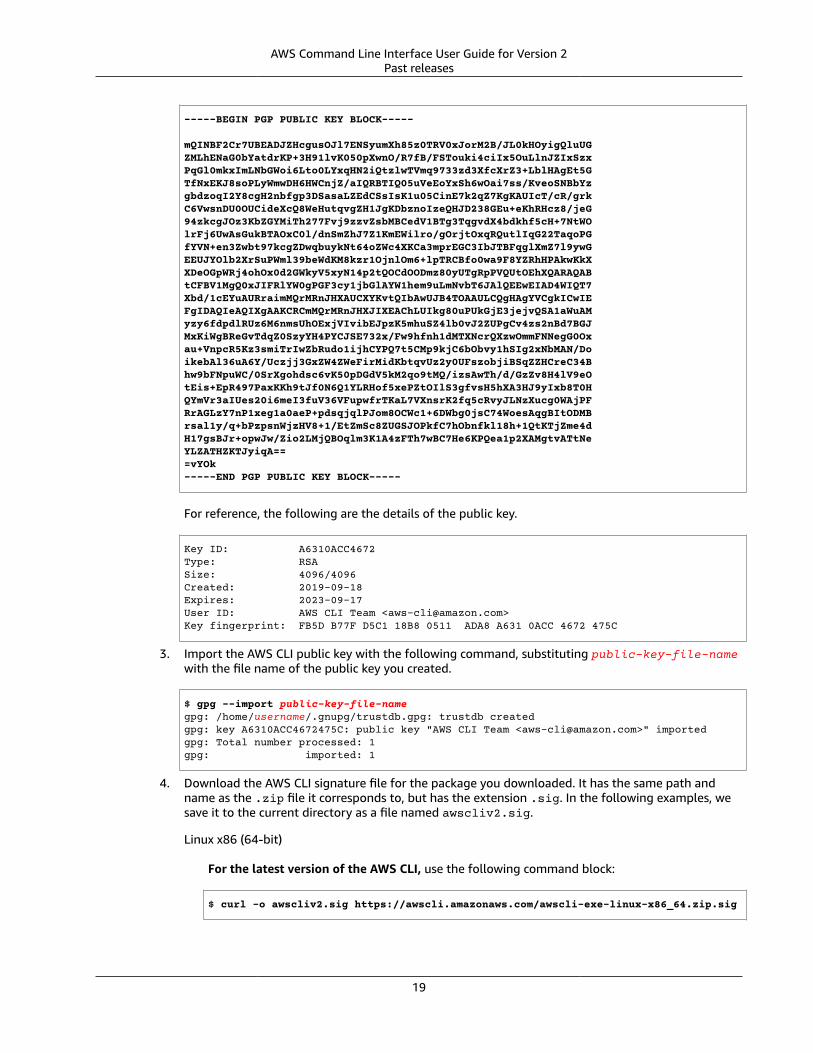
AWS Command Line Interface User Guide for Version 2Past releases
-----BEGIN PGP PUBLIC KEY BLOCK-----
mQINBF2Cr7UBEADJZHcgusOJl7ENSyumXh85z0TRV0xJorM2B/JL0kHOyigQluUGZMLhENaG0bYatdrKP+3H91lvK050pXwnO/R7fB/FSTouki4ciIx5OuLlnJZIxSzxPqGl0mkxImLNbGWoi6Lto0LYxqHN2iQtzlwTVmq9733zd3XfcXrZ3+LblHAgEt5GTfNxEKJ8soPLyWmwDH6HWCnjZ/aIQRBTIQ05uVeEoYxSh6wOai7ss/KveoSNBbYzgbdzoqI2Y8cgH2nbfgp3DSasaLZEdCSsIsK1u05CinE7k2qZ7KgKAUIcT/cR/grkC6VwsnDU0OUCideXcQ8WeHutqvgZH1JgKDbznoIzeQHJD238GEu+eKhRHcz8/jeG94zkcgJOz3KbZGYMiTh277Fvj9zzvZsbMBCedV1BTg3TqgvdX4bdkhf5cH+7NtWOlrFj6UwAsGukBTAOxC0l/dnSmZhJ7Z1KmEWilro/gOrjtOxqRQutlIqG22TaqoPGfYVN+en3Zwbt97kcgZDwqbuykNt64oZWc4XKCa3mprEGC3IbJTBFqglXmZ7l9ywGEEUJYOlb2XrSuPWml39beWdKM8kzr1OjnlOm6+lpTRCBfo0wa9F8YZRhHPAkwKkXXDeOGpWRj4ohOx0d2GWkyV5xyN14p2tQOCdOODmz80yUTgRpPVQUtOEhXQARAQABtCFBV1MgQ0xJIFRlYW0gPGF3cy1jbGlAYW1hem9uLmNvbT6JAlQEEwEIAD4WIQT7Xbd/1cEYuAURraimMQrMRnJHXAUCXYKvtQIbAwUJB4TOAAULCQgHAgYVCgkICwIEFgIDAQIeAQIXgAAKCRCmMQrMRnJHXJIXEAChLUIkg80uPUkGjE3jejvQSA1aWuAMyzy6fdpdlRUz6M6nmsUhOExjVIvibEJpzK5mhuSZ4lb0vJ2ZUPgCv4zs2nBd7BGJMxKiWgBReGvTdqZ0SzyYH4PYCJSE732x/Fw9hfnh1dMTXNcrQXzwOmmFNNegG0Oxau+VnpcR5Kz3smiTrIwZbRudo1ijhCYPQ7t5CMp9kjC6bObvy1hSIg2xNbMAN/DoikebAl36uA6Y/Uczjj3GxZW4ZWeFirMidKbtqvUz2y0UFszobjiBSqZZHCreC34Bhw9bFNpuWC/0SrXgohdsc6vK50pDGdV5kM2qo9tMQ/izsAwTh/d/GzZv8H4lV9eOtEis+EpR497PaxKKh9tJf0N6Q1YLRHof5xePZtOIlS3gfvsH5hXA3HJ9yIxb8T0HQYmVr3aIUes20i6meI3fuV36VFupwfrTKaL7VXnsrK2fq5cRvyJLNzXucg0WAjPFRrAGLzY7nP1xeg1a0aeP+pdsqjqlPJom8OCWc1+6DWbg0jsC74WoesAqgBItODMBrsal1y/q+bPzpsnWjzHV8+1/EtZmSc8ZUGSJOPkfC7hObnfkl18h+1QtKTjZme4dH17gsBJr+opwJw/Zio2LMjQBOqlm3K1A4zFTh7wBC7He6KPQea1p2XAMgtvATtNeYLZATHZKTJyiqA===vYOk-----END PGP PUBLIC KEY BLOCK-----
For reference, the following are the details of the public key.
Key ID: A6310ACC4672Type: RSASize: 4096/4096Created: 2019-09-18Expires: 2023-09-17User ID: AWS CLI Team <[email protected]>Key fingerprint: FB5D B77F D5C1 18B8 0511 ADA8 A631 0ACC 4672 475C
3. Import the AWS CLI public key with the following command, substituting public-key-file-namewith the file name of the public key you created.
$ gpg --import public-key-file-namegpg: /home/username/.gnupg/trustdb.gpg: trustdb createdgpg: key A6310ACC4672475C: public key "AWS CLI Team <[email protected]>" importedgpg: Total number processed: 1gpg: imported: 1
4. Download the AWS CLI signature file for the package you downloaded. It has the same path andname as the .zip file it corresponds to, but has the extension .sig. In the following examples, wesave it to the current directory as a file named awscliv2.sig.
Linux x86 (64-bit)
For the latest version of the AWS CLI, use the following command block:
$ curl -o awscliv2.sig https://awscli.amazonaws.com/awscli-exe-linux-x86_64.zip.sig
19
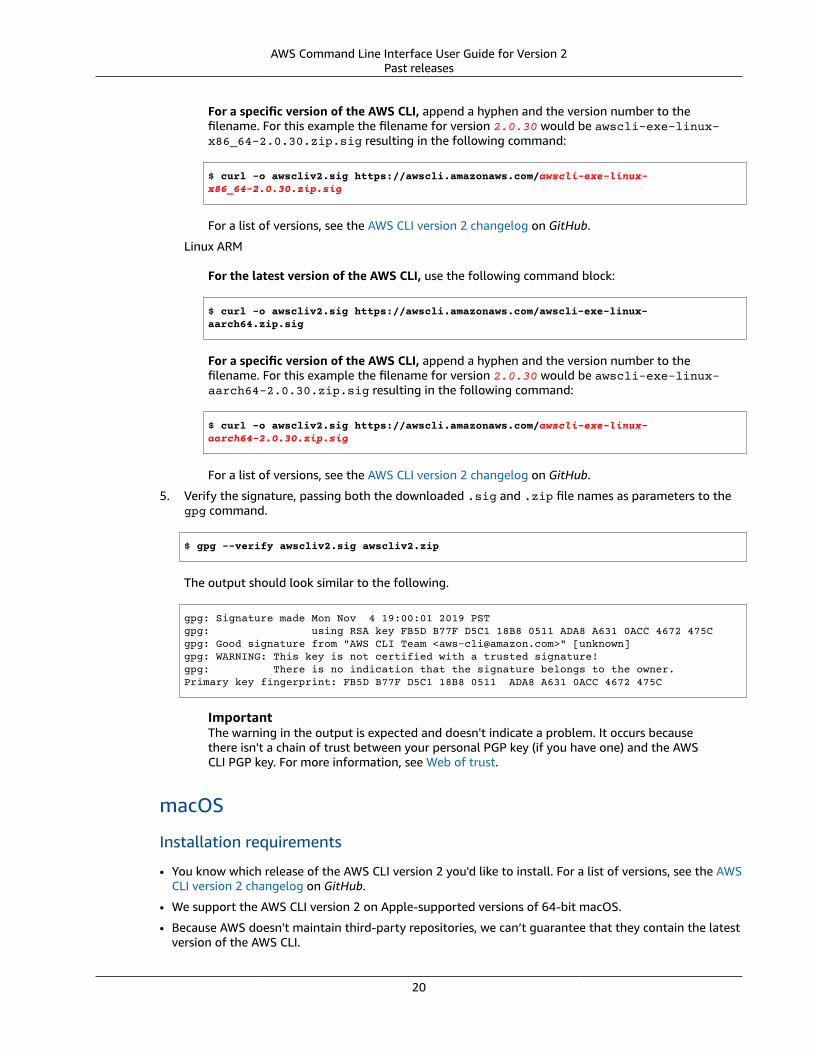
AWS Command Line Interface User Guide for Version 2Past releases
For a specific version of the AWS CLI, append a hyphen and the version number to thefilename. For this example the filename for version 2.0.30 would be awscli-exe-linux-x86_64-2.0.30.zip.sig resulting in the following command:
$ curl -o awscliv2.sig https://awscli.amazonaws.com/awscli-exe-linux-x86_64-2.0.30.zip.sig
For a list of versions, see the AWS CLI version 2 changelog on GitHub.
Linux ARM
For the latest version of the AWS CLI, use the following command block:
$ curl -o awscliv2.sig https://awscli.amazonaws.com/awscli-exe-linux-aarch64.zip.sig
For a specific version of the AWS CLI, append a hyphen and the version number to thefilename. For this example the filename for version 2.0.30 would be awscli-exe-linux-aarch64-2.0.30.zip.sig resulting in the following command:
$ curl -o awscliv2.sig https://awscli.amazonaws.com/awscli-exe-linux-aarch64-2.0.30.zip.sig
For a list of versions, see the AWS CLI version 2 changelog on GitHub.
5. Verify the signature, passing both the downloaded .sig and .zip file names as parameters to thegpg command.
$ gpg --verify awscliv2.sig awscliv2.zip
The output should look similar to the following.
gpg: Signature made Mon Nov 4 19:00:01 2019 PSTgpg: using RSA key FB5D B77F D5C1 18B8 0511 ADA8 A631 0ACC 4672 475Cgpg: Good signature from "AWS CLI Team <[email protected]>" [unknown]gpg: WARNING: This key is not certified with a trusted signature!gpg: There is no indication that the signature belongs to the owner.Primary key fingerprint: FB5D B77F D5C1 18B8 0511 ADA8 A631 0ACC 4672 475C
ImportantThe warning in the output is expected and doesn't indicate a problem. It occurs becausethere isn't a chain of trust between your personal PGP key (if you have one) and the AWSCLI PGP key. For more information, see Web of trust.
macOS
Installation requirements
• You know which release of the AWS CLI version 2 you'd like to install. For a list of versions, see the AWSCLI version 2 changelog on GitHub.
• We support the AWS CLI version 2 on Apple-supported versions of 64-bit macOS.
• Because AWS doesn't maintain third-party repositories, we can’t guarantee that they contain the latestversion of the AWS CLI.
20

AWS Command Line Interface User Guide for Version 2Past releases
Installation instructions
You can install the AWS CLI version 2 on macOS in the following ways.
GUI installer
The following steps show how to install or update to the latest version of the AWS CLI version 2 byusing the standard macOS user interface and your browser. If you are updating to the latest version,use the same installation method that you used for your current version.
1. In your browser, download your specific version of the AWS CLI by appending a hyphen and theversion number to the filename.
https://awscli.amazonaws.com/AWSCLIV2-version.number.pkg
For this example, the filename for version 2.0.30 would be AWSCLIV2-2.0.30.pkg resultingin the following link: https://awscli.amazonaws.com/AWSCLIV2-2.0.30.pkg.
2. Run your downloaded file and follow the on-screen instructions. You can choose to install theAWS CLI version 2 in the following ways:
• For all users on the computer (requires sudo)
• You can install to any folder, or choose the recommended default folder of /usr/local/aws-cli.
• The installer automatically creates a symlink at /usr/local/bin/aws that links to themain program in the installation folder you chose.
• For only the current user (doesn't require sudo)
• You can install to any folder to which you have write permission.
• Due to standard user permissions, after the installer finishes, you must manually create asymlink file in your $PATH that points to the aws and aws_completer programs by usingthe following commands at the command prompt. If your $PATH includes a folder you canwrite to, you can run the following command without sudo if you specify that folder as thetarget's path. If you don't have a writable folder in your $PATH, you must use sudo in thecommands to get permissions to write to the specified target folder. The default locationfor a symlink is /usr/local/bin/.
$ sudo ln -s /folder/installed/aws-cli/aws /usr/local/bin/aws$ sudo ln -s /folder/installed/aws-cli/aws_completer /usr/local/bin/aws_completer
NoteYou can view debug logs for the installation by pressing Cmd+L anywhere in theinstaller. This opens a log pane that enables you to filter and save the log. The log file isalso automatically saved to /var/log/install.log.
3. To verify that the shell can find and run the aws command in your $PATH, use the followingcommands.
$ which aws/usr/local/bin/aws $ aws --versionaws-cli/2.4.5 Python/3.8.8 Darwin/18.7.0 botocore/2.4.5
If the aws command cannot be found, you may need to restart your terminal or follow theinstructions in the section called “Add to path” (p. 30).
21
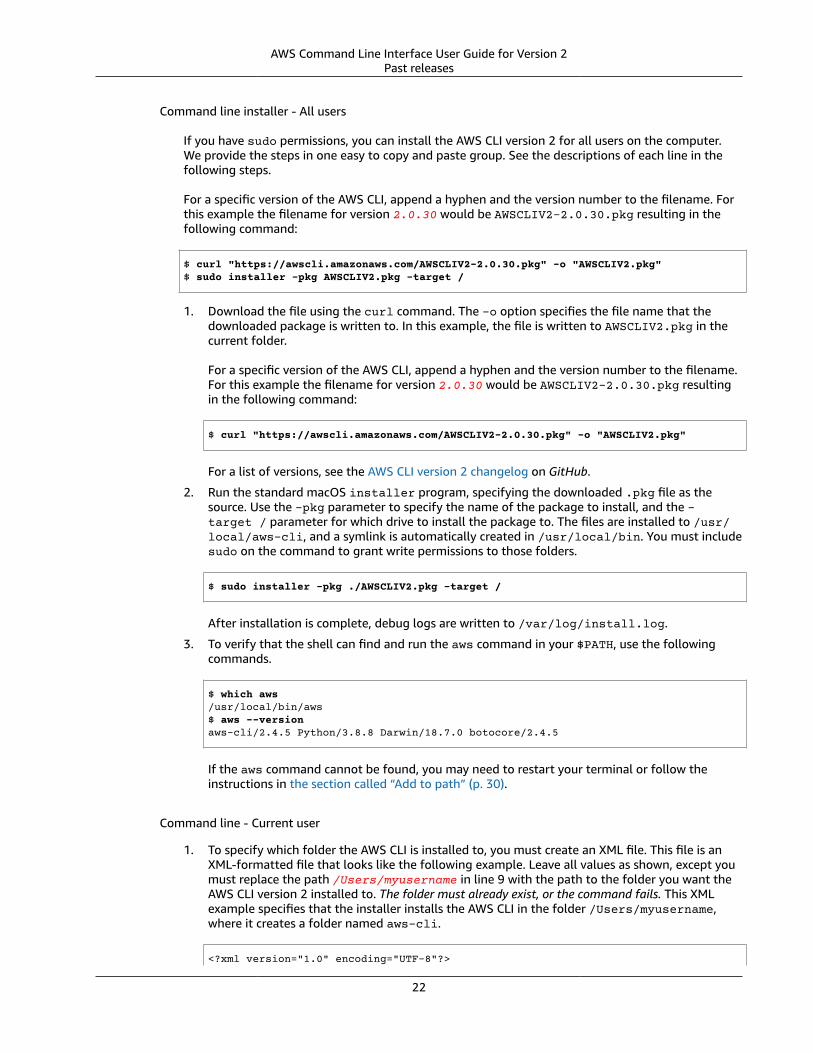
AWS Command Line Interface User Guide for Version 2Past releases
Command line installer - All users
If you have sudo permissions, you can install the AWS CLI version 2 for all users on the computer.We provide the steps in one easy to copy and paste group. See the descriptions of each line in thefollowing steps.
For a specific version of the AWS CLI, append a hyphen and the version number to the filename. Forthis example the filename for version 2.0.30 would be AWSCLIV2-2.0.30.pkg resulting in thefollowing command:
$ curl "https://awscli.amazonaws.com/AWSCLIV2-2.0.30.pkg" -o "AWSCLIV2.pkg"$ sudo installer -pkg AWSCLIV2.pkg -target /
1. Download the file using the curl command. The -o option specifies the file name that thedownloaded package is written to. In this example, the file is written to AWSCLIV2.pkg in thecurrent folder.
For a specific version of the AWS CLI, append a hyphen and the version number to the filename.For this example the filename for version 2.0.30 would be AWSCLIV2-2.0.30.pkg resultingin the following command:
$ curl "https://awscli.amazonaws.com/AWSCLIV2-2.0.30.pkg" -o "AWSCLIV2.pkg"
For a list of versions, see the AWS CLI version 2 changelog on GitHub.
2. Run the standard macOS installer program, specifying the downloaded .pkg file as thesource. Use the -pkg parameter to specify the name of the package to install, and the -target / parameter for which drive to install the package to. The files are installed to /usr/local/aws-cli, and a symlink is automatically created in /usr/local/bin. You must includesudo on the command to grant write permissions to those folders.
$ sudo installer -pkg ./AWSCLIV2.pkg -target /
After installation is complete, debug logs are written to /var/log/install.log.
3. To verify that the shell can find and run the aws command in your $PATH, use the followingcommands.
$ which aws/usr/local/bin/aws $ aws --versionaws-cli/2.4.5 Python/3.8.8 Darwin/18.7.0 botocore/2.4.5
If the aws command cannot be found, you may need to restart your terminal or follow theinstructions in the section called “Add to path” (p. 30).
Command line - Current user
1. To specify which folder the AWS CLI is installed to, you must create an XML file. This file is anXML-formatted file that looks like the following example. Leave all values as shown, except youmust replace the path /Users/myusername in line 9 with the path to the folder you want theAWS CLI version 2 installed to. The folder must already exist, or the command fails. This XMLexample specifies that the installer installs the AWS CLI in the folder /Users/myusername,where it creates a folder named aws-cli.
<?xml version="1.0" encoding="UTF-8"?>
22
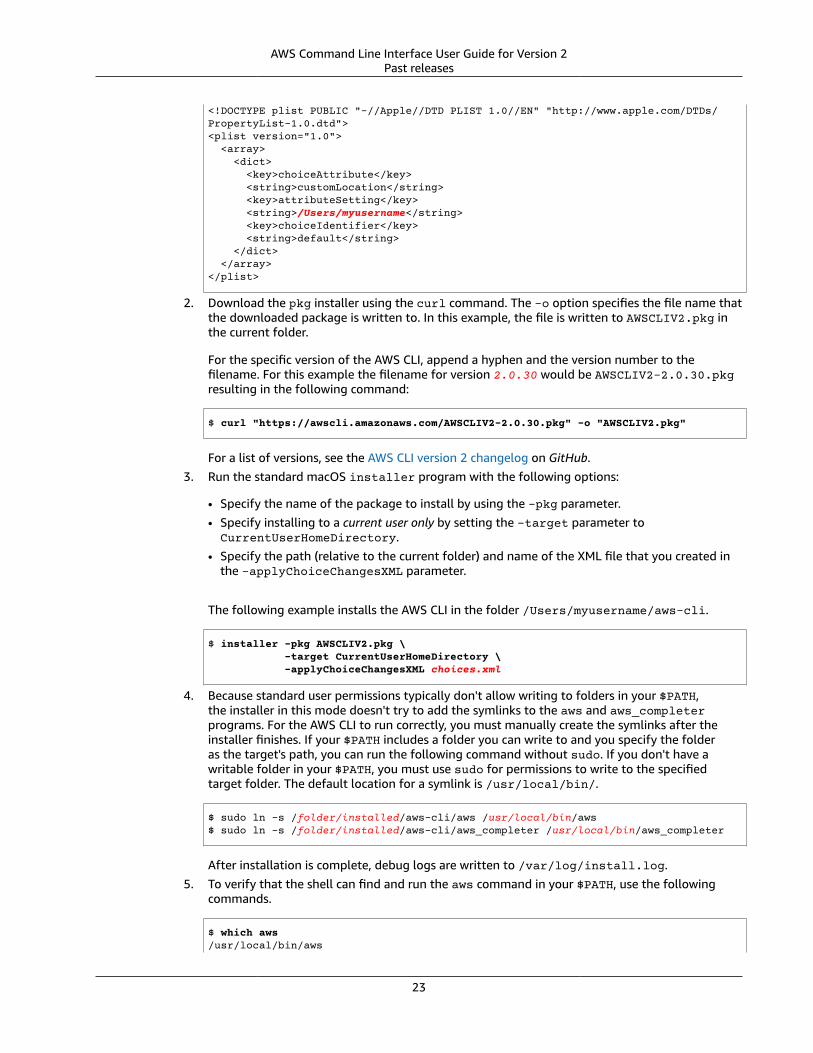
AWS Command Line Interface User Guide for Version 2Past releases
<!DOCTYPE plist PUBLIC "-//Apple//DTD PLIST 1.0//EN" "http://www.apple.com/DTDs/PropertyList-1.0.dtd"><plist version="1.0"> <array> <dict> <key>choiceAttribute</key> <string>customLocation</string> <key>attributeSetting</key> <string>/Users/myusername</string> <key>choiceIdentifier</key> <string>default</string> </dict> </array></plist>
2. Download the pkg installer using the curl command. The -o option specifies the file name thatthe downloaded package is written to. In this example, the file is written to AWSCLIV2.pkg inthe current folder.
For the specific version of the AWS CLI, append a hyphen and the version number to thefilename. For this example the filename for version 2.0.30 would be AWSCLIV2-2.0.30.pkgresulting in the following command:
$ curl "https://awscli.amazonaws.com/AWSCLIV2-2.0.30.pkg" -o "AWSCLIV2.pkg"
For a list of versions, see the AWS CLI version 2 changelog on GitHub.3. Run the standard macOS installer program with the following options:
• Specify the name of the package to install by using the -pkg parameter.• Specify installing to a current user only by setting the -target parameter toCurrentUserHomeDirectory.
• Specify the path (relative to the current folder) and name of the XML file that you created inthe -applyChoiceChangesXML parameter.
The following example installs the AWS CLI in the folder /Users/myusername/aws-cli.
$ installer -pkg AWSCLIV2.pkg \ -target CurrentUserHomeDirectory \ -applyChoiceChangesXML choices.xml
4. Because standard user permissions typically don't allow writing to folders in your $PATH,the installer in this mode doesn't try to add the symlinks to the aws and aws_completerprograms. For the AWS CLI to run correctly, you must manually create the symlinks after theinstaller finishes. If your $PATH includes a folder you can write to and you specify the folderas the target's path, you can run the following command without sudo. If you don't have awritable folder in your $PATH, you must use sudo for permissions to write to the specifiedtarget folder. The default location for a symlink is /usr/local/bin/.
$ sudo ln -s /folder/installed/aws-cli/aws /usr/local/bin/aws$ sudo ln -s /folder/installed/aws-cli/aws_completer /usr/local/bin/aws_completer
After installation is complete, debug logs are written to /var/log/install.log.5. To verify that the shell can find and run the aws command in your $PATH, use the following
commands.
$ which aws/usr/local/bin/aws
23

AWS Command Line Interface User Guide for Version 2Past releases
$ aws --versionaws-cli/2.4.5 Python/3.8.8 Darwin/18.7.0 botocore/2.4.5
If the aws command cannot be found, you may need to restart your terminal or follow theinstructions in the section called “Add to path” (p. 30).
Windows
Installation requirements
• You know which release of the AWS CLI version 2 you'd like to install. For a list of versions, see the AWSCLI version 2 changelog on GitHub.
• A 64-bit version of Windows XP or later.
• Admin rights to install software
Installation instructions
To update your current installation of AWS CLI version 2 on Windows, download a new installer eachtime you update to overwrite previous versions. AWS CLI is updated regularly. To see when the latestversion was released, see the AWS CLI version 2 changelog on GitHub.
1. Download and run the AWS CLI MSI installer for Windows (64-bit) in one of the following ways:
• Downloading and running the MSI installer: To create your download link for a specific versionof the AWS CLI, append a hyphen and the version number to the filename.
https://awscli.amazonaws.com/AWSCLIV2-version.number.msi
For this example the filename for version 2.0.30 would be AWSCLIV2-2.0.30.msi resulting inthe following link: https://awscli.amazonaws.com/AWSCLIV2-2.0.30.msi.
• Using the msiexec command: Alternatively, you can use the MSI installer by adding the link tothe msiexec command. For a specific version of the AWS CLI, append a hyphen and the versionnumber to the filename.
C:\> msiexec.exe /i https://awscli.amazonaws.com/AWSCLIV2-version.number.msi
For this example the filename for version 2.0.30 would be AWSCLIV2-2.0.30.msi resulting inthe following link https://awscli.amazonaws.com/AWSCLIV2-2.0.30.msi.
C:\> msiexec.exe /i https://awscli.amazonaws.com/AWSCLIV2-2.0.30.msi
For various parameters that can be used with msiexec, see msiexec on the Microsoft Docswebsite.
For a list of versions, see the AWS CLI version 2 changelog on GitHub.
2. To confirm the installation, open the Start menu, search for cmd to open a command promptwindow, and at the command prompt use the aws --version command.
C:\> aws --versionaws-cli/2.4.5 Python/3.8.8 Windows/10 exe/AMD64 prompt/off
24
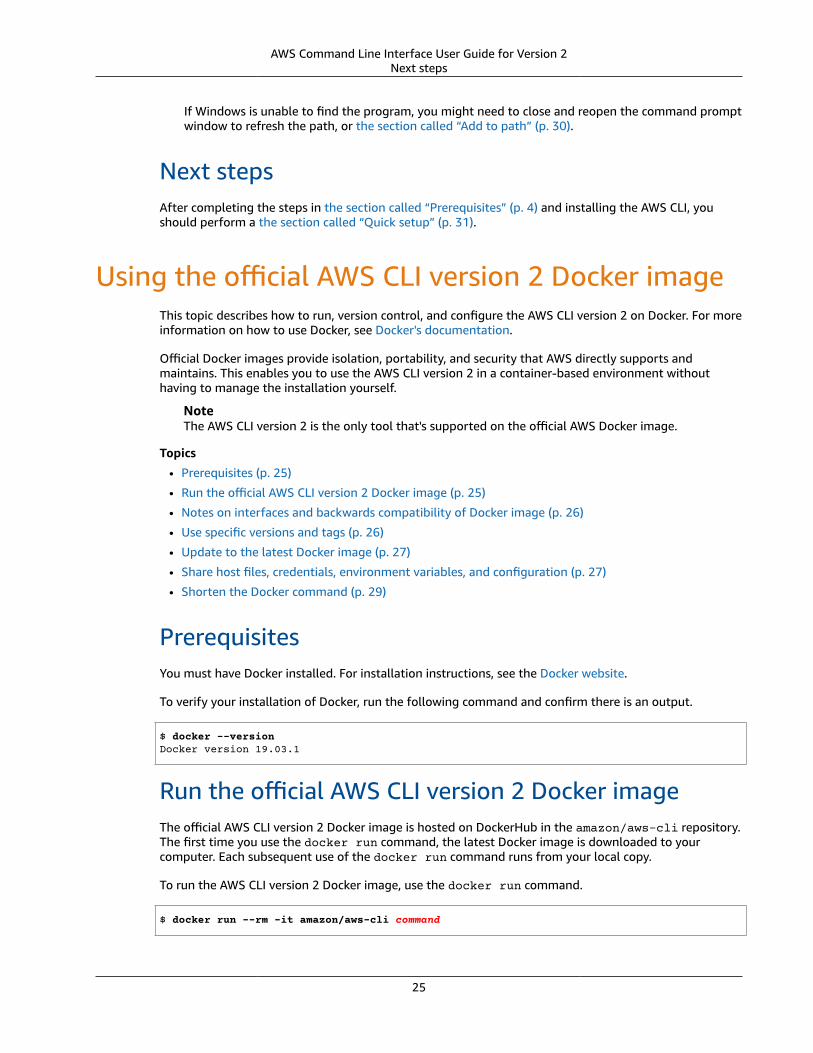
AWS Command Line Interface User Guide for Version 2Next steps
If Windows is unable to find the program, you might need to close and reopen the command promptwindow to refresh the path, or the section called “Add to path” (p. 30).
Next stepsAfter completing the steps in the section called “Prerequisites” (p. 4) and installing the AWS CLI, youshould perform a the section called “Quick setup” (p. 31).
Using the official AWS CLI version 2 Docker imageThis topic describes how to run, version control, and configure the AWS CLI version 2 on Docker. For moreinformation on how to use Docker, see Docker's documentation.
Official Docker images provide isolation, portability, and security that AWS directly supports andmaintains. This enables you to use the AWS CLI version 2 in a container-based environment withouthaving to manage the installation yourself.
NoteThe AWS CLI version 2 is the only tool that's supported on the official AWS Docker image.
Topics
• Prerequisites (p. 25)
• Run the official AWS CLI version 2 Docker image (p. 25)
• Notes on interfaces and backwards compatibility of Docker image (p. 26)
• Use specific versions and tags (p. 26)
• Update to the latest Docker image (p. 27)
• Share host files, credentials, environment variables, and configuration (p. 27)
• Shorten the Docker command (p. 29)
PrerequisitesYou must have Docker installed. For installation instructions, see the Docker website.
To verify your installation of Docker, run the following command and confirm there is an output.
$ docker --versionDocker version 19.03.1
Run the official AWS CLI version 2 Docker imageThe official AWS CLI version 2 Docker image is hosted on DockerHub in the amazon/aws-cli repository.The first time you use the docker run command, the latest Docker image is downloaded to yourcomputer. Each subsequent use of the docker run command runs from your local copy.
To run the AWS CLI version 2 Docker image, use the docker run command.
$ docker run --rm -it amazon/aws-cli command
25
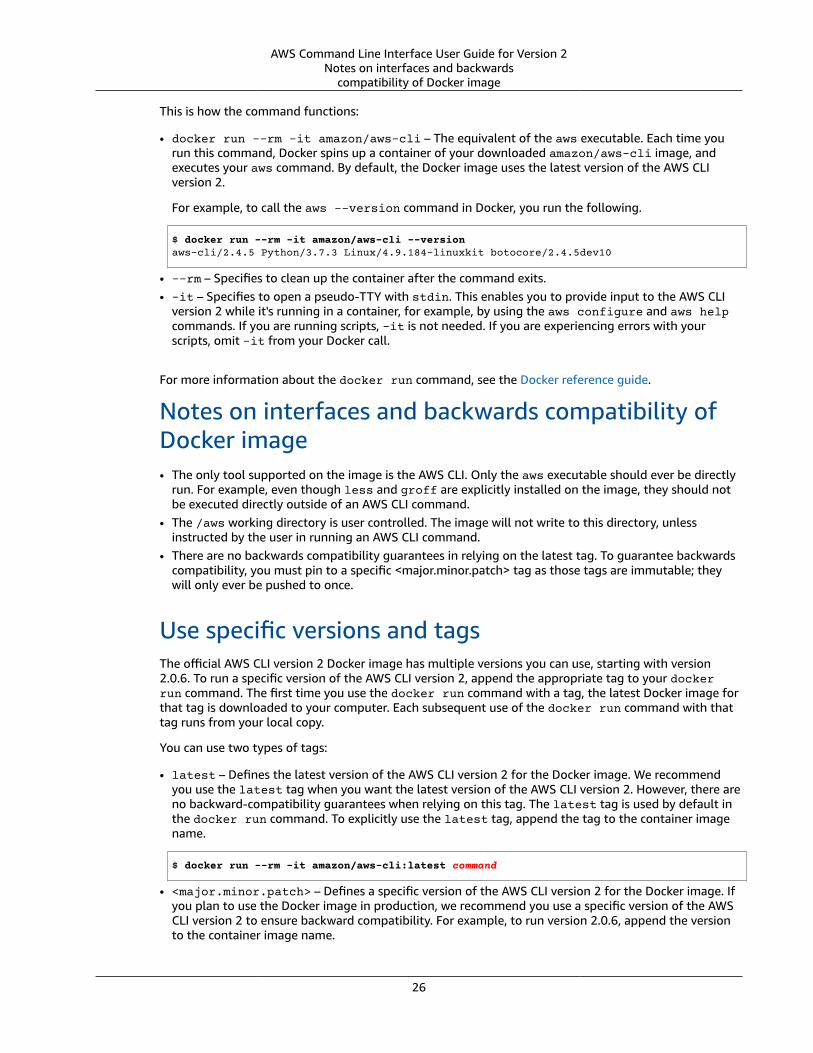
AWS Command Line Interface User Guide for Version 2Notes on interfaces and backwards
compatibility of Docker image
This is how the command functions:
• docker run --rm -it amazon/aws-cli – The equivalent of the aws executable. Each time yourun this command, Docker spins up a container of your downloaded amazon/aws-cli image, andexecutes your aws command. By default, the Docker image uses the latest version of the AWS CLIversion 2.
For example, to call the aws --version command in Docker, you run the following.
$ docker run --rm -it amazon/aws-cli --versionaws-cli/2.4.5 Python/3.7.3 Linux/4.9.184-linuxkit botocore/2.4.5dev10
• --rm – Specifies to clean up the container after the command exits.• -it – Specifies to open a pseudo-TTY with stdin. This enables you to provide input to the AWS CLI
version 2 while it's running in a container, for example, by using the aws configure and aws helpcommands. If you are running scripts, -it is not needed. If you are experiencing errors with yourscripts, omit -it from your Docker call.
For more information about the docker run command, see the Docker reference guide.
Notes on interfaces and backwards compatibility ofDocker image• The only tool supported on the image is the AWS CLI. Only the aws executable should ever be directly
run. For example, even though less and groff are explicitly installed on the image, they should notbe executed directly outside of an AWS CLI command.
• The /aws working directory is user controlled. The image will not write to this directory, unlessinstructed by the user in running an AWS CLI command.
• There are no backwards compatibility guarantees in relying on the latest tag. To guarantee backwardscompatibility, you must pin to a specific <major.minor.patch> tag as those tags are immutable; theywill only ever be pushed to once.
Use specific versions and tagsThe official AWS CLI version 2 Docker image has multiple versions you can use, starting with version2.0.6. To run a specific version of the AWS CLI version 2, append the appropriate tag to your dockerrun command. The first time you use the docker run command with a tag, the latest Docker image forthat tag is downloaded to your computer. Each subsequent use of the docker run command with thattag runs from your local copy.
You can use two types of tags:
• latest – Defines the latest version of the AWS CLI version 2 for the Docker image. We recommendyou use the latest tag when you want the latest version of the AWS CLI version 2. However, there areno backward-compatibility guarantees when relying on this tag. The latest tag is used by default inthe docker run command. To explicitly use the latest tag, append the tag to the container imagename.
$ docker run --rm -it amazon/aws-cli:latest command
• <major.minor.patch> – Defines a specific version of the AWS CLI version 2 for the Docker image. Ifyou plan to use the Docker image in production, we recommend you use a specific version of the AWSCLI version 2 to ensure backward compatibility. For example, to run version 2.0.6, append the versionto the container image name.
26
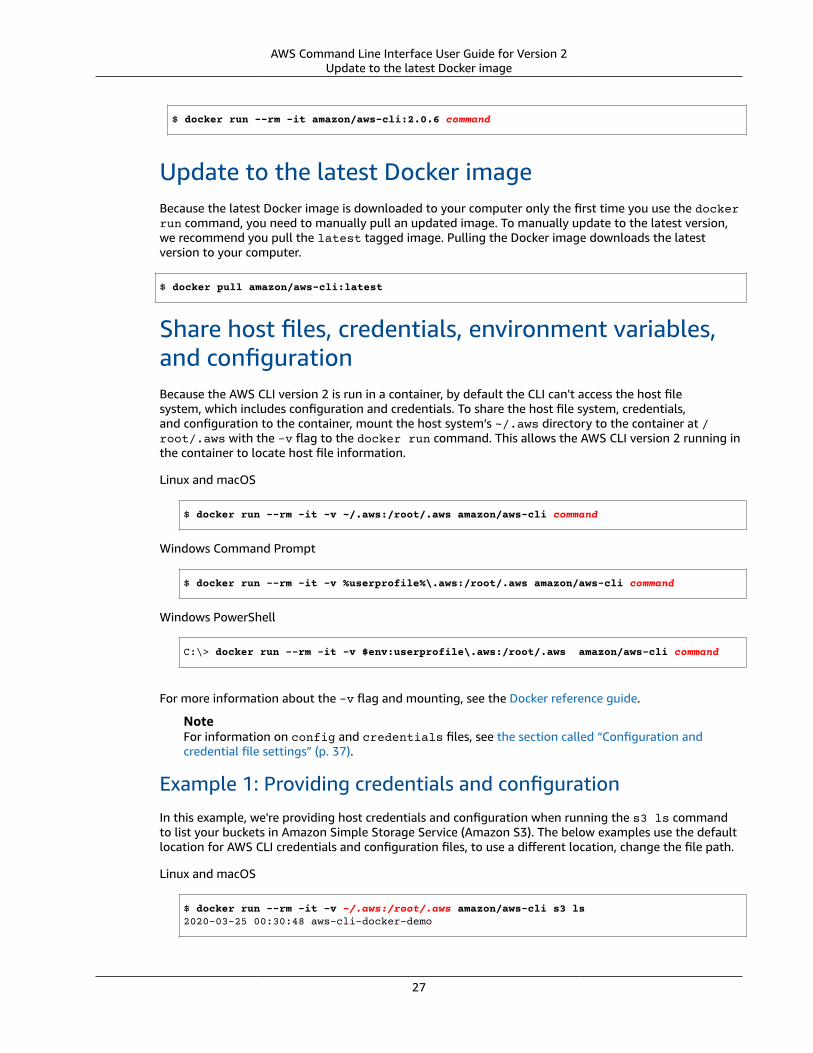
AWS Command Line Interface User Guide for Version 2Update to the latest Docker image
$ docker run --rm -it amazon/aws-cli:2.0.6 command
Update to the latest Docker imageBecause the latest Docker image is downloaded to your computer only the first time you use the dockerrun command, you need to manually pull an updated image. To manually update to the latest version,we recommend you pull the latest tagged image. Pulling the Docker image downloads the latestversion to your computer.
$ docker pull amazon/aws-cli:latest
Share host files, credentials, environment variables,and configurationBecause the AWS CLI version 2 is run in a container, by default the CLI can't access the host filesystem, which includes configuration and credentials. To share the host file system, credentials,and configuration to the container, mount the host system’s ~/.aws directory to the container at /root/.aws with the -v flag to the docker run command. This allows the AWS CLI version 2 running inthe container to locate host file information.
Linux and macOS
$ docker run --rm -it -v ~/.aws:/root/.aws amazon/aws-cli command
Windows Command Prompt
$ docker run --rm -it -v %userprofile%\.aws:/root/.aws amazon/aws-cli command
Windows PowerShell
C:\> docker run --rm -it -v $env:userprofile\.aws:/root/.aws amazon/aws-cli command
For more information about the -v flag and mounting, see the Docker reference guide.
NoteFor information on config and credentials files, see the section called “Configuration andcredential file settings” (p. 37).
Example 1: Providing credentials and configurationIn this example, we're providing host credentials and configuration when running the s3 ls commandto list your buckets in Amazon Simple Storage Service (Amazon S3). The below examples use the defaultlocation for AWS CLI credentials and configuration files, to use a different location, change the file path.
Linux and macOS
$ docker run --rm -it -v ~/.aws:/root/.aws amazon/aws-cli s3 ls2020-03-25 00:30:48 aws-cli-docker-demo
27

AWS Command Line Interface User Guide for Version 2Share host files, credentials,
environment variables, and configuration
Windows Command Prompt
$ docker run --rm -it -v %userprofile%\.aws:/root/.aws amazon/aws-cli s3 ls2020-03-25 00:30:48 aws-cli-docker-demo
Windows PowerShell
C:\> docker run --rm -it -v $env:userprofile\.aws:/root/.aws amazon/aws-cli s3 ls
You can call specific system's environment variables using the -e flag. To use an environment variable,call it by name.
Linux and macOS
$ docker run --rm -it -v ~/.aws:/root/.aws -e ENVVAR_NAME amazon/aws-cli s3 ls2020-03-25 00:30:48 aws-cli-docker-demo
Windows Command Prompt
$ docker run --rm -it -v %userprofile%\.aws:/root/.aws -e ENVVAR_NAME amazon/aws-cli s3 ls2020-03-25 00:30:48 aws-cli-docker-demo
Windows PowerShell
C:\> docker run --rm -it -v $env:userprofile\.aws:/root/.aws -e ENVVAR_NAME amazon/aws-cli s3 ls
Example 2: Downloading an Amazon S3 file to your host systemFor some AWS CLI version 2 commands, you can read files from the host system in the container or writefiles from the container to the host system.
In this example, we download the S3 object s3://aws-cli-docker-demo/hello to your local filesystem by mounting the current working directory to the container's /aws directory. By downloadingthe hello object to the container's /aws directory, the file is saved to the host system’s current workingdirectory also.
Linux and macOS
$ docker run --rm -it -v ~/.aws:/root/.aws -v $(pwd):/aws amazon/aws-cli s3 cp s3://aws-cli-docker-demo/hello .download: s3://aws-cli-docker-demo/hello to ./hello
Windows Command Prompt
$ docker run --rm -it -v %userprofile%\.aws:/root/.aws -v %cd%:/aws amazon/aws-cli s3 cp s3://aws-cli-docker-demo/hello .download: s3://aws-cli-docker-demo/hello to ./hello
Windows PowerShell
C:\> docker run --rm -it -v $env:userprofile\.aws:/root/.aws -v $pwd\aws:/aws amazon/aws-cli s3 cp s3://aws-cli-docker-demo/hello .
28
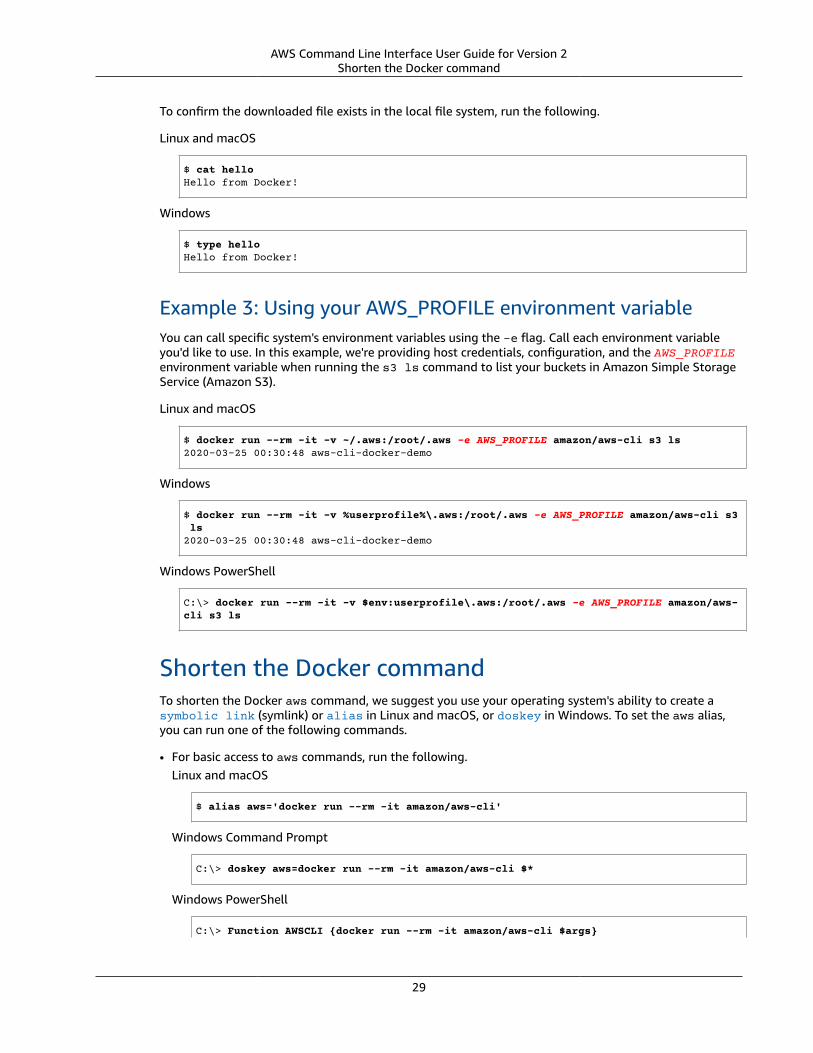
AWS Command Line Interface User Guide for Version 2Shorten the Docker command
To confirm the downloaded file exists in the local file system, run the following.
Linux and macOS
$ cat helloHello from Docker!
Windows
$ type helloHello from Docker!
Example 3: Using your AWS_PROFILE environment variableYou can call specific system's environment variables using the -e flag. Call each environment variableyou'd like to use. In this example, we're providing host credentials, configuration, and the AWS_PROFILEenvironment variable when running the s3 ls command to list your buckets in Amazon Simple StorageService (Amazon S3).
Linux and macOS
$ docker run --rm -it -v ~/.aws:/root/.aws -e AWS_PROFILE amazon/aws-cli s3 ls2020-03-25 00:30:48 aws-cli-docker-demo
Windows
$ docker run --rm -it -v %userprofile%\.aws:/root/.aws -e AWS_PROFILE amazon/aws-cli s3 ls2020-03-25 00:30:48 aws-cli-docker-demo
Windows PowerShell
C:\> docker run --rm -it -v $env:userprofile\.aws:/root/.aws -e AWS_PROFILE amazon/aws-cli s3 ls
Shorten the Docker commandTo shorten the Docker aws command, we suggest you use your operating system's ability to create asymbolic link (symlink) or alias in Linux and macOS, or doskey in Windows. To set the aws alias,you can run one of the following commands.
• For basic access to aws commands, run the following.Linux and macOS
$ alias aws='docker run --rm -it amazon/aws-cli'
Windows Command Prompt
C:\> doskey aws=docker run --rm -it amazon/aws-cli $*
Windows PowerShell
C:\> Function AWSCLI {docker run --rm -it amazon/aws-cli $args}
29
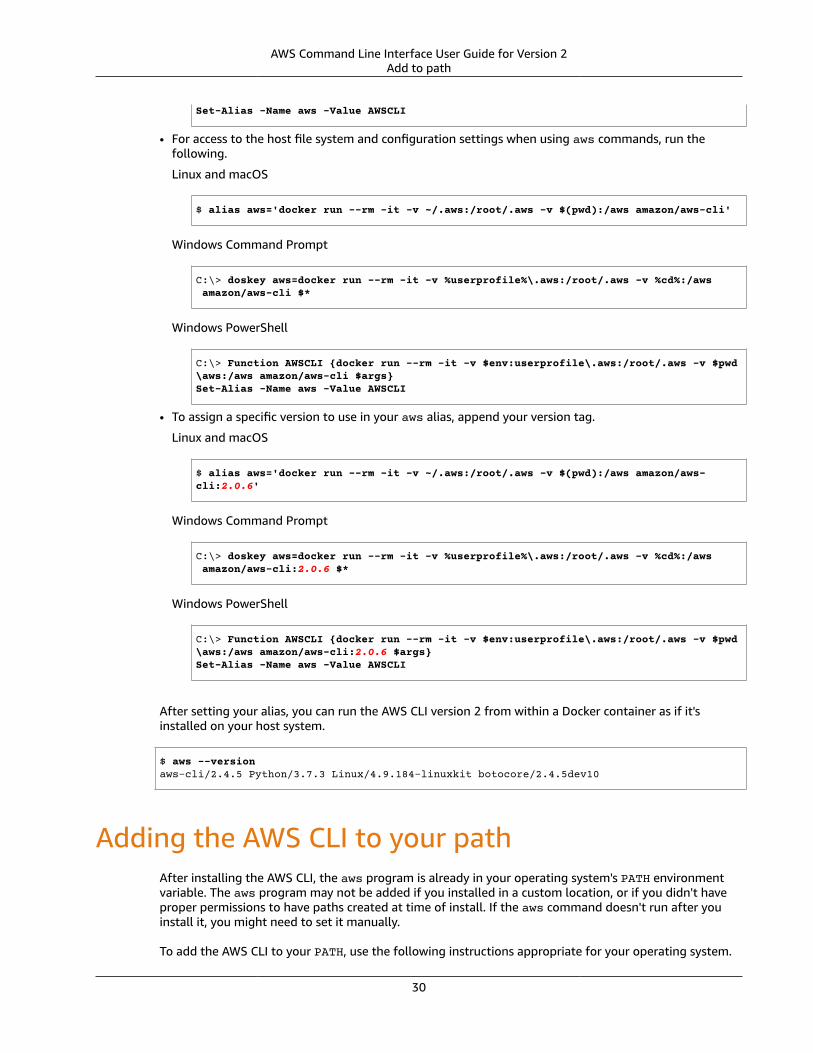
AWS Command Line Interface User Guide for Version 2Add to path
Set-Alias -Name aws -Value AWSCLI
• For access to the host file system and configuration settings when using aws commands, run thefollowing.
Linux and macOS
$ alias aws='docker run --rm -it -v ~/.aws:/root/.aws -v $(pwd):/aws amazon/aws-cli'
Windows Command Prompt
C:\> doskey aws=docker run --rm -it -v %userprofile%\.aws:/root/.aws -v %cd%:/aws amazon/aws-cli $*
Windows PowerShell
C:\> Function AWSCLI {docker run --rm -it -v $env:userprofile\.aws:/root/.aws -v $pwd\aws:/aws amazon/aws-cli $args}Set-Alias -Name aws -Value AWSCLI
• To assign a specific version to use in your aws alias, append your version tag.
Linux and macOS
$ alias aws='docker run --rm -it -v ~/.aws:/root/.aws -v $(pwd):/aws amazon/aws-cli:2.0.6'
Windows Command Prompt
C:\> doskey aws=docker run --rm -it -v %userprofile%\.aws:/root/.aws -v %cd%:/aws amazon/aws-cli:2.0.6 $*
Windows PowerShell
C:\> Function AWSCLI {docker run --rm -it -v $env:userprofile\.aws:/root/.aws -v $pwd\aws:/aws amazon/aws-cli:2.0.6 $args}Set-Alias -Name aws -Value AWSCLI
After setting your alias, you can run the AWS CLI version 2 from within a Docker container as if it'sinstalled on your host system.
$ aws --versionaws-cli/2.4.5 Python/3.7.3 Linux/4.9.184-linuxkit botocore/2.4.5dev10
Adding the AWS CLI to your pathAfter installing the AWS CLI, the aws program is already in your operating system's PATH environmentvariable. The aws program may not be added if you installed in a custom location, or if you didn't haveproper permissions to have paths created at time of install. If the aws command doesn't run after youinstall it, you might need to set it manually.
To add the AWS CLI to your PATH, use the following instructions appropriate for your operating system.
30
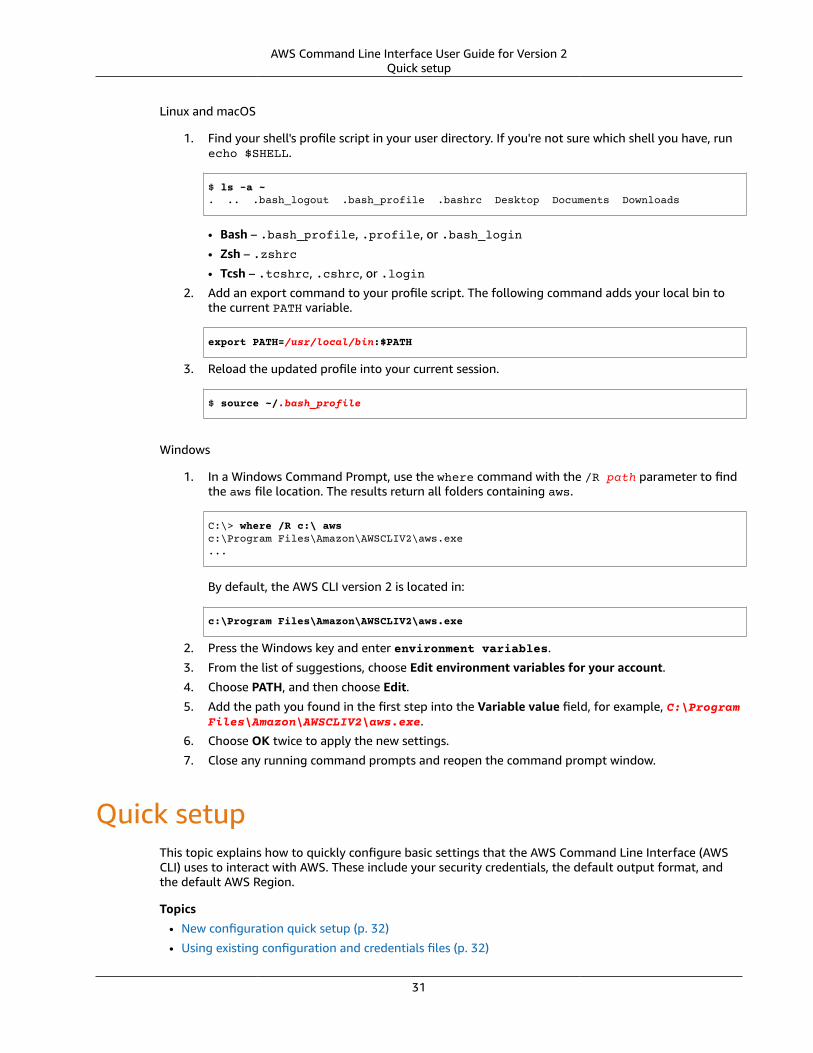
AWS Command Line Interface User Guide for Version 2Quick setup
Linux and macOS
1. Find your shell's profile script in your user directory. If you're not sure which shell you have, runecho $SHELL.
$ ls -a ~. .. .bash_logout .bash_profile .bashrc Desktop Documents Downloads
• Bash – .bash_profile, .profile, or .bash_login
• Zsh – .zshrc
• Tcsh – .tcshrc, .cshrc, or .login
2. Add an export command to your profile script. The following command adds your local bin tothe current PATH variable.
export PATH=/usr/local/bin:$PATH
3. Reload the updated profile into your current session.
$ source ~/.bash_profile
Windows
1. In a Windows Command Prompt, use the where command with the /R path parameter to findthe aws file location. The results return all folders containing aws.
C:\> where /R c:\ awsc:\Program Files\Amazon\AWSCLIV2\aws.exe...
By default, the AWS CLI version 2 is located in:
c:\Program Files\Amazon\AWSCLIV2\aws.exe
2. Press the Windows key and enter environment variables.
3. From the list of suggestions, choose Edit environment variables for your account.
4. Choose PATH, and then choose Edit.
5. Add the path you found in the first step into the Variable value field, for example, C:\ProgramFiles\Amazon\AWSCLIV2\aws.exe.
6. Choose OK twice to apply the new settings.
7. Close any running command prompts and reopen the command prompt window.
Quick setupThis topic explains how to quickly configure basic settings that the AWS Command Line Interface (AWSCLI) uses to interact with AWS. These include your security credentials, the default output format, andthe default AWS Region.
Topics
• New configuration quick setup (p. 32)
• Using existing configuration and credentials files (p. 32)
31
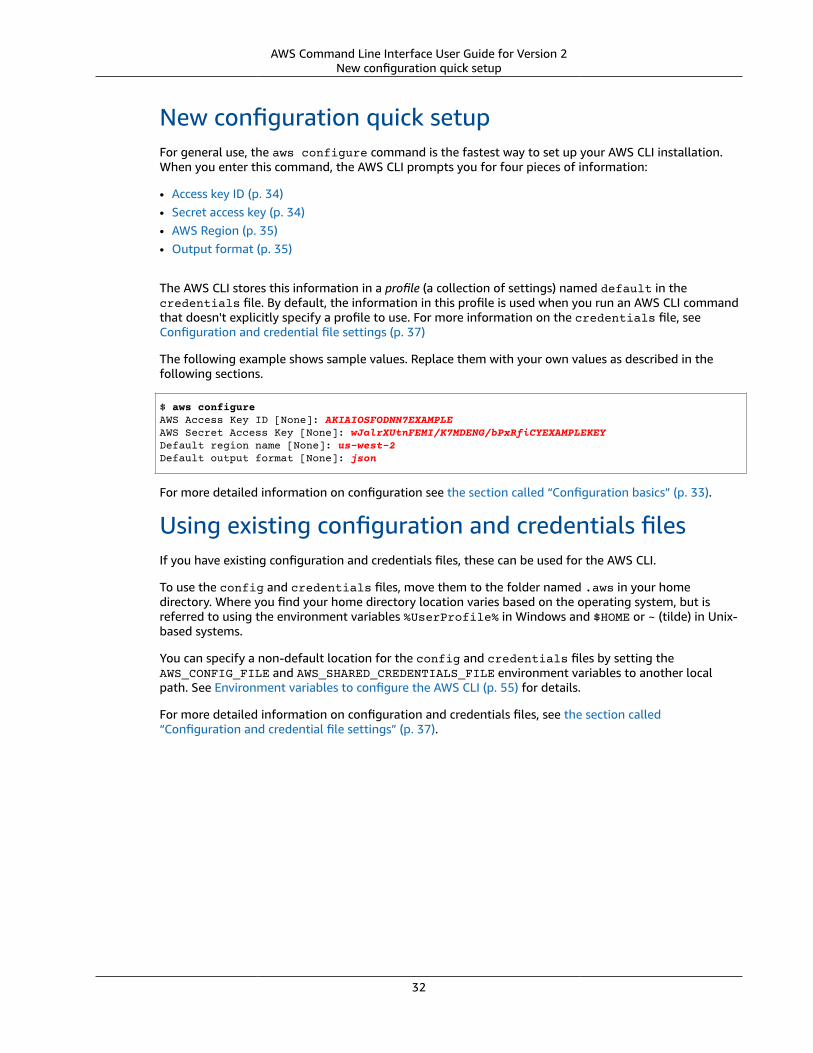
AWS Command Line Interface User Guide for Version 2New configuration quick setup
New configuration quick setupFor general use, the aws configure command is the fastest way to set up your AWS CLI installation.When you enter this command, the AWS CLI prompts you for four pieces of information:
• Access key ID (p. 34)• Secret access key (p. 34)• AWS Region (p. 35)• Output format (p. 35)
The AWS CLI stores this information in a profile (a collection of settings) named default in thecredentials file. By default, the information in this profile is used when you run an AWS CLI commandthat doesn't explicitly specify a profile to use. For more information on the credentials file, seeConfiguration and credential file settings (p. 37)
The following example shows sample values. Replace them with your own values as described in thefollowing sections.
$ aws configureAWS Access Key ID [None]: AKIAIOSFODNN7EXAMPLEAWS Secret Access Key [None]: wJalrXUtnFEMI/K7MDENG/bPxRfiCYEXAMPLEKEYDefault region name [None]: us-west-2Default output format [None]: json
For more detailed information on configuration see the section called “Configuration basics” (p. 33).
Using existing configuration and credentials filesIf you have existing configuration and credentials files, these can be used for the AWS CLI.
To use the config and credentials files, move them to the folder named .aws in your homedirectory. Where you find your home directory location varies based on the operating system, but isreferred to using the environment variables %UserProfile% in Windows and $HOME or ~ (tilde) in Unix-based systems.
You can specify a non-default location for the config and credentials files by setting theAWS_CONFIG_FILE and AWS_SHARED_CREDENTIALS_FILE environment variables to another localpath. See Environment variables to configure the AWS CLI (p. 55) for details.
For more detailed information on configuration and credentials files, see the section called“Configuration and credential file settings” (p. 37).
32
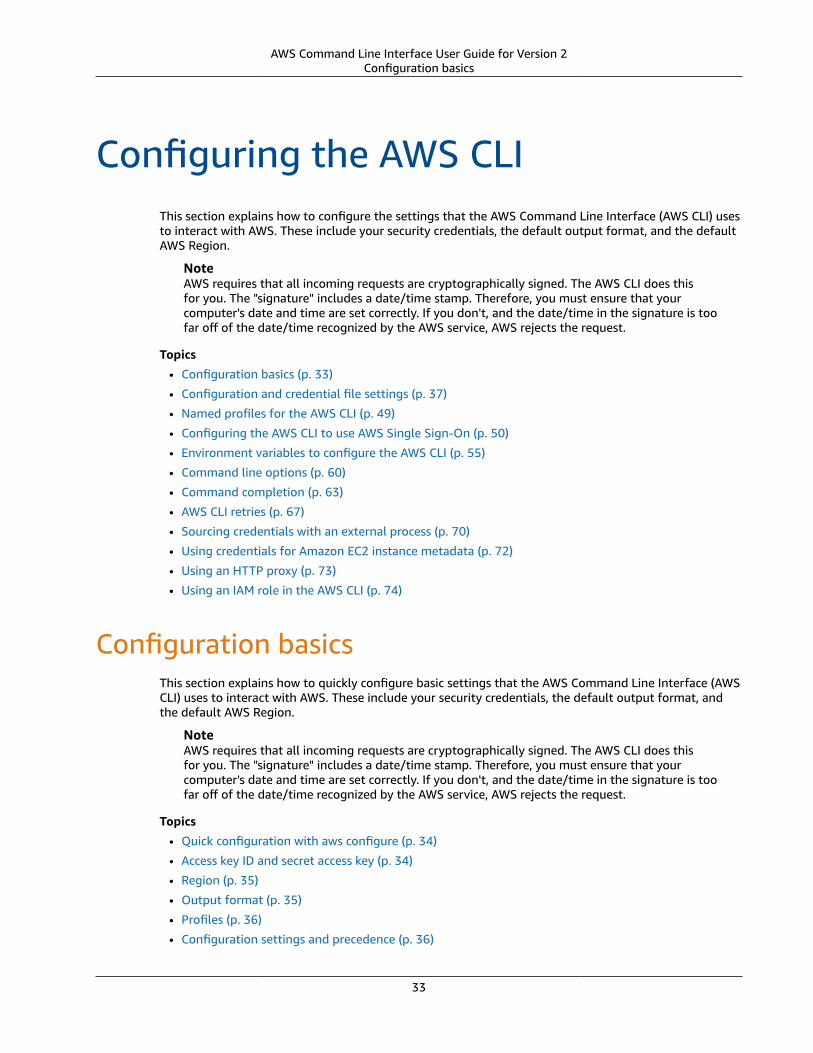
AWS Command Line Interface User Guide for Version 2Configuration basics
Configuring the AWS CLIThis section explains how to configure the settings that the AWS Command Line Interface (AWS CLI) usesto interact with AWS. These include your security credentials, the default output format, and the defaultAWS Region.
NoteAWS requires that all incoming requests are cryptographically signed. The AWS CLI does thisfor you. The "signature" includes a date/time stamp. Therefore, you must ensure that yourcomputer's date and time are set correctly. If you don't, and the date/time in the signature is toofar off of the date/time recognized by the AWS service, AWS rejects the request.
Topics
• Configuration basics (p. 33)
• Configuration and credential file settings (p. 37)
• Named profiles for the AWS CLI (p. 49)
• Configuring the AWS CLI to use AWS Single Sign-On (p. 50)
• Environment variables to configure the AWS CLI (p. 55)
• Command line options (p. 60)
• Command completion (p. 63)
• AWS CLI retries (p. 67)
• Sourcing credentials with an external process (p. 70)
• Using credentials for Amazon EC2 instance metadata (p. 72)
• Using an HTTP proxy (p. 73)
• Using an IAM role in the AWS CLI (p. 74)
Configuration basicsThis section explains how to quickly configure basic settings that the AWS Command Line Interface (AWSCLI) uses to interact with AWS. These include your security credentials, the default output format, andthe default AWS Region.
NoteAWS requires that all incoming requests are cryptographically signed. The AWS CLI does thisfor you. The "signature" includes a date/time stamp. Therefore, you must ensure that yourcomputer's date and time are set correctly. If you don't, and the date/time in the signature is toofar off of the date/time recognized by the AWS service, AWS rejects the request.
Topics
• Quick configuration with aws configure (p. 34)
• Access key ID and secret access key (p. 34)
• Region (p. 35)
• Output format (p. 35)
• Profiles (p. 36)
• Configuration settings and precedence (p. 36)
33
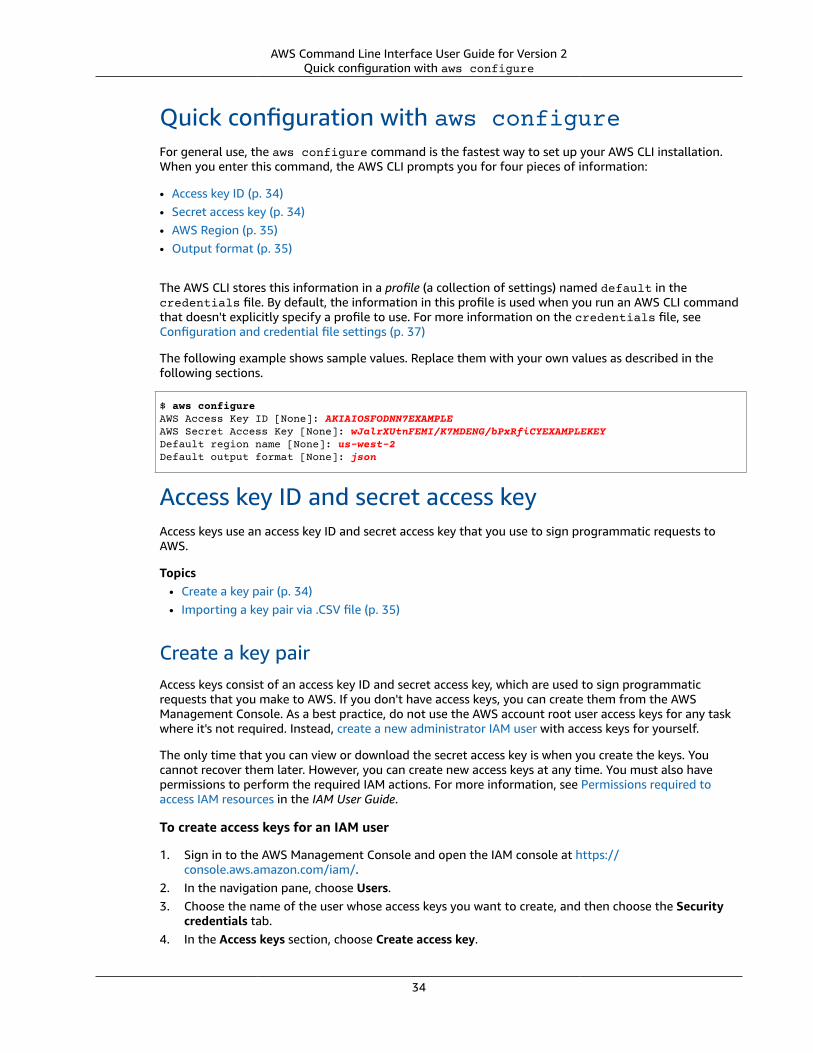
AWS Command Line Interface User Guide for Version 2Quick configuration with aws configure
Quick configuration with aws configureFor general use, the aws configure command is the fastest way to set up your AWS CLI installation.When you enter this command, the AWS CLI prompts you for four pieces of information:
• Access key ID (p. 34)• Secret access key (p. 34)• AWS Region (p. 35)• Output format (p. 35)
The AWS CLI stores this information in a profile (a collection of settings) named default in thecredentials file. By default, the information in this profile is used when you run an AWS CLI commandthat doesn't explicitly specify a profile to use. For more information on the credentials file, seeConfiguration and credential file settings (p. 37)
The following example shows sample values. Replace them with your own values as described in thefollowing sections.
$ aws configureAWS Access Key ID [None]: AKIAIOSFODNN7EXAMPLEAWS Secret Access Key [None]: wJalrXUtnFEMI/K7MDENG/bPxRfiCYEXAMPLEKEYDefault region name [None]: us-west-2Default output format [None]: json
Access key ID and secret access keyAccess keys use an access key ID and secret access key that you use to sign programmatic requests toAWS.
Topics• Create a key pair (p. 34)• Importing a key pair via .CSV file (p. 35)
Create a key pairAccess keys consist of an access key ID and secret access key, which are used to sign programmaticrequests that you make to AWS. If you don't have access keys, you can create them from the AWSManagement Console. As a best practice, do not use the AWS account root user access keys for any taskwhere it's not required. Instead, create a new administrator IAM user with access keys for yourself.
The only time that you can view or download the secret access key is when you create the keys. Youcannot recover them later. However, you can create new access keys at any time. You must also havepermissions to perform the required IAM actions. For more information, see Permissions required toaccess IAM resources in the IAM User Guide.
To create access keys for an IAM user
1. Sign in to the AWS Management Console and open the IAM console at https://console.aws.amazon.com/iam/.
2. In the navigation pane, choose Users.3. Choose the name of the user whose access keys you want to create, and then choose the Security
credentials tab.4. In the Access keys section, choose Create access key.
34
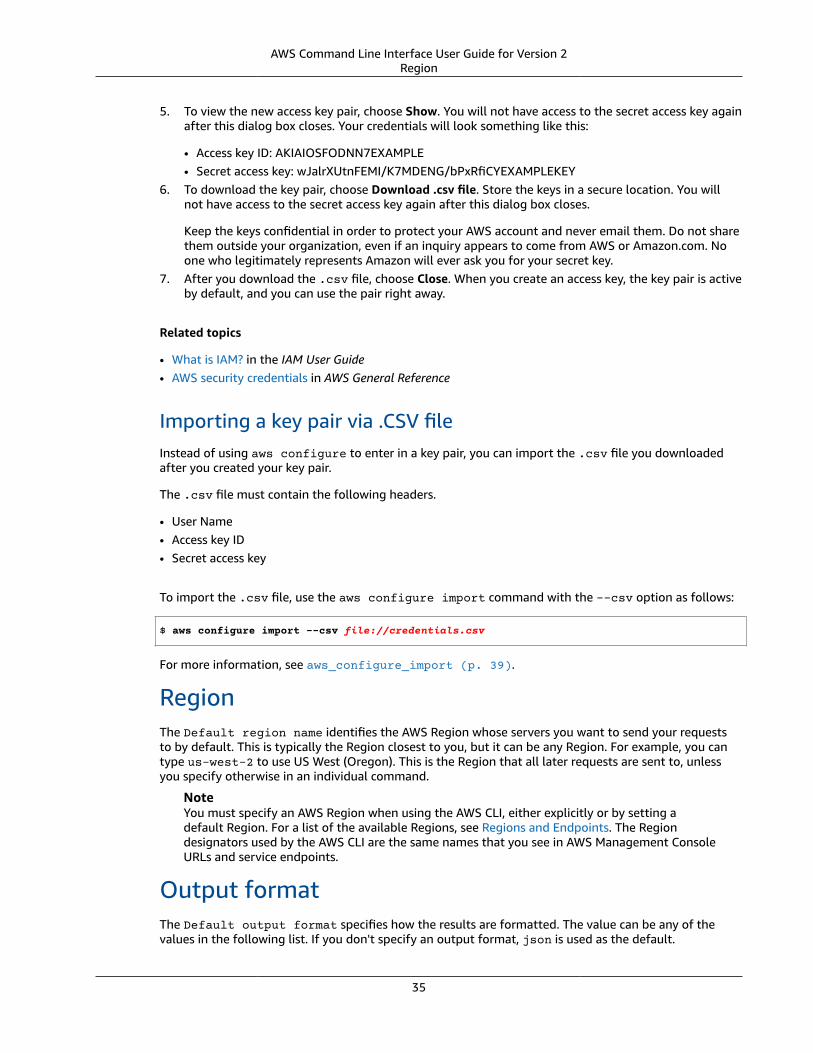
AWS Command Line Interface User Guide for Version 2Region
5. To view the new access key pair, choose Show. You will not have access to the secret access key againafter this dialog box closes. Your credentials will look something like this:
• Access key ID: AKIAIOSFODNN7EXAMPLE• Secret access key: wJalrXUtnFEMI/K7MDENG/bPxRfiCYEXAMPLEKEY
6. To download the key pair, choose Download .csv file. Store the keys in a secure location. You willnot have access to the secret access key again after this dialog box closes.
Keep the keys confidential in order to protect your AWS account and never email them. Do not sharethem outside your organization, even if an inquiry appears to come from AWS or Amazon.com. Noone who legitimately represents Amazon will ever ask you for your secret key.
7. After you download the .csv file, choose Close. When you create an access key, the key pair is activeby default, and you can use the pair right away.
Related topics
• What is IAM? in the IAM User Guide• AWS security credentials in AWS General Reference
Importing a key pair via .CSV fileInstead of using aws configure to enter in a key pair, you can import the .csv file you downloadedafter you created your key pair.
The .csv file must contain the following headers.
• User Name• Access key ID• Secret access key
To import the .csv file, use the aws configure import command with the --csv option as follows:
$ aws configure import --csv file://credentials.csv
For more information, see aws_configure_import (p. 39).
RegionThe Default region name identifies the AWS Region whose servers you want to send your requeststo by default. This is typically the Region closest to you, but it can be any Region. For example, you cantype us-west-2 to use US West (Oregon). This is the Region that all later requests are sent to, unlessyou specify otherwise in an individual command.
NoteYou must specify an AWS Region when using the AWS CLI, either explicitly or by setting adefault Region. For a list of the available Regions, see Regions and Endpoints. The Regiondesignators used by the AWS CLI are the same names that you see in AWS Management ConsoleURLs and service endpoints.
Output formatThe Default output format specifies how the results are formatted. The value can be any of thevalues in the following list. If you don't specify an output format, json is used as the default.
35
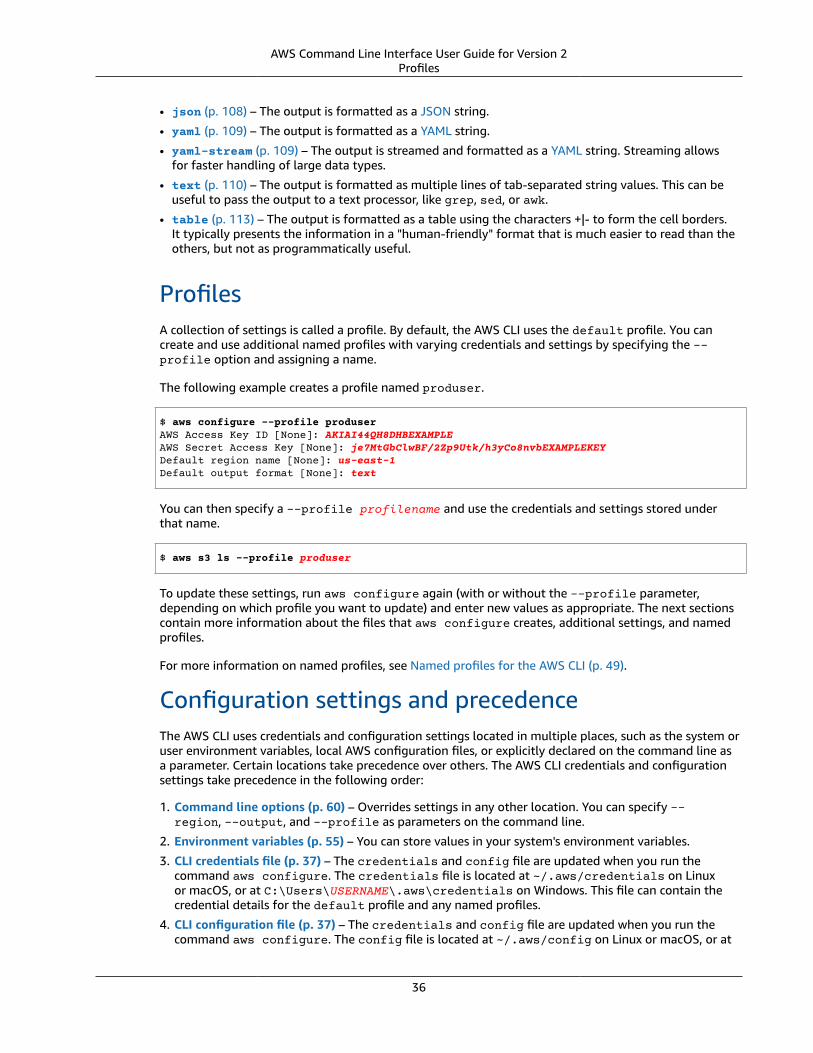
AWS Command Line Interface User Guide for Version 2Profiles
• json (p. 108) – The output is formatted as a JSON string.
• yaml (p. 109) – The output is formatted as a YAML string.
• yaml-stream (p. 109) – The output is streamed and formatted as a YAML string. Streaming allowsfor faster handling of large data types.
• text (p. 110) – The output is formatted as multiple lines of tab-separated string values. This can beuseful to pass the output to a text processor, like grep, sed, or awk.
• table (p. 113) – The output is formatted as a table using the characters +|- to form the cell borders.It typically presents the information in a "human-friendly" format that is much easier to read than theothers, but not as programmatically useful.
ProfilesA collection of settings is called a profile. By default, the AWS CLI uses the default profile. You cancreate and use additional named profiles with varying credentials and settings by specifying the --profile option and assigning a name.
The following example creates a profile named produser.
$ aws configure --profile produserAWS Access Key ID [None]: AKIAI44QH8DHBEXAMPLEAWS Secret Access Key [None]: je7MtGbClwBF/2Zp9Utk/h3yCo8nvbEXAMPLEKEYDefault region name [None]: us-east-1Default output format [None]: text
You can then specify a --profile profilename and use the credentials and settings stored underthat name.
$ aws s3 ls --profile produser
To update these settings, run aws configure again (with or without the --profile parameter,depending on which profile you want to update) and enter new values as appropriate. The next sectionscontain more information about the files that aws configure creates, additional settings, and namedprofiles.
For more information on named profiles, see Named profiles for the AWS CLI (p. 49).
Configuration settings and precedenceThe AWS CLI uses credentials and configuration settings located in multiple places, such as the system oruser environment variables, local AWS configuration files, or explicitly declared on the command line asa parameter. Certain locations take precedence over others. The AWS CLI credentials and configurationsettings take precedence in the following order:
1. Command line options (p. 60) – Overrides settings in any other location. You can specify --region, --output, and --profile as parameters on the command line.
2. Environment variables (p. 55) – You can store values in your system's environment variables.
3. CLI credentials file (p. 37) – The credentials and config file are updated when you run thecommand aws configure. The credentials file is located at ~/.aws/credentials on Linuxor macOS, or at C:\Users\USERNAME\.aws\credentials on Windows. This file can contain thecredential details for the default profile and any named profiles.
4. CLI configuration file (p. 37) – The credentials and config file are updated when you run thecommand aws configure. The config file is located at ~/.aws/config on Linux or macOS, or at
36
AWS Command Line Interface User Guide for Version 2Configuration and credential file settings
C:\Users\USERNAME\.aws\config on Windows. This file contains the configuration settings forthe default profile and any named profiles.
5. Container credentials – You can associate an IAM role with each of your Amazon Elastic ContainerService (Amazon ECS) task definitions. Temporary credentials for that role are then available to thattask's containers. For more information, see IAM Roles for Tasks in the Amazon Elastic ContainerService Developer Guide.
6. Instance profile credentials – You can associate an IAM role with each of your Amazon ElasticCompute Cloud (Amazon EC2) instances. Temporary credentials for that role are then available tocode running in the instance. The credentials are delivered through the Amazon EC2 metadata service.For more information, see IAM Roles for Amazon EC2 in the Amazon EC2 User Guide for Linux Instancesand Using Instance Profiles in the IAM User Guide.
Configuration and credential file settingsYou can save your frequently used configuration settings and credentials in files that are maintained bythe AWS CLI.
The files are divided into profiles. By default, the AWS CLI uses the settings found in the profilenamed default. To use alternate settings, you can create and reference additional profiles. For moreinformation on named profiles, see Named profiles for the AWS CLI (p. 49).
You can override an individual setting by either setting one of the supported environment variables,or by using a command line parameter. For more information on configuration setting precedence, seeConfiguration settings and precedence (p. 36).
Topics• Where are configuration settings stored? (p. 37)
• Set and view configuration settings (p. 38)
• Supported config file settings (p. 39)
Where are configuration settings stored?The AWS CLI stores sensitive credential information that you specify with aws configure in a local filenamed credentials, in a folder named .aws in your home directory. The less sensitive configurationoptions that you specify with aws configure are stored in a local file named config, also stored inthe .aws folder in your home directory.
Storing credentials in the config fileYou can keep all of your profile settings in a single file as the AWS CLI can read credentials fromthe config file. If there are credentials in both files for a profile sharing the same name, thekeys in the credentials file take precedence.These files are also used by the various language software development kits (SDKs). If you useone of the SDKs in addition to the AWS CLI, confirm if the credentials should be stored in theirown file.
Where you find your home directory location varies based on the operating system, but is referred tousing the environment variables %UserProfile% in Windows and $HOME or ~ (tilde) in Unix-basedsystems. You can specify a non-default location for the config file by setting the AWS_CONFIG_FILEenvironment variable to another local path. See Environment variables to configure the AWSCLI (p. 55) for details.
For example, the files generated by the AWS CLI for a default profile configured with aws configurelooks similar to the following.
37
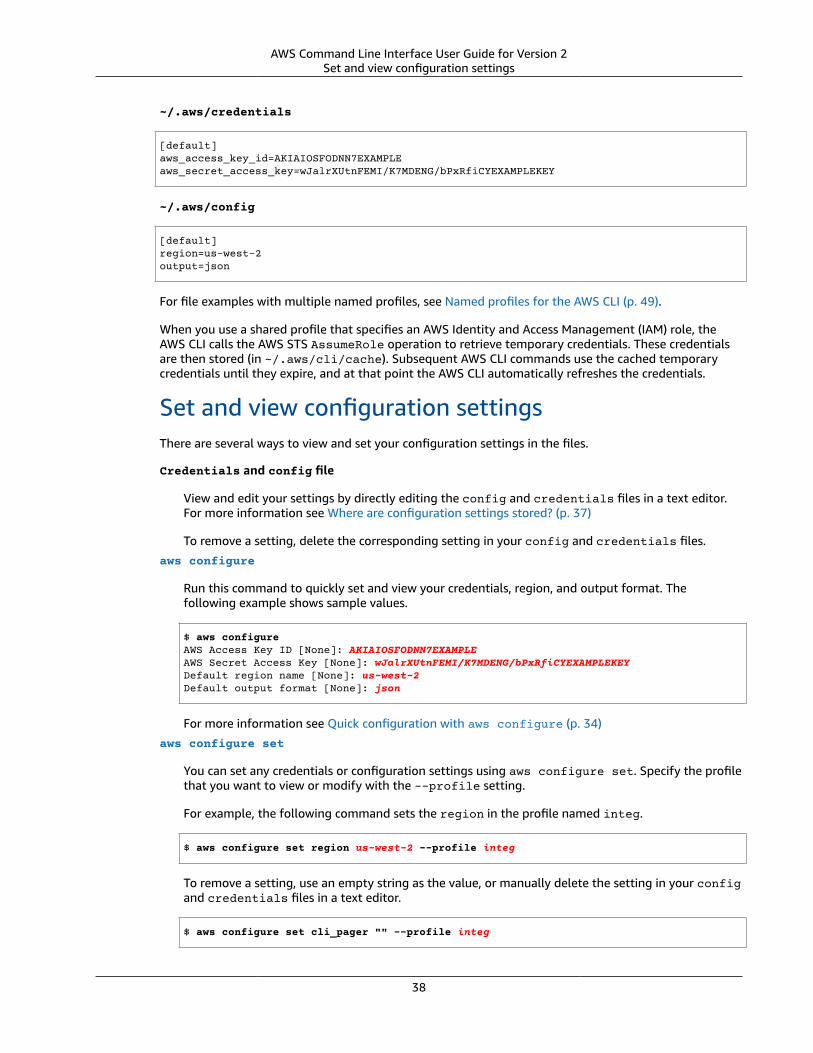
AWS Command Line Interface User Guide for Version 2Set and view configuration settings
~/.aws/credentials
[default]aws_access_key_id=AKIAIOSFODNN7EXAMPLEaws_secret_access_key=wJalrXUtnFEMI/K7MDENG/bPxRfiCYEXAMPLEKEY
~/.aws/config
[default]region=us-west-2output=json
For file examples with multiple named profiles, see Named profiles for the AWS CLI (p. 49).
When you use a shared profile that specifies an AWS Identity and Access Management (IAM) role, theAWS CLI calls the AWS STS AssumeRole operation to retrieve temporary credentials. These credentialsare then stored (in ~/.aws/cli/cache). Subsequent AWS CLI commands use the cached temporarycredentials until they expire, and at that point the AWS CLI automatically refreshes the credentials.
Set and view configuration settingsThere are several ways to view and set your configuration settings in the files.
Credentials and config file
View and edit your settings by directly editing the config and credentials files in a text editor.For more information see Where are configuration settings stored? (p. 37)
To remove a setting, delete the corresponding setting in your config and credentials files.
aws configure
Run this command to quickly set and view your credentials, region, and output format. Thefollowing example shows sample values.
$ aws configureAWS Access Key ID [None]: AKIAIOSFODNN7EXAMPLEAWS Secret Access Key [None]: wJalrXUtnFEMI/K7MDENG/bPxRfiCYEXAMPLEKEYDefault region name [None]: us-west-2Default output format [None]: json
For more information see Quick configuration with aws configure (p. 34)
aws configure set
You can set any credentials or configuration settings using aws configure set. Specify the profilethat you want to view or modify with the --profile setting.
For example, the following command sets the region in the profile named integ.
$ aws configure set region us-west-2 --profile integ
To remove a setting, use an empty string as the value, or manually delete the setting in your configand credentials files in a text editor.
$ aws configure set cli_pager "" --profile integ
38
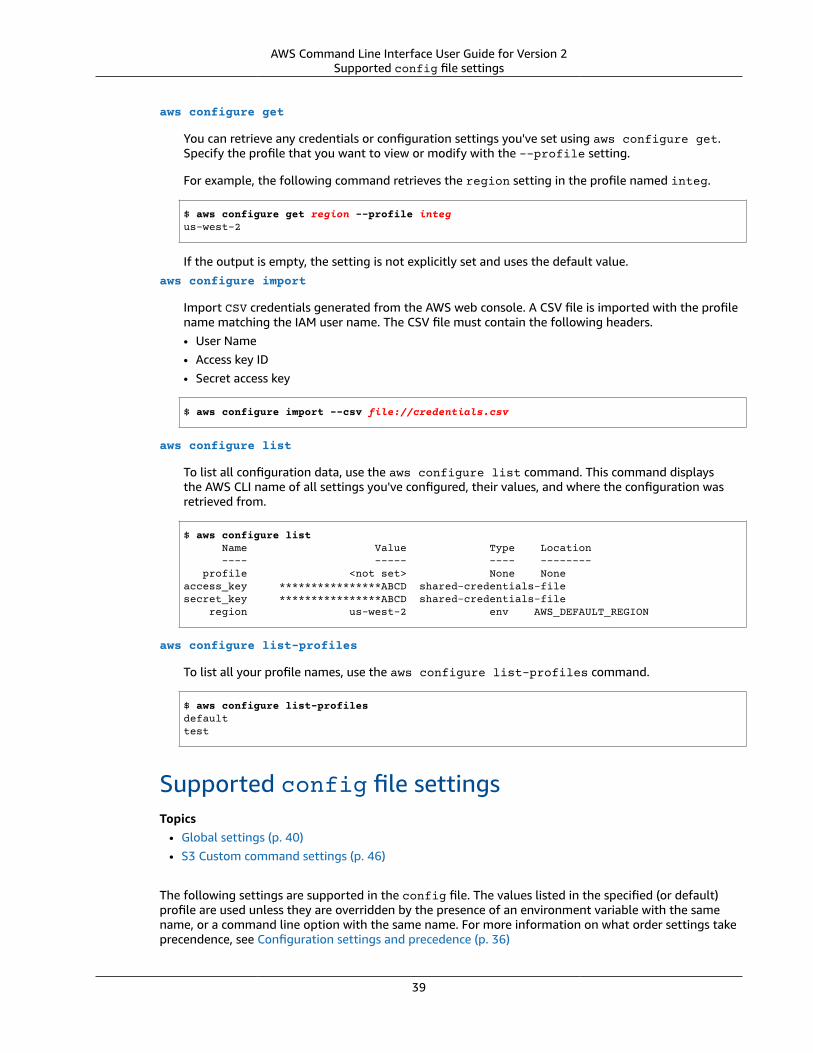
AWS Command Line Interface User Guide for Version 2Supported config file settings
aws configure get
You can retrieve any credentials or configuration settings you've set using aws configure get.Specify the profile that you want to view or modify with the --profile setting.
For example, the following command retrieves the region setting in the profile named integ.
$ aws configure get region --profile integus-west-2
If the output is empty, the setting is not explicitly set and uses the default value.aws configure import
Import CSV credentials generated from the AWS web console. A CSV file is imported with the profilename matching the IAM user name. The CSV file must contain the following headers.• User Name• Access key ID• Secret access key
$ aws configure import --csv file://credentials.csv
aws configure list
To list all configuration data, use the aws configure list command. This command displaysthe AWS CLI name of all settings you've configured, their values, and where the configuration wasretrieved from.
$ aws configure list Name Value Type Location ---- ----- ---- -------- profile <not set> None Noneaccess_key ****************ABCD shared-credentials-file secret_key ****************ABCD shared-credentials-file region us-west-2 env AWS_DEFAULT_REGION
aws configure list-profiles
To list all your profile names, use the aws configure list-profiles command.
$ aws configure list-profilesdefaulttest
Supported config file settingsTopics
• Global settings (p. 40)• S3 Custom command settings (p. 46)
The following settings are supported in the config file. The values listed in the specified (or default)profile are used unless they are overridden by the presence of an environment variable with the samename, or a command line option with the same name. For more information on what order settings takeprecendence, see Configuration settings and precedence (p. 36)
39
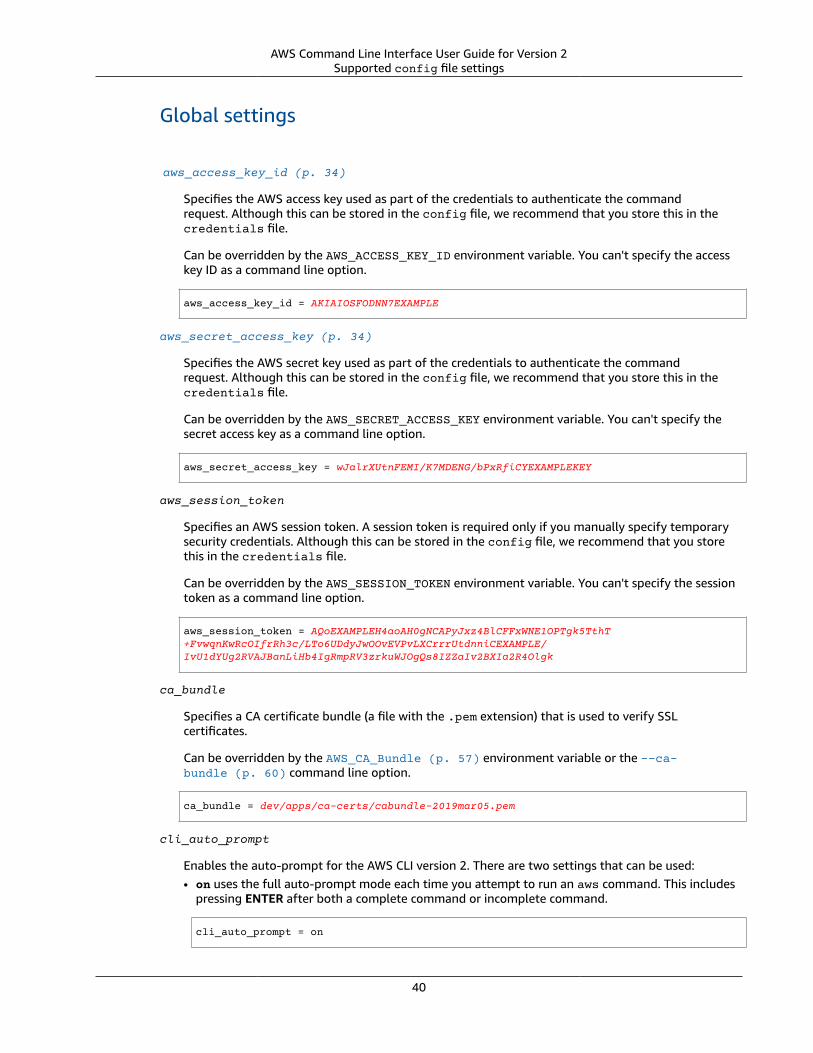
AWS Command Line Interface User Guide for Version 2Supported config file settings
Global settings
aws_access_key_id (p. 34)
Specifies the AWS access key used as part of the credentials to authenticate the commandrequest. Although this can be stored in the config file, we recommend that you store this in thecredentials file.
Can be overridden by the AWS_ACCESS_KEY_ID environment variable. You can't specify the accesskey ID as a command line option.
aws_access_key_id = AKIAIOSFODNN7EXAMPLE
aws_secret_access_key (p. 34)
Specifies the AWS secret key used as part of the credentials to authenticate the commandrequest. Although this can be stored in the config file, we recommend that you store this in thecredentials file.
Can be overridden by the AWS_SECRET_ACCESS_KEY environment variable. You can't specify thesecret access key as a command line option.
aws_secret_access_key = wJalrXUtnFEMI/K7MDENG/bPxRfiCYEXAMPLEKEY
aws_session_token
Specifies an AWS session token. A session token is required only if you manually specify temporarysecurity credentials. Although this can be stored in the config file, we recommend that you storethis in the credentials file.
Can be overridden by the AWS_SESSION_TOKEN environment variable. You can't specify the sessiontoken as a command line option.
aws_session_token = AQoEXAMPLEH4aoAH0gNCAPyJxz4BlCFFxWNE1OPTgk5TthT+FvwqnKwRcOIfrRh3c/LTo6UDdyJwOOvEVPvLXCrrrUtdnniCEXAMPLE/IvU1dYUg2RVAJBanLiHb4IgRmpRV3zrkuWJOgQs8IZZaIv2BXIa2R4Olgk
ca_bundle
Specifies a CA certificate bundle (a file with the .pem extension) that is used to verify SSLcertificates.
Can be overridden by the AWS_CA_Bundle (p. 57) environment variable or the --ca-bundle (p. 60) command line option.
ca_bundle = dev/apps/ca-certs/cabundle-2019mar05.pem
cli_auto_prompt
Enables the auto-prompt for the AWS CLI version 2. There are two settings that can be used:• on uses the full auto-prompt mode each time you attempt to run an aws command. This includes
pressing ENTER after both a complete command or incomplete command.
cli_auto_prompt = on
40
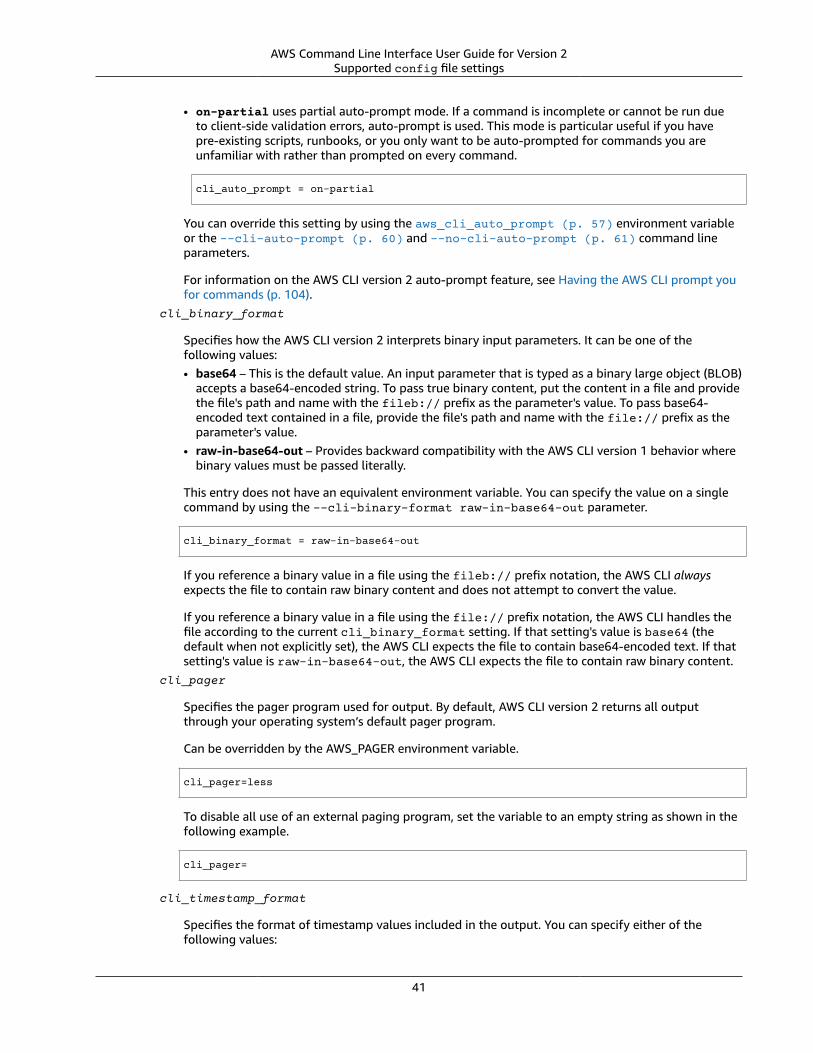
AWS Command Line Interface User Guide for Version 2Supported config file settings
• on-partial uses partial auto-prompt mode. If a command is incomplete or cannot be run dueto client-side validation errors, auto-prompt is used. This mode is particular useful if you havepre-existing scripts, runbooks, or you only want to be auto-prompted for commands you areunfamiliar with rather than prompted on every command.
cli_auto_prompt = on-partial
You can override this setting by using the aws_cli_auto_prompt (p. 57) environment variableor the --cli-auto-prompt (p. 60) and --no-cli-auto-prompt (p. 61) command lineparameters.
For information on the AWS CLI version 2 auto-prompt feature, see Having the AWS CLI prompt youfor commands (p. 104).
cli_binary_format
Specifies how the AWS CLI version 2 interprets binary input parameters. It can be one of thefollowing values:• base64 – This is the default value. An input parameter that is typed as a binary large object (BLOB)
accepts a base64-encoded string. To pass true binary content, put the content in a file and providethe file's path and name with the fileb:// prefix as the parameter's value. To pass base64-encoded text contained in a file, provide the file's path and name with the file:// prefix as theparameter's value.
• raw-in-base64-out – Provides backward compatibility with the AWS CLI version 1 behavior wherebinary values must be passed literally.
This entry does not have an equivalent environment variable. You can specify the value on a singlecommand by using the --cli-binary-format raw-in-base64-out parameter.
cli_binary_format = raw-in-base64-out
If you reference a binary value in a file using the fileb:// prefix notation, the AWS CLI alwaysexpects the file to contain raw binary content and does not attempt to convert the value.
If you reference a binary value in a file using the file:// prefix notation, the AWS CLI handles thefile according to the current cli_binary_format setting. If that setting's value is base64 (thedefault when not explicitly set), the AWS CLI expects the file to contain base64-encoded text. If thatsetting's value is raw-in-base64-out, the AWS CLI expects the file to contain raw binary content.
cli_pager
Specifies the pager program used for output. By default, AWS CLI version 2 returns all outputthrough your operating system’s default pager program.
Can be overridden by the AWS_PAGER environment variable.
cli_pager=less
To disable all use of an external paging program, set the variable to an empty string as shown in thefollowing example.
cli_pager=
cli_timestamp_format
Specifies the format of timestamp values included in the output. You can specify either of thefollowing values:
41
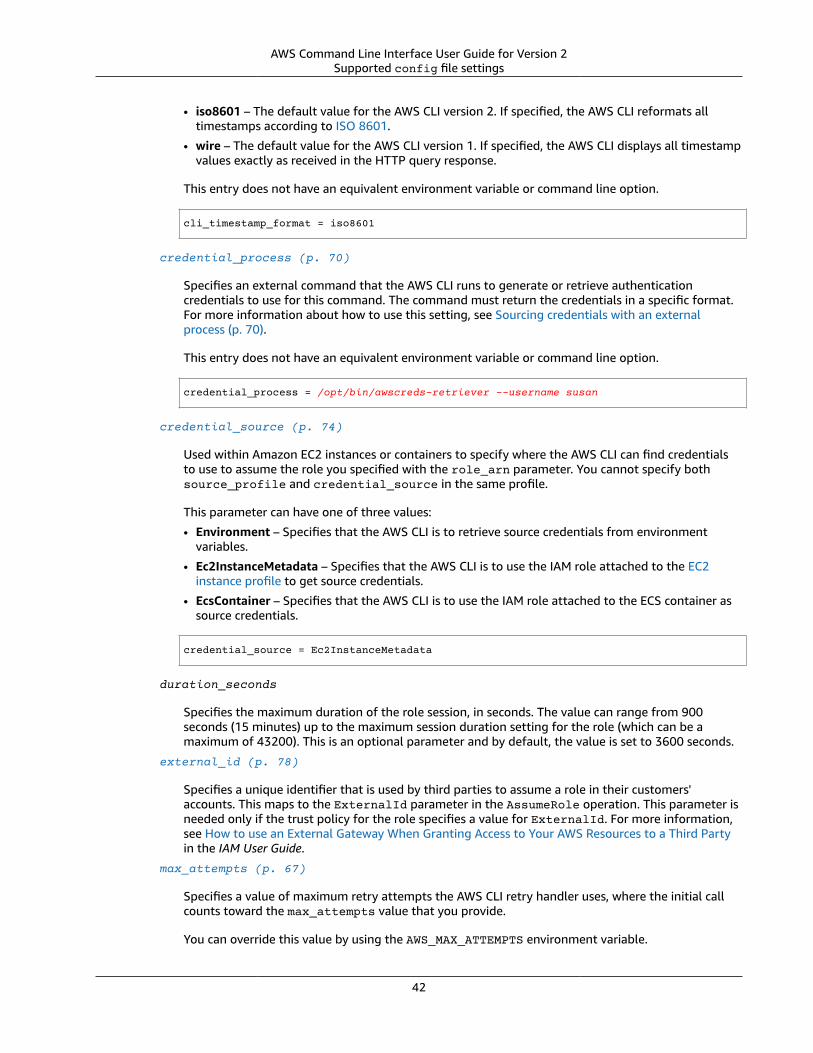
AWS Command Line Interface User Guide for Version 2Supported config file settings
• iso8601 – The default value for the AWS CLI version 2. If specified, the AWS CLI reformats alltimestamps according to ISO 8601.
• wire – The default value for the AWS CLI version 1. If specified, the AWS CLI displays all timestampvalues exactly as received in the HTTP query response.
This entry does not have an equivalent environment variable or command line option.
cli_timestamp_format = iso8601
credential_process (p. 70)
Specifies an external command that the AWS CLI runs to generate or retrieve authenticationcredentials to use for this command. The command must return the credentials in a specific format.For more information about how to use this setting, see Sourcing credentials with an externalprocess (p. 70).
This entry does not have an equivalent environment variable or command line option.
credential_process = /opt/bin/awscreds-retriever --username susan
credential_source (p. 74)
Used within Amazon EC2 instances or containers to specify where the AWS CLI can find credentialsto use to assume the role you specified with the role_arn parameter. You cannot specify bothsource_profile and credential_source in the same profile.
This parameter can have one of three values:
• Environment – Specifies that the AWS CLI is to retrieve source credentials from environmentvariables.
• Ec2InstanceMetadata – Specifies that the AWS CLI is to use the IAM role attached to the EC2instance profile to get source credentials.
• EcsContainer – Specifies that the AWS CLI is to use the IAM role attached to the ECS container assource credentials.
credential_source = Ec2InstanceMetadata
duration_seconds
Specifies the maximum duration of the role session, in seconds. The value can range from 900seconds (15 minutes) up to the maximum session duration setting for the role (which can be amaximum of 43200). This is an optional parameter and by default, the value is set to 3600 seconds.
external_id (p. 78)
Specifies a unique identifier that is used by third parties to assume a role in their customers'accounts. This maps to the ExternalId parameter in the AssumeRole operation. This parameter isneeded only if the trust policy for the role specifies a value for ExternalId. For more information,see How to use an External Gateway When Granting Access to Your AWS Resources to a Third Partyin the IAM User Guide.
max_attempts (p. 67)
Specifies a value of maximum retry attempts the AWS CLI retry handler uses, where the initial callcounts toward the max_attempts value that you provide.
You can override this value by using the AWS_MAX_ATTEMPTS environment variable.
42
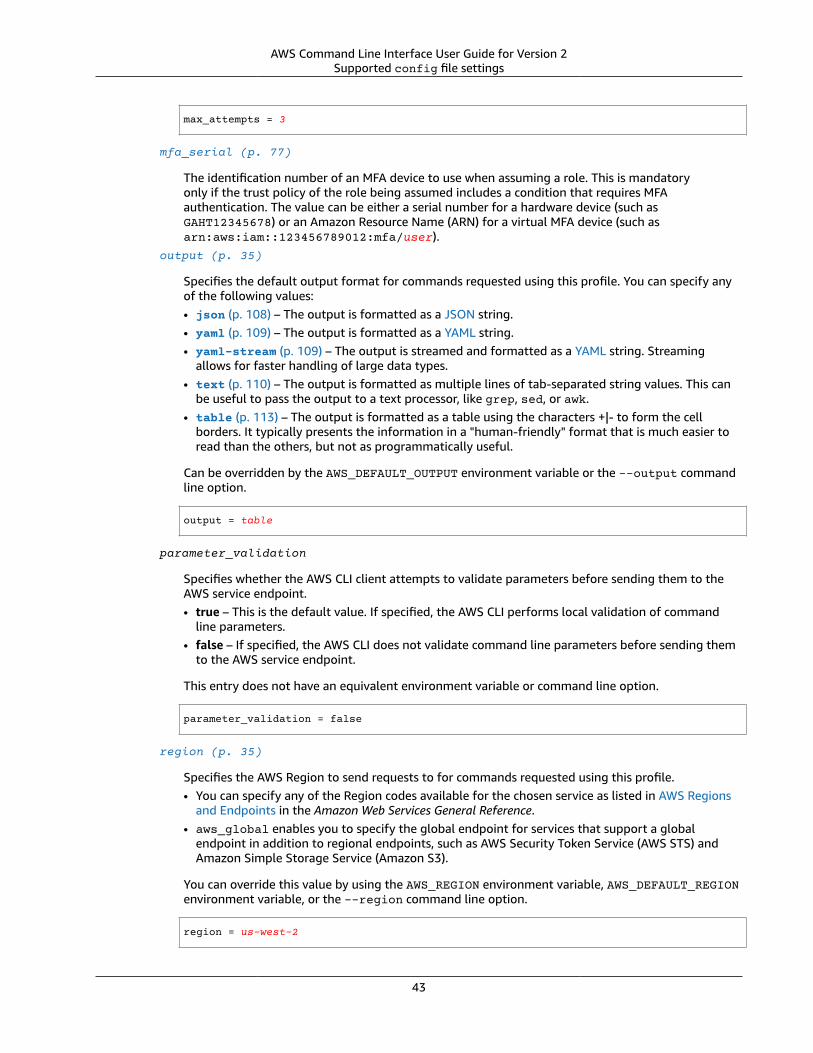
AWS Command Line Interface User Guide for Version 2Supported config file settings
max_attempts = 3
mfa_serial (p. 77)
The identification number of an MFA device to use when assuming a role. This is mandatoryonly if the trust policy of the role being assumed includes a condition that requires MFAauthentication. The value can be either a serial number for a hardware device (such asGAHT12345678) or an Amazon Resource Name (ARN) for a virtual MFA device (such asarn:aws:iam::123456789012:mfa/user).
output (p. 35)
Specifies the default output format for commands requested using this profile. You can specify anyof the following values:• json (p. 108) – The output is formatted as a JSON string.• yaml (p. 109) – The output is formatted as a YAML string.• yaml-stream (p. 109) – The output is streamed and formatted as a YAML string. Streaming
allows for faster handling of large data types.• text (p. 110) – The output is formatted as multiple lines of tab-separated string values. This can
be useful to pass the output to a text processor, like grep, sed, or awk.• table (p. 113) – The output is formatted as a table using the characters +|- to form the cell
borders. It typically presents the information in a "human-friendly" format that is much easier toread than the others, but not as programmatically useful.
Can be overridden by the AWS_DEFAULT_OUTPUT environment variable or the --output commandline option.
output = table
parameter_validation
Specifies whether the AWS CLI client attempts to validate parameters before sending them to theAWS service endpoint.• true – This is the default value. If specified, the AWS CLI performs local validation of command
line parameters.• false – If specified, the AWS CLI does not validate command line parameters before sending them
to the AWS service endpoint.
This entry does not have an equivalent environment variable or command line option.
parameter_validation = false
region (p. 35)
Specifies the AWS Region to send requests to for commands requested using this profile.• You can specify any of the Region codes available for the chosen service as listed in AWS Regions
and Endpoints in the Amazon Web Services General Reference.• aws_global enables you to specify the global endpoint for services that support a global
endpoint in addition to regional endpoints, such as AWS Security Token Service (AWS STS) andAmazon Simple Storage Service (Amazon S3).
You can override this value by using the AWS_REGION environment variable, AWS_DEFAULT_REGIONenvironment variable, or the --region command line option.
region = us-west-2
43
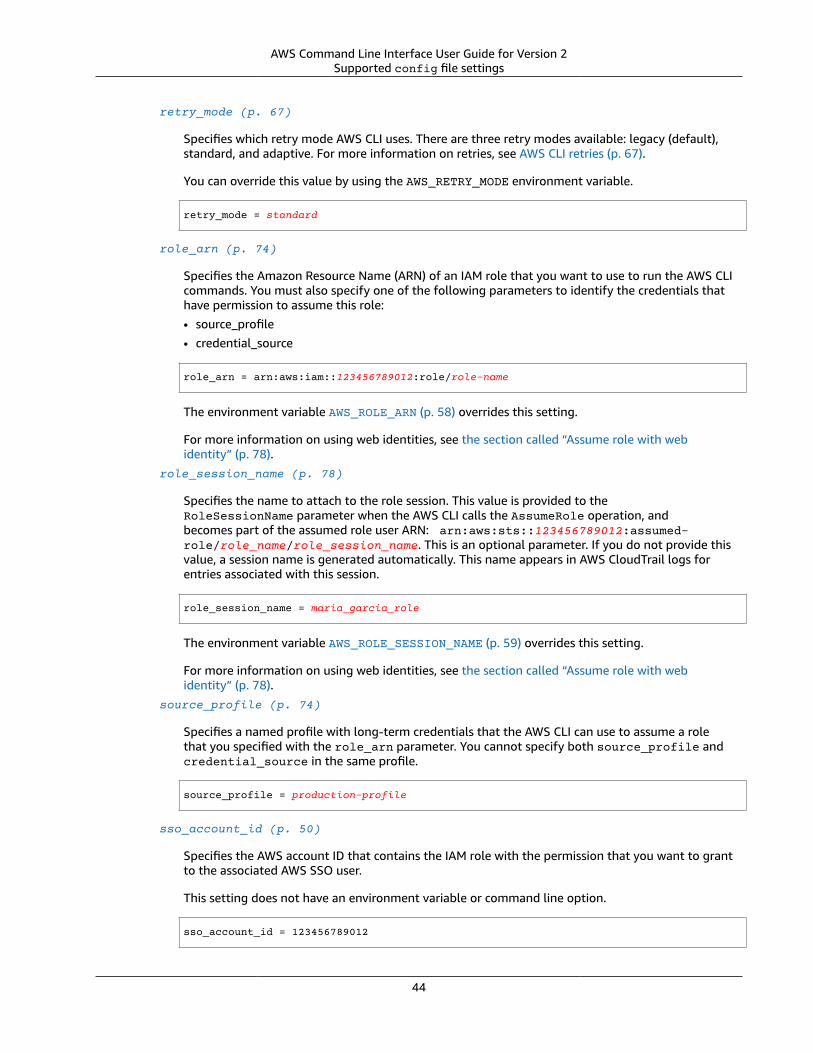
AWS Command Line Interface User Guide for Version 2Supported config file settings
retry_mode (p. 67)
Specifies which retry mode AWS CLI uses. There are three retry modes available: legacy (default),standard, and adaptive. For more information on retries, see AWS CLI retries (p. 67).
You can override this value by using the AWS_RETRY_MODE environment variable.
retry_mode = standard
role_arn (p. 74)
Specifies the Amazon Resource Name (ARN) of an IAM role that you want to use to run the AWS CLIcommands. You must also specify one of the following parameters to identify the credentials thathave permission to assume this role:• source_profile• credential_source
role_arn = arn:aws:iam::123456789012:role/role-name
The environment variable AWS_ROLE_ARN (p. 58) overrides this setting.
For more information on using web identities, see the section called “Assume role with webidentity” (p. 78).
role_session_name (p. 78)
Specifies the name to attach to the role session. This value is provided to theRoleSessionName parameter when the AWS CLI calls the AssumeRole operation, andbecomes part of the assumed role user ARN: arn:aws:sts::123456789012:assumed-role/role_name/role_session_name. This is an optional parameter. If you do not provide thisvalue, a session name is generated automatically. This name appears in AWS CloudTrail logs forentries associated with this session.
role_session_name = maria_garcia_role
The environment variable AWS_ROLE_SESSION_NAME (p. 59) overrides this setting.
For more information on using web identities, see the section called “Assume role with webidentity” (p. 78).
source_profile (p. 74)
Specifies a named profile with long-term credentials that the AWS CLI can use to assume a rolethat you specified with the role_arn parameter. You cannot specify both source_profile andcredential_source in the same profile.
source_profile = production-profile
sso_account_id (p. 50)
Specifies the AWS account ID that contains the IAM role with the permission that you want to grantto the associated AWS SSO user.
This setting does not have an environment variable or command line option.
sso_account_id = 123456789012
44
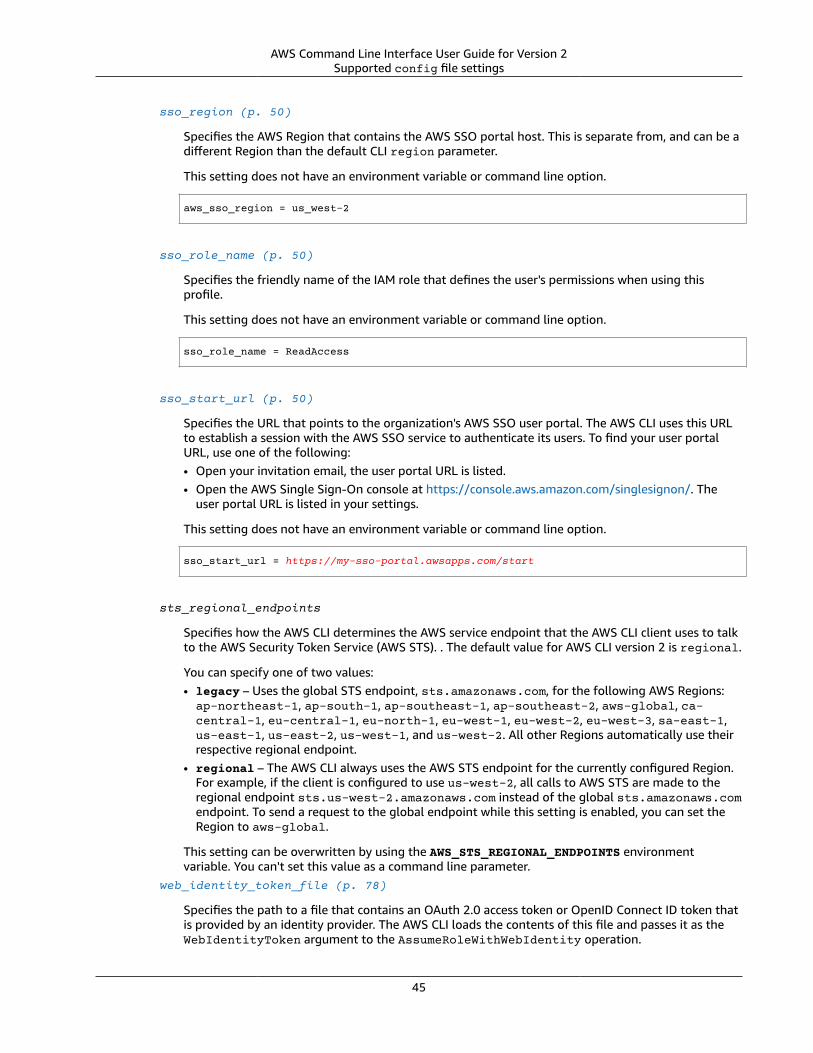
AWS Command Line Interface User Guide for Version 2Supported config file settings
sso_region (p. 50)
Specifies the AWS Region that contains the AWS SSO portal host. This is separate from, and can be adifferent Region than the default CLI region parameter.
This setting does not have an environment variable or command line option.
aws_sso_region = us_west-2
sso_role_name (p. 50)
Specifies the friendly name of the IAM role that defines the user's permissions when using thisprofile.
This setting does not have an environment variable or command line option.
sso_role_name = ReadAccess
sso_start_url (p. 50)
Specifies the URL that points to the organization's AWS SSO user portal. The AWS CLI uses this URLto establish a session with the AWS SSO service to authenticate its users. To find your user portalURL, use one of the following:• Open your invitation email, the user portal URL is listed.• Open the AWS Single Sign-On console at https://console.aws.amazon.com/singlesignon/. The
user portal URL is listed in your settings.
This setting does not have an environment variable or command line option.
sso_start_url = https://my-sso-portal.awsapps.com/start
sts_regional_endpoints
Specifies how the AWS CLI determines the AWS service endpoint that the AWS CLI client uses to talkto the AWS Security Token Service (AWS STS). . The default value for AWS CLI version 2 is regional.
You can specify one of two values:• legacy – Uses the global STS endpoint, sts.amazonaws.com, for the following AWS Regions:ap-northeast-1, ap-south-1, ap-southeast-1, ap-southeast-2, aws-global, ca-central-1, eu-central-1, eu-north-1, eu-west-1, eu-west-2, eu-west-3, sa-east-1,us-east-1, us-east-2, us-west-1, and us-west-2. All other Regions automatically use theirrespective regional endpoint.
• regional – The AWS CLI always uses the AWS STS endpoint for the currently configured Region.For example, if the client is configured to use us-west-2, all calls to AWS STS are made to theregional endpoint sts.us-west-2.amazonaws.com instead of the global sts.amazonaws.comendpoint. To send a request to the global endpoint while this setting is enabled, you can set theRegion to aws-global.
This setting can be overwritten by using the AWS_STS_REGIONAL_ENDPOINTS environmentvariable. You can't set this value as a command line parameter.
web_identity_token_file (p. 78)
Specifies the path to a file that contains an OAuth 2.0 access token or OpenID Connect ID token thatis provided by an identity provider. The AWS CLI loads the contents of this file and passes it as theWebIdentityToken argument to the AssumeRoleWithWebIdentity operation.
45
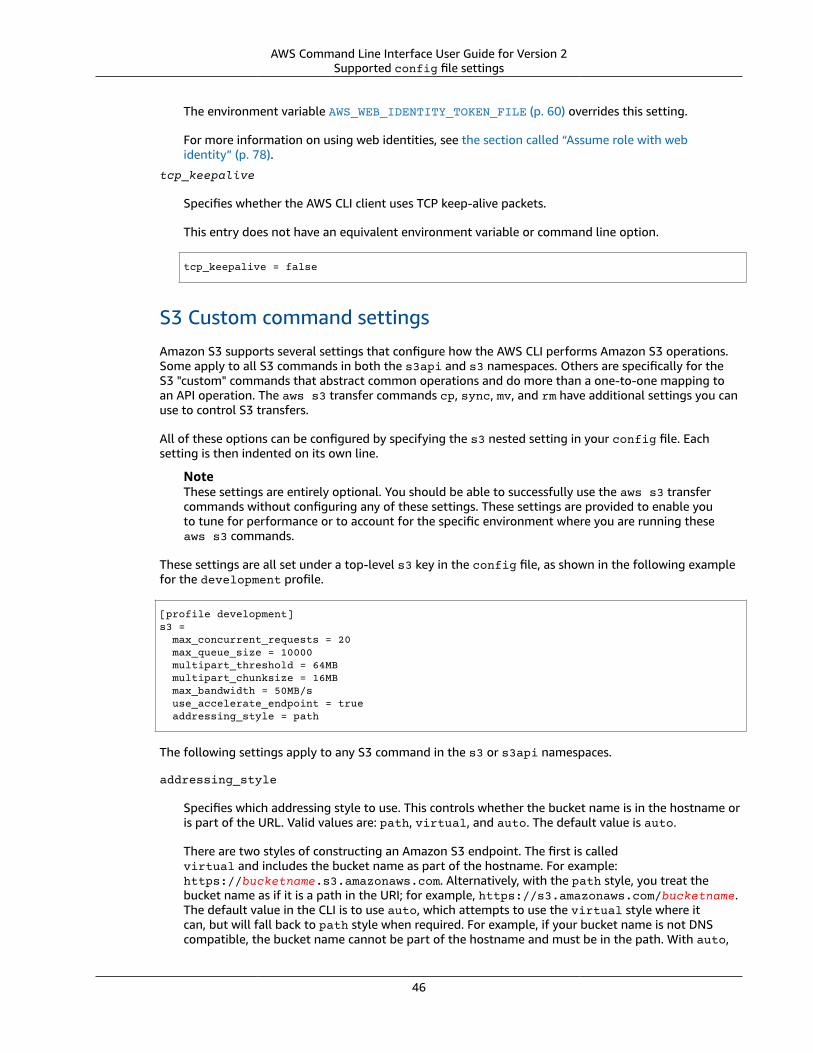
AWS Command Line Interface User Guide for Version 2Supported config file settings
The environment variable AWS_WEB_IDENTITY_TOKEN_FILE (p. 60) overrides this setting.
For more information on using web identities, see the section called “Assume role with webidentity” (p. 78).
tcp_keepalive
Specifies whether the AWS CLI client uses TCP keep-alive packets.
This entry does not have an equivalent environment variable or command line option.
tcp_keepalive = false
S3 Custom command settings
Amazon S3 supports several settings that configure how the AWS CLI performs Amazon S3 operations.Some apply to all S3 commands in both the s3api and s3 namespaces. Others are specifically for theS3 "custom" commands that abstract common operations and do more than a one-to-one mapping toan API operation. The aws s3 transfer commands cp, sync, mv, and rm have additional settings you canuse to control S3 transfers.
All of these options can be configured by specifying the s3 nested setting in your config file. Eachsetting is then indented on its own line.
NoteThese settings are entirely optional. You should be able to successfully use the aws s3 transfercommands without configuring any of these settings. These settings are provided to enable youto tune for performance or to account for the specific environment where you are running theseaws s3 commands.
These settings are all set under a top-level s3 key in the config file, as shown in the following examplefor the development profile.
[profile development]s3 = max_concurrent_requests = 20 max_queue_size = 10000 multipart_threshold = 64MB multipart_chunksize = 16MB max_bandwidth = 50MB/s use_accelerate_endpoint = true addressing_style = path
The following settings apply to any S3 command in the s3 or s3api namespaces.
addressing_style
Specifies which addressing style to use. This controls whether the bucket name is in the hostname oris part of the URL. Valid values are: path, virtual, and auto. The default value is auto.
There are two styles of constructing an Amazon S3 endpoint. The first is calledvirtual and includes the bucket name as part of the hostname. For example:https://bucketname.s3.amazonaws.com. Alternatively, with the path style, you treat thebucket name as if it is a path in the URI; for example, https://s3.amazonaws.com/bucketname.The default value in the CLI is to use auto, which attempts to use the virtual style where itcan, but will fall back to path style when required. For example, if your bucket name is not DNScompatible, the bucket name cannot be part of the hostname and must be in the path. With auto,
46
AWS Command Line Interface User Guide for Version 2Supported config file settings
the CLI will detect this condition and automatically switch to path style for you. If you set theaddressing style to path, you must then ensure that the AWS Region you configured in the AWS CLImatches the Region of your bucket.
payload_signing_enabled
Specifies whether to SHA256 sign sigv4 payloads. By default, this is disabled for streaming uploads(UploadPart and PutObject) when using HTTPS. By default, this is set to false for streaminguploads (UploadPart and PutObject), but only if a ContentMD5 is present (it is generated bydefault) and the endpoint uses HTTPS.
If set to true, S3 requests receive additional content validation in the form of a SHA256 checksumwhich is calculated for you and included in the request signature. If set to false, the checksumisn't calculated. Disabling this can be useful to reduce the performance overhead created by thechecksum calculation.
use_dualstack_endpoint
Use the Amazon S3 dual IPv4 / IPv6 endpoint for all s3 and s3api commands. The default value isfalse. This is mutually exclusive with the use_accelerate_endpoint setting.
If set to true, the AWS CLI directs all Amazon S3 requests to the dual IPv4 / IPv6 endpoint for theconfigured Region.
use_accelerate_endpoint
Use the Amazon S3 Accelerate endpoint for all s3 and s3api commands. The default value is false.This is mutually exclusive with the use_dualstack_endpoint setting.
If set to true, the AWS CLI directs all Amazon S3 requests to the S3 Accelerate endpoint ats3-accelerate.amazonaws.com. To use this endpoint, you must enable your bucket to use S3Accelerate. All requests are sent using the virtual style of bucket addressing: my-bucket.s3-accelerate.amazonaws.com. Any ListBuckets, CreateBucket, and DeleteBucketrequests aren't sent to the S3 Accelerate endpoint as that endpoint doesn't support thoseoperations. This behavior can also be set if the --endpoint-url parameter is set to https://s3-accelerate.amazonaws.com or http://s3-accelerate.amazonaws.com for any s3 or s3apicommand.
The following settings apply only to commands in the s3 namespace command set.
max_bandwidth
Specifies the maximum bandwidth that can be consumed for uploading and downloading data toand from Amazon S3. The default is no limit.
This limits the maximum bandwidth that the S3 commands can use to transfer data to and fromAmazon S3. This value applies to only uploads and downloads; it doesn't apply to copies or deletes.The value is expressed as bytes per second. The value can be specified as:
• An integer. For example, 1048576 sets the maximum bandwidth usage to 1 megabyte per second.
• An integer followed by a rate suffix. You can specify rate suffixes using: KB/s, MB/s, or GB/s. Forexample, 300KB/s, 10MB/s.
In general, we recommend that you first try to lower bandwidth consumption by loweringmax_concurrent_requests. If that doesn't adequately limit bandwidth consumption to thedesired rate, you can use the max_bandwidth setting to further limit bandwidth consumption. Thisis because max_concurrent_requests controls how many threads are currently running. If youinstead first lower max_bandwidth but leave a high max_concurrent_requests setting, it canresult in threads having to wait unnecessarily. This can lead to excess resource consumption andconnection timeouts.
47
AWS Command Line Interface User Guide for Version 2Supported config file settings
max_concurrent_requests
Specifies the maximum number of concurrent requests. The default value is 10.
The aws s3 transfer commands are multithreaded. At any given time, multiple Amazon S3 requestscan be running. For example, when you use the command aws s3 cp localdir s3://bucket/--recursive to upload files to an S3 bucket, the AWS CLI can upload the files localdir/file1,localdir/file2, and localdir/file3 in parallel. The setting max_concurrent_requestsspecifies the maximum number of transfer operations that can run at the same time.
You might need to change this value for a few reasons:• Decreasing this value – On some environments, the default of 10 concurrent requests can
overwhelm a system. This can cause connection timeouts or slow the responsiveness of thesystem. Lowering this value makes the S3 transfer commands less resource intensive. The tradeoffis that S3 transfers can take longer to complete. Lowering this value might be necessary if you usea tool to limit bandwidth.
• Increasing this value – In some scenarios, you might want the Amazon S3 transfers to completeas quickly as possible, using as much network bandwidth as necessary. In this scenario, thedefault number of concurrent requests might not be sufficient to use all of the available networkbandwidth. Increasing this value can improve the time it takes to complete an Amazon S3 transfer.
max_queue_size
Specifies the maximum number of tasks in the task queue. The default value is 1000.
The AWS CLI internally uses a model where it queues up Amazon S3 tasks that are then executed byconsumers whose numbers are limited by max_concurrent_requests. A task generally maps to asingle Amazon S3 operation. For example, a task could be a PutObjectTask, or a GetObjectTask,or an UploadPartTask. The rate at which tasks are added to the queue can be much faster thanthe rate at which consumers finish the tasks. To avoid unbounded growth, the task queue size iscapped to a specific size. This setting changes the value of that maximum number.
You generally don't need to change this setting. This setting also corresponds to the number of tasksthat the AWS CLI is aware of that need to be run. This means that by default the AWS CLI can onlysee 1000 tasks ahead. Increasing this value means that the AWS CLI can more quickly know the totalnumber of tasks needed, assuming that the queuing rate is quicker than the rate of task completion.The tradeoff is that a larger max_queue_size requires more memory.
multipart_chunksize
Specifies the chunk size that the AWS CLI uses for multipart transfers of individual files. The defaultvalue is 8 MB, with a minimum of 5 MB.
When a file transfer exceeds the multipart_threshold, the AWS CLI divides the file into chunksof this size. This value can be specified using the same syntax as multipart_threshold, either asthe number of bytes as an integer, or by using a size and a suffix.
multipart_threshold
Specifies the size threshold the AWS CLI uses for multipart transfers of individual files. The defaultvalue is 8 MB.
When uploading, downloading, or copying a file, the Amazon S3 commands switch to multipartoperations if the file exceeds this size. You can specify this value in one of two ways:• The file size in bytes. For example, 1048576.• The file size with a size suffix. You can use KB, MB, GB, or TB. For example: 10MB, 1GB.
NoteS3 can impose constraints on valid values that can be used for multipart operations. Formore information, see the S3 Multipart Upload documentation in the Amazon SimpleStorage Service User Guide.
48

AWS Command Line Interface User Guide for Version 2Named profiles
Named profiles for the AWS CLIA named profile is a collection of settings and credentials that you can apply to a AWS CLI command.When you specify a profile to run a command, the settings and credentials are used to run thatcommand. Multiple named profiles can be stored in the config and credentials files.
You can specify one default profile that is used when no profile is explicitly referenced. Other profileshave names that you can specify as a parameter on the command line for individual commands.Alternatively, you can specify a profile in the AWS_PROFILE (p. 55) environment variable whichoverrides the default profile for commands that run in that session.
Topics• Creating named profiles (p. 49)• Using named profiles (p. 50)
Creating named profilesYou can configure additional profiles by using aws configure (p. 38) with the --profile option, orby manually adding entries to the config and credentials files. For more information on the configand credentials files, see the section called “Configuration and credential file settings” (p. 37).
Credentials profile
The following example shows a credentials file with two profiles. The first [default] is used when yourun a AWS CLI command with no profile. The second is used when you run a AWS CLI command with the--profile user1 parameter.
The credentials file uses a different naming format than the AWS CLI config file for named profiles.Do not use the word profile when creating an entry in the credentials file.
~/.aws/credentials (Linux & Mac) or %USERPROFILE%\.aws\credentials (Windows)
[default]aws_access_key_id=AKIAIOSFODNN7EXAMPLEaws_secret_access_key=wJalrXUtnFEMI/K7MDENG/bPxRfiCYEXAMPLEKEY
[user1]aws_access_key_id=AKIAI44QH8DHBEXAMPLEaws_secret_access_key=je7MtGbClwBF/2Zp9Utk/h3yCo8nvbEXAMPLEKEY
Config profile
Each profile can specify different credentials—perhaps from different IAM users—and can also specifydifferent AWS Regions and output formats. When naming the profile in a config file, include the prefixword "profile".
The following example specifies region and output information for the default and user1 profiles.
~/.aws/config (Linux & Mac) or %USERPROFILE%\.aws\config (Windows)
[default]region=us-west-2output=json
[profile user1]region=us-east-1output=text
49
AWS Command Line Interface User Guide for Version 2Using named profiles
Using named profilesTo use a named profile, add the --profile profile-name option to your command. The followingexample lists all of your Amazon EC2 instances using the credentials and settings defined in the user1profile from the previous example files.
$ aws ec2 describe-instances --profile user1
To use a named profile for multiple commands, you can avoid specifying the profile in every commandby setting the AWS_PROFILE environment variable at the command line.
Linux or macOS
$ export AWS_PROFILE=user1
Windows
C:\> setx AWS_PROFILE user1
Using set to set an environment variable changes the value used until the end of the current commandprompt session, or until you set the variable to a different value.
Using setx to set an environment variable changes the value in all command shells that you create afterrunning the command. It does not affect any command shell that is already running at the time you runthe command. Close and restart the command shell to see the effects of the change.
Setting the environment variable changes the default profile until the end of your shell session, or untilyou set the variable to a different value. You can make environment variables persistent across futuresessions by putting them in your shell's startup script. For more information, see Environment variablesto configure the AWS CLI (p. 55).
NoteIf you specify a profile with --profile on an individual command, that overrides the settingspecified in the environment variable for only that command.
Configuring the AWS CLI to use AWS Single Sign-On
If your organization uses AWS Single Sign-On (AWS SSO), your users can sign in to Active Directory, abuilt-in AWS SSO directory, or another iDP connected to AWS SSO and get mapped to an AWS Identityand Access Management (IAM) role that enables you to run AWS CLI commands. Regardless of which iDPyou use, AWS SSO abstracts those distinctions away, and they all work with the AWS CLI as describedbelow. For example, you can connect Microsoft Azure AD as described in the blog article The NextEvolution in AWS Single Sign-On
For more information about AWS SSO, see the AWS Single Sign-On User Guide.
This topic describes how to configure the AWS CLI to authenticate the user with AWS SSO to get short-term credentials to run AWS CLI commands. It includes the following sections:
• Configuring a named profile to use AWS SSO (p. 51) - How to create and configure profiles thatuse AWS SSO for authentication and mapping to an IAM role for AWS permissions.
• Using an AWS SSO enabled named profile (p. 54) - how to login to AWS SSO from the CLI and usethe provided AWS temporary credentials to run AWS CLI commands.
50
AWS Command Line Interface User Guide for Version 2Configuring a named profile to use AWS SSO
Configuring a named profile to use AWS SSOYou can configure one or more of your AWS CLI named profiles (p. 49) to use a role from AWS SSOYou can create and configure multiple profiles and configure each one to use a different AWS SSO userportal or SSO-defined role.
You can configure the profile in the following ways:
• Automatically (p. 51), using the command aws configure sso• Manually (p. 53), by editing the .aws/config file that stores the named profiles.
Automatic configurationYou can add an AWS SSO enabled profile to your AWS CLI by running the following command, providingyour AWS SSO start URL and the AWS Region that hosts the AWS SSO directory.
$ aws configure ssoSSO start URL [None]: [None]: https://my-sso-portal.awsapps.com/startSSO region [None]:us-east-1
The AWS CLI attempts to open your default browser and begin the login process for your AWS SSOaccount.
SSO authorization page has automatically been opened in your default browser.Follow the instructions in the browser to complete this authorization request.
If the AWS CLI cannot open the browser, the following message appears with instructions on how tomanually start the login process.
Using a browser, open the following URL: https://my-sso-portal.awsapps.com/verify
and enter the following code:QCFK-N451
AWS SSO uses the code to associate the AWS SSO session with your current AWS CLI session. The AWSSSO browser page prompts you to sign in with your AWS SSO account credentials. This enables the AWSCLI (through the permissions associated with your AWS SSO account) to retrieve and display the AWSaccounts and roles that you are authorized to use with AWS SSO.
Next, the AWS CLI displays the AWS accounts available for you to use. If you are authorized to use onlyone account, the AWS CLI selects that account for you automatically and skips the prompt. The AWSaccounts that are available for you to use are determined by your user configuration in AWS SSO.
There are 2 AWS accounts available to you.> DeveloperAccount, [email protected] (123456789011) ProductionAccount, [email protected] (123456789022)
Use the arrow keys to select the account you want to use with this profile. The ">" character on the leftpoints to the current choice. Press ENTER to make your selection.
Next, the AWS CLI confirms your account choice, and displays the IAM roles that are available to you inthe selected account. If the selected account lists only one role, the AWS CLI selects that role for you
51
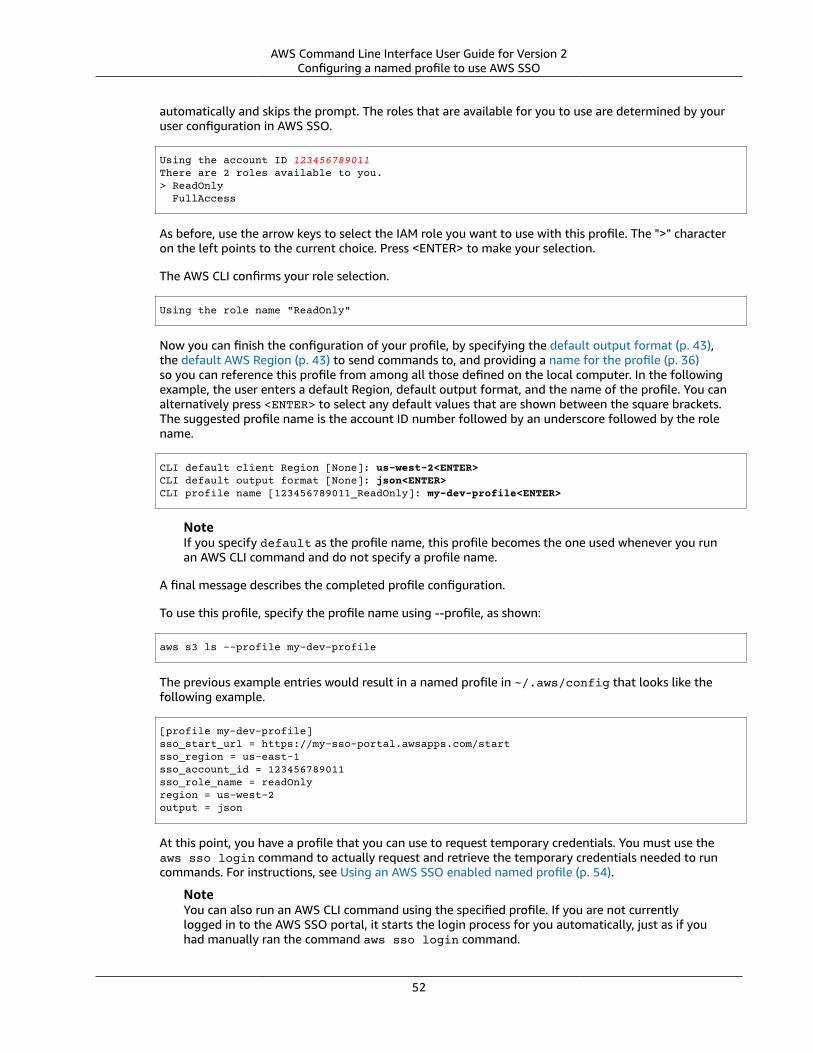
AWS Command Line Interface User Guide for Version 2Configuring a named profile to use AWS SSO
automatically and skips the prompt. The roles that are available for you to use are determined by youruser configuration in AWS SSO.
Using the account ID 123456789011There are 2 roles available to you.> ReadOnly FullAccess
As before, use the arrow keys to select the IAM role you want to use with this profile. The ">" characteron the left points to the current choice. Press <ENTER> to make your selection.
The AWS CLI confirms your role selection.
Using the role name "ReadOnly"
Now you can finish the configuration of your profile, by specifying the default output format (p. 43),the default AWS Region (p. 43) to send commands to, and providing a name for the profile (p. 36)so you can reference this profile from among all those defined on the local computer. In the followingexample, the user enters a default Region, default output format, and the name of the profile. You canalternatively press <ENTER> to select any default values that are shown between the square brackets.The suggested profile name is the account ID number followed by an underscore followed by the rolename.
CLI default client Region [None]: us-west-2<ENTER>CLI default output format [None]: json<ENTER>CLI profile name [123456789011_ReadOnly]: my-dev-profile<ENTER>
NoteIf you specify default as the profile name, this profile becomes the one used whenever you runan AWS CLI command and do not specify a profile name.
A final message describes the completed profile configuration.
To use this profile, specify the profile name using --profile, as shown:
aws s3 ls --profile my-dev-profile
The previous example entries would result in a named profile in ~/.aws/config that looks like thefollowing example.
[profile my-dev-profile]sso_start_url = https://my-sso-portal.awsapps.com/startsso_region = us-east-1sso_account_id = 123456789011sso_role_name = readOnlyregion = us-west-2output = json
At this point, you have a profile that you can use to request temporary credentials. You must use theaws sso login command to actually request and retrieve the temporary credentials needed to runcommands. For instructions, see Using an AWS SSO enabled named profile (p. 54).
NoteYou can also run an AWS CLI command using the specified profile. If you are not currentlylogged in to the AWS SSO portal, it starts the login process for you automatically, just as if youhad manually ran the command aws sso login command.
52
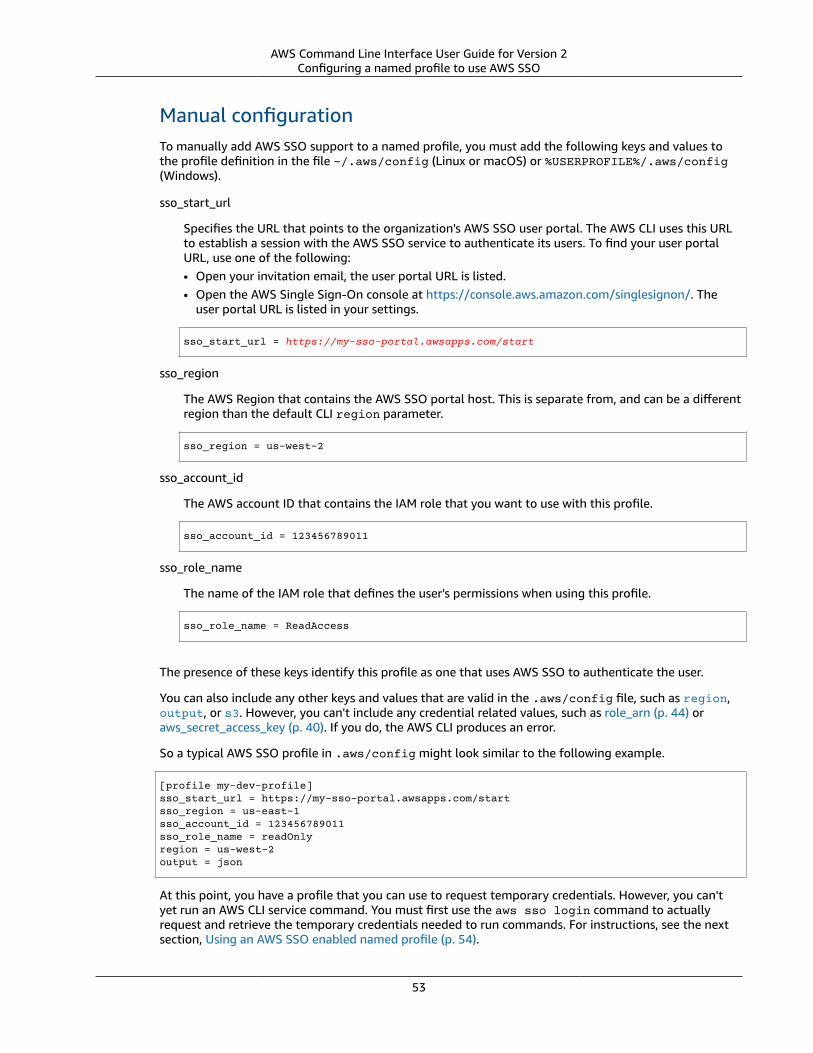
AWS Command Line Interface User Guide for Version 2Configuring a named profile to use AWS SSO
Manual configurationTo manually add AWS SSO support to a named profile, you must add the following keys and values tothe profile definition in the file ~/.aws/config (Linux or macOS) or %USERPROFILE%/.aws/config(Windows).
sso_start_url
Specifies the URL that points to the organization's AWS SSO user portal. The AWS CLI uses this URLto establish a session with the AWS SSO service to authenticate its users. To find your user portalURL, use one of the following:• Open your invitation email, the user portal URL is listed.• Open the AWS Single Sign-On console at https://console.aws.amazon.com/singlesignon/. The
user portal URL is listed in your settings.
sso_start_url = https://my-sso-portal.awsapps.com/start
sso_region
The AWS Region that contains the AWS SSO portal host. This is separate from, and can be a differentregion than the default CLI region parameter.
sso_region = us-west-2
sso_account_id
The AWS account ID that contains the IAM role that you want to use with this profile.
sso_account_id = 123456789011
sso_role_name
The name of the IAM role that defines the user's permissions when using this profile.
sso_role_name = ReadAccess
The presence of these keys identify this profile as one that uses AWS SSO to authenticate the user.
You can also include any other keys and values that are valid in the .aws/config file, such as region,output, or s3. However, you can't include any credential related values, such as role_arn (p. 44) oraws_secret_access_key (p. 40). If you do, the AWS CLI produces an error.
So a typical AWS SSO profile in .aws/config might look similar to the following example.
[profile my-dev-profile]sso_start_url = https://my-sso-portal.awsapps.com/startsso_region = us-east-1sso_account_id = 123456789011sso_role_name = readOnlyregion = us-west-2output = json
At this point, you have a profile that you can use to request temporary credentials. However, you can'tyet run an AWS CLI service command. You must first use the aws sso login command to actuallyrequest and retrieve the temporary credentials needed to run commands. For instructions, see the nextsection, Using an AWS SSO enabled named profile (p. 54).
53
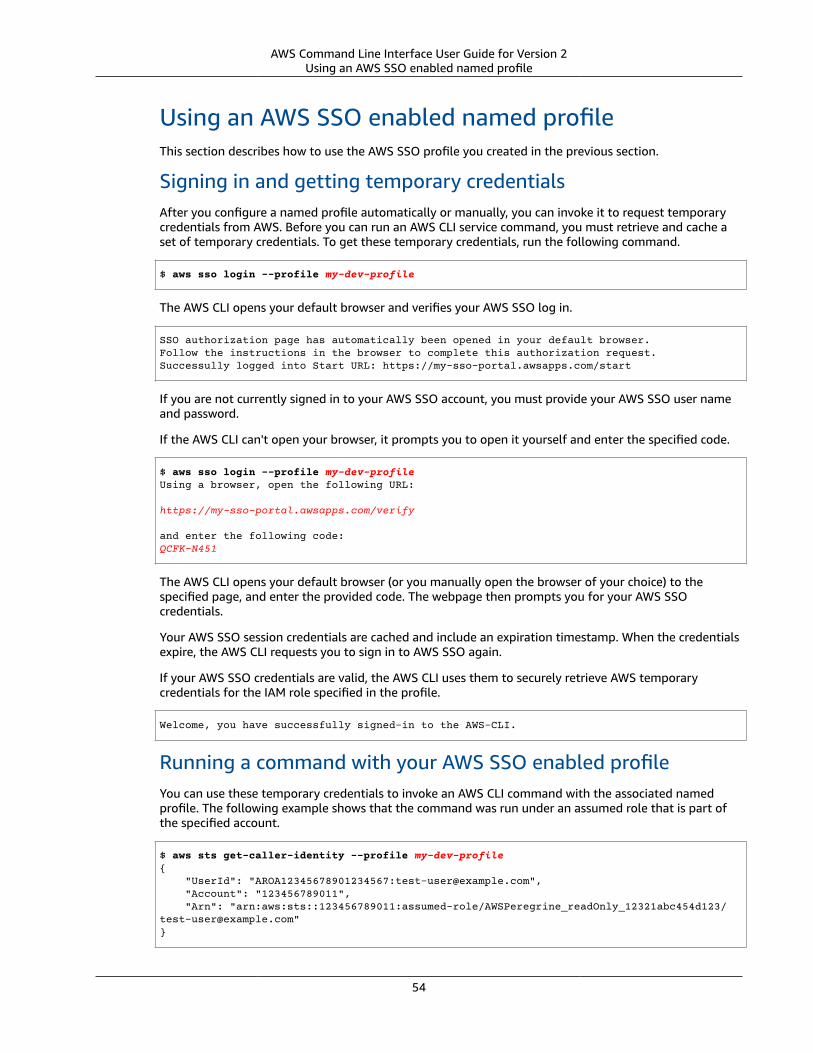
AWS Command Line Interface User Guide for Version 2Using an AWS SSO enabled named profile
Using an AWS SSO enabled named profileThis section describes how to use the AWS SSO profile you created in the previous section.
Signing in and getting temporary credentialsAfter you configure a named profile automatically or manually, you can invoke it to request temporarycredentials from AWS. Before you can run an AWS CLI service command, you must retrieve and cache aset of temporary credentials. To get these temporary credentials, run the following command.
$ aws sso login --profile my-dev-profile
The AWS CLI opens your default browser and verifies your AWS SSO log in.
SSO authorization page has automatically been opened in your default browser. Follow the instructions in the browser to complete this authorization request.Successully logged into Start URL: https://my-sso-portal.awsapps.com/start
If you are not currently signed in to your AWS SSO account, you must provide your AWS SSO user nameand password.
If the AWS CLI can't open your browser, it prompts you to open it yourself and enter the specified code.
$ aws sso login --profile my-dev-profileUsing a browser, open the following URL: https://my-sso-portal.awsapps.com/verify
and enter the following code:QCFK-N451
The AWS CLI opens your default browser (or you manually open the browser of your choice) to thespecified page, and enter the provided code. The webpage then prompts you for your AWS SSOcredentials.
Your AWS SSO session credentials are cached and include an expiration timestamp. When the credentialsexpire, the AWS CLI requests you to sign in to AWS SSO again.
If your AWS SSO credentials are valid, the AWS CLI uses them to securely retrieve AWS temporarycredentials for the IAM role specified in the profile.
Welcome, you have successfully signed-in to the AWS-CLI.
Running a command with your AWS SSO enabled profileYou can use these temporary credentials to invoke an AWS CLI command with the associated namedprofile. The following example shows that the command was run under an assumed role that is part ofthe specified account.
$ aws sts get-caller-identity --profile my-dev-profile{ "UserId": "AROA12345678901234567:[email protected]", "Account": "123456789011", "Arn": "arn:aws:sts::123456789011:assumed-role/AWSPeregrine_readOnly_12321abc454d123/[email protected]"}
54
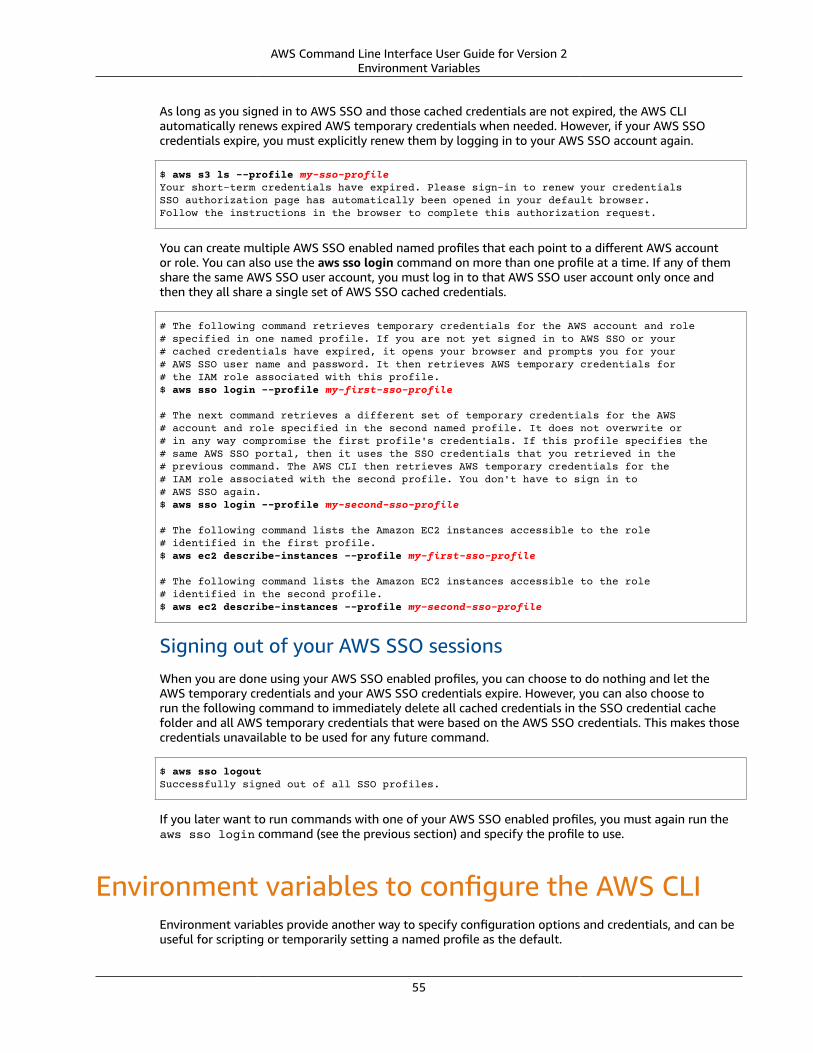
AWS Command Line Interface User Guide for Version 2Environment Variables
As long as you signed in to AWS SSO and those cached credentials are not expired, the AWS CLIautomatically renews expired AWS temporary credentials when needed. However, if your AWS SSOcredentials expire, you must explicitly renew them by logging in to your AWS SSO account again.
$ aws s3 ls --profile my-sso-profileYour short-term credentials have expired. Please sign-in to renew your credentialsSSO authorization page has automatically been opened in your default browser. Follow the instructions in the browser to complete this authorization request.
You can create multiple AWS SSO enabled named profiles that each point to a different AWS accountor role. You can also use the aws sso login command on more than one profile at a time. If any of themshare the same AWS SSO user account, you must log in to that AWS SSO user account only once andthen they all share a single set of AWS SSO cached credentials.
# The following command retrieves temporary credentials for the AWS account and role # specified in one named profile. If you are not yet signed in to AWS SSO or your # cached credentials have expired, it opens your browser and prompts you for your # AWS SSO user name and password. It then retrieves AWS temporary credentials for# the IAM role associated with this profile.$ aws sso login --profile my-first-sso-profile
# The next command retrieves a different set of temporary credentials for the AWS # account and role specified in the second named profile. It does not overwrite or # in any way compromise the first profile's credentials. If this profile specifies the# same AWS SSO portal, then it uses the SSO credentials that you retrieved in the # previous command. The AWS CLI then retrieves AWS temporary credentials for the# IAM role associated with the second profile. You don't have to sign in to # AWS SSO again.$ aws sso login --profile my-second-sso-profile
# The following command lists the Amazon EC2 instances accessible to the role # identified in the first profile.$ aws ec2 describe-instances --profile my-first-sso-profile
# The following command lists the Amazon EC2 instances accessible to the role # identified in the second profile.$ aws ec2 describe-instances --profile my-second-sso-profile
Signing out of your AWS SSO sessionsWhen you are done using your AWS SSO enabled profiles, you can choose to do nothing and let theAWS temporary credentials and your AWS SSO credentials expire. However, you can also choose torun the following command to immediately delete all cached credentials in the SSO credential cachefolder and all AWS temporary credentials that were based on the AWS SSO credentials. This makes thosecredentials unavailable to be used for any future command.
$ aws sso logoutSuccessfully signed out of all SSO profiles.
If you later want to run commands with one of your AWS SSO enabled profiles, you must again run theaws sso login command (see the previous section) and specify the profile to use.
Environment variables to configure the AWS CLIEnvironment variables provide another way to specify configuration options and credentials, and can beuseful for scripting or temporarily setting a named profile as the default.
55
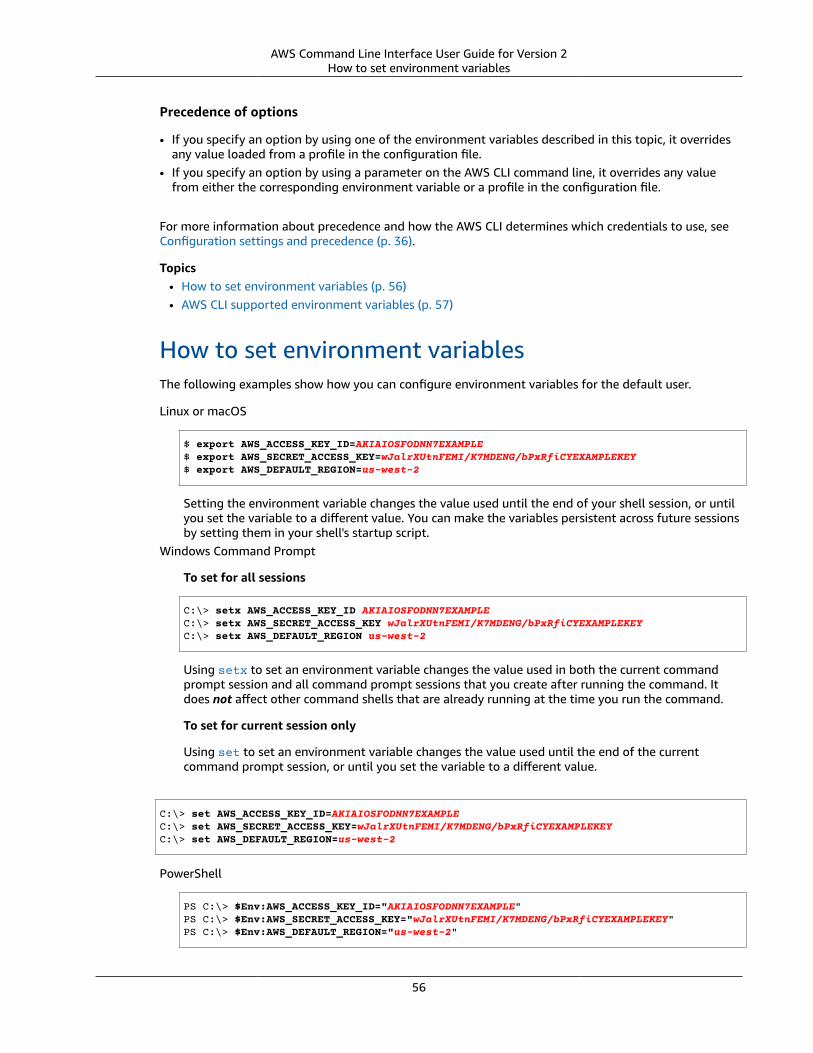
AWS Command Line Interface User Guide for Version 2How to set environment variables
Precedence of options
• If you specify an option by using one of the environment variables described in this topic, it overridesany value loaded from a profile in the configuration file.
• If you specify an option by using a parameter on the AWS CLI command line, it overrides any valuefrom either the corresponding environment variable or a profile in the configuration file.
For more information about precedence and how the AWS CLI determines which credentials to use, seeConfiguration settings and precedence (p. 36).
Topics• How to set environment variables (p. 56)• AWS CLI supported environment variables (p. 57)
How to set environment variablesThe following examples show how you can configure environment variables for the default user.
Linux or macOS
$ export AWS_ACCESS_KEY_ID=AKIAIOSFODNN7EXAMPLE$ export AWS_SECRET_ACCESS_KEY=wJalrXUtnFEMI/K7MDENG/bPxRfiCYEXAMPLEKEY$ export AWS_DEFAULT_REGION=us-west-2
Setting the environment variable changes the value used until the end of your shell session, or untilyou set the variable to a different value. You can make the variables persistent across future sessionsby setting them in your shell's startup script.
Windows Command Prompt
To set for all sessions
C:\> setx AWS_ACCESS_KEY_ID AKIAIOSFODNN7EXAMPLEC:\> setx AWS_SECRET_ACCESS_KEY wJalrXUtnFEMI/K7MDENG/bPxRfiCYEXAMPLEKEYC:\> setx AWS_DEFAULT_REGION us-west-2
Using setx to set an environment variable changes the value used in both the current commandprompt session and all command prompt sessions that you create after running the command. Itdoes not affect other command shells that are already running at the time you run the command.
To set for current session only
Using set to set an environment variable changes the value used until the end of the currentcommand prompt session, or until you set the variable to a different value.
C:\> set AWS_ACCESS_KEY_ID=AKIAIOSFODNN7EXAMPLEC:\> set AWS_SECRET_ACCESS_KEY=wJalrXUtnFEMI/K7MDENG/bPxRfiCYEXAMPLEKEYC:\> set AWS_DEFAULT_REGION=us-west-2
PowerShell
PS C:\> $Env:AWS_ACCESS_KEY_ID="AKIAIOSFODNN7EXAMPLE"PS C:\> $Env:AWS_SECRET_ACCESS_KEY="wJalrXUtnFEMI/K7MDENG/bPxRfiCYEXAMPLEKEY"PS C:\> $Env:AWS_DEFAULT_REGION="us-west-2"
56
AWS Command Line Interface User Guide for Version 2AWS CLI supported environment variables
If you set an environment variable at the PowerShell prompt as shown in the previous examples,it saves the value for only the duration of the current session. To make the environment variablesetting persistent across all PowerShell and Command Prompt sessions, store it by using the Systemapplication in Control Panel. Alternatively, you can set the variable for all future PowerShell sessionsby adding it to your PowerShell profile. See the PowerShell documentation for more informationabout storing environment variables or persisting them across sessions.
AWS CLI supported environment variablesThe AWS CLI supports the following environment variables.
AWS_ACCESS_KEY_ID
Specifies an AWS access key associated with an IAM user or role.
If defined, this environment variable overrides the value for the profile settingaws_access_key_id. You can't specify the access key ID by using a command line option.
AWS_CA_BUNDLE
Specifies the path to a certificate bundle to use for HTTPS certificate validation.
If defined, this environment variable overrides the value for the profile settingca_bundle (p. 40). You can override this environment variable by using the --ca-bundle (p. 60) command line parameter.
AWS_CLI_AUTO_PROMPT
Enables the auto-prompt for the AWS CLI version 2. There are two settings that can be used:• on uses the full auto-prompt mode each time you attempt to run an aws command. This includes
pressing ENTER after both a complete command or incomplete command.
aws_cli_auto_prompt=on
• on-partial uses partial auto-prompt mode. If a command is incomplete or cannot be run dueto client-side validation errors, auto-prompt is used. This mode is particular useful if you havepre-existing scripts, runbooks, or you only want to be auto-prompted for commands you areunfamiliar with rather than prompted on every command.
aws_cli_auto_prompt=on-partial
If defined, this environment variable overrides the value for the cli_auto_prompt (p. 40)profile setting. You can override this environment variable by using the --cli-auto-prompt (p. 60) and --no-cli-auto-prompt (p. 61) command line parameters.
For information on the AWS CLI version 2 auto-prompt feature, see Having the AWS CLI prompt youfor commands (p. 104).
AWS_CLI_FILE_ENCODING
Specifies the encoding used for text files. By default encoding matches your locale. To set encodingdifferent from the locale, use the aws_cli_file_encoding environment variable. For example, ifyou use Windows with default encoding CP1252, setting aws_cli_file_encoding=UTF-8 setsthe CLI to open text files using UTF-8.
AWS_CONFIG_FILE
Specifies the location of the file that the AWS CLI uses to store configuration profiles. The defaultpath is ~/.aws/config.
You can't specify this value in a named profile setting or by using a command line parameter.
57
AWS Command Line Interface User Guide for Version 2AWS CLI supported environment variables
AWS_DEFAULT_OUTPUT (p. 35)
Specifies the output format (p. 107) to use.
If defined, this environment variable overrides the value for the profile setting output. You canoverride this environment variable by using the --output command line parameter.
AWS_DEFAULT_REGION (p. 35)
Specifies the AWS Region to send the request to.
If defined, this environment variable overrides the value for the profile setting region and . You canoverride this environment variable by using the --region command line parameter and the AWSSDK compatible AWS_REGION environment variable.
AWS_EC2_METADATA_DISABLED
Disables the use of the Amazon EC2 instance metadata service (IMDS).
If set to true, user credentials or configuration (like the region) are not requested from IMDS.AWS_MAX_ATTEMPTS (p. 42)
Specifies a value of maximum retry attempts the AWS CLI retry handler uses, where the initialcall counts toward the value that you provide. For more information on retries, see AWS CLIretries (p. 67).
If defined, this environment variable overrides the value for the profiles setting max_attempts.AWS_PAGER (p. 41)
Specifies the pager program used for output. By default, AWS CLI version 2 returns all outputthrough your operating system’s default pager program.
To disable all use of an external paging program, set the variable to an empty string.
If defined, this environment variable overrides the value for the profile setting cli_pager.AWS_PROFILE (p. 49)
Specifies the name of the AWS CLI profile with the credentials and options to use. This can be thename of a profile stored in a credentials or config file, or the value default to use the defaultprofile.
If defined, this environment variable overrides the behavior of using the profile named [default]in the configuration file. You can override this environment variable by using the --profilecommand line parameter.
AWS_REGION (p. 35)
The AWS SDK compatible environment variable that specifies the AWS Region to send the requestto.
If defined, this environment variable overrides the values in the environment variableAWS_DEFAULT_REGION and the profile setting region. You can override this environment variableby using the --region command line parameter.
AWS_RETRY_MODE (p. 44)
Specifies which retry mode AWS CLI uses. There are three retry modes available: legacy (default),standard, and adaptive. For more information on retries, see AWS CLI retries (p. 67).
If defined, this environment variable overrides the value for the profiles setting retry_mode.AWS_ROLE_ARN
Specifies the Amazon Resource Name (ARN) of an IAM role with a web identity provider that youwant to use to run the AWS CLI commands.
58
AWS Command Line Interface User Guide for Version 2AWS CLI supported environment variables
Used with the AWS_WEB_IDENTITY_TOKEN_FILE and AWS_ROLE_SESSION_NAME environmentvariables.
If defined, this environment variable overrides the value for the profile setting role_arn (p. 44).You can't specify a role session name as a command line parameter.
NoteThis environment variable only applies to an assumed role with web identity provider itdoes not apply to the general assume role provider configuration.
For more information on using web identities, see the section called “Assume role with webidentity” (p. 78).
AWS_ROLE_SESSION_NAME
Specifies the name to attach to the role session. This value is provided to theRoleSessionName parameter when the AWS CLI calls the AssumeRole operation, andbecomes part of the assumed role user ARN: arn:aws:sts::123456789012:assumed-role/role_name/role_session_name. This is an optional parameter. If you do not provide thisvalue, a session name is generated automatically. This name appears in AWS CloudTrail logs forentries associated with this session.
If defined, this environment variable overrides the value for the profile settingrole_session_name (p. 44).
Used with the AWS_ROLE_ARN and AWS_WEB_IDENTITY_TOKEN_FILE environment variables.
For more information on using web identities, see the section called “Assume role with webidentity” (p. 78).
NoteThis environment variable only applies to an assumed role with web identity provider itdoes not apply to the general assume role provider configuration.
AWS_SECRET_ACCESS_KEY
Specifies the secret key associated with the access key. This is essentially the "password" for theaccess key.
If defined, this environment variable overrides the value for the profile settingaws_secret_access_key. You can't specify the secret access key ID as a command line option.
AWS_SESSION_TOKEN
Specifies the session token value that is required if you are using temporary security credentials thatyou retrieved directly from AWS STS operations. For more information, see the Output section of theassume-role command in the AWS CLI Command Reference.
If defined, this environment variable overrides the value for the profile settingaws_session_token.
AWS_SHARED_CREDENTIALS_FILE
Specifies the location of the file that the AWS CLI uses to store access keys. The default path is~/.aws/credentials.
You can't specify this value in a named profile setting or by using a command line parameter.AWS_STS_REGIONAL_ENDPOINTS (p. 45)
Specifies how the AWS CLI determines the AWS service endpoint that the AWS CLI client uses to talkto the AWS Security Token Service (AWS STS).• The default value for AWS CLI version 1 is legacy.
59
AWS Command Line Interface User Guide for Version 2Command line options
• The default value for AWS CLI version 2 is regional.
You can specify one of two values:• legacy – Uses the global STS endpoint, sts.amazonaws.com, for the following AWS Regions:ap-northeast-1, ap-south-1, ap-southeast-1, ap-southeast-2, aws-global, ca-central-1, eu-central-1, eu-north-1, eu-west-1, eu-west-2, eu-west-3, sa-east-1,us-east-1, us-east-2, us-west-1, and us-west-2. All other Regions automatically use theirrespective regional endpoint.
• regional – The AWS CLI always uses the AWS STS endpoint for the currently configured Region.For example, if the client is configured to use us-west-2, all calls to AWS STS are made to theregional endpoint sts.us-west-2.amazonaws.com instead of the global sts.amazonaws.comendpoint. To send a request to the global endpoint while this setting is enabled, you can set theRegion to aws-global.
AWS_WEB_IDENTITY_TOKEN_FILE (p. 55)
Specifies the path to a file that contains an OAuth 2.0 access token or OpenID Connect ID token thatis provided by an identity provider. The AWS CLI loads the contents of this file and passes it as theWebIdentityToken argument to the AssumeRoleWithWebIdentity operation.
Used with the AWS_ROLE_ARN and AWS_ROLE_SESSION_NAME environment variables.
If defined, this environment variable overrides the value for the profile settingweb_identity_token_file.
For more information on using web identities, see the section called “Assume role with webidentity” (p. 78).
NoteThis environment variable only applies to an assumed role with web identity provider itdoes not apply to the general assume role provider configuration.
Command line optionsIn the AWS CLI you can use the following command line options to override the default configurationsettings, any corresponding profile setting, or environment variable setting for that single command. Youcan't use command line options to directly specify credentials, although you can specify which profileto use. Each option that takes an argument requires a space or equals sign (=) separating the argumentfrom the option name. If the argument value is a string that contains a space, you must use quotationmarks around the argument.
The argument types (for example, string, Boolean) for each command line option are described in detailin Specifying parameter values for the AWS CLI (p. 87).
--ca-bundle <string>
Specifies the certificate authority (CA) certificate bundle to use when verifying SSL certificates.
If defined, this option overrides the value for the profile setting ca_bundle (p. 40) and theAWS_CA_Bundle (p. 57) environment variable.
--cli-auto-prompt
Enables auto-prompt mode for a single command. As the following examples show, you can specifyit at any point.
$ aws --cli-auto-prompt$ aws dynamodb --cli-auto-prompt
60
AWS Command Line Interface User Guide for Version 2Command line options
$ aws dynamodb describe-table --cli-auto-prompt
This option overrides the aws_cli_auto_prompt (p. 57) environment variable and thecli_auto_prompt (p. 40) profile setting.
For information on the AWS CLI version 2 auto-prompt feature, see Having the AWS CLI prompt youfor commands (p. 104).
--cli-connect-timeout <integer>
Specifies the maximum socket connect time in seconds. If the value is set to zero (0), the socketconnect waits indefinitely (is blocking) and doesn't timeout.
--cli-read-timeout <integer>
Specifies the maximum socket read time in seconds. If the value is set to zero (0) the socket readwaits indefinitely (is blocking) and doesn't timeout.
--color <string>
Specifies support for color output. Valid values are on, off, and auto. The default value is auto.--debug
A Boolean switch that enables debug logging. The AWS CLI by default provides cleanedup information regarding any successes or failures regarding command outcomes in thecommand output. The --debug option provides the full Python logs. This includes additionalstderr diagnostic information about the operation of the command that can be useful whentroubleshooting why a command provides unexpected results. To easily view debug logs, we suggestsending the logs to a file to more easily search the information. You can do this by using one of thefollowing.
To send only the stderr diagnostic information, append 2> debug.txt where debug.txt is thename you want to use for your debug file:
$ aws servicename commandname options --debug 2> debug.txt
To send both the output and stderr diagnostic information, append &> debug.txt wheredebug.txt is the name you want to use for your debug file:
$ aws servicename commandname options --debug &> debug.txt
--endpoint-url <string>
Specifies the URL to send the request to. For most commands, the AWS CLI automaticallydetermines the URL based on the selected service and the specified AWS Region. However, somecommands require that you specify an account-specific URL. You can also configure some AWSservices to host an endpoint directly within your private VPC, which might then need to be specified.
For a list of the standard service endpoints available in each Region, see AWS Regions and Endpointsin the Amazon Web Services General Reference.
--no-cli-auto-prompt
Disables auto-prompt mode for a single command.
$ aws dynamodb describe-table --table-name Table1 --no-cli-auto-prompt
This option overrides the aws_cli_auto_prompt (p. 57) environment variable and thecli_auto_prompt (p. 40) profile setting.
61
AWS Command Line Interface User Guide for Version 2Command line options
For information on the AWS CLI version 2 auto-prompt feature, see Having the AWS CLI prompt youfor commands (p. 104).
--no-cli-pager
A Boolean switch that disables using a pager for the output of the command.
--no-paginate
A Boolean switch that disables the multiple calls the automatically AWS CLI makes to receive allcommand results that creates pagination of the output. This means only the first page of youroutput is displayed.
--no-sign-request
A Boolean switch that disables signing the HTTP requests to the AWS service endpoint. This preventscredentials from being loaded.
--output <string>
Specifies the output format to use for this command. You can specify any of the following values:
• json (p. 108) – The output is formatted as a JSON string.
• yaml (p. 109) – The output is formatted as a YAML string.
• yaml-stream (p. 109) – The output is streamed and formatted as a YAML string. Streamingallows for faster handling of large data types.
• text (p. 110) – The output is formatted as multiple lines of tab-separated string values. This canbe useful to pass the output to a text processor, like grep, sed, or awk.
• table (p. 113) – The output is formatted as a table using the characters +|- to form the cellborders. It typically presents the information in a "human-friendly" format that is much easier toread than the others, but not as programmatically useful.
--profile <string>
Specifies the named profile (p. 49) to use for this command. To set up additional named profiles,you can use the aws configure command with the --profile option.
$ aws configure --profile <profilename>
--query <string>
Specifies a JMESPath query to use in filtering the response data. For more information, see FilteringAWS CLI output (p. 118).
--region <string>
Specifies which AWS Region to send this command's AWS request to. For a list of all of the Regionsthat you can specify, see AWS Regions and Endpoints in the Amazon Web Services General Reference.
--version
A Boolean switch that displays the current version of the AWS CLI program that is running.
Common uses for command line options include checking your resources in multiple AWS Regions, andchanging the output format for legibility or ease of use when scripting. For example, if you're not surewhich Region your instance is running in, you can run the describe-instances command against eachRegion until you find it, as follows.
$ aws ec2 describe-instances --output table --region us-east-1-------------------|DescribeInstances|
62
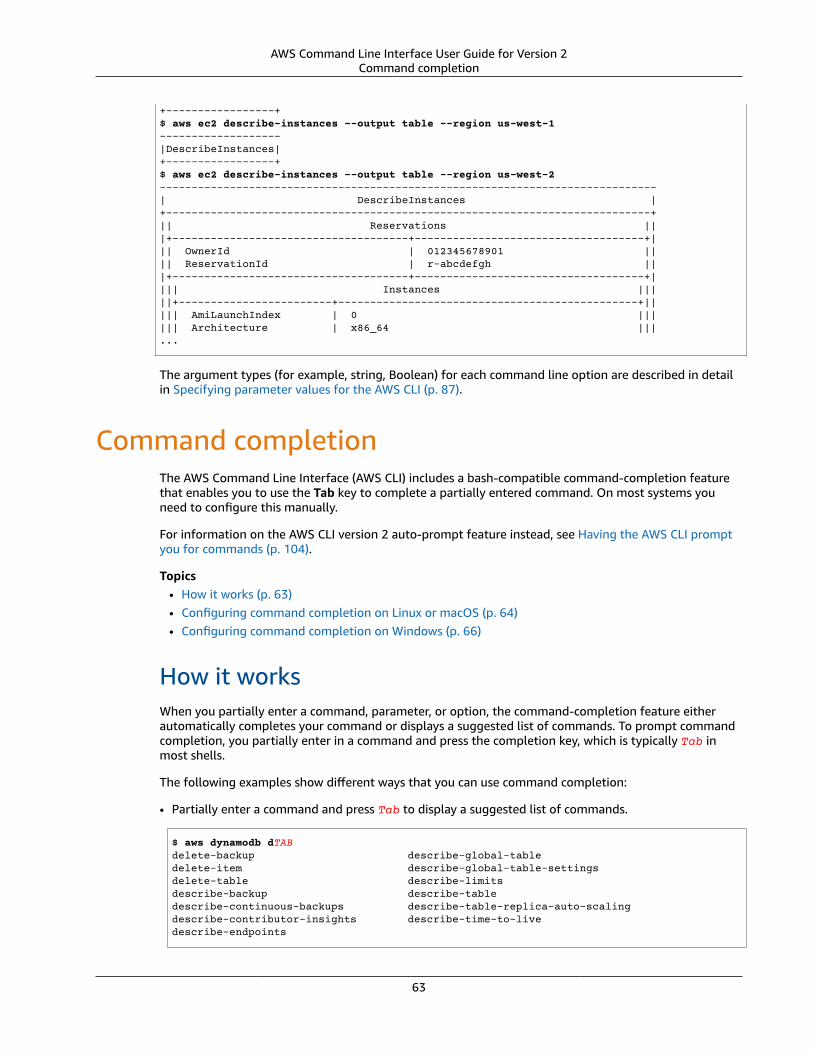
AWS Command Line Interface User Guide for Version 2Command completion
+-----------------+$ aws ec2 describe-instances --output table --region us-west-1-------------------|DescribeInstances|+-----------------+$ aws ec2 describe-instances --output table --region us-west-2------------------------------------------------------------------------------| DescribeInstances |+----------------------------------------------------------------------------+|| Reservations |||+-------------------------------------+------------------------------------+||| OwnerId | 012345678901 |||| ReservationId | r-abcdefgh |||+-------------------------------------+------------------------------------+|||| Instances |||||+------------------------+-----------------------------------------------+||||| AmiLaunchIndex | 0 |||||| Architecture | x86_64 |||...
The argument types (for example, string, Boolean) for each command line option are described in detailin Specifying parameter values for the AWS CLI (p. 87).
Command completionThe AWS Command Line Interface (AWS CLI) includes a bash-compatible command-completion featurethat enables you to use the Tab key to complete a partially entered command. On most systems youneed to configure this manually.
For information on the AWS CLI version 2 auto-prompt feature instead, see Having the AWS CLI promptyou for commands (p. 104).
Topics• How it works (p. 63)• Configuring command completion on Linux or macOS (p. 64)• Configuring command completion on Windows (p. 66)
How it worksWhen you partially enter a command, parameter, or option, the command-completion feature eitherautomatically completes your command or displays a suggested list of commands. To prompt commandcompletion, you partially enter in a command and press the completion key, which is typically Tab inmost shells.
The following examples show different ways that you can use command completion:
• Partially enter a command and press Tab to display a suggested list of commands.
$ aws dynamodb dTABdelete-backup describe-global-tabledelete-item describe-global-table-settingsdelete-table describe-limitsdescribe-backup describe-tabledescribe-continuous-backups describe-table-replica-auto-scalingdescribe-contributor-insights describe-time-to-livedescribe-endpoints
63
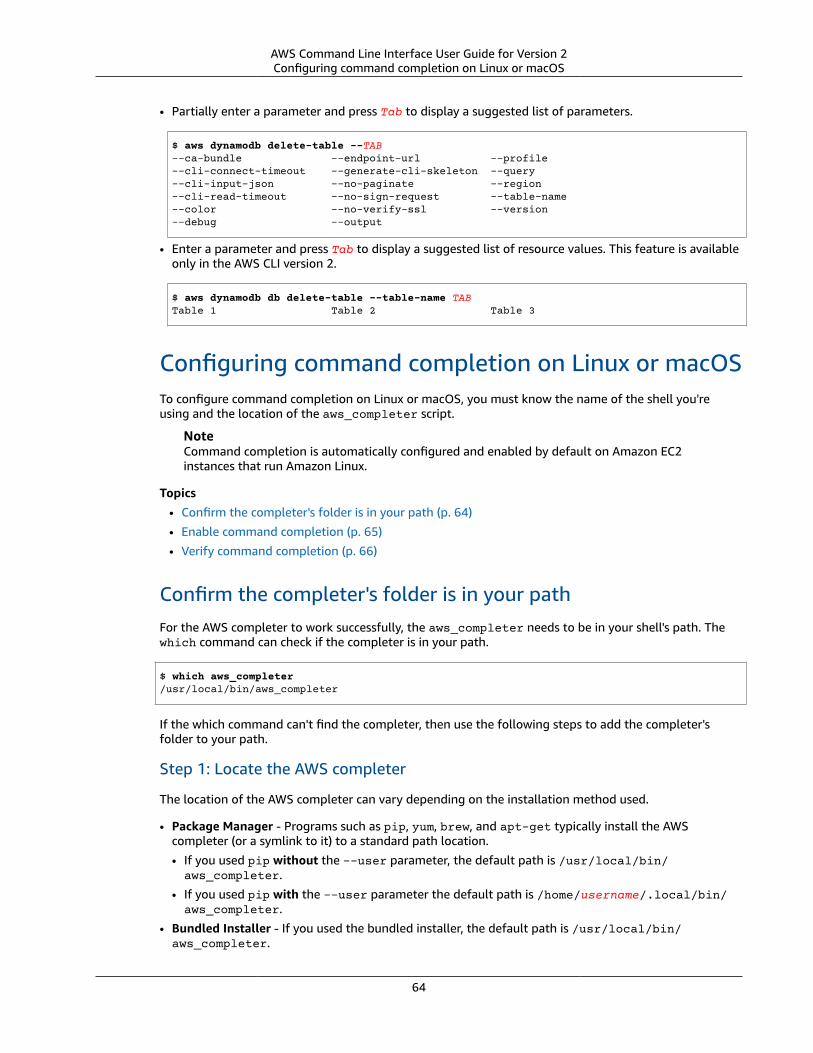
AWS Command Line Interface User Guide for Version 2Configuring command completion on Linux or macOS
• Partially enter a parameter and press Tab to display a suggested list of parameters.
$ aws dynamodb delete-table --TAB--ca-bundle --endpoint-url --profile --cli-connect-timeout --generate-cli-skeleton --query --cli-input-json --no-paginate --region --cli-read-timeout --no-sign-request --table-name --color --no-verify-ssl --version --debug --output
• Enter a parameter and press Tab to display a suggested list of resource values. This feature is availableonly in the AWS CLI version 2.
$ aws dynamodb db delete-table --table-name TABTable 1 Table 2 Table 3
Configuring command completion on Linux or macOSTo configure command completion on Linux or macOS, you must know the name of the shell you'reusing and the location of the aws_completer script.
NoteCommand completion is automatically configured and enabled by default on Amazon EC2instances that run Amazon Linux.
Topics• Confirm the completer's folder is in your path (p. 64)
• Enable command completion (p. 65)
• Verify command completion (p. 66)
Confirm the completer's folder is in your pathFor the AWS completer to work successfully, the aws_completer needs to be in your shell's path. Thewhich command can check if the completer is in your path.
$ which aws_completer/usr/local/bin/aws_completer
If the which command can't find the completer, then use the following steps to add the completer'sfolder to your path.
Step 1: Locate the AWS completer
The location of the AWS completer can vary depending on the installation method used.
• Package Manager - Programs such as pip, yum, brew, and apt-get typically install the AWScompleter (or a symlink to it) to a standard path location.
• If you used pip without the --user parameter, the default path is /usr/local/bin/aws_completer.
• If you used pip with the --user parameter the default path is /home/username/.local/bin/aws_completer.
• Bundled Installer - If you used the bundled installer, the default path is /usr/local/bin/aws_completer.
64
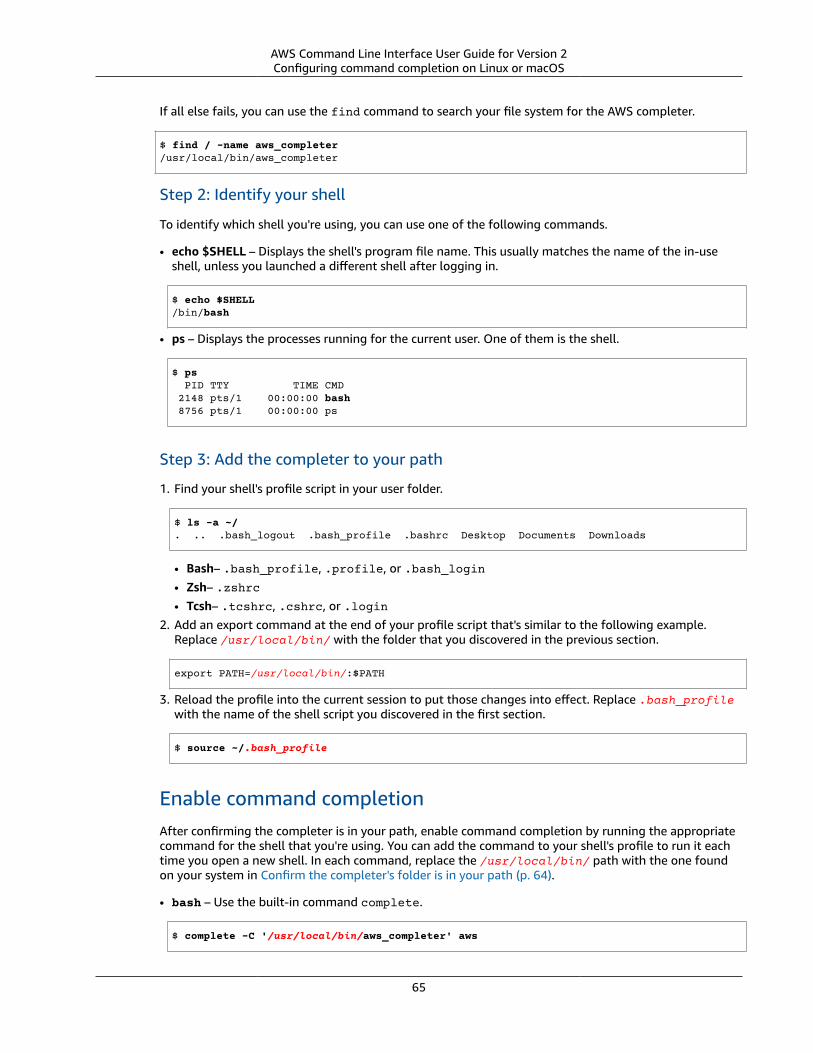
AWS Command Line Interface User Guide for Version 2Configuring command completion on Linux or macOS
If all else fails, you can use the find command to search your file system for the AWS completer.
$ find / -name aws_completer/usr/local/bin/aws_completer
Step 2: Identify your shell
To identify which shell you're using, you can use one of the following commands.
• echo $SHELL – Displays the shell's program file name. This usually matches the name of the in-useshell, unless you launched a different shell after logging in.
$ echo $SHELL/bin/bash
• ps – Displays the processes running for the current user. One of them is the shell.
$ ps PID TTY TIME CMD 2148 pts/1 00:00:00 bash 8756 pts/1 00:00:00 ps
Step 3: Add the completer to your path
1. Find your shell's profile script in your user folder.
$ ls -a ~/. .. .bash_logout .bash_profile .bashrc Desktop Documents Downloads
• Bash– .bash_profile, .profile, or .bash_login• Zsh– .zshrc• Tcsh– .tcshrc, .cshrc, or .login
2. Add an export command at the end of your profile script that's similar to the following example.Replace /usr/local/bin/ with the folder that you discovered in the previous section.
export PATH=/usr/local/bin/:$PATH
3. Reload the profile into the current session to put those changes into effect. Replace .bash_profilewith the name of the shell script you discovered in the first section.
$ source ~/.bash_profile
Enable command completionAfter confirming the completer is in your path, enable command completion by running the appropriatecommand for the shell that you're using. You can add the command to your shell's profile to run it eachtime you open a new shell. In each command, replace the /usr/local/bin/ path with the one foundon your system in Confirm the completer's folder is in your path (p. 64).
• bash – Use the built-in command complete.
$ complete -C '/usr/local/bin/aws_completer' aws
65
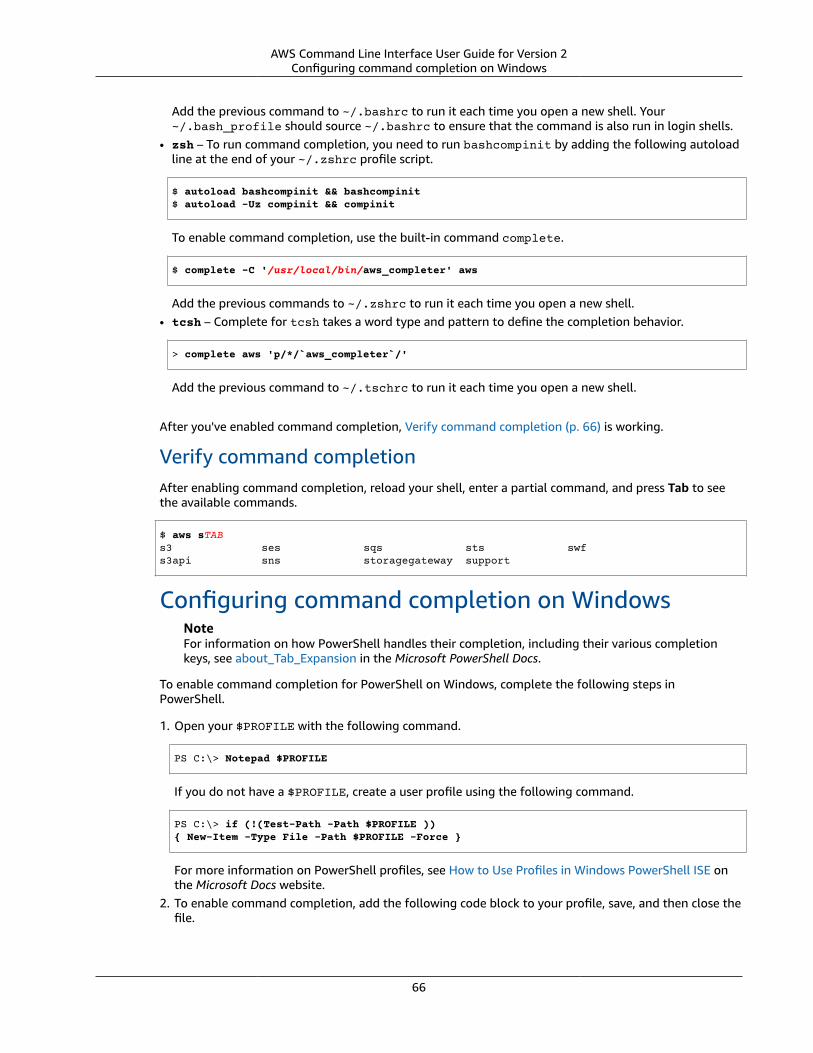
AWS Command Line Interface User Guide for Version 2Configuring command completion on Windows
Add the previous command to ~/.bashrc to run it each time you open a new shell. Your~/.bash_profile should source ~/.bashrc to ensure that the command is also run in login shells.
• zsh – To run command completion, you need to run bashcompinit by adding the following autoloadline at the end of your ~/.zshrc profile script.
$ autoload bashcompinit && bashcompinit$ autoload -Uz compinit && compinit
To enable command completion, use the built-in command complete.
$ complete -C '/usr/local/bin/aws_completer' aws
Add the previous commands to ~/.zshrc to run it each time you open a new shell.• tcsh – Complete for tcsh takes a word type and pattern to define the completion behavior.
> complete aws 'p/*/`aws_completer`/'
Add the previous command to ~/.tschrc to run it each time you open a new shell.
After you've enabled command completion, Verify command completion (p. 66) is working.
Verify command completionAfter enabling command completion, reload your shell, enter a partial command, and press Tab to seethe available commands.
$ aws sTABs3 ses sqs sts swfs3api sns storagegateway support
Configuring command completion on WindowsNoteFor information on how PowerShell handles their completion, including their various completionkeys, see about_Tab_Expansion in the Microsoft PowerShell Docs.
To enable command completion for PowerShell on Windows, complete the following steps inPowerShell.
1. Open your $PROFILE with the following command.
PS C:\> Notepad $PROFILE
If you do not have a $PROFILE, create a user profile using the following command.
PS C:\> if (!(Test-Path -Path $PROFILE )){ New-Item -Type File -Path $PROFILE -Force }
For more information on PowerShell profiles, see How to Use Profiles in Windows PowerShell ISE onthe Microsoft Docs website.
2. To enable command completion, add the following code block to your profile, save, and then close thefile.
66
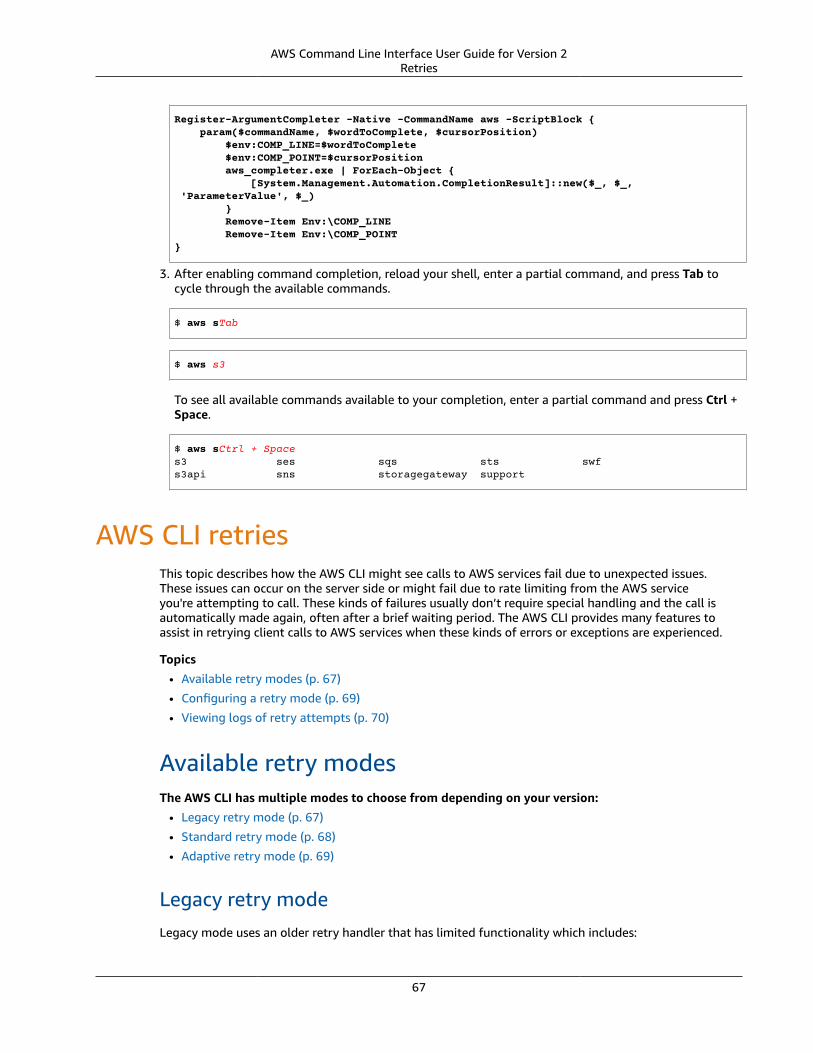
AWS Command Line Interface User Guide for Version 2Retries
Register-ArgumentCompleter -Native -CommandName aws -ScriptBlock { param($commandName, $wordToComplete, $cursorPosition) $env:COMP_LINE=$wordToComplete $env:COMP_POINT=$cursorPosition aws_completer.exe | ForEach-Object { [System.Management.Automation.CompletionResult]::new($_, $_, 'ParameterValue', $_) } Remove-Item Env:\COMP_LINE Remove-Item Env:\COMP_POINT }
3. After enabling command completion, reload your shell, enter a partial command, and press Tab tocycle through the available commands.
$ aws sTab
$ aws s3
To see all available commands available to your completion, enter a partial command and press Ctrl +Space.
$ aws sCtrl + Spaces3 ses sqs sts swfs3api sns storagegateway support
AWS CLI retriesThis topic describes how the AWS CLI might see calls to AWS services fail due to unexpected issues.These issues can occur on the server side or might fail due to rate limiting from the AWS serviceyou're attempting to call. These kinds of failures usually don’t require special handling and the call isautomatically made again, often after a brief waiting period. The AWS CLI provides many features toassist in retrying client calls to AWS services when these kinds of errors or exceptions are experienced.
Topics
• Available retry modes (p. 67)
• Configuring a retry mode (p. 69)
• Viewing logs of retry attempts (p. 70)
Available retry modesThe AWS CLI has multiple modes to choose from depending on your version:
• Legacy retry mode (p. 67)
• Standard retry mode (p. 68)
• Adaptive retry mode (p. 69)
Legacy retry modeLegacy mode uses an older retry handler that has limited functionality which includes:
67
AWS Command Line Interface User Guide for Version 2Available retry modes
• A default value of 4 for maximum retry attempts, making a total of 5 call attempts. This value can beoverwritten through the max_attempts configuration parameter.
• DynamoDB has a default value of 9 for maximum retry attempts, making a total of 10 call attempts.This value can be overwritten through the max_attempts configuration parameter.
• Retry attempts for the following limited number of errors/exceptions:
• General socket/connection errors:
• ConnectionError
• ConnectionClosedError
• ReadTimeoutError
• EndpointConnectionError
• Service-side throttling/limit errors and exceptions:
• Throttling
• ThrottlingException
• ThrottledException
• RequestThrottledException
• ProvisionedThroughputExceededException
• Retry attempts on several HTTP status codes, including 429, 500, 502, 503, 504, and 509.
• Any retry attempt will include an exponential backoff by a base factor of 2.
Standard retry modeStandard mode is a standard set of retry rules across the AWS SDKs with more functionality than legacy.This mode is the default for AWS CLI version 2. Standard mode was created for the AWS CLI version 2and is backported to AWS CLI version 1. Standard mode’s functionality includes:
• A default value of 2 for maximum retry attempts, making a total of 3 call attempts. This value can beoverwritten through the max_attempts configuration parameter.
• Retry attempts for the following expanded list of errors/exceptions:
• Transient errors/exceptions
• RequestTimeout
• RequestTimeoutException
• PriorRequestNotComplete
• ConnectionError
• HTTPClientError
• Service-side throttling/limit errors and exceptions:
• Throttling
• ThrottlingException
• ThrottledException
• RequestThrottledException
• TooManyRequestsException
• ProvisionedThroughputExceededException
• TransactionInProgressException
• RequestLimitExceeded
• BandwidthLimitExceeded
• LimitExceededException
• RequestThrottled
• SlowDown 68
AWS Command Line Interface User Guide for Version 2Configuring a retry mode
• EC2ThrottledException
• Retry attempts on nondescriptive, transient error codes. Specifically, these HTTP status codes: 500,502, 503, 504.
• Any retry attempt will include an exponential backoff by a base factor of 2 for a maximum backofftime of 20 seconds.
Adaptive retry modeWarningAdaptive mode is an experimental mode and is subject to change, both in features and behavior.
Adaptive retry mode is an experimental retry mode that includes all the features of standard mode. Inaddition to the standard mode features, adaptive mode also introduces client-side rate limiting throughthe use of a token bucket and rate-limit variables that are dynamically updated with each retry attempt.This mode offers flexibility in client-side retries that adapts to the error/exception state response froman AWS service.
With each new retry attempt, adaptive mode modifies the rate-limit variables based on the error,exception, or HTTP status code presented in the response from the AWS service. These rate-limitvariables are then used to calculate a new call rate for the client. Each exception/error or non-successHTTP response (provided in the list above) from an AWS service updates the rate-limit variables as retriesoccur until success is reached, the token bucket is exhausted, or the configured maximum attempts valueis reached.
Configuring a retry modeThe AWS CLI includes a variety of both retry configurations as well as configuration methods to considerwhen creating your client object.
Available configuration methodsIn the AWS CLI, users can configure retries in the following ways:
• Environment variables• AWS CLI configuration file
Users can customize the following retry options:
• Retry mode - Specifies which retry mode the AWS CLI uses. As described previously, there are threeretry modes available: legacy, standard, and adaptive. The default value for the AWS CLI version 2 isstandard.
• Max attempts - Specifies the value of maximum retry attempts the AWS CLI retry handler uses, wherethe initial call counts toward the value that you provide. The default value is 5.
Defining a retry configuration in your environment variablesTo define your retry configuration for the AWS CLI, update your operating system's environmentvariables.
The retry environment variables are:
• AWS_RETRY_MODE
69
AWS Command Line Interface User Guide for Version 2Viewing logs of retry attempts
• AWS_MAX_ATTEMPTS
For more information on environment variables, see Environment variables to configure the AWSCLI (p. 55).
Defining a retry configuration in your AWS configuration fileTo change your retry configuration, update your global AWS configuration file. The default location foryour AWS config file is ~/.aws/config.
The following is an example of an AWS config file:
[default]retry_mode = standardmax_attempts = 6
For more information on configuration files, see Configuration and credential file settings (p. 37).
Viewing logs of retry attemptsThe AWS CLI uses Boto3's retry methodology and logging. You can use the --debug option onany command to receive debug logs. For more information on how to use the --debug option, seeCommand line options (p. 60).
If you search for "retry" in your debug logs, you'll find the retry information you need. The client logentries for retry attempts depend on which retry mode you’ve enabled.
Legacy mode:
Retry messages are generated by botocore.retryhandler. You’ll see one of three messages:
• No retry needed
• Retry needed, action of: <action_name>
• Reached the maximum number of retry attempts: <attempt_number>
Standard or adaptive mode:
Retry messages are generated by botocore.retries.standard. You’ll see one of three messages:
• No retrying request
• Retry needed, retrying request after delay of: <delay_value>
• Retry needed but retry quota reached, not retrying request
For the full definition file of botocore retries, see _retry.json on the botocore GitHub Repository.
Sourcing credentials with an external processWarningThis topic discusses sourcing credentials from an external process. This could be a security riskif the command to generate the credentials becomes accessible by non-approved processesor users. We recommend that you use the supported, secure alternatives provided by the AWS
70
AWS Command Line Interface User Guide for Version 2External credentials
CLI and AWS to reduce the risk of compromising your credentials. Ensure that you secure theconfig file and any supporting files and tools to prevent disclosure.Ensure that your custom credential tool does not write any secret information to StdErrbecause the SDKs and AWS CLI can capture and log such information, potentially exposing it tounauthorized users.
If you have a method to generate or look up credentials that isn't directly supported by the AWS CLI, youcan configure the AWS CLI to use it by configuring the credential_process setting in the config file.
For example, you might include an entry similar to the following in the config file.
[profile developer]credential_process = /opt/bin/awscreds-custom --username helen
Syntax
To create this string in a way that is compatible with any operating system, follow these rules:
• If the path or file name contains a space, surround the complete path and file name with double-quotation marks (" "). The path and file name can consist of only the characters: A-Z a-z 0-9 - _ . space
• If a parameter name or a parameter value contains a space, surround that element with double-quotation marks (" "). Surround only the name or value, not the pair.
• Do not include any environment variables in the strings. For example, you can't include $HOME or%USERPROFILE%.
• Do not specify the home folder as ~. You must specify the full path.
Example for Windows
credential_process = "C:\Path\To\credentials.cmd" parameterWithoutSpaces "parameter with spaces"
Example for Linux or macOS
credential_process = "/Users/Dave/path/to/credentials.sh" parameterWithoutSpaces "parameter with spaces"
Expected output from the Credentials program
The AWS CLI runs the command as specified in the profile and then reads data from STDOUT. Thecommand you specify must generate JSON output on STDOUT that matches the following syntax.
{ "Version": 1, "AccessKeyId": "an AWS access key", "SecretAccessKey": "your AWS secret access key", "SessionToken": "the AWS session token for temporary credentials", "Expiration": "ISO8601 timestamp when the credentials expire"}
NoteAs of this writing, the Version key must be set to 1. This might increment over time as thestructure evolves.
The Expiration key is an ISO8601 formatted timestamp. If the Expiration key is not present inthe tool's output, the CLI assumes that the credentials are long-term credentials that do not refresh.
71
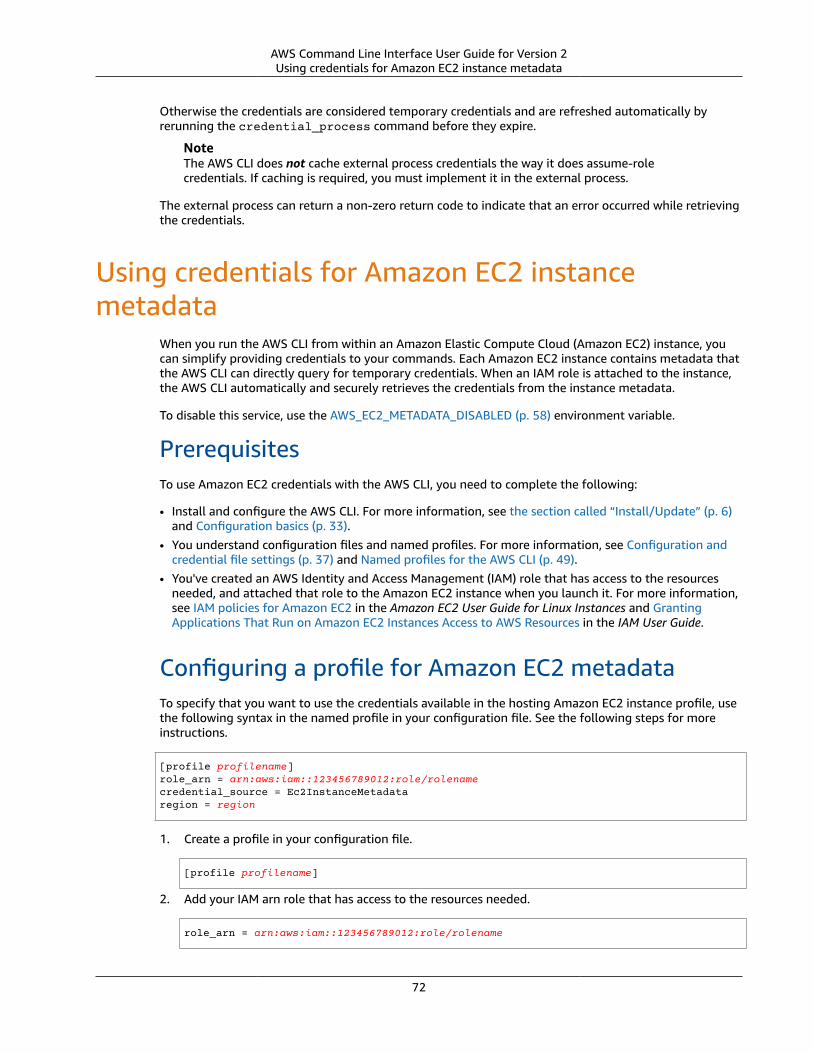
AWS Command Line Interface User Guide for Version 2Using credentials for Amazon EC2 instance metadata
Otherwise the credentials are considered temporary credentials and are refreshed automatically byrerunning the credential_process command before they expire.
NoteThe AWS CLI does not cache external process credentials the way it does assume-rolecredentials. If caching is required, you must implement it in the external process.
The external process can return a non-zero return code to indicate that an error occurred while retrievingthe credentials.
Using credentials for Amazon EC2 instancemetadata
When you run the AWS CLI from within an Amazon Elastic Compute Cloud (Amazon EC2) instance, youcan simplify providing credentials to your commands. Each Amazon EC2 instance contains metadata thatthe AWS CLI can directly query for temporary credentials. When an IAM role is attached to the instance,the AWS CLI automatically and securely retrieves the credentials from the instance metadata.
To disable this service, use the AWS_EC2_METADATA_DISABLED (p. 58) environment variable.
PrerequisitesTo use Amazon EC2 credentials with the AWS CLI, you need to complete the following:
• Install and configure the AWS CLI. For more information, see the section called “Install/Update” (p. 6)and Configuration basics (p. 33).
• You understand configuration files and named profiles. For more information, see Configuration andcredential file settings (p. 37) and Named profiles for the AWS CLI (p. 49).
• You've created an AWS Identity and Access Management (IAM) role that has access to the resourcesneeded, and attached that role to the Amazon EC2 instance when you launch it. For more information,see IAM policies for Amazon EC2 in the Amazon EC2 User Guide for Linux Instances and GrantingApplications That Run on Amazon EC2 Instances Access to AWS Resources in the IAM User Guide.
Configuring a profile for Amazon EC2 metadataTo specify that you want to use the credentials available in the hosting Amazon EC2 instance profile, usethe following syntax in the named profile in your configuration file. See the following steps for moreinstructions.
[profile profilename]role_arn = arn:aws:iam::123456789012:role/rolenamecredential_source = Ec2InstanceMetadataregion = region
1. Create a profile in your configuration file.
[profile profilename]
2. Add your IAM arn role that has access to the resources needed.
role_arn = arn:aws:iam::123456789012:role/rolename
72
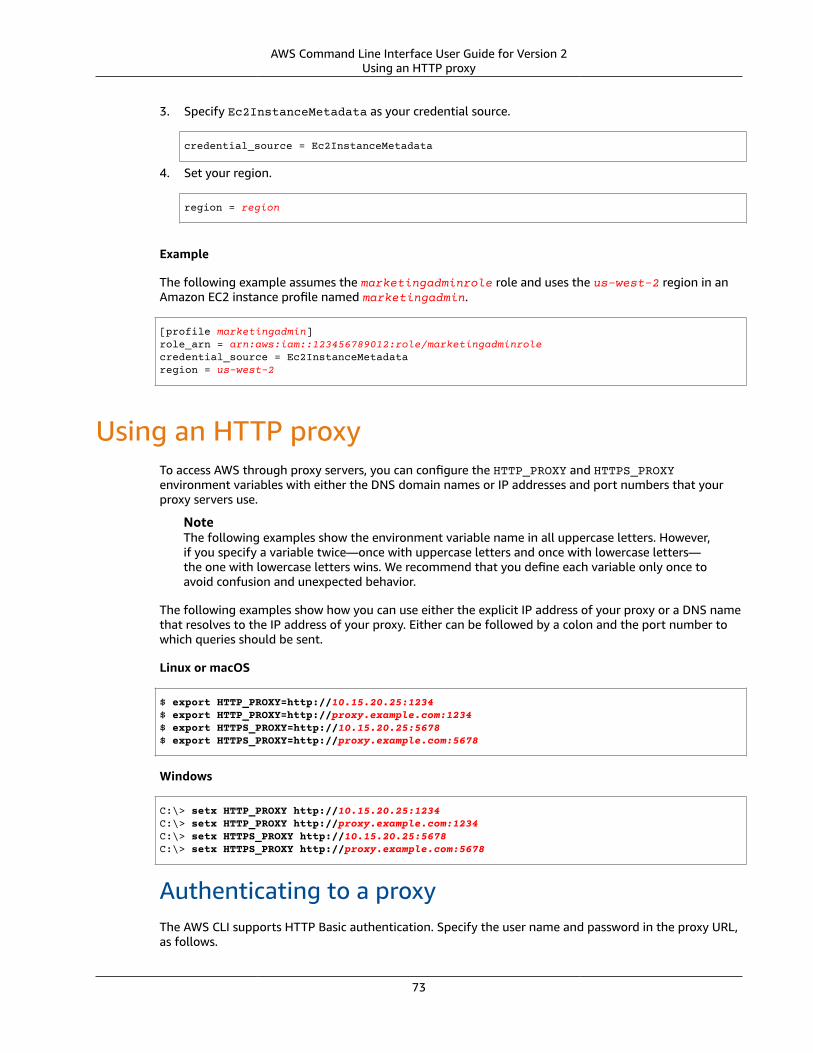
AWS Command Line Interface User Guide for Version 2Using an HTTP proxy
3. Specify Ec2InstanceMetadata as your credential source.
credential_source = Ec2InstanceMetadata
4. Set your region.
region = region
Example
The following example assumes the marketingadminrole role and uses the us-west-2 region in anAmazon EC2 instance profile named marketingadmin.
[profile marketingadmin]role_arn = arn:aws:iam::123456789012:role/marketingadminrolecredential_source = Ec2InstanceMetadataregion = us-west-2
Using an HTTP proxyTo access AWS through proxy servers, you can configure the HTTP_PROXY and HTTPS_PROXYenvironment variables with either the DNS domain names or IP addresses and port numbers that yourproxy servers use.
NoteThe following examples show the environment variable name in all uppercase letters. However,if you specify a variable twice—once with uppercase letters and once with lowercase letters—the one with lowercase letters wins. We recommend that you define each variable only once toavoid confusion and unexpected behavior.
The following examples show how you can use either the explicit IP address of your proxy or a DNS namethat resolves to the IP address of your proxy. Either can be followed by a colon and the port number towhich queries should be sent.
Linux or macOS
$ export HTTP_PROXY=http://10.15.20.25:1234$ export HTTP_PROXY=http://proxy.example.com:1234$ export HTTPS_PROXY=http://10.15.20.25:5678$ export HTTPS_PROXY=http://proxy.example.com:5678
Windows
C:\> setx HTTP_PROXY http://10.15.20.25:1234C:\> setx HTTP_PROXY http://proxy.example.com:1234C:\> setx HTTPS_PROXY http://10.15.20.25:5678C:\> setx HTTPS_PROXY http://proxy.example.com:5678
Authenticating to a proxyThe AWS CLI supports HTTP Basic authentication. Specify the user name and password in the proxy URL,as follows.
73
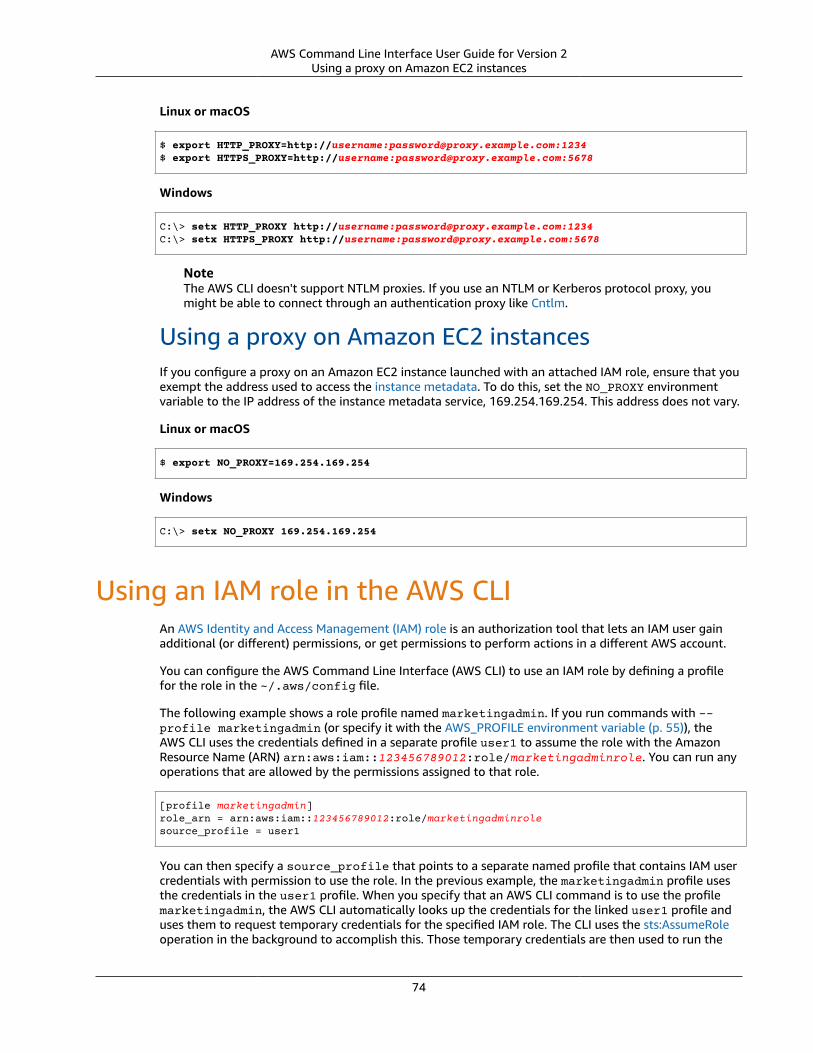
AWS Command Line Interface User Guide for Version 2Using a proxy on Amazon EC2 instances
Linux or macOS
$ export HTTP_PROXY=http://username:[email protected]:1234$ export HTTPS_PROXY=http://username:[email protected]:5678
Windows
C:\> setx HTTP_PROXY http://username:[email protected]:1234C:\> setx HTTPS_PROXY http://username:[email protected]:5678
NoteThe AWS CLI doesn't support NTLM proxies. If you use an NTLM or Kerberos protocol proxy, youmight be able to connect through an authentication proxy like Cntlm.
Using a proxy on Amazon EC2 instancesIf you configure a proxy on an Amazon EC2 instance launched with an attached IAM role, ensure that youexempt the address used to access the instance metadata. To do this, set the NO_PROXY environmentvariable to the IP address of the instance metadata service, 169.254.169.254. This address does not vary.
Linux or macOS
$ export NO_PROXY=169.254.169.254
Windows
C:\> setx NO_PROXY 169.254.169.254
Using an IAM role in the AWS CLIAn AWS Identity and Access Management (IAM) role is an authorization tool that lets an IAM user gainadditional (or different) permissions, or get permissions to perform actions in a different AWS account.
You can configure the AWS Command Line Interface (AWS CLI) to use an IAM role by defining a profilefor the role in the ~/.aws/config file.
The following example shows a role profile named marketingadmin. If you run commands with --profile marketingadmin (or specify it with the AWS_PROFILE environment variable (p. 55)), theAWS CLI uses the credentials defined in a separate profile user1 to assume the role with the AmazonResource Name (ARN) arn:aws:iam::123456789012:role/marketingadminrole. You can run anyoperations that are allowed by the permissions assigned to that role.
[profile marketingadmin]role_arn = arn:aws:iam::123456789012:role/marketingadminrolesource_profile = user1
You can then specify a source_profile that points to a separate named profile that contains IAM usercredentials with permission to use the role. In the previous example, the marketingadmin profile usesthe credentials in the user1 profile. When you specify that an AWS CLI command is to use the profilemarketingadmin, the AWS CLI automatically looks up the credentials for the linked user1 profile anduses them to request temporary credentials for the specified IAM role. The CLI uses the sts:AssumeRoleoperation in the background to accomplish this. Those temporary credentials are then used to run the
74
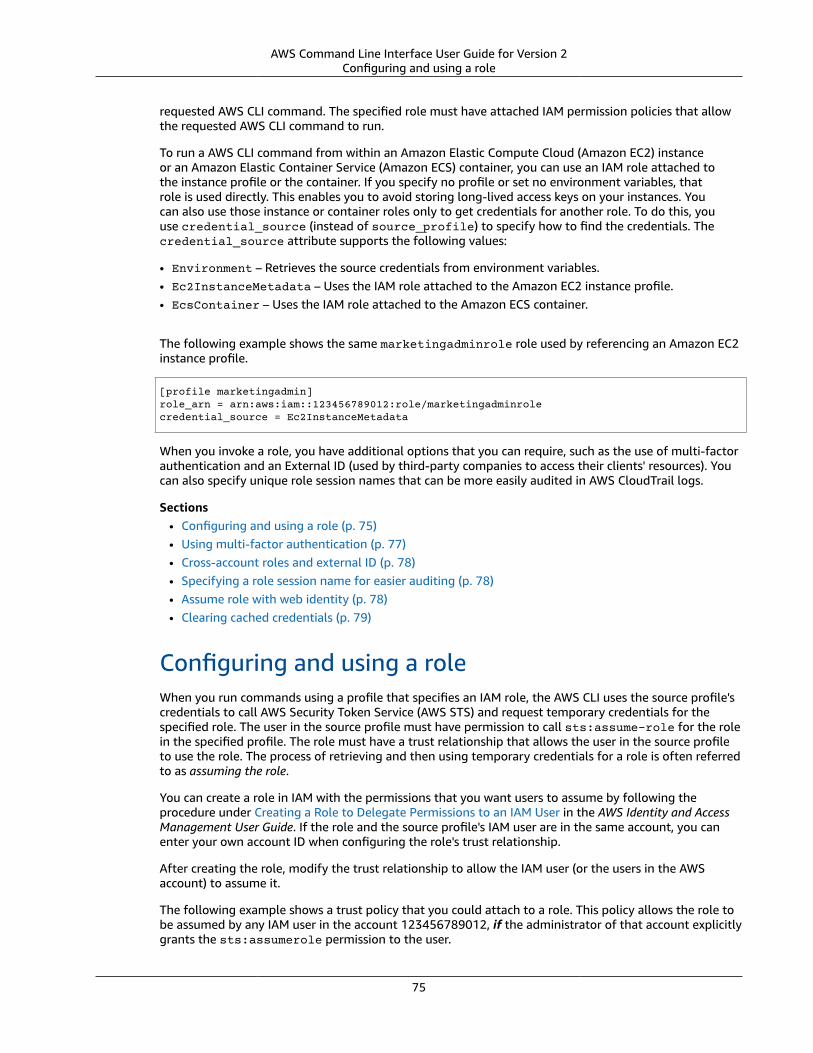
AWS Command Line Interface User Guide for Version 2Configuring and using a role
requested AWS CLI command. The specified role must have attached IAM permission policies that allowthe requested AWS CLI command to run.
To run a AWS CLI command from within an Amazon Elastic Compute Cloud (Amazon EC2) instanceor an Amazon Elastic Container Service (Amazon ECS) container, you can use an IAM role attached tothe instance profile or the container. If you specify no profile or set no environment variables, thatrole is used directly. This enables you to avoid storing long-lived access keys on your instances. Youcan also use those instance or container roles only to get credentials for another role. To do this, youuse credential_source (instead of source_profile) to specify how to find the credentials. Thecredential_source attribute supports the following values:
• Environment – Retrieves the source credentials from environment variables.• Ec2InstanceMetadata – Uses the IAM role attached to the Amazon EC2 instance profile.• EcsContainer – Uses the IAM role attached to the Amazon ECS container.
The following example shows the same marketingadminrole role used by referencing an Amazon EC2instance profile.
[profile marketingadmin]role_arn = arn:aws:iam::123456789012:role/marketingadminrolecredential_source = Ec2InstanceMetadata
When you invoke a role, you have additional options that you can require, such as the use of multi-factorauthentication and an External ID (used by third-party companies to access their clients' resources). Youcan also specify unique role session names that can be more easily audited in AWS CloudTrail logs.
Sections• Configuring and using a role (p. 75)• Using multi-factor authentication (p. 77)• Cross-account roles and external ID (p. 78)• Specifying a role session name for easier auditing (p. 78)• Assume role with web identity (p. 78)• Clearing cached credentials (p. 79)
Configuring and using a roleWhen you run commands using a profile that specifies an IAM role, the AWS CLI uses the source profile'scredentials to call AWS Security Token Service (AWS STS) and request temporary credentials for thespecified role. The user in the source profile must have permission to call sts:assume-role for the rolein the specified profile. The role must have a trust relationship that allows the user in the source profileto use the role. The process of retrieving and then using temporary credentials for a role is often referredto as assuming the role.
You can create a role in IAM with the permissions that you want users to assume by following theprocedure under Creating a Role to Delegate Permissions to an IAM User in the AWS Identity and AccessManagement User Guide. If the role and the source profile's IAM user are in the same account, you canenter your own account ID when configuring the role's trust relationship.
After creating the role, modify the trust relationship to allow the IAM user (or the users in the AWSaccount) to assume it.
The following example shows a trust policy that you could attach to a role. This policy allows the role tobe assumed by any IAM user in the account 123456789012, if the administrator of that account explicitlygrants the sts:assumerole permission to the user.
75
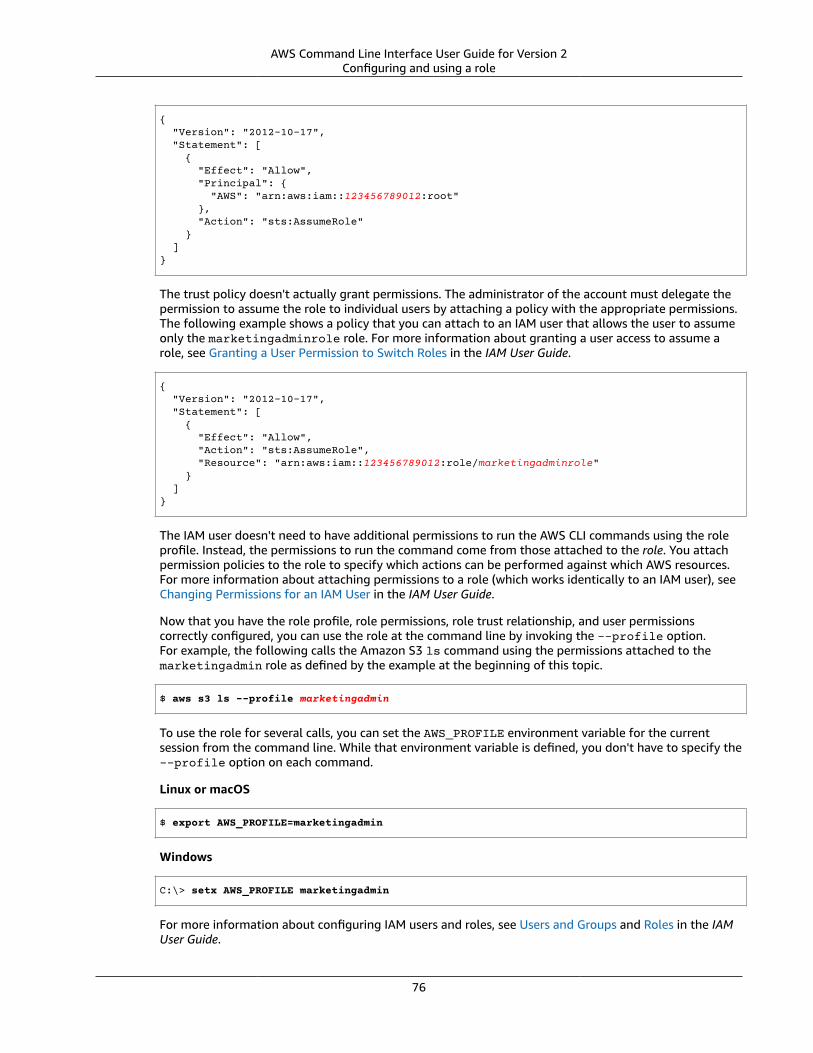
AWS Command Line Interface User Guide for Version 2Configuring and using a role
{ "Version": "2012-10-17", "Statement": [ { "Effect": "Allow", "Principal": { "AWS": "arn:aws:iam::123456789012:root" }, "Action": "sts:AssumeRole" } ]}
The trust policy doesn't actually grant permissions. The administrator of the account must delegate thepermission to assume the role to individual users by attaching a policy with the appropriate permissions.The following example shows a policy that you can attach to an IAM user that allows the user to assumeonly the marketingadminrole role. For more information about granting a user access to assume arole, see Granting a User Permission to Switch Roles in the IAM User Guide.
{ "Version": "2012-10-17", "Statement": [ { "Effect": "Allow", "Action": "sts:AssumeRole", "Resource": "arn:aws:iam::123456789012:role/marketingadminrole" } ]}
The IAM user doesn't need to have additional permissions to run the AWS CLI commands using the roleprofile. Instead, the permissions to run the command come from those attached to the role. You attachpermission policies to the role to specify which actions can be performed against which AWS resources.For more information about attaching permissions to a role (which works identically to an IAM user), seeChanging Permissions for an IAM User in the IAM User Guide.
Now that you have the role profile, role permissions, role trust relationship, and user permissionscorrectly configured, you can use the role at the command line by invoking the --profile option.For example, the following calls the Amazon S3 ls command using the permissions attached to themarketingadmin role as defined by the example at the beginning of this topic.
$ aws s3 ls --profile marketingadmin
To use the role for several calls, you can set the AWS_PROFILE environment variable for the currentsession from the command line. While that environment variable is defined, you don't have to specify the--profile option on each command.
Linux or macOS
$ export AWS_PROFILE=marketingadmin
Windows
C:\> setx AWS_PROFILE marketingadmin
For more information about configuring IAM users and roles, see Users and Groups and Roles in the IAMUser Guide.
76
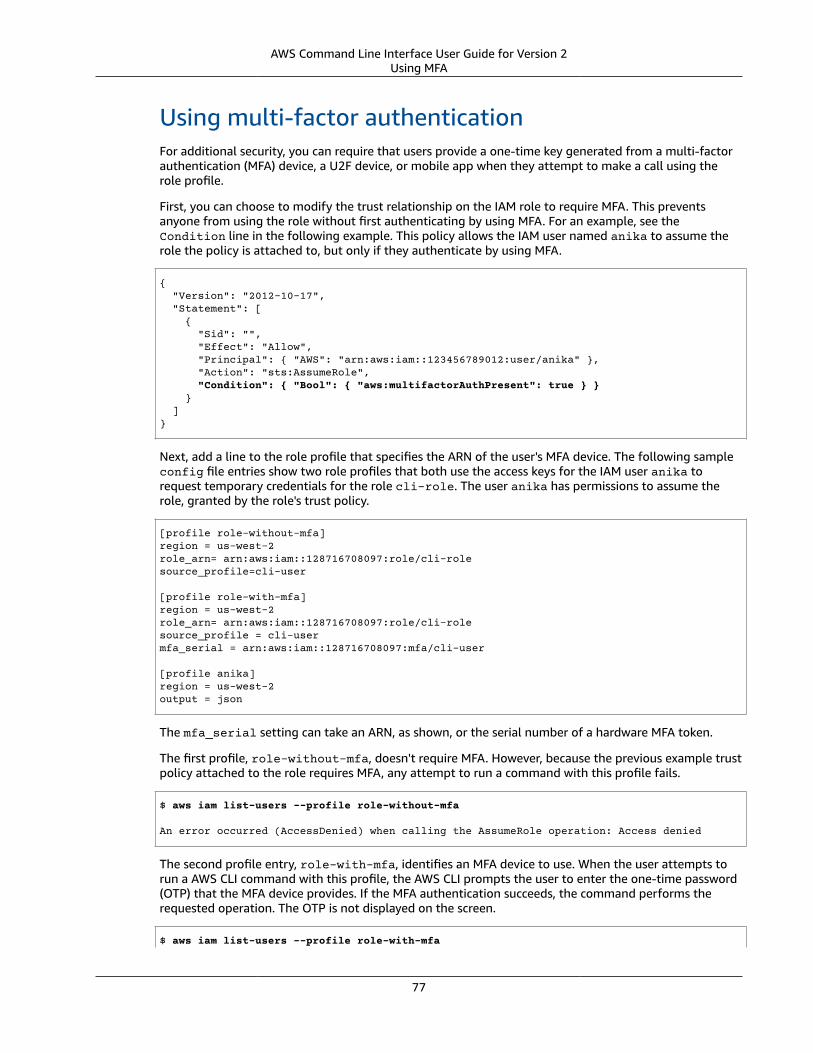
AWS Command Line Interface User Guide for Version 2Using MFA
Using multi-factor authenticationFor additional security, you can require that users provide a one-time key generated from a multi-factorauthentication (MFA) device, a U2F device, or mobile app when they attempt to make a call using therole profile.
First, you can choose to modify the trust relationship on the IAM role to require MFA. This preventsanyone from using the role without first authenticating by using MFA. For an example, see theCondition line in the following example. This policy allows the IAM user named anika to assume therole the policy is attached to, but only if they authenticate by using MFA.
{ "Version": "2012-10-17", "Statement": [ { "Sid": "", "Effect": "Allow", "Principal": { "AWS": "arn:aws:iam::123456789012:user/anika" }, "Action": "sts:AssumeRole", "Condition": { "Bool": { "aws:multifactorAuthPresent": true } } } ]}
Next, add a line to the role profile that specifies the ARN of the user's MFA device. The following sampleconfig file entries show two role profiles that both use the access keys for the IAM user anika torequest temporary credentials for the role cli-role. The user anika has permissions to assume therole, granted by the role's trust policy.
[profile role-without-mfa]region = us-west-2role_arn= arn:aws:iam::128716708097:role/cli-rolesource_profile=cli-user
[profile role-with-mfa]region = us-west-2role_arn= arn:aws:iam::128716708097:role/cli-rolesource_profile = cli-usermfa_serial = arn:aws:iam::128716708097:mfa/cli-user
[profile anika]region = us-west-2output = json
The mfa_serial setting can take an ARN, as shown, or the serial number of a hardware MFA token.
The first profile, role-without-mfa, doesn't require MFA. However, because the previous example trustpolicy attached to the role requires MFA, any attempt to run a command with this profile fails.
$ aws iam list-users --profile role-without-mfa
An error occurred (AccessDenied) when calling the AssumeRole operation: Access denied
The second profile entry, role-with-mfa, identifies an MFA device to use. When the user attempts torun a AWS CLI command with this profile, the AWS CLI prompts the user to enter the one-time password(OTP) that the MFA device provides. If the MFA authentication succeeds, the command performs therequested operation. The OTP is not displayed on the screen.
$ aws iam list-users --profile role-with-mfa
77
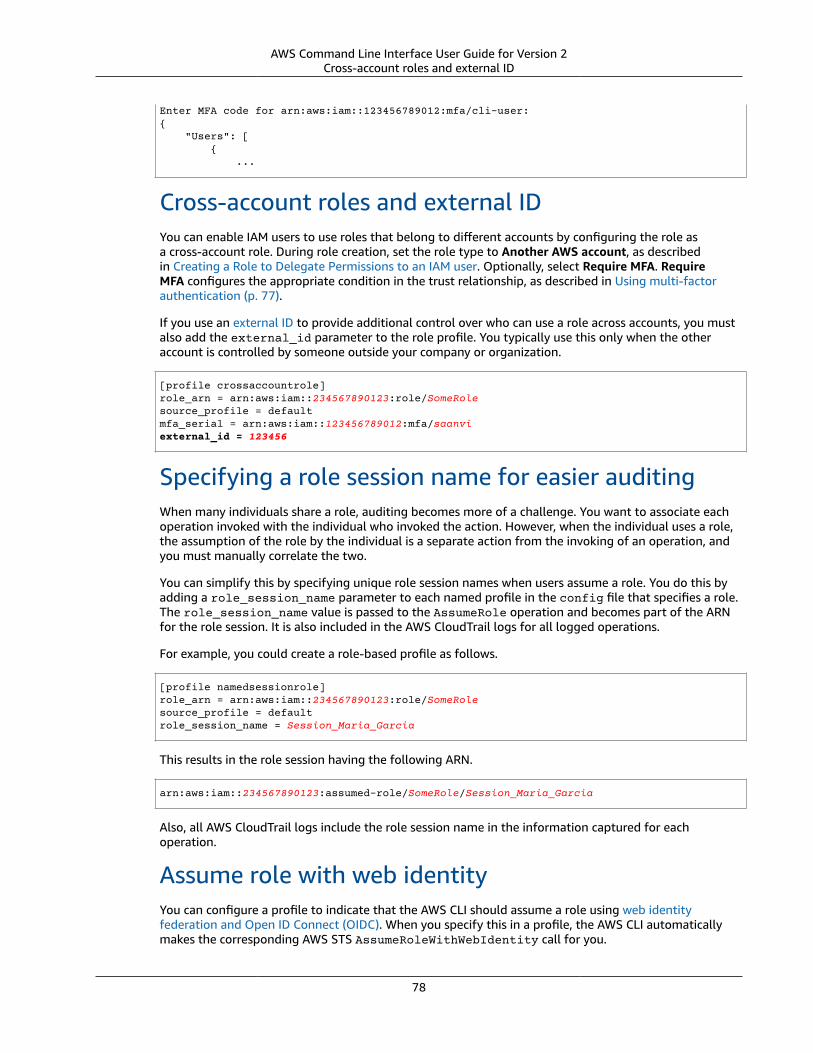
AWS Command Line Interface User Guide for Version 2Cross-account roles and external ID
Enter MFA code for arn:aws:iam::123456789012:mfa/cli-user:{ "Users": [ { ...
Cross-account roles and external IDYou can enable IAM users to use roles that belong to different accounts by configuring the role asa cross-account role. During role creation, set the role type to Another AWS account, as describedin Creating a Role to Delegate Permissions to an IAM user. Optionally, select Require MFA. RequireMFA configures the appropriate condition in the trust relationship, as described in Using multi-factorauthentication (p. 77).
If you use an external ID to provide additional control over who can use a role across accounts, you mustalso add the external_id parameter to the role profile. You typically use this only when the otheraccount is controlled by someone outside your company or organization.
[profile crossaccountrole]role_arn = arn:aws:iam::234567890123:role/SomeRolesource_profile = defaultmfa_serial = arn:aws:iam::123456789012:mfa/saanviexternal_id = 123456
Specifying a role session name for easier auditingWhen many individuals share a role, auditing becomes more of a challenge. You want to associate eachoperation invoked with the individual who invoked the action. However, when the individual uses a role,the assumption of the role by the individual is a separate action from the invoking of an operation, andyou must manually correlate the two.
You can simplify this by specifying unique role session names when users assume a role. You do this byadding a role_session_name parameter to each named profile in the config file that specifies a role.The role_session_name value is passed to the AssumeRole operation and becomes part of the ARNfor the role session. It is also included in the AWS CloudTrail logs for all logged operations.
For example, you could create a role-based profile as follows.
[profile namedsessionrole]role_arn = arn:aws:iam::234567890123:role/SomeRolesource_profile = defaultrole_session_name = Session_Maria_Garcia
This results in the role session having the following ARN.
arn:aws:iam::234567890123:assumed-role/SomeRole/Session_Maria_Garcia
Also, all AWS CloudTrail logs include the role session name in the information captured for eachoperation.
Assume role with web identityYou can configure a profile to indicate that the AWS CLI should assume a role using web identityfederation and Open ID Connect (OIDC). When you specify this in a profile, the AWS CLI automaticallymakes the corresponding AWS STS AssumeRoleWithWebIdentity call for you.
78
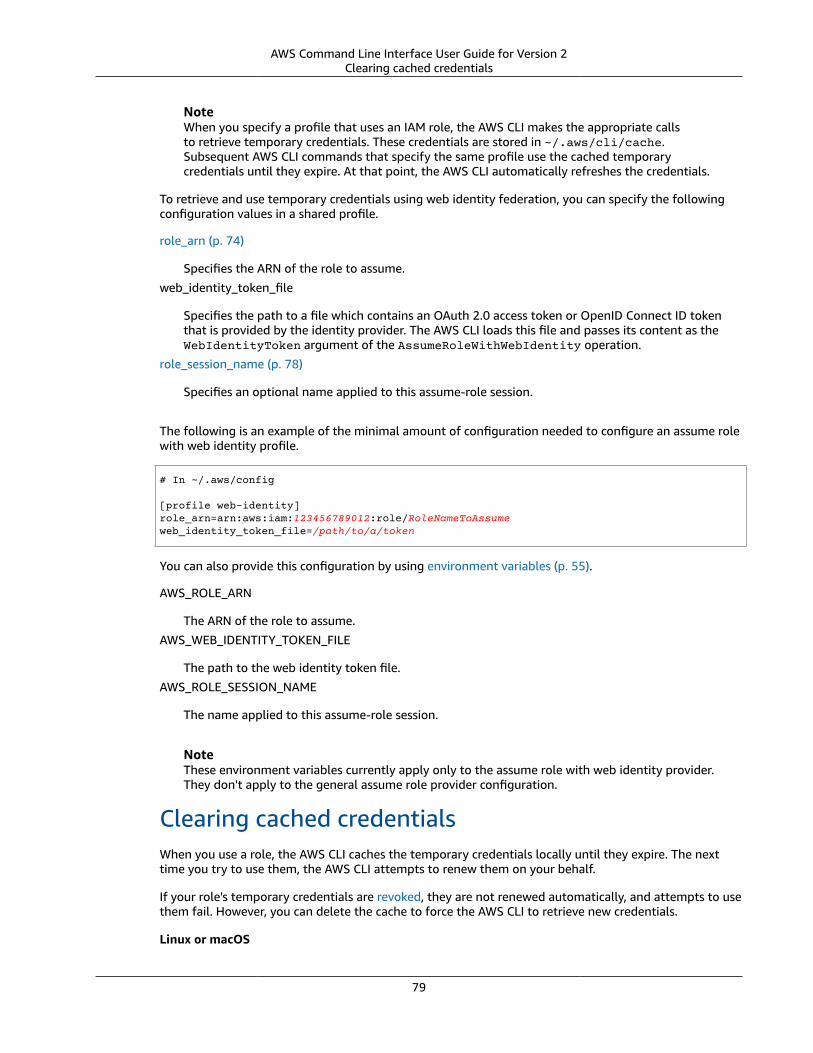
AWS Command Line Interface User Guide for Version 2Clearing cached credentials
NoteWhen you specify a profile that uses an IAM role, the AWS CLI makes the appropriate callsto retrieve temporary credentials. These credentials are stored in ~/.aws/cli/cache.Subsequent AWS CLI commands that specify the same profile use the cached temporarycredentials until they expire. At that point, the AWS CLI automatically refreshes the credentials.
To retrieve and use temporary credentials using web identity federation, you can specify the followingconfiguration values in a shared profile.
role_arn (p. 74)
Specifies the ARN of the role to assume.
web_identity_token_file
Specifies the path to a file which contains an OAuth 2.0 access token or OpenID Connect ID tokenthat is provided by the identity provider. The AWS CLI loads this file and passes its content as theWebIdentityToken argument of the AssumeRoleWithWebIdentity operation.
role_session_name (p. 78)
Specifies an optional name applied to this assume-role session.
The following is an example of the minimal amount of configuration needed to configure an assume rolewith web identity profile.
# In ~/.aws/config
[profile web-identity]role_arn=arn:aws:iam:123456789012:role/RoleNameToAssumeweb_identity_token_file=/path/to/a/token
You can also provide this configuration by using environment variables (p. 55).
AWS_ROLE_ARN
The ARN of the role to assume.
AWS_WEB_IDENTITY_TOKEN_FILE
The path to the web identity token file.
AWS_ROLE_SESSION_NAME
The name applied to this assume-role session.
NoteThese environment variables currently apply only to the assume role with web identity provider.They don't apply to the general assume role provider configuration.
Clearing cached credentialsWhen you use a role, the AWS CLI caches the temporary credentials locally until they expire. The nexttime you try to use them, the AWS CLI attempts to renew them on your behalf.
If your role's temporary credentials are revoked, they are not renewed automatically, and attempts to usethem fail. However, you can delete the cache to force the AWS CLI to retrieve new credentials.
Linux or macOS
79

AWS Command Line Interface User Guide for Version 2Clearing cached credentials
$ rm -r ~/.aws/cli/cache
Windows
C:\> del /s /q %UserProfile%\.aws\cli\cache
80
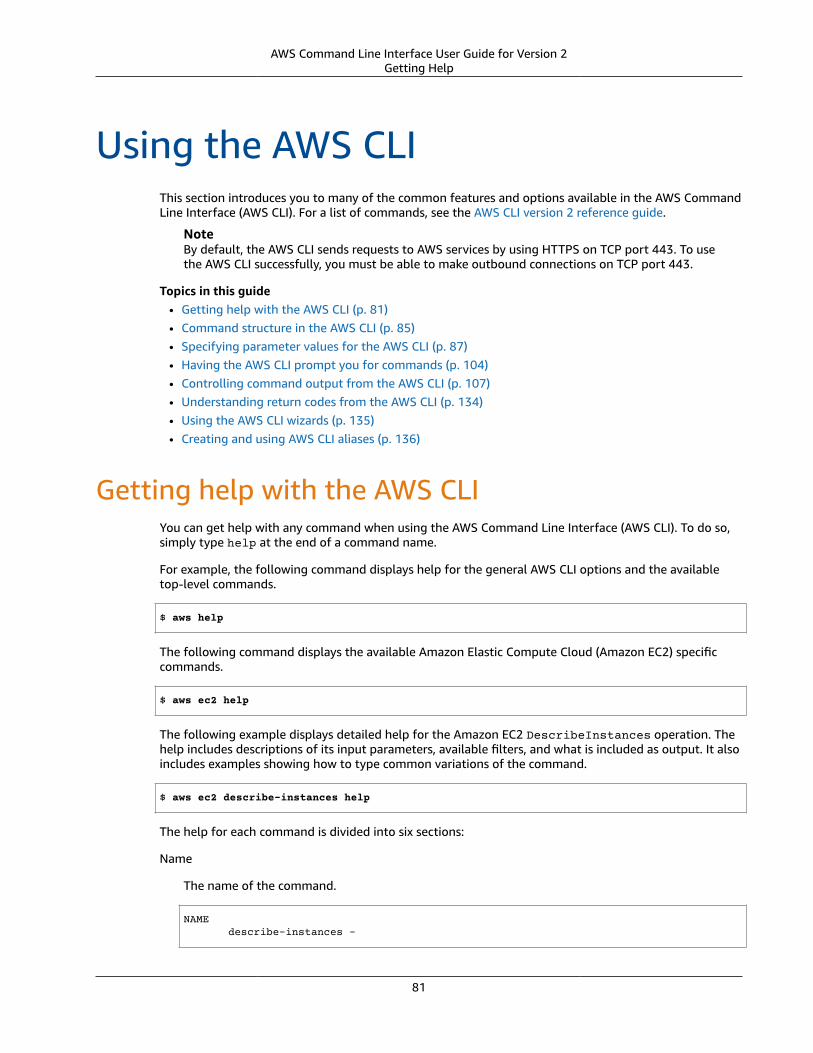
AWS Command Line Interface User Guide for Version 2Getting Help
Using the AWS CLIThis section introduces you to many of the common features and options available in the AWS CommandLine Interface (AWS CLI). For a list of commands, see the AWS CLI version 2 reference guide.
NoteBy default, the AWS CLI sends requests to AWS services by using HTTPS on TCP port 443. To usethe AWS CLI successfully, you must be able to make outbound connections on TCP port 443.
Topics in this guide• Getting help with the AWS CLI (p. 81)• Command structure in the AWS CLI (p. 85)• Specifying parameter values for the AWS CLI (p. 87)• Having the AWS CLI prompt you for commands (p. 104)• Controlling command output from the AWS CLI (p. 107)• Understanding return codes from the AWS CLI (p. 134)• Using the AWS CLI wizards (p. 135)• Creating and using AWS CLI aliases (p. 136)
Getting help with the AWS CLIYou can get help with any command when using the AWS Command Line Interface (AWS CLI). To do so,simply type help at the end of a command name.
For example, the following command displays help for the general AWS CLI options and the availabletop-level commands.
$ aws help
The following command displays the available Amazon Elastic Compute Cloud (Amazon EC2) specificcommands.
$ aws ec2 help
The following example displays detailed help for the Amazon EC2 DescribeInstances operation. Thehelp includes descriptions of its input parameters, available filters, and what is included as output. It alsoincludes examples showing how to type common variations of the command.
$ aws ec2 describe-instances help
The help for each command is divided into six sections:
Name
The name of the command.
NAME describe-instances -
81
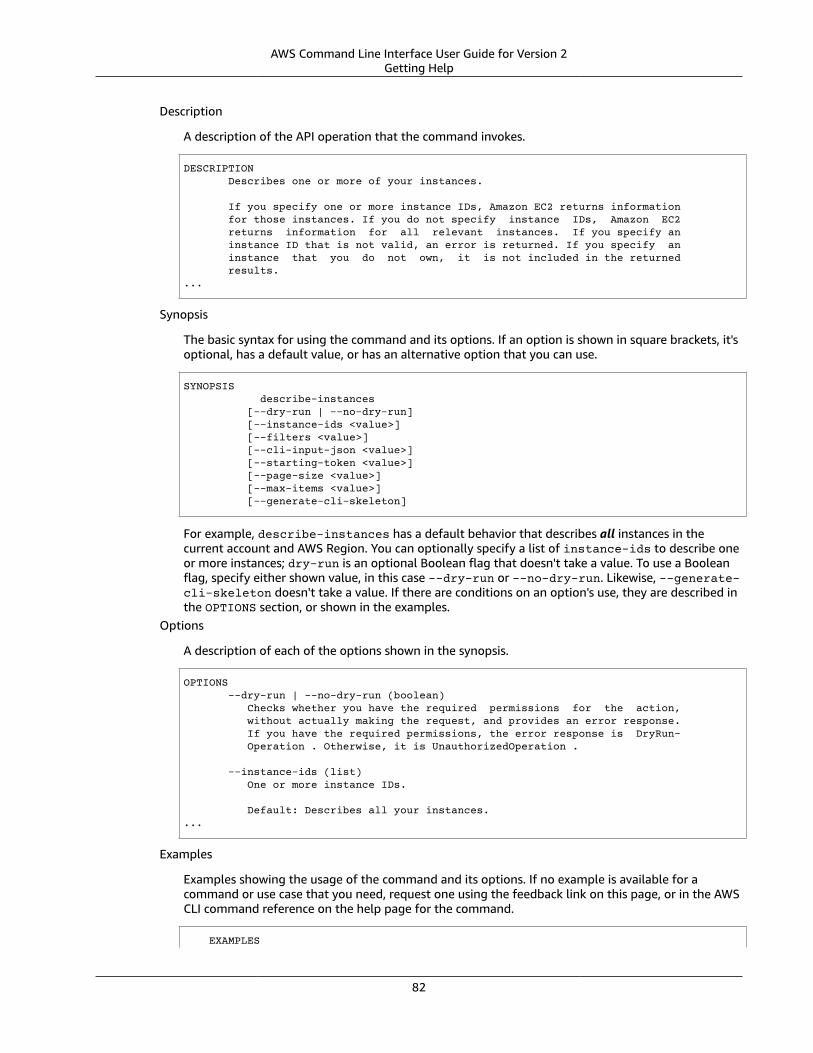
AWS Command Line Interface User Guide for Version 2Getting Help
Description
A description of the API operation that the command invokes.
DESCRIPTION Describes one or more of your instances.
If you specify one or more instance IDs, Amazon EC2 returns information for those instances. If you do not specify instance IDs, Amazon EC2 returns information for all relevant instances. If you specify an instance ID that is not valid, an error is returned. If you specify an instance that you do not own, it is not included in the returned results....
Synopsis
The basic syntax for using the command and its options. If an option is shown in square brackets, it'soptional, has a default value, or has an alternative option that you can use.
SYNOPSIS describe-instances [--dry-run | --no-dry-run] [--instance-ids <value>] [--filters <value>] [--cli-input-json <value>] [--starting-token <value>] [--page-size <value>] [--max-items <value>] [--generate-cli-skeleton]
For example, describe-instances has a default behavior that describes all instances in thecurrent account and AWS Region. You can optionally specify a list of instance-ids to describe oneor more instances; dry-run is an optional Boolean flag that doesn't take a value. To use a Booleanflag, specify either shown value, in this case --dry-run or --no-dry-run. Likewise, --generate-cli-skeleton doesn't take a value. If there are conditions on an option's use, they are described inthe OPTIONS section, or shown in the examples.
Options
A description of each of the options shown in the synopsis.
OPTIONS --dry-run | --no-dry-run (boolean) Checks whether you have the required permissions for the action, without actually making the request, and provides an error response. If you have the required permissions, the error response is DryRun- Operation . Otherwise, it is UnauthorizedOperation .
--instance-ids (list) One or more instance IDs.
Default: Describes all your instances....
Examples
Examples showing the usage of the command and its options. If no example is available for acommand or use case that you need, request one using the feedback link on this page, or in the AWSCLI command reference on the help page for the command.
EXAMPLES
82
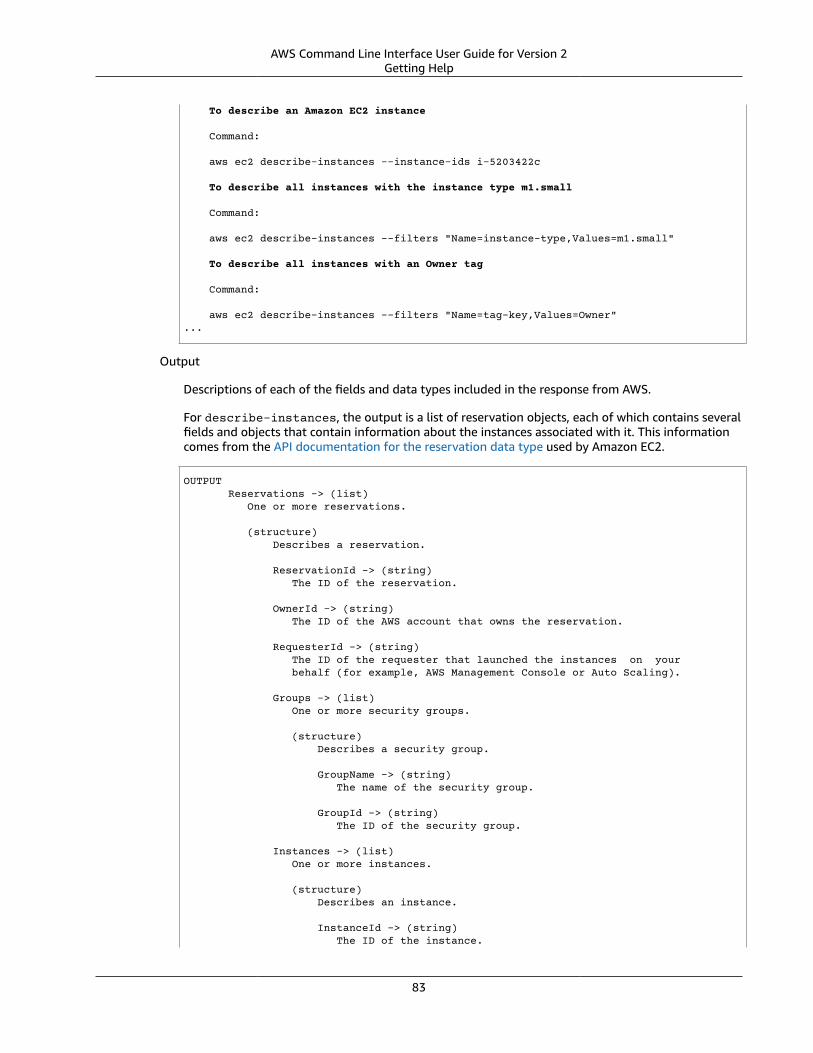
AWS Command Line Interface User Guide for Version 2Getting Help
To describe an Amazon EC2 instance
Command: aws ec2 describe-instances --instance-ids i-5203422c To describe all instances with the instance type m1.small Command: aws ec2 describe-instances --filters "Name=instance-type,Values=m1.small" To describe all instances with an Owner tag Command: aws ec2 describe-instances --filters "Name=tag-key,Values=Owner"...
Output
Descriptions of each of the fields and data types included in the response from AWS.
For describe-instances, the output is a list of reservation objects, each of which contains severalfields and objects that contain information about the instances associated with it. This informationcomes from the API documentation for the reservation data type used by Amazon EC2.
OUTPUT Reservations -> (list) One or more reservations.
(structure) Describes a reservation.
ReservationId -> (string) The ID of the reservation.
OwnerId -> (string) The ID of the AWS account that owns the reservation.
RequesterId -> (string) The ID of the requester that launched the instances on your behalf (for example, AWS Management Console or Auto Scaling).
Groups -> (list) One or more security groups.
(structure) Describes a security group.
GroupName -> (string) The name of the security group.
GroupId -> (string) The ID of the security group.
Instances -> (list) One or more instances.
(structure) Describes an instance.
InstanceId -> (string) The ID of the instance.
83
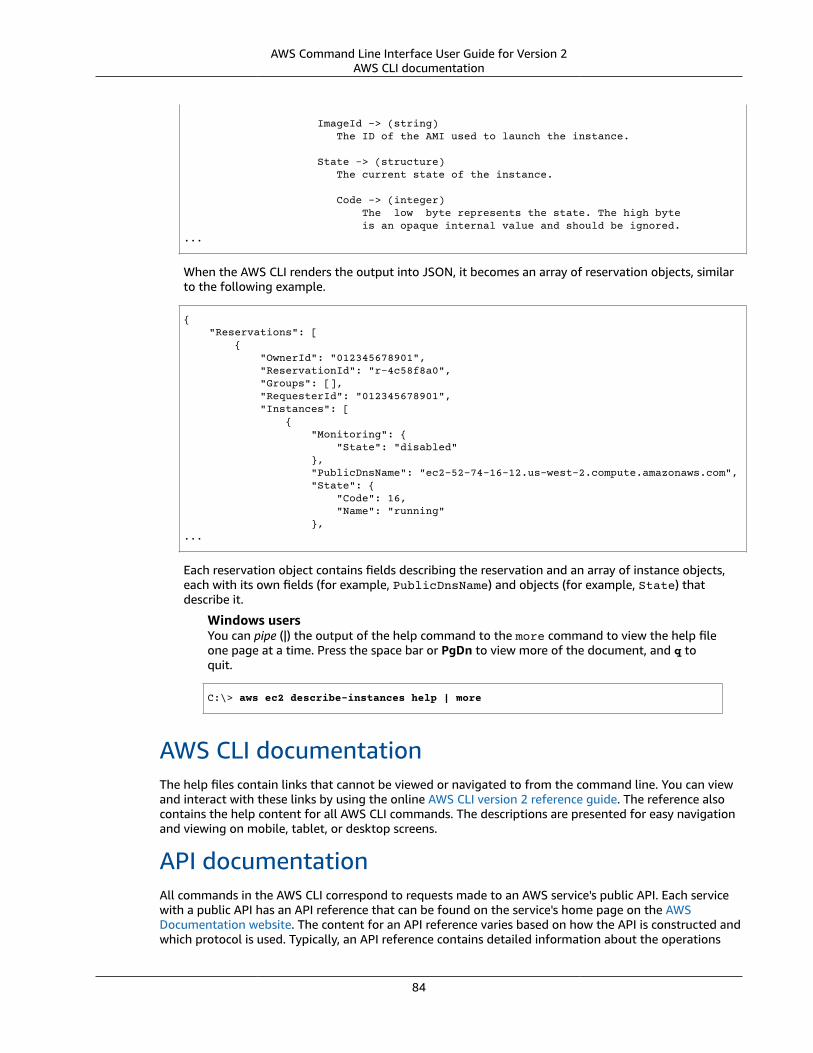
AWS Command Line Interface User Guide for Version 2AWS CLI documentation
ImageId -> (string) The ID of the AMI used to launch the instance.
State -> (structure) The current state of the instance.
Code -> (integer) The low byte represents the state. The high byte is an opaque internal value and should be ignored....
When the AWS CLI renders the output into JSON, it becomes an array of reservation objects, similarto the following example.
{ "Reservations": [ { "OwnerId": "012345678901", "ReservationId": "r-4c58f8a0", "Groups": [], "RequesterId": "012345678901", "Instances": [ { "Monitoring": { "State": "disabled" }, "PublicDnsName": "ec2-52-74-16-12.us-west-2.compute.amazonaws.com", "State": { "Code": 16, "Name": "running" },...
Each reservation object contains fields describing the reservation and an array of instance objects,each with its own fields (for example, PublicDnsName) and objects (for example, State) thatdescribe it.
Windows usersYou can pipe (|) the output of the help command to the more command to view the help fileone page at a time. Press the space bar or PgDn to view more of the document, and q toquit.
C:\> aws ec2 describe-instances help | more
AWS CLI documentationThe help files contain links that cannot be viewed or navigated to from the command line. You can viewand interact with these links by using the online AWS CLI version 2 reference guide. The reference alsocontains the help content for all AWS CLI commands. The descriptions are presented for easy navigationand viewing on mobile, tablet, or desktop screens.
API documentationAll commands in the AWS CLI correspond to requests made to an AWS service's public API. Each servicewith a public API has an API reference that can be found on the service's home page on the AWSDocumentation website. The content for an API reference varies based on how the API is constructed andwhich protocol is used. Typically, an API reference contains detailed information about the operations
84
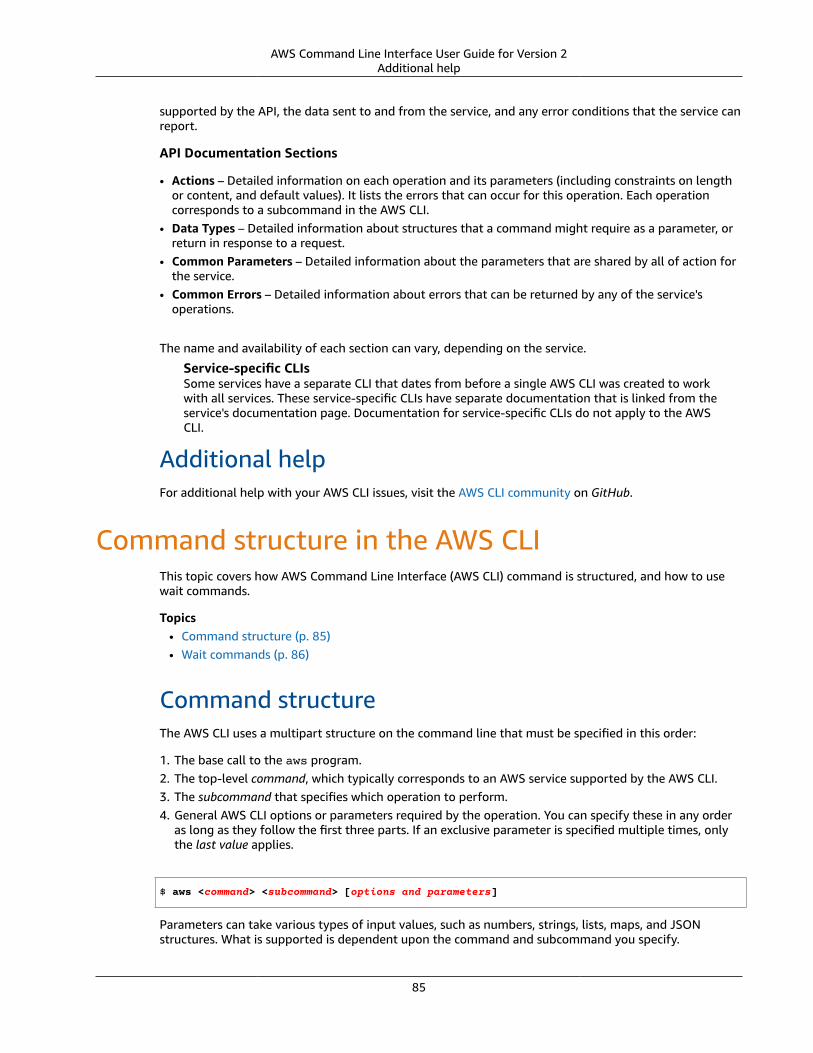
AWS Command Line Interface User Guide for Version 2Additional help
supported by the API, the data sent to and from the service, and any error conditions that the service canreport.
API Documentation Sections
• Actions – Detailed information on each operation and its parameters (including constraints on lengthor content, and default values). It lists the errors that can occur for this operation. Each operationcorresponds to a subcommand in the AWS CLI.
• Data Types – Detailed information about structures that a command might require as a parameter, orreturn in response to a request.
• Common Parameters – Detailed information about the parameters that are shared by all of action forthe service.
• Common Errors – Detailed information about errors that can be returned by any of the service'soperations.
The name and availability of each section can vary, depending on the service.
Service-specific CLIsSome services have a separate CLI that dates from before a single AWS CLI was created to workwith all services. These service-specific CLIs have separate documentation that is linked from theservice's documentation page. Documentation for service-specific CLIs do not apply to the AWSCLI.
Additional helpFor additional help with your AWS CLI issues, visit the AWS CLI community on GitHub.
Command structure in the AWS CLIThis topic covers how AWS Command Line Interface (AWS CLI) command is structured, and how to usewait commands.
Topics• Command structure (p. 85)• Wait commands (p. 86)
Command structureThe AWS CLI uses a multipart structure on the command line that must be specified in this order:
1. The base call to the aws program.2. The top-level command, which typically corresponds to an AWS service supported by the AWS CLI.3. The subcommand that specifies which operation to perform.4. General AWS CLI options or parameters required by the operation. You can specify these in any order
as long as they follow the first three parts. If an exclusive parameter is specified multiple times, onlythe last value applies.
$ aws <command> <subcommand> [options and parameters]
Parameters can take various types of input values, such as numbers, strings, lists, maps, and JSONstructures. What is supported is dependent upon the command and subcommand you specify.
85
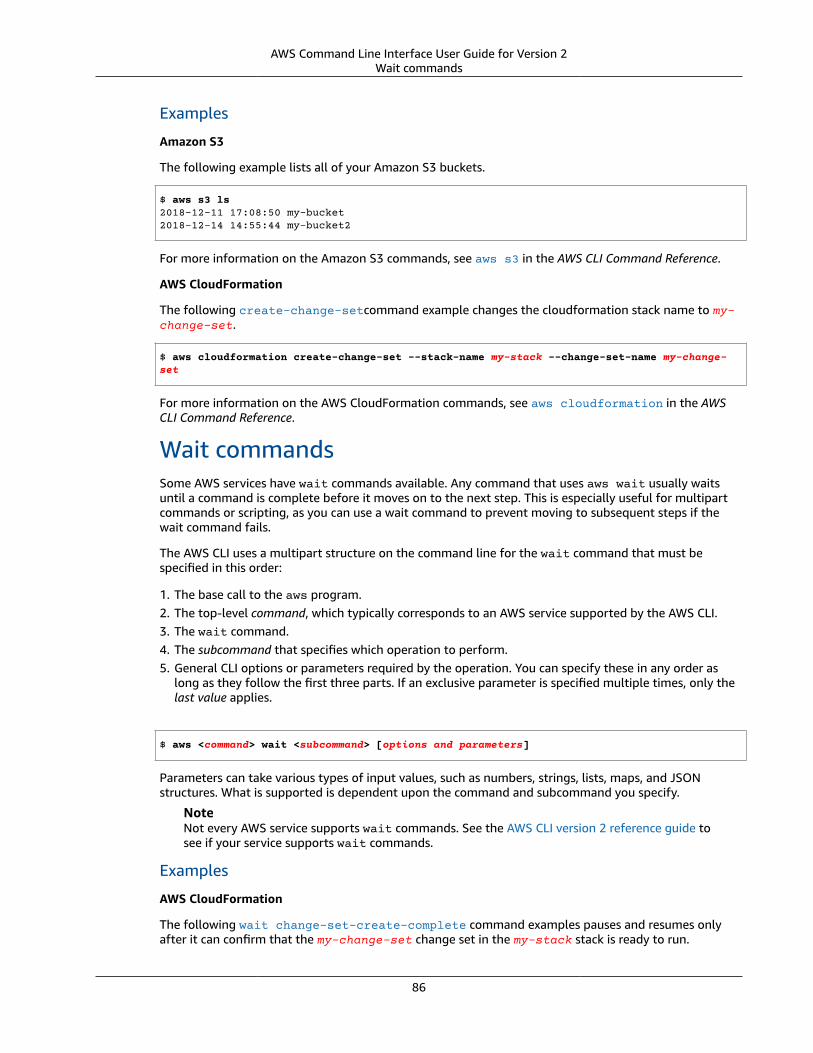
AWS Command Line Interface User Guide for Version 2Wait commands
Examples
Amazon S3
The following example lists all of your Amazon S3 buckets.
$ aws s3 ls2018-12-11 17:08:50 my-bucket2018-12-14 14:55:44 my-bucket2
For more information on the Amazon S3 commands, see aws s3 in the AWS CLI Command Reference.
AWS CloudFormation
The following create-change-setcommand example changes the cloudformation stack name to my-change-set.
$ aws cloudformation create-change-set --stack-name my-stack --change-set-name my-change-set
For more information on the AWS CloudFormation commands, see aws cloudformation in the AWSCLI Command Reference.
Wait commandsSome AWS services have wait commands available. Any command that uses aws wait usually waitsuntil a command is complete before it moves on to the next step. This is especially useful for multipartcommands or scripting, as you can use a wait command to prevent moving to subsequent steps if thewait command fails.
The AWS CLI uses a multipart structure on the command line for the wait command that must bespecified in this order:
1. The base call to the aws program.2. The top-level command, which typically corresponds to an AWS service supported by the AWS CLI.3. The wait command.4. The subcommand that specifies which operation to perform.5. General CLI options or parameters required by the operation. You can specify these in any order as
long as they follow the first three parts. If an exclusive parameter is specified multiple times, only thelast value applies.
$ aws <command> wait <subcommand> [options and parameters]
Parameters can take various types of input values, such as numbers, strings, lists, maps, and JSONstructures. What is supported is dependent upon the command and subcommand you specify.
NoteNot every AWS service supports wait commands. See the AWS CLI version 2 reference guide tosee if your service supports wait commands.
Examples
AWS CloudFormation
The following wait change-set-create-complete command examples pauses and resumes onlyafter it can confirm that the my-change-set change set in the my-stack stack is ready to run.
86

AWS Command Line Interface User Guide for Version 2Specifying Parameter Values
$ aws cloudformation wait change-set-create-complete --stack-name my-stack --change-set-name my-change-set
For more information on the AWS CloudFormation wait commands, see wait in the AWS CLI CommandReference.
AWS CodeDeploy
The following wait deployment-successful command examples pauses until the d-A1B2C3111deployment completes successfully.
$ aws deploy wait deployment-successful --deployment-id d-A1B2C3111
For more information on the AWS CodeDeploy wait commands, see wait in the AWS CLI CommandReference.
Specifying parameter values for the AWS CLIMany parameters used in the AWS Command Line Interface (AWS CLI) are simple string or numericvalues, such as the key-pair name my-key-pair in the following example.
$ aws ec2 create-key-pair --key-name my-key-pair
You can surround strings that do not contain any space characters with quotation marks or not. However,you must use quotation marks around strings that include one or more space characters. For moreinformation about using quotation marks around complex parameters, see Using quotation marks withstrings in the AWS CLI (p. 90).
Parameter topics• Common AWS CLI parameter types (p. 87)• Using quotation marks with strings in the AWS CLI (p. 90)• Loading AWS CLI parameters from a file (p. 93)• Generating an AWS CLI skeleton and input file (p. 95)• Using shorthand syntax with the AWS CLI (p. 103)
Common AWS CLI parameter typesThis section describes some of the common parameter types and the typical required format.
If you are having trouble formatting a parameter for a specific command, check the help by enteringhelp after the command name. The help for each subcommand includes an option's name anddescription. The option's parameter type is listed in parentheses. For more information on viewing help,see the section called “Getting Help” (p. 81).
Parameter types include:• String (p. 88)• Timestamp (p. 88)• List (p. 88)• Boolean (p. 88)• Integer (p. 88)• Binary/Blob (binary large object) (p. 89)
87
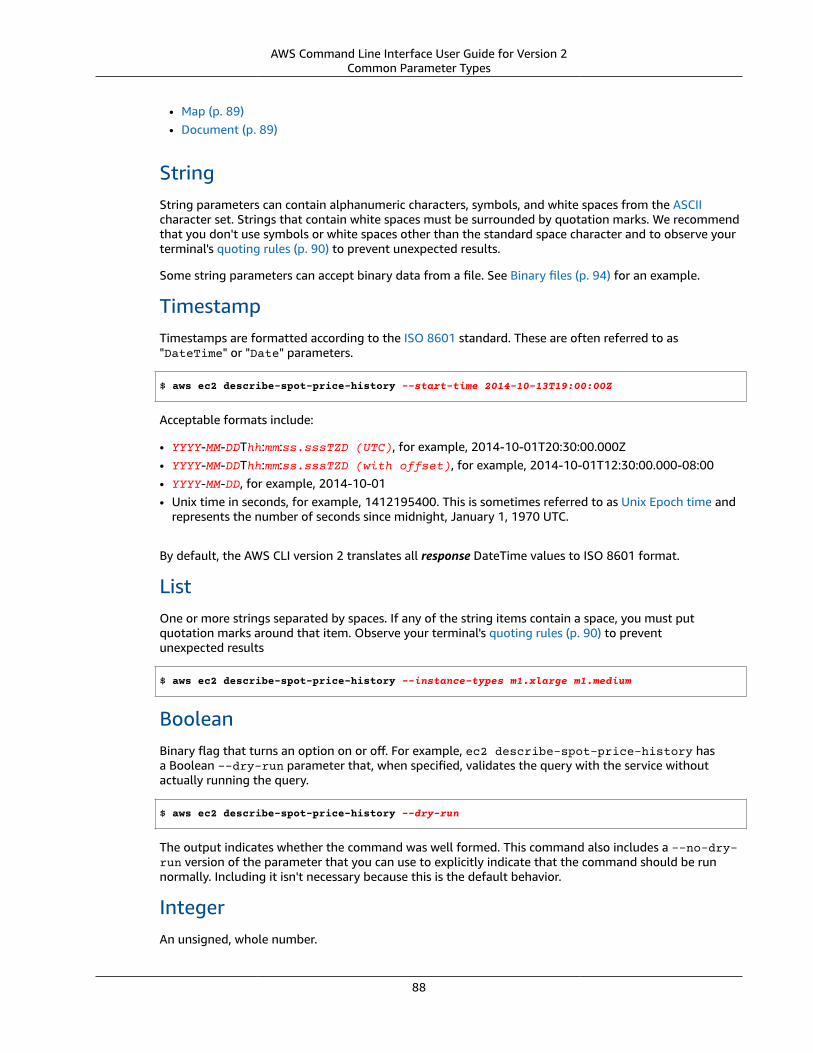
AWS Command Line Interface User Guide for Version 2Common Parameter Types
• Map (p. 89)• Document (p. 89)
StringString parameters can contain alphanumeric characters, symbols, and white spaces from the ASCIIcharacter set. Strings that contain white spaces must be surrounded by quotation marks. We recommendthat you don't use symbols or white spaces other than the standard space character and to observe yourterminal's quoting rules (p. 90) to prevent unexpected results.
Some string parameters can accept binary data from a file. See Binary files (p. 94) for an example.
TimestampTimestamps are formatted according to the ISO 8601 standard. These are often referred to as"DateTime" or "Date" parameters.
$ aws ec2 describe-spot-price-history --start-time 2014-10-13T19:00:00Z
Acceptable formats include:
• YYYY-MM-DDThh:mm:ss.sssTZD (UTC), for example, 2014-10-01T20:30:00.000Z• YYYY-MM-DDThh:mm:ss.sssTZD (with offset), for example, 2014-10-01T12:30:00.000-08:00• YYYY-MM-DD, for example, 2014-10-01• Unix time in seconds, for example, 1412195400. This is sometimes referred to as Unix Epoch time and
represents the number of seconds since midnight, January 1, 1970 UTC.
By default, the AWS CLI version 2 translates all response DateTime values to ISO 8601 format.
ListOne or more strings separated by spaces. If any of the string items contain a space, you must putquotation marks around that item. Observe your terminal's quoting rules (p. 90) to preventunexpected results
$ aws ec2 describe-spot-price-history --instance-types m1.xlarge m1.medium
BooleanBinary flag that turns an option on or off. For example, ec2 describe-spot-price-history hasa Boolean --dry-run parameter that, when specified, validates the query with the service withoutactually running the query.
$ aws ec2 describe-spot-price-history --dry-run
The output indicates whether the command was well formed. This command also includes a --no-dry-run version of the parameter that you can use to explicitly indicate that the command should be runnormally. Including it isn't necessary because this is the default behavior.
IntegerAn unsigned, whole number.
88

AWS Command Line Interface User Guide for Version 2Common Parameter Types
$ aws ec2 describe-spot-price-history --max-items 5
Binary/Blob (binary large object)In the AWS CLI version 2, you can pass a binary value as a base64-encoded string directly on thecommand line. Also, by default in the AWS CLI version 2, files referenced with the file:// prefix aretreated as base64-encoded text.
You can revert the AWS CLI version 2 to be compatible with AWS CLI version 1 by setting the cli-binary-format (p. 41) setting:
• If the setting's value is raw-in-base64-out, files referenced using the file:// prefix are treated asraw unencoded binary.
• If the setting's value is base64 (the default value), files referenced using the file:// prefix aretreated as base64-encoded text.
Files referenced using the fileb:// prefix are always treated as raw unencoded binary, regardless ofthe cli_binary_format setting.
For more information, see the setting cli-binary-format (p. 41).
MapA set of key-value pairs specified in JSON or by using the CLI's shorthand syntax (p. 103). The followingJSON example reads an item from an Amazon DynamoDB table named my-table with a map parameter,--key. The parameter specifies the primary key named id with a number value of 1 in a nested JSONstructure.
For more advanced JSON usage in a command line, consider using a command line JSON processor, likejq, to create JSON strings. For more information on jq, see the jq repository on GitHub.
$ aws dynamodb get-item --table-name my-table --key '{"id": {"N":"1"}}'
{ "Item": { "name": { "S": "John" }, "id": { "N": "1" } }}
DocumentNoteShorthand syntax (p. 103) is not compatible with document types.
Document types are used to send data without needing to embed JSON inside strings. The documenttype enables services to provide arbitrary schemas for you to use more flexible data types.
This allows for sending JSON data without needing to escape values. For example, instead of using thefollowing escaped JSON input:
{"document": "{\"key\":true}"}
You can use the following document type:
89
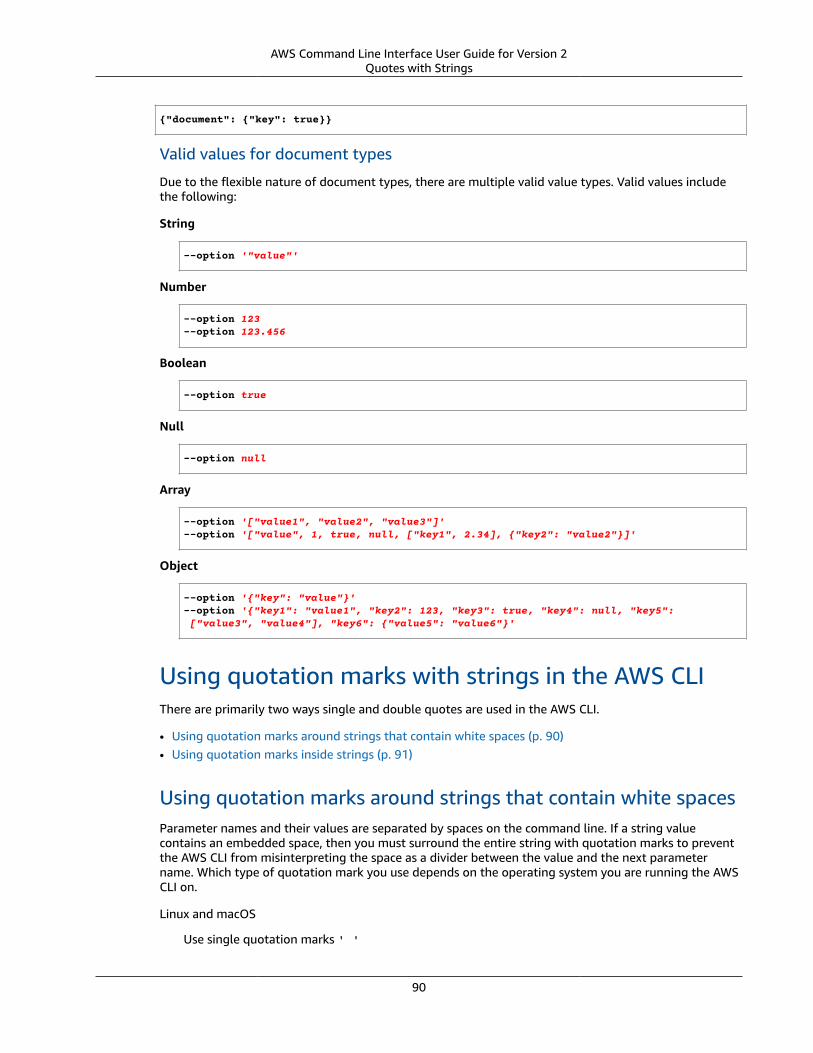
AWS Command Line Interface User Guide for Version 2Quotes with Strings
{"document": {"key": true}}
Valid values for document types
Due to the flexible nature of document types, there are multiple valid value types. Valid values includethe following:
String
--option '"value"'
Number
--option 123--option 123.456
Boolean
--option true
Null
--option null
Array
--option '["value1", "value2", "value3"]'--option '["value", 1, true, null, ["key1", 2.34], {"key2": "value2"}]'
Object
--option '{"key": "value"}'--option '{"key1": "value1", "key2": 123, "key3": true, "key4": null, "key5": ["value3", "value4"], "key6": {"value5": "value6"}'
Using quotation marks with strings in the AWS CLIThere are primarily two ways single and double quotes are used in the AWS CLI.
• Using quotation marks around strings that contain white spaces (p. 90)• Using quotation marks inside strings (p. 91)
Using quotation marks around strings that contain white spacesParameter names and their values are separated by spaces on the command line. If a string valuecontains an embedded space, then you must surround the entire string with quotation marks to preventthe AWS CLI from misinterpreting the space as a divider between the value and the next parametername. Which type of quotation mark you use depends on the operating system you are running the AWSCLI on.
Linux and macOS
Use single quotation marks ' '
90
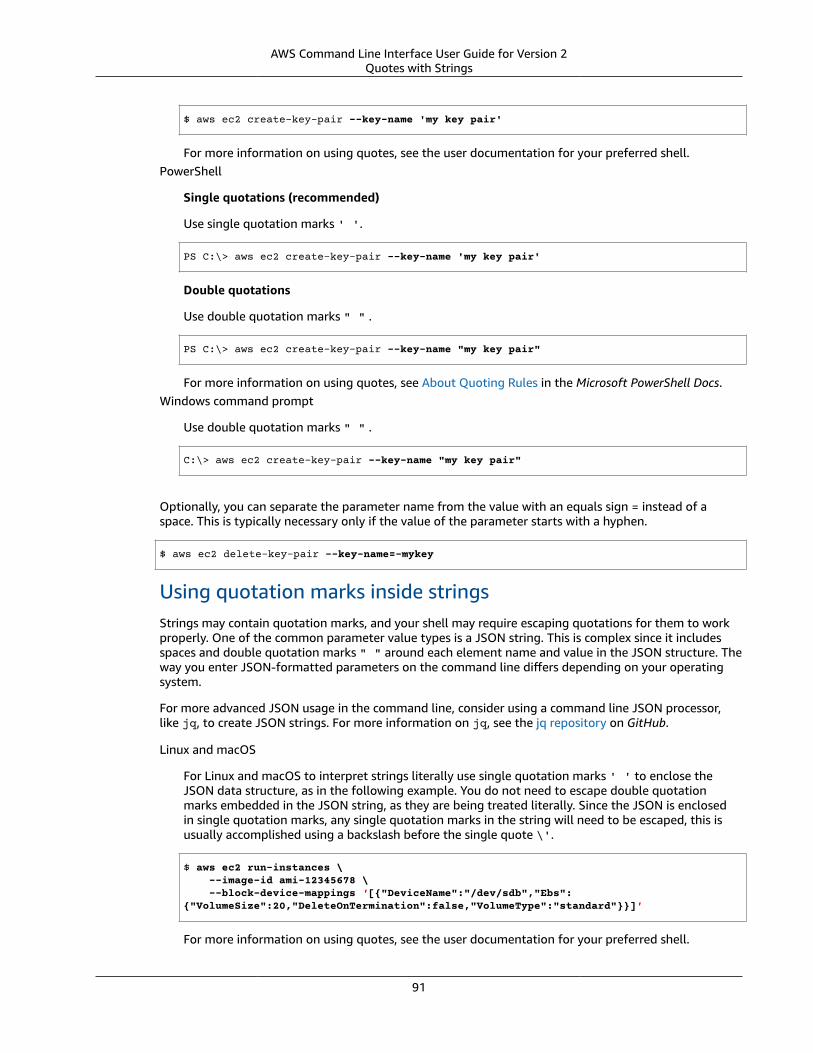
AWS Command Line Interface User Guide for Version 2Quotes with Strings
$ aws ec2 create-key-pair --key-name 'my key pair'
For more information on using quotes, see the user documentation for your preferred shell.PowerShell
Single quotations (recommended)
Use single quotation marks ' '.
PS C:\> aws ec2 create-key-pair --key-name 'my key pair'
Double quotations
Use double quotation marks " " .
PS C:\> aws ec2 create-key-pair --key-name "my key pair"
For more information on using quotes, see About Quoting Rules in the Microsoft PowerShell Docs.Windows command prompt
Use double quotation marks " " .
C:\> aws ec2 create-key-pair --key-name "my key pair"
Optionally, you can separate the parameter name from the value with an equals sign = instead of aspace. This is typically necessary only if the value of the parameter starts with a hyphen.
$ aws ec2 delete-key-pair --key-name=-mykey
Using quotation marks inside stringsStrings may contain quotation marks, and your shell may require escaping quotations for them to workproperly. One of the common parameter value types is a JSON string. This is complex since it includesspaces and double quotation marks " " around each element name and value in the JSON structure. Theway you enter JSON-formatted parameters on the command line differs depending on your operatingsystem.
For more advanced JSON usage in the command line, consider using a command line JSON processor,like jq, to create JSON strings. For more information on jq, see the jq repository on GitHub.
Linux and macOS
For Linux and macOS to interpret strings literally use single quotation marks ' ' to enclose theJSON data structure, as in the following example. You do not need to escape double quotationmarks embedded in the JSON string, as they are being treated literally. Since the JSON is enclosedin single quotation marks, any single quotation marks in the string will need to be escaped, this isusually accomplished using a backslash before the single quote \'.
$ aws ec2 run-instances \ --image-id ami-12345678 \ --block-device-mappings '[{"DeviceName":"/dev/sdb","Ebs":{"VolumeSize":20,"DeleteOnTermination":false,"VolumeType":"standard"}}]'
For more information on using quotes, see the user documentation for your preferred shell.
91
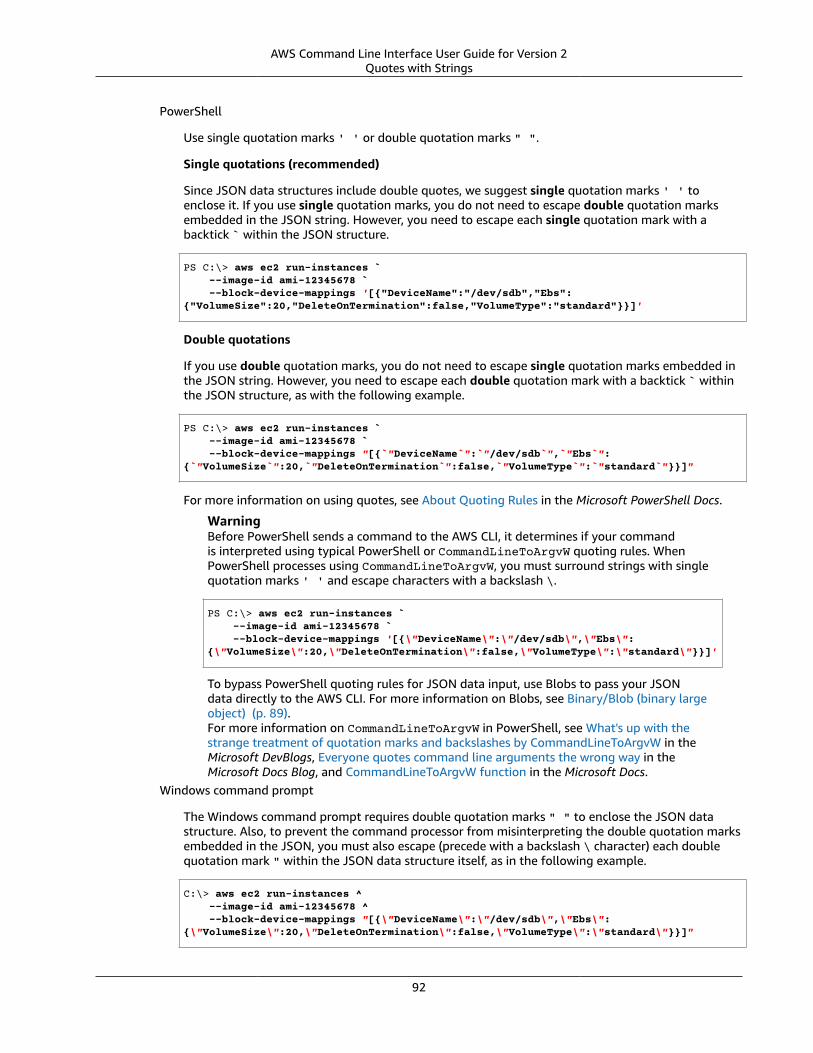
AWS Command Line Interface User Guide for Version 2Quotes with Strings
PowerShell
Use single quotation marks ' ' or double quotation marks " ".
Single quotations (recommended)
Since JSON data structures include double quotes, we suggest single quotation marks ' ' toenclose it. If you use single quotation marks, you do not need to escape double quotation marksembedded in the JSON string. However, you need to escape each single quotation mark with abacktick ` within the JSON structure.
PS C:\> aws ec2 run-instances ` --image-id ami-12345678 ` --block-device-mappings '[{"DeviceName":"/dev/sdb","Ebs":{"VolumeSize":20,"DeleteOnTermination":false,"VolumeType":"standard"}}]'
Double quotations
If you use double quotation marks, you do not need to escape single quotation marks embedded inthe JSON string. However, you need to escape each double quotation mark with a backtick ` withinthe JSON structure, as with the following example.
PS C:\> aws ec2 run-instances ` --image-id ami-12345678 ` --block-device-mappings "[{`"DeviceName`":`"/dev/sdb`",`"Ebs`":{`"VolumeSize`":20,`"DeleteOnTermination`":false,`"VolumeType`":`"standard`"}}]"
For more information on using quotes, see About Quoting Rules in the Microsoft PowerShell Docs.
WarningBefore PowerShell sends a command to the AWS CLI, it determines if your commandis interpreted using typical PowerShell or CommandLineToArgvW quoting rules. WhenPowerShell processes using CommandLineToArgvW, you must surround strings with singlequotation marks ' ' and escape characters with a backslash \.
PS C:\> aws ec2 run-instances ` --image-id ami-12345678 ` --block-device-mappings '[{\"DeviceName\":\"/dev/sdb\",\"Ebs\":{\"VolumeSize\":20,\"DeleteOnTermination\":false,\"VolumeType\":\"standard\"}}]'
To bypass PowerShell quoting rules for JSON data input, use Blobs to pass your JSONdata directly to the AWS CLI. For more information on Blobs, see Binary/Blob (binary largeobject) (p. 89).For more information on CommandLineToArgvW in PowerShell, see What's up with thestrange treatment of quotation marks and backslashes by CommandLineToArgvW in theMicrosoft DevBlogs, Everyone quotes command line arguments the wrong way in theMicrosoft Docs Blog, and CommandLineToArgvW function in the Microsoft Docs.
Windows command prompt
The Windows command prompt requires double quotation marks " " to enclose the JSON datastructure. Also, to prevent the command processor from misinterpreting the double quotation marksembedded in the JSON, you must also escape (precede with a backslash \ character) each doublequotation mark " within the JSON data structure itself, as in the following example.
C:\> aws ec2 run-instances ^ --image-id ami-12345678 ^ --block-device-mappings "[{\"DeviceName\":\"/dev/sdb\",\"Ebs\":{\"VolumeSize\":20,\"DeleteOnTermination\":false,\"VolumeType\":\"standard\"}}]"
92
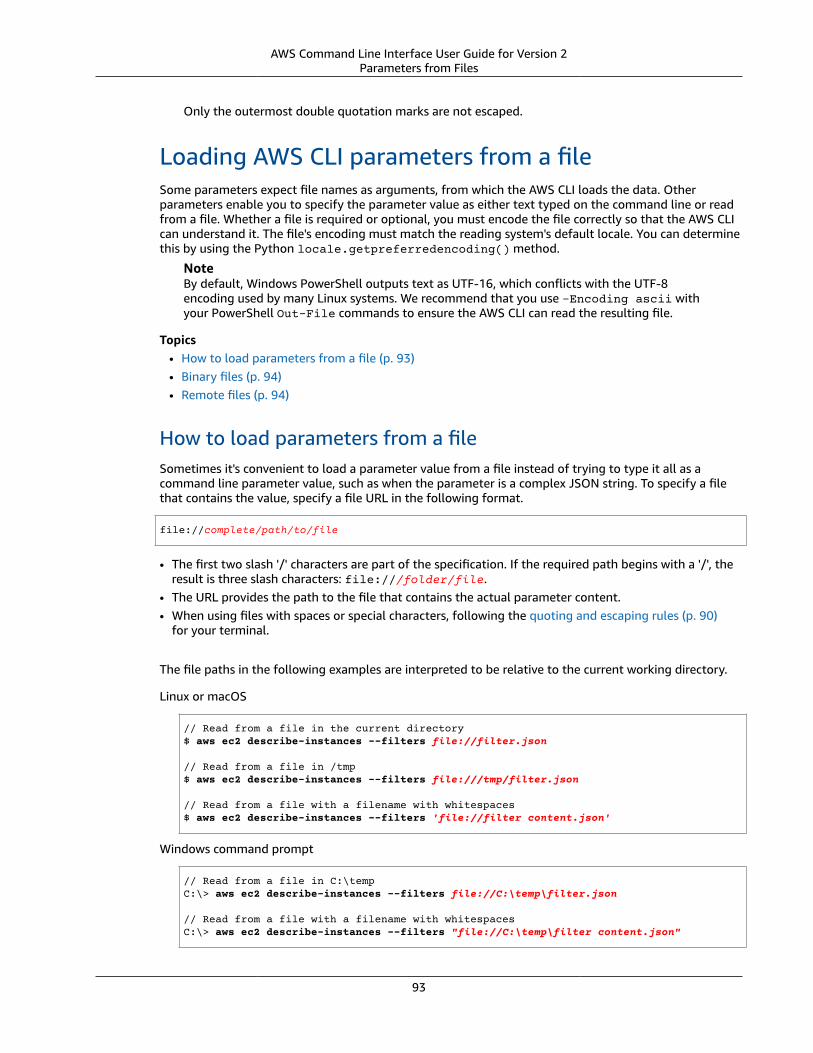
AWS Command Line Interface User Guide for Version 2Parameters from Files
Only the outermost double quotation marks are not escaped.
Loading AWS CLI parameters from a fileSome parameters expect file names as arguments, from which the AWS CLI loads the data. Otherparameters enable you to specify the parameter value as either text typed on the command line or readfrom a file. Whether a file is required or optional, you must encode the file correctly so that the AWS CLIcan understand it. The file's encoding must match the reading system's default locale. You can determinethis by using the Python locale.getpreferredencoding() method.
NoteBy default, Windows PowerShell outputs text as UTF-16, which conflicts with the UTF-8encoding used by many Linux systems. We recommend that you use -Encoding ascii withyour PowerShell Out-File commands to ensure the AWS CLI can read the resulting file.
Topics• How to load parameters from a file (p. 93)• Binary files (p. 94)• Remote files (p. 94)
How to load parameters from a fileSometimes it's convenient to load a parameter value from a file instead of trying to type it all as acommand line parameter value, such as when the parameter is a complex JSON string. To specify a filethat contains the value, specify a file URL in the following format.
file://complete/path/to/file
• The first two slash '/' characters are part of the specification. If the required path begins with a '/', theresult is three slash characters: file:///folder/file.
• The URL provides the path to the file that contains the actual parameter content.• When using files with spaces or special characters, following the quoting and escaping rules (p. 90)
for your terminal.
The file paths in the following examples are interpreted to be relative to the current working directory.
Linux or macOS
// Read from a file in the current directory$ aws ec2 describe-instances --filters file://filter.json
// Read from a file in /tmp$ aws ec2 describe-instances --filters file:///tmp/filter.json
// Read from a file with a filename with whitespaces$ aws ec2 describe-instances --filters 'file://filter content.json'
Windows command prompt
// Read from a file in C:\tempC:\> aws ec2 describe-instances --filters file://C:\temp\filter.json
// Read from a file with a filename with whitespacesC:\> aws ec2 describe-instances --filters "file://C:\temp\filter content.json"
93
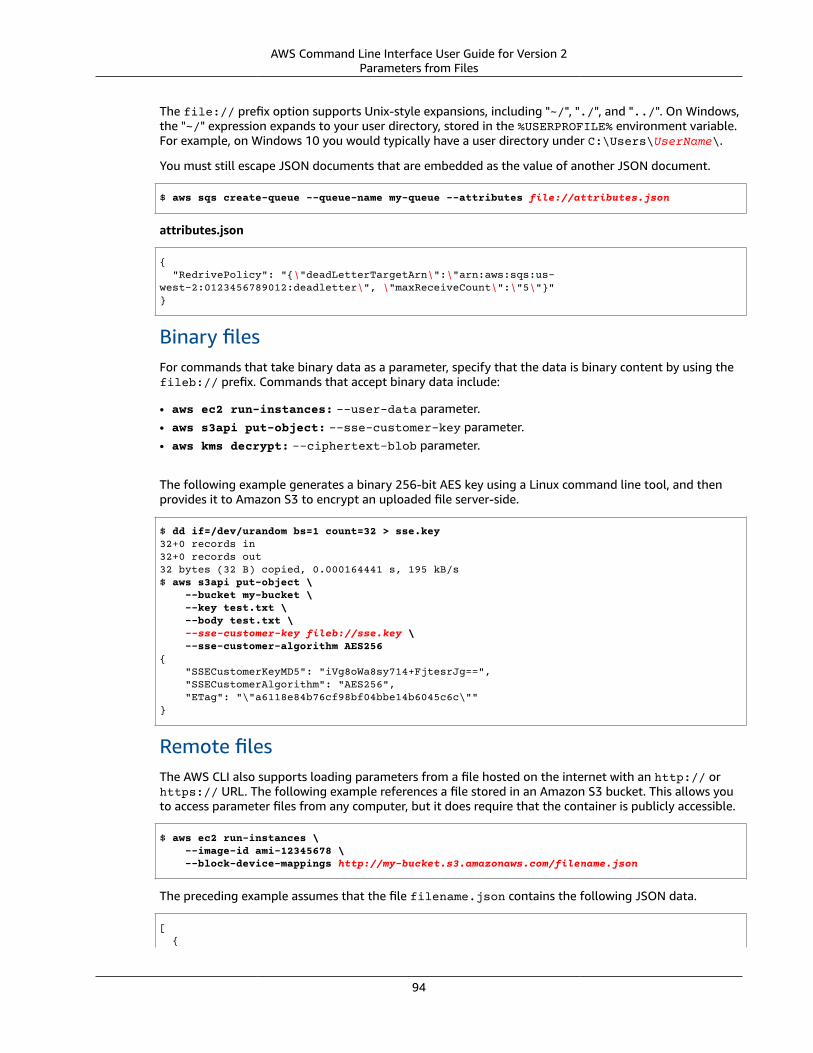
AWS Command Line Interface User Guide for Version 2Parameters from Files
The file:// prefix option supports Unix-style expansions, including "~/", "./", and "../". On Windows,the "~/" expression expands to your user directory, stored in the %USERPROFILE% environment variable.For example, on Windows 10 you would typically have a user directory under C:\Users\UserName\.
You must still escape JSON documents that are embedded as the value of another JSON document.
$ aws sqs create-queue --queue-name my-queue --attributes file://attributes.json
attributes.json
{ "RedrivePolicy": "{\"deadLetterTargetArn\":\"arn:aws:sqs:us-west-2:0123456789012:deadletter\", \"maxReceiveCount\":\"5\"}"}
Binary filesFor commands that take binary data as a parameter, specify that the data is binary content by using thefileb:// prefix. Commands that accept binary data include:
• aws ec2 run-instances: --user-data parameter.• aws s3api put-object: --sse-customer-key parameter.• aws kms decrypt: --ciphertext-blob parameter.
The following example generates a binary 256-bit AES key using a Linux command line tool, and thenprovides it to Amazon S3 to encrypt an uploaded file server-side.
$ dd if=/dev/urandom bs=1 count=32 > sse.key32+0 records in32+0 records out32 bytes (32 B) copied, 0.000164441 s, 195 kB/s$ aws s3api put-object \ --bucket my-bucket \ --key test.txt \ --body test.txt \ --sse-customer-key fileb://sse.key \ --sse-customer-algorithm AES256{ "SSECustomerKeyMD5": "iVg8oWa8sy714+FjtesrJg==", "SSECustomerAlgorithm": "AES256", "ETag": "\"a6118e84b76cf98bf04bbe14b6045c6c\""}
Remote filesThe AWS CLI also supports loading parameters from a file hosted on the internet with an http:// orhttps:// URL. The following example references a file stored in an Amazon S3 bucket. This allows youto access parameter files from any computer, but it does require that the container is publicly accessible.
$ aws ec2 run-instances \ --image-id ami-12345678 \ --block-device-mappings http://my-bucket.s3.amazonaws.com/filename.json
The preceding example assumes that the file filename.json contains the following JSON data.
[ {
94
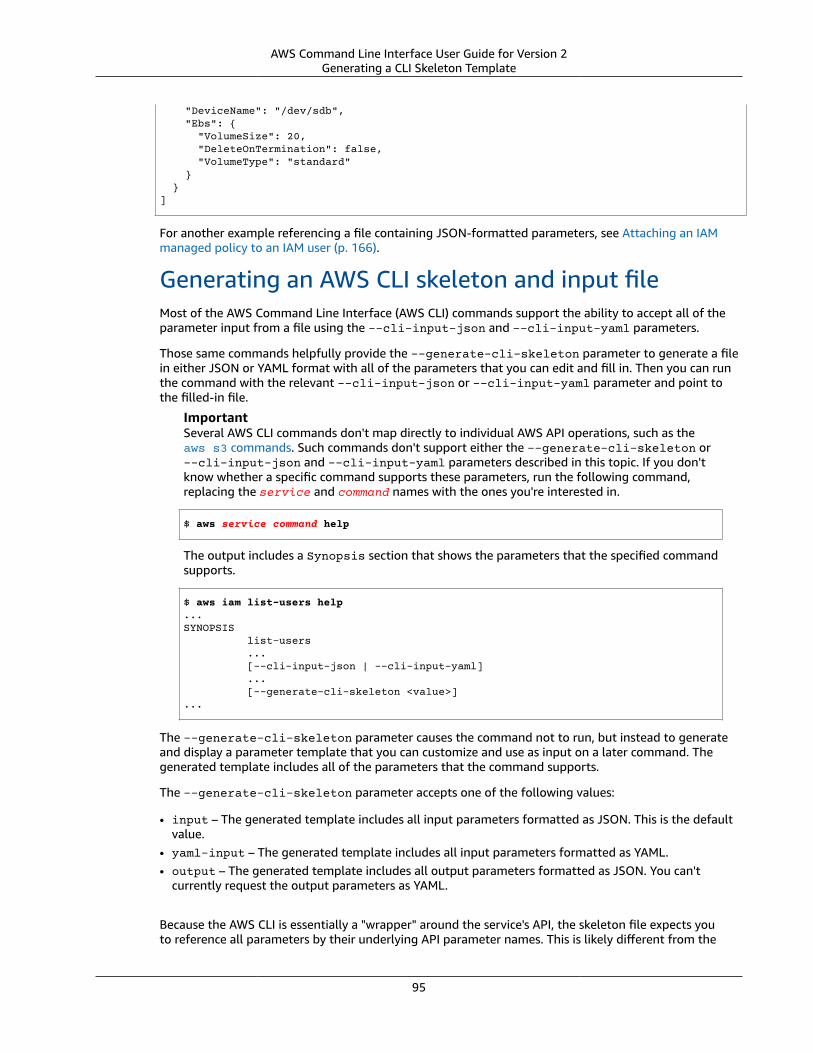
AWS Command Line Interface User Guide for Version 2Generating a CLI Skeleton Template
"DeviceName": "/dev/sdb", "Ebs": { "VolumeSize": 20, "DeleteOnTermination": false, "VolumeType": "standard" } }]
For another example referencing a file containing JSON-formatted parameters, see Attaching an IAMmanaged policy to an IAM user (p. 166).
Generating an AWS CLI skeleton and input fileMost of the AWS Command Line Interface (AWS CLI) commands support the ability to accept all of theparameter input from a file using the --cli-input-json and --cli-input-yaml parameters.
Those same commands helpfully provide the --generate-cli-skeleton parameter to generate a filein either JSON or YAML format with all of the parameters that you can edit and fill in. Then you can runthe command with the relevant --cli-input-json or --cli-input-yaml parameter and point tothe filled-in file.
ImportantSeveral AWS CLI commands don't map directly to individual AWS API operations, such as theaws s3 commands. Such commands don't support either the --generate-cli-skeleton or--cli-input-json and --cli-input-yaml parameters described in this topic. If you don'tknow whether a specific command supports these parameters, run the following command,replacing the service and command names with the ones you're interested in.
$ aws service command help
The output includes a Synopsis section that shows the parameters that the specified commandsupports.
$ aws iam list-users help...SYNOPSIS list-users ... [--cli-input-json | --cli-input-yaml] ... [--generate-cli-skeleton <value>]...
The --generate-cli-skeleton parameter causes the command not to run, but instead to generateand display a parameter template that you can customize and use as input on a later command. Thegenerated template includes all of the parameters that the command supports.
The --generate-cli-skeleton parameter accepts one of the following values:
• input – The generated template includes all input parameters formatted as JSON. This is the defaultvalue.
• yaml-input – The generated template includes all input parameters formatted as YAML.• output – The generated template includes all output parameters formatted as JSON. You can't
currently request the output parameters as YAML.
Because the AWS CLI is essentially a "wrapper" around the service's API, the skeleton file expects youto reference all parameters by their underlying API parameter names. This is likely different from the
95
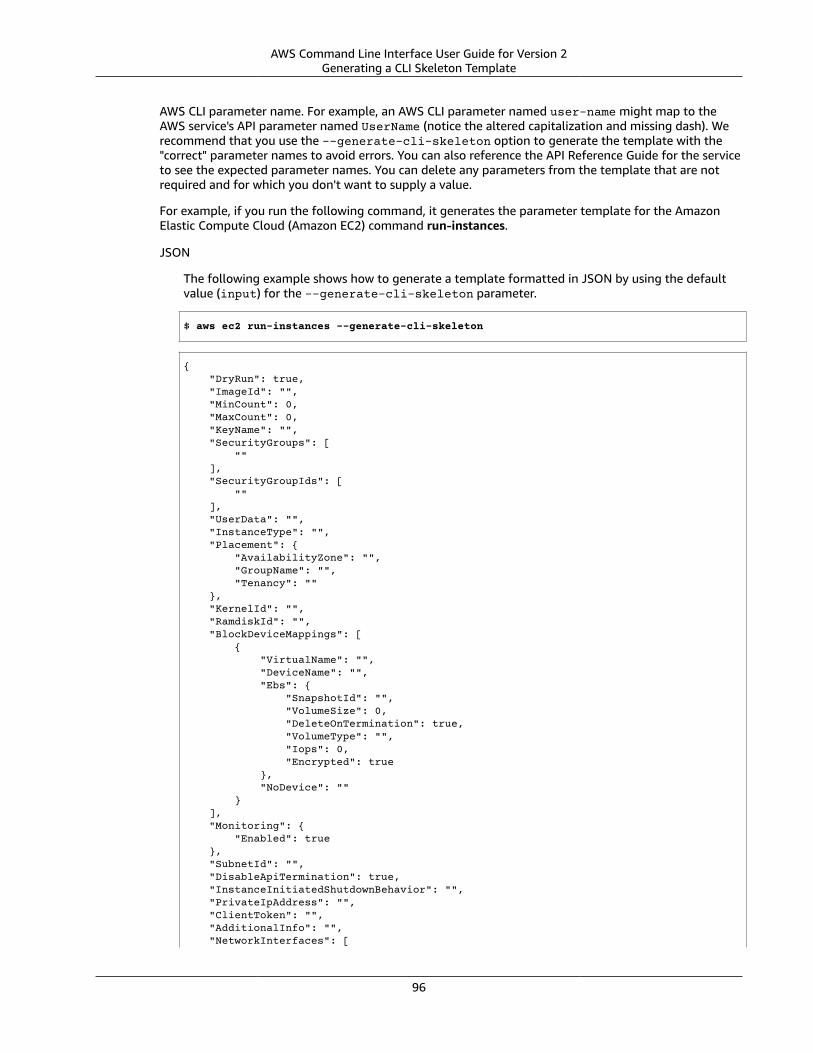
AWS Command Line Interface User Guide for Version 2Generating a CLI Skeleton Template
AWS CLI parameter name. For example, an AWS CLI parameter named user-name might map to theAWS service's API parameter named UserName (notice the altered capitalization and missing dash). Werecommend that you use the --generate-cli-skeleton option to generate the template with the"correct" parameter names to avoid errors. You can also reference the API Reference Guide for the serviceto see the expected parameter names. You can delete any parameters from the template that are notrequired and for which you don't want to supply a value.
For example, if you run the following command, it generates the parameter template for the AmazonElastic Compute Cloud (Amazon EC2) command run-instances.
JSON
The following example shows how to generate a template formatted in JSON by using the defaultvalue (input) for the --generate-cli-skeleton parameter.
$ aws ec2 run-instances --generate-cli-skeleton
{ "DryRun": true, "ImageId": "", "MinCount": 0, "MaxCount": 0, "KeyName": "", "SecurityGroups": [ "" ], "SecurityGroupIds": [ "" ], "UserData": "", "InstanceType": "", "Placement": { "AvailabilityZone": "", "GroupName": "", "Tenancy": "" }, "KernelId": "", "RamdiskId": "", "BlockDeviceMappings": [ { "VirtualName": "", "DeviceName": "", "Ebs": { "SnapshotId": "", "VolumeSize": 0, "DeleteOnTermination": true, "VolumeType": "", "Iops": 0, "Encrypted": true }, "NoDevice": "" } ], "Monitoring": { "Enabled": true }, "SubnetId": "", "DisableApiTermination": true, "InstanceInitiatedShutdownBehavior": "", "PrivateIpAddress": "", "ClientToken": "", "AdditionalInfo": "", "NetworkInterfaces": [
96
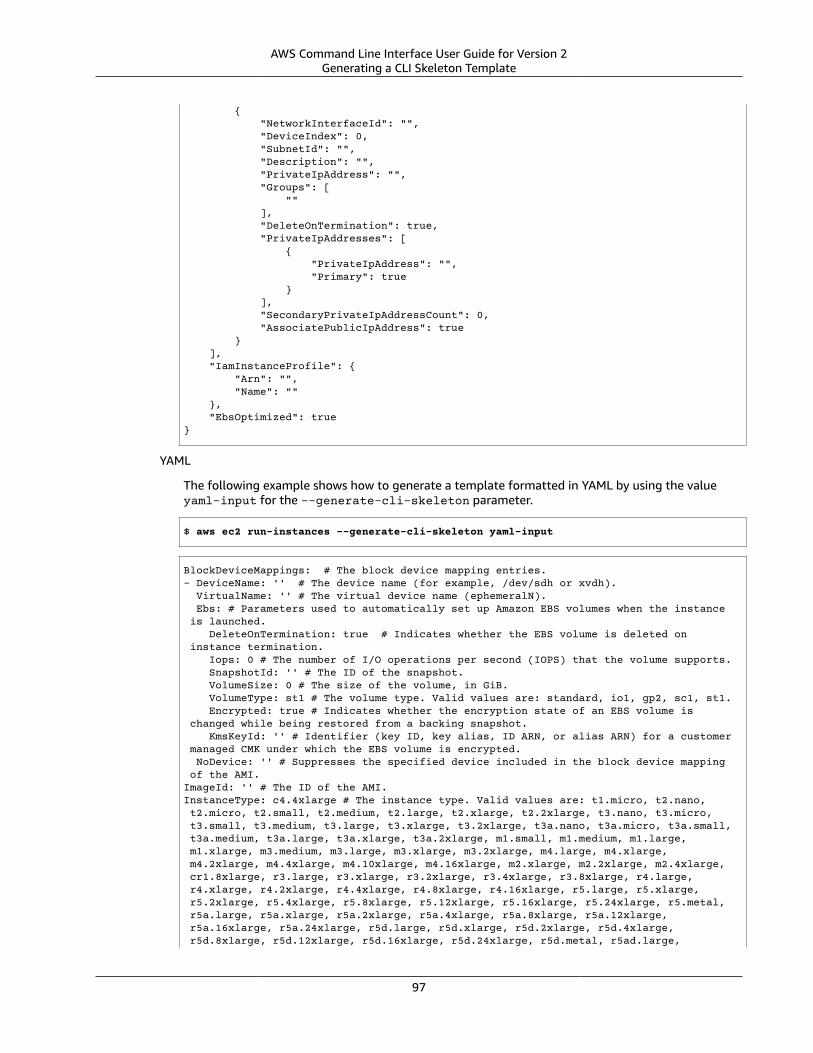
AWS Command Line Interface User Guide for Version 2Generating a CLI Skeleton Template
{ "NetworkInterfaceId": "", "DeviceIndex": 0, "SubnetId": "", "Description": "", "PrivateIpAddress": "", "Groups": [ "" ], "DeleteOnTermination": true, "PrivateIpAddresses": [ { "PrivateIpAddress": "", "Primary": true } ], "SecondaryPrivateIpAddressCount": 0, "AssociatePublicIpAddress": true } ], "IamInstanceProfile": { "Arn": "", "Name": "" }, "EbsOptimized": true}
YAML
The following example shows how to generate a template formatted in YAML by using the valueyaml-input for the --generate-cli-skeleton parameter.
$ aws ec2 run-instances --generate-cli-skeleton yaml-input
BlockDeviceMappings: # The block device mapping entries.- DeviceName: '' # The device name (for example, /dev/sdh or xvdh). VirtualName: '' # The virtual device name (ephemeralN). Ebs: # Parameters used to automatically set up Amazon EBS volumes when the instance is launched. DeleteOnTermination: true # Indicates whether the EBS volume is deleted on instance termination. Iops: 0 # The number of I/O operations per second (IOPS) that the volume supports. SnapshotId: '' # The ID of the snapshot. VolumeSize: 0 # The size of the volume, in GiB. VolumeType: st1 # The volume type. Valid values are: standard, io1, gp2, sc1, st1. Encrypted: true # Indicates whether the encryption state of an EBS volume is changed while being restored from a backing snapshot. KmsKeyId: '' # Identifier (key ID, key alias, ID ARN, or alias ARN) for a customer managed CMK under which the EBS volume is encrypted. NoDevice: '' # Suppresses the specified device included in the block device mapping of the AMI.ImageId: '' # The ID of the AMI.InstanceType: c4.4xlarge # The instance type. Valid values are: t1.micro, t2.nano, t2.micro, t2.small, t2.medium, t2.large, t2.xlarge, t2.2xlarge, t3.nano, t3.micro, t3.small, t3.medium, t3.large, t3.xlarge, t3.2xlarge, t3a.nano, t3a.micro, t3a.small, t3a.medium, t3a.large, t3a.xlarge, t3a.2xlarge, m1.small, m1.medium, m1.large, m1.xlarge, m3.medium, m3.large, m3.xlarge, m3.2xlarge, m4.large, m4.xlarge, m4.2xlarge, m4.4xlarge, m4.10xlarge, m4.16xlarge, m2.xlarge, m2.2xlarge, m2.4xlarge, cr1.8xlarge, r3.large, r3.xlarge, r3.2xlarge, r3.4xlarge, r3.8xlarge, r4.large, r4.xlarge, r4.2xlarge, r4.4xlarge, r4.8xlarge, r4.16xlarge, r5.large, r5.xlarge, r5.2xlarge, r5.4xlarge, r5.8xlarge, r5.12xlarge, r5.16xlarge, r5.24xlarge, r5.metal, r5a.large, r5a.xlarge, r5a.2xlarge, r5a.4xlarge, r5a.8xlarge, r5a.12xlarge, r5a.16xlarge, r5a.24xlarge, r5d.large, r5d.xlarge, r5d.2xlarge, r5d.4xlarge, r5d.8xlarge, r5d.12xlarge, r5d.16xlarge, r5d.24xlarge, r5d.metal, r5ad.large,
97
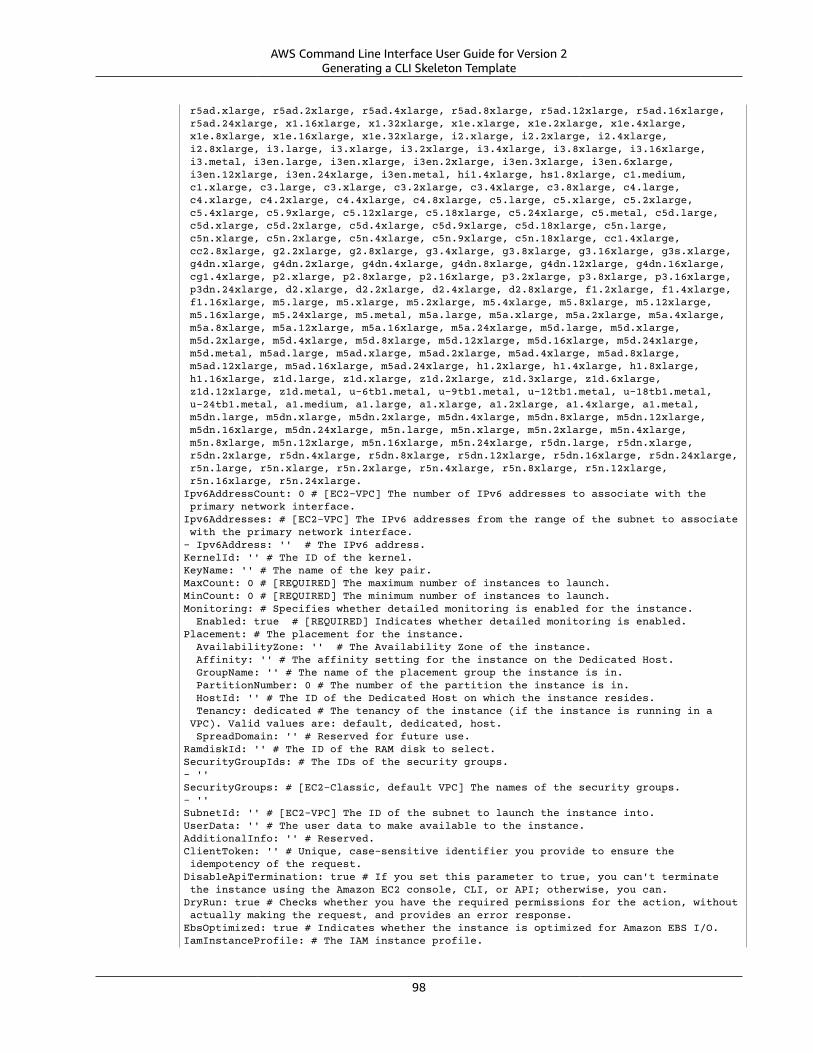
AWS Command Line Interface User Guide for Version 2Generating a CLI Skeleton Template
r5ad.xlarge, r5ad.2xlarge, r5ad.4xlarge, r5ad.8xlarge, r5ad.12xlarge, r5ad.16xlarge, r5ad.24xlarge, x1.16xlarge, x1.32xlarge, x1e.xlarge, x1e.2xlarge, x1e.4xlarge, x1e.8xlarge, x1e.16xlarge, x1e.32xlarge, i2.xlarge, i2.2xlarge, i2.4xlarge, i2.8xlarge, i3.large, i3.xlarge, i3.2xlarge, i3.4xlarge, i3.8xlarge, i3.16xlarge, i3.metal, i3en.large, i3en.xlarge, i3en.2xlarge, i3en.3xlarge, i3en.6xlarge, i3en.12xlarge, i3en.24xlarge, i3en.metal, hi1.4xlarge, hs1.8xlarge, c1.medium, c1.xlarge, c3.large, c3.xlarge, c3.2xlarge, c3.4xlarge, c3.8xlarge, c4.large, c4.xlarge, c4.2xlarge, c4.4xlarge, c4.8xlarge, c5.large, c5.xlarge, c5.2xlarge, c5.4xlarge, c5.9xlarge, c5.12xlarge, c5.18xlarge, c5.24xlarge, c5.metal, c5d.large, c5d.xlarge, c5d.2xlarge, c5d.4xlarge, c5d.9xlarge, c5d.18xlarge, c5n.large, c5n.xlarge, c5n.2xlarge, c5n.4xlarge, c5n.9xlarge, c5n.18xlarge, cc1.4xlarge, cc2.8xlarge, g2.2xlarge, g2.8xlarge, g3.4xlarge, g3.8xlarge, g3.16xlarge, g3s.xlarge, g4dn.xlarge, g4dn.2xlarge, g4dn.4xlarge, g4dn.8xlarge, g4dn.12xlarge, g4dn.16xlarge, cg1.4xlarge, p2.xlarge, p2.8xlarge, p2.16xlarge, p3.2xlarge, p3.8xlarge, p3.16xlarge, p3dn.24xlarge, d2.xlarge, d2.2xlarge, d2.4xlarge, d2.8xlarge, f1.2xlarge, f1.4xlarge, f1.16xlarge, m5.large, m5.xlarge, m5.2xlarge, m5.4xlarge, m5.8xlarge, m5.12xlarge, m5.16xlarge, m5.24xlarge, m5.metal, m5a.large, m5a.xlarge, m5a.2xlarge, m5a.4xlarge, m5a.8xlarge, m5a.12xlarge, m5a.16xlarge, m5a.24xlarge, m5d.large, m5d.xlarge, m5d.2xlarge, m5d.4xlarge, m5d.8xlarge, m5d.12xlarge, m5d.16xlarge, m5d.24xlarge, m5d.metal, m5ad.large, m5ad.xlarge, m5ad.2xlarge, m5ad.4xlarge, m5ad.8xlarge, m5ad.12xlarge, m5ad.16xlarge, m5ad.24xlarge, h1.2xlarge, h1.4xlarge, h1.8xlarge, h1.16xlarge, z1d.large, z1d.xlarge, z1d.2xlarge, z1d.3xlarge, z1d.6xlarge, z1d.12xlarge, z1d.metal, u-6tb1.metal, u-9tb1.metal, u-12tb1.metal, u-18tb1.metal, u-24tb1.metal, a1.medium, a1.large, a1.xlarge, a1.2xlarge, a1.4xlarge, a1.metal, m5dn.large, m5dn.xlarge, m5dn.2xlarge, m5dn.4xlarge, m5dn.8xlarge, m5dn.12xlarge, m5dn.16xlarge, m5dn.24xlarge, m5n.large, m5n.xlarge, m5n.2xlarge, m5n.4xlarge, m5n.8xlarge, m5n.12xlarge, m5n.16xlarge, m5n.24xlarge, r5dn.large, r5dn.xlarge, r5dn.2xlarge, r5dn.4xlarge, r5dn.8xlarge, r5dn.12xlarge, r5dn.16xlarge, r5dn.24xlarge, r5n.large, r5n.xlarge, r5n.2xlarge, r5n.4xlarge, r5n.8xlarge, r5n.12xlarge, r5n.16xlarge, r5n.24xlarge.Ipv6AddressCount: 0 # [EC2-VPC] The number of IPv6 addresses to associate with the primary network interface.Ipv6Addresses: # [EC2-VPC] The IPv6 addresses from the range of the subnet to associate with the primary network interface.- Ipv6Address: '' # The IPv6 address.KernelId: '' # The ID of the kernel.KeyName: '' # The name of the key pair.MaxCount: 0 # [REQUIRED] The maximum number of instances to launch.MinCount: 0 # [REQUIRED] The minimum number of instances to launch.Monitoring: # Specifies whether detailed monitoring is enabled for the instance. Enabled: true # [REQUIRED] Indicates whether detailed monitoring is enabled.Placement: # The placement for the instance. AvailabilityZone: '' # The Availability Zone of the instance. Affinity: '' # The affinity setting for the instance on the Dedicated Host. GroupName: '' # The name of the placement group the instance is in. PartitionNumber: 0 # The number of the partition the instance is in. HostId: '' # The ID of the Dedicated Host on which the instance resides. Tenancy: dedicated # The tenancy of the instance (if the instance is running in a VPC). Valid values are: default, dedicated, host. SpreadDomain: '' # Reserved for future use.RamdiskId: '' # The ID of the RAM disk to select.SecurityGroupIds: # The IDs of the security groups.- ''SecurityGroups: # [EC2-Classic, default VPC] The names of the security groups.- ''SubnetId: '' # [EC2-VPC] The ID of the subnet to launch the instance into.UserData: '' # The user data to make available to the instance.AdditionalInfo: '' # Reserved.ClientToken: '' # Unique, case-sensitive identifier you provide to ensure the idempotency of the request.DisableApiTermination: true # If you set this parameter to true, you can't terminate the instance using the Amazon EC2 console, CLI, or API; otherwise, you can.DryRun: true # Checks whether you have the required permissions for the action, without actually making the request, and provides an error response.EbsOptimized: true # Indicates whether the instance is optimized for Amazon EBS I/O.IamInstanceProfile: # The IAM instance profile.
98
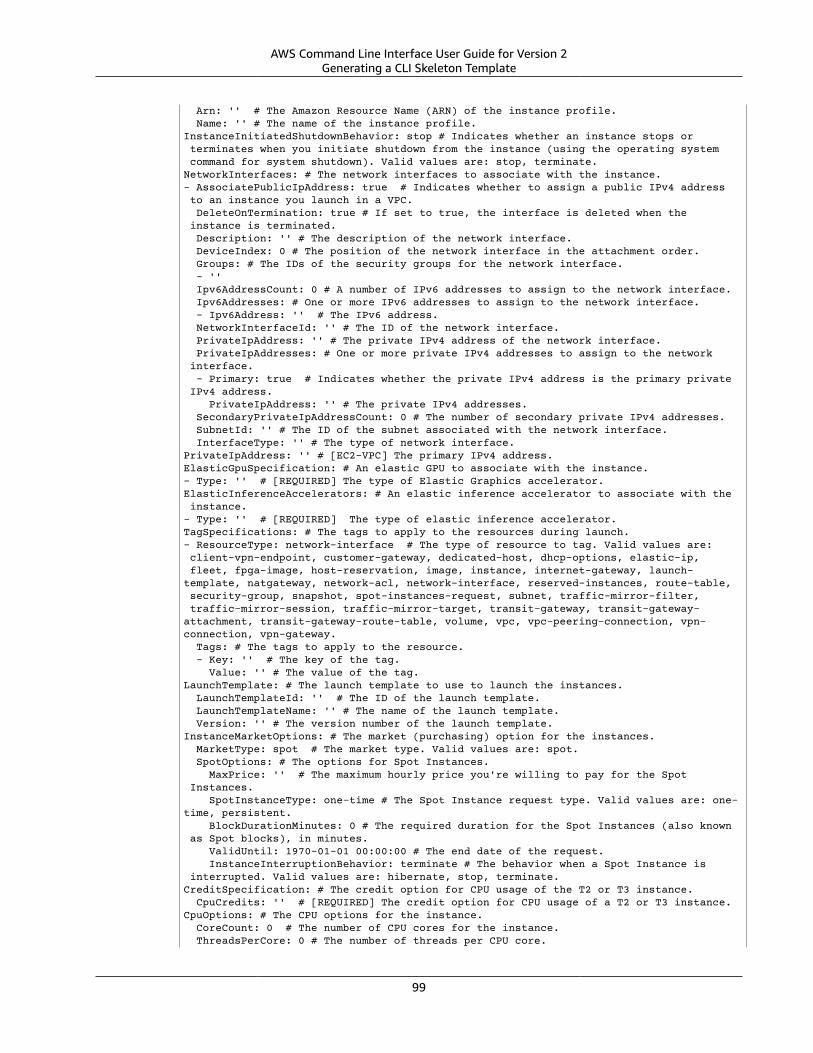
AWS Command Line Interface User Guide for Version 2Generating a CLI Skeleton Template
Arn: '' # The Amazon Resource Name (ARN) of the instance profile. Name: '' # The name of the instance profile.InstanceInitiatedShutdownBehavior: stop # Indicates whether an instance stops or terminates when you initiate shutdown from the instance (using the operating system command for system shutdown). Valid values are: stop, terminate.NetworkInterfaces: # The network interfaces to associate with the instance.- AssociatePublicIpAddress: true # Indicates whether to assign a public IPv4 address to an instance you launch in a VPC. DeleteOnTermination: true # If set to true, the interface is deleted when the instance is terminated. Description: '' # The description of the network interface. DeviceIndex: 0 # The position of the network interface in the attachment order. Groups: # The IDs of the security groups for the network interface. - '' Ipv6AddressCount: 0 # A number of IPv6 addresses to assign to the network interface. Ipv6Addresses: # One or more IPv6 addresses to assign to the network interface. - Ipv6Address: '' # The IPv6 address. NetworkInterfaceId: '' # The ID of the network interface. PrivateIpAddress: '' # The private IPv4 address of the network interface. PrivateIpAddresses: # One or more private IPv4 addresses to assign to the network interface. - Primary: true # Indicates whether the private IPv4 address is the primary private IPv4 address. PrivateIpAddress: '' # The private IPv4 addresses. SecondaryPrivateIpAddressCount: 0 # The number of secondary private IPv4 addresses. SubnetId: '' # The ID of the subnet associated with the network interface. InterfaceType: '' # The type of network interface.PrivateIpAddress: '' # [EC2-VPC] The primary IPv4 address.ElasticGpuSpecification: # An elastic GPU to associate with the instance.- Type: '' # [REQUIRED] The type of Elastic Graphics accelerator.ElasticInferenceAccelerators: # An elastic inference accelerator to associate with the instance.- Type: '' # [REQUIRED] The type of elastic inference accelerator.TagSpecifications: # The tags to apply to the resources during launch.- ResourceType: network-interface # The type of resource to tag. Valid values are: client-vpn-endpoint, customer-gateway, dedicated-host, dhcp-options, elastic-ip, fleet, fpga-image, host-reservation, image, instance, internet-gateway, launch-template, natgateway, network-acl, network-interface, reserved-instances, route-table, security-group, snapshot, spot-instances-request, subnet, traffic-mirror-filter, traffic-mirror-session, traffic-mirror-target, transit-gateway, transit-gateway-attachment, transit-gateway-route-table, volume, vpc, vpc-peering-connection, vpn-connection, vpn-gateway. Tags: # The tags to apply to the resource. - Key: '' # The key of the tag. Value: '' # The value of the tag.LaunchTemplate: # The launch template to use to launch the instances. LaunchTemplateId: '' # The ID of the launch template. LaunchTemplateName: '' # The name of the launch template. Version: '' # The version number of the launch template.InstanceMarketOptions: # The market (purchasing) option for the instances. MarketType: spot # The market type. Valid values are: spot. SpotOptions: # The options for Spot Instances. MaxPrice: '' # The maximum hourly price you're willing to pay for the Spot Instances. SpotInstanceType: one-time # The Spot Instance request type. Valid values are: one-time, persistent. BlockDurationMinutes: 0 # The required duration for the Spot Instances (also known as Spot blocks), in minutes. ValidUntil: 1970-01-01 00:00:00 # The end date of the request. InstanceInterruptionBehavior: terminate # The behavior when a Spot Instance is interrupted. Valid values are: hibernate, stop, terminate.CreditSpecification: # The credit option for CPU usage of the T2 or T3 instance. CpuCredits: '' # [REQUIRED] The credit option for CPU usage of a T2 or T3 instance.CpuOptions: # The CPU options for the instance. CoreCount: 0 # The number of CPU cores for the instance. ThreadsPerCore: 0 # The number of threads per CPU core.
99
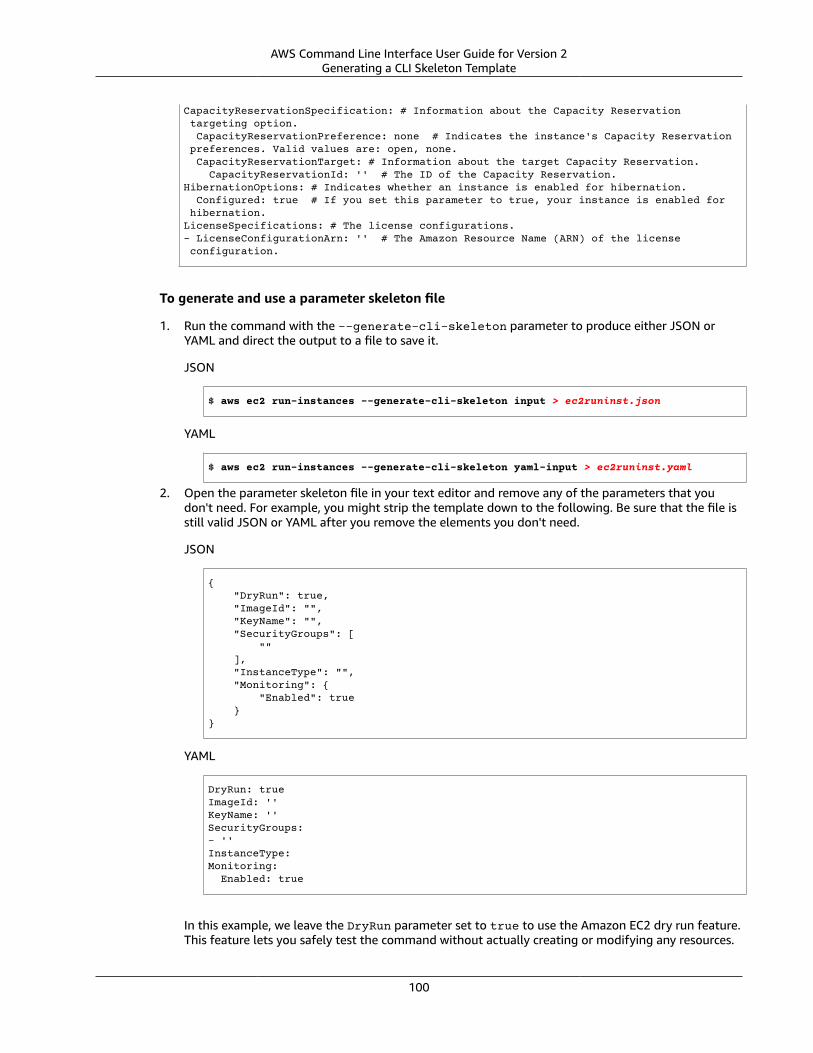
AWS Command Line Interface User Guide for Version 2Generating a CLI Skeleton Template
CapacityReservationSpecification: # Information about the Capacity Reservation targeting option. CapacityReservationPreference: none # Indicates the instance's Capacity Reservation preferences. Valid values are: open, none. CapacityReservationTarget: # Information about the target Capacity Reservation. CapacityReservationId: '' # The ID of the Capacity Reservation.HibernationOptions: # Indicates whether an instance is enabled for hibernation. Configured: true # If you set this parameter to true, your instance is enabled for hibernation.LicenseSpecifications: # The license configurations.- LicenseConfigurationArn: '' # The Amazon Resource Name (ARN) of the license configuration.
To generate and use a parameter skeleton file
1. Run the command with the --generate-cli-skeleton parameter to produce either JSON orYAML and direct the output to a file to save it.
JSON
$ aws ec2 run-instances --generate-cli-skeleton input > ec2runinst.json
YAML
$ aws ec2 run-instances --generate-cli-skeleton yaml-input > ec2runinst.yaml
2. Open the parameter skeleton file in your text editor and remove any of the parameters that youdon't need. For example, you might strip the template down to the following. Be sure that the file isstill valid JSON or YAML after you remove the elements you don't need.
JSON
{ "DryRun": true, "ImageId": "", "KeyName": "", "SecurityGroups": [ "" ], "InstanceType": "", "Monitoring": { "Enabled": true }}
YAML
DryRun: trueImageId: ''KeyName: ''SecurityGroups:- ''InstanceType:Monitoring: Enabled: true
In this example, we leave the DryRun parameter set to true to use the Amazon EC2 dry run feature.This feature lets you safely test the command without actually creating or modifying any resources.
100
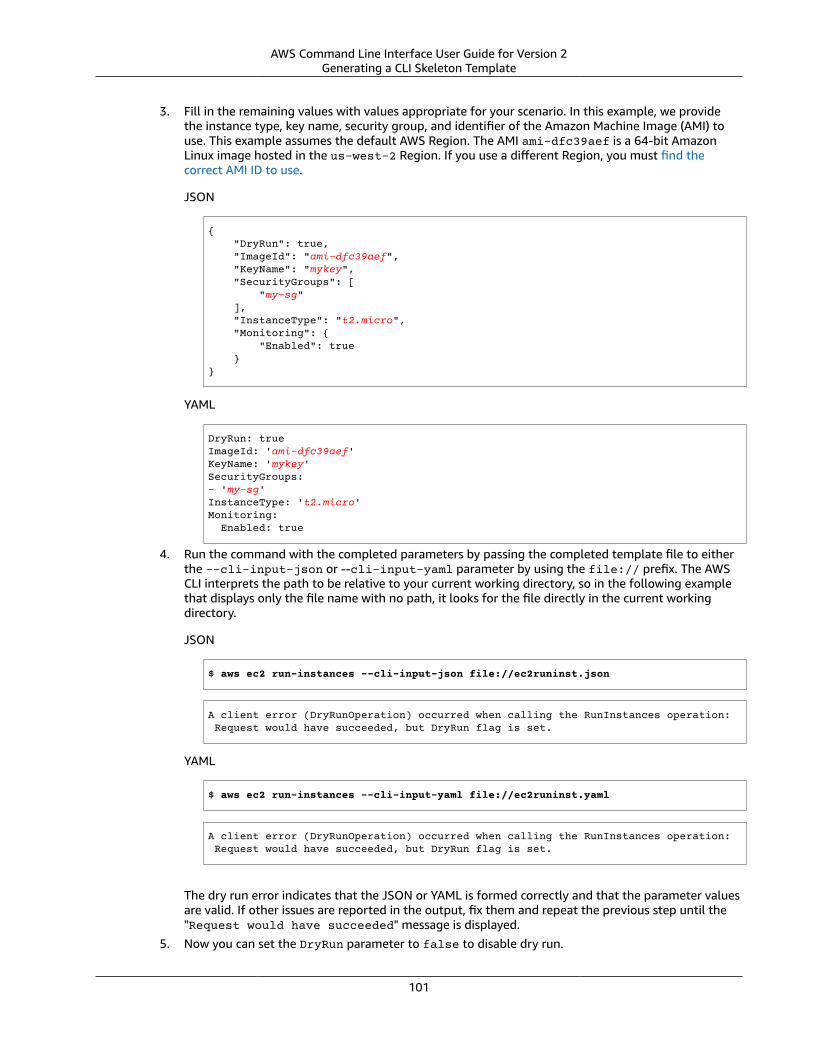
AWS Command Line Interface User Guide for Version 2Generating a CLI Skeleton Template
3. Fill in the remaining values with values appropriate for your scenario. In this example, we providethe instance type, key name, security group, and identifier of the Amazon Machine Image (AMI) touse. This example assumes the default AWS Region. The AMI ami-dfc39aef is a 64-bit AmazonLinux image hosted in the us-west-2 Region. If you use a different Region, you must find thecorrect AMI ID to use.
JSON
{ "DryRun": true, "ImageId": "ami-dfc39aef", "KeyName": "mykey", "SecurityGroups": [ "my-sg" ], "InstanceType": "t2.micro", "Monitoring": { "Enabled": true }}
YAML
DryRun: trueImageId: 'ami-dfc39aef'KeyName: 'mykey'SecurityGroups:- 'my-sg'InstanceType: 't2.micro'Monitoring: Enabled: true
4. Run the command with the completed parameters by passing the completed template file to eitherthe --cli-input-json or --cli-input-yaml parameter by using the file:// prefix. The AWSCLI interprets the path to be relative to your current working directory, so in the following examplethat displays only the file name with no path, it looks for the file directly in the current workingdirectory.
JSON
$ aws ec2 run-instances --cli-input-json file://ec2runinst.json
A client error (DryRunOperation) occurred when calling the RunInstances operation: Request would have succeeded, but DryRun flag is set.
YAML
$ aws ec2 run-instances --cli-input-yaml file://ec2runinst.yaml
A client error (DryRunOperation) occurred when calling the RunInstances operation: Request would have succeeded, but DryRun flag is set.
The dry run error indicates that the JSON or YAML is formed correctly and that the parameter valuesare valid. If other issues are reported in the output, fix them and repeat the previous step until the"Request would have succeeded" message is displayed.
5. Now you can set the DryRun parameter to false to disable dry run.
101
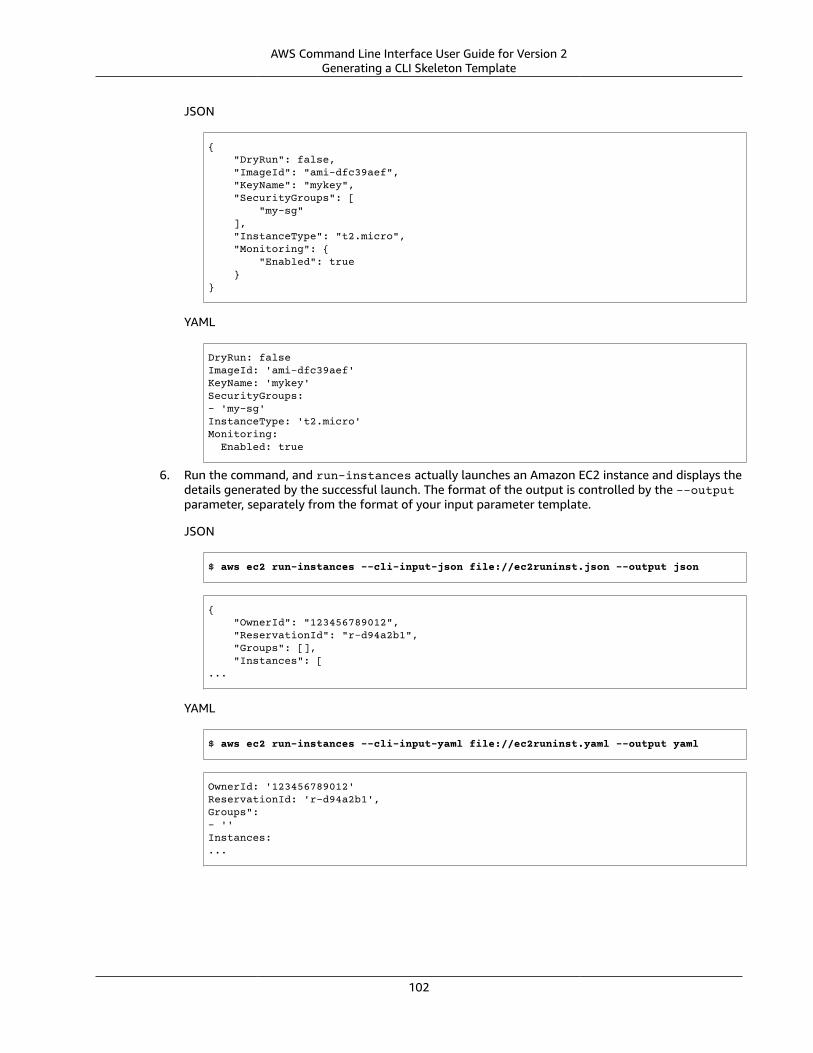
AWS Command Line Interface User Guide for Version 2Generating a CLI Skeleton Template
JSON
{ "DryRun": false, "ImageId": "ami-dfc39aef", "KeyName": "mykey", "SecurityGroups": [ "my-sg" ], "InstanceType": "t2.micro", "Monitoring": { "Enabled": true }}
YAML
DryRun: falseImageId: 'ami-dfc39aef'KeyName: 'mykey'SecurityGroups:- 'my-sg'InstanceType: 't2.micro'Monitoring: Enabled: true
6. Run the command, and run-instances actually launches an Amazon EC2 instance and displays thedetails generated by the successful launch. The format of the output is controlled by the --outputparameter, separately from the format of your input parameter template.
JSON
$ aws ec2 run-instances --cli-input-json file://ec2runinst.json --output json
{ "OwnerId": "123456789012", "ReservationId": "r-d94a2b1", "Groups": [], "Instances": [...
YAML
$ aws ec2 run-instances --cli-input-yaml file://ec2runinst.yaml --output yaml
OwnerId: '123456789012'ReservationId: 'r-d94a2b1',Groups":- ''Instances:...
102
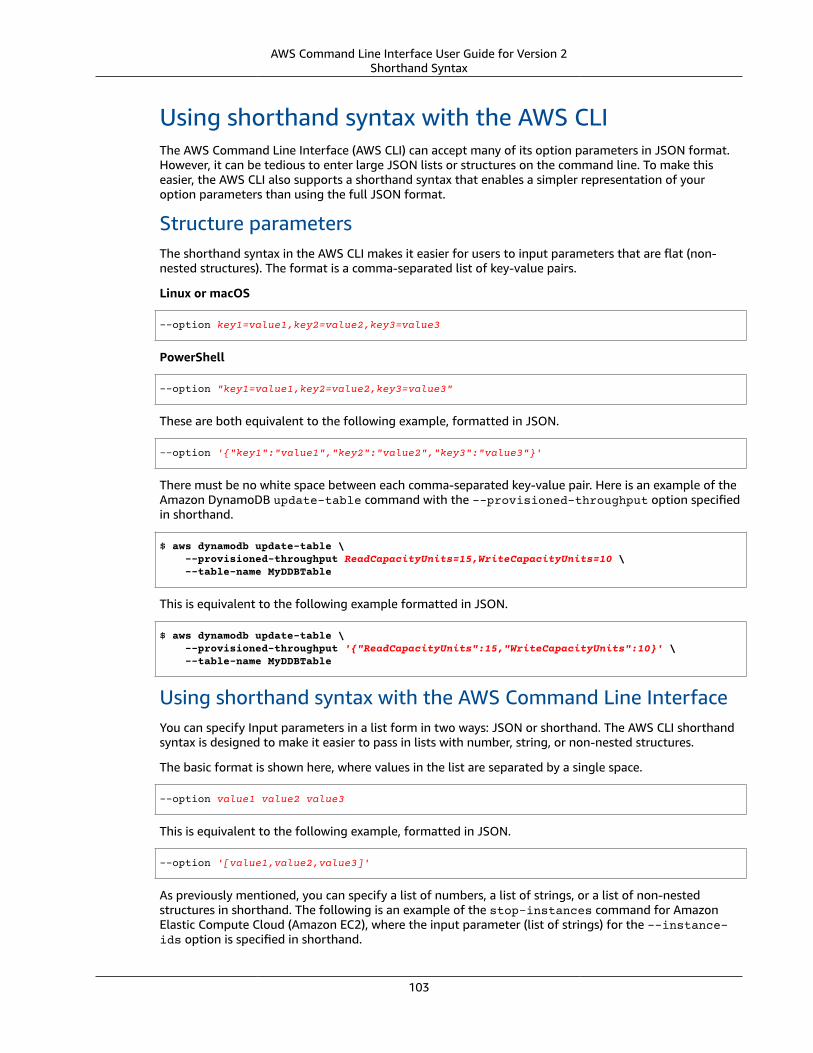
AWS Command Line Interface User Guide for Version 2Shorthand Syntax
Using shorthand syntax with the AWS CLIThe AWS Command Line Interface (AWS CLI) can accept many of its option parameters in JSON format.However, it can be tedious to enter large JSON lists or structures on the command line. To make thiseasier, the AWS CLI also supports a shorthand syntax that enables a simpler representation of youroption parameters than using the full JSON format.
Structure parametersThe shorthand syntax in the AWS CLI makes it easier for users to input parameters that are flat (non-nested structures). The format is a comma-separated list of key-value pairs.
Linux or macOS
--option key1=value1,key2=value2,key3=value3
PowerShell
--option "key1=value1,key2=value2,key3=value3"
These are both equivalent to the following example, formatted in JSON.
--option '{"key1":"value1","key2":"value2","key3":"value3"}'
There must be no white space between each comma-separated key-value pair. Here is an example of theAmazon DynamoDB update-table command with the --provisioned-throughput option specifiedin shorthand.
$ aws dynamodb update-table \ --provisioned-throughput ReadCapacityUnits=15,WriteCapacityUnits=10 \ --table-name MyDDBTable
This is equivalent to the following example formatted in JSON.
$ aws dynamodb update-table \ --provisioned-throughput '{"ReadCapacityUnits":15,"WriteCapacityUnits":10}' \ --table-name MyDDBTable
Using shorthand syntax with the AWS Command Line InterfaceYou can specify Input parameters in a list form in two ways: JSON or shorthand. The AWS CLI shorthandsyntax is designed to make it easier to pass in lists with number, string, or non-nested structures.
The basic format is shown here, where values in the list are separated by a single space.
--option value1 value2 value3
This is equivalent to the following example, formatted in JSON.
--option '[value1,value2,value3]'
As previously mentioned, you can specify a list of numbers, a list of strings, or a list of non-nestedstructures in shorthand. The following is an example of the stop-instances command for AmazonElastic Compute Cloud (Amazon EC2), where the input parameter (list of strings) for the --instance-ids option is specified in shorthand.
103
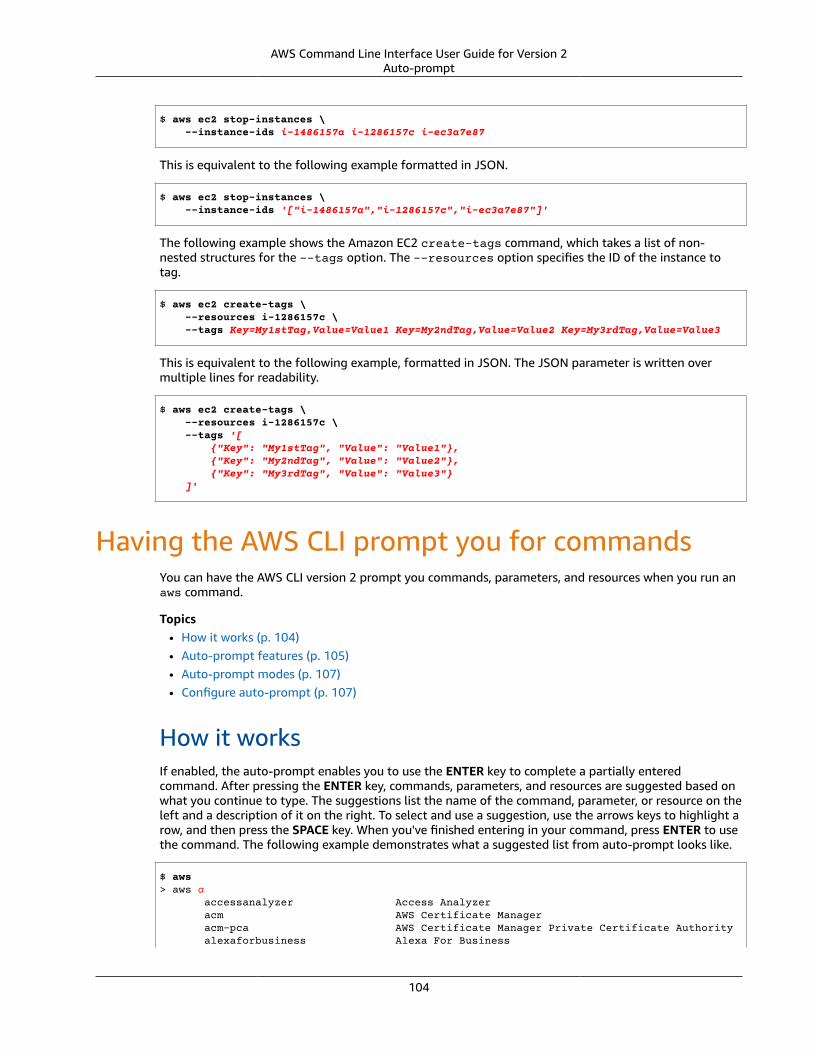
AWS Command Line Interface User Guide for Version 2Auto-prompt
$ aws ec2 stop-instances \ --instance-ids i-1486157a i-1286157c i-ec3a7e87
This is equivalent to the following example formatted in JSON.
$ aws ec2 stop-instances \ --instance-ids '["i-1486157a","i-1286157c","i-ec3a7e87"]'
The following example shows the Amazon EC2 create-tags command, which takes a list of non-nested structures for the --tags option. The --resources option specifies the ID of the instance totag.
$ aws ec2 create-tags \ --resources i-1286157c \ --tags Key=My1stTag,Value=Value1 Key=My2ndTag,Value=Value2 Key=My3rdTag,Value=Value3
This is equivalent to the following example, formatted in JSON. The JSON parameter is written overmultiple lines for readability.
$ aws ec2 create-tags \ --resources i-1286157c \ --tags '[ {"Key": "My1stTag", "Value": "Value1"}, {"Key": "My2ndTag", "Value": "Value2"}, {"Key": "My3rdTag", "Value": "Value3"} ]'
Having the AWS CLI prompt you for commandsYou can have the AWS CLI version 2 prompt you commands, parameters, and resources when you run anaws command.
Topics• How it works (p. 104)• Auto-prompt features (p. 105)• Auto-prompt modes (p. 107)• Configure auto-prompt (p. 107)
How it worksIf enabled, the auto-prompt enables you to use the ENTER key to complete a partially enteredcommand. After pressing the ENTER key, commands, parameters, and resources are suggested based onwhat you continue to type. The suggestions list the name of the command, parameter, or resource on theleft and a description of it on the right. To select and use a suggestion, use the arrows keys to highlight arow, and then press the SPACE key. When you've finished entering in your command, press ENTER to usethe command. The following example demonstrates what a suggested list from auto-prompt looks like.
$ aws> aws a accessanalyzer Access Analyzer acm AWS Certificate Manager acm-pca AWS Certificate Manager Private Certificate Authority alexaforbusiness Alexa For Business
104

AWS Command Line Interface User Guide for Version 2Auto-prompt features
amplify AWS Amplify
Auto-prompt featuresThe auto-prompt contains the following useful features:
Documentation panel
Provides the help documentation for the current command. To open the documentation, press theF3 key.
Command completion
Suggests aws commands to use. To see a list, partially enter the command. The following example issearching for a service starting with the letter a.
$ aws> aws a accessanalyzer Access Analyzer acm AWS Certificate Manager acm-pca AWS Certificate Manager Private Certificate Authority alexaforbusiness Alexa For Business amplify AWS Amplify
Parameter completion
After a command is typed, auto-prompt starts to suggest parameters. The descriptions for theparameters include the value type, and a description of what the parameter is. Required parametersare listed first, and are labeled as required. The following example shows the auto-prompt list ofparameters for aws dynamodb describe-table.
$ aws dynamodb describe-table> aws dynamodb describe-table --table-name (required) [string] The name of the table to describe. --cli-input-json [string] Reads arguments from the JSON string provided. The JSON string follows the format provide... --cli-input-yaml [string] Reads arguments from the YAML string provided. The YAML string follows the format provide... --generate-cli-skeleton [string] Prints a JSON skeleton to standard output without sending an API request. If provided wit...
Resource completion
The auto-prompt makes AWS API calls using available AWS resource properties to suggest resourcevalues. This allows for auto-prompt to suggest possible resources you own when entering inparameters. In the following example auto-prompt lists your table names when filling in the --table-name parameter for the aws dynamodb describe-table command.
$ aws dynamodb describe-table> aws dynamodb describe-table --table-name Table1 Table2 Table3
Shorthand completion
For parameters that use shorthand syntax, auto-prompt suggests values to use. In the followingexample, auto-prompt lists shorthand syntax values for the --placement parameter in the awsec2 run-stances command.
105
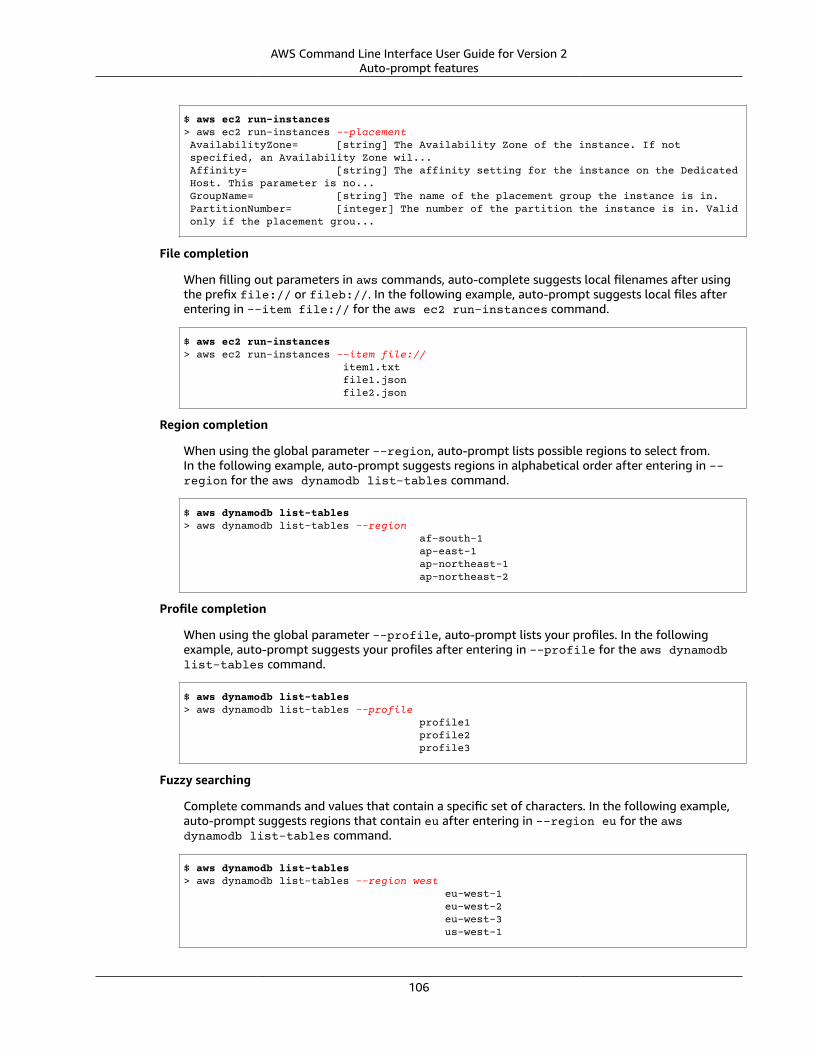
AWS Command Line Interface User Guide for Version 2Auto-prompt features
$ aws ec2 run-instances> aws ec2 run-instances --placement AvailabilityZone= [string] The Availability Zone of the instance. If not specified, an Availability Zone wil... Affinity= [string] The affinity setting for the instance on the Dedicated Host. This parameter is no... GroupName= [string] The name of the placement group the instance is in. PartitionNumber= [integer] The number of the partition the instance is in. Valid only if the placement grou...
File completion
When filling out parameters in aws commands, auto-complete suggests local filenames after usingthe prefix file:// or fileb://. In the following example, auto-prompt suggests local files afterentering in --item file:// for the aws ec2 run-instances command.
$ aws ec2 run-instances> aws ec2 run-instances --item file:// item1.txt file1.json file2.json
Region completion
When using the global parameter --region, auto-prompt lists possible regions to select from.In the following example, auto-prompt suggests regions in alphabetical order after entering in --region for the aws dynamodb list-tables command.
$ aws dynamodb list-tables> aws dynamodb list-tables --region af-south-1 ap-east-1 ap-northeast-1 ap-northeast-2
Profile completion
When using the global parameter --profile, auto-prompt lists your profiles. In the followingexample, auto-prompt suggests your profiles after entering in --profile for the aws dynamodblist-tables command.
$ aws dynamodb list-tables> aws dynamodb list-tables --profile profile1 profile2 profile3
Fuzzy searching
Complete commands and values that contain a specific set of characters. In the following example,auto-prompt suggests regions that contain eu after entering in --region eu for the awsdynamodb list-tables command.
$ aws dynamodb list-tables> aws dynamodb list-tables --region west eu-west-1 eu-west-2 eu-west-3 us-west-1
106
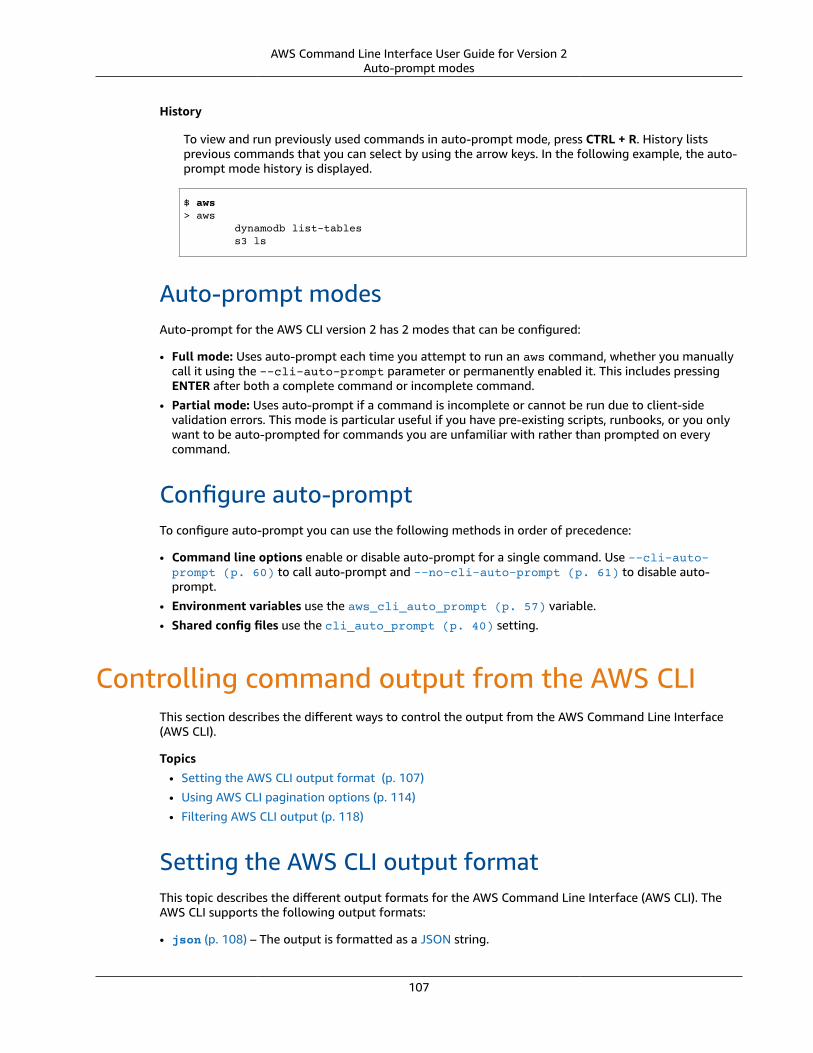
AWS Command Line Interface User Guide for Version 2Auto-prompt modes
History
To view and run previously used commands in auto-prompt mode, press CTRL + R. History listsprevious commands that you can select by using the arrow keys. In the following example, the auto-prompt mode history is displayed.
$ aws> aws dynamodb list-tables s3 ls
Auto-prompt modesAuto-prompt for the AWS CLI version 2 has 2 modes that can be configured:
• Full mode: Uses auto-prompt each time you attempt to run an aws command, whether you manuallycall it using the --cli-auto-prompt parameter or permanently enabled it. This includes pressingENTER after both a complete command or incomplete command.
• Partial mode: Uses auto-prompt if a command is incomplete or cannot be run due to client-sidevalidation errors. This mode is particular useful if you have pre-existing scripts, runbooks, or you onlywant to be auto-prompted for commands you are unfamiliar with rather than prompted on everycommand.
Configure auto-promptTo configure auto-prompt you can use the following methods in order of precedence:
• Command line options enable or disable auto-prompt for a single command. Use --cli-auto-prompt (p. 60) to call auto-prompt and --no-cli-auto-prompt (p. 61) to disable auto-prompt.
• Environment variables use the aws_cli_auto_prompt (p. 57) variable.
• Shared config files use the cli_auto_prompt (p. 40) setting.
Controlling command output from the AWS CLIThis section describes the different ways to control the output from the AWS Command Line Interface(AWS CLI).
Topics• Setting the AWS CLI output format (p. 107)
• Using AWS CLI pagination options (p. 114)
• Filtering AWS CLI output (p. 118)
Setting the AWS CLI output formatThis topic describes the different output formats for the AWS Command Line Interface (AWS CLI). TheAWS CLI supports the following output formats:
• json (p. 108) – The output is formatted as a JSON string.
107
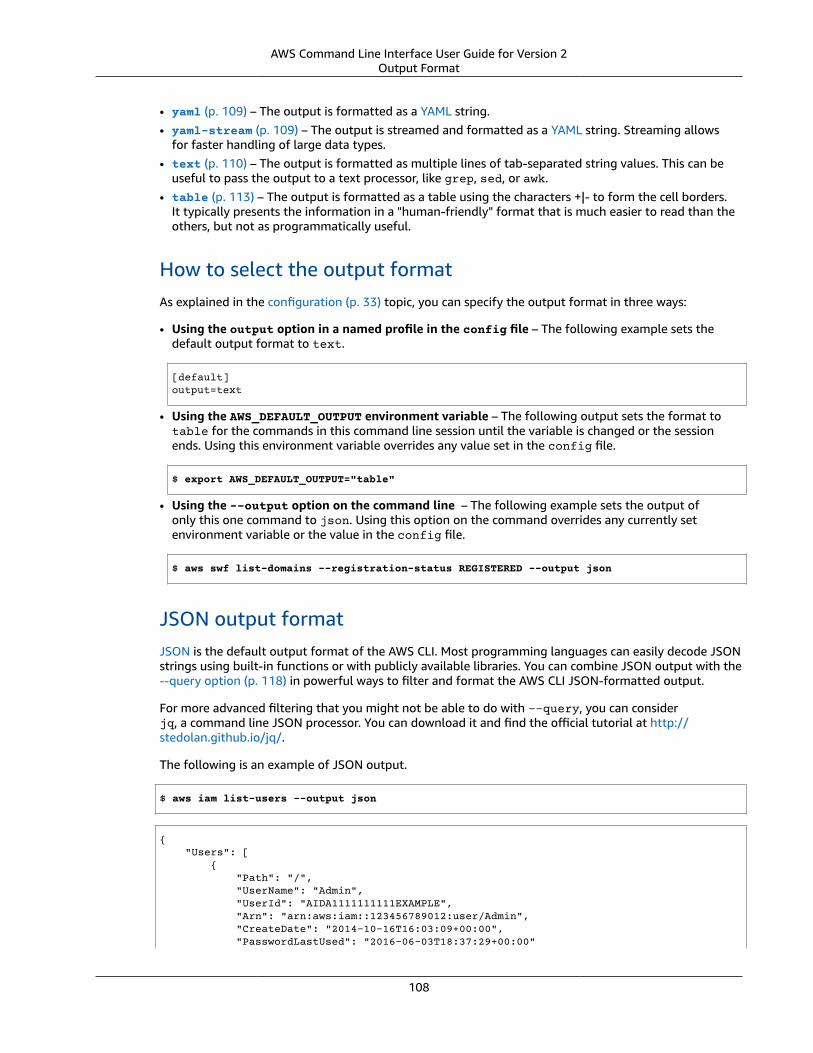
AWS Command Line Interface User Guide for Version 2Output Format
• yaml (p. 109) – The output is formatted as a YAML string.• yaml-stream (p. 109) – The output is streamed and formatted as a YAML string. Streaming allows
for faster handling of large data types.• text (p. 110) – The output is formatted as multiple lines of tab-separated string values. This can be
useful to pass the output to a text processor, like grep, sed, or awk.• table (p. 113) – The output is formatted as a table using the characters +|- to form the cell borders.
It typically presents the information in a "human-friendly" format that is much easier to read than theothers, but not as programmatically useful.
How to select the output formatAs explained in the configuration (p. 33) topic, you can specify the output format in three ways:
• Using the output option in a named profile in the config file – The following example sets thedefault output format to text.
[default]output=text
• Using the AWS_DEFAULT_OUTPUT environment variable – The following output sets the format totable for the commands in this command line session until the variable is changed or the sessionends. Using this environment variable overrides any value set in the config file.
$ export AWS_DEFAULT_OUTPUT="table"
• Using the --output option on the command line – The following example sets the output ofonly this one command to json. Using this option on the command overrides any currently setenvironment variable or the value in the config file.
$ aws swf list-domains --registration-status REGISTERED --output json
JSON output formatJSON is the default output format of the AWS CLI. Most programming languages can easily decode JSONstrings using built-in functions or with publicly available libraries. You can combine JSON output with the--query option (p. 118) in powerful ways to filter and format the AWS CLI JSON-formatted output.
For more advanced filtering that you might not be able to do with --query, you can considerjq, a command line JSON processor. You can download it and find the official tutorial at http://stedolan.github.io/jq/.
The following is an example of JSON output.
$ aws iam list-users --output json
{ "Users": [ { "Path": "/", "UserName": "Admin", "UserId": "AIDA1111111111EXAMPLE", "Arn": "arn:aws:iam::123456789012:user/Admin", "CreateDate": "2014-10-16T16:03:09+00:00", "PasswordLastUsed": "2016-06-03T18:37:29+00:00"
108

AWS Command Line Interface User Guide for Version 2Output Format
}, { "Path": "/backup/", "UserName": "backup-user", "UserId": "AIDA2222222222EXAMPLE", "Arn": "arn:aws:iam::123456789012:user/backup/backup-user", "CreateDate": "2019-09-17T19:30:40+00:00" }, { "Path": "/", "UserName": "cli-user", "UserId": "AIDA3333333333EXAMPLE", "Arn": "arn:aws:iam::123456789012:user/cli-user", "CreateDate": "2019-09-17T19:11:39+00:00" } ]}
YAML output formatYAML is a good choice for handling the output programmatically with services and tools that emit orconsume YAML-formatted strings, such as AWS CloudFormation with its support for YAML-formattedtemplates.
For more advanced filtering that you might not be able to do with --query, you can consideryq, a command line YAML processor. You can download it and find documentation at https://mikefarah.gitbook.io/yq/.
The following is an example of YAML output.
$ aws iam list-users --output yaml
Users:- Arn: arn:aws:iam::123456789012:user/Admin CreateDate: '2014-10-16T16:03:09+00:00' PasswordLastUsed: '2016-06-03T18:37:29+00:00' Path: / UserId: AIDA1111111111EXAMPLE UserName: Admin- Arn: arn:aws:iam::123456789012:user/backup/backup-user CreateDate: '2019-09-17T19:30:40+00:00' Path: /backup/ UserId: AIDA2222222222EXAMPLE UserName: arq-45EFD6D1-CE56-459B-B39F-F9C1F78FBE19- Arn: arn:aws:iam::123456789012:user/cli-user CreateDate: '2019-09-17T19:30:40+00:00' Path: / UserId: AIDA3333333333EXAMPLE UserName: cli-user
YAML stream output formatThe yaml-stream format takes advantage of the YAML format while providing more responsive/fasterviewing of large data sets by streaming the data to you. You can start viewing and using YAML databefore the entire query downloads.
For more advanced filtering that you might not be able to do with --query, you can consideryq, a command line YAML processor. You can download it and find documentation at http://mikefarah.github.io/yq/.
109
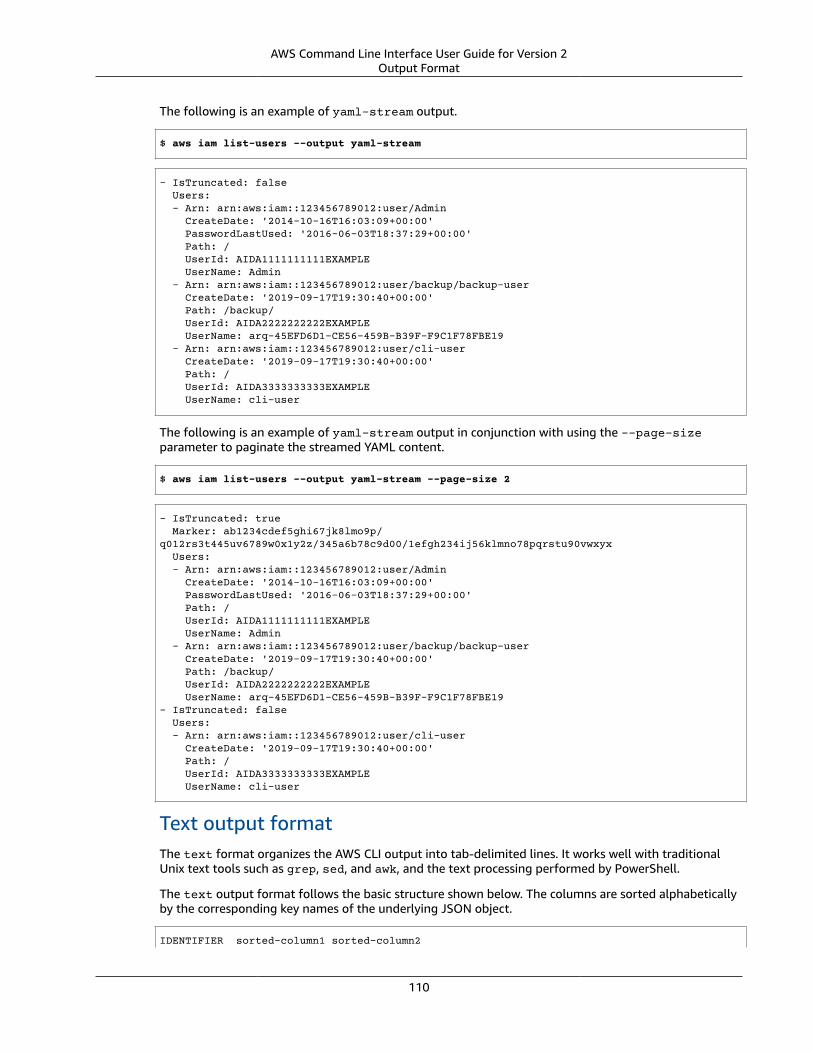
AWS Command Line Interface User Guide for Version 2Output Format
The following is an example of yaml-stream output.
$ aws iam list-users --output yaml-stream
- IsTruncated: false Users: - Arn: arn:aws:iam::123456789012:user/Admin CreateDate: '2014-10-16T16:03:09+00:00' PasswordLastUsed: '2016-06-03T18:37:29+00:00' Path: / UserId: AIDA1111111111EXAMPLE UserName: Admin - Arn: arn:aws:iam::123456789012:user/backup/backup-user CreateDate: '2019-09-17T19:30:40+00:00' Path: /backup/ UserId: AIDA2222222222EXAMPLE UserName: arq-45EFD6D1-CE56-459B-B39F-F9C1F78FBE19 - Arn: arn:aws:iam::123456789012:user/cli-user CreateDate: '2019-09-17T19:30:40+00:00' Path: / UserId: AIDA3333333333EXAMPLE UserName: cli-user
The following is an example of yaml-stream output in conjunction with using the --page-sizeparameter to paginate the streamed YAML content.
$ aws iam list-users --output yaml-stream --page-size 2
- IsTruncated: true Marker: ab1234cdef5ghi67jk8lmo9p/q012rs3t445uv6789w0x1y2z/345a6b78c9d00/1efgh234ij56klmno78pqrstu90vwxyx Users: - Arn: arn:aws:iam::123456789012:user/Admin CreateDate: '2014-10-16T16:03:09+00:00' PasswordLastUsed: '2016-06-03T18:37:29+00:00' Path: / UserId: AIDA1111111111EXAMPLE UserName: Admin - Arn: arn:aws:iam::123456789012:user/backup/backup-user CreateDate: '2019-09-17T19:30:40+00:00' Path: /backup/ UserId: AIDA2222222222EXAMPLE UserName: arq-45EFD6D1-CE56-459B-B39F-F9C1F78FBE19- IsTruncated: false Users: - Arn: arn:aws:iam::123456789012:user/cli-user CreateDate: '2019-09-17T19:30:40+00:00' Path: / UserId: AIDA3333333333EXAMPLE UserName: cli-user
Text output formatThe text format organizes the AWS CLI output into tab-delimited lines. It works well with traditionalUnix text tools such as grep, sed, and awk, and the text processing performed by PowerShell.
The text output format follows the basic structure shown below. The columns are sorted alphabeticallyby the corresponding key names of the underlying JSON object.
IDENTIFIER sorted-column1 sorted-column2
110
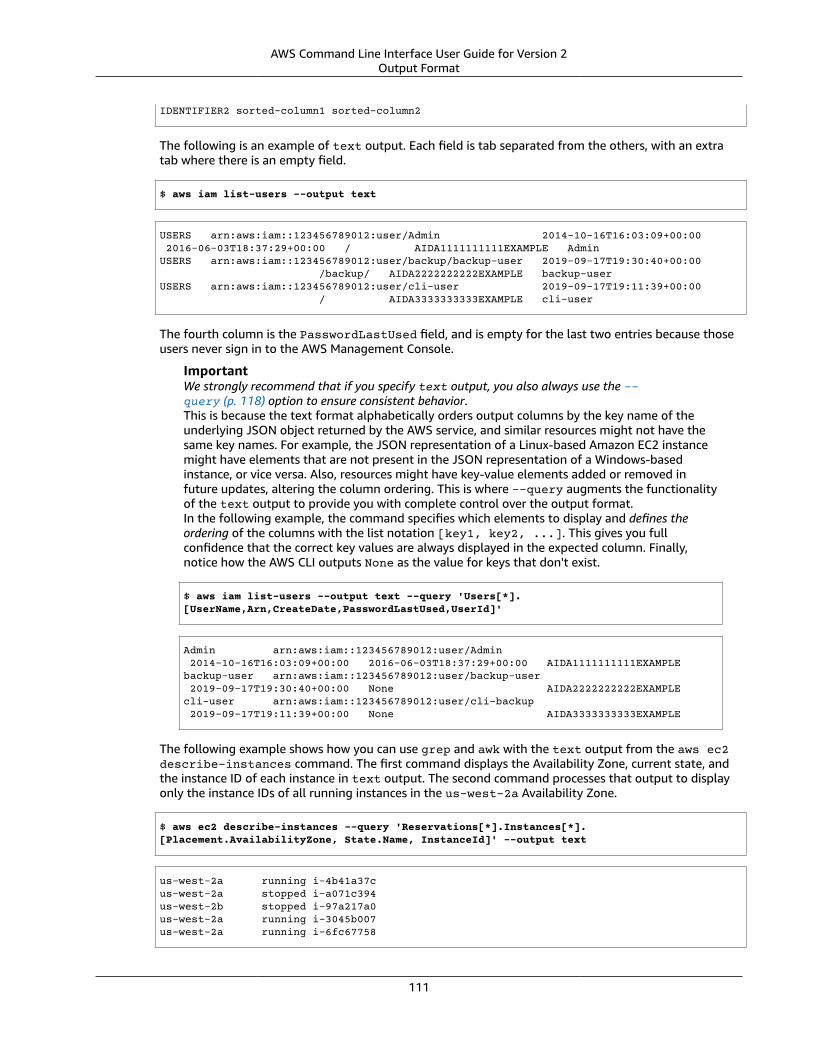
AWS Command Line Interface User Guide for Version 2Output Format
IDENTIFIER2 sorted-column1 sorted-column2
The following is an example of text output. Each field is tab separated from the others, with an extratab where there is an empty field.
$ aws iam list-users --output text
USERS arn:aws:iam::123456789012:user/Admin 2014-10-16T16:03:09+00:00 2016-06-03T18:37:29+00:00 / AIDA1111111111EXAMPLE AdminUSERS arn:aws:iam::123456789012:user/backup/backup-user 2019-09-17T19:30:40+00:00 /backup/ AIDA2222222222EXAMPLE backup-userUSERS arn:aws:iam::123456789012:user/cli-user 2019-09-17T19:11:39+00:00 / AIDA3333333333EXAMPLE cli-user
The fourth column is the PasswordLastUsed field, and is empty for the last two entries because thoseusers never sign in to the AWS Management Console.
ImportantWe strongly recommend that if you specify text output, you also always use the --query (p. 118) option to ensure consistent behavior.This is because the text format alphabetically orders output columns by the key name of theunderlying JSON object returned by the AWS service, and similar resources might not have thesame key names. For example, the JSON representation of a Linux-based Amazon EC2 instancemight have elements that are not present in the JSON representation of a Windows-basedinstance, or vice versa. Also, resources might have key-value elements added or removed infuture updates, altering the column ordering. This is where --query augments the functionalityof the text output to provide you with complete control over the output format.In the following example, the command specifies which elements to display and defines theordering of the columns with the list notation [key1, key2, ...]. This gives you fullconfidence that the correct key values are always displayed in the expected column. Finally,notice how the AWS CLI outputs None as the value for keys that don't exist.
$ aws iam list-users --output text --query 'Users[*].[UserName,Arn,CreateDate,PasswordLastUsed,UserId]'
Admin arn:aws:iam::123456789012:user/Admin 2014-10-16T16:03:09+00:00 2016-06-03T18:37:29+00:00 AIDA1111111111EXAMPLEbackup-user arn:aws:iam::123456789012:user/backup-user 2019-09-17T19:30:40+00:00 None AIDA2222222222EXAMPLEcli-user arn:aws:iam::123456789012:user/cli-backup 2019-09-17T19:11:39+00:00 None AIDA3333333333EXAMPLE
The following example shows how you can use grep and awk with the text output from the aws ec2describe-instances command. The first command displays the Availability Zone, current state, andthe instance ID of each instance in text output. The second command processes that output to displayonly the instance IDs of all running instances in the us-west-2a Availability Zone.
$ aws ec2 describe-instances --query 'Reservations[*].Instances[*].[Placement.AvailabilityZone, State.Name, InstanceId]' --output text
us-west-2a running i-4b41a37cus-west-2a stopped i-a071c394us-west-2b stopped i-97a217a0us-west-2a running i-3045b007us-west-2a running i-6fc67758
111
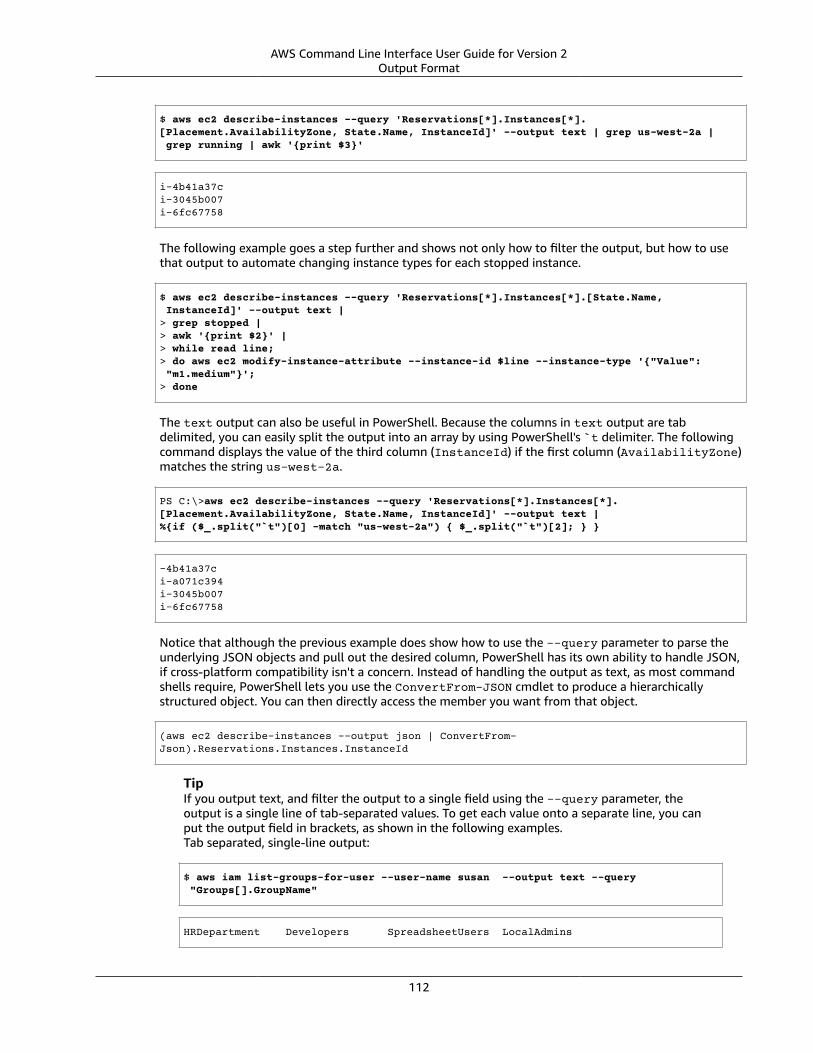
AWS Command Line Interface User Guide for Version 2Output Format
$ aws ec2 describe-instances --query 'Reservations[*].Instances[*].[Placement.AvailabilityZone, State.Name, InstanceId]' --output text | grep us-west-2a | grep running | awk '{print $3}'
i-4b41a37ci-3045b007i-6fc67758
The following example goes a step further and shows not only how to filter the output, but how to usethat output to automate changing instance types for each stopped instance.
$ aws ec2 describe-instances --query 'Reservations[*].Instances[*].[State.Name, InstanceId]' --output text |> grep stopped |> awk '{print $2}' |> while read line;> do aws ec2 modify-instance-attribute --instance-id $line --instance-type '{"Value": "m1.medium"}';> done
The text output can also be useful in PowerShell. Because the columns in text output are tabdelimited, you can easily split the output into an array by using PowerShell's `t delimiter. The followingcommand displays the value of the third column (InstanceId) if the first column (AvailabilityZone)matches the string us-west-2a.
PS C:\>aws ec2 describe-instances --query 'Reservations[*].Instances[*].[Placement.AvailabilityZone, State.Name, InstanceId]' --output text |%{if ($_.split("`t")[0] -match "us-west-2a") { $_.split("`t")[2]; } }
-4b41a37ci-a071c394i-3045b007i-6fc67758
Notice that although the previous example does show how to use the --query parameter to parse theunderlying JSON objects and pull out the desired column, PowerShell has its own ability to handle JSON,if cross-platform compatibility isn't a concern. Instead of handling the output as text, as most commandshells require, PowerShell lets you use the ConvertFrom-JSON cmdlet to produce a hierarchicallystructured object. You can then directly access the member you want from that object.
(aws ec2 describe-instances --output json | ConvertFrom-Json).Reservations.Instances.InstanceId
TipIf you output text, and filter the output to a single field using the --query parameter, theoutput is a single line of tab-separated values. To get each value onto a separate line, you canput the output field in brackets, as shown in the following examples.Tab separated, single-line output:
$ aws iam list-groups-for-user --user-name susan --output text --query "Groups[].GroupName"
HRDepartment Developers SpreadsheetUsers LocalAdmins
112
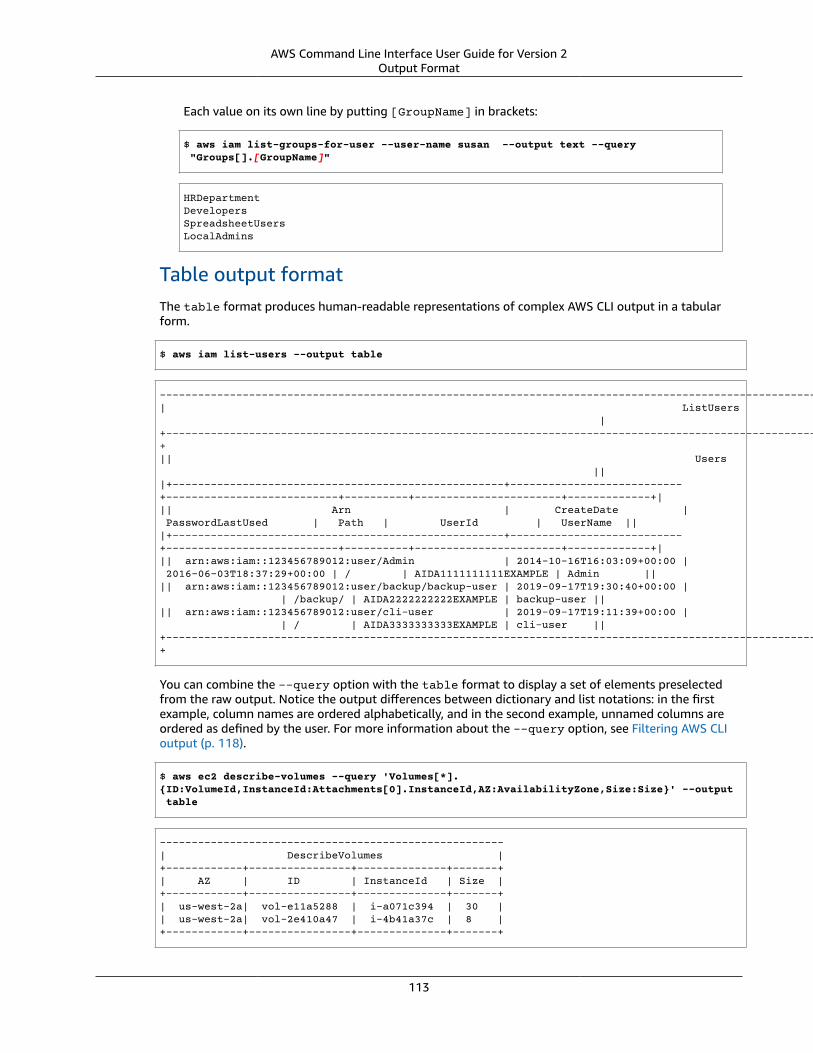
AWS Command Line Interface User Guide for Version 2Output Format
Each value on its own line by putting [GroupName] in brackets:
$ aws iam list-groups-for-user --user-name susan --output text --query "Groups[].[GroupName]"
HRDepartmentDevelopersSpreadsheetUsersLocalAdmins
Table output formatThe table format produces human-readable representations of complex AWS CLI output in a tabularform.
$ aws iam list-users --output table
-----------------------------------------------------------------------------------------------------------------------------------------------------------------| ListUsers |+---------------------------------------------------------------------------------------------------------------------------------------------------------------+|| Users |||+----------------------------------------------------+---------------------------+---------------------------+----------+-----------------------+-------------+||| Arn | CreateDate | PasswordLastUsed | Path | UserId | UserName |||+----------------------------------------------------+---------------------------+---------------------------+----------+-----------------------+-------------+||| arn:aws:iam::123456789012:user/Admin | 2014-10-16T16:03:09+00:00 | 2016-06-03T18:37:29+00:00 | / | AIDA1111111111EXAMPLE | Admin |||| arn:aws:iam::123456789012:user/backup/backup-user | 2019-09-17T19:30:40+00:00 | | /backup/ | AIDA2222222222EXAMPLE | backup-user |||| arn:aws:iam::123456789012:user/cli-user | 2019-09-17T19:11:39+00:00 | | / | AIDA3333333333EXAMPLE | cli-user ||+---------------------------------------------------------------------------------------------------------------------------------------------------------------+
You can combine the --query option with the table format to display a set of elements preselectedfrom the raw output. Notice the output differences between dictionary and list notations: in the firstexample, column names are ordered alphabetically, and in the second example, unnamed columns areordered as defined by the user. For more information about the --query option, see Filtering AWS CLIoutput (p. 118).
$ aws ec2 describe-volumes --query 'Volumes[*].{ID:VolumeId,InstanceId:Attachments[0].InstanceId,AZ:AvailabilityZone,Size:Size}' --output table
------------------------------------------------------| DescribeVolumes | +------------+----------------+--------------+-------+| AZ | ID | InstanceId | Size |+------------+----------------+--------------+-------+| us-west-2a| vol-e11a5288 | i-a071c394 | 30 || us-west-2a| vol-2e410a47 | i-4b41a37c | 8 |+------------+----------------+--------------+-------+
113
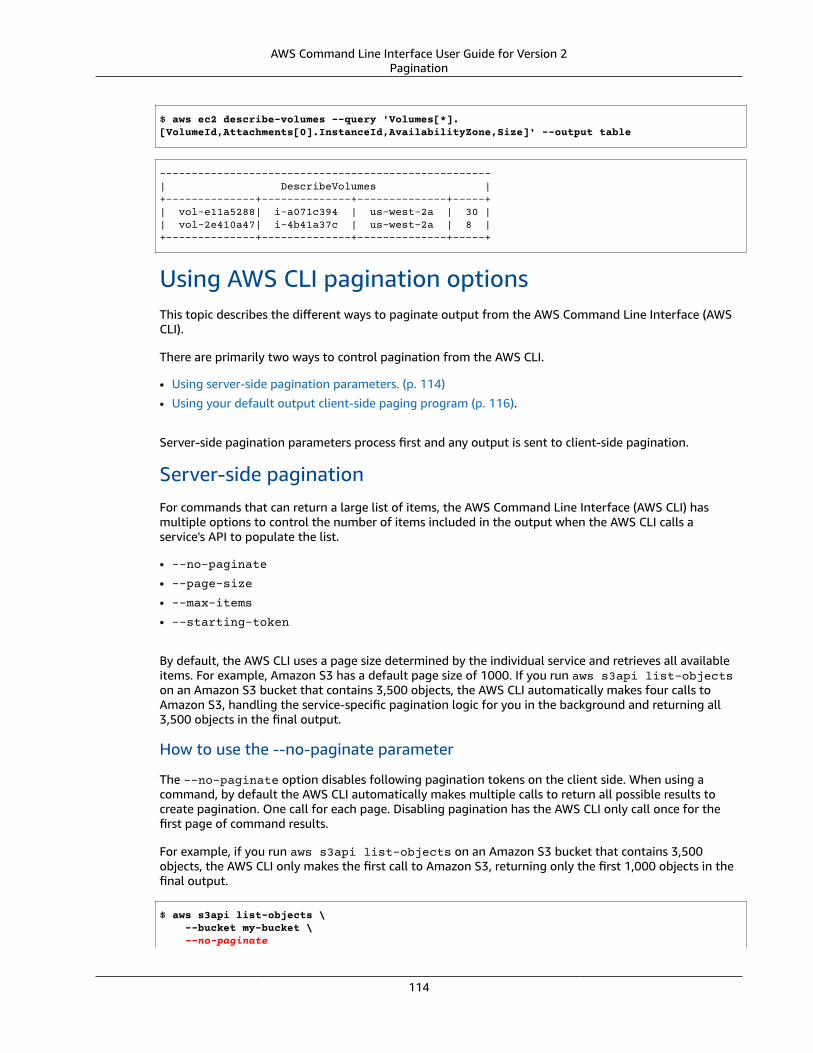
AWS Command Line Interface User Guide for Version 2Pagination
$ aws ec2 describe-volumes --query 'Volumes[*].[VolumeId,Attachments[0].InstanceId,AvailabilityZone,Size]' --output table
----------------------------------------------------| DescribeVolumes |+--------------+--------------+--------------+-----+| vol-e11a5288| i-a071c394 | us-west-2a | 30 || vol-2e410a47| i-4b41a37c | us-west-2a | 8 |+--------------+--------------+--------------+-----+
Using AWS CLI pagination optionsThis topic describes the different ways to paginate output from the AWS Command Line Interface (AWSCLI).
There are primarily two ways to control pagination from the AWS CLI.
• Using server-side pagination parameters. (p. 114)
• Using your default output client-side paging program (p. 116).
Server-side pagination parameters process first and any output is sent to client-side pagination.
Server-side paginationFor commands that can return a large list of items, the AWS Command Line Interface (AWS CLI) hasmultiple options to control the number of items included in the output when the AWS CLI calls aservice's API to populate the list.
• --no-paginate
• --page-size
• --max-items
• --starting-token
By default, the AWS CLI uses a page size determined by the individual service and retrieves all availableitems. For example, Amazon S3 has a default page size of 1000. If you run aws s3api list-objectson an Amazon S3 bucket that contains 3,500 objects, the AWS CLI automatically makes four calls toAmazon S3, handling the service-specific pagination logic for you in the background and returning all3,500 objects in the final output.
How to use the --no-paginate parameter
The --no-paginate option disables following pagination tokens on the client side. When using acommand, by default the AWS CLI automatically makes multiple calls to return all possible results tocreate pagination. One call for each page. Disabling pagination has the AWS CLI only call once for thefirst page of command results.
For example, if you run aws s3api list-objects on an Amazon S3 bucket that contains 3,500objects, the AWS CLI only makes the first call to Amazon S3, returning only the first 1,000 objects in thefinal output.
$ aws s3api list-objects \ --bucket my-bucket \ --no-paginate
114
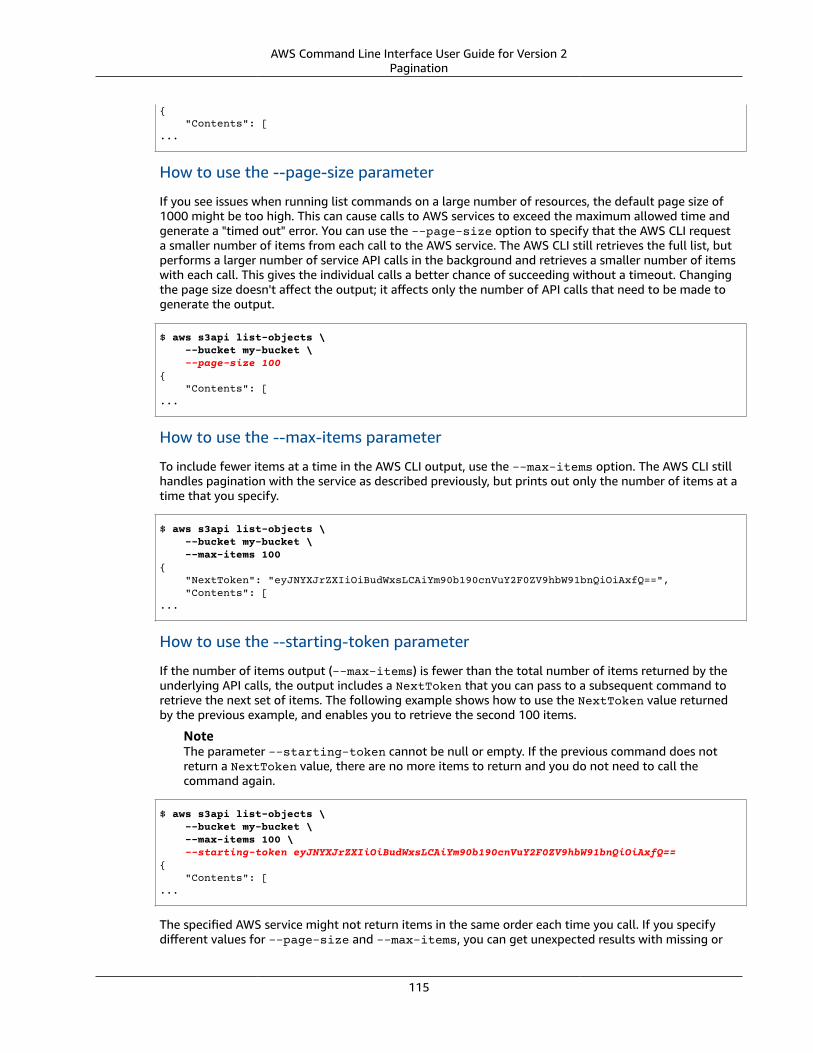
AWS Command Line Interface User Guide for Version 2Pagination
{ "Contents": [...
How to use the --page-size parameter
If you see issues when running list commands on a large number of resources, the default page size of1000 might be too high. This can cause calls to AWS services to exceed the maximum allowed time andgenerate a "timed out" error. You can use the --page-size option to specify that the AWS CLI requesta smaller number of items from each call to the AWS service. The AWS CLI still retrieves the full list, butperforms a larger number of service API calls in the background and retrieves a smaller number of itemswith each call. This gives the individual calls a better chance of succeeding without a timeout. Changingthe page size doesn't affect the output; it affects only the number of API calls that need to be made togenerate the output.
$ aws s3api list-objects \ --bucket my-bucket \ --page-size 100{ "Contents": [...
How to use the --max-items parameter
To include fewer items at a time in the AWS CLI output, use the --max-items option. The AWS CLI stillhandles pagination with the service as described previously, but prints out only the number of items at atime that you specify.
$ aws s3api list-objects \ --bucket my-bucket \ --max-items 100{ "NextToken": "eyJNYXJrZXIiOiBudWxsLCAiYm90b190cnVuY2F0ZV9hbW91bnQiOiAxfQ==", "Contents": [...
How to use the --starting-token parameter
If the number of items output (--max-items) is fewer than the total number of items returned by theunderlying API calls, the output includes a NextToken that you can pass to a subsequent command toretrieve the next set of items. The following example shows how to use the NextToken value returnedby the previous example, and enables you to retrieve the second 100 items.
NoteThe parameter --starting-token cannot be null or empty. If the previous command does notreturn a NextToken value, there are no more items to return and you do not need to call thecommand again.
$ aws s3api list-objects \ --bucket my-bucket \ --max-items 100 \ --starting-token eyJNYXJrZXIiOiBudWxsLCAiYm90b190cnVuY2F0ZV9hbW91bnQiOiAxfQ=={ "Contents": [...
The specified AWS service might not return items in the same order each time you call. If you specifydifferent values for --page-size and --max-items, you can get unexpected results with missing or
115
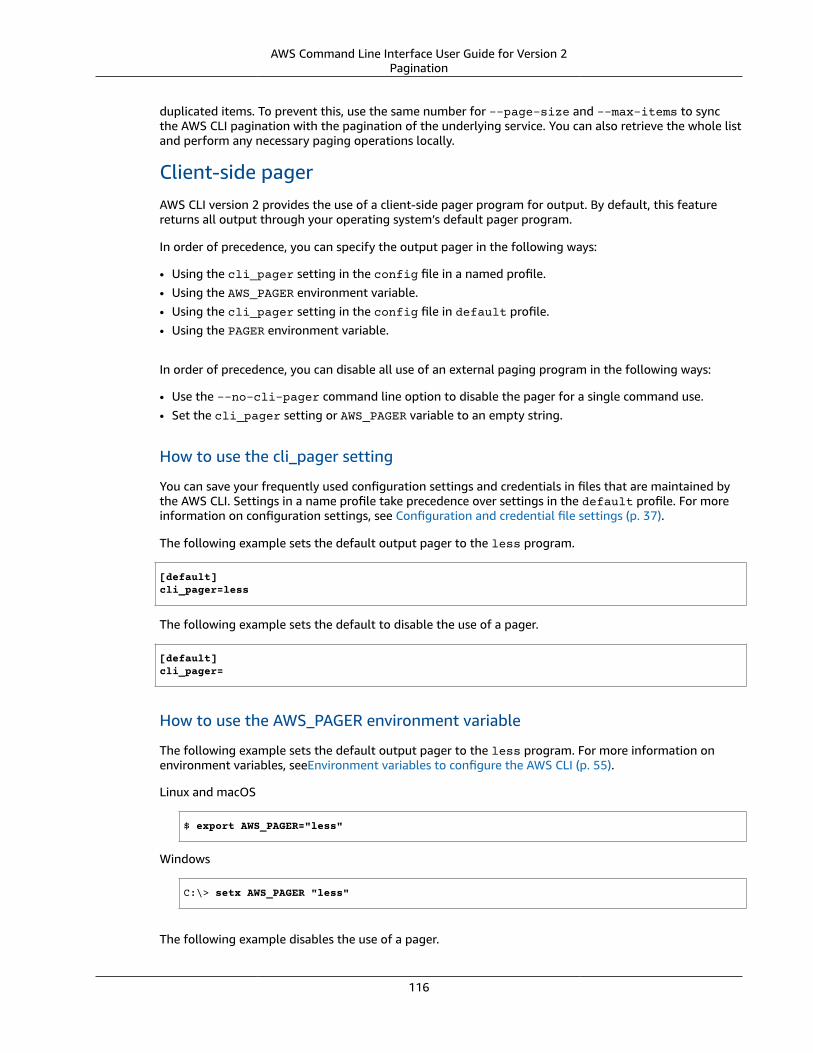
AWS Command Line Interface User Guide for Version 2Pagination
duplicated items. To prevent this, use the same number for --page-size and --max-items to syncthe AWS CLI pagination with the pagination of the underlying service. You can also retrieve the whole listand perform any necessary paging operations locally.
Client-side pagerAWS CLI version 2 provides the use of a client-side pager program for output. By default, this featurereturns all output through your operating system’s default pager program.
In order of precedence, you can specify the output pager in the following ways:
• Using the cli_pager setting in the config file in a named profile.• Using the AWS_PAGER environment variable.• Using the cli_pager setting in the config file in default profile.• Using the PAGER environment variable.
In order of precedence, you can disable all use of an external paging program in the following ways:
• Use the --no-cli-pager command line option to disable the pager for a single command use.• Set the cli_pager setting or AWS_PAGER variable to an empty string.
How to use the cli_pager setting
You can save your frequently used configuration settings and credentials in files that are maintained bythe AWS CLI. Settings in a name profile take precedence over settings in the default profile. For moreinformation on configuration settings, see Configuration and credential file settings (p. 37).
The following example sets the default output pager to the less program.
[default]cli_pager=less
The following example sets the default to disable the use of a pager.
[default]cli_pager=
How to use the AWS_PAGER environment variable
The following example sets the default output pager to the less program. For more information onenvironment variables, seeEnvironment variables to configure the AWS CLI (p. 55).
Linux and macOS
$ export AWS_PAGER="less"
Windows
C:\> setx AWS_PAGER "less"
The following example disables the use of a pager.
116
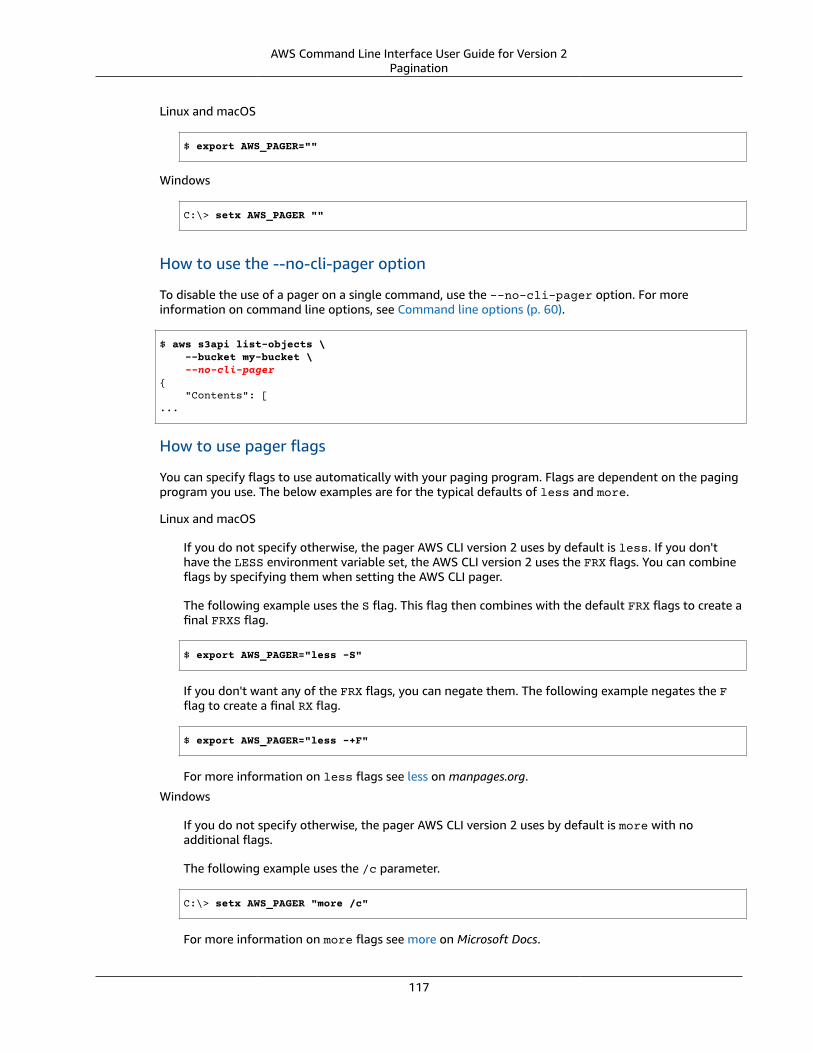
AWS Command Line Interface User Guide for Version 2Pagination
Linux and macOS
$ export AWS_PAGER=""
Windows
C:\> setx AWS_PAGER ""
How to use the --no-cli-pager option
To disable the use of a pager on a single command, use the --no-cli-pager option. For moreinformation on command line options, see Command line options (p. 60).
$ aws s3api list-objects \ --bucket my-bucket \ --no-cli-pager{ "Contents": [...
How to use pager flags
You can specify flags to use automatically with your paging program. Flags are dependent on the pagingprogram you use. The below examples are for the typical defaults of less and more.
Linux and macOS
If you do not specify otherwise, the pager AWS CLI version 2 uses by default is less. If you don'thave the LESS environment variable set, the AWS CLI version 2 uses the FRX flags. You can combineflags by specifying them when setting the AWS CLI pager.
The following example uses the S flag. This flag then combines with the default FRX flags to create afinal FRXS flag.
$ export AWS_PAGER="less -S"
If you don't want any of the FRX flags, you can negate them. The following example negates the Fflag to create a final RX flag.
$ export AWS_PAGER="less -+F"
For more information on less flags see less on manpages.org.
Windows
If you do not specify otherwise, the pager AWS CLI version 2 uses by default is more with noadditional flags.
The following example uses the /c parameter.
C:\> setx AWS_PAGER "more /c"
For more information on more flags see more on Microsoft Docs.
117
AWS Command Line Interface User Guide for Version 2Filtering
Filtering AWS CLI outputThe AWS Command Line Interface (AWS CLI) has both server-side and client-side filtering that you canuse individually or together to filter your AWS CLI output. Server-side filtering is processed first andreturns your output for client-side filtering.
• Server-side filtering is supported by the API, and you usually implement it with a --filterparameter. The service only returns matching results which can speed up HTTP response times forlarge data sets.
• Client-side filtering is supported by the AWS CLI client using the --query parameter. This parameterhas capabilities the server-side filtering may not have.
Topics
• Server-side filtering (p. 118)
• Client-side filtering (p. 118)
• Combining server-side and client-side filtering (p. 132)
• Additional resources (p. 133)
Server-side filteringServer-side filtering in the AWS CLI is provided by the AWS service API. The AWS service only returns therecords in the HTTP response that match your filter, which can speed up HTTP response times for largedata sets. Since server-side filtering is defined by the service API, the parameter names and functionsvary between services. Some common parameter names used for filtering are:
• --filter such as ses and ce.
• --filters such as ec2, autoscaling, and rds.
• Names starting with the word filter, for example --filter-expression for the aws dynamodbscan command.
For information about whether a specific command has server-side filtering and the filtering rules, seethe AWS CLI version 2 reference guide.
Client-side filteringThe AWS CLI provides built-in JSON-based client-side filtering capabilities with the --query parameter.The --query parameter is a powerful tool you can use to customize the content and style of youroutput. The --query parameter takes the HTTP response that comes back from the server and filtersthe results before displaying them. Since the entire HTTP response is sent to the client before filtering,client-side filtering can be slower than server-side filtering for large data-sets.
Querying uses JMESPath syntax to create expressions for filtering your output. To learn JMESPath syntax,see Tutorial on the JMESPath website.
ImportantThe output type you specify changes how the --query option operates:
• If you specify --output text, the output is paginated before the --query filter is applied,and the AWS CLI runs the query once on each page of the output. Due to this, the queryincludes the first matching element on each page which can result in unexpected extraoutput. To additionally filter the output, you can use other command line tools such as heador tail.
118

AWS Command Line Interface User Guide for Version 2Filtering
• If you specify --output json, --output yaml, or --output yaml-stream the outputis completely processed as a single, native structure before the --query filter is applied. TheAWS CLI runs the query only once against the entire structure, producing a filtered result thatis then output.
Client-side filtering topics• Before you start (p. 119)• Identifiers (p. 120)• Selecting from a list (p. 121)• Filtering nested data (p. 125)• Flattening results (p. 126)• Filtering for specific values (p. 126)• Piping expressions (p. 127)• Filtering for multiple identifier values (p. 128)• Adding labels to identifier values (p. 129)• Functions (p. 130)• Advanced --query examples (p. 131)
Before you start
When using filter expressions used in these examples, be sure to use the correct quoting rules for yourterminal shell. For more information, see the section called “Quotes with Strings” (p. 90).
The following JSON output shows an example of what the --query parameter can produce. The outputdescribes three Amazon EBS volumes attached to separate Amazon EC2 instances.
Example output
$ aws ec2 describe-volumes{ "Volumes": [ { "AvailabilityZone": "us-west-2a", "Attachments": [ { "AttachTime": "2013-09-17T00:55:03.000Z", "InstanceId": "i-a071c394", "VolumeId": "vol-e11a5288", "State": "attached", "DeleteOnTermination": true, "Device": "/dev/sda1" } ], "VolumeType": "standard", "VolumeId": "vol-e11a5288", "State": "in-use", "SnapshotId": "snap-f23ec1c8", "CreateTime": "2013-09-17T00:55:03.000Z", "Size": 30 }, { "AvailabilityZone": "us-west-2a", "Attachments": [ { "AttachTime": "2013-09-18T20:26:16.000Z", "InstanceId": "i-4b41a37c", "VolumeId": "vol-2e410a47",
119
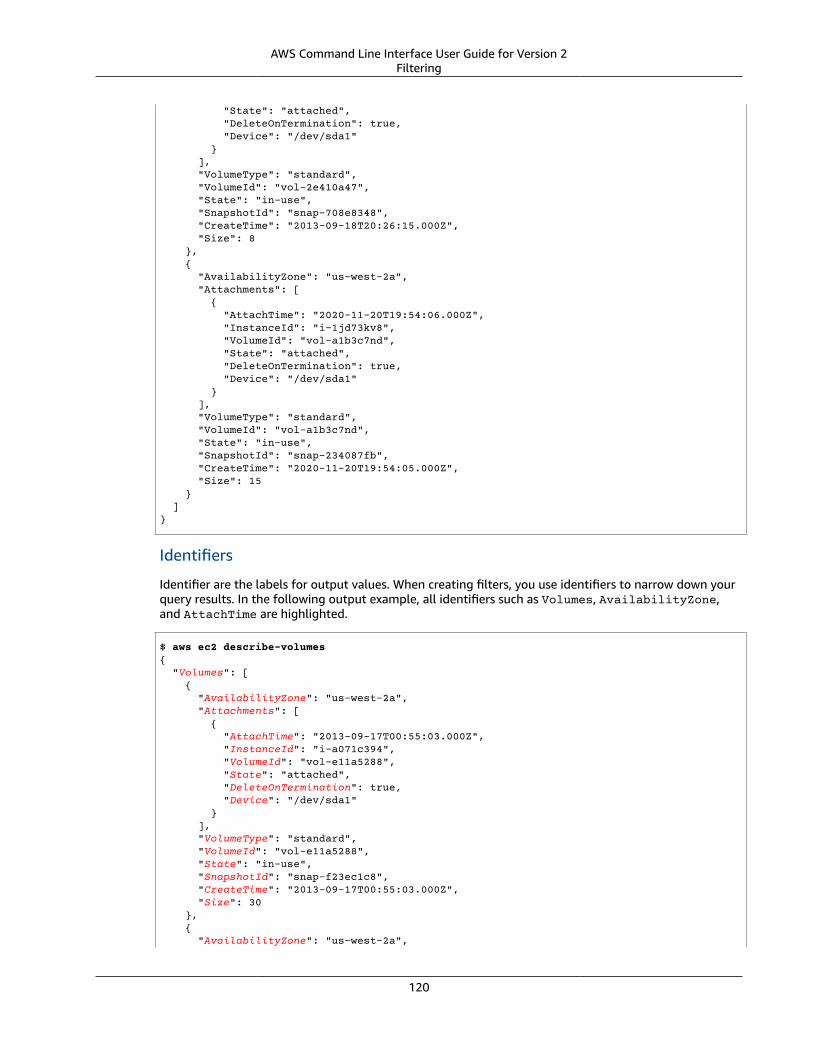
AWS Command Line Interface User Guide for Version 2Filtering
"State": "attached", "DeleteOnTermination": true, "Device": "/dev/sda1" } ], "VolumeType": "standard", "VolumeId": "vol-2e410a47", "State": "in-use", "SnapshotId": "snap-708e8348", "CreateTime": "2013-09-18T20:26:15.000Z", "Size": 8 }, { "AvailabilityZone": "us-west-2a", "Attachments": [ { "AttachTime": "2020-11-20T19:54:06.000Z", "InstanceId": "i-1jd73kv8", "VolumeId": "vol-a1b3c7nd", "State": "attached", "DeleteOnTermination": true, "Device": "/dev/sda1" } ], "VolumeType": "standard", "VolumeId": "vol-a1b3c7nd", "State": "in-use", "SnapshotId": "snap-234087fb", "CreateTime": "2020-11-20T19:54:05.000Z", "Size": 15 } ]}
Identifiers
Identifier are the labels for output values. When creating filters, you use identifiers to narrow down yourquery results. In the following output example, all identifiers such as Volumes, AvailabilityZone,and AttachTime are highlighted.
$ aws ec2 describe-volumes{ "Volumes": [ { "AvailabilityZone": "us-west-2a", "Attachments": [ { "AttachTime": "2013-09-17T00:55:03.000Z", "InstanceId": "i-a071c394", "VolumeId": "vol-e11a5288", "State": "attached", "DeleteOnTermination": true, "Device": "/dev/sda1" } ], "VolumeType": "standard", "VolumeId": "vol-e11a5288", "State": "in-use", "SnapshotId": "snap-f23ec1c8", "CreateTime": "2013-09-17T00:55:03.000Z", "Size": 30 }, { "AvailabilityZone": "us-west-2a",
120
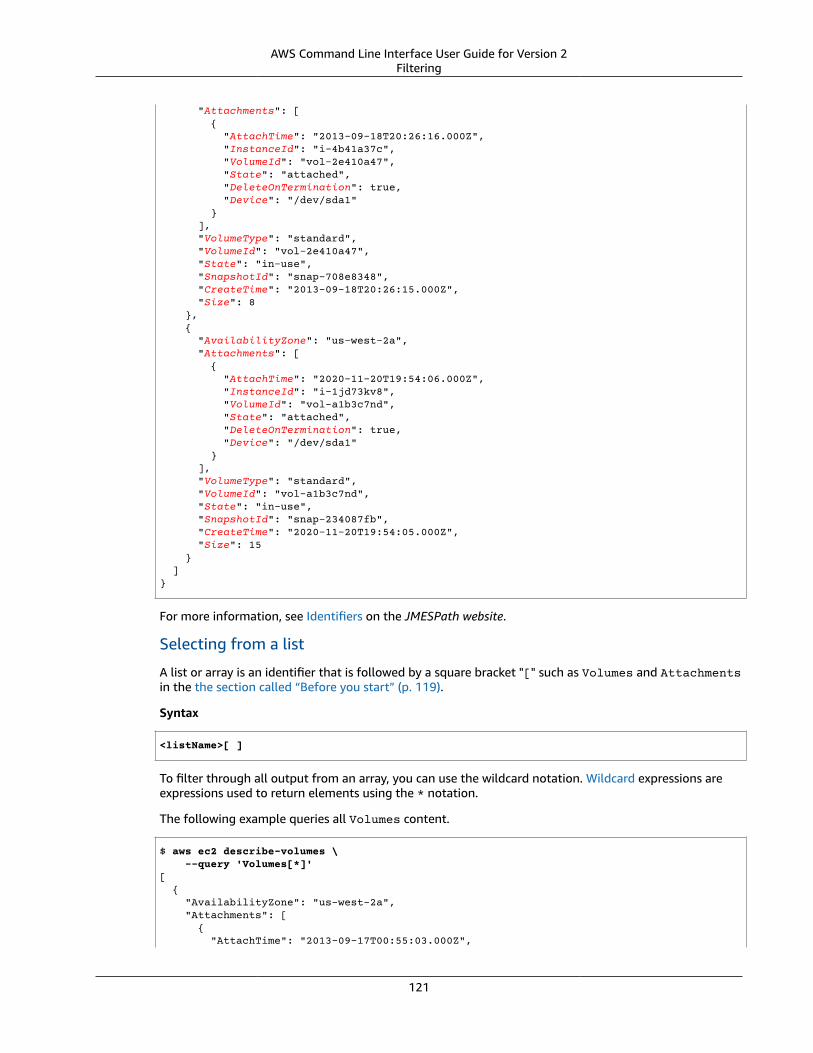
AWS Command Line Interface User Guide for Version 2Filtering
"Attachments": [ { "AttachTime": "2013-09-18T20:26:16.000Z", "InstanceId": "i-4b41a37c", "VolumeId": "vol-2e410a47", "State": "attached", "DeleteOnTermination": true, "Device": "/dev/sda1" } ], "VolumeType": "standard", "VolumeId": "vol-2e410a47", "State": "in-use", "SnapshotId": "snap-708e8348", "CreateTime": "2013-09-18T20:26:15.000Z", "Size": 8 }, { "AvailabilityZone": "us-west-2a", "Attachments": [ { "AttachTime": "2020-11-20T19:54:06.000Z", "InstanceId": "i-1jd73kv8", "VolumeId": "vol-a1b3c7nd", "State": "attached", "DeleteOnTermination": true, "Device": "/dev/sda1" } ], "VolumeType": "standard", "VolumeId": "vol-a1b3c7nd", "State": "in-use", "SnapshotId": "snap-234087fb", "CreateTime": "2020-11-20T19:54:05.000Z", "Size": 15 } ]}
For more information, see Identifiers on the JMESPath website.
Selecting from a list
A list or array is an identifier that is followed by a square bracket "[" such as Volumes and Attachmentsin the the section called “Before you start” (p. 119).
Syntax
<listName>[ ]
To filter through all output from an array, you can use the wildcard notation. Wildcard expressions areexpressions used to return elements using the * notation.
The following example queries all Volumes content.
$ aws ec2 describe-volumes \ --query 'Volumes[*]'[ { "AvailabilityZone": "us-west-2a", "Attachments": [ { "AttachTime": "2013-09-17T00:55:03.000Z",
121
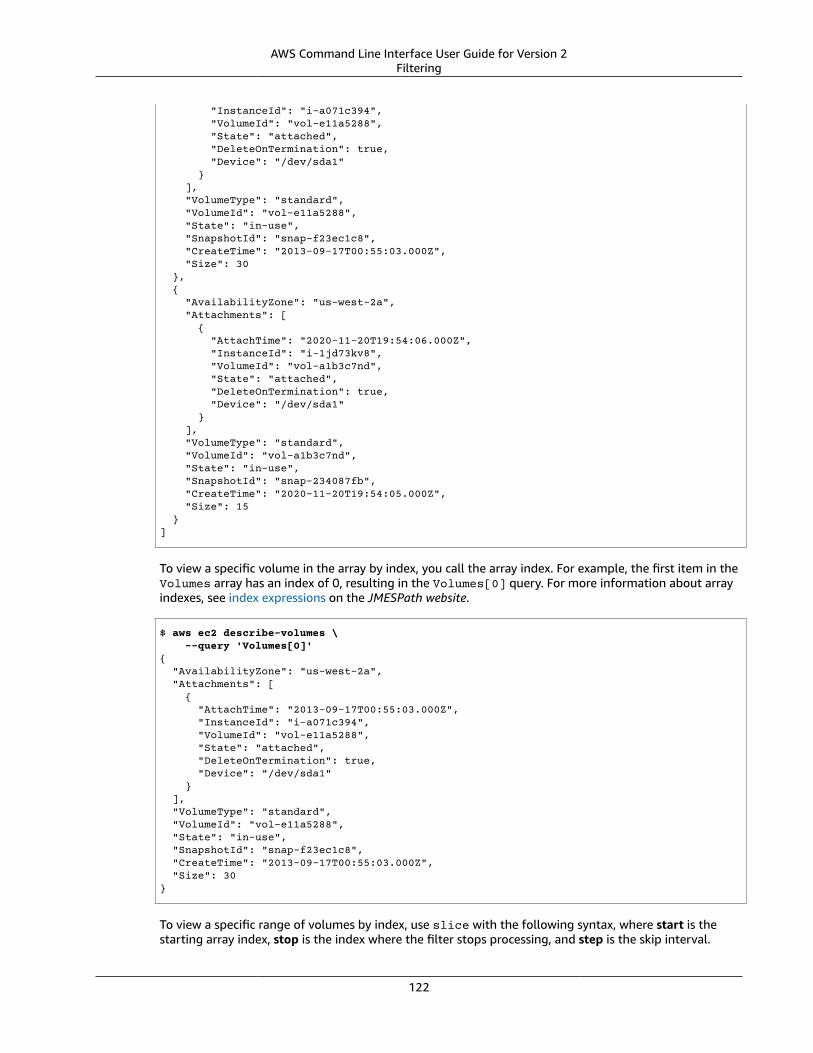
AWS Command Line Interface User Guide for Version 2Filtering
"InstanceId": "i-a071c394", "VolumeId": "vol-e11a5288", "State": "attached", "DeleteOnTermination": true, "Device": "/dev/sda1" } ], "VolumeType": "standard", "VolumeId": "vol-e11a5288", "State": "in-use", "SnapshotId": "snap-f23ec1c8", "CreateTime": "2013-09-17T00:55:03.000Z", "Size": 30 }, { "AvailabilityZone": "us-west-2a", "Attachments": [ { "AttachTime": "2020-11-20T19:54:06.000Z", "InstanceId": "i-1jd73kv8", "VolumeId": "vol-a1b3c7nd", "State": "attached", "DeleteOnTermination": true, "Device": "/dev/sda1" } ], "VolumeType": "standard", "VolumeId": "vol-a1b3c7nd", "State": "in-use", "SnapshotId": "snap-234087fb", "CreateTime": "2020-11-20T19:54:05.000Z", "Size": 15 }]
To view a specific volume in the array by index, you call the array index. For example, the first item in theVolumes array has an index of 0, resulting in the Volumes[0] query. For more information about arrayindexes, see index expressions on the JMESPath website.
$ aws ec2 describe-volumes \ --query 'Volumes[0]'{ "AvailabilityZone": "us-west-2a", "Attachments": [ { "AttachTime": "2013-09-17T00:55:03.000Z", "InstanceId": "i-a071c394", "VolumeId": "vol-e11a5288", "State": "attached", "DeleteOnTermination": true, "Device": "/dev/sda1" } ], "VolumeType": "standard", "VolumeId": "vol-e11a5288", "State": "in-use", "SnapshotId": "snap-f23ec1c8", "CreateTime": "2013-09-17T00:55:03.000Z", "Size": 30}
To view a specific range of volumes by index, use slice with the following syntax, where start is thestarting array index, stop is the index where the filter stops processing, and step is the skip interval.
122
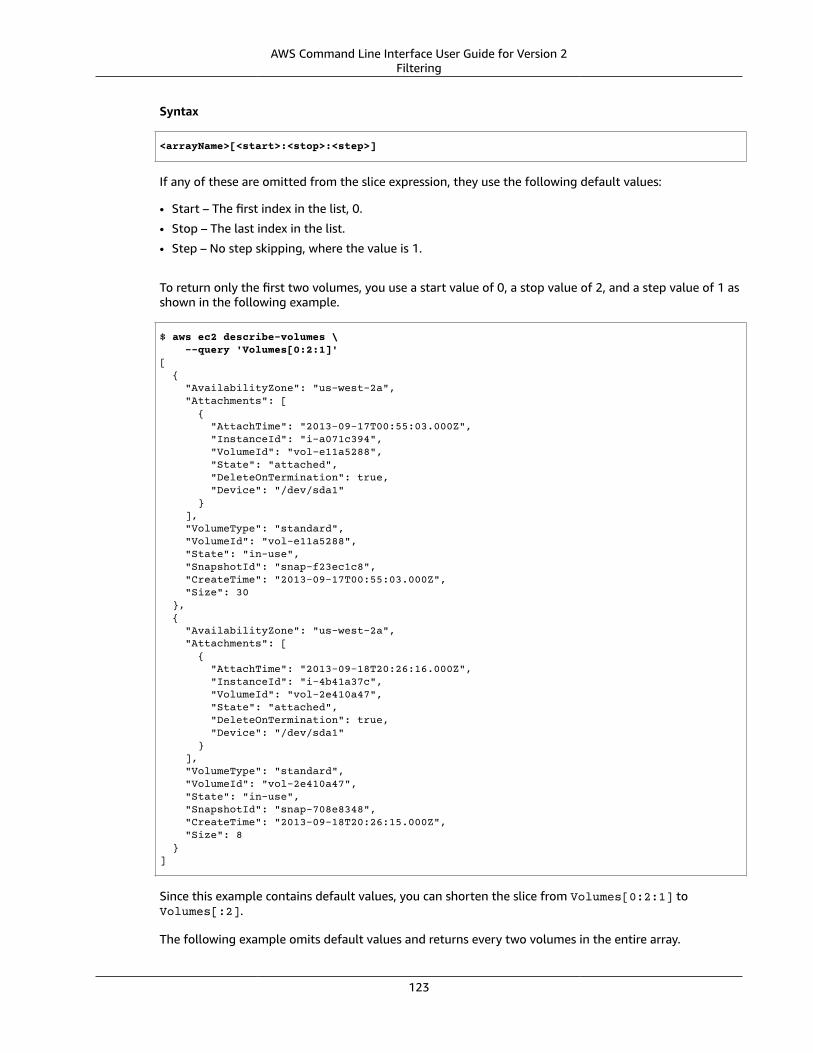
AWS Command Line Interface User Guide for Version 2Filtering
Syntax
<arrayName>[<start>:<stop>:<step>]
If any of these are omitted from the slice expression, they use the following default values:
• Start – The first index in the list, 0.
• Stop – The last index in the list.
• Step – No step skipping, where the value is 1.
To return only the first two volumes, you use a start value of 0, a stop value of 2, and a step value of 1 asshown in the following example.
$ aws ec2 describe-volumes \ --query 'Volumes[0:2:1]'[ { "AvailabilityZone": "us-west-2a", "Attachments": [ { "AttachTime": "2013-09-17T00:55:03.000Z", "InstanceId": "i-a071c394", "VolumeId": "vol-e11a5288", "State": "attached", "DeleteOnTermination": true, "Device": "/dev/sda1" } ], "VolumeType": "standard", "VolumeId": "vol-e11a5288", "State": "in-use", "SnapshotId": "snap-f23ec1c8", "CreateTime": "2013-09-17T00:55:03.000Z", "Size": 30 }, { "AvailabilityZone": "us-west-2a", "Attachments": [ { "AttachTime": "2013-09-18T20:26:16.000Z", "InstanceId": "i-4b41a37c", "VolumeId": "vol-2e410a47", "State": "attached", "DeleteOnTermination": true, "Device": "/dev/sda1" } ], "VolumeType": "standard", "VolumeId": "vol-2e410a47", "State": "in-use", "SnapshotId": "snap-708e8348", "CreateTime": "2013-09-18T20:26:15.000Z", "Size": 8 }]
Since this example contains default values, you can shorten the slice from Volumes[0:2:1] toVolumes[:2].
The following example omits default values and returns every two volumes in the entire array.
123
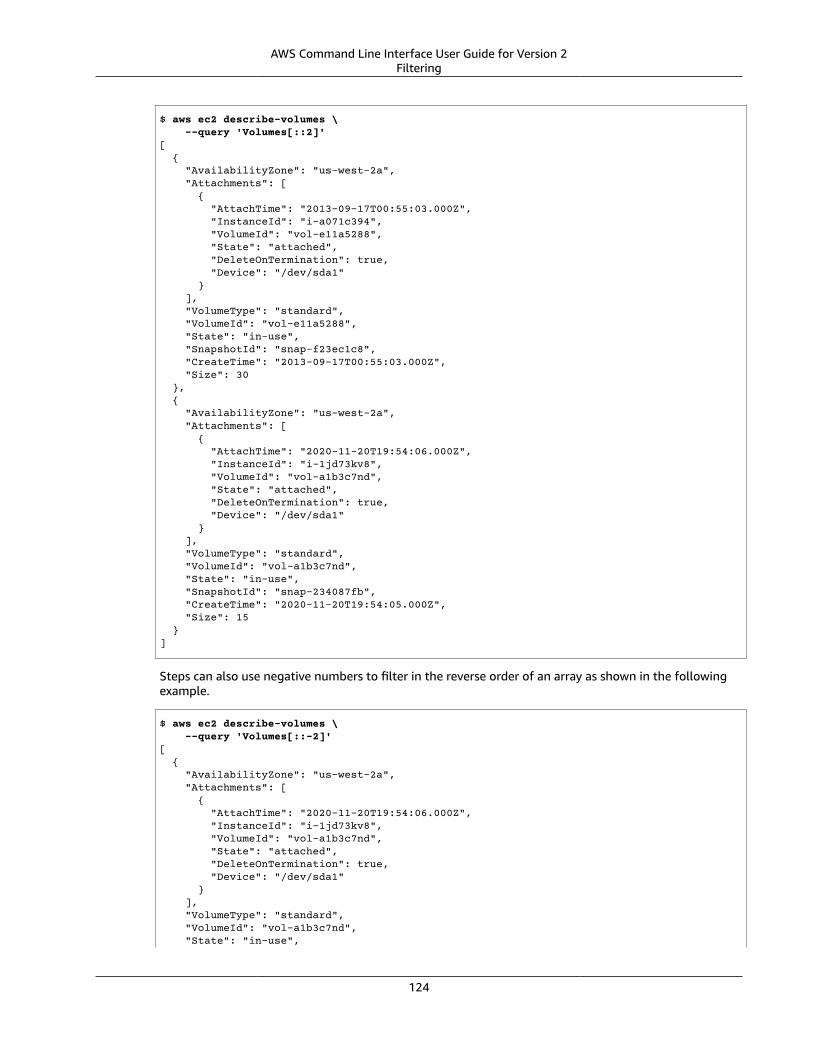
AWS Command Line Interface User Guide for Version 2Filtering
$ aws ec2 describe-volumes \ --query 'Volumes[::2]'[ { "AvailabilityZone": "us-west-2a", "Attachments": [ { "AttachTime": "2013-09-17T00:55:03.000Z", "InstanceId": "i-a071c394", "VolumeId": "vol-e11a5288", "State": "attached", "DeleteOnTermination": true, "Device": "/dev/sda1" } ], "VolumeType": "standard", "VolumeId": "vol-e11a5288", "State": "in-use", "SnapshotId": "snap-f23ec1c8", "CreateTime": "2013-09-17T00:55:03.000Z", "Size": 30 }, { "AvailabilityZone": "us-west-2a", "Attachments": [ { "AttachTime": "2020-11-20T19:54:06.000Z", "InstanceId": "i-1jd73kv8", "VolumeId": "vol-a1b3c7nd", "State": "attached", "DeleteOnTermination": true, "Device": "/dev/sda1" } ], "VolumeType": "standard", "VolumeId": "vol-a1b3c7nd", "State": "in-use", "SnapshotId": "snap-234087fb", "CreateTime": "2020-11-20T19:54:05.000Z", "Size": 15 }]
Steps can also use negative numbers to filter in the reverse order of an array as shown in the followingexample.
$ aws ec2 describe-volumes \ --query 'Volumes[::-2]'[ { "AvailabilityZone": "us-west-2a", "Attachments": [ { "AttachTime": "2020-11-20T19:54:06.000Z", "InstanceId": "i-1jd73kv8", "VolumeId": "vol-a1b3c7nd", "State": "attached", "DeleteOnTermination": true, "Device": "/dev/sda1" } ], "VolumeType": "standard", "VolumeId": "vol-a1b3c7nd", "State": "in-use",
124
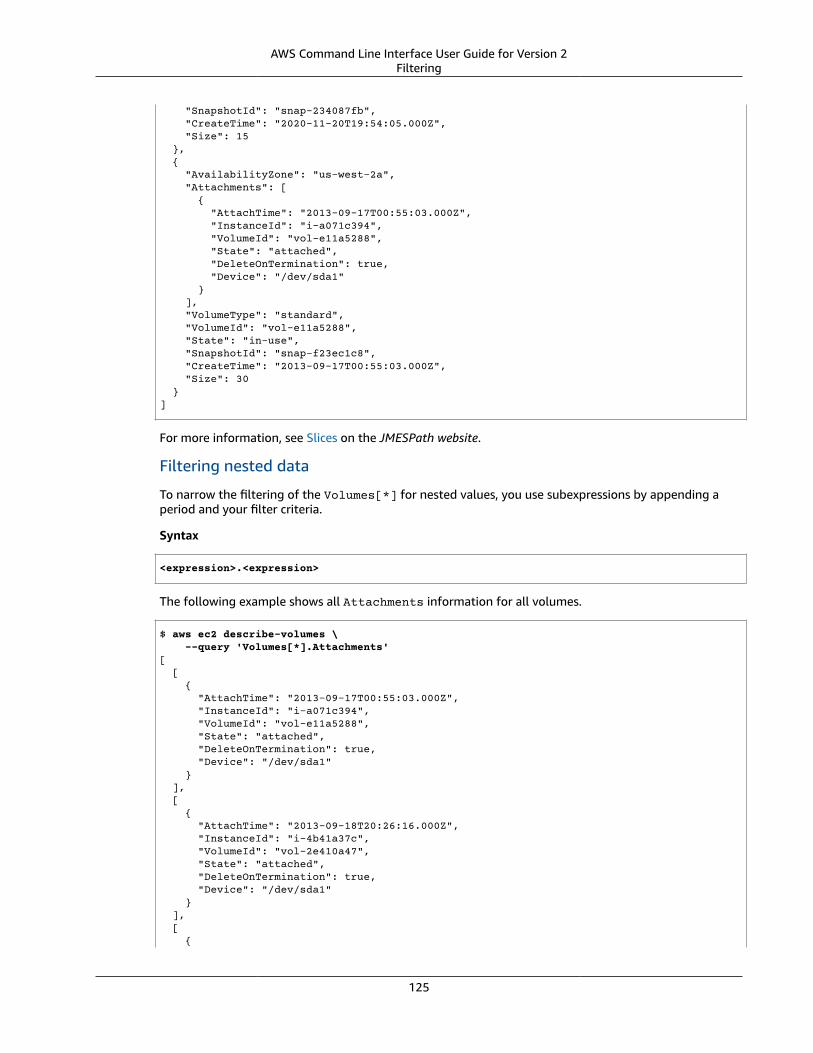
AWS Command Line Interface User Guide for Version 2Filtering
"SnapshotId": "snap-234087fb", "CreateTime": "2020-11-20T19:54:05.000Z", "Size": 15 }, { "AvailabilityZone": "us-west-2a", "Attachments": [ { "AttachTime": "2013-09-17T00:55:03.000Z", "InstanceId": "i-a071c394", "VolumeId": "vol-e11a5288", "State": "attached", "DeleteOnTermination": true, "Device": "/dev/sda1" } ], "VolumeType": "standard", "VolumeId": "vol-e11a5288", "State": "in-use", "SnapshotId": "snap-f23ec1c8", "CreateTime": "2013-09-17T00:55:03.000Z", "Size": 30 }]
For more information, see Slices on the JMESPath website.
Filtering nested data
To narrow the filtering of the Volumes[*] for nested values, you use subexpressions by appending aperiod and your filter criteria.
Syntax
<expression>.<expression>
The following example shows all Attachments information for all volumes.
$ aws ec2 describe-volumes \ --query 'Volumes[*].Attachments'[ [ { "AttachTime": "2013-09-17T00:55:03.000Z", "InstanceId": "i-a071c394", "VolumeId": "vol-e11a5288", "State": "attached", "DeleteOnTermination": true, "Device": "/dev/sda1" } ], [ { "AttachTime": "2013-09-18T20:26:16.000Z", "InstanceId": "i-4b41a37c", "VolumeId": "vol-2e410a47", "State": "attached", "DeleteOnTermination": true, "Device": "/dev/sda1" } ], [ {
125
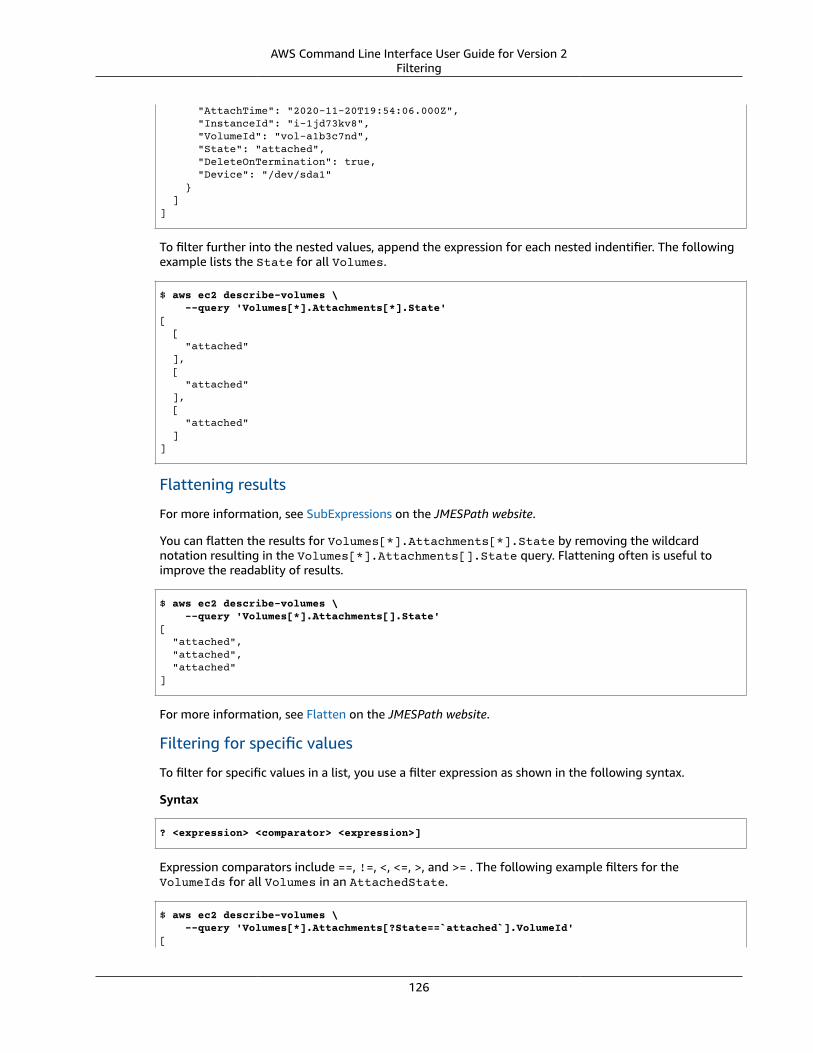
AWS Command Line Interface User Guide for Version 2Filtering
"AttachTime": "2020-11-20T19:54:06.000Z", "InstanceId": "i-1jd73kv8", "VolumeId": "vol-a1b3c7nd", "State": "attached", "DeleteOnTermination": true, "Device": "/dev/sda1" } ]]
To filter further into the nested values, append the expression for each nested indentifier. The followingexample lists the State for all Volumes.
$ aws ec2 describe-volumes \ --query 'Volumes[*].Attachments[*].State'[ [ "attached" ], [ "attached" ], [ "attached" ]]
Flattening results
For more information, see SubExpressions on the JMESPath website.
You can flatten the results for Volumes[*].Attachments[*].State by removing the wildcardnotation resulting in the Volumes[*].Attachments[].State query. Flattening often is useful toimprove the readablity of results.
$ aws ec2 describe-volumes \ --query 'Volumes[*].Attachments[].State'[ "attached", "attached", "attached"]
For more information, see Flatten on the JMESPath website.
Filtering for specific values
To filter for specific values in a list, you use a filter expression as shown in the following syntax.
Syntax
? <expression> <comparator> <expression>]
Expression comparators include ==, !=, <, <=, >, and >= . The following example filters for theVolumeIds for all Volumes in an AttachedState.
$ aws ec2 describe-volumes \ --query 'Volumes[*].Attachments[?State==`attached`].VolumeId'[
126
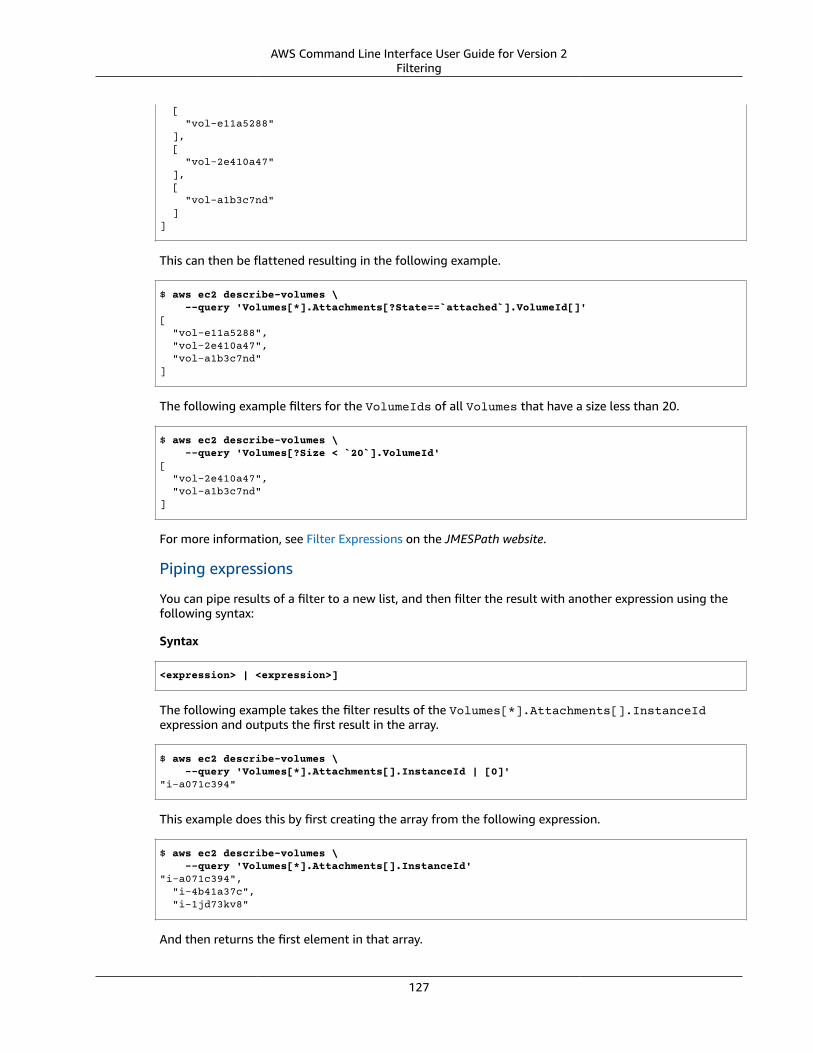
AWS Command Line Interface User Guide for Version 2Filtering
[ "vol-e11a5288" ], [ "vol-2e410a47" ], [ "vol-a1b3c7nd" ]]
This can then be flattened resulting in the following example.
$ aws ec2 describe-volumes \ --query 'Volumes[*].Attachments[?State==`attached`].VolumeId[]'[ "vol-e11a5288", "vol-2e410a47", "vol-a1b3c7nd"]
The following example filters for the VolumeIds of all Volumes that have a size less than 20.
$ aws ec2 describe-volumes \ --query 'Volumes[?Size < `20`].VolumeId'[ "vol-2e410a47", "vol-a1b3c7nd"]
For more information, see Filter Expressions on the JMESPath website.
Piping expressions
You can pipe results of a filter to a new list, and then filter the result with another expression using thefollowing syntax:
Syntax
<expression> | <expression>]
The following example takes the filter results of the Volumes[*].Attachments[].InstanceIdexpression and outputs the first result in the array.
$ aws ec2 describe-volumes \ --query 'Volumes[*].Attachments[].InstanceId | [0]'"i-a071c394"
This example does this by first creating the array from the following expression.
$ aws ec2 describe-volumes \ --query 'Volumes[*].Attachments[].InstanceId'"i-a071c394", "i-4b41a37c", "i-1jd73kv8"
And then returns the first element in that array.
127
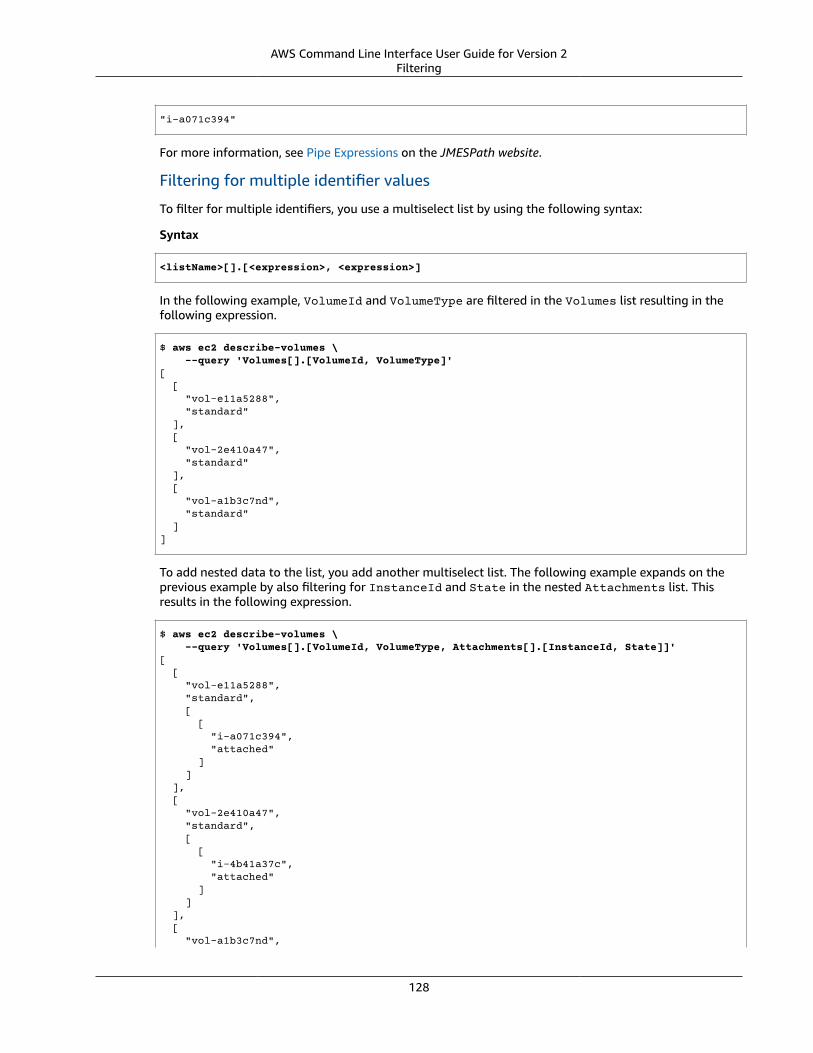
AWS Command Line Interface User Guide for Version 2Filtering
"i-a071c394"
For more information, see Pipe Expressions on the JMESPath website.
Filtering for multiple identifier values
To filter for multiple identifiers, you use a multiselect list by using the following syntax:
Syntax
<listName>[].[<expression>, <expression>]
In the following example, VolumeId and VolumeType are filtered in the Volumes list resulting in thefollowing expression.
$ aws ec2 describe-volumes \ --query 'Volumes[].[VolumeId, VolumeType]'[ [ "vol-e11a5288", "standard" ], [ "vol-2e410a47", "standard" ], [ "vol-a1b3c7nd", "standard" ]]
To add nested data to the list, you add another multiselect list. The following example expands on theprevious example by also filtering for InstanceId and State in the nested Attachments list. Thisresults in the following expression.
$ aws ec2 describe-volumes \ --query 'Volumes[].[VolumeId, VolumeType, Attachments[].[InstanceId, State]]'[ [ "vol-e11a5288", "standard", [ [ "i-a071c394", "attached" ] ] ], [ "vol-2e410a47", "standard", [ [ "i-4b41a37c", "attached" ] ] ], [ "vol-a1b3c7nd",
128

AWS Command Line Interface User Guide for Version 2Filtering
"standard", [ [ "i-1jd73kv8", "attached" ] ] ]]
To be more readable, flatten out the expression as shown in the following example.
$ aws ec2 describe-volumes \ --query 'Volumes[].[VolumeId, VolumeType, Attachments[].[InstanceId, VolumeId][]][]'[ "vol-e11a5288", "standard", [ "i-a071c394", "attached" ], "vol-2e410a47", "standard", [ "i-4b41a37c", "attached" ], "vol-a1b3c7nd", "standard", [ "i-1jd73kv8", "attached" ]]
For more information, see Multiselect list on the JMESPath website.
Adding labels to identifier values
To make this output easier to read, use a multiselect hash with the following syntax.
Syntax
<listName>[].{<label>: <expression>, <label>: <expression>}
Your identifier label does not need to be the same as the name of the identifier. The following exampleuses the label Type for the VolumeType values.
$ aws ec2 describe-volumes \ --query 'Volumes[].{VolumeType: VolumeType}'[ { "VolumeType": "standard", }, { "VolumeType": "standard", }, { "VolumeType": "standard", }]
129
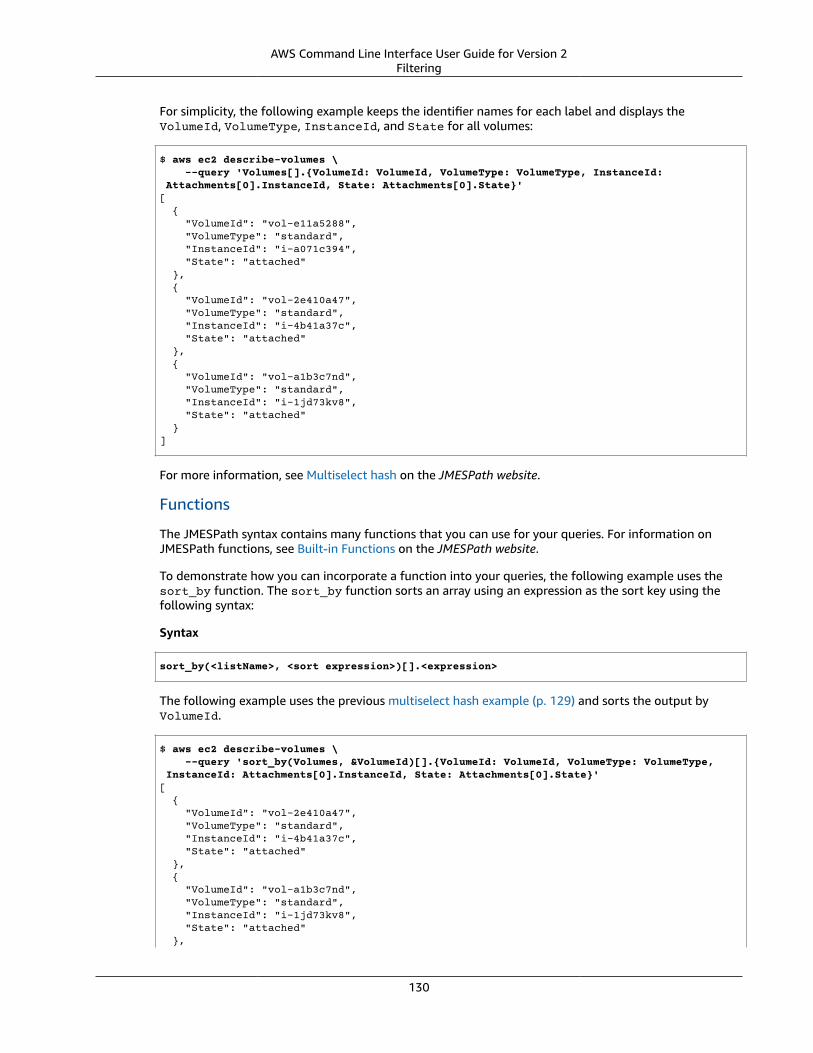
AWS Command Line Interface User Guide for Version 2Filtering
For simplicity, the following example keeps the identifier names for each label and displays theVolumeId, VolumeType, InstanceId, and State for all volumes:
$ aws ec2 describe-volumes \ --query 'Volumes[].{VolumeId: VolumeId, VolumeType: VolumeType, InstanceId: Attachments[0].InstanceId, State: Attachments[0].State}'[ { "VolumeId": "vol-e11a5288", "VolumeType": "standard", "InstanceId": "i-a071c394", "State": "attached" }, { "VolumeId": "vol-2e410a47", "VolumeType": "standard", "InstanceId": "i-4b41a37c", "State": "attached" }, { "VolumeId": "vol-a1b3c7nd", "VolumeType": "standard", "InstanceId": "i-1jd73kv8", "State": "attached" }]
For more information, see Multiselect hash on the JMESPath website.
Functions
The JMESPath syntax contains many functions that you can use for your queries. For information onJMESPath functions, see Built-in Functions on the JMESPath website.
To demonstrate how you can incorporate a function into your queries, the following example uses thesort_by function. The sort_by function sorts an array using an expression as the sort key using thefollowing syntax:
Syntax
sort_by(<listName>, <sort expression>)[].<expression>
The following example uses the previous multiselect hash example (p. 129) and sorts the output byVolumeId.
$ aws ec2 describe-volumes \ --query 'sort_by(Volumes, &VolumeId)[].{VolumeId: VolumeId, VolumeType: VolumeType, InstanceId: Attachments[0].InstanceId, State: Attachments[0].State}'[ { "VolumeId": "vol-2e410a47", "VolumeType": "standard", "InstanceId": "i-4b41a37c", "State": "attached" }, { "VolumeId": "vol-a1b3c7nd", "VolumeType": "standard", "InstanceId": "i-1jd73kv8", "State": "attached" },
130
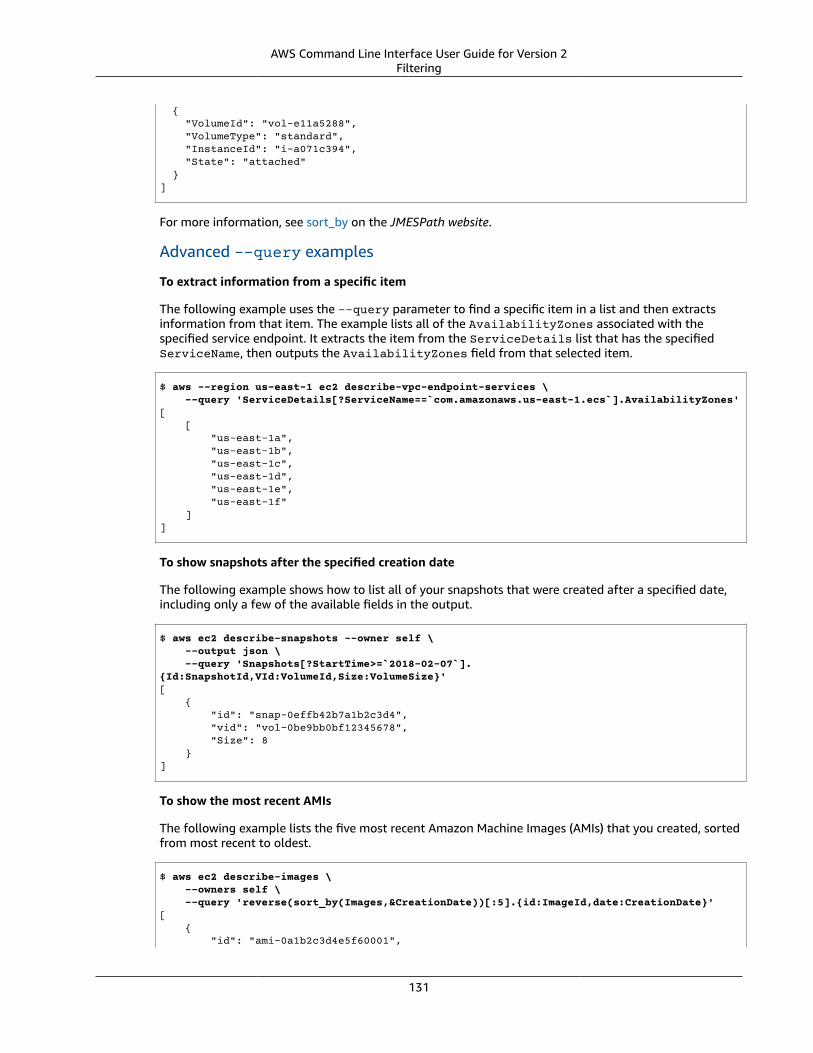
AWS Command Line Interface User Guide for Version 2Filtering
{ "VolumeId": "vol-e11a5288", "VolumeType": "standard", "InstanceId": "i-a071c394", "State": "attached" }]
For more information, see sort_by on the JMESPath website.
Advanced --query examples
To extract information from a specific item
The following example uses the --query parameter to find a specific item in a list and then extractsinformation from that item. The example lists all of the AvailabilityZones associated with thespecified service endpoint. It extracts the item from the ServiceDetails list that has the specifiedServiceName, then outputs the AvailabilityZones field from that selected item.
$ aws --region us-east-1 ec2 describe-vpc-endpoint-services \ --query 'ServiceDetails[?ServiceName==`com.amazonaws.us-east-1.ecs`].AvailabilityZones'[ [ "us-east-1a", "us-east-1b", "us-east-1c", "us-east-1d", "us-east-1e", "us-east-1f" ]]
To show snapshots after the specified creation date
The following example shows how to list all of your snapshots that were created after a specified date,including only a few of the available fields in the output.
$ aws ec2 describe-snapshots --owner self \ --output json \ --query 'Snapshots[?StartTime>=`2018-02-07`].{Id:SnapshotId,VId:VolumeId,Size:VolumeSize}'[ { "id": "snap-0effb42b7a1b2c3d4", "vid": "vol-0be9bb0bf12345678", "Size": 8 }]
To show the most recent AMIs
The following example lists the five most recent Amazon Machine Images (AMIs) that you created, sortedfrom most recent to oldest.
$ aws ec2 describe-images \ --owners self \ --query 'reverse(sort_by(Images,&CreationDate))[:5].{id:ImageId,date:CreationDate}'[ { "id": "ami-0a1b2c3d4e5f60001",
131
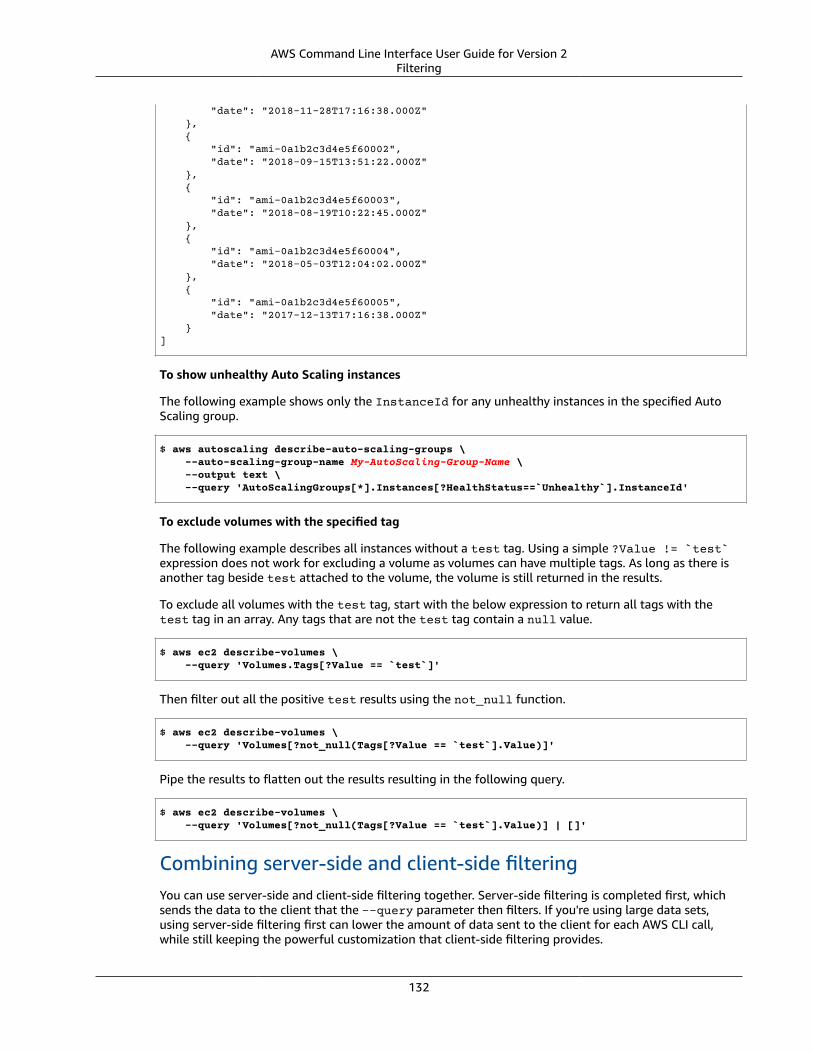
AWS Command Line Interface User Guide for Version 2Filtering
"date": "2018-11-28T17:16:38.000Z" }, { "id": "ami-0a1b2c3d4e5f60002", "date": "2018-09-15T13:51:22.000Z" }, { "id": "ami-0a1b2c3d4e5f60003", "date": "2018-08-19T10:22:45.000Z" }, { "id": "ami-0a1b2c3d4e5f60004", "date": "2018-05-03T12:04:02.000Z" }, { "id": "ami-0a1b2c3d4e5f60005", "date": "2017-12-13T17:16:38.000Z" }]
To show unhealthy Auto Scaling instances
The following example shows only the InstanceId for any unhealthy instances in the specified AutoScaling group.
$ aws autoscaling describe-auto-scaling-groups \ --auto-scaling-group-name My-AutoScaling-Group-Name \ --output text \ --query 'AutoScalingGroups[*].Instances[?HealthStatus==`Unhealthy`].InstanceId'
To exclude volumes with the specified tag
The following example describes all instances without a test tag. Using a simple ?Value != `test`expression does not work for excluding a volume as volumes can have multiple tags. As long as there isanother tag beside test attached to the volume, the volume is still returned in the results.
To exclude all volumes with the test tag, start with the below expression to return all tags with thetest tag in an array. Any tags that are not the test tag contain a null value.
$ aws ec2 describe-volumes \ --query 'Volumes.Tags[?Value == `test`]'
Then filter out all the positive test results using the not_null function.
$ aws ec2 describe-volumes \ --query 'Volumes[?not_null(Tags[?Value == `test`].Value)]'
Pipe the results to flatten out the results resulting in the following query.
$ aws ec2 describe-volumes \ --query 'Volumes[?not_null(Tags[?Value == `test`].Value)] | []'
Combining server-side and client-side filteringYou can use server-side and client-side filtering together. Server-side filtering is completed first, whichsends the data to the client that the --query parameter then filters. If you're using large data sets,using server-side filtering first can lower the amount of data sent to the client for each AWS CLI call,while still keeping the powerful customization that client-side filtering provides.
132
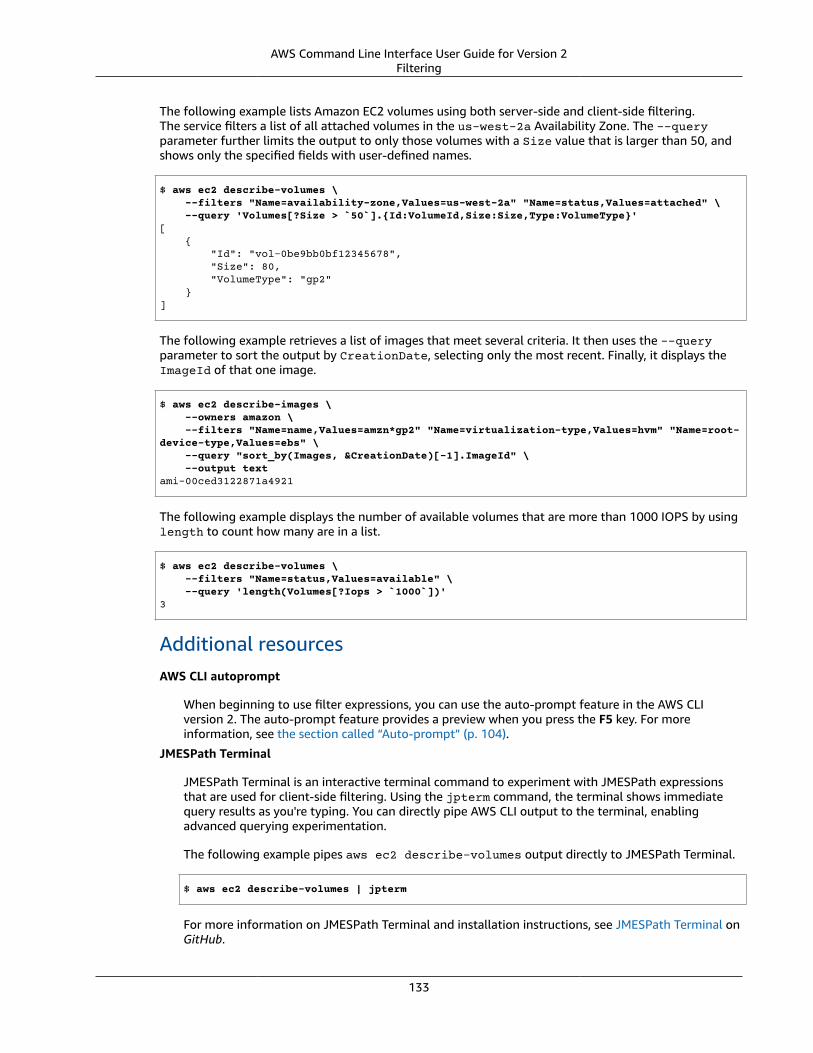
AWS Command Line Interface User Guide for Version 2Filtering
The following example lists Amazon EC2 volumes using both server-side and client-side filtering.The service filters a list of all attached volumes in the us-west-2a Availability Zone. The --queryparameter further limits the output to only those volumes with a Size value that is larger than 50, andshows only the specified fields with user-defined names.
$ aws ec2 describe-volumes \ --filters "Name=availability-zone,Values=us-west-2a" "Name=status,Values=attached" \ --query 'Volumes[?Size > `50`].{Id:VolumeId,Size:Size,Type:VolumeType}'[ { "Id": "vol-0be9bb0bf12345678", "Size": 80, "VolumeType": "gp2" }]
The following example retrieves a list of images that meet several criteria. It then uses the --queryparameter to sort the output by CreationDate, selecting only the most recent. Finally, it displays theImageId of that one image.
$ aws ec2 describe-images \ --owners amazon \ --filters "Name=name,Values=amzn*gp2" "Name=virtualization-type,Values=hvm" "Name=root-device-type,Values=ebs" \ --query "sort_by(Images, &CreationDate)[-1].ImageId" \ --output textami-00ced3122871a4921
The following example displays the number of available volumes that are more than 1000 IOPS by usinglength to count how many are in a list.
$ aws ec2 describe-volumes \ --filters "Name=status,Values=available" \ --query 'length(Volumes[?Iops > `1000`])'3
Additional resourcesAWS CLI autoprompt
When beginning to use filter expressions, you can use the auto-prompt feature in the AWS CLIversion 2. The auto-prompt feature provides a preview when you press the F5 key. For moreinformation, see the section called “Auto-prompt” (p. 104).
JMESPath Terminal
JMESPath Terminal is an interactive terminal command to experiment with JMESPath expressionsthat are used for client-side filtering. Using the jpterm command, the terminal shows immediatequery results as you're typing. You can directly pipe AWS CLI output to the terminal, enablingadvanced querying experimentation.
The following example pipes aws ec2 describe-volumes output directly to JMESPath Terminal.
$ aws ec2 describe-volumes | jpterm
For more information on JMESPath Terminal and installation instructions, see JMESPath Terminal onGitHub.
133
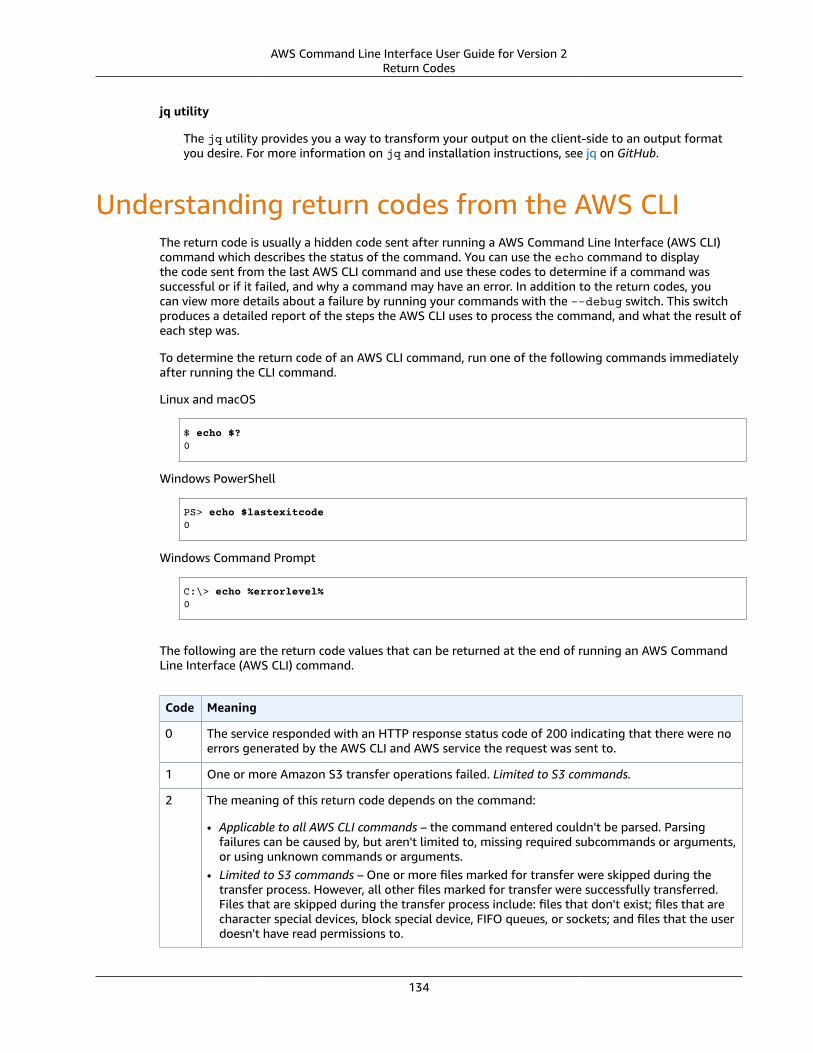
AWS Command Line Interface User Guide for Version 2Return Codes
jq utility
The jq utility provides you a way to transform your output on the client-side to an output formatyou desire. For more information on jq and installation instructions, see jq on GitHub.
Understanding return codes from the AWS CLIThe return code is usually a hidden code sent after running a AWS Command Line Interface (AWS CLI)command which describes the status of the command. You can use the echo command to displaythe code sent from the last AWS CLI command and use these codes to determine if a command wassuccessful or if it failed, and why a command may have an error. In addition to the return codes, youcan view more details about a failure by running your commands with the --debug switch. This switchproduces a detailed report of the steps the AWS CLI uses to process the command, and what the result ofeach step was.
To determine the return code of an AWS CLI command, run one of the following commands immediatelyafter running the CLI command.
Linux and macOS
$ echo $?0
Windows PowerShell
PS> echo $lastexitcode0
Windows Command Prompt
C:\> echo %errorlevel%0
The following are the return code values that can be returned at the end of running an AWS CommandLine Interface (AWS CLI) command.
Code Meaning
0 The service responded with an HTTP response status code of 200 indicating that there were noerrors generated by the AWS CLI and AWS service the request was sent to.
1 One or more Amazon S3 transfer operations failed. Limited to S3 commands.
2 The meaning of this return code depends on the command:
• Applicable to all AWS CLI commands – the command entered couldn't be parsed. Parsingfailures can be caused by, but aren't limited to, missing required subcommands or arguments,or using unknown commands or arguments.
• Limited to S3 commands – One or more files marked for transfer were skipped during thetransfer process. However, all other files marked for transfer were successfully transferred.Files that are skipped during the transfer process include: files that don't exist; files that arecharacter special devices, block special device, FIFO queues, or sockets; and files that the userdoesn't have read permissions to.
134
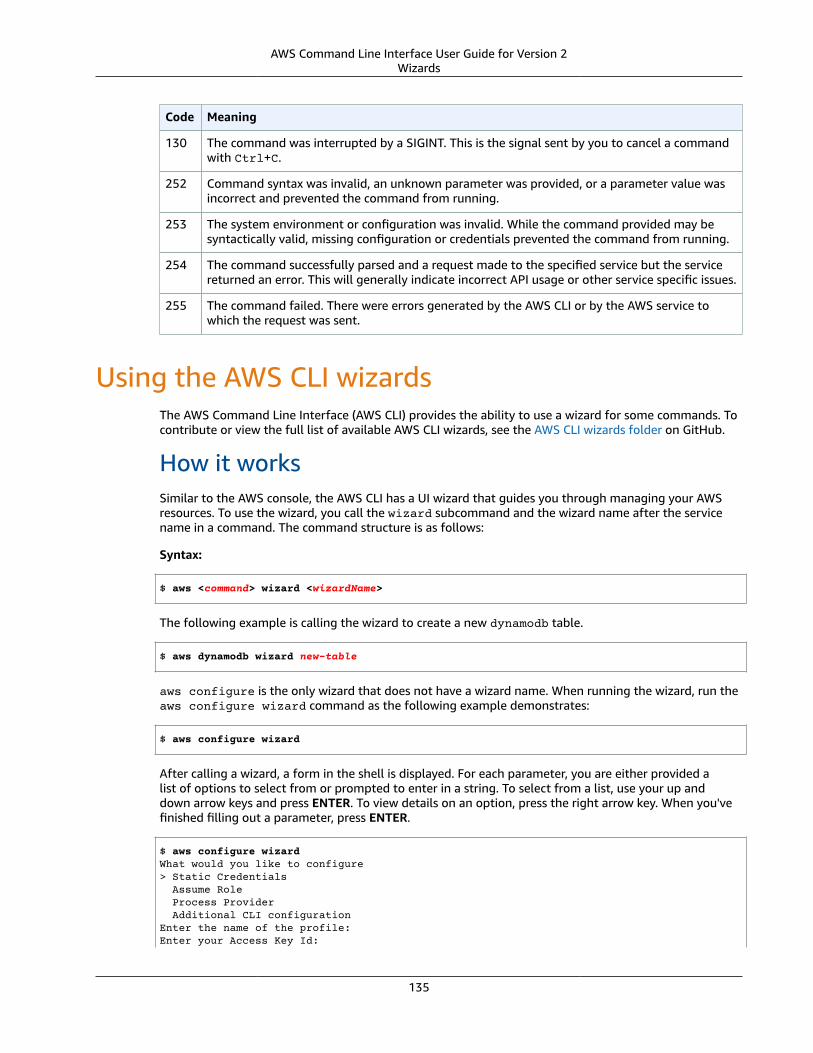
AWS Command Line Interface User Guide for Version 2Wizards
Code Meaning
130 The command was interrupted by a SIGINT. This is the signal sent by you to cancel a commandwith Ctrl+C.
252 Command syntax was invalid, an unknown parameter was provided, or a parameter value wasincorrect and prevented the command from running.
253 The system environment or configuration was invalid. While the command provided may besyntactically valid, missing configuration or credentials prevented the command from running.
254 The command successfully parsed and a request made to the specified service but the servicereturned an error. This will generally indicate incorrect API usage or other service specific issues.
255 The command failed. There were errors generated by the AWS CLI or by the AWS service towhich the request was sent.
Using the AWS CLI wizardsThe AWS Command Line Interface (AWS CLI) provides the ability to use a wizard for some commands. Tocontribute or view the full list of available AWS CLI wizards, see the AWS CLI wizards folder on GitHub.
How it worksSimilar to the AWS console, the AWS CLI has a UI wizard that guides you through managing your AWSresources. To use the wizard, you call the wizard subcommand and the wizard name after the servicename in a command. The command structure is as follows:
Syntax:
$ aws <command> wizard <wizardName>
The following example is calling the wizard to create a new dynamodb table.
$ aws dynamodb wizard new-table
aws configure is the only wizard that does not have a wizard name. When running the wizard, run theaws configure wizard command as the following example demonstrates:
$ aws configure wizard
After calling a wizard, a form in the shell is displayed. For each parameter, you are either provided alist of options to select from or prompted to enter in a string. To select from a list, use your up anddown arrow keys and press ENTER. To view details on an option, press the right arrow key. When you'vefinished filling out a parameter, press ENTER.
$ aws configure wizardWhat would you like to configure> Static Credentials Assume Role Process Provider Additional CLI configurationEnter the name of the profile: Enter your Access Key Id:
135
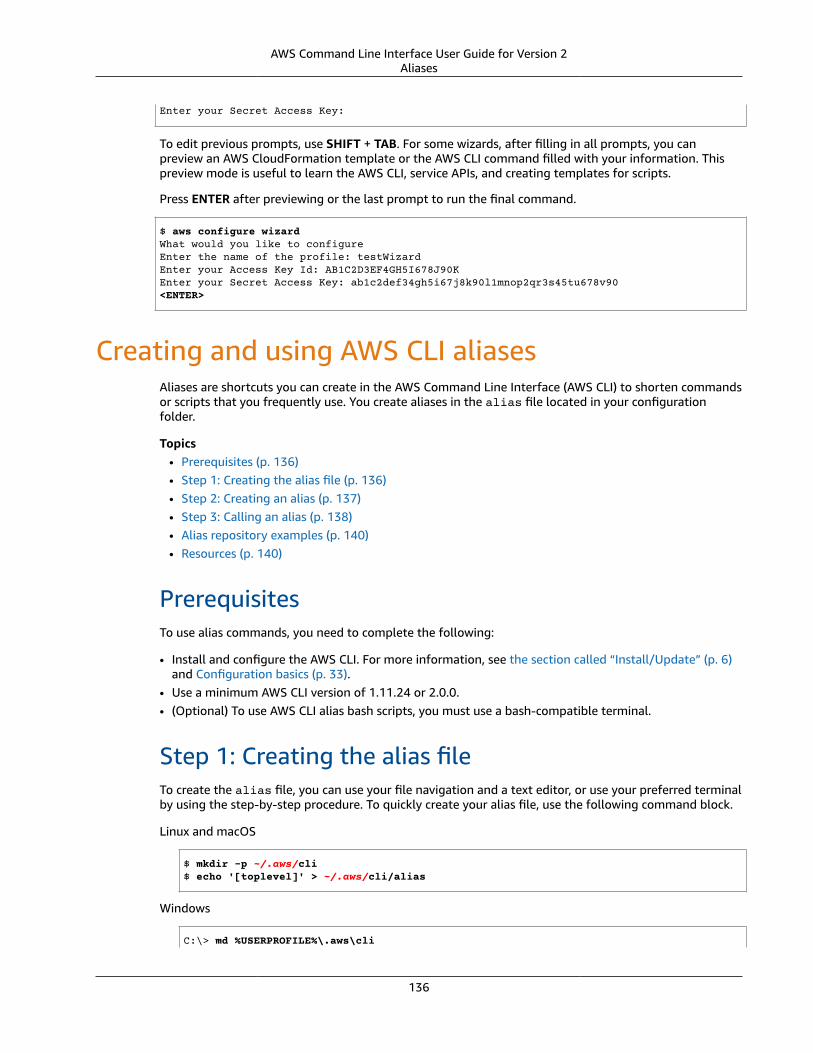
AWS Command Line Interface User Guide for Version 2Aliases
Enter your Secret Access Key:
To edit previous prompts, use SHIFT + TAB. For some wizards, after filling in all prompts, you canpreview an AWS CloudFormation template or the AWS CLI command filled with your information. Thispreview mode is useful to learn the AWS CLI, service APIs, and creating templates for scripts.
Press ENTER after previewing or the last prompt to run the final command.
$ aws configure wizardWhat would you like to configureEnter the name of the profile: testWizardEnter your Access Key Id: AB1C2D3EF4GH5I678J90KEnter your Secret Access Key: ab1c2def34gh5i67j8k90l1mnop2qr3s45tu678v90<ENTER>
Creating and using AWS CLI aliasesAliases are shortcuts you can create in the AWS Command Line Interface (AWS CLI) to shorten commandsor scripts that you frequently use. You create aliases in the alias file located in your configurationfolder.
Topics• Prerequisites (p. 136)• Step 1: Creating the alias file (p. 136)• Step 2: Creating an alias (p. 137)• Step 3: Calling an alias (p. 138)• Alias repository examples (p. 140)• Resources (p. 140)
PrerequisitesTo use alias commands, you need to complete the following:
• Install and configure the AWS CLI. For more information, see the section called “Install/Update” (p. 6)and Configuration basics (p. 33).
• Use a minimum AWS CLI version of 1.11.24 or 2.0.0.• (Optional) To use AWS CLI alias bash scripts, you must use a bash-compatible terminal.
Step 1: Creating the alias fileTo create the alias file, you can use your file navigation and a text editor, or use your preferred terminalby using the step-by-step procedure. To quickly create your alias file, use the following command block.
Linux and macOS
$ mkdir -p ~/.aws/cli$ echo '[toplevel]' > ~/.aws/cli/alias
Windows
C:\> md %USERPROFILE%\.aws\cli
136
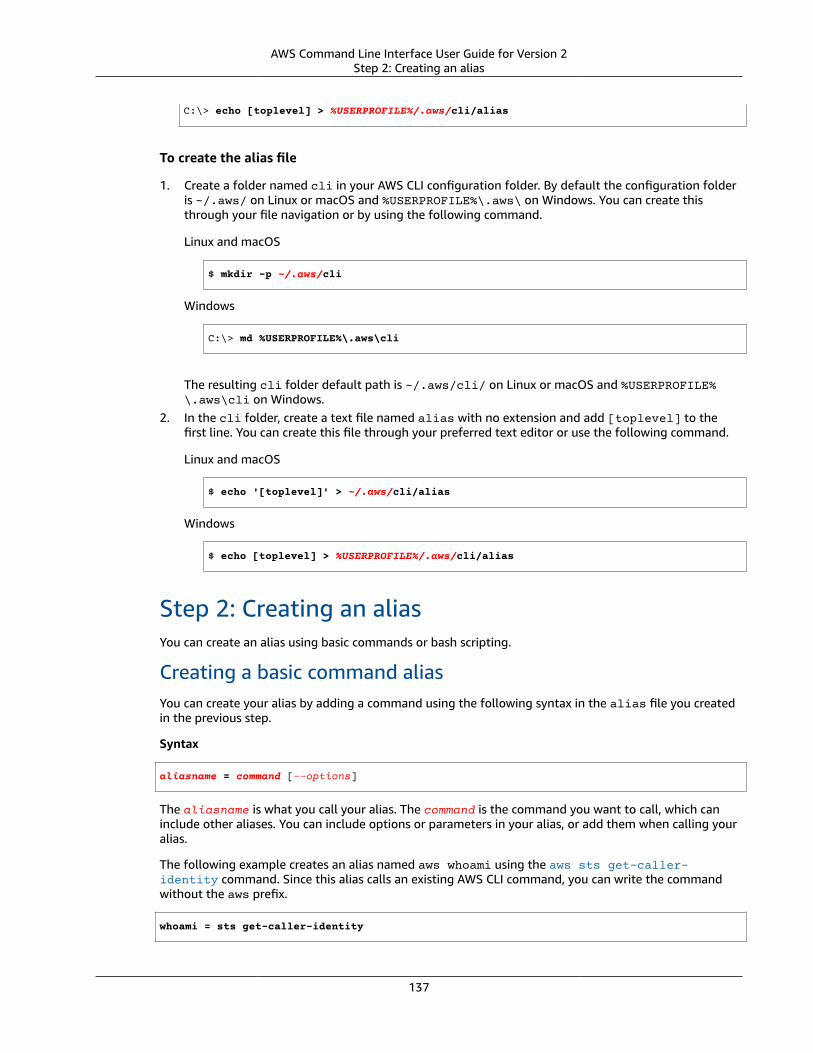
AWS Command Line Interface User Guide for Version 2Step 2: Creating an alias
C:\> echo [toplevel] > %USERPROFILE%/.aws/cli/alias
To create the alias file
1. Create a folder named cli in your AWS CLI configuration folder. By default the configuration folderis ~/.aws/ on Linux or macOS and %USERPROFILE%\.aws\ on Windows. You can create thisthrough your file navigation or by using the following command.
Linux and macOS
$ mkdir -p ~/.aws/cli
Windows
C:\> md %USERPROFILE%\.aws\cli
The resulting cli folder default path is ~/.aws/cli/ on Linux or macOS and %USERPROFILE%\.aws\cli on Windows.
2. In the cli folder, create a text file named alias with no extension and add [toplevel] to thefirst line. You can create this file through your preferred text editor or use the following command.
Linux and macOS
$ echo '[toplevel]' > ~/.aws/cli/alias
Windows
$ echo [toplevel] > %USERPROFILE%/.aws/cli/alias
Step 2: Creating an aliasYou can create an alias using basic commands or bash scripting.
Creating a basic command aliasYou can create your alias by adding a command using the following syntax in the alias file you createdin the previous step.
Syntax
aliasname = command [--options]
The aliasname is what you call your alias. The command is the command you want to call, which caninclude other aliases. You can include options or parameters in your alias, or add them when calling youralias.
The following example creates an alias named aws whoami using the aws sts get-caller-identity command. Since this alias calls an existing AWS CLI command, you can write the commandwithout the aws prefix.
whoami = sts get-caller-identity
137
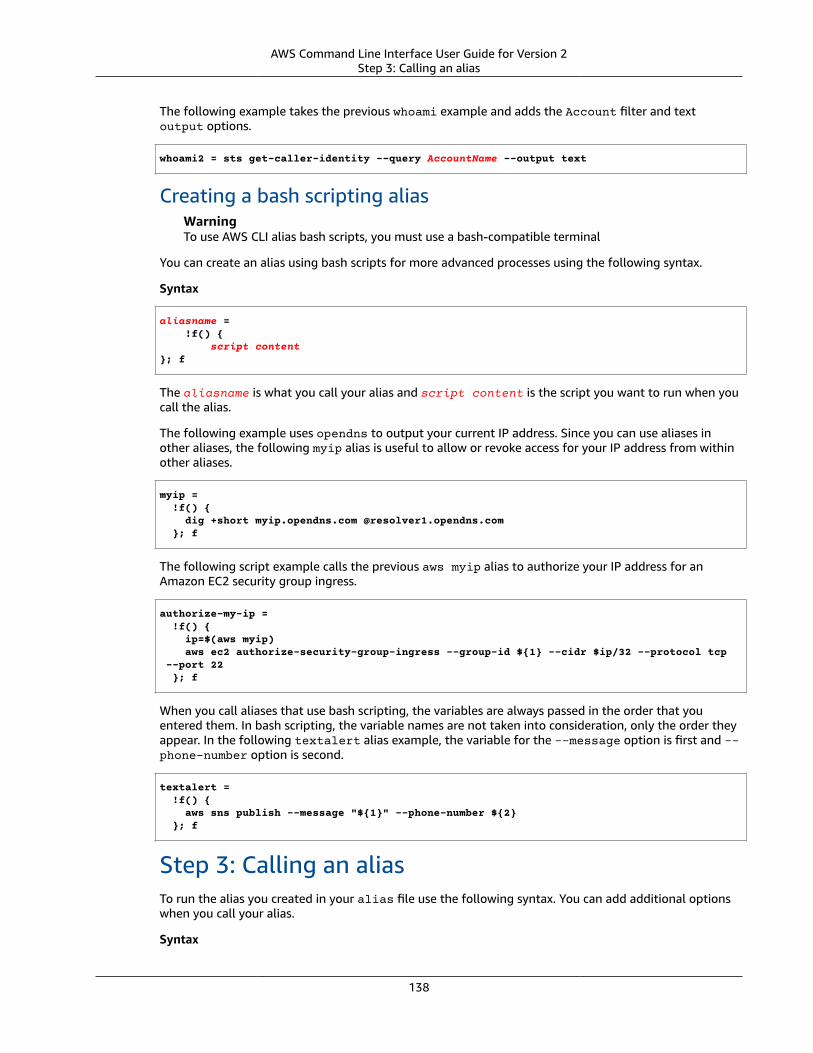
AWS Command Line Interface User Guide for Version 2Step 3: Calling an alias
The following example takes the previous whoami example and adds the Account filter and textoutput options.
whoami2 = sts get-caller-identity --query AccountName --output text
Creating a bash scripting aliasWarningTo use AWS CLI alias bash scripts, you must use a bash-compatible terminal
You can create an alias using bash scripts for more advanced processes using the following syntax.
Syntax
aliasname = !f() { script content}; f
The aliasname is what you call your alias and script content is the script you want to run when youcall the alias.
The following example uses opendns to output your current IP address. Since you can use aliases inother aliases, the following myip alias is useful to allow or revoke access for your IP address from withinother aliases.
myip = !f() { dig +short myip.opendns.com @resolver1.opendns.com }; f
The following script example calls the previous aws myip alias to authorize your IP address for anAmazon EC2 security group ingress.
authorize-my-ip = !f() { ip=$(aws myip) aws ec2 authorize-security-group-ingress --group-id ${1} --cidr $ip/32 --protocol tcp --port 22 }; f
When you call aliases that use bash scripting, the variables are always passed in the order that youentered them. In bash scripting, the variable names are not taken into consideration, only the order theyappear. In the following textalert alias example, the variable for the --message option is first and --phone-number option is second.
textalert = !f() { aws sns publish --message "${1}" --phone-number ${2} }; f
Step 3: Calling an aliasTo run the alias you created in your alias file use the following syntax. You can add additional optionswhen you call your alias.
Syntax
138
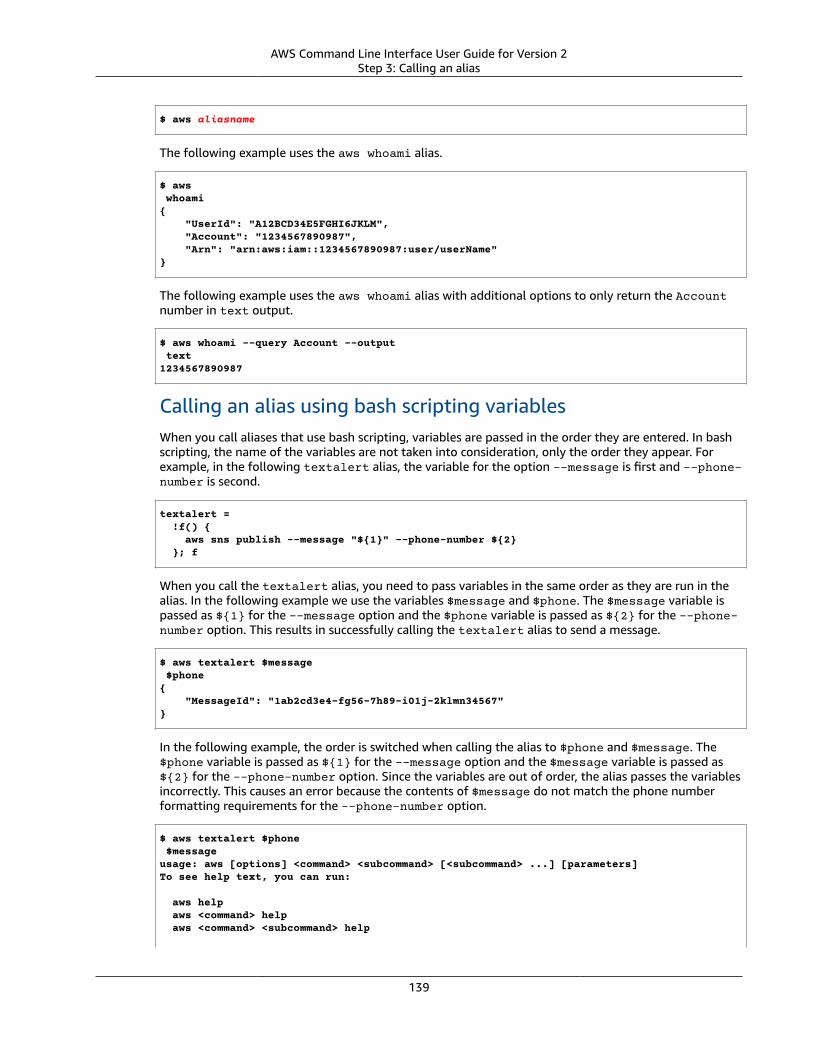
AWS Command Line Interface User Guide for Version 2Step 3: Calling an alias
$ aws aliasname
The following example uses the aws whoami alias.
$ aws whoami{ "UserId": "A12BCD34E5FGHI6JKLM", "Account": "1234567890987", "Arn": "arn:aws:iam::1234567890987:user/userName"}
The following example uses the aws whoami alias with additional options to only return the Accountnumber in text output.
$ aws whoami --query Account --output text1234567890987
Calling an alias using bash scripting variablesWhen you call aliases that use bash scripting, variables are passed in the order they are entered. In bashscripting, the name of the variables are not taken into consideration, only the order they appear. Forexample, in the following textalert alias, the variable for the option --message is first and --phone-number is second.
textalert = !f() { aws sns publish --message "${1}" --phone-number ${2} }; f
When you call the textalert alias, you need to pass variables in the same order as they are run in thealias. In the following example we use the variables $message and $phone. The $message variable ispassed as ${1} for the --message option and the $phone variable is passed as ${2} for the --phone-number option. This results in successfully calling the textalert alias to send a message.
$ aws textalert $message $phone{ "MessageId": "1ab2cd3e4-fg56-7h89-i01j-2klmn34567"}
In the following example, the order is switched when calling the alias to $phone and $message. The$phone variable is passed as ${1} for the --message option and the $message variable is passed as${2} for the --phone-number option. Since the variables are out of order, the alias passes the variablesincorrectly. This causes an error because the contents of $message do not match the phone numberformatting requirements for the --phone-number option.
$ aws textalert $phone $messageusage: aws [options] <command> <subcommand> [<subcommand> ...] [parameters]To see help text, you can run:
aws help aws <command> help aws <command> <subcommand> help
139
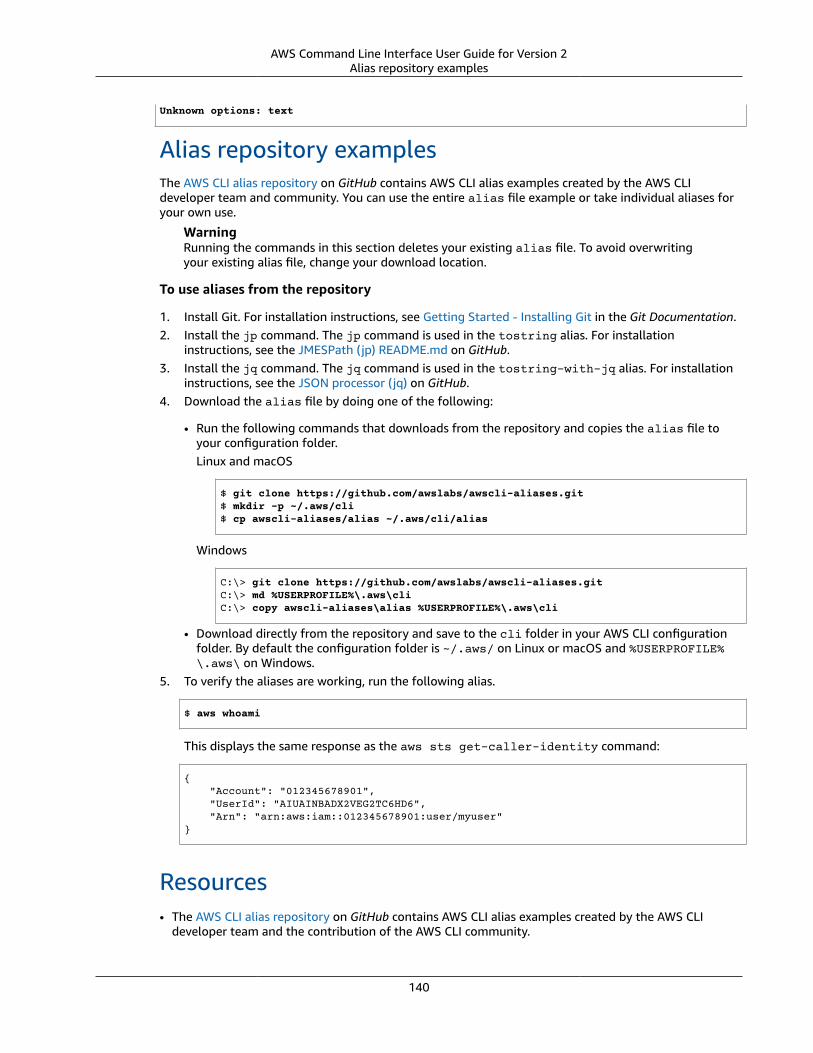
AWS Command Line Interface User Guide for Version 2Alias repository examples
Unknown options: text
Alias repository examplesThe AWS CLI alias repository on GitHub contains AWS CLI alias examples created by the AWS CLIdeveloper team and community. You can use the entire alias file example or take individual aliases foryour own use.
WarningRunning the commands in this section deletes your existing alias file. To avoid overwritingyour existing alias file, change your download location.
To use aliases from the repository
1. Install Git. For installation instructions, see Getting Started - Installing Git in the Git Documentation.2. Install the jp command. The jp command is used in the tostring alias. For installation
instructions, see the JMESPath (jp) README.md on GitHub.3. Install the jq command. The jq command is used in the tostring-with-jq alias. For installation
instructions, see the JSON processor (jq) on GitHub.4. Download the alias file by doing one of the following:
• Run the following commands that downloads from the repository and copies the alias file toyour configuration folder.Linux and macOS
$ git clone https://github.com/awslabs/awscli-aliases.git$ mkdir -p ~/.aws/cli$ cp awscli-aliases/alias ~/.aws/cli/alias
Windows
C:\> git clone https://github.com/awslabs/awscli-aliases.gitC:\> md %USERPROFILE%\.aws\cliC:\> copy awscli-aliases\alias %USERPROFILE%\.aws\cli
• Download directly from the repository and save to the cli folder in your AWS CLI configurationfolder. By default the configuration folder is ~/.aws/ on Linux or macOS and %USERPROFILE%\.aws\ on Windows.
5. To verify the aliases are working, run the following alias.
$ aws whoami
This displays the same response as the aws sts get-caller-identity command:
{ "Account": "012345678901", "UserId": "AIUAINBADX2VEG2TC6HD6", "Arn": "arn:aws:iam::012345678901:user/myuser"}
Resources• The AWS CLI alias repository on GitHub contains AWS CLI alias examples created by the AWS CLI
developer team and the contribution of the AWS CLI community.
140

AWS Command Line Interface User Guide for Version 2Resources
• The alias feature announcement from AWS re:Invent 2016: The Effective AWS CLI User on YouTube.• aws sts get-caller-identity
• aws ec2 describe-instances
• aws sns publish
141

AWS Command Line Interface User Guide for Version 2DynamoDB
Using the AWS CLI to work with AWSServices
This section provides examples that show how to use the AWS Command Line Interface (AWS CLI) toaccess various AWS services.
NoteFor a complete reference of all the available commands for each service, see the AWS CLIversion 2 reference guide, or use the built-in command line help. For more information, seeGetting help with the AWS CLI (p. 81).
Services
• Using Amazon DynamoDB with the AWS CLI (p. 142)
• Using Amazon EC2 with the AWS CLI (p. 145)
• Using Amazon S3 Glacier with the AWS CLI (p. 160)
• Using AWS Identity and Access Management from the AWS CLI (p. 165)
• Using Amazon S3 with the AWS CLI (p. 168)
• Using Amazon SNS with the AWS CLI (p. 180)
• Using Amazon Simple Workflow Service with the AWS CLI (p. 182)
Using Amazon DynamoDB with the AWS CLI
An introduction to Amazon DynamoDB
What is Amazon DynamoDB?
The AWS Command Line Interface (AWS CLI) provides support for all of the AWS database services,including Amazon DynamoDB. You can use the AWS CLI for impromptu operations, such as creating atable. You can also use it to embed DynamoDB operations within utility scripts.
For more information about using the AWS CLI with DynamoDB, see dynamodb in the AWS CLI CommandReference.
To list the AWS CLI commands for DynamoDB, use the following command.
$ aws dynamodb help
Topics
• Prerequisites (p. 143)
• Creating and using DynamoDB tables (p. 143)
• Using DynamoDB Local (p. 144)
142
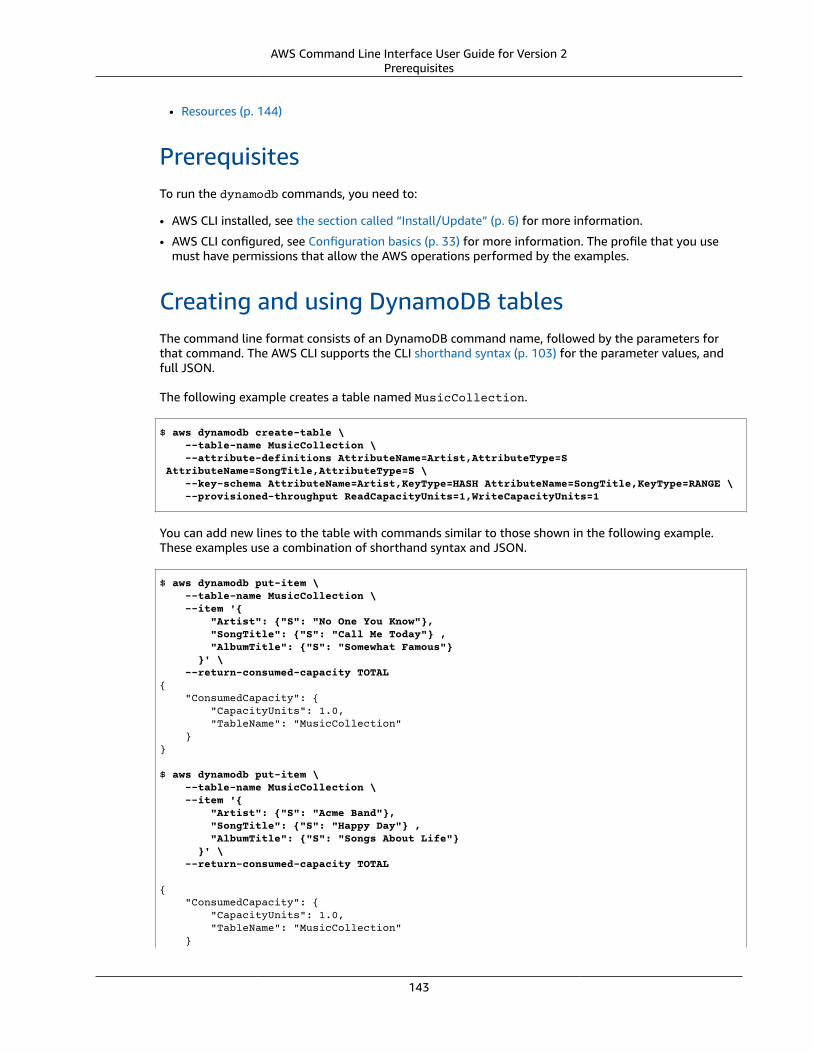
AWS Command Line Interface User Guide for Version 2Prerequisites
• Resources (p. 144)
PrerequisitesTo run the dynamodb commands, you need to:
• AWS CLI installed, see the section called “Install/Update” (p. 6) for more information.
• AWS CLI configured, see Configuration basics (p. 33) for more information. The profile that you usemust have permissions that allow the AWS operations performed by the examples.
Creating and using DynamoDB tablesThe command line format consists of an DynamoDB command name, followed by the parameters forthat command. The AWS CLI supports the CLI shorthand syntax (p. 103) for the parameter values, andfull JSON.
The following example creates a table named MusicCollection.
$ aws dynamodb create-table \ --table-name MusicCollection \ --attribute-definitions AttributeName=Artist,AttributeType=S AttributeName=SongTitle,AttributeType=S \ --key-schema AttributeName=Artist,KeyType=HASH AttributeName=SongTitle,KeyType=RANGE \ --provisioned-throughput ReadCapacityUnits=1,WriteCapacityUnits=1
You can add new lines to the table with commands similar to those shown in the following example.These examples use a combination of shorthand syntax and JSON.
$ aws dynamodb put-item \ --table-name MusicCollection \ --item '{ "Artist": {"S": "No One You Know"}, "SongTitle": {"S": "Call Me Today"} , "AlbumTitle": {"S": "Somewhat Famous"} }' \ --return-consumed-capacity TOTAL{ "ConsumedCapacity": { "CapacityUnits": 1.0, "TableName": "MusicCollection" }}
$ aws dynamodb put-item \ --table-name MusicCollection \ --item '{ "Artist": {"S": "Acme Band"}, "SongTitle": {"S": "Happy Day"} , "AlbumTitle": {"S": "Songs About Life"} }' \ --return-consumed-capacity TOTAL
{ "ConsumedCapacity": { "CapacityUnits": 1.0, "TableName": "MusicCollection" }
143
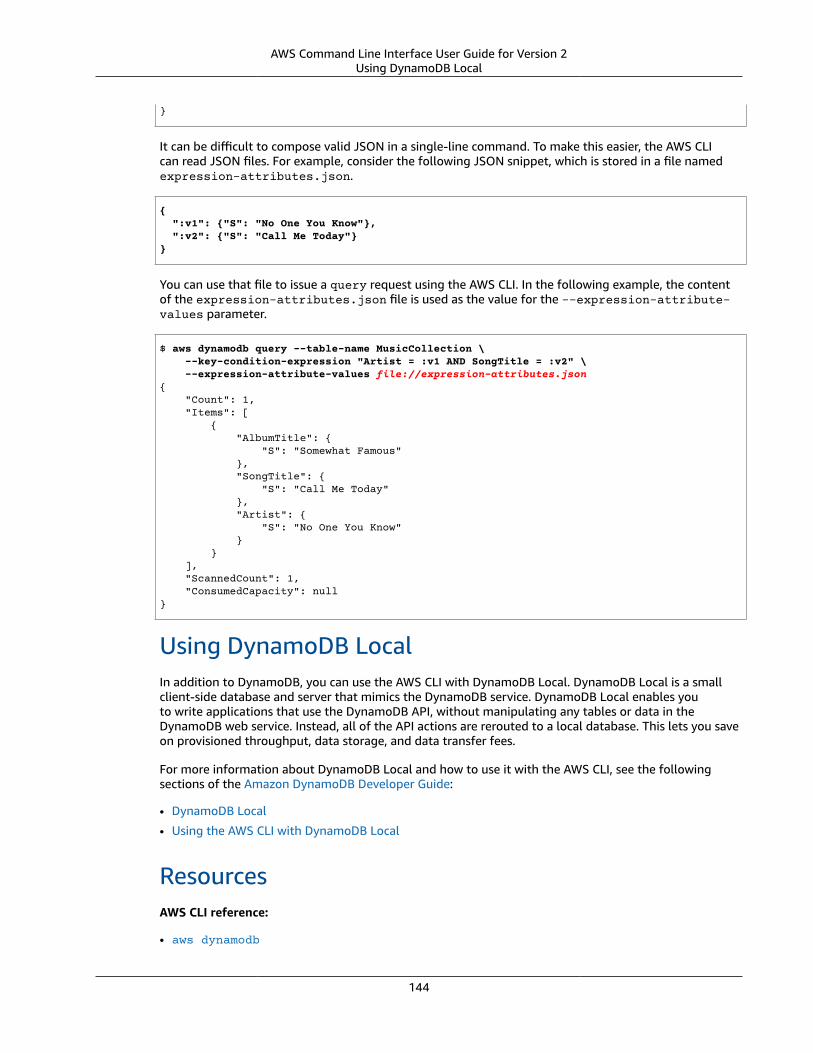
AWS Command Line Interface User Guide for Version 2Using DynamoDB Local
}
It can be difficult to compose valid JSON in a single-line command. To make this easier, the AWS CLIcan read JSON files. For example, consider the following JSON snippet, which is stored in a file namedexpression-attributes.json.
{ ":v1": {"S": "No One You Know"}, ":v2": {"S": "Call Me Today"}}
You can use that file to issue a query request using the AWS CLI. In the following example, the contentof the expression-attributes.json file is used as the value for the --expression-attribute-values parameter.
$ aws dynamodb query --table-name MusicCollection \ --key-condition-expression "Artist = :v1 AND SongTitle = :v2" \ --expression-attribute-values file://expression-attributes.json{ "Count": 1, "Items": [ { "AlbumTitle": { "S": "Somewhat Famous" }, "SongTitle": { "S": "Call Me Today" }, "Artist": { "S": "No One You Know" } } ], "ScannedCount": 1, "ConsumedCapacity": null}
Using DynamoDB LocalIn addition to DynamoDB, you can use the AWS CLI with DynamoDB Local. DynamoDB Local is a smallclient-side database and server that mimics the DynamoDB service. DynamoDB Local enables youto write applications that use the DynamoDB API, without manipulating any tables or data in theDynamoDB web service. Instead, all of the API actions are rerouted to a local database. This lets you saveon provisioned throughput, data storage, and data transfer fees.
For more information about DynamoDB Local and how to use it with the AWS CLI, see the followingsections of the Amazon DynamoDB Developer Guide:
• DynamoDB Local
• Using the AWS CLI with DynamoDB Local
ResourcesAWS CLI reference:
• aws dynamodb
144
AWS Command Line Interface User Guide for Version 2Amazon EC2
• aws dynamodb create-table
• aws dynamodb put-item
• aws dynamodb query
Service reference:
• DynamoDB Local in the Amazon DynamoDB Developer Guide
• Using the AWS CLI with DynamoDB Local in the Amazon DynamoDB Developer Guide
Using Amazon EC2 with the AWS CLI
An introduction to Amazon Elastic Compute Cloud
Introduction to Amazon EC2 - Elastic Cloud Server and Hosting with AWS
You can access the features of Amazon Elastic Compute Cloud (Amazon EC2) using the AWS CommandLine Interface (AWS CLI). To list the AWS CLI commands for Amazon EC2, use the following command.
aws ec2 help
Before you run any commands, set your default credentials. For more information, see Configuring theAWS CLI (p. 33).
This topic shows short-form examples of AWS CLI commands that perform common tasks for AmazonEC2.
For long-form examples of AWS CLI commands, see AWS CLI code examples repository on GitHub.
Topics• Creating, displaying, and deleting Amazon EC2 key pairs (p. 145)
• Creating, configuring, and deleting security groups for Amazon EC2 (p. 148)
• Launching, listing, and terminating Amazon EC2 instances (p. 152)
• Change an Amazon EC2 instance type using a bash script (p. 158)
Creating, displaying, and deleting Amazon EC2 keypairsYou can use the AWS Command Line Interface (AWS CLI) to create, display, and delete your key pairs forAmazon Elastic Compute Cloud (Amazon EC2). You use key pairs to connect to an Amazon EC2 instance.
You must provide the key pair to Amazon EC2 when you create the instance, and then use that key pairto authenticate when you connect to the instance.
NoteFor additional command examples, see the AWS CLI reference guide.
Topics• Prerequisites (p. 146)
145
AWS Command Line Interface User Guide for Version 2Amazon EC2 Key Pairs
• Create a key pair (p. 146)• Display your key pair (p. 147)• Delete your key pair (p. 147)• References (p. 147)
PrerequisitesTo run the ec2 commands, you need to:
• Install and configure the AWS CLI. For more information, see the section called “Install/Update” (p. 6)and Configuration basics (p. 33).
• Set your IAM permissions to allow for Amazon EC2 access. For more information about IAMpermissions for Amazon EC2, see IAM policies for Amazon EC2 in the Amazon EC2 User Guide for LinuxInstances.
Create a key pairTo create a key pair, use the aws ec2 create-key-pair command with the --query option, and the--output text option to pipe your private key directly into a file.
$ aws ec2 create-key-pair --key-name MyKeyPair --query 'KeyMaterial' --output text > MyKeyPair.pem
For PowerShell, the > file redirection defaults to UTF-8 encoding, which cannot be used with someSSH clients. So, you must convert the output by piping it to the out-file command and explicitly setthe encoding to ascii.
PS C:\>aws ec2 create-key-pair --key-name MyKeyPair --query 'KeyMaterial' --output text | out-file -encoding ascii -filepath MyKeyPair.pem
The resulting MyKeyPair.pem file looks similar to the following.
-----BEGIN RSA PRIVATE KEY-----EXAMPLEKEYKCAQEAy7WZhaDsrA1W3mRlQtvhwyORRX8gnxgDAfRt/gx42kWXsT4rXE/b5CpSgie/vBoU7jLxx92pNHoFnByP+Dc21eyyz6CvjTmWA0JwfWiW5/akH7iO5dSrvC7dQkW2duV5QuUdE0QWZ/aNxMniGQE6XAgfwlnXVBwrerrQo+ZWQeqiUwwMkuEbLeJFLhMCvYURpUMSC1oehm449ilx9X1FG50TCFeOzfl8dqqCP6GzbPaIjiU19xX/azOR9V+tpUOzEL+wmXnZt3/nHPQ5xvD2OJH67km6SuPWoPzev/D8V+x4+bHthfSjR9Y7DvQFjfBVwHXigBdtZcU2/wei8D/HYwIDAQABAoIBAGZ1kaEvnrqu/uler7vgIn5m7lN5LKw4hJLAIW6tUT/fzvtcHK0SkbQCQXuriHmQ2MQyJX/0kn2NfjLV/ufGxbL1mb5qwMGUnEpJaZD6QSSs3kICLwWUYUiGfc0uiSbmJoap/GTLU0W5Mfcv36PaBUNy5p53V6G7hXb2bahyWyJNfjLe4M86yd2YK3V2CmK+X/BOsShnJ36+hjrXPPWmV3N9zEmCdJjA+K15DYmhm/tJWSD981oGk9TopEp7CkIfatEATyyZiVqoRq6k64iuM9JkA3OzdXzMQexXVJ1TLZVEH0E7bhlY9d8O1ozRoQs/FiZNAx2iijCWyv0lpjE73+kCgYEA9mZtyhkHkFDpwrSM1APaL8oNAbbjwEy7Z5Mqfql+lIp1YkriL0DbLXlvRAH+yHPRit2hHOjtUNZh4Axv+cpg09qbUI3+43eEy24B7G/Uh+GTfbjsXsOxQx/xp9otyVwc7hsQ5TA5PZb+mvkJ5OBEKzet9XcKwONBYELGhnEPe7cCgYEA06Vgov6YHleHui9kHuwsayav0elc5zkxjF9nfHFJRry21R1trw2Vdpn+9g481URrpzWVOEihvm+xTtmaZlSp//lkq75XDwnUWA8gkn6O3QE3fq2yN98BURsAKdJfJ5RL1HvGQvTe10HLYYXpJnEkHv+Unl2ajLivWUt5pbBrKbUCgYBjbO+OZk0sCcpZ29sbzjYjpIddErySIyRX5gV2uNQwAjLdp9PfN295yQ+BxMBXiIycWVQiw0bHoMo7yykABY7Ozd5wQewBQ4AdSlWSX4nGDtsiFxWiI5sKuAAeOCbTosy1s8w8fxoJ5Tz1sdoxNeGsArq6Wv/G16zQuAE9zK9vvwKBgF+09VI/1wJBirsDGz9whVWfFPrTkJNvJZzYt69qezxlsjgFKshyWBhd4xHZtmCqpBPlAymEjr/TOlbxyARmXMnIOWIAnNXMGB4KGSyl1mzSVAoQ+fqR+cJ3d0dyPl1jjjb0Ed/NY8frlNDxAVHE8BSkdsx2f6ELEyBKJSRr9snRAoGAMrTwYneXzvTskF/S5Fyu0iOegLDaNWUH38v/nDCgEpIXD5Hn3qAEcju1IjmbwlvtW+nY2jVhv7UGd8MjwUTNGItdb6nsYqM2asrnF3qSVRkAKKKYeGjkpUfVTrW0YFjXkfcrR/V+QFL5OndHAKJXjW7a4ejJLncTzmZSpYzwApc=-----END RSA PRIVATE KEY-----
146
AWS Command Line Interface User Guide for Version 2Amazon EC2 Key Pairs
Your private key isn't stored in AWS and can be retrieved only when it's created. You can't recover it later.Instead, if you lose the private key, you must create a new key pair.
If you're connecting to your instance from a Linux computer, we recommend that you use the followingcommand to set the permissions of your private key file so that only you can read it.
$ chmod 400 MyKeyPair.pem
Display your key pairA "fingerprint" is generated from your key pair, and you can use it to verify that the private key that youhave on your local machine matches the public key that's stored in AWS.
The fingerprint is an SHA1 hash taken from a DER-encoded copy of the private key. This value is capturedwhen the key pair is created, and is stored in AWS with the public key. You can view the fingerprint in theAmazon EC2 console or by running the AWS CLI command aws ec2 describe-key-pairs.
The following example displays the fingerprint for MyKeyPair.
$ aws ec2 describe-key-pairs --key-name MyKeyPair{ "KeyPairs": [ { "KeyName": "MyKeyPair", "KeyFingerprint": "1f:51:ae:28:bf:89:e9:d8:1f:25:5d:37:2d:7d:b8:ca:9f:f5:f1:6f" } ]}
For more information about keys and fingerprints, see Amazon EC2 Key Pairs in the Amazon EC2 UserGuide for Linux Instances.
Delete your key pairTo delete a key pair, run the aws ec2 delete-key-pair command, substituting MyKeyPair with thename of the pair to delete.
$ aws ec2 delete-key-pair --key-name MyKeyPair
ReferencesAWS CLI reference:
• aws ec2
• aws ec2 create-key-pair
• aws ec2 delete-key-pair
• aws ec2 describe-key-pairs
Other reference:
• Amazon Elastic Compute Cloud Documentation
• To view and contribute to AWS SDK and AWS CLI code examples, see the AWS Code ExamplesRepository on GitHub.
147
AWS Command Line Interface User Guide for Version 2Amazon EC2 Security Groups
Creating, configuring, and deleting security groupsfor Amazon EC2You can create a security group for your Amazon Elastic Compute Cloud (Amazon EC2) instances thatessentially operates as a firewall, with rules that determine what network traffic can enter and leave.
You can create security groups to use in a virtual private cloud (VPC), or in the EC2-Classic shared flatnetwork. For more information about the differences between EC2-Classic and EC2-VPC, see SupportedPlatforms in the Amazon EC2 User Guide for Linux Instances.
Use the AWS Command Line Interface (AWS CLI) to create a security group, add rules to existing securitygroups, and delete security groups.
NoteFor additional command examples, see the AWS CLI reference guide.
Topics• Prerequisites (p. 148)• Create a security group (p. 148)• Add rules to your security group (p. 149)• Delete your security group (p. 151)• References (p. 152)
PrerequisitesTo run the ec2 commands, you need to:
• Install and configure the AWS CLI. For more information, see the section called “Install/Update” (p. 6)and Configuration basics (p. 33).
• Set your IAM permissions to allow for Amazon EC2 access. For more information about IAMpermissions for Amazon EC2, see IAM policies for Amazon EC2 in the Amazon EC2 User Guide for LinuxInstances.
Create a security groupYou can create security groups associated with VPCs or for EC2-Classic.
EC2-VPC
The following aws ec2 create-security-group example shows how to create a security group for aspecified VPC.
$ aws ec2 create-security-group --group-name my-sg --description "My security group" --vpc-id vpc-1a2b3c4d{ "GroupId": "sg-903004f8"}
To view the initial information for a security group, run the aws ec2 describe-security-groupscommand. You can reference an EC2-VPC security group only by its vpc-id, not its name.
$ aws ec2 describe-security-groups --group-ids sg-903004f8{ "SecurityGroups": [
148
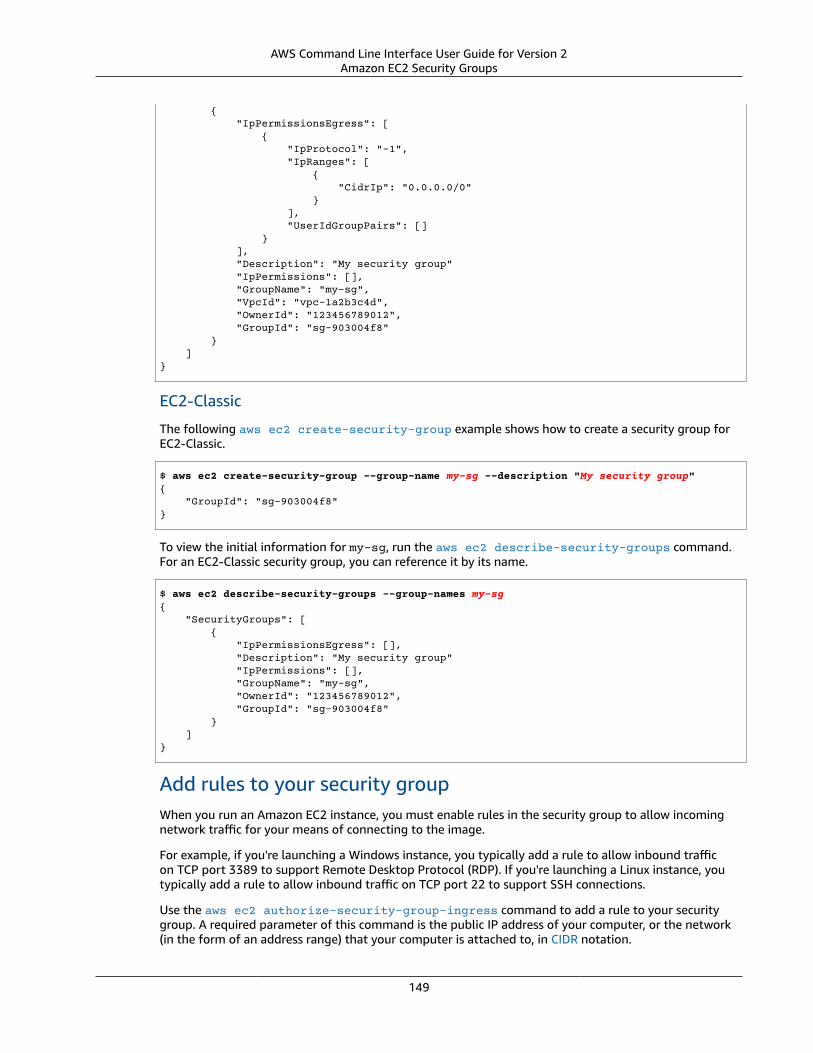
AWS Command Line Interface User Guide for Version 2Amazon EC2 Security Groups
{ "IpPermissionsEgress": [ { "IpProtocol": "-1", "IpRanges": [ { "CidrIp": "0.0.0.0/0" } ], "UserIdGroupPairs": [] } ], "Description": "My security group" "IpPermissions": [], "GroupName": "my-sg", "VpcId": "vpc-1a2b3c4d", "OwnerId": "123456789012", "GroupId": "sg-903004f8" } ]}
EC2-Classic
The following aws ec2 create-security-group example shows how to create a security group forEC2-Classic.
$ aws ec2 create-security-group --group-name my-sg --description "My security group"{ "GroupId": "sg-903004f8"}
To view the initial information for my-sg, run the aws ec2 describe-security-groups command.For an EC2-Classic security group, you can reference it by its name.
$ aws ec2 describe-security-groups --group-names my-sg{ "SecurityGroups": [ { "IpPermissionsEgress": [], "Description": "My security group" "IpPermissions": [], "GroupName": "my-sg", "OwnerId": "123456789012", "GroupId": "sg-903004f8" } ]}
Add rules to your security groupWhen you run an Amazon EC2 instance, you must enable rules in the security group to allow incomingnetwork traffic for your means of connecting to the image.
For example, if you're launching a Windows instance, you typically add a rule to allow inbound trafficon TCP port 3389 to support Remote Desktop Protocol (RDP). If you're launching a Linux instance, youtypically add a rule to allow inbound traffic on TCP port 22 to support SSH connections.
Use the aws ec2 authorize-security-group-ingress command to add a rule to your securitygroup. A required parameter of this command is the public IP address of your computer, or the network(in the form of an address range) that your computer is attached to, in CIDR notation.
149
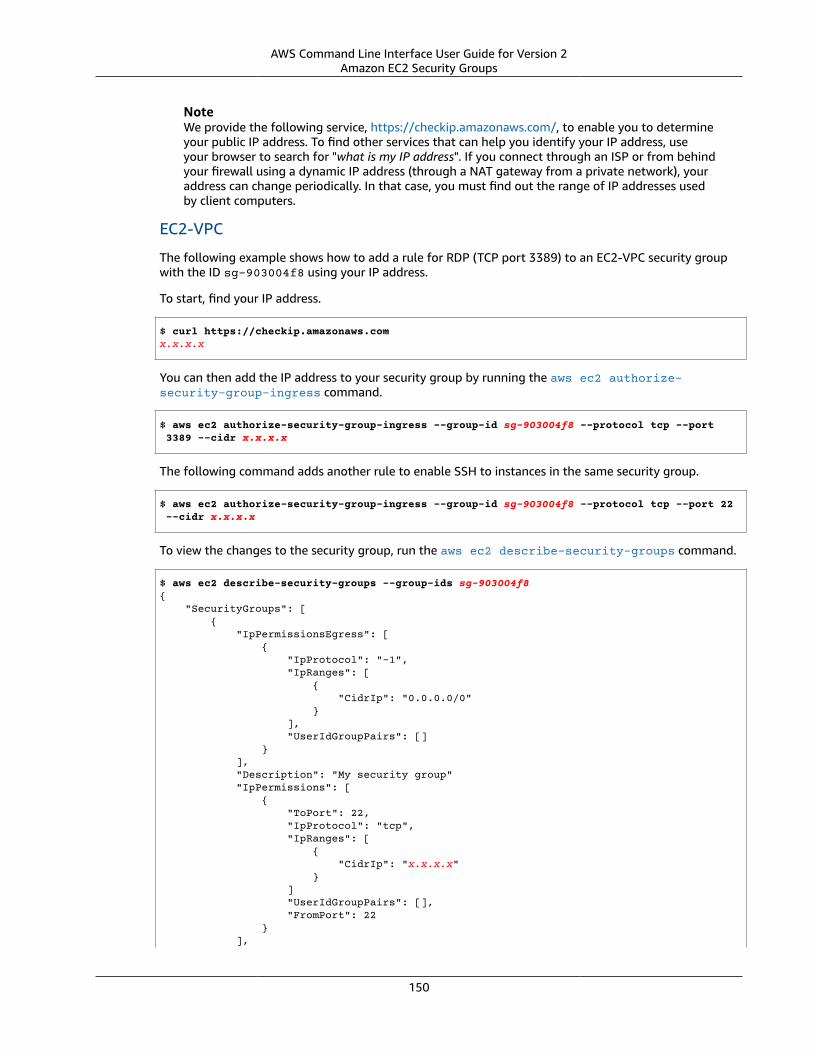
AWS Command Line Interface User Guide for Version 2Amazon EC2 Security Groups
NoteWe provide the following service, https://checkip.amazonaws.com/, to enable you to determineyour public IP address. To find other services that can help you identify your IP address, useyour browser to search for "what is my IP address". If you connect through an ISP or from behindyour firewall using a dynamic IP address (through a NAT gateway from a private network), youraddress can change periodically. In that case, you must find out the range of IP addresses usedby client computers.
EC2-VPC
The following example shows how to add a rule for RDP (TCP port 3389) to an EC2-VPC security groupwith the ID sg-903004f8 using your IP address.
To start, find your IP address.
$ curl https://checkip.amazonaws.comx.x.x.x
You can then add the IP address to your security group by running the aws ec2 authorize-security-group-ingress command.
$ aws ec2 authorize-security-group-ingress --group-id sg-903004f8 --protocol tcp --port 3389 --cidr x.x.x.x
The following command adds another rule to enable SSH to instances in the same security group.
$ aws ec2 authorize-security-group-ingress --group-id sg-903004f8 --protocol tcp --port 22 --cidr x.x.x.x
To view the changes to the security group, run the aws ec2 describe-security-groups command.
$ aws ec2 describe-security-groups --group-ids sg-903004f8{ "SecurityGroups": [ { "IpPermissionsEgress": [ { "IpProtocol": "-1", "IpRanges": [ { "CidrIp": "0.0.0.0/0" } ], "UserIdGroupPairs": [] } ], "Description": "My security group" "IpPermissions": [ { "ToPort": 22, "IpProtocol": "tcp", "IpRanges": [ { "CidrIp": "x.x.x.x" } ] "UserIdGroupPairs": [], "FromPort": 22 } ],
150
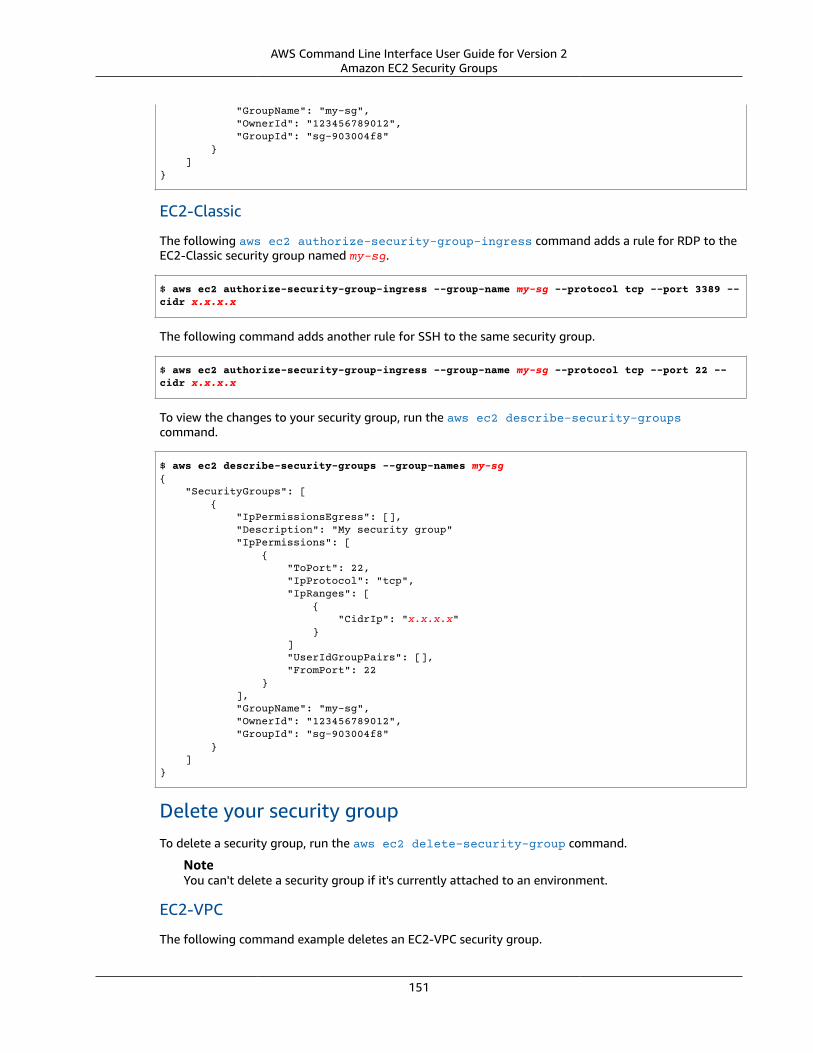
AWS Command Line Interface User Guide for Version 2Amazon EC2 Security Groups
"GroupName": "my-sg", "OwnerId": "123456789012", "GroupId": "sg-903004f8" } ]}
EC2-Classic
The following aws ec2 authorize-security-group-ingress command adds a rule for RDP to theEC2-Classic security group named my-sg.
$ aws ec2 authorize-security-group-ingress --group-name my-sg --protocol tcp --port 3389 --cidr x.x.x.x
The following command adds another rule for SSH to the same security group.
$ aws ec2 authorize-security-group-ingress --group-name my-sg --protocol tcp --port 22 --cidr x.x.x.x
To view the changes to your security group, run the aws ec2 describe-security-groupscommand.
$ aws ec2 describe-security-groups --group-names my-sg{ "SecurityGroups": [ { "IpPermissionsEgress": [], "Description": "My security group" "IpPermissions": [ { "ToPort": 22, "IpProtocol": "tcp", "IpRanges": [ { "CidrIp": "x.x.x.x" } ] "UserIdGroupPairs": [], "FromPort": 22 } ], "GroupName": "my-sg", "OwnerId": "123456789012", "GroupId": "sg-903004f8" } ]}
Delete your security groupTo delete a security group, run the aws ec2 delete-security-group command.
NoteYou can't delete a security group if it's currently attached to an environment.
EC2-VPC
The following command example deletes an EC2-VPC security group.
151
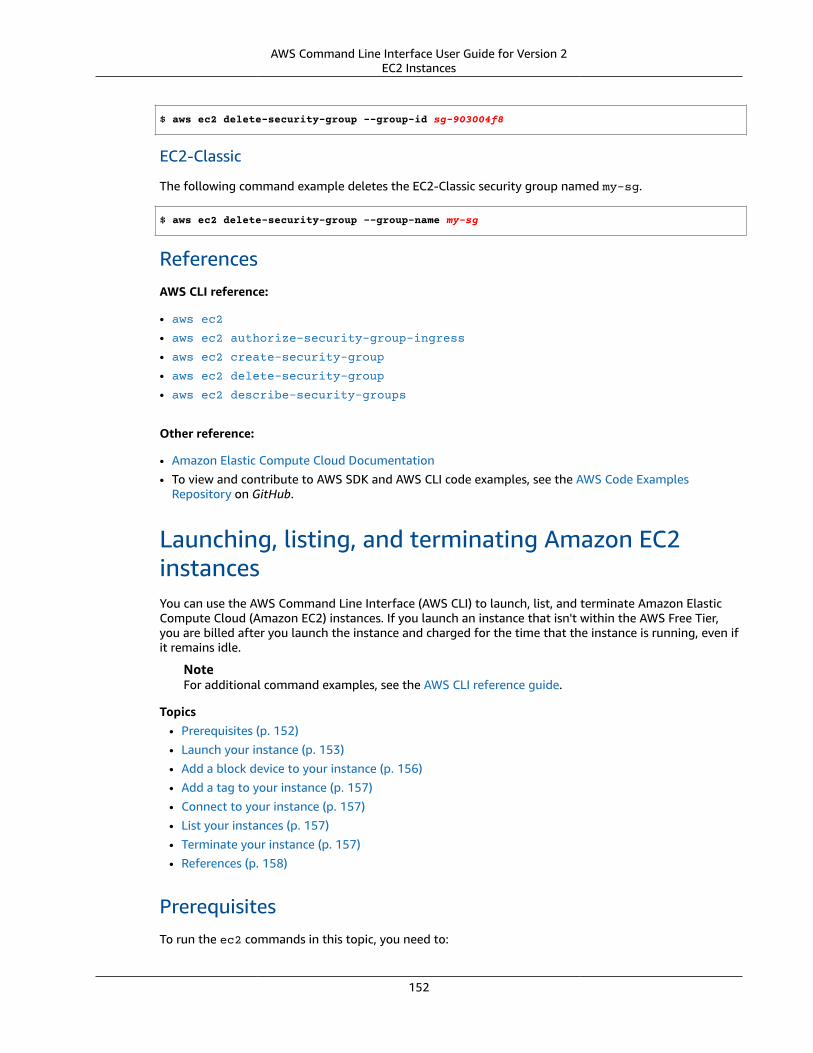
AWS Command Line Interface User Guide for Version 2EC2 Instances
$ aws ec2 delete-security-group --group-id sg-903004f8
EC2-Classic
The following command example deletes the EC2-Classic security group named my-sg.
$ aws ec2 delete-security-group --group-name my-sg
ReferencesAWS CLI reference:
• aws ec2
• aws ec2 authorize-security-group-ingress
• aws ec2 create-security-group
• aws ec2 delete-security-group
• aws ec2 describe-security-groups
Other reference:
• Amazon Elastic Compute Cloud Documentation• To view and contribute to AWS SDK and AWS CLI code examples, see the AWS Code Examples
Repository on GitHub.
Launching, listing, and terminating Amazon EC2instancesYou can use the AWS Command Line Interface (AWS CLI) to launch, list, and terminate Amazon ElasticCompute Cloud (Amazon EC2) instances. If you launch an instance that isn't within the AWS Free Tier,you are billed after you launch the instance and charged for the time that the instance is running, even ifit remains idle.
NoteFor additional command examples, see the AWS CLI reference guide.
Topics• Prerequisites (p. 152)• Launch your instance (p. 153)• Add a block device to your instance (p. 156)• Add a tag to your instance (p. 157)• Connect to your instance (p. 157)• List your instances (p. 157)• Terminate your instance (p. 157)• References (p. 158)
PrerequisitesTo run the ec2 commands in this topic, you need to:
152
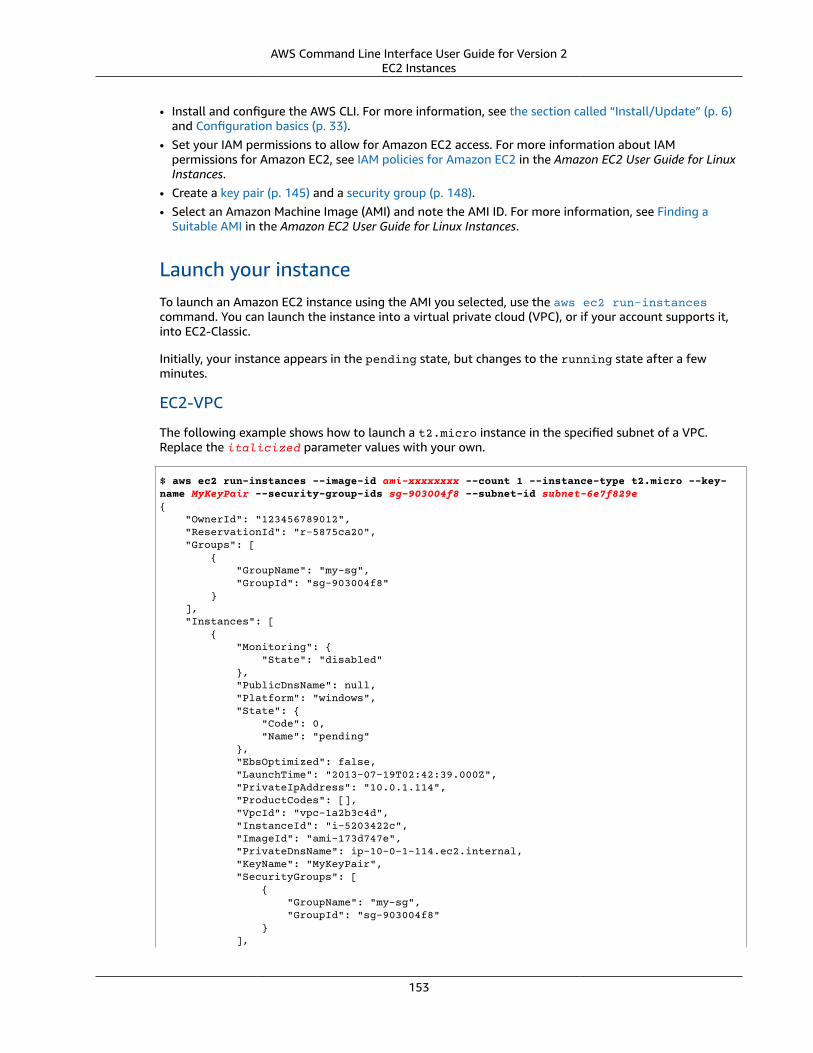
AWS Command Line Interface User Guide for Version 2EC2 Instances
• Install and configure the AWS CLI. For more information, see the section called “Install/Update” (p. 6)and Configuration basics (p. 33).
• Set your IAM permissions to allow for Amazon EC2 access. For more information about IAMpermissions for Amazon EC2, see IAM policies for Amazon EC2 in the Amazon EC2 User Guide for LinuxInstances.
• Create a key pair (p. 145) and a security group (p. 148).• Select an Amazon Machine Image (AMI) and note the AMI ID. For more information, see Finding a
Suitable AMI in the Amazon EC2 User Guide for Linux Instances.
Launch your instanceTo launch an Amazon EC2 instance using the AMI you selected, use the aws ec2 run-instancescommand. You can launch the instance into a virtual private cloud (VPC), or if your account supports it,into EC2-Classic.
Initially, your instance appears in the pending state, but changes to the running state after a fewminutes.
EC2-VPC
The following example shows how to launch a t2.micro instance in the specified subnet of a VPC.Replace the italicized parameter values with your own.
$ aws ec2 run-instances --image-id ami-xxxxxxxx --count 1 --instance-type t2.micro --key-name MyKeyPair --security-group-ids sg-903004f8 --subnet-id subnet-6e7f829e{ "OwnerId": "123456789012", "ReservationId": "r-5875ca20", "Groups": [ { "GroupName": "my-sg", "GroupId": "sg-903004f8" } ], "Instances": [ { "Monitoring": { "State": "disabled" }, "PublicDnsName": null, "Platform": "windows", "State": { "Code": 0, "Name": "pending" }, "EbsOptimized": false, "LaunchTime": "2013-07-19T02:42:39.000Z", "PrivateIpAddress": "10.0.1.114", "ProductCodes": [], "VpcId": "vpc-1a2b3c4d", "InstanceId": "i-5203422c", "ImageId": "ami-173d747e", "PrivateDnsName": ip-10-0-1-114.ec2.internal, "KeyName": "MyKeyPair", "SecurityGroups": [ { "GroupName": "my-sg", "GroupId": "sg-903004f8" } ],
153
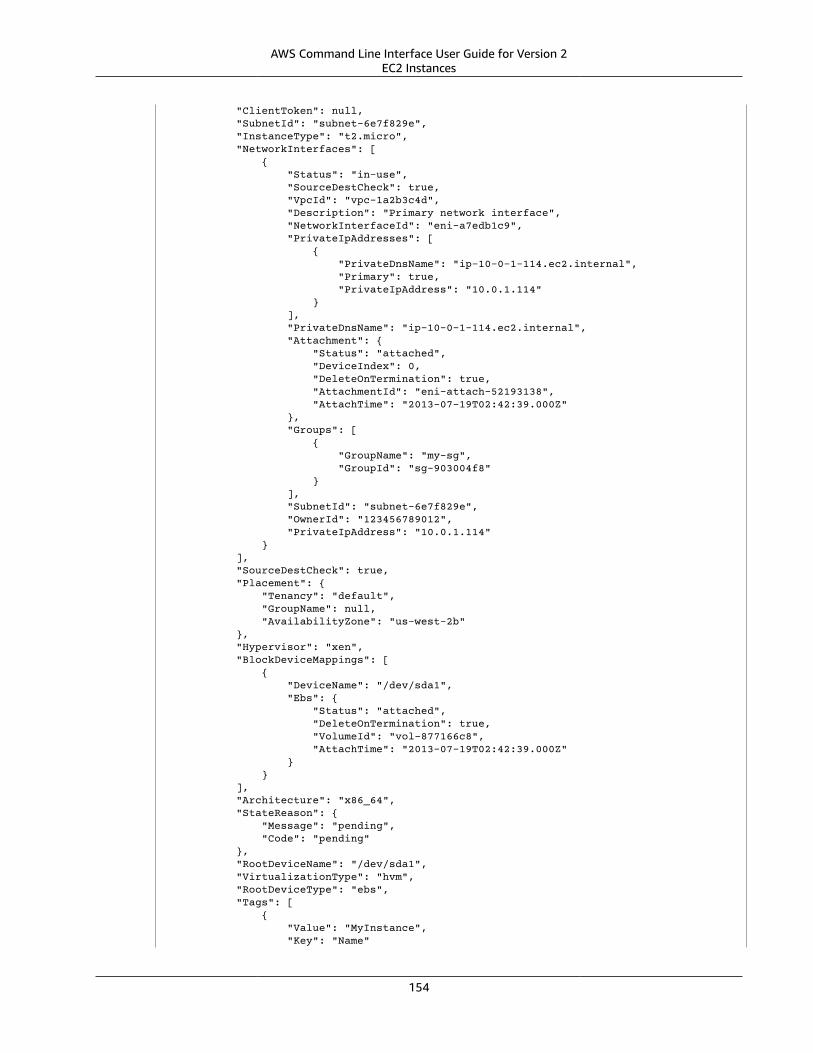
AWS Command Line Interface User Guide for Version 2EC2 Instances
"ClientToken": null, "SubnetId": "subnet-6e7f829e", "InstanceType": "t2.micro", "NetworkInterfaces": [ { "Status": "in-use", "SourceDestCheck": true, "VpcId": "vpc-1a2b3c4d", "Description": "Primary network interface", "NetworkInterfaceId": "eni-a7edb1c9", "PrivateIpAddresses": [ { "PrivateDnsName": "ip-10-0-1-114.ec2.internal", "Primary": true, "PrivateIpAddress": "10.0.1.114" } ], "PrivateDnsName": "ip-10-0-1-114.ec2.internal", "Attachment": { "Status": "attached", "DeviceIndex": 0, "DeleteOnTermination": true, "AttachmentId": "eni-attach-52193138", "AttachTime": "2013-07-19T02:42:39.000Z" }, "Groups": [ { "GroupName": "my-sg", "GroupId": "sg-903004f8" } ], "SubnetId": "subnet-6e7f829e", "OwnerId": "123456789012", "PrivateIpAddress": "10.0.1.114" } ], "SourceDestCheck": true, "Placement": { "Tenancy": "default", "GroupName": null, "AvailabilityZone": "us-west-2b" }, "Hypervisor": "xen", "BlockDeviceMappings": [ { "DeviceName": "/dev/sda1", "Ebs": { "Status": "attached", "DeleteOnTermination": true, "VolumeId": "vol-877166c8", "AttachTime": "2013-07-19T02:42:39.000Z" } } ], "Architecture": "x86_64", "StateReason": { "Message": "pending", "Code": "pending" }, "RootDeviceName": "/dev/sda1", "VirtualizationType": "hvm", "RootDeviceType": "ebs", "Tags": [ { "Value": "MyInstance", "Key": "Name"
154
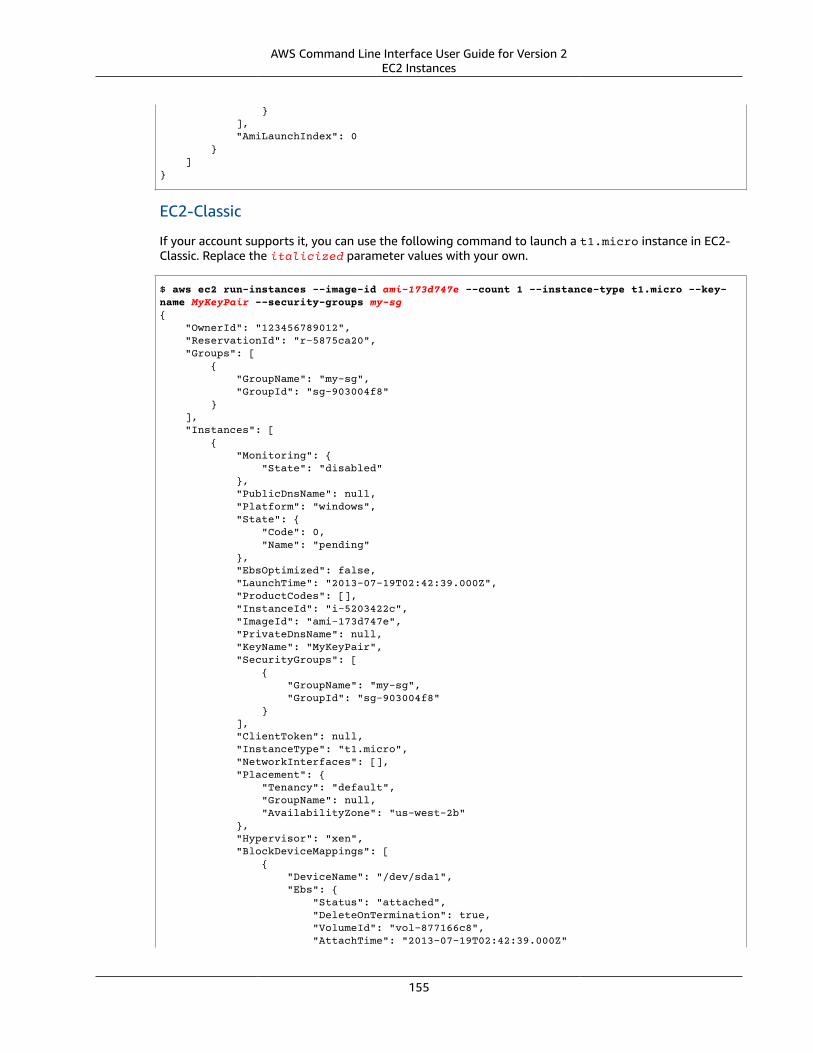
AWS Command Line Interface User Guide for Version 2EC2 Instances
} ], "AmiLaunchIndex": 0 } ]}
EC2-Classic
If your account supports it, you can use the following command to launch a t1.micro instance in EC2-Classic. Replace the italicized parameter values with your own.
$ aws ec2 run-instances --image-id ami-173d747e --count 1 --instance-type t1.micro --key-name MyKeyPair --security-groups my-sg{ "OwnerId": "123456789012", "ReservationId": "r-5875ca20", "Groups": [ { "GroupName": "my-sg", "GroupId": "sg-903004f8" } ], "Instances": [ { "Monitoring": { "State": "disabled" }, "PublicDnsName": null, "Platform": "windows", "State": { "Code": 0, "Name": "pending" }, "EbsOptimized": false, "LaunchTime": "2013-07-19T02:42:39.000Z", "ProductCodes": [], "InstanceId": "i-5203422c", "ImageId": "ami-173d747e", "PrivateDnsName": null, "KeyName": "MyKeyPair", "SecurityGroups": [ { "GroupName": "my-sg", "GroupId": "sg-903004f8" } ], "ClientToken": null, "InstanceType": "t1.micro", "NetworkInterfaces": [], "Placement": { "Tenancy": "default", "GroupName": null, "AvailabilityZone": "us-west-2b" }, "Hypervisor": "xen", "BlockDeviceMappings": [ { "DeviceName": "/dev/sda1", "Ebs": { "Status": "attached", "DeleteOnTermination": true, "VolumeId": "vol-877166c8", "AttachTime": "2013-07-19T02:42:39.000Z"
155
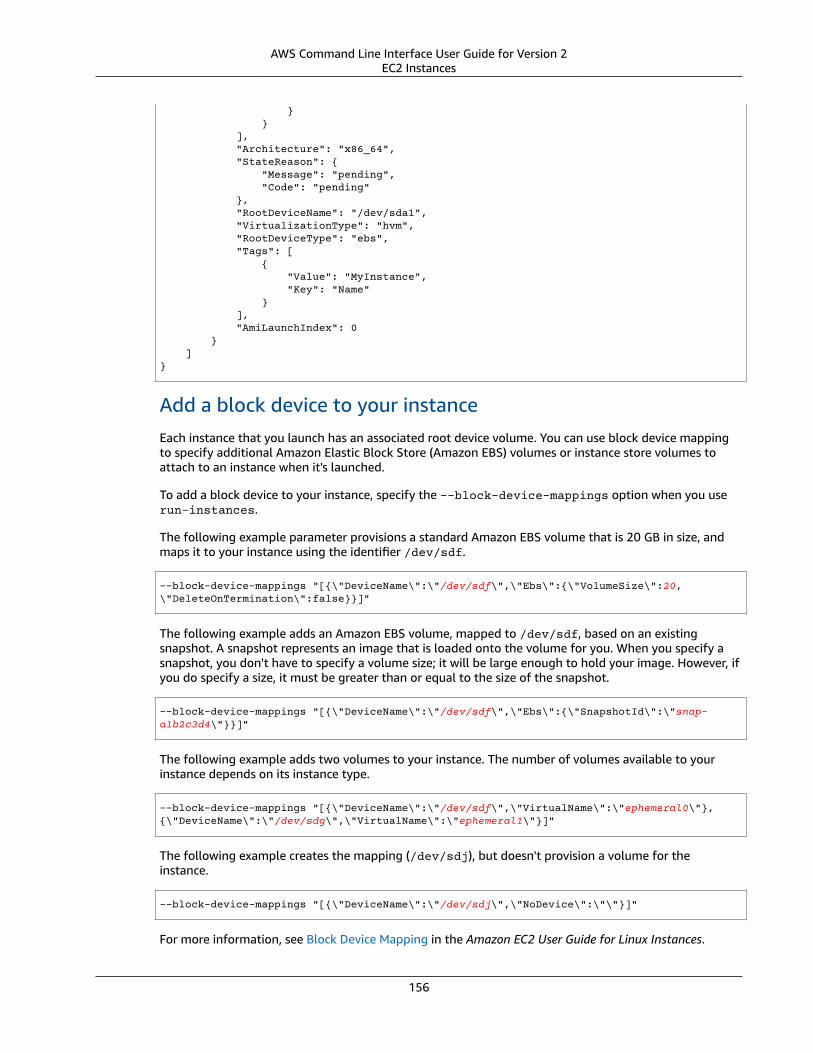
AWS Command Line Interface User Guide for Version 2EC2 Instances
} } ], "Architecture": "x86_64", "StateReason": { "Message": "pending", "Code": "pending" }, "RootDeviceName": "/dev/sda1", "VirtualizationType": "hvm", "RootDeviceType": "ebs", "Tags": [ { "Value": "MyInstance", "Key": "Name" } ], "AmiLaunchIndex": 0 } ]}
Add a block device to your instanceEach instance that you launch has an associated root device volume. You can use block device mappingto specify additional Amazon Elastic Block Store (Amazon EBS) volumes or instance store volumes toattach to an instance when it's launched.
To add a block device to your instance, specify the --block-device-mappings option when you userun-instances.
The following example parameter provisions a standard Amazon EBS volume that is 20 GB in size, andmaps it to your instance using the identifier /dev/sdf.
--block-device-mappings "[{\"DeviceName\":\"/dev/sdf\",\"Ebs\":{\"VolumeSize\":20,\"DeleteOnTermination\":false}}]"
The following example adds an Amazon EBS volume, mapped to /dev/sdf, based on an existingsnapshot. A snapshot represents an image that is loaded onto the volume for you. When you specify asnapshot, you don't have to specify a volume size; it will be large enough to hold your image. However, ifyou do specify a size, it must be greater than or equal to the size of the snapshot.
--block-device-mappings "[{\"DeviceName\":\"/dev/sdf\",\"Ebs\":{\"SnapshotId\":\"snap-a1b2c3d4\"}}]"
The following example adds two volumes to your instance. The number of volumes available to yourinstance depends on its instance type.
--block-device-mappings "[{\"DeviceName\":\"/dev/sdf\",\"VirtualName\":\"ephemeral0\"},{\"DeviceName\":\"/dev/sdg\",\"VirtualName\":\"ephemeral1\"}]"
The following example creates the mapping (/dev/sdj), but doesn't provision a volume for theinstance.
--block-device-mappings "[{\"DeviceName\":\"/dev/sdj\",\"NoDevice\":\"\"}]"
For more information, see Block Device Mapping in the Amazon EC2 User Guide for Linux Instances.
156

AWS Command Line Interface User Guide for Version 2EC2 Instances
Add a tag to your instanceA tag is a label that you assign to an AWS resource. It enables you to add metadata to your resources thatyou can use for a variety of purposes. For more information, see Tagging Your Resources in the AmazonEC2 User Guide for Linux Instances.
The following example shows how to add a tag with the key name "Name" and the value "MyInstance"to the specified instance, by using the aws ec2 create-tags command.
$ aws ec2 create-tags --resources i-5203422c --tags Key=Name,Value=MyInstance
Connect to your instanceWhen your instance is running, you can connect to it and use it just as you'd use a computer sitting infront of you. For more information, see Connect to Your Amazon EC2 Instance in the Amazon EC2 UserGuide for Linux Instances.
List your instancesYou can use the AWS CLI to list your instances and view information about them. You can list all yourinstances, or filter the results based on the instances that you're interested in.
The following examples show how to use the aws ec2 describe-instances command.
The following command filters the list to only your t2.micro instances and outputs only theInstanceId values for each match.
$ aws ec2 describe-instances --filters "Name=instance-type,Values=t2.micro" --query "Reservations[].Instances[].InstanceId"[ "i-05e998023d9c69f9a"]
The following command lists any of your instances that have the tag Name=MyInstance.
$ aws ec2 describe-instances --filters "Name=tag:Name,Values=MyInstance"
The following command lists your instances that were launched using any of the following AMIs: ami-x0123456, ami-y0123456, and ami-z0123456.
$ aws ec2 describe-instances --filters "Name=image-id,Values=ami-x0123456,ami-y0123456,ami-z0123456"
Terminate your instanceTerminating an instance deletes it. You can't reconnect to an instance after you've terminated it.
As soon as the state of the instance changes to shutting-down or terminated, you stop incurringcharges for that instance. If you want to reconnect to an instance later, use stop-instances instead ofterminate-instances. For more information, see Terminate Your Instance in the Amazon EC2 UserGuide for Linux Instances.
To delete an instance, you use the command aws ec2 terminate-instances to delete it.
$ aws ec2 terminate-instances --instance-ids i-5203422c
157
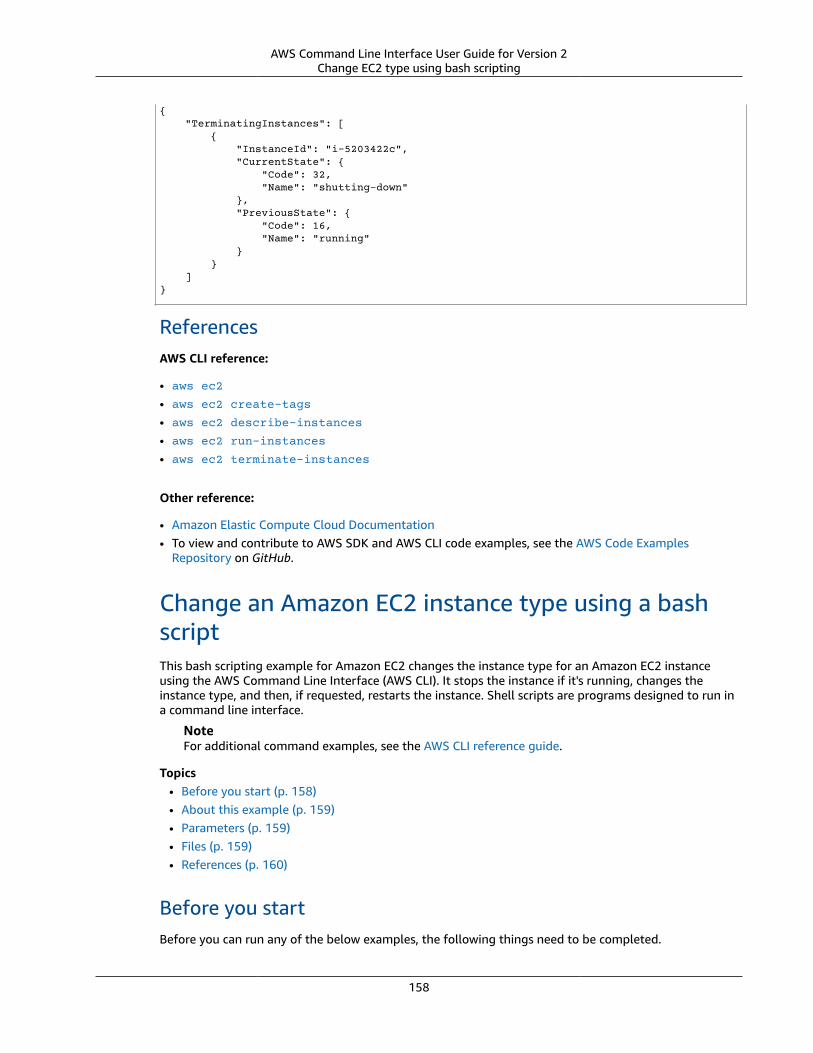
AWS Command Line Interface User Guide for Version 2Change EC2 type using bash scripting
{ "TerminatingInstances": [ { "InstanceId": "i-5203422c", "CurrentState": { "Code": 32, "Name": "shutting-down" }, "PreviousState": { "Code": 16, "Name": "running" } } ]}
ReferencesAWS CLI reference:
• aws ec2
• aws ec2 create-tags
• aws ec2 describe-instances
• aws ec2 run-instances
• aws ec2 terminate-instances
Other reference:
• Amazon Elastic Compute Cloud Documentation• To view and contribute to AWS SDK and AWS CLI code examples, see the AWS Code Examples
Repository on GitHub.
Change an Amazon EC2 instance type using a bashscriptThis bash scripting example for Amazon EC2 changes the instance type for an Amazon EC2 instanceusing the AWS Command Line Interface (AWS CLI). It stops the instance if it's running, changes theinstance type, and then, if requested, restarts the instance. Shell scripts are programs designed to run ina command line interface.
NoteFor additional command examples, see the AWS CLI reference guide.
Topics• Before you start (p. 158)• About this example (p. 159)• Parameters (p. 159)• Files (p. 159)• References (p. 160)
Before you startBefore you can run any of the below examples, the following things need to be completed.
158
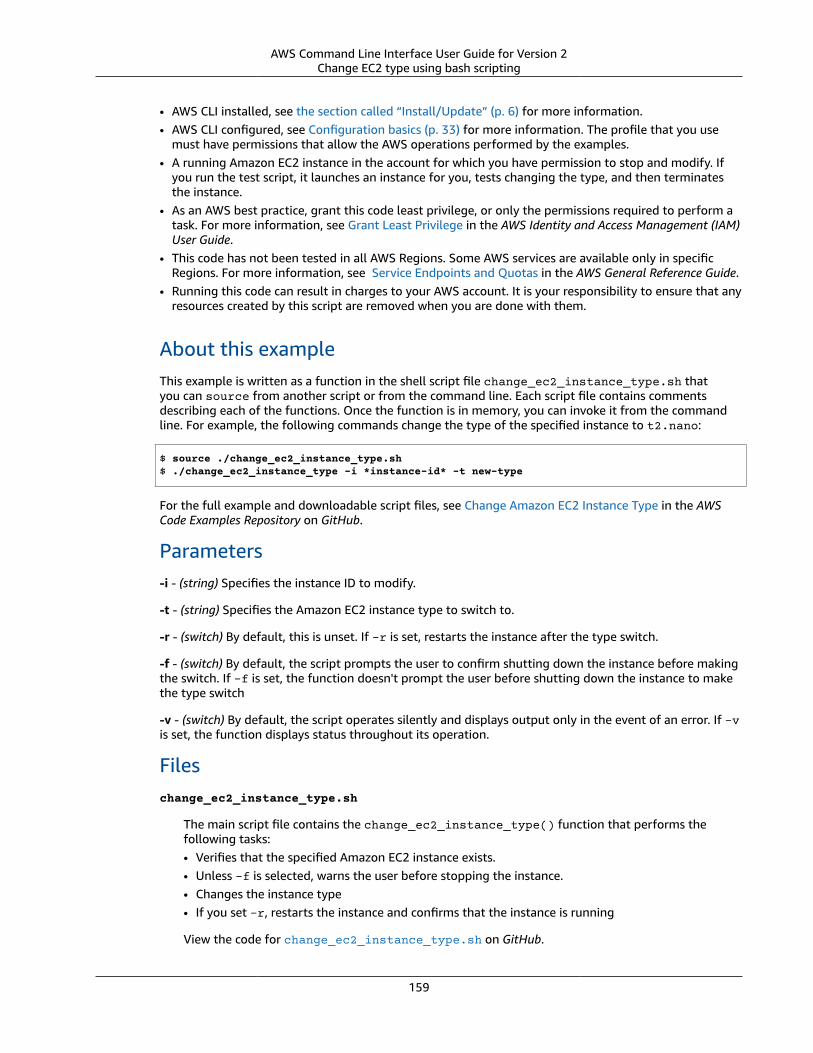
AWS Command Line Interface User Guide for Version 2Change EC2 type using bash scripting
• AWS CLI installed, see the section called “Install/Update” (p. 6) for more information.• AWS CLI configured, see Configuration basics (p. 33) for more information. The profile that you use
must have permissions that allow the AWS operations performed by the examples.• A running Amazon EC2 instance in the account for which you have permission to stop and modify. If
you run the test script, it launches an instance for you, tests changing the type, and then terminatesthe instance.
• As an AWS best practice, grant this code least privilege, or only the permissions required to perform atask. For more information, see Grant Least Privilege in the AWS Identity and Access Management (IAM)User Guide.
• This code has not been tested in all AWS Regions. Some AWS services are available only in specificRegions. For more information, see Service Endpoints and Quotas in the AWS General Reference Guide.
• Running this code can result in charges to your AWS account. It is your responsibility to ensure that anyresources created by this script are removed when you are done with them.
About this exampleThis example is written as a function in the shell script file change_ec2_instance_type.sh thatyou can source from another script or from the command line. Each script file contains commentsdescribing each of the functions. Once the function is in memory, you can invoke it from the commandline. For example, the following commands change the type of the specified instance to t2.nano:
$ source ./change_ec2_instance_type.sh$ ./change_ec2_instance_type -i *instance-id* -t new-type
For the full example and downloadable script files, see Change Amazon EC2 Instance Type in the AWSCode Examples Repository on GitHub.
Parameters-i - (string) Specifies the instance ID to modify.
-t - (string) Specifies the Amazon EC2 instance type to switch to.
-r - (switch) By default, this is unset. If -r is set, restarts the instance after the type switch.
-f - (switch) By default, the script prompts the user to confirm shutting down the instance before makingthe switch. If -f is set, the function doesn't prompt the user before shutting down the instance to makethe type switch
-v - (switch) By default, the script operates silently and displays output only in the event of an error. If -vis set, the function displays status throughout its operation.
Fileschange_ec2_instance_type.sh
The main script file contains the change_ec2_instance_type() function that performs thefollowing tasks:• Verifies that the specified Amazon EC2 instance exists.• Unless -f is selected, warns the user before stopping the instance.• Changes the instance type• If you set -r, restarts the instance and confirms that the instance is running
View the code for change_ec2_instance_type.sh on GitHub.
159
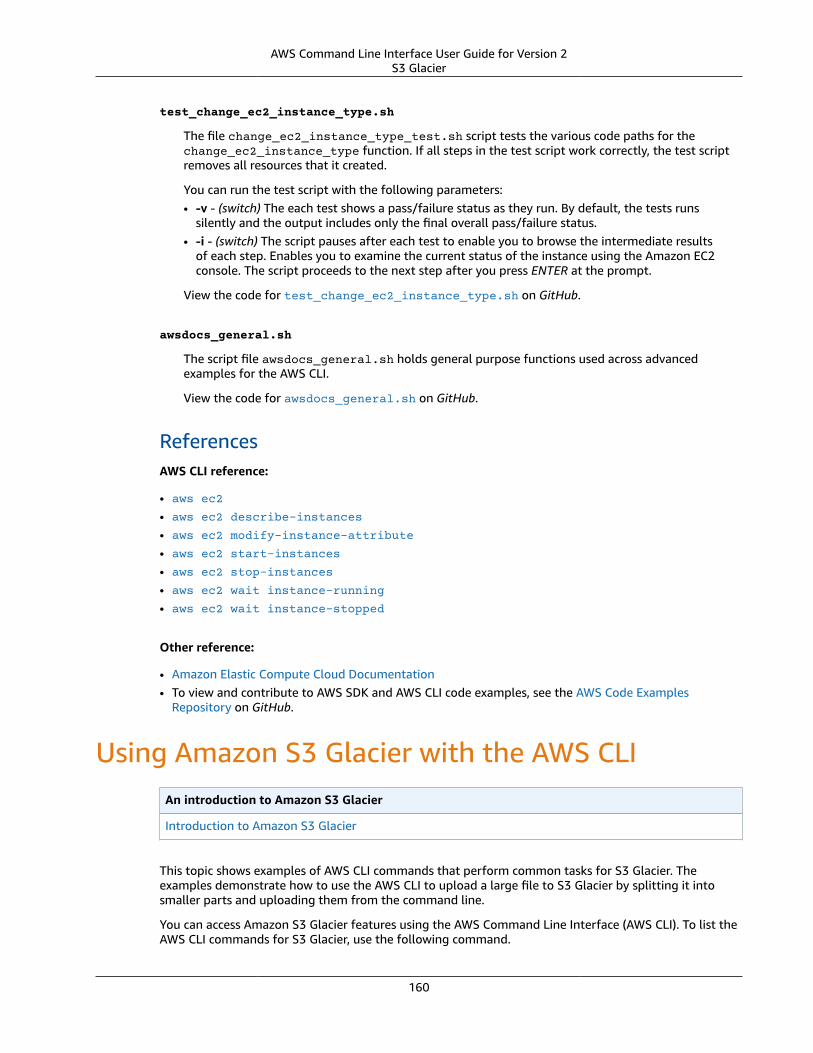
AWS Command Line Interface User Guide for Version 2S3 Glacier
test_change_ec2_instance_type.sh
The file change_ec2_instance_type_test.sh script tests the various code paths for thechange_ec2_instance_type function. If all steps in the test script work correctly, the test scriptremoves all resources that it created.
You can run the test script with the following parameters:• -v - (switch) The each test shows a pass/failure status as they run. By default, the tests runs
silently and the output includes only the final overall pass/failure status.• -i - (switch) The script pauses after each test to enable you to browse the intermediate results
of each step. Enables you to examine the current status of the instance using the Amazon EC2console. The script proceeds to the next step after you press ENTER at the prompt.
View the code for test_change_ec2_instance_type.sh on GitHub.
awsdocs_general.sh
The script file awsdocs_general.sh holds general purpose functions used across advancedexamples for the AWS CLI.
View the code for awsdocs_general.sh on GitHub.
ReferencesAWS CLI reference:
• aws ec2
• aws ec2 describe-instances
• aws ec2 modify-instance-attribute
• aws ec2 start-instances
• aws ec2 stop-instances
• aws ec2 wait instance-running
• aws ec2 wait instance-stopped
Other reference:
• Amazon Elastic Compute Cloud Documentation• To view and contribute to AWS SDK and AWS CLI code examples, see the AWS Code Examples
Repository on GitHub.
Using Amazon S3 Glacier with the AWS CLIAn introduction to Amazon S3 Glacier
Introduction to Amazon S3 Glacier
This topic shows examples of AWS CLI commands that perform common tasks for S3 Glacier. Theexamples demonstrate how to use the AWS CLI to upload a large file to S3 Glacier by splitting it intosmaller parts and uploading them from the command line.
You can access Amazon S3 Glacier features using the AWS Command Line Interface (AWS CLI). To list theAWS CLI commands for S3 Glacier, use the following command.
160
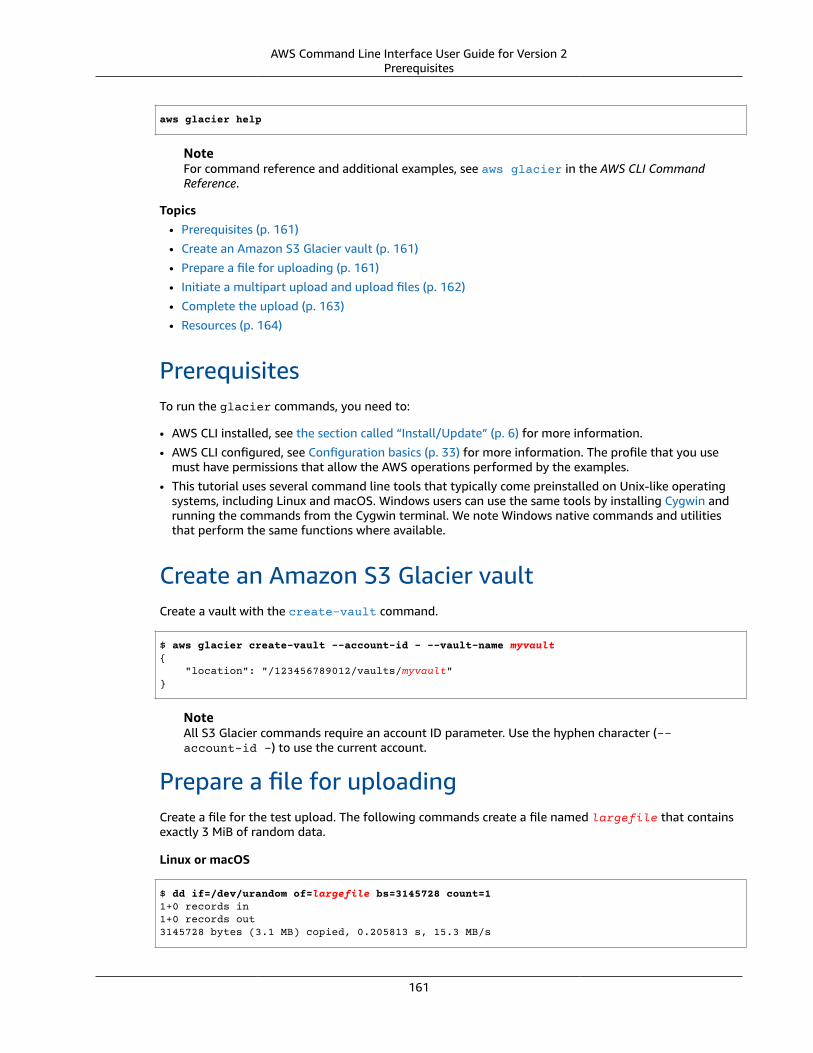
AWS Command Line Interface User Guide for Version 2Prerequisites
aws glacier help
NoteFor command reference and additional examples, see aws glacier in the AWS CLI CommandReference.
Topics• Prerequisites (p. 161)• Create an Amazon S3 Glacier vault (p. 161)• Prepare a file for uploading (p. 161)• Initiate a multipart upload and upload files (p. 162)• Complete the upload (p. 163)• Resources (p. 164)
PrerequisitesTo run the glacier commands, you need to:
• AWS CLI installed, see the section called “Install/Update” (p. 6) for more information.• AWS CLI configured, see Configuration basics (p. 33) for more information. The profile that you use
must have permissions that allow the AWS operations performed by the examples.• This tutorial uses several command line tools that typically come preinstalled on Unix-like operating
systems, including Linux and macOS. Windows users can use the same tools by installing Cygwin andrunning the commands from the Cygwin terminal. We note Windows native commands and utilitiesthat perform the same functions where available.
Create an Amazon S3 Glacier vaultCreate a vault with the create-vault command.
$ aws glacier create-vault --account-id - --vault-name myvault{ "location": "/123456789012/vaults/myvault"}
NoteAll S3 Glacier commands require an account ID parameter. Use the hyphen character (--account-id -) to use the current account.
Prepare a file for uploadingCreate a file for the test upload. The following commands create a file named largefile that containsexactly 3 MiB of random data.
Linux or macOS
$ dd if=/dev/urandom of=largefile bs=3145728 count=11+0 records in1+0 records out3145728 bytes (3.1 MB) copied, 0.205813 s, 15.3 MB/s
161
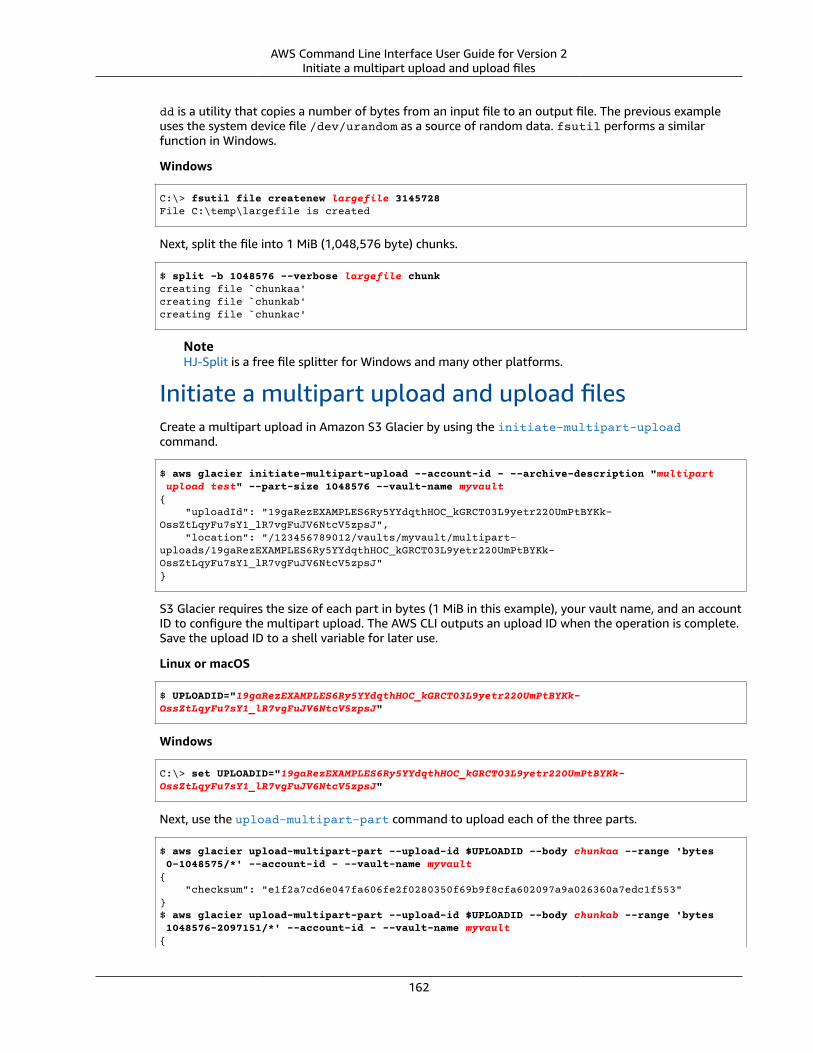
AWS Command Line Interface User Guide for Version 2Initiate a multipart upload and upload files
dd is a utility that copies a number of bytes from an input file to an output file. The previous exampleuses the system device file /dev/urandom as a source of random data. fsutil performs a similarfunction in Windows.
Windows
C:\> fsutil file createnew largefile 3145728File C:\temp\largefile is created
Next, split the file into 1 MiB (1,048,576 byte) chunks.
$ split -b 1048576 --verbose largefile chunkcreating file `chunkaa'creating file `chunkab'creating file `chunkac'
NoteHJ-Split is a free file splitter for Windows and many other platforms.
Initiate a multipart upload and upload filesCreate a multipart upload in Amazon S3 Glacier by using the initiate-multipart-uploadcommand.
$ aws glacier initiate-multipart-upload --account-id - --archive-description "multipart upload test" --part-size 1048576 --vault-name myvault{ "uploadId": "19gaRezEXAMPLES6Ry5YYdqthHOC_kGRCT03L9yetr220UmPtBYKk-OssZtLqyFu7sY1_lR7vgFuJV6NtcV5zpsJ", "location": "/123456789012/vaults/myvault/multipart-uploads/19gaRezEXAMPLES6Ry5YYdqthHOC_kGRCT03L9yetr220UmPtBYKk-OssZtLqyFu7sY1_lR7vgFuJV6NtcV5zpsJ"}
S3 Glacier requires the size of each part in bytes (1 MiB in this example), your vault name, and an accountID to configure the multipart upload. The AWS CLI outputs an upload ID when the operation is complete.Save the upload ID to a shell variable for later use.
Linux or macOS
$ UPLOADID="19gaRezEXAMPLES6Ry5YYdqthHOC_kGRCT03L9yetr220UmPtBYKk-OssZtLqyFu7sY1_lR7vgFuJV6NtcV5zpsJ"
Windows
C:\> set UPLOADID="19gaRezEXAMPLES6Ry5YYdqthHOC_kGRCT03L9yetr220UmPtBYKk-OssZtLqyFu7sY1_lR7vgFuJV6NtcV5zpsJ"
Next, use the upload-multipart-part command to upload each of the three parts.
$ aws glacier upload-multipart-part --upload-id $UPLOADID --body chunkaa --range 'bytes 0-1048575/*' --account-id - --vault-name myvault{ "checksum": "e1f2a7cd6e047fa606fe2f0280350f69b9f8cfa602097a9a026360a7edc1f553"}$ aws glacier upload-multipart-part --upload-id $UPLOADID --body chunkab --range 'bytes 1048576-2097151/*' --account-id - --vault-name myvault{
162
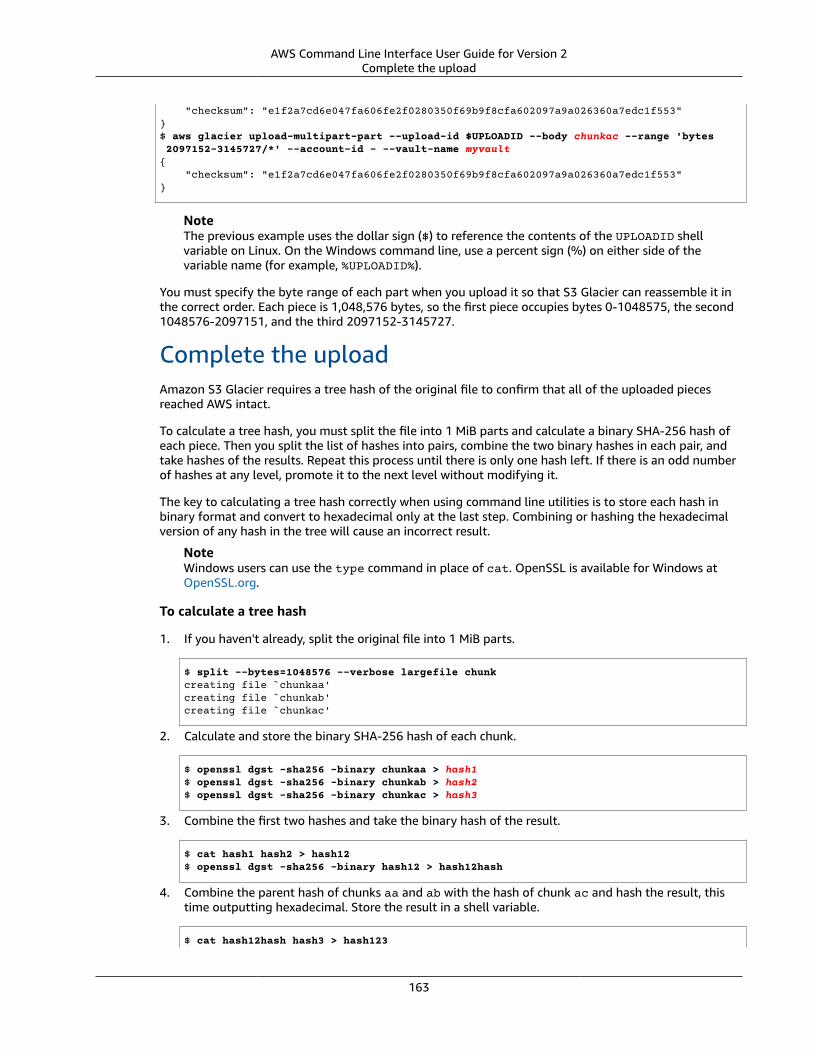
AWS Command Line Interface User Guide for Version 2Complete the upload
"checksum": "e1f2a7cd6e047fa606fe2f0280350f69b9f8cfa602097a9a026360a7edc1f553"}$ aws glacier upload-multipart-part --upload-id $UPLOADID --body chunkac --range 'bytes 2097152-3145727/*' --account-id - --vault-name myvault{ "checksum": "e1f2a7cd6e047fa606fe2f0280350f69b9f8cfa602097a9a026360a7edc1f553"}
NoteThe previous example uses the dollar sign ($) to reference the contents of the UPLOADID shellvariable on Linux. On the Windows command line, use a percent sign (%) on either side of thevariable name (for example, %UPLOADID%).
You must specify the byte range of each part when you upload it so that S3 Glacier can reassemble it inthe correct order. Each piece is 1,048,576 bytes, so the first piece occupies bytes 0-1048575, the second1048576-2097151, and the third 2097152-3145727.
Complete the uploadAmazon S3 Glacier requires a tree hash of the original file to confirm that all of the uploaded piecesreached AWS intact.
To calculate a tree hash, you must split the file into 1 MiB parts and calculate a binary SHA-256 hash ofeach piece. Then you split the list of hashes into pairs, combine the two binary hashes in each pair, andtake hashes of the results. Repeat this process until there is only one hash left. If there is an odd numberof hashes at any level, promote it to the next level without modifying it.
The key to calculating a tree hash correctly when using command line utilities is to store each hash inbinary format and convert to hexadecimal only at the last step. Combining or hashing the hexadecimalversion of any hash in the tree will cause an incorrect result.
NoteWindows users can use the type command in place of cat. OpenSSL is available for Windows atOpenSSL.org.
To calculate a tree hash
1. If you haven't already, split the original file into 1 MiB parts.
$ split --bytes=1048576 --verbose largefile chunkcreating file `chunkaa'creating file `chunkab'creating file `chunkac'
2. Calculate and store the binary SHA-256 hash of each chunk.
$ openssl dgst -sha256 -binary chunkaa > hash1$ openssl dgst -sha256 -binary chunkab > hash2$ openssl dgst -sha256 -binary chunkac > hash3
3. Combine the first two hashes and take the binary hash of the result.
$ cat hash1 hash2 > hash12$ openssl dgst -sha256 -binary hash12 > hash12hash
4. Combine the parent hash of chunks aa and ab with the hash of chunk ac and hash the result, thistime outputting hexadecimal. Store the result in a shell variable.
$ cat hash12hash hash3 > hash123
163
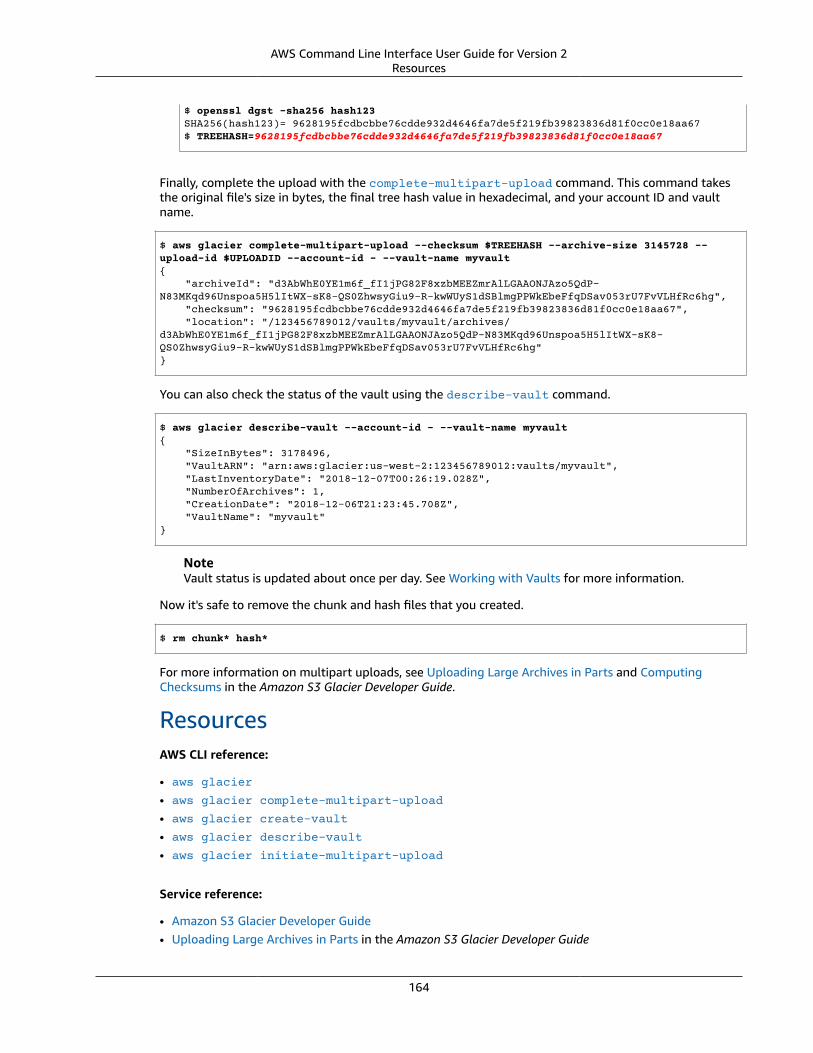
AWS Command Line Interface User Guide for Version 2Resources
$ openssl dgst -sha256 hash123SHA256(hash123)= 9628195fcdbcbbe76cdde932d4646fa7de5f219fb39823836d81f0cc0e18aa67$ TREEHASH=9628195fcdbcbbe76cdde932d4646fa7de5f219fb39823836d81f0cc0e18aa67
Finally, complete the upload with the complete-multipart-upload command. This command takesthe original file's size in bytes, the final tree hash value in hexadecimal, and your account ID and vaultname.
$ aws glacier complete-multipart-upload --checksum $TREEHASH --archive-size 3145728 --upload-id $UPLOADID --account-id - --vault-name myvault{ "archiveId": "d3AbWhE0YE1m6f_fI1jPG82F8xzbMEEZmrAlLGAAONJAzo5QdP-N83MKqd96Unspoa5H5lItWX-sK8-QS0ZhwsyGiu9-R-kwWUyS1dSBlmgPPWkEbeFfqDSav053rU7FvVLHfRc6hg", "checksum": "9628195fcdbcbbe76cdde932d4646fa7de5f219fb39823836d81f0cc0e18aa67", "location": "/123456789012/vaults/myvault/archives/d3AbWhE0YE1m6f_fI1jPG82F8xzbMEEZmrAlLGAAONJAzo5QdP-N83MKqd96Unspoa5H5lItWX-sK8-QS0ZhwsyGiu9-R-kwWUyS1dSBlmgPPWkEbeFfqDSav053rU7FvVLHfRc6hg"}
You can also check the status of the vault using the describe-vault command.
$ aws glacier describe-vault --account-id - --vault-name myvault{ "SizeInBytes": 3178496, "VaultARN": "arn:aws:glacier:us-west-2:123456789012:vaults/myvault", "LastInventoryDate": "2018-12-07T00:26:19.028Z", "NumberOfArchives": 1, "CreationDate": "2018-12-06T21:23:45.708Z", "VaultName": "myvault"}
NoteVault status is updated about once per day. See Working with Vaults for more information.
Now it's safe to remove the chunk and hash files that you created.
$ rm chunk* hash*
For more information on multipart uploads, see Uploading Large Archives in Parts and ComputingChecksums in the Amazon S3 Glacier Developer Guide.
ResourcesAWS CLI reference:
• aws glacier
• aws glacier complete-multipart-upload
• aws glacier create-vault
• aws glacier describe-vault
• aws glacier initiate-multipart-upload
Service reference:
• Amazon S3 Glacier Developer Guide• Uploading Large Archives in Parts in the Amazon S3 Glacier Developer Guide
164
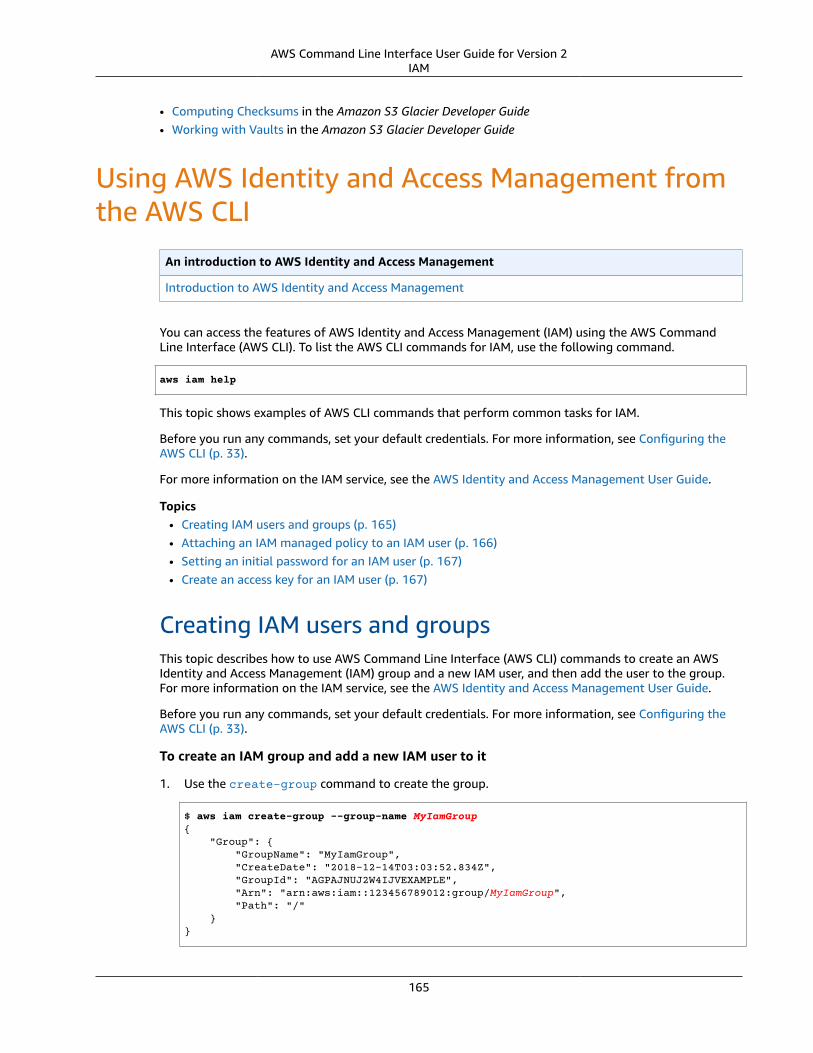
AWS Command Line Interface User Guide for Version 2IAM
• Computing Checksums in the Amazon S3 Glacier Developer Guide• Working with Vaults in the Amazon S3 Glacier Developer Guide
Using AWS Identity and Access Management fromthe AWS CLI
An introduction to AWS Identity and Access Management
Introduction to AWS Identity and Access Management
You can access the features of AWS Identity and Access Management (IAM) using the AWS CommandLine Interface (AWS CLI). To list the AWS CLI commands for IAM, use the following command.
aws iam help
This topic shows examples of AWS CLI commands that perform common tasks for IAM.
Before you run any commands, set your default credentials. For more information, see Configuring theAWS CLI (p. 33).
For more information on the IAM service, see the AWS Identity and Access Management User Guide.
Topics• Creating IAM users and groups (p. 165)• Attaching an IAM managed policy to an IAM user (p. 166)• Setting an initial password for an IAM user (p. 167)• Create an access key for an IAM user (p. 167)
Creating IAM users and groupsThis topic describes how to use AWS Command Line Interface (AWS CLI) commands to create an AWSIdentity and Access Management (IAM) group and a new IAM user, and then add the user to the group.For more information on the IAM service, see the AWS Identity and Access Management User Guide.
Before you run any commands, set your default credentials. For more information, see Configuring theAWS CLI (p. 33).
To create an IAM group and add a new IAM user to it
1. Use the create-group command to create the group.
$ aws iam create-group --group-name MyIamGroup{ "Group": { "GroupName": "MyIamGroup", "CreateDate": "2018-12-14T03:03:52.834Z", "GroupId": "AGPAJNUJ2W4IJVEXAMPLE", "Arn": "arn:aws:iam::123456789012:group/MyIamGroup", "Path": "/" }}
165

AWS Command Line Interface User Guide for Version 2Attaching an IAM managed policy to an IAM user
2. Use the create-user command to create the user.
$ aws iam create-user --user-name MyUser{ "User": { "UserName": "MyUser", "Path": "/", "CreateDate": "2018-12-14T03:13:02.581Z", "UserId": "AIDAJY2PE5XUZ4EXAMPLE", "Arn": "arn:aws:iam::123456789012:user/MyUser" }}
3. Use the add-user-to-group command to add the user to the group.
$ aws iam add-user-to-group --user-name MyUser --group-name MyIamGroup
4. To verify that the MyIamGroup group contains the MyUser, use the get-group command.
$ aws iam get-group --group-name MyIamGroup{ "Group": { "GroupName": "MyIamGroup", "CreateDate": "2018-12-14T03:03:52Z", "GroupId": "AGPAJNUJ2W4IJVEXAMPLE", "Arn": "arn:aws:iam::123456789012:group/MyIamGroup", "Path": "/" }, "Users": [ { "UserName": "MyUser", "Path": "/", "CreateDate": "2018-12-14T03:13:02Z", "UserId": "AIDAJY2PE5XUZ4EXAMPLE", "Arn": "arn:aws:iam::123456789012:user/MyUser" } ], "IsTruncated": "false"}
Attaching an IAM managed policy to an IAM userThis topic describes how to use AWS Command Line Interface (AWS CLI) commands to attach an AWSIdentity and Access Management (IAM) policy to an IAM user. The policy in this example provides theuser with "Power User Access". For more information on the IAM service, see the AWS Identity and AccessManagement User Guide.
Before you run any commands, set your default credentials. For more information, see Configuring theAWS CLI (p. 33).
To attach an IAM managed policy to an IAM user
1. Determine the Amazon Resource Name (ARN) of the policy to attach. The following command useslist-policies to find the ARN of the policy with the name PowerUserAccess. It then storesthat ARN in an environment variable.
$ export POLICYARN=$(aws iam list-policies --query 'Policies[?PolicyName==`PowerUserAccess`].{ARN:Arn}' --output text) ~$ echo $POLICYARN
166

AWS Command Line Interface User Guide for Version 2Setting an initial password for an IAM user
arn:aws:iam::aws:policy/PowerUserAccess
2. To attach the policy, use the attach-user-policy command, and reference the environmentvariable that holds the policy ARN.
$ aws iam attach-user-policy --user-name MyUser --policy-arn $POLICYARN
3. Verify that the policy is attached to the user by running the list-attached-user-policiescommand.
$ aws iam list-attached-user-policies --user-name MyUser{ "AttachedPolicies": [ { "PolicyName": "PowerUserAccess", "PolicyArn": "arn:aws:iam::aws:policy/PowerUserAccess" } ]}
For more information, see Access Management Resources. This topic provides links to an overview ofpermissions and policies, and links to examples of policies for accessing Amazon S3, Amazon EC2, andother services.
Setting an initial password for an IAM userThis topic describes how to use AWS Command Line Interface (AWS CLI) commands to set an initialpassword for an AWS Identity and Access Management( IAM) user. For more information on the IAMservice, see the AWS Identity and Access Management User Guide.
Before you run any commands, set your default credentials. For more information, see Configuring theAWS CLI (p. 33).
The following command uses create-login-profile to set an initial password on the specified user.When the user signs in for the first time, the user is required to change the password to something thatonly the user knows.
$ aws iam create-login-profile --user-name MyUser --password My!User1Login8P@ssword --password-reset-required{ "LoginProfile": { "UserName": "MyUser", "CreateDate": "2018-12-14T17:27:18Z", "PasswordResetRequired": true }}
You can use the update-login-profile command to change the password for an IAM user.
$ aws iam update-login-profile --user-name MyUser --password My!User1ADifferentP@ssword
Create an access key for an IAM userThis topic describes how to use AWS Command Line Interface (AWS CLI) commands to create a set ofaccess keys for an AWS Identity and Access Management (IAM) user. For more information on the IAMservice, see the AWS Identity and Access Management User Guide.
167
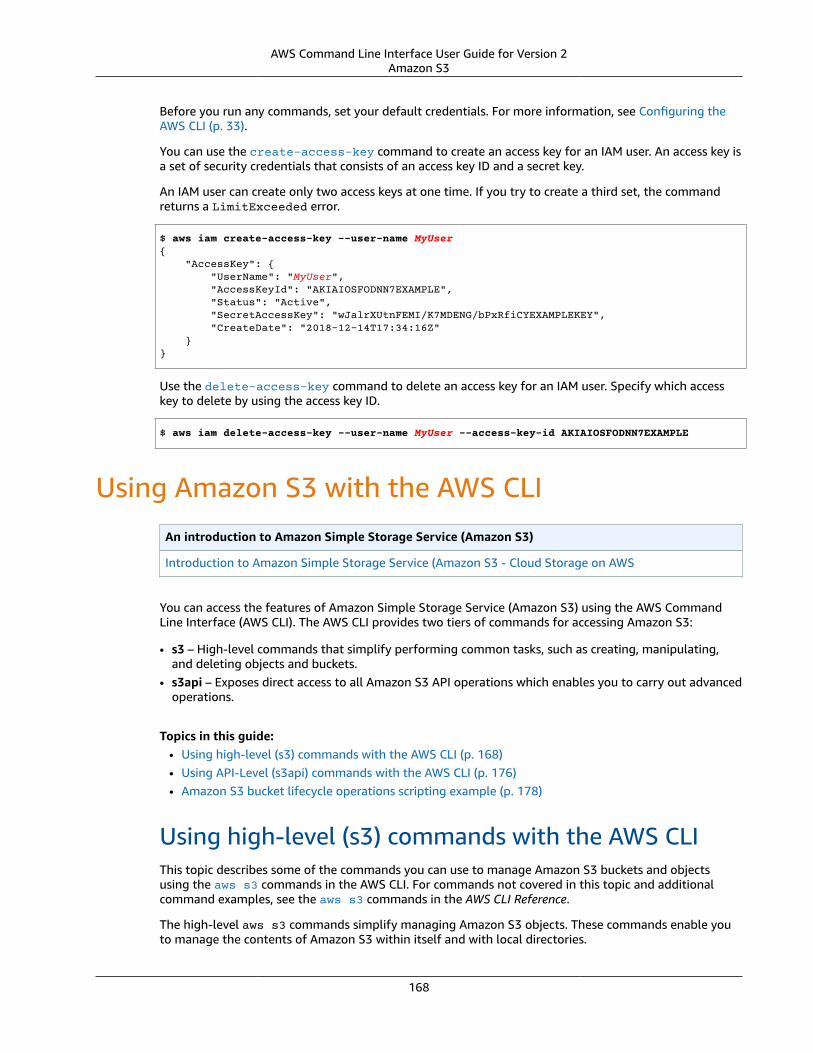
AWS Command Line Interface User Guide for Version 2Amazon S3
Before you run any commands, set your default credentials. For more information, see Configuring theAWS CLI (p. 33).
You can use the create-access-key command to create an access key for an IAM user. An access key isa set of security credentials that consists of an access key ID and a secret key.
An IAM user can create only two access keys at one time. If you try to create a third set, the commandreturns a LimitExceeded error.
$ aws iam create-access-key --user-name MyUser{ "AccessKey": { "UserName": "MyUser", "AccessKeyId": "AKIAIOSFODNN7EXAMPLE", "Status": "Active", "SecretAccessKey": "wJalrXUtnFEMI/K7MDENG/bPxRfiCYEXAMPLEKEY", "CreateDate": "2018-12-14T17:34:16Z" }}
Use the delete-access-key command to delete an access key for an IAM user. Specify which accesskey to delete by using the access key ID.
$ aws iam delete-access-key --user-name MyUser --access-key-id AKIAIOSFODNN7EXAMPLE
Using Amazon S3 with the AWS CLI
An introduction to Amazon Simple Storage Service (Amazon S3)
Introduction to Amazon Simple Storage Service (Amazon S3 - Cloud Storage on AWS
You can access the features of Amazon Simple Storage Service (Amazon S3) using the AWS CommandLine Interface (AWS CLI). The AWS CLI provides two tiers of commands for accessing Amazon S3:
• s3 – High-level commands that simplify performing common tasks, such as creating, manipulating,and deleting objects and buckets.
• s3api – Exposes direct access to all Amazon S3 API operations which enables you to carry out advancedoperations.
Topics in this guide:• Using high-level (s3) commands with the AWS CLI (p. 168)• Using API-Level (s3api) commands with the AWS CLI (p. 176)• Amazon S3 bucket lifecycle operations scripting example (p. 178)
Using high-level (s3) commands with the AWS CLIThis topic describes some of the commands you can use to manage Amazon S3 buckets and objectsusing the aws s3 commands in the AWS CLI. For commands not covered in this topic and additionalcommand examples, see the aws s3 commands in the AWS CLI Reference.
The high-level aws s3 commands simplify managing Amazon S3 objects. These commands enable youto manage the contents of Amazon S3 within itself and with local directories.
168
AWS Command Line Interface User Guide for Version 2High-level (s3) commands
NoteWhen you use aws s3 commands to upload large objects to an Amazon S3 bucket, the AWS CLIautomatically performs a multipart upload. You can't resume a failed upload when using theseaws s3 commands.If the multipart upload fails due to a timeout, or if you manually canceled in the AWS CLI,the AWS CLI stops the upload and cleans up any files that were created. This process can takeseveral minutes.If the multipart upload or cleanup process is canceled by a kill command or system failure, thecreated files remain in the Amazon S3 bucket. To clean up the multipart upload, use the s3apiabort-multipart-upload command.For more information, see Multipart upload overview in the Amazon Simple Storage Service UserGuide.
Topics• Prerequisites (p. 169)• Create a bucket (p. 169)• List buckets and objects (p. 170)• Delete buckets (p. 170)• Delete objects (p. 171)• Move objects (p. 171)• Copy objects (p. 172)• Sync objects (p. 173)• Frequently used options for s3 commands (p. 174)• Resources (p. 176)
PrerequisitesTo run the s3 commands, you need to:
• AWS CLI installed, see the section called “Install/Update” (p. 6) for more information.• AWS CLI configured, see Configuration basics (p. 33) for more information. The profile that you use
must have permissions that allow the AWS operations performed by the examples.• Understand these Amazon S3 terms:
• Bucket – A top-level Amazon S3 folder.• Prefix – An Amazon S3 folder in a bucket.• Object – Any item that's hosted in an Amazon S3 bucket.
Create a bucketUse the s3 mb command to make a bucket. Bucket names must be globally unique (unique across all ofAmazon S3) and should be DNS compliant.
Bucket names can contain lowercase letters, numbers, hyphens, and periods. Bucket names can start andend only with a letter or number, and cannot contain a period next to a hyphen or another period.
Syntax
$ aws s3 mb <target> [--options]
s3 mb examples
The following example creates the s3://bucket-name bucket.
169
AWS Command Line Interface User Guide for Version 2High-level (s3) commands
$ aws s3 mb s3://bucket-name
List buckets and objectsTo list your buckets, folders, or objects, use the s3 ls command. Using the command without a targetor options lists all buckets.
Syntax
$ aws s3 ls <target> [--options]
For a few common options to use with this command, and examples, see Frequently used options fors3 commands (p. 174). For a complete list of available options, see s3 ls in the AWS CLI CommandReference.
s3 ls examples
The following example lists all of your Amazon S3 buckets.
$ aws s3 ls2018-12-11 17:08:50 my-bucket2018-12-14 14:55:44 my-bucket2
The following command lists all objects and prefixes in a bucket. In this example output, the prefixexample/ has one file named MyFile1.txt.
$ aws s3 ls s3://bucket-name PRE example/2018-12-04 19:05:48 3 MyFile1.txt
You can filter the output to a specific prefix by including it in the command. The following commandlists the objects in bucket-name/example/ (that is, objects in bucket-name filtered by the prefixexample/).
$ aws s3 ls s3://bucket-name/example/2018-12-06 18:59:32 3 MyFile1.txt
Delete bucketsTo delete a bucket, use the s3 rb command.
Syntax
$ aws s3 rb <target> [--options]
s3 rb examples
The following example removes the s3://bucket-name bucket.
$ aws s3 rb s3://bucket-name
By default, the bucket must be empty for the operation to succeed. To remove a bucket that's not empty,you need to include the --force option. If you're using a versioned bucket that contains previously
170
AWS Command Line Interface User Guide for Version 2High-level (s3) commands
deleted—but retained—objects, this command does not allow you to remove the bucket. You must firstremove all of the content.
The following example deletes all objects and prefixes in the bucket, and then deletes the bucket.
$ aws s3 rb s3://bucket-name --force
Delete objectsTo delete objects in a bucket or your local directory, use the s3 rm command.
Syntax
$ aws s3 rm <target> [--options]
For a few common options to use with this command, and examples, see Frequently used options for s3commands (p. 174). For a complete list of options, see s3 rm in the AWS CLI Command Reference.
s3 rm examples
The following example deletes filename.txt from s3://bucket-name/example.
$ aws s3 rm s3://bucket-name/example/filename.txt --recursive
The following example deletes all objects from s3://bucket-name/example using the --recursiveoption.
$ aws s3 rm s3://bucket-name/example --recursive
Move objectsUse the s3 mv command to move objects from a bucket or a local directory.
Syntax
$ aws s3 mv <source> <target> [--options]
For a few common options to use with this command, and examples, see Frequently used options fors3 commands (p. 174). For a complete list of available options, see s3 mv in the AWS CLI CommandReference.
s3 mv examples
The following example moves all objects from s3://bucket-name/example to s3://my-bucket/.
$ aws s3 mv s3://bucket-name/example s3://my-bucket/
The following example moves a local file from your current working directory to the Amazon S3 bucketwith the s3 cp command.
$ aws s3 mv filename.txt s3://bucket-name
The following example moves a file from your Amazon S3 bucket to your current working directory,where ./ specifies your current working directory.
171
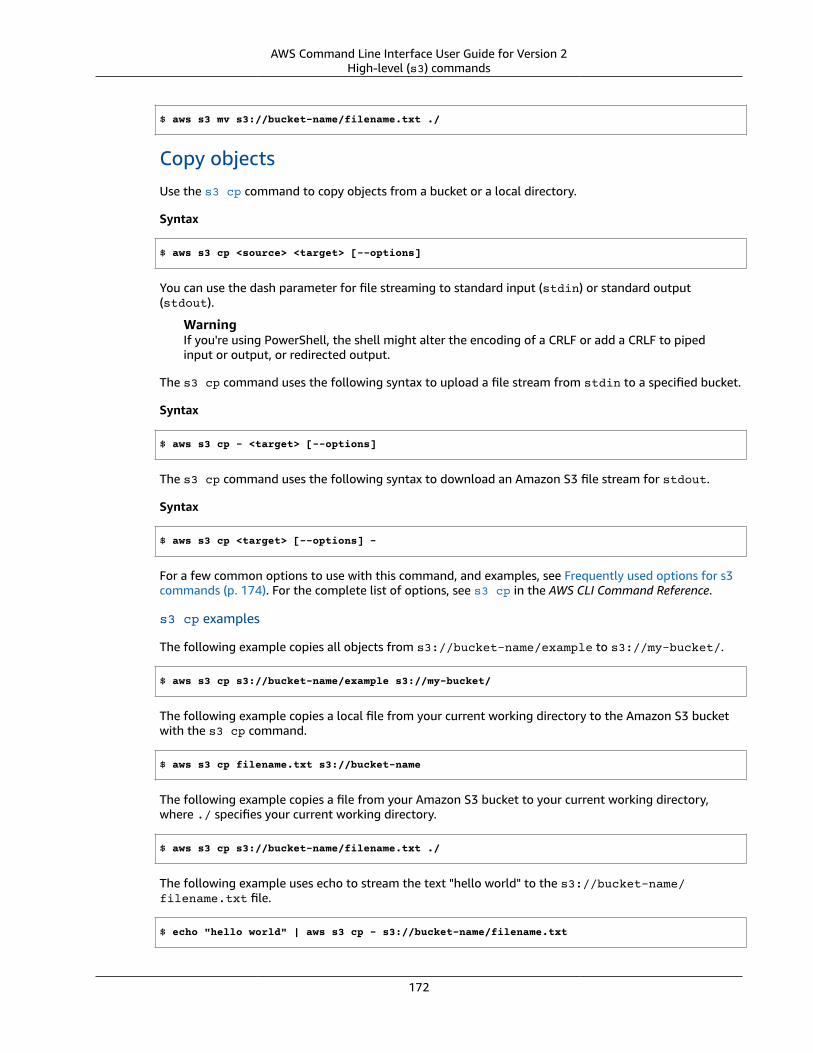
AWS Command Line Interface User Guide for Version 2High-level (s3) commands
$ aws s3 mv s3://bucket-name/filename.txt ./
Copy objectsUse the s3 cp command to copy objects from a bucket or a local directory.
Syntax
$ aws s3 cp <source> <target> [--options]
You can use the dash parameter for file streaming to standard input (stdin) or standard output(stdout).
WarningIf you're using PowerShell, the shell might alter the encoding of a CRLF or add a CRLF to pipedinput or output, or redirected output.
The s3 cp command uses the following syntax to upload a file stream from stdin to a specified bucket.
Syntax
$ aws s3 cp - <target> [--options]
The s3 cp command uses the following syntax to download an Amazon S3 file stream for stdout.
Syntax
$ aws s3 cp <target> [--options] -
For a few common options to use with this command, and examples, see Frequently used options for s3commands (p. 174). For the complete list of options, see s3 cp in the AWS CLI Command Reference.
s3 cp examples
The following example copies all objects from s3://bucket-name/example to s3://my-bucket/.
$ aws s3 cp s3://bucket-name/example s3://my-bucket/
The following example copies a local file from your current working directory to the Amazon S3 bucketwith the s3 cp command.
$ aws s3 cp filename.txt s3://bucket-name
The following example copies a file from your Amazon S3 bucket to your current working directory,where ./ specifies your current working directory.
$ aws s3 cp s3://bucket-name/filename.txt ./
The following example uses echo to stream the text "hello world" to the s3://bucket-name/filename.txt file.
$ echo "hello world" | aws s3 cp - s3://bucket-name/filename.txt
172
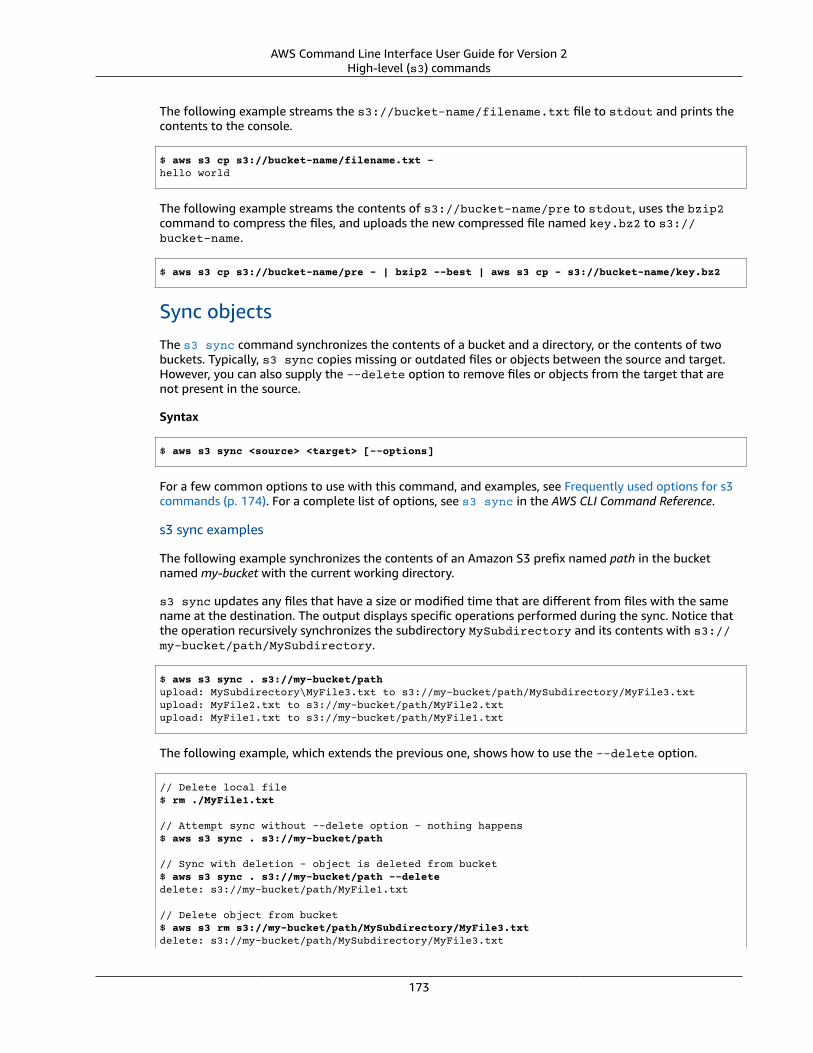
AWS Command Line Interface User Guide for Version 2High-level (s3) commands
The following example streams the s3://bucket-name/filename.txt file to stdout and prints thecontents to the console.
$ aws s3 cp s3://bucket-name/filename.txt -hello world
The following example streams the contents of s3://bucket-name/pre to stdout, uses the bzip2command to compress the files, and uploads the new compressed file named key.bz2 to s3://bucket-name.
$ aws s3 cp s3://bucket-name/pre - | bzip2 --best | aws s3 cp - s3://bucket-name/key.bz2
Sync objectsThe s3 sync command synchronizes the contents of a bucket and a directory, or the contents of twobuckets. Typically, s3 sync copies missing or outdated files or objects between the source and target.However, you can also supply the --delete option to remove files or objects from the target that arenot present in the source.
Syntax
$ aws s3 sync <source> <target> [--options]
For a few common options to use with this command, and examples, see Frequently used options for s3commands (p. 174). For a complete list of options, see s3 sync in the AWS CLI Command Reference.
s3 sync examples
The following example synchronizes the contents of an Amazon S3 prefix named path in the bucketnamed my-bucket with the current working directory.
s3 sync updates any files that have a size or modified time that are different from files with the samename at the destination. The output displays specific operations performed during the sync. Notice thatthe operation recursively synchronizes the subdirectory MySubdirectory and its contents with s3://my-bucket/path/MySubdirectory.
$ aws s3 sync . s3://my-bucket/pathupload: MySubdirectory\MyFile3.txt to s3://my-bucket/path/MySubdirectory/MyFile3.txtupload: MyFile2.txt to s3://my-bucket/path/MyFile2.txtupload: MyFile1.txt to s3://my-bucket/path/MyFile1.txt
The following example, which extends the previous one, shows how to use the --delete option.
// Delete local file$ rm ./MyFile1.txt
// Attempt sync without --delete option - nothing happens$ aws s3 sync . s3://my-bucket/path
// Sync with deletion - object is deleted from bucket$ aws s3 sync . s3://my-bucket/path --deletedelete: s3://my-bucket/path/MyFile1.txt
// Delete object from bucket$ aws s3 rm s3://my-bucket/path/MySubdirectory/MyFile3.txtdelete: s3://my-bucket/path/MySubdirectory/MyFile3.txt
173
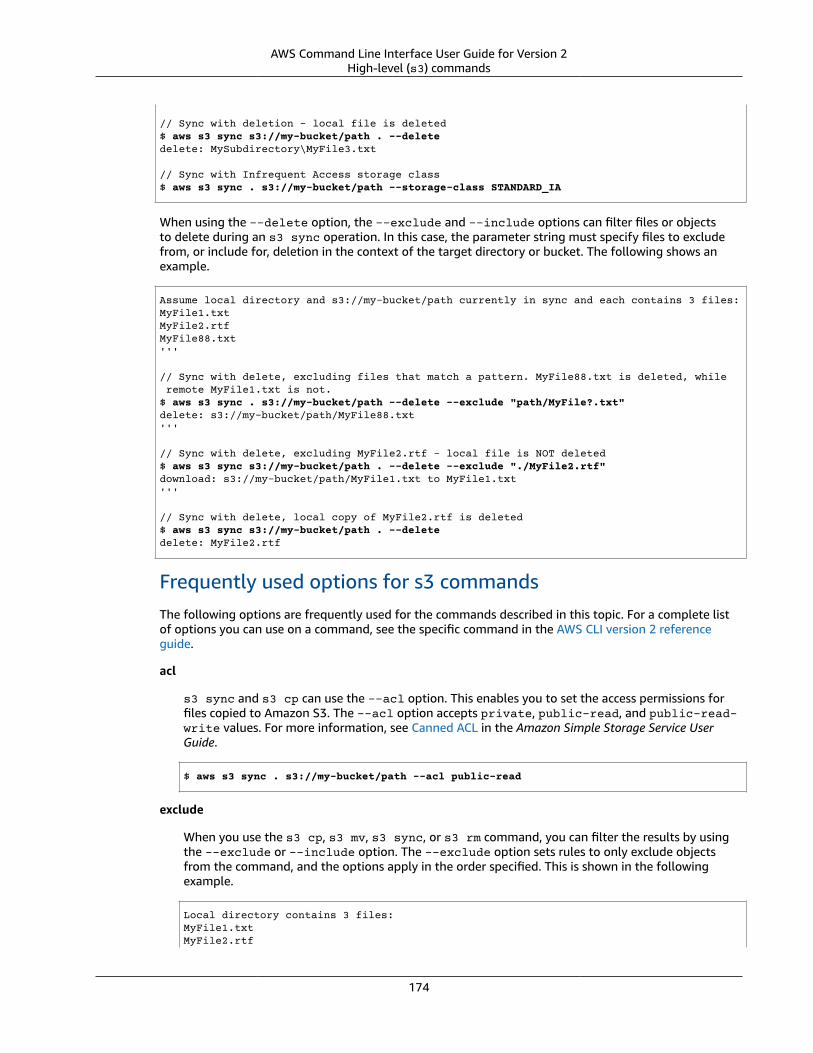
AWS Command Line Interface User Guide for Version 2High-level (s3) commands
// Sync with deletion - local file is deleted$ aws s3 sync s3://my-bucket/path . --deletedelete: MySubdirectory\MyFile3.txt
// Sync with Infrequent Access storage class$ aws s3 sync . s3://my-bucket/path --storage-class STANDARD_IA
When using the --delete option, the --exclude and --include options can filter files or objectsto delete during an s3 sync operation. In this case, the parameter string must specify files to excludefrom, or include for, deletion in the context of the target directory or bucket. The following shows anexample.
Assume local directory and s3://my-bucket/path currently in sync and each contains 3 files:MyFile1.txtMyFile2.rtfMyFile88.txt'''
// Sync with delete, excluding files that match a pattern. MyFile88.txt is deleted, while remote MyFile1.txt is not.$ aws s3 sync . s3://my-bucket/path --delete --exclude "path/MyFile?.txt"delete: s3://my-bucket/path/MyFile88.txt'''
// Sync with delete, excluding MyFile2.rtf - local file is NOT deleted$ aws s3 sync s3://my-bucket/path . --delete --exclude "./MyFile2.rtf"download: s3://my-bucket/path/MyFile1.txt to MyFile1.txt'''
// Sync with delete, local copy of MyFile2.rtf is deleted$ aws s3 sync s3://my-bucket/path . --deletedelete: MyFile2.rtf
Frequently used options for s3 commandsThe following options are frequently used for the commands described in this topic. For a complete listof options you can use on a command, see the specific command in the AWS CLI version 2 referenceguide.
acl
s3 sync and s3 cp can use the --acl option. This enables you to set the access permissions forfiles copied to Amazon S3. The --acl option accepts private, public-read, and public-read-write values. For more information, see Canned ACL in the Amazon Simple Storage Service UserGuide.
$ aws s3 sync . s3://my-bucket/path --acl public-read
exclude
When you use the s3 cp, s3 mv, s3 sync, or s3 rm command, you can filter the results by usingthe --exclude or --include option. The --exclude option sets rules to only exclude objectsfrom the command, and the options apply in the order specified. This is shown in the followingexample.
Local directory contains 3 files:MyFile1.txtMyFile2.rtf
174
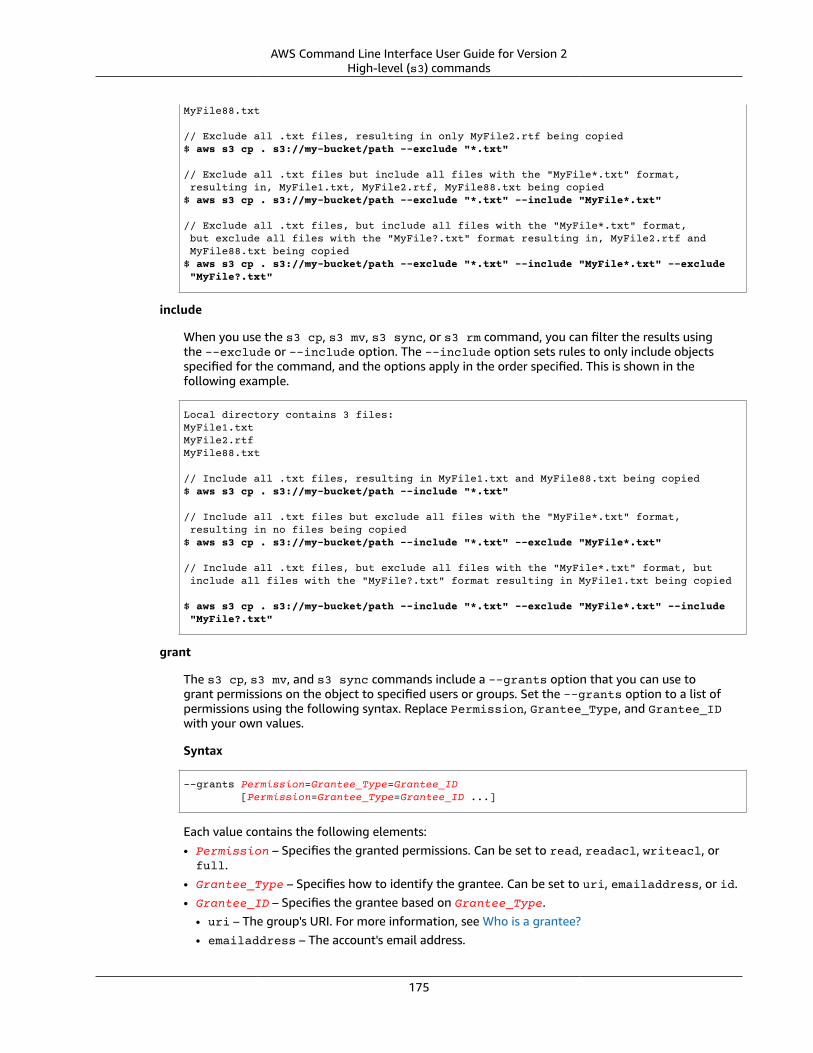
AWS Command Line Interface User Guide for Version 2High-level (s3) commands
MyFile88.txt
// Exclude all .txt files, resulting in only MyFile2.rtf being copied$ aws s3 cp . s3://my-bucket/path --exclude "*.txt"
// Exclude all .txt files but include all files with the "MyFile*.txt" format, resulting in, MyFile1.txt, MyFile2.rtf, MyFile88.txt being copied$ aws s3 cp . s3://my-bucket/path --exclude "*.txt" --include "MyFile*.txt"
// Exclude all .txt files, but include all files with the "MyFile*.txt" format, but exclude all files with the "MyFile?.txt" format resulting in, MyFile2.rtf and MyFile88.txt being copied$ aws s3 cp . s3://my-bucket/path --exclude "*.txt" --include "MyFile*.txt" --exclude "MyFile?.txt"
include
When you use the s3 cp, s3 mv, s3 sync, or s3 rm command, you can filter the results usingthe --exclude or --include option. The --include option sets rules to only include objectsspecified for the command, and the options apply in the order specified. This is shown in thefollowing example.
Local directory contains 3 files:MyFile1.txtMyFile2.rtfMyFile88.txt
// Include all .txt files, resulting in MyFile1.txt and MyFile88.txt being copied$ aws s3 cp . s3://my-bucket/path --include "*.txt"
// Include all .txt files but exclude all files with the "MyFile*.txt" format, resulting in no files being copied$ aws s3 cp . s3://my-bucket/path --include "*.txt" --exclude "MyFile*.txt"
// Include all .txt files, but exclude all files with the "MyFile*.txt" format, but include all files with the "MyFile?.txt" format resulting in MyFile1.txt being copied
$ aws s3 cp . s3://my-bucket/path --include "*.txt" --exclude "MyFile*.txt" --include "MyFile?.txt"
grant
The s3 cp, s3 mv, and s3 sync commands include a --grants option that you can use togrant permissions on the object to specified users or groups. Set the --grants option to a list ofpermissions using the following syntax. Replace Permission, Grantee_Type, and Grantee_IDwith your own values.
Syntax
--grants Permission=Grantee_Type=Grantee_ID [Permission=Grantee_Type=Grantee_ID ...]
Each value contains the following elements:• Permission – Specifies the granted permissions. Can be set to read, readacl, writeacl, orfull.
• Grantee_Type – Specifies how to identify the grantee. Can be set to uri, emailaddress, or id.• Grantee_ID – Specifies the grantee based on Grantee_Type.
• uri – The group's URI. For more information, see Who is a grantee?• emailaddress – The account's email address.
175
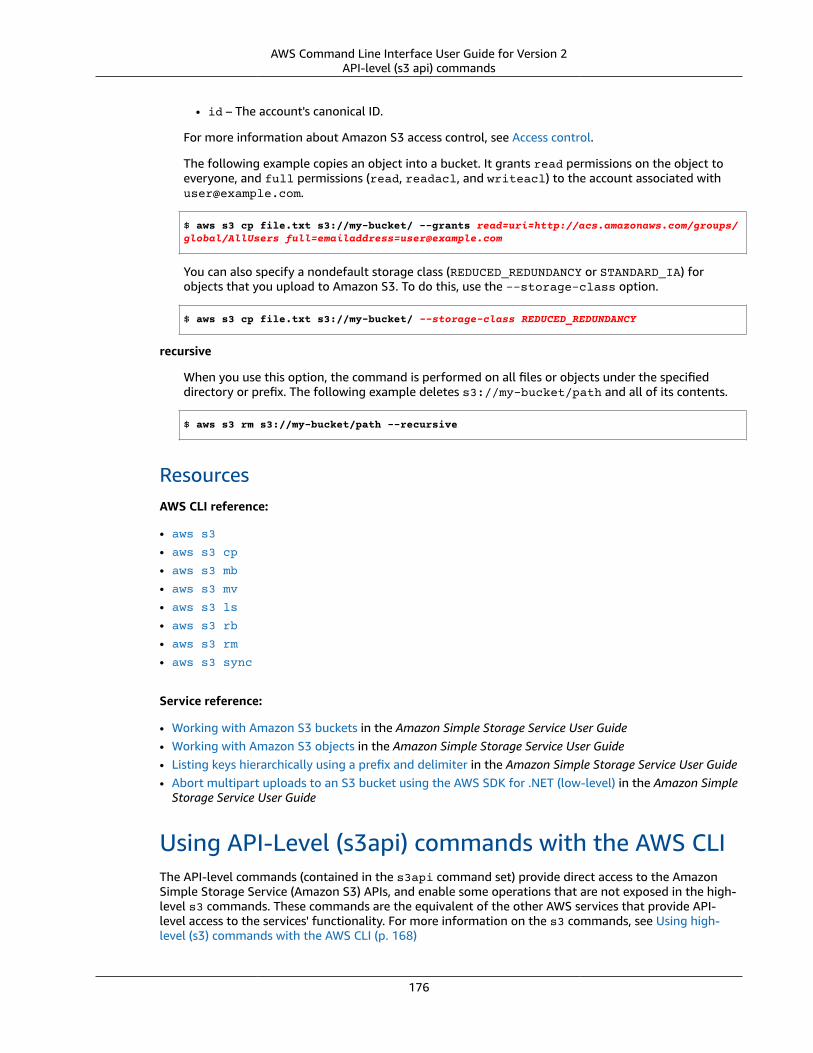
AWS Command Line Interface User Guide for Version 2API-level (s3 api) commands
• id – The account's canonical ID.
For more information about Amazon S3 access control, see Access control.
The following example copies an object into a bucket. It grants read permissions on the object toeveryone, and full permissions (read, readacl, and writeacl) to the account associated [email protected].
$ aws s3 cp file.txt s3://my-bucket/ --grants read=uri=http://acs.amazonaws.com/groups/global/AllUsers [email protected]
You can also specify a nondefault storage class (REDUCED_REDUNDANCY or STANDARD_IA) forobjects that you upload to Amazon S3. To do this, use the --storage-class option.
$ aws s3 cp file.txt s3://my-bucket/ --storage-class REDUCED_REDUNDANCY
recursive
When you use this option, the command is performed on all files or objects under the specifieddirectory or prefix. The following example deletes s3://my-bucket/path and all of its contents.
$ aws s3 rm s3://my-bucket/path --recursive
ResourcesAWS CLI reference:
• aws s3
• aws s3 cp
• aws s3 mb
• aws s3 mv
• aws s3 ls
• aws s3 rb
• aws s3 rm
• aws s3 sync
Service reference:
• Working with Amazon S3 buckets in the Amazon Simple Storage Service User Guide• Working with Amazon S3 objects in the Amazon Simple Storage Service User Guide• Listing keys hierarchically using a prefix and delimiter in the Amazon Simple Storage Service User Guide• Abort multipart uploads to an S3 bucket using the AWS SDK for .NET (low-level) in the Amazon Simple
Storage Service User Guide
Using API-Level (s3api) commands with the AWS CLIThe API-level commands (contained in the s3api command set) provide direct access to the AmazonSimple Storage Service (Amazon S3) APIs, and enable some operations that are not exposed in the high-level s3 commands. These commands are the equivalent of the other AWS services that provide API-level access to the services' functionality. For more information on the s3 commands, see Using high-level (s3) commands with the AWS CLI (p. 168)
176
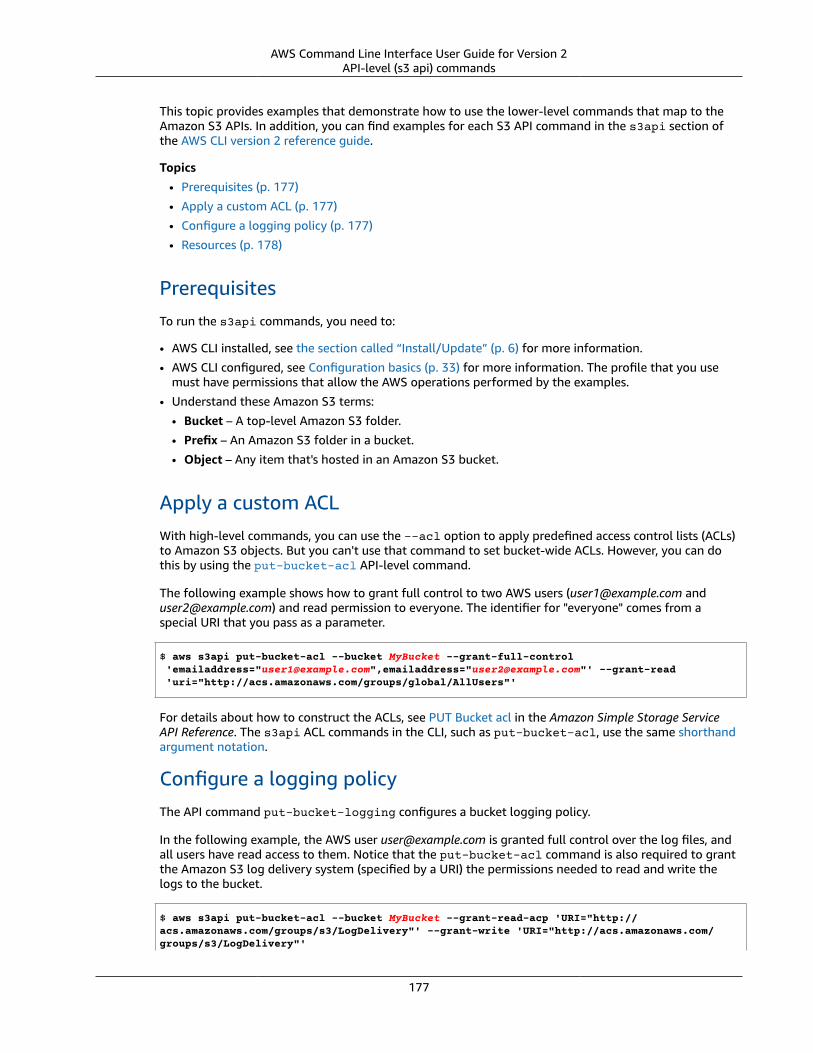
AWS Command Line Interface User Guide for Version 2API-level (s3 api) commands
This topic provides examples that demonstrate how to use the lower-level commands that map to theAmazon S3 APIs. In addition, you can find examples for each S3 API command in the s3api section ofthe AWS CLI version 2 reference guide.
Topics• Prerequisites (p. 177)
• Apply a custom ACL (p. 177)
• Configure a logging policy (p. 177)
• Resources (p. 178)
PrerequisitesTo run the s3api commands, you need to:
• AWS CLI installed, see the section called “Install/Update” (p. 6) for more information.
• AWS CLI configured, see Configuration basics (p. 33) for more information. The profile that you usemust have permissions that allow the AWS operations performed by the examples.
• Understand these Amazon S3 terms:
• Bucket – A top-level Amazon S3 folder.
• Prefix – An Amazon S3 folder in a bucket.
• Object – Any item that's hosted in an Amazon S3 bucket.
Apply a custom ACLWith high-level commands, you can use the --acl option to apply predefined access control lists (ACLs)to Amazon S3 objects. But you can't use that command to set bucket-wide ACLs. However, you can dothis by using the put-bucket-acl API-level command.
The following example shows how to grant full control to two AWS users ([email protected] [email protected]) and read permission to everyone. The identifier for "everyone" comes from aspecial URI that you pass as a parameter.
$ aws s3api put-bucket-acl --bucket MyBucket --grant-full-control 'emailaddress="[email protected]",emailaddress="[email protected]"' --grant-read 'uri="http://acs.amazonaws.com/groups/global/AllUsers"'
For details about how to construct the ACLs, see PUT Bucket acl in the Amazon Simple Storage ServiceAPI Reference. The s3api ACL commands in the CLI, such as put-bucket-acl, use the same shorthandargument notation.
Configure a logging policyThe API command put-bucket-logging configures a bucket logging policy.
In the following example, the AWS user [email protected] is granted full control over the log files, andall users have read access to them. Notice that the put-bucket-acl command is also required to grantthe Amazon S3 log delivery system (specified by a URI) the permissions needed to read and write thelogs to the bucket.
$ aws s3api put-bucket-acl --bucket MyBucket --grant-read-acp 'URI="http://acs.amazonaws.com/groups/s3/LogDelivery"' --grant-write 'URI="http://acs.amazonaws.com/groups/s3/LogDelivery"'
177
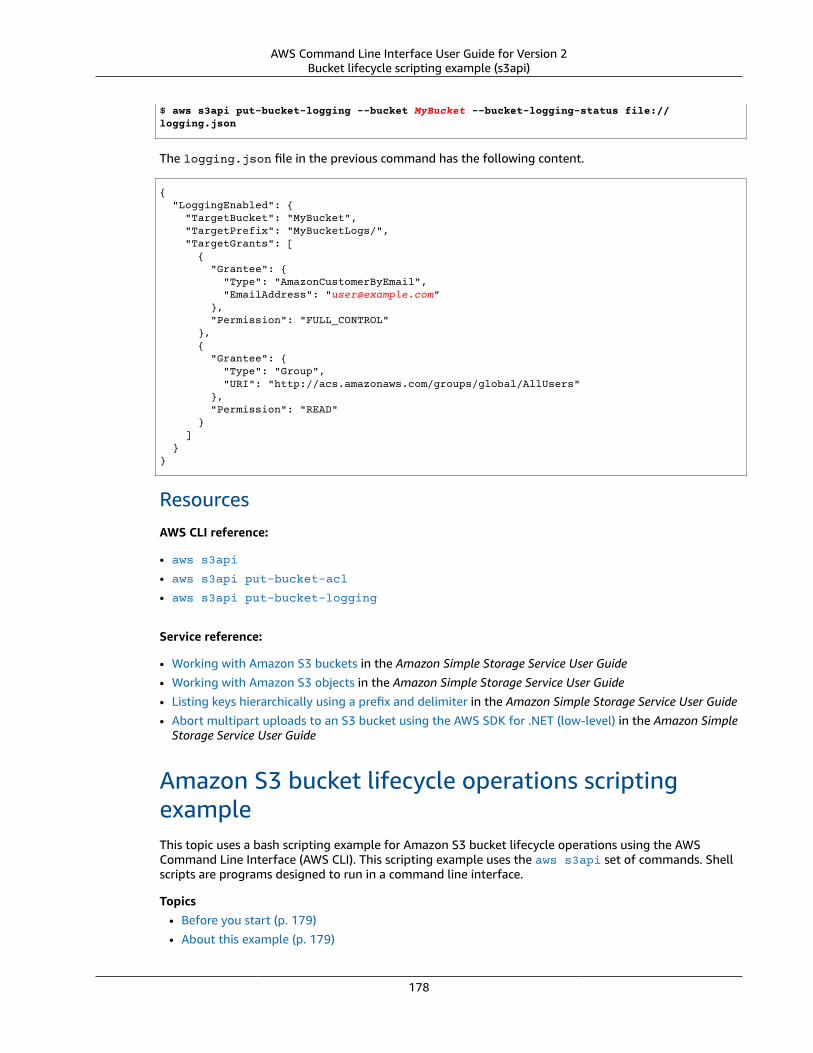
AWS Command Line Interface User Guide for Version 2Bucket lifecycle scripting example (s3api)
$ aws s3api put-bucket-logging --bucket MyBucket --bucket-logging-status file://logging.json
The logging.json file in the previous command has the following content.
{ "LoggingEnabled": { "TargetBucket": "MyBucket", "TargetPrefix": "MyBucketLogs/", "TargetGrants": [ { "Grantee": { "Type": "AmazonCustomerByEmail", "EmailAddress": "[email protected]" }, "Permission": "FULL_CONTROL" }, { "Grantee": { "Type": "Group", "URI": "http://acs.amazonaws.com/groups/global/AllUsers" }, "Permission": "READ" } ] }}
ResourcesAWS CLI reference:
• aws s3api
• aws s3api put-bucket-acl
• aws s3api put-bucket-logging
Service reference:
• Working with Amazon S3 buckets in the Amazon Simple Storage Service User Guide• Working with Amazon S3 objects in the Amazon Simple Storage Service User Guide• Listing keys hierarchically using a prefix and delimiter in the Amazon Simple Storage Service User Guide• Abort multipart uploads to an S3 bucket using the AWS SDK for .NET (low-level) in the Amazon Simple
Storage Service User Guide
Amazon S3 bucket lifecycle operations scriptingexampleThis topic uses a bash scripting example for Amazon S3 bucket lifecycle operations using the AWSCommand Line Interface (AWS CLI). This scripting example uses the aws s3api set of commands. Shellscripts are programs designed to run in a command line interface.
Topics• Before you start (p. 179)• About this example (p. 179)
178
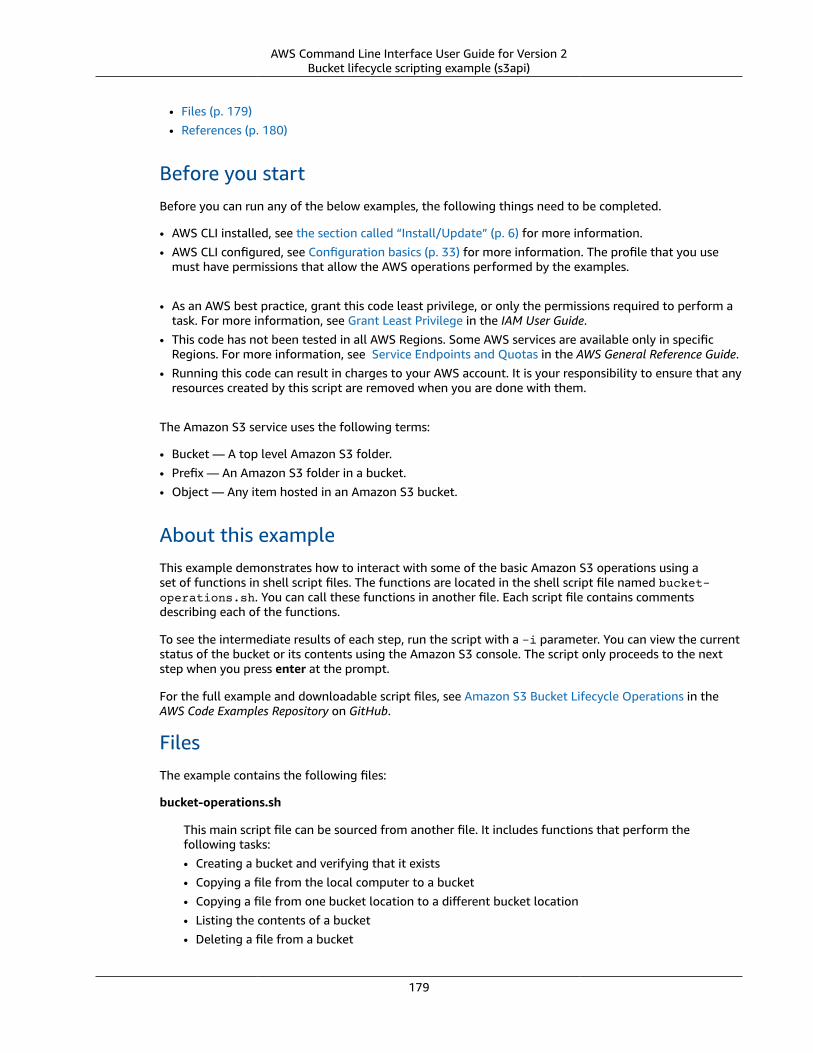
AWS Command Line Interface User Guide for Version 2Bucket lifecycle scripting example (s3api)
• Files (p. 179)• References (p. 180)
Before you startBefore you can run any of the below examples, the following things need to be completed.
• AWS CLI installed, see the section called “Install/Update” (p. 6) for more information.• AWS CLI configured, see Configuration basics (p. 33) for more information. The profile that you use
must have permissions that allow the AWS operations performed by the examples.
• As an AWS best practice, grant this code least privilege, or only the permissions required to perform atask. For more information, see Grant Least Privilege in the IAM User Guide.
• This code has not been tested in all AWS Regions. Some AWS services are available only in specificRegions. For more information, see Service Endpoints and Quotas in the AWS General Reference Guide.
• Running this code can result in charges to your AWS account. It is your responsibility to ensure that anyresources created by this script are removed when you are done with them.
The Amazon S3 service uses the following terms:
• Bucket — A top level Amazon S3 folder.• Prefix — An Amazon S3 folder in a bucket.• Object — Any item hosted in an Amazon S3 bucket.
About this exampleThis example demonstrates how to interact with some of the basic Amazon S3 operations using aset of functions in shell script files. The functions are located in the shell script file named bucket-operations.sh. You can call these functions in another file. Each script file contains commentsdescribing each of the functions.
To see the intermediate results of each step, run the script with a -i parameter. You can view the currentstatus of the bucket or its contents using the Amazon S3 console. The script only proceeds to the nextstep when you press enter at the prompt.
For the full example and downloadable script files, see Amazon S3 Bucket Lifecycle Operations in theAWS Code Examples Repository on GitHub.
FilesThe example contains the following files:
bucket-operations.sh
This main script file can be sourced from another file. It includes functions that perform thefollowing tasks:• Creating a bucket and verifying that it exists• Copying a file from the local computer to a bucket• Copying a file from one bucket location to a different bucket location• Listing the contents of a bucket• Deleting a file from a bucket
179
AWS Command Line Interface User Guide for Version 2Amazon SNS
• Deleting a bucket
View the code for bucket-operations.sh on GitHub.
test-bucket-operations.sh
The shell script file test-bucket-operations.sh demonstrates how to call the functions bysourcing the bucket-operations.sh file and calling each of the functions. After calling functions,the test script removes all resources that it created.
View the code for test-bucket-operations.sh on GitHub.
awsdocs-general.sh
The script file awsdocs-general.sh holds general purpose functions used across advanced codeexamples for the AWS CLI.
View the code for awsdocs-general.sh on GitHub.
ReferencesAWS CLI reference:
• aws s3api
• aws s3api create-bucket
• aws s3api copy-object
• aws s3api delete-bucket
• aws s3api delete-object
• aws s3api head-bucket
• aws s3api list-objects
• aws s3api put-object
Other reference:
• Working with Amazon S3 buckets in the Amazon Simple Storage Service User Guide• Working with Amazon S3 objects in the Amazon Simple Storage Service User Guide• To view and contribute to AWS SDK and AWS CLI code examples, see the AWS Code Examples
Repository on GitHub.
Using Amazon SNS with the AWS CLIGetting Started with Amazon SNS - Push Notification Service on AWS
You can access the features of Amazon Simple Notification Service (Amazon SNS) using the AWSCommand Line Interface (AWS CLI). To list the AWS CLI commands for Amazon SNS, use the followingcommand.
aws sns help
Before you run any commands, set your default credentials. For more information, see Configuring theAWS CLI (p. 33).
180
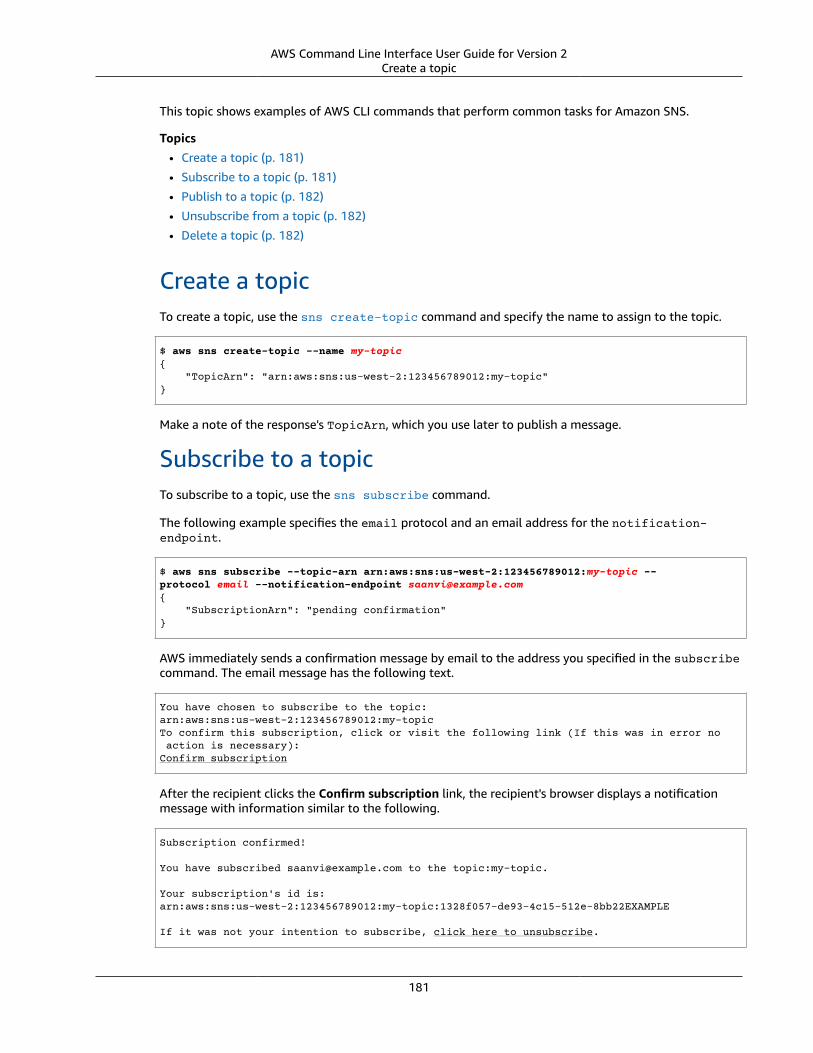
AWS Command Line Interface User Guide for Version 2Create a topic
This topic shows examples of AWS CLI commands that perform common tasks for Amazon SNS.
Topics
• Create a topic (p. 181)
• Subscribe to a topic (p. 181)
• Publish to a topic (p. 182)
• Unsubscribe from a topic (p. 182)
• Delete a topic (p. 182)
Create a topicTo create a topic, use the sns create-topic command and specify the name to assign to the topic.
$ aws sns create-topic --name my-topic{ "TopicArn": "arn:aws:sns:us-west-2:123456789012:my-topic"}
Make a note of the response's TopicArn, which you use later to publish a message.
Subscribe to a topicTo subscribe to a topic, use the sns subscribe command.
The following example specifies the email protocol and an email address for the notification-endpoint.
$ aws sns subscribe --topic-arn arn:aws:sns:us-west-2:123456789012:my-topic --protocol email --notification-endpoint [email protected]{ "SubscriptionArn": "pending confirmation"}
AWS immediately sends a confirmation message by email to the address you specified in the subscribecommand. The email message has the following text.
You have chosen to subscribe to the topic:arn:aws:sns:us-west-2:123456789012:my-topicTo confirm this subscription, click or visit the following link (If this was in error no action is necessary):Confirm subscription
After the recipient clicks the Confirm subscription link, the recipient's browser displays a notificationmessage with information similar to the following.
Subscription confirmed!
You have subscribed [email protected] to the topic:my-topic.
Your subscription's id is:arn:aws:sns:us-west-2:123456789012:my-topic:1328f057-de93-4c15-512e-8bb22EXAMPLE
If it was not your intention to subscribe, click here to unsubscribe.
181
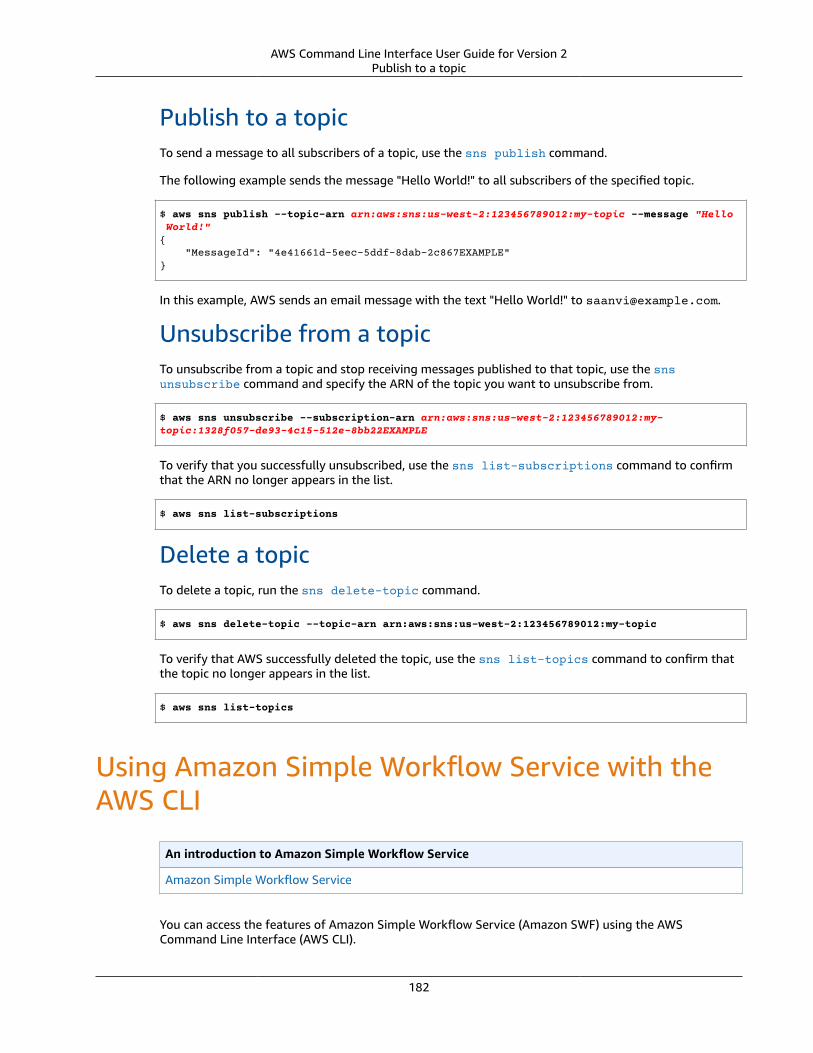
AWS Command Line Interface User Guide for Version 2Publish to a topic
Publish to a topicTo send a message to all subscribers of a topic, use the sns publish command.
The following example sends the message "Hello World!" to all subscribers of the specified topic.
$ aws sns publish --topic-arn arn:aws:sns:us-west-2:123456789012:my-topic --message "Hello World!"{ "MessageId": "4e41661d-5eec-5ddf-8dab-2c867EXAMPLE"}
In this example, AWS sends an email message with the text "Hello World!" to [email protected].
Unsubscribe from a topicTo unsubscribe from a topic and stop receiving messages published to that topic, use the snsunsubscribe command and specify the ARN of the topic you want to unsubscribe from.
$ aws sns unsubscribe --subscription-arn arn:aws:sns:us-west-2:123456789012:my-topic:1328f057-de93-4c15-512e-8bb22EXAMPLE
To verify that you successfully unsubscribed, use the sns list-subscriptions command to confirmthat the ARN no longer appears in the list.
$ aws sns list-subscriptions
Delete a topicTo delete a topic, run the sns delete-topic command.
$ aws sns delete-topic --topic-arn arn:aws:sns:us-west-2:123456789012:my-topic
To verify that AWS successfully deleted the topic, use the sns list-topics command to confirm thatthe topic no longer appears in the list.
$ aws sns list-topics
Using Amazon Simple Workflow Service with theAWS CLI
An introduction to Amazon Simple Workflow Service
Amazon Simple Workflow Service
You can access the features of Amazon Simple Workflow Service (Amazon SWF) using the AWSCommand Line Interface (AWS CLI).
182
AWS Command Line Interface User Guide for Version 2List of Amazon SWF Commands
To list the AWS CLI commands for Amazon SWF, use the following command.
aws swf help
Before you run any commands, set your default credentials. For more information, see Configuring theAWS CLI (p. 33).
The following topics show examples of AWS CLI commands that perform common tasks for AmazonSWF.
Topics• List of Amazon SWF commands by category (p. 183)• Working with Amazon SWF domains using the AWS CLI (p. 185)
List of Amazon SWF commands by categoryYou can use the AWS Command Line Interface (AWS CLI) to create, display, and manage workflows inAmazon Simple Workflow Service (Amazon SWF).
This section lists the reference topics for Amazon SWF commands in the AWS CLI, grouped by functionalcategory.
For an alphabetic list of commands, see the Amazon SWF section of the AWS CLI Command Reference, oruse the following command.
$ aws swf help
You can also get help for an individual command, by placing the help directive after the commandname. The following shows an example.
$ aws swf register-domain help
Topics• Commands related to activities (p. 183)• Commands related to deciders (p. 184)• Commands related to workflow executions (p. 184)• Commands related to administration (p. 184)• Visibility commands (p. 185)
Commands related to activitiesActivity workers use poll-for-activity-task to get new activity tasks. After a worker receives anactivity task from Amazon SWF, it performs the task and responds using respond-activity-task-completed if successful or respond-activity-task-failed if unsuccessful.
The following are commands that are performed by activity workers:
• poll-for-activity-task
• respond-activity-task-completed
• respond-activity-task-failed
• respond-activity-task-canceled
183
AWS Command Line Interface User Guide for Version 2List of Amazon SWF Commands
• record-activity-task-heartbeat
Commands related to decidersDeciders use poll-for-decision-task to get decision tasks. After a decider receives a decision taskfrom Amazon SWF, it examines its workflow execution history and decides what to do next. It callsrespond-decision-task-completed to complete the decision task and provides zero or more nextdecisions.
The following are commands that are performed by deciders:
• poll-for-decision-task
• respond-decision-task-completed
Commands related to workflow executionsThe following commands operate on a workflow execution:
• request-cancel-workflow-execution
• start-workflow-execution
• signal-workflow-execution
• terminate-workflow-execution
Commands related to administrationAlthough you can perform administrative tasks from the Amazon SWF console, you can use thecommands in this section to automate functions or build your own administrative tools.
Activity management
• register-activity-type
• deprecate-activity-type
Workflow management
• register-workflow-type
• deprecate-workflow-type
Domain management
• register-domain
• deprecate-domain
For more information and examples of these domain management commands, see Working withAmazon SWF domains using the AWS CLI (p. 185).
Workflow execution management
• request-cancel-workflow-execution
• terminate-workflow-execution
184
AWS Command Line Interface User Guide for Version 2Working with Amazon SWF Domains
Visibility commandsAlthough you can perform visibility actions from the Amazon SWF console, you can use the commands inthis section to build your own console or administrative tools.
Activity visibility
• list-activity-types
• describe-activity-type
Workflow visibility
• list-workflow-types
• describe-workflow-type
Workflow execution visibility
• describe-workflow-execution
• list-open-workflow-executions
• list-closed-workflow-executions
• count-open-workflow-executions
• count-closed-workflow-executions
• get-workflow-execution-history
Domain visibility
• list-domains
• describe-domain
For more information and examples of these domain visibility commands, see Working with AmazonSWF domains using the AWS CLI (p. 185).
Task list visibility
• count-pending-activity-tasks
• count-pending-decision-tasks
Working with Amazon SWF domains using the AWSCLIYou can use the AWS Command Line Interface (AWS CLI) to manage your Amazon Simple WorkflowService (Amazon SWF) domains.
Topics• List your domains (p. 186)• Get information about a domain (p. 186)• Register a domain (p. 186)• Deprecate a domain (p. 187)
185
AWS Command Line Interface User Guide for Version 2Working with Amazon SWF Domains
List your domainsTo list the Amazon SWF domains that you have registered for your AWS account, you can use swflist-domains. You must include --registration-status and specify either REGISTERED orDEPRECATED.
Here's a minimal example.
$ aws swf list-domains --registration-status REGISTERED{ "domainInfos": [ { "status": "REGISTERED", "name": "ExampleDomain" }, { "status": "REGISTERED", "name": "mytest" } ]}
NoteFor an example of using DEPRECATED, see Deprecate a domain (p. 187).
For more information, see swf list-domains in the AWS CLI Command Reference.
Get information about a domainTo get detailed information about a particular domain, use swf describe-domain. There is onerequired parameter, --name, which takes the name of the domain you want information about, as shownin the following example.
$ aws swf describe-domain --name ExampleDomain{ "domainInfo": { "status": "REGISTERED", "name": "ExampleDomain" }, "configuration": { "workflowExecutionRetentionPeriodInDays": "1" }}
For more information, see swf describe-domain in the AWS CLI Command Reference.
Register a domainTo register new domains, use swf register-domain.
There are two required parameters: --name and --workflow-execution-retention-period-in-days. The --name parameter takes the domain name to register. The --workflow-execution-retention-period-in-days parameter takes an integer to specify the number of days to retainworkflow execution data on this domain, up to a maximum period of 90 days (for more information, seethe Amazon SWF FAQ).
If you specify zero (0) for this value, the retention period is automatically set at the maximum duration.Otherwise, workflow execution data isn't retained after the specified number of days have passed. Thefollowing example shows how to register a new domain.
186
AWS Command Line Interface User Guide for Version 2Working with Amazon SWF Domains
$ aws swf register-domain --name MyNeatNewDomain --workflow-execution-retention-period-in-days 0
The command doesn't return any output, but you can use swf list-domains or swf describe-domain to see the new domain, as shown in the following example.
$ aws swf describe-domain --name MyNeatNewDomain{ "domainInfo": { "status": "REGISTERED", "name": "MyNeatNewDomain" }, "configuration": { "workflowExecutionRetentionPeriodInDays": "0" }}
For more information, see swf register-domain in the AWS CLI Command Reference.
Deprecate a domainTo deprecate a domain (you can still see it, but cannot create new workflow executions or register typeson it), use swf deprecate-domain. It has a sole required parameter, --name, which takes the name ofthe domain to deprecate.
$ aws swf deprecate-domain --name MyNeatNewDomain
As with register-domain, no output is returned. If you use list-domains to view the registereddomains, however, you will see that the domain no longer appears among them. You can also use --registration-status DEPRECATED.
$ aws swf list-domains --registration-status DEPRECATED{ "domainInfos": [ { "status": "DEPRECATED", "name": "MyNeatNewDomain" } ]}
For more information, see deprecate-domain in the AWS CLI Command Reference.
187
AWS Command Line Interface User Guide for Version 2Data Protection
Security in the AWS Command LineInterface
Cloud security at AWS is the highest priority. As an AWS customer, you benefit from a data center andnetwork architecture that is built to meet the requirements of the most security-sensitive organizations.
Security is a shared responsibility between AWS and you. The shared responsibility model describes thisas security of the cloud and security in the cloud:
• Security of the cloud – AWS is responsible for protecting the infrastructure that runs AWS services inthe AWS Cloud. AWS also provides you with services that you can use securely. Third-party auditorsregularly test and verify the effectiveness of our security as part of the AWS Compliance Programs. Tolearn about the compliance programs that apply to AWS Command Line Interface, see AWS Services inScope by Compliance Program.
• Security in the cloud – Your responsibility is determined by the AWS service that you use. You are alsoresponsible for other factors including the sensitivity of your data, your company’s requirements, andapplicable laws and regulations.
This documentation helps you understand how to apply the shared responsibility model when using theAWS Command Line Interface (AWS CLI). The following topics show you how to configure the AWS CLIto meet your security and compliance objectives. You also learn how to use the AWS CLI to help you tomonitor and secure your AWS resources.
Topics• Data protection in the AWS CLI (p. 188)• Identity and Access Management for the AWS CLI (p. 189)• Compliance validation for the AWS CLI (p. 190)• Enforcing a minimum version of TLS 1.2 (p. 190)
Data protection in the AWS CLIThe AWS shared responsibility model applies to data protection in AWS Command Line Interface.As described in this model, AWS is responsible for protecting the global infrastructure that runs allof the AWS Cloud. You are responsible for maintaining control over your content that is hosted onthis infrastructure. This content includes the security configuration and management tasks for theAWS services that you use. For more information about data privacy, see the Data Privacy FAQ. Forinformation about data protection in Europe, see the AWS Shared Responsibility Model and GDPR blogpost on the AWS Security Blog.
For data protection purposes, we recommend that you protect AWS account credentials and set upindividual user accounts with AWS Identity and Access Management (IAM). That way each user is givenonly the permissions necessary to fulfill their job duties. We also recommend that you secure your datain the following ways:
• Use multi-factor authentication (MFA) with each account.• Use SSL/TLS to communicate with AWS resources. We recommend TLS 1.2 or later.• Set up API and user activity logging with AWS CloudTrail.
188
AWS Command Line Interface User Guide for Version 2Data encryption
• Use AWS encryption solutions, along with all default security controls within AWS services.• Use advanced managed security services such as Amazon Macie, which assists in discovering and
securing personal data that is stored in Amazon S3.• If you require FIPS 140-2 validated cryptographic modules when accessing AWS through a command
line interface or an API, use a FIPS endpoint. For more information about the available FIPS endpoints,see Federal Information Processing Standard (FIPS) 140-2.
We strongly recommend that you never put confidential or sensitive information, such as yourcustomers' email addresses, into tags or free-form fields such as a Name field. This includes when youwork with AWS CLI or other AWS services using the console, API, AWS CLI, or AWS SDKs. Any data thatyou enter into tags or free-form fields used for names may be used for billing or diagnostic logs. Ifyou provide a URL to an external server, we strongly recommend that you do not include credentialsinformation in the URL to validate your request to that server.
Data encryptionA key feature of any secure service is that information is encrypted when it is not being actively used.
Encryption at restThe AWS CLI does not itself store any customer data other than the credentials it needs to interact withthe AWS services on the user's behalf.
If you use the AWS CLI to invoke an AWS service that transmits customer data to your local computer forstorage, then refer to the Security & Compliance chapter in that service's User Guide for information onhow that data is stored, protected, and encrypted.
Encryption in transitBy default, all data transmitted from the client computer running the AWS CLI and AWS serviceendpoints is encrypted by sending everything through a HTTPS/TLS connection.
You don't need to do anything to enable the use of HTTPS/TLS. It is always enabled unless you explicitlydisable it for an individual command by using the --no-verify-ssl command line option.
Identity and Access Management for the AWS CLIThe AWS Command Line Interface (AWS CLI) uses the same users and roles to access your AWS resourcesand their services. The policies that grant permissions are the same because the AWS CLI calls the sameAPI operations that are used by the service console. For more information, see the "Identity and AccessManagement" section in the "Security" chapter of the AWS service that you want to use.
The only major difference is how you authenticate when using a standard IAM user and long-termcredentials. Although an IAM user requires a password to access an AWS service's console, that same IAMuser requires an access key pair to perform the same operations using the AWS CLI. All other short-termcredentials are used in the same way they are used with the console.
The credentials used by the AWS CLI are stored in plaintext files and are not encrypted.
• The $HOME/.aws/credentials file stores long-term credentials required to access your AWSresources. These include your access key ID and secret access key.
• Short-term credentials, such as those for roles that you assume, or that are for AWS Single Sign-On services, are also stored in the $HOME/.aws/cli/cache and $HOME/.aws/sso/cache folders,respectively.
189
AWS Command Line Interface User Guide for Version 2Compliance Validation
Mitigation of Risk
• We strongly recommend that you configure your file system permissions on the $HOME/.aws folderand its child folders and files to restrict access to only authorized users.
• Use roles with temporary credentials wherever possible to reduce the opportunity for damage if thecredentials are compromised. Use long-term credentials only to request and refresh short-term rolecredentials.
Compliance validation for the AWS CLIThird-party auditors assess the security and compliance of AWS services as part of multiple AWScompliance programs. Using the AWS Command Line Interface (AWS CLI) to access a service does notalter that service's compliance.
For a list of AWS services in scope of specific compliance programs, see AWS Services in Scope byCompliance Program. For general information, see AWS Compliance Programs.
You can download third-party audit reports using the AWS Artifact. For more information, seeDownloading Reports in AWS Artifact.
Your compliance responsibility when using AWS CLI is determined by the sensitivity of your data, yourcompany's compliance objectives, and applicable laws and regulations. AWS provides the followingresources to help with compliance:
• Security and Compliance Quick Start Guides – These deployment guides discuss architecturalconsiderations and provide steps for deploying security- and compliance-focused baselineenvironments on AWS.
• Architecting for HIPAA Security and Compliance Whitepaper – This whitepaper describes howcompanies can use AWS to create HIPAA-compliant applications.
• AWS Compliance Resources – This collection of workbooks and guides might apply to your industryand location.
• Evaluating Resources with Rules in the AWS Config Developer Guide – The AWS Config service assesseshow well your resource configurations comply with internal practices, industry guidelines, andregulations.
• AWS Security Hub – This AWS service provides a comprehensive view of your security state within AWSthat helps you check your compliance with security industry standards and best practices.
Enforcing a minimum version of TLS 1.2To add increased security when communicating with AWS services, you should use TLS 1.2 or later. Whenyou use the AWS CLI, Python is used to set the TLS version.
AWS CLI version 2 uses an internal Python script that's compiled to use a minimum of TLS 1.2 whenthe service it's talking to supports it. As long as you use version 2 of the AWS CLI, no further steps areneeded to enforce this minimum.
190
AWS Command Line Interface User Guide for Version 2General: Ensure you're runninga recent version of the AWS CLI.
Troubleshooting AWS CLI errorsTopics
• General: Ensure you're running a recent version of the AWS CLI. (p. 191)• General: Use the --debug option. (p. 191)• I get the error "command not found" when I run aws. (p. 195)• I get "access denied" errors. (p. 195)• I get an "invalid credentials" error. (p. 196)• I get a "signature does not match" error. (p. 197)• I get a "No Windows console found. Are you running cmd.exe?" error. (p. 198)• I get a "[SSL: CERTIFICATE_ VERIFY_FAILED] certificate verify failed" error. (p. 198)• Additional resources (p. 198)
General: Ensure you're running a recent version ofthe AWS CLI.
If you receive an error that indicates that a command doesn't exist, or that it doesn't recognize aparameter that the documentation says is available, we recommend that the first thing you do (afterchecking your command for spelling errors!) is to upgrade to the most recent version of the AWS CLI.Updated versions of the AWS CLI are released almost every business day. New AWS services, features,and parameters are introduced in those new versions of the AWS CLI. The only way to get access to thosenew services, features, or parameters is to upgrade to a version that was released after that element wasfirst introduced.
How you update your version of the AWS CLI depends on how you originally installed it as described inthe section called “Install/Update” (p. 6).
If you used one of the bundled installers, you may need to remove the existing installation before youdownload and install the latest version of the bundled installer for your operating system.
General: Use the --debug option.One of the first things you should do when the AWS CLI reports an error that you don't immediatelyunderstand, or produces results that you don't expect, is get more detail about the error. You can dothis by running the command again and including the --debug option at the end of the command line.This causes the AWS CLI to report details about every step it takes to process your command, send therequest to the AWS servers, receive the response, and process the response into the output you see. Thedetails in the output can help you to determine in which step the error occurs and to get context that canprovide clues about what triggered it.
You can send the output to a text file to capture it for later review or to send it to AWS support whenasked for it.
Here's an example of a command run with and without the --debug option.
$ aws iam list-groups --profile MyTestProfile
191
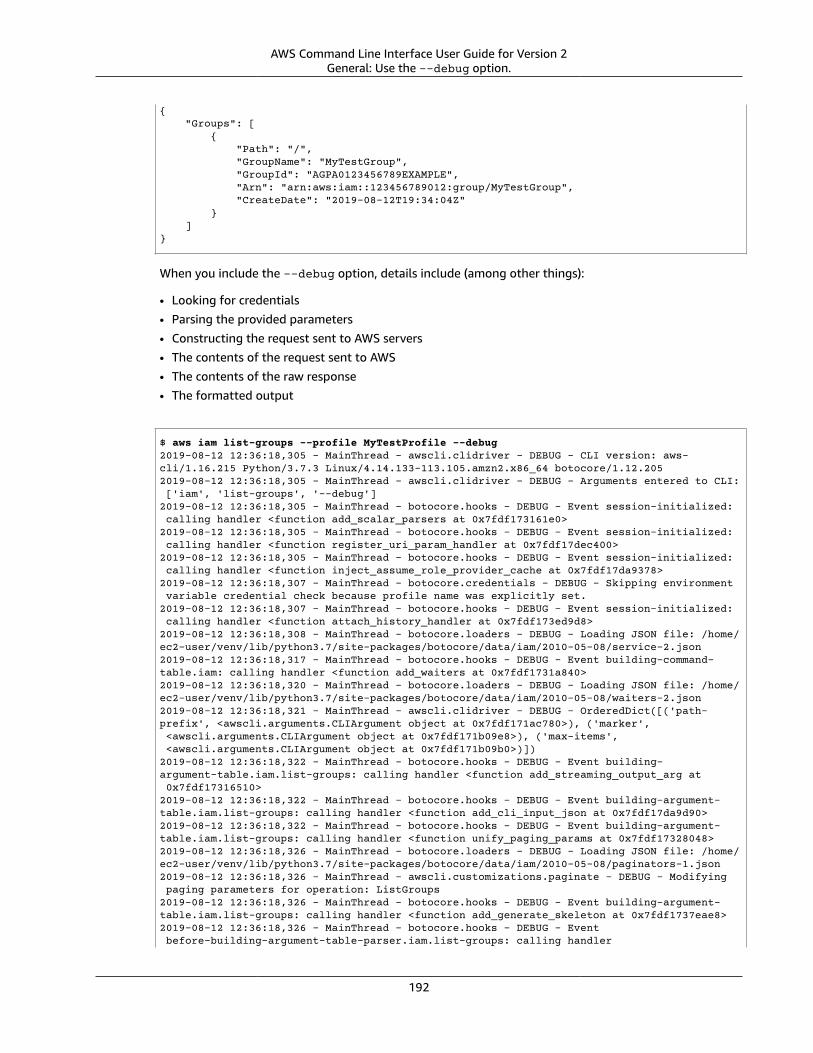
AWS Command Line Interface User Guide for Version 2General: Use the --debug option.
{ "Groups": [ { "Path": "/", "GroupName": "MyTestGroup", "GroupId": "AGPA0123456789EXAMPLE", "Arn": "arn:aws:iam::123456789012:group/MyTestGroup", "CreateDate": "2019-08-12T19:34:04Z" } ]}
When you include the --debug option, details include (among other things):
• Looking for credentials• Parsing the provided parameters• Constructing the request sent to AWS servers• The contents of the request sent to AWS• The contents of the raw response• The formatted output
$ aws iam list-groups --profile MyTestProfile --debug2019-08-12 12:36:18,305 - MainThread - awscli.clidriver - DEBUG - CLI version: aws-cli/1.16.215 Python/3.7.3 Linux/4.14.133-113.105.amzn2.x86_64 botocore/1.12.2052019-08-12 12:36:18,305 - MainThread - awscli.clidriver - DEBUG - Arguments entered to CLI: ['iam', 'list-groups', '--debug']2019-08-12 12:36:18,305 - MainThread - botocore.hooks - DEBUG - Event session-initialized: calling handler <function add_scalar_parsers at 0x7fdf173161e0>2019-08-12 12:36:18,305 - MainThread - botocore.hooks - DEBUG - Event session-initialized: calling handler <function register_uri_param_handler at 0x7fdf17dec400>2019-08-12 12:36:18,305 - MainThread - botocore.hooks - DEBUG - Event session-initialized: calling handler <function inject_assume_role_provider_cache at 0x7fdf17da9378>2019-08-12 12:36:18,307 - MainThread - botocore.credentials - DEBUG - Skipping environment variable credential check because profile name was explicitly set.2019-08-12 12:36:18,307 - MainThread - botocore.hooks - DEBUG - Event session-initialized: calling handler <function attach_history_handler at 0x7fdf173ed9d8>2019-08-12 12:36:18,308 - MainThread - botocore.loaders - DEBUG - Loading JSON file: /home/ec2-user/venv/lib/python3.7/site-packages/botocore/data/iam/2010-05-08/service-2.json2019-08-12 12:36:18,317 - MainThread - botocore.hooks - DEBUG - Event building-command-table.iam: calling handler <function add_waiters at 0x7fdf1731a840>2019-08-12 12:36:18,320 - MainThread - botocore.loaders - DEBUG - Loading JSON file: /home/ec2-user/venv/lib/python3.7/site-packages/botocore/data/iam/2010-05-08/waiters-2.json2019-08-12 12:36:18,321 - MainThread - awscli.clidriver - DEBUG - OrderedDict([('path-prefix', <awscli.arguments.CLIArgument object at 0x7fdf171ac780>), ('marker', <awscli.arguments.CLIArgument object at 0x7fdf171b09e8>), ('max-items', <awscli.arguments.CLIArgument object at 0x7fdf171b09b0>)])2019-08-12 12:36:18,322 - MainThread - botocore.hooks - DEBUG - Event building-argument-table.iam.list-groups: calling handler <function add_streaming_output_arg at 0x7fdf17316510>2019-08-12 12:36:18,322 - MainThread - botocore.hooks - DEBUG - Event building-argument-table.iam.list-groups: calling handler <function add_cli_input_json at 0x7fdf17da9d90>2019-08-12 12:36:18,322 - MainThread - botocore.hooks - DEBUG - Event building-argument-table.iam.list-groups: calling handler <function unify_paging_params at 0x7fdf17328048>2019-08-12 12:36:18,326 - MainThread - botocore.loaders - DEBUG - Loading JSON file: /home/ec2-user/venv/lib/python3.7/site-packages/botocore/data/iam/2010-05-08/paginators-1.json2019-08-12 12:36:18,326 - MainThread - awscli.customizations.paginate - DEBUG - Modifying paging parameters for operation: ListGroups2019-08-12 12:36:18,326 - MainThread - botocore.hooks - DEBUG - Event building-argument-table.iam.list-groups: calling handler <function add_generate_skeleton at 0x7fdf1737eae8>2019-08-12 12:36:18,326 - MainThread - botocore.hooks - DEBUG - Event before-building-argument-table-parser.iam.list-groups: calling handler
192
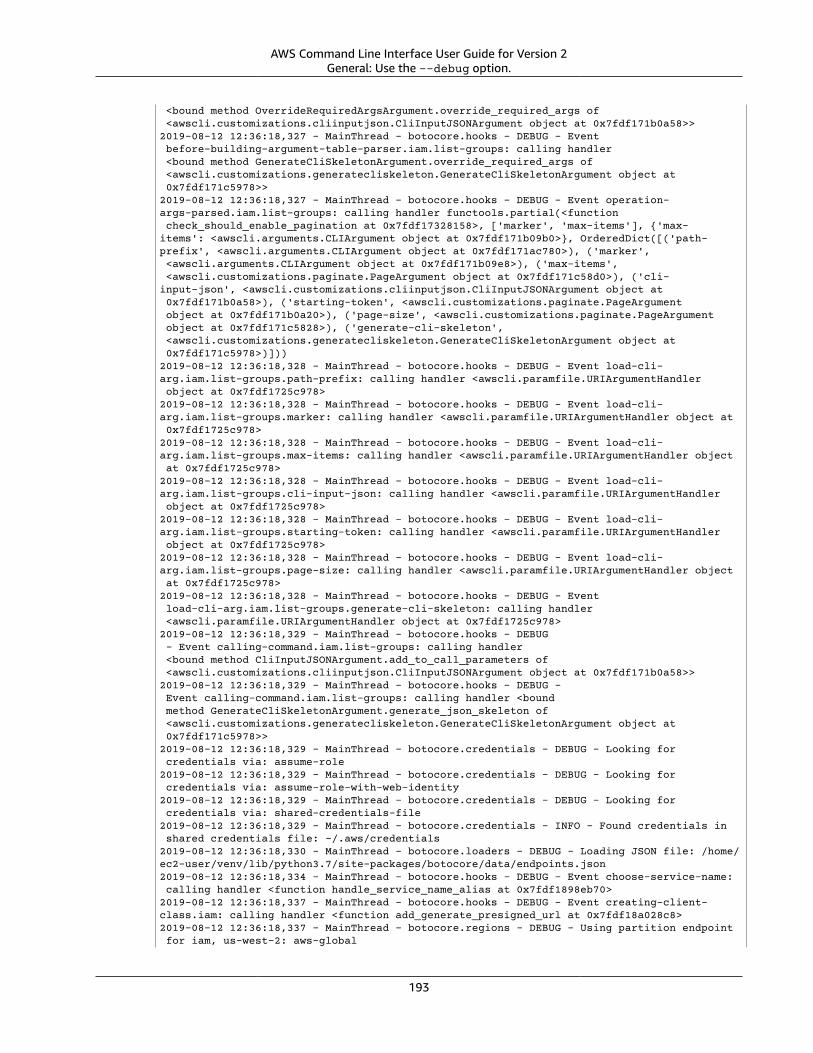
AWS Command Line Interface User Guide for Version 2General: Use the --debug option.
<bound method OverrideRequiredArgsArgument.override_required_args of <awscli.customizations.cliinputjson.CliInputJSONArgument object at 0x7fdf171b0a58>>2019-08-12 12:36:18,327 - MainThread - botocore.hooks - DEBUG - Event before-building-argument-table-parser.iam.list-groups: calling handler <bound method GenerateCliSkeletonArgument.override_required_args of <awscli.customizations.generatecliskeleton.GenerateCliSkeletonArgument object at 0x7fdf171c5978>>2019-08-12 12:36:18,327 - MainThread - botocore.hooks - DEBUG - Event operation-args-parsed.iam.list-groups: calling handler functools.partial(<function check_should_enable_pagination at 0x7fdf17328158>, ['marker', 'max-items'], {'max-items': <awscli.arguments.CLIArgument object at 0x7fdf171b09b0>}, OrderedDict([('path-prefix', <awscli.arguments.CLIArgument object at 0x7fdf171ac780>), ('marker', <awscli.arguments.CLIArgument object at 0x7fdf171b09e8>), ('max-items', <awscli.customizations.paginate.PageArgument object at 0x7fdf171c58d0>), ('cli-input-json', <awscli.customizations.cliinputjson.CliInputJSONArgument object at 0x7fdf171b0a58>), ('starting-token', <awscli.customizations.paginate.PageArgument object at 0x7fdf171b0a20>), ('page-size', <awscli.customizations.paginate.PageArgument object at 0x7fdf171c5828>), ('generate-cli-skeleton', <awscli.customizations.generatecliskeleton.GenerateCliSkeletonArgument object at 0x7fdf171c5978>)]))2019-08-12 12:36:18,328 - MainThread - botocore.hooks - DEBUG - Event load-cli-arg.iam.list-groups.path-prefix: calling handler <awscli.paramfile.URIArgumentHandler object at 0x7fdf1725c978>2019-08-12 12:36:18,328 - MainThread - botocore.hooks - DEBUG - Event load-cli-arg.iam.list-groups.marker: calling handler <awscli.paramfile.URIArgumentHandler object at 0x7fdf1725c978>2019-08-12 12:36:18,328 - MainThread - botocore.hooks - DEBUG - Event load-cli-arg.iam.list-groups.max-items: calling handler <awscli.paramfile.URIArgumentHandler object at 0x7fdf1725c978>2019-08-12 12:36:18,328 - MainThread - botocore.hooks - DEBUG - Event load-cli-arg.iam.list-groups.cli-input-json: calling handler <awscli.paramfile.URIArgumentHandler object at 0x7fdf1725c978>2019-08-12 12:36:18,328 - MainThread - botocore.hooks - DEBUG - Event load-cli-arg.iam.list-groups.starting-token: calling handler <awscli.paramfile.URIArgumentHandler object at 0x7fdf1725c978>2019-08-12 12:36:18,328 - MainThread - botocore.hooks - DEBUG - Event load-cli-arg.iam.list-groups.page-size: calling handler <awscli.paramfile.URIArgumentHandler object at 0x7fdf1725c978>2019-08-12 12:36:18,328 - MainThread - botocore.hooks - DEBUG - Event load-cli-arg.iam.list-groups.generate-cli-skeleton: calling handler <awscli.paramfile.URIArgumentHandler object at 0x7fdf1725c978>2019-08-12 12:36:18,329 - MainThread - botocore.hooks - DEBUG - Event calling-command.iam.list-groups: calling handler <bound method CliInputJSONArgument.add_to_call_parameters of <awscli.customizations.cliinputjson.CliInputJSONArgument object at 0x7fdf171b0a58>>2019-08-12 12:36:18,329 - MainThread - botocore.hooks - DEBUG - Event calling-command.iam.list-groups: calling handler <bound method GenerateCliSkeletonArgument.generate_json_skeleton of <awscli.customizations.generatecliskeleton.GenerateCliSkeletonArgument object at 0x7fdf171c5978>>2019-08-12 12:36:18,329 - MainThread - botocore.credentials - DEBUG - Looking for credentials via: assume-role2019-08-12 12:36:18,329 - MainThread - botocore.credentials - DEBUG - Looking for credentials via: assume-role-with-web-identity2019-08-12 12:36:18,329 - MainThread - botocore.credentials - DEBUG - Looking for credentials via: shared-credentials-file2019-08-12 12:36:18,329 - MainThread - botocore.credentials - INFO - Found credentials in shared credentials file: ~/.aws/credentials2019-08-12 12:36:18,330 - MainThread - botocore.loaders - DEBUG - Loading JSON file: /home/ec2-user/venv/lib/python3.7/site-packages/botocore/data/endpoints.json2019-08-12 12:36:18,334 - MainThread - botocore.hooks - DEBUG - Event choose-service-name: calling handler <function handle_service_name_alias at 0x7fdf1898eb70>2019-08-12 12:36:18,337 - MainThread - botocore.hooks - DEBUG - Event creating-client-class.iam: calling handler <function add_generate_presigned_url at 0x7fdf18a028c8>2019-08-12 12:36:18,337 - MainThread - botocore.regions - DEBUG - Using partition endpoint for iam, us-west-2: aws-global
193
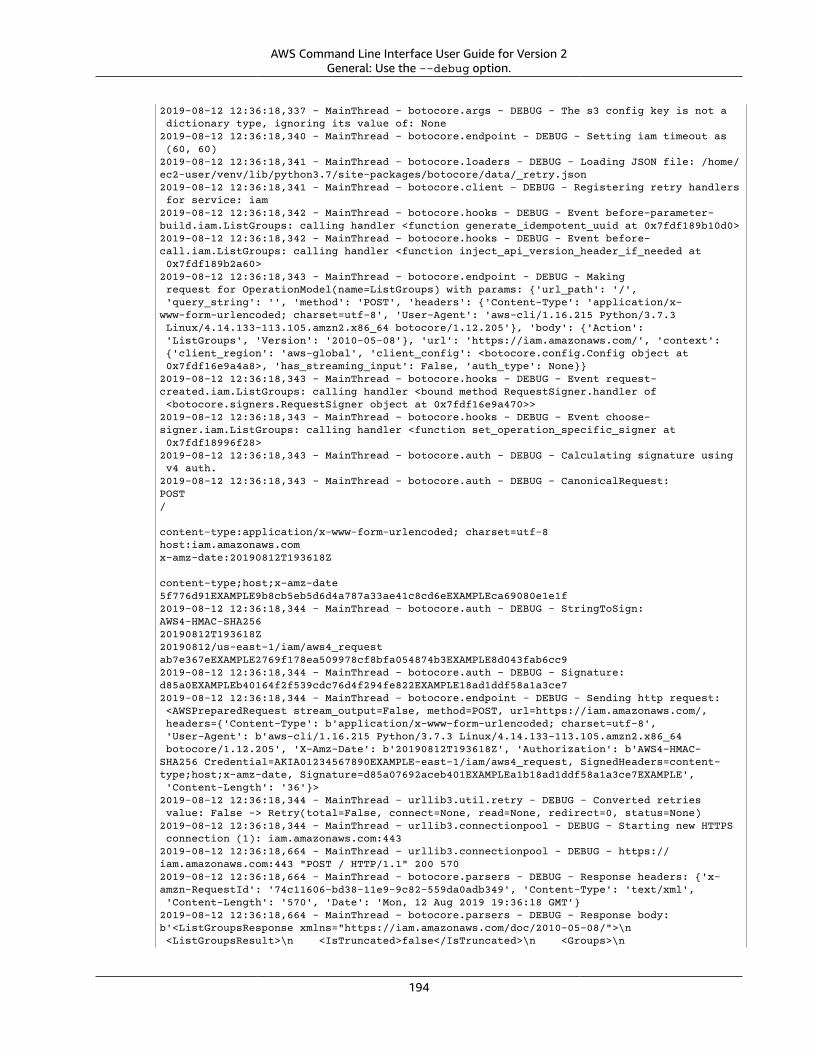
AWS Command Line Interface User Guide for Version 2General: Use the --debug option.
2019-08-12 12:36:18,337 - MainThread - botocore.args - DEBUG - The s3 config key is not a dictionary type, ignoring its value of: None2019-08-12 12:36:18,340 - MainThread - botocore.endpoint - DEBUG - Setting iam timeout as (60, 60)2019-08-12 12:36:18,341 - MainThread - botocore.loaders - DEBUG - Loading JSON file: /home/ec2-user/venv/lib/python3.7/site-packages/botocore/data/_retry.json2019-08-12 12:36:18,341 - MainThread - botocore.client - DEBUG - Registering retry handlers for service: iam2019-08-12 12:36:18,342 - MainThread - botocore.hooks - DEBUG - Event before-parameter-build.iam.ListGroups: calling handler <function generate_idempotent_uuid at 0x7fdf189b10d0>2019-08-12 12:36:18,342 - MainThread - botocore.hooks - DEBUG - Event before-call.iam.ListGroups: calling handler <function inject_api_version_header_if_needed at 0x7fdf189b2a60>2019-08-12 12:36:18,343 - MainThread - botocore.endpoint - DEBUG - Making request for OperationModel(name=ListGroups) with params: {'url_path': '/', 'query_string': '', 'method': 'POST', 'headers': {'Content-Type': 'application/x-www-form-urlencoded; charset=utf-8', 'User-Agent': 'aws-cli/1.16.215 Python/3.7.3 Linux/4.14.133-113.105.amzn2.x86_64 botocore/1.12.205'}, 'body': {'Action': 'ListGroups', 'Version': '2010-05-08'}, 'url': 'https://iam.amazonaws.com/', 'context': {'client_region': 'aws-global', 'client_config': <botocore.config.Config object at 0x7fdf16e9a4a8>, 'has_streaming_input': False, 'auth_type': None}}2019-08-12 12:36:18,343 - MainThread - botocore.hooks - DEBUG - Event request-created.iam.ListGroups: calling handler <bound method RequestSigner.handler of <botocore.signers.RequestSigner object at 0x7fdf16e9a470>>2019-08-12 12:36:18,343 - MainThread - botocore.hooks - DEBUG - Event choose-signer.iam.ListGroups: calling handler <function set_operation_specific_signer at 0x7fdf18996f28>2019-08-12 12:36:18,343 - MainThread - botocore.auth - DEBUG - Calculating signature using v4 auth.2019-08-12 12:36:18,343 - MainThread - botocore.auth - DEBUG - CanonicalRequest:POST/
content-type:application/x-www-form-urlencoded; charset=utf-8host:iam.amazonaws.comx-amz-date:20190812T193618Z
content-type;host;x-amz-date5f776d91EXAMPLE9b8cb5eb5d6d4a787a33ae41c8cd6eEXAMPLEca69080e1e1f2019-08-12 12:36:18,344 - MainThread - botocore.auth - DEBUG - StringToSign:AWS4-HMAC-SHA25620190812T193618Z20190812/us-east-1/iam/aws4_requestab7e367eEXAMPLE2769f178ea509978cf8bfa054874b3EXAMPLE8d043fab6cc92019-08-12 12:36:18,344 - MainThread - botocore.auth - DEBUG - Signature:d85a0EXAMPLEb40164f2f539cdc76d4f294fe822EXAMPLE18ad1ddf58a1a3ce72019-08-12 12:36:18,344 - MainThread - botocore.endpoint - DEBUG - Sending http request: <AWSPreparedRequest stream_output=False, method=POST, url=https://iam.amazonaws.com/, headers={'Content-Type': b'application/x-www-form-urlencoded; charset=utf-8', 'User-Agent': b'aws-cli/1.16.215 Python/3.7.3 Linux/4.14.133-113.105.amzn2.x86_64 botocore/1.12.205', 'X-Amz-Date': b'20190812T193618Z', 'Authorization': b'AWS4-HMAC-SHA256 Credential=AKIA01234567890EXAMPLE-east-1/iam/aws4_request, SignedHeaders=content-type;host;x-amz-date, Signature=d85a07692aceb401EXAMPLEa1b18ad1ddf58a1a3ce7EXAMPLE', 'Content-Length': '36'}>2019-08-12 12:36:18,344 - MainThread - urllib3.util.retry - DEBUG - Converted retries value: False -> Retry(total=False, connect=None, read=None, redirect=0, status=None)2019-08-12 12:36:18,344 - MainThread - urllib3.connectionpool - DEBUG - Starting new HTTPS connection (1): iam.amazonaws.com:4432019-08-12 12:36:18,664 - MainThread - urllib3.connectionpool - DEBUG - https://iam.amazonaws.com:443 "POST / HTTP/1.1" 200 5702019-08-12 12:36:18,664 - MainThread - botocore.parsers - DEBUG - Response headers: {'x-amzn-RequestId': '74c11606-bd38-11e9-9c82-559da0adb349', 'Content-Type': 'text/xml', 'Content-Length': '570', 'Date': 'Mon, 12 Aug 2019 19:36:18 GMT'}2019-08-12 12:36:18,664 - MainThread - botocore.parsers - DEBUG - Response body:b'<ListGroupsResponse xmlns="https://iam.amazonaws.com/doc/2010-05-08/">\n <ListGroupsResult>\n <IsTruncated>false</IsTruncated>\n <Groups>\n
194

AWS Command Line Interface User Guide for Version 2I get the error "command not found" when I run aws.
<member>\n <Path>/</Path>\n <GroupName>MyTestGroup</GroupName>\n <Arn>arn:aws:iam::123456789012:group/MyTestGroup</Arn>\n <GroupId>AGPA1234567890EXAMPLE</GroupId>\n <CreateDate>2019-08-12T19:34:04Z</CreateDate>\n </member>\n </Groups>\n </ListGroupsResult>\n <ResponseMetadata>\n <RequestId>74c11606-bd38-11e9-9c82-559da0adb349</RequestId>\n </ResponseMetadata>\n</ListGroupsResponse>\n'2019-08-12 12:36:18,665 - MainThread - botocore.hooks - DEBUG - Event needs-retry.iam.ListGroups: calling handler <botocore.retryhandler.RetryHandler object at 0x7fdf16e9a780>2019-08-12 12:36:18,665 - MainThread - botocore.retryhandler - DEBUG - No retry needed.2019-08-12 12:36:18,665 - MainThread - botocore.hooks - DEBUG - Event after-call.iam.ListGroups: calling handler <function json_decode_policies at 0x7fdf189b1d90>{ "Groups": [ { "Path": "/", "GroupName": "MyTestGroup", "GroupId": "AGPA123456789012EXAMPLE", "Arn": "arn:aws:iam::123456789012:group/MyTestGroup", "CreateDate": "2019-08-12T19:34:04Z" } ]}
I get the error "command not found" when I runaws.
Possible cause: The operating system "path" was notupdated during installation.This error means that the operating system can't find the AWS CLI program. The installation might beincomplete.
If you use pip to install the AWS CLI, you might need to add the folder that contains the aws program toyour operating system's PATH environment variable, or change its mode to make it executable.
You might need to add the aws executable to your operating system's PATH environment variable.Follow the steps in the appropriate procedure in Getting started (p. 4).
I get "access denied" errors.Possible cause: The AWS CLI program file doesn'thave "run" permission.On Linux or macOS, ensure that the aws program has run permissions for the calling user. Typically, thepermissions are set to 755.
To add run permission for your user, run the following command, substituting ~/.local/bin/aws withthe path to the program on your computer.
$ chmod +x ~/.local/bin/aws
195
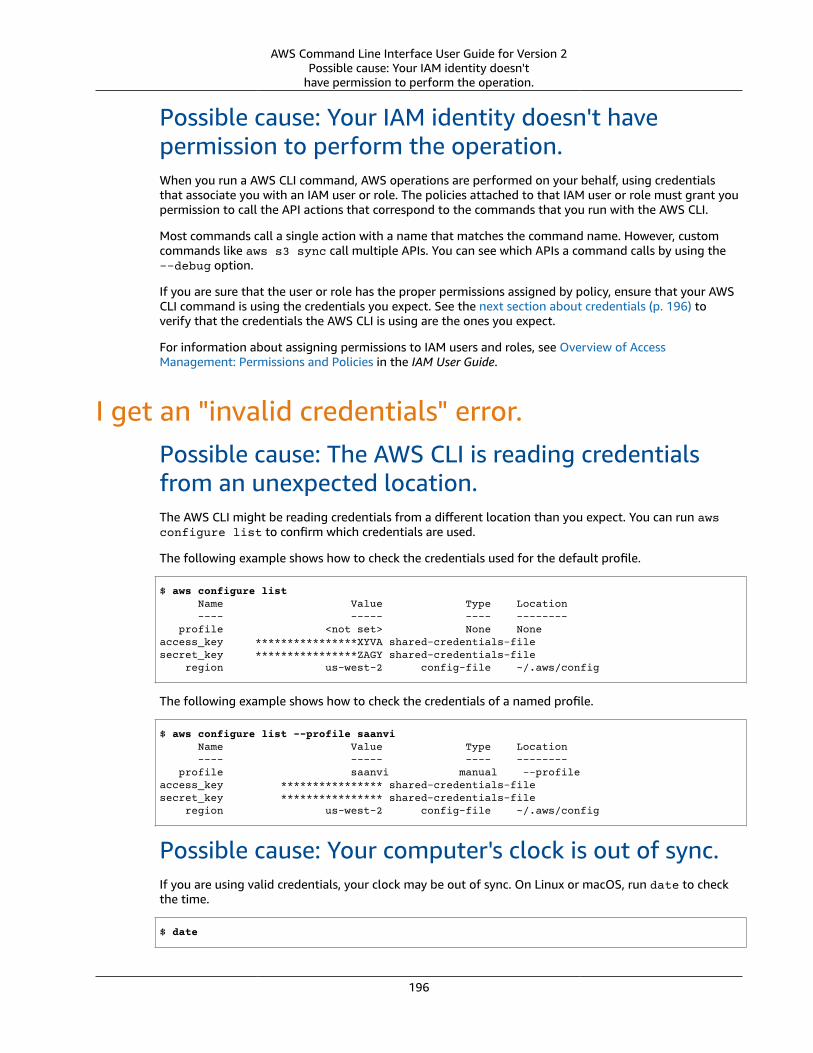
AWS Command Line Interface User Guide for Version 2Possible cause: Your IAM identity doesn't
have permission to perform the operation.
Possible cause: Your IAM identity doesn't havepermission to perform the operation.When you run a AWS CLI command, AWS operations are performed on your behalf, using credentialsthat associate you with an IAM user or role. The policies attached to that IAM user or role must grant youpermission to call the API actions that correspond to the commands that you run with the AWS CLI.
Most commands call a single action with a name that matches the command name. However, customcommands like aws s3 sync call multiple APIs. You can see which APIs a command calls by using the--debug option.
If you are sure that the user or role has the proper permissions assigned by policy, ensure that your AWSCLI command is using the credentials you expect. See the next section about credentials (p. 196) toverify that the credentials the AWS CLI is using are the ones you expect.
For information about assigning permissions to IAM users and roles, see Overview of AccessManagement: Permissions and Policies in the IAM User Guide.
I get an "invalid credentials" error.Possible cause: The AWS CLI is reading credentialsfrom an unexpected location.The AWS CLI might be reading credentials from a different location than you expect. You can run awsconfigure list to confirm which credentials are used.
The following example shows how to check the credentials used for the default profile.
$ aws configure list Name Value Type Location ---- ----- ---- -------- profile <not set> None Noneaccess_key ****************XYVA shared-credentials-filesecret_key ****************ZAGY shared-credentials-file region us-west-2 config-file ~/.aws/config
The following example shows how to check the credentials of a named profile.
$ aws configure list --profile saanvi Name Value Type Location ---- ----- ---- -------- profile saanvi manual --profileaccess_key **************** shared-credentials-filesecret_key **************** shared-credentials-file region us-west-2 config-file ~/.aws/config
Possible cause: Your computer's clock is out of sync.If you are using valid credentials, your clock may be out of sync. On Linux or macOS, run date to checkthe time.
$ date
196
AWS Command Line Interface User Guide for Version 2I get a "signature does not match" error.
If your system clock is not correct within a few minutes, use ntpd to sync it.
$ sudo service ntpd stop$ sudo ntpdate time.nist.gov$ sudo service ntpd start$ ntpstat
On Windows, use the date and time options in the Control Panel to configure your system clock.
I get a "signature does not match" error.When the AWS CLI runs a command, it sends an encrypted request to the AWS servers to perform theappropriate AWS service operations. Your credentials (the access key and secret key) are involved in theencryption and enable AWS to authenticate the person making the request. There are several things thatcan interfere with the correct operation of this process, as follows.
Possible cause: Your clock is out of sync with the AWSservers.To help protect against replay attacks, the current time can be used during the encryption/decryptionprocess. If the time of the client and server disagree by more than the allowed amount, the process canfail and the request is rejected. This can also happen when you run a command in a virtual machinewhose clock is out of sync with the host machine's clock. One possible cause is when the virtual machinehibernates and takes some time after waking up to sync the clock with the host machine.
On Linux or macOS, run date to check the time.
$ date
If your system clock is not correct within a few minutes, use ntpd to sync it.
$ sudo service ntpd stop$ sudo ntpdate time.nist.gov$ sudo service ntpd start$ ntpstat
On Windows, use the date and time options in the Control Panel to configure your system clock.
Possible cause: Your operating system is mishandlingAWS secret keys that contain certain specialcharacters.If your AWS secret key includes certain special characters, such as -, +, /, or %, some operating systemvariants process the string improperly and cause the secret key string to be interpreted incorrectly.
If you process your access keys and secret keys using other tools or scripts, such as tools that build thecredentials file on a new instance as part of its creation, those tools and scripts might have their ownhandling of special characters that causes them to be transformed into something that AWS no longerrecognizes.
The easy solution is to regenerate the secret key to get one that does not include the special character.
197
AWS Command Line Interface User Guide for Version 2I get a "No Windows console found.
Are you running cmd.exe?" error.
I get a "No Windows console found. Are yourunning cmd.exe?" error.
When you use a AWS CLI command, you receive a "No Windows console found. Are you runningcmd.exe?" error message. This is usually due to the Python prompt_toolkit you have installed beingoutdated. To resolve this issue, install a recent version of the prompt_toolkit on the Python website.
I get a "[SSL: CERTIFICATE_ VERIFY_FAILED]certificate verify failed" error.
When you use a AWS CLI command, you receive a "[SSL: CERTIFICATE_ VERIFY_FAILED] certificate verifyfailed" error message. This is cause by the AWS CLI not trusting your proxy's certificate due to factorssuch as your proxy's certificate being self-signed, with your company set as the Certification Authority(CA). This prevents the AWS CLI from finding your companies CA root certificate in the local CA registry.
To fix this, instruct the AWS CLI where to find your companies .pem file using the ca_bundle (p. 40)configuration file setting, --ca-bundle (p. 60) command line option, or the AWS_CA_Bundle (p. 57)environment variable.
Additional resourcesFor additional help with your AWS CLI issues, visit the AWS CLI community on GitHub.
198
AWS Command Line Interface User Guide for Version 2File encoding environment variable
Breaking changes – Migrating fromAWS CLI version 1 to version 2
This topic describes the changes in behavior between AWS CLI version 1 and AWS CLI version 2 thatmight require you to make changes to scripts or commands to get the same behavior in version 2 as youdid in version 1.
Topics• AWS CLI version 2 now uses environment variable to set text file encoding (p. 199)• AWS CLI version 2 now passes binary parameters as base64-encoded strings by default (p. 199)• AWS CLI version 2 improves Amazon S3 handling of file properties and tags when performing
multipart copies (p. 200)• AWS CLI version 2 no longer automatically retrieves http:// or https:// URLs for
parameters (p. 201)• AWS CLI version 2 uses a paging program for all output by default. (p. 201)• AWS CLI version 2 now returns all timestamp output values in ISO 8601 format (p. 202)• AWS CLI version 2 improves handling of AWS CloudFormation deployments that result in no
changes (p. 202)• AWS CLI version 2 uses the correct Amazon S3 regional endpoint for us-east-1 Region (p. 203)• AWS CLI version 2 uses regional AWS STS endpoints by default (p. 203)• AWS CLI version 2 replaces ecr get-login with ecr get-login-password (p. 203)• AWS CLI version 2 support for plugins is changing (p. 204)• AWS CLI version 2 no longer supports "hidden" aliases (p. 204)• AWS CLI version 2 no longer supports the api_versions configuration file setting (p. 205)
AWS CLI version 2 now uses environment variableto set text file encoding
By default, text files use the same encoding as the installed locale. To set encoding for text files to bedifferent from the locale, use the AWS_CLI_FILE_ENCODING environment variable. The below examplesets the CLI to open text files using UTF-8 on windows.
AWS_CLI_FILE_ENCODING=UTF-8
For more information, see Environment variables to configure the AWS CLI (p. 55) .
AWS CLI version 2 now passes binary parametersas base64-encoded strings by default
AWS CLI version 1 didn't always make it easy to pass binary parameters from the output of onecommand to the input of another command without requiring some intermediate processing. Some
199
AWS Command Line Interface User Guide for Version 2Improved Amazon S3 property and taghandling during s3 copy operations
commands required base64-encoded strings, others required UTF8-encoded byte strings. AWS CLIversion 2 makes handling binary parameters more consistent to enable more reliable passing of valuesfrom one command to another.
By default, the AWS CLI version 2 now passes all binary input and binary output parameters as base64-encoded strings. A parameter that requires binary input has its type specified as blob (binary largeobject) in the documentation. To pass binary data as a file to a AWS CLI parameter, the AWS CLI version 2enables you to specify the file using the following prefixes:
• file:// – The AWS CLI treats the file content as base64-encoded text. For example: --some-paramfile://~/my/path/file-with-base64.txt
• fileb:// – The AWS CLI treats the file content as unencoded binary. For example: --some-paramfileb://~/my/path/file-with-raw-binary.bin
You can tell the AWS CLI version 2 to revert to the AWS CLI version 1 behavior by specifying thefollowing line in the ~/.aws/config file for a profile.
cli_binary_format=raw-in-base64-out
You can also revert the setting for an individual command, overriding the active profile setting, byincluding the parameter --cli-binary-format raw-in-base64-out on the command-line.
If you revert to the AWS CLI version 1 behavior and specify a file for a binary parameter using eitherfile:// or fileb://, the AWS CLI treats the file content as unencoded raw binary.
AWS CLI version 2 improves Amazon S3 handlingof file properties and tags when performingmultipart copies
When you use the AWS CLI version 1 version of commands in the aws s3 namespace to copy a filefrom one Amazon S3 bucket location to another Amazon S3 bucket location, and that operation usesmultipart copy, no file properties from the source object are copied to the destination object.
By default, the AWS CLI version 2 commands in the s3 namespace that perform multipart copies nowtransfer all tags and the following set of properties from the source to the destination copy: content-type, content-language, content-encoding, content-disposition, cache-control,expires, and metadata.
This can result in additional AWS API calls to the Amazon S3 endpoint that would not have beenmade if you used AWS CLI version 1. These can include: HeadObject, GetObjectTagging, andPutObjectTagging.
If you need to change this default behavior in AWS CLI version 2 commands, use the --copy-propsparameter to specify one of the following options:
• default – The default value. Specifies that the copy includes all tags attached to the source objectand the properties encompassed by the --metadata-directive parameter used for non-multipartcopies: content-type, content-language, content-encoding, content-disposition,cache-control, expires, and metadata.
• metadata-directive – Specifies that the copy includes only the properties that are encompassed by the--metadata-directive parameter used for non-multipart copies. It doesn't copy any tags.
• none – Specifies that the copy includes none of the properties from the source object.
200
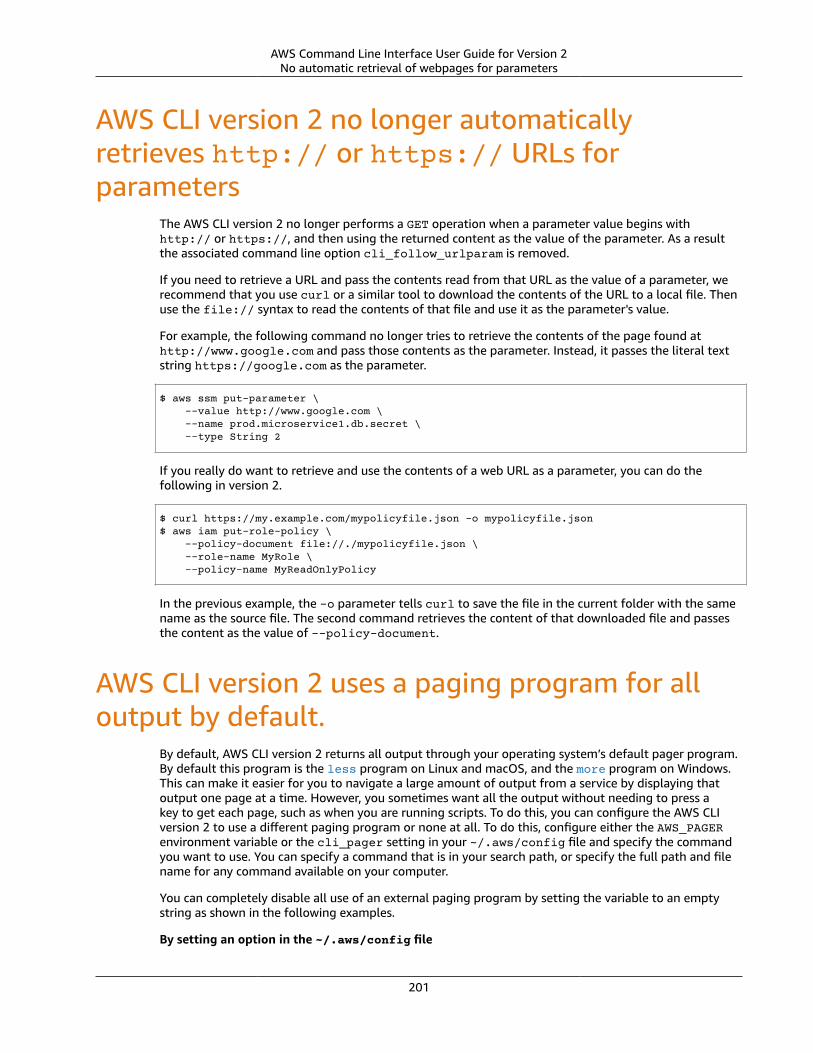
AWS Command Line Interface User Guide for Version 2No automatic retrieval of webpages for parameters
AWS CLI version 2 no longer automaticallyretrieves http:// or https:// URLs forparameters
The AWS CLI version 2 no longer performs a GET operation when a parameter value begins withhttp:// or https://, and then using the returned content as the value of the parameter. As a resultthe associated command line option cli_follow_urlparam is removed.
If you need to retrieve a URL and pass the contents read from that URL as the value of a parameter, werecommend that you use curl or a similar tool to download the contents of the URL to a local file. Thenuse the file:// syntax to read the contents of that file and use it as the parameter's value.
For example, the following command no longer tries to retrieve the contents of the page found athttp://www.google.com and pass those contents as the parameter. Instead, it passes the literal textstring https://google.com as the parameter.
$ aws ssm put-parameter \ --value http://www.google.com \ --name prod.microservice1.db.secret \ --type String 2
If you really do want to retrieve and use the contents of a web URL as a parameter, you can do thefollowing in version 2.
$ curl https://my.example.com/mypolicyfile.json -o mypolicyfile.json$ aws iam put-role-policy \ --policy-document file://./mypolicyfile.json \ --role-name MyRole \ --policy-name MyReadOnlyPolicy
In the previous example, the -o parameter tells curl to save the file in the current folder with the samename as the source file. The second command retrieves the content of that downloaded file and passesthe content as the value of --policy-document.
AWS CLI version 2 uses a paging program for alloutput by default.
By default, AWS CLI version 2 returns all output through your operating system’s default pager program.By default this program is the less program on Linux and macOS, and the more program on Windows.This can make it easier for you to navigate a large amount of output from a service by displaying thatoutput one page at a time. However, you sometimes want all the output without needing to press akey to get each page, such as when you are running scripts. To do this, you can configure the AWS CLIversion 2 to use a different paging program or none at all. To do this, configure either the AWS_PAGERenvironment variable or the cli_pager setting in your ~/.aws/config file and specify the commandyou want to use. You can specify a command that is in your search path, or specify the full path and filename for any command available on your computer.
You can completely disable all use of an external paging program by setting the variable to an emptystring as shown in the following examples.
By setting an option in the ~/.aws/config file
201

AWS Command Line Interface User Guide for Version 2All date/time values in ISO 8601 format
The following example shows setting it for the default profile, but you can add the setting to anyprofile in your ~/.aws/config file.
[default]cli_pager=
By setting an environment variable
Linux or macOS:
$ export AWS_PAGER=""
Windows:
C:\> setx AWS_PAGER ""
AWS CLI version 2 now returns all timestampoutput values in ISO 8601 format
By default, AWS CLI version 2 returns all timestamp response values in the ISO 8601 format. In AWSCLI version 1, commands returned timestamp values in whatever format was returned by the HTTP APIresponse, which could vary from service to service.
ISO 8601 formatted timestamps look like the following examples. The first example shows the time inCoordinated Universal Time (UTC) by including a Z after the time. The date and the time are separatedby a T.
2019-10-31T22:21:41Z
To specify a different time zone, instead of the Z, specify a + or - and the number of hours the desiredtime zone is ahead of or behind UTC, as a two-digit value. The following example shows the same timeas the previous example but adjusted to Pacific Standard time, which is eight hours behind UTC.
2019-10-31T14:21:41-08
To see timestamps in the format returned by the HTTP API response, add the following line to your.aws/config profile.
cli_timestamp_format = wire
AWS CLI version 2 improves handling of AWSCloudFormation deployments that result in nochanges
In AWS CLI version 1, if you deployed a AWS CloudFormation template that resulted in no changes, bydefault, the AWS CLI failed with an error code. This could be a problem if you didn't consider that to be
202
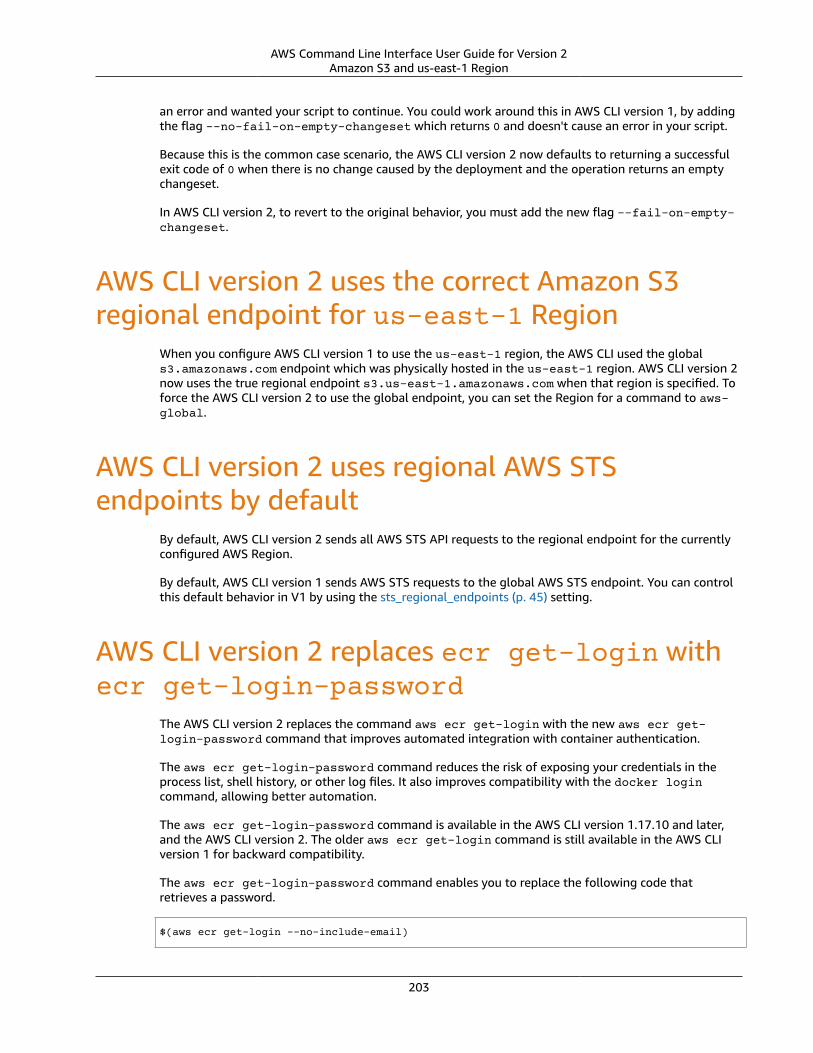
AWS Command Line Interface User Guide for Version 2Amazon S3 and us-east-1 Region
an error and wanted your script to continue. You could work around this in AWS CLI version 1, by addingthe flag -–no-fail-on-empty-changeset which returns 0 and doesn't cause an error in your script.
Because this is the common case scenario, the AWS CLI version 2 now defaults to returning a successfulexit code of 0 when there is no change caused by the deployment and the operation returns an emptychangeset.
In AWS CLI version 2, to revert to the original behavior, you must add the new flag --fail-on-empty-changeset.
AWS CLI version 2 uses the correct Amazon S3regional endpoint for us-east-1 Region
When you configure AWS CLI version 1 to use the us-east-1 region, the AWS CLI used the globals3.amazonaws.com endpoint which was physically hosted in the us-east-1 region. AWS CLI version 2now uses the true regional endpoint s3.us-east-1.amazonaws.com when that region is specified. Toforce the AWS CLI version 2 to use the global endpoint, you can set the Region for a command to aws-global.
AWS CLI version 2 uses regional AWS STSendpoints by default
By default, AWS CLI version 2 sends all AWS STS API requests to the regional endpoint for the currentlyconfigured AWS Region.
By default, AWS CLI version 1 sends AWS STS requests to the global AWS STS endpoint. You can controlthis default behavior in V1 by using the sts_regional_endpoints (p. 45) setting.
AWS CLI version 2 replaces ecr get-login withecr get-login-password
The AWS CLI version 2 replaces the command aws ecr get-login with the new aws ecr get-login-password command that improves automated integration with container authentication.
The aws ecr get-login-password command reduces the risk of exposing your credentials in theprocess list, shell history, or other log files. It also improves compatibility with the docker logincommand, allowing better automation.
The aws ecr get-login-password command is available in the AWS CLI version 1.17.10 and later,and the AWS CLI version 2. The older aws ecr get-login command is still available in the AWS CLIversion 1 for backward compatibility.
The aws ecr get-login-password command enables you to replace the following code thatretrieves a password.
$(aws ecr get-login --no-include-email)
203
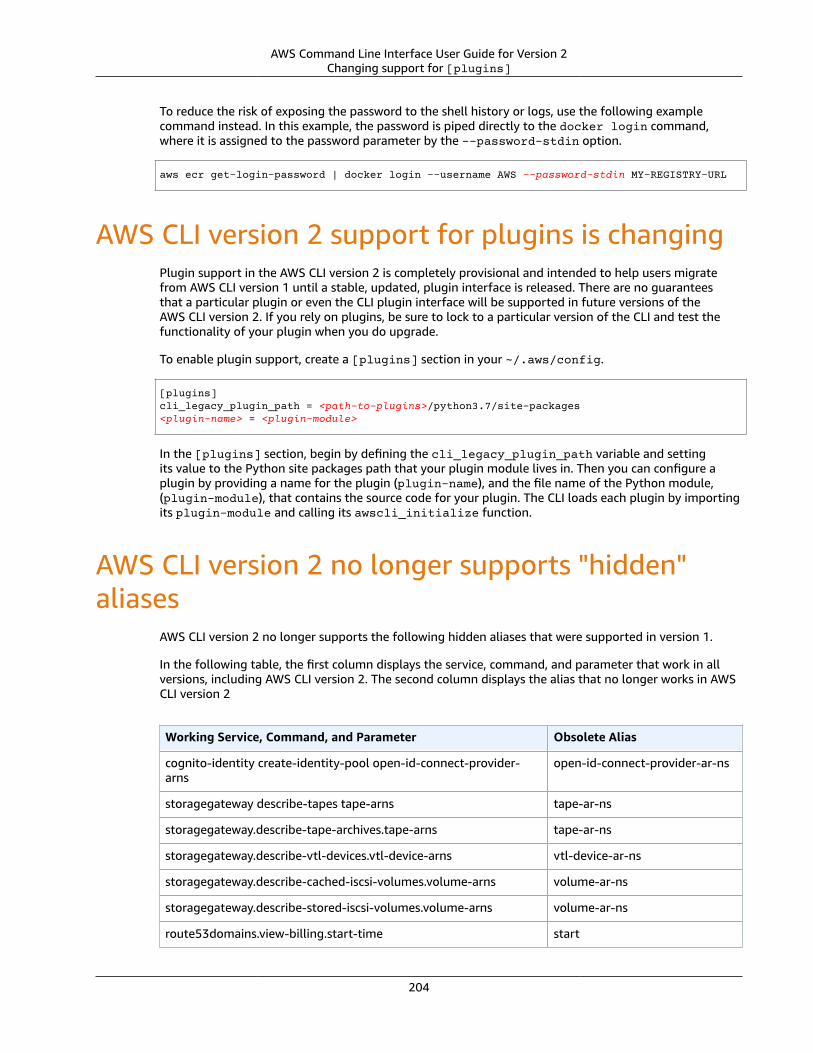
AWS Command Line Interface User Guide for Version 2Changing support for [plugins]
To reduce the risk of exposing the password to the shell history or logs, use the following examplecommand instead. In this example, the password is piped directly to the docker login command,where it is assigned to the password parameter by the --password-stdin option.
aws ecr get-login-password | docker login --username AWS --password-stdin MY-REGISTRY-URL
AWS CLI version 2 support for plugins is changingPlugin support in the AWS CLI version 2 is completely provisional and intended to help users migratefrom AWS CLI version 1 until a stable, updated, plugin interface is released. There are no guaranteesthat a particular plugin or even the CLI plugin interface will be supported in future versions of theAWS CLI version 2. If you rely on plugins, be sure to lock to a particular version of the CLI and test thefunctionality of your plugin when you do upgrade.
To enable plugin support, create a [plugins] section in your ~/.aws/config.
[plugins]cli_legacy_plugin_path = <path-to-plugins>/python3.7/site-packages<plugin-name> = <plugin-module>
In the [plugins] section, begin by defining the cli_legacy_plugin_path variable and settingits value to the Python site packages path that your plugin module lives in. Then you can configure aplugin by providing a name for the plugin (plugin-name), and the file name of the Python module,(plugin-module), that contains the source code for your plugin. The CLI loads each plugin by importingits plugin-module and calling its awscli_initialize function.
AWS CLI version 2 no longer supports "hidden"aliases
AWS CLI version 2 no longer supports the following hidden aliases that were supported in version 1.
In the following table, the first column displays the service, command, and parameter that work in allversions, including AWS CLI version 2. The second column displays the alias that no longer works in AWSCLI version 2
Working Service, Command, and Parameter Obsolete Alias
cognito-identity create-identity-pool open-id-connect-provider-arns
open-id-connect-provider-ar-ns
storagegateway describe-tapes tape-arns tape-ar-ns
storagegateway.describe-tape-archives.tape-arns tape-ar-ns
storagegateway.describe-vtl-devices.vtl-device-arns vtl-device-ar-ns
storagegateway.describe-cached-iscsi-volumes.volume-arns volume-ar-ns
storagegateway.describe-stored-iscsi-volumes.volume-arns volume-ar-ns
route53domains.view-billing.start-time start
204
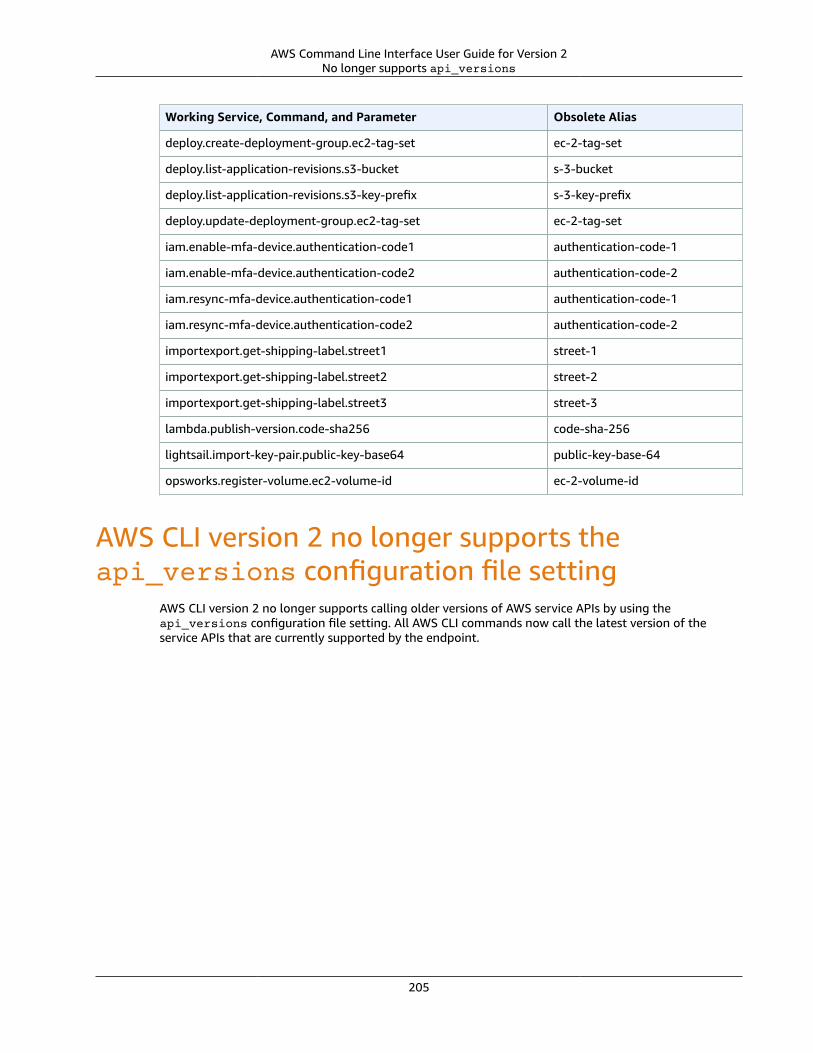
AWS Command Line Interface User Guide for Version 2No longer supports api_versions
Working Service, Command, and Parameter Obsolete Alias
deploy.create-deployment-group.ec2-tag-set ec-2-tag-set
deploy.list-application-revisions.s3-bucket s-3-bucket
deploy.list-application-revisions.s3-key-prefix s-3-key-prefix
deploy.update-deployment-group.ec2-tag-set ec-2-tag-set
iam.enable-mfa-device.authentication-code1 authentication-code-1
iam.enable-mfa-device.authentication-code2 authentication-code-2
iam.resync-mfa-device.authentication-code1 authentication-code-1
iam.resync-mfa-device.authentication-code2 authentication-code-2
importexport.get-shipping-label.street1 street-1
importexport.get-shipping-label.street2 street-2
importexport.get-shipping-label.street3 street-3
lambda.publish-version.code-sha256 code-sha-256
lightsail.import-key-pair.public-key-base64 public-key-base-64
opsworks.register-volume.ec2-volume-id ec-2-volume-id
AWS CLI version 2 no longer supports theapi_versions configuration file setting
AWS CLI version 2 no longer supports calling older versions of AWS service APIs by using theapi_versions configuration file setting. All AWS CLI commands now call the latest version of theservice APIs that are currently supported by the endpoint.
205
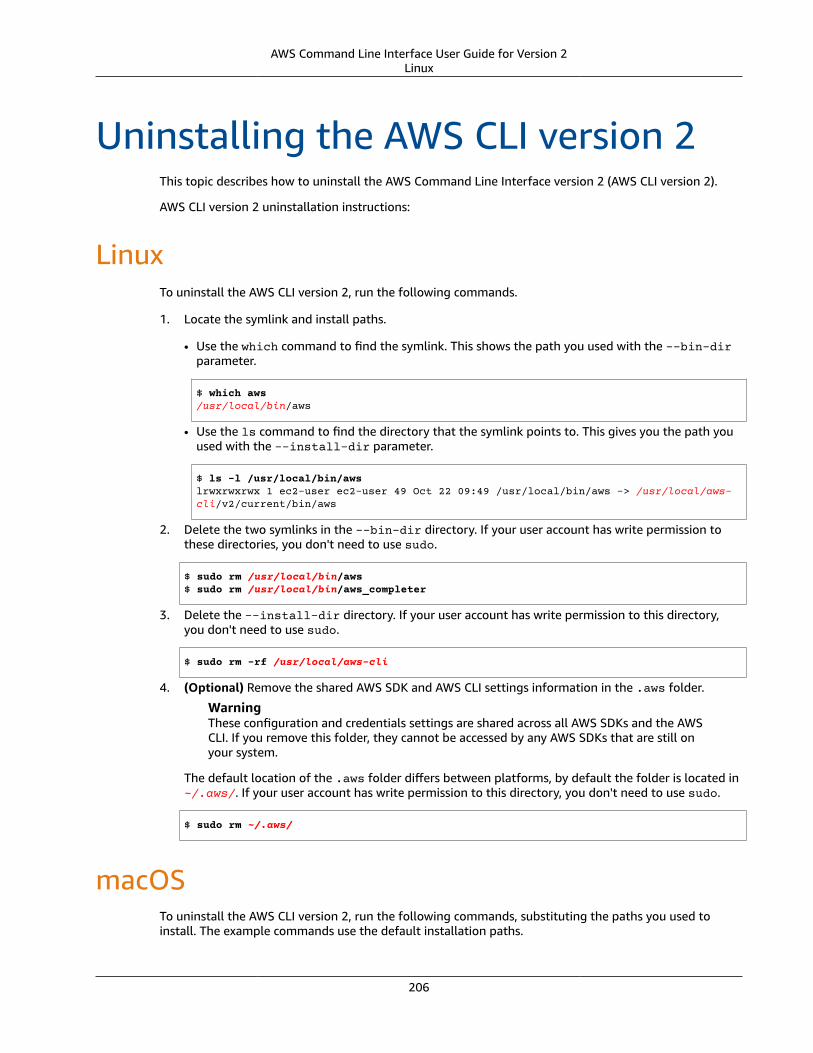
AWS Command Line Interface User Guide for Version 2Linux
Uninstalling the AWS CLI version 2This topic describes how to uninstall the AWS Command Line Interface version 2 (AWS CLI version 2).
AWS CLI version 2 uninstallation instructions:
LinuxTo uninstall the AWS CLI version 2, run the following commands.
1. Locate the symlink and install paths.
• Use the which command to find the symlink. This shows the path you used with the --bin-dirparameter.
$ which aws/usr/local/bin/aws
• Use the ls command to find the directory that the symlink points to. This gives you the path youused with the --install-dir parameter.
$ ls -l /usr/local/bin/awslrwxrwxrwx 1 ec2-user ec2-user 49 Oct 22 09:49 /usr/local/bin/aws -> /usr/local/aws-cli/v2/current/bin/aws
2. Delete the two symlinks in the --bin-dir directory. If your user account has write permission tothese directories, you don't need to use sudo.
$ sudo rm /usr/local/bin/aws$ sudo rm /usr/local/bin/aws_completer
3. Delete the --install-dir directory. If your user account has write permission to this directory,you don't need to use sudo.
$ sudo rm -rf /usr/local/aws-cli
4. (Optional) Remove the shared AWS SDK and AWS CLI settings information in the .aws folder.
WarningThese configuration and credentials settings are shared across all AWS SDKs and the AWSCLI. If you remove this folder, they cannot be accessed by any AWS SDKs that are still onyour system.
The default location of the .aws folder differs between platforms, by default the folder is located in~/.aws/. If your user account has write permission to this directory, you don't need to use sudo.
$ sudo rm ~/.aws/
macOSTo uninstall the AWS CLI version 2, run the following commands, substituting the paths you used toinstall. The example commands use the default installation paths.
206
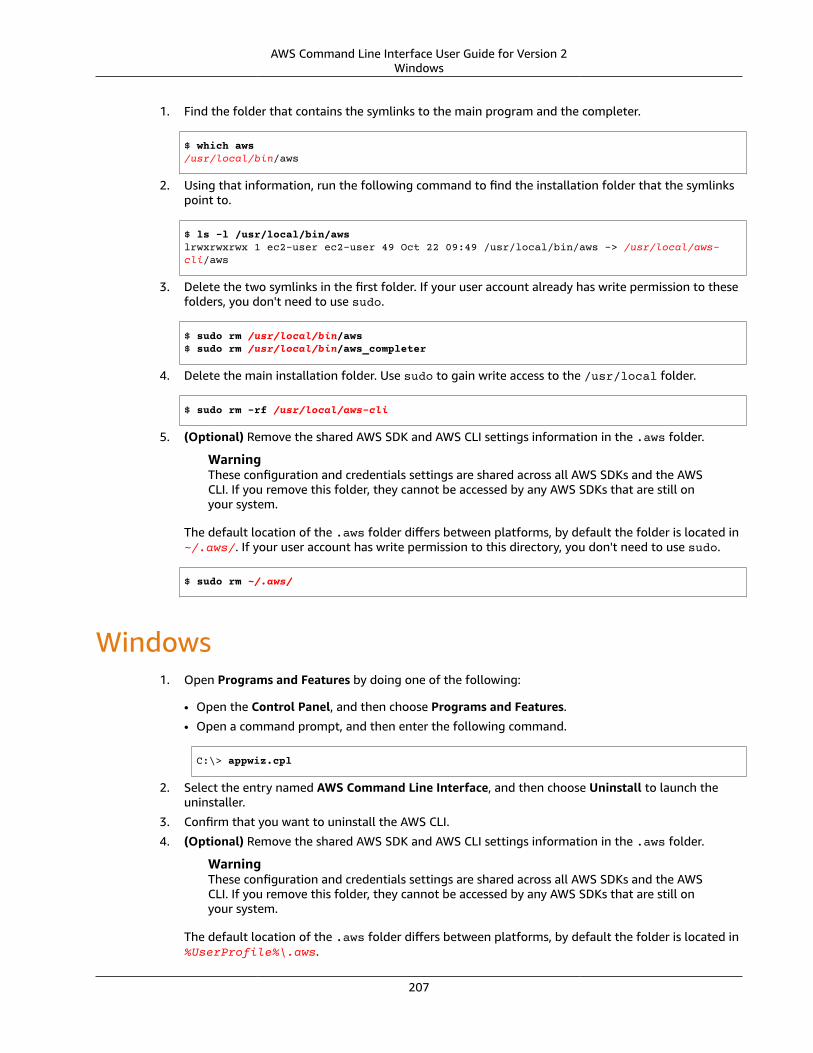
AWS Command Line Interface User Guide for Version 2Windows
1. Find the folder that contains the symlinks to the main program and the completer.
$ which aws/usr/local/bin/aws
2. Using that information, run the following command to find the installation folder that the symlinkspoint to.
$ ls -l /usr/local/bin/awslrwxrwxrwx 1 ec2-user ec2-user 49 Oct 22 09:49 /usr/local/bin/aws -> /usr/local/aws-cli/aws
3. Delete the two symlinks in the first folder. If your user account already has write permission to thesefolders, you don't need to use sudo.
$ sudo rm /usr/local/bin/aws$ sudo rm /usr/local/bin/aws_completer
4. Delete the main installation folder. Use sudo to gain write access to the /usr/local folder.
$ sudo rm -rf /usr/local/aws-cli
5. (Optional) Remove the shared AWS SDK and AWS CLI settings information in the .aws folder.
WarningThese configuration and credentials settings are shared across all AWS SDKs and the AWSCLI. If you remove this folder, they cannot be accessed by any AWS SDKs that are still onyour system.
The default location of the .aws folder differs between platforms, by default the folder is located in~/.aws/. If your user account has write permission to this directory, you don't need to use sudo.
$ sudo rm ~/.aws/
Windows1. Open Programs and Features by doing one of the following:
• Open the Control Panel, and then choose Programs and Features.
• Open a command prompt, and then enter the following command.
C:\> appwiz.cpl
2. Select the entry named AWS Command Line Interface, and then choose Uninstall to launch theuninstaller.
3. Confirm that you want to uninstall the AWS CLI.
4. (Optional) Remove the shared AWS SDK and AWS CLI settings information in the .aws folder.
WarningThese configuration and credentials settings are shared across all AWS SDKs and the AWSCLI. If you remove this folder, they cannot be accessed by any AWS SDKs that are still onyour system.
The default location of the .aws folder differs between platforms, by default the folder is located in%UserProfile%\.aws.
207

AWS Command Line Interface User Guide for Version 2Windows
$ rmdir %UserProfile%\.aws
208
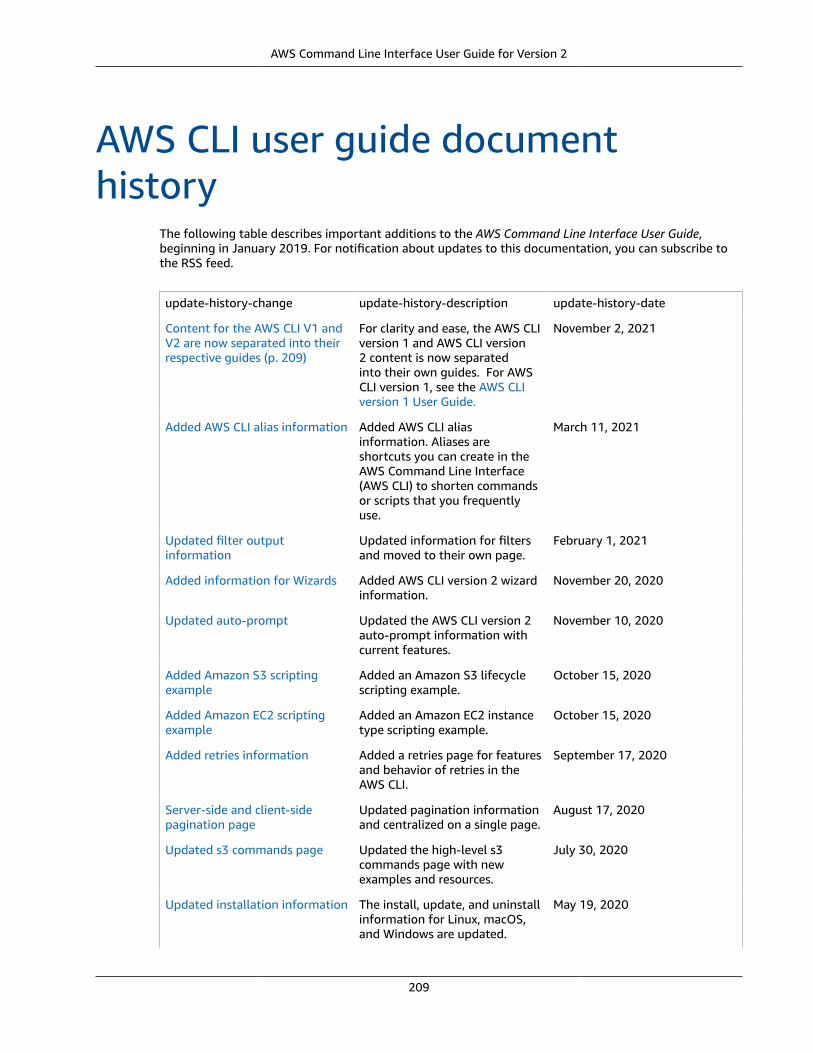
AWS Command Line Interface User Guide for Version 2
AWS CLI user guide documenthistory
The following table describes important additions to the AWS Command Line Interface User Guide,beginning in January 2019. For notification about updates to this documentation, you can subscribe tothe RSS feed.
update-history-change update-history-description update-history-date
Content for the AWS CLI V1 andV2 are now separated into theirrespective guides (p. 209)
For clarity and ease, the AWS CLIversion 1 and AWS CLI version2 content is now separatedinto their own guides. For AWSCLI version 1, see the AWS CLIversion 1 User Guide.
November 2, 2021
Added AWS CLI alias information Added AWS CLI aliasinformation. Aliases areshortcuts you can create in theAWS Command Line Interface(AWS CLI) to shorten commandsor scripts that you frequentlyuse.
March 11, 2021
Updated filter outputinformation
Updated information for filtersand moved to their own page.
February 1, 2021
Added information for Wizards Added AWS CLI version 2 wizardinformation.
November 20, 2020
Updated auto-prompt Updated the AWS CLI version 2auto-prompt information withcurrent features.
November 10, 2020
Added Amazon S3 scriptingexample
Added an Amazon S3 lifecyclescripting example.
October 15, 2020
Added Amazon EC2 scriptingexample
Added an Amazon EC2 instancetype scripting example.
October 15, 2020
Added retries information Added a retries page for featuresand behavior of retries in theAWS CLI.
September 17, 2020
Server-side and client-sidepagination page
Updated pagination informationand centralized on a single page.
August 17, 2020
Updated s3 commands page Updated the high-level s3commands page with newexamples and resources.
July 30, 2020
Updated installation information The install, update, and uninstallinformation for Linux, macOS,and Windows are updated.
May 19, 2020
209
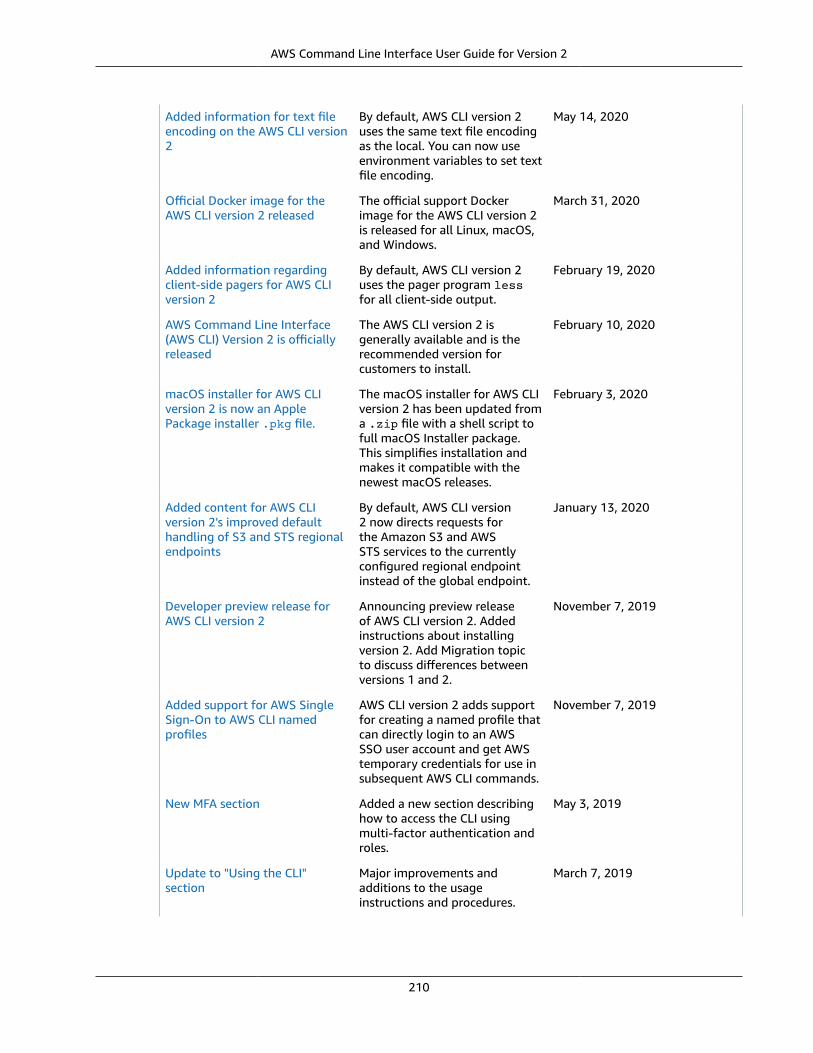
AWS Command Line Interface User Guide for Version 2
Added information for text fileencoding on the AWS CLI version2
By default, AWS CLI version 2uses the same text file encodingas the local. You can now useenvironment variables to set textfile encoding.
May 14, 2020
Official Docker image for theAWS CLI version 2 released
The official support Dockerimage for the AWS CLI version 2is released for all Linux, macOS,and Windows.
March 31, 2020
Added information regardingclient-side pagers for AWS CLIversion 2
By default, AWS CLI version 2uses the pager program lessfor all client-side output.
February 19, 2020
AWS Command Line Interface(AWS CLI) Version 2 is officiallyreleased
The AWS CLI version 2 isgenerally available and is therecommended version forcustomers to install.
February 10, 2020
macOS installer for AWS CLIversion 2 is now an ApplePackage installer .pkg file.
The macOS installer for AWS CLIversion 2 has been updated froma .zip file with a shell script tofull macOS Installer package.This simplifies installation andmakes it compatible with thenewest macOS releases.
February 3, 2020
Added content for AWS CLIversion 2's improved defaulthandling of S3 and STS regionalendpoints
By default, AWS CLI version2 now directs requests forthe Amazon S3 and AWSSTS services to the currentlyconfigured regional endpointinstead of the global endpoint.
January 13, 2020
Developer preview release forAWS CLI version 2
Announcing preview releaseof AWS CLI version 2. Addedinstructions about installingversion 2. Add Migration topicto discuss differences betweenversions 1 and 2.
November 7, 2019
Added support for AWS SingleSign-On to AWS CLI namedprofiles
AWS CLI version 2 adds supportfor creating a named profile thatcan directly login to an AWSSSO user account and get AWStemporary credentials for use insubsequent AWS CLI commands.
November 7, 2019
New MFA section Added a new section describinghow to access the CLI usingmulti-factor authentication androles.
May 3, 2019
Update to "Using the CLI"section
Major improvements andadditions to the usageinstructions and procedures.
March 7, 2019
210
AWS Command Line Interface User Guide for Version 2
Update to "Installing the CLI"section
Major improvements andadditions to the AWS CLIinstallation instructions andprocedures.
March 7, 2019
Update to "Configuring the CLI"section
Major improvements andadditions to the AWS CLIconfiguration instructions andprocedures.
March 7, 2019
211