aws batch - user guide · pdf fileaws batch user guide components of aws batch what is aws...
TRANSCRIPT
AWS BatchUser Guide

AWS Batch User Guide
AWS Batch: User GuideCopyright © 2018 Amazon Web Services, Inc. and/or its affiliates. All rights reserved.
Amazon's trademarks and trade dress may not be used in connection with any product or service that is not Amazon's, in any mannerthat is likely to cause confusion among customers, or in any manner that disparages or discredits Amazon. All other trademarks notowned by Amazon are the property of their respective owners, who may or may not be affiliated with, connected to, or sponsored byAmazon.
AWS Batch User Guide
Table of ContentsWhat Is AWS Batch? .... . . . . . . . . . . . . . . . . . . . . . . . . . . . . . . . . . . . . . . . . . . . . . . . . . . . . . . . . . . . . . . . . . . . . . . . . . . . . . . . . . . . . . . . . . . . . . . . . . . . . . . . . . . . . . . . . . . . . . . . 1
Components of AWS Batch .... . . . . . . . . . . . . . . . . . . . . . . . . . . . . . . . . . . . . . . . . . . . . . . . . . . . . . . . . . . . . . . . . . . . . . . . . . . . . . . . . . . . . . . . . . . . . . . . . . . . . . 1Jobs .... . . . . . . . . . . . . . . . . . . . . . . . . . . . . . . . . . . . . . . . . . . . . . . . . . . . . . . . . . . . . . . . . . . . . . . . . . . . . . . . . . . . . . . . . . . . . . . . . . . . . . . . . . . . . . . . . . . . . . . . . . . . . . 1Job Definitions .... . . . . . . . . . . . . . . . . . . . . . . . . . . . . . . . . . . . . . . . . . . . . . . . . . . . . . . . . . . . . . . . . . . . . . . . . . . . . . . . . . . . . . . . . . . . . . . . . . . . . . . . . . . . . . . . 1Job Queues .... . . . . . . . . . . . . . . . . . . . . . . . . . . . . . . . . . . . . . . . . . . . . . . . . . . . . . . . . . . . . . . . . . . . . . . . . . . . . . . . . . . . . . . . . . . . . . . . . . . . . . . . . . . . . . . . . . . . 1Compute Environment .... . . . . . . . . . . . . . . . . . . . . . . . . . . . . . . . . . . . . . . . . . . . . . . . . . . . . . . . . . . . . . . . . . . . . . . . . . . . . . . . . . . . . . . . . . . . . . . . . . . . . 2
Getting Started .... . . . . . . . . . . . . . . . . . . . . . . . . . . . . . . . . . . . . . . . . . . . . . . . . . . . . . . . . . . . . . . . . . . . . . . . . . . . . . . . . . . . . . . . . . . . . . . . . . . . . . . . . . . . . . . . . . . . . . . 2Setting Up .... . . . . . . . . . . . . . . . . . . . . . . . . . . . . . . . . . . . . . . . . . . . . . . . . . . . . . . . . . . . . . . . . . . . . . . . . . . . . . . . . . . . . . . . . . . . . . . . . . . . . . . . . . . . . . . . . . . . . . . . . . . . . . . . . . . . . 3
Sign Up for AWS .... . . . . . . . . . . . . . . . . . . . . . . . . . . . . . . . . . . . . . . . . . . . . . . . . . . . . . . . . . . . . . . . . . . . . . . . . . . . . . . . . . . . . . . . . . . . . . . . . . . . . . . . . . . . . . . . . . . . . 3Create an IAM User .... . . . . . . . . . . . . . . . . . . . . . . . . . . . . . . . . . . . . . . . . . . . . . . . . . . . . . . . . . . . . . . . . . . . . . . . . . . . . . . . . . . . . . . . . . . . . . . . . . . . . . . . . . . . . . . . . 3Create IAM Roles for your Compute Environments and Container Instances .... . . . . . . . . . . . . . . . . . . . . . . . . . . . . . . . . . . . . 5Create a Key Pair ... . . . . . . . . . . . . . . . . . . . . . . . . . . . . . . . . . . . . . . . . . . . . . . . . . . . . . . . . . . . . . . . . . . . . . . . . . . . . . . . . . . . . . . . . . . . . . . . . . . . . . . . . . . . . . . . . . . . . 5Create a Virtual Private Cloud .... . . . . . . . . . . . . . . . . . . . . . . . . . . . . . . . . . . . . . . . . . . . . . . . . . . . . . . . . . . . . . . . . . . . . . . . . . . . . . . . . . . . . . . . . . . . . . . . . . 6Create a Security Group .... . . . . . . . . . . . . . . . . . . . . . . . . . . . . . . . . . . . . . . . . . . . . . . . . . . . . . . . . . . . . . . . . . . . . . . . . . . . . . . . . . . . . . . . . . . . . . . . . . . . . . . . . . . 7Install the AWS CLI ... . . . . . . . . . . . . . . . . . . . . . . . . . . . . . . . . . . . . . . . . . . . . . . . . . . . . . . . . . . . . . . . . . . . . . . . . . . . . . . . . . . . . . . . . . . . . . . . . . . . . . . . . . . . . . . . . . 8
Getting Started .... . . . . . . . . . . . . . . . . . . . . . . . . . . . . . . . . . . . . . . . . . . . . . . . . . . . . . . . . . . . . . . . . . . . . . . . . . . . . . . . . . . . . . . . . . . . . . . . . . . . . . . . . . . . . . . . . . . . . . . . . . . . . . . 9Step 1: Define a Job .... . . . . . . . . . . . . . . . . . . . . . . . . . . . . . . . . . . . . . . . . . . . . . . . . . . . . . . . . . . . . . . . . . . . . . . . . . . . . . . . . . . . . . . . . . . . . . . . . . . . . . . . . . . . . . . . 9Step 2: Configure the Compute Environment and Job Queue .... . . . . . . . . . . . . . . . . . . . . . . . . . . . . . . . . . . . . . . . . . . . . . . . . . . . . . 10
Jobs .... . . . . . . . . . . . . . . . . . . . . . . . . . . . . . . . . . . . . . . . . . . . . . . . . . . . . . . . . . . . . . . . . . . . . . . . . . . . . . . . . . . . . . . . . . . . . . . . . . . . . . . . . . . . . . . . . . . . . . . . . . . . . . . . . . . . . . . . . . . . . 13Submitting a Job .... . . . . . . . . . . . . . . . . . . . . . . . . . . . . . . . . . . . . . . . . . . . . . . . . . . . . . . . . . . . . . . . . . . . . . . . . . . . . . . . . . . . . . . . . . . . . . . . . . . . . . . . . . . . . . . . . . 13Job States .... . . . . . . . . . . . . . . . . . . . . . . . . . . . . . . . . . . . . . . . . . . . . . . . . . . . . . . . . . . . . . . . . . . . . . . . . . . . . . . . . . . . . . . . . . . . . . . . . . . . . . . . . . . . . . . . . . . . . . . . . . . . 15Automated Job Retries ... . . . . . . . . . . . . . . . . . . . . . . . . . . . . . . . . . . . . . . . . . . . . . . . . . . . . . . . . . . . . . . . . . . . . . . . . . . . . . . . . . . . . . . . . . . . . . . . . . . . . . . . . . . . 16Job Dependencies .... . . . . . . . . . . . . . . . . . . . . . . . . . . . . . . . . . . . . . . . . . . . . . . . . . . . . . . . . . . . . . . . . . . . . . . . . . . . . . . . . . . . . . . . . . . . . . . . . . . . . . . . . . . . . . . . . 16Job Timeouts .... . . . . . . . . . . . . . . . . . . . . . . . . . . . . . . . . . . . . . . . . . . . . . . . . . . . . . . . . . . . . . . . . . . . . . . . . . . . . . . . . . . . . . . . . . . . . . . . . . . . . . . . . . . . . . . . . . . . . . . . 17Array Jobs .... . . . . . . . . . . . . . . . . . . . . . . . . . . . . . . . . . . . . . . . . . . . . . . . . . . . . . . . . . . . . . . . . . . . . . . . . . . . . . . . . . . . . . . . . . . . . . . . . . . . . . . . . . . . . . . . . . . . . . . . . . . . 17
Example Array Job Workflow ..... . . . . . . . . . . . . . . . . . . . . . . . . . . . . . . . . . . . . . . . . . . . . . . . . . . . . . . . . . . . . . . . . . . . . . . . . . . . . . . . . . . . . . . . . 19Job Definitions .... . . . . . . . . . . . . . . . . . . . . . . . . . . . . . . . . . . . . . . . . . . . . . . . . . . . . . . . . . . . . . . . . . . . . . . . . . . . . . . . . . . . . . . . . . . . . . . . . . . . . . . . . . . . . . . . . . . . . . . . . . . . . . 22
Creating a Job Definition .... . . . . . . . . . . . . . . . . . . . . . . . . . . . . . . . . . . . . . . . . . . . . . . . . . . . . . . . . . . . . . . . . . . . . . . . . . . . . . . . . . . . . . . . . . . . . . . . . . . . . . . 22Job Definition Template .... . . . . . . . . . . . . . . . . . . . . . . . . . . . . . . . . . . . . . . . . . . . . . . . . . . . . . . . . . . . . . . . . . . . . . . . . . . . . . . . . . . . . . . . . . . . . . . . . 24
Job Definition Parameters ... . . . . . . . . . . . . . . . . . . . . . . . . . . . . . . . . . . . . . . . . . . . . . . . . . . . . . . . . . . . . . . . . . . . . . . . . . . . . . . . . . . . . . . . . . . . . . . . . . . . . . . 25Job Definition Name .... . . . . . . . . . . . . . . . . . . . . . . . . . . . . . . . . . . . . . . . . . . . . . . . . . . . . . . . . . . . . . . . . . . . . . . . . . . . . . . . . . . . . . . . . . . . . . . . . . . . . . 26Type .... . . . . . . . . . . . . . . . . . . . . . . . . . . . . . . . . . . . . . . . . . . . . . . . . . . . . . . . . . . . . . . . . . . . . . . . . . . . . . . . . . . . . . . . . . . . . . . . . . . . . . . . . . . . . . . . . . . . . . . . . . . . 26Parameters ... . . . . . . . . . . . . . . . . . . . . . . . . . . . . . . . . . . . . . . . . . . . . . . . . . . . . . . . . . . . . . . . . . . . . . . . . . . . . . . . . . . . . . . . . . . . . . . . . . . . . . . . . . . . . . . . . . . . 26Retry Strategy .... . . . . . . . . . . . . . . . . . . . . . . . . . . . . . . . . . . . . . . . . . . . . . . . . . . . . . . . . . . . . . . . . . . . . . . . . . . . . . . . . . . . . . . . . . . . . . . . . . . . . . . . . . . . . . 27Timeout .... . . . . . . . . . . . . . . . . . . . . . . . . . . . . . . . . . . . . . . . . . . . . . . . . . . . . . . . . . . . . . . . . . . . . . . . . . . . . . . . . . . . . . . . . . . . . . . . . . . . . . . . . . . . . . . . . . . . . . . 27Container Properties ... . . . . . . . . . . . . . . . . . . . . . . . . . . . . . . . . . . . . . . . . . . . . . . . . . . . . . . . . . . . . . . . . . . . . . . . . . . . . . . . . . . . . . . . . . . . . . . . . . . . . . . 27
Example Job Definitions .... . . . . . . . . . . . . . . . . . . . . . . . . . . . . . . . . . . . . . . . . . . . . . . . . . . . . . . . . . . . . . . . . . . . . . . . . . . . . . . . . . . . . . . . . . . . . . . . . . . . . . . . . 32Use Environment Variables .... . . . . . . . . . . . . . . . . . . . . . . . . . . . . . . . . . . . . . . . . . . . . . . . . . . . . . . . . . . . . . . . . . . . . . . . . . . . . . . . . . . . . . . . . . . . . 32Using Parameter Substitution .... . . . . . . . . . . . . . . . . . . . . . . . . . . . . . . . . . . . . . . . . . . . . . . . . . . . . . . . . . . . . . . . . . . . . . . . . . . . . . . . . . . . . . . . . 33Test GPU Functionality ... . . . . . . . . . . . . . . . . . . . . . . . . . . . . . . . . . . . . . . . . . . . . . . . . . . . . . . . . . . . . . . . . . . . . . . . . . . . . . . . . . . . . . . . . . . . . . . . . . . . 33
Job Queues .... . . . . . . . . . . . . . . . . . . . . . . . . . . . . . . . . . . . . . . . . . . . . . . . . . . . . . . . . . . . . . . . . . . . . . . . . . . . . . . . . . . . . . . . . . . . . . . . . . . . . . . . . . . . . . . . . . . . . . . . . . . . . . . . . . 35Creating a Job Queue .... . . . . . . . . . . . . . . . . . . . . . . . . . . . . . . . . . . . . . . . . . . . . . . . . . . . . . . . . . . . . . . . . . . . . . . . . . . . . . . . . . . . . . . . . . . . . . . . . . . . . . . . . . . . 35
Job Queue Template .... . . . . . . . . . . . . . . . . . . . . . . . . . . . . . . . . . . . . . . . . . . . . . . . . . . . . . . . . . . . . . . . . . . . . . . . . . . . . . . . . . . . . . . . . . . . . . . . . . . . . . 35Job Queue Parameters ... . . . . . . . . . . . . . . . . . . . . . . . . . . . . . . . . . . . . . . . . . . . . . . . . . . . . . . . . . . . . . . . . . . . . . . . . . . . . . . . . . . . . . . . . . . . . . . . . . . . . . . . . . . . 36
Job Queue Name .... . . . . . . . . . . . . . . . . . . . . . . . . . . . . . . . . . . . . . . . . . . . . . . . . . . . . . . . . . . . . . . . . . . . . . . . . . . . . . . . . . . . . . . . . . . . . . . . . . . . . . . . . . 36State .... . . . . . . . . . . . . . . . . . . . . . . . . . . . . . . . . . . . . . . . . . . . . . . . . . . . . . . . . . . . . . . . . . . . . . . . . . . . . . . . . . . . . . . . . . . . . . . . . . . . . . . . . . . . . . . . . . . . . . . . . . . . 36Priority ... . . . . . . . . . . . . . . . . . . . . . . . . . . . . . . . . . . . . . . . . . . . . . . . . . . . . . . . . . . . . . . . . . . . . . . . . . . . . . . . . . . . . . . . . . . . . . . . . . . . . . . . . . . . . . . . . . . . . . . . . . 36Compute Environment Order .... . . . . . . . . . . . . . . . . . . . . . . . . . . . . . . . . . . . . . . . . . . . . . . . . . . . . . . . . . . . . . . . . . . . . . . . . . . . . . . . . . . . . . . . . . 37
Job Scheduling .... . . . . . . . . . . . . . . . . . . . . . . . . . . . . . . . . . . . . . . . . . . . . . . . . . . . . . . . . . . . . . . . . . . . . . . . . . . . . . . . . . . . . . . . . . . . . . . . . . . . . . . . . . . . . . . . . . . . . . . . . . . . . 38Compute Environments .... . . . . . . . . . . . . . . . . . . . . . . . . . . . . . . . . . . . . . . . . . . . . . . . . . . . . . . . . . . . . . . . . . . . . . . . . . . . . . . . . . . . . . . . . . . . . . . . . . . . . . . . . . . . . . . . . . 39
Managed Compute Environments .... . . . . . . . . . . . . . . . . . . . . . . . . . . . . . . . . . . . . . . . . . . . . . . . . . . . . . . . . . . . . . . . . . . . . . . . . . . . . . . . . . . . . . . . . . . . 39Unmanaged Compute Environments .... . . . . . . . . . . . . . . . . . . . . . . . . . . . . . . . . . . . . . . . . . . . . . . . . . . . . . . . . . . . . . . . . . . . . . . . . . . . . . . . . . . . . . . . 40Compute Resource AMIs .... . . . . . . . . . . . . . . . . . . . . . . . . . . . . . . . . . . . . . . . . . . . . . . . . . . . . . . . . . . . . . . . . . . . . . . . . . . . . . . . . . . . . . . . . . . . . . . . . . . . . . . . . 40
Compute Resource AMI Specification .... . . . . . . . . . . . . . . . . . . . . . . . . . . . . . . . . . . . . . . . . . . . . . . . . . . . . . . . . . . . . . . . . . . . . . . . . . . . . . . 40
iii
AWS Batch User Guide
Creating a Compute Resource AMI .... . . . . . . . . . . . . . . . . . . . . . . . . . . . . . . . . . . . . . . . . . . . . . . . . . . . . . . . . . . . . . . . . . . . . . . . . . . . . . . . . . . 41Creating a GPU Workload AMI .... . . . . . . . . . . . . . . . . . . . . . . . . . . . . . . . . . . . . . . . . . . . . . . . . . . . . . . . . . . . . . . . . . . . . . . . . . . . . . . . . . . . . . . . 42
Creating a Compute Environment .... . . . . . . . . . . . . . . . . . . . . . . . . . . . . . . . . . . . . . . . . . . . . . . . . . . . . . . . . . . . . . . . . . . . . . . . . . . . . . . . . . . . . . . . . . . . 44Compute Environment Template .... . . . . . . . . . . . . . . . . . . . . . . . . . . . . . . . . . . . . . . . . . . . . . . . . . . . . . . . . . . . . . . . . . . . . . . . . . . . . . . . . . . . . 47
Compute Environment Parameters ... . . . . . . . . . . . . . . . . . . . . . . . . . . . . . . . . . . . . . . . . . . . . . . . . . . . . . . . . . . . . . . . . . . . . . . . . . . . . . . . . . . . . . . . . . . 47Compute Environment Name .... . . . . . . . . . . . . . . . . . . . . . . . . . . . . . . . . . . . . . . . . . . . . . . . . . . . . . . . . . . . . . . . . . . . . . . . . . . . . . . . . . . . . . . . . . 48Type .... . . . . . . . . . . . . . . . . . . . . . . . . . . . . . . . . . . . . . . . . . . . . . . . . . . . . . . . . . . . . . . . . . . . . . . . . . . . . . . . . . . . . . . . . . . . . . . . . . . . . . . . . . . . . . . . . . . . . . . . . . . . 48State .... . . . . . . . . . . . . . . . . . . . . . . . . . . . . . . . . . . . . . . . . . . . . . . . . . . . . . . . . . . . . . . . . . . . . . . . . . . . . . . . . . . . . . . . . . . . . . . . . . . . . . . . . . . . . . . . . . . . . . . . . . . . 48Compute Resources .... . . . . . . . . . . . . . . . . . . . . . . . . . . . . . . . . . . . . . . . . . . . . . . . . . . . . . . . . . . . . . . . . . . . . . . . . . . . . . . . . . . . . . . . . . . . . . . . . . . . . . . 48Service Role .... . . . . . . . . . . . . . . . . . . . . . . . . . . . . . . . . . . . . . . . . . . . . . . . . . . . . . . . . . . . . . . . . . . . . . . . . . . . . . . . . . . . . . . . . . . . . . . . . . . . . . . . . . . . . . . . . . 51
Memory Management .... . . . . . . . . . . . . . . . . . . . . . . . . . . . . . . . . . . . . . . . . . . . . . . . . . . . . . . . . . . . . . . . . . . . . . . . . . . . . . . . . . . . . . . . . . . . . . . . . . . . . . . . . . . . 51Reserving System Memory .... . . . . . . . . . . . . . . . . . . . . . . . . . . . . . . . . . . . . . . . . . . . . . . . . . . . . . . . . . . . . . . . . . . . . . . . . . . . . . . . . . . . . . . . . . . . . 52Viewing Compute Resource Memory .... . . . . . . . . . . . . . . . . . . . . . . . . . . . . . . . . . . . . . . . . . . . . . . . . . . . . . . . . . . . . . . . . . . . . . . . . . . . . . . . 52
IAM Policies, Roles, and Permissions .... . . . . . . . . . . . . . . . . . . . . . . . . . . . . . . . . . . . . . . . . . . . . . . . . . . . . . . . . . . . . . . . . . . . . . . . . . . . . . . . . . . . . . . . . . . . . . . . 53Policy Structure .... . . . . . . . . . . . . . . . . . . . . . . . . . . . . . . . . . . . . . . . . . . . . . . . . . . . . . . . . . . . . . . . . . . . . . . . . . . . . . . . . . . . . . . . . . . . . . . . . . . . . . . . . . . . . . . . . . . . . 53
Policy Syntax .... . . . . . . . . . . . . . . . . . . . . . . . . . . . . . . . . . . . . . . . . . . . . . . . . . . . . . . . . . . . . . . . . . . . . . . . . . . . . . . . . . . . . . . . . . . . . . . . . . . . . . . . . . . . . . . . 53Actions for AWS Batch .... . . . . . . . . . . . . . . . . . . . . . . . . . . . . . . . . . . . . . . . . . . . . . . . . . . . . . . . . . . . . . . . . . . . . . . . . . . . . . . . . . . . . . . . . . . . . . . . . . . 54Amazon Resource Names for AWS Batch .... . . . . . . . . . . . . . . . . . . . . . . . . . . . . . . . . . . . . . . . . . . . . . . . . . . . . . . . . . . . . . . . . . . . . . . . . . 54Testing Permissions .... . . . . . . . . . . . . . . . . . . . . . . . . . . . . . . . . . . . . . . . . . . . . . . . . . . . . . . . . . . . . . . . . . . . . . . . . . . . . . . . . . . . . . . . . . . . . . . . . . . . . . . 55
AWS Batch Managed Policy .... . . . . . . . . . . . . . . . . . . . . . . . . . . . . . . . . . . . . . . . . . . . . . . . . . . . . . . . . . . . . . . . . . . . . . . . . . . . . . . . . . . . . . . . . . . . . . . . . . . . 55AWSBatchFullAccess .... . . . . . . . . . . . . . . . . . . . . . . . . . . . . . . . . . . . . . . . . . . . . . . . . . . . . . . . . . . . . . . . . . . . . . . . . . . . . . . . . . . . . . . . . . . . . . . . . . . . . . . 56
Creating IAM Policies ... . . . . . . . . . . . . . . . . . . . . . . . . . . . . . . . . . . . . . . . . . . . . . . . . . . . . . . . . . . . . . . . . . . . . . . . . . . . . . . . . . . . . . . . . . . . . . . . . . . . . . . . . . . . . . 56AWS Batch Service IAM Role .... . . . . . . . . . . . . . . . . . . . . . . . . . . . . . . . . . . . . . . . . . . . . . . . . . . . . . . . . . . . . . . . . . . . . . . . . . . . . . . . . . . . . . . . . . . . . . . . . . . 56Amazon ECS Instance Role .... . . . . . . . . . . . . . . . . . . . . . . . . . . . . . . . . . . . . . . . . . . . . . . . . . . . . . . . . . . . . . . . . . . . . . . . . . . . . . . . . . . . . . . . . . . . . . . . . . . . . 58Amazon EC2 Spot Fleet Role .... . . . . . . . . . . . . . . . . . . . . . . . . . . . . . . . . . . . . . . . . . . . . . . . . . . . . . . . . . . . . . . . . . . . . . . . . . . . . . . . . . . . . . . . . . . . . . . . . . 59
Create Amazon EC2 Spot Fleet Roles in the AWS Management Console .... . . . . . . . . . . . . . . . . . . . . . . . . . . . . . . . 59Create Amazon EC2 Spot Fleet Roles with the AWS CLI ... . . . . . . . . . . . . . . . . . . . . . . . . . . . . . . . . . . . . . . . . . . . . . . . . . . . . . . 60
CloudWatch Events IAM Role .... . . . . . . . . . . . . . . . . . . . . . . . . . . . . . . . . . . . . . . . . . . . . . . . . . . . . . . . . . . . . . . . . . . . . . . . . . . . . . . . . . . . . . . . . . . . . . . . . . 61CloudWatch Events .... . . . . . . . . . . . . . . . . . . . . . . . . . . . . . . . . . . . . . . . . . . . . . . . . . . . . . . . . . . . . . . . . . . . . . . . . . . . . . . . . . . . . . . . . . . . . . . . . . . . . . . . . . . . . . . . . . . . . . . . 62
AWS Batch Events .... . . . . . . . . . . . . . . . . . . . . . . . . . . . . . . . . . . . . . . . . . . . . . . . . . . . . . . . . . . . . . . . . . . . . . . . . . . . . . . . . . . . . . . . . . . . . . . . . . . . . . . . . . . . . . . . . 62Job State Change Events .... . . . . . . . . . . . . . . . . . . . . . . . . . . . . . . . . . . . . . . . . . . . . . . . . . . . . . . . . . . . . . . . . . . . . . . . . . . . . . . . . . . . . . . . . . . . . . . . 62
AWS Batch Jobs as CloudWatch Events Targets ... . . . . . . . . . . . . . . . . . . . . . . . . . . . . . . . . . . . . . . . . . . . . . . . . . . . . . . . . . . . . . . . . . . . . . . . . . 63Tutorial: Listening for AWS Batch CloudWatch Events .... . . . . . . . . . . . . . . . . . . . . . . . . . . . . . . . . . . . . . . . . . . . . . . . . . . . . . . . . . . . . . . . 65
Prerequisites ... . . . . . . . . . . . . . . . . . . . . . . . . . . . . . . . . . . . . . . . . . . . . . . . . . . . . . . . . . . . . . . . . . . . . . . . . . . . . . . . . . . . . . . . . . . . . . . . . . . . . . . . . . . . . . . . . . 65Step 1: Create the Lambda Function .... . . . . . . . . . . . . . . . . . . . . . . . . . . . . . . . . . . . . . . . . . . . . . . . . . . . . . . . . . . . . . . . . . . . . . . . . . . . . . . . 65Step 2: Register Event Rule .... . . . . . . . . . . . . . . . . . . . . . . . . . . . . . . . . . . . . . . . . . . . . . . . . . . . . . . . . . . . . . . . . . . . . . . . . . . . . . . . . . . . . . . . . . . . 65Step 3: Test Your Configuration .... . . . . . . . . . . . . . . . . . . . . . . . . . . . . . . . . . . . . . . . . . . . . . . . . . . . . . . . . . . . . . . . . . . . . . . . . . . . . . . . . . . . . . 66
Tutorial: Sending Amazon Simple Notification Service Alerts for Failed Job Events .... . . . . . . . . . . . . . . . . . . . . . . . . 66Prerequisites ... . . . . . . . . . . . . . . . . . . . . . . . . . . . . . . . . . . . . . . . . . . . . . . . . . . . . . . . . . . . . . . . . . . . . . . . . . . . . . . . . . . . . . . . . . . . . . . . . . . . . . . . . . . . . . . . . . 66Step 1: Create and Subscribe to an Amazon SNS Topic ... . . . . . . . . . . . . . . . . . . . . . . . . . . . . . . . . . . . . . . . . . . . . . . . . . . . . . . . 67Step 2: Register Event Rule .... . . . . . . . . . . . . . . . . . . . . . . . . . . . . . . . . . . . . . . . . . . . . . . . . . . . . . . . . . . . . . . . . . . . . . . . . . . . . . . . . . . . . . . . . . . . 67Step 3: Test Your Rule .... . . . . . . . . . . . . . . . . . . . . . . . . . . . . . . . . . . . . . . . . . . . . . . . . . . . . . . . . . . . . . . . . . . . . . . . . . . . . . . . . . . . . . . . . . . . . . . . . . . 67
CloudTrail .. . . . . . . . . . . . . . . . . . . . . . . . . . . . . . . . . . . . . . . . . . . . . . . . . . . . . . . . . . . . . . . . . . . . . . . . . . . . . . . . . . . . . . . . . . . . . . . . . . . . . . . . . . . . . . . . . . . . . . . . . . . . . . . . . . . . . . . 69AWS Batch Information in CloudTrail .. . . . . . . . . . . . . . . . . . . . . . . . . . . . . . . . . . . . . . . . . . . . . . . . . . . . . . . . . . . . . . . . . . . . . . . . . . . . . . . . . . . . . . . . . 69Understanding AWS Batch Log File Entries ... . . . . . . . . . . . . . . . . . . . . . . . . . . . . . . . . . . . . . . . . . . . . . . . . . . . . . . . . . . . . . . . . . . . . . . . . . . . . . . . 69
Tutorial: Creating a VPC .... . . . . . . . . . . . . . . . . . . . . . . . . . . . . . . . . . . . . . . . . . . . . . . . . . . . . . . . . . . . . . . . . . . . . . . . . . . . . . . . . . . . . . . . . . . . . . . . . . . . . . . . . . . . . . . . . 72Step 1: Create an Elastic IP Address for Your NAT Gateway .... . . . . . . . . . . . . . . . . . . . . . . . . . . . . . . . . . . . . . . . . . . . . . . . . . . . . . . . . 72Step 2: Run the VPC Wizard .... . . . . . . . . . . . . . . . . . . . . . . . . . . . . . . . . . . . . . . . . . . . . . . . . . . . . . . . . . . . . . . . . . . . . . . . . . . . . . . . . . . . . . . . . . . . . . . . . . . 72Step 3: Create Additional Subnets .... . . . . . . . . . . . . . . . . . . . . . . . . . . . . . . . . . . . . . . . . . . . . . . . . . . . . . . . . . . . . . . . . . . . . . . . . . . . . . . . . . . . . . . . . . . 73Next Steps .... . . . . . . . . . . . . . . . . . . . . . . . . . . . . . . . . . . . . . . . . . . . . . . . . . . . . . . . . . . . . . . . . . . . . . . . . . . . . . . . . . . . . . . . . . . . . . . . . . . . . . . . . . . . . . . . . . . . . . . . . . . . 73
Service Limits ... . . . . . . . . . . . . . . . . . . . . . . . . . . . . . . . . . . . . . . . . . . . . . . . . . . . . . . . . . . . . . . . . . . . . . . . . . . . . . . . . . . . . . . . . . . . . . . . . . . . . . . . . . . . . . . . . . . . . . . . . . . . . . . . 75Troubleshooting .... . . . . . . . . . . . . . . . . . . . . . . . . . . . . . . . . . . . . . . . . . . . . . . . . . . . . . . . . . . . . . . . . . . . . . . . . . . . . . . . . . . . . . . . . . . . . . . . . . . . . . . . . . . . . . . . . . . . . . . . . . . . 76
INVALID Compute Environment .... . . . . . . . . . . . . . . . . . . . . . . . . . . . . . . . . . . . . . . . . . . . . . . . . . . . . . . . . . . . . . . . . . . . . . . . . . . . . . . . . . . . . . . . . . . . . 76Incorrect Role Name or ARN .... . . . . . . . . . . . . . . . . . . . . . . . . . . . . . . . . . . . . . . . . . . . . . . . . . . . . . . . . . . . . . . . . . . . . . . . . . . . . . . . . . . . . . . . . . . 76Repairing an INVALID Compute Environment .... . . . . . . . . . . . . . . . . . . . . . . . . . . . . . . . . . . . . . . . . . . . . . . . . . . . . . . . . . . . . . . . . . . 77
Jobs Stuck in RUNNABLE Status .... . . . . . . . . . . . . . . . . . . . . . . . . . . . . . . . . . . . . . . . . . . . . . . . . . . . . . . . . . . . . . . . . . . . . . . . . . . . . . . . . . . . . . . . . . . . . . . 77Spot Instances Not Tagged on Creation .... . . . . . . . . . . . . . . . . . . . . . . . . . . . . . . . . . . . . . . . . . . . . . . . . . . . . . . . . . . . . . . . . . . . . . . . . . . . . . . . . . . . 77
iv

AWS Batch User Guide
Document History .... . . . . . . . . . . . . . . . . . . . . . . . . . . . . . . . . . . . . . . . . . . . . . . . . . . . . . . . . . . . . . . . . . . . . . . . . . . . . . . . . . . . . . . . . . . . . . . . . . . . . . . . . . . . . . . . . . . . . . . . . 79AWS Glossary .... . . . . . . . . . . . . . . . . . . . . . . . . . . . . . . . . . . . . . . . . . . . . . . . . . . . . . . . . . . . . . . . . . . . . . . . . . . . . . . . . . . . . . . . . . . . . . . . . . . . . . . . . . . . . . . . . . . . . . . . . . . . . . . 81
v
AWS Batch User GuideComponents of AWS Batch
What Is AWS Batch?AWS Batch enables you to run batch computing workloads on the AWS Cloud. Batch computing is acommon way for developers, scientists, and engineers to access large amounts of compute resources,and AWS Batch removes the undifferentiated heavy lifting of configuring and managing the requiredinfrastructure. AWS Batch is similar to traditional batch computing software. This service can efficientlyprovision resources in response to jobs submitted in order to eliminate capacity constraints, reducecompute costs, and deliver results quickly.
As a fully managed service, AWS Batch enables developers, scientists, and engineers to run batchcomputing workloads of any scale. AWS Batch automatically provisions compute resources and optimizesthe workload distribution based on the quantity and scale of the workloads. With AWS Batch, there isno need to install or manage batch computing software, which allows you to focus on analyzing resultsand solving problems. AWS Batch reduces operational complexities, saves time, and reduces costs, whichmakes it easy for developers, scientists, and engineers to run their batch jobs in the AWS Cloud.
Components of AWS BatchAWS Batch is a regional service that simplifies running batch jobs across multiple Availability Zoneswithin a region. You can create AWS Batch compute environments within a new or existing VPC. Aftera compute environment is up and associated with a job queue, you can define job definitions thatspecify which Docker container images to run your jobs. Container images are stored in and pulled fromcontainer registries, which may exist within or outside of your AWS infrastructure.
JobsA unit of work (such as a shell script, a Linux executable, or a Docker container image) that you submitto AWS Batch. It has a name, and runs as a containerized application on an Amazon EC2 instance inyour compute environment, using parameters that you specify in a job definition. Jobs can referenceother jobs by name or by ID, and can be dependent on the successful completion of other jobs. For moreinformation, see Jobs (p. 13).
Job DefinitionsA job definition specifies how jobs are to be run; you can think of it as a blueprint for the resourcesin your job. You can supply your job with an IAM role to provide programmatic access to other AWSresources, and you specify both memory and CPU requirements. The job definition can also controlcontainer properties, environment variables, and mount points for persistent storage. Many of thespecifications in a job definition can be overridden by specifying new values when submitting individualJobs. For more information, see Job Definitions (p. 22)
Job QueuesWhen you submit an AWS Batch job, you submit it to a particular job queue, where it resides until it isscheduled onto a compute environment. You associate one or more compute environments with a jobqueue, and you can assign priority values for these compute environments and even across job queuesthemselves. For example, you could have a high priority queue that you submit time-sensitive jobs to,and a low priority queue for jobs that can run anytime when compute resources are cheaper.
1
AWS Batch User GuideCompute Environment
Compute EnvironmentA compute environment is a set of managed or unmanaged compute resources that are used to runjobs. Managed compute environments allow you to specify desired instance types at several levelsof detail. You can set up compute environments that use a particular type of instance, a particularmodel such as c4.2xlarge or m4.10xlarge, or simply specify that you want to use the newestinstance types. You can also specify the minimum, desired, and maximum number of vCPUs for theenvironment, along with a percentage value for bids on the Spot Market and a target set of VPCsubnets. AWS Batch will efficiently launch, manage, and terminate EC2 instances as needed. You can alsomanage your own compute environments. In this case you are responsible for setting up and scaling theinstances in an Amazon ECS cluster that AWS Batch creates for you. For more information, see ComputeEnvironments (p. 39).
Getting StartedGet started with AWS Batch by creating a job definition, compute environment, and a job queue in theAWS Batch console.
The AWS Batch first-run wizard gives you the option of creating a compute environment and a job queueand submitting a sample hello world job. If you already have a Docker image you would like to launch inAWS Batch, you can create a job definition with that image and submit that to your queue instead. Formore information, see Getting Started with AWS Batch (p. 9).
2
AWS Batch User GuideSign Up for AWS
Setting Up with AWS BatchIf you've already signed up for Amazon Web Services (AWS) and have been using Amazon ElasticCompute Cloud (Amazon EC2) or Amazon Elastic Container Service (Amazon ECS), you are close to beingable to use AWS Batch. The setup process for these services is very similar, as AWS Batch uses AmazonECS container instances in its compute environments. To use the AWS CLI with AWS Batch , you must usea version of the AWS CLI that supports the latest AWS Batch features. If you do not see support for anAWS Batch feature in the AWS CLI, you should upgrade to the latest version. For more information, seehttp://aws.amazon.com/cli/.
NoteBecause AWS Batch uses components of Amazon EC2, you use the Amazon EC2 console formany of these steps.
Complete the following tasks to get set up for AWS Batch. If you have already completed any of thesesteps, you may skip them and move on to installing the AWS CLI.
1. Sign Up for AWS (p. 3)2. Create an IAM User (p. 3)3. Create IAM Roles for your Compute Environments and Container Instances (p. 5)4. Create a Key Pair (p. 5)5. Create a Virtual Private Cloud (p. 6)6. Create a Security Group (p. 7)7. Install the AWS CLI (p. 8)
Sign Up for AWSWhen you sign up for AWS, your AWS account is automatically signed up for all services, includingAmazon EC2 and AWS Batch. You are charged only for the services that you use.
If you have an AWS account already, skip to the next task. If you don't have an AWS account, use thefollowing procedure to create one.
To create an AWS account
1. Open https://aws.amazon.com/, and then choose Create an AWS Account.
NoteThis might be unavailable in your browser if you previously signed into the AWSManagement Console. In that case, choose Sign in to a different account, and then chooseCreate a new AWS account.
2. Follow the online instructions.
Part of the sign-up procedure involves receiving a phone call and entering a PIN using the phonekeypad.
Note your AWS account number, because you'll need it for the next task.
Create an IAM UserServices in AWS, such as Amazon EC2 and AWS Batch, require that you provide credentials when youaccess them, so that the service can determine whether you have permission to access its resources. The
3

AWS Batch User GuideCreate an IAM User
console requires your password. You can create access keys for your AWS account to access the commandline interface or API. However, we don't recommend that you access AWS using the credentials for yourAWS account; we recommend that you use AWS Identity and Access Management (IAM) instead. Createan IAM user, and then add the user to an IAM group with administrative permissions or and grant thisuser administrative permissions. You can then access AWS using a special URL and the credentials for theIAM user.
If you signed up for AWS but have not created an IAM user for yourself, you can create one using the IAMconsole.
To create an IAM user for yourself and add the user to an Administrators group
1. Use your AWS account email address and password to sign in as the AWS account root user to theIAM console at https://console.aws.amazon.com/iam/.
NoteWe strongly recommend that you adhere to the best practice of using the AdministratorIAM user below and securely lock away the root user credentials. Sign in as the root useronly to perform a few account and service management tasks.
2. In the navigation pane of the console, choose Users, and then choose Add user.3. For User name, type Administrator.4. Select the check box next to AWS Management Console access, select Custom password, and then
type the new user's password in the text box. You can optionally select Require password reset toforce the user to create a new password the next time the user signs in.
5. Choose Next: Permissions.6. On the Set permissions for user page, choose Add user to group.7. Choose Create group.8. In the Create group dialog box, type Administrators.9. For Filter, choose Job function.10. In the policy list, select the check box for AdministratorAccess. Then choose Create group.11. Back in the list of groups, select the check box for your new group. Choose Refresh if necessary to
see the group in the list.12. Choose Next: Review to see the list of group memberships to be added to the new user. When you
are ready to proceed, choose Create user.
You can use this same process to create more groups and users, and to give your users access to yourAWS account resources. To learn about using policies to restrict users' permissions to specific AWSresources, go to Access Management and Example Policies.
To sign in as this new IAM user, sign out of the AWS console, then use the following URL, whereyour_aws_account_id is your AWS account number without the hyphens (for example, if your AWSaccount number is 1234-5678-9012, your AWS account ID is 123456789012):
https://your_aws_account_id.signin.aws.amazon.com/console/
Enter the IAM user name and password that you just created. When you're signed in, the navigation bardisplays "your_user_name @ your_aws_account_id".
If you don't want the URL for your sign-in page to contain your AWS account ID, you can create anaccount alias. From the IAM dashboard, choose Create Account Alias and enter an alias, such as yourcompany name. To sign in after you create an account alias, use the following URL:
https://your_account_alias.signin.aws.amazon.com/console/
4
AWS Batch User GuideCreate IAM Roles for your Compute
Environments and Container Instances
To verify the sign-in link for IAM users for your account, open the IAM console and check under IAMusers sign-in link on the dashboard.
For more information about IAM, see the AWS Identity and Access Management User Guide.
Create IAM Roles for your Compute Environmentsand Container Instances
Your AWS Batch compute environments and container instances require AWS account credentials tomake calls to other AWS APIs on your behalf. You must create IAM roles that provides these credentialsto your compute environments and container instances and then associate that role with your computeenvironments.
NoteThe AWS Batch compute environment and container instance roles are automatically createdfor you in the console first-run experience, so if you intend to use the AWS Batch console,you can move ahead to the next section. If you plan to use the AWS CLI instead, complete theprocedures in AWS Batch Service IAM Role (p. 56) and Amazon ECS Instance Role (p. 58)before creating your first compute environment.
Create a Key PairAWS uses public-key cryptography to secure the login information for your instance. A Linux instance,such as an AWS Batch compute environment container instance, has no password to use for SSH access;you use a key pair to log in to your instance securely. You specify the name of the key pair when youcreate your compute environment, then provide the private key when you log in using SSH.
If you haven't created a key pair already, you can create one using the Amazon EC2 console. Note that ifyou plan to launch instances in multiple regions, you'll need to create a key pair in each region. For moreinformation about regions, see Regions and Availability Zones in the Amazon EC2 User Guide for LinuxInstances.
To create a key pair
1. Open the Amazon EC2 console at https://console.aws.amazon.com/ec2/.2. From the navigation bar, select a region for the key pair. You can select any region that's available to
you, regardless of your location: however, key pairs are specific to a region. For example, if you planto launch an instance in the US West (Oregon) region, you must create a key pair for the instance inthe same region.
3. In the navigation pane, choose Key Pairs, Create Key Pair.4. In the Create Key Pair dialog box, for Key pair name, enter a name for the new key pair , and choose
Create. Choose a name that is easy for you to remember, such as your IAM user name, followed by -key-pair, plus the region name. For example, me-key-pair-uswest2.
5. The private key file is automatically downloaded by your browser. The base file name is the nameyou specified as the name of your key pair, and the file name extension is .pem. Save the private keyfile in a safe place.
ImportantThis is the only chance for you to save the private key file. You'll need to provide the nameof your key pair when you launch an instance and the corresponding private key each timeyou connect to the instance.
6. If you will use an SSH client on a Mac or Linux computer to connect to your Linux instance, use thefollowing command to set the permissions of your private key file so that only you can read it.
5
AWS Batch User GuideCreate a Virtual Private Cloud
$ chmod 400 your_user_name-key-pair-region_name.pem
For more information, see Amazon EC2 Key Pairs in the Amazon EC2 User Guide for Linux Instances.
To connect to your instance using your key pair
To connect to your Linux instance from a computer running Mac or Linux, specify the .pem file to yourSSH client with the -i option and the path to your private key. To connect to your Linux instance from acomputer running Windows, you can use either MindTerm or PuTTY. If you plan to use PuTTY, you'll needto install it and use the following procedure to convert the .pem file to a .ppk file.
(Optional) To prepare to connect to a Linux instance from Windows using PuTTY
1. Download and install PuTTY from http://www.chiark.greenend.org.uk/~sgtatham/putty/. Be sureto install the entire suite.
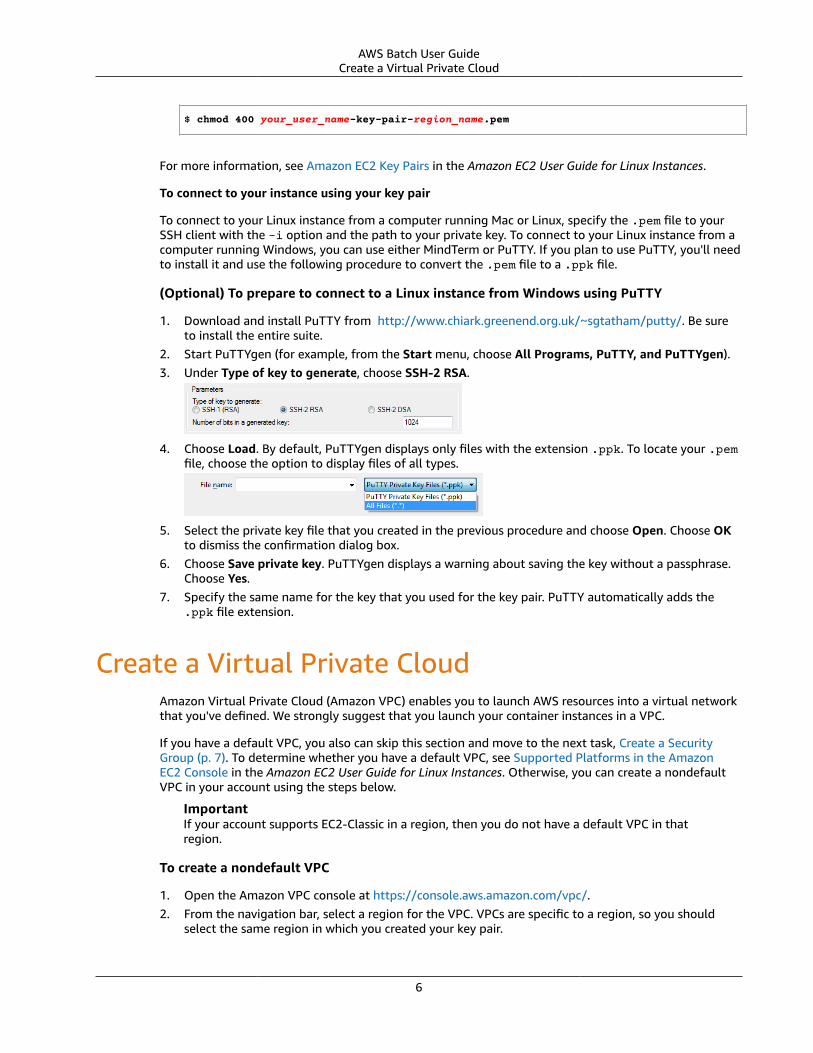
2. Start PuTTYgen (for example, from the Start menu, choose All Programs, PuTTY, and PuTTYgen).3. Under Type of key to generate, choose SSH-2 RSA.
4. Choose Load. By default, PuTTYgen displays only files with the extension .ppk. To locate your .pemfile, choose the option to display files of all types.
5. Select the private key file that you created in the previous procedure and choose Open. Choose OKto dismiss the confirmation dialog box.
6. Choose Save private key. PuTTYgen displays a warning about saving the key without a passphrase.Choose Yes.
7. Specify the same name for the key that you used for the key pair. PuTTY automatically adds the.ppk file extension.
Create a Virtual Private CloudAmazon Virtual Private Cloud (Amazon VPC) enables you to launch AWS resources into a virtual networkthat you've defined. We strongly suggest that you launch your container instances in a VPC.
If you have a default VPC, you also can skip this section and move to the next task, Create a SecurityGroup (p. 7). To determine whether you have a default VPC, see Supported Platforms in the AmazonEC2 Console in the Amazon EC2 User Guide for Linux Instances. Otherwise, you can create a nondefaultVPC in your account using the steps below.
ImportantIf your account supports EC2-Classic in a region, then you do not have a default VPC in thatregion.
To create a nondefault VPC
1. Open the Amazon VPC console at https://console.aws.amazon.com/vpc/.2. From the navigation bar, select a region for the VPC. VPCs are specific to a region, so you should
select the same region in which you created your key pair.
6
AWS Batch User GuideCreate a Security Group
3. On the VPC dashboard, choose Start VPC Wizard.4. On the Step 1: Select a VPC Configuration page, ensure that VPC with a Single Public Subnet is
selected, and choose Select.5. On the Step 2: VPC with a Single Public Subnet page, enter a friendly name for your VPC for VPC
name. Leave the other default configuration settings, and choose Create VPC. On the confirmationpage, choose OK.
For more information about Amazon VPC, see What is Amazon VPC? in the Amazon VPC User Guide.
Create a Security GroupSecurity groups act as a firewall for associated compute environment container instances, controllingboth inbound and outbound traffic at the container instance level. You can add rules to a security groupthat enable you to connect to your container instance from your IP address using SSH. You can also addrules that allow inbound and outbound HTTP and HTTPS access from anywhere. Add any rules to openports that are required by your tasks.
Note that if you plan to launch container instances in multiple regions, you need to create a securitygroup in each region. For more information, see Regions and Availability Zones in the Amazon EC2 UserGuide for Linux Instances.
NoteYou need the public IP address of your local computer, which you can get using a service.For example, we provide the following service: http://checkip.amazonaws.com/ or https://checkip.amazonaws.com/. To locate another service that provides your IP address, use thesearch phrase "what is my IP address." If you are connecting through an Internet service provider(ISP) or from behind a firewall without a static IP address, you need to find out the range of IPaddresses used by client computers.
To create a security group with least privilege
1. Open the Amazon EC2 console at https://console.aws.amazon.com/ec2/.2. From the navigation bar, select a region for the security group. Security groups are specific to a
region, so you should select the same region in which you created your key pair.3. In the navigation pane, choose Security Groups, Create Security Group.4. Enter a name for the new security group and a description. Choose a name that is easy for you
to remember, such as your IAM user name, followed by _SG_, plus the region name. For example,me_SG_useast1.
5. In the VPC list, ensure that your default VPC is selected; it's marked with an asterisk (*).
NoteIf your account supports EC2-Classic, select the VPC that you created in the previous task.
6. AWS Batch container instances do not require any inbound ports to be open. However, you mightwant to add an SSH rule so you can log into the container instance and examine the containers injobs with Docker commands. You can also add rules for HTTP if you want your container instance tohost a job that runs a web server. Complete the following steps to add these optional security grouprules.
On the Inbound tab, create the following rules and choose Create:
• Choose Add Rule. For Type, choose HTTP. For Source, choose Anywhere (0.0.0.0/0).• Choose Add Rule. For Type, choose SSH. For Source, ensure that Custom IP is selected, and
specify the public IP address of your computer or network in CIDR notation. To specify anindividual IP address in CIDR notation, add the routing prefix /32. For example, if your IP address
7
AWS Batch User GuideInstall the AWS CLI
is 203.0.113.25, specify 203.0.113.25/32. If your company allocates addresses from a range,specify the entire range, such as 203.0.113.0/24.
NoteFor security reasons, we don't recommend that you allow SSH access from all IP addresses(0.0.0.0/0) to your instance, except for testing purposes and only for a short time.
Install the AWS CLITo use the AWS CLI with AWS Batch, install the latest AWS CLI, version. For information about installingthe AWS CLI or upgrading it to the latest version, see Installing the AWS Command Line Interface in theAWS Command Line Interface User Guide.
8
AWS Batch User GuideStep 1: Define a Job
Getting Started with AWS BatchGet started with AWS Batch by creating a job definition, compute environment, and a job queue in theAWS Batch console.
The AWS Batch first-run wizard gives you the option of creating a compute environment and a job queueand submitting a sample hello world job. If you already have a Docker image you would like to launch inAWS Batch, you can create a job definition with that image and submit that to your queue instead.
ImportantBefore you begin, be sure that you've completed the steps in Setting Up with AWS Batch (p. 3)and that your AWS user has the required permissions (admin users do not need to worry aboutpermissions issues). For more information, see Creating Your First IAM Admin User and Group inthe IAM User Guide.
Step 1: Define a JobIn this section, you choose to define your job definition or move ahead to creating a computeenvironment and job queue without a job definition.
To configure job options
1. Open the AWS Batch console first-run wizard at https://console.aws.amazon.com/batch/home#/wizard.
2. To create an AWS Batch job definition, compute environment, and job queue and then submit yourjob, choose Using Amazon EC2. To only create the compute environment and job queue withoutsubmitting a job, choose No job submission.
3. If you chose to create a job definition, then complete the next four sections of the first-run wizard,Job run-time, Environment, Parameters, and Environment variables and then choose Next. Ifyou are not creating a job definition, choose Next and move on to Step 2: Configure the ComputeEnvironment and Job Queue (p. 10).
To specify job run time
1. If you are creating a new job definition, for Job definition name, specify a name for your jobdefinition.
2. (Optional) For Job role, you can specify an IAM role that provides the container in your job withpermissions to use the AWS APIs. This feature uses Amazon ECS IAM roles for task functionality. Formore information about this feature, including configuration prerequisites, see IAM Roles for Tasksin the Amazon Elastic Container Service Developer Guide.
NoteOnly roles that have the Amazon Elastic Container Service Task Role trust relationshipare shown here. For more information about creating an IAM role for your AWS Batch jobs,see Creating an IAM Role and Policy for your Tasks in the Amazon Elastic Container ServiceDeveloper Guide.
3. For Container image, choose the Docker image to use for your job. Images in the Docker Hubregistry are available by default. You can also specify other repositories with repository-url/image:tag. Up to 255 letters (uppercase and lowercase), numbers, hyphens, underscores,colons, periods, forward slashes, and number signs are allowed. This parameter maps to Image inthe Create a container section of the Docker Remote API and the IMAGE parameter of docker run.
• Images in Amazon ECR repositories use the full registry/repository:tag naming convention.For example, aws_account_id.dkr.ecr.region.amazonaws.com/my-web-app:latest
9
AWS Batch User GuideStep 2: Configure the Compute
Environment and Job Queue
• Images in official repositories on Docker Hub use a single name (for example, ubuntu or mongo).
• Images in other repositories on Docker Hub are qualified with an organization name (for example,amazon/amazon-ecs-agent).
• Images in other online repositories are qualified further by a domain name (for example,quay.io/assemblyline/ubuntu).
To specify resources for your environment
1. For Command, specify the command to pass to the container. This parameter maps to Cmd in theCreate a container section of the Docker Remote API and the COMMAND parameter to docker run.For more information about the Docker CMD parameter, go to https://docs.docker.com/engine/reference/builder/#cmd.
NoteYou can use parameter substitution default values and placeholders in your command. Formore information, see Parameters (p. 26).
2. For vCPUs, specify the number of vCPUs to reserve for the container. This parameter maps toCpuShares in the Create a container section of the Docker Remote API and the --cpu-sharesoption to docker run. Each vCPU is equivalent to 1,024 CPU shares.
3. For Memory, specify the hard limit (in MiB) of memory to present to the job's container. If yourcontainer attempts to exceed the memory specified here, the container is killed. This parametermaps to Memory in the Create a container section of the Docker Remote API and the --memoryoption to docker run.
4. For Job attempts, specify the maximum number of times to attempt your job (in case it fails). Formore information, see Automated Job Retries (p. 16).
Parameters
You can optionally specify parameter substitution default values and placeholders in your command. Formore information, see Parameters (p. 26).
1. For Key, specify the key for your parameter.
2. For Value, specify the value for your parameter.
To specify environment variables
You can optionally specify environment variables to pass to your job's container. This parameter maps toEnv in the Create a container section of the Docker Remote API and the --env option to docker run.
ImportantWe do not recommend using plaintext environment variables for sensitive information, such ascredential data.
1. For Key, specify the key for your environment variable.
2. For Value, specify the value for your environment variable.
Step 2: Configure the Compute Environment andJob Queue
A compute environment is a way to reference your compute resources (Amazon EC2 instances): thesettings and constraints that tell AWS Batch how instances should be configured and automatically
10
AWS Batch User GuideStep 2: Configure the Compute
Environment and Job Queue
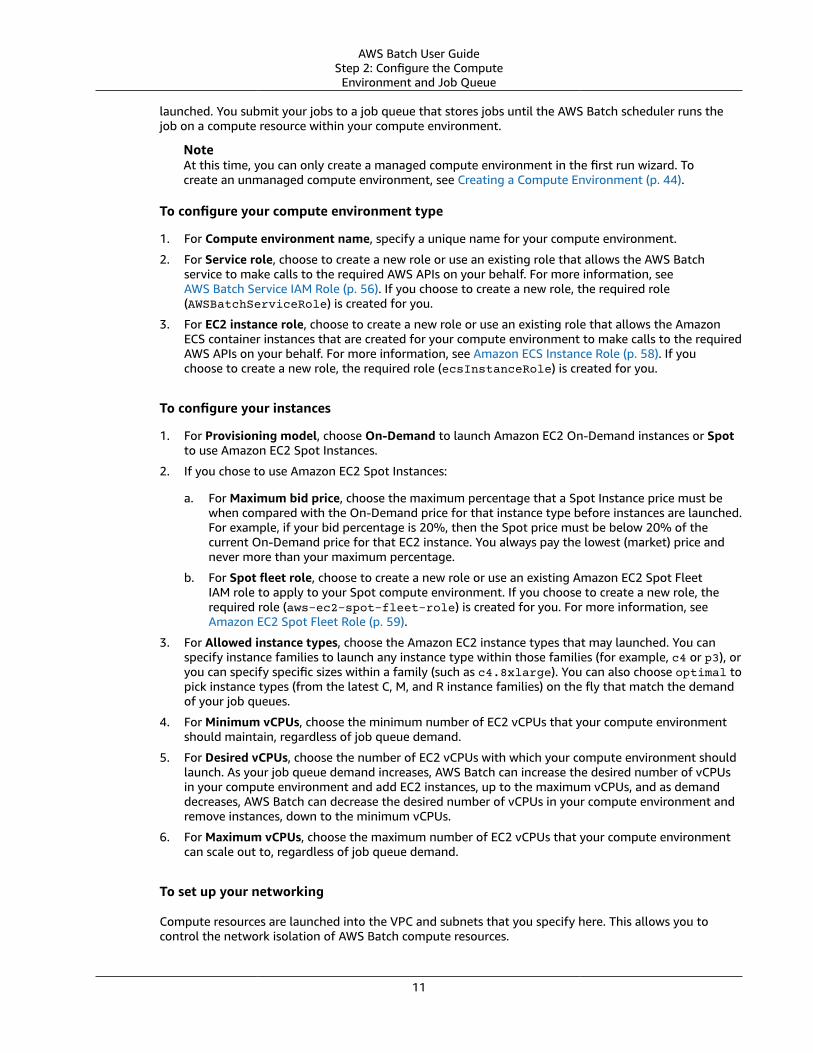
launched. You submit your jobs to a job queue that stores jobs until the AWS Batch scheduler runs thejob on a compute resource within your compute environment.
NoteAt this time, you can only create a managed compute environment in the first run wizard. Tocreate an unmanaged compute environment, see Creating a Compute Environment (p. 44).
To configure your compute environment type
1. For Compute environment name, specify a unique name for your compute environment.
2. For Service role, choose to create a new role or use an existing role that allows the AWS Batchservice to make calls to the required AWS APIs on your behalf. For more information, seeAWS Batch Service IAM Role (p. 56). If you choose to create a new role, the required role(AWSBatchServiceRole) is created for you.
3. For EC2 instance role, choose to create a new role or use an existing role that allows the AmazonECS container instances that are created for your compute environment to make calls to the requiredAWS APIs on your behalf. For more information, see Amazon ECS Instance Role (p. 58). If youchoose to create a new role, the required role (ecsInstanceRole) is created for you.
To configure your instances
1. For Provisioning model, choose On-Demand to launch Amazon EC2 On-Demand instances or Spotto use Amazon EC2 Spot Instances.
2. If you chose to use Amazon EC2 Spot Instances:
a. For Maximum bid price, choose the maximum percentage that a Spot Instance price must bewhen compared with the On-Demand price for that instance type before instances are launched.For example, if your bid percentage is 20%, then the Spot price must be below 20% of thecurrent On-Demand price for that EC2 instance. You always pay the lowest (market) price andnever more than your maximum percentage.
b. For Spot fleet role, choose to create a new role or use an existing Amazon EC2 Spot FleetIAM role to apply to your Spot compute environment. If you choose to create a new role, therequired role (aws-ec2-spot-fleet-role) is created for you. For more information, seeAmazon EC2 Spot Fleet Role (p. 59).
3. For Allowed instance types, choose the Amazon EC2 instance types that may launched. You canspecify instance families to launch any instance type within those families (for example, c4 or p3), oryou can specify specific sizes within a family (such as c4.8xlarge). You can also choose optimal topick instance types (from the latest C, M, and R instance families) on the fly that match the demandof your job queues.
4. For Minimum vCPUs, choose the minimum number of EC2 vCPUs that your compute environmentshould maintain, regardless of job queue demand.
5. For Desired vCPUs, choose the number of EC2 vCPUs with which your compute environment shouldlaunch. As your job queue demand increases, AWS Batch can increase the desired number of vCPUsin your compute environment and add EC2 instances, up to the maximum vCPUs, and as demanddecreases, AWS Batch can decrease the desired number of vCPUs in your compute environment andremove instances, down to the minimum vCPUs.
6. For Maximum vCPUs, choose the maximum number of EC2 vCPUs that your compute environmentcan scale out to, regardless of job queue demand.
To set up your networking
Compute resources are launched into the VPC and subnets that you specify here. This allows you tocontrol the network isolation of AWS Batch compute resources.
11
AWS Batch User GuideStep 2: Configure the Compute
Environment and Job Queue
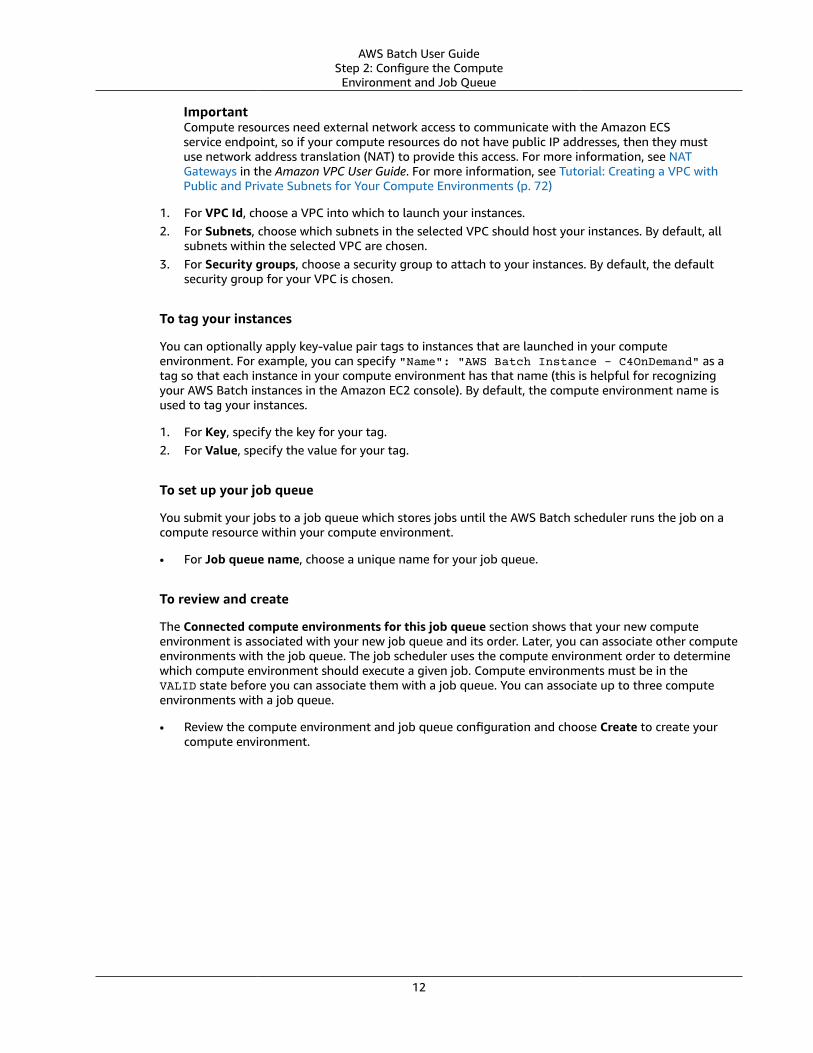
ImportantCompute resources need external network access to communicate with the Amazon ECSservice endpoint, so if your compute resources do not have public IP addresses, then they mustuse network address translation (NAT) to provide this access. For more information, see NATGateways in the Amazon VPC User Guide. For more information, see Tutorial: Creating a VPC withPublic and Private Subnets for Your Compute Environments (p. 72)
1. For VPC Id, choose a VPC into which to launch your instances.2. For Subnets, choose which subnets in the selected VPC should host your instances. By default, all
subnets within the selected VPC are chosen.3. For Security groups, choose a security group to attach to your instances. By default, the default
security group for your VPC is chosen.
To tag your instances
You can optionally apply key-value pair tags to instances that are launched in your computeenvironment. For example, you can specify "Name": "AWS Batch Instance - C4OnDemand" as atag so that each instance in your compute environment has that name (this is helpful for recognizingyour AWS Batch instances in the Amazon EC2 console). By default, the compute environment name isused to tag your instances.
1. For Key, specify the key for your tag.2. For Value, specify the value for your tag.
To set up your job queue
You submit your jobs to a job queue which stores jobs until the AWS Batch scheduler runs the job on acompute resource within your compute environment.
• For Job queue name, choose a unique name for your job queue.
To review and create
The Connected compute environments for this job queue section shows that your new computeenvironment is associated with your new job queue and its order. Later, you can associate other computeenvironments with the job queue. The job scheduler uses the compute environment order to determinewhich compute environment should execute a given job. Compute environments must be in theVALID state before you can associate them with a job queue. You can associate up to three computeenvironments with a job queue.
• Review the compute environment and job queue configuration and choose Create to create yourcompute environment.
12
AWS Batch User GuideSubmitting a Job
Jobs
Jobs are the unit of work executed by AWS Batch. Jobs can be executed as containerized applicationsrunning on Amazon ECS container instances in an ECS cluster.
Containerized jobs can reference a container image, command, and parameters. For more information,see Job Definition Parameters (p. 25).
You can submit a large number of independent, simple jobs.
Topics
• Submitting a Job (p. 13)
• Job States (p. 15)
• Automated Job Retries (p. 16)
• Job Dependencies (p. 16)
• Job Timeouts (p. 17)
• Array Jobs (p. 17)
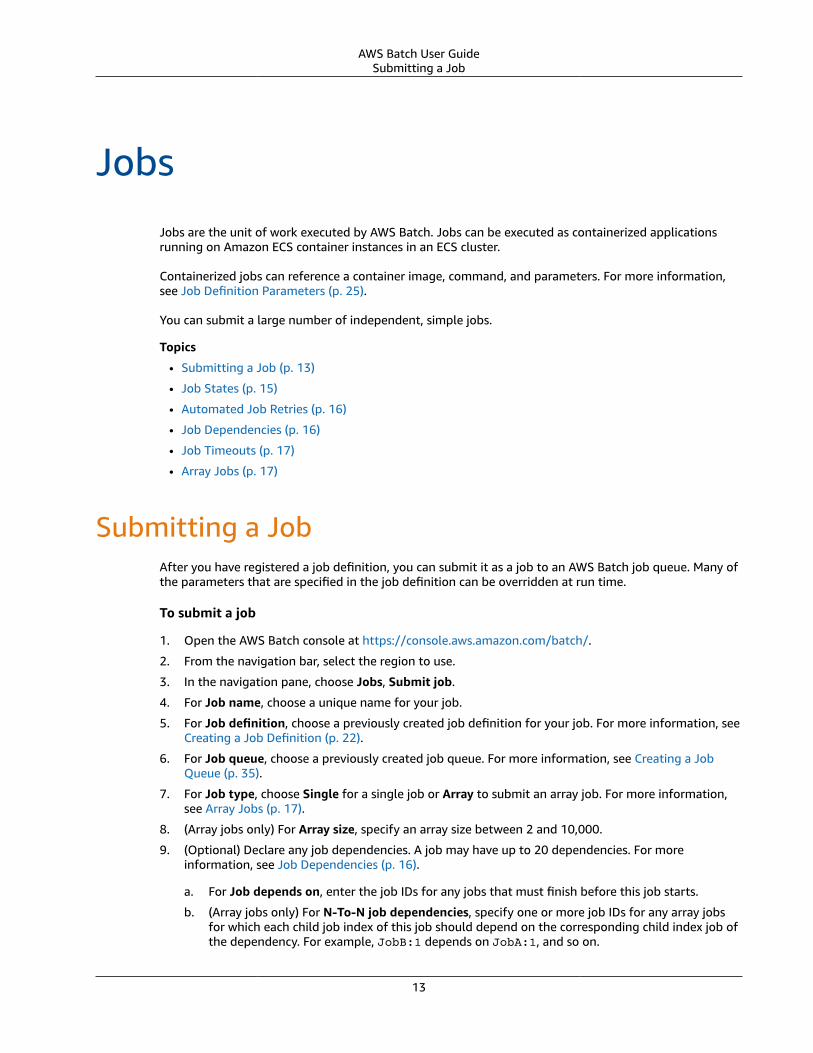
Submitting a JobAfter you have registered a job definition, you can submit it as a job to an AWS Batch job queue. Many ofthe parameters that are specified in the job definition can be overridden at run time.
To submit a job
1. Open the AWS Batch console at https://console.aws.amazon.com/batch/.
2. From the navigation bar, select the region to use.
3. In the navigation pane, choose Jobs, Submit job.
4. For Job name, choose a unique name for your job.
5. For Job definition, choose a previously created job definition for your job. For more information, seeCreating a Job Definition (p. 22).
6. For Job queue, choose a previously created job queue. For more information, see Creating a JobQueue (p. 35).
7. For Job type, choose Single for a single job or Array to submit an array job. For more information,see Array Jobs (p. 17).
8. (Array jobs only) For Array size, specify an array size between 2 and 10,000.
9. (Optional) Declare any job dependencies. A job may have up to 20 dependencies. For moreinformation, see Job Dependencies (p. 16).
a. For Job depends on, enter the job IDs for any jobs that must finish before this job starts.
b. (Array jobs only) For N-To-N job dependencies, specify one or more job IDs for any array jobsfor which each child job index of this job should depend on the corresponding child index job ofthe dependency. For example, JobB:1 depends on JobA:1, and so on.
13
AWS Batch User GuideSubmitting a Job
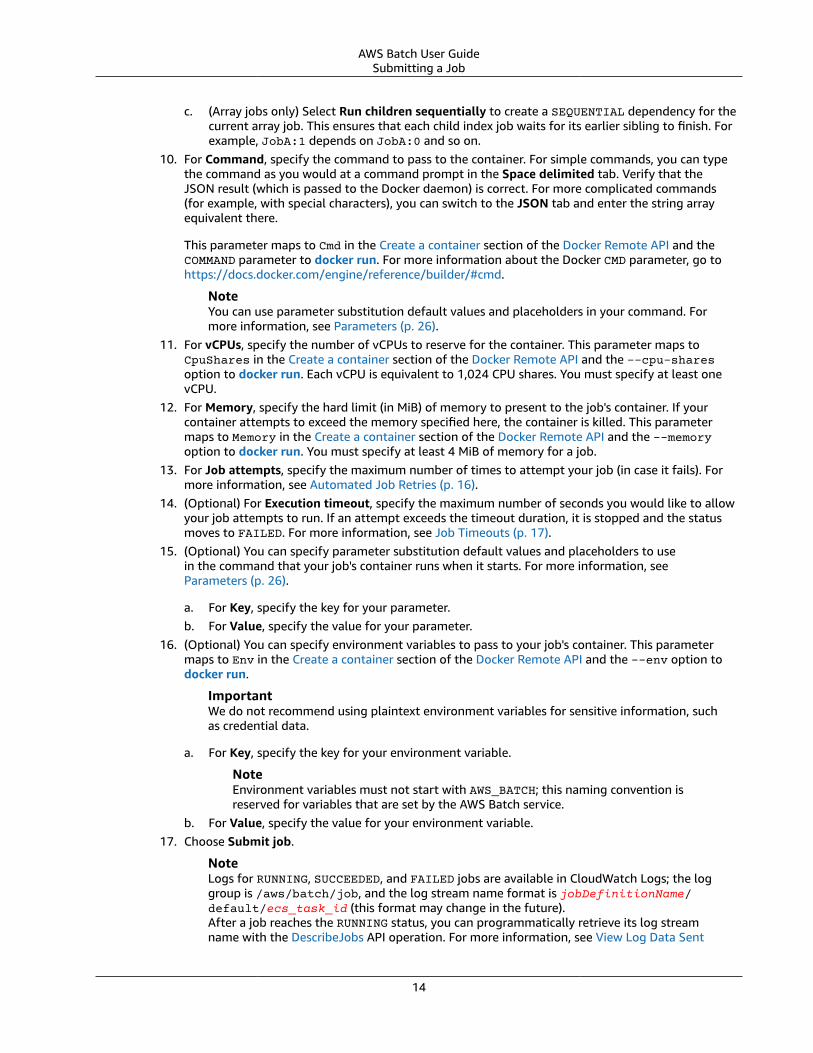
c. (Array jobs only) Select Run children sequentially to create a SEQUENTIAL dependency for thecurrent array job. This ensures that each child index job waits for its earlier sibling to finish. Forexample, JobA:1 depends on JobA:0 and so on.
10. For Command, specify the command to pass to the container. For simple commands, you can typethe command as you would at a command prompt in the Space delimited tab. Verify that theJSON result (which is passed to the Docker daemon) is correct. For more complicated commands(for example, with special characters), you can switch to the JSON tab and enter the string arrayequivalent there.
This parameter maps to Cmd in the Create a container section of the Docker Remote API and theCOMMAND parameter to docker run. For more information about the Docker CMD parameter, go tohttps://docs.docker.com/engine/reference/builder/#cmd.
NoteYou can use parameter substitution default values and placeholders in your command. Formore information, see Parameters (p. 26).
11. For vCPUs, specify the number of vCPUs to reserve for the container. This parameter maps toCpuShares in the Create a container section of the Docker Remote API and the --cpu-sharesoption to docker run. Each vCPU is equivalent to 1,024 CPU shares. You must specify at least onevCPU.
12. For Memory, specify the hard limit (in MiB) of memory to present to the job's container. If yourcontainer attempts to exceed the memory specified here, the container is killed. This parametermaps to Memory in the Create a container section of the Docker Remote API and the --memoryoption to docker run. You must specify at least 4 MiB of memory for a job.
13. For Job attempts, specify the maximum number of times to attempt your job (in case it fails). Formore information, see Automated Job Retries (p. 16).
14. (Optional) For Execution timeout, specify the maximum number of seconds you would like to allowyour job attempts to run. If an attempt exceeds the timeout duration, it is stopped and the statusmoves to FAILED. For more information, see Job Timeouts (p. 17).
15. (Optional) You can specify parameter substitution default values and placeholders to usein the command that your job's container runs when it starts. For more information, seeParameters (p. 26).
a. For Key, specify the key for your parameter.b. For Value, specify the value for your parameter.
16. (Optional) You can specify environment variables to pass to your job's container. This parametermaps to Env in the Create a container section of the Docker Remote API and the --env option todocker run.
ImportantWe do not recommend using plaintext environment variables for sensitive information, suchas credential data.
a. For Key, specify the key for your environment variable.
NoteEnvironment variables must not start with AWS_BATCH; this naming convention isreserved for variables that are set by the AWS Batch service.
b. For Value, specify the value for your environment variable.17. Choose Submit job.
NoteLogs for RUNNING, SUCCEEDED, and FAILED jobs are available in CloudWatch Logs; the loggroup is /aws/batch/job, and the log stream name format is jobDefinitionName/default/ecs_task_id (this format may change in the future).After a job reaches the RUNNING status, you can programmatically retrieve its log streamname with the DescribeJobs API operation. For more information, see View Log Data Sent
14
AWS Batch User GuideJob States
to CloudWatch Logs in the Amazon CloudWatch Logs User Guide. By default, these logs areset to never expire, but you can modify the retention period. For more information, seeChange Log Data Retention in CloudWatch Logs in the Amazon CloudWatch Logs User Guide.
Job StatesWhen you submit a job to an AWS Batch job queue, the job enters the SUBMITTED state. It then passesthrough the following states until it succeeds (exits with code 0) or fails (exits with a non-zero code). AWSBatch jobs can have the following states:
SUBMITTED
A job that has been submitted to the queue, and has yet been evaluated by the scheduler. Thescheduler evaluates the job to determine if it has any outstanding dependencies on the successfulcompletion of any other jobs. If there are dependencies, the job is moved to PENDING. If there are nodependencies, the job is moved to RUNNABLE.
PENDING
A job that resides in the queue and is not yet able to run due to a dependency on another job orresource. After the dependencies are satisfied, the job is moved to RUNNABLE.
RUNNABLE
A job that resides in the queue, has no outstanding dependencies, and is therefore ready to bescheduled to a host. Jobs in this state are started as soon as sufficient resources are available in oneof the compute environments that are mapped to the job’s queue. However, jobs can remain in thisstate indefinitely when sufficient resources are unavailable.
STARTING
These jobs have been scheduled to a host and the relevant container initiation operations areunderway. After the container image is pulled and the container is up and running, the jobtransitions to RUNNING.
RUNNING
The job is running as a container job on an Amazon ECS container instance within a computeenvironment. When the job's container exits, the process exit code determines whether the jobsucceeded or failed. An exit code of 0 indicates success, and any non-zero exit code indicates failure.If the job associated with a failed attempt has any remaining attempts left in its optional retrystrategy configuration, the job is moved to RUNNABLE again. For more information, see AutomatedJob Retries (p. 16).
NoteLogs for RUNNING jobs are available in CloudWatch Logs; the log group is /aws/batch/job, and the log stream name format is jobDefinitionName/default/ecs_task_id(this format may change in the future).After a job reaches the RUNNING status, you can programmatically retrieve its log streamname with the DescribeJobs API operation. For more information, see View Log Data Sentto CloudWatch Logs in the Amazon CloudWatch Logs User Guide. By default, these logs areset to never expire, but you can modify the retention period. For more information, seeChange Log Data Retention in CloudWatch Logs in the Amazon CloudWatch Logs User Guide.
SUCCEEDED
The job has successfully completed with an exit code of 0. The job state for SUCCEEDED jobs ispersisted in AWS Batch for 24 hours.
NoteLogs for SUCCEEDED jobs are available in CloudWatch Logs; the log group is /aws/batch/job, and the log stream name format is jobDefinitionName/default/ecs_task_id(this format may change in the future).
15
AWS Batch User GuideAutomated Job Retries
After a job reaches the RUNNING status, you can programmatically retrieve its log streamname with the DescribeJobs API operation. For more information, see View Log Data Sentto CloudWatch Logs in the Amazon CloudWatch Logs User Guide. By default, these logs areset to never expire, but you can modify the retention period. For more information, seeChange Log Data Retention in CloudWatch Logs in the Amazon CloudWatch Logs User Guide.
FAILED
The job has failed all available attempts. The job state for FAILED jobs is persisted in AWS Batch for24 hours.
NoteLogs for FAILED jobs are available in CloudWatch Logs; the log group is /aws/batch/job,and the log stream name format is jobDefinitionName/default/ecs_task_id (thisformat may change in the future).After a job reaches the RUNNING status, you can programmatically retrieve its log streamwith the DescribeJobs API operation. For more information, see View Log Data Sent toCloudWatch Logs in the Amazon CloudWatch Logs User Guide. By default, these logs are setto never expire, but you can modify the retention period. For more information, see ChangeLog Data Retention in CloudWatch Logs in the Amazon CloudWatch Logs User Guide.
Automated Job RetriesYou can apply a retry strategy to your jobs and job definitions that allows your jobs to be automaticallyretried if they fail. Possible failure scenarios include:
• Any non-zero exit code from a container job• Amazon EC2 instance failure or termination• Internal AWS service error or outage
When a job is submitted to a job queue and placed into the RUNNING state, that is considered anattempt. By default, each job is given one attempt to move to either the SUCCEEDED or FAILED jobstate. However, both the job definition and the job submission workflows allow you to specify a retrystrategy with between 1 and 10 attempts. For more information, see Retry Strategy (p. 27).
At runtime, the AWS_BATCH_JOB_ATTEMPT environment variable is set to the container's correspondingjob attempt number. The first attempt is numbered 1, and subsequent attempts are in ascending order(2, 3, 4, and so on).
If a job attempt fails for any reason, and the number of attempts specified in the retry configuration isgreater than the AWS_BATCH_JOB_ATTEMPT number, then the job is placed back in the RUNNABLE stateagain. For more information about the various job states, see Job States (p. 15).
NoteJobs that have been cancelled or terminated are not retried. Also, jobs that fail due to an invalidjob definition are not retried.
For more information, see Creating a Job Definition (p. 22) and Submitting a Job (p. 13).
Job DependenciesWhen you submit an AWS Batch job, you can specify the job IDs on which the job will depend. Whenyou do so, the AWS Batch scheduler ensures that your job is run only after the specified dependencieshave successfully completed. After they succeed, the dependent job transitions from PENDING to
16
AWS Batch User GuideJob Timeouts
RUNNABLE and then to STARTING and RUNNING. If any of the job dependencies fail, the dependent jobautomatically transitions from PENDING to FAILED.
For example, Job A can express a dependency on up to 20 other jobs that must succeed before it can run.You can then submit additional jobs that have a dependency on Job A and up to 19 other jobs.
For array jobs, you can specify a SEQUENTIAL type dependency without specifying a job ID so thateach child array job completes sequentially, starting at index 0. You can also specify an N_TO_N typedependency with a job ID so that each index child of this job must wait for the corresponding index childof each dependency to complete before it can begin. For more information, see Array Jobs (p. 17).
To submit an AWS Batch job with dependencies, see Submitting a Job (p. 13).
Job TimeoutsYou can configure a timeout duration for your jobs so that if a job runs longer than that, AWS Batchterminates the job. For example, if you have a job that you know should only take 15 minutes tocomplete, but sometimes your application gets stuck in a loop and runs forever, you can set a timeout of30 minutes to terminate the stuck job.
You specify an attemptDurationSeconds parameter, which must be at least 60 seconds, either in yourjob definition, or when you submit the job. When this number of seconds has passed following the jobattempt's startedAt timestamp, AWS Batch terminates the job. On the compute resource, your job'scontainer receives a SIGTERM signal to give your application a chance to shut down gracefully; if thecontainer is still running after 30 seconds, a SIGKILL signal is sent to forcefully shut down the container.
Timeout terminations are handled on a best-effort basis, and you should not expect your timeouttermination to happen exactly when the job attempt times out (it may take a few seconds longer). If yourapplication requires precise timeout execution, you should implement this logic within the application.If you have a large number of jobs timing out concurrently, the timeout terminations behave as a first in,first out queue, where jobs are terminated in batches.
If a job is terminated for exceeding the timeout duration, it is not retried. If a job attempt fails on itsown, then it can retry if retries are enabled, and the timeout countdown is started over for the newattempt.
For array jobs, child jobs have the same timeout configuration as the parent job.
To submit an AWS Batch job with a timeout configuration, see Submitting a Job (p. 13).
Array JobsAn array job is a job that shares common parameters, such as the job definition, vCPUs, and memory. Itruns as a collection of related, yet separate, basic jobs that may be distributed across multiple hosts andmay run concurrently. Array jobs are the most efficient way to execute embarrassingly parallel jobs suchas Monte Carlo simulations, parametric sweeps, or large rendering jobs.
AWS Batch array jobs are submitted just like regular jobs. However, you specify an array size (between 2and 10,000) to define how many child jobs should run in the array. If you submit a job with an array sizeof 1000, a single job runs and spawns 1000 child jobs. The array job is a reference or pointer to manageall the child jobs. This allows you to submit large workloads with a single query.
When you submit an array job, the parent array job gets a normal AWS Batch job ID. Each child job hasthe same base ID, but the array index for the child job is appended to the end of the parent ID, such asexample_job_ID:0 for the first child job of the array.
17
AWS Batch User GuideArray Jobs
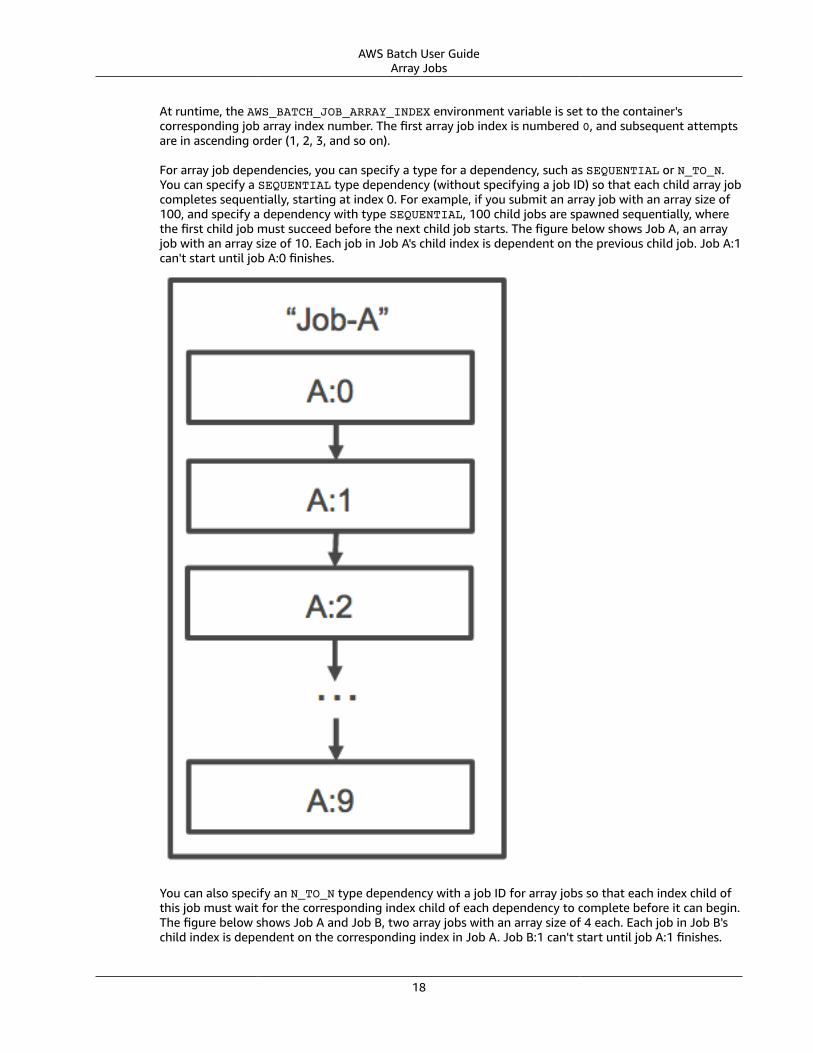
At runtime, the AWS_BATCH_JOB_ARRAY_INDEX environment variable is set to the container'scorresponding job array index number. The first array job index is numbered 0, and subsequent attemptsare in ascending order (1, 2, 3, and so on).
For array job dependencies, you can specify a type for a dependency, such as SEQUENTIAL or N_TO_N.You can specify a SEQUENTIAL type dependency (without specifying a job ID) so that each child array jobcompletes sequentially, starting at index 0. For example, if you submit an array job with an array size of100, and specify a dependency with type SEQUENTIAL, 100 child jobs are spawned sequentially, wherethe first child job must succeed before the next child job starts. The figure below shows Job A, an arrayjob with an array size of 10. Each job in Job A's child index is dependent on the previous child job. Job A:1can't start until job A:0 finishes.
You can also specify an N_TO_N type dependency with a job ID for array jobs so that each index child ofthis job must wait for the corresponding index child of each dependency to complete before it can begin.The figure below shows Job A and Job B, two array jobs with an array size of 4 each. Each job in Job B'schild index is dependent on the corresponding index in Job A. Job B:1 can't start until job A:1 finishes.
18

AWS Batch User GuideExample Array Job Workflow
If you cancel or terminate a parent array job, all of the child jobs are cancelled or terminated with it. Youcan cancel or terminate individual child jobs (which moves them to the FAILED status) without affectingthe other child jobs. However, if a child array job fails (on its own or by cancelling/terminating manually),the parent job also fails.
Example Array Job WorkflowA common workflow for AWS Batch customers is to run a prerequisite setup job, run a series ofcommands against a large number of input tasks, and then conclude with a job that aggregates resultsand writes summary data to Amazon S3, DynamoDB, Amazon Redshift, or Aurora.
For example:
• JobA: A standard, non-array job that performs a quick listing and metadata validation of objects in anAmazon S3 bucket, BucketA. The SubmitJob JSON syntax is shown below.
19
AWS Batch User GuideExample Array Job Workflow
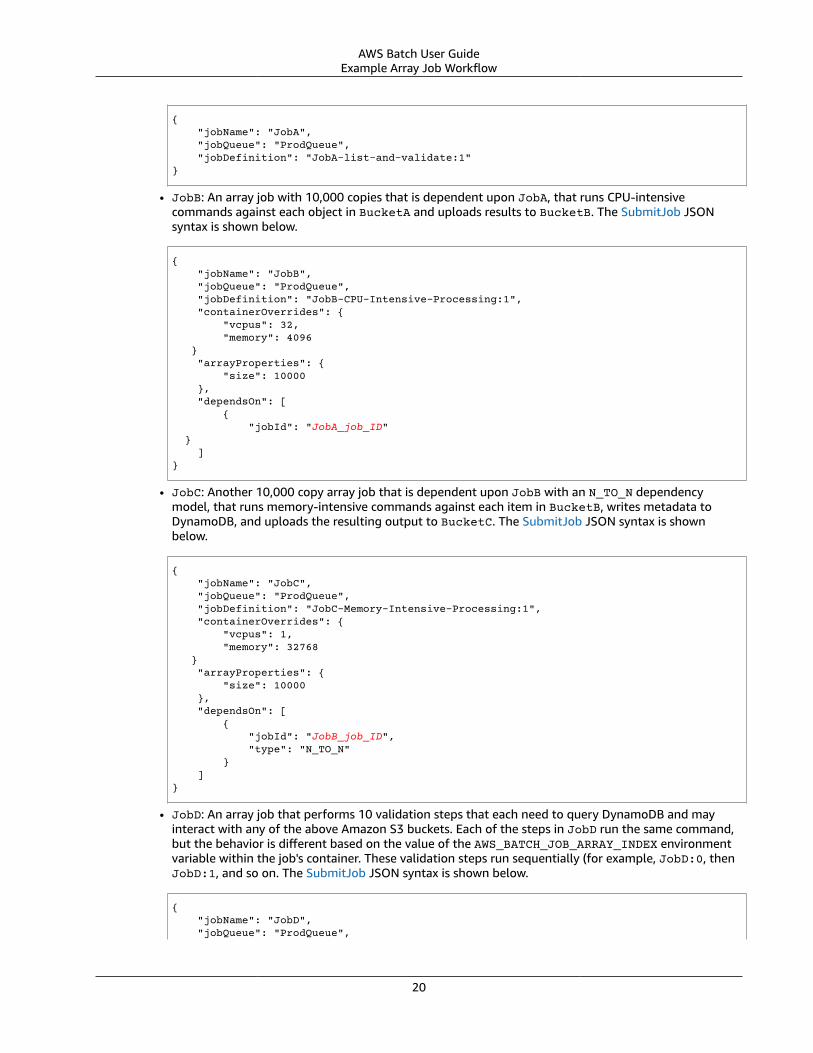
{ "jobName": "JobA", "jobQueue": "ProdQueue", "jobDefinition": "JobA-list-and-validate:1"}
• JobB: An array job with 10,000 copies that is dependent upon JobA, that runs CPU-intensivecommands against each object in BucketA and uploads results to BucketB. The SubmitJob JSONsyntax is shown below.
{ "jobName": "JobB", "jobQueue": "ProdQueue", "jobDefinition": "JobB-CPU-Intensive-Processing:1", "containerOverrides": { "vcpus": 32, "memory": 4096 } "arrayProperties": { "size": 10000 }, "dependsOn": [ { "jobId": "JobA_job_ID" } ]}
• JobC: Another 10,000 copy array job that is dependent upon JobB with an N_TO_N dependencymodel, that runs memory-intensive commands against each item in BucketB, writes metadata toDynamoDB, and uploads the resulting output to BucketC. The SubmitJob JSON syntax is shownbelow.
{ "jobName": "JobC", "jobQueue": "ProdQueue", "jobDefinition": "JobC-Memory-Intensive-Processing:1", "containerOverrides": { "vcpus": 1, "memory": 32768 } "arrayProperties": { "size": 10000 }, "dependsOn": [ { "jobId": "JobB_job_ID", "type": "N_TO_N" } ]}
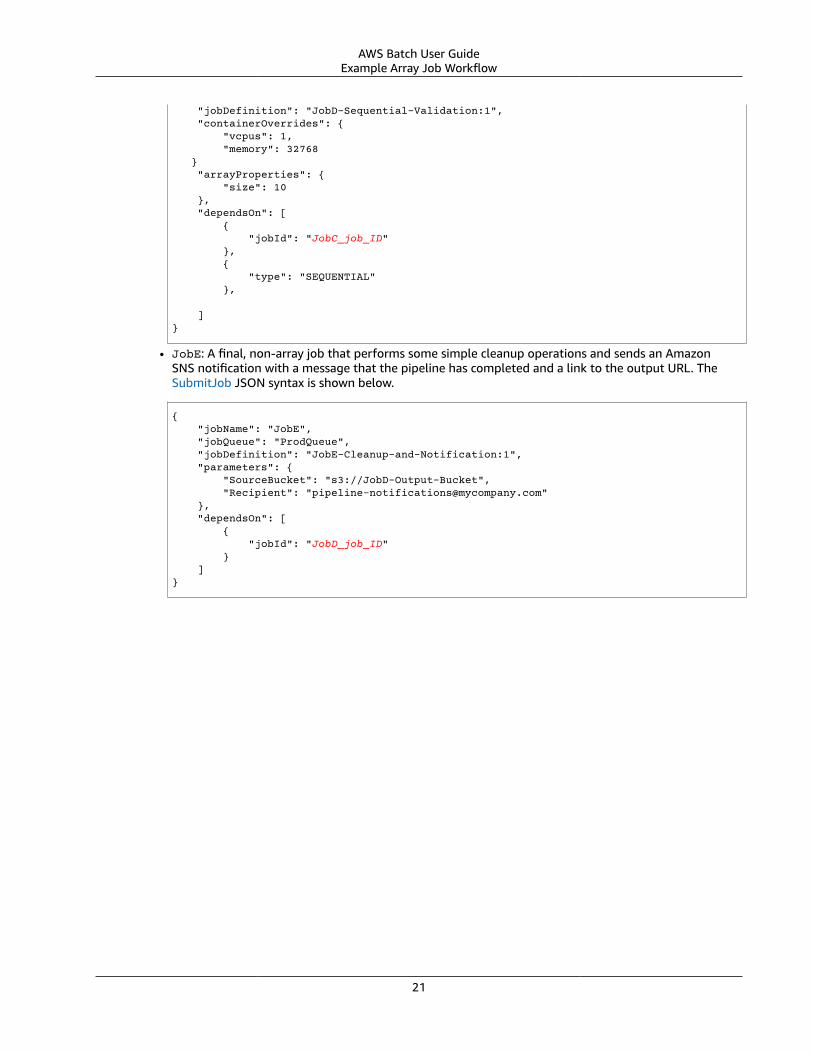
• JobD: An array job that performs 10 validation steps that each need to query DynamoDB and mayinteract with any of the above Amazon S3 buckets. Each of the steps in JobD run the same command,but the behavior is different based on the value of the AWS_BATCH_JOB_ARRAY_INDEX environmentvariable within the job's container. These validation steps run sequentially (for example, JobD:0, thenJobD:1, and so on. The SubmitJob JSON syntax is shown below.
{ "jobName": "JobD", "jobQueue": "ProdQueue",
20
AWS Batch User GuideExample Array Job Workflow
"jobDefinition": "JobD-Sequential-Validation:1", "containerOverrides": { "vcpus": 1, "memory": 32768 } "arrayProperties": { "size": 10 }, "dependsOn": [ { "jobId": "JobC_job_ID" }, { "type": "SEQUENTIAL" }, ]}
• JobE: A final, non-array job that performs some simple cleanup operations and sends an AmazonSNS notification with a message that the pipeline has completed and a link to the output URL. TheSubmitJob JSON syntax is shown below.
{ "jobName": "JobE", "jobQueue": "ProdQueue", "jobDefinition": "JobE-Cleanup-and-Notification:1", "parameters": { "SourceBucket": "s3://JobD-Output-Bucket", "Recipient": "[email protected]" }, "dependsOn": [ { "jobId": "JobD_job_ID" } ]}
21
AWS Batch User GuideCreating a Job Definition
Job Definitions
AWS Batch job definitions specify how jobs are to be run. While each job must reference a job definition,many of the parameters that are specified in the job definition can be overridden at run time.
Contents
• Creating a Job Definition (p. 22)
• Job Definition Parameters (p. 25)
• Example Job Definitions (p. 32)
Some of the attributes specified in a job definition include:
• Which Docker image to use with the container in your job
• How many vCPUs and how much memory to use with the container
• The command the container should run when it is started
• What (if any) environment variables should be passed to the container when it starts
• Any data volumes that should be used with the container
• What (if any) IAM role your job should use for AWS permissions
For a complete description of the parameters available in a job definition, see Job DefinitionParameters (p. 25).
Creating a Job DefinitionBefore you can run jobs in AWS Batch, you must create a job definition.
To create a new job definition
1. Open the AWS Batch console at https://console.aws.amazon.com/batch/.
2. From the navigation bar, select the region to use.
3. In the navigation pane, choose Job definitions, Create.
4. For Job definition name, enter a unique name for your job definition. Up to 128 letters (uppercaseand lowercase), numbers, hyphens, and underscores are allowed.
5. (Optional) For Job role, you can specify an IAM role that provides the container in your job withpermissions to use the AWS APIs. This feature uses Amazon ECS IAM roles for task functionality.For more information, including configuration prerequisites, see IAM Roles for Tasks in the AmazonElastic Container Service Developer Guide.
NoteOnly roles that have the Amazon Elastic Container Service Task Role trust relationshipare shown here. For more information about creating an IAM role for your AWS Batch jobs,see Creating an IAM Role and Policy for your Tasks in the Amazon Elastic Container ServiceDeveloper Guide.
22
AWS Batch User GuideCreating a Job Definition
6. For Container image, choose the Docker image to use for your job. Images in the Docker Hubregistry are available by default. You can also specify other repositories with repository-url/image:tag. Up to 255 letters (uppercase and lowercase), numbers, hyphens, underscores,colons, periods, forward slashes, and number signs are allowed. This parameter maps to Image inthe Create a container section of the Docker Remote API and the IMAGE parameter of docker run.
• Images in Amazon ECR repositories use the full registry/repository:tag naming convention.For example, aws_account_id.dkr.ecr.region.amazonaws.com/my-web-app:latest
• Images in official repositories on Docker Hub use a single name (for example, ubuntu or mongo).
• Images in other repositories on Docker Hub are qualified with an organization name (for example,amazon/amazon-ecs-agent).
• Images in other online repositories are qualified further by a domain name (for example,quay.io/assemblyline/ubuntu).
7. For Command, specify the command to pass to the container. For simple commands, you can typethe command as you would at a command prompt in the Space delimited tab. Then, verify that theJSON result (which is passed to the Docker daemon) is correct. For more complicated commands(for example, with special characters), you can switch to the JSON tab and enter the string arrayequivalent there.
This parameter maps to Cmd in the Create a container section of the Docker Remote API and theCOMMAND parameter to docker run. For more information about the Docker CMD parameter, go tohttps://docs.docker.com/engine/reference/builder/#cmd.
NoteYou can use default values for parameter substitution as well as placeholders in yourcommand. For more information, see Parameters (p. 26).
8. For vCPUs, specify the number of vCPUs to reserve for the container. This parameter maps toCpuShares in the Create a container section of the Docker Remote API and the --cpu-sharesoption to docker run. Each vCPU is equivalent to 1,024 CPU shares. You must specify at least 1vCPU.
9. For Memory, specify the hard limit (in MiB) of memory to present to the job's container. If yourcontainer attempts to exceed the memory specified here, the container is killed. This parametermaps to Memory in the Create a container section of the Docker Remote API and the --memoryoption to docker run. You must specify at least 4 MiB of memory for a job.
NoteIf you are trying to maximize your resource utilization by providing your jobs as muchmemory as possible for a particular instance type, see Compute Resource MemoryManagement (p. 51).
10. For Job attempts, specify the maximum number of times to attempt your job (in case it fails). Formore information, see Automated Job Retries (p. 16).
11. (Optional) For Execution timeout, specify the maximum number of seconds you would like to allowyour job attempts to run. If an attempt exceeds the timeout duration, it is stopped and the statusmoves to FAILED. For more information, see Job Timeouts (p. 17).
12. For Ulimits, configure any ulimit values to use for your job's container.
a. For Limit name, choose a ulimit to apply.
b. For Soft limit, choose the soft limit to apply for the ulimit type.
c. For Hard limit, choose the hard limit to apply for the ulimit type.
13. (Optional) You can specify default values for parameter substitution as well as placeholders touse in the command that your job's container runs when it starts. For more information, seeParameters (p. 26).
a. For Key, specify the key for your parameter.
b. For Value, specify the value for your parameter.
23

AWS Batch User GuideJob Definition Template
14. (Optional) You can specify environment variables to pass to your job's container. This parametermaps to Env in the Create a container section of the Docker Remote API and the --env option todocker run.
ImportantWe do not recommend using plaintext environment variables for sensitive information, suchas credential data.
a. For Key, specify the key for your environment variable.
NoteEnvironment variables must not start with AWS_BATCH; this naming convention isreserved for variables that are set by the AWS Batch service.
b. For Value, specify the value for your environment variable.
15. (Optional) In the Security section, you can configure security options for your job's container.
a. To give your job's container elevated privileges on the host instance (similar to the root user),select Privileged. This parameter maps to Privileged in the Create a container section of theDocker Remote API and the --privileged option to docker run.
b. For User, enter the user name to use inside the container. This parameter maps to User in theCreate a container section of the Docker Remote API and the --user option to docker run.
16. (Optional) You can specify data volumes for your job to pass to your job's container.
a. For Name, enter a name for your volume. Up to 255 letters (uppercase and lowercase),numbers, hyphens, and underscores are allowed.
b. (Optional) For Source Path, enter the path on the host instance to present to the container. Ifyou leave this field empty, then the Docker daemon assigns a host path for you. If you specifya source path, then the data volume persists at the specified location on the host containerinstance until you delete it manually. If the source path does not exist on the host containerinstance, the Docker daemon creates it. If the location does exist, the contents of the sourcepath folder are exported to the container.
17. (Optional) Specify mount points for your job's container to access.
a. For Container path, enter the path on the container at which to mount the host volume.
b. For Source volume, enter the name of the volume to mount.
c. To make the volume read-only for the container, choose Read-only.
18. Choose Create job definition.
Job Definition TemplateAn empty job definition template is shown below. You can use this template to create your job definition,which can then be saved to a file and used with the AWS CLI --cli-input-json option. For moreinformation about these parameters, see Job Definition Parameters (p. 25).
{ "jobDefinitionName": "", "type": "container", "parameters": { "KeyName": "" }, "containerProperties": { "image": "", "vcpus": 0, "memory": 0, "command": [ ""
24
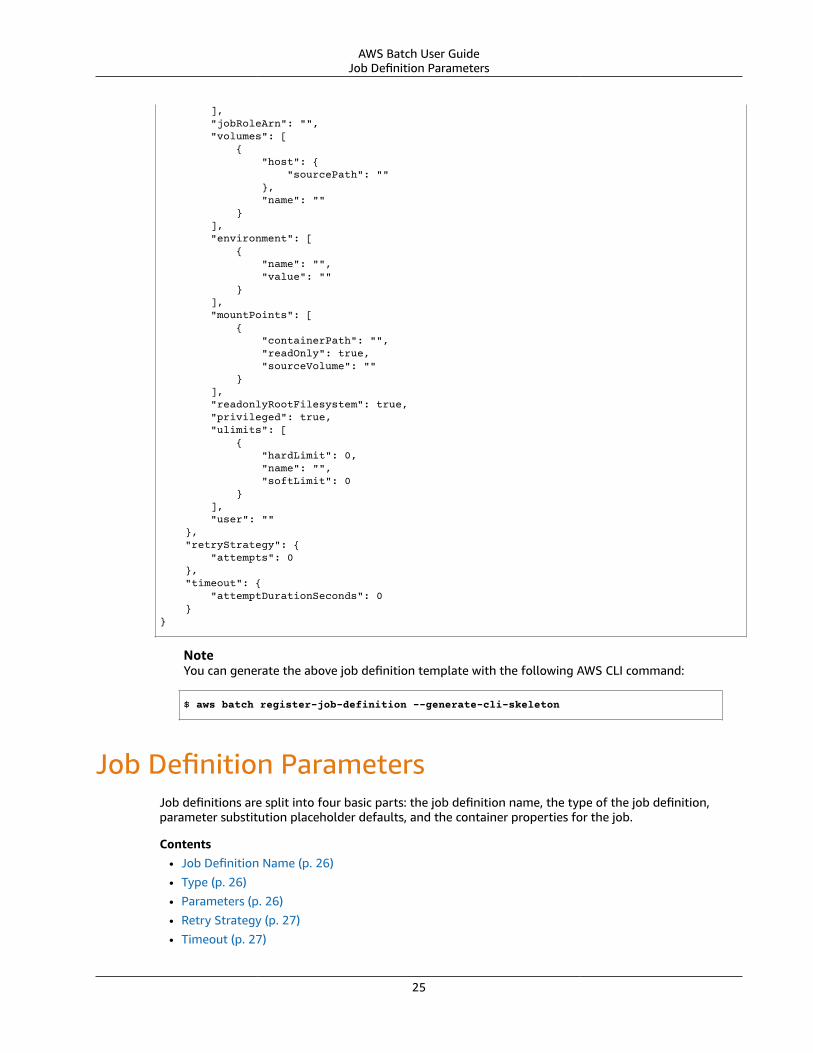
AWS Batch User GuideJob Definition Parameters
], "jobRoleArn": "", "volumes": [ { "host": { "sourcePath": "" }, "name": "" } ], "environment": [ { "name": "", "value": "" } ], "mountPoints": [ { "containerPath": "", "readOnly": true, "sourceVolume": "" } ], "readonlyRootFilesystem": true, "privileged": true, "ulimits": [ { "hardLimit": 0, "name": "", "softLimit": 0 } ], "user": "" }, "retryStrategy": { "attempts": 0 }, "timeout": { "attemptDurationSeconds": 0 }}
NoteYou can generate the above job definition template with the following AWS CLI command:
$ aws batch register-job-definition --generate-cli-skeleton
Job Definition ParametersJob definitions are split into four basic parts: the job definition name, the type of the job definition,parameter substitution placeholder defaults, and the container properties for the job.
Contents• Job Definition Name (p. 26)• Type (p. 26)• Parameters (p. 26)• Retry Strategy (p. 27)• Timeout (p. 27)
25

AWS Batch User GuideJob Definition Name
• Container Properties (p. 27)
Job Definition NamejobDefinitionName
When you register a job definition, you specify a name. Up to 128 letters (uppercase and lowercase),numbers, hyphens, and underscores are allowed. The first job definition that is registered with thatname is given a revision of 1. Any subsequent job definitions that are registered with that name aregiven an incremental revision number.
Type: String
Required: Yes
Typetype
When you register a job definition, you specify the type of job. At this time, only container jobs aresupported.
Type: String
Valid values: container
Required: Yes
Parametersparameters
When you submit a job, you can specify parameters that should replace the placeholders or overridethe default job definition parameters. Parameters in job submission requests take precedence overthe defaults in a job definition. This allows you to use the same job definition for multiple jobs thatuse the same format, and programmatically change values in the command at submission time.
Type: String to string map
Required: No
When you register a job definition, you can use parameter substitution placeholders in the commandfield of a job's container properties. For example:
"command": [ "ffmpeg", "-i", "Ref::inputfile", "-c", "Ref::codec", "-o", "Ref::outputfile" ]
In the above example, there are Ref::inputfile, Ref::codec, and Ref::outputfileparameter substitution placeholders in the command. The parameters object in the job definitionallows you to set default values for these placeholders. For example, to set a default for theRef::codec placeholder, you specify the following in the job definition:
"parameters" : {"codec" : "mp4"}
26
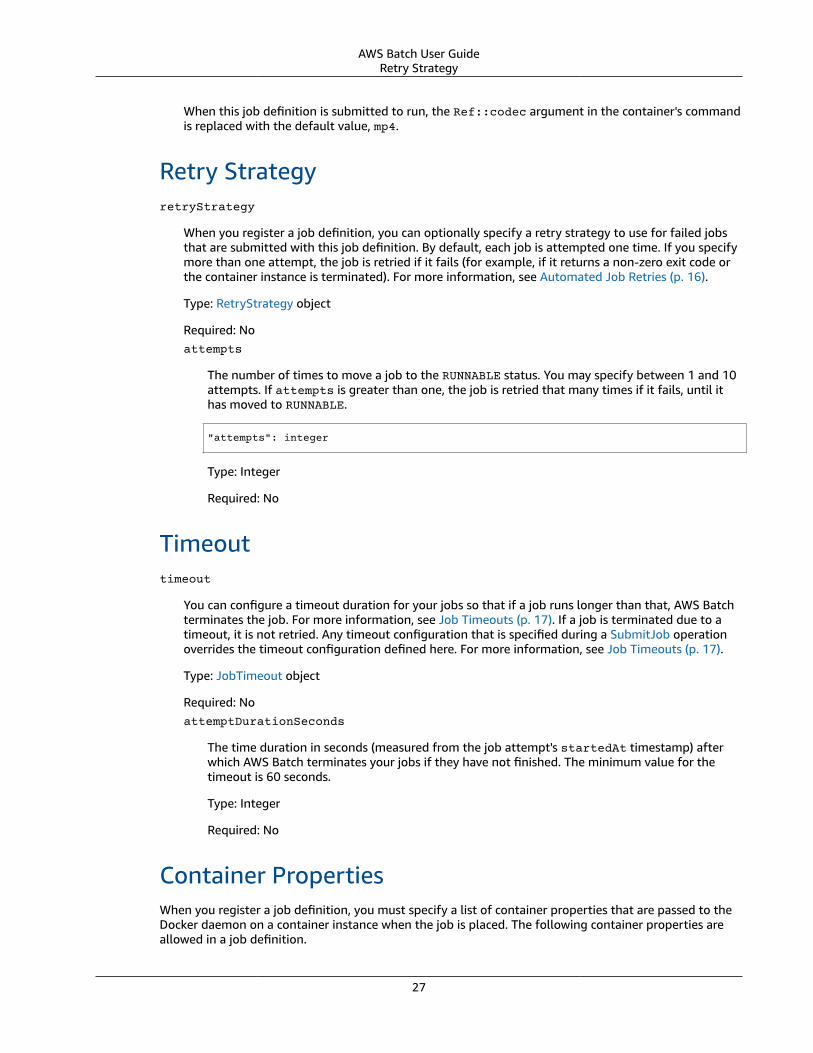
AWS Batch User GuideRetry Strategy
When this job definition is submitted to run, the Ref::codec argument in the container's commandis replaced with the default value, mp4.
Retry StrategyretryStrategy
When you register a job definition, you can optionally specify a retry strategy to use for failed jobsthat are submitted with this job definition. By default, each job is attempted one time. If you specifymore than one attempt, the job is retried if it fails (for example, if it returns a non-zero exit code orthe container instance is terminated). For more information, see Automated Job Retries (p. 16).
Type: RetryStrategy object
Required: Noattempts
The number of times to move a job to the RUNNABLE status. You may specify between 1 and 10attempts. If attempts is greater than one, the job is retried that many times if it fails, until ithas moved to RUNNABLE.
"attempts": integer
Type: Integer
Required: No
Timeouttimeout
You can configure a timeout duration for your jobs so that if a job runs longer than that, AWS Batchterminates the job. For more information, see Job Timeouts (p. 17). If a job is terminated due to atimeout, it is not retried. Any timeout configuration that is specified during a SubmitJob operationoverrides the timeout configuration defined here. For more information, see Job Timeouts (p. 17).
Type: JobTimeout object
Required: NoattemptDurationSeconds
The time duration in seconds (measured from the job attempt's startedAt timestamp) afterwhich AWS Batch terminates your jobs if they have not finished. The minimum value for thetimeout is 60 seconds.
Type: Integer
Required: No
Container PropertiesWhen you register a job definition, you must specify a list of container properties that are passed to theDocker daemon on a container instance when the job is placed. The following container properties areallowed in a job definition.
27

AWS Batch User GuideContainer Properties
command
The command that is passed to the container. This parameter maps to Cmd in the Create a containersection of the Docker Remote API and the COMMAND parameter to docker run. For more informationabout the Docker CMD parameter, see https://docs.docker.com/engine/reference/builder/#cmd.
"command": ["string", ...]
Type: String array
Required: Noenvironment
The environment variables to pass to a container. This parameter maps to Env in the Create acontainer section of the Docker Remote API and the --env option to docker run.
ImportantWe do not recommend using plaintext environment variables for sensitive information, suchas credential data.
Type: Array of key-value pairs
Required: Noname
The name of the environment variable.
Type: String
Required: Yes, when environment is used.value
The value of the environment variable.
Type: String
Required: Yes, when environment is used.
"environment" : [ { "name" : "string", "value" : "string" }, { "name" : "string", "value" : "string" }]
image
The image used to start a container. This string is passed directly to the Docker daemon. Imagesin the Docker Hub registry are available by default. You can also specify other repositories withrepository-url/image:tag. Up to 255 letters (uppercase and lowercase), numbers, hyphens,underscores, colons, periods, forward slashes, and number signs are allowed. This parameter mapsto Image in the Create a container section of the Docker Remote API and the IMAGE parameter ofdocker run.• Images in Amazon ECR repositories use the full registry/repository:tag naming convention.
For example, aws_account_id.dkr.ecr.region.amazonaws.com/my-web-app:latest• Images in official repositories on Docker Hub use a single name (for example, ubuntu or mongo).• Images in other repositories on Docker Hub are qualified with an organization name (for example,amazon/amazon-ecs-agent).
• Images in other online repositories are qualified further by a domain name (for example,quay.io/assemblyline/ubuntu).
28
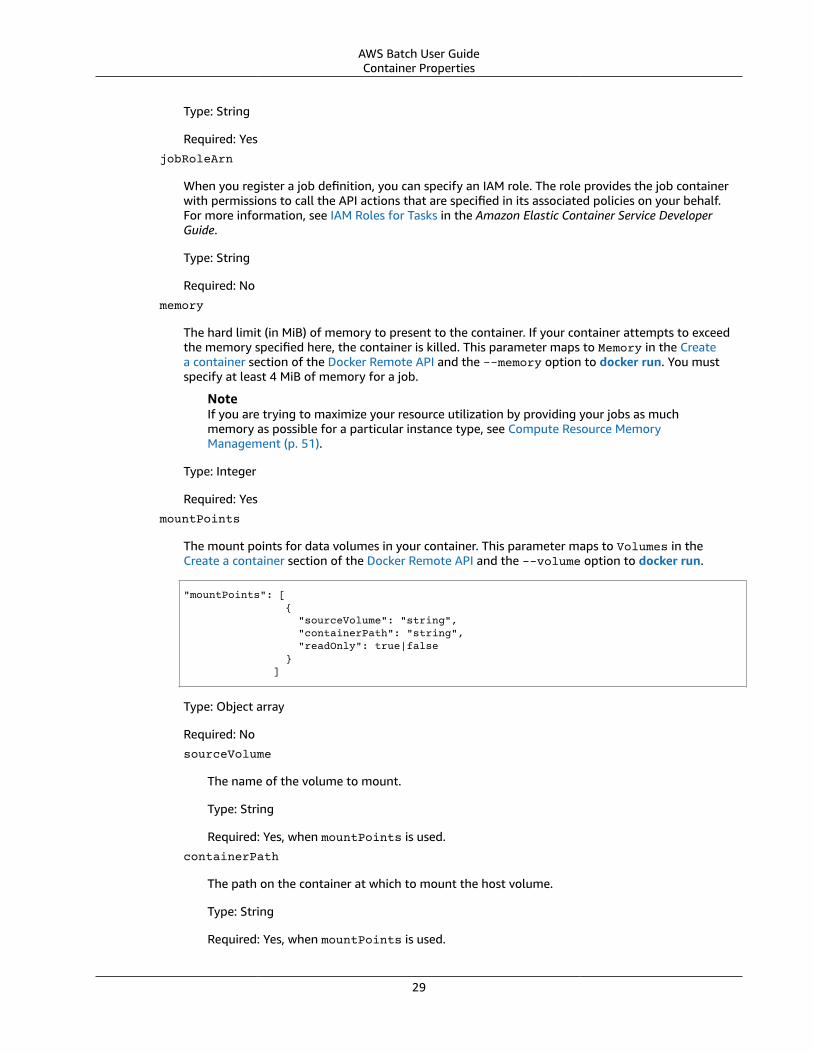
AWS Batch User GuideContainer Properties
Type: String
Required: Yes
jobRoleArn
When you register a job definition, you can specify an IAM role. The role provides the job containerwith permissions to call the API actions that are specified in its associated policies on your behalf.For more information, see IAM Roles for Tasks in the Amazon Elastic Container Service DeveloperGuide.
Type: String
Required: No
memory
The hard limit (in MiB) of memory to present to the container. If your container attempts to exceedthe memory specified here, the container is killed. This parameter maps to Memory in the Createa container section of the Docker Remote API and the --memory option to docker run. You mustspecify at least 4 MiB of memory for a job.
NoteIf you are trying to maximize your resource utilization by providing your jobs as muchmemory as possible for a particular instance type, see Compute Resource MemoryManagement (p. 51).
Type: Integer
Required: Yes
mountPoints
The mount points for data volumes in your container. This parameter maps to Volumes in theCreate a container section of the Docker Remote API and the --volume option to docker run.
"mountPoints": [ { "sourceVolume": "string", "containerPath": "string", "readOnly": true|false } ]
Type: Object array
Required: No
sourceVolume
The name of the volume to mount.
Type: String
Required: Yes, when mountPoints is used.
containerPath
The path on the container at which to mount the host volume.
Type: String
Required: Yes, when mountPoints is used.
29
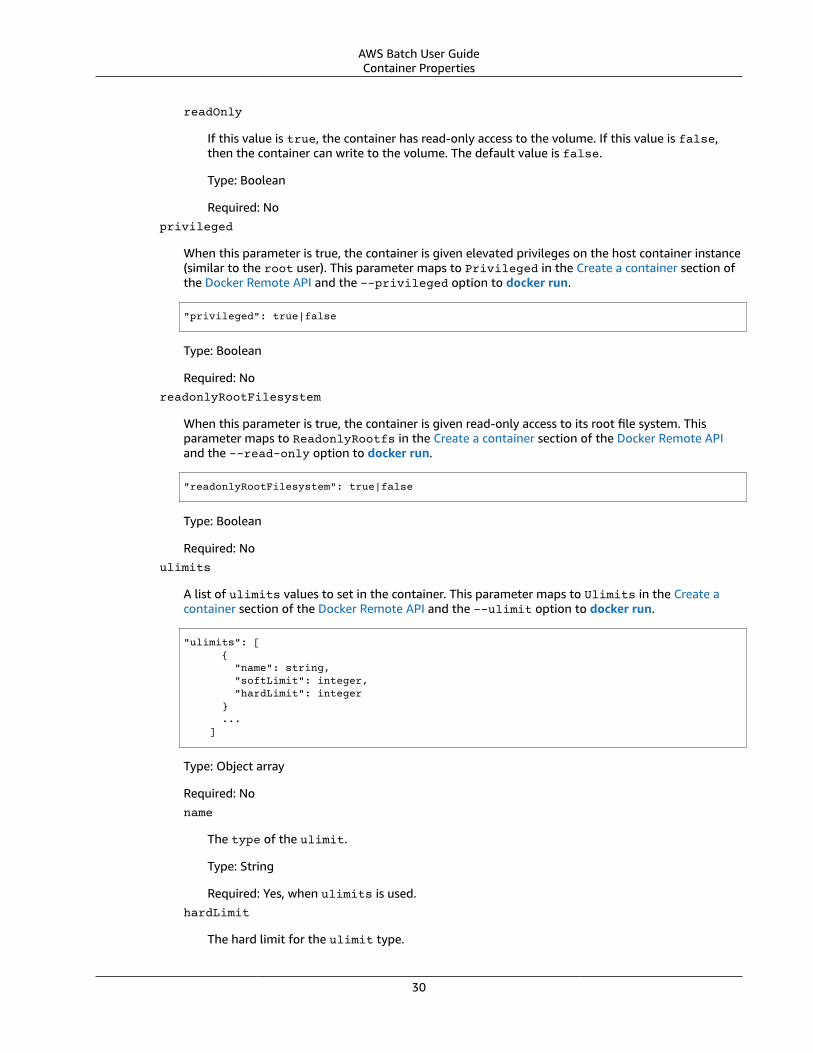
AWS Batch User GuideContainer Properties
readOnly
If this value is true, the container has read-only access to the volume. If this value is false,then the container can write to the volume. The default value is false.
Type: Boolean
Required: Noprivileged
When this parameter is true, the container is given elevated privileges on the host container instance(similar to the root user). This parameter maps to Privileged in the Create a container section ofthe Docker Remote API and the --privileged option to docker run.
"privileged": true|false
Type: Boolean
Required: NoreadonlyRootFilesystem
When this parameter is true, the container is given read-only access to its root file system. Thisparameter maps to ReadonlyRootfs in the Create a container section of the Docker Remote APIand the --read-only option to docker run.
"readonlyRootFilesystem": true|false
Type: Boolean
Required: Noulimits
A list of ulimits values to set in the container. This parameter maps to Ulimits in the Create acontainer section of the Docker Remote API and the --ulimit option to docker run.
"ulimits": [ { "name": string, "softLimit": integer, "hardLimit": integer } ... ]
Type: Object array
Required: Noname
The type of the ulimit.
Type: String
Required: Yes, when ulimits is used.hardLimit
The hard limit for the ulimit type.
30

AWS Batch User GuideContainer Properties
Type: Integer
Required: Yes, when ulimits is used.softLimit
The soft limit for the ulimit type.
Type: Integer
Required: Yes, when ulimits is used.user
The user name to use inside the container. This parameter maps to User in the Create a containersection of the Docker Remote API and the --user option to docker run.
"user": "string"
Type: String
Required: Novcpus
The number of vCPUs reserved for the container. This parameter maps to CpuShares in the Createa container section of the Docker Remote API and the --cpu-shares option to docker run. EachvCPU is equivalent to 1,024 CPU shares. You must specify at least 1 vCPU.
Type: Integer
Required: Yesvolumes
When you register a job definition, you can optionally specify a list of volumes that are passed tothe Docker daemon on a container instance. The following parameters are allowed in the containerproperties:name
The name of the volume. Up to 255 letters (uppercase and lowercase), numbers, hyphens, andunderscores are allowed. This name is referenced in the sourceVolume parameter of containerdefinition mountPoints.
Type: String
Required: Yeshost
The contents of the host parameter determine whether your data volume persists on the hostcontainer instance and where it is stored. If the host parameter is empty, then the Dockerdaemon assigns a host path for your data volume. However, the data is not guaranteed topersist after the container associated with it stops running.
[ { "name": "string", "host": { "sourcePath": "string" } }]
31
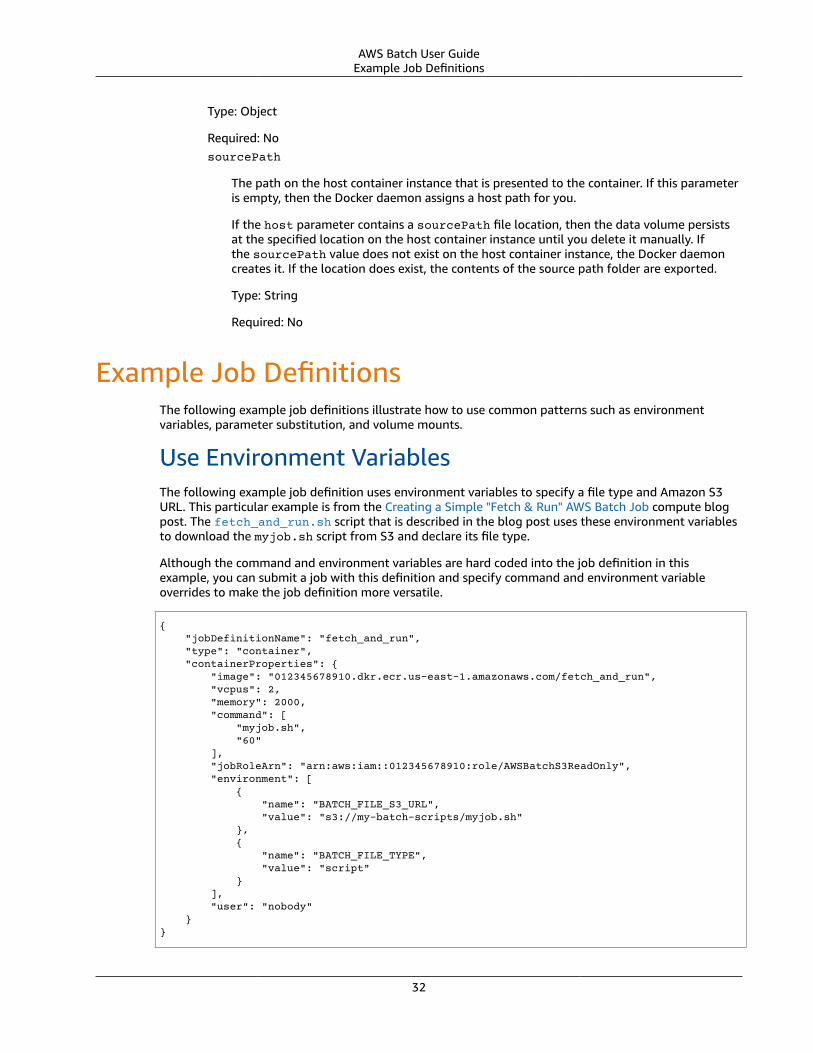
AWS Batch User GuideExample Job Definitions
Type: Object
Required: NosourcePath
The path on the host container instance that is presented to the container. If this parameteris empty, then the Docker daemon assigns a host path for you.
If the host parameter contains a sourcePath file location, then the data volume persistsat the specified location on the host container instance until you delete it manually. Ifthe sourcePath value does not exist on the host container instance, the Docker daemoncreates it. If the location does exist, the contents of the source path folder are exported.
Type: String
Required: No
Example Job DefinitionsThe following example job definitions illustrate how to use common patterns such as environmentvariables, parameter substitution, and volume mounts.
Use Environment VariablesThe following example job definition uses environment variables to specify a file type and Amazon S3URL. This particular example is from the Creating a Simple "Fetch & Run" AWS Batch Job compute blogpost. The fetch_and_run.sh script that is described in the blog post uses these environment variablesto download the myjob.sh script from S3 and declare its file type.
Although the command and environment variables are hard coded into the job definition in thisexample, you can submit a job with this definition and specify command and environment variableoverrides to make the job definition more versatile.
{ "jobDefinitionName": "fetch_and_run", "type": "container", "containerProperties": { "image": "012345678910.dkr.ecr.us-east-1.amazonaws.com/fetch_and_run", "vcpus": 2, "memory": 2000, "command": [ "myjob.sh", "60" ], "jobRoleArn": "arn:aws:iam::012345678910:role/AWSBatchS3ReadOnly", "environment": [ { "name": "BATCH_FILE_S3_URL", "value": "s3://my-batch-scripts/myjob.sh" }, { "name": "BATCH_FILE_TYPE", "value": "script" } ], "user": "nobody" }}
32
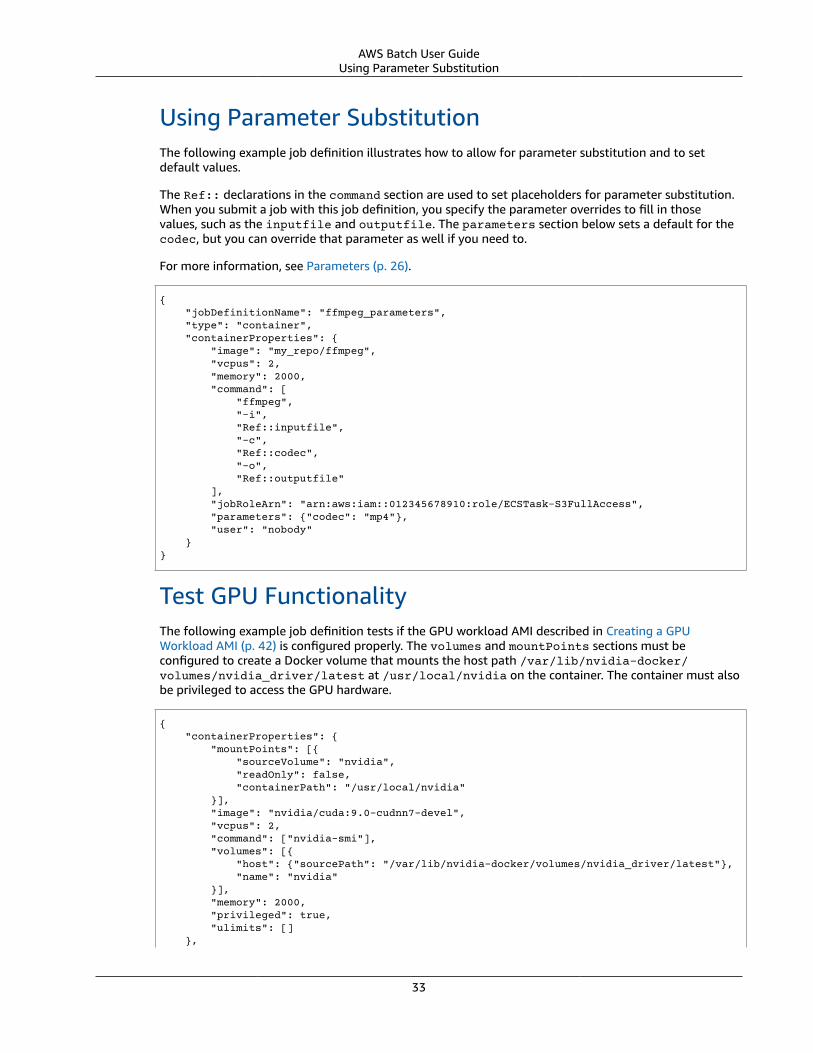
AWS Batch User GuideUsing Parameter Substitution
Using Parameter SubstitutionThe following example job definition illustrates how to allow for parameter substitution and to setdefault values.
The Ref:: declarations in the command section are used to set placeholders for parameter substitution.When you submit a job with this job definition, you specify the parameter overrides to fill in thosevalues, such as the inputfile and outputfile. The parameters section below sets a default for thecodec, but you can override that parameter as well if you need to.
For more information, see Parameters (p. 26).
{ "jobDefinitionName": "ffmpeg_parameters", "type": "container", "containerProperties": { "image": "my_repo/ffmpeg", "vcpus": 2, "memory": 2000, "command": [ "ffmpeg", "-i", "Ref::inputfile", "-c", "Ref::codec", "-o", "Ref::outputfile" ], "jobRoleArn": "arn:aws:iam::012345678910:role/ECSTask-S3FullAccess", "parameters": {"codec": "mp4"}, "user": "nobody" }}
Test GPU FunctionalityThe following example job definition tests if the GPU workload AMI described in Creating a GPUWorkload AMI (p. 42) is configured properly. The volumes and mountPoints sections must beconfigured to create a Docker volume that mounts the host path /var/lib/nvidia-docker/volumes/nvidia_driver/latest at /usr/local/nvidia on the container. The container must alsobe privileged to access the GPU hardware.
{ "containerProperties": { "mountPoints": [{ "sourceVolume": "nvidia", "readOnly": false, "containerPath": "/usr/local/nvidia" }], "image": "nvidia/cuda:9.0-cudnn7-devel", "vcpus": 2, "command": ["nvidia-smi"], "volumes": [{ "host": {"sourcePath": "/var/lib/nvidia-docker/volumes/nvidia_driver/latest"}, "name": "nvidia" }], "memory": 2000, "privileged": true, "ulimits": [] },
33
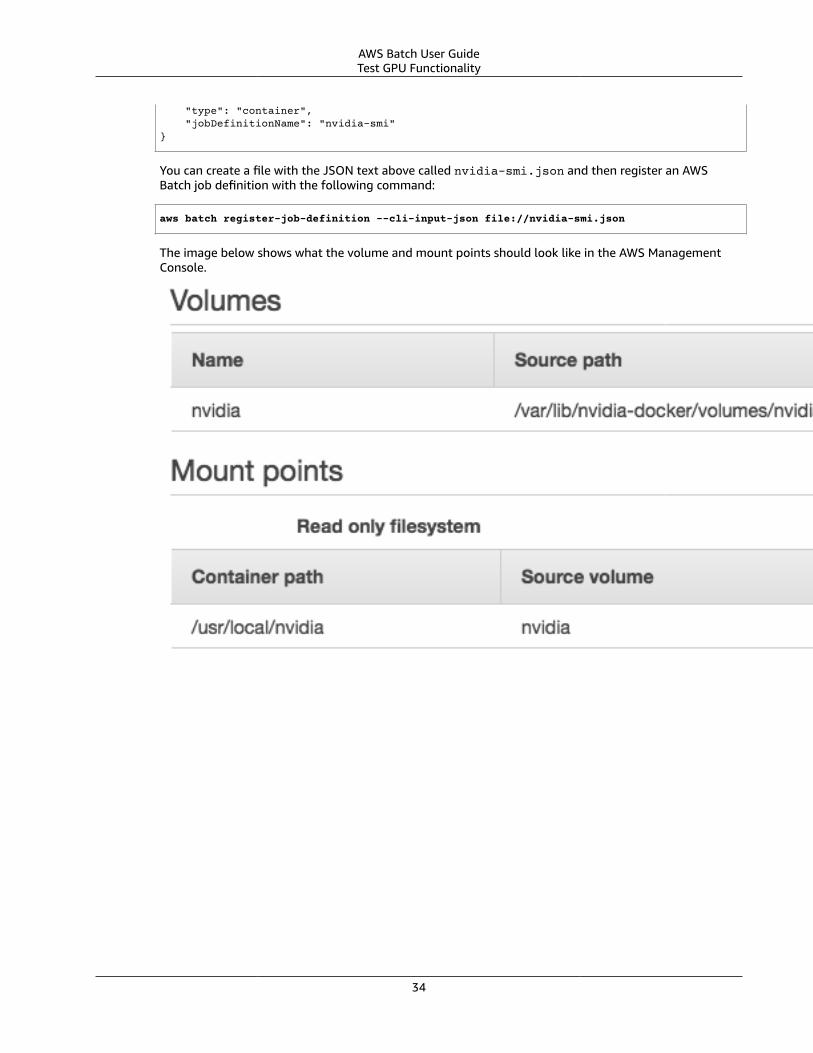
AWS Batch User GuideTest GPU Functionality
"type": "container", "jobDefinitionName": "nvidia-smi"}
You can create a file with the JSON text above called nvidia-smi.json and then register an AWSBatch job definition with the following command:
aws batch register-job-definition --cli-input-json file://nvidia-smi.json
The image below shows what the volume and mount points should look like in the AWS ManagementConsole.
34
AWS Batch User GuideCreating a Job Queue
Job QueuesJobs are submitted to a job queue, where they reside until they are able to be scheduled to run in acompute environment. An AWS account can have multiple job queues. For example, you might create aqueue that uses Amazon EC2 On-Demand instances for high priority jobs and another queue that usesAmazon EC2 Spot Instances for low-priority jobs. Job queues have a priority that is used by the schedulerto determine which jobs in which queue should be evaluated for execution first.
Creating a Job QueueBefore you can submit jobs in AWS Batch, you must create a job queue. When you create a job queue,you associate one or more compute environments to the queue and assign an order of preference for thecompute environments.
You also set a priority to the job queue that determines the order in which the AWS Batch schedulerplaces jobs onto its associated compute environments. For example, if a compute environment isassociated with more than one job queue, the job queue with a higher priority is given preference forscheduling jobs to that compute environment.
To create a job queue
1. Open the AWS Batch console at https://console.aws.amazon.com/batch/.2. From the navigation bar, select the region to use.3. In the navigation pane, choose Job queues, Create queue.4. For Queue name, enter a unique name for your job queue.5. Ensure that Enable job queue is selected so that your job queue can accept job submissions.6. For Priority, enter an integer value for the job queue's priority. Job queues with a higher priority (or
a higher integer value for the priority parameter) are evaluated first when associated with thesame compute environment. Priority is determined in descending order, for example, a job queuewith a priority value of 10 is given scheduling preference over a job queue with a priority value of 1.
7. In the Connected compute environments for this queue section, select one or more computeenvironments from the list to associate with the job queue, in the order that the queue shouldattempt placement. The job scheduler uses compute environment order to determine whichcompute environment should execute a given job. Compute environments must be in the VALIDstate before you can associate them with a job queue. You can associate up to three computeenvironments with a job queue.
You can change the order of compute environments by choosing the up and down arrows next tothe Order column in the table.
8. Choose Create to finish and create your job queue.
Job Queue TemplateAn empty job queue template is shown below. You can use this template to create your job queue whichcan then be saved to a file and used with the AWS CLI --cli-input-json option. For more informationabout these parameters, see CreateJobQueue in the AWS Batch API Reference.
{
35
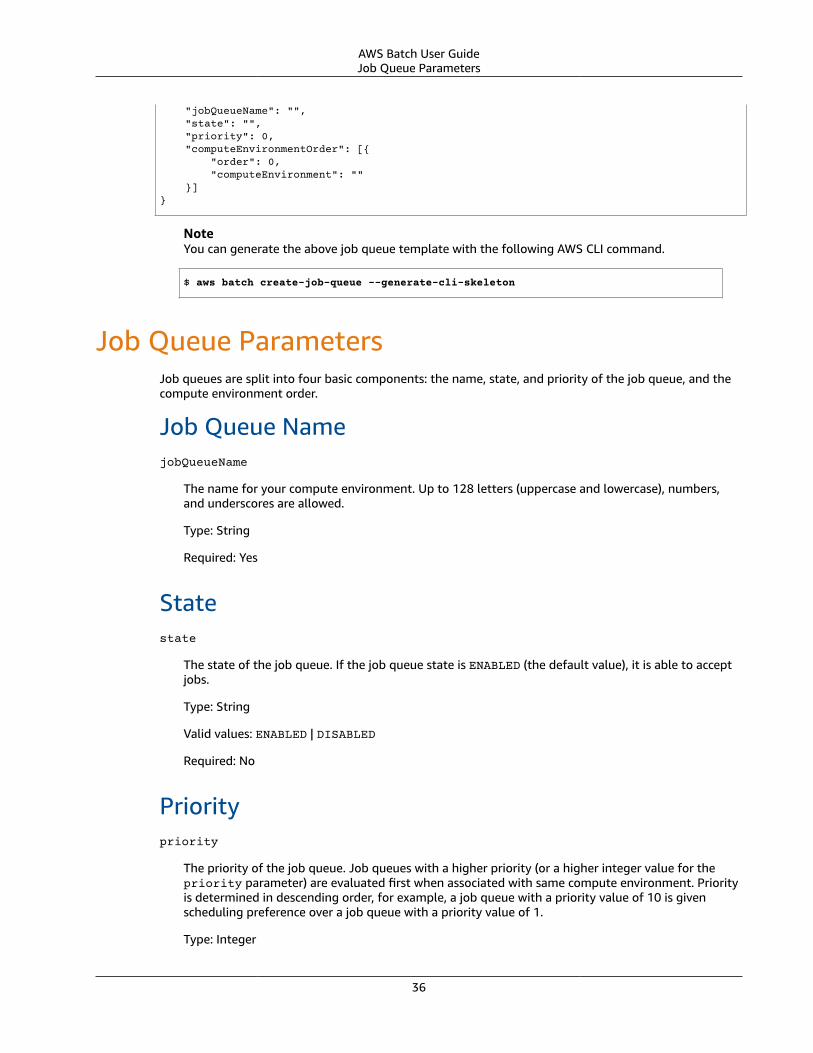
AWS Batch User GuideJob Queue Parameters
"jobQueueName": "", "state": "", "priority": 0, "computeEnvironmentOrder": [{ "order": 0, "computeEnvironment": "" }]}
NoteYou can generate the above job queue template with the following AWS CLI command.
$ aws batch create-job-queue --generate-cli-skeleton
Job Queue ParametersJob queues are split into four basic components: the name, state, and priority of the job queue, and thecompute environment order.
Job Queue NamejobQueueName
The name for your compute environment. Up to 128 letters (uppercase and lowercase), numbers,and underscores are allowed.
Type: String
Required: Yes
Statestate
The state of the job queue. If the job queue state is ENABLED (the default value), it is able to acceptjobs.
Type: String
Valid values: ENABLED | DISABLED
Required: No
Prioritypriority
The priority of the job queue. Job queues with a higher priority (or a higher integer value for thepriority parameter) are evaluated first when associated with same compute environment. Priorityis determined in descending order, for example, a job queue with a priority value of 10 is givenscheduling preference over a job queue with a priority value of 1.
Type: Integer
36
AWS Batch User GuideCompute Environment Order
Required: Yes
Compute Environment OrdercomputeEnvironmentOrder
The set of compute environments mapped to a job queue and their order relative to each other. Thejob scheduler uses this parameter to determine which compute environment should execute a givenjob. Compute environments must be in the VALID state before you can associate them with a jobqueue. You can associate up to three compute environments with a job queue.
Type: Array of ComputeEnvironmentOrder objects
Required: YescomputeEnvironment
The Amazon Resource Name (ARN) of the compute environment.
Type: String
Required: Yesorder
The order of the compute environment. Compute environments are tried in ascending order.For example, if two compute environments are associated with a job queue, the computeenvironment with a lower order integer value is tried for job placement first.
37

AWS Batch User Guide
Job SchedulingThe AWS Batch scheduler evaluates when, where, and how to run jobs that have been submitted to a jobqueue. Jobs run in approximately the order in which they are submitted as long as all dependencies onother jobs have been met.
38
AWS Batch User GuideManaged Compute Environments
Compute EnvironmentsJob queues are mapped to one or more compute environments. Compute environments containthe Amazon ECS container instances that are used to run containerized batch jobs. A given computeenvironment can also be mapped to one or many job queues. Within a job queue, the associatedcompute environments each have an order that is used by the scheduler to determine where to placejobs that are ready to be executed. If the first compute environment has free resources, the job isscheduled to a container instance within that compute environment. If the compute environmentis unable to provide a suitable compute resource, the scheduler attempts to run the job on the nextcompute environment.
Topics• Managed Compute Environments (p. 39)
• Unmanaged Compute Environments (p. 40)
• Compute Resource AMIs (p. 40)
• Creating a Compute Environment (p. 44)
• Compute Environment Parameters (p. 47)
• Compute Resource Memory Management (p. 51)
Managed Compute EnvironmentsManaged compute environments enable you to describe your business requirements. In a managedcompute environment, AWS Batch manages the compute resources within the environment, based onthe compute resources that you specify. Instances launched into a managed compute environment usea recent, approved version of the Amazon ECS-optimized AMI. You can choose to use Amazon EC2 On-Demand Instances or Spot Instances in your managed compute environment. You can optionally set amaximum price so that Spot Instances only launch when the Spot Instance price is below a specifiedpercentage of the On-Demand price.
Managed compute environments launch Amazon ECS container instances into the VPC and subnets thatyou specify when you create the compute environment. Amazon ECS container instances need externalnetwork access to communicate with the Amazon ECS service endpoint. If your container instances donot have public IP addresses (because the subnets you've chosen do not provide them by default), thenthey must use network address translation (NAT) to provide this access. For more information, see NATGateways in the Amazon VPC User Guide. For help creating a VPC, see Tutorial: Creating a VPC with Publicand Private Subnets for Your Compute Environments (p. 72).
By default, AWS Batch managed compute environments use a recent, approved version of the AmazonECS-optimized AMI for compute resources. However, you may want to create your own AMI to use foryour managed compute environments for various reasons. For more information, see Compute ResourceAMIs (p. 40).
NoteAWS Batch does not upgrade the AMIs in a compute environment after it is created. To use anew AMI for your AWS Batch jobs:
1. Create a new compute environment with the new AMI.
2. Add the compute environment to an existing job queue.
3. Remove the old compute environment from your job queue.
39
AWS Batch User GuideUnmanaged Compute Environments
4. Delete the old compute environment.
Unmanaged Compute EnvironmentsIn an unmanaged compute environment, you manage your own compute resources. You must ensurethat the AMI you use for your compute resources meets the Amazon ECS container instance AMIspecification. For more information, see Compute Resource AMI Specification (p. 40) and Creating aCompute Resource AMI (p. 41).
After you have created your unmanaged compute environment, use the DescribeComputeEnvironmentsAPI operation to view the compute environment details. Find the Amazon ECS cluster that is associatedwith the environment and then manually launch your container instances into that Amazon ECS cluster.
The following AWS CLI command also provides the Amazon ECS cluster ARN:
aws batch describe-compute-environments --compute-environments unmanagedCE --query computeEnvironments[].ecsClusterArn
For more information, see Launching an Amazon ECS Container Instance in the Amazon Elastic ContainerService Developer Guide. When you launch your compute resources, specify the Amazon ECS cluster ARNthat the resources should register with the following Amazon EC2 user data. Replace ecsClusterArnwith the cluster ARN you obtained with the previous command.
#!/bin/bashecho "ECS_CLUSTER=ecsClusterArn" >> /etc/ecs/ecs.config
Compute Resource AMIsBy default, AWS Batch managed compute environments use a recent, approved version of the AmazonECS-optimized AMI for compute resources. However, you may want to create your own AMI to use foryour managed and unmanaged compute environments for the following reasons:
• Increase the storage size of your AMI root or data volumes
• Add instance storage volumes for supported Amazon EC2 instance types
• Configure the Amazon ECS container agent with custom options
• Configure Docker to use custom options
• Configure a GPU workload AMI that allows containers to access GPU hardware on supported AmazonEC2 instance types
Topics
• Compute Resource AMI Specification (p. 40)
• Creating a Compute Resource AMI (p. 41)
• Creating a GPU Workload AMI (p. 42)
Compute Resource AMI SpecificationThe basic AWS Batch compute resource AMI specification consists of the following:
40
AWS Batch User GuideCreating a Compute Resource AMI
Required
• A modern Linux distribution running at least version 3.10 of the Linux kernel on an HVM virtualizationtype AMI.
• The Amazon ECS container agent (preferably the latest version). For more information, see Installingthe Amazon ECS Container Agent in the Amazon Elastic Container Service Developer Guide.
• The awslogs log driver must be specified as an available log driver with theECS_AVAILABLE_LOGGING_DRIVERS environment variable when the Amazon ECS container agent isstarted. For more information, see Amazon ECS Container Agent Configuration in the Amazon ElasticContainer Service Developer Guide.
• A Docker daemon running at least version 1.9, and any Docker runtime dependencies. For moreinformation, see Check runtime dependencies in the Docker documentation.
NoteFor the best experience, we recommend the Docker version that ships with and is tested withthe corresponding Amazon ECS agent version that you are using. For more information, seeAmazon ECS Container Agent Versions in the Amazon Elastic Container Service DeveloperGuide.
Recommended
• An initialization and nanny process to run and monitor the Amazon ECS agent. The Amazon ECS-optimized AMI uses the ecs-init upstart process, and other operating systems may use systemd.To view several example user data configuration scripts that use systemd to start and monitor theAmazon ECS container agent, see Example Container Instance User Data Configuration Scripts in theAmazon Elastic Container Service Developer Guide. For more information about ecs-init, see theecs-init project on GitHub. At a minimum, managed compute environments require the AmazonECS agent to start at boot. If the Amazon ECS agent is not running on your compute resource, then itcannot accept jobs from AWS Batch.
The Amazon ECS-optimized AMI is preconfigured with these requirements and recommendations. Werecommend that you use the Amazon ECS-optimized AMI or an Amazon Linux AMI with the ecs-initpackage installed for your compute resources. Choose another AMI if your application requires a specificoperating system or a Docker version that is not yet available in those AMIs. For more information, seeAmazon ECS-Optimized AMI in the Amazon Elastic Container Service Developer Guide.
Creating a Compute Resource AMIYou can create your own custom compute resource AMI to use for your managed and unmanagedcompute environments, provided that you follow the Compute Resource AMI Specification (p. 40).After you have created your custom AMI, you can create a compute environment that uses that AMI,associate it with a job queue, and then start submitting jobs to that queue.
To create a custom compute resource AMI
1. Choose a base AMI to start from. The base AMI must use HVM virtualization, and it cannot be aWindows AMI.
The Amazon ECS-optimized AMI is the default AMI for compute resources in managed computeenvironments. The Amazon ECS-optimized AMI is preconfigured and tested on AWS Batch by AWSengineers. It is the simplest AMI for you to get started and to get your compute resources running onAWS quickly. For more information, see Amazon ECS-Optimized AMI in the Amazon Elastic ContainerService Developer Guide.
Alternatively, you can choose another Amazon Linux variant and install the ecs-init package withthe following command:
41
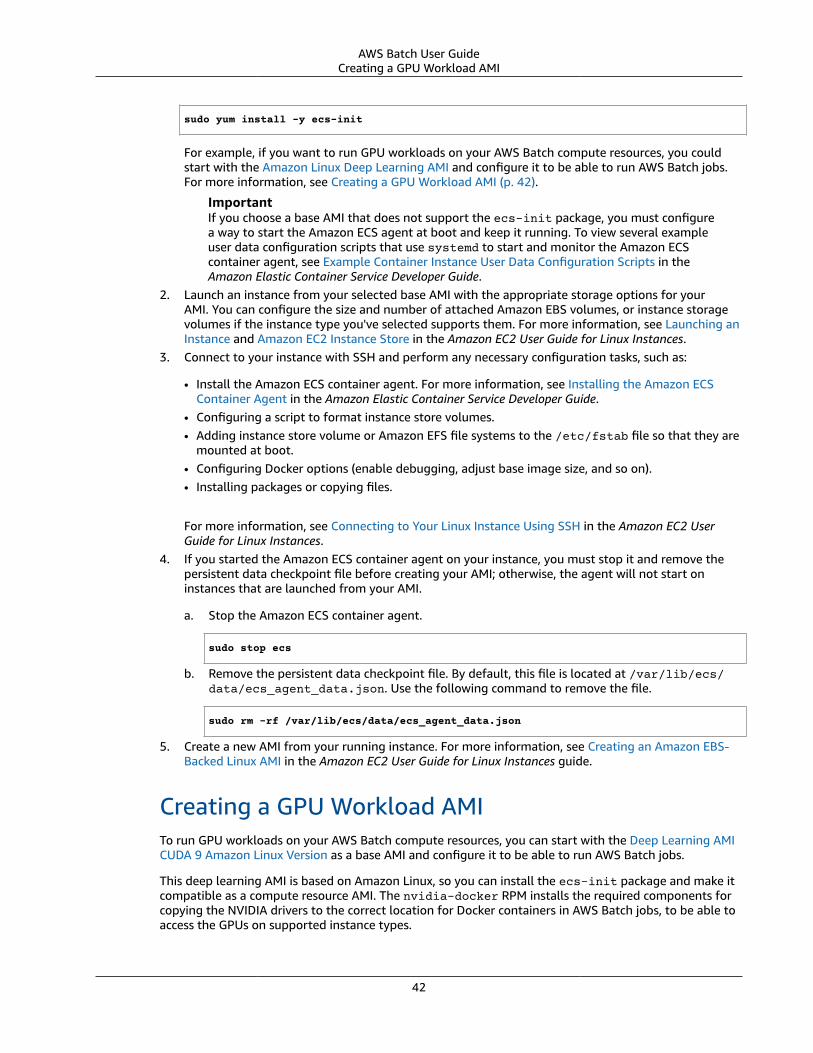
AWS Batch User GuideCreating a GPU Workload AMI
sudo yum install -y ecs-init
For example, if you want to run GPU workloads on your AWS Batch compute resources, you couldstart with the Amazon Linux Deep Learning AMI and configure it to be able to run AWS Batch jobs.For more information, see Creating a GPU Workload AMI (p. 42).
ImportantIf you choose a base AMI that does not support the ecs-init package, you must configurea way to start the Amazon ECS agent at boot and keep it running. To view several exampleuser data configuration scripts that use systemd to start and monitor the Amazon ECScontainer agent, see Example Container Instance User Data Configuration Scripts in theAmazon Elastic Container Service Developer Guide.
2. Launch an instance from your selected base AMI with the appropriate storage options for yourAMI. You can configure the size and number of attached Amazon EBS volumes, or instance storagevolumes if the instance type you've selected supports them. For more information, see Launching anInstance and Amazon EC2 Instance Store in the Amazon EC2 User Guide for Linux Instances.
3. Connect to your instance with SSH and perform any necessary configuration tasks, such as:
• Install the Amazon ECS container agent. For more information, see Installing the Amazon ECSContainer Agent in the Amazon Elastic Container Service Developer Guide.
• Configuring a script to format instance store volumes.• Adding instance store volume or Amazon EFS file systems to the /etc/fstab file so that they are
mounted at boot.• Configuring Docker options (enable debugging, adjust base image size, and so on).• Installing packages or copying files.
For more information, see Connecting to Your Linux Instance Using SSH in the Amazon EC2 UserGuide for Linux Instances.
4. If you started the Amazon ECS container agent on your instance, you must stop it and remove thepersistent data checkpoint file before creating your AMI; otherwise, the agent will not start oninstances that are launched from your AMI.
a. Stop the Amazon ECS container agent.
sudo stop ecs
b. Remove the persistent data checkpoint file. By default, this file is located at /var/lib/ecs/data/ecs_agent_data.json. Use the following command to remove the file.
sudo rm -rf /var/lib/ecs/data/ecs_agent_data.json
5. Create a new AMI from your running instance. For more information, see Creating an Amazon EBS-Backed Linux AMI in the Amazon EC2 User Guide for Linux Instances guide.
Creating a GPU Workload AMITo run GPU workloads on your AWS Batch compute resources, you can start with the Deep Learning AMICUDA 9 Amazon Linux Version as a base AMI and configure it to be able to run AWS Batch jobs.
This deep learning AMI is based on Amazon Linux, so you can install the ecs-init package and make itcompatible as a compute resource AMI. The nvidia-docker RPM installs the required components forcopying the NVIDIA drivers to the correct location for Docker containers in AWS Batch jobs, to be able toaccess the GPUs on supported instance types.
42
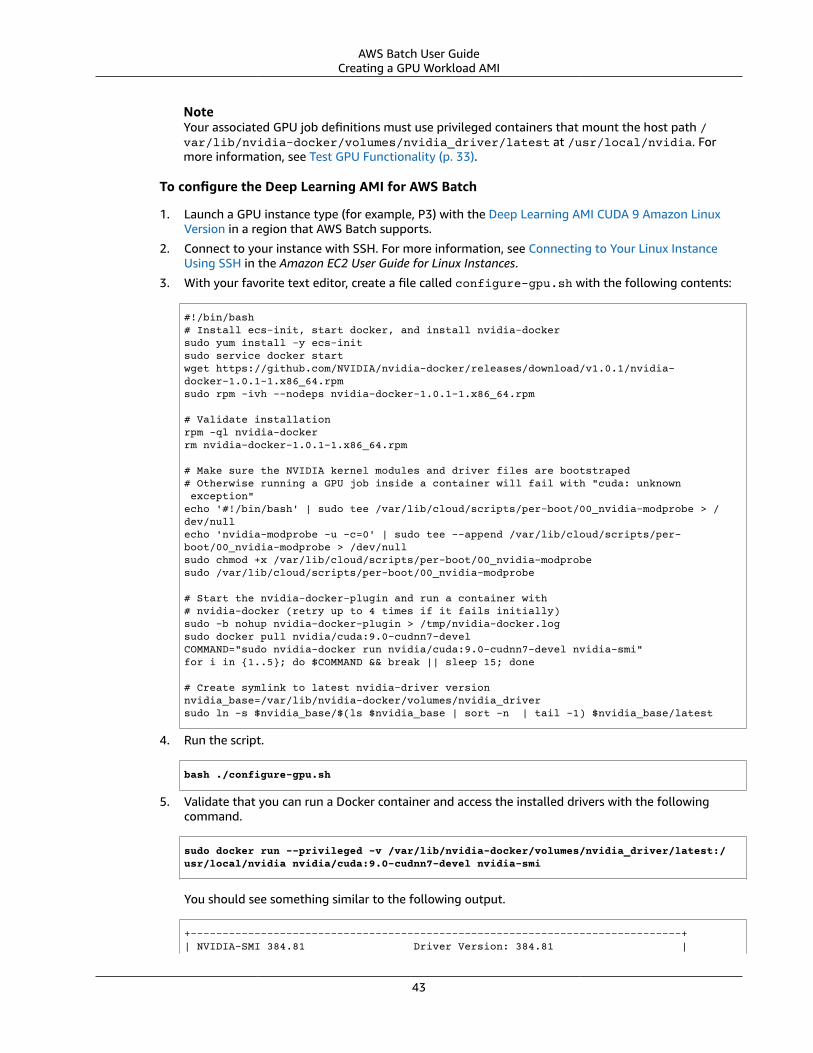
AWS Batch User GuideCreating a GPU Workload AMI
NoteYour associated GPU job definitions must use privileged containers that mount the host path /var/lib/nvidia-docker/volumes/nvidia_driver/latest at /usr/local/nvidia. Formore information, see Test GPU Functionality (p. 33).
To configure the Deep Learning AMI for AWS Batch
1. Launch a GPU instance type (for example, P3) with the Deep Learning AMI CUDA 9 Amazon LinuxVersion in a region that AWS Batch supports.
2. Connect to your instance with SSH. For more information, see Connecting to Your Linux InstanceUsing SSH in the Amazon EC2 User Guide for Linux Instances.
3. With your favorite text editor, create a file called configure-gpu.sh with the following contents:
#!/bin/bash# Install ecs-init, start docker, and install nvidia-dockersudo yum install -y ecs-initsudo service docker startwget https://github.com/NVIDIA/nvidia-docker/releases/download/v1.0.1/nvidia-docker-1.0.1-1.x86_64.rpmsudo rpm -ivh --nodeps nvidia-docker-1.0.1-1.x86_64.rpm
# Validate installationrpm -ql nvidia-dockerrm nvidia-docker-1.0.1-1.x86_64.rpm
# Make sure the NVIDIA kernel modules and driver files are bootstraped# Otherwise running a GPU job inside a container will fail with "cuda: unknown exception"echo '#!/bin/bash' | sudo tee /var/lib/cloud/scripts/per-boot/00_nvidia-modprobe > /dev/nullecho 'nvidia-modprobe -u -c=0' | sudo tee --append /var/lib/cloud/scripts/per-boot/00_nvidia-modprobe > /dev/nullsudo chmod +x /var/lib/cloud/scripts/per-boot/00_nvidia-modprobesudo /var/lib/cloud/scripts/per-boot/00_nvidia-modprobe
# Start the nvidia-docker-plugin and run a container with # nvidia-docker (retry up to 4 times if it fails initially)sudo -b nohup nvidia-docker-plugin > /tmp/nvidia-docker.logsudo docker pull nvidia/cuda:9.0-cudnn7-develCOMMAND="sudo nvidia-docker run nvidia/cuda:9.0-cudnn7-devel nvidia-smi"for i in {1..5}; do $COMMAND && break || sleep 15; done
# Create symlink to latest nvidia-driver versionnvidia_base=/var/lib/nvidia-docker/volumes/nvidia_driversudo ln -s $nvidia_base/$(ls $nvidia_base | sort -n | tail -1) $nvidia_base/latest
4. Run the script.
bash ./configure-gpu.sh
5. Validate that you can run a Docker container and access the installed drivers with the followingcommand.
sudo docker run --privileged -v /var/lib/nvidia-docker/volumes/nvidia_driver/latest:/usr/local/nvidia nvidia/cuda:9.0-cudnn7-devel nvidia-smi
You should see something similar to the following output.
+-----------------------------------------------------------------------------+| NVIDIA-SMI 384.81 Driver Version: 384.81 |
43
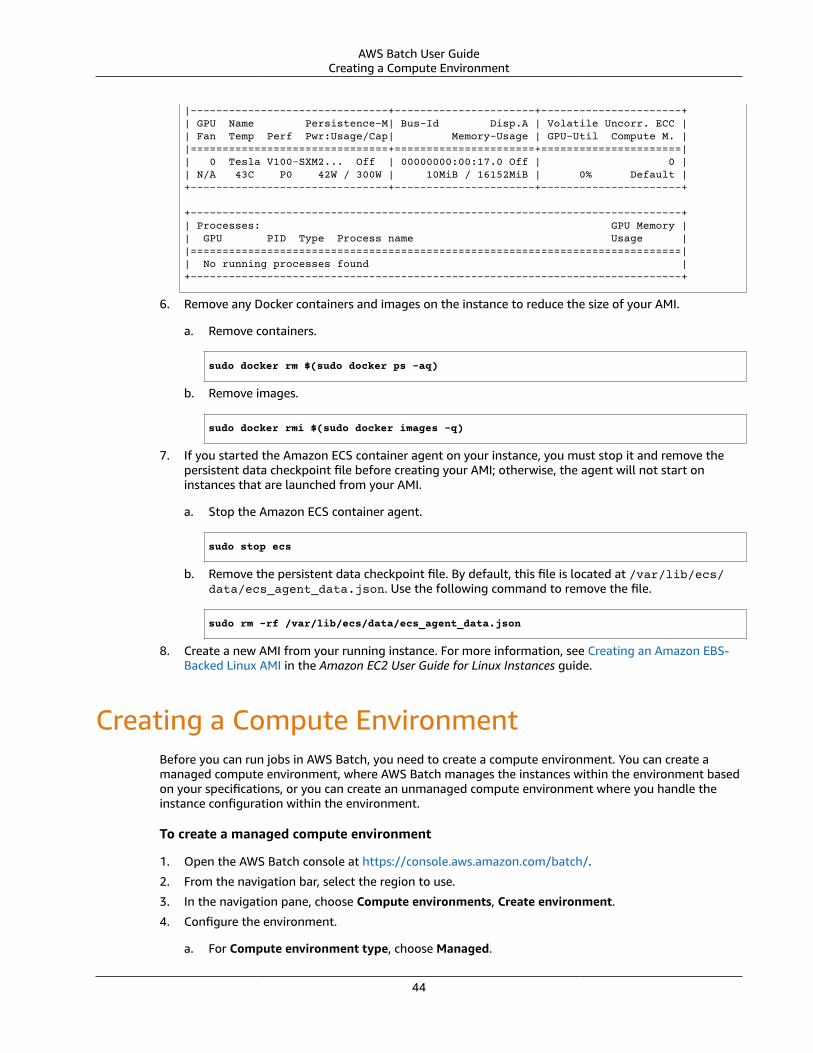
AWS Batch User GuideCreating a Compute Environment
|-------------------------------+----------------------+----------------------+| GPU Name Persistence-M| Bus-Id Disp.A | Volatile Uncorr. ECC || Fan Temp Perf Pwr:Usage/Cap| Memory-Usage | GPU-Util Compute M. ||===============================+======================+======================|| 0 Tesla V100-SXM2... Off | 00000000:00:17.0 Off | 0 || N/A 43C P0 42W / 300W | 10MiB / 16152MiB | 0% Default |+-------------------------------+----------------------+----------------------+
+-----------------------------------------------------------------------------+| Processes: GPU Memory || GPU PID Type Process name Usage ||=============================================================================|| No running processes found |+-----------------------------------------------------------------------------+
6. Remove any Docker containers and images on the instance to reduce the size of your AMI.
a. Remove containers.
sudo docker rm $(sudo docker ps -aq)
b. Remove images.
sudo docker rmi $(sudo docker images -q)
7. If you started the Amazon ECS container agent on your instance, you must stop it and remove thepersistent data checkpoint file before creating your AMI; otherwise, the agent will not start oninstances that are launched from your AMI.
a. Stop the Amazon ECS container agent.
sudo stop ecs
b. Remove the persistent data checkpoint file. By default, this file is located at /var/lib/ecs/data/ecs_agent_data.json. Use the following command to remove the file.
sudo rm -rf /var/lib/ecs/data/ecs_agent_data.json
8. Create a new AMI from your running instance. For more information, see Creating an Amazon EBS-Backed Linux AMI in the Amazon EC2 User Guide for Linux Instances guide.
Creating a Compute EnvironmentBefore you can run jobs in AWS Batch, you need to create a compute environment. You can create amanaged compute environment, where AWS Batch manages the instances within the environment basedon your specifications, or you can create an unmanaged compute environment where you handle theinstance configuration within the environment.
To create a managed compute environment
1. Open the AWS Batch console at https://console.aws.amazon.com/batch/.
2. From the navigation bar, select the region to use.
3. In the navigation pane, choose Compute environments, Create environment.
4. Configure the environment.
a. For Compute environment type, choose Managed.
44
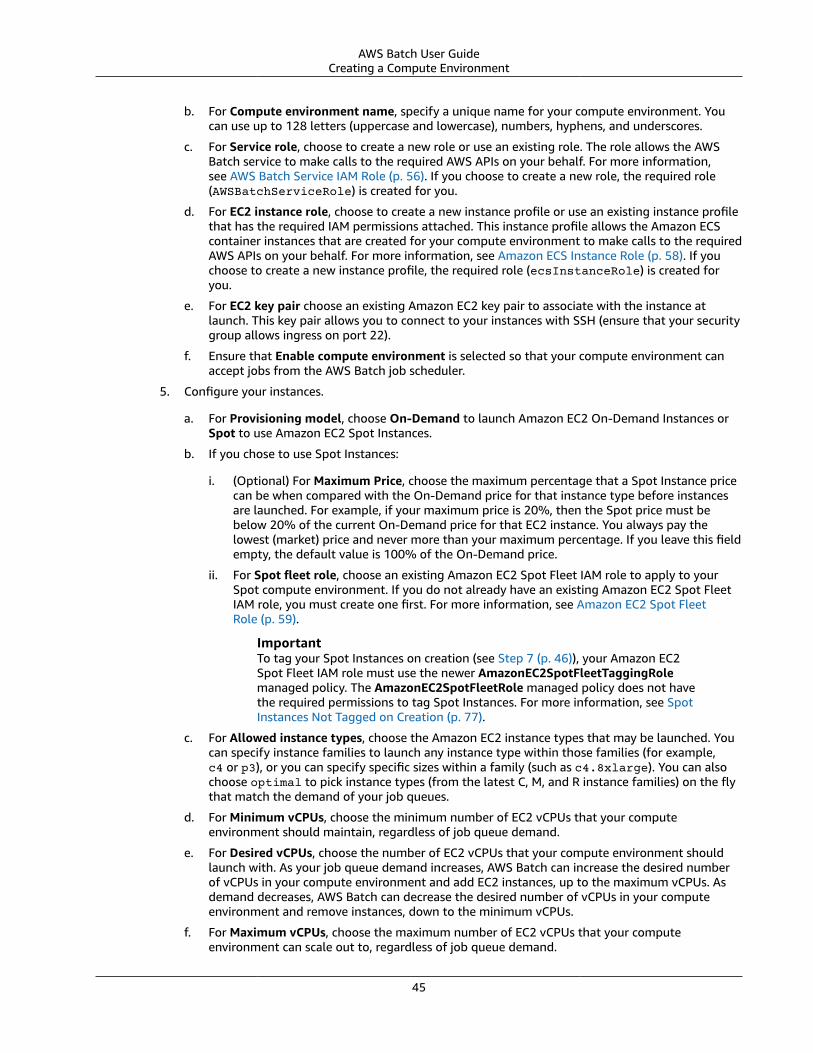
AWS Batch User GuideCreating a Compute Environment
b. For Compute environment name, specify a unique name for your compute environment. Youcan use up to 128 letters (uppercase and lowercase), numbers, hyphens, and underscores.
c. For Service role, choose to create a new role or use an existing role. The role allows the AWSBatch service to make calls to the required AWS APIs on your behalf. For more information,see AWS Batch Service IAM Role (p. 56). If you choose to create a new role, the required role(AWSBatchServiceRole) is created for you.
d. For EC2 instance role, choose to create a new instance profile or use an existing instance profilethat has the required IAM permissions attached. This instance profile allows the Amazon ECScontainer instances that are created for your compute environment to make calls to the requiredAWS APIs on your behalf. For more information, see Amazon ECS Instance Role (p. 58). If youchoose to create a new instance profile, the required role (ecsInstanceRole) is created foryou.
e. For EC2 key pair choose an existing Amazon EC2 key pair to associate with the instance atlaunch. This key pair allows you to connect to your instances with SSH (ensure that your securitygroup allows ingress on port 22).
f. Ensure that Enable compute environment is selected so that your compute environment canaccept jobs from the AWS Batch job scheduler.
5. Configure your instances.
a. For Provisioning model, choose On-Demand to launch Amazon EC2 On-Demand Instances orSpot to use Amazon EC2 Spot Instances.
b. If you chose to use Spot Instances:
i. (Optional) For Maximum Price, choose the maximum percentage that a Spot Instance pricecan be when compared with the On-Demand price for that instance type before instancesare launched. For example, if your maximum price is 20%, then the Spot price must bebelow 20% of the current On-Demand price for that EC2 instance. You always pay thelowest (market) price and never more than your maximum percentage. If you leave this fieldempty, the default value is 100% of the On-Demand price.
ii. For Spot fleet role, choose an existing Amazon EC2 Spot Fleet IAM role to apply to yourSpot compute environment. If you do not already have an existing Amazon EC2 Spot FleetIAM role, you must create one first. For more information, see Amazon EC2 Spot FleetRole (p. 59).
ImportantTo tag your Spot Instances on creation (see Step 7 (p. 46)), your Amazon EC2Spot Fleet IAM role must use the newer AmazonEC2SpotFleetTaggingRolemanaged policy. The AmazonEC2SpotFleetRole managed policy does not havethe required permissions to tag Spot Instances. For more information, see SpotInstances Not Tagged on Creation (p. 77).
c. For Allowed instance types, choose the Amazon EC2 instance types that may be launched. Youcan specify instance families to launch any instance type within those families (for example,c4 or p3), or you can specify specific sizes within a family (such as c4.8xlarge). You can alsochoose optimal to pick instance types (from the latest C, M, and R instance families) on the flythat match the demand of your job queues.
d. For Minimum vCPUs, choose the minimum number of EC2 vCPUs that your computeenvironment should maintain, regardless of job queue demand.
e. For Desired vCPUs, choose the number of EC2 vCPUs that your compute environment shouldlaunch with. As your job queue demand increases, AWS Batch can increase the desired numberof vCPUs in your compute environment and add EC2 instances, up to the maximum vCPUs. Asdemand decreases, AWS Batch can decrease the desired number of vCPUs in your computeenvironment and remove instances, down to the minimum vCPUs.
f. For Maximum vCPUs, choose the maximum number of EC2 vCPUs that your computeenvironment can scale out to, regardless of job queue demand.
45
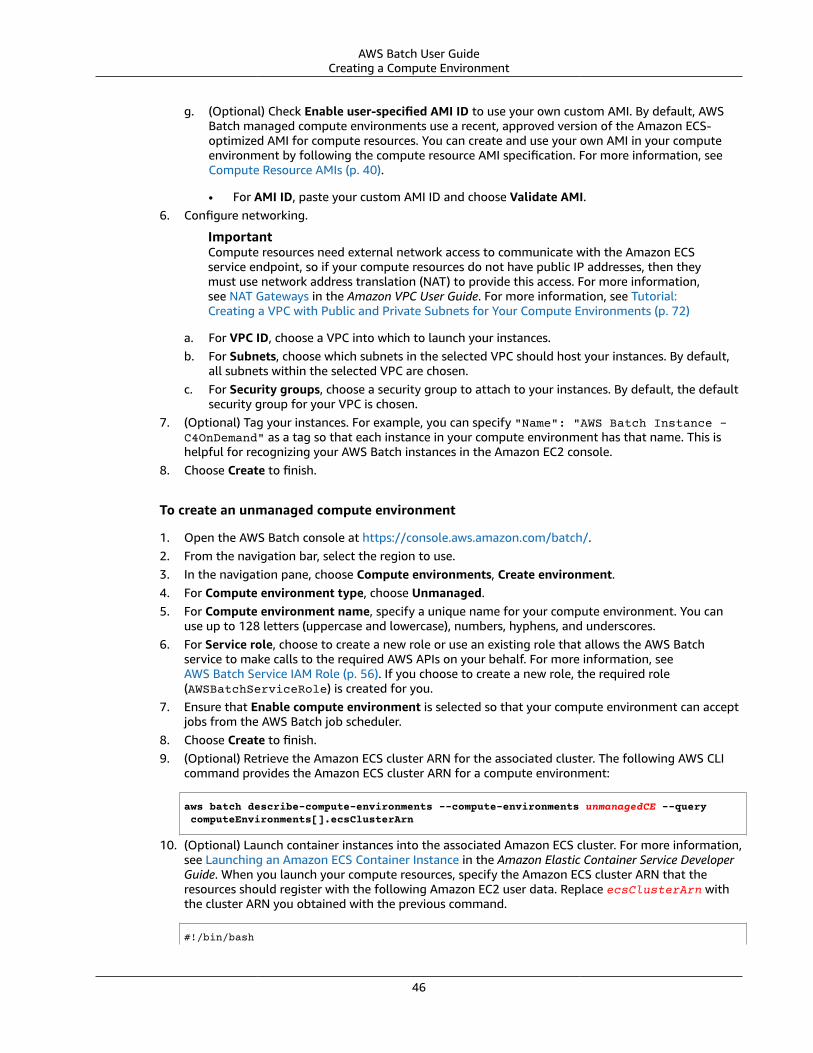
AWS Batch User GuideCreating a Compute Environment
g. (Optional) Check Enable user-specified AMI ID to use your own custom AMI. By default, AWSBatch managed compute environments use a recent, approved version of the Amazon ECS-optimized AMI for compute resources. You can create and use your own AMI in your computeenvironment by following the compute resource AMI specification. For more information, seeCompute Resource AMIs (p. 40).
• For AMI ID, paste your custom AMI ID and choose Validate AMI.6. Configure networking.
ImportantCompute resources need external network access to communicate with the Amazon ECSservice endpoint, so if your compute resources do not have public IP addresses, then theymust use network address translation (NAT) to provide this access. For more information,see NAT Gateways in the Amazon VPC User Guide. For more information, see Tutorial:Creating a VPC with Public and Private Subnets for Your Compute Environments (p. 72)
a. For VPC ID, choose a VPC into which to launch your instances.b. For Subnets, choose which subnets in the selected VPC should host your instances. By default,
all subnets within the selected VPC are chosen.c. For Security groups, choose a security group to attach to your instances. By default, the default
security group for your VPC is chosen.7. (Optional) Tag your instances. For example, you can specify "Name": "AWS Batch Instance -
C4OnDemand" as a tag so that each instance in your compute environment has that name. This ishelpful for recognizing your AWS Batch instances in the Amazon EC2 console.
8. Choose Create to finish.
To create an unmanaged compute environment
1. Open the AWS Batch console at https://console.aws.amazon.com/batch/.2. From the navigation bar, select the region to use.3. In the navigation pane, choose Compute environments, Create environment.4. For Compute environment type, choose Unmanaged.5. For Compute environment name, specify a unique name for your compute environment. You can
use up to 128 letters (uppercase and lowercase), numbers, hyphens, and underscores.6. For Service role, choose to create a new role or use an existing role that allows the AWS Batch
service to make calls to the required AWS APIs on your behalf. For more information, seeAWS Batch Service IAM Role (p. 56). If you choose to create a new role, the required role(AWSBatchServiceRole) is created for you.
7. Ensure that Enable compute environment is selected so that your compute environment can acceptjobs from the AWS Batch job scheduler.
8. Choose Create to finish.9. (Optional) Retrieve the Amazon ECS cluster ARN for the associated cluster. The following AWS CLI
command provides the Amazon ECS cluster ARN for a compute environment:
aws batch describe-compute-environments --compute-environments unmanagedCE --query computeEnvironments[].ecsClusterArn
10. (Optional) Launch container instances into the associated Amazon ECS cluster. For more information,see Launching an Amazon ECS Container Instance in the Amazon Elastic Container Service DeveloperGuide. When you launch your compute resources, specify the Amazon ECS cluster ARN that theresources should register with the following Amazon EC2 user data. Replace ecsClusterArn withthe cluster ARN you obtained with the previous command.
#!/bin/bash
46
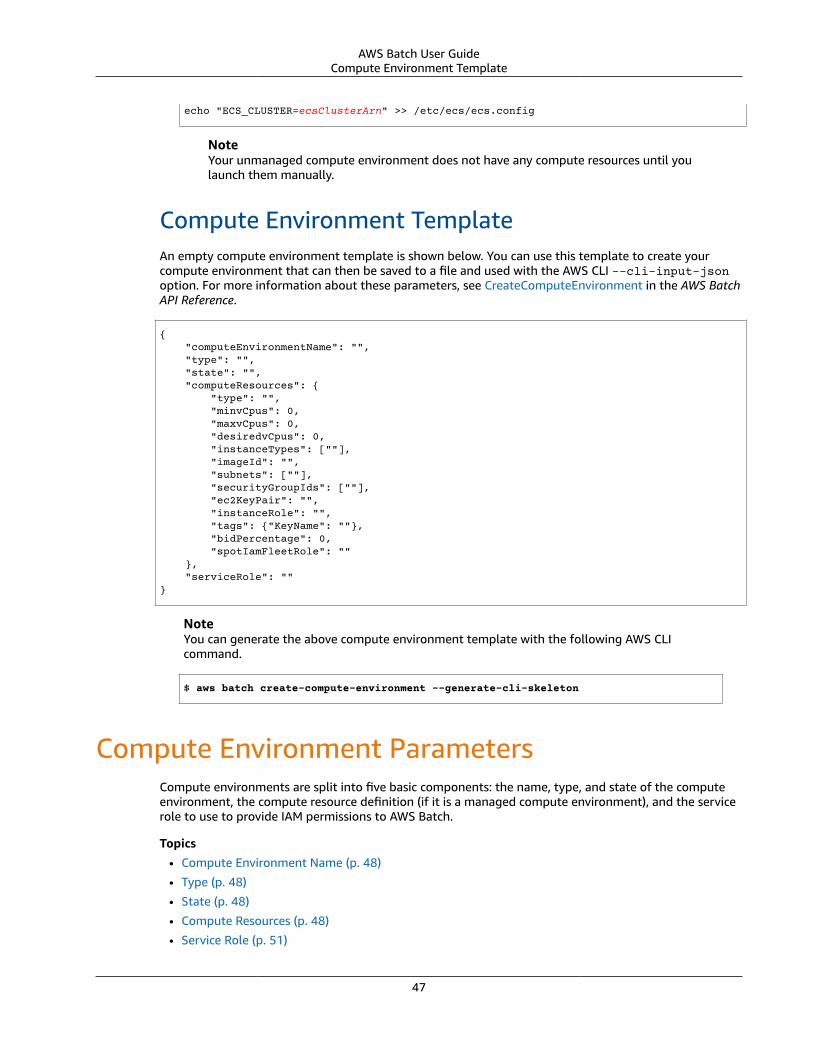
AWS Batch User GuideCompute Environment Template
echo "ECS_CLUSTER=ecsClusterArn" >> /etc/ecs/ecs.config
NoteYour unmanaged compute environment does not have any compute resources until youlaunch them manually.
Compute Environment TemplateAn empty compute environment template is shown below. You can use this template to create yourcompute environment that can then be saved to a file and used with the AWS CLI --cli-input-jsonoption. For more information about these parameters, see CreateComputeEnvironment in the AWS BatchAPI Reference.
{ "computeEnvironmentName": "", "type": "", "state": "", "computeResources": { "type": "", "minvCpus": 0, "maxvCpus": 0, "desiredvCpus": 0, "instanceTypes": [""], "imageId": "", "subnets": [""], "securityGroupIds": [""], "ec2KeyPair": "", "instanceRole": "", "tags": {"KeyName": ""}, "bidPercentage": 0, "spotIamFleetRole": "" }, "serviceRole": ""}
NoteYou can generate the above compute environment template with the following AWS CLIcommand.
$ aws batch create-compute-environment --generate-cli-skeleton
Compute Environment ParametersCompute environments are split into five basic components: the name, type, and state of the computeenvironment, the compute resource definition (if it is a managed compute environment), and the servicerole to use to provide IAM permissions to AWS Batch.
Topics• Compute Environment Name (p. 48)
• Type (p. 48)
• State (p. 48)
• Compute Resources (p. 48)
• Service Role (p. 51)
47
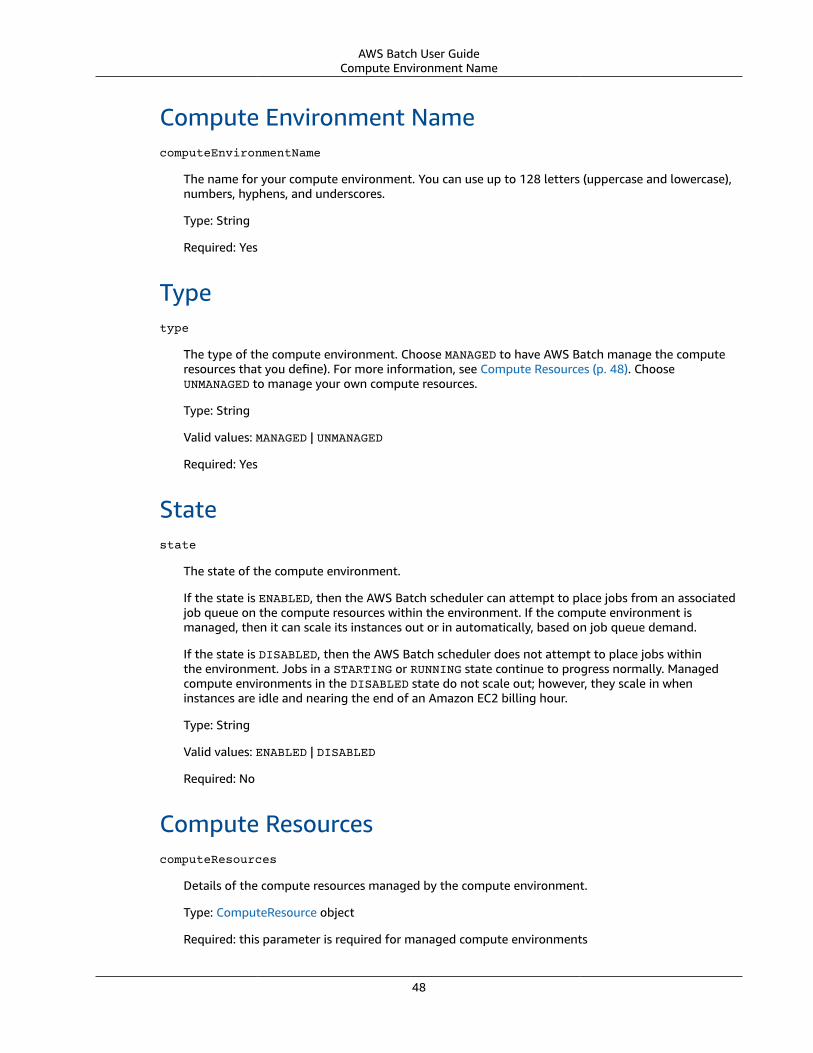
AWS Batch User GuideCompute Environment Name
Compute Environment NamecomputeEnvironmentName
The name for your compute environment. You can use up to 128 letters (uppercase and lowercase),numbers, hyphens, and underscores.
Type: String
Required: Yes
Typetype
The type of the compute environment. Choose MANAGED to have AWS Batch manage the computeresources that you define). For more information, see Compute Resources (p. 48). ChooseUNMANAGED to manage your own compute resources.
Type: String
Valid values: MANAGED | UNMANAGED
Required: Yes
Statestate
The state of the compute environment.
If the state is ENABLED, then the AWS Batch scheduler can attempt to place jobs from an associatedjob queue on the compute resources within the environment. If the compute environment ismanaged, then it can scale its instances out or in automatically, based on job queue demand.
If the state is DISABLED, then the AWS Batch scheduler does not attempt to place jobs withinthe environment. Jobs in a STARTING or RUNNING state continue to progress normally. Managedcompute environments in the DISABLED state do not scale out; however, they scale in wheninstances are idle and nearing the end of an Amazon EC2 billing hour.
Type: String
Valid values: ENABLED | DISABLED
Required: No
Compute ResourcescomputeResources
Details of the compute resources managed by the compute environment.
Type: ComputeResource object
Required: this parameter is required for managed compute environments
48
AWS Batch User GuideCompute Resources
type
The type of compute environment. Use this parameter to specify whether to use AmazonEC2 On-Demand Instances or Amazon EC2 Spot Instances in your compute environment.If you choose SPOT, you must also specify an Amazon EC2 Spot Fleet role with thespotIamFleetRole parameter. For more information, see Amazon EC2 Spot FleetRole (p. 59).
Valid values: EC2 | SPOT
Required: YesminvCpus
The minimum number of EC2 vCPUs that an environment should maintain.
Type: Integer
Required: YesmaxvCpus
The maximum number of EC2 vCPUs that an environment can reach.
Type: Integer
Required: YesdesiredvCpus
The desired number of EC2 vCPUS in the compute environment. AWS Batch modifies this valuebetween the minimum and maximum values, based on job queue demand.
Type: Integer
Required: NoinstanceTypes
The instance types that may be launched. You can specify instance families to launch anyinstance type within those families (for example, c4 or p3), or you can specify specific sizeswithin a family (such as c4.8xlarge). You can also choose optimal to pick instance types(from the latest C, M, and R instance families) on the fly that match the demand of your jobqueues.
Type: Array of strings
Valid values: "optimal", "m3", "m4", "c3", "c4", "r3", "r4", "i2", "i3","d2", "g2", "g3", "p2", "p3", "x1", "f1", "m3.medium", "m3.large","m3.xlarge", "m3.2xlarge", "m4.large", "m4.xlarge", "m4.2xlarge","m4.4xlarge", "m4.10xlarge", "m4.16xlarge", "c3.large", "c3.xlarge","c3.2xlarge", "c3.4xlarge", "c3.8xlarge", "c4.large", "c4.xlarge","c4.2xlarge", "c4.4xlarge", "c4.8xlarge", "r3.large", "r3.xlarge","r3.2xlarge", "r3.4xlarge", "r3.8xlarge", "r4.large", "r4.xlarge","r4.2xlarge", "r4.4xlarge", "r4.8xlarge", "i2.xlarge", "i2.2xlarge","i2.4xlarge", "i2.8xlarge", "i3.xlarge", "i3.2xlarge", "i3.4xlarge","i3.8xlarge", "i3.16xlarge", "d2.xlarge", "d2.4xlarge", "d2.8xlarge","g2.2xlarge", "g2.8xlarge", "g3.4xlarge", "g3.8xlarge", "g3.16xlarge","p2.xlarge", "p2.8xlarge", "p2.16xlarge", "p3.2xlarge", "p3.8xlarge","p3.16xlarge", "x1.16xlarge", "x1.32xlarge", "f1.2xlarge", "f1.16xlarge"
Required: yes
49
AWS Batch User GuideCompute Resources
imageId
The Amazon Machine Image (AMI) ID used for instances launched in the compute environment.
Type: String
Required: Nosubnets
The VPC subnets into which the compute resources are launched. These subnets must be withinthe same VPC.
Type: Array of strings
Required: YessecurityGroupIds
The EC2 security groups to associate with the instances launched in the compute environment.
Type: Array of strings
Required: Yesec2KeyPair
The EC2 key pair that is used for instances launched in the compute environment. You can usethis key pair to log in to your instances with SSH.
Type: String
Required: NoinstanceRole
The Amazon ECS instance profile to attach to Amazon EC2 instances in a compute environment.You can specify the short name or full Amazon Resource Name (ARN) of an instance profile. Forexample, ecsInstanceRole or arn:aws:iam::aws_account_id:instance-profile/ecsInstanceRole. For more information, see Amazon ECS Instance Role (p. 58).
Type: String
Required: Yestags
Key-value pair tags to be applied to instances that are launched in the compute environment.For example, you can specify "Name": "AWS Batch Instance - C4OnDemand" as a tag sothat each instance in your compute environment has that name. This is helpful for recognizingyour AWS Batch instances in the Amazon EC2 console.
Type: String to string map
Required: NobidPercentage
The maximum percentage that a Spot Instance price must be when compared with the On-Demand price for that instance type before instances are launched. For example, if your bidpercentage is 20%, then the Spot price must be below 20% of the current On-Demand price forthat EC2 instance.
Required: This parameter is required for SPOT compute environments.
50
AWS Batch User GuideService Role
spotIamFleetRole
The Amazon Resource Name (ARN) of the Amazon EC2 Spot Fleet IAM role applied to a SPOTcompute environment. For more information, see Amazon EC2 Spot Fleet Role (p. 59).
ImportantTo tag your Spot Instances on creation, the Spot Fleet IAM role specified here mustuse the newer AmazonEC2SpotFleetTaggingRole managed policy. The previouslyrecommended AmazonEC2SpotFleetRole managed policy does not have the requiredpermissions to tag Spot Instances. For more information, see Spot Instances NotTagged on Creation (p. 77).
Type: String
Required: This parameter is required for SPOT compute environments.
Service RoleserviceRole
The full Amazon Resource Name (ARN) of the IAM role that allows AWS Batch to make calls to otherAWS services on your behalf. For more information, see AWS Batch Service IAM Role (p. 56).
Type: String
Required: Yes
Compute Resource Memory ManagementWhen the Amazon ECS container agent registers a compute resource into a compute environment, theagent must determine how much memory the compute resource has available to reserve for your jobs.Because of platform memory overhead and memory occupied by the system kernel, this number isdifferent than the installed memory amount that is advertised for Amazon EC2 instances. For example,an m4.large instance has 8 GiB of installed memory. However, this does not always translate to exactly8192 MiB of memory available for jobs when the compute resource registers.
If you specify 8192 MiB for the job, and none of your compute resources have 8192 MiB or greaterof memory available to satisfy this requirement, then the job cannot be placed in your computeenvironment. If you are using a managed compute environment, then AWS Batch must launch a largerinstance type to accommodate the request.
The default AWS Batch compute resource AMI also reserves 32 MiB of memory for the Amazon ECScontainer agent and other critical system processes. This memory is not available for job allocation. Formore information, see Reserving System Memory (p. 52).
The Amazon ECS container agent uses the Docker ReadMemInfo() function to query the total memoryavailable to the operating system. Linux provides command line utilities to determine the total memory.
Example - Determine Linux total memory
The free command returns the total memory that is recognized by the operating system.
free -b
Example output for an m4.large instance running the Amazon ECS-optimized Linux AMI.
51
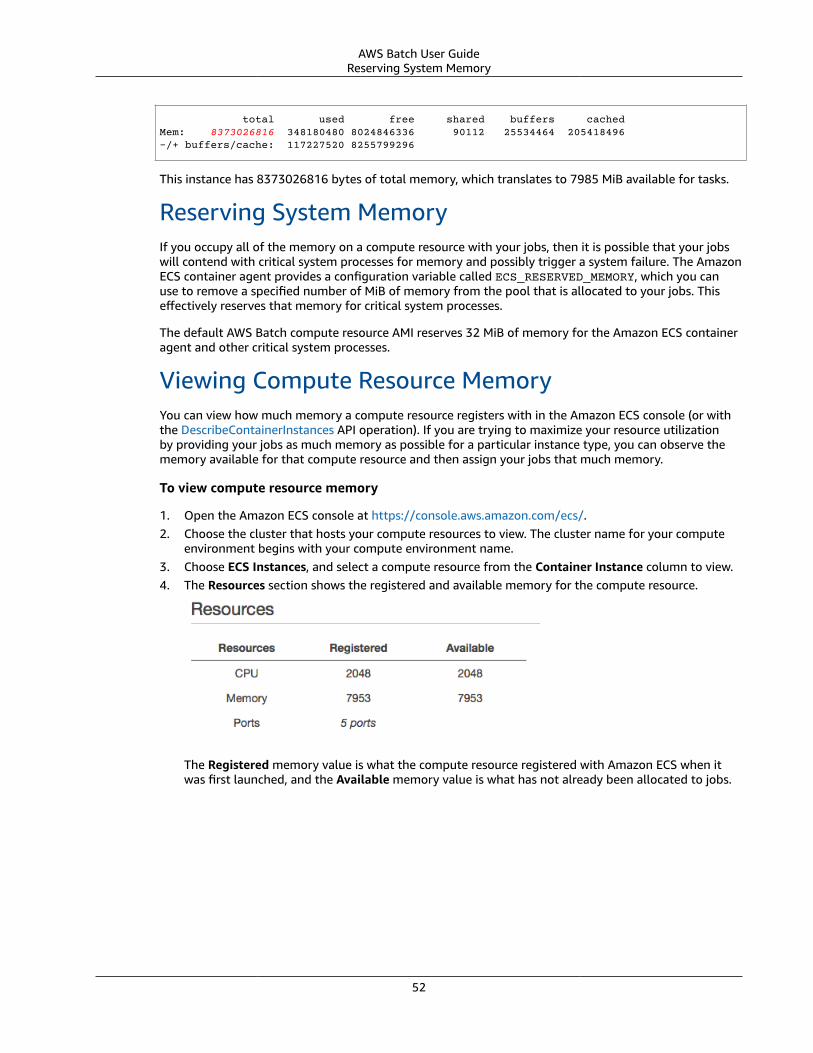
AWS Batch User GuideReserving System Memory
total used free shared buffers cachedMem: 8373026816 348180480 8024846336 90112 25534464 205418496-/+ buffers/cache: 117227520 8255799296
This instance has 8373026816 bytes of total memory, which translates to 7985 MiB available for tasks.
Reserving System MemoryIf you occupy all of the memory on a compute resource with your jobs, then it is possible that your jobswill contend with critical system processes for memory and possibly trigger a system failure. The AmazonECS container agent provides a configuration variable called ECS_RESERVED_MEMORY, which you canuse to remove a specified number of MiB of memory from the pool that is allocated to your jobs. Thiseffectively reserves that memory for critical system processes.
The default AWS Batch compute resource AMI reserves 32 MiB of memory for the Amazon ECS containeragent and other critical system processes.
Viewing Compute Resource MemoryYou can view how much memory a compute resource registers with in the Amazon ECS console (or withthe DescribeContainerInstances API operation). If you are trying to maximize your resource utilizationby providing your jobs as much memory as possible for a particular instance type, you can observe thememory available for that compute resource and then assign your jobs that much memory.
To view compute resource memory
1. Open the Amazon ECS console at https://console.aws.amazon.com/ecs/.2. Choose the cluster that hosts your compute resources to view. The cluster name for your compute
environment begins with your compute environment name.3. Choose ECS Instances, and select a compute resource from the Container Instance column to view.4. The Resources section shows the registered and available memory for the compute resource.
The Registered memory value is what the compute resource registered with Amazon ECS when itwas first launched, and the Available memory value is what has not already been allocated to jobs.
52
AWS Batch User GuidePolicy Structure
AWS Batch IAM Policies, Roles, andPermissions
By default, IAM users don't have permission to create or modify AWS Batch resources, or perform tasksusing the AWS Batch API. (This means that they also can't do so using the AWS Batch console or the AWSCLI.) To allow IAM users to create or modify resources and submit jobs, you must create IAM policies thatgrant IAM users permission to use the specific resources and API actions they'll need, and then attachthose policies to the IAM users or groups that require those permissions.
When you attach a policy to a user or group of users, it allows or denies the users permission to performthe specified tasks on the specified resources. For more information, see Permissions and Policies in theIAM User Guide. For more information about managing and creating custom IAM policies, see ManagingIAM Policies.
Likewise, AWS Batch makes calls to other AWS services on your behalf, so the service must authenticatewith your credentials. This authentication is accomplished by creating an IAM role and policy that canprovide these permissions and then associating that role with your compute environments when youcreate them. For more information, see Amazon ECS Instance Role (p. 58) and also IAM Roles in theIAM User Guide.
Getting Started
An IAM policy must grant or deny permissions to use one or more AWS Batch actions.
Topics• Policy Structure (p. 53)• AWS Batch Managed Policy (p. 55)• Creating AWS Batch IAM Policies (p. 56)• AWS Batch Service IAM Role (p. 56)• Amazon ECS Instance Role (p. 58)• Amazon EC2 Spot Fleet Role (p. 59)• CloudWatch Events IAM Role (p. 61)
Policy StructureThe following topics explain the structure of an IAM policy.
Topics• Policy Syntax (p. 53)• Actions for AWS Batch (p. 54)• Amazon Resource Names for AWS Batch (p. 54)• Checking That Users Have the Required Permissions (p. 55)
Policy SyntaxAn IAM policy is a JSON document that consists of one or more statements. Each statement is structuredas follows:
53
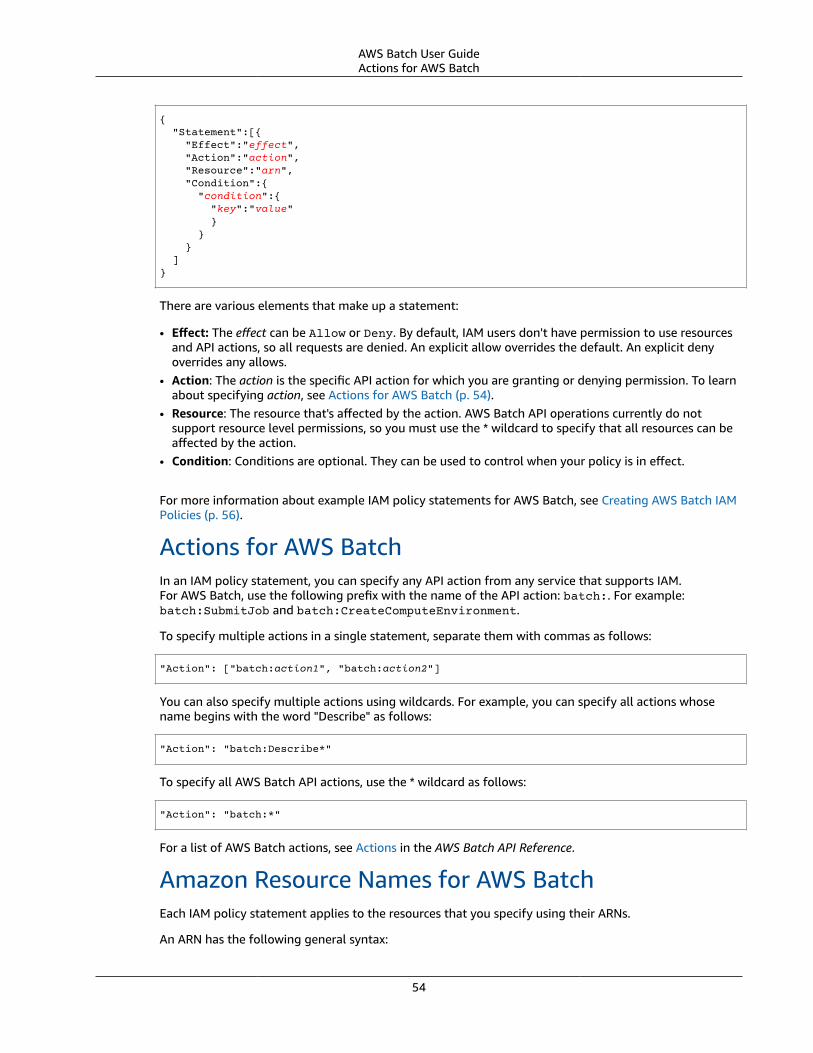
AWS Batch User GuideActions for AWS Batch
{ "Statement":[{ "Effect":"effect", "Action":"action", "Resource":"arn", "Condition":{ "condition":{ "key":"value" } } } ]}
There are various elements that make up a statement:
• Effect: The effect can be Allow or Deny. By default, IAM users don't have permission to use resourcesand API actions, so all requests are denied. An explicit allow overrides the default. An explicit denyoverrides any allows.
• Action: The action is the specific API action for which you are granting or denying permission. To learnabout specifying action, see Actions for AWS Batch (p. 54).
• Resource: The resource that's affected by the action. AWS Batch API operations currently do notsupport resource level permissions, so you must use the * wildcard to specify that all resources can beaffected by the action.
• Condition: Conditions are optional. They can be used to control when your policy is in effect.
For more information about example IAM policy statements for AWS Batch, see Creating AWS Batch IAMPolicies (p. 56).
Actions for AWS BatchIn an IAM policy statement, you can specify any API action from any service that supports IAM.For AWS Batch, use the following prefix with the name of the API action: batch:. For example:batch:SubmitJob and batch:CreateComputeEnvironment.
To specify multiple actions in a single statement, separate them with commas as follows:
"Action": ["batch:action1", "batch:action2"]
You can also specify multiple actions using wildcards. For example, you can specify all actions whosename begins with the word "Describe" as follows:
"Action": "batch:Describe*"
To specify all AWS Batch API actions, use the * wildcard as follows:
"Action": "batch:*"
For a list of AWS Batch actions, see Actions in the AWS Batch API Reference.
Amazon Resource Names for AWS BatchEach IAM policy statement applies to the resources that you specify using their ARNs.
An ARN has the following general syntax:
54
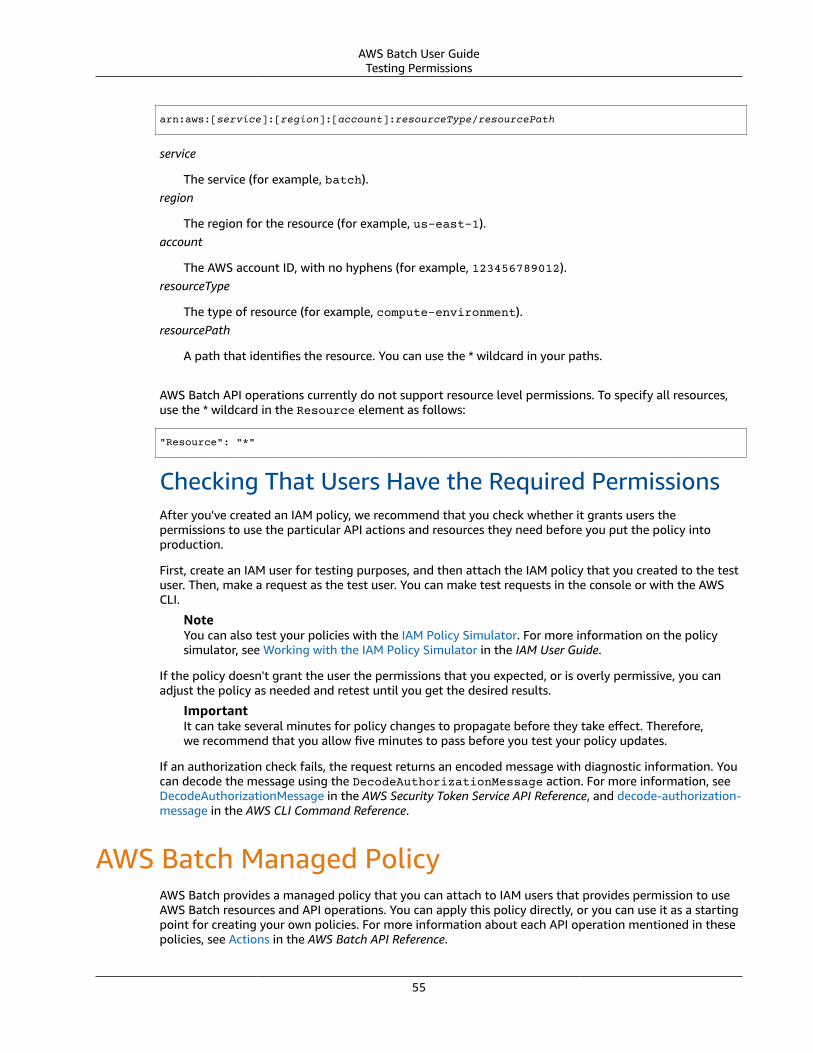
AWS Batch User GuideTesting Permissions
arn:aws:[service]:[region]:[account]:resourceType/resourcePath
service
The service (for example, batch).region
The region for the resource (for example, us-east-1).account
The AWS account ID, with no hyphens (for example, 123456789012).resourceType
The type of resource (for example, compute-environment).resourcePath
A path that identifies the resource. You can use the * wildcard in your paths.
AWS Batch API operations currently do not support resource level permissions. To specify all resources,use the * wildcard in the Resource element as follows:
"Resource": "*"
Checking That Users Have the Required PermissionsAfter you've created an IAM policy, we recommend that you check whether it grants users thepermissions to use the particular API actions and resources they need before you put the policy intoproduction.
First, create an IAM user for testing purposes, and then attach the IAM policy that you created to the testuser. Then, make a request as the test user. You can make test requests in the console or with the AWSCLI.
NoteYou can also test your policies with the IAM Policy Simulator. For more information on the policysimulator, see Working with the IAM Policy Simulator in the IAM User Guide.
If the policy doesn't grant the user the permissions that you expected, or is overly permissive, you canadjust the policy as needed and retest until you get the desired results.
ImportantIt can take several minutes for policy changes to propagate before they take effect. Therefore,we recommend that you allow five minutes to pass before you test your policy updates.
If an authorization check fails, the request returns an encoded message with diagnostic information. Youcan decode the message using the DecodeAuthorizationMessage action. For more information, seeDecodeAuthorizationMessage in the AWS Security Token Service API Reference, and decode-authorization-message in the AWS CLI Command Reference.
AWS Batch Managed PolicyAWS Batch provides a managed policy that you can attach to IAM users that provides permission to useAWS Batch resources and API operations. You can apply this policy directly, or you can use it as a startingpoint for creating your own policies. For more information about each API operation mentioned in thesepolicies, see Actions in the AWS Batch API Reference.
55
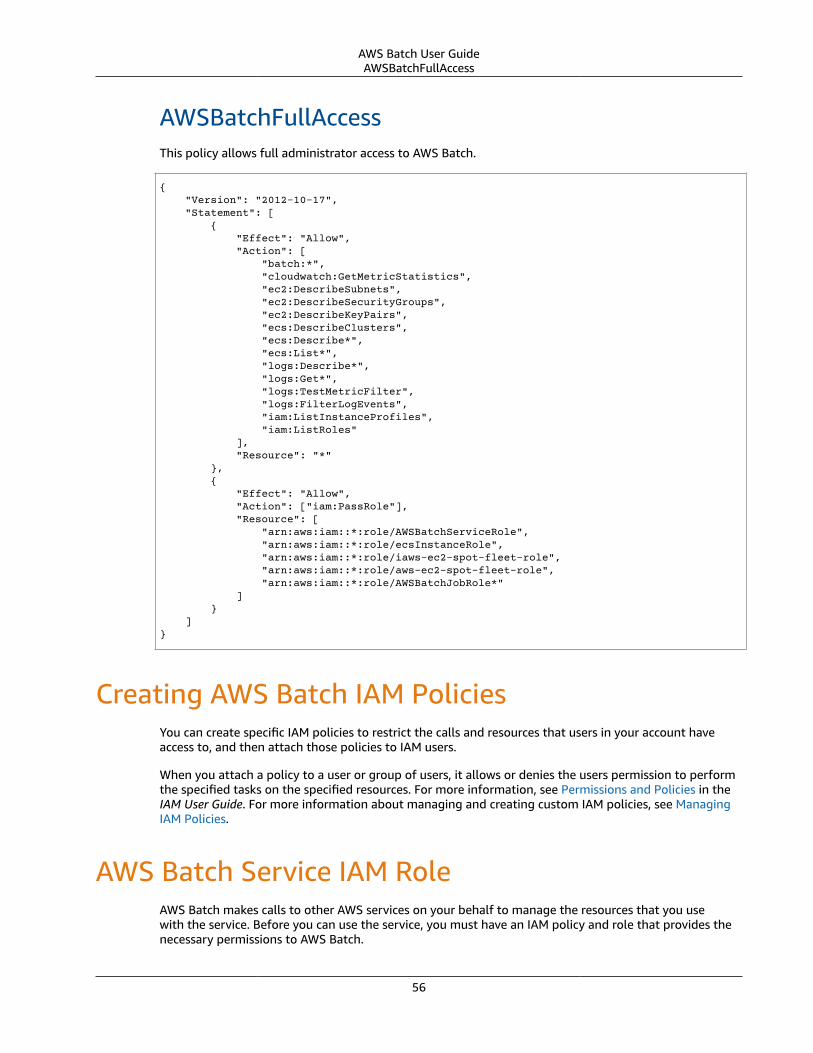
AWS Batch User GuideAWSBatchFullAccess
AWSBatchFullAccessThis policy allows full administrator access to AWS Batch.
{ "Version": "2012-10-17", "Statement": [ { "Effect": "Allow", "Action": [ "batch:*", "cloudwatch:GetMetricStatistics", "ec2:DescribeSubnets", "ec2:DescribeSecurityGroups", "ec2:DescribeKeyPairs", "ecs:DescribeClusters", "ecs:Describe*", "ecs:List*", "logs:Describe*", "logs:Get*", "logs:TestMetricFilter", "logs:FilterLogEvents", "iam:ListInstanceProfiles", "iam:ListRoles" ], "Resource": "*" }, { "Effect": "Allow", "Action": ["iam:PassRole"], "Resource": [ "arn:aws:iam::*:role/AWSBatchServiceRole", "arn:aws:iam::*:role/ecsInstanceRole", "arn:aws:iam::*:role/iaws-ec2-spot-fleet-role", "arn:aws:iam::*:role/aws-ec2-spot-fleet-role", "arn:aws:iam::*:role/AWSBatchJobRole*" ] } ]}
Creating AWS Batch IAM PoliciesYou can create specific IAM policies to restrict the calls and resources that users in your account haveaccess to, and then attach those policies to IAM users.
When you attach a policy to a user or group of users, it allows or denies the users permission to performthe specified tasks on the specified resources. For more information, see Permissions and Policies in theIAM User Guide. For more information about managing and creating custom IAM policies, see ManagingIAM Policies.
AWS Batch Service IAM RoleAWS Batch makes calls to other AWS services on your behalf to manage the resources that you usewith the service. Before you can use the service, you must have an IAM policy and role that provides thenecessary permissions to AWS Batch.
56
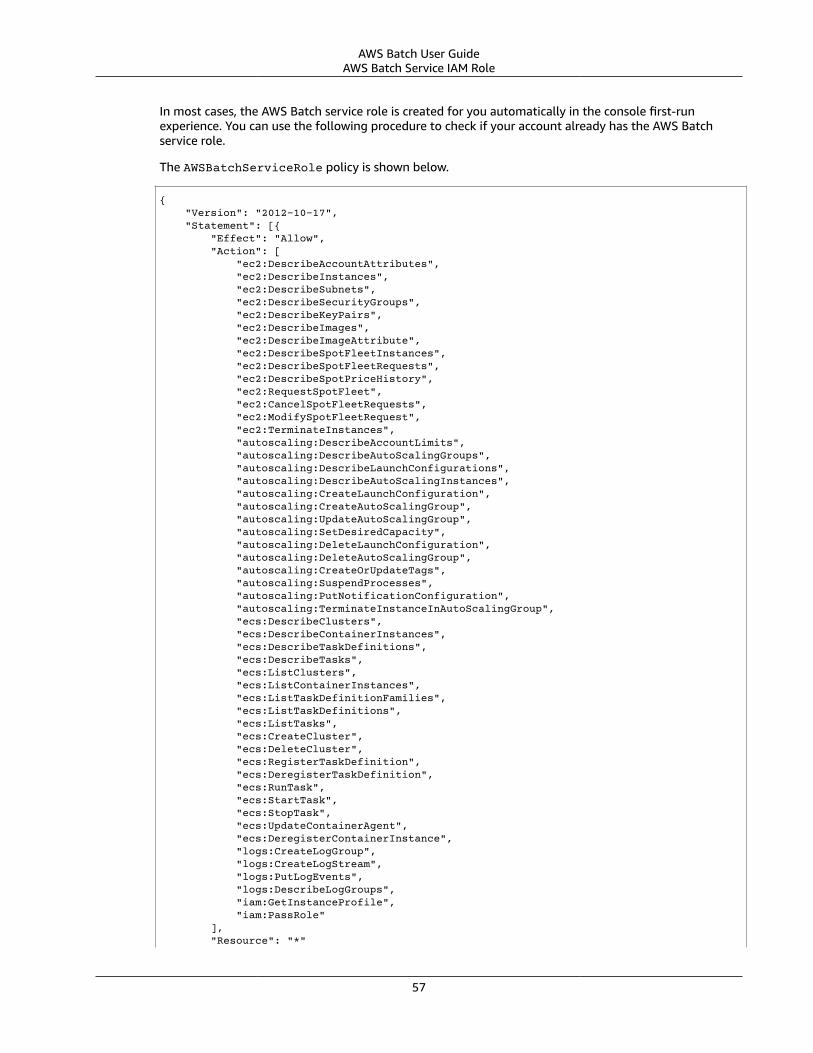
AWS Batch User GuideAWS Batch Service IAM Role
In most cases, the AWS Batch service role is created for you automatically in the console first-runexperience. You can use the following procedure to check if your account already has the AWS Batchservice role.
The AWSBatchServiceRole policy is shown below.
{ "Version": "2012-10-17", "Statement": [{ "Effect": "Allow", "Action": [ "ec2:DescribeAccountAttributes", "ec2:DescribeInstances", "ec2:DescribeSubnets", "ec2:DescribeSecurityGroups", "ec2:DescribeKeyPairs", "ec2:DescribeImages", "ec2:DescribeImageAttribute", "ec2:DescribeSpotFleetInstances", "ec2:DescribeSpotFleetRequests", "ec2:DescribeSpotPriceHistory", "ec2:RequestSpotFleet", "ec2:CancelSpotFleetRequests", "ec2:ModifySpotFleetRequest", "ec2:TerminateInstances", "autoscaling:DescribeAccountLimits", "autoscaling:DescribeAutoScalingGroups", "autoscaling:DescribeLaunchConfigurations", "autoscaling:DescribeAutoScalingInstances", "autoscaling:CreateLaunchConfiguration", "autoscaling:CreateAutoScalingGroup", "autoscaling:UpdateAutoScalingGroup", "autoscaling:SetDesiredCapacity", "autoscaling:DeleteLaunchConfiguration", "autoscaling:DeleteAutoScalingGroup", "autoscaling:CreateOrUpdateTags", "autoscaling:SuspendProcesses", "autoscaling:PutNotificationConfiguration", "autoscaling:TerminateInstanceInAutoScalingGroup", "ecs:DescribeClusters", "ecs:DescribeContainerInstances", "ecs:DescribeTaskDefinitions", "ecs:DescribeTasks", "ecs:ListClusters", "ecs:ListContainerInstances", "ecs:ListTaskDefinitionFamilies", "ecs:ListTaskDefinitions", "ecs:ListTasks", "ecs:CreateCluster", "ecs:DeleteCluster", "ecs:RegisterTaskDefinition", "ecs:DeregisterTaskDefinition", "ecs:RunTask", "ecs:StartTask", "ecs:StopTask", "ecs:UpdateContainerAgent", "ecs:DeregisterContainerInstance", "logs:CreateLogGroup", "logs:CreateLogStream", "logs:PutLogEvents", "logs:DescribeLogGroups", "iam:GetInstanceProfile", "iam:PassRole" ], "Resource": "*"
57
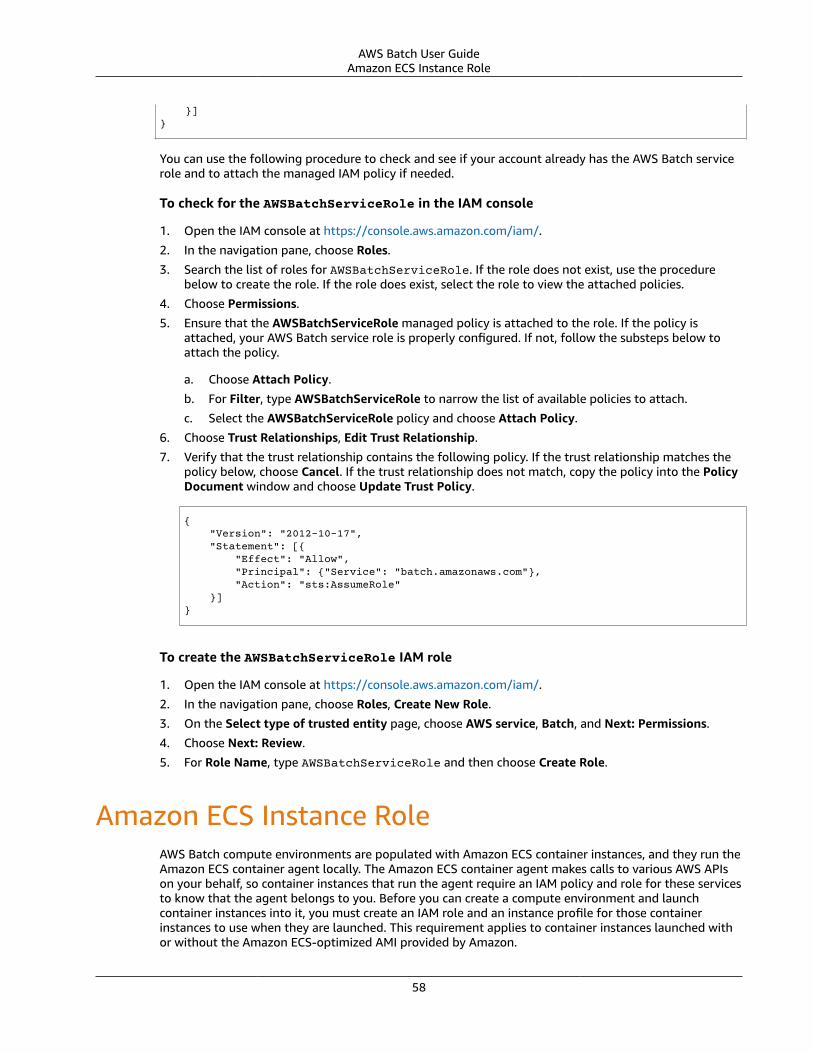
AWS Batch User GuideAmazon ECS Instance Role
}]}
You can use the following procedure to check and see if your account already has the AWS Batch servicerole and to attach the managed IAM policy if needed.
To check for the AWSBatchServiceRole in the IAM console
1. Open the IAM console at https://console.aws.amazon.com/iam/.
2. In the navigation pane, choose Roles.
3. Search the list of roles for AWSBatchServiceRole. If the role does not exist, use the procedurebelow to create the role. If the role does exist, select the role to view the attached policies.
4. Choose Permissions.
5. Ensure that the AWSBatchServiceRole managed policy is attached to the role. If the policy isattached, your AWS Batch service role is properly configured. If not, follow the substeps below toattach the policy.
a. Choose Attach Policy.
b. For Filter, type AWSBatchServiceRole to narrow the list of available policies to attach.
c. Select the AWSBatchServiceRole policy and choose Attach Policy.
6. Choose Trust Relationships, Edit Trust Relationship.
7. Verify that the trust relationship contains the following policy. If the trust relationship matches thepolicy below, choose Cancel. If the trust relationship does not match, copy the policy into the PolicyDocument window and choose Update Trust Policy.
{ "Version": "2012-10-17", "Statement": [{ "Effect": "Allow", "Principal": {"Service": "batch.amazonaws.com"}, "Action": "sts:AssumeRole" }]}
To create the AWSBatchServiceRole IAM role
1. Open the IAM console at https://console.aws.amazon.com/iam/.
2. In the navigation pane, choose Roles, Create New Role.
3. On the Select type of trusted entity page, choose AWS service, Batch, and Next: Permissions.
4. Choose Next: Review.
5. For Role Name, type AWSBatchServiceRole and then choose Create Role.
Amazon ECS Instance RoleAWS Batch compute environments are populated with Amazon ECS container instances, and they run theAmazon ECS container agent locally. The Amazon ECS container agent makes calls to various AWS APIson your behalf, so container instances that run the agent require an IAM policy and role for these servicesto know that the agent belongs to you. Before you can create a compute environment and launchcontainer instances into it, you must create an IAM role and an instance profile for those containerinstances to use when they are launched. This requirement applies to container instances launched withor without the Amazon ECS-optimized AMI provided by Amazon.
58
AWS Batch User GuideAmazon EC2 Spot Fleet Role
The Amazon ECS instance role and instance profile are automatically created for you in the console first-run experience; however, you can use the following procedure to check and see if your account alreadyhas the Amazon ECS instance role and instance profile and to attach the managed IAM policy if needed.
To check for the ecsInstanceRole in the IAM console
1. Open the IAM console at https://console.aws.amazon.com/iam/.
2. In the navigation pane, choose Roles.
3. Search the list of roles for ecsInstanceRole. If the role does not exist, use the steps below tocreate the role.
4. Choose Create New Role.
5. In the Select type of trusted entity section, choose the AWS service tab, then choose ElasticContainer Service.
6. Choose Next: Reviewand then choose Next: Permissions.
7. For Role Name, type ecsInstanceRole and choose Create Role to finish.
Amazon EC2 Spot Fleet RoleIf you create a managed compute environment that uses Amazon EC2 Spot Fleet Instances, youmust create a role that grants the Spot Fleet permission to bid on, launch, tag, and terminateinstances on your behalf, and specify it in your Spot Fleet request. You must also have theAWSServiceRoleForEC2Spot and AWSServiceRoleForEC2SpotFleet service-linked roles for Amazon EC2Spot and Spot Fleet. Use the procedures below to create all of these roles.
Topics
• Create Amazon EC2 Spot Fleet Roles in the AWS Management Console (p. 59)
• Create Amazon EC2 Spot Fleet Roles with the AWS CLI (p. 60)
Create Amazon EC2 Spot Fleet Roles in the AWSManagement ConsoleTo create the AmazonEC2SpotFleetRole IAM role for your Spot Fleet computeenvironments
1. Open the IAM console at https://console.aws.amazon.com/iam/.
2. In the navigation pane, choose Roles, Create role.
3. Choose AWS service as the trusted entity type, and then EC2 as the service to use the role.
4. In the Select your use case section, choose EC2 Spot Fleet Role and then Next: Permissions.
5. Choose Next: Review.
NoteHistorically, there have been two managed policies for the Amazon EC2 Spot Fleet role.
• AmazonEC2SpotFleetRole: This was the original managed policy for the Spot Fleet role.It has tighter IAM permissions, but it does not support Spot Instance tagging in computeenvironments. If you've previously created a Spot Fleet role with this policy, see SpotInstances Not Tagged on Creation (p. 77) to apply the new recommended policy tothat role.
59
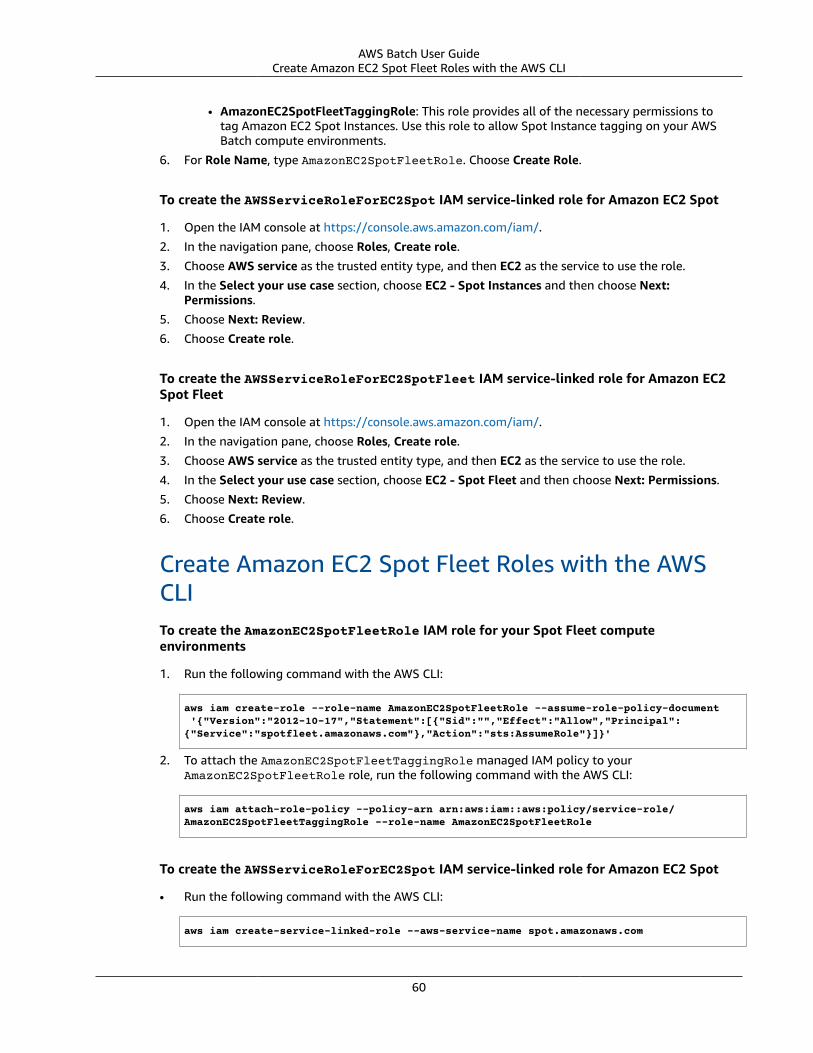
AWS Batch User GuideCreate Amazon EC2 Spot Fleet Roles with the AWS CLI
• AmazonEC2SpotFleetTaggingRole: This role provides all of the necessary permissions totag Amazon EC2 Spot Instances. Use this role to allow Spot Instance tagging on your AWSBatch compute environments.
6. For Role Name, type AmazonEC2SpotFleetRole. Choose Create Role.
To create the AWSServiceRoleForEC2Spot IAM service-linked role for Amazon EC2 Spot
1. Open the IAM console at https://console.aws.amazon.com/iam/.
2. In the navigation pane, choose Roles, Create role.
3. Choose AWS service as the trusted entity type, and then EC2 as the service to use the role.
4. In the Select your use case section, choose EC2 - Spot Instances and then choose Next:Permissions.
5. Choose Next: Review.
6. Choose Create role.
To create the AWSServiceRoleForEC2SpotFleet IAM service-linked role for Amazon EC2Spot Fleet
1. Open the IAM console at https://console.aws.amazon.com/iam/.
2. In the navigation pane, choose Roles, Create role.
3. Choose AWS service as the trusted entity type, and then EC2 as the service to use the role.
4. In the Select your use case section, choose EC2 - Spot Fleet and then choose Next: Permissions.
5. Choose Next: Review.
6. Choose Create role.
Create Amazon EC2 Spot Fleet Roles with the AWSCLITo create the AmazonEC2SpotFleetRole IAM role for your Spot Fleet computeenvironments
1. Run the following command with the AWS CLI:
aws iam create-role --role-name AmazonEC2SpotFleetRole --assume-role-policy-document '{"Version":"2012-10-17","Statement":[{"Sid":"","Effect":"Allow","Principal":{"Service":"spotfleet.amazonaws.com"},"Action":"sts:AssumeRole"}]}'
2. To attach the AmazonEC2SpotFleetTaggingRole managed IAM policy to yourAmazonEC2SpotFleetRole role, run the following command with the AWS CLI:
aws iam attach-role-policy --policy-arn arn:aws:iam::aws:policy/service-role/AmazonEC2SpotFleetTaggingRole --role-name AmazonEC2SpotFleetRole
To create the AWSServiceRoleForEC2Spot IAM service-linked role for Amazon EC2 Spot
• Run the following command with the AWS CLI:
aws iam create-service-linked-role --aws-service-name spot.amazonaws.com
60
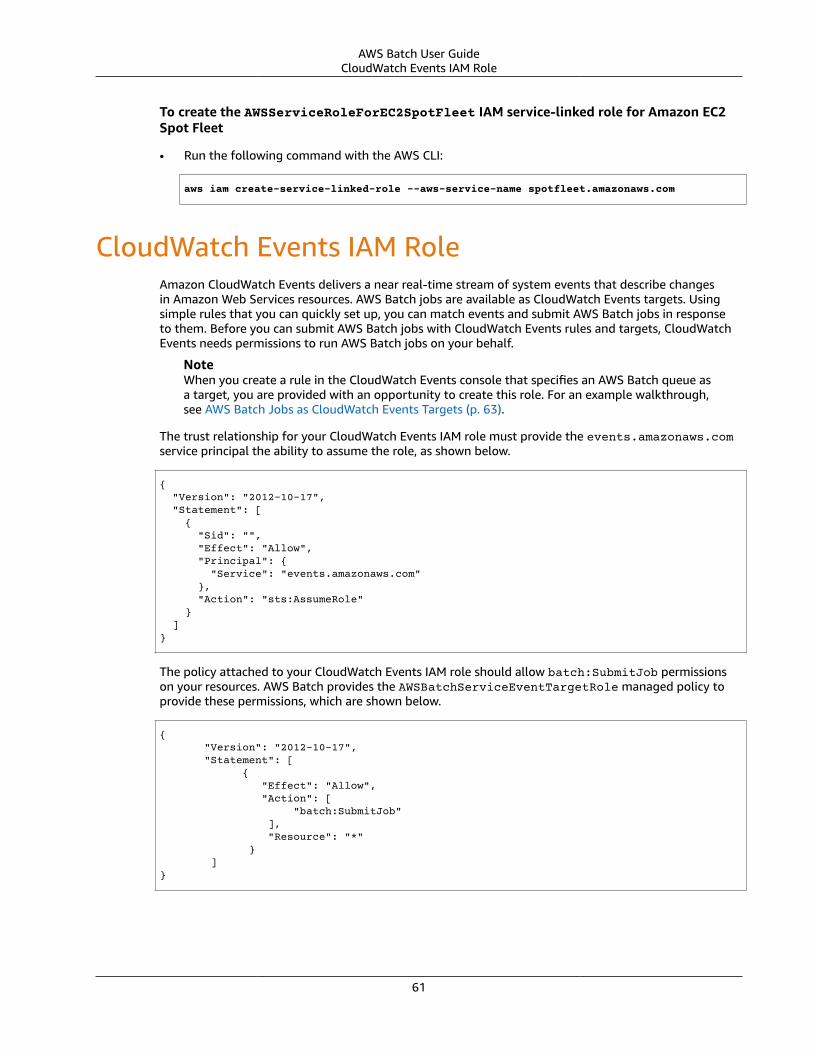
AWS Batch User GuideCloudWatch Events IAM Role
To create the AWSServiceRoleForEC2SpotFleet IAM service-linked role for Amazon EC2Spot Fleet
• Run the following command with the AWS CLI:
aws iam create-service-linked-role --aws-service-name spotfleet.amazonaws.com
CloudWatch Events IAM RoleAmazon CloudWatch Events delivers a near real-time stream of system events that describe changesin Amazon Web Services resources. AWS Batch jobs are available as CloudWatch Events targets. Usingsimple rules that you can quickly set up, you can match events and submit AWS Batch jobs in responseto them. Before you can submit AWS Batch jobs with CloudWatch Events rules and targets, CloudWatchEvents needs permissions to run AWS Batch jobs on your behalf.
NoteWhen you create a rule in the CloudWatch Events console that specifies an AWS Batch queue asa target, you are provided with an opportunity to create this role. For an example walkthrough,see AWS Batch Jobs as CloudWatch Events Targets (p. 63).
The trust relationship for your CloudWatch Events IAM role must provide the events.amazonaws.comservice principal the ability to assume the role, as shown below.
{ "Version": "2012-10-17", "Statement": [ { "Sid": "", "Effect": "Allow", "Principal": { "Service": "events.amazonaws.com" }, "Action": "sts:AssumeRole" } ]}
The policy attached to your CloudWatch Events IAM role should allow batch:SubmitJob permissionson your resources. AWS Batch provides the AWSBatchServiceEventTargetRole managed policy toprovide these permissions, which are shown below.
{ "Version": "2012-10-17", "Statement": [ { "Effect": "Allow", "Action": [ "batch:SubmitJob" ], "Resource": "*" } ]}
61
AWS Batch User GuideAWS Batch Events
AWS Batch Event Stream forCloudWatch Events
You can use the AWS Batch event stream for CloudWatch Events to receive near real-time notificationsregarding the current state of jobs that have been submitted to your job queues.
Using CloudWatch Events, you can monitor the progress of jobs, build AWS Batch custom workflowswith complex dependencies, generate usage reports or metrics around job execution, or build yourown custom dashboards. With AWS Batch and CloudWatch Events, you can eliminate scheduling andmonitoring code that continuously polls AWS Batch for job status changes. Instead, handle AWS Batchjob state changes asynchronously using any CloudWatch Events target, such as AWS Lambda, AmazonSimple Queue Service, Amazon Simple Notification Service, or Amazon Kinesis Data Streams.
Events from the AWS Batch event stream are ensured to be delivered at least one time. In the eventthat duplicate events are sent, the event provides enough information to identify duplicates (you cancompare the time stamp of the event and the job status).
AWS Batch jobs are available as CloudWatch Events targets. Using simple rules that you can quickly setup, you can match events and submit AWS Batch jobs in response to them. For more information, seeWhat is Amazon CloudWatch Events? in the Amazon CloudWatch Events User Guide. You can also useCloudWatch Events to schedule automated actions that self-trigger at certain times using cron or rateexpressions. For more information, see Schedule Expressions for Rules in the Amazon CloudWatch EventsUser Guide. For an example walkthrough, see AWS Batch Jobs as CloudWatch Events Targets (p. 63).
Topics• AWS Batch Events (p. 62)• AWS Batch Jobs as CloudWatch Events Targets (p. 63)• Tutorial: Listening for AWS Batch CloudWatch Events (p. 65)• Tutorial: Sending Amazon Simple Notification Service Alerts for Failed Job Events (p. 66)
AWS Batch EventsAWS Batch sends job status change events to CloudWatch Events. AWS Batch tracks the state of yourjobs. If a previously submitted job's status changes, an event is triggered, for example, if a job in theRUNNING status moves to the FAILED status. These events are classified as job state change events.
NoteAWS Batch may add other event types, sources, and details in the future. If you areprogrammatically deserializing event JSON data, make sure that your application is prepared tohandle unknown properties to avoid issues if and when these additional properties are added.
Job State Change EventsAny time that an existing (previously submitted) job changes states, an event is created. For moreinformation about AWS Batch job states, see Job States (p. 15).
NoteEvents are not created for the initial job submission.
Example Job State Change Event
Job state change events are delivered in the following format (the detail section below resemblesthe Job object that is returned from a DescribeJobs API operation in the AWS Batch API Reference). For
62
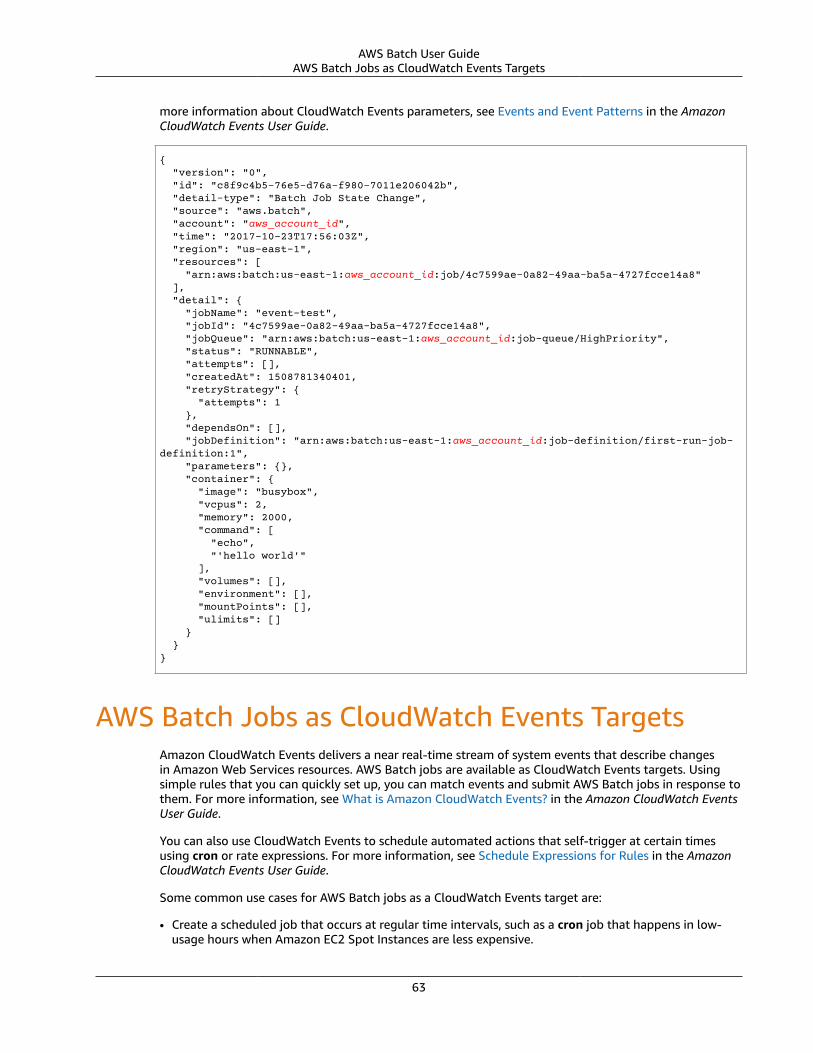
AWS Batch User GuideAWS Batch Jobs as CloudWatch Events Targets
more information about CloudWatch Events parameters, see Events and Event Patterns in the AmazonCloudWatch Events User Guide.
{ "version": "0", "id": "c8f9c4b5-76e5-d76a-f980-7011e206042b", "detail-type": "Batch Job State Change", "source": "aws.batch", "account": "aws_account_id", "time": "2017-10-23T17:56:03Z", "region": "us-east-1", "resources": [ "arn:aws:batch:us-east-1:aws_account_id:job/4c7599ae-0a82-49aa-ba5a-4727fcce14a8" ], "detail": { "jobName": "event-test", "jobId": "4c7599ae-0a82-49aa-ba5a-4727fcce14a8", "jobQueue": "arn:aws:batch:us-east-1:aws_account_id:job-queue/HighPriority", "status": "RUNNABLE", "attempts": [], "createdAt": 1508781340401, "retryStrategy": { "attempts": 1 }, "dependsOn": [], "jobDefinition": "arn:aws:batch:us-east-1:aws_account_id:job-definition/first-run-job-definition:1", "parameters": {}, "container": { "image": "busybox", "vcpus": 2, "memory": 2000, "command": [ "echo", "'hello world'" ], "volumes": [], "environment": [], "mountPoints": [], "ulimits": [] } }}
AWS Batch Jobs as CloudWatch Events TargetsAmazon CloudWatch Events delivers a near real-time stream of system events that describe changesin Amazon Web Services resources. AWS Batch jobs are available as CloudWatch Events targets. Usingsimple rules that you can quickly set up, you can match events and submit AWS Batch jobs in response tothem. For more information, see What is Amazon CloudWatch Events? in the Amazon CloudWatch EventsUser Guide.
You can also use CloudWatch Events to schedule automated actions that self-trigger at certain timesusing cron or rate expressions. For more information, see Schedule Expressions for Rules in the AmazonCloudWatch Events User Guide.
Some common use cases for AWS Batch jobs as a CloudWatch Events target are:
• Create a scheduled job that occurs at regular time intervals, such as a cron job that happens in low-usage hours when Amazon EC2 Spot Instances are less expensive.
63
AWS Batch User GuideAWS Batch Jobs as CloudWatch Events Targets
• Run an AWS Batch job in response to an API operation logged in CloudTrail, such as a job toautomatically create a thumbnail of an image when it is uploaded to a specified Amazon S3 bucket.
NoteIn this scenario, all of the AWS resources (Amazon S3 bucket, CloudWatch Events rule,CloudTrail logs, etc.) must be in the same region.
Before you can submit AWS Batch jobs with CloudWatch Events rules and targets, the CloudWatchEvents service needs permissions to run AWS Batch jobs on your behalf. When you create a rule inthe CloudWatch Events console that specifies an AWS Batch job as a target, you are provided with anopportunity to create this role. For more information about the required service principal and IAMpermissions for this role, see CloudWatch Events IAM Role (p. 61).
The procedure below shows how to create a scheduled AWS Batch job and the required CloudWatchEvents IAM role.
To create a scheduled AWS Batch job with CloudWatch Events
1. Open the CloudWatch console at https://console.aws.amazon.com/cloudwatch/.
2. In the left navigation, choose Events, Create rule.
3. For Event source, choose Schedule, and then whether to use a fixed interval schedule or a cronexpression for your schedule rule. For more information, see Schedule Expressions for Rules in theAmazon CloudWatch Events User Guide.
• For Fixed rate of, enter the interval and unit for your schedule.
• For Cron expression, enter the cron expression for your task schedule. These expressions have sixrequired fields, and fields are separated by white space. For more information, and examples ofcron expressions, see Cron Expressions in the Amazon CloudWatch Events User Guide.
4. For Targets, choose Add target.
5. Choose Batch job queue and fill in the following fields appropriately:
• Job queue: Enter the Amazon Resource Name (ARN) of the job queue in which to schedule yourjob.
• Job definition: Enter the name and revision or full ARN of the job definition to use for your job.
• Job name: Enter a name for your job.
• Array size: (Optional) Enter an array size for your job to run more than one copy. For moreinformation, see Array Jobs (p. 17).
• Job attempts: (Optional) Enter the number of times to retry your job if it fails. For moreinformation, see Automated Job Retries (p. 16).
6. Choose an existing CloudWatch Events IAM role to use for your job, or Create a new role forthis specific resource to create a new one. For more information, see CloudWatch Events IAMRole (p. 61).
7. For Rule definition, fill in the following fields appropriately, and then choose Create rule.
• Name: Enter a name for your rule.
• Description: (Optional) Enter a description for your rule.
• State: Choose whether to enable your rule so that it begins scheduling at the next interval, ordisable it until a later date.
64

AWS Batch User GuideTutorial: Listening for AWS Batch CloudWatch Events
Tutorial: Listening for AWS Batch CloudWatchEvents
In this tutorial, you set up a simple AWS Lambda function that listens for AWS Batch job events andwrites them out to a CloudWatch Logs log stream.
PrerequisitesThis tutorial assumes that you have a working compute environment and job queue that are ready toaccept jobs. If you do not have a running compute environment and job queue to capture events from,follow the steps in Getting Started with AWS Batch (p. 9) to create one. At the end of this tutorial, youcan submit a job to this job queue to test that you have configured your Lambda function correctly.
Step 1: Create the Lambda FunctionIn this procedure, you create a simple Lambda function to serve as a target for AWS Batch event streammessages.
To create a target Lambda function
1. Open the AWS Lambda console at https://console.aws.amazon.com/lambda/.2. Choose Create a Lambda function, Author from scratch.3. For Name, enter batch-event-stream-handler.4. For Role, choose Create a custom role, Allow.5. Choose Create function.6. In the Function code section, choose Python 2.7 for the runtime and edit the sample code to match
the following example:
import json
def handler(event, context): if event["source"] != "aws.batch": raise ValueError("Function only supports input from events with a source type of: aws.batch") print(json.dumps(event))
This is a simple Python 2.7 function that prints the events sent by AWS Batch. If everythingis configured correctly, at the end of this tutorial, you see that the event details appear in theCloudWatch Logs log stream associated with this Lambda function.
7. Choose Save.
Step 2: Register Event RuleNext, you create a CloudWatch Events event rule that captures job events coming from your AWS Batchresources. This rule captures all events coming from AWS Batch within the account where it is defined.The job messages themselves contain information about the event source, including the job queue towhich it was submitted, that you can use to filter and sort events programmatically.
NoteWhen you use the AWS Management Console to create an event rule, the console automaticallyadds the IAM permissions necessary to grant CloudWatch Events permissions to call yourLambda function. If you are creating an event rule using the AWS CLI, you must grant
65
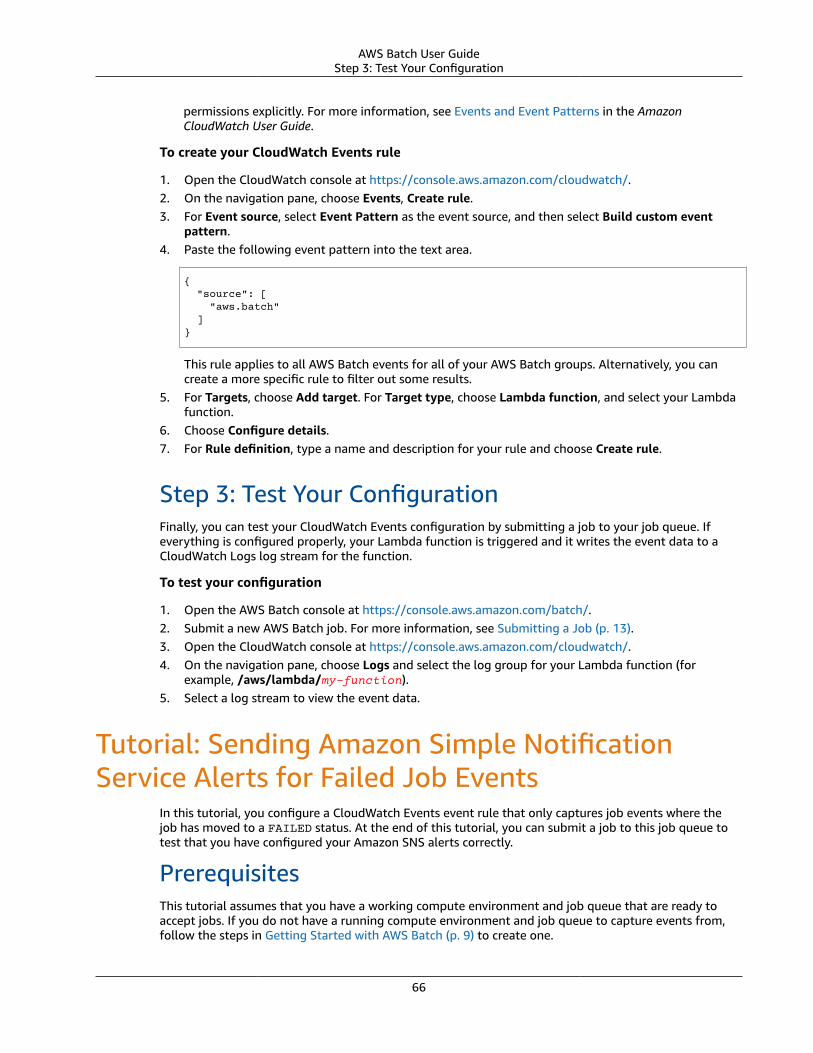
AWS Batch User GuideStep 3: Test Your Configuration
permissions explicitly. For more information, see Events and Event Patterns in the AmazonCloudWatch User Guide.
To create your CloudWatch Events rule
1. Open the CloudWatch console at https://console.aws.amazon.com/cloudwatch/.2. On the navigation pane, choose Events, Create rule.3. For Event source, select Event Pattern as the event source, and then select Build custom event
pattern.4. Paste the following event pattern into the text area.
{ "source": [ "aws.batch" ]}
This rule applies to all AWS Batch events for all of your AWS Batch groups. Alternatively, you cancreate a more specific rule to filter out some results.
5. For Targets, choose Add target. For Target type, choose Lambda function, and select your Lambdafunction.
6. Choose Configure details.7. For Rule definition, type a name and description for your rule and choose Create rule.
Step 3: Test Your ConfigurationFinally, you can test your CloudWatch Events configuration by submitting a job to your job queue. Ifeverything is configured properly, your Lambda function is triggered and it writes the event data to aCloudWatch Logs log stream for the function.
To test your configuration
1. Open the AWS Batch console at https://console.aws.amazon.com/batch/.2. Submit a new AWS Batch job. For more information, see Submitting a Job (p. 13).3. Open the CloudWatch console at https://console.aws.amazon.com/cloudwatch/.4. On the navigation pane, choose Logs and select the log group for your Lambda function (for
example, /aws/lambda/my-function).5. Select a log stream to view the event data.
Tutorial: Sending Amazon Simple NotificationService Alerts for Failed Job Events
In this tutorial, you configure a CloudWatch Events event rule that only captures job events where thejob has moved to a FAILED status. At the end of this tutorial, you can submit a job to this job queue totest that you have configured your Amazon SNS alerts correctly.
PrerequisitesThis tutorial assumes that you have a working compute environment and job queue that are ready toaccept jobs. If you do not have a running compute environment and job queue to capture events from,follow the steps in Getting Started with AWS Batch (p. 9) to create one.
66
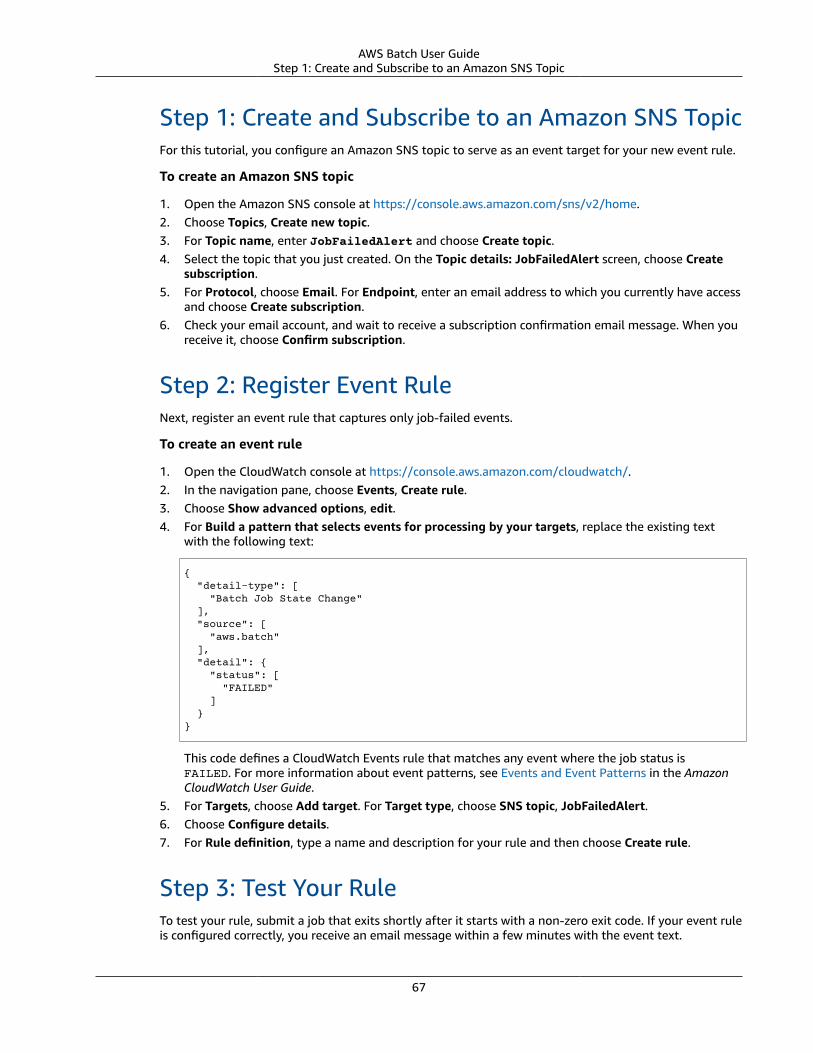
AWS Batch User GuideStep 1: Create and Subscribe to an Amazon SNS Topic
Step 1: Create and Subscribe to an Amazon SNS TopicFor this tutorial, you configure an Amazon SNS topic to serve as an event target for your new event rule.
To create an Amazon SNS topic
1. Open the Amazon SNS console at https://console.aws.amazon.com/sns/v2/home.2. Choose Topics, Create new topic.3. For Topic name, enter JobFailedAlert and choose Create topic.4. Select the topic that you just created. On the Topic details: JobFailedAlert screen, choose Create
subscription.5. For Protocol, choose Email. For Endpoint, enter an email address to which you currently have access
and choose Create subscription.6. Check your email account, and wait to receive a subscription confirmation email message. When you
receive it, choose Confirm subscription.
Step 2: Register Event RuleNext, register an event rule that captures only job-failed events.
To create an event rule
1. Open the CloudWatch console at https://console.aws.amazon.com/cloudwatch/.2. In the navigation pane, choose Events, Create rule.3. Choose Show advanced options, edit.4. For Build a pattern that selects events for processing by your targets, replace the existing text
with the following text:
{ "detail-type": [ "Batch Job State Change" ], "source": [ "aws.batch" ], "detail": { "status": [ "FAILED" ] }}
This code defines a CloudWatch Events rule that matches any event where the job status isFAILED. For more information about event patterns, see Events and Event Patterns in the AmazonCloudWatch User Guide.
5. For Targets, choose Add target. For Target type, choose SNS topic, JobFailedAlert.6. Choose Configure details.7. For Rule definition, type a name and description for your rule and then choose Create rule.
Step 3: Test Your RuleTo test your rule, submit a job that exits shortly after it starts with a non-zero exit code. If your event ruleis configured correctly, you receive an email message within a few minutes with the event text.
67

AWS Batch User GuideStep 3: Test Your Rule
To test a rule
1. Open the AWS Batch console at https://console.aws.amazon.com/batch/.2. Submit a new AWS Batch job. For more information, see Submitting a Job (p. 13). For the job's
command, substitute this command to exit the container with an exit code of 1.
/bin/sh, -c, 'exit 1'
3. Check your email to confirm that you have received an email alert for the failed job notification.
68
AWS Batch User GuideAWS Batch Information in CloudTrail
Logging AWS Batch API Calls withAWS CloudTrail
AWS Batch is integrated with AWS CloudTrail, a service that provides a record of actions taken by auser, role, or an AWS service in AWS Batch. If you create a trail, you can enable continuous delivery ofCloudTrail events to an Amazon S3 bucket, Amazon CloudWatch Logs, and Amazon CloudWatch Events.Using the information collected by CloudTrail, you can determine the request that was made to AWSBatch, the IP address from which the request was made, who made the request, when it was made, andadditional details.
To learn more about CloudTrail, including how to configure and enable it, see the AWS CloudTrail UserGuide.
AWS Batch Information in CloudTrailAll AWS Batch actions are logged by CloudTrail and are documented in the AWS Batch API Reference.For example, calls to the SubmitJob, ListJobs and DescribeJobs sections generate entries in theCloudTrail log files.
Every event or log entry contains information about who generated the request. The identityinformation helps you determine the following:
• Whether the request was made with root or IAM user credentials.• Whether the request was made with temporary security credentials for a role or federated user.• Whether the request was made by another AWS service.
For more information, see the CloudTrail userIdentity Element.
You can also create a trail and store your log files in your Amazon S3 bucket for as long as you want, anddefine Amazon S3 lifecycle rules to archive or delete log files automatically. By default, your log files areencrypted with Amazon S3 server-side encryption (SSE).
To be notified of log file delivery, configure CloudTrail to publish Amazon SNS notifications when newlog files are delivered. For more information, see Configuring Amazon SNS Notifications for CloudTrail.
You can also aggregate AWS Batch log files from multiple AWS regions and multiple AWS accounts into asingle Amazon S3 bucket.
For more information, see Receiving CloudTrail Log Files from Multiple Regions and Receiving CloudTrailLog Files from Multiple Accounts.
Understanding AWS Batch Log File EntriesA trail is a configuration that enables delivery of events as log files to an Amazon S3 bucket that youspecify. CloudTrail log files contain one or more log entries. An event represents a single request fromany source and includes information about the requested action, the date and time of the action, request
69
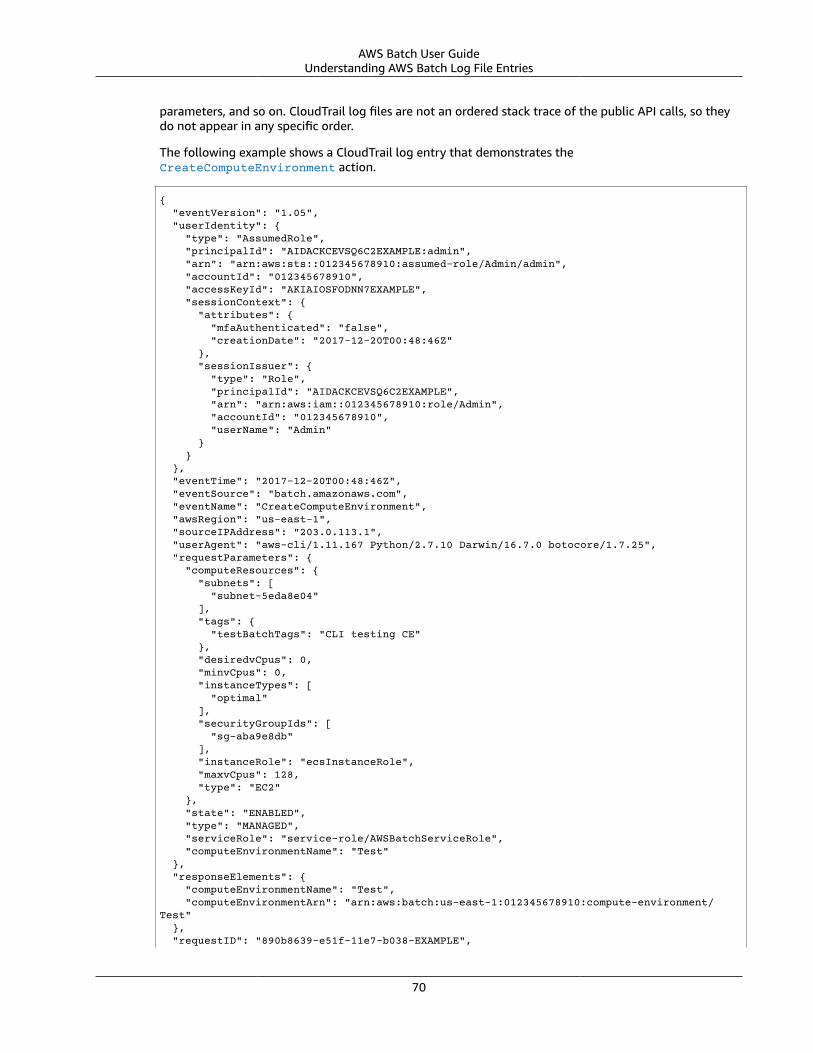
AWS Batch User GuideUnderstanding AWS Batch Log File Entries
parameters, and so on. CloudTrail log files are not an ordered stack trace of the public API calls, so theydo not appear in any specific order.
The following example shows a CloudTrail log entry that demonstrates theCreateComputeEnvironment action.
{ "eventVersion": "1.05", "userIdentity": { "type": "AssumedRole", "principalId": "AIDACKCEVSQ6C2EXAMPLE:admin", "arn": "arn:aws:sts::012345678910:assumed-role/Admin/admin", "accountId": "012345678910", "accessKeyId": "AKIAIOSFODNN7EXAMPLE", "sessionContext": { "attributes": { "mfaAuthenticated": "false", "creationDate": "2017-12-20T00:48:46Z" }, "sessionIssuer": { "type": "Role", "principalId": "AIDACKCEVSQ6C2EXAMPLE", "arn": "arn:aws:iam::012345678910:role/Admin", "accountId": "012345678910", "userName": "Admin" } } }, "eventTime": "2017-12-20T00:48:46Z", "eventSource": "batch.amazonaws.com", "eventName": "CreateComputeEnvironment", "awsRegion": "us-east-1", "sourceIPAddress": "203.0.113.1", "userAgent": "aws-cli/1.11.167 Python/2.7.10 Darwin/16.7.0 botocore/1.7.25", "requestParameters": { "computeResources": { "subnets": [ "subnet-5eda8e04" ], "tags": { "testBatchTags": "CLI testing CE" }, "desiredvCpus": 0, "minvCpus": 0, "instanceTypes": [ "optimal" ], "securityGroupIds": [ "sg-aba9e8db" ], "instanceRole": "ecsInstanceRole", "maxvCpus": 128, "type": "EC2" }, "state": "ENABLED", "type": "MANAGED", "serviceRole": "service-role/AWSBatchServiceRole", "computeEnvironmentName": "Test" }, "responseElements": { "computeEnvironmentName": "Test", "computeEnvironmentArn": "arn:aws:batch:us-east-1:012345678910:compute-environment/Test" }, "requestID": "890b8639-e51f-11e7-b038-EXAMPLE",
70

AWS Batch User GuideUnderstanding AWS Batch Log File Entries
"eventID": "874f89fa-70fc-4798-bc00-EXAMPLE", "readOnly": false, "eventType": "AwsApiCall", "recipientAccountId": "012345678910"}
71
AWS Batch User GuideStep 1: Create an Elastic IP Address for Your NAT Gateway
Tutorial: Creating a VPC with Publicand Private Subnets for YourCompute Environments
Compute resources in your compute environments need external network access to communicate withthe Amazon ECS service endpoint. However, you might have jobs that you would like to run in privatesubnets. Creating a VPC with both public and private subnets provides you the flexibility to run jobsin either a public or private subnet. Jobs in the private subnets can access the internet through a NATgateway.
This tutorial guides you through creating a VPC with two public subnets and two private subnets, whichare provided with internet access through a NAT gateway.
Topics• Step 1: Create an Elastic IP Address for Your NAT Gateway (p. 72)• Step 2: Run the VPC Wizard (p. 72)• Step 3: Create Additional Subnets (p. 73)• Next Steps (p. 73)
Step 1: Create an Elastic IP Address for Your NATGateway
A NAT gateway requires an Elastic IP address in your public subnet, but the VPC wizard does not createone for you. Create the Elastic IP address before running the VPC wizard.
To create an Elastic IP address
1. Open the Amazon VPC console at https://console.aws.amazon.com/vpc/.2. In the left navigation pane, choose Elastic IPs.3. Choose Allocate new address, Allocate, Close.4. Note the Allocation ID for your newly created Elastic IP address; you enter this later in the VPC
wizard.
Step 2: Run the VPC WizardThe VPC wizard automatically creates and configures most of your VPC resources for you.
To run the VPC wizard
1. In the left navigation pane, choose VPC Dashboard.2. Choose Start VPC Wizard, VPC with Public and Private Subnets, Select.3. For VPC name, give your VPC a unique name.4. For Elastic IP Allocation ID, choose the ID of the Elastic IP address that you created earlier.
72
AWS Batch User GuideStep 3: Create Additional Subnets
5. Choose Create VPC.6. When the wizard is finished, choose OK. Note the Availability Zone in which your VPC subnets were
created. Your additional subnets should be created in a different Availability Zone.
Step 3: Create Additional SubnetsThe wizard creates a VPC with a single public and a single private subnet in a single Availability Zone. Forgreater availability, you should create at least one more of each subnet type in a different AvailabilityZone so that your VPC has both public and private subnets across two Availability Zones.
To create an additional private subnet
1. In the left navigation pane, choose Subnets.2. Choose Create Subnet.3. For Name tag, enter a name for your subnet, such as Private subnet.4. For VPC, choose the VPC that you created earlier.5. For Availability Zone, choose a different Availability Zone than your original subnets in the VPC.6. For IPv4 CIDR block, enter a valid CIDR block. For example, the wizard creates CIDR blocks in
10.0.0.0/24 and 10.0.1.0/24 by default. You could use 10.0.3.0/24 for your second private subnet.7. Choose Yes, Create.
To create an additional public subnet
1. In the left navigation pane, choose Subnets and then Create Subnet.2. For Name tag, enter a name for your subnet, such as Public subnet.3. For VPC, choose the VPC that you created earlier.4. For Availability Zone, choose the same Availability Zone as the additional private subnet that you
created in the previous procedure.5. For IPv4 CIDR block, enter a valid CIDR block. For example, the wizard creates CIDR blocks in
10.0.0.0/24 and 10.0.1.0/24 by default. You could use 10.0.2.0/24 for your second public subnet.6. Choose Yes, Create.7. Select the public subnet that you just created and choose Route Table, Edit.8. By default, the private route table is selected. Choose the other available route table so that the
0.0.0.0/0 destination is routed to the internet gateway (igw-xxxxxxxx) and choose Save.9. With your second public subnet still selected, choose Subnet Actions, Modify auto-assign IP
settings.10. Select Enable auto-assign public IPv4 address and choose Save, Close.
Next StepsAfter you have created your VPC, you should consider the following next steps:
• Create security groups for your public and private resources if they require inbound network access.For more information, see Working with Security Groups in the Amazon VPC User Guide.
• Create an AWS Batch managed compute environment that launches compute resources into yournew VPC. For more information, see Creating a Compute Environment (p. 44). If you use the computeenvironment creation wizard in the AWS Batch console, you can specify the VPC that you just createdand the public or private subnets into which to launch your instances, depending on your use case.
73

AWS Batch User GuideNext Steps
• Create an AWS Batch job queue that is mapped to your new compute environment. For moreinformation, see Creating a Job Queue (p. 35).
• Create a job definition to run your jobs with. For more information, see Creating a JobDefinition (p. 22).
• Submit a job with your job definition to your new job queue. This job will land in the computeenvironment you created with your new VPC and subnets. For more information, see Submitting aJob (p. 13).
74

AWS Batch User Guide
AWS Batch Service LimitsThe following table provides the default limits for AWS Batch for an AWS account; default limits can bechanged on request. For more information, see AWS Service Limits in the Amazon Web Services GeneralReference.
Resource Default Limit
Maximum number of job queues 20
Maximum number of compute environments perjob queue
3
The following table provides limits for AWS Batch that cannot be changed.
Resource Default Limit
Maximum number of compute environments 18
Maximum number of job dependencies 20
Maximum job definition size (forRegisterJobDefinition API operations)
20 KiB
Maximum job payload size (for SubmitJob APIoperations)
50 KiB
Maximum array size for array jobs 10,000
Maximum number of jobs in SUBMITTED state 1,000,000
75
AWS Batch User GuideINVALID Compute Environment
Troubleshooting AWS BatchYou may find the need to troubleshoot issues with your compute environments, job queues, jobdefinitions, or jobs. This chapter helps you troubleshoot and repair issues with your AWS Batchenvironment.
INVALID Compute EnvironmentIt is possible to incorrectly configure a managed compute environment so that it enters an INVALIDstate and cannot accept jobs for placement. These sections describe the possible causes and how to fixthem.
Incorrect Role Name or ARNThe most common cause for invalid compute environments is an incorrect name or ARN for the AWSBatch service role or the Amazon EC2 Spot Fleet role. This is more of an issue for compute environmentsthat are created with the AWS CLI or the AWS SDKs; when you create a compute environment in the AWSManagement Console, AWS Batch can help you choose the correct service or Spot Fleet roles and youcannot misspell the name or deform the ARN.
However, if you manually type the name or ARN for an IAM in an AWS CLI command or your SDK code,AWS Batch is unable to validate the string and it accepts the bad value and attempts to create theenvironment. After failing to create the environment, the environment moves to an INVALID state, andyou see the following errors.
For an invalid service role:
CLIENT_ERROR - Not authorized to perform sts:AssumeRole (Service: AWSSecurityTokenService; Status Code: 403; Error Code: AccessDenied; Request ID: dc0e2d28-2e99-11e7-b372-7fcc6fb65fe7)
For an invalid Spot Fleet role:
CLIENT_ERROR - Parameter: SpotFleetRequestConfig.IamFleetRole is invalid. (Service: AmazonEC2; Status Code: 400; Error Code: InvalidSpotFleetRequestConfig; Request ID: 331205f0-5ae3-4cea-bac4-897769639f8d) Parameter: SpotFleetRequestConfig.IamFleetRole is invalid
One common cause for this issue is if you only specify the name of an IAM role when using the AWSCLI or the AWS SDKs, instead of the full ARN. This is because depending on how you created the role,the ARN may contain a service-role path prefix. For example, if you manually create the AWS Batchservice role using the procedures in AWS Batch Service IAM Role (p. 56), your service role ARN would looklike this:
arn:aws:iam::123456789012:role/AWSBatchServiceRole
However, if you created the service role as part of the console first run wizard today, your service roleARN would look like this:
arn:aws:iam::123456789012:role/service-role/AWSBatchServiceRole
76
AWS Batch User GuideRepairing an INVALID Compute Environment
When you only specify the name of an IAM role when using the AWS CLI or the AWS SDKs, AWS Batchassumes that your ARN does not use the service-role path prefix. Because of this, we recommendthat you specify the full ARN for your IAM roles when you create compute environments.
To repair a compute environment that is misconfigured this way, see Repairing an INVALID ComputeEnvironment (p. 77).
Repairing an INVALID Compute EnvironmentWhen you have a compute environment in an INVALID state, you should update it to repair the invalidparameter. For the case of an Incorrect Role Name or ARN (p. 76), you can update the computeenvironment with the correct service role.
To repair a misconfigured compute environment
1. Open the AWS Batch console at https://console.aws.amazon.com/batch/.2. From the navigation bar, select the region to use.3. In the navigation pane, choose Compute environments.4. On the Compute environments page, select the radio button next to the compute environment to
edit, and then choose Edit.5. On the Update compute environment page, for Service role, choose the IAM role to use with
your compute environment. The AWS Batch console only displays roles that have the correct trustrelationship for compute environments.
6. Choose Save to update your compute environment.
Jobs Stuck in RUNNABLE StatusIf your compute environment contains compute resources, but your jobs do not progress beyond theRUNNABLE status, then there is something preventing the jobs from actually being placed on a computeresource. Here are some common causes for this issue:
The awslogs log driver is not configured on your compute resources
AWS Batch jobs send their log information to CloudWatch Logs. To enable this, you must configureyour compute resources to use the awslogs log driver. If you base your compute resource AMI offof the Amazon ECS-optimized AMI (or Amazon Linux), then this driver is registered by default withthe ecs-init package. If you use a different base AMI, then you must ensure that the awslogslog driver is specified as an available log driver with the ECS_AVAILABLE_LOGGING_DRIVERSenvironment variable when the Amazon ECS container agent is started. For more information, seeCompute Resource AMI Specification (p. 40) and Creating a Compute Resource AMI (p. 41).
Insufficient resources
If your job definitions specify more CPU or memory resources than your compute resources canallocate, then your jobs will never be placed. For example, if your job specifies 4 GiB of memory,and your compute resources have less than that, then the job cannot be placed on those computeresources. In this case, you must reduce the specified memory in your job definition or add largercompute resources to your environment.
Spot Instances Not Tagged on CreationSpot Instance tagging for AWS Batch compute resources is supported as of October 25, 2017. Prior tothat support, the recommended IAM managed policy (AmazonEC2SpotFleetRole) for the Amazon EC2
77

AWS Batch User GuideSpot Instances Not Tagged on Creation
Spot Fleet role did not contain permissions to tag Spot Instances at launch. The new recommended IAMmanaged policy is called AmazonEC2SpotFleetTaggingRole.
To fix Spot Instance tagging on creation, follow the procedure below to apply the current recommendedIAM managed policy to your Amazon EC2 Spot Fleet role, and then any future Spot Instances that arecreated with that role have permissions to apply instance tags on creation.
To apply the current IAM managed policy to your Amazon EC2 Spot Fleet role
1. Open the IAM console at https://console.aws.amazon.com/iam/.2. Choose Roles, and choose your Amazon EC2 Spot Fleet role.3. Choose Attach policy.4. Select the AmazonEC2SpotFleetTaggingRole and choose Attach policy.5. Choose your Amazon EC2 Spot Fleet role again to remove the previous policy.6. Select the x to the right of the AmazonEC2SpotFleetRole policy, and choose Detach.
78
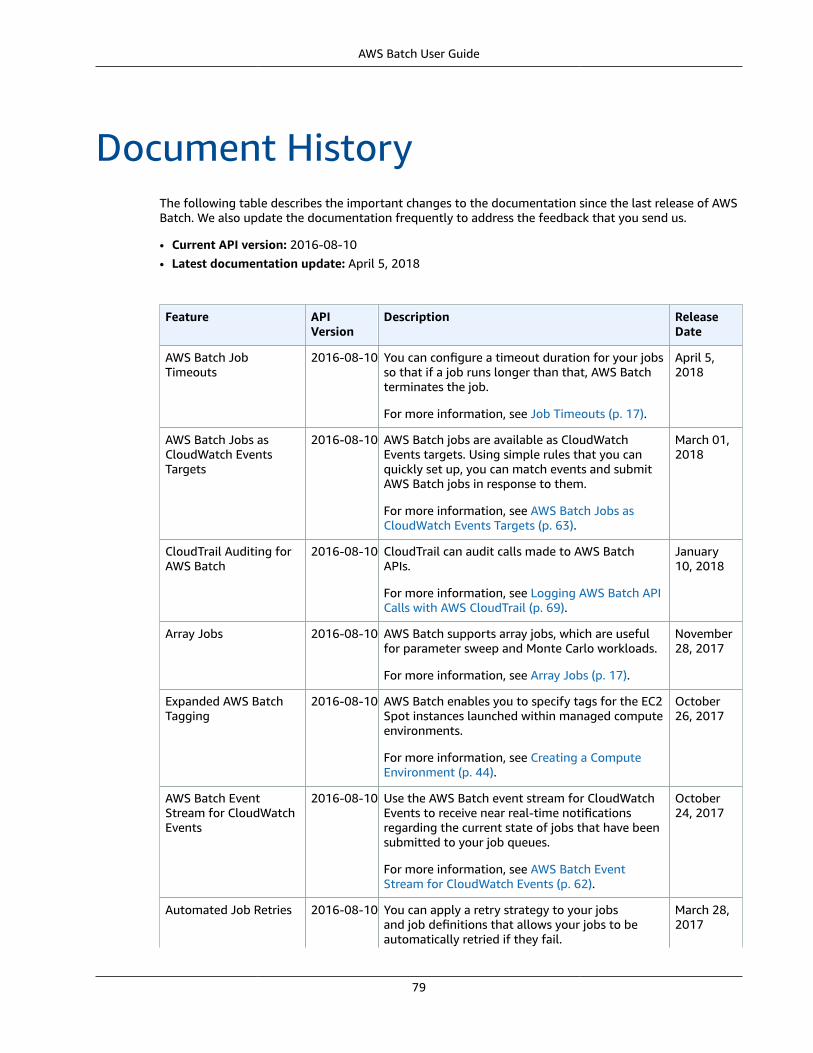
AWS Batch User Guide
Document HistoryThe following table describes the important changes to the documentation since the last release of AWSBatch. We also update the documentation frequently to address the feedback that you send us.
• Current API version: 2016-08-10• Latest documentation update: April 5, 2018
Feature APIVersion
Description ReleaseDate
AWS Batch JobTimeouts
2016-08-10 You can configure a timeout duration for your jobsso that if a job runs longer than that, AWS Batchterminates the job.
For more information, see Job Timeouts (p. 17).
April 5,2018
AWS Batch Jobs asCloudWatch EventsTargets
2016-08-10 AWS Batch jobs are available as CloudWatchEvents targets. Using simple rules that you canquickly set up, you can match events and submitAWS Batch jobs in response to them.
For more information, see AWS Batch Jobs asCloudWatch Events Targets (p. 63).
March 01,2018
CloudTrail Auditing forAWS Batch
2016-08-10 CloudTrail can audit calls made to AWS BatchAPIs.
For more information, see Logging AWS Batch APICalls with AWS CloudTrail (p. 69).
January10, 2018
Array Jobs 2016-08-10 AWS Batch supports array jobs, which are usefulfor parameter sweep and Monte Carlo workloads.
For more information, see Array Jobs (p. 17).
November28, 2017
Expanded AWS BatchTagging
2016-08-10 AWS Batch enables you to specify tags for the EC2Spot instances launched within managed computeenvironments.
For more information, see Creating a ComputeEnvironment (p. 44).
October26, 2017
AWS Batch EventStream for CloudWatchEvents
2016-08-10 Use the AWS Batch event stream for CloudWatchEvents to receive near real-time notificationsregarding the current state of jobs that have beensubmitted to your job queues.
For more information, see AWS Batch EventStream for CloudWatch Events (p. 62).
October24, 2017
Automated Job Retries 2016-08-10 You can apply a retry strategy to your jobsand job definitions that allows your jobs to beautomatically retried if they fail.
March 28,2017
79

AWS Batch User Guide
Feature APIVersion
Description ReleaseDate
For more information, see Automated JobRetries (p. 16).
AWS Batch GeneralAvailability
2016-08-10 AWS Batch enables you to run batch computingworkloads on the AWS Cloud.
January 5,2017
80

AWS Batch User Guide
AWS GlossaryFor the latest AWS terminology, see the AWS Glossary in the AWS General Reference.
81