automation terminals of - bosch rexroth terminals of the rexroth inline product range r911317021...
TRANSCRIPT

Automation Terminals Of The Rexroth Inline Product Range
R911317021Edition 01
Application Description
Electric Drivesand Controls Pneumatics Service
Linear Motion and Assembly TechnologiesHydraulics

Bosch Rexroth AG | Electric Drives Inline | Application descriptionand Controls
Title Automation Terminals of the Rexroth Inline Product Range
Type of Documentation Application Description
Document Typecode DOK-CONTRL-ILSYSINS***-AW01-EN-P
Internal Reference 7290_en_00, 120-0401-B329-01/EN
Purpose of Documentation This document describes the automation terminals of the Rexroth Inline productrange.
Record of Revision
Copyright Bosch Rexroth AG, 2006-12-07.
Copying this document, giving it to others and the use or communication of thecontents thereof without express authority, are forbidden. Offenders are liable forthe payment of damages. All rights are reserved in the event of the grant of apatent or the registration of a utility model or design (DIN 34-1).
Validity The specified data is for product description purposes only and may not bedeemed to be guaranteed unless expressly confirmed in the contract. All rightsare reserved with respect to the content of this documentation and the availabilityof the product.
Published by Bosch Rexroth AGBgm.-Dr.-Nebel-Str. 2 • 97816 Lohr a. Main, GermanyTel. +49 - (0)52 35 30 0 • Fax +49 - (0) 52 35 34 18 08www.boschrexroth.com/Abt. BRC/EPH3 (WW)
Notes This document is printed on non-chlorine bleached paper.
Document designation of previous editions
Release Date
Notes
120-0401-B329-01/EN 12/06 First release

Page
Application description | Inline Electric Drives | Bosch Rexroth AG I/IVand Controls
1 The Inline Product Range.............................................................................................11.1 Features...................................................................................................................................................11.2 Product Description..................................................................................................................................21.3 Standard Product Designations Used in This Application Description.....................................................3
2 Important Directions for Use........................................................................................52.1 Appropriate Use.......................................................................................................................................52.1.1 Introduction ..........................................................................................................................................52.1.2 Areas of use and application ...............................................................................................................62.2 Inappropriate Use ....................................................................................................................................6
3 Safety Instructions for Electric Drives and Controls.................................................73.1 Safety Instructions - General Information ................................................................................................73.1.1 Using the Safety Instructions and Passing them on to Others ............................................................73.1.2 How to Employ the Safety Instructions ................................................................................................73.1.3 Explanation of Warning Symbols and Degrees of Hazard Seriousness ..............................................93.1.4 Hazards by Improper Use ..................................................................................................................103.2 Instructions with Regard to Specific Dangers ........................................................................................113.2.1 Protection Against Contact with Electrical Parts and Housings .........................................................113.2.2 Protection Against Electric Shock by Protective Extra-Low Voltage ..................................................123.2.3 Protection Against Dangerous Movements .......................................................................................123.2.4 Protection Against Magnetic and Electromagnetic Fields During Operation and Mounting ..............143.2.5 Protection Against Contact with Hot Parts .........................................................................................143.2.6 Protection During Handling and Mounting .........................................................................................153.2.7 Battery Safety ....................................................................................................................................153.2.8 Protection Against Pressurized Systems ..........................................................................................16
4 Important Information on Voltage Areas ..................................................................174.1 Inline Voltage Areas...............................................................................................................................174.2 Correct Usage........................................................................................................................................174.3 Safety Instructions for the Low-Voltage Area.........................................................................................184.4 Installation Instructions and Notes for the Low-Voltage Area ...............................................................184.5 Structure of an Area With a Relay Terminal ..........................................................................................194.6 Electronics Base and Connectors..........................................................................................................194.7 Safety Mechanisms to Prevent Incorrect Connection of Connectors for Different Voltage Areas .........204.7.1 Protection Against the Connection of Connectors of the 24-V-Level to Relay Terminals ..................204.7.2 Protection Against the Connection of Live 230-V-AC- Connectors in the 24 V DC Area ..................204.8 Response to the Connection of a Relay Terminal in the 24-V-DC Area................................................20
Table of Contents

Table of Contents
II/IV Bosch Rexroth AG | Electric Drives Inline | Application descriptionand Controls
Page5 Inline Product Groups ................................................................................................ 215.1 General ................................................................................................................................................. 215.1.1 Different Transmission Speeds ......................................................................................................... 215.1.2 Products With or Without Accessories .............................................................................................. 215.2 Bus Couplers and Terminals With Remote Bus Branch ....................................................................... 225.2.1 Bus Couplers .................................................................................................................................... 225.2.2 Terminal With Remote Bus Branch ................................................................................................... 235.3 Supply Terminals .................................................................................................................................. 245.3.1 Power Terminal ................................................................................................................................. 255.3.2 Segment Terminal ............................................................................................................................. 265.4 Input/Output Terminals ......................................................................................................................... 275.4.1 General Information on Terminals for Analog and Digital Signals .................................................... 275.4.2 Terminals for Analog Signals ............................................................................................................ 285.5 Function Terminals (Communication, Open and Closed-Loop Control) ............................................... 285.6 Branch Terminal.................................................................................................................................... 295.7 Example Structure of an Inline Station.................................................................................................. 295.8 Inline Block IO Modules ........................................................................................................................ 30
6 Structure and Dimensions of the Inline Terminals..................................................316.1 Basic Structure of Terminals................................................................................................................. 316.2 Electronics Base ................................................................................................................................... 326.3 Connectors............................................................................................................................................ 326.4 Function Identification and Labeling ..................................................................................................... 366.5 Housing Dimensions for Terminals ....................................................................................................... 406.5.1 Dimensions of the Electronics Base ................................................................................................. 406.5.2 Connector Dimensions ...................................................................................................................... 436.6 Mounting Distances .............................................................................................................................. 446.6.1 Mounting Distances .......................................................................................................................... 446.6.2 Mounting Distances for Mounting Outside a Terminal Box ............................................................... 45
7 Electrical Potential and Data Routing.......................................................................477.1 Circuits and Provision of Supply Voltages ............................................................................................ 477.1.1 Supply of the Bus Coupler ................................................................................................................ 477.1.2 Logic Circuit ...................................................................................................................................... 487.1.3 Analog Circuit .................................................................................................................................... 487.1.4 Main Circuit ....................................................................................................................................... 497.1.5 Segment Circuit ................................................................................................................................ 507.1.6 Example of a Circuit Diagram ........................................................................................................... 527.2 Electrical Potential and Data Routing ................................................................................................... 557.2.1 Arrangement of Potential Jumpers and Data Jumpers ..................................................................... 557.2.2 Current and Voltage Distribution ....................................................................................................... 58

Table of Contents
Application description | Inline Electric Drives | Bosch Rexroth AG III/IVand Controls
Page8 Diagnostic and Status Indicators ..............................................................................598.1 Indicators on Bus Couplers and Terminals With Remote Bus Branch...................................................598.2 Indicators Available on Different Terminals in the Inline System...........................................................608.3 Indicators on Supply Terminals..............................................................................................................618.4 Indicators on Input/Output Terminals and Function Terminals ..............................................................62
9 Mounting/Removing InlineTerminals and Connecting Cables ...............................659.1 Installation Instructions ..........................................................................................................................659.1.1 Unpacking a Terminal ........................................................................................................................659.1.2 Replacing Terminals ..........................................................................................................................659.2 Sequence of the Inline Terminals ..........................................................................................................669.2.1 Remote Bus Branch in an Inline Station ............................................................................................669.2.2 Positioning Terminals for Analog Signals ..........................................................................................679.3 Mounting and Removing Inline Terminals..............................................................................................689.4 Replacing a Fuse...................................................................................................................................729.5 Grounding Concept (Functional Earth Ground) .....................................................................................749.6 Shielding Concept..................................................................................................................................769.6.1 Inline Shielding Concept ....................................................................................................................769.6.2 Shielding Analog Sensors and Actuators ..........................................................................................769.7 Connecting Cables.................................................................................................................................769.7.1 Connecting Unshielded Cables .........................................................................................................779.7.2 Connecting Shielded Cables Using a Shield Connector ....................................................................789.8 Connecting the Voltage Supply..............................................................................................................839.8.1 Bus Coupler Supply ...........................................................................................................................839.8.2 Power Terminal Supply ......................................................................................................................839.8.3 Providing Segment Voltage at Segment Terminals ...........................................................................839.8.4 Notes on Supply Voltages .................................................................................................................849.8.5 Voltage Supply Requirements ..........................................................................................................849.8.6 Supply Voltage Requirements ...........................................................................................................849.9 Connecting the Bus................................................................................................................................859.10 Connecting Sensors and Actuators .......................................................................................................859.10.1 Connection Methods for Sensors and Actuators ...............................................................................859.10.2 Connections Used for Digital Input and Output Terminals .................................................................869.10.3 Different Connection Methods for Sensors and Actuators .................................................................87
10 Examples and Tips......................................................................................................9110.1 Tips for Working With Inline .................................................................................................................. 9110.2 Temperature Response of the Terminals ............................................................................................. 9110.3 Calculation Examples for Power Dissipation and Operating Temperature Range ............................... 9210.3.1 Constant Power Dissipation of the Housing Over the Operating Temperature Range ......................9210.3.2 Power Dissipation of the Housing Within the Operating Temperature Range Depending on the Ambient
Temperature ......................................................................................................................................93

Notes
IV/IV Bosch Rexroth AG | Electric Drives Inline | Application descriptionand Controls
11 Technical Data and Ordering Data ............................................................................9711.1 Technical Data for Inline ....................................................................................................................... 9711.2 Ordering Data ..................................................................................................................................... 103
12 Disposal and Environmental Protection.................................................................10512.1 Disposal .............................................................................................................................................. 10512.1.1 Products .......................................................................................................................................... 10512.1.2 Packaging Materials ........................................................................................................................ 10512.2 Environmental Protection.................................................................................................................... 10512.2.1 No Release of Hazardous Substances ........................................................................................... 10512.2.2 Materials Contained in the Products ............................................................................................... 10512.2.3 Recycling ........................................................................................................................................ 106
13 Service & Support.....................................................................................................10713.1 Helpdesk ............................................................................................................................................. 10713.2 Service Hotline.................................................................................................................................... 10713.3 Internet................................................................................................................................................ 10713.4 Helpful Information.............................................................................................................................. 107
14 Glossary ....................................................................................................................10914.1 Explanation of Abbreviations and Symbols......................................................................................... 10914.1.1 Explanation of Abbreviations .......................................................................................................... 10914.1.2 Representations Used in Circuit Diagrams ..................................................................................... 11014.1.3 Frequently Used Symbols ............................................................................................................... 111
15 Index .......................................................................................................................... 113

The Inline Product Range
Application description | Inline Electric Drives | Bosch Rexroth AG 1/118and Controls
1 The Inline Product RangeThe Inline product range consists of
• Inline Modular IOs: modular terminals and • Inline Block IOs: compact remote I/O modules
This application description mainly deals with the Inline Modular IOs,which are referred to as Inline terminals. For information about theInline Block IOs, please refer to the module-specific data sheets.
1.1 FeaturesInline Modular IO• Modules can be easily installed side by side without tools.• Open, flexible, modular structure• Terminals of varying widths may be combined to create a time-saving,
compact, and cost-effective station structure.• 2-slot terminals:
These terminals provide optimum adaptation to the desired configuration.They enable a flexible and compact station structure without unnecessaryreserve installation space.
• 8-slot terminals:These terminals provide a fast and effective station structure for largerstations.
• Functional orientation of the switch box or control cabinet.The modular structure makes it possible to assemble standard functionblocks in advance. Parts of the system can be started up independently ofone another. This means that pretests can be carried out when the systemis set up and the whole system can be adapted and expanded.
• Automatic creation of isolated groups, potential and data circuits• The amount of costly parallel wiring is reduced
Within a station, potential and data routing can be carried out withoutadditional wiring.
Inline Block IO• Integrated bus interface for all popular bus systems• High channel density• Compact and 55 mm flat design• Modules can be easily installed without tools.• Same look and feel as Inline Modular IO

The Inline Product Range
2/118 Bosch Rexroth AG | Electric Drives Inline | Application descriptionand Controls
1.2 Product DescriptionWithin the Inline product range, automation terminals are available for I/Ofunctions, special functions, control functions, and power-level terminals.
Automation terminals consist of an electronics base and one or more connectorsfor connecting the I/O devices or the power supply. The electronics base can bereplaced without removing a single wire from the connector.
The Inline terminals are integrated into the bus system via a bus coupler (see"Bus Couplers" on page 22).
VersionsInline Modular IO
The Inline product range offers terminals for all automation tasks:
• Bus coupler for integrating the Inline station in various bus systems• Terminals with remote bus branch for opening a remote bus branch • Supply terminals for supplying the supply voltages and segmenting the
station (with and without fuse)• Input and output terminals for digital and analog signals• Function terminals (e.g., counters, incremental encoders)• Branch terminals to integrate branches• Terminals with or without accessories• Terminal for different transmission speeds (500 kbps, 2 Mbps)
Inline Block IO versions • Input modules, output modules and input/output modules for digital andanalog signals
Mounting location Inline terminals (IP20 protection) and Block IO modules are designed for use inclosed housings. The compact structure means that most of the Inline terminalsand all Block IO modules can be installed in standard terminal boxes.
Mounting Inline terminals and Block IO modules can be snapped onto DIN rails withouttools. Potential and data jumpers are automatically created when theInline Modular IO terminals are properly installed.
Bus connection Inline Modular IO: The Inline station is connected to the bus via a bus coupler.The bus is controlled by the Inline station using data routing.
Inline Block IO: The bus interface is integrated in the module.
I/O connection The Inline terminals and Block IO modules have connectors for 1-, 2-, 3-, and4-wire sensors or actuators. The wires use spring-cage connections. For furtherinformation refer to the individual sections.

The Inline Product Range
Application description | Inline Electric Drives | Bosch Rexroth AG 3/118and Controls
1.3 Standard Product Designations Used in This Application Description
Terminals are available with or without accessories and for various transmissionspeeds. Deviations are given in the Section "General" on page 21. Since thebasic functions of the terminals are identical, only the designation of the standardproduct (without accessories, 500 kbps) is used in this document in order to makethings simpler. In all cases, you can use the product with accessories rather thanthe standard product. In a system with a transmission speed of 2 Mbps, you woulduse the 2MBD version rather than the standard product.
For available product versions, please refer to the online product catalog atwww.boschrexroth.com.
Example
R-IB IL 24 DI 2 Without accessories, 500 kbpsR-IB IL 24 DI 2-PAC Including accessoriesR-IB IL 24 DI 2-2MBD Without accessories, 2 Mbps

The Inline Product Range
4/118 Bosch Rexroth AG | Electric Drives Inline | Application descriptionand Controls
Notes:

Important Directions for Use
Application description | Inline Electric Drives | Bosch Rexroth AG 5/118and Controls
2 Important Directions for Use2.1 Appropriate Use2.1.1 Introduction
Rexroth products represent state-of-the-art developments and manufacturing.They are tested prior to delivery to ensure operating safety and reliability.
The products may only be used in the manner that is defined as appropriate. Ifthey are used in an inappropriate manner, then situations can develop that maylead to property damage or injury to personnel.
Bosch Rexroth, as manufacturer, is not liable for any damagesresulting from inappropriate use. In such cases, the guarantee andthe right to payment of damages resulting from inappropriate use areforfeited. The user alone carries all responsibility of the risks.
Before using Rexroth products, make sure that all the pre-requisites forappropriate use of the products are satisfied:
• Personnel that in any way, shape or form uses our products must first readand understand the relevant safety instructions and be familiar withappropriate use.
• If the product takes the form of hardware, then they must remain in theiroriginal state, in other words, no structural changes are permitted. It is notpermitted to decompile software products or alter source codes.
• Do not mount damaged or faulty products or use them in operation.• Make sure that the products have been installed in the manner described in
the relevant documentation.

Important Directions for Use
6/118 Bosch Rexroth AG | Electric Drives Inline | Application descriptionand Controls
2.1.2 Areas of use and applicationThe Inline system of Rexroth is a modular and flexibly scalable input/outputsystem in the degree of protection IP 20. It can be operated locally at theIndraControl L or peripherally via a field bus coupler.
The Rexroth Inline system may only be used with the accessories andparts specified in this document. If a component has not beenspecifically named, then it may not be either mounted or connected.The same applies to cables and lines.Operation is only permitted in the specified configurations andcombinations of components using the software and firmware asspecified in the relevant function descriptions.
Typical applications of the Rexroth Inline system are:
• Handling and assembly systems,• Packaging and foodstuff machines,• Printing and paper processing machines and • Machine tools.The Rexroth Inline system may only be operated under the assembly, installationand ambient conditions as described here (temperature, system of protection,humidity, EMC requirements, etc.) and in the position specified.
In residential areas as well as in business and commercial areas Class A devicesmay be used with the following note:
This is a Class A device. In a residential area, this device may causeradio interferences. In such a case, the user may be required tointroduce suitable countermeasures at his own cost.
2.2 Inappropriate UseUsing the Rexroth Inline system outside of the above-referenced areas ofapplication or under operating conditions other than described in the documentand the technical data specified is defined as "inappropriate use".
The Rexroth Inline system may not be used if
• they are subject to operating conditions that do not meet the above specifiedambient conditions. This includes, for example, operation under water, in thecase of extreme temperature fluctuations or extremely high maximumtemperatures or if
• Bosch Rexroth has not specifically released them for that intended purpose.Please note the specifications outlined in the general Safety Guidelines!

Safety Instructions for Electric Drives and Controls
Application description | Inline Electric Drives | Bosch Rexroth AG 7/118and Controls
3 Safety Instructions for Electric Drives and Controls3.1 Safety Instructions - General Information3.1.1 Using the Safety Instructions and Passing them on to Others
Do not attempt to install or commission this device without first reading alldocumentation provided with the product. Read and understand these safetyinstructions and all user documentation prior to working with the device. If you donot have the user documentation for the device, contact your responsibleBosch Rexroth sales representative. Ask for these documents to be sentimmediately to the person or persons responsible for the safe operation of thedevice.
If the device is resold, rented and/or passed on to others in any other form, thesesafety instructions must be delivered with the device in the official language of theuser's country.
3.1.2 How to Employ the Safety InstructionsRead these instructions before initial commissioning of the equipment in order toeliminate the risk of bodily harm and/or material damage. Follow these safetyinstructions at all times.
• Bosch Rexroth AG is not liable for damages resulting from failure to observethe warnings provided in this documentation.
• Read the operating, maintenance and safety instructions in your languagebefore commissioning the machine. If you find that you cannot completelyunderstand the documentation for your product, please ask your supplier toclarify.
• Proper and correct transport, storage, assembly and installation, as well ascare in operation and maintenance, are prerequisites for optimal and safeoperation of this device.
• Only assign trained and qualified persons to work with electricalinstallations:– Only persons who are trained and qualified for the use and operation
of the device may work on this device or within its proximity. Thepersons are qualified if they have sufficient knowledge of the assembly,installation and operation of the product, as well as an understandingof all warnings and precautionary measures noted in these instructions.
– Furthermore, they must be trained, instructed and qualified to switchelectrical circuits and devices on and off in accordance with technicalsafety regulations, to ground them and to mark them according to therequirements of safe work practices. They must have adequate safetyequipment and be trained in first aid.
• Only use spare parts and accessories approved by the manufacturer.
Improper use of these devices, failure to follow the safety instructions in this document or tampering with the product, including disabling of safety devices, may result in material damage, bodily harm, electric shock or even death!Observe the safety instructions!WARNING

Safety Instructions for Electric Drives and Controls
8/118 Bosch Rexroth AG | Electric Drives Inline | Application descriptionand Controls
• Follow all safety regulations and requirements for the specific application aspracticed in the country of use.
• The devices have been designed for installation in industrial machinery.• The ambient conditions given in the product documentation must be
observed.• Only use safety-relevant applications that are clearly and explicitly approved
in the Project Planning Manual. If this is not the case, they are excluded.Safety-relevant are all such applications which can cause danger to personsand material damage.
• The information given in the documentation of the product with regard to theuse of the delivered components contains only examples of applications andsuggestions.
• The machine and installation manufacturer must – make sure that the delivered components are suited for his individual
application and check the information given in this documentation withregard to the use of the components,
– make sure that his application complies with the applicable safetyregulations and standards and carry out the required measures,modifications and complements.
• Commissioning of the delivered components is only permitted once it is surethat the machine or installation in which they are installed complies with thenational regulations, safety specifications and standards of the application.
• Operation is only permitted if the national EMC regulations for theapplication are met.
• The instructions for installation in accordance with EMC requirements canbe found in the section on EMC in the respective documentation (ProjectPlanning Manuals of components and system).The machine or installation manufacturer is responsible for compliance withthe limiting values as prescribed in the national regulations.
• Technical data, connection and installation conditions are specified in theproduct documentation and must be followed at all times.
National regulations which the user must take into account
• European countries: according to European EN standards• United States of America (USA):
– National Electrical Code (NEC)– National Electrical Manufacturers Association (NEMA), as well as local
engineering regulations– regulations of the National Fire Protection Association (NFPA)
• Canada: Canadian Standards Association (CSA)• Other countries:
– International Organization for Standardization (ISO)– International Electrotechnical Commission (IEC)

Safety Instructions for Electric Drives and Controls
Application description | Inline Electric Drives | Bosch Rexroth AG 9/118and Controls
3.1.3 Explanation of Warning Symbols and Degrees of Hazard Seriousness
The safety instructions describe the following degrees of hazard seriousness. Thedegree of hazard seriousness informs about the consequences resulting fromnon-compliance with the safety instructions:
Warning symbol
Signal word Degree of hazard seriousness acc. to ANSI Z 535.4-2002
Danger Death or severe bodily harm will occur.
Warning Death or severe bodily harm may occur.
Caution Minor or moderate bodily harm or material damage may occur.
Fig. 3-1 Hazard classification (according to ANSI Z 535)

Safety Instructions for Electric Drives and Controls
10/118 Bosch Rexroth AG | Electric Drives Inline | Application descriptionand Controls
3.1.4 Hazards by Improper UseHigh electric voltage and high working current! Risk of death or severe bodily injury by electric shock!Observe the safety instructions!
Dangerous movements! Danger to life, severe bodily harm or material damage by unintentional motor movements!Observe the safety instructions!
High electric voltage because of incorrect connection! Risk of death or bodily injury by electric shock!Observe the safety instructions!
Health hazard for persons with heart pacemakers, metal implants and hearing aids in proximity to electrical equipment!Observe the safety instructions!
Hot surfaces on device housing! Danger of injury! Danger of burns!Observe the safety instructions!
DANGER
DANGER
WARNING
WARNING
CAUTION
Risk of injury by improper handling! Risk of bodily injury by bruising, shearing, cutting, hitting or improper handling of pressurized lines!Observe the safety instructions!
Risk of injury by improper handling of batteries!Observe the safety instructions!
CAUTION
CAUTION

Safety Instructions for Electric Drives and Controls
Application description | Inline Electric Drives | Bosch Rexroth AG 11/118and Controls
3.2 Instructions with Regard to Specific Dangers3.2.1 Protection Against Contact with Electrical Parts and Housings
This section concerns devices and drive components with voltages ofmore than 50 volts.
Contact with parts conducting voltages above 50 volts can cause personal dangerand electric shock. When operating electrical equipment, it is unavoidable thatsome parts of the units conduct dangerous voltage.
For electrical drive and filter components with voltages of more than50 volts, observe the following additional safety instructions.
High electrical voltage! Danger to life, electric shock and severebodily injury!• Only those trained and qualified to work with or on electrical equipment are
permitted to operate, maintain and repair this equipment.• Follow general construction and safety regulations when working on
electrical power installations.• Before switching on the device, the equipment grounding conductor must
have been permanently connected to all electrical equipment in accordancewith the connection diagram.
• Do not operate electrical equipment at any time, even for briefmeasurements or tests, if the equipment grounding conductor is notpermanently connected to the mounting points of the components providedfor this purpose.
• Before working with electrical parts with voltage potentials higher than 50 V,the device must be disconnected from the mains voltage or power supplyunit. Provide a safeguard to prevent reconnection.
• For electrical drive and filter components, observe the following:Wait 30 minutes after switching off power to allow capacitors todischarge before beginning to work. Measure the electrical voltage on thecapacitors before beginning to work to make sure that the equipment is safeto touch.
• Never touch the electrical connection points of a component while power isturned on.
• Install the covers and guards provided with the equipment properly beforeswitching the device on. Before switching the equipment on, cover andsafeguard live parts safely to prevent contact with those parts.
• A residual-current-operated circuit-breaker or r.c.d. cannot be used forelectric drives! Indirect contact must be prevented by other means, forexample, by an overcurrent protective device according to the relevantstandards.
• Secure built-in devices from direct touching of electrical parts by providingan external housing, for example a control cabinet.
DANGER

Safety Instructions for Electric Drives and Controls
12/118 Bosch Rexroth AG | Electric Drives Inline | Application descriptionand Controls
3.2.2 Protection Against Electric Shock by Protective Extra-Low Voltage
Protective extra-low voltage is used to allow connecting devices with basicinsulation to extra-low voltage circuits.
All connections and terminals with voltages between 5 and 50 volts at Rexrothproducts are PELV systems1. It is therefore allowed to connect devices equippedwith basic insulation (such as programming devices, PCs, notebooks, displayunits) to these connections and terminals.
3.2.3 Protection Against Dangerous MovementsDangerous movements can be caused by faulty control of connected motors.Some common examples are:
• improper or wrong wiring of cable connections• incorrect operation of the equipment components• wrong input of parameters before operation• malfunction of sensors, encoders and monitoring devices• defective components• software or firmware errorsThese errors can occur immediately after equipment is switched on or even afteran unspecified time of trouble-free operation.
The monitoring in the drive components will normally be sufficient to avoid faultyoperation in the connected drives. Regarding personal safety, especially thedanger of bodily harm and/or material damage, this alone cannot be relied uponto ensure complete safety. Until the integrated monitoring functions becomeeffective, it must be assumed in any case that faulty drive movements will occur.The extent of faulty drive movements depends upon the type of control and thestate of operation.
High housing voltage and high leakage current! Risk of death or bodily injury by electric shock!• Before switching on, the housings of all electrical equipment and motors
must be connected or grounded with the equipment grounding conductor tothe grounding points. This is also applicable before short tests.
• The equipment grounding conductor of the electrical equipment and thedevices must be non-detachably and permanently connected to the powersupply unit at all times. The leakage current is greater than 3.5 mA.
• Over the total length, use copper wire of a cross section of a minimum of10 mm² for this equipment grounding connection!
• Before commissioning, also in trial runs, always attach the equipmentgrounding conductor or connect to the ground wire. Otherwise, highvoltages may occur at the housing causing electric
DANGER
1) "Protective Extra-Low Voltage"
High electric voltage by incorrect connection! Risk of death or bodily injury by electric shock!If extra-low voltage circuits of devices containing voltages and circuits of morethan 50 volts (e.g. the mains connection) are connected to Rexroth products, theconnected extra-low voltage circuits must comply with the requirements forPELV1.
WARNING

Safety Instructions for Electric Drives and Controls
Application description | Inline Electric Drives | Bosch Rexroth AG 13/118and Controls
Dangerous movements! Danger to life, risk of injury, severe bodilyharm or material damage!• For the above reasons, ensure personal safety by means of qualified and
tested higher-level monitoring devices or measures integrated in theinstallation.They have to be provided for by the user according to the specificconditions within the installation and a hazard and fault analysis. The safetyregulations applicable for the installation have to be taken intoconsideration. Unintended machine motion or other malfunction is possibleif safety devices are disabled, bypassed or not activated.
To avoid accidents, bodily harm and/or material damage• Keep free and clear of the machine’s range of motion and moving parts.
Possible measures to prevent people from accidentally entering themachine’s range of motion:– use safety fences– use safety guards– use protective coverings– install light curtains or light barriers
• Fences and coverings must be strong enough to resist maximum possiblemomentum.
• Mount the emergency stop switch in the immediate reach of the operator.Verify that the emergency stop works before commissioning. Do notoperate the device if the emergency stop switch is not working.
• Isolate the drive power connection by means of an emergency stop circuitor use a safety related starting lockout to prevent unintentional start.
• Make sure that the drives are brought to a safe standstill before accessingor entering the danger zone.
• Additionally secure vertical axes against falling or dropping after switchingoff the motor power by, for example:– mechanically securing the vertical axes,– adding an external braking/arrester/clamping mechanism or– ensuring sufficient equilibration of the vertical axes.
• The standard equipment motor brake or an external brake controlled by thedrive controller are not sufficient to guarantee personal safety!
• Disconnect electrical power to the equipment using a master switch andsecure the switch against reconnection for:– maintenance and repair work– cleaning of equipment– long periods of discontinued equipment use
• Prevent the operation of high-frequency, remote control and radioequipment near electronics circuits and supply leads. If the use of suchdevices cannot be avoided, verify the system and the installation forpossible malfunctions in all possible positions of normal use before initialcommissioning. If necessary, perform a special electromagneticcompatibility (EMC) test on the installation.
DANGER

Safety Instructions for Electric Drives and Controls
14/118 Bosch Rexroth AG | Electric Drives Inline | Application descriptionand Controls
3.2.4 Protection Against Magnetic and Electromagnetic Fields During Operation and Mounting
Magnetic and electromagnetic fields generated by current-carrying conductorsand permanent magnets in motors represent a serious personal danger to thosewith heart pacemakers, metal implants and hearing aids.
3.2.5 Protection Against Contact with Hot Parts
Health hazard for persons with heart pacemakers, metal implantsand hearing aids in proximity to electrical equipment!• Persons with heart pacemakers and metal implants are not permitted to
enter following areas:– Areas in which electrical equipment and parts are mounted, being
operated or commissioned.– Areas in which parts of motors with permanent magnets are being
stored, repaired or mounted.• If it is necessary for somebody with a pacemaker to enter such an area, a
doctor must be consulted prior to doing so. The noise immunity of presentor future implanted heart pacemakers differs greatly so that no generalrules can be given.
• Those with metal implants or metal pieces, as well as with hearing aids,must consult a doctor before they enter the areas described above.Otherwise health hazards may occur.
Hot surfaces at motor housings, on drive controllers or chokes! Danger of injury!Danger of burns!
• Do not touch surfaces of device housings and chokes in the proximity ofheat sources! Danger of burns!
• Do not touch housing surfaces of motors! Danger of burns!• According to the operating conditions, temperatures can be higher than
60 °C, 140 °F during or after operation.• Before accessing motors after having switched them off, let them cool down
for a sufficiently long time. Cooling down can require up to 140 minutes!Roughly estimated, the time required for cooling down is five times thethermal time constant specified in the Technical Data.
• After switching drive controllers or chokes off, wait 15 minutes to allow themto cool down before touching them.
• Wear safety gloves or do not work at hot surfaces.• For certain applications, the manufacturer of the end product, machine or
installation, according to the respective safety regulations, has to takemeasures to avoid injuries caused by burns in the end application. Thesemeasures can be, for example: warnings, guards (shielding or barrier),technical documentation.
WARNING
CAUTION

Safety Instructions for Electric Drives and Controls
Application description | Inline Electric Drives | Bosch Rexroth AG 15/118and Controls
3.2.6 Protection During Handling and MountingIn unfavorable conditions, handling and mounting certain parts and componentsin an improper way can cause injuries.
3.2.7 Battery SafetyBatteries consist of active chemicals enclosed in a solid housing. Therefore,improper handling can cause injury or material damage.
Environmental protection and disposal! The batteries contained in theproduct are considered dangerous goods during land, air, and seatransport (risk of explosion) in the sense of the legal regulations.Dispose of used batteries separate from other waste. Observe thelocal regulations in the country of assembly.
Risk of injury by improper handling! Bodily injury by bruising,shearing, cutting, hitting!• Observe the general construction and safety regulations on handling and
mounting.• Use suitable devices for mounting and transport.• Avoid jamming and bruising by appropriate measures.• Always use suitable tools. Use special tools if specified.• Use lifting equipment and tools in the correct manner.• If necessary, use suitable protective equipment (for example safety gog-
gles, safety shoes, safety gloves).• Do not stand under hanging loads.• Immediately clean up any spilled liquids because of the danger of skidding.
CAUTION
Risk of injury by improper handling!• Do not attempt to reactivate low batteries by heating or other methods (risk
of explosion and cauterization).• Do not recharge the batteries as this may cause leakage or explosion.• Do not throw batteries into open flames.• Do not dismantle batteries.• When replacing the battery/batteries do not damage electrical parts
installed in the devices.• Only use the battery types specified by the manufacturer.
CAUTION

Safety Instructions for Electric Drives and Controls
16/118 Bosch Rexroth AG | Electric Drives Inline | Application descriptionand Controls
3.2.8 Protection Against Pressurized Systems According to the information given in the Project Planning Manuals, motorscooled with liquid and compressed air, as well as drive controllers, can be partiallysupplied with externally fed, pressurized media, such as compressed air,hydraulics oil, cooling liquids and cooling lubricating agents. Improper handling ofthe connected supply systems, supply lines or connections can cause injuries ormaterial damage.
Environmental protection and disposal! The agents used to operatethe product might not be economically friendly. Dispose ofecologically harmful agents separately from other waste. Observe thelocal regulations in the country of assembly.
Risk of injury by improper handling of pressurized lines!• Do not attempt to disconnect, open or cut pressurized lines (risk of
explosion).• Observe the respective manufacturer's operating instructions.• Before dismounting lines, relieve pressure and empty medium.• Use suitable protective equipment (for example safety goggles, safety
shoes, safety gloves).• Immediately clean up any spilled liquids from the floor.
CAUTION

Important Information on Voltage Areas
Application description | Inline Electric Drives | Bosch Rexroth AG 17/118and Controls
4 Important Information on Voltage Areas4.1 Inline Voltage Areas
Inline terminals are mainly available for the safety extralow voltage area. Whenusing relay terminals, you work in the low-voltage area. The terminals are dividedinto two product groups according to their use in a specific voltage area and theirfunction.
4.2 Correct UsageThe Inline terminals should only be used within an Inline station according to theinstructions given in the terminal-specific data sheets and in this applicationdescription. Accepts no liability if the device is used for anything other than its designated use.
Voltage Area Voltage Used for Inline Product GroupSELV 24 V DC Low-level signal terminals
Low voltage 230 V AC Relay terminals
Figure 4-1 Voltage areas and corresponding terminal designations for Inline
Follow the safety instructions given in the following sections whenworking outside the SELV area.
Dangerous voltagePlease note that there are dangerous voltages when switching circuits that domeet SELV requirements.When working on the terminals and wiring, alwaysswitch off the supply voltage and ensure it cannot be switched on again.
Do not replace terminals while the power is connected.Before removing or mounting a terminal, disconnect power to the entire station.Make sure the entire station is reassembled before switching the power back on.
WARNING
DANGER

Important Information on Voltage Areas
18/118 Bosch Rexroth AG | Electric Drives Inline | Application descriptionand Controls
4.3 Safety Instructions for the Low-Voltage Area
An electrician is a person who, because of their education, experience andinstruction and their knowledge of relevant standards, can assess any requiredoperations and recognize any possible dangers. (Definitions according toDIN VDE 1000-10:1995)
A person instructed in electrical engineering is someone who has beeninstructed by an electrician in their required tasks and the possible dangerscaused by incorrect handling and, if necessary, has also been informed of thenecessary safety equipment and safety measures. (Definitions according to DINVDE 1000-10:1995)
4.4 Installation Instructions and Notes for the Low-Voltage Area
Only qualified personnel (qualified electricians or persons instructed in electricalengineering) may work on Inline terminals outside the SELV area.The instructions given in the terminal-specific data sheets must be followed during installation and startup.
CAUTION
Dangerous voltagePlease note that there are dangerous voltages when switching circuits that domeet SELV requirements. Connecting and disconnecting connectors and terminals in the 230 V AC voltagearea is only permitted if the power supply is disconnected.When working on the terminals and wiring, always switch off the supply voltageand ensure it cannot be switched on again.
Use grounded AC voltage networks.Inline terminals for the 230 V AC voltage area should only be operated ingrounded AC voltage networks (AC networks).
CAUTION
CAUTION

Important Information on Voltage Areas
Application description | Inline Electric Drives | Bosch Rexroth AG 19/118and Controls
4.5 Structure of an Area With a Relay TerminalA relay terminal must be separated from the 24 V area of the Inline station bymeans of distance terminals.
The number of terminals within a station is limited by the system restrictions of thebus system and the Inline system (see Chapter 11, "Technical Data and OrderingData").
Figure 4-1 Typical structure of an Inline station with 24 V voltage area and a relay terminal
1 Bus couplers2 Various input/output terminals for the 24 V AC area3 Relay terminal between distance terminals4 Power terminal for the 24 V DC area5 Various input/output terminals for the 24 V DC area
4.6 Electronics Base and ConnectorsLow-level signal terminals and relay terminals are located in the same type ofhousing, which is referred to as a low-level signal housing. An externalcharacteristic that distinguishes the base and the appropriate connectors for therelay terminals from the base and connectors for the low-level signal terminals istheir color:
1 2
1
2
3
4
1
2
3
4
1 2
1
2
3
4
1
2
3
4
1 2
1
2
3
4
1
2
3
4
1 2
1
2
3
4
1
2
3
4
BA
RC
BK-T&U
RD
LD
UL US
UM
1
1 2
1
2
3
4
1
2
3
4
1 2
1
2
3
4
1
2
3
4
1 2
1
2
3
4
1
2
3
4
1 D
DOR 1/W
1 2
1
2
3
1
2
3
4
UM
PWR IN
1 2
1
2
3
4
1
2
3
4
1 2
1
2
3
4
1
2
3
4
1 2
1
2
3
4
1
2
3
4
1 2
1
2
3
4
1
2
3
4
1 2
1
2
3
4
1
2
3
4
53
7290A001
2 4
4
Area Terminal Connector Other DifferencesLow-level signal (24 V DC)
Light gray Light gray Light color for function identification (e.g., light blue)
Relay terminals (low voltage; 230 V AC)
Dark gray Dark gray Light color for function identification (e.g., light blue)with white lightning bolt
Figure 4-2 Color of base and connectors

Important Information on Voltage Areas
20/118 Bosch Rexroth AG | Electric Drives Inline | Application descriptionand Controls
4.7 Safety Mechanisms to Prevent Incorrect Connection of Connectors for Different Voltage Areas
4.7.1 Protection Against the Connection of Connectors of the 24-V-Level to Relay Terminals
The low-level signal connectors can be plugged into relay terminals. Because therelay outputs are floating, this connection error has no negative effects.
4.7.2 Protection Against the Connection of Live 230-V-AC- Connectors in the 24 V DC Area
In the low-voltage area, live connectors can be connectors for the relay terminals.
These connectors are closed using filler plugs at some places and, therefore, donot fit on the terminals of the 24-V-area.
4.8 Response to the Connection of a Relay Terminal in the 24-V-DC Area
A relay terminal can be inserted in the 24 V DC area. This does not result in directdanger to people.
The module has no diagonal routing, so there is no direct danger from theterminal, even with a 230 V connector. This means that the shortest isolatingdistance is the distance from one connector to the next. This isolating distance isnot permitted. Therefore, insert a distance terminal (type: R-IB IL DOR LV-SET)before and after the relay terminal.

Inline Product Groups
Application description | Inline Electric Drives | Bosch Rexroth AG 21/118and Controls
5 Inline Product GroupsThe following sections give you an overview of the Inline product groups. Forspecific information on the individual terminals, please refer to the terminal-specific data sheets and the individual sections in this application description.
5.1 General5.1.1 Different Transmission Speeds
Inline terminals are available for transmission speeds of 500 kbps and 2 Mbps.The order designation specifies the transmission speed.
Example:
You can identify terminals by means of the function identification (see "FunctionIdentification and Labeling" on page 36).
5.1.2 Products With or Without AccessoriesInline terminals are available with or without accessories. The order designationspecifies the scope of supply.
Example:
In the case of PAC products, Inline connectors and labeling fields are included inthe scope of supply.
500 kbps: R-IB IL 24 DI 4
2 Mbps R-IB IL 24 DI 4-2MBD
Please note that you can only work with one transmission speed within a bus system.
CAUTION
Withoutaccessories:
R-IB IL 24 DI 4
Includingaccessories:
R-IB IL 24 DI 4-PAC

Inline Product Groups
22/118 Bosch Rexroth AG | Electric Drives Inline | Application descriptionand Controls
5.2 Bus Couplers and Terminals With Remote Bus Branch5.2.1 Bus Couplers
A bus coupler is needed to connect an Inline station to a bus. The following buscouplers were available when this application description was ready for printing:
Bus Coupler Bus SystemR-IBS IL 24 BK-T/UR-IBS IL 24 BK-DSUB INTERBUS
R-IL PB BKR-IL PB BK DP/V1R-IL PB BK DI8 DO4
PROFIBUS-DP
R-IL DN BK DeviceNET
R-IL CAN BK-TC CANopen
Figure 5-1 Bus couplers for different bus systems
The product range is continuously growing. More information on therange can be found on the Internet at www.boschrexroth.com.
The different bus couplers are described in separate documents.Not every Inline terminal can be operated with every bus coupler. Foran overview of the compatibility between Inline terminals and buscouplers for various bus systems, please see "DOC-CONTRL-ILIOLIST***-KB..-EN-P".

Inline Product Groups
Application description | Inline Electric Drives | Bosch Rexroth AG 23/118and Controls
5.2.2 Terminal With Remote Bus BranchIf permitted by your bus system, this terminal can be used to create a remote busbranch from the Inline station. This enables further segmentation of the systemso that, for example, star structures can be created. This terminal can be used toswitch the connected remote bus branch on or off.
The remote bus branch modules do not count as Inline station modules.
Terminals with remote bus branch can only be placed directly behind a buscoupler or a terminal with remote bus branch.
This means that there must be no INTERBUS devices (no terminals withprotocol chip/ID code) between the bus coupler and the terminal with remote busbranch.
Figure 5-1 Terminal with remote bus branch: R-IBS IL 24 RB-T
Observe the restrictions of your bus system or bus coupler with regardto terminals with remote bus branch.

Inline Product Groups
24/118 Bosch Rexroth AG | Electric Drives Inline | Application descriptionand Controls
5.3 Supply TerminalsPower terminals and segment terminals are available to supply the station withI/O voltage. The segment terminals complement the power terminals. Thesegment terminals make it possible to create different segments within a maincircuit.
Different types can be used to meet your requirements:
Designation Type Supply/Provision
Fuse Diagnostics(INTERBUS Device)
Fused Area
R-IB IL 24 PWR INPower terminal
UM/US No No None
R-IB IL 24 PWR IN/R U24V (UL/UANA)/UM/US
No No None
R-IB IL 24 SEG/F Segment terminal US Yes
NoSegment circuit
R-IB IL 24 SEG/F-D Yes
Figure 5-2 Overview of the supply terminals
Protect the power supply.Protect the voltage supply externally, regardless of the supply terminal used.
Do not replace terminals while the power is connected.Make sure power to the entire station is disconnected before removing aterminal. Make sure the entire station is reassembled before switching the powerback on.
CAUTION
CAUTION

Inline Product Groups
Application description | Inline Electric Drives | Bosch Rexroth AG 25/118and Controls
5.3.1 Power TerminalA power terminal is used to supply the required voltages to the internal stationpotential jumpers. Several supply terminals can be used in one station. Thismeans that different circuits can be electrically isolated.
All power terminals are used to supply the main voltage and/or segment voltage.
Figure 5-2 Example of a power terminal: R-IB IL 24 PWR IN
Potential jumpers The power terminal interrupts all potential jumpers for the voltages to bereinjected, and recreates all potential jumpers (see also "Electrical Potential andData Routing" on page 47).
Carrying capacity of thejumper contacts
The maximum load capacity of the jumper contacts on the side is indicated in"Current and Voltage Distribution" on page 58.
Electrical isolation The power terminal is used to create electrically isolated I/O areas within astation.
Functional earth groundconnection
24 V terminals are connected to the functional earth ground when they aresnapped onto the grounded DIN rail via the FE spring on the bottom side of theterminal. This spring is connected to the FE potential jumper and to the terminalpoints for an FE connection.
If the previous terminal is a 24 V terminal, the power terminal is connected to theFE potential jumper of the station when snapped onto this terminal.

Inline Product Groups
26/118 Bosch Rexroth AG | Electric Drives Inline | Application descriptionand Controls
5.3.2 Segment TerminalSegment terminals can only be used in the 24 V DC area. Segment terminals areused to create partial circuits (segment circuits) within the main circuit.
On segment terminals without a fuse, the connection between the main circuit UMand the segment circuit US must be established using a jumper or a switch.Segment terminals with a fuse establish this connection automatically.
Figure 5-3 Example of a segment terminal: R-IB IL 24 SEG
UM The potential jumper for the main circuit UM is not interrupted in the segmentterminal. The potential for the segment circuit US is tapped from the potentialjumper at the segment terminal.
US The segment terminal interrupts the segment circuit US in the potential jumper ofthe previous terminal.
For further information on the supply voltages, please refer to "Circuits andProvision of Supply Voltages" on page 47.
Carrying capacity of thejumper contacts
The maximum load capacity of the jumper contacts on the side is indicated in"Current and Voltage Distribution" on page 58.
Functional earth groundconnection
The terminal is connected to the functional earth ground when it is snapped ontothe grounded DIN rail via the FE spring on the bottom side of the terminal. Thisspring is connected to the FE potential jumper and to the terminal points for anFE-connection.
When mounting a segment terminal onto the previous terminal, this segmentterminal is connected to the potential jumper FE of the station.

Inline Product Groups
Application description | Inline Electric Drives | Bosch Rexroth AG 27/118and Controls
5.4 Input/Output Terminals5.4.1 General Information on Terminals for Analog and Digital Signals
For low-level signals, terminals with different functions are available. Thisincludes, for example, input/output terminals for analog and digital signals,counter terminals and positioning terminals.
These terminals are available in different sizes. This enables you to set up thestation in a modular way so that it meets your application requirements.
Input/output terminals for digital signals and terminals with floating SPDT relaycontacts are available for the low voltage level.
Figure 5-4 Example of a digital input terminal: R-IB IL 24 DI 8
Protection Overload protection of the system is centrally provided by a fuse in the powerterminal or by an external fuse provided by the user. The rating of thepreconnected fuse must be such that the maximum load current is not exceeded.For the maximum permissible load current of an I/O terminal, please refer to theterminal-specific data sheet.
Carrying capacity of thejumper contacts
The maximum load capacity of the jumper contacts on the side is indicated in"Current and Voltage Distribution" on page 58.
Grounding (FE) Connection to functional earth ground (24 V DC area) is provided via the potentialjumpers when the terminal is snapped onto the previous terminal.
Voltage area Input/output terminals are available for the 24 V DC voltage area.

Inline Product Groups
28/118 Bosch Rexroth AG | Electric Drives Inline | Application descriptionand Controls
5.4.2 Terminals for Analog SignalsShielding The connectors of analog terminals have a special shield connection to shield the
cables.
Parameterization Terminals for analog signals are in a preset configuration upon delivery.
Some terminals may also be parameterized to other configurations using theoutput data words. Please refer to the terminal-specific data sheet to see if aspecific analog terminal can be configured and how the output data words areassigned.
Data formats The measured values and the corresponding output values of terminals foranalog signals can be represented in different data formats depending on theterminal used and on its configuration. These formats are listed in the terminal-specific data sheets.
Diagnostics in the input dataword
Analog input terminals have overrange detection in all measuring ranges.
Open circuit is indicated in the 4 mA - 20 mA range.
Open circuit is also reported when using terminals for connecting thermocouplesand resistive temperature sensors.
Extended diagnostics Some data formats support extended diagnostics. To determine whetherextended diagnostics are available for a specific terminal, please refer to theterminal-specific data sheet.
5.5 Function Terminals (Communication, Open and Closed-Loop Control)
Function terminals are available to meet the following requirements:
• Counting (R-IB IL CNT)• Positioning (e.g., R-IB IL SSI, R-IB IL INC)• Integrating V.24 devices
(R-IB IL RS 232-PRO, R-IB IL RS 485/422-PRO)• Pulse width modulation (R-IB IL PWM/2)• Temperature controller (R-IB IL TEMPCON UTH, R-IB IL TEMPCON RTD)
Please refer to the corresponding data sheet or applicationdescription for information on these terminals.

Inline Product Groups
Application description | Inline Electric Drives | Bosch Rexroth AG 29/118and Controls
5.6 Branch TerminalA branch terminal is available for integrating a Fieldline modular local bus in anInline station.
This terminal can be used to integrate sensors and actuators in close proximity tothe station, which are connected to the Fieldline modular local bus withIP65/67 protection, in your bus system. Only use the branch terminal as the lastterminal in an Inline station.
5.7 Example Structure of an Inline Station
Figure 5-5 Example station with 24-V-DC-terminals
The example Inline station shown in Figure 5-5 consists of the following elements:
1 End clamp2 Bus coupler (here, basic representation of a bus coupler with optional voltage
supply)3 24 V DC terminals (e.g., I/O terminal)4 End plate (end of the station)
Please refer to the corresponding data sheet for information on thisterminal.
314
1
2
7290A018

Notes
30/118 Bosch Rexroth AG | Electric Drives Inline | Application descriptionand Controls
5.8 Inline Block IO ModulesBlock IO modules are available for inputting and/or outputting digital and analogsignals to various bus systems. Modules are available for the following bussystems: INTERBUS, PROFIBUS-DP, DeviceNET, and CANopen.
The product range is continuously growing. More information on therange can be found in the latest online product catalog atwww.boschrexroth.com.

Structure and Dimensions of the Inline Terminals
Application description | Inline Electric Drives | Bosch Rexroth AG 31/118and Controls
6 Structure and Dimensions of the Inline Terminals6.1 Basic Structure of Terminals
Independent of function and design width, an Inline terminal consists of theelectronics base and the snap-in-place connector.
Figure 6-1 Basic Inline terminal structure
The components shown in Figure 6-1 are described in the following sections.
1 23 4
D
DI 4
Front snap-on mechanismPotential jumpers(knife contacts)
Latching onDIN rail
Slot encoding
Backsnap-on mechanism
Coloredfunction encoding
Diagnostic an statusindicators
ZBFM labeling field for connector
Keyway for attaching labeling fieldBack connectorshaft latching
Transparent field
Front connector shaft latching
Signal terminals 1/2
FE or Signal terminals 3/4
Potential terminals
Feather ofkeyway/featherkey connection
Electronics base
Connector
Data jumpers(knife contacts)
7290A011
The components required for labeling are listed in "Ordering Data" onpage 103.

Structure and Dimensions of the Inline Terminals
32/118 Bosch Rexroth AG | Electric Drives Inline | Application descriptionand Controls
6.2 Electronics BaseThe electronics base holds the entire electronics for an Inline terminal and thepotential and data routing.
Potential and data routing Potential and data routing are located in the base. As all terminals are snappedonto the DIN rail, the position of the interfaces between the terminals with regardto the DIN rail is the same for all terminals (see also Figure 7-2 on page 55). Theadvantage of this is that terminals of different sizes can be integrated into thestation.
The knife contacts are located on the left-hand side of the terminal (shown inFigure 6-1). They snap into the featherkeys of the next terminal on the left whenthe station is mounted.
The type of routing contacts (i.e., potential or data) that are on each terminaldepends on the function of the terminal and is shown in the circuit diagram of eachterminal-specific data sheet.
Snap-on mechanism/latching
Pressing the front and back snap-on mechanism at the same time releases thelatching, enabling the terminal to be removed by pulling it straight back from theDIN rail (see "Mounting and Removing Inline Terminals" on page 68).
Keyway/featherkeyconnection
The featherkeys are on the left-hand side of the terminal (Figure 6-1). They snapinto the keyways of the next terminal on the left when the terminal is mounted onthe DIN rail. The featherkeys are also referred to as locking clips and the keywaysas guideways.
Base colors The base and the appropriate connectors for the different voltage areas are ofdifferent colors (see "Electronics Base and Connectors" on page 19).
6.3 ConnectorsThe I/O or supply voltages are connected using a pluggable connector.
Connector width Regardless of the width of the electronics base, the connectors have a width oftwo terminal points (connection points). This means that you must plug oneconnector on a 2-slot base, two connectors on a 4-slot base, and four connectorson an 8-slot base.
Connector colors To distinguish between the functions and voltage areas, the connectors havebeen assigned different colors:
Light gray Connectors for low-level signal (24 V DC) terminals (excludingsupply terminals)
Black Connectors for low-level signal supply terminals (24 V DC)Dark gray Connectors for relay terminals

Structure and Dimensions of the Inline Terminals
Application description | Inline Electric Drives | Bosch Rexroth AG 33/118and Controls
Connector types (24 V DC) The following connector types are available for the 24 V DC area:
Figure 6-2 Connector types for Inline terminals
A Standard connectorThe light gray standard connector is used for the connection of two signals in 4-wire technology (e.g., digital input/output signals).The black standard connector is used for supply terminals. Some of the adjacent contacts are jumpered internally (see Figure 6-3 on page 35).
B Shield connector for connecting one cableC Shield connector for connecting two cables
Light gray connectors B and C are used for signals connected using shielded cables (e.g., analog input/output signals, high-frequency counter inputs, remote bus cable).FE or shielding is connected by a shield connection clamp rather than by a terminal point.
D Extended double signal connectorThis light gray connector is used for the connection of four signals in 3-wire technology (e.g., digital I/O signals).
Relay-module connector Dark gray standard connectors are available for the relay modules.

Structure and Dimensions of the Inline Terminals
34/118 Bosch Rexroth AG | Electric Drives Inline | Application descriptionand Controls
Connector identification All connectors are offered with and without color print. The connectors with colorprint (marked with CP in the order designation) have terminal points that are color-coded according to their functions.
The following colors indicate the signals of the terminal points:
Color Terminal Point SignalRed +
Blue -
Green Functional earth ground (FE)
Green/yellow Functional earth ground (FE);This marking may still be seen on older connectors. Functional earth ground is marked in green on modern connectors.
Figure 6-1 Terminal point color-coding (24 V DC)
The connectors for distance terminals are color-coded with twocolors.The green marked side must point in the direction of the 24 V area andthe gray marked side in the direction of the AC area.

Structure and Dimensions of the Inline Terminals
Application description | Inline Electric Drives | Bosch Rexroth AG 35/118and Controls
Special features and internaljumpering
Figure 6-3 Internal jumpering within 24 V DC connectors
A Light gray connector for I/O connectionB Black connector for providing the supply voltagesC Light gray shield connector for the connection of shielded cablesD Light gray double signal connector for I/O connectionE Dark gray connector for relay terminals
The shield connector is jumpered between terminal points 1.4 and 2.4 through theshield connection as seen in Figure 6-3. All other connectors are jumperedinternally through the terminal point connections in the connector.
Terminal point without metal contact
1 2
1
2
3
4
1
2
3
4
1 2
1
2
3
4
1
2
3
4
7290A028
1 2
1
2
3
4
1
2
3
4
5
6
5
6
1 2
1
2
3
4
1
2
3
4
BA C D1 2
1
2
3
4
1
2
3
4
E
Only install the appropriate connectors.To avoid a malfunction, only snap a connector on a terminal that is appropriatefor this connector. Refer to the terminal-specific data sheet to select the correctconnectors.Only place black connectors on supply terminals.When the terminal points are jumpered in the black connector, power is carriedthrough the jumpering in the connector and not through the printed circuit boardof the terminal. The complete current carrying capacity is ensured through thisjumpering.The black connector must not be placed on a terminal that is to be used for adouble signal connector. Incorrect connection may lead to a short circuitbetween two signal terminal points.
CAUTION

Structure and Dimensions of the Inline Terminals
36/118 Bosch Rexroth AG | Electric Drives Inline | Application descriptionand Controls
6.4 Function Identification and LabelingHousing The basic fields of application for terminals can be identified by their housing
color.
Function identification The terminals are color-coded to enable visual identification of the functions(1 in Figure 6-4).
Figure 6-4 Function identification
The following colors indicate the functions:
Field of Application Housing Type Housing Color
Connector Color
Low-level signal terminals (24 V DC)
Low-level signal housing
Light gray Light gray/black
Relay terminals Low-level signal housing
Dark gray Dark gray
Figure 6-2 Field of application and housing
Color Terminal Function24 V DC areaGray Bus coupler
Black Power terminal/segment terminal
Light blue Digital input
Pink Digital output
Green Analog input
Yellow Analog output
Orange Function terminal/control terminal
Relay terminalRed with lightning bolt
Digital output
Figure 6-3 Terminal color-coding

Structure and Dimensions of the Inline Terminals
Application description | Inline Electric Drives | Bosch Rexroth AG 37/118and Controls
Identification of transmissionspeed
Terminals with a transmission speed of 2 Mbps are identified by a white stripe atthe level of the D LED.
Figure 6-5 Identification of transmission speed
Connector identification The color-coding of the terminal points is described on page 34.
Labeling/terminal numbering Terminal point numbering is explained using the example of an 8-slot terminal.
Figure 6-6 Terminal numbering
Slot/connector The slots (connectors) on a base are numbered consecutively (A in Figure 6-6).This numbering is not shown on the terminal.
7290B003
12D
DO 4
34
12D
DO 4
34
500 kbps 2 Mbps

Structure and Dimensions of the Inline Terminals
38/118 Bosch Rexroth AG | Electric Drives Inline | Application descriptionand Controls
Terminal point Depending on your requirements you may order connectors with differentterminal point labeling:
1 Connectors without labeling (diagram on the left-hand side in Figure 6-6):The terminal points on these connectors are marked X.Y.
X is the number of the terminal point row on the connector. It is indicated abovethe terminal point row (B).
Y is the terminal point number in the terminal point row. It is directly indicated onthe terminal point (C).
The precise designation for a point is thus specified by the slot and terminal point.The highlighted (gray) terminal point (D) would be numbered as follows: Slot 3terminal point 2.3 (3.2.3).
2 Connector with printed terminal point numbering for each connector (middle diagram in Figure 6-6):
Here, the terminal points are numbered as described above. The numbers areprinted above the terminal point.
3 Connector with printed terminal point numbering for each channel (diagram on the right-hand side in Figure 6-6):
For terminals with eight or sixteen inputs or outputs, connector sets are available,in which the terminal point rows are numbered by terminal (1 to 8) rather than byconnector (1 and 2). The numbers are printed above the terminal point.
Use the information provided in the terminal-specific data sheet toselect the connectors you require.

Structure and Dimensions of the Inline Terminals
Application description | Inline Electric Drives | Bosch Rexroth AG 39/118and Controls
Additional labeling In addition to this terminal designation, you can identify the slots, terminal points,and connections using labeling fields.
Figure 6-7 Labeling
Labeling fields are available in two widths, either as a labeling field covering oneconnector (1; R-IB IL FIELD 2) or as a labeling field covering four connectors(2; R-IB IL FIELD 8). You can label each channel individually with free text. Onthe upper part of the connector there is a keyway for attaching this labeling field.The labeling field can be tilted up and down. In each end position a light latchingensures that the labeling field remains in place.
Using the markers on the connector and on the electronics base, you can clearlyassign both connector and slot.
Insert strips for use with a laser printer are available for insertion in theR-IB IL FIELD 2 and R-IB IL FIELD 8 labeling fields (see "Ordering Data forAccessories" on page 103).
1 23 4
D
DI 4
7290A036
1
2

Structure and Dimensions of the Inline Terminals
40/118 Bosch Rexroth AG | Electric Drives Inline | Application descriptionand Controls
6.5 Housing Dimensions for TerminalsToday, small I/O stations are frequently installed in 80 mm standard controlboxes. Inline terminals are designed so that they can be used in this type ofcontrol box.
The terminal dimensions are determined by the dimensions of the electronicsbase and the dimensions of the connector.
The electronics base of the terminals is available in three standard design widths(12.2 mm, 24.4 mm and 48.8 mm. They take one (1), two (2) or four (4), 12.2 mmwide connectors.
When a connector is plugged in, each terminal has a depth of 71.5 mm.
The height of the terminal depends on the connector used. The connectors areavailable in three different versions.
6.5.1 Dimensions of the Electronics Base2-slot housing,
example:R-IB IL 24 DO 2R-IB IL 24 DI 4
Figure 6-8 Dimensions of the electronics base (2-slot housing)

Structure and Dimensions of the Inline Terminals
Application description | Inline Electric Drives | Bosch Rexroth AG 41/118and Controls
4-slot housing,example:
R-IB IL AO 1/SFR-IB IL CNT
Figure 6-9 Dimensions of the electronics base (4-slot housing)
8-slot housing,example:
R-IB IL 24 DO 8R-IB IL 24 DI 16
Figure 6-10 Dimensions of the electronics base (8-slot housing)

Structure and Dimensions of the Inline Terminals
42/118 Bosch Rexroth AG | Electric Drives Inline | Application descriptionand Controls
Container housing 1,example:
R-IBS IL 24 BK-DSUBR-IL PB BK
Figure 6-11 Dimensions of the electronics base (container housing 1)

Structure and Dimensions of the Inline Terminals
Application description | Inline Electric Drives | Bosch Rexroth AG 43/118and Controls
6.5.2 Connector DimensionsConnector
Figure 6-12 Connector dimensions
Key:
A Standard connector (dimensions also apply to connector for relay terminals)
B Shield connector for connecting one cableC Shield connector for connecting two cablesD Extended double signal connectorThe depth of the connector does not influence the overall depth of the terminal.

Structure and Dimensions of the Inline Terminals
44/118 Bosch Rexroth AG | Electric Drives Inline | Application descriptionand Controls
6.6 Mounting DistancesDIN rail Inline terminals are always mounted onto DIN rails.
The distance between DIN rail fasteners must not exceed 200 mm. This distanceis necessary for the stability of the rail when mounting and removing Inlineterminals.
6.6.1 Mounting Distances
Figure 6-13 Mounting Distances
If the distances are smaller, the minimum bending radius of thecables, easy handling during installation, and a clear structure cannotbe guaranteed.

Structure and Dimensions of the Inline Terminals
Application description | Inline Electric Drives | Bosch Rexroth AG 45/118and Controls
6.6.2 Mounting Distances for Mounting Outside a Terminal BoxIf the Inline stations are housed in a control cabinet rather than a terminal box,for example, the DIN rail distances depend on the previously mentioned mountingdistances.
Figure 6-14 Mounting distances for mounting outside a terminal box
DE
PWR INPWR IN
12D
DO2-2A
12D
DO2-2A
12D
DO4
34
12D
DO2-2A
12D
DO2
12D
DI8
12
12
12E
D
SEG-ELF
12D
DI2
12D
DI2
D
2RTD
160
mm
(6.2
99")
40 m
m(1
.578
")
7290A005

Notes
46/118 Bosch Rexroth AG | Electric Drives Inline | Application descriptionand Controls

Electrical Potential and Data Routing
Application description | Inline Electric Drives | Bosch Rexroth AG 47/118and Controls
7 Electrical Potential and Data Routing7.1 Circuits and Provision of Supply Voltages
There are several circuits within an Inline station. These are automatically createdwhen the terminals are properly installed. The voltages of the different circuits aresupplied to the connected terminals via potential jumpers.
An example of the circuits within an Inline station is given in "Example of a CircuitDiagram" on page 52. The descriptions in the following sections refer to thisexample.
Carrying capacity of thejumper contacts
Observe the maximum current carrying capacity of the jumper contacts on theside for each circuit. The current carrying capacities for all potential jumpers aregiven in the following sections and are summarized in "Current and VoltageDistribution" on page 58.
The arrangement of the potential jumpers and information on current and voltagedistribution on the potential jumpers can be found in "Electrical Potential and DataRouting" on page 55.
The connection of the supply voltages is described in "Connecting the VoltageSupply" on page 83.
7.1.1 Supply of the Bus Coupler
The voltages for the logic circuit UL and the supply of the terminals for analogsignals UANA are always internally generated from the bus coupler supply.
Please refer to the terminal-specific data sheet for the circuit towhich the I/O circuit of a special terminal is to be connected.
For voltage connection, please refer to the notes given in the terminal-specific data sheets.
Please refer to the documentation for your bus coupler to determinethe correct voltage supply for the bus coupler.
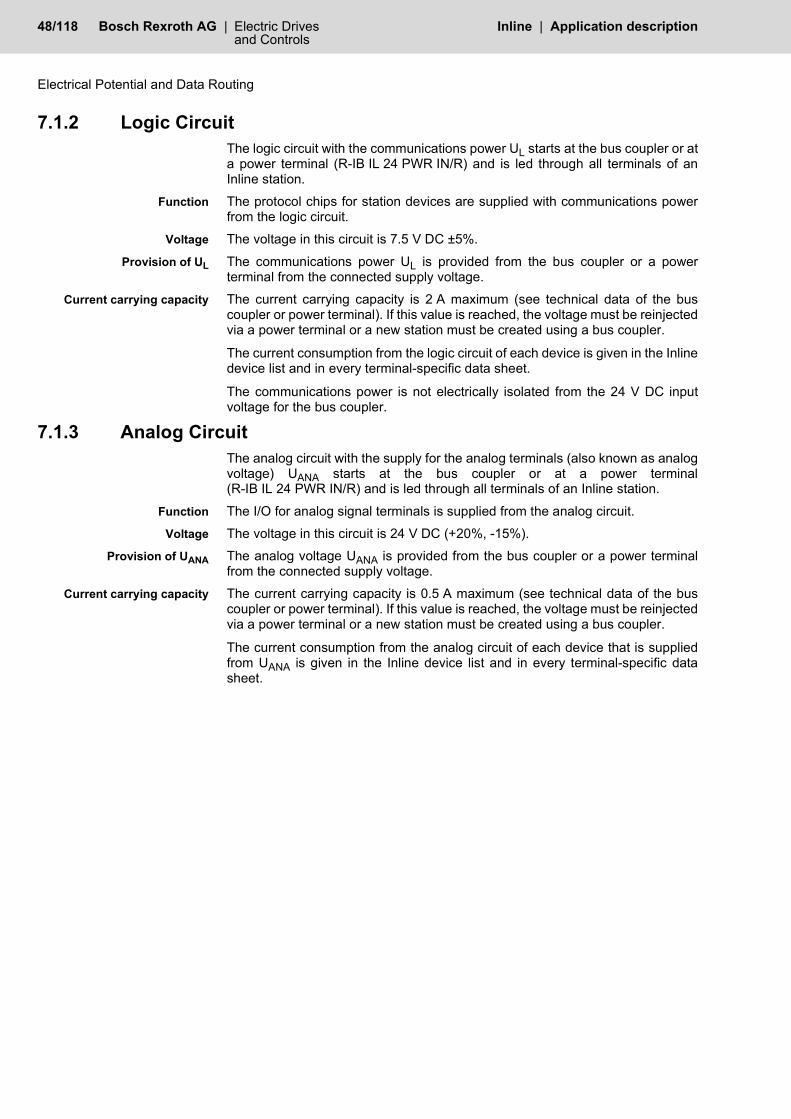
Electrical Potential and Data Routing
48/118 Bosch Rexroth AG | Electric Drives Inline | Application descriptionand Controls
7.1.2 Logic CircuitThe logic circuit with the communications power UL starts at the bus coupler or ata power terminal (R-IB IL 24 PWR IN/R) and is led through all terminals of anInline station.
Function The protocol chips for station devices are supplied with communications powerfrom the logic circuit.
Voltage The voltage in this circuit is 7.5 V DC ±5%.
Provision of UL The communications power UL is provided from the bus coupler or a powerterminal from the connected supply voltage.
Current carrying capacity The current carrying capacity is 2 A maximum (see technical data of the buscoupler or power terminal). If this value is reached, the voltage must be reinjectedvia a power terminal or a new station must be created using a bus coupler.
The current consumption from the logic circuit of each device is given in the Inlinedevice list and in every terminal-specific data sheet.
The communications power is not electrically isolated from the 24 V DC inputvoltage for the bus coupler.
7.1.3 Analog CircuitThe analog circuit with the supply for the analog terminals (also known as analogvoltage) UANA starts at the bus coupler or at a power terminal(R-IB IL 24 PWR IN/R) and is led through all terminals of an Inline station.
Function The I/O for analog signal terminals is supplied from the analog circuit.
Voltage The voltage in this circuit is 24 V DC (+20%, -15%).
Provision of UANA The analog voltage UANA is provided from the bus coupler or a power terminalfrom the connected supply voltage.
Current carrying capacity The current carrying capacity is 0.5 A maximum (see technical data of the buscoupler or power terminal). If this value is reached, the voltage must be reinjectedvia a power terminal or a new station must be created using a bus coupler.
The current consumption from the analog circuit of each device that is suppliedfrom UANA is given in the Inline device list and in every terminal-specific datasheet.

Electrical Potential and Data Routing
Application description | Inline Electric Drives | Bosch Rexroth AG 49/118and Controls
7.1.4 Main CircuitThe main circuit with the main voltage UM starts at the bus coupler or a powerterminal and is led through subsequent terminals until it reaches the next powerterminal.
A new circuit starts at the next power terminal. This circuit is electrically isolatedfrom the previous one if electrically isolated power supply units are used.
Several power terminals can be used within one station.
Function The segment voltage US can be tapped from the main voltage UM using differentsegment terminals. Several independent segments can thus be created within themain circuit. The main circuit provides the supply voltage for these segments.
Some terminals access the main circuit directly. For example, the encoder supplyfor positioning terminals is tapped from the main circuit, while the I/O devices aresupplied from the segment circuit.
Voltage The voltage in this circuit should not exceed 30 V DC.
Current carrying capacity The maximum current carrying capacity for the main circuit is 8 A (total currentwith the segment circuit).
This current carrying capacity can be reduced by certain terminals.
If the limit value of the potential jumpers UM and US is reached (total current of USand UM), a new power terminal must be used.
Please note the special feature of Inline terminals with relay outputs.These terminals interrupt the potential jumpers UM and US.
Please refer to the information in the terminal-specific data sheets.

Electrical Potential and Data Routing
50/118 Bosch Rexroth AG | Electric Drives Inline | Application descriptionand Controls
Provision of UM In the simplest case, the main voltage UM can be supplied at the bus coupler.
The main voltage UM can also be supplied via a power terminal. A power terminalmust be used if:
1 A bus coupler that cannot supply the main voltage is used.2 A new 24 V area is to be created downstream of a relay terminal.3 Electrical isolation between different I/O areas is to be created.4 The maximum current carrying capacity of the potential jumpers UM, US and
GND (total current of US and UM) is reached.
7.1.5 Segment CircuitThe segment circuit with segment voltage US starts at the bus coupler or a supplyterminal (power terminal or segment terminal) and is led through the subsequentterminals until it reaches the next supply terminal.
You can use several segment terminals within a main circuit and, therefore,segment the main circuit.
Function Almost all the terminals in the Inline station except the analog terminals aresupplied from the segment circuit (e.g., digital input terminals, digital outputterminals).
The segment circuit also provides the auxiliary supply voltage for controllingpower switches and contactors.
Some terminals access both the segment circuit and the main circuit. Forexample, the encoder supply for positioning terminals is tapped from the maincircuit, while the I/O devices are supplied from the segment circuit.
The segment circuit can be switched off or fused using the safety or segmentterminals. It has the same reference ground as the main circuit. This means thatcircuits with different fuses can be created within the station without externalcross wiring.
Voltage The voltage in this circuit should not exceed 30 V DC.
Current carrying capacity If the segment terminal and the preconnected power terminal do not have anyother limitations, the maximum current carrying capacity is 8 A (total current withthe main circuit). If the limit value of the potential jumpers UM and US is reached(total current of US and UM), a new power terminal must be used.
Please note the special feature of Inline terminals with relay output.These terminals interrupt the potential jumpers UM and US.

Electrical Potential and Data Routing
Application description | Inline Electric Drives | Bosch Rexroth AG 51/118and Controls
Provision of US There are various ways of providing the segment voltage US:
1 The segment voltage can be supplied at the bus coupler or a power terminal.2 The segment voltage can be tapped from the main voltage at the bus coupler
or a power terminal using a jumper or a switch.3 A power terminal with fuse can be used for the segment circuit. In this
terminal, the segment voltage is automatically tapped from the main voltage.

Electrical Potential and Data Routing
52/118 Bosch Rexroth AG | Electric Drives Inline | Application descriptionand Controls
7.1.6 Example of a Circuit Diagram
Figure 7-1 Potential routing within an Inline station
The illustrated Inline station is a typical example. It indicates the supply andprovision of different voltages and their forwarding via potential jumpers.Explanations for this can be found in the following sections.
+-
US
UM
Local bus
UL+UANAUL-
M1S1.1 S1.2
M2S2.1 S2.2
US
UM
US
UM
U 2M
+-U 1M
24 V
7,5 V
+ -UBK
Protocolchip
7290A002
R-I
BIL
24
SE
G/F
R-I
BIL
24
PW
RIN
R-I
BIL
24
SE
G/F
BK
(+P
WR
IN)

Electrical Potential and Data Routing
Application description | Inline Electric Drives | Bosch Rexroth AG 53/118and Controls
Main circuit M1/segment S1.1 The supply voltage for the bus coupler UBK is provided at the bus coupler (BK).In addition, the main voltage UM1 is supplied at the bus coupler or a subsequentpower terminal.
The supply voltage of the logic UL and the supply voltage of the analog terminalsUANA are generated from the bus coupler supply and are led through the entirestation.
Electrical isolation between logic and I/O is provided through the separate supplyof the bus coupler supply UBK and the main voltage UM1.
No terminals are used in segment S1.1.
Segment S1.2 In a segment terminal with fuse, the segment voltage US for segment S1.2 isautomatically tapped from the main voltage UM1. This segment circuit is protectedby the internal fuse.
Mx Main circuit (e.g., M1, M2)Sx, y Segment circuit y in main circuit x (e.g., S2.1, S2.2)
BK (PWR IN) Bus coupler in conjunction with a power terminal, if requiredUBK Bus coupler supply (supply for bus coupler, generates UANA and UL)
UM Main supply (I/O supply in the main circuit)US Segment supply (I/O supply in the segment circuit)
UANA I/O supply for analog terminalsUL Communications power
Local bus Data jumper for the local busGround (GND for the supply voltages UM and US)
Noiseless ground (functional earth ground, FE)
Protective earth ground
I Indicates the interruption of a potential jumper
If these voltages are not supplied separately (i.e., only the voltageUM1, from which UL and UANA are also generated, for example) thereis no electrical isolation between logic and I/O.
This segment terminal has been specifically used to create aprotected segment circuit without the need for additional externalfusing. If this is not necessary, the terminal does not have to be used.In this case, the connection between UM and US on the bus couplermust be established using a jumper (as shown on the R-IB IL24 PWR/IN terminal) or a switch.

Electrical Potential and Data Routing
54/118 Bosch Rexroth AG | Electric Drives Inline | Application descriptionand Controls
Main circuit M2/segment S2.1 The supply voltage for the power-level terminals and the subsequent terminalsshould be provided separately. For this, a new power terminal(e.g., R-IB IL 24 PRW/IN) is used, which provides the supply voltage UM2.
Using a jumper, the segment voltage US for segment S2.1 is tapped from themain voltage UM2 at this terminal.
Segment S2.2 Segment terminal R-IB IL 24 SEG provides the segment voltage US via a switch.Output terminals installed here can, therefore, be switched externally.
Errors and their effects In this example structure, a short circuit in segment S1.2 or segment S2.2 wouldnot affect the terminals in other segments. The fuse in segment terminalR-IB IL 24 SEG/F means that only segment S1.2 is switched off.

Electrical Potential and Data Routing
Application description | Inline Electric Drives | Bosch Rexroth AG 55/118and Controls
7.2 Electrical Potential and Data Routing7.2.1 Arrangement of Potential Jumpers and Data Jumpers
An important feature of Inline is its internal potential routing system. The electricconnection between the individual station devices is created automatically whenthe station is installed. When the individual station devices are connected, apower rail is created for the relevant circuit. Mechanically, this is created byinterlocking knife and featherkey contacts from the adjacent terminals.
This potential routing eliminates the need for additional external potentialjumpering or cross wiring.
Figure 7-2 Arrangement of the potential and data jumpers
7290A108
A1 2 3 4 5 6 7
8 9
1234567
89
US UM
Local bus
UM US UL-UANAUL+
Local bus
UL+ UANA UL-
B

Electrical Potential and Data Routing
56/118 Bosch Rexroth AG | Electric Drives Inline | Application descriptionand Controls
No. Function MeaningSee Figure 7-2 "Arrangement of the potential and data jumpers" on page 55
Potential jumpers1 7.5 V DC UL+ Communications power for the bus interface
2 24 V DC UANA I/O supply for analog terminals
3 GNDL UL- Ground of communications power and I/O supply for analog terminals
4 24 V DC US Supply of the segment circuit (if necessary with overload protection)
5 24 V DC UM Supply of the main circuit (if necessary with overload protection)
6 GND GND Ground of segment and main supply
7 FE FE Functional earth ground
(9) FE spring FE contact to the DIN rail(for bus couplers, segment terminals, and power terminals for the SELV area)
Data jumper8 Local bus
Figure 7-1 Potential and data jumpers (24 V DC area)
Terminal inputs and outputs are supplied with voltage via the segmentcircuit.The voltage for the segment circuit can be tapped from the maincircuit. In addition, some terminals tap the voltage directly from themain circuit.For further information on circuits that are created via the potentialjumpers UL, UANA, UM, and US, please refer to page 47.
Depending on the terminal function, not all of the jumpers listed inFigure 7-2 are present in a terminal. Please refer to the circuitdiagram of the terminal to see which jumpers are provided for aterminal and how they are internally connected. The circuit diagram isshown in the terminal-specific data sheet.

Electrical Potential and Data Routing
Application description | Inline Electric Drives | Bosch Rexroth AG 57/118and Controls
GND This potential jumper is ground for the main and segment circuits.
FE The FE potential jumper must be connected via the corresponding connection atthe bus coupler to a grounding terminal. In addition, the FE potential jumper isconnected via the FE spring to the grounded DIN rail of every supply terminal andled through all of the terminals.
FE spring The spring creates the FE contact between the bus coupler, a 24 V DC powerterminal or a segment terminal, and the grounded DIN rail.
Data routing The bus signal is also transmitted within the station using a connection that iscreated automatically when the station devices are snapped on.
Current carrying capacity The maximum total current flowing through the potential jumpers is limited. Themaximum current carrying capacity is indicated for each circuit in "Circuits andProvision of Supply Voltages" on page 47.
Note that the GND potential jumper carries the total current of the main andsegment circuits. The total current of the main and segment circuits must notexceed the maximum current carrying capacity of the potential jumpers (8 A).The maximum current carrying capacity is determined not only by the potentialjumpers, but also by the power/segment terminals used.CAUTION
Refer to the data provided in the terminal-specific data sheet for yourparticular application.
Please refer to the information on the current carrying capacity of thepower and segment terminals provided in the terminal-specific datasheets.
If the current carrying capacity of the potential jumpers UL or UANA is reached,voltage must be reinjected via a power terminal, or a new station must be createdusing a bus couplerIf the current carrying capacity of the potential jumpers UM, US and GND is reached (total current of US and UM), a new power terminal must be used.CAUTION

Electrical Potential and Data Routing
58/118 Bosch Rexroth AG | Electric Drives Inline | Application descriptionand Controls
7.2.2 Current and Voltage Distribution
Figure 7-3 Current and voltage distribution
No. Function Voltage to Contact1 CurrentMinimum Maximum Maximum
Potential jumpers1 7.5 V DC UL+ 7.0 V DC 7.87 V DC 2 A2 24 V DC UANA 19.2 V DC 30 V DC 0.5 A3 GNDL UL- 0 V DC 0 V DC 2.5 A4 24 V DC US 19.2 V DC 30 V DC
8 A 5 24 V DC UM 19.2 V DC 30 V DC6 GND GND 0 V 0 V 8 A7 FE FE Not defined Not defined Not defined(9) FE springData jumpers8 a Bus signal8 b Bus signal8 c Clock
Figure 7-2 Current and voltage distribution in potential and data jumpers1 Contact no. 3 is reference potential for the logic.
Contact no. 6 is reference potential for the I/O. If there is no electrical isolation between logic and I/O, both have the same potential.

Diagnostic and Status Indicators
Application description | Inline Electric Drives | Bosch Rexroth AG 59/118and Controls
8 Diagnostic and Status IndicatorsAll terminals are provided with diagnostic and status indicators for quick localerror diagnostics. They enable the clear localization of system errors (bus errors)or I/O errors.
Diagnostics The diagnostic indicators (red, yellow or green) provide information about thestatus of the terminal and, in the event of an error, provide information about thetype and location of the error. A terminal is operating correctly if all its green LEDsare on.
Status The status indicators (yellow) display the status of the relevant input/output andthe connected device.
Extended diagnostics Some Inline terminals have extended diagnostics. A short circuit or overload ofthe sensor supply is indicated for each input. If a short circuit occurs at an output,each channel is diagnosed individually. Information on the supply voltage is alsoreported. Information on I/O errors is sent to the control system with the preciseidentification of the error type and is displayed using status indicators.
8.1 Indicators on Bus Couplers and Terminals With Remote Bus Branch
Please refer to the terminal-specific data sheet for information aboutthe diagnostic and status indicators on each terminal.
For the meaning of the diagnostic and status indicators of the buscouplers and the terminals with remote bus branch, please refer to thecorresponding documentation.

Diagnostic and Status Indicators
60/118 Bosch Rexroth AG | Electric Drives Inline | Application descriptionand Controls
8.2 Indicators Available on Different Terminals in the Inline System
Some indicators can be found on various terminals and generally have the samemeaning:
UM Green LED Supply in the main circuit
ON: Supply is present in the main circuit
OFF: Supply is not present in the main circuit
US Green LED Supply in the segment circuit
ON: Supply is present in the segment circuit
OFF: Supply is not present in the segment circuit
D
(3)
Green LED Diagnostics
ON: Data transmission within the station is active
Flashing:
0.5 Hz:(slow)
Communications power is present,data transmission within the station is not active
2 Hz:(medium)
Communications power is present,I/O error is present (e.g., fuse has blown, voltage is missing)
4 Hz:(fast)
Communications power is present, error at the interface between previous and flashing terminal (the terminals after the flashing terminal cannot be addressed)(e.g., loose contact at the bus interface, terminal before the flashing terminal has failed, another terminal was snapped on during operation [not permitted])
OFF: Communications power is not present

Diagnostic and Status Indicators
Application description | Inline Electric Drives | Bosch Rexroth AG 61/118and Controls
8.3 Indicators on Supply Terminals
Figure 8-1 Possible indicators on supply terminals
Diagnostics The following states can be read on the supply terminals:
If the red E LED is on and the green D LED is flashing at 2 Hz onterminals with fuses and diagnostics, there is no voltage after thefuse. Thus, a blown fuse is indicated by both diagnostic indicators.The red E LED is on and the green D LED flashes at 2 Hz.
7290A029
1 2
1 1
1
2
USE
SEG/F
1 2
1 1
US
1
SEG
1 2
1 1
UM
1
PWR IN
1 2
1 1
1
2
DE
SEG/F-D
Power Terminal
UM (1) Green LED Supply voltage in the main circuit (for meaning see page 60)
Segment Terminal
US (1) Green LED Supply voltage in the segment circuit (for meaning see page 60)
Power Terminal With Fuse and Diagnostics/Segment Terminal With Electronic Fuse
D (3) Green LED Diagnostics (for meaning see page 60)
Also on Supply Terminals With Fuse
E (2) Red LED Fuse status
ON: Fuse not present or blown
OFF: Fuse OK
On terminals with fuses, the green UM or US LED indicates that themain or segment voltage is present at the line side of the fuse,meaning that if the green LED is on, there is voltage on the line sideof the fuse. If the red E LED is also on, the fuse has blown or ismissing and no voltage is applied after the fuse.

Diagnostic and Status Indicators
62/118 Bosch Rexroth AG | Electric Drives Inline | Application descriptionand Controls
8.4 Indicators on Input/Output Terminals and Function Terminals
The LEDs of the input/output terminals are electrically located in the logic area.
This may mean that the LED of an output is on but the output cannot be controlleddue to an error between the logic area and the digital output. The LED does notmonitor the output state. In the event of an error, the actual output state may differfrom the state indicated by the LED.
Figure 8-2 I/O terminal indicators
Diagnostics The following states can be read on the I/O terminals:
Status The status of the input or output can be read on the relevant yellow LED:
Function terminals Diagnostic indicator D is located on all function terminals and has the samefunction as described on page 60.
D
(1)
Green LED Diagnostics (for meaning see page 60)
1, 2, 3, 4(2)
Yellow LED Status of the input/output
ON: Corresponding input/output is set
OFF: Corresponding input/output is not set
For terminals with extended diagnostics
E1, E2, E3, E4
Yellow LED The meaning depends on the terminal. It is described in the terminal-specific data sheet, e.g.:
Initiator supply short circuit/overloadOutput short circuitError message of the diagnostic input
ON: An error has occurred
OFF: No error
Additional diagnostic indicators can be found on the functionterminals. They are described in the corresponding documentation.The various status indicators for the function terminals are alsodescribed in the corresponding documentation.

Diagnostic and Status Indicators
Application description | Inline Electric Drives | Bosch Rexroth AG 63/118and Controls
Assignment Between Status LED and Input/OutputThe figure shows the general principle of the assignment of a status LED to itsinput or output.
Figure 8-3 Assignment between status LED and input/output
Please refer to "Function Identification and Labeling" on page 36 for anexplanation of the numbering.
With an 8-slot terminal, the LEDs of a slot belong to the terminal points of this slot.Every slot can be considered a 2-slot terminal.
For a 2-slot terminal with four inputs or outputs (example in the middle inFigure 8-3), the following LEDs belong to the following terminal points:
On the 8-slot terminal in Figure 8-3 and Figure 8-4, e.g., with 4/2, LED 2 on slot 4is indicated. The LED belongs to input 14 on terminal point 4.2.1 (slot 4, terminalpoint 2.1).
LED 1 Terminal point 1.1
LED 2 Terminal point 2.1
LED 3 Terminal point 1.4
LED 4 Terminal point 2.4

Diagnostic and Status Indicators
64/118 Bosch Rexroth AG | Electric Drives Inline | Application descriptionand Controls
Figure 8-4 Assignment between status LED and input/output using the example of an R-IB IL 24 DI 16 terminal
For every terminal, the assignment is indicated in the terminal-specificdata sheet.

Mounting/Removing InlineTerminals and Connecting Cables
Application description | Inline Electric Drives | Bosch Rexroth AG 65/118and Controls
9 Mounting/Removing InlineTerminals and Connecting Cables
9.1 Installation Instructions9.1.1 Unpacking a Terminal
ESD Regulations
9.1.2 Replacing Terminals
Electrostatic dischargeThe terminal contains components that can be damaged or destroyed byelectrostatic discharge. When handling the terminal, observe the necessarysafety precautions against electrostatic discharge (ESD) according toEN 61340-5-1 and EN 61340-5-2.
Unpacking the TerminalThe terminal is supplied in an ESD box.Only qualified persons should pack, unpack, mount, and remove a terminal whileobserving the ESD regulations.
Do not replace terminals while the power is connected.Before removing or mounting a terminal, disconnect power to the entire station.Make sure the entire station is reassembled before switching the power back on.
WARNING

Mounting/Removing InlineTerminals and Connecting Cables
66/118 Bosch Rexroth AG | Electric Drives Inline | Application descriptionand Controls
9.2 Sequence of the Inline TerminalsThe sequence of the terminals within an Inline station should depend on thecurrent consumption of the I/O devices from the potential jumpers UM and US.
As the voltage at every power terminal is resupplied into the potential jumpers UMand US, the section (main circuit) between a bus coupler and a power terminal orbetween a power terminal and a power terminal must always be considered whencalculating the current. If power terminals are not used, the entire station is a maincircuit.
Within a main circuit, install the terminals according to their currentconsumption. Install the terminals with the highest current consumption first. Thishas the advantage that the high supply current does not flow through the entiremain circuit and thus does not flow through all the terminals.
This results in the following sequence:
1. Digital output terminals2. Digital input terminals3. Function terminals4. Analog terminalsPower-level terminals may be placed anywhere in the main circuit before functionand analog terminals.
For the current consumption of the terminals, please refer to theterminal-specific data sheet.
9.2.1 Remote Bus Branch in an Inline StationIf you want to integrate a remote bus branch into an Inline station, note that theterminal with remote bus branch must be placed directly behind a bus terminalor a terminal with remote bus branch.
Please refer to the corresponding data sheets to see if any otherspecial requirements should be noted.

Mounting/Removing InlineTerminals and Connecting Cables
Application description | Inline Electric Drives | Bosch Rexroth AG 67/118and Controls
9.2.2 Positioning Terminals for Analog SignalsHigh current flowing through potential jumpers UM and US leads to a temperaturerise in the potential jumpers and the inside of the terminal. This decreases themeasuring precision and shortens the life of the terminal.
Observe the following instructions to keep the current flowing through thepotential jumpers of the analog terminals as low as possible:
Create a separate main circuit for each analog terminal.If this is not possible in your application and if you are using analog terminals ina main circuit together with other terminals, place the analog terminals after allthe other terminals at the end of the main circuit.
CAUTION
Creating a separate main circuit means that
• A main circuit is provided for all analog terminals or • Several main circuits are only provided exclusively for analog
terminals. This also means that no terminals other than analog terminals shouldbe in a main circuit for analog terminals.
Within the analog terminals, position theR-IB IL TEMP 2/UTH terminal behind all the other terminals to keepthe current flowing through all potential jumpers as low as possible.

Mounting/Removing InlineTerminals and Connecting Cables
68/118 Bosch Rexroth AG | Electric Drives Inline | Application descriptionand Controls
9.3 Mounting and Removing Inline TerminalsMounting location Terminals of the Inline product range have IP20 protection and are therefore
suitable for use in closed control cabinets or control boxes (box for terminals) withIP54 or higher.
DIN rail All Inline terminals are mounted on 35 mm standard DIN rails.
The modules are mounted perpendicular to the DIN rail. This ensures that theycan be easily mounted and removed even within limited space.
Mounting side by side An Inline station is set up by mounting the individual components side by side. Notools are required. Mounting the components side by side automatically createsthe potential and bus signal connections between the individual stationcomponents.
After a station has been set up, individual terminals can be exchanged by pullingthem out or plugging them in. Tools are not required.
End clamp Mount end clamps on both sides of the Inline station. The end clamps ensure thatthe Inline station is correctly mounted. End clamps fix the Inline station on bothsides and stop it moving from side to side on the DIN rail.
Bosch Rexroth recommends that SUB-M01 ENDHALTER (MNR R911170685, pack of 2) are snapped on without tools.
End plate The end plate terminates an Inline station. It has no electrical function. It protectsthe station against ESD pulses and the user against dangerous voltages. The endplate is supplied with the bus coupler and need not be ordered separately.
Mounting When mounting a terminal, proceed as shown in Figure 9-1 on page 69:
• Disconnect the power to the station.• First snap on the electronics base, which is required for mounting the station,
perpendicular to the DIN rail (detail A).
The keyway/featherkey connection links adjacent terminals together and ensures that data and potential routing is created safely.
When doing this ensure that all featherkeys and keyways on adjacentterminals are securely interlocked (B).
• First, insert the data jumper for the bus interface in the guideways by snapping it into the previous terminal (detail B1). Press gently against the previous terminal to make sure that the featherkey has snapped into its keyway on the bus interface.
• Then insert the other potential jumpers into their guideways and snap the featherkeys into the corresponding keyways (detail B2).
• Detail C1 shows a common error. Here, the bus interface has not contacted properly. The featherkey is not in the keyway. The bus is not running or running with errors ("loose contact").
• Detail C2 shows secure contacting of the data jumpers and the interlocking keyway/featherkey connection.

Mounting/Removing InlineTerminals and Connecting Cables
Application description | Inline Electric Drives | Bosch Rexroth AG 69/118and Controls
• Once all the bases have been snapped on, plug the connectors into the appropriate bases.First, place the front connector shaft latching in the front snap-on mechanism (detail D1). Then pivot the top of the connector towards the base until it snaps into the back snap-on mechanism (detail D2).
Figure 9-1 Mounting a terminal
The keyways of an electronics base do not continue when aconnector has been installed on the base. When snapping on anelectronics base, there must be no connector on the left-hand side ofthe base. If a connector is present, it will have to be removed.
A
D
D1
D2
B B1
B2
C1
C2
C
7290A010

Mounting/Removing InlineTerminals and Connecting Cables
70/118 Bosch Rexroth AG | Electric Drives Inline | Application descriptionand Controls
Removal When removing a terminal, proceed as shown in Figure 9-2 on page 71:
• Disconnect the power to the station.• If there is a labeling field, which covers several connectors, it may be
necessary to remove it (detail A1).
• Lift the connector of the terminal to be removed by pressing on the back connector shaft latching (detail A2).
• Remove the connector (detail B). • Remove the adjacent connectors of the neighboring terminals (detail C). This
prevents the potential routing knife contacts and the keyway/featherkey connection from being damaged. You also have more space available for accessing the terminal.
• Press the snap-on mechanism (detail D1), and remove the electronics base from the DIN rail by pulling the base straight back (detail D2). If you have not removed the connector of the adjacent terminal on the left, remove it now in order to protect the potential routing knife contacts and the featherkeys of the keyway/featherkey connection.
If a terminal has several connectors, all connectors of the terminalmust be removed. The following describes how a 2-slot terminal isremoved.
Please ensure when using extended double signal connectors (longconnectors) that you do not bend the connectors back too far, as youmay break the front snap-on mechanism.

Mounting/Removing InlineTerminals and Connecting Cables
Application description | Inline Electric Drives | Bosch Rexroth AG 71/118and Controls
Figure 9-2 Removing a terminal
Replacing a terminal If you want to replace a terminal within the Inline station, follow the removalprocedure described above. Do not snap the connector of the adjacent terminalon the left back on yet. Insert the base of the new terminal. Then reconnect all theconnectors.
Ensure that all featherkeys and keyways on adjacent terminals aresecurely interlocked.

Mounting/Removing InlineTerminals and Connecting Cables
72/118 Bosch Rexroth AG | Electric Drives Inline | Application descriptionand Controls
9.4 Replacing a FuseThe 24 V DC power and segment terminals are also available in versions with afuse. If a fuse is not present or faulty, you must insert or replace it.
When replacing a fuse, proceed as shown in Figure 9-3 on page 73:
• Lift the fuse lever (detail A).• Insert the screwdriver behind a metal contact of the fuse (detail B).• Carefully lift out the metal contact of the fuse (detail C).• Remove the fuse by hand (detail D).• Insert a new fuse (detail E).• Push the fuse lever down again until it clicks into place (detail F).
Observe the following notes when replacing a fuse for the protection of your health and your system.1. Use the screwdriver carefully to avoid injury to yourself or other persons.2. Lift the fuse out at the metal contact. Do not lift the fuse out at the glass part
as this may break it.Carefully lift the fuse out at one side and remove it by hand. Make sure the fusedoes not fall into your system.
WARNING

Mounting/Removing InlineTerminals and Connecting Cables
Application description | Inline Electric Drives | Bosch Rexroth AG 73/118and Controls
Figure 9-3 Replacing a fuse

Mounting/Removing InlineTerminals and Connecting Cables
74/118 Bosch Rexroth AG | Electric Drives Inline | Application descriptionand Controls
9.5 Grounding Concept (Functional Earth Ground)
Functional earthgrounding (FE)
Functional earth grounding is used to improve immunity to interference. Alldevices must be grounded so that any possible interference from datatransmission paths is shielded and discharged to ground.
A wire of 1.5 mm2 (16 AWG) must be used for grounding spring-cage terminals.
Functional earth ground is a low-impedance path between electrical circuits andground. It is not designed as a safety measure but rather, for example, for theimprovement of immunity to interference.
Functional earth ground is used within the 24 V DC area (SELV).
It is led from the grounded bus coupler or power terminal through the 24 V DCarea of the station using the FE potential jumper.
To ensure reliable functional earth grounding of the station, you must observevarious points.
1 Bus coupler, power terminals, and segment terminals have an FE spring (metal clip) on the bottom of the electronics base. This spring creates an electrical connection to the DIN rail. Use grounding terminals to connect the DIN rail to protective earth ground. The terminals are grounded when they are snapped onto the DIN rail.
2 It is also recommended that the bus coupler should be grounded using the FE-terminal point to ensure reliable functional earth grounding even if the DIN rail is dirty or the metal clip damaged (see terminal-specific data sheet).
The other Inline low-level signal terminals are automatically grounded via the FEpotential jumper when they are mounted adjacent to other terminals.
The FE potential jumper is looped through the relay terminals.
Only the functional earth ground is used within an Inline station.
Functional earth ground is only used to discharge interference. It doesnot provide shock protection for people.

Mounting/Removing InlineTerminals and Connecting Cables
Application description | Inline Electric Drives | Bosch Rexroth AG 75/118and Controls
Figure 9-4 Diagram of the additional functional earth grounding of a bus coupler
Figure 9-4 shows the additional grounding of a standard bus coupler.The additional grounding of a special bus coupler is shown in thedocumentation for the bus coupler.

Mounting/Removing InlineTerminals and Connecting Cables
76/118 Bosch Rexroth AG | Electric Drives Inline | Application descriptionand Controls
9.6 Shielding ConceptShielding is used to reduce the effects of interference on the system.
9.6.1 Inline Shielding ConceptIn the Inline system, remote bus cables and the cables to connect terminals foranalog signals are shielded.
Observe the following notes when installing shielding:• Fasten the shielding so that as much of the braided shield as possible is held
underneath the clamp of the shield connection.• Make sure there is good contact between the connector and base.• Do not damage or squeeze the wires. Do not strip more than 8 mm off the
wires.
9.6.2 Shielding Analog Sensors and Actuators• Always connect analog sensors and actuators with shielded, twisted pair
cables.• Connect the shielding via the shield connector. The method for connecting
the shielding is described in "Connecting Shielded Cables Using a ShieldConnector" on page 78.
9.7 Connecting CablesShielded and unshielded cables are used in an Inline station.
The I/O devices, supply voltages, and bus cables are connected using the spring-cage connection method. This means that signals up to 250 V AC/DC and 5 Acan be connected with a conductor cross section of 0.2 mm2 to 2.5 mm2 (24 -14 AWG).
When connecting the cables observe the instructions in the terminal-specific data sheets.
Please note the sensor/actuator cable must be less than 30 m long.

Mounting/Removing InlineTerminals and Connecting Cables
Application description | Inline Electric Drives | Bosch Rexroth AG 77/118and Controls
9.7.1 Connecting Unshielded Cables
Figure 9-5 Connecting unshielded cables
Wire the connectors as required for your application.
When wiring, proceed as follows:
• Strip 8 mm off the cable.
• Push a screwdriver into the slot above the appropriate terminal point (Figure 9-5, 1), so that you can plug the wire into the spring opening.Bosch Rexroth recommends using a screwdriver with a 0.6 mm x 3.5 mm x 100 mm blade.
• Insert the wire (Figure 9-5, detail 2). Remove the screwdriver from the opening. This clamps the wire.
After installation, you should always label the wires and the terminal points (seealso "Function Identification and Labeling" on page 36).
For the connector pin assignment, please refer to the appropriateterminal-specific data sheet.
Inline wiring is normally done without ferrules. However, it is possibleto use ferrules. If using ferrules, make sure they are properly crimped.

Mounting/Removing InlineTerminals and Connecting Cables
78/118 Bosch Rexroth AG | Electric Drives Inline | Application descriptionand Controls
9.7.2 Connecting Shielded Cables Using a Shield ConnectorShielded cables can be connected via the R-IB IL SCN-6 SHIELD andR-IB IL SCN 6-SHIELD-TWIN shield connectors. The R-IB IL SCN-6 SHIELDshield connector is designed to connect one shielded cable. Two shielded cablescan be easily connected via the R-IB IL SCN 6-SHIELD-TWIN shield connector.In principle, cables are connected via the shield connector in the same way asshown in Figure 9-6 on page 80 and Figure 9-7 on page 81.
Figure 9-6 shows the connection of a shielded cable using a remote bus cable asan example. In this example, the cables are twisted pair cables.
Figure 9-7 shows the connection of two shielded cables, using the wiring of theR-IB IL AI 2/SF terminal as an example. As two channels can be used here, theR-IB IL SCN 6-SHIELD-TWIN shield connector is used.
When connecting the cables proceed as shown in Figure 9-6 and Figure 9-7:
Stripping cables • Strip the outer cable sheath to the desired length (a). (Detail A) The desired length (a) depends on the connection position of the wires and whether the wires should have a large or small amount of space between the connection point and the shield connection.
• Shorten the braided shield to 15 mm. (Detail A)• Fold the braided shield back over the outer sheath. (Detail B)• Remove the protective foil.• Strip 8 mm off the wires. (Detail B)
Inline wiring is normally carried out without ferrules. However, it ispossible to use ferrules. If using ferrules, make sure they are properlycrimped.
When using twisted pair cables, keep the wire twisted until just beforethe terminal point.

Mounting/Removing InlineTerminals and Connecting Cables
Application description | Inline Electric Drives | Bosch Rexroth AG 79/118and Controls
Wiring the connectors • Push a screwdriver into the slot above the appropriate terminal point (Figure 9-5 on page 77, 1), so that you can plug the wire into the spring opening.Bosch Rexroth recommends using a screwdriver with a 0.6 mm x 3.5 mm x 100 mm blade.
• Insert the wire (Figure 9-5 on page 77, detail 2). Remove the screwdriver from the opening. This clamps the wire.
Connecting the shield Figure 9-6 shows the shield connection for the R-IB IL SCN 6-SHIELD connector.The procedure for the R-IB IL SCN 6-SHIELD-TWIN connector (shown inFigure 9-7) is the same.
• Open the shield connection (detail C).• Check the position of the shield connection clamp in the shield connection
(see also "Shield connection clamp" on page 82).• Place the cable with the folded braided shield in the shield connection
(detail D).• Close the shield connection (detail E).• Fasten the screws for the shield connection using a screwdriver. (Detail F)
For the connector pin assignment, please refer to the appropriateterminal-specific data sheet.
To ensure that the shield connection clamp remains in place when theshield connection is closed, first secure the shield clamp with screwsand then close the shield connection.

Mounting/Removing InlineTerminals and Connecting Cables
80/118 Bosch Rexroth AG | Electric Drives Inline | Application descriptionand Controls
Figure 9-6 Connecting a shielded cable via the R-IB IL SCN-6 SHIELD shield connector

Mounting/Removing InlineTerminals and Connecting Cables
Application description | Inline Electric Drives | Bosch Rexroth AG 81/118and Controls
Figure 9-7 Connecting two shielded cables via the R-IB IL SCN 6-SHIELD-TWIN shield connector

Mounting/Removing InlineTerminals and Connecting Cables
82/118 Bosch Rexroth AG | Electric Drives Inline | Application descriptionand Controls
Shield connection clamp The shield connection clamp (a in Figure 9-8, detail B) in the shield connectioncan be used in various ways depending on the cross section of the cable. Forthicker cables (e.g., bus cable), the dip in the clamp must be turned away fromthe cable (Figure 9-8, detail B). For thinner cables, the dip in the clamp must beturned towards the cable (Figure 9-8, detail F).
If you need to change the position of the shield connection clamp, proceed asshown in Figure 9-8:
• Open the shield connection housing (detail A).• The shield connection is delivered with the clamp positioned for connecting
thicker cables (detail B).• Remove the clamp (detail C), turn it to suit the cross section of the cable
(detail D), then reinsert the clamp (detail E).• Detail F shows the position of the clamp for a thin cable.
Figure 9-8 Shield connection clamp alignment

Mounting/Removing InlineTerminals and Connecting Cables
Application description | Inline Electric Drives | Bosch Rexroth AG 83/118and Controls
9.8 Connecting the Voltage SupplyTo operate an Inline station you must provide the supply voltage for the buscoupler, logic of the terminals, and the sensors and actuators.
The voltage supplies are connected using unshielded cables (see "ConnectingUnshielded Cables" on page 77).
9.8.1 Bus Coupler Supply
For information on this, please refer to the documentation of your buscoupler.
9.8.2 Power Terminal SupplyDepending on the power terminal, the following voltages may be fed in orprovided:
• UM and US (I/O supply voltage)• U24V (generation of UL and UANA), UM and US (supply voltage for logic and
I/O devices).
9.8.3 Providing Segment Voltage at Segment TerminalsAt segment terminals, the segment voltage US is provided from the main circuitUM.
For the connector pin assignment of the supply voltage connections,please refer to the terminal-specific data sheets for bus couplers,power terminals, and segment terminals.
Please refer to the information given in "Supply Terminals" onpage 24.
Please also refer to the information given in "Supply Terminals" onpage 24.

Mounting/Removing InlineTerminals and Connecting Cables
84/118 Bosch Rexroth AG | Electric Drives Inline | Application descriptionand Controls
9.8.4 Notes on Supply VoltagesThe bus coupler supplies the module electronics of the connected terminals withcommunications power (UL), which is generated, for example, from the buscoupler supply voltage (UBK). If supply voltage UBK is disconnected, the busstops.
The supply voltage to the sensors and actuators (UM/US) should be installed andprotected independently of the supply of the bus coupler (UBK). In this way the buscontinues to run even if some I/O devices are switched off.
9.8.5 Voltage Supply Requirements
For additional voltage supply requirements, please refer to thedocumentation for your bus coupler and the power terminals.
9.8.6 Supply Voltage RequirementsThe specifications for Inline system supply voltages are described in "TechnicalData for Inline" on page 97. However, some terminals have specific requirements.Therefore, always refer to the corresponding data sheet.
Two options are available when using terminals, which have special requirementsregarding the voltage supply:
1 Observe the specific parameters for the voltage supply in the entire system.2 Observe the specific parameters in the main circuit where the terminals are
located.
Use power supply units with safe isolation.Only use power supplies that ensure safe isolation between the primary andsecondary circuits according to EN 50178.
WARNING

Mounting/Removing InlineTerminals and Connecting Cables
Application description | Inline Electric Drives | Bosch Rexroth AG 85/118and Controls
9.9 Connecting the BusThe bus cable of your system is connected to a bus coupler.
For information on this, please refer to the documentation of your buscoupler.
9.10 Connecting Sensors and ActuatorsSensors and actuators are connected using connectors. Each terminal-specificdata sheet indicates which connector(s) can be used for which terminal.
Connect unshielded cables as described in "Connecting Unshielded Cables" onpage 77.
Connect shielded cables as described in "Connecting Shielded Cables Using aShield Connector" on page 78.
9.10.1 Connection Methods for Sensors and Actuators Most of the digital I/O terminals in the Inline product range permit the connectionof sensors and actuators in 1-, 2-, 3-, or 4-wire technology.
Because of the different types of connectors, a single connector can support thefollowing connection methods:
• 8 sensors or actuators in 1-wire technology• 2 sensors or actuators in 2-, 3- or 4-wire technology • 4 sensors or actuators in 2- or 3-wire technology• 2 sensors or actuators in 2- or 3-wire technology with shield
(for analog sensors or actuators) When connecting analog devices, please refer to the terminal-specificdata sheets, as the connection method for analog devices differs fromthat for digital devices.

Mounting/Removing InlineTerminals and Connecting Cables
86/118 Bosch Rexroth AG | Electric Drives Inline | Application descriptionand Controls
9.10.2 Connections Used for Digital Input and Output TerminalsDifferent connection options are described below using 24 V DC terminals as anexample. A connection example is given in each terminal-specific data sheet.
X Used– Not used
X Used– Not used
Connection Representation in the Figure
1-Wire 2-Wire 3-Wire 4-Wire
Sensor signal IN IN X X X X
Sensor supply US/UM US (+24 V) External X X X
Ground GND GND (⊥) – – X X
Ground/FE shielding FE ( ) – – – X
Detail 9-1 Overview of the connections used for digital input terminals
Connection Representation in the Figure
1-Wire 2-Wire 3-Wire 4-Wire
Actuator signal OUT OUT X X X X
Actuator supply US US (+24 V) – – – X
Ground GND GND (⊥) External X X X
Ground/FE shielding FE ( ) – – X X
Detail 9-2 Overview of the connections used for digital output terminals
In the following diagrams, US is the supply voltage because thispotential jumper is accessed in the majority of terminals. Eachterminal-specific data sheet indicates whether the I/O devices aresupplied from the main circuit UM or the segment circuit US.

Mounting/Removing InlineTerminals and Connecting Cables
Application description | Inline Electric Drives | Bosch Rexroth AG 87/118and Controls
9.10.3 Different Connection Methods for Sensors and Actuators1-wire technology
Figure 9-9 1-wire termination for digital devices
Sensor Figure 9-10, detail A, shows the detection of a sensor signal in a schematic way.The SW switch provides the input signal. The sensor signal is routed to the IN1terminal point. Sensor power is supplied from the voltage US.
Actuator Figure 9-10, detail B, shows the connection of an actuator. The actuator power issupplied via output OUT1. The load is switched directly via the output.
! "
" #
The sensors and US of the Inline station must be supplied from the same voltagesupply.
CAUTION
GND of the actuators and GND of the supply voltage US, which supply theactuators, must have the same potential.
CAUTION
The R-IB IL 24 DI 32/HD and R-IB IL 24 DO 32/HD Inline terminalsare designed to connect sensors and actuators in 1-wire technology.For the connection examples, please refer to the corresponding datasheets.

Mounting/Removing InlineTerminals and Connecting Cables
88/118 Bosch Rexroth AG | Electric Drives Inline | Application descriptionand Controls
2-wire technology
Figure 9-10 2-wire termination for digital devices
Sensor Figure 9-10, detail A shows the connection of a 2-wire sensor. The sensor signalis routed to the IN1 terminal point. Sensor power is supplied from the voltage US.
Actuator Figure 9-10, detail B, shows the connection of an actuator. The actuator power issupplied via output OUT1. The load is switched directly via the output.
$ %
$ %
" "
& ' & '
!

Mounting/Removing InlineTerminals and Connecting Cables
Application description | Inline Electric Drives | Bosch Rexroth AG 89/118and Controls
3-wire technology
Figure 9-11 3-wire termination for digital devices
Sensor Figure 9-11, detail A shows the connection of a 3-wire sensor. The sensor signalis routed to the IN1 (IN2) terminal point. The sensor is supplied with power viaterminal points US and GND.
Actuator Figure 9-11, detail B shows the connection of a shielded actuator. The actuator issupplied through output OUT1 (OUT2). The load is switched directly via theoutput.
4-wire technology
Figure 9-12 4-wire termination for digital devices
Sensor Figure 9-12, detail A shows the connection of a shielded 3-wire sensor. Thesensor signal is routed to the IN1 terminal point. The sensor is supplied withpower via terminal points US and GND. The sensor is grounded via the FEterminal point.
$ %
$ %
"
& '
"
& '
& '
& '
!
!
$ %
$ %
"
& '
"
& '
!
!

Notes
90/118 Bosch Rexroth AG | Electric Drives Inline | Application descriptionand Controls

Examples and Tips
Application Description | Inline Electric Drives | Bosch Rexroth AG 91/118and Controls
10 Examples and Tips10.1 Tips for Working With Inline
Safe grounding When grounding, always observe the notes in "Grounding Concept (FunctionalEarth Ground)" on page 74.
Sequence of the terminals During configuration, always observe the notes in "Sequence of the InlineTerminals" on page 66.
10.2 Temperature Response of the TerminalsPlease note that derating or simultaneity limitations must be taken intoconsideration depending on the ambient temperature. Notes on this are providedin the terminal-specific data sheets. The terms used in the data sheets areexplained below:
Power dissipation of theelectronics (PTOT)
The power dissipation of the electronics of a terminal is calculated according tothe formula provided in the terminal-specific data sheet. The calculated valuemust not exceed the power dissipation of the housing.
Power dissipation of thehousing (PHOU)
The power dissipation of the housing indicates the maximum power dissipation.The maximum power dissipation is specified in the terminal-specific data sheet.
In the permissible operating temperature range, the power dissipation of thehousing can be dependent on or independent of the ambient temperature.
If the power dissipation of the housing depends on the ambient temperature, apermissible operating temperature range must be defined.
Permissible operatingtemperature range
Depending on the power dissipation of the housing and the power dissipation ofthe electronics at a certain current, the maximum temperature at which theterminal can be operated with this current can be calculated.
Examples Examples for calculating these values can be found in the section below.

Examples and Tips
92/118 Bosch Rexroth AG | Electric Drives Inline | Application Descriptionand Controls
10.3 Calculation Examples for Power Dissipation and Operating Temperature Range
10.3.1 Constant Power Dissipation of the Housing Over the Operating Temperature Range
An example is calculated using the R-IB IL 24 DO 8 terminal.
Formula to Calculate the Power Dissipation of the ElectronicsThis formula is terminal-specific and is provided in every data sheet.
Where
PTOT Total power dissipation of the modulen Index of the number of set outputs n = 1 to 8ILn Load current of output n
Example: Load currents of the outputs:
IL1 = 0.5 A, IL2 = 0.4 A, IL3= 0.2 A, IL4 = 0.5 A, IL5 = 0.3 A, IL6 = 0.4 A
Outputs 7 and 8 are not used (IL7 = IL8 = 0 A).
Power dissipation of theelectronics
According to the formula, the electronics of this specific configuration has thefollowing power dissipation:
Power dissipation of thehousing
The value for the power dissipation of the housing is specified in every terminal-specific data sheet.
The power dissipation of the housing for the specified terminal is 2.7 W within theoperating temperature range of -25°C to +55°C. The calculated power dissipationfor the electronics does not exceed the permissible upper limit.
Maximum load Even with the maximum permissible load current (0.5 A per channel), the upperlimit of 2.7 W is not exceeded within the permissible temperature range of -25°C to +55°C.
( ) # # * +
)
( ) # , # +
, # +
, # +
, # +
, # +
, # +
, # +
, # +
( ) # # # # #
# # # #
( ) #
( ) # + , # +
( ) #

Examples and Tips
Application Description | Inline Electric Drives | Bosch Rexroth AG 93/118and Controls
10.3.2 Power Dissipation of the Housing Within the Operating Temperature Range Depending on the Ambient Temperature
An example is calculated using a terminal.
Formula to Calculate the Power Dissipation of the ElectronicsThis formula is terminal-specific and is provided in every data sheet.
Where
PTOT Total power dissipation of the modulen Index of the number of set outputs n = 1 to 2ILn Load current of output n
Example: Both outputs are enabled and operating at full load. The load currents of theoutputs are IL1 = IL2 = 2 A.
Power dissipation of theelectronics
According to the formula, the electronics of this specific configuration has thefollowing power dissipation:
PTOT = 0.19 W + 2 x [0.12 W + (2 A)2 x 0.09 Ω)]
PTOT = 0.19 W + 2 x 0.48 W
PTOT = 0.19 W + 0.96 W
PTOT = 1.15 W
( ) # # * +
)

Examples and Tips
94/118 Bosch Rexroth AG | Electric Drives Inline | Application Descriptionand Controls
Power dissipation of thehousing
The value for the power dissipation of the housing is specified in every terminal-specific data sheet.
The permissible power dissipation of the housing for the terminal depends on thetemperature.
PHOU = 2.4 W -25°C < TA ≤ -5°C
PHOU = 2.4 W - [(TA - (-5°C))/37.5°C/W] -5°C < TA ≤ 55°CWhere
PHOU Power dissipation of the housingTA Ambient temperatureAt an ambient temperature of up to -5°C, you can load the housing with themaximum power dissipation.
Permissible operatingtemperature range
At an increased ambient temperature, you must calculate the permissibleoperating temperature range for the calculated power dissipation.
To do this set PTOT = PHOU.
PTOT = 2.4 W - [(TA + 5°C)/37.5°C/W]
After changing the formula, the maximum permissible ambient temperature, withthis load, is calculated as:
TA = (2.4 W - PTOT) x 37.5°C/W - 5°C
PTOT = 1.15 W (from the calculation for the power dissipation of the electronics)
TA = (2.4 W - 1.15 W) x 37.5°C/W - 5°C
TA = 1.25 W x 37.5°C/W - 5°C
TA = 41.875°C
With both outputs at full load, this terminal can be operated up to an ambienttemperature of 41°C.

Examples and Tips
Application Description | Inline Electric Drives | Bosch Rexroth AG 95/118and Controls
If you never operate the outputs simultaneously and if a set output consumes acurrent of 2 A, you can operate up to an ambient temperature of:
PTOT = 0.19 W + [0.12 W + (2 A)2 x 0.09 Ω)] + [0.12 W + (0 A)2 x 0.09 Ω)]
PTOT = 0.19 W + 0.48 W + 0.12 W
PTOT = 0.79 W
TA = (2.4 W - PTOT) x 37.5°C/W - 5°C
PTOT = 0.79 W (from the calculation for the power dissipation of the electronics)
TA = (2.4 W - 0.79 W) x 37.5°C/W - 5°C
TA = 1.61 W x 37.5°C/W - 5°C
TA = 55.375 °C
TA = 55°C (maximum permissible ambient temperature)
As the maximum permissible ambient temperature is 55°C, you can operateunder the conditions specified above in the entire permissible temperature range.This leads to a simultaneity of 50% at 55°C..

Examples and Tips
96/118 Bosch Rexroth AG | Electric Drives Inline | Application Descriptionand Controls

Technical Data and Ordering Data
Application description | Inline Electric Drives | Bosch Rexroth AG 97/118and Controls
11 Technical Data and Ordering Data
This data is valid for the preferred mounting position (vertical).
The technical data does not claim to be complete. Technical modificationsreserved.
11.1 Technical Data for Inline
For the system data for your bus system, please refer to thecorresponding documentation.
If you are using Inline in a system with other product families, also observe theirtechnical data. Please refer to the associated documentation for this technicaldata.
The following tables provide standard data. For different values,please refer to the terminal-specific data sheets.
System DataNumber of devices of an Inline station 63 devices, maximum; see documentation for bus couplers
Maximum Current Carrying Capacity of the Potential Jumper UL
2 A (see technical data of the bus coupler and/or power terminal)
Maximum current carrying capacity of the potential jumper UANA
0.5 A
Maximum current carrying capacity of the potential jumpers UM, US, GND (total current)
8 A
Observe the current consumption of every device on the individual potential jumpers whenconfiguring an Inline station. It is given in the Inline device list and in each terminal-specific datasheet. It can differ depending on the individual terminal. If the maximum current carrying capacity ofa potential jumper is reached, a new power terminal must be used or a new station must be created.
Maximum current consumption of the I/O terminals See terminal-specific data sheet or Inline-device list

Technical Data and Ordering Data
98/118 Bosch Rexroth AG | Electric Drives Inline | Application descriptionand Controls
Ambient Conditions
This table provides standard data. For different values, please refer to the terminal-specific datasheets.
Regulations Developed according to VDE 0160, UL 508
Ambient temperature
Ambient temperature (operation) -25°C to +55°C
Ambient temperature (storage/transport) -25°C to +85°C
Maximum permissible temperature inside the terminal during operation
85°C
Temperature cycles(Speed of changing from positive to negative temperatures and vice versa)
0.5 K/min (no condensation)
Humidity
Humidity (operation/storage/transport) 10% to 95%, according to DIN EN 61131-2
Air pressure
Air pressure (operation/storage/transport) 70 kPa to 106 kPa (up to 3000 m above sea level)
Degree of protection according to DIN 40050, IEC 60529 IP20
Protection class according to DIN 57106-1 Class 3
Connection data for Inline connector
Connection method Spring-cage terminals
Conductor cross-section 0.2 mm2 to 1.5 mm2 (solid or stranded), 24 - 16 AWG
Air and creepage distances According to IEC 60644/IEC 60664A/DIN VDE 0110: 1989-01 and DIN VDE 0160: 1988-05
Housing material Plastic, PVC-free, PBT, self-extinguishing (V0)
Pollution degree according to EN 50178 2; condensation not permitted during operation
Surge voltage class II (24 V DC and 230 V AC areas)
Ambient compatibility Not resistant to chloroform
Gases that may endanger functions according to DIN 40046-36, DIN 40046-37
Sulfur dioxide (SO2) Concentration 10 ± 0.3 ppmEnvironmental conditions - Temperature: 25°C (± 2°C])- Humidity: 75% (± 5%)- Test duration: 10 days
Hydrogen sulfide (H2S) Concentration 1 ± 0.3 ppmEnvironmental conditions - Temperature: 25°C (± 2°C)- Humidity: 75% (± 5%)- Test duration: 4 days
Resistance of housing material to termites Resistant
Resistance of housing material to fungal decay Resistant

Technical Data and Ordering Data
Application description | Inline Electric Drives | Bosch Rexroth AG 99/118and Controls
Mechanical RequirementsVibration testSinusoidal vibrations according to IEC 60068-2-6; EN 60068-2-6
5g load, 2 hours in each space direction(24 V DC and 230 V AC areas)
Shock test according to IEC 60068-2-27; EN 60068-2-27 25 g load for 11 ms, half sinusoidal wave, three shocks in each space direction and orientation
Broadband noise according to IEC 60068-2-64; EN 60068-2-64
0.78 g load, 2.5 hours in each space direction
Insertion/withdrawal cycles
Terminal 10 cycles
Connector 10 cycles
Conformance With EMC Directive 89/336/EEC
This table provides standard data. For different values, please refer to the terminal-specific datasheets.
Noise Immunity Test According to EN 50082-2Electrostatic discharge (ESD) EN 61000-4-2/
IEC 61000-4-2Criterion B6 kV contact discharge8 kV air discharge
Electromagnetic fields EN 61000-4-3IEC 61000-4-3
Criterion AField strength: 10 V/m
Fast transients (burst) EN 61000-4-4/IEC 61000-4-4
Criterion BRemote bus: 2 kVVoltage supply: 2 kVI/O cables: 2 kVCriterion AAll interfaces: 1 kV
Surge voltage EN 61000-4-5/IEC 61000-4-5
Criterion BAC supply cables:2.0 kV/4.0 kV (symmetrical/asymmetrical)DC supply cables:0.5 kV/0.5 kV (symmetrical/asymmetrical)Signal cables: 1.0 kV/2.0 kV (symmetrical/asymmetrical)
Conducted interference EN 61000-4-6IEC 61000-4-6
Criterion ATest voltage 10 V
Noise Emission Test According to EN 50081-2Noise emission of housing EN 55011 Class A
Data TransferProtocol EN 50254
Protocol chip Optical Protocol Chip
Transmission Data jumper
Level Logic level

Technical Data and Ordering Data
100/118 Bosch Rexroth AG | Electric Drives Inline | Application descriptionand Controls
24 V Bus Coupler Supply (UBK)Nominal voltage 24 V DC
Ripple ± 5%
Permissible voltage range 19.2 V DC to 30.0 V DC, ripple included
Connection Spring-cage terminals
7.5 V Bus Logic Supply (UL)Nominal voltage 7.5 V
Ripple ± 5%
Load current 2 A maximum (see technical data of the bus coupler)
Connection Potential jumper on the side
Remark Voltage is generated in the bus coupler by a DC/DC converter from the 24 V supply voltage.UL is not electrically isolated from the 24 V bus coupler supply voltage.UL is electrically isolated from the I/O voltages UM and US.The logic supply UL is electronically short-circuit proof.
Supply of Terminals for Analog Signals (UANA)Nominal voltage 24 V DC
Tolerance - 15%/+ 20%
Ripple ± 5%
Permissible voltage range 19.2 V DC to 30.0 V DC, ripple included
Load current 500 mA maximum (see technical data of the bus coupler)
Connection Potential jumper on the side
Remark Decoupling of the 24 V input voltage by means of a diodeSmoothing via π filter with base frequency 9.8 kHz and attenuation of 40 dB/decadeUANA is not electrically isolated from the 24 V bus coupler supply voltage and the 7.5 V communications power.
Supply of Terminals for Digital Signals (UM, US) in the 24 V AreaNominal voltage 24 V DC
Tolerance - 15%/+ 20%
Ripple ± 5%
Permissible voltage range 19.2 V DC to 30.0 V DC, ripple included
Load current 8 A, maximum
Connection Potential jumper on the side

Technical Data and Ordering Data
Application description | Inline Electric Drives | Bosch Rexroth AG 101/118and Controls
Voltage Dips and Interruptions to the I/O SupplyIntensity PS1 Interrupt time < 1 ms
Time interval between voltage dips < 1 s
Behavior Evaluation criterion 1A dip in the supply voltage < 1 ms is not registered by the bus.
Intensity PS2 Interrupt time < 10 ms
Time interval between voltage dips < 1 s
Behavior Evaluation criterion 3Bus disconnection, all system outputs are reset.
Current and Voltage Distribution in Data and Potential JumpersSee Section 7.2.2 „Current and Voltage Distribution“
Cable Connection Method/Cross SectionCable connection method for the low-level signal- and low voltage levels
Spring-cage terminals
Cable connection method for the power level Screw terminal blocks
Cable cross section for the low-level signal and low voltage levels (typical)
0.2 mm² to 1.5 mm²
Cable cross section for the low-level signal and low voltage levels(Connection of the protective conductor PE)
1.5 mm² (16 AWG); cable is as short as possible
Cable cross section for the low-level signal and low voltage levels(Connection of equalizing conductors for thermocouples to the R-IB IL TEMP 2 UTH terminal)
0.13 mm² to 2.5 mm²
Cable cross section for the power level (Power terminal, motor connection, brake connection)
0.2 mm² to 2.5 mm² (26 to 16 AWG)(flexible and rigid cables)
Cable cross section for the power level(hand-held operator panel mode)
0.14 mm² to 1.5 mm² (26 to 16 AWG)(flexible and rigid cables)
Length of the sensor/actuator cables < 30 m
Conductor pull-out force
For 0.2 mm2 (25 AWG) cables 10 N
For 1.5 mm2 (16 AWG) cables 40 N
Frequency of cable use 5
Electrically Isolated AreasSee terminal-specific data sheets
Air and Creepage Distances (According to EN 50178, VDE 0109, VDE 0110)Isolating Distance Clearance Creepage
DistanceRated Surge Voltage
Technology for 24 V AreaIncoming bus/bus logic 0.3 mm 0.3 mm 0.5 kV
Outgoing bus/bus logic 0.3 mm 0.3 mm 0.5 kV

Technical Data and Ordering Data
102/118 Bosch Rexroth AG | Electric Drives Inline | Application descriptionand Controls
Incoming/outgoing bus 0.3 mm 0.3 mm 0.5 kV
Bus logic/I/O 0.3 mm 0.3 mm 0.5 kV
Relay OutputsMain contact/NO contact See terminal-specific data sheet
Relay contact/bus logic See terminal-specific data sheet
Air and Creepage Distances (According to EN 50178, VDE 0109, VDE 0110) (Continued)
Test VoltagesIsolating Distance Test VoltageTechnology for 24 V Area (up to 60 V DC)
For information about the test voltages between the bus and other potential areas, please refer tothe documentation for the bus coupler.
7.5 V communications power, 24 V bus coupler supply/functional earth ground
500 V AC, 50 Hz, 1 min.
7.5 V communications power, 24 V bus coupler supply/24 V main supply, 24 V segment supply
500 V AC, 50 Hz, 1 min.
24 V main supply, 24 V segment supply/functional earth ground
500 V AC, 50 Hz, 1 min.
Relay OutputsMain contact/NO contact 1000 V AC, 50 Hz, 1 min.
Relay contact/bus logic 2500 V AC, 50 Hz, 1 min.
ApprovalsFor the latest approvals, please visit www.boschrexroth.com.

Technical Data and Ordering Data
Application description | Inline Electric Drives | Bosch Rexroth AG 103/118and Controls
11.2 Ordering DataOrdering Data for Inline Terminals and Associated ConnectorsFor ordering data for Inline terminals and associated connectors, please refer tothe online product catalog at www.boschrexroth.com.
Ordering Data for Accessories
Ordering Data for Documentation
Description Type MNR Pcs./Pck.Keying profile On request
Zack marker strip to label the terminals On request
Labeling field covering one connector R-IB IL FIELD 2 R911289341 10
Labeling field covering four connectors R-IB IL FIELD 8 R911289342 10
Labeling sheets for R-IB IL FIELD 2, perforated, can be labeled using a laser printer, marker pen or CMS system (72 sheets)
On request 1
Labeling sheets for R-IB IL FIELD 8, perforated, can be labeled using a laser printer, marker pen or CMS system (15 sheets)
On request 5
End clamp snapped on without tools SUB-M01 ENDHALTER R911170685 2
For the ordering data for application descriptions for special Inlineterminals, please refer to the online product catalog atwww.boschrexroth.com.Make sure you always use the latest documentation.This documentation can be downloaded from www.boschrexroth.com.

Notes
104/118 Bosch Rexroth AG | Electric Drives Inline | Application descriptionand Controls

Disposal and Environmental Protection
Application Description | Inline Electric Drives | Bosch Rexroth AG 105/118and Controls
12 Disposal and Environmental Protection12.1 Disposal12.1.1 Products
Our products can be returned to us free of charge for disposal. However, it is aprecondition that the products are free of oil, grease or other dirt.
Furthermore, the products returned for disposal must not contain any undue for-eign matter or foreign component.
Please send the products free domicile to the following address:
Bosch Rexroth AG
Electric Drives and Controls
Bürgermeister-Dr.-Nebel-Straße 2
D-97816 Lohr am Main
12.1.2 Packaging MaterialsThe packaging materials consist of cardboard, wood and polystyrene. These materials can be easily recycled in any municipal recycling system. For ecologi-cal reasons, please refrain from returning the empty packages to us.
12.2 Environmental Protection12.2.1 No Release of Hazardous Substances
Our products do not contain any hazardous substances which may be released in the case of appropriate use. Accordingly, our products will normally not have any negative effect on the environment.
12.2.2 Materials Contained in the ProductsElectronic Devices
Electronic devices mainly contain:
• steel• aluminium• copper• synthetic materials• electronic components and modules
MotorsMotors mainly contain:
• steel• aluminium• copper• brass• magnetic materials• electronic components and modules

Disposal and Environmental Protection
106/118 Bosch Rexroth AG | Electric Drives Inline | Application Descriptionand Controls
12.2.3 RecyclingDue to their high content of metal most of the product components can be recy-cled.In order to recycle the metal in the best possible way, the products must bedisassembled into individual modules.
Metals contained in electric and electronic modules can also be recycled bymeans of special separation processes. The synthetic materials remaining afterthese processes can be thermally recycled.
If the products contain batteries or rechargeable batteries, these batteries are tobe removed and disposed before they are recycled.

Service & Support
Application description | Inline Electric Drives | Bosch Rexroth AG 107/118and Controls
13 Service & Support13.1 Helpdesk
Our service helpdesk at our headquarters in Lohr, Germany, will assist you withall kinds of enquiries.
Contact us:
• By phone through the Service Call Entry Center,Mo - Fr 7:00 am - 6:00 pm CET+49 (0) 9352 40 50 60
• By Fax+49 (0) 9352 40 49 41
• By email: [email protected]
13.2 Service HotlineOut of helpdesk hours please contact our German service department directly:
+49 (0) 171 333 88 26
or
+49 (0) 172 660 04 06
Hotline numbers for other countries can be found in the addresses of each region(see below).
13.3 InternetAdditional notes regarding service, maintenance and training, as well as the cur-rent addresses of our sales and service offices can be found on
http://www.boschrexroth.com
Outwith Germany please contact our sales/service office in your area first.
13.4 Helpful InformationFor quick and efficient help please have the following information ready:
• detailed description of the fault and the circumstances• information on the type plate of the affected products, especially type codes
and serial numbers• your phone / fax numbers and e-mail address so we can contact you in case
of questions

Service & Support
108/118 Bosch Rexroth AG | Electric Drives Inline | Application descriptionand Controls

Glossary
Application Description | Inline Electric Drives | Bosch Rexroth AG 109/118and Controls
14 Glossary 14.1 Explanation of Abbreviations and Symbols14.1.1 Explanation of Abbreviations
Ground Ground, general symbol
FE Functional earth groundNoiseless ground
This ground is free from external noise voltage, and is used to ground cableshields and to suppress noise and interference voltages.
Functional earth ground is a low-impedance path between electric circuits andground. It is not designed as a safety measure but rather, for example, for theimprovement of noise immunity (EN 61131).
This ground connection must be separated from parts with hazardous voltage bymeans of double or reinforced insulation (EN 60950).
PE Protective earth ground
This ground is used to ground devices. It also provides shock protection forpeople.
Protective earth ground is a low-impedance current path that minimizes the riskto the user in the event of an error (EN 61131).
GND 0 V ground; housing or chassis
In this user manual the term ground refers to common voltage return lines.Ground is electrically isolated from FE and PE. If a jumper is placed betweenground and FE or PE, this isolation is removed.
Various additions to GND (such as F-GND, BC-GND, etc.) indicate separatepotentials.
UBC Bus coupler supply
The voltage UBC is used to supply the bus coupler power supply unit. In the powersupply unit, the communications power UL and the analog voltage UANA aregenerated from the voltage UBC.
UM Main supply (I/O supply in the main circuit)
The voltage UM supplies all of the devices connected to the main circuit.
The voltage UM is supplied using a bus coupler or a power terminal and is ledthrough the potential jumper to the next power terminal. (Exception: terminal witha relay output interrupts the potential jumper)
US Segment supply (I/O supply in the segment circuit)
The voltage US supplies all of the devices connected to the segment circuit.
The voltage US is supplied using a bus coupler or a power terminal or is tappedfrom the main voltage UM on the bus coupler, a power terminal or a segmentterminal and is led through the potential jumper to the next supply terminal.(Exception: terminal with a relay output interrupts the potential jumper)

Glossary
110/118 Bosch Rexroth AG | Electric Drives Inline | Application Descriptionand Controls
UANA I/O supply for analog terminals
The voltage UANA is used to supply all the terminals for analog signals.
It is generated in the bus coupler or in a special power terminal and is led throughthe Inline station by means of potential routing.
UL Communications power
The voltage UL is used to supply all the devices with communications power(supply of the module electronics).
It is generated in the bus coupler or in a special power terminal and is led throughthe Inline station by means of potential routing.
PTOT Power dissipation of the electronics
PHOU Power dissipation of the housing
14.1.2 Representations Used in Circuit DiagramsLocal bus
(INTERBUS)This designation represents the data jumpers for the local bus (two jumpers)(sometimes still called INTERBUS).
UL This designation represents the following potential jumpers:
• Communications power (UL+)• Communications power ground (UL-)• Supply voltage for analog terminals (UANA)
UANA Supply voltage for analog terminals
US +24 V DC segment voltage
UM +24 V DC main voltage
L Phase in the 120 V AC or 230 V AC voltage area
N Neutral conductor in the 120 V AC or 230 V AC voltage area

Glossary
Application Description | Inline Electric Drives | Bosch Rexroth AG 111/118and Controls
14.1.3 Frequently Used Symbols
Earth, Ground, and Equipotentials
Ground, general symbol
Noiseless ground, functional earth ground (FE)
Protective earth ground (PE)
Ground, housing (GND)
GroundIn circuit diagrams: Different markings indicate the electrical isolations.
ShieldIn circuit diagrams: Different markings indicate the electrical isolations.
Inputs, Outputs, and Other Connections
Analog input
Analog output
Digital input
Digital output
Potential or data jumper with jumper contacts on the side
Terminal point
Cable(s); x indicates the number of cables
Ideal Circuits
Ideal current source
Ideal voltage source
Resistors, Capacitors, and Inductors
Resistor, general symbol
Capacitor, general symbol
x

Glossary
112/118 Bosch Rexroth AG | Electric Drives Inline | Application Descriptionand Controls
Semiconductors
Semiconductor diode, general symbol
LED, general symbol In circuit diagram: Diagnostic and status indicators on the terminals
PNP transistor
Miscellaneous
Protocol chip (Bus logic including voltage conditioning)
Optocoupler
Converter, general symbol
Analog/digital converter
Digital/analog converter
Coupler with electrical isolationPower supply unit with electrical isolation, general symbol
Coupling network
Amplifier
Electrically isolated area
Fuse
OPC

Index
Application description | Inline Electric Drives | Bosch Rexroth AG 113/118and Controls
15 IndexNumerics1-wire technology 872-wire technology 883-wire technology 894-wire technology 89
AAccessories 103Additional functional earth grounding
Bus coupler 75Air and creepage distances 101Ambient conditions 98Analog circuit 48Analog terminals
Positioning 67Appropriate use
Introduction 5Uses 6
BBranch terminal 29Bus connection 2Bus coupler
Additional functional earth grounding 75Diagnostic and status indicators 59
Bus couplers 22
CCircuit diagram
Example 52Explanation of symbols 110
Connecting cables 76Shielded 78Unshielded 77
Connecting shielded cables 78Connecting unshielded cables 77Connection
Cable cross section 101Connection method 85
1-wire technology 872-wire technology 883-wire technology 894-wire technology 89
Connector 2, 69Colors 32Designation 34Dimensions 43Internal structure 35Structure 31Types 33Width 32
Control box 68See also terminal box
Control cabinet 68
DData routing 57, 58Data transfer 99Diagnostic and status indicators 59
Bus coupler 59Function terminals 62Input/output terminals 62Supply terminals 61
DiagnosticsExtended 28, 59Terminals for analog signals 28
DimensionsConnector 43Housing 40
DIN rail 44, 68
EElectronics base 2, 32
Dimensions 40–42Mounting 68, 69Removal 70Structure 31
EMC directive 99End clamp 68End plate 68Error
Diagnostics 59ESD 65
FFE 57
See also functional earth groundFE spring 57Featherkey 32Featherkeys 32Function identification 36Function terminals 28
Diagnostic and status indicators 62Functional earth ground connection
I/O terminals 27Power terminals 25Segment terminals 26
GGND 57Grounding
FE potential jumper 74Functional earth grounding 74Grounding concept 74I/O terminals 27

Index
114/118 Bosch Rexroth AG | Electric Drives Inline | Application descriptionand Controls
Guideways 32
HHousing dimensions 40
II/O connection 2I/O connector
See connectorsInappropriate use 6
Consequences, Discharge of liability 5Inline
Mounting location 2Product description 2Terminal versions 2
Inline stationExample 29Sequence of the terminals 66
Input/output terminalsDiagnostic and status indicators 62General 27Grounding 27Protection 27
IP20 68
KKeyway/featherkey connection 32, 68Knife contacts 32
LLatching 32Locking clips 32Logic circuit 48Low voltage 17Low-level signal housing 19
MMain circuit 49Mechanical requirements 99Mounting 2, 68
Distances 44–??Location 68Regulations 65
OOperating temperature range 91
Calculation example 92
PParameterization
Terminals for analog signals 28Potential and data routing 32
Arrangement of the jumpers 55See also data routingSee also potential routing
Potential routing 68Analog circuit 48Current and voltage distribution 58Current carrying capacity 57FE 57, 74FE spring 57GND 57Logic circuit 48Main circuit 49Segment circuit 50
Power connector24 V DC 35
Power dissipationCalculation example 92Electronics 91Housing 91Operating temperature range 91
Power supply 47Power terminals 25
Diagnostic indicators 61Electrical isolation 25
RRelay terminals 17Remote bus branch 66
Positioning 66Replacing a fuse 73
SSegment circuit 26, 50Segment terminals 25, 26
Diagnostic indicators 61Functional earth ground connection 26
Segmentation 26SELV 17Sequence of the Inline terminals 66Shielding 76
Analog sensors and actuators 76Concept 76Connecting the shield 78Shield connection 28Shield connection clamp 82Terminals for analog signals 28
Slot 37Snap-on mechanism 32Status indicators
See also diagnostic and status indicatorsStructure
Connector 31Electronics base 31Terminals 31
Supply terminals 24Power terminals 25Segment terminals 25, 26

Index
Application description | Inline Electric Drives | Bosch Rexroth AG 115/118and Controls
System data 97
TTemperature response 91Terminal box 68Terminal labeling 37, 39Terminal numbering 37Terminal point 38Terminals for analog signals 28
Positioning 67Terminals with remote bus branch 23Test voltages 102
UUse See appropriate use and inappropriate use
VVoltage areas 17, 27

Notes
116/118 Bosch Rexroth AG | Electric Drives Inline | Application descriptionand Controls

Notes
Application Description | Inline Electric Drives | Bosch Rexroth AG 117/118and Controls

Bosch Rexroth AGElectric Drives and ControlsP.O. Box 13 5797803 Lohr, GermanyBgm.-Dr.-Nebel-Str. 297816 Lohr, GermanyPhone +49 (0)93 52-40-50 60Fax +49 (0)93 52-40-49 [email protected]
Printed in GermanyDOK-CONTRL-ILSYSINS***-AW01-EN-PR911317021