assembly, instruction, & operations · pdf fileassembly, instruction, & operations...
TRANSCRIPT
Axiom Sports Manufacturing A Division of Fitec International 3525 Ridge Meadow Parkway
Memphis, TN 38115 (901) 366-9144
www.axiomsports.com
ASSEMBLY, INSTRUCTION, & OPERATIONS MANUAL
COBRA II COMBINATION PITCHING MACHINE — OPERATIONS MANUAL
Axiom Sports Manufacturing Page 2
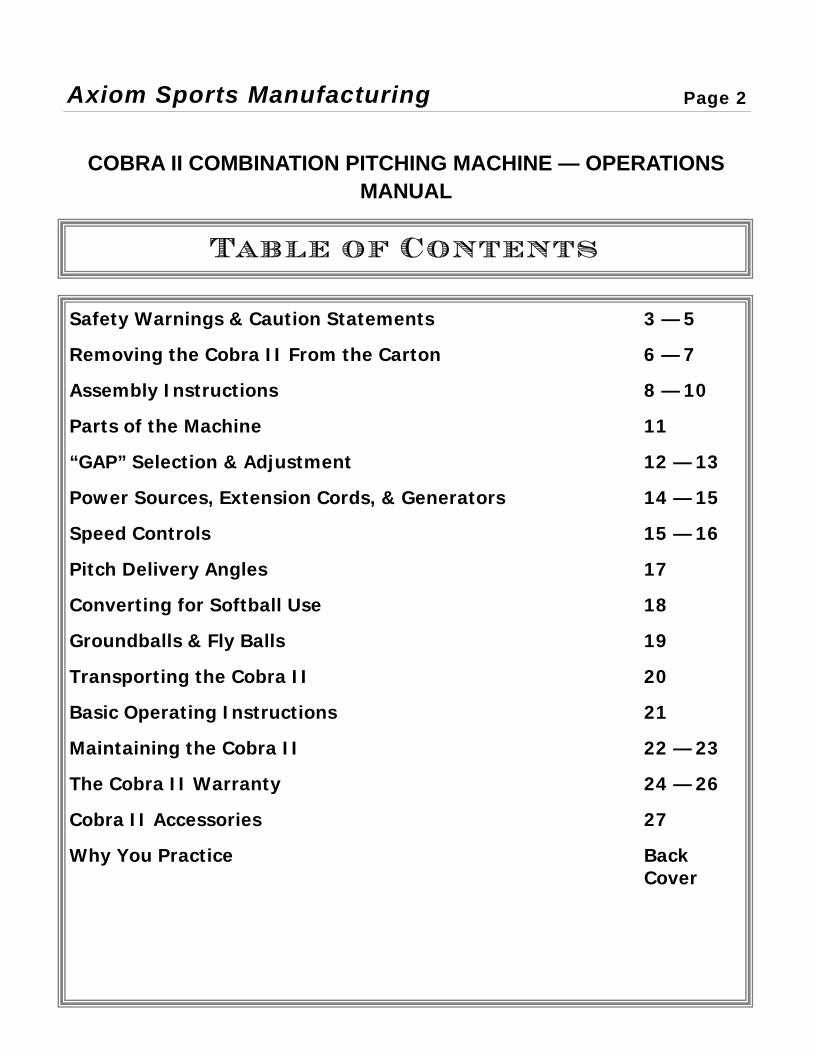
Table of Contents
Safety Warnings & Caution Statements 3 — 5
Removing the Cobra II From the Carton 6 — 7
Assembly Instructions 8 — 10
Parts of the Machine 11
“GAP” Selection & Adjustment 12 — 13
Power Sources, Extension Cords, & Generators 14 — 15
Speed Controls 15 — 16
Pitch Delivery Angles 17
Converting for Softball Use 18
Groundballs & Fly Balls 19
Transporting the Cobra II 20
Basic Operating Instructions 21
Maintaining the Cobra II 22 — 23
The Cobra II Warranty 24 — 26
Cobra II Accessories 27
Why You Practice Back Cover
Hello and thank you for purchasing the Axiom Sports Cobra II Combination Pitching Machine. The Cobra II is a high performance, precision pitching in-strument designed to provide you with many years of operation.
Please pay careful attention to the maintenance section of this booklet. Used, maintained, and adjusted properly the Cobra II will give you
years of problem free use.
This is your assembly, operation, and practice manual. Please read all instructions before using your new Cobra II.
The Cobra II has different settings for different types of balls. The ma-chine is preset for regulation leather baseballs and dimpled baseballs.
Using other types of balls will require adjustments that are explained in this manual.
Read and understand these instructions before operating your new Cobra II machine.
If, during the course of assembly or initial use, you have problems with your Cobra II, please contact Axiom Sports.
Axiom Sports Manufacturing A Division of Fitec International 3525 Ridge Meadow Parkway
Memphis, TN 38115 (901) 366-9144
www.axiomsports.com
www.axiomsports.com Page 3

!WARNING!
This machine is not guaranteed to be 100% accurate. Although each and every machine is thoroughly tested for accuracy before leaving the factory, occasional errant pitches may occur due to balls in poor condition, moisture, careless or negligent use, improper maintenance, or other factors.
It is important to make certain that all safety precautions are taken and to instruct all par-ticipants on proper operating procedures before allowing them to operate the machine. It is the owner’s responsibility to make certain the machine is in good working or-der, properly maintained, appropriately adjusted, and all safety measures are fol-lowed before and during each use.
2. Cut the tape and fold back all four flaps
Axiom Sports Manufacturing Page 4
!SAFETY INSTRUCTIONS!
⇒ Never use the Cobra II in or near water , in the rain, or in a high moisture environment
⇒ Never place any part of your body on or near any part of the pitching wheels or in front of the machine while it is in operation and/or connected to a power source
⇒ Keep hands away from all moving parts
⇒ Batter should always wear protective head gear, preferably with a face guard
⇒ Turn the machine off and wait for the pitching wheels to stop rotating before changing the tilt angle of the pitching head. Do not attempt to manually stop the wheels from rotating, even after turning the power off
⇒ Place a protective screen in front of the machine to protect both the machine and the operator. Axiom screens are sold separately — please see page 27
⇒ Before each use, check the pitching wheels for tightness. Tighten with the 6mm Allen wrench provided
⇒ Before connecting the Cobra II to a power source, make certain the speed controls are set to “0”

!IMPORTANT!
Please pay careful attention to the bolts, connectors, set-screws, and other fastening de-vices on your Cobra II. Check all bolts and connections for tightness before your first and every use of the machine
www.axiomsports.com Page 5
!CAUTION!
DO NOT set both wheels to 100% (setting #10) when pitching to batters. This will pro-duce a knuckleball in excess of 100 MPH!
Axiom strongly recommends that you do not set the machine any faster than 85% when pitching to batters. With the top wheel at 70% (setting #7) and the bottom wheel at 100% (setting #10), you will produce a realistic fastball of almost 90 MPH.
Using excessive speeds for amusement can be very dangerous, can lead to immediate serious injury or even death, and is not recommended. For your safety, we ask that you use the Cobra II only for its intended purpose. Select speeds that are equal to the batter’s level of ability.
Additionally, Axiom insists that speeds in excess of 60 MPH not be used when pitching from Little League or softball distance. Speeds in excess of 60 MPH, at this distance, are dangerous.
NOTE:
A 60 MPH pitch from 40 feet is equivalent to a 90 MPH pitch from 60 feet. To calculate the equivalent of any pitch from 40 feet, multiply the actual speed by 1.5.
REMOVING YOUR COBRA II FROM THE PACKAGE
PLEASE CONSULT THE PHOTOGRAPHS ON PAGE 7 THROUGHOUT THIS
PROCESS!
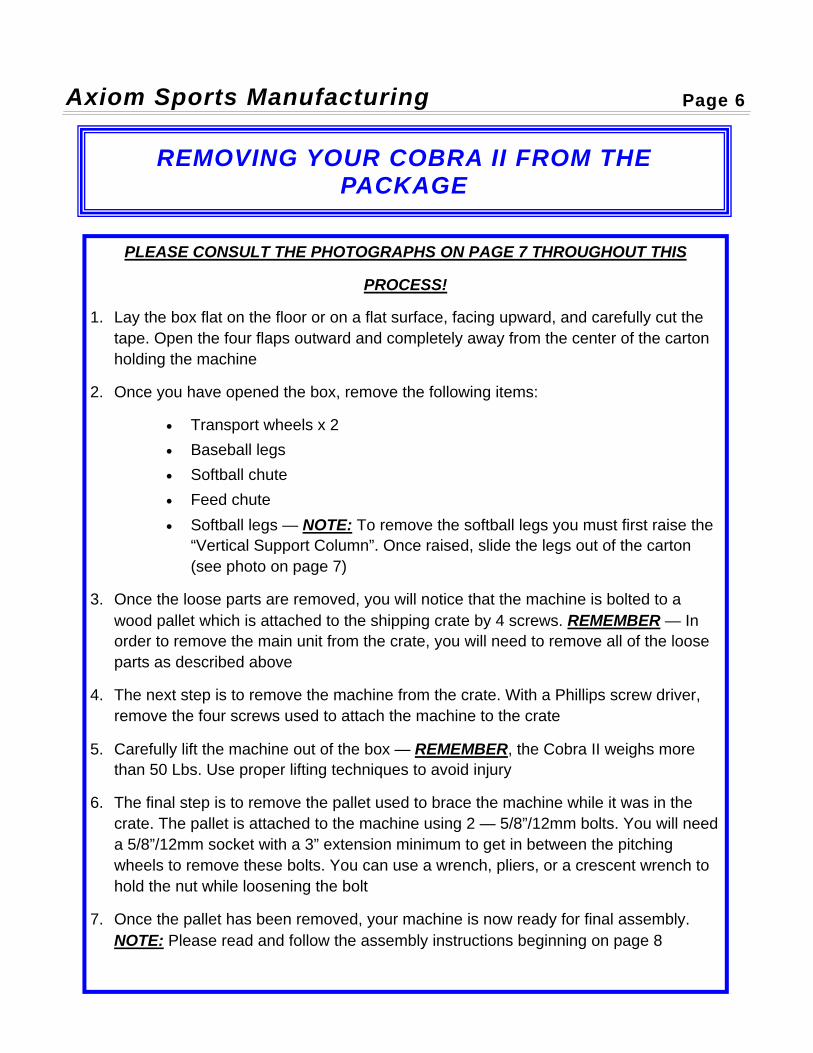
1. Lay the box flat on the floor or on a flat surface, facing upward, and carefully cut the tape. Open the four flaps outward and completely away from the center of the carton holding the machine
2. Once you have opened the box, remove the following items:
• Transport wheels x 2 • Baseball legs • Softball chute • Feed chute • Softball legs — NOTE: To remove the softball legs you must first raise the
“Vertical Support Column”. Once raised, slide the legs out of the carton (see photo on page 7)
3. Once the loose parts are removed, you will notice that the machine is bolted to a wood pallet which is attached to the shipping crate by 4 screws. REMEMBER — In order to remove the main unit from the crate, you will need to remove all of the loose parts as described above
4. The next step is to remove the machine from the crate. With a Phillips screw driver, remove the four screws used to attach the machine to the crate
5. Carefully lift the machine out of the box — REMEMBER, the Cobra II weighs more than 50 Lbs. Use proper lifting techniques to avoid injury
6. The final step is to remove the pallet used to brace the machine while it was in the crate. The pallet is attached to the machine using 2 — 5/8”/12mm bolts. You will need a 5/8”/12mm socket with a 3” extension minimum to get in between the pitching wheels to remove these bolts. You can use a wrench, pliers, or a crescent wrench to hold the nut while loosening the bolt
7. Once the pallet has been removed, your machine is now ready for final assembly. NOTE: Please read and follow the assembly instructions beginning on page 8
Axiom Sports Manufacturing Page 6
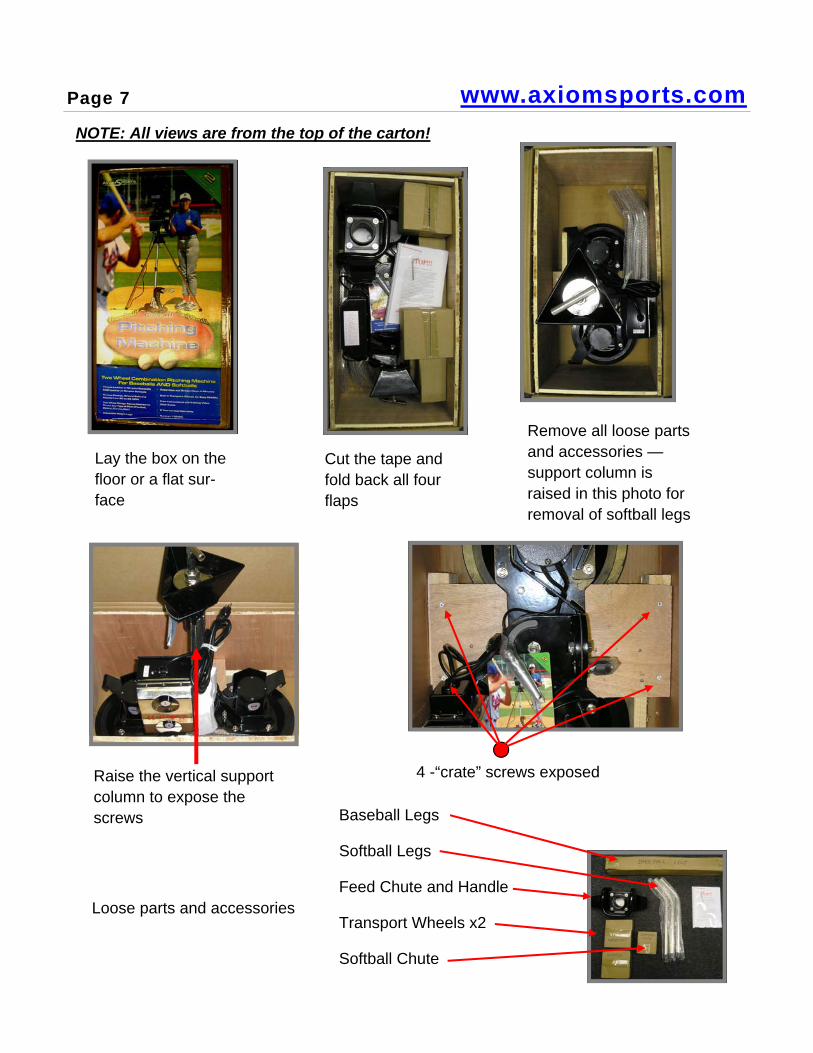
Lay the box on the floor or a flat sur-face
Cut the tape and fold back all four flaps
Remove all loose parts and accessories —support column is raised in this photo for removal of softball legs
Raise the vertical support column to expose the screws
4 -“crate” screws exposed
Loose parts and accessories
Baseball Legs
Softball Legs
Feed Chute and Handle
Transport Wheels x2
Softball Chute
www.axiomsports.com Page 7
NOTE: All views are from the top of the carton!

ASSEMBLY INSTRUCTIONS
⇒ Remove the machine from the package (see page 6) and set it on the floor (see page 9)
⇒ Loosen the “Tilt Adjustment Lock Handle” and tilt the “Vertical Support Column” so that the “Tripod Base” is pointing upward (see below & page 9)
⇒ Loosen the “Leg Retainer”, insert three legs and retighten the “Leg Retainer” - legs should be firmly in place (see page 9) - DO NOT OVER-TIGHTEN
⇒ With the help of another person, carefully turn the machine upright and install the “Transport Wheels” (see page 10)
⇒ Loosen the “Tilt Adjustment Lock Handle” and rotate the machine head to a vertical position (see page 9)
⇒ Install the “Feed Chute/Handle Bar/Hand Guard” assembly. There are two bolts al-ready in place (inserted into the frame above the “Control Box”). Slide the “Handle Bar” onto the bolts and install washers and locknuts. You will need a 13mm wrench to tighten the nuts (see page 11)
YOUR NEW COBRA II PITCHING MACHINE IS NOW READY TO USE!
Vertical Support Column
Leg Retainer
Tripod Base Feed Chute Bolts (machine is shipped with these in place)
Feed Chute Installed
Axiom Sports Manufacturing Page 8

Cobra II—Out of box & crate, lying on flat, dry surface, on the wheels
Pitching Wheels
Motors
Tilt Adjustment Lock Handle
Vertical Support Column In “Up” Position
Tilt Adjustment Lock Handle
Tripod Base
Tripod Base
Leg Retainer
Leg
Cobra II — Completed leg assembly, with ver-tical support column still in “up” position
ASSEMBLY INSTRUCTIONS CONTD.— Leg Installation
www.axiomsports.com Page 9
Axiom Sports Manufacturing Page 10
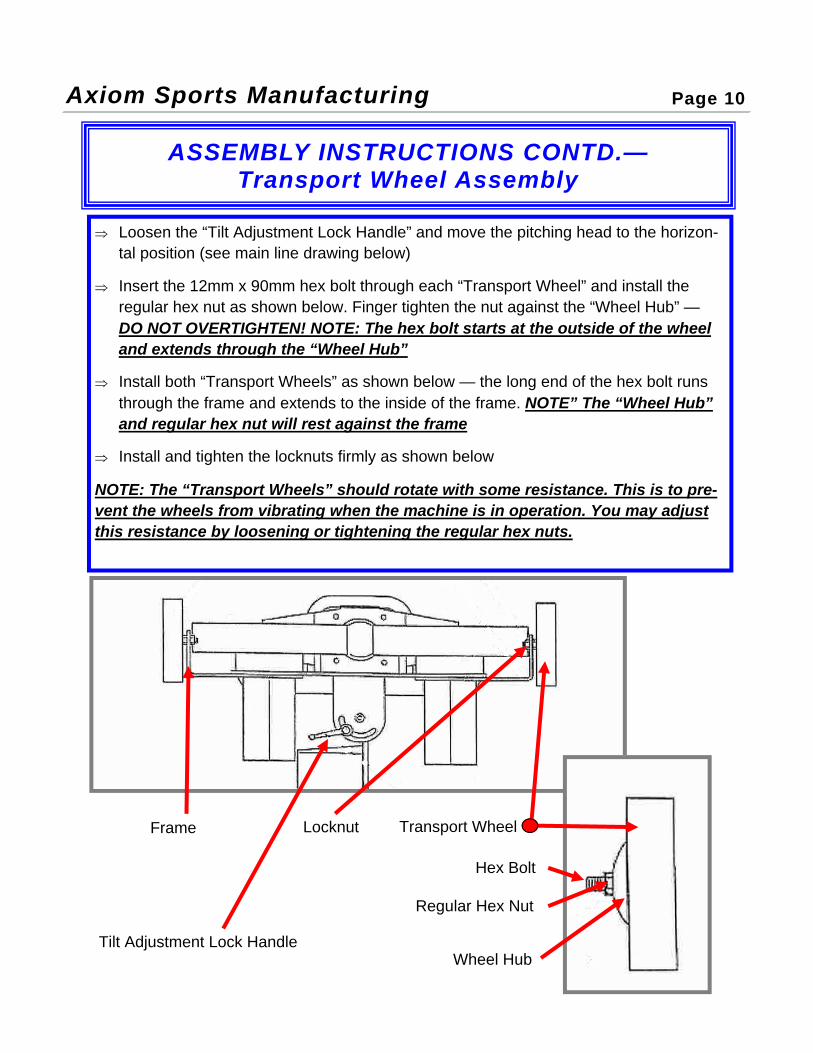
⇒ Loosen the “Tilt Adjustment Lock Handle” and move the pitching head to the horizon-tal position (see main line drawing below)
⇒ Insert the 12mm x 90mm hex bolt through each “Transport Wheel” and install the regular hex nut as shown below. Finger tighten the nut against the “Wheel Hub” — DO NOT OVERTIGHTEN! NOTE: The hex bolt starts at the outside of the wheel and extends through the “Wheel Hub”
⇒ Install both “Transport Wheels” as shown below — the long end of the hex bolt runs through the frame and extends to the inside of the frame. NOTE” The “Wheel Hub” and regular hex nut will rest against the frame
⇒ Install and tighten the locknuts firmly as shown below NOTE: The “Transport Wheels” should rotate with some resistance. This is to pre-vent the wheels from vibrating when the machine is in operation. You may adjust this resistance by loosening or tightening the regular hex nuts.
Frame
Tilt Adjustment Lock Handle
Transport Wheel
Hex Bolt
Regular Hex Nut
Wheel Hub
ASSEMBLY INSTRUCTIONS CONTD.— Transport Wheel Assembly
Locknut
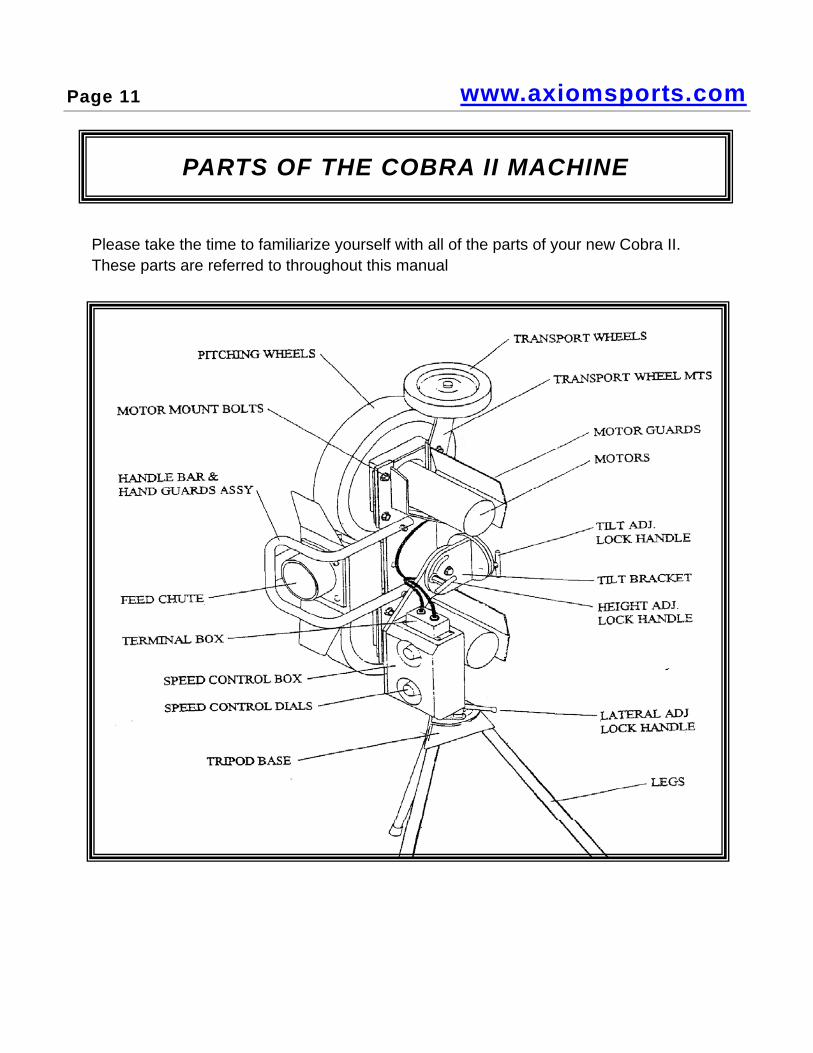
PARTS OF THE COBRA II MACHINE
www.axiomsports.com Page 11
Please take the time to familiarize yourself with all of the parts of your new Cobra II. These parts are referred to throughout this manual
“GAP” SELECTION
The term “GAP” refers to the space between the pitching wheels. The Cobra II is de-signed to throw different types and sizes of balls (Baseball and Softball). Different balls require different “GAPS”.
It is not necessary to change the “GAP” very often (if at all — depending on your pri-mary use of the machine), unless you plan to use different types and sizes of balls. For example, if you what to change from baseballs to softballs, the “GAP” must be widened.
In selecting the proper “GAP”, two things must be considered:
1st. - The type and/or size of the ball being used 2nd. - The speed range desired
There are thee different “GAP” settings:
1. Soft Dimpled Baseballs (25 MPH to 100 MPH) 2. Leather Baseballs (25 MPH to 100 MPH) and Dimpled Baseballs (25 MPH to 70
MPH) 3. Softballs (25 MPH to 60 MPH) - NOTE: DO NOT THROW SOFTBALLS OVER
60 MPH AT REGULATION SOFTBALL DISTANCE!
Your Cobra II arrives preset in the “#2” position, Leather Baseballs (25 MPH to 100 MPH) and Dimpled Baseballs (25 MPH to 70 MPH). You do not need to change the “GAP” unless one of the following are true: (NOTE: This DOES NOT apply to softball “GAP” settings)
• You are going to use Soft Dimpled Baseballs, and • You want to pitch Dimpled Baseballs over 70 MPH
If you are going to throw balls at 70 MPH or less, the #2 setting is correct. With the “GAP” in the #2 position, leather baseballs may be pitched from 25 MPH to 100 MPH and Dimpled Baseballs may be pitched from 25 MPH to 70 MPH. Soft Dimpled Base-balls are softer than leather baseballs and require a smaller gap to achieve higher speeds. Please consult the pictures on page 13. “GAP” settings are determined by the position of the “Motor Mount Bolts”. The side of the frame closest to the “Motor Guards” has the long slots required to adjust “GAP” settings.
Axiom Sports Manufacturing Page 12

⇒ Turn the machine off and unplug the electrical cord
⇒ Loosen the “Tilt Adjustment Lock Handle” and place the head in the horizontal posi-tion — retighten the handle
⇒ Locate the 4 “Motor Mount Bolts” where each motor is connected to the frame —these are the bolts used to adjust the “GAP”
⇒ To change from “GAP” setting #2 to setting #1, loosen all eight (8) bolts and slide the motor mounts toward the feed chute. The motor mounts will only move approxi-mately 2mm each. Retighten all eight bolts
⇒ To change from “GAP” setting #2 to setting #3, loosen the bolts on the “Motor Guard” side just enough to slide the motor mounts. You do not need to remove these two bolts. On the side opposite the “Motor Guards”, remove the bolts com-pletely. Slide the motor mounts away from the feed chute by approximately 12mm so they are aligned with the round holes. Reinstall the bolts and retighten all 8 con-nections
TO CHANGE THE “GAP”
“GAP”
Motor Mount Bolts
Motor Guards
www.axiomsports.com Page 13

Power Sources:
Your Cobra II operates on 110/120 volt AC electricity (60 Hz). You may plug your ma-chine directly into a standard 110v household outlet, use an extension cord, or use a gen-erator in accordance with the instructions on page 15.
To avoid damage to the speed controllers, always use a surge protector.
Extension Cords:
If you require an extension cord, it is important that you select one with an adequate wire gauge. An inadequate cord will cause overheating, poor performance, and pre-mature motor burnout.
Adequate wire gauge size depends on the length of the cord. The longer the cord, the thicker the wire gauge must be. Wire gauges come in even numbers (8, 10, 12, 14, 16, etc…). The lower the number, the thicker the wire. For example, an 8-gauge cord is thicker than a 16-gauge cord. When selecting an extension cord, please follow these ba-sic guidelines:
CORD LENGTH RECOMMENDED GAUGE
25 Feet 16 Gauge
50 Feet 14 Gauge
100 Feet 12 Gauge
150 Feet 10 Gauge
200 Feet 8 Gauge
POWER SOURCES, EXTENSION CORDS, & GENERATORS
Axiom Sports Manufacturing Page 14
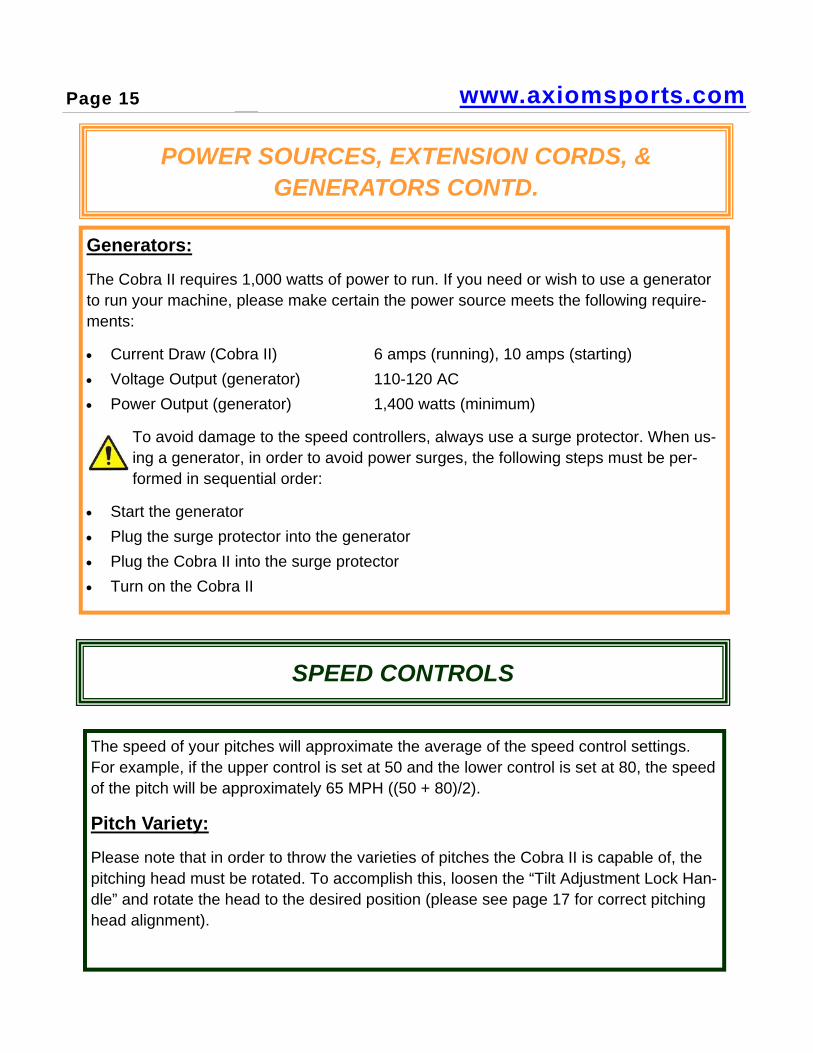
Generators:
The Cobra II requires 1,000 watts of power to run. If you need or wish to use a generator to run your machine, please make certain the power source meets the following require-ments:
• Current Draw (Cobra II) 6 amps (running), 10 amps (starting) • Voltage Output (generator) 110-120 AC • Power Output (generator) 1,400 watts (minimum)
To avoid damage to the speed controllers, always use a surge protector. When us-ing a generator, in order to avoid power surges, the following steps must be per-formed in sequential order:
• Start the generator • Plug the surge protector into the generator • Plug the Cobra II into the surge protector • Turn on the Cobra II
POWER SOURCES, EXTENSION CORDS, & GENERATORS CONTD.
www.axiomsports.com Page 15
SPEED CONTROLS
The speed of your pitches will approximate the average of the speed control settings. For example, if the upper control is set at 50 and the lower control is set at 80, the speed of the pitch will be approximately 65 MPH ((50 + 80)/2).
Pitch Variety:
Please note that in order to throw the varieties of pitches the Cobra II is capable of, the pitching head must be rotated. To accomplish this, loosen the “Tilt Adjustment Lock Han-dle” and rotate the head to the desired position (please see page 17 for correct pitching head alignment).
SPEED CONTROLS CONTD.
Axiom Sports Manufacturing Page 16
FASTBALLS
To throw a regular fastball, the ball must have backspin to counteract gravity thereby preventing it from sinking. To accomplish this, the lower wheel must be spinning faster than the upper wheel — normally at least 25 points faster for an overhand fastball.
The easiest method for calculating the appropriate pitch settings for a fastball:
1) Determine the speed (in MPH) at which you want the ball to travel
2) Set the speed for the upper wheel 15 points slower than your chosen speed
3) Set the speed for the lower wheel 15 points faster than your chosen speed
EXAMPLE:
• You have determined that you want to throw a 60 MPH fastball • Upper wheel setting = 60 - 15 = 45 • Lower wheel setting = 60 + 15 = 75
A fastball pitched in an overhand configuration will travel in a virtually straight line.
CURVEBALLS
To throw a curveball, the ball must be spinning forward; the opposite of a fastball. Gener-ally speaking, the top wheel should be set two to three times faster than the lower wheel. The greater the differential, the greater the break. Additionally, the slower speed gives the pitch more time to break.
With the pitching head in the overhand position, a curveball will break downward. For more right or left break adjust the pitching head to the desired angle.
SLIDERS
A slider is thrown exactly like a curveball except with more speed. The best way to throw a slider is to set the pitching head as follows:
• Set the pitching head in the sidearm delivery position • Set one wheel 10 to 30 points slower than the other depending on the desired
break angle. The ball will break to the side of the slower wheel
www.axiomsports.com Page 17
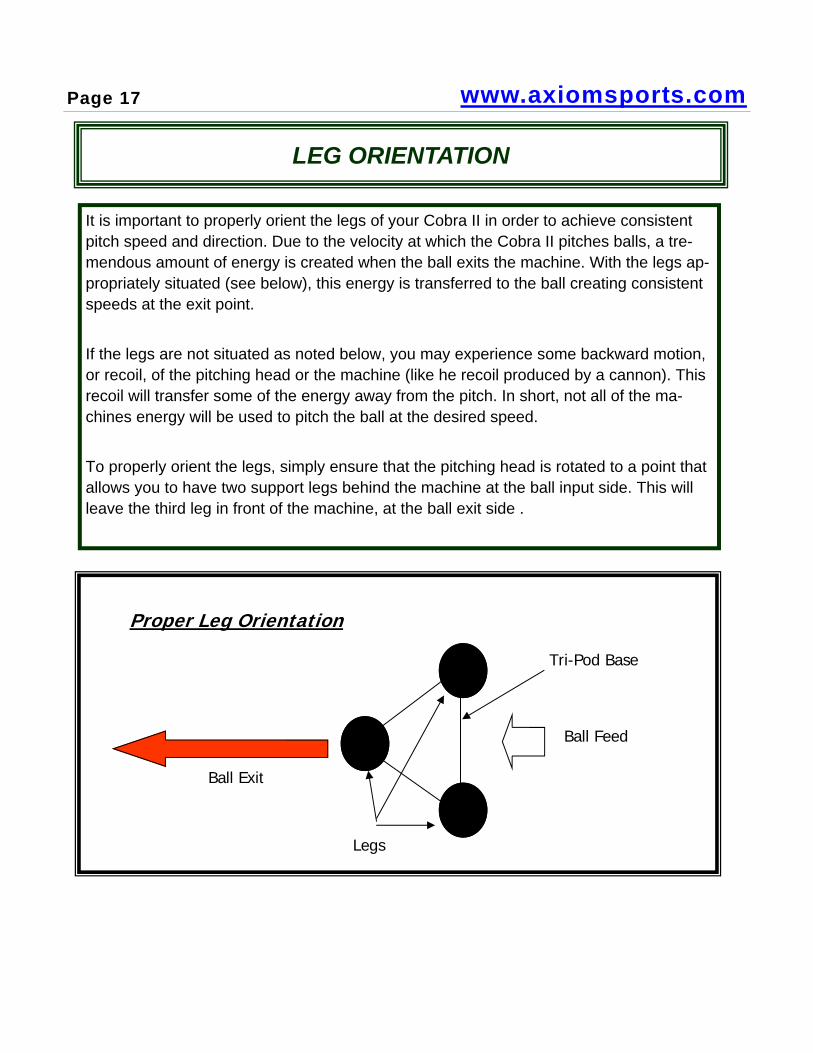
Proper Leg Orientation
Ball Exit
Ball Feed
Legs
Tri-Pod Base
LEG ORIENTATION
It is important to properly orient the legs of your Cobra II in order to achieve consistent pitch speed and direction. Due to the velocity at which the Cobra II pitches balls, a tre-mendous amount of energy is created when the ball exits the machine. With the legs ap-propriately situated (see below), this energy is transferred to the ball creating consistent speeds at the exit point. If the legs are not situated as noted below, you may experience some backward motion, or recoil, of the pitching head or the machine (like he recoil produced by a cannon). This recoil will transfer some of the energy away from the pitch. In short, not all of the ma-chines energy will be used to pitch the ball at the desired speed. To properly orient the legs, simply ensure that the pitching head is rotated to a point that allows you to have two support legs behind the machine at the ball input side. This will leave the third leg in front of the machine, at the ball exit side .

Axiom Sports Manufacturing Page 18
A NOTE ABOUT BALLS:
Your Cobra II is designed to throw a wide range of baseballs and softballs. Here are just a few of the balls your machine will pitch:
⇒ Poly balls (at lower speeds) ⇒ Ventilated poly balls (at lower speeds) ⇒ Durafoam balls ⇒ Dimpled baseballs and softballs ⇒ Leather baseballs and softballs
While the Cobra II is designed to throw real leather balls, here are some important points you should consider. 1) Real leather balls have raised seams as part of their construction 2) Raised seams increase the overall wear on the polyurethane wheels of the machine
and will potentially shorten the life of the wheel — this is true of all pitching machines 3) Raised seams also increase the overall wear on the ball itself potentially reducing the
life span of the ball — this is also true of all pitching machines 4) Due to the components used to construct the core of a real leather ball, constant use
in a pitching machine will result in an overall softening of the ball, caused by breaking apart these internal components, thereby reducing its accuracy and “feel”— this is also true of all pitching machines
5) While real leather balls are sold at a variety of price points, they typically are more expensive than dimpled baseballs and softballs
6) Synthetic leather balls also offer raised seams creating the same pressure and wear of real leather although they are typically less expensive
7) Dimpled baseballs, made of polyurethane, are specifically designed for high speed pitching machines. These balls offer weight and size matches to real baseballs and softballs but will last longer, create less wear on the machine, and cost less (in most instances) than real balls
8) Used properly, with appropriate pitching head alignment, you will find that the Cobra II will throw polyurethane high-speed fastballs, sliders, screw balls, and curves as ef-fectively as real baseballs
WARNING: NEVER USE SYNTHETIC LEATHER BALLS WITH YOUR COBRA II. THESE BALLS WILL LEAVE A SUBSTANTIAL RESIDUE ON THE PITCHING
WHEELS AND WILL VOID YOUR WARRANTY!

PITCH DELIVERY ANGLES
To adjust the angle of the pitching head, loosen the “Tilt Adjustment Lock Handle” and rotate the head to the desired angle. Retighten the “Tilt Adjustment Lock Handle”
Overhand or Fastball Sidearm or Slider
Left-handed 3/4 Delivery or Curveball
Right-handed 3/4 Delivery or Curveball
www.axiomsports.com Page 19
CONVERTING FROM BASEBALL TO SOFTBALL
To convert your Cobra II to softball mode, please perform the following steps:
• Remove the four nuts and bolts holding the “Feed Chute” to the “Hand Guard/Handle Bar” assembly. Remove the baseball “Feed Chute”. You will need a12mm wrench and a pair of pliers or crescent wrench
• Tilt the pitching head to the horizontal or sidearm position
• Change the “GAP” to setting #3 — See “GAP” selection on page #13
• Install the softball “Feed Chute” (packaged separately) in the same location and using the same hardware as the baseball “Feed Chute”
• With the help of another person, turn the Cobra II over (laying on the pitching wheels) - BE ABOSOLUTLEY CERTAIN THAT THE MACHINE IS IN A CLEAN DRY AREA — DO NOT GET DIRT ON THE PITCHING WHEELS
• Remove the baseball legs and install the softball legs, as shown below, using the in-stallation techniques discussed on pages #8 & 9
• With the help of another person, turn the Cobra II upright — NOTE: Pitching head configurations are the same as for baseball (see page #17)
REMEMBER — It is important that you DO NOT pitch softballs in excess of 60 MPH
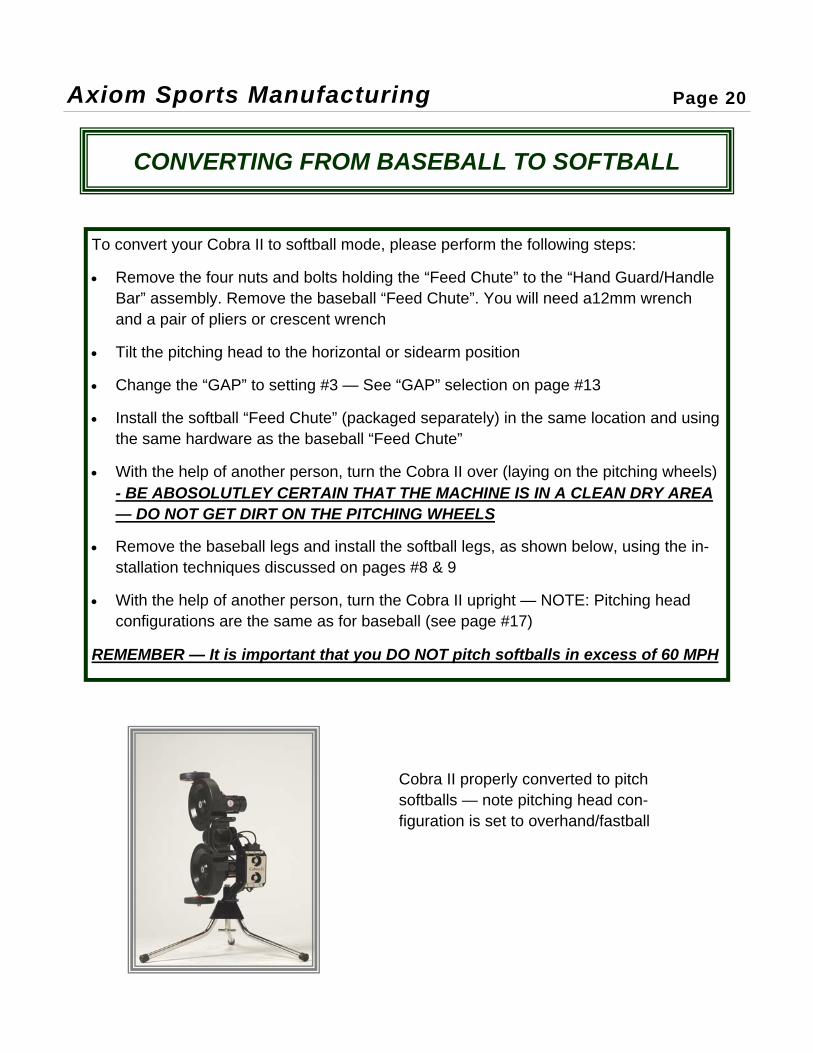
Cobra II properly converted to pitch softballs — note pitching head con-figuration is set to overhand/fastball
Axiom Sports Manufacturing Page 20
GROUNDBALLS & FLY BALLS
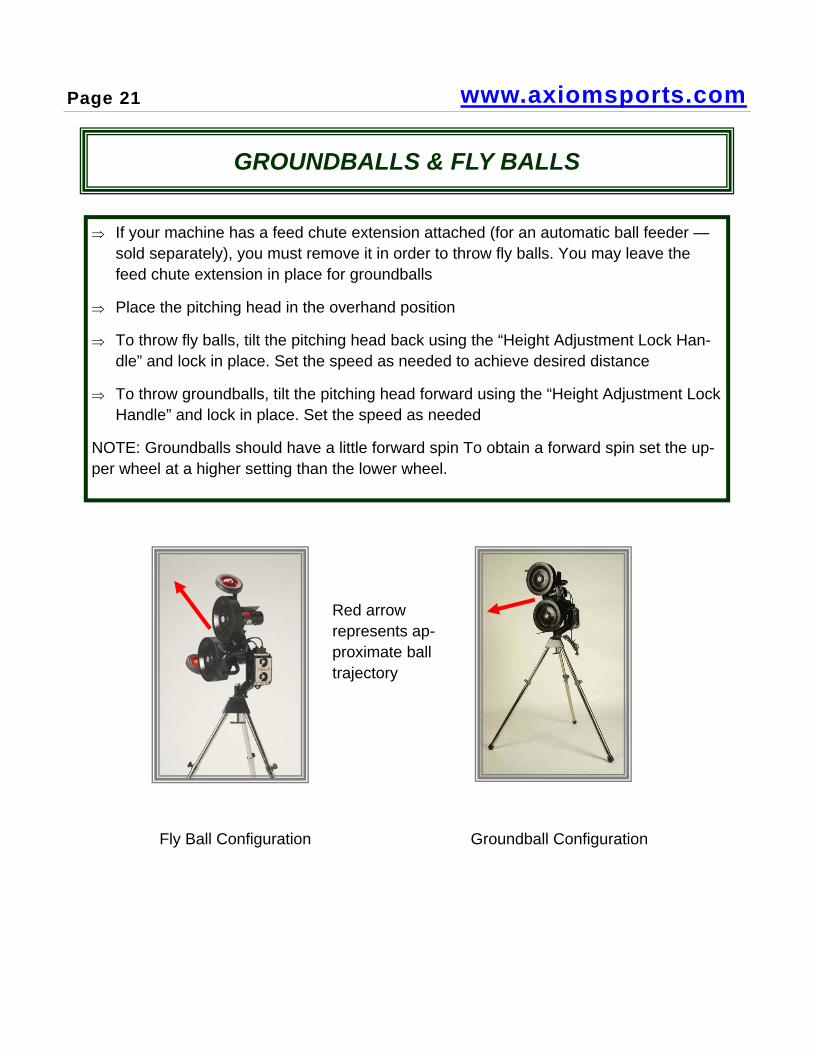
⇒ If your machine has a feed chute extension attached (for an automatic ball feeder —sold separately), you must remove it in order to throw fly balls. You may leave the feed chute extension in place for groundballs
⇒ Place the pitching head in the overhand position
⇒ To throw fly balls, tilt the pitching head back using the “Height Adjustment Lock Han-dle” and lock in place. Set the speed as needed to achieve desired distance
⇒ To throw groundballs, tilt the pitching head forward using the “Height Adjustment Lock Handle” and lock in place. Set the speed as needed
NOTE: Groundballs should have a little forward spin To obtain a forward spin set the up-per wheel at a higher setting than the lower wheel.
Fly Ball Configuration Groundball Configuration
www.axiomsports.com Page 21
Red arrow represents ap-proximate ball trajectory

TRANSPORTING THE MACHINE
Your Cobra II has a built-in transportation system (installed using the instructions on page #10). As the machine weighs over 50 Lbs., this system is designed to help you move the Cobra II from site to site without excessive effort or the need to dismantle it.
REMEMBER:
• Do not get dirt or soil on the wheels • Do not transport the machine through standing water • Do not attempt to lift the machine by yourself • Do not drop the machine while in transit • Do not set the machine down on the control panel • Do not attempt to move or transport the machine while it is in operation or plugged in
To transport the machine:
1) Rotate the pitching head to the sidearm position 2) Loosen the “Lateral Adjustment Lock Handle” and position the machine so two
of the legs are even with the transport wheels (essentially one wheel will line up with one leg on THE WHEEL SIDE of the pitching head). Lock the “Lateral Ad-justment Lock Handle”
3) With the help of another person, carefully lower the machine to the floor so that the transport wheels are touching the ground
4) Lift the machine using the two legs adjusted in point #2 and roll it on the trans-port wheels
Transport Wheels
Pitching Wheels
Control Box
Axiom Sports Manufacturing Page 22
BASIC OPERATING INSTRUCTIONS
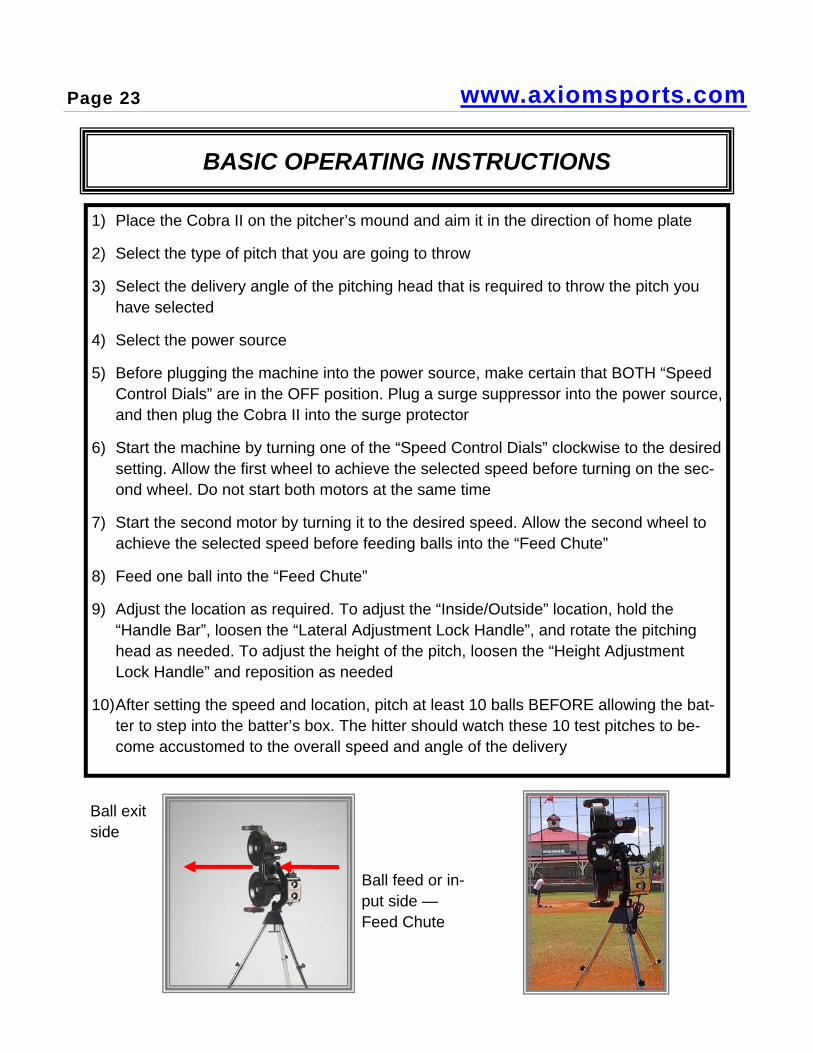
1) Place the Cobra II on the pitcher’s mound and aim it in the direction of home plate
2) Select the type of pitch that you are going to throw
3) Select the delivery angle of the pitching head that is required to throw the pitch you have selected
4) Select the power source
5) Before plugging the machine into the power source, make certain that BOTH “Speed Control Dials” are in the OFF position. Plug a surge suppressor into the power source, and then plug the Cobra II into the surge protector
6) Start the machine by turning one of the “Speed Control Dials” clockwise to the desired setting. Allow the first wheel to achieve the selected speed before turning on the sec-ond wheel. Do not start both motors at the same time
7) Start the second motor by turning it to the desired speed. Allow the second wheel to achieve the selected speed before feeding balls into the “Feed Chute”
8) Feed one ball into the “Feed Chute”
9) Adjust the location as required. To adjust the “Inside/Outside” location, hold the “Handle Bar”, loosen the “Lateral Adjustment Lock Handle”, and rotate the pitching head as needed. To adjust the height of the pitch, loosen the “Height Adjustment Lock Handle” and reposition as needed
10) After setting the speed and location, pitch at least 10 balls BEFORE allowing the bat-ter to step into the batter’s box. The hitter should watch these 10 test pitches to be-come accustomed to the overall speed and angle of the delivery
Ball feed or in-put side — Feed Chute
Ball exit side
www.axiomsports.com Page 23
Axiom Sports Manufacturing Page 24
Your Cobra II requires periodic maintenance. Please follow these basic instructions to en-sure proper performance of your machine
⇒ Check all nuts and bolts for tightness before each use
⇒ There are three places where the machine pivots — 1.) “Tilt Adjustment Lock Handle”; 2.) “Height Adjustment Lock Handle”; 3.) “Lateral Adjustment Lock Handle”. The lock-ing handles at these points should be tight enough to keep the machine in the proper configuration without rotation during use. Please DO NOT over tighten
⇒ When not in use, please store the Cobra II in a clean, dry location. If you choose to leave your machine outside, make sure it is covered and kept dry. A plastic trash-can liner with a draw-string works well. Axiom does not recommend storing your machine outside. Moisture will ruin the electronic circuitry of the machine and void the warranty. Additionally, constant exposure to direct sunlight will shorten the lifespan of the pitch-ing wheels
⇒ Keep the pitching wheels clean, dry, and free of debris. Residue from balls does not need to be removed. If you need to clean the pitching wheels, rubbing alcohol and a coarse rag work very well. DO NOT CLEAN THE WHEELS WITH THE MACHINE PLUGGED IN AND/OR RUNNING!
NOTE: After throwing several thousand pitches, you will notice a groove forming on the pitching wheels and that material from the wheels has collected on other parts of the ma-chine. This is normal. Simply remove the material and debris that has collected on the machine. Using a clean, old paint brush works well for this exercise
⇒ Before using the machine for the first time and every time thereafter, be certain to check the pitching wheel alignment. The wheels should be aligned to produce a verti-cal match. If the wheels do not align vertically, loosen the setscrew on the wheel hub, using a 6mm Allen wrench, and slide the wheels on the motor shaft to gain the re-quired alignment. BE CERTAIN THAT YOU DO NOT EXTEND THE WHEEL HUB PAST THE END OF THE MOTOR SHAFT!
⇒ When transporting the machine be careful not to roll the machine over any extremely uneven ground. This could move the motor mounts and alter the machine set-up. Please refer to page #20 for additional cautions while transporting your Cobra II
⇒ Before each use, check the “GAP” between the pitching wheels. Proper “GAPS” are 2-1/6” for real baseballs and 1-3/4” for dimpled baseballs. See pages 12 & 13
MAINTENANCE

⇒ It is necessary to check and occasionally tighten the pitching wheel set-screws. The pitching wheels on the Cobra II are secured to the motor shaft by a set-screw located in the center of the rim closest to the motor shaft. This set-screw can be tightened by using a 6mm Allen wrench. This set-screw MUST BE as tight as possible using the tool provided.
NOTE: Failure to perform this maintenance check could result in the wheels coming off while the machine is in operation. This could cause serious injury or even death.
⇒ It is necessary that you check the “Motor Mounting Bolts” no less than 4 times per sea-son. These bolts can only be seen with the pitching wheels removed. To remove the pitching wheels, loosen the pitching wheel set-screw with a 6mm Allen wrench (included with your machine). Remove the pitching wheel from the motor shaft BEING VERY CAREFUL NOT TO LOSE THE “HUB KEY”! The “Hub Key” is a small, rectan-gular piece of metal that keys the wheel on the motor shaft. Once the pitching wheel is removed from the motor shaft, you will see the “Motor Mounting Bolts”. Ensure these bolts are tightened with 25 foot-pounds of force.
⇒ It is also necessary to check the “Motor Adjustment Bolts” before each use. These are the bolts you move and/or loosen each time you change the “GAP”. These bolts should also be tightened using 25 foot-pounds of force.
MAINTENANCE CONTD.
www.axiomsports.com Page 25
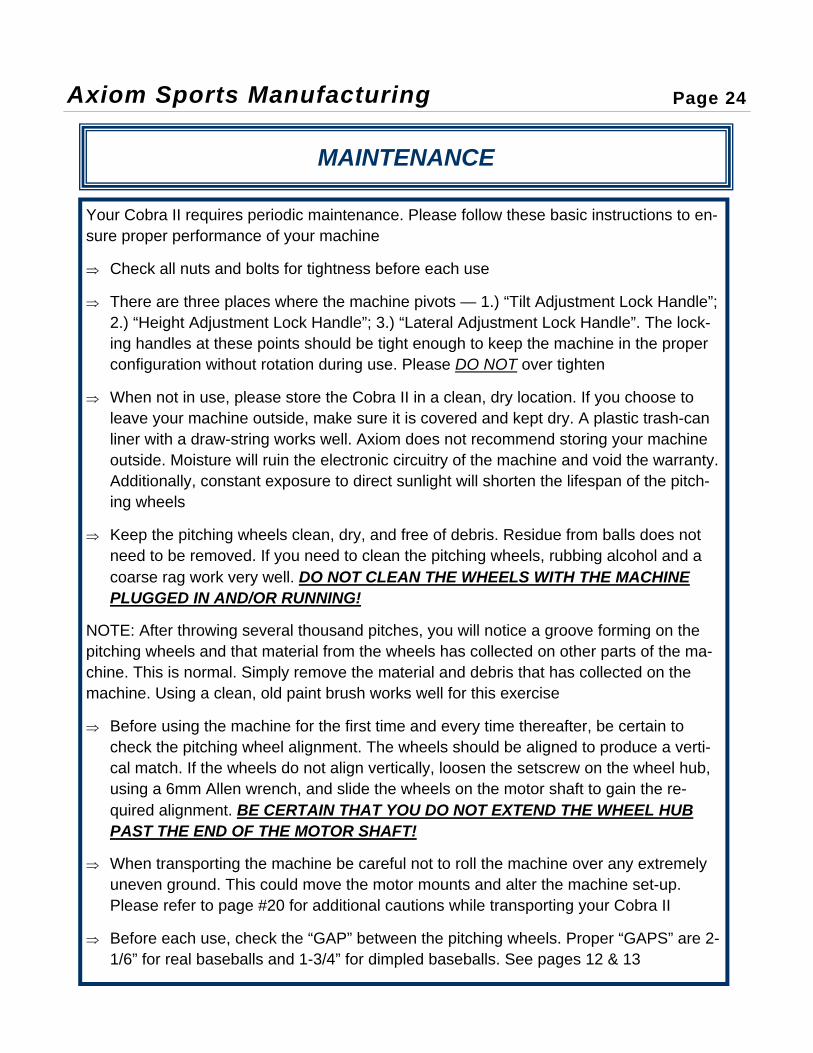
Pitching Wheel Set-Screw
Pitching Wheel Set-Screw
Hub Key

YOUR COBRA II WARRANTY
Customer warranty statement for the Cobra II Combination Pitching
Machine
Purpose of Warranty:
To provide customers with confidence that they have purchased a quality product that will withstand the rigors of normal batting practice use. In order to protect all parties, certain conditions are imposed on the warranty. Rest assured that Axiom Sports Manufacturing stands behind all of our products and supports them with the after sales support they de-serve.
Warranty:
This warranty is divided into two parts
Part 1 — The Full Warranty Period:
The full warranty period covers the first six (6) months of use from the date of purchase.
During this period, Axiom Sports Manufacturing warrants that it will, at its own option, re-pair, replace, or adjust, free of charge, any part that Axiom finds to be defective in materi-als and/or workmanship when used within the conditions of this warranty. All shipping costs related to returning products to Axiom Sports Manufacturing will be the responsibility of the customer.
Part 2 — The Pro-Rated Warranty Period:
The pro-rated warranty period covers 6 to 24 months of use from the date of purchase.
This warranty is void if product transfers ownership. During this period, Axiom warrants that it will, at its own option, repair, replace, or adjust any component that Axiom finds to be defective in materials and/or workmanship when used within the conditions of this war-ranty, at commercial rates based on the pro-rated schedule below. All shipping costs re-lated to returning products to Axiom Sports Manufacturing will be the responsibility of the customer.
Age of Cobra II 0 to 6 Months 6 to 12 months 12 to 18 Months 18 to 24 Months
Warranty 100% 75% 50% 25%
www.axiomsports.com Page 26

YOUR COBRA II WARRANTY CONTD.
Customer warranty statement for the Cobra II Combination Pitching
Machine
Subject Conditions & What Your Warranty Does Not Cover:
⇒ The defect is a consequence of the customer’s failure to properly maintain, or use the Cobra II pitching machine in accordance with good practice
⇒ This warranty does not apply to conditions caused by abuse, neglect, improper mainte-nance, or misuse
⇒ Shipping damage not originating from original product shipment to the customer
⇒ Normal wear and tear
⇒ The use of the Cobra II in commercial situations voids this warranty
⇒ Water damage
⇒ Use of improper balls
NOTE: At times, Axiom Sports Manufacturing will request that the consumer replace a part on the product in an effort to shorten the products “down time” and save the customer shipping costs
How to Obtain Service:
Prior to returning a product to Axiom Sports Manufacturing, you must:
1. Call us at 901-366-9144
2. Have your proof of purchase (receipt, bill of sale, or invoice) ready
3. Explain the problem to the representative who answers the phone
4. If the representative determines that you should return the product you will be provided with a return authorization number. This nine (9) digit number should be written clearly on the outside of the shipping carton when you return the product
5. Return the product in question along with a brief note describing the malfunction. Please include the following information:
Axiom Sports Manufacturing Page 27

YOUR COBRA II WARRANTY CONTD.
• Your Name
• Your Address
• Your Phone Number
• Your E-Mail Address
• A Copy of Your Proof of Purchase
6. Ship the product, prepaid, to the following address:
Axiom Sports Manufacturing
ATTN: Returns (fill in Return Authorization Number here)
3889 Raines Road
Memphis, Tennessee 38118
Product Registration:
Please complete and mail the product warranty registration card packed with your Cobra II This will make it much easier to contact you should it ever be necessary. Returning your product registration card will also make it easier to verify your original purchase information should warranty coverage be required.
How State Laws Relate to this Warranty:
This warranty gives you specific legal rights and you may have other rights that will vary from state to state
Thank You
www.axiomsports.com Page 28

COBRA II ACCESSORIES
Axiom Sports Manufacturing Page 29
Backyard Batting Cage (Complete w/Fittings):
40’ x 10’ x 10’ #012703, MSRP $299.97
60’ x 10’ x 10’ #012710, MSRP 349.97
These nets require 3/4” EMT conduit for the support frame (available at most hardware stores). Approximate cost — 40’ = $90.00; 60’ = $120.00
Dimpled Fluorescent Green Softballs:
12-Pack #84010, MSRP $29.97
Dimpled Yellow Baseballs:
12-Pack #83020, MSRP $24.97
The Sock Net:
Sock Net 7’ x 7’ #81515, MSRP $99.97
Frame 7’ x 7’ #81161, MSRP $97.97
Pitcher’s “L” Net:
Pitcher’s “L” Net 7’ x 6’ #81511, MSRP $64.97
“L” Frame 7’ x 6’ #81160, MSRP $99.97
Fielder’s Screen
Fielder’s Net 7’ x 7’ #81508, MSRP $69.97
Frame 7’ x 7’ #81161, MSRP $97.97
#36 Batting Cage Barrier Net:
10’ x 10’ #81057, MSRP $34.97

Axiom Sports Manufacturing A Division of Fitec International 3525 Ridge Meadow Parkway
Memphis, TN 38115 (901) 366-9144
www.axiomsports.com