assembly instruction - modul-system.de fileinstructions • fix the top plate on the front...
TRANSCRIPT

ASSEMBLY INSTRUCTION SLIDING DOOR SPRINTER H2 EU
Doc No: 104804
Revision: 01
Composer file: 07018467
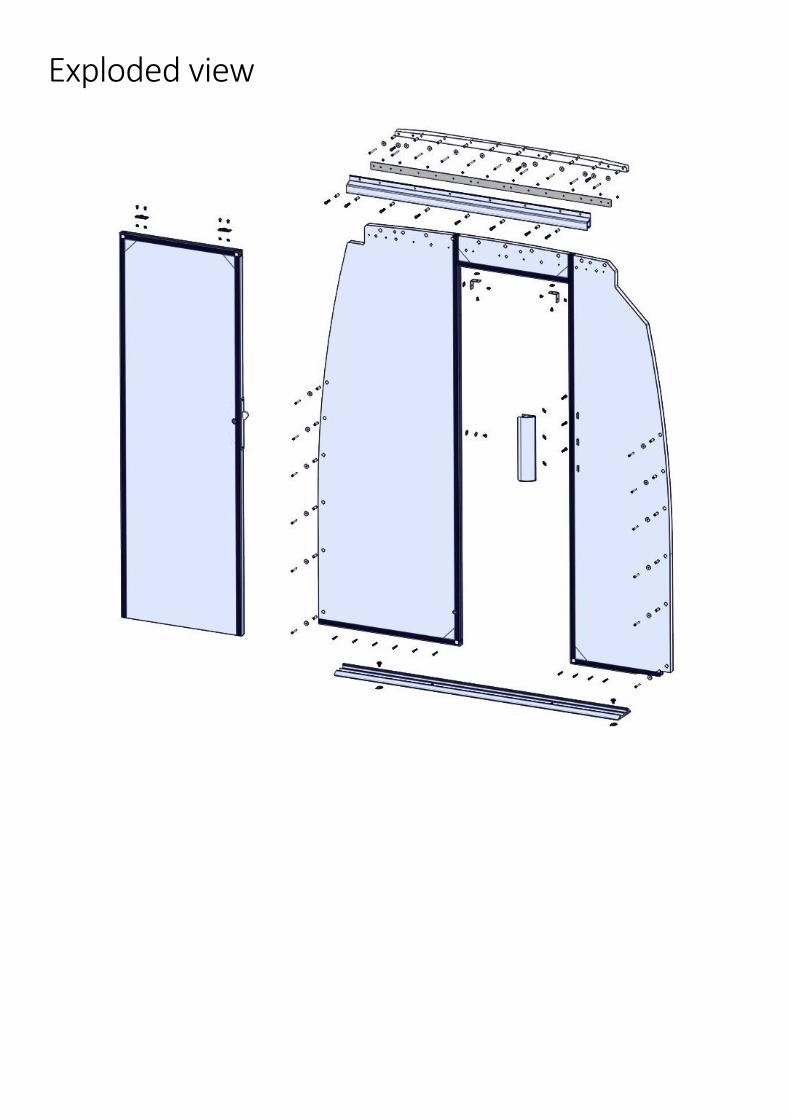
Exploded view
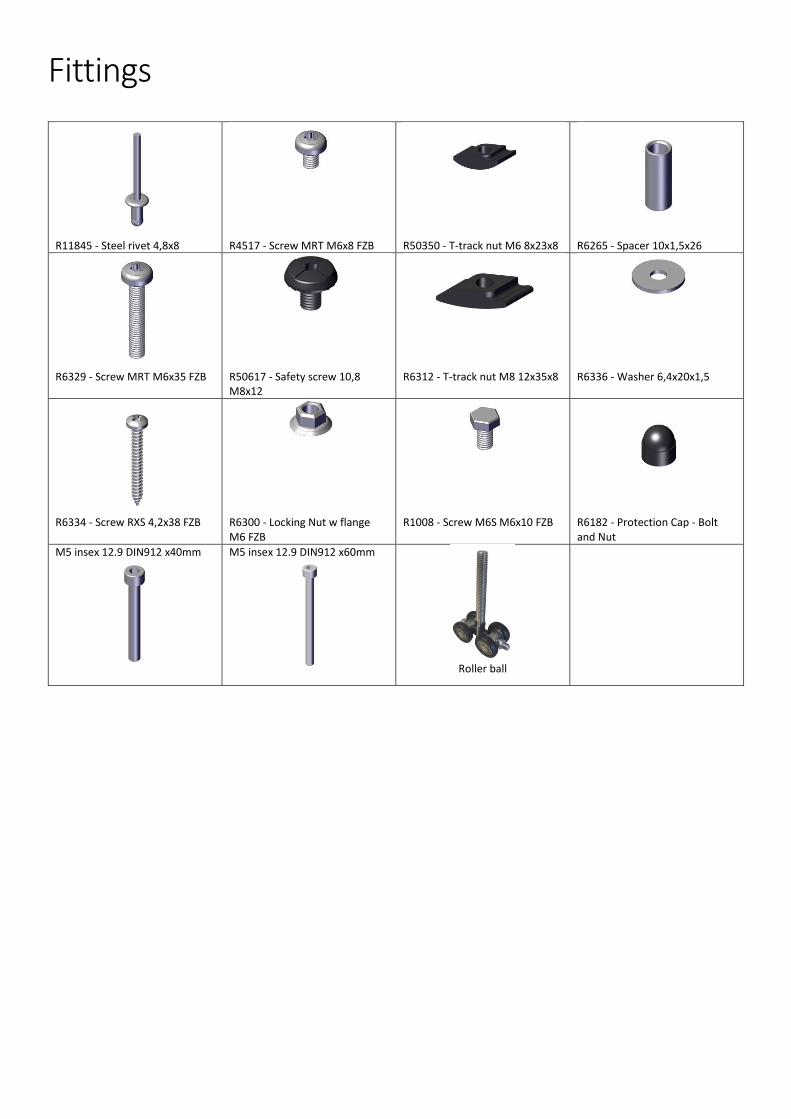
Fittings
R11845 - Steel rivet 4,8x8
R4517 - Screw MRT M6x8 FZB
R50350 - T-track nut M6 8x23x8
R6265 - Spacer 10x1,5x26
R6329 - Screw MRT M6x35 FZB
R50617 - Safety screw 10,8 M8x12
R6312 - T-track nut M8 12x35x8
R6336 - Washer 6,4x20x1,5
R6334 - Screw RXS 4,2x38 FZB
R6300 - Locking Nut w flange M6 FZB
R1008 - Screw M6S M6x10 FZB
R6182 - Protection Cap - Bolt and Nut
M5 insex 12.9 DIN912 x40mm
M5 insex 12.9 DIN912 x60mm
Roller ball

Instructions • Fix the top plate on the front compartment
side with Steel rivet 4,8x8.
• Use M6x8 and T-track nut to fix two brackets to the top corners of the door opening
• Add support bar at the bottom of the lower
part of the door opening. Recommended to use the 550mm sliding door support bracket accessory.
• Fasten in the t-tracks.
• Flip the door carefully.
• Mount the top rail, placing spacers in all hole and fix with M6x35 FZB screws.

• Mount the top beam bracket with 3x m6 x 35 fzb screws.
• Use 3x m6 washers. Do not use spacers is these holes.
• Mount the bottom profile on the floor rails.
Use M8x12 and T-track M8.
• If there is no floor rail, use appropriate length M8 screws and safety nuts.
• Note: Check position of rail with wall mounted before fastening it.
This area of the bottom rail should
be aligned with the B-beam.

• Fasten edge strip to the side of the wall.
• Use the double-sided tape and approximately 10x st4,2 screws to secure the edge strip to the side of the wall.
• Place the wall on the bottom rail.
• Mount the wall to the top beam of the car.
Place spacer in all holes, use washers before fixing with M5x60 FZB screws.
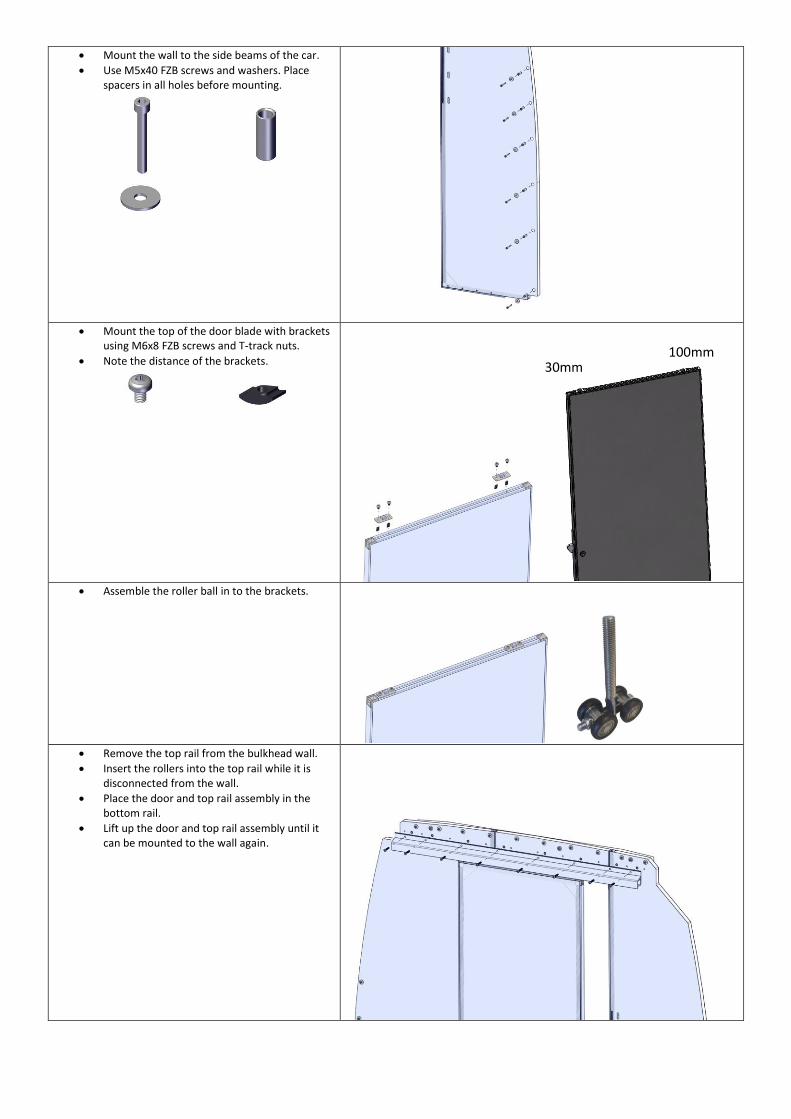
• Mount the wall to the side beams of the car.
• Use M5x40 FZB screws and washers. Place spacers in all holes before mounting.
• Mount the top of the door blade with brackets
using M6x8 FZB screws and T-track nuts.
• Note the distance of the brackets.
• Assemble the roller ball in to the brackets.
• Remove the top rail from the bulkhead wall.
• Insert the rollers into the top rail while it is disconnected from the wall.
• Place the door and top rail assembly in the bottom rail.
• Lift up the door and top rail assembly until it can be mounted to the wall again.
30mm 100mm

• Fasten the striker by placing M6x35 screws in the hole from passenger side. Fasten with T-track nut and push them back in the slot.
• Insert the sticker profile in the slot cut and push sideward.
• Fasten with T-track nuts.
• Fix the bottom of the wall to the rail with self
cutting screw 4,2x38mm
• Remove support bar.
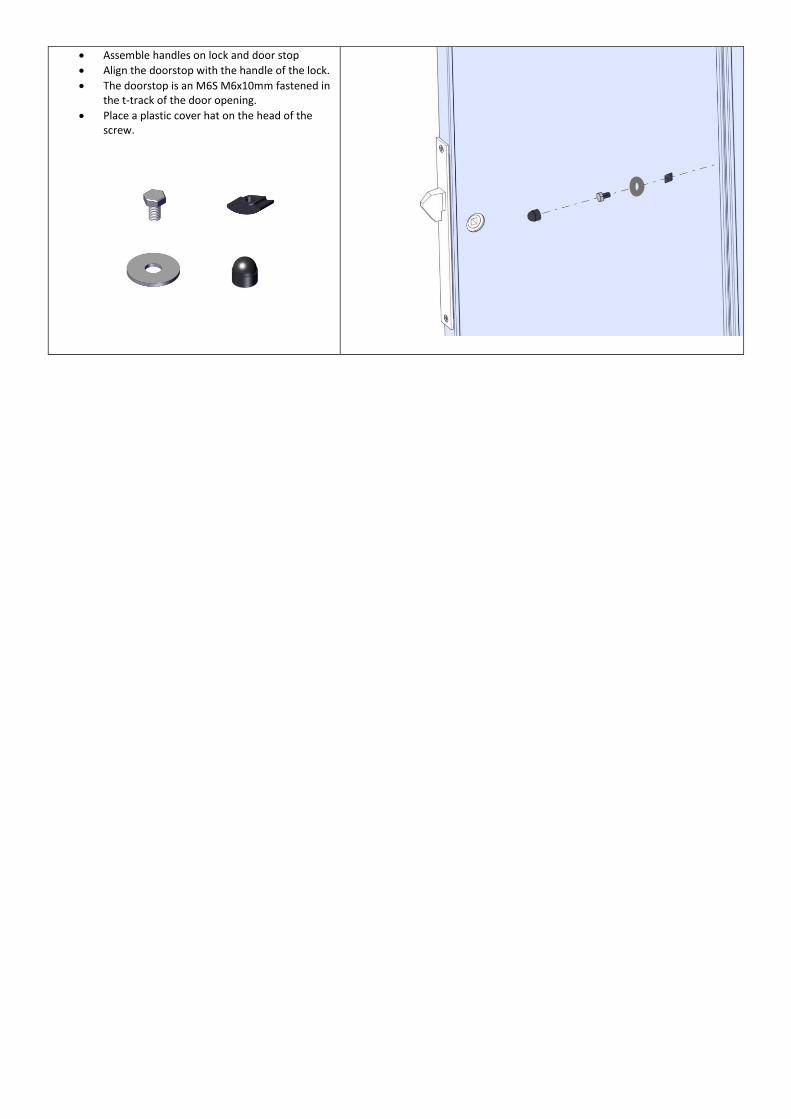
• Assemble handles on lock and door stop
• Align the doorstop with the handle of the lock.
• The doorstop is an M6S M6x10mm fastened in the t-track of the door opening.
• Place a plastic cover hat on the head of the screw.