artificial incubation in the classroom - …...•add tepid water to the reservoirs, avoiding any...
TRANSCRIPT

Artificial Incubation in the Classroom
Choose an incubator to suit you:
• Manual turning is good for pupils’ involvement but needs to be done when school is closed, too.
• Some have better viewing windows.
• Hire or purchase?
• Where do you source your eggs?
• What happens to the chicks?

Setting Up
• Health and safety signage
• Stable site: near a power source and away from busy traffic, drafts, strong sunlight.
• Ensure that the incubator is clean, dust-free and working properly.
• Run it for at least 12 hours before adding eggs, following the manufacturer’s instructions.
• Check the temperature is consistent.


Up and Running
• Add tepid water to the reservoirs, avoiding any electrical parts. Never top up with cold water.
• Adjust the thermometer, if appropriate, so that the bulb is within a few centimetres of the height of the eggs.
• Eggs need to be 37.5 °C at the centre, which means an incubator temperature of 38°C

The Best Chance• Eggs up to a week old have a greater chance of
hatching.• Store eggs widest end up before adding to the
incubator.• Allow eggs to stand like this at room temperature
for 24 hours before adding to the incubator, to allow a gradual adjustment.
• Discard any cracked or dirty eggs.• Mark eggs with a cross on one side, to ensure
that the turning mechanism is working effectively.


Monitoring Progress
• Weighing: eggs should lose between 12 and 15 % of their weight during incubation
• Checking temperature and humidity (wet bulb system)
• Checking water levels
• Candling
• Measuring air space
• Checking movement
• Listening!

What to look for1) Clear when candled - probably
infertile (or very early death) when candled at 1/3 of the incubation
period2) Fertile with red blood vessels -after 1/3 of the incubation period
3) Red or black staining - early death when candled at 1/3 of the
incubation period4) Embryo with red blood ‘ring’ -
early death when candled at 1/3 of the incubation period
5) Dark outline with ill defined detail - late death (1/2 or 2/3 of
the incubation period)6) Live embryo with bill in air sack -
due to hatch in 24-48 hours

Growing with Schools Incubation Chart
School: ____________________________
Class: _____________________________
Type of Egg
Quantity Date Set in Incubator
Temperature
Humidity Candled Number Fertile
Date Pipped
Estimated Hatch Date
Actual Hatch Date
Number of Chicks
Notes

Day 19
• Stop turning mechanisms a couple of days before hatching. This enables the chick to manoeuvre itself into the best position for breaking out. Or move eggs to a separate hatcher.
• Add more water if recommended. Eggs need around 45% humidity for development, increased to 75% for hatching.
• Prepare the brooder!
Day 21?
• Chicks will ‘pip’ before hatching once their beak has penetrated the air space. A mother hen would call back in encouragement.
• Some pip days before hatching, some only once hatching has properly begun.
• Eggs will rock and wobble.
• The first impact on the shell is usually a diamond shape on the top, near the wide end!
Chicks haven’t read the manual.
• Some chicks arrive on day 20, some on day 23 or even later! Be patient.
• Too low or too high a temperature can affect this, as can a power cut of even a few hours.
• Hatching can take 24 hours, but is a struggle they are prepared for!
• Leave chicks in the incubator until they have fluffed up.


Good Practice
• Keep the lid on as much as possible. Only take dry chicks out if they are causing trouble, and do it quickly.
• Don’t intervene: chicks are connected to the shell via blood vessels and membranes that are still healing during the hatch. Picking at a shell to ‘help’ can result in a chick bleeding to death.
• A brief period of frantic activity will be followed by stillness; chicks will rest often between escape attempts.
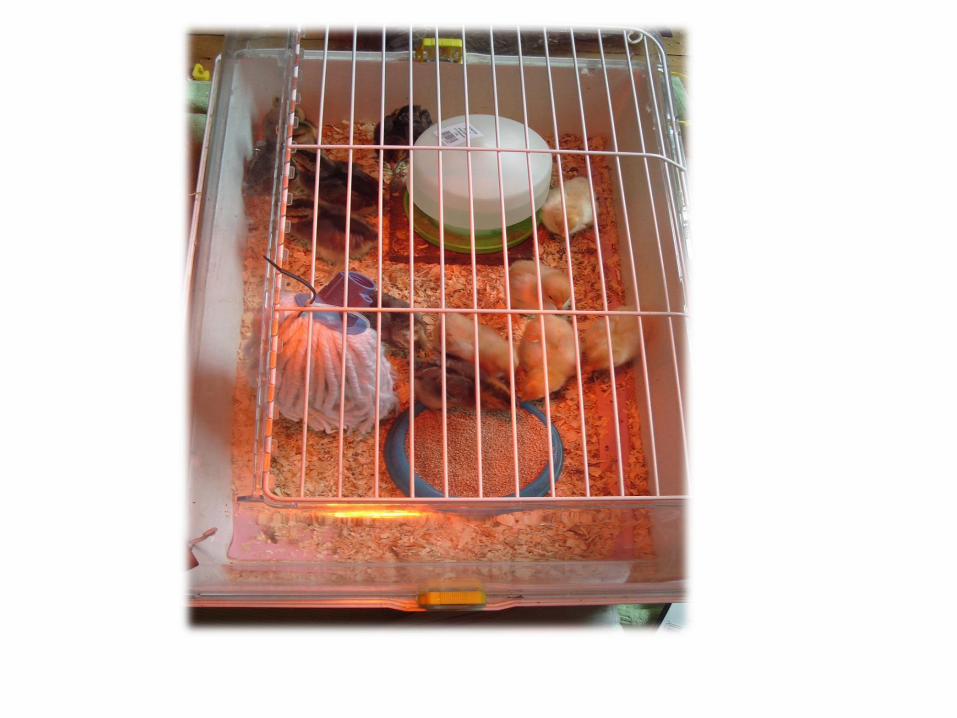

The First Days
• The brooder should be set up at the same temperature as the incubator. Provide a warm and a cooler area.
• Slippy surfaces can damage chicks’ legs. Use towelling or similar at first. Soft bedding such as Dengie Medibed are good but check no chicks are eating them.
• Use a shallow, wide feeder filled with chick crumbs.
• Make sure the water dish isn’t a drowning hazard. Fill with tepid water.


Are they alright?
• Chicks have enough stored yolk for a day or two.
• Some need to be shown how to feed and drink. Dip their beaks in the water gently. Imitate a mother hen by picking up crumbs and dropping in front of the chicks. On to paper gets their attention.
• Chicks sleep a lot, often face down!

Some Problems
• Splayed Leg: a common occurrence but easily fixed!
• Starve-outs: make sure all the chicks are eating and drinking.
• Deformities: could be genetic, congenital or caused by a dietary deficiency in the parent.
• Huddled heap of chicks: raise heat lamp.
• Scattered to edges of brooder: lower heat lamp


Raising Babies
• Chicks need heat for the first 5 weeks, with a gradual reduction. Introduce them to the outdoors bit by bit, as they start to feather up.
• Keep the brooder clean and well-ventilated
• Chick crumbs provide all they need; available with or without an added coccidiostat.
• Tiny amounts of other foods are a good idea after the first week. Provide aviary grit with it.


Lesson Links
• Pupils can perform all the checks needed on a daily basis, with adult supervision for some.
• Record keeping and calculations are an important part of effective incubation.
• Responsibility for and empathy with the chicks in their care is unavoidable!
• Adaptation, habitat and life cycles.


Incubation and Education