arduino: interactive lego police car
TRANSCRIPT
arduino: interactive lego police car
kevin flick
mengyao zhao

At the heart of a child’s toy is the interaction that the child has with the toy. It is this engage-ment of activity where the child’s imagination is lived out in their mind that true interactivity
takes place. We strove to capture the imagination of a child and implement the interactivity that they might have with a particular toy. Our aim is to bring this imagination to life using Arduino technology, with two physical inputs and two outputs.
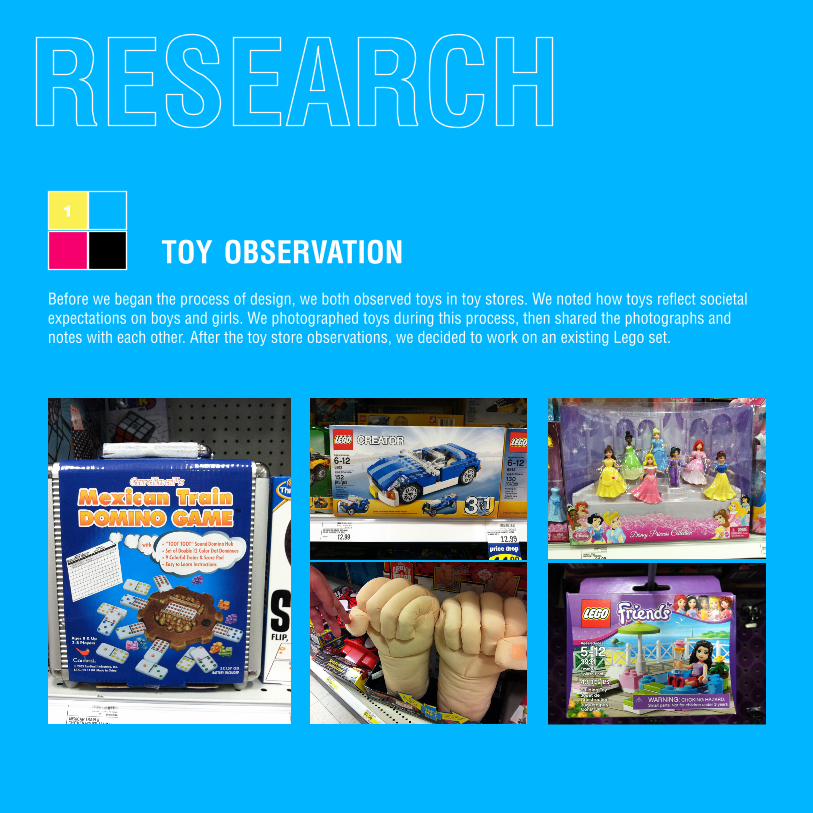
toy observation1
Before we began the process of design, we both observed toys in toy stores. We noted how toys reflect societal expectations on boys and girls. We photographed toys during this process, then shared the photographs and notes with each other. After the toy store observations, we decided to work on an existing Lego set.
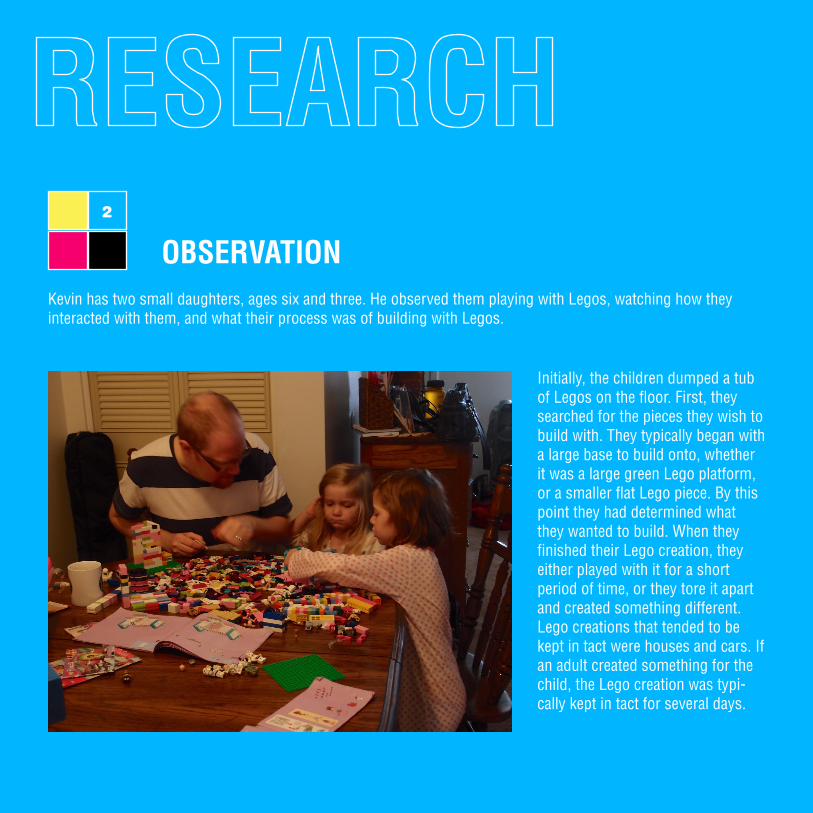
observation2
Kevin has two small daughters, ages six and three. He observed them playing with Legos, watching how they interacted with them, and what their process was of building with Legos.
Initially, the children dumped a tub of Legos on the floor. First, they searched for the pieces they wish to build with. They typically began with a large base to build onto, whether it was a large green Lego platform, or a smaller flat Lego piece. By this point they had determined what they wanted to build. When they finished their Lego creation, they either played with it for a short period of time, or they tore it apart and created something different. Lego creations that tended to be kept in tact were houses and cars. If an adult created something for the child, the Lego creation was typi-cally kept in tact for several days.

literacy3
We also gathered a number of articles on Legos. One article in particular was about DigiBlox, research that combined Lego-like blocks and Arduino interactions. Their research suggest-
ed that when these blocks were constructed that interactions would be created. This article was also an inspiration in our approach.
children need interactions between toys and them, as well as the other people and themselves.
children have expectations of the toys they interact with, like a “should be” reaction, place or sound.
parents need a chance to participate in children’s playing with toys, and they need educational toy sets.
1
lego parent
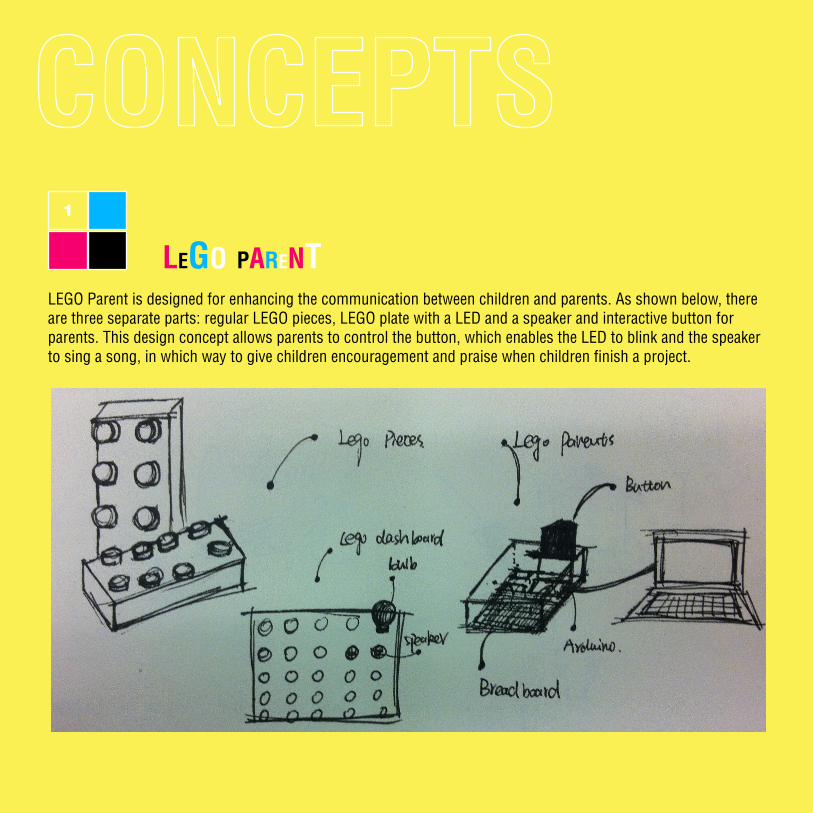
LEGO Parent is designed for enhancing the communication between children and parents. As is shown below, there are three separate parts: regular LEGO pieces, LEGO plate with a LED and a speaker and interactive but-
ton for parents. This design concept allows parents to control the button, which enables the LED to blink and the speaker to sing a song, in which way to give children encouragement and praise when children finish a project.
1
lego parentLEGO Parent is designed for enhancing the communication between children and parents. As shown below, there are three separate parts: regular LEGO pieces, LEGO plate with a LED and a speaker and interactive button for parents. This design concept allows parents to control the button, which enables the LED to blink and the speaker to sing a song, in which way to give children encouragement and praise when children finish a project.

1
lego parent
LEGO Parent is designed for enhancing the communication between children and parents. As is shown below, there are three separate parts: regular LEGO pieces, LEGO plate with a LED and a speaker and interactive but-
ton for parents. This design concept allows parents to control the button, which enables the LED to blink and the speaker to sing a song, in which way to give children encouragement and praise when children finish a project.
1
lego parent
Maria goes to play her LEGO, she wants to build a little house. Her Mom, Linda, wants to join and help Maria gain joy.
Maria tries to build her house on the LEGO plate and Linda is observing Maria playing.
storyboard
1
lego parent
LEGO Parent is designed for enhancing the communication between children and parents. As is shown below, there are three separate parts: regular LEGO pieces, LEGO plate with a LED and a speaker and interactive but-
ton for parents. This design concept allows parents to control the button, which enables the LED to blink and the speaker to sing a song, in which way to give children encouragement and praise when children finish a project.
1
lego parent
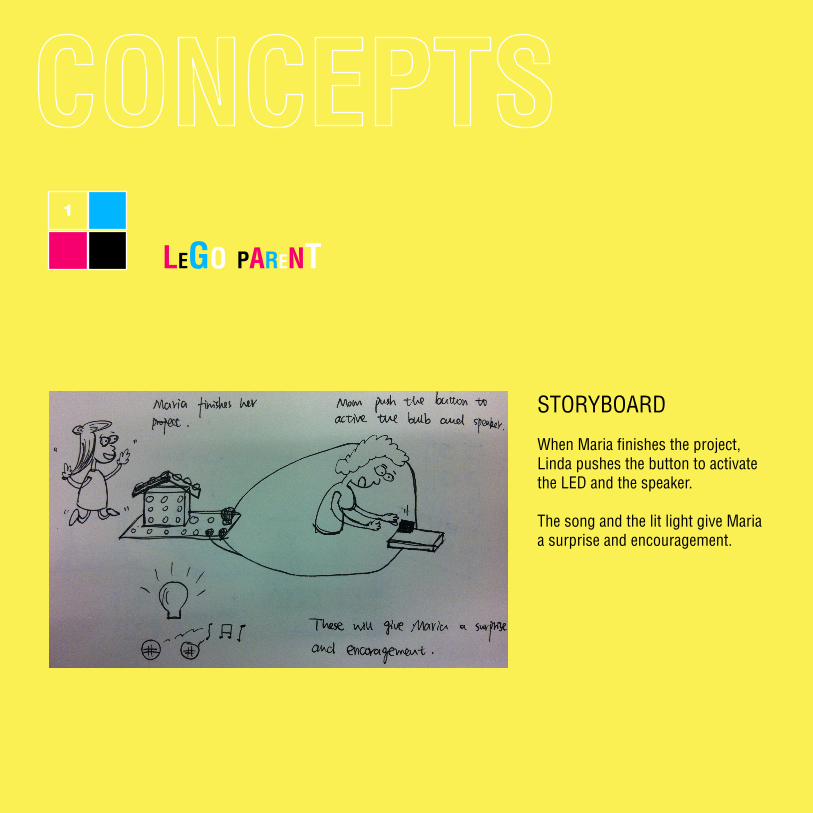
When Maria finishes the project, Linda pushes the button to activate the LED and the speaker.
The song and the lit light give Maria a surprise and encouragement.
storyboard
2
lego game
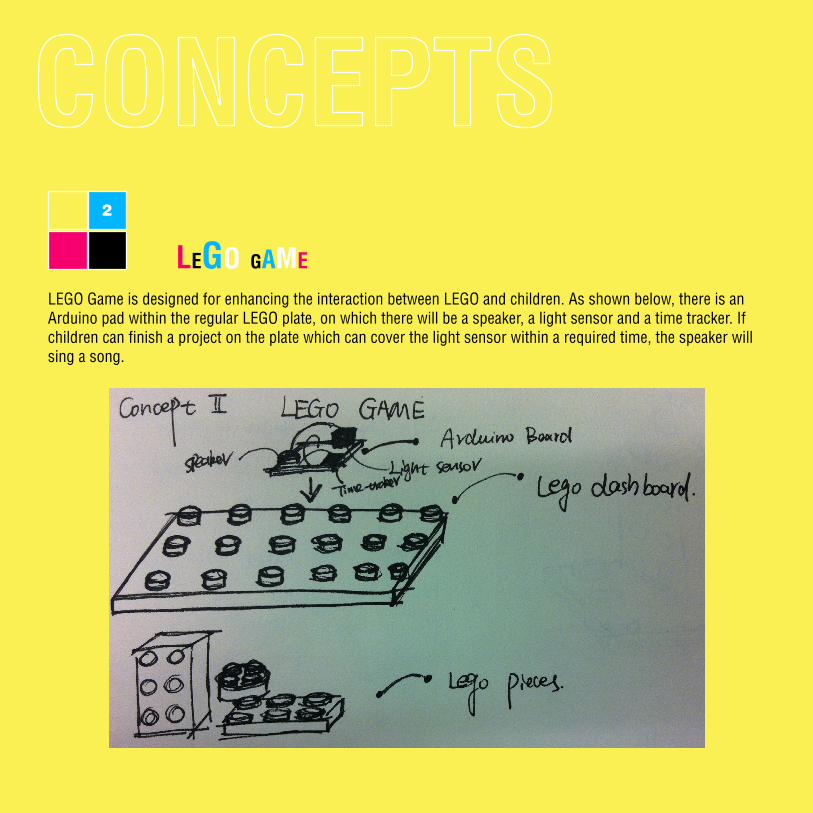
LEGO Game is designed for enhancing the interaction between LEGO and children. As shown below, there is an Arduino pad within the regular LEGO plate, on which there will be a speaker, a light sensor and a time tracker. If children can finish a project on the plate which can cover the light sensor within a required time, the speaker will sing a song.
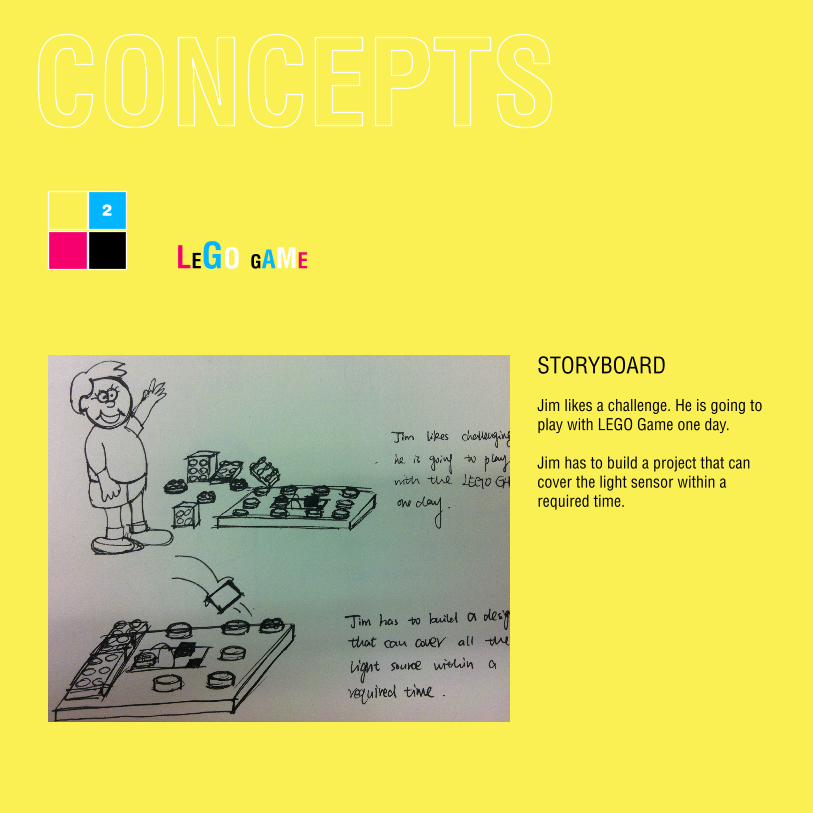
Jim likes a challenge. He is going to play with LEGO Game one day.
Jim has to build a project that can cover the light sensor within a required time.
storyboard
2
lego game
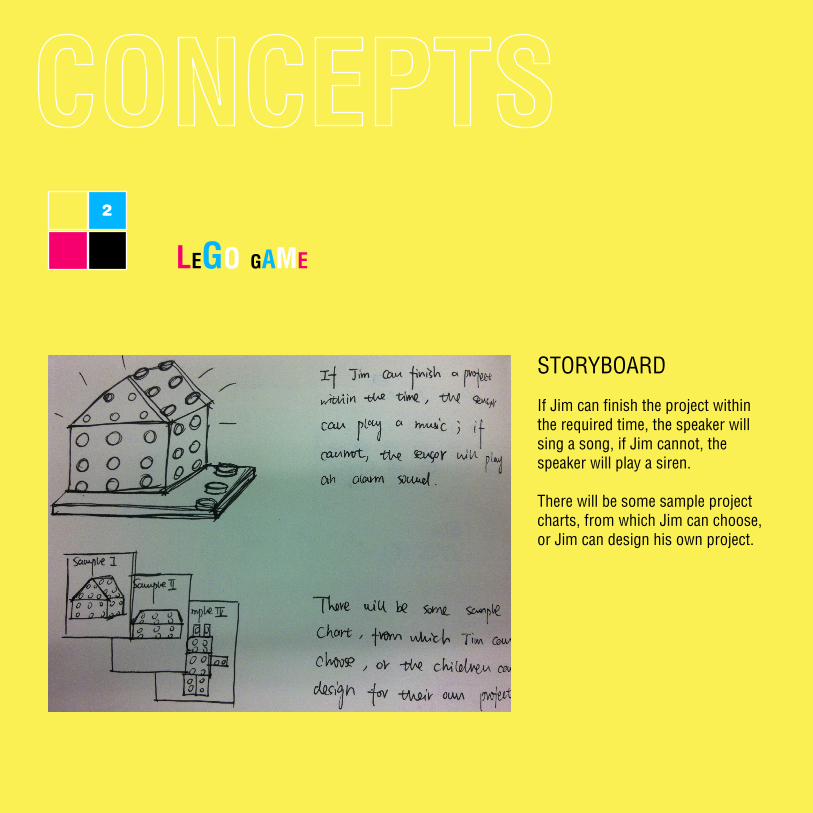
If Jim can finish the project within the required time, the speaker will sing a song, if Jim cannot, the speaker will play a siren.
There will be some sample project charts, from which Jim can choose, or Jim can design his own project.
storyboard
2
lego game
lego police
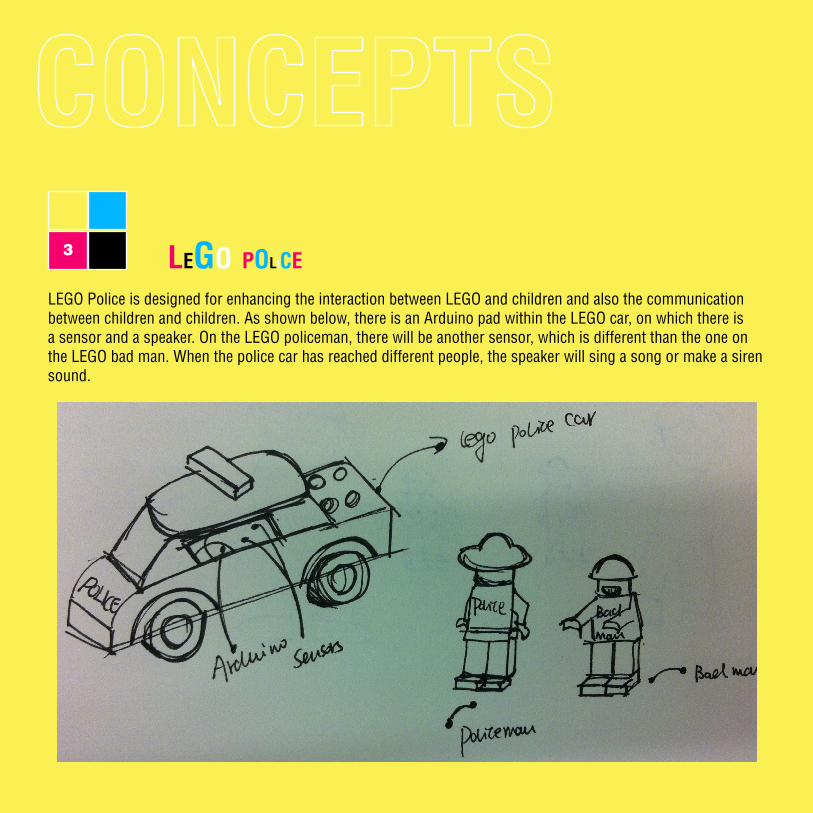
LEGO Police is designed for enhancing the interaction between LEGO and children and also the communication between children and children. As shown below, there is an Arduino pad within the LEGO car, on which there is a sensor and a speaker. On the LEGO policeman, there will be another sensor, which is different than the one on the LEGO bad man. When the police car has reached different people, the speaker will sing a song or make a siren sound.
3
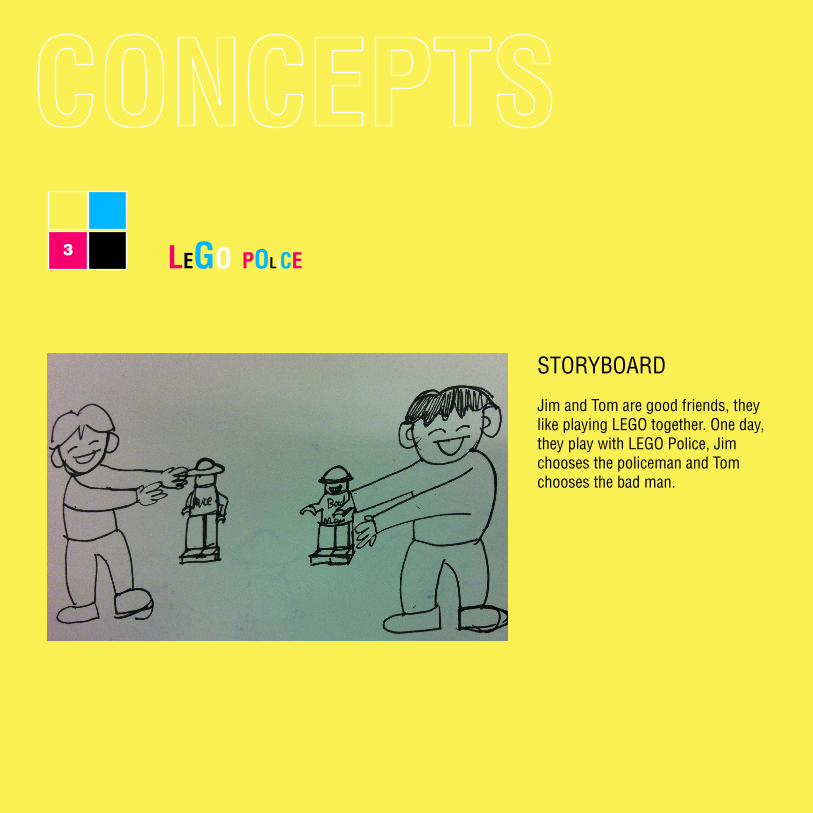
Jim and Tom are good friends, they like playing LEGO together. One day, they play with LEGO Police, Jim chooses the policeman and Tom chooses the bad man.
storyboard
lego police3
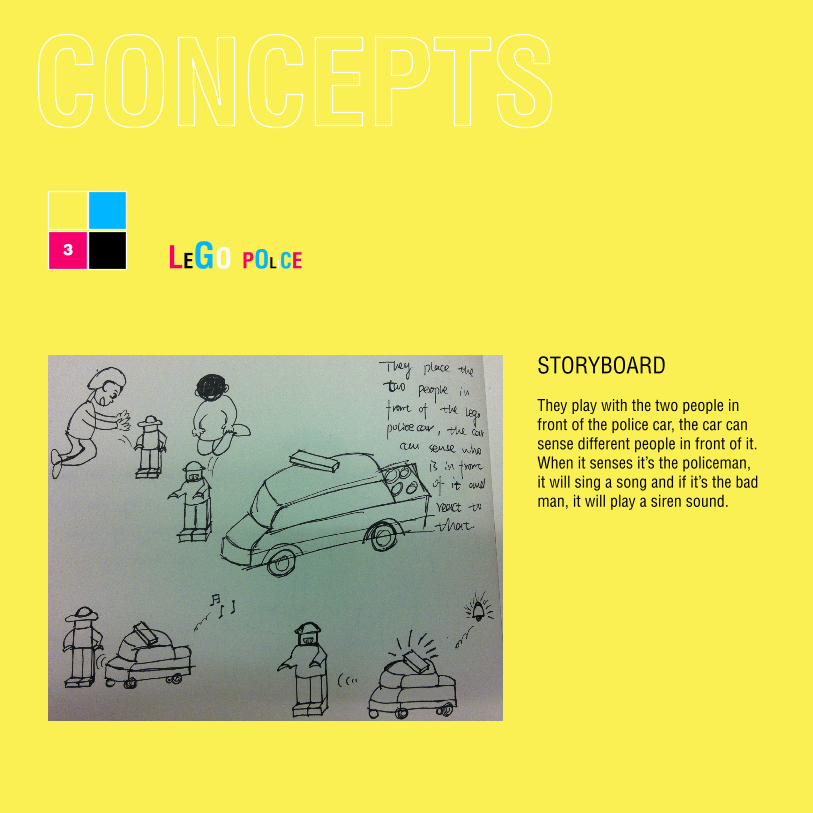
They play with the two people in front of the police car, the car can sense different people in front of it. When it senses it’s the policeman, it will sing a song and if it’s the bad man, it will play a siren sound.
storyboard
lego police3

After we came up with three different concepts, we started to think about how to implement the design idea with available techniques. We were trying to make the interaction easy to access
for children and meanwhile realizable with what we got: an Arduino UNO pad and an Arduino Lilypad. We narrowed down our ideas to the LEGO police car, and in order to modify our initial concept we conducted more research.
observation4
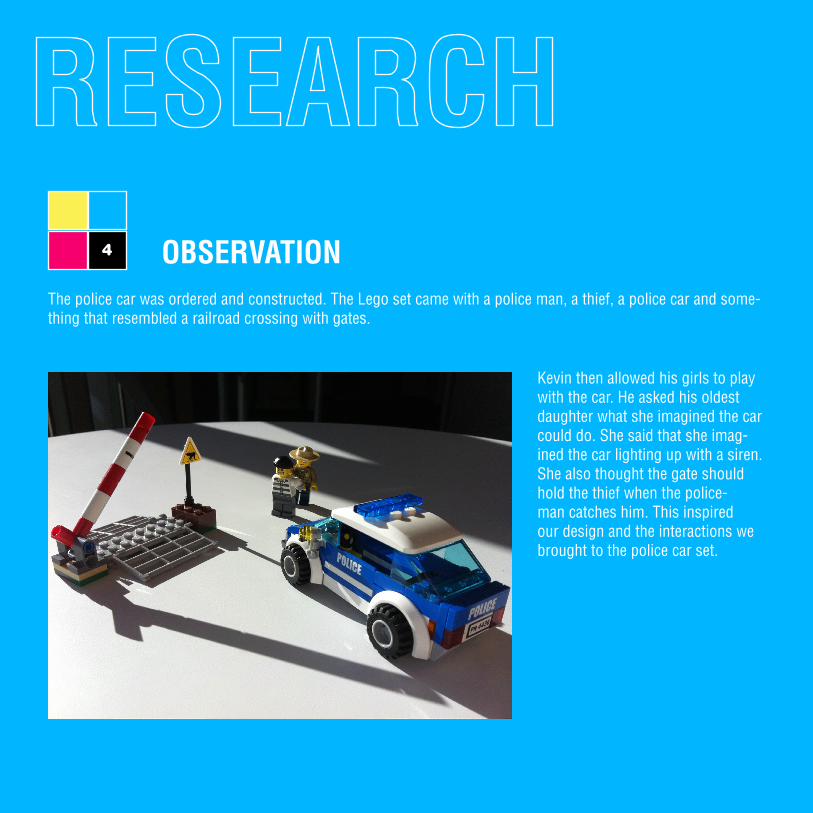
The police car was ordered and constructed. The Lego set came with a police man, a thief, a police car and some-thing that resembled a railroad crossing with gates.
Kevin then allowed his girls to play with the car. He asked his oldest daughter what she imagined the car could do. She said that she imag-ined the car lighting up with a siren. She also thought the gate should hold the thief when the police-man catches him. This inspired our design and the interactions we brought to the police car set.
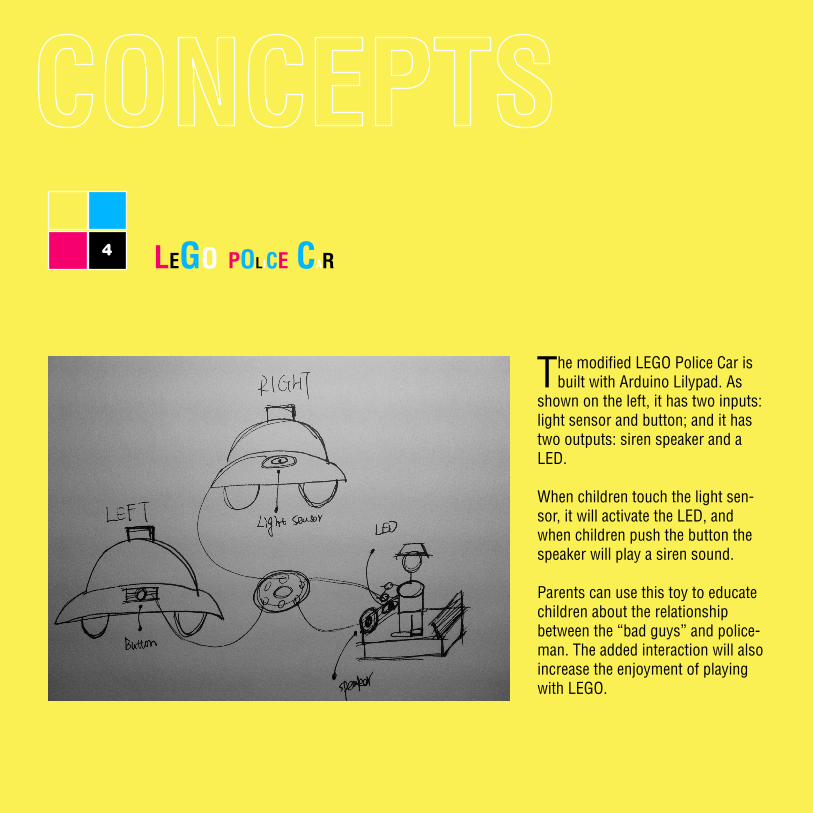
The modified LEGO Police Car is built with Arduino Lilypad. As
shown on the left, it has two inputs: light sensor and button; and it has two outputs: siren speaker and a LED.
When children touch the light sen-sor, it will activate the LED, and when children push the button the speaker will play a siren sound.
Parents can use this toy to educate children about the relationship between the “bad guys” and police-man. The added interaction will also increase the enjoyment of playing with LEGO.
lego police car4
circuit diagrams1
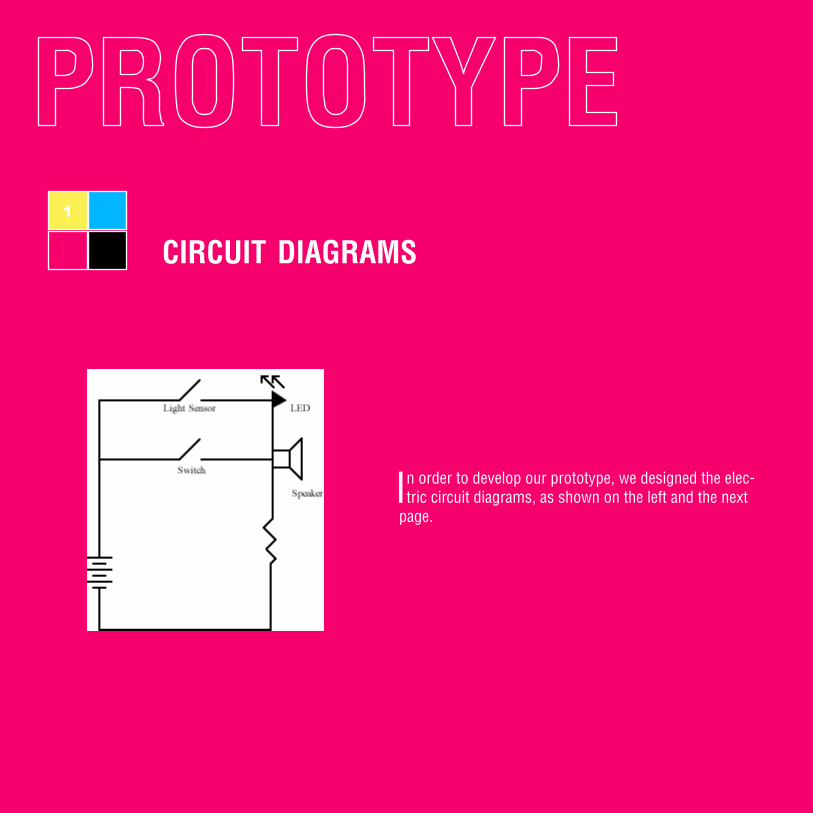
In order to develop our prototype, we designed the elec-tric circuit diagrams, as shown on the left and the next
page.
circuit diagrams1
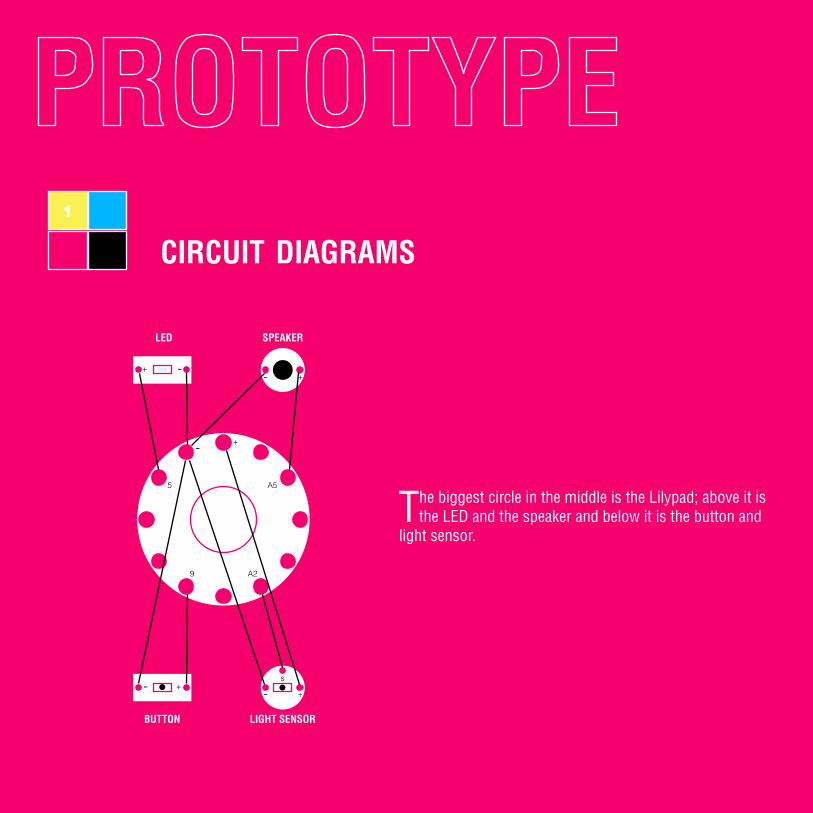
The biggest circle in the middle is the Lilypad; above it is the LED and the speaker and below it is the button and
light sensor.
-+- +
- +
- +
9
- +
s
A2
5 A5
led speaker
button light sensor
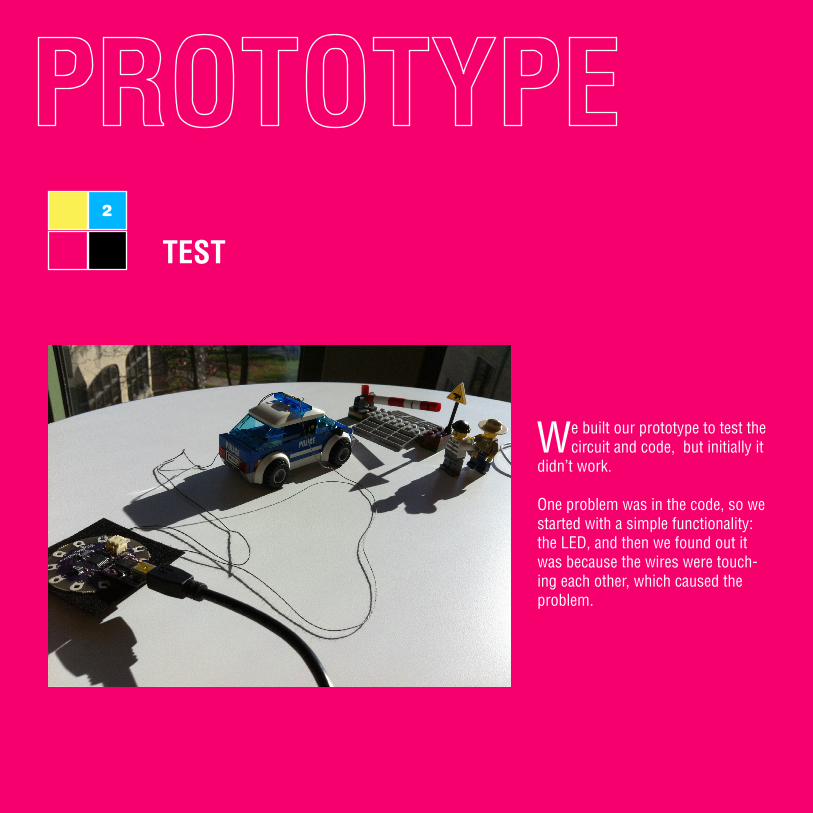
test2
We built our prototype to test the circuit and code, but initially it
didn’t work.
One problem was in the code, so we started with a simple functionality: the LED, and then we found out it was because the wires were touch-ing each other, which caused the problem.
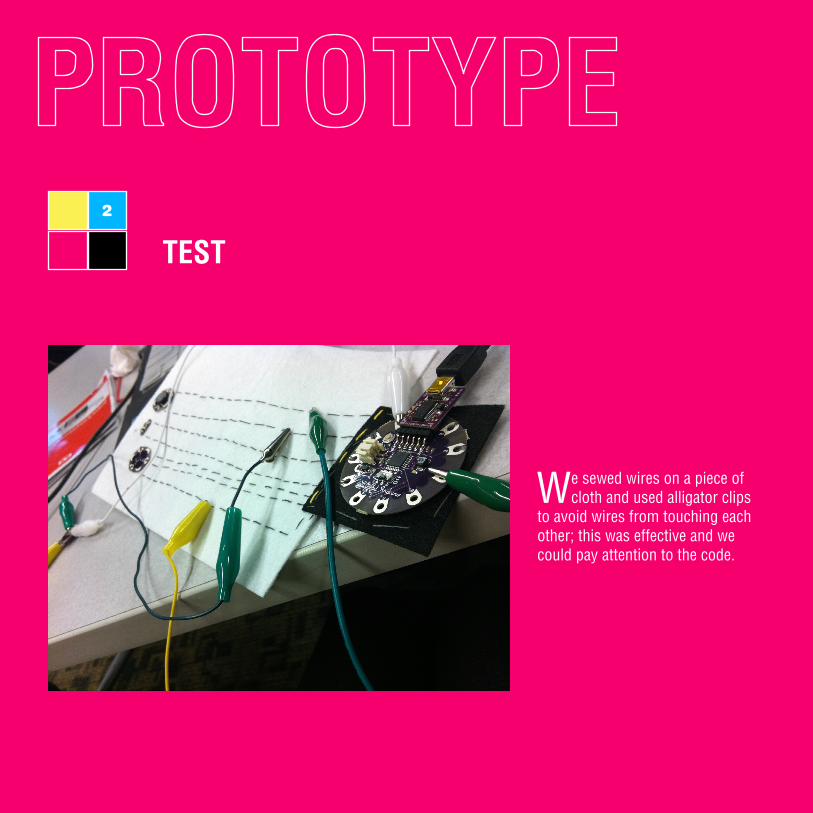
test2
We sewed wires on a piece of cloth and used alligator clips
to avoid wires from touching each other; this was effective and we could pay attention to the code.
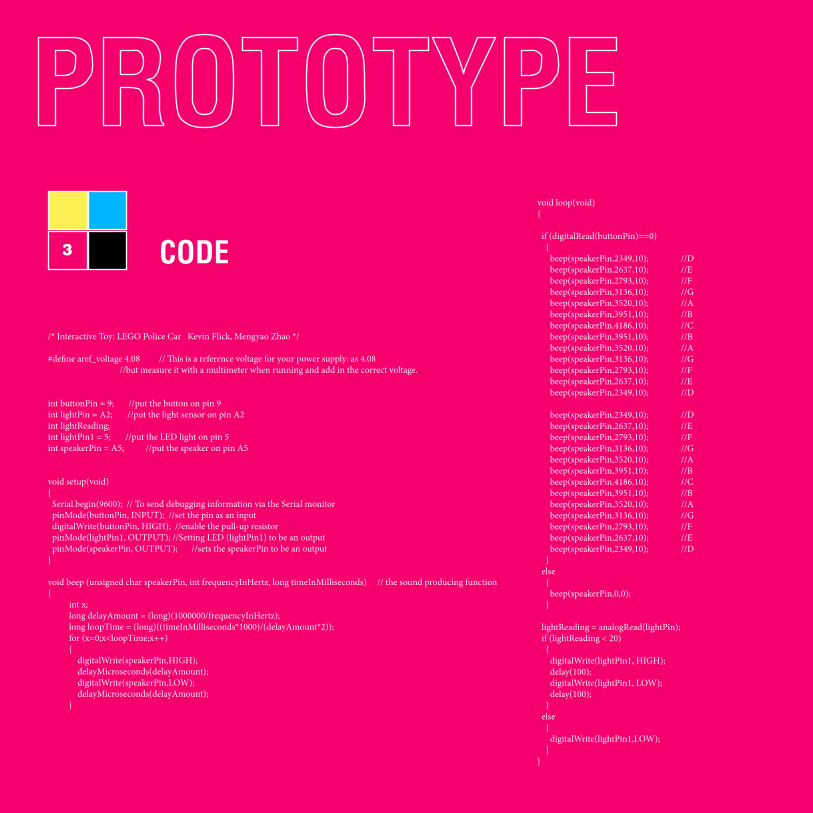
code3
/* Interactive Toy: LEGO Police Car Kevin Flick, Mengyao Zhao */ #define aref_voltage 4.08 // This is a reference voltage for your power supply: as 4.08 //but measure it with a multimeter when running and add in the correct voltage.
int buttonPin = 9; //put the button on pin 9int lightPin = A2; //put the light sensor on pin A2int lightReading;int lightPin1 = 5; //put the LED light on pin 5int speakerPin = A5; //put the speaker on pin A5
void setup(void) { Serial.begin(9600); // To send debugging information via the Serial monitor pinMode(buttonPin, INPUT); //set the pin as an input digitalWrite(buttonPin, HIGH); //enable the pull-up resistor pinMode(lightPin1, OUTPUT); //Setting LED (lightPin1) to be an output pinMode(speakerPin, OUTPUT); //sets the speakerPin to be an output}
void beep (unsigned char speakerPin, int frequencyInHertz, long timeInMilliseconds) // the sound producing function{ int x; long delayAmount = (long)(1000000/frequencyInHertz); long loopTime = (long)((timeInMilliseconds*1000)/(delayAmount*2)); for (x=0;x<loopTime;x++) { digitalWrite(speakerPin,HIGH); delayMicroseconds(delayAmount); digitalWrite(speakerPin,LOW); delayMicroseconds(delayAmount); }
void loop(void) { if (digitalRead(buttonPin)==0) { beep(speakerPin,2349,10); //D beep(speakerPin,2637,10); //E beep(speakerPin,2793,10); //F beep(speakerPin,3136,10); //G beep(speakerPin,3520,10); //A beep(speakerPin,3951,10); //B beep(speakerPin,4186,10); //C beep(speakerPin,3951,10); //B beep(speakerPin,3520,10); //A beep(speakerPin,3136,10); //G beep(speakerPin,2793,10); //F beep(speakerPin,2637,10); //E beep(speakerPin,2349,10); //D beep(speakerPin,2349,10); //D beep(speakerPin,2637,10); //E beep(speakerPin,2793,10); //F beep(speakerPin,3136,10); //G beep(speakerPin,3520,10); //A beep(speakerPin,3951,10); //B beep(speakerPin,4186,10); //C beep(speakerPin,3951,10); //B beep(speakerPin,3520,10); //A beep(speakerPin,3136,10); //G beep(speakerPin,2793,10); //F beep(speakerPin,2637,10); //E beep(speakerPin,2349,10); //D } else { beep(speakerPin,0,0); }
lightReading = analogRead(lightPin); if (lightReading < 20) { digitalWrite(lightPin1, HIGH); delay(100); digitalWrite(lightPin1, LOW); delay(100); } else { digitalWrite(lightPin1,LOW); }}
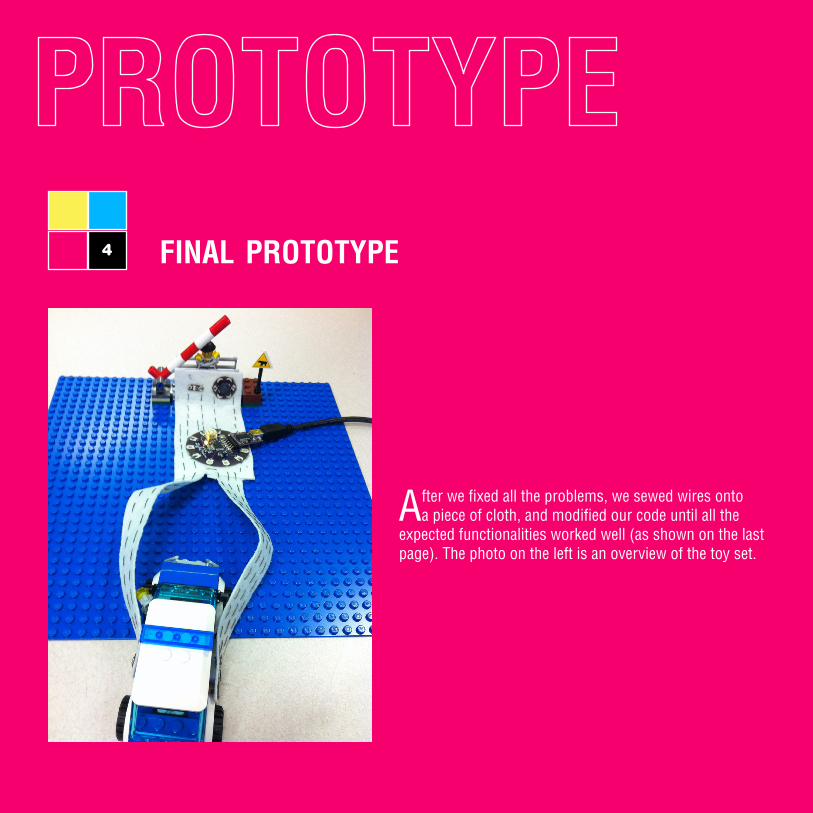
final prototype4
After we fixed all the problems, we sewed wires onto a piece of cloth, and modified our code until all the
expected functionalities worked well (as shown on the last page). The photo on the left is an overview of the toy set.
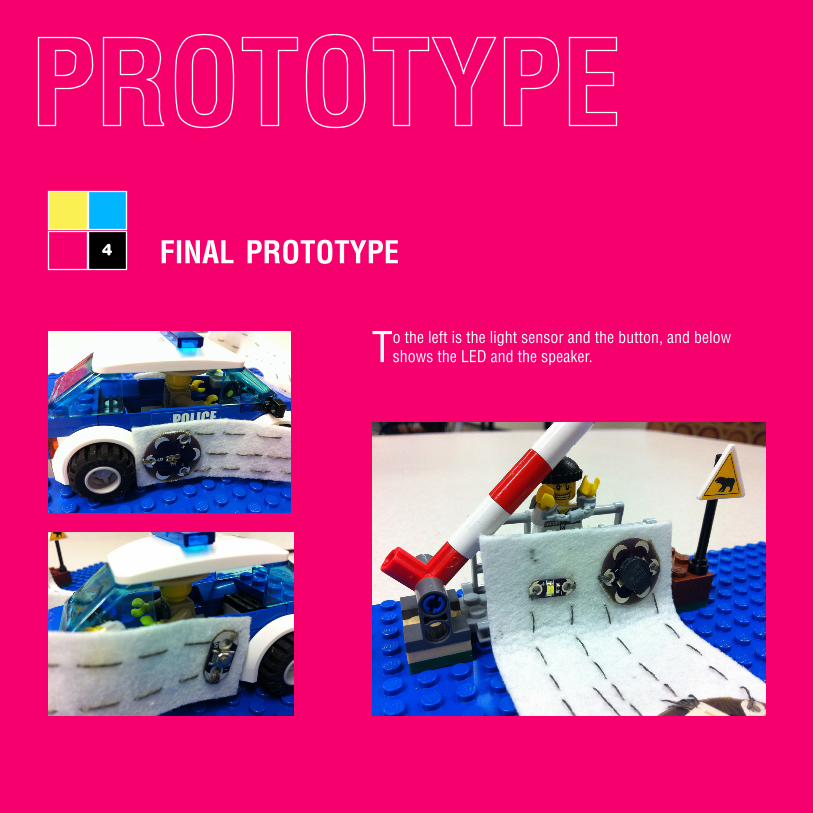
final prototype4
To the left is the light sensor and the button, and below shows the LED and the speaker.
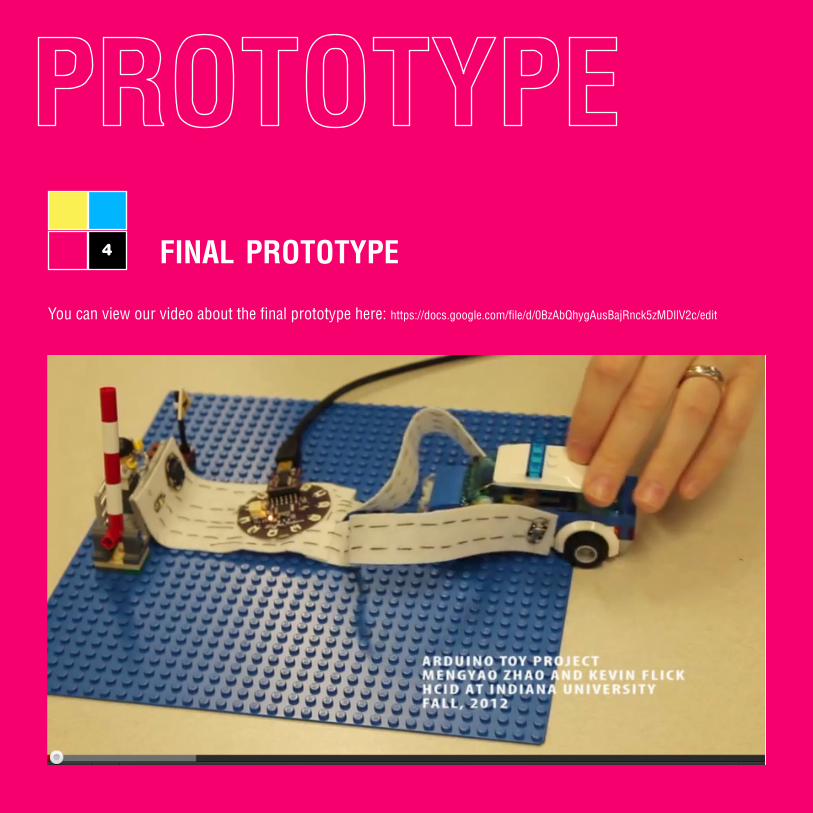
final prototype4
You can view our video about the final prototype here: https://docs.google.com/file/d/0BzAbQhygAusBajRnck5zMDllV2c/edit

what would you do differently if you were to do it again?
we found it difficult to use the lilypad with the lego car, mainly because of the small size of the car. the lego police car was from a lego set and wasn’t wide enough to contain the lilypad.
also, the wires were difficult to man-age. since there were so many wire threads, we were not able to attach the led flashing light and the siren to the car without crossing the wires.
what would you have liked to have included?
we would have liked to have included the temperature sensor instead of the button to control the siren. the idea was that the sensor would detect when a child picks up the lego car and would sound the siren. we had difficulties getting an accurate reading from the sensor, which forced us to abandon the sensor.
what would you like to be able to do with arduino next?
we imagine lego and arduino working together in the future to allow for the circuitry to be integrated into the lego pieces. ideally, the lights on the police car could have arduino led lights built into them. children could create inter-active lego designs simply by combining lego pieces together. this idea was inspired by research conducted by digi-blox (https://www.wpi.edu/Pubs/E-project/Available/E-project-011411-082210/unre-stricted/DigiBlox.pdf).
http://www.lego.comhttp://venturebeat.com/2012/08/30/new-sifteo-cubes-make-the-little-blocks-of-gaming-joy-more-convenient/http://www.ohhaveyouseenthis.com/2011/09/interactive-lego-app.htmlhttp://www.azcentral.com/community/phoenix/articles/2012/10/04/20121004arizona-science-center-hosts-interactive-lego-travel-exhibit.htmlhttps://www.wpi.edu/Pubs/E-project/Available/E-project-011411-082210/unrestricted/DigiBlox.pdfhttp://hlt.media.mit.edu/?p=27http://hlt.media.mit.edu/?p=5http://hlt.media.mit.edu/?p=2286http://www.instructables.com/id/Tweet-a-Pot-Twitter-Enabled-Coffee-Pot/http://www.instructables.com/id/Singing-plant-Make-your-plant-sing-with-Arduino-/
lego
interactive-gaming cubes interactive lego app
interactive lego exhibit
digiblox
living wall
electronic popables
pu gong ying tu
tweet-a-pot
singing plant