aquacontroller apex wireless expansion module - amazon s3€¦ · aquacontroller apex wireless...
TRANSCRIPT

AquaController Apex
Wireless Expansion
Module
Setup Guide

Table of Contents
WIRELESS EXPANSION MODULE – INTRODUCTION ....................................................... 1
FEATURES ...................................................................................................................... 1
PHYSICAL INSTALLATION .............................................................................................. 1
INITIAL CONNECTIONS ....................................................................................................... 2 STARTUP ........................................................................................................................... 2
VERIFY THE INSTALLATION ........................................................................................... 2
UPDATE WXM, PUMP AND RADION FIRMWARE .............................................................. 2
RADION LED FIXURES ........................................................................................................ 3 RADION RF UPDATE ........................................................................................................... 3 ECOTECH PUMP DRIVER FIRMWARE UPDATE ......................................................................... 4 WWD FIRMWARE UPDATE ................................................................................................... 5 ECOSMART MANUAL FIRMWARE UPDATE ............................................................................... 6 ECOSMART AUTOMATIC FIRMWARE UPDATE ......................................................................... 7
ATTACHING DEVICES TO THE WXM ................................................................................ 8
ATTACHING PUMPS ............................................................................................................ 8 ATTACHING A RADION ........................................................................................................ 9
PROGRAMMING .............................................................................................................. 9
PUMPS .............................................................................................................................. 9 ADVANCED PUMP PROGRAM EXAMPLE ................................................................................ 11 RADIONS ........................................................................................................................ 12 ADVANCED RADION PROGRAM EXAMPLES........................................................................... 13
NEPTUNE SYSTEMS LIMITED WARRANTY ..................................................................... 15
CE DECLARATION OF CONFORMITY .............................................................................. 16
*VorTech, EcoSMART, Radion and EcoTech Marine are all registered trademarks of EcoTech Marine.

AquaController Apex Wireless Expansion Module - Setup Guide Page 1
WIRELESS EXPANSION MODULE – INTRODUCTION
Congratulations on your purchase of the AquaController Apex expansion accessory. The AquaController Apex
Wireless Expansion Module (WXM) provides the ability to control Ecotech Marine wireless pumps and Radion
LED fixtures from your AquaController system. You can control them based on time of day, in response to feed
timers, or any event you can think of using the powerful Apex programming language.
The AquaController Apex System delivers an expandable, professional quality aquarium controller at hobbyist
prices. The AquaController Apex is the most flexible, expandable system on the market today.
FEATURES
Wirelessly controls any of EcoTech Marine's wireless pumps (Wireless Wave Driver or EcoSmart) and
Radion LED fixtures.
11 Independent channels to support up to 11 pumps and/or Radion fixtures.
Supports Ecotech Marine's Constant, Reef Crest, Lagoon Random, Nutrient Transport*, Tidal Swell*,
Pulse, Sync and Anti-Sync modes.
Independently controls the intensity of the different LED channels in EcoTech Radion lighting.
Pumps and lights can be changed based on conditions and events throughout the day using powerful
Apex programming commands.
The WXM attaches to and is powered by the Apex system via AquaBus.
Automatic Plug N Play for easy setup and configuration.
Pumps and lights can be dynamically added/removed from the system.
Upgradable WXM and EcoTech firmware upgrade through AquaBus via the Apex Base Module.
Multi-color LED Status and Wireless Status indicators.
2 AquaBus ports for flexible system connections.
Comes with a 3' AquaBus cable.
Compatible with all Apex systems – Apex, Lite and Jr.
* Requires EcoSmart pump driver.
PHYSICAL INSTALLATION
WARNING: Your Apex Base Module must be running firmware version 4.30 or higher to support the
Wireless Expansion Module (WXM). The current firmware version can be checked from the Apex Display
on the Self Test screen. If needed, please upgrade the Apex Base Module firmware to 4.30 or higher before
proceeding with the installation. See the Apex Setup and Programming Guide for firmware upgrade instructions.
The AquaController WXM should be securely mounted as close as possible to the EcoTech Marine Wireless Wave
Driver (WWD), EcoSmart driver or Radion LED fixture in a location free from moisture. Use wood screws
through the mounting tabs of the expansion module case or if mounting on drywall, use drywall anchors
(mounting hardware not included).
Mount the WXM as close as possible to your EcoTech pump or light fixture to ensure reliable wireless
communication.
Mount all modules above the water line of the aquarium.
Be sure to utilize drip loops on all power cords, AquaBus cables and probe cables.
AquaController Apex Wireless Expansion Module - Setup Guide Page 2
WARNING: Water damage will void your warranty! Mount all modules in locations safe from moisture
exposure.
INITIAL CONNECTIONS
Plug one end of the included AquaBus cable into one of the AquaBus ports on the WXM and the other end into
an available AquaBus port on your existing Apex system. It makes no difference which AquaBus port is used
and you do not need to power down the system when connecting AquaBus accessories as the system is plug-
and-play.
WARNING: NEVER plug standard USB devices into any AquaBus connector or AquaBus accessories into
computer USB ports. Damage to the AquaBus accessory and/or USB device may result.
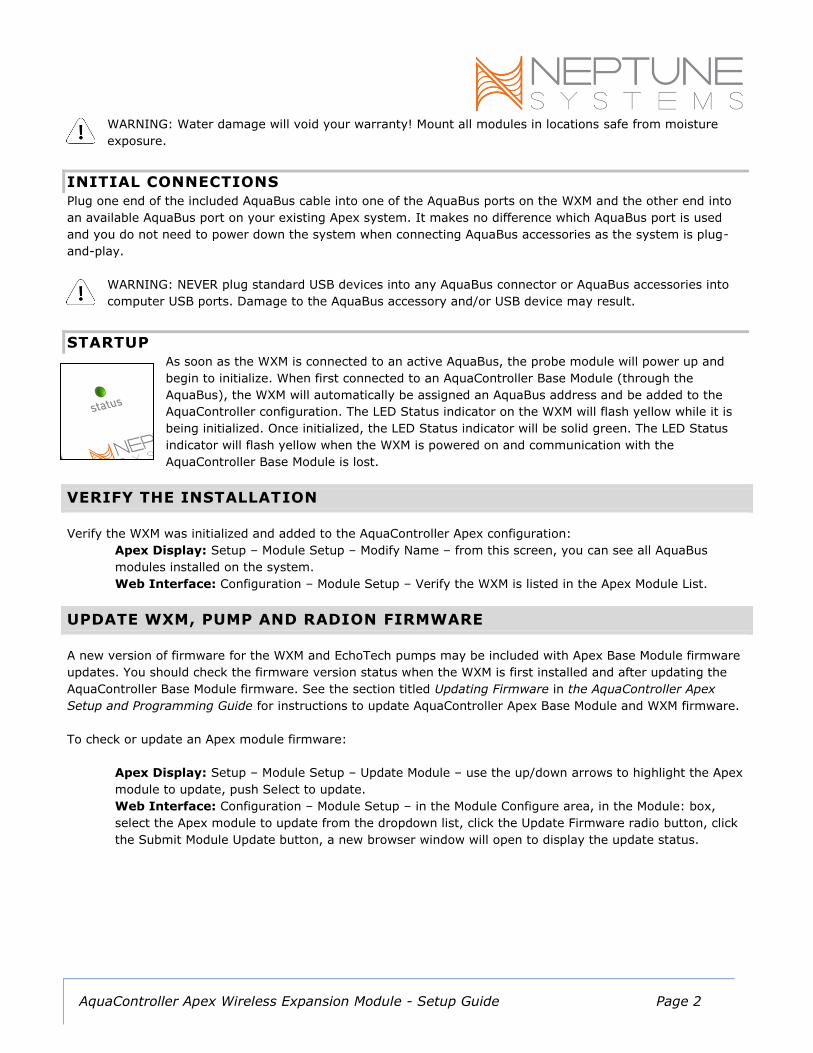
STARTUP
As soon as the WXM is connected to an active AquaBus, the probe module will power up and
begin to initialize. When first connected to an AquaController Base Module (through the
AquaBus), the WXM will automatically be assigned an AquaBus address and be added to the
AquaController configuration. The LED Status indicator on the WXM will flash yellow while it is
being initialized. Once initialized, the LED Status indicator will be solid green. The LED Status
indicator will flash yellow when the WXM is powered on and communication with the
AquaController Base Module is lost.
VERIFY THE INSTALLATION
Verify the WXM was initialized and added to the AquaController Apex configuration:
Apex Display: Setup – Module Setup – Modify Name – from this screen, you can see all AquaBus
modules installed on the system.
Web Interface: Configuration – Module Setup – Verify the WXM is listed in the Apex Module List.
UPDATE WXM, PUMP AND RADION FIRMWARE
A new version of firmware for the WXM and EchoTech pumps may be included with Apex Base Module firmware
updates. You should check the firmware version status when the WXM is first installed and after updating the
AquaController Base Module firmware. See the section titled Updating Firmware in the AquaController Apex
Setup and Programming Guide for instructions to update AquaController Apex Base Module and WXM firmware.
To check or update an Apex module firmware:
Apex Display: Setup – Module Setup – Update Module – use the up/down arrows to highlight the Apex
module to update, push Select to update.
Web Interface: Configuration – Module Setup – in the Module Configure area, in the Module: box,
select the Apex module to update from the dropdown list, click the Update Firmware radio button, click
the Submit Module Update button, a new browser window will open to display the update status.

AquaController Apex Wireless Expansion Module - Setup Guide Page 3
Refer to the below diagram for the following firmware updates:
RADION LED FIXURES
In order to connect to Radion® fixtures your WXM firmware must be Rev 1.11 or greater and the RF Rev must
be 1.2 or greater. You can view your WXM Rev versions in the Module Setup screen. In addition your
controller must be on version 4.30 or higher. If your system meets these requirements you can skip to
‘Attaching Devices to the WXM’ otherwise you must update your software:
1. First, download and apply the latest firmware version from Neptunes support web page. Firmware must
be version 4.30 or greater. Remember to update the Web Pages as well.
2. From the Module Setup web page, select your WXM module to be updated.
3. Click on the ‘Update Firmware’ radio button.
4. Click ‘Submit Module Change’. Your WXM firmware will be updated
RADION RF UPDATE
After updating the firmware in your WXM module (see above) you must update the RF module inside the WXM.
There is a new option in the Module Setup web page when you select the WXM module specifically to do this.

AquaController Apex Wireless Expansion Module - Setup Guide Page 4
1. From the Module Status page, select your WXM module to be updated.
2. Select the ‘WXM RF Firmware’ option.
3. Click on ‘Submit Module Change’. You’ll see a progress message in the Module Status box that looks
like this:
4. Wait 10 – 15 seconds after you get the ‘Complete’ message then unplug your WXM from the Aquabus.
5. Wait a couple seconds then reconnect the WXM to the Aquabus.
6. At this point the revision levels for both the WXM and the RF should be updated. Rev must be 1.11 or
greater and RF Rev must be 1.2 or greater.
ECOTECH PUMP DRIVER FIRMWARE UPDATE
The WWD and EcoSmart drivers must be updated to a minimum firmware level before they can be controlled by
the WXM. See Table 1 - Minimum Firmware Versions for minimum firmware versions.
The firmware version installed on an EcoTech Marine pump driver can be determined by counting the LED
blinking sequence when the pump is initially powered on. The major revision is indicated by the number of
green blinks while the minor revision by the number of blue blinks. For example, 3 green blinks followed by 1
blue blink indicates version 3.1. If your pumps were manufactured after 2010 then likely there will be
no need for a firmware update to your pumps unless you are instructed to do so by Neptune
Systems or EcoTech Marine. Please skip ahead to ‘Attaching Devices to the WXM’.
Pump Type Minimum Firmware Version
MP40W 3.1
MP10 EcoSmart 1.5
MP40 EcoSmart 1.5
Table 1 - Minimum Firmware Versions
If your pumps are up to date, continue configuring your WXM and EcoTech Marine pumps by following the
directions in the section titled Attaching Devices to the WXM.
If your pump needs a firmware update, it can be upgraded through the WXM.
To update WWD pumps follow the steps outlined in the section titled WWD Firmware Update.
To update EcoSmart pumps that have not been connected or configured to connect to the WXM must be
updated manually using the instructions in the section titled ‘Ecosmart Manual Firmware Update’.
EcoSmart pumps already connected to the WXM can be updated using the automatic mode using the
instructions in the ‘Ecosmart Automatic Firmware Update’ section.

AquaController Apex Wireless Expansion Module - Setup Guide Page 5
NOTE: To downgrade EcoSmart pumps, the Automatic mode cannot be used, the manual method must be used
in this case.
WWD FIRMWARE UPDATE
Follow these steps to update the WWD firmware. The update procedure is initiated and controlled at the Apex
Display, these procedures cannot be performed from the Apex Web Interface.
WARNING: Place the WXM and WWD within 2 feet of each other to ensure reliable wireless
communications during the entire firmware update procedure. Make sure all EcoTech pumps are powered
OFF except the pump being updated. Wireless communications from other EcoTech Marine pumps can interfere
with the update process.
Apex Display: Setup – Module Setup – Config Module
1) If you have more than one WXM connected to the Apex, use the up and down arrows to
highlight the WXM that is within 2 feet of the pump to be updated and press Select.
2) Use the up and down arrow keys to highlight WWD Update and press Select.
The Apex Display will indicate:
WWD Update
Download: XX%
3) Once the download has completed, the Apex Display will indicate:
WWD Update
Download Complete
Begin Pump
Firmware update
Pumps Updated: X
4) Remove power to all EcoTech Marine wireless pumps (both WWD and EcoSmart pumps).
5) On the pump you wish to update, press and hold the Set and Mode buttons while you apply
power to the WWD pump. Continue to hold these buttons (about 10 seconds) until the WWD
LED flashes red/white. Release the buttons.
NOTE: Only the pump being updated should be powered on during the update procedure.
Wireless communications from other EcoTech Marine pumps can interfere with the update
process.
6) Press and hold the Set button (about 10 seconds) on the WWD until the LED flashes
white/blue rapidly and the update process will begin. The update process can take up to 6
minutes.
7) Once the update has completed, the Apex Display will increment the Pumps Updated: count
and the WMD LED will flash red/white.

AquaController Apex Wireless Expansion Module - Setup Guide Page 6
8) To verify the pump’s firmware version, power cycle the pump and count the LED blinking
sequence when the pump is initially powered on. The major revision is indicated by the
number of green blinks while the minor revision by the number of blue blinks. For example,
3 green blinks followed by 1 blue blink indicates version 3.1.
9) To update more WWD pumps, repeat steps 4 through 8.
Web Interface:
1. Select your WXM module on the Module Setup web page.
2. Select the WWD Firmware Update button
3. Click the Update WXM Firmware button
ECOSMART MANUAL FIRMWARE UPDATE
Follow these steps to update the EcoSmart firmware using the manual update method. The update procedure is
initiated and controlled at the Apex Display, these procedures cannot be performed from the Apex Web
Interface.
WARNING: Place the WXM and EcoSmart within 2 feet of each other to ensure reliable wireless
communications during the entire firmware update procedure. Make sure all EcoTech pumps are powered
OFF except the pump being updated. Wireless communications from other EcoTech Marine pumps can interfere
with the update process.
Apex Display: Setup – Module Setup – Config Module
1) If you have more than one WXM connected to the Apex, use the up and down arrows to
highlight the WXM that is within 2 feet of the pump to be updated and press Select.
1) Use the up and down arrow keys to highlight EcoSmart Update and press Select.
The Apex Display will indicate:
EcoSmart Update
Download: XX%
2) Once the download has completed, the Apex Display will indicate:
EcoSmart Update
Download Complete
Begin Pump
Firmware update
Pumps Updated: X
3) Remove power to all EcoTech Marine wireless pumps (both WWD and EcoSmart pumps).
4) On the pump you wish to update, press and hold the Set and Mode buttons while you apply
power to the EcoSmart pump. Continue to hold these buttons (about 10 seconds) until the
EcoSmart control dial LED flashes red/white. Release the buttons.

AquaController Apex Wireless Expansion Module - Setup Guide Page 7
NOTE: Only the pump being updated should be powered on during the update procedure.
Wireless communications from other EcoTech Marine pumps can interfere with the update
process.
5) Press and hold the Set button (about 10 seconds) on the EcoSmart until the control dial LED
flashes white/blue rapidly and the update process will begin. The update process can take
up to 2 minutes.
6) Once the update has completed, the Apex Display will increment the Pumps Updated: count
and the EcoSmart LED will flash red/white.
7) To verify the pump’s firmware version, power cycle the pump and count the LED blinking
sequence when the pump is initially powered on. The major revision is indicated by the
number of green blinks while the minor revision by the number of blue blinks. For example,
3 green blinks followed by 1 blue blink indicates version 3.1.
8) To update more EcoSmart pumps, repeat steps 4 through 8.
Web Interface:
1. Select your WXM module on the Module Setup web page.
2. Select the Ecosmart Firmware Manual button
3. Click the Update WXM Firmware button
ECOSMART AUTOMATIC FIRMWARE UPDATE
Follow these steps to update the EcoSmart firmware using the automatic update method. Pumps that are
configured on the WXM can be updated using this method. The update procedure is initiated and controlled at
the Apex Display, these procedures cannot be performed from the Apex Web Interface.
NOTE: Automatic update will only update an EcoSmart’s firmware, it cannot downgrade firmware. If it is
necessary to downgrade firmware, follow the steps in the section titled Error! Reference source not found..
WARNING: Place the WXM and EcoSmart within 2 feet of each other to ensure reliable wireless
communications during the entire firmware update procedure. Make sure all EcoTech pumps are powered
OFF except the pump being updated. Wireless communications from other EcoTech Marine pumps can interfere
with the update process.
Apex Display: Setup – Module Setup – Config Module
1) If you have more than one WXM connected to the Apex, use the up and down arrows to
highlight the WXM where the pump is connected and press Select.
NOTE: Only the configured/attached pumps being updated should be powered on during the
update procedure. Wireless communications from other unattached/unconfigured EcoTech
Marine pumps can interfere with the update process.
2) Use the up and down arrow keys to highlight EcoSmart Update and press Select.
The Apex Display will indicate:

AquaController Apex Wireless Expansion Module - Setup Guide Page 8
EcoSmart Update
Download: XX%
3) Once the download has completed, the Apex Display will indicate:
EcoSmart Update
Download Complete
Begin Pump
Firmware update
Pumps Updated: X
4) The WXM will automatically update all the EcoSmart pumps configured on the WXM.
5) To verify the pump’s firmware version, power cycle the pump and count the LED blinking
sequence when the pump is initially powered on. The major revision is indicated by the
number of green blinks while the minor revision by the number of blue blinks. For example,
3 green blinks followed by 1 blue blink indicates version 3.1.
Web Interface:
1. Select your WXM module on the Module Setup web page.
2. Select the Ecosmart Firmware Auto button
3. Click the Update WXM Firmware button
ATTACHING DEVICES TO THE WXM
ATTACHING PUMPS
Once you have confirmed your pumps have the required firmware version, you must “attach” the pump to the
WXM so they can be controlled by the Apex system.
To attach the pump to the WXM:
1) The pump’s memory must be cleared so it can be attached to the WXM:
a. With the pump powered on, press and hold the Set and Mode buttons (about 3 seconds) until
the pump’s LED flashes red/white/blue. Release the buttons.
b. Press and hold the Mode button (about 3 seconds) until the pump’s LED flashes purple/red.
Release the button.
c. Press and hold the Set button (about 3 seconds) until the pump resets.
2) Assign the pump as a slave to the WXM:
a. With the pump powered on, press and hold the Set and Mode buttons (about 3 seconds) until
the pump’s LED flashes red/white/blue. Release the buttons.
b. Tap the Set button.
i. If the pump was successfully attached to the WXM, the pump LED will flash blue/yellow.

AquaController Apex Wireless Expansion Module - Setup Guide Page 9
ii. If the pump flashes blue/red, the attachment failed. Retry the procedure starting at step
1.
3) Once the pump has been attached to the WXM, an Apex Outlet will be created to allow programming of
the pump. The first pump attached will be named VorTech_X_1 and the second VorTech_X_2. The X will
be replaced with the AquaBus number assigned to the WXM on which the pump was attached. The
default outlet names can be changed using typical Apex programming procedures. See the Apex Setup
and Programming guide for more information.
The EcoTech Marine pumps attached to a WXM can be viewed from the Apex Display by opening the
Control/Status – WXM Status screen.
ATTACHING A RADION
Note: Once you attach a Radion fixture to the WXM you will no longer be able to connect or control your fixture
via EcoSmart Live®.
1. Again, you will use the Module Setup web page. Select your WXM module.
2. Select the ‘Reset Radions’ button. Your Radion lights will briefly flash then go off.
3. Select the ‘Attach Radions’ button. After a moment, your lights will be paired to the WXM module. To
verify, go to your Outlet Configuration web page. You should see new outlets for your Radion created.
PROGRAMMING
PUMPS
Once the EcoTech Marine pumps have been attached to the WXM by following the steps in the section titled
Web Interface:
4. Select your WXM module on the Module Setup web page.
5. Select the Ecosmart Firmware Auto button
6. Click the Update WXM Firmware button
ATTACHING DEVICES TO THE WXM, an outlet is added to the Apex system that is used to program the pump.
Basic programming instructions are included in this manual but more detailed instructions can be found in the
Apex Setup and Programming Guide in the section titled Variable Speed Port Programming and in the Advanced
Programming Examples Appendix.
The VorTech outlets can be programmed using the Pump wizard built in to the Apex. Set the outlet Program
Type to Pump and set the variables as described below:

AquaController Apex Wireless Expansion Module - Setup Guide Page 10
Fallback – the state the pump should switch to if contact between the WXM and base module is lost (on
or off).
Initial Off Time – when this pump first starts, this is the amount of time the pump should be off before
proceeding to the On Time (minutes:seconds).
On Time – after the Initial Off Time expires, this is the amount of time the pump should be On before
proceeding to the Off Time (minutes:seconds).
Off Time – after the On Time expires, this is the amount of time the pump should be Off before
proceeding back to Initial Off Time (minutes:seconds).
Feed timer – the Feed Timer that should turn off this pump (A, B, C or D).
Feed timer delay – the time after the Feed Timer expires before starting the pump back up.
However, to get the most flexibility and control of variable speed VorTech pumps, the Advanced Program Type
should be used in combination with Apex variable speed Profiles. Profiles are edited from either the Web
Interface or the Apex Display. A new profile type called VorTech has been added to support the WXM module.
The VorTech profile type has the following VorTech Pump Control types:
Constant – The constant type allows for to be run as constant speed from 0 to 100%.
Reef Crest – The Reef Crest Random type is used to simulate a high energy reef-crest environment.
Refer to the VorTech pump owner’s manual for more information. The maximum pump intensity can be
configured in this mode.
Lagoon – The Lagoon Random type is used to simulate a low energy lagoon reef environment. Refer to
the VorTech pump owner’s manual for more information. The maximum pump intensity can be
configured in this mode.
Pulse – The Pulse type is used to generate periodic wave pulses in the tank. The period change can be
adjusted from .25 seconds to 1300 seconds. Also, the maximum pump intensity can be configured in
this mode. The table below shows the on times used to generate resonate waves in our test tanks. The
values used in your tank may be slightly different but these should be a good starting point.
Tank Width
(feet)
ON Time
3 0.55 Seconds
4 0.8 Seconds
6 1.2 Seconds
8 1.8 Seconds
Table 2 - Starting Pulse Widths
Tidal Swell – The Tidal Swell type is an EcoSMART only mode used to generate left to right, right to left,
calm, surge flows in the tank. The maximum pump intensity can be configured in this mode.
Nutrient Tran – The Nutrient Transport Mode is an EcoSMART only mode used to generate resonant
wave, and a surge effect in the tank. The maximum pump intensity can be configured in this mode.

AquaController Apex Wireless Expansion Module - Setup Guide Page 11
Sync – The sync Type allows for one pump to be synchronized to another pump. The maximum
intensity as well as the master pump to synchronize is specified in this profile type. Synchronizing a
non-EcoSMART pump to an EcoSMART pump running the Tidal Swell or Nutrient Transport mode is not
possible.
Anti-Sync – The Anti-Synchronizing Type allows for one pump to be opposite state of another pump.
The maximum intensity as well as the master pump to Anti-Sync with is specified in this profile type.
Anti-Synchronizing a non-EcoSMART pump to an EcoSMART pump running the Tidal Swell or Nutrient
Transport mode is not possible.
Eco-Back – The EcoSMART Back Type allows for one pump to run the EcoSMART Back pump mode. See
the EcoSMART Pump’s owner’s manual for more details. The maximum intensity as well as the master
pump to be synchronized to is specified in this profile type. Eco-Back a non-EcoSMART pump to an
EcoSMART pump is not possible.
ADVANCED PUMP PROGRAM EXAMPLE
The following program assumes that there are two pumps in the Aquarium – one on the right side, and one on
the left side. This example shows how each pump can be controlled independently, and its mode of operation
changed multiple times throughout the day.
The following table shows how the profiles required for this program example.
Profile Name Mode Notes
ReefCrst Reef Crest Max Intensity 100%
TidalSwl Tidal Swell Max Intensity 80%
Nutrient Nutrient Export Max Intensity 90%
Pulse Pulse Max Intensity 100%, on time to 0.55 seconds
Night Constant Max Intensity 50%
Sync Synchronize Max Intensity 100%, sync to VorTechLeft
Anti-Sync Anti-sync Max Intensity 100%, anti-sync to VorTechLeft
Slow Constant Max Intensity 25%
Table 3 - Profiles Defined for Program Example
The following programs are used for each of the VorTech outlets.
<VorTechLeft>
Set Pulse
If Time 8:00 to 10:00 Then ReefCrst
If Time 12:00 to 14:00 Then TidalSwl
If Time 16:00 to 20:00 Then Nutrient
If Time 22:00 to 06:00 Then Night
If FeedA 000 Then Slow
If FeedD 000 Then Off
<VorTechRight>
Set antiSync
If Time 8:00 to 9:00 Then Sync
If Time 12:00 to 13:00 Then Sync

AquaController Apex Wireless Expansion Module - Setup Guide Page 12
If Time 16:00 to 21:00 Then Sync
If Time 22:00 to 06:00 Then Night
If FeedA 000 Then Slow
If FeedD 000 Then Off
Table 4 - Pump States lists the various states of the pump at times throughout the day. If FeedA cycle is
initiated both pumps will run in a constant speed of 25%. If the FeedD cycle is started, both pumps will be shut
off for duration of the feed or maintenance cycle.
Time VorTechLeft Status VorTechRight Status
06:00 to 08:00 Pulse Pulse (anti-sync to left pump)
08:00 to 09:00 Reef Crest Reef Crest (sync to left pump)
09:00 to 10:00 Reef Crest Reef Crest (anti-sync to left pump)
10:00 to 12:00 Pulse Pulse (anti-sync to left pump)
12:00 to 13:00 Tidal Swell Tidal Swell (sync to left pump)
13:00 to 14:00 Tidal Swell Tidal Swell (anti-sync to left pump)
14:00 to 16:00 Pulse Pulse (anti-sync to left pump)
16:00 to 20:00 Nutrient Transport Nutrient Transport (sync to left pump)
20:00 to 21:00 Pulse Pulse (sync to left pump)
21:00 to 22:00 Pulse Pulse (anti-sync to left pump)
22:00 to 06:00 Constant (50%) Constant (50%)
Table 4 - Pump States
RADIONS
By no means is this a complete guide to programming your Radions, and the pending release of Apex Fusion
will have a dramatic difference in the programming interface.
Once you’ve established communications with the Radion fixture(s), it’s time to program your lights. Now
would be a good time to add the new light outlet to your Dashboard (for instructions on how to do this, see the
Comprehensive Reference Manual or visit the Neptune Community Forum at
http://forum.neptunesystems.comand look in the Dashboard forum).
1. Test your fixture by turning your light outlet to ON. Your fixture should turn on with 100% intensity, all
colors. If so, everything is working and you can set the outlet to OFF for now until it’s programmed.
2. Defining your profiles will be the first step in programming and you do this from the Configuration>
Profiles Setup web page. Your light fixture has multiple colored LED’s. Each color can be independently
controlled in terms of its intensity (0 – 100%). In addition, the overall intensity or brightness of the
fixture can be controlled, again 0 – 100%. This is established using profiles. You can have up to 32
different profiles defined with the Apex controller. Using profiles, you can define a color assortment for
midday and a different color profile for mornings or evenings. This can be thought of as “the how.”
Follow these steps:
a. Select an unused profile (default names are PF1 – PF32).
b. Change the default name to a unique profile name. Note that profile names are case sensitive!
c. Select ‘Radion’ for the Control Type. You will see all the possible colors along with begin/end
overall intensity and Ramp Time. We’ll use these in just a minute.

AquaController Apex Wireless Expansion Module - Setup Guide Page 13
d. Begin entering your selected color intensities skipping those colors your fixture does not
support.
i. If there is not a color on your fixture, then adjusting the value will have no effect. For
example, a Radion G2 doesn’t have UV, but a Radion Pro does.
e. ‘Start Overall Intensity’ and ‘End Overall Intensity’ are used to ramp your fixture up or down at
the beginning of the day to simulate sunrise or at the end to simulate sunset.
f. ‘Ramp Time’ is the duration of the ramp in minutes. For example, begin/end intensities of 30
and 100 with a ramp time of 60 will take your fixture from 30% to 100% over a 60 minute
period.
g. ‘Update’ to save.
3. Now we will program “when” the Radion will run these profiles.
a. Select your newly created Radion outlet in Configuration> Outlet Setup
b. Select the “Advanced” for the control type.
c. The configuration below assumes you’ve created three profiles named ‘RampUp’, ‘Day’ and
‘RampDn’. Both of the ramp profiles have a Ramp Time of 120 minutes. RampUp starts at 20%
and ends at 100%, RampDn just the opposite. The profile Day has a start and end intensity of
100 and a Ramp Time of 1 since there really isn’t any ramp
Fallback OFF
Set OFF
If Time 08:00 to 10:00 Then RampUp
If Time 10:00 to 16:00 Then Day
If Time 16:00 to 18:00 Then RampDn
ADVANCED RADION PROGRAM EXAMPLES
1. Adding Moonlights to your Radion
a. Create a profile, name it ‘moonlight’.
b. Set all the color channels to 0 except Blue and Royal Blue which can be set to 100. You can
experiment with other colors but this is a good starting point.
c. Set the begin and end intensities to 1 and the ramp time to 1.
d. Then in your Radion(s) outlet configuration:
Fallback OFF
i. If Time 08:00 to 10:00 Then RampUp
ii. If Time 10:00 to 16:00 Then Day
iii. If Time 16:00 to 18:00 Then RampDn
iv. If Time 18:00 to 08:00 Then moonlight
2. Adding Weather Events in your Radion
a. Begin by creating a new profile using the ‘weather’ control type. Name this profile as you wish.
The following fields are used:
i. Light Maximum Intensity (%): the lighting intensity during periods other than cloudy
– this could be sunny or simply overcast.
ii. Cloudy light Intensity (%): the intensity of the lights during a cloudy period – this
could be stormy if you use the light intensity to represent overcast.
iii. Cloud Duration (MMM): the number of minutes for each cloudy period.

AquaController Apex Wireless Expansion Module - Setup Guide Page 14
iv. Cloudy Time (%): the percent of time that it will be cloudy. This is applied against the
length of time you chose to run this profile. If you run this profile for 60 minutes with
75% cloudy time then cloudy time will be 45 minutes. With a 15 minute cloud duration
in the example that would mean 3 cloudy periods over the 60 minutes.
v. Probability of Lightning (%): a metric which sets the frequency of a lightning strike
during cloud cover. 0% means no lightning will occur and a 100% value means that
lightning will occur almost continuously.
vi. Lightning Intensity (%): the lightning white light intensity during a lightning strike. It
can be set between 0 and 100%.
b. Once you’ve defined your weather profile, you can incorporate it a variety of ways. The simplest
is to just set some times during the day you want weather. For example:
Fallback OFF
i. Set OFF
ii. If Time 08:00 to 10:00 Then RampUp
iii. If Time 10:00 to 16:00 Then Day
iv. If Time 16:00 to 18:00 Then RampDn
v. If Time 11:00 to 12:00 Then weather
vi. If Time 17:00 to 17:30 Then weather

AquaController Apex Wireless Expansion Module - Setup Guide Page 15
NEPTUNE SYSTEMS LIMITED WARRANTY
Neptune Systems warrants this product to be free from defects in material and workmanship for a period of 1
year from the date of purchase. Probes carry a 90-day warranty. If repair or adjustment is necessary and has
not been the result of abuse, misuse, or accidental damage, within the 1-year period, please return the product
with proof of purchase, and correction of the defect will be made without charge.
For your protection, items being returned must be carefully packed to prevent damage in shipment and insured
against possible damage or loss. Neptune Systems will not be responsible for damage resulting from careless or
insufficient packaging. Before returning please obtain a return authorization (RMA) number from Neptune
Systems. Returned merchandise will not be accepted without a RMA number.
Except for the warranty set forth above, Neptune Systems is not responsible for any damages including, but not
limited to, consequential damage occurring out of or in connection with the delivery, use or performance of
Neptune Systems’ products. Buyer’s remedies for breach of warranty shall be limited to repair, or replacement
and full or partial adjustment to purchase price.
Information in this manual is subject to change without notice. Please see www.neptunesys.com for the latest
product information and product updates.
105 Cochrane Circle, Suite L
Morgan Hill, CA 95037
http://www.neptunesys.com
Phone 408-779-4090 Fax 408-762-2042
©2013 Neptune Systems - All Rights Reserved
WXM Manual V2

AquaController Apex Wireless Expansion Module - Setup Guide Page 16
CE DECLARATION OF CONFORMITY
Manufacturer: Neptune Systems, LLC. 105 Cochrane Circle Suite L, Morgan Hill, CA 95037; 408-779-4090
Product: Wireless Expansion Module, Vortech Compatible
Model No. WXM
The undersigned hereby declares, on behalf of the Neptune Systems, LLC. of Morgan Hill, California that the above-referenced
product, to which this declaration relates, is in conformity with the provisions of:
EN 60950-1+A1:2009
EN 60335-1:2010
The Technical Construction File required by this Directive is maintained at the corporate headquarters of Neptune Systems,
LLC, 105 Cochrane Circle, Suite L, Morgan Hill, California.
________________________
Curt Pansegrau
President
The symbol to the right means that according to local laws and regulations your product should be disposed of separately from household waste. When this product reaches its end of life, take it to a collection point designated by local authorities. Some collection points accept products for free. The separate collection and recycling of your product at the time of disposal will help conserve natural resources and ensure that it is recycled in a manner that protects human health and the environment.