antibody identification mohammed jaber. antibody presence presence of an antibody may be indicated...
Post on 21-Dec-2015
260 views
TRANSCRIPT

Antibody Identification
Mohammed Jaber

Antibody Presence
Presence of an antibody may be indicated by the following serological tests:
1.A discrepancy in the results of cell and serum ABH grouping.
2.A positive test for unexpected antibodies.
3.A positive direct Coomb’s test.
4.An incompatible major cross match.

The Basics…..
As we said in the previous lecture, Antibody Screens use 2 or 3 Screening Cells to
“detect” if antibodies are present in the serum If antibodies are detected, then they should
be identified…
present
Not present

Why do we need to identify?
Antibody identification is an important component of compatibility testing
It will identify any unexpected antibodies in the patient’s serum
If a person with an antibody is exposed to donor cells with the corresponding antigen, serious side effects can occur (i.e. transfusion reactions).
Key Concepts
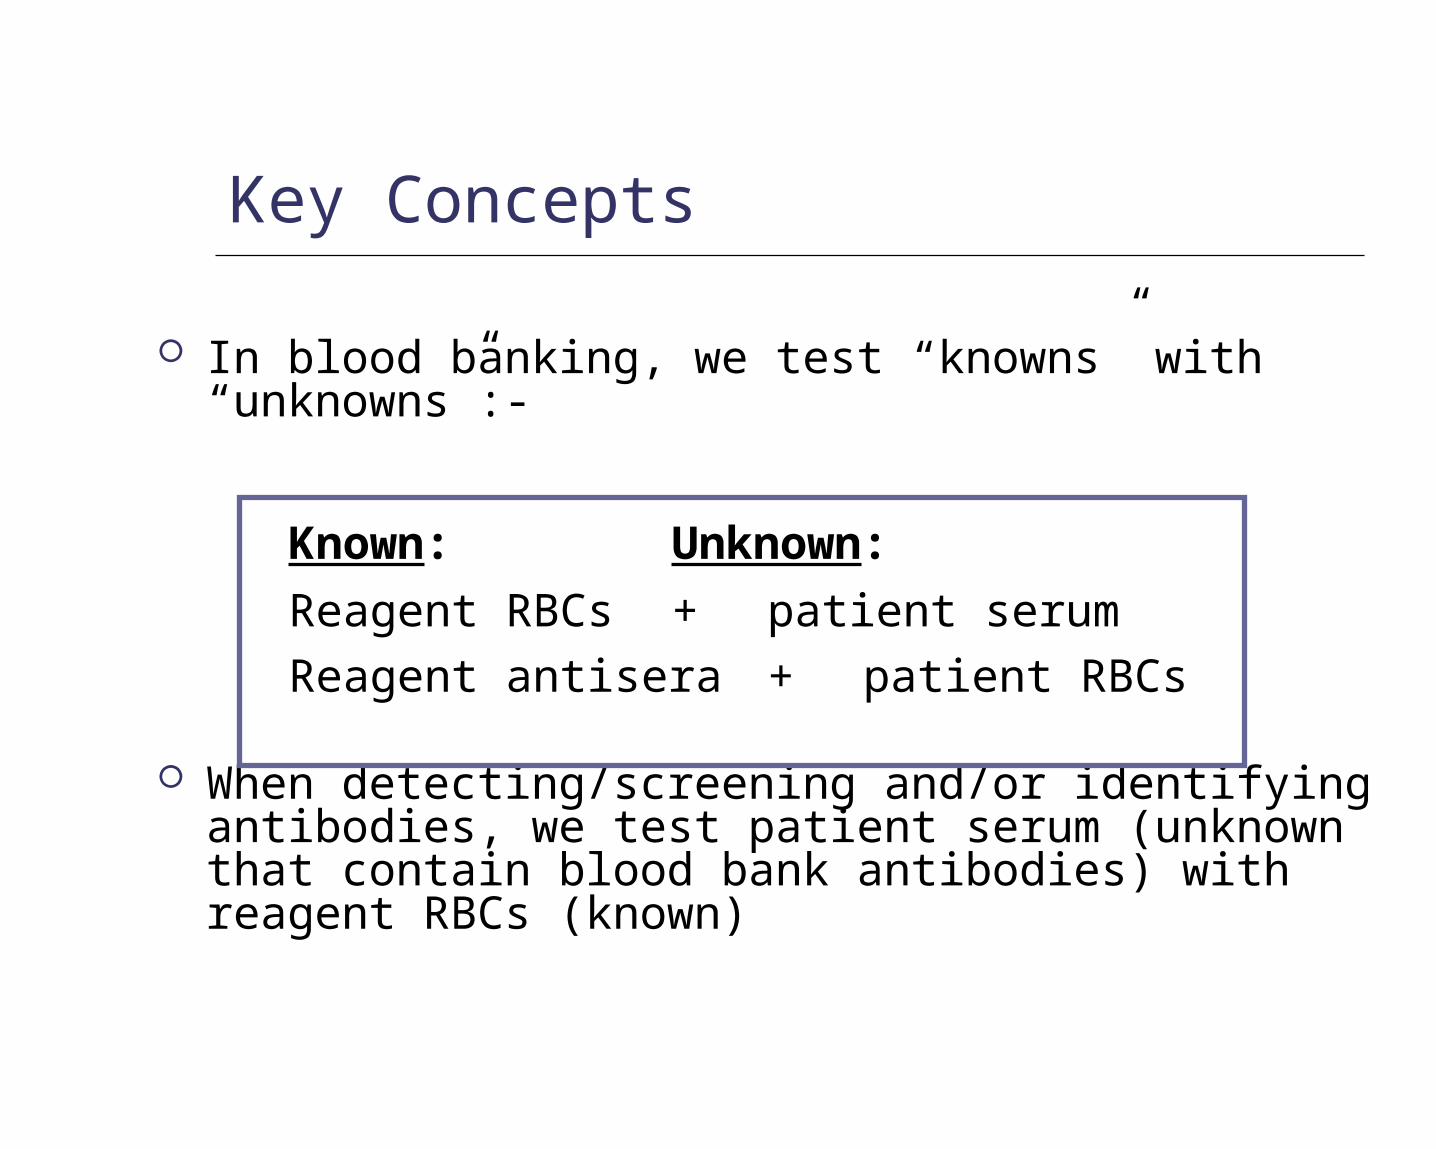
In blood banking, we test “knowns” with “unknowns”:-
When detecting/screening and/or identifying antibodies, we test patient serum (unknown that contain blood bank antibodies) with reagent RBCs (known)
Known: Unknown:
Reagent RBCs + patient serumReagent antisera + patient RBCs

Reagent RBCs
Screening Red Cells and Panel Red Cells are the same with minor differences: Screening red cells
Antibody detection/screening Sets of only 2 or 3 vials
Panel red cells Antibody identification At least 10 vials/set
Antibody Panel vs. Screen
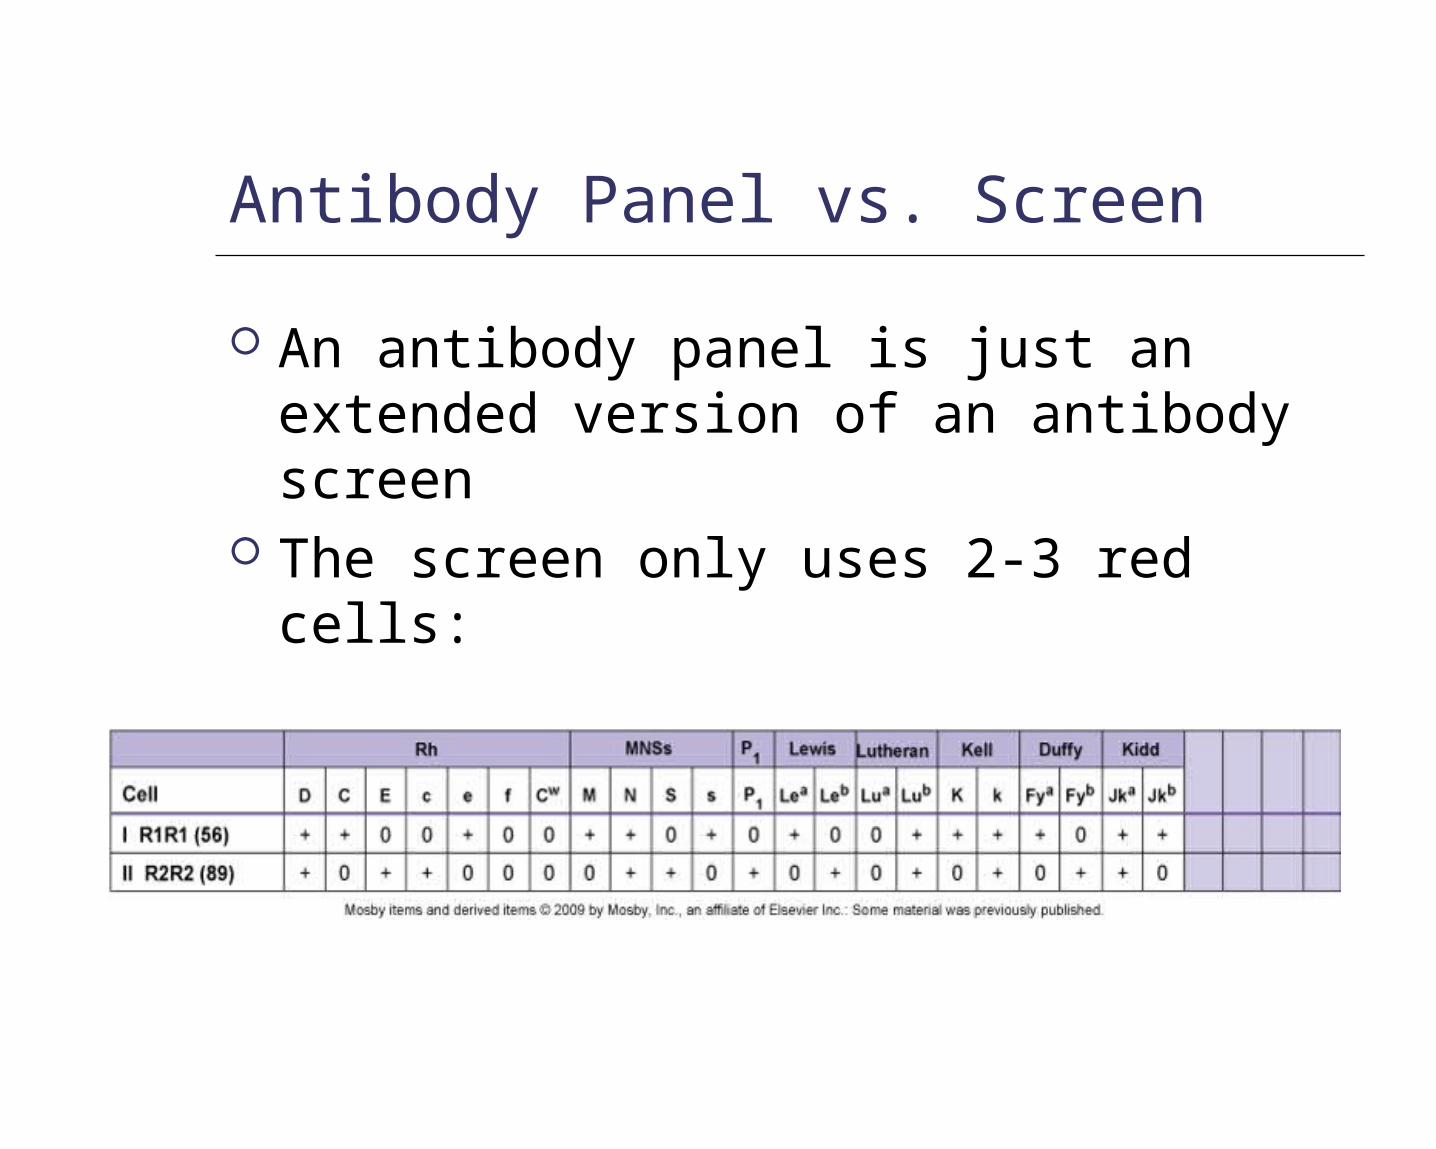
An antibody panel is just an extended version of an antibody screen
The screen only uses 2-3 red cells:

Antibody Panel
While antibody panel usually includes at least 10 panel cells: (8-16 group O RBCs)

Panel Red Cells
Group O red blood cells obtained from donors

Panel Red Cells
Each of the panel cells has been antigen typed (shown on antigram) + refers to the presence of the antigen 0 refers to the absence of the antigen
Example: Panel Cell #10 has 9 antigens present: c, e, f, M, s, Leb, k, Fya, and Jka
Panel Red Cells
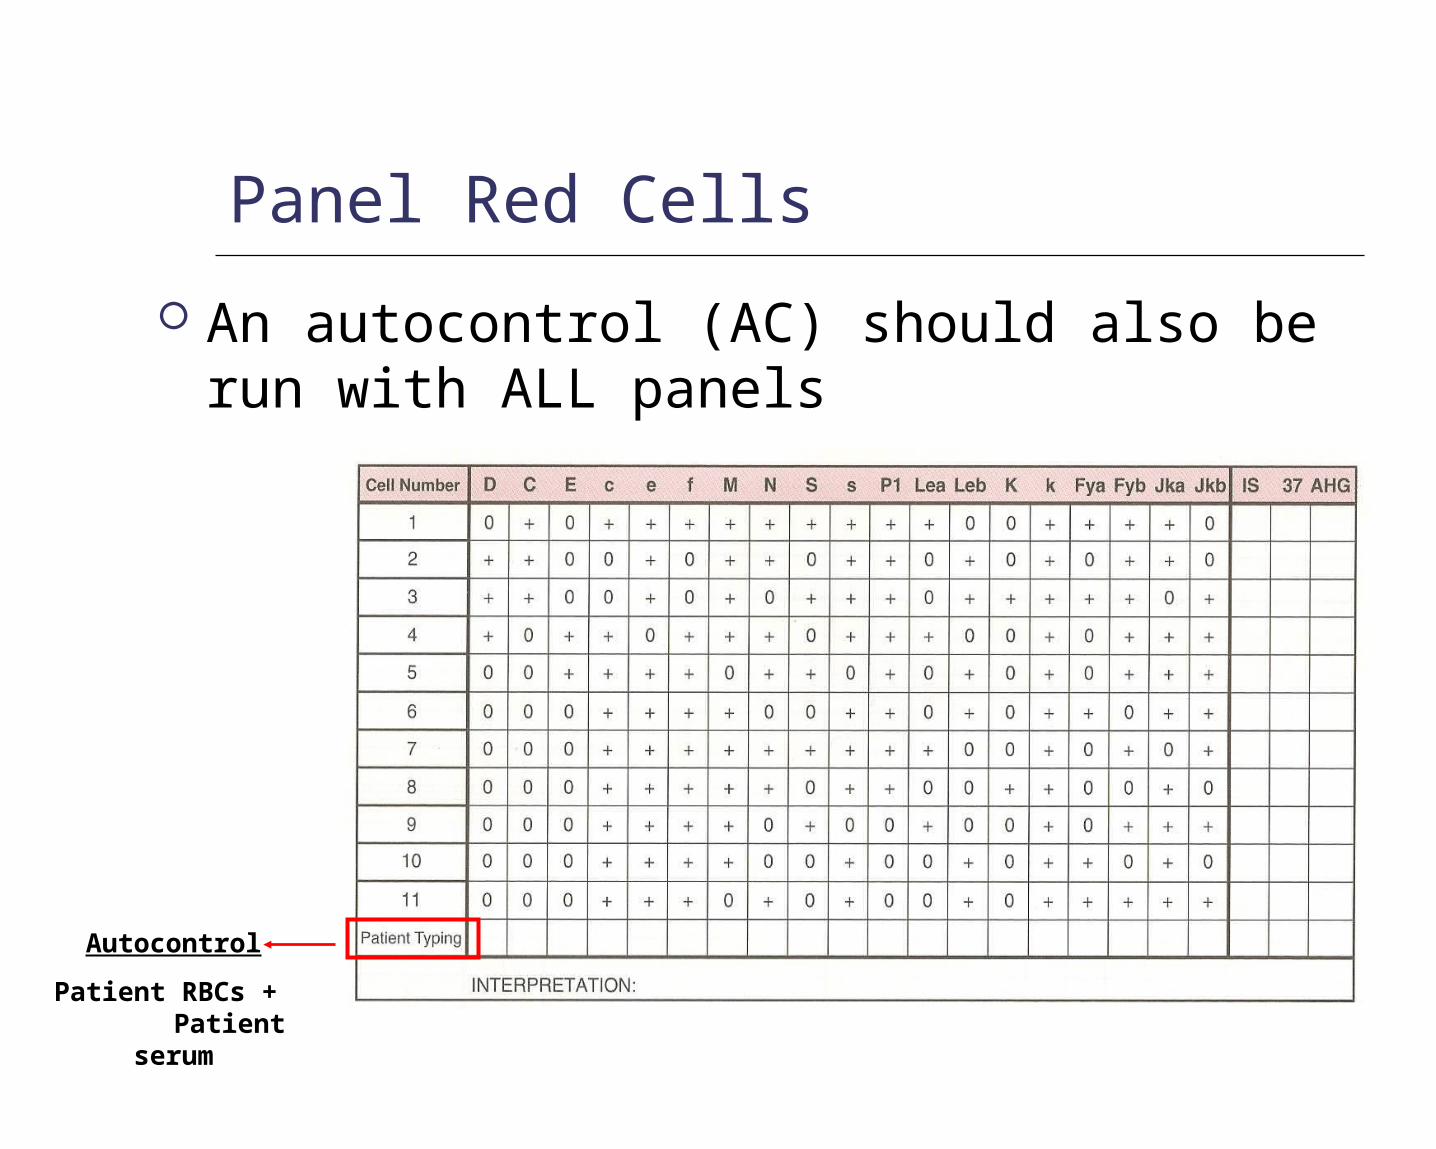
An autocontrol (AC) should also be run with ALL panels
Autocontrol
Patient RBCs + Patient
serum

Panel Red Cells
The same phases used in an antibody screen are used in a panel
• IS
• 37°C
• AHG

Antibody ID Testing
A tube is labeled for each of the panel cells plus one tube for AC:
AC
1 drop of each panel cell
+
2 drops of the patients serum
1 2 3 4 5 6 7 8 9 10 11
Do not forget to write patient name and ID, Lab No.
Patient cells
Patient serum

IS Phase
2+
0
0
Up to the Last tube
Perform immediate spin (IS) and grade agglutination; inspect for hemolysis
Record the results in the appropriate space as shown:

(LISS) 37°C Phase
2 drops of LISS are added, mixed and the mixture is incubated for 10-15 minutes
Centrifuge and check for agglutination Record results as previous but now fill
the 37°C lane.
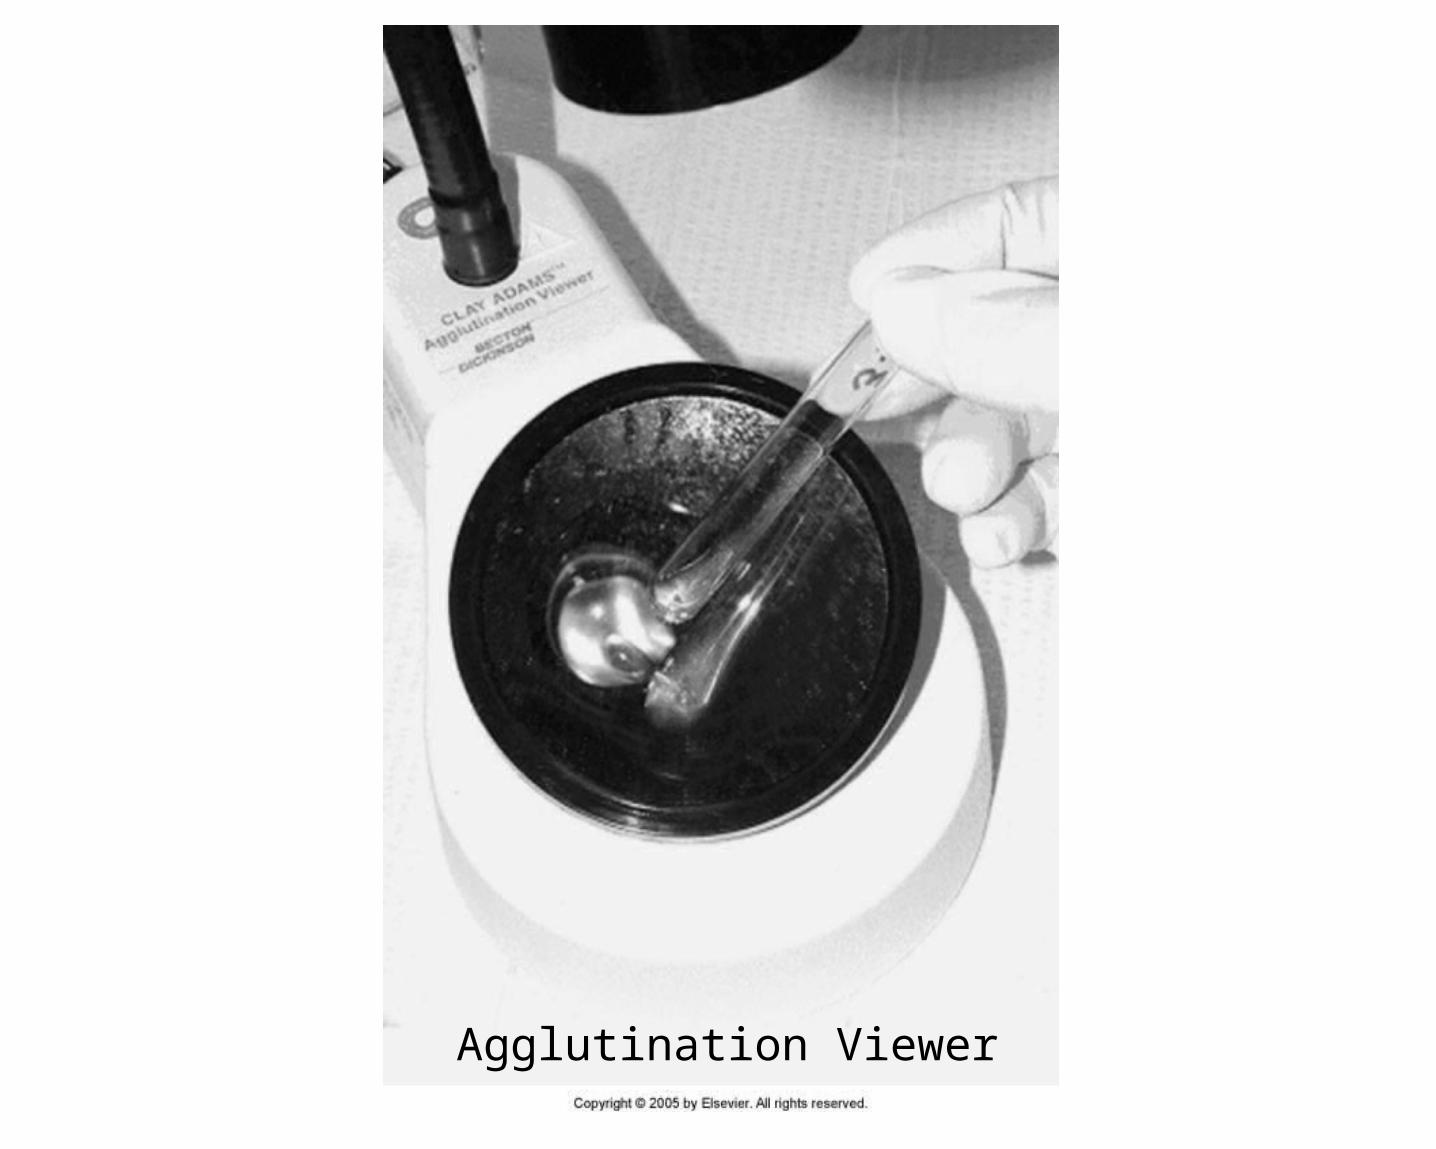
Agglutination Viewer


(LISS) 37°C Phase
2+
0
0
2+
0
0
2+
0
0
2+
0
0
0
0

IAT Phase (or AHG)
Indirect Antiglobulin Test (IAT) – we’re testing whether or not possible antibodies in patient’s serum will react with RBCs in vitro
To do this we use the Anti-Human Globulin reagent (AHG) Polyspecific AHG Monospecific Anti-IgG Monospecific Anti-Complement

IAT (AHG) Phase
Wash red cells 3X with saline (manual or automated (cell washer))
Add 2 drops of AHG and gently mix Centrifuge Read for agglutination Record reactions

IAT (AHG) Phase
2+
0
0
2+
0
0
2+
0
0
2+
0
0
0
0
0
0
0
0
0
0
0
0
0
0
0
0
0
0
0
0
0
0
0
0 0 0

And don’t forget….
….add “check” cells to any negative AHG !

ISLISS 37°
AHG CC
2+ 0 0
0 0 0
0 0 0
2+ 0 0
0 0 0
0 0 0
2+ 0 0 0 0 0
2+ 0 0
0 0 0 0 0 0
All cells are negative at AHG, so add
“Check” Cells

You have agglutination…now what?
2+
0
0
2+
0
0
2+
0
0
2+
0
0
0
0
0
0
0
0
0
0
0
0
0
0
0
0
0
0
0
0
0
0
0
0 0 0
??
CC

Interpreting Antibody Panels
There are a few basic steps to follow when interpreting panels
1. “Ruling out” means crossing out antigens that did not react
2. Circle the antigens that are not crossed out3. Consider antibody’s (from the circled) usual
reactivity4. Look for a matching pattern

An antibody will only react with cells that have the corresponding
antigen; antibodies will not react with cells that do not have
the antigen
Always remember:

Here’s an example:

1. Ruling Out
2+
0
0
2+
0
0
2+
0
0
2+
0
0
0
0
0
0
0
0
0
0
0
0
0
0
0
0
0
0
0
0
0
0
0
0 0 0
Cross out antigens that show NO REACTION in any phase; do NOT cross out heterozygous antigens that show dosage.

2. Circle antigens not crossed out
2+
0
0
2+
0
0
2+
0
0
2+
0
0
0
0
0
0
0
0
0
0
0
0
0
0
0
0
0
0
0
0
0
0
0
0 0 0

3. Consider antibody’s usual reactivity
2+
0
0
2+
0
0
2+
0
0
2+
0
0
0
0
0
0
0
0
0
0
0
0
0
0
0
0
0
0
0
0
0
0
0
0 0 0
Lea is normally a Cold-Reacting antibody (IgM), so it makes sense that we see the reaction in the IS phase of testing; The E antigen
will usually react at warmer temperatures

4. Look for a matching pattern
2+
0
0
2+
0
0
2+
0
0
2+
0
0
0
0
0
0
0
0
0
0
0
0
0
0
0
0
0
0
0
0
0
0
0
0 0 0
…Yes, there is a matching pattern!
E doesn’t match and it’s a warmer rxn Ab

Interpretation:
anti-Leaa

Guidelines
Again, it’s important to look at: Autocontrol
Negative - alloantibody Positive – autoantibody or DTR (i.e. alloantibodies)
Phases IS – cold (IgM) 37° - cold (some have higher thermal range) or warm
reacting AHG – warm (IgG)…significant!!
Reaction strength 1 consistent strength – one antibody Different strengths – multiple antibodies or dosage

About reaction strengths…… Strength of reaction may be due to
“dosage” If panel cells are homozygous, a strong
reaction may be seen If panel cells are heterozygous, reaction may
be weak or even non-reactive Panel cells that are heterozygous for an
antigen should not be crossed out because antibody may be too weak to react (see previous example)

Guidelines (continued)
Matching the pattern Single antibodies usually shows a pattern
that matches one of the antigens (see previous panel example)
Multiple antibodies are more difficult to match because they often show mixed reaction strengths

Rule of three The rule of three must be met to
confirm the presence of the antibody A p-value ≤ 0.05 must be observed This gives a 95% confidence interval How is it demonstrated?
Patient serum MUST be: Positive with 3 panel cells with the antigen,
+ve reaction. Negative with 3 cells without the antigen and
should not be reacting.

Our previous example fulfills the “rule of three”
2+
0
0
2+
0
0
2+
0
0
2+
0
0
0
0
0
0
0
0
0
0
0
0
0
0
0
0
0
0
0
0
0
0
0
0 0 0
3 Negative cells
3 Positive cells
Panel Cells 1, 4, and 7 are positive for the antigen and gave a reaction at IS
Panel Cells 8, 10, and 11 are negative for the antigen and did not give a reaction at IS

What if the “rule of three” is not fulfilled?
If there are not enough cells in the panel to fulfill the rule, then additional cells from another panel could be used
Most good (I do not know if we are good or not!!) labs carry different lot numbers of panel cells

Patient Antigen Typing (Phenotyping)
In addition to the rule of three, antigen typing the patient red cells can also confirm an antibody
How is this done? Only perform this if the patient has NOT been
recently transfused (donor cells could react (chimera)).
If reagent antisera (of the suspected antibody) is added to the patient RBCs, a negative reaction should result…Why?

Remember Landsteiner’s Rule
Individuals DO NOT make allo-antibodies against antigens they
have

Multiple antibodies
Multiple antibodies may be more of a challenge than a single antibody
Why? Reaction strengths can vary Matching the pattern is difficult

So what we have to do?
Several procedures can be performed to identify multiple antibodies Selected Cells Neutralization Chemical treatment
Proteolytic enzymes Sulfhydryl reagents ZZAP

1- Selected Red Cells
Selected cells are chosen from other panel or screening cells to confirm or eliminate the antibody.
The cells are “selected” from other panels because of their characteristics.
The number of selected cells needed depends on how may antibodies are identified.

Selected Red Cells ….. Cont’d
Every cell should be positive only for each of the antibodies and negative for the remaining suspicious antibodies
For example: Let’s say you ran a panel and identified 3
different antibodies (you cannot rule out): anti-S, anti-Jka, and anti-P1
Selected cells could help…

Selected Red Cells ….. Cont’d
Selected cells
S Jka P1 IS 37°C AHG
#1 + 0 0 0 0 2+
#5 0 + 0 0 0 3+
#8 0 0 + 0 0 0
These results show that instead of 3 antibodies, there are actually 2: anti-S and anti-Jka
Ag they have Reaction pattern
2- Neutralization
Some antibodies may be neutralized as a way of confirmation
Commercial “substances” bind to the antibodies in the patient serum, causing them to show no reaction when tested with the corresponding antigen (in panel)
Neutralization ….. Cont’d
Manufacturer’s directions should be followed and a positive dilutional control should always be used The positive dilutional control contains saline
and serum (no substance is added) and should remain positive with panel cells.
A control shows that a loss of reactivity is due to the neutralization and not to the dilution of the antibody strength when the substance is added

Neutralization ….. Cont’d
Common substances P1 substance (derived from hydatid cyst fluid) Lea and Leb substance (soluble antigen found in
plasma and saliva) I substance can be found in breast milk
**you should be aware that many of these substances neutralize COLD antibodies; Cold antibodies can sometimes mask more clinically significant antibodies (IgG), an important reason to use neutralization techniques

3- Again: Proteolytic Enzymes
Can be used to enhance or destroy certain blood group antigens
Several enzymes exist: Ficin (figs) Bromelin (pineapple) Papain (papaya)
In addition, enzyme procedures may be One-step Two-step

Enzymes
Enzymes remove the sialic acid from the RBC membrane, thus “destroying” it and allowing other antigens to be “enhanced”
Antigens destroyed: M, N, S, s, Duffy Antigens enhanced: Rh, Kidd, Lewis, I, and P

Enzyme techniques
One-stage Enzyme is added directly to the serum/panel
cell mixture Two-stage
Panel cells are pre-treated with an enzyme, and washed
Patient serum is added to treated panel cells and tested

Enzyme techniques
If there is no agglutination after treatment, then it is assumed the enzymes destroyed the antigen

Enzyme treatment
Anti-K
Perfect match for anti-Fya
•Duffy antigens destroyed
•Kell antigens not affected
Enzyme treatment

Summary
If an unexpected antibody is detected in a patient’s serum or plasma it must be identified.
Once identified the clinical significance must be determined.

Summary
If the antibody is clinically significant antigen negative donors must be found and crossmatched for the patient, a Coomb’s crossmatch must be done.
If the antibody is not clinically significant it is not necessary to provide antigen negative blood, but the donors must be compatible by the Coomb’s crossmatch.

Providing Compatible Donor Units
Once an antibody has been identified, the next task is to provide appropriate units of RBCs for transfusion.
When clinically insignificant antibodies
are detected, use of crossmatch-compatible RBCs is appropriate.

No further testing is needed to confirm compatibility when the antibody is anti-M, anti-N, anti-Pi. Lea, or Leb.
However, when a clinically significant antibody is identified, the blood must be cross-match compatible and confirmed as antigen-negative with reagent antisera.
Providing Compatible Donor Units

Example
Knowledge of the incidence of antigens is useful for determining how many units of blood to screen or cross match for patients with antibodies.
If a patient with an anti-Jk(a-) needed 4 units of blood, how many units would need to be tested to find them?
Jk (a+)= 0.77 Jk (a-) = 0.23
4 units Jk(a-) blood needed = 17.4 units 0.23 incidence of Jk(a-) 4 units Jk(a-) blood needed = 17.4 units 0.23 incidence of Jk(a-)
In this case, testing 17 or 18 random units should yield 4 Jk(a-) units.

Example 2
The same calculations can be used when multiple antibodies are present if the antigen frequencies are first multiplied together.
E.g. a patient with an anti-K and anti-Jka, 10 random units would need to be tested to find 2 that are compatible.
Jk(a+) = 0.77 K positive = 0.09 Jk(a-) = 0.23 K negative = 0.91
Jk(a-) (0.23) X K negative (0.91) = 0.20 Jk(a-) and K negative Jk(a-) (0.23) X K negative (0.91) = 0.20 Jk(a-) and K negative
2 units needed = 10 units 0.20 Jk(a-) and Kell negative

THE END!!