angular 2 essentials - sample chapter
DESCRIPTION
Chapter No. 1 Creating Our Very First Component in Angular 2Your quick, no-nonsense guide to start building real-world apps with Angular 2For more information: http://bit.ly/1Y79PZrTRANSCRIPT
C o m m u n i t y E x p e r i e n c e D i s t i l l e d
Your quick, no-nonsense guide to building real-world apps with Angular 2
Angular 2 Essentials
Pablo D
eeleman
Angular 2 EssentialsAngular 2 was conceived as a complete rewrite in order to fulfi ll the expectations of modern developers who demand blazing fast performance and responsiveness from their web applications.
This book will help you learn the basics of how to design and build Angular 2 components right from the beginning, providing full coverage of the TypeScript syntax required to follow the examples included. From that point on, we will build upon our fi rst components, interconnect them, and give shape to larger web applications. We will then move to implementing routing in Angular 2, analyzing how to handle application states, and navigating from one component to another in depth. After this, the book features full coverage of web forms and user input validation, later leveraging all of this information to go through the basics of implementing user authentication in Angular 2 and providing a bird’s eye view of the different strategies at hand to secure pages and areas of your website. Animating components and DOM elements with Angular 2 is also covered in this book. The fi nal part of this book provides broad insights into how to unit test components and other modules such as services, directives, routes or pipes.
Who this book is written forThis book is targeted at web developers who want to build the next generation of state-of-the-art mobile and desktop web applications with Angular 2. This book does not require you to have prior exposure to either Angular 1.x or 2, although comprehensive knowledge of JavaScript is assumed. It's great for newcomers to Angular who learn best through clear explanations and defi nitions of concepts.
$ 39.99 US£ 25.99 UK
Prices do not include local sales tax or VAT where applicable
Pablo Deeleman
What you will learn from this book
Set up your working environment in order to have all the tools you need to start building Angular 2 components with minimum effort
Get up to speed with TypeScript, a powerful typed superset of JavaScript that compiles to plain JavaScript
Take full control of how your data is rendered and updated upon data changes
Build powerful web applications based on structured component hierarchies that emit and listen to events and data changes throughout the elements tree
Explore how to consume external APIs and data services and allow data editing by harnessing the power of web forms made with Angular 2
Deliver seamless web navigation experiences with application routing and state handling common features with ease
Discover how to bulletproof your applications by introducing smart unit testing techniques and debugging tools
Angular 2 Essentials
P U B L I S H I N GP U B L I S H I N G
community experience dist i l led
Visit www.PacktPub.com for books, eBooks, code, downloads, and PacktLib.
Free Sample

In this package, you will find: The author biography
A preview chapter from the book, Chapter 1 'Creating Our Very First
Component in Angular 2'
A synopsis of the book’s content
More information on Angular 2 Essentials
About the Author
Pablo Deeleman is a former UX designer and frontend engineer who discovered the Web back in the 90s, when a 14,400 bps modem was the key to an unparalleled world of marvels and a build-your-own-website was the name of the game.
After getting his BA (Hons) degree in marketing and moving through different roles in the advertising arena, he took his chance and evolved into a self-taught, passionate UX designer and frontend developer with a crunch for beautifully crafted CSS layouts and JavaScript thick clients, having produced countless interactive designs and web desktop and mobile applications ever since.
During these years, he has fulfi lled his career as both an UX designer and frontend developer by successfully leading Internet projects for a wide range of clients and teams, encompassing European online travel operators, Silicon Valley-based start-ups, international heavy-traffi c tube websites, global banking portals, or gambling and mobile gaming companies, just to name a few. At some point along this journey, the rise of Node.js and single-page-application frameworks became a turning point in his career, being currently focused on building JavaScript-driven web experiences.
After having lived and worked in several countries, Pablo Deeleman currently lives in Barcelona, Spain, where he leads the frontend endeavor in the Barcelona studio of Gameloft, the world leader in mobile gaming, and the home of internationally acclaimed games, such as Despicable Me: Minions Rush and Asphalt 8.
When not writing books or taking part in industry events and talks, he spends most of his time fulfi lling his other passion: playing piano and guitar.
PrefaceOver the past years, Angular 1.x has became one of the most ubiquitous JavaScript frameworks for building cutting edge web applications, either big or small. At some point, its shortcomings with regard to performance and scalability became too prominent as soon as applications grew in size and complexity. Angular 2 was then conceived as a full rewrite from scratch to fulfi ll the expectations of modern developers, who demand blazing fast performance and responsiveness in their web applications.
Angular 2 has been designed with modern web standards in mind and allows full fl exibility when picking up your language of choice, providing full support for ES6 and TypeScript, but working equally well with today's ES5, Dart, or CoffeeScript. Its built-in dependency injection functionalities let the user build highly scalable and modular applications with an expressive and self-explanatory code, turning maintainability tasks into a breeze, while simplifying test-driven development to the max. However, where Angular 2 stands out is when it shows off its unparalleled level of speed and performance, thanks to its new change detection system that is up to fi ve times faster than its previous incarnation. Cleaner views and an unsurpassed standards-compliant templating syntax compound an endless list of powerful features for building the next generation of web mobile and desktop apps.
Angular 2 is here to stay and will become a game changer in the way modern web applications are envisioned and developed in the years to come. However, and due to its disruptive design and architecture, learning Angular 2 might seem a daunting effort to newcomers.
This is where this book comes in—its goal is to avoid bloating the reader with API references and framework descriptions, but to embrace a hands-on approach, helping the reader learn how to leverage the framework to build stuff that matters right from day one. This is learning by doing right from the start.

Preface
[ x ]
This book aims to give developers a complete walkthrough of this new platform and its TypeScript-fl avored syntax by building a web project from back to forth, starting from the basic concepts and sample components and iterating on them to build up more complex functionalities in every chapter until we launch a complete, tested, production-ready sample web application by the end of the book.
What this book coversChapter 1, Creating Our Very First Component in Angular 2, introduces the reader to web components, which are the building blocks of all Angular 2 applications.
Chapter 2, Introducing TypeScript, instructs the reader about the syntax and particularities of this typed superset of ECMAScript 6, being in fact the syntax of choice of the Angular team for building Angular 2.
Chapter 3, Implementing Properties and Events in Our Components, describes how our components behave like state machines that can change their state by receiving data through their input properties and emit data as events through their output properties.
Chapter 4, Enhancing our Components with Pipes and Directives, gives a complete walkthrough of the framework's built-in pipes used to digest data output in our templates, and also the built-in directives that provide advanced functionality to our component. The reader will also learn how to create custom pipes or directives
Chapter 5, Building an Application with Angular 2 Components, devotes an entire chapter to recap what we have learned so far and orchestrates everything to ensure our Angular 2 projects scale well regardless their size and conform to the community coding and naming conventions.
Chapter 6, Asynchronous Data Services with Angular 2, teaches the reader how to implement and deploy HTTP connections with other data services by means of the Http module, so we can create our own data service clients.
Chapter 7, Routing in Angular 2, introduces the reader to Angular 2's router and its built-in directives, providing a complete walkthrough the different strategies we have to load components from routes and handle the state through the History API.
Chapter 8, Forms and Authentication Handling in Angular 2, illustrates the different strategies we have at our disposal to build web forms with Angular 2, manage two-way data binding on input controls, and create complex forms and validations.
Chapter 9, Animating Components with Angular 2, covers the currently available tools and classes for implementing animations on our components, from pure CSS animations handled with Angular 2 directives to more complex transitions purely managed through JavaScript, thanks to Angular 2 animation builders.
Preface
Chapter 10, Unit Testing in Angular 2, will guide the reader through the steps required for implementing a sound testing foundation in our application, and the general patterns for deploying unit tests on components, directives, pipes, routes, and services.

[ 1 ]
Creating Our Very First Component in Angular 2
Unless you were lost in space for the past couple of years, chances are you are well aware of the momentum that modern JavaScript web frameworks and libraries have got in the frontend arena nowadays. We have even reached a stage where a new framework is born every day, forcing frontend developers to assess carefully whether this new cutting-edge code toolkit adds enough value to justify the time and effort required to face its learning curve and put it to good use in our next project.
Eventually, a handful of names ended up gaining more relevance than the rest. We are obviously referring to client-side frameworks that will probably sound pretty familiar to you already: Backbone, Ember, Knockout, Angular 1, and so on.
As the battle for supremacy in the JavaScript world carried on, new frameworks such as React or Aurelia entered the game, favoring web components and harnessing the power of Shadow DOM as the cornerstone of its architecture. Applications built this way proved to be more modular, scalable, and maintainable, let alone their unparalleled level of performance.
Angular 1 had come a long way already since its inception and its shortcomings had become too prominent to be overlooked any longer. It was time for something better and a simple revamp of codebase did not suffi ce. A more ambitious approach was required and Angular 2 was developed—a new framework engineered from scratch, which fully embraces the newest trends in the industry. It has web components at the heart of its design and it harnesses the power of Shadow DOM to maximize the responsiveness of our web entities against state changes. On top of that, Angular 2 offers a state-of-the-art change detection system baked in to each component, which is responsible for propagating bindings throughout the tree of components that comprise our applications.

Creating Our Very First Component in Angular 2
[ 2 ]
The defi ning traits of Angular 2 go beyond the concept of just being a mere web components framework, since its features encompass pretty much everything you need in a modern web application: component interoperability, universal support for multiple platforms and devices, a top-notch dependency injection machinery, a fl exible but advanced router mechanism with support for decoupling and componentization of route defi nitions, advanced HTTP messaging, and animation or internationalization, just to name a few.
In this chapter, we will:
• Learn why Angular 2 is so unique in comparison to its previous versions• Learn how to set up our code environment to work with Angular 2 and
TypeScript• Enhance our IDE of choice to provide a better experience coding
Angular 2 apps• Build our very first Angular 2 web component and learn how to embed it on
a web page• Add basic interactivity features to our web component• Discover some basic helpers to better format the data output
A fresh startAs mentioned before, Angular 2 represents a full rewrite of the Angular 1.x framework, introducing a brand new application architecture completely built from scratch in TypeScript, a strict superset of JavaScript that adds optional static typing and support for interfaces and decorators.
In a nutshell, Angular 2 applications are based on an architecture design that comprises trees of web components interconnected between them by their own particular I/O interface. Each component takes advantage under the covers of a completely revamped dependency injection mechanism. To be fair, this is a simplistic description of what Angular 2 really is. However, the simplest project ever made in Angular is cut out by these defi nition traits. We will focus on learning how to build interoperable components and manage dependency injection in the next chapters, before moving on to routing, web forms, or HTTP communication. This also explains why we will not make explicit references to Angular 1.x throughout the book. Obviously, it makes no sense to waste time and pages referring to something that will not provide any useful insights on the topic, besides the fact we assume that you might not know about Angular 1.x, so such knowledge does not have any value here.

Chapter 1
[ 3 ]
Web componentsWeb components is a concept that encompasses four technologies designed to be used together to build feature elements with a higher level of visual expressivity and reusability, thereby leading to a more modular, consistent, and maintainable web. These four technologies are as follows:
• Templates: These are pieces of HTML that structure the content we aim to render
• Custom Elements: These templates not only contain traditional HTML elements, but also the custom wrapper items that provide further presentation elements or API functionalities
• Shadow DOM: This provides a sandbox to encapsulate the CSS layout rules and JavaScript behaviors of each custom element
• HTML Imports: HTML is no longer constrained to host HTML elements, but to other HTML documents as well
In theory, an Angular 2 component is indeed a custom element that contains a template to host the HTML structure of its layout, the latter being governed by a scoped CSS style sheet encapsulated within a Shadow DOM container. Let's try to rephrase this in plain English. Think of the range input control type in HTML5. It is a handy way to give our users a convenient input control for entering a value ranging between two predefi ned boundaries. If you have not used it before, insert the following piece of markup in a blank HTML template and load it in your browser:
<input id="mySlider" type="range" min="0" max="100" step="10">
You will see a nice input control featuring a horizontal slider in your browser. Inspecting such control with the browser developer tools will unveil a concealed set of HTML tags that were not present at the time you edited your HTML template. There you have an example of Shadow DOM in action, with an actual HTML template governed by its own encapsulated CSS with advanced dragging functionality. You will probably agree that it would be cool to do that yourself. Well, good news is that Angular 2 gives you the toolset required for delivering this very same functionality, so we can build our own custom elements (input controls, personalized tags, and self-contained widgets) featuring the inner HTML markup of our choice and a very own stylesheet that does not affect (nor is impacted) by the CSS of the page hosting our component.

Creating Our Very First Component in Angular 2
[ 4 ]
Why TypeScript over other syntaxes?Angular 2 applications can be coded in a wide variety of languages and syntaxes: ECMAScript 5, Dart, ECMAScript 6, TypeScript, or ECMAScript 7.
TypeScript is a typed superset of ECMAScript 6 (also known as ECMAScript 2015) that compiles to plain JavaScript and is widely supported by modern OSes. It features a sound object-oriented design and supports annotations, decorators, and type checking.
The reason why we picked (and obviously recommend) TypeScript as the syntax of choice for instructing how to develop Angular 2 applications in this book is based on the fact that Angular 2 itself is written in this language. Being profi cient in TypeScript will give the developer an enormous advantage when it comes to understanding the guts of the framework.
On the other hand, it is worth remarking that TypeScript's support for annotations and type introspection turns out to be paramount when it comes to managing dependency injection and type binding between components with a minimum code footprint, as we will see further down the line in this book.
Ultimately, you can carry out your Angular 2 projects in plain ECMAScript 6 syntax if that is your preference. Even the examples provided in the book can be easily ported to ES6 by removing type annotations and interfaces, or replacing the way dependency injection is handled in TypeScript with the most verbose ES6 way.
For the sake of brevity, we will only cover examples written in TypeScript and actually recommend its use because of its higher expressivity thanks to type annotations, and its neat way of approaching dependency injection based on type introspection out of such type annotations.
Setting up our workspaceBefore jumping into the implementation of our very fi rst and shiny Angular 2 component, we need to bring in all the tools we will require to implement software based on TypeScript, let alone the Angular 2 framework modules themselves.
First and foremost, create a folder and double check that the NPM CLI is available in your system and is properly updated to the latest stable version. Otherwise, please go to https://nodejs.org and install the latest Node.js runtime.

Chapter 1
[ 5 ]
At the time of writing, the Angular 2 framework is still in Beta, so the requirements for building and deploying the examples contained in this book might have changed overnight. The author maintains a code repository at https://github.com/deeleman/angular2-essentials, where you can check the most up-to-date version of each example contained in this book. The repository is divided into chapter folders and each folder contains the incremental version of the project as it is at the end of each chapter. Please refer to the code repository should any problem arise upon installing or deploying the examples in the book.
Installing dependenciesOur fi rst requirement will obviously be to install Angular 2 onto our workspace, including its own peer dependencies. The Angular 2 team has made a great effort to ensure the installation is modular enough to allow us to bring only what we need, becoming our projects more or less lean depending on the requirements.
At the time of writing, these are all the different third-party libraries that are required as peer dependencies in an Angular 2 project, apart from the Angular 2 module itself:
• es6-shim: This introduces ECMAScript 6 compatibility polyfills for legacy JavaScript engines (mostly Microsoft Internet Explorer). This dependency is now required because many major browsers still do not provide wide support for ECMAScript 6 features, but hopefully this will change soon.
• zone.js, a polyfill for the Zone specification that is used to handle change detection in Angular 2 applications.
• reflect-metadata: This brings support for decorators in our Angular 2 classes, and metadata reflection in our components. We will see decorators in action later on in this chapter and a broader overview of its different types and implementations in Chapter 2, Introducing TypeScript. Decorators are a core part of Angular 2.
• rxjs: This library was developed by Microsoft Open Technologies, Inc. According to Microsoft, it is a set of libraries to compose asynchronous and event-based programs using observable collections and Array#extras style composition in JavaScript. In short, RxJS is a library for managing Observables, which allow us to make our applications fully reactive to asynchronous state changes. The Observables spec will be standardized by modern browsers in the future, so we will be able to rule out this dependency by then.

Creating Our Very First Component in Angular 2
[ 6 ]
These dependencies may evolve without prior notice so please refer to the GitHub repository for the most up-to-date list of requirements.
You will be probably surprised by the amount of libraries that Angular 2 does need and the fact that these dependencies are not part of the Angular bundle itself. This is because these requisites are not specifi c to Angular 2, but of a vast majority of modern JavaScript applications nowadays.
With all these dependencies and third-party libraries in mind, you can run the following set of bash commands in your terminal console, once you have created a folder for the project we will cover in this book:
$ mkdir angular2-essentials
$ cd angular2-essentials
$ npm init
$ npm install angular2 es6-shim reflect-metadata rxjs zone.js --save
Apart from the dependencies enlisted previously, we will also need to install the SystemJS universal module loader package in order support module loading between code units once transpiled into ES5. SystemJS is not the only option available for managing module loading in Angular 2. In fact we can swap it for other module loaders such as WebPack (https://webpack.github.io/), although all examples provided in this book make use of SystemJS for handling code injection. We will install SystemJS, fl agging it as a development dependency by executing the following command:
$ npm install systemjs --save-dev
Last but not least, we will also install Bootstrap in our application so that we can easily craft a nice UI for the example application we will build incrementally in each chapter. This is not an Angular 2 requirement, but a particular dependency of the project we will carry out throughout this book.
$ npm install bootstrap --save
The installation can throw different alerts and warnings depending on the versions of each peer dependency required by Angular 2 at this moment in time, so in case of issues I strongly recommend to fetch the latest version of the package.json fi le available at this book's code repository: https://github.com/deeleman/angular2-essentials/blob/master/chapter_01/package.json.
Chapter 1
[ 7 ]
Download the fi le to your directory workspace and run npm install. NPM will fi nd and install all the dependencies for you automatically.
Mac OS users who have not claimed ownership rights on the npm directory located at /usr/local/bin/npm (or /usr/local/npm for those users on OS versions prior to Mac OS El Capitan) might need to execute the npm install with sudo privileges.
Installing TypeScriptWe have now a complete set of Angular 2 sources and their dependencies, plus the Bootstrap module to beautify our project and SystemJS to handle module loading and bundle generation.
However, TypeScript is probably not available on your system yet. Let's install TypeScript and make it globally available on your environment so that we can leverage its convenient CLI to compile our fi les later on:
$ npm install -g typescript
Great! We're almost done. One last step entails informing TypeScript about how we want to use the compiler within our project. To do so, just execute the following one-time command:
$ tsc --init --experimentalDecorators --emitDecoratorMetadata --target ES5 --module system --moduleResolution node
Basically, we have just initialized a TypeScript project (which is our Angular 2 project itself) with support for experimental decorators (as we mentioned already, these are a new feature in ES7 and TypeScript that Angular 2 uses extensively) and set SystemJS as the default mechanism for importing modules and dependencies between fi les.
As a result of this action, we will fi nd a new tsconfig.json fi le at the root of our project, including the settings required by the TypeScript compiler to transpile the component code into plain ECMAScript 5 JavaScript code readable by current browsers.
Please remember that our browsers do not provide support for TypeScript or ECMAScript 6 out of the box, so we will transpile our code to some fl avor of JavaScript that is widely supported by our target browsers.

Creating Our Very First Component in Angular 2
[ 8 ]
A sneak peek on such fi le will yield the following:
{ "compilerOptions": { "experimentalDecorators": true, "emitDecoratorMetadata": true, "target": "es5", "module": "system", "moduleResolution": "node", "noImplicitAny": false, "outDir": "built", "rootDir": ".", "sourceMap": false }, "exclude": [ "node_modules" ]}
Simple, right? The set of properties included in our confi g manifest is self-descriptive enough, but we can highlight three interesting properties. They are as follows:
• rootDir: This points to the folder the compiler will use to scan for TypeScript files to compile (currently the base folder in our example).
• outDir: This defines where the compiled files will be moved unless we define our own output path by means of the --outDir parameter in the command line, the compiler will default to the built folder created at runtime in the same location where the tsconfig.json file lives.
• sourceMap: This sets the source code mapping preferences to help debugging.
Toggle its value to true if you want source map fi les to be generated at runtime to back trace the code to its source through the browser's dev tools in case exceptions arise.
Besides these properties, we also can see that we have marked the node_modules folder as excluded, which means that the tsc command will skip that folder and all its contents when transpiling TypeScript fi les to ES5 throughout the application tree.
I would encourage you to refer to the TypeScript compiler wiki at https://github.com/Microsoft/TypeScript/wiki/Compiler-Options for a full rundown of options available in the compiler API.

Chapter 1
[ 9 ]
Installing TypeScript typingsBesides the project dependencies, such as Bootstrap and Angular 2's own dependencies, TypeScript does require some additional libraries so we can get the best out of it. Specifi cally, ES6 extends the JavaScript environment with methods and APIs that need to be described to the TypeScript compiler. Otherwise, it will not recognize them as part of the syntax and will throw errors upon compiling. Whenever we need to instruct the TypeScript compiler about a JavaScript API, either a native one or any other API belonging to a third party library, we will want to use a TypeScript type defi nition fi le.
A TypeScript type defi nition fi le is basically a fi le with the d.ts fi le extension that contains TypeScript interfaces (more on this in Chapter 2, Introducing TypeScript) so we can better perform real-time type checking and prevent compiler errors. Installing type defi nition fi les in our projects is not a big deal and just requires having a typings tool installed in our environment. In fact, we need to install a type defi nition fi le to ensure that the TypeScript compiler is acquainted with the most up-to-date ES6 API. Good news is that we can install a TypeScript defi nitions manager tool right from the NPM registry, so we can automate the process of searching, installing and deploying type defi nition fi les. Therefore, return to the console and proceed with the following commands:
$ npm install -g typings
$ typings install es6-shim --ambient --save
First, we install the typings tool globally and then we leverage the typings CLI to install the es6-shim types defi nition fi le into our project, creating the typings.json fi le that will store the references to the source origin for all type defi nition fi les we will install now and later on. A new folder named typings is created and it contains the defi nition fi les we require. Without them, basic ES6 features like the new functional methods of the Array class would not be available.
Before moving forward, we need to tackle one more step regarding the TypeScript typings. When installing type defi nition fi les, two façade fi les are generated by the CLI: typings/main.d.ts and typings/browser.d.ts. However, only one should be exposed to the TypeScript compiler. Otherwise, it will raise an exception after fi nding duplicated type defi nitions. Since we are building frontend applications, we will stick to browser.d.ts and exclude main.d.ts and its linked defi nition fi les by marking it as excluded at tsconfig.json:
{ "compilerOptions": { "experimentalDecorators": true, "emitDecoratorMetadata": true, "target": "es5",

Creating Our Very First Component in Angular 2
[ 10 ]
"module": "system", "moduleResolution": "node", "noImplicitAny": false, "outDir": "built", "rootDir": ".", "sourceMap": false }, "exclude": [ "node_modules", "typings/main.d.ts", "typings/main" ]}
On the other hand, it is actually recommended to exclude the typings folder from your project distribution by including it in your .gitignore fi le, same as we usually do with the node_modules folder. You only want to include the typings.json manifest when distributing your app and then have all the installation processes handled by npm, so it is very convenient to include the type defi nition fi les installation as an action handled by the postinstall script in the package.json fi le. This way, we can install the npm dependencies and the defi nition fi les in one shot. The code is as follows:
"scripts": { "typings": "typings", "postinstall": "typings install"},
When taking this approach, the typings package should be included in the package.json as part of the development dependencies. Thus, reinstall it with the --save-dev fl ag. Again, please refer to the book code repository at GitHub to fetch the latest version of the package.json fi le for this chapter.
Hello, Angular 2!With the Angular 2 library bundle in place and full support for TypeScript now available, the time has come to put everything to the test. First, create and empty fi le named hello-angular.ts (.ts is the natural extension for TypeScript fi les) at the root of our working folder.

Chapter 1
[ 11 ]
Here, we stumble upon the fi rst of many coding conventions we will cover in this book: fi le naming. We name our module fi les using lower kebab case. In Chapter 5, Building an Application with Angular 2 Components, we will delve deeper into naming conventions and best practices for coding Angular 2 applications. Until then, we will concur into some anti-patterns for learning purposes, as those more experienced readers will soon notice.
Now, open that fi le and write the following at the top:
import { Component } from 'angular2/core';import { bootstrap } from 'angular2/platform/browser';
We have just imported the most basic type and function we will need to scaffold a very basic component in the next section. The importing syntax will be familiar to those who are already familiar with ECMAScript 6. For those who are not familiar with its code paradigm, don't worry. We will discuss more on this in Chapter 2, Introducing TypeScript.
TypeScript classesLet's now defi ne a class:
class HelloAngularComponent { greeting: string; constructor() { this.greeting = 'Hello Angular 2!'; }}
ECMAScript 6 (and TypeScript as well) introduced classes as one of the core parts of its building blocks. Our example features a class fi eld property named greeting typed as string, which is populated within the constructor with a text string, as you can see in the preceding code. The constructor function is called automatically when an instance of the class is created, and each and every property (and functions as well) should be annotated with the type it represents (or returns in the case of functions).
Do not worry about all this now. Chapter 2, Introducing TypeScript, will give you the insights you need to better understand the mechanics of TypeScript. Now, let's focus on the actual layout of our component. You have probably noticed the name structure, which conforms to another common coding convention in Angular 2. We defi ne each and every class in Pascal casing by appending a suffi x pointing out its type (will it be a component, directive, pipe, and so on), which is Component for this case.

Creating Our Very First Component in Angular 2
[ 12 ]
Introducing metadata decoratorsThe controller class we have just created gives us the machinery we need to instance an object exposing a greeting property, but we still need to apply some Angular 2 sugar to turn it into an actual component. We already imported the Component metadata class, remember? Let's put it to work and decorate our class like this:
@Component({ selector: 'hello-angular', template: '<h1> {{greeting}} </h1>'})
class HelloAngularComponent { greeting: string; constructor() { this.greeting = 'Hello Angular 2!'; }}
A decorator is a very interesting experimental feature proposed by ECMAScript 7 that was later embraced and implemented by TypeScript in order to decorate classes with metadata. There are several types of decorators and all of them are easily recognizable by the @ symbol prefi x. Although Chapter 2, Introducing TypeScript, will give you an idea about decorators, delving deeper into its core logic is out of the scope of this book. However, we will get used to them as we advance through the book.
In this example, we are telling the compiler that the HelloAngularComponent class is, in fact, an Angular 2 component. The component is meant to be encapsulated by the <hello-angular> custom element and the template property defi nes the internal HTML structure of our component. As we already mentioned previously, custom elements encapsulating HTML templates are the foundation of web components.
Compiling TypeScript into browser-friendly JavaScriptWe are done with our primer on TypeScript, but unfortunately it is quite likely that our browser of choice will not support TypeScript. So, we need to compile our source code into good old ECMAScript 5 JavaScript code.
The good news is that the TypeScript CLI contains tools to compile TypeScript into JavaScript code out of the box. To do this, just open a terminal window and type the following command at the location of the hello-angular.ts fi le:
$ tsc --watch
Chapter 1
[ 13 ]
A new hello-angular.js fi le will show up within the built directory (or the path you have defi ned in the outDir property at tsconfig.json), and it will contain an ECMAScript 5 version of the TypeScript code we just built. This fi le already contains some functional code to implement support for the Metadata decorator we confi gured.
Please note the --watch fl ag in our command. This parameter informs the compiler that we want the compilation to be automatically triggered again upon changing any fi le. Disregard the fl ag when you just need to compile your stuff once and do not need to watch the code for changes.
Our component is looking better by the minute and now we are in a good state to start using it, but we still need to embed it somewhere in order to see it live. It's time to defi ne the HTML shell or web container where it will live.
The HTML containerCreate an HTML fi le at the root of our workspace and name it index.html. Then populate it with the following code:
<!DOCTYPE html><html> <head> <meta charset="utf-8"> <title>Hello Angular 2!</title> <script src="node_modules/systemjs/dist/system.js"> </script> <script src="node_modules/rxjs/bundles/Rx.js"></script> <script src="node_modules/angular2/bundles/angular2-polyfills.js"></script> <script src="node_modules/angular2/bundles/angular2.js"> </script> <script> System.config({ packages: { built: { format: 'register', defaultExtension: 'js' } } });

Creating Our Very First Component in Angular 2
[ 14 ]
</script> </head> <body> </body></html>
This is the most basic, barebones version of an HTML container for an Angular 2 application we can come up with. This is great because most of the presentation logic and dependency management will be handled by our component itself.
However, two things catch our attention in this template. I am obviously referring to the script includes in the previous HTML code. The fi rst script tag introduces support for the SystemJS module loader in this project. As we pointed out in the previous section, SystemJS is an open source universal module loader, and since both the Angular 2 library (included in the following script tags block) and our own Angular 2 component make use of ES6 module loading functionalities, we need something in place to ensure that both scripts can actually expose and require modules. Then, we include a reference to the RxJS bundle, which is a core dependency of the Angular main bundle that has not been integrated in the main package in order to keep it as lean as possible. Last but not least, we fi nd the Angular 2 polyfi lls and the Angular 2 main bundle itself.
In the next JavaScript block of the previous code, we can fi nd the SystemJS confi guration block. We basically confi gure a package named built whose modules conform to the System.register polyfi ll module format. An additional property allows us to refer to those modules without pointing out the .js fi le extension, as we will see shortly.
Do not try to reshuffl e the sorting layout of these code blocks unless you want to face unexpected exceptions.
Serving the examples of this bookBefore moving on with our example, we need a local web server to execute the examples contained in this book. If you already have a working web server that you can confi gure to point to your working directory, then skip to the next section. Otherwise, set up a web server in your workspace. As an easy workaround, we recommend you install the extraordinarily powerful and lightweight lite-server node module from NPM:
$ npm install -g lite-server

Chapter 1
[ 15 ]
Then, you can run a web server with live-reloading functionality by running the following command in a terminal shell after moving into your project folder:
$ lite-server
After executing the preceding command, a browser window will be fi red, pointing to your working directory. Please refer to the NPM module offi cial repository in order to check out all the options available (https://github.com/johnpapa/lite-server).
It is actually recommended to install the lite-server package paired up with the typescript and concurrently packages, all of them as development dependencies installed with the --save-dev fl ag. This way, you can run the TypeScript compiler in watch mode and the local server at the same time with a single command that can be wrapped in the start script of package.json. Then, you can start building stuff right away by accessing your working folder and executing npm start. This book's code repository in GitHub implements this approach, so feel free to borrow the package.json example for your convenience.
Putting everything togetherOur HTML fi le is now ready to host our Angular 2 component. To do so, let's edit the template again and drop a custom element with the same tag name we defi ned in the selector property of our component. Then, import the actual fi le that contains the component class declaration, leveraging the API of SystemJS for that. Check out these changes in the following example:
<!DOCTYPE html><html> <head> <meta charset="utf-8"> <title>Hello Angular 2!</title> <script src="node_modules/systemjs/dist/system.js"> </script> <script src="node_modules/rxjs/bundles/Rx.js"></script> <script src="node_modules/angular2/bundles/angular2-polyfills.js"></script> <script src="node_modules/angular2/bundles/angular2.js"> </script> <script> System.config({ packages: {

Creating Our Very First Component in Angular 2
[ 16 ]
built: { format: 'register', defaultExtension: 'js' } }
}); // Here we import the component module // with no file extension System.import ('built/hello-angular'); </script> </head> <body> <!-- This is our custom element tag --> <hello-angular></hello-angular> </body></html>
How cool is that? Now, we can create our own custom elements that render whatever we defi ne in them. Let's bring up the page in our web server and see it in action by going to http://localhost:3000/ (or whatever host and port your local web server operates in).
Unfortunately, if we reload the browser, nothing will happen and we will only see a blank page with nothing in there. This is because we still need to bootstrap our component to instantiate it on the HTML page.
Let's return to our component fi le hello-angular.ts and add a fi nal line of code:
import { Component } from 'angular2/core';import { bootstrap } from 'angular2/platform/browser';
@Component({
selector: 'hello-angular', template: '<h1> {{greeting}} </h1>'})class HelloAngularComponent { greeting: string; constructor() { this.greeting = 'Hello Angular 2!'; }}
bootstrap(HelloAngularComponent); // Component is bootstrapped!

Chapter 1
[ 17 ]
The bootstrap command instances the controller class we pass as an argument and uses it to lay out a complete application scaffold. Basically, the bootstrap method kickstarts the following actions:
• Analyzes the component configured as its first argument and checks its type.• Searches the DOM after an element with a tag matching the component
selector.• Creates a child injector that will handle the injection of dependencies in that
component and all the child directives (including components, which are directives too) that such a component might host, in a very similar way a tree has ramifications.
• It creates a new Zone. We will not cover Zones in this book, but let's just say that Zones are in charge of managing the change detection mechanism of each instance of a bootstrapped component in an isolated fashion.
• It creates a Shadow DOM context in the custom element identified by the component selector and renders within the HTML defined in the component template.
• The component controller class is instantiated straight away and the change detection machinery is fired. Now that we have the Shadow DOM placeholders in place, data providers are initiated and data is injected where required.
Later in this book, we will cover how we can leverage the bootstrap command to display debugging information or how application providers can be globally overridden throughout the whole application so the dependency injector baked in Angular 2 picks the right dependency where required.

Creating Our Very First Component in Angular 2
[ 18 ]
Hopefully, you are running the TypeScript compiler in watch mode. Otherwise, please execute the tsc command to transpile our code to ES5 and reload the browser. We can delight ourselves with the rendered content of our very fi rst Angular 2 component. Yay!
Enhancing our IDEBefore moving on with our journey through Angular 2, it's time to take a look at IDEs too. Our favorite code editor can become an unparalleled ally when it comes to undertaking an agile workfl ow entailing TypeScript compilation at runtime, static type checking and introspection, and code completion and visual assistance for debugging and building our app. That being said, let's highlight some major code editors and take a bird's eye view of how each one of them can assist us when developing Angular 2 applications. If you're just happy with triggering the compilation of your TypeScript fi les from the command line and do not want to have visual code assistance, feel free to skip to the next section. Otherwise, jump straight to the following section that covers the IDE of your choice.

Chapter 1
[ 19 ]
Sublime Text 3This is probably one of the most widespread code editors nowadays, although it has lost some momentum lately with users favoring other rising competitors such as GitHub's very own Atom. If this is your editor of choice, we will assume that it's already installed on your system and you also have Node (which is obvious, otherwise, you could have not installed TypeScript in fi rst place through NPM). In order to provide support for TypeScript code editing, you need to install Microsoft's TypeScript plugin, available at https://github.com/Microsoft/TypeScript-Sublime-Plugin. Please refer to this page to learn how to install the plugin and all the shortcuts and key mappings.
Once successfully installed, it only takes Ctrl + space bar to display code hints based on type introspection (see the following screenshot). On top of that, we can trigger the build process and compile the fi le to the JavaScript we are working on by hitting the F7 function key. Real time code error reporting is another fancy functionality you can enable from the command menu.
Creating Our Very First Component in Angular 2
[ 20 ]
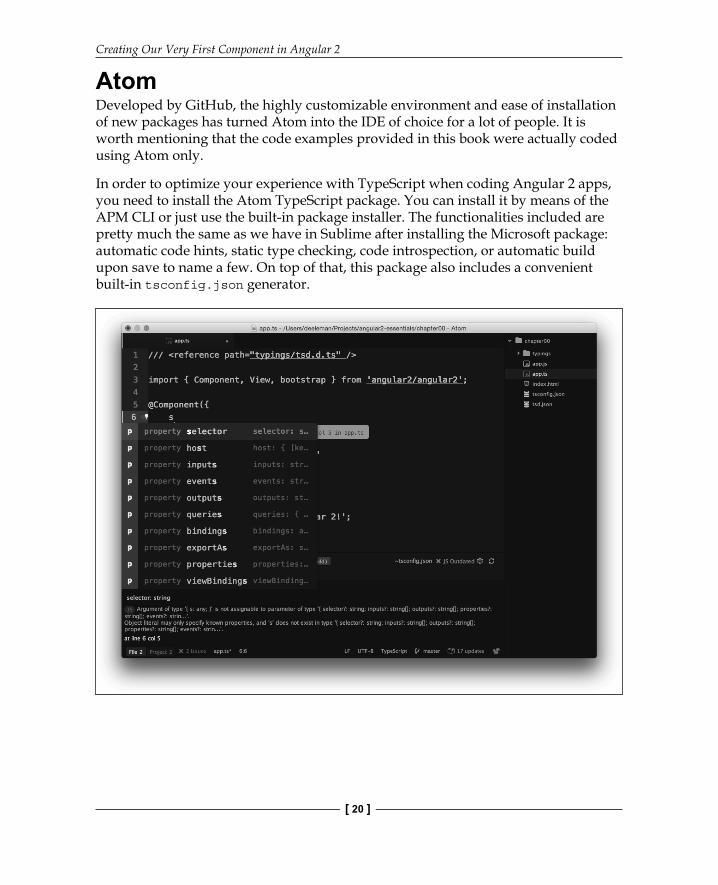
AtomDeveloped by GitHub, the highly customizable environment and ease of installation of new packages has turned Atom into the IDE of choice for a lot of people. It is worth mentioning that the code examples provided in this book were actually coded using Atom only.
In order to optimize your experience with TypeScript when coding Angular 2 apps, you need to install the Atom TypeScript package. You can install it by means of the APM CLI or just use the built-in package installer. The functionalities included are pretty much the same as we have in Sublime after installing the Microsoft package: automatic code hints, static type checking, code introspection, or automatic build upon save to name a few. On top of that, this package also includes a convenient built-in tsconfig.json generator.
Chapter 1
[ 21 ]
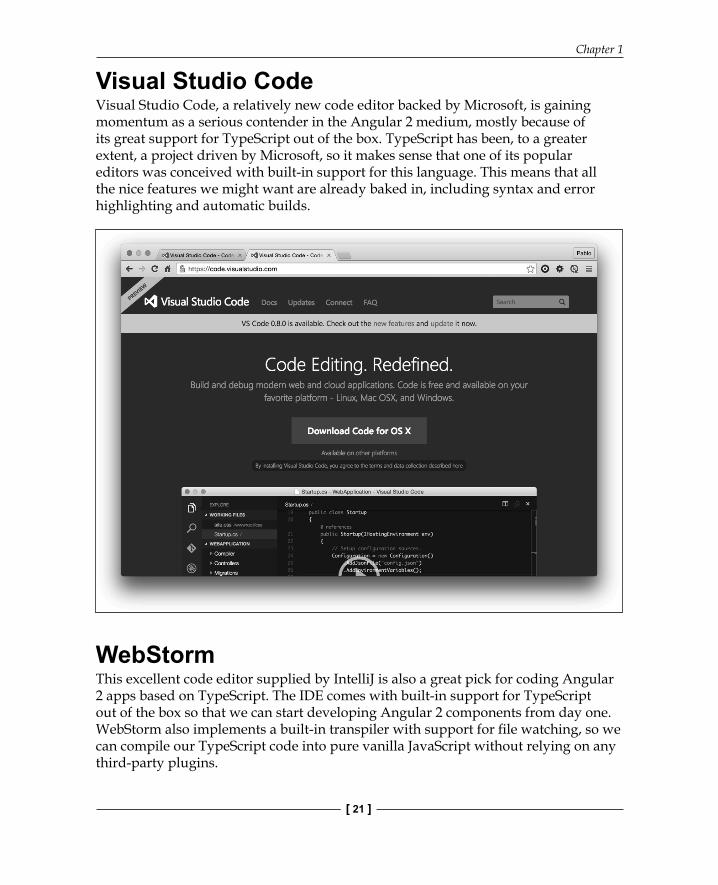
Visual Studio CodeVisual Studio Code, a relatively new code editor backed by Microsoft, is gaining momentum as a serious contender in the Angular 2 medium, mostly because of its great support for TypeScript out of the box. TypeScript has been, to a greater extent, a project driven by Microsoft, so it makes sense that one of its popular editors was conceived with built-in support for this language. This means that all the nice features we might want are already baked in, including syntax and error highlighting and automatic builds.
WebStormThis excellent code editor supplied by IntelliJ is also a great pick for coding Angular 2 apps based on TypeScript. The IDE comes with built-in support for TypeScript out of the box so that we can start developing Angular 2 components from day one. WebStorm also implements a built-in transpiler with support for fi le watching, so we can compile our TypeScript code into pure vanilla JavaScript without relying on any third-party plugins.

Creating Our Very First Component in Angular 2
[ 22 ]
Leveraging Gulp with other IDEsMay be your IDE is not listed here and you do not want to switch from your favorite code editor now, not having the chance, for whatever reason, to automate TypeScript compilation for your project. Or perhaps you do not feel very comfortable messing around with the TypeScript commands on the console.
If this is not the case, feel free to skip to the next section. However, if you relate to this case scenario, don't worry. Modern JavaScript task runners have your back. Let's pick Gulp (http://gulpjs.com) and see how we can create a super simple script to automate TypeScript compilation in our project.
First, let's proceed with the dependencies installation. Basically, we will install Gulp and then gulp-typescript, a typescript compiler for gulp with incremental compilation support. On your console window, type the following commands:
$ npm install -g gulp
$ npm install gulp gulp-typescript --save-dev
Let's create a JavaScript fi le named gulpfile.js at the root of your project with the following content:
var gulp = require('gulp');var ts = require('gulp-typescript');var tsProject = ts.createProject('tsconfig.json');
gulp.task('build', function() { var tsResult = tsProject.src().pipe(ts(tsProject)); return tsResult.js.pipe(gulp.dest('./built'));});
You will need a tsconfig.json fi le at the root of your project, so our Gulp task can fetch our compilation preferences from it. From this moment onwards, we can launch the build processing over the fi les listed at the fi les' array property in our tsconfig.json fi le by executing the following command:
$ gulp build
Unfortunately, the gulp-typescript plugin does not support fi le watching, so if we want to trigger the build processing automatically every time a TypeScript fi le change, we need to rely on Gulp's native watch method. To do so, just add the following chunk of code at the end of our gulpfile.js fi le:
gulp.task('watch', ['build'], function() { gulp.watch('./**/*.ts', ['build']);});

Chapter 1
[ 23 ]
Now, you can launch the build process and watch the fi le changes by executing the following command:
$ gulp watch
Diving deeper into Angular 2 componentsWe have come a long way now, from tapping on TypeScript for the fi rst time to learning how to code the basic scripting schema of an Angular 2 component. However, before jumping onto more abstract topics, let's fl esh out our current component with more functionalities and take an overview of the most common traits of Angular apps and components.
Improving productivitySometimes, we need some helpers to boost our focus, especially when we deal with too abstract stuff that requires additional attention. A widely accepted approach is the Pomodoro technique, in which we put together a task list and then split the deliverables into to-do items that won't require us more than 25 minutes to accomplish. When we pick any of those to-do items, we focus under distraction-free mode on its delivery for 25 minutes with the help of a countdown timer. You can grab more information about this technique at http://pomodorotechnique.com.
In this book, we are going to build a major component that represents this functionality and fi ll the component with additional functionalities and UI items wrapped inside their own components. To do so, we will use the Pomodoro technique, so let's start by creating a Pomodoro timer.
Component methods and data updatesCreate a new pomodoro-timer.ts fi le in the same folder and populate it with the following basic implementation of a very simple component. Don't worry about the added complexity, we will review each and every change made after the code block:
import { Component } from 'angular2/core';import { bootstrap } from 'angular2/platform/browser';
@Component({ selector: 'pomodoro-timer', template: '<h1> {{ minutes }}:{{ seconds }} </h1>'})class PomodoroTimerComponent { minutes: number;

Creating Our Very First Component in Angular 2
[ 24 ]
seconds: number;
constructor() { this.minutes = 24; this.seconds = 59; }}
bootstrap(PomodoroTimerComponent);
Our new component is, in fairness, not that much different from the one we previously had. We updated the names to make them more self-descriptive and then defi ned two property fi elds, statically typed as numbers in our PomodoroTimerComponent class. These are rendered in the contained view, wrapped inside an <h1> element. Now, open the index.html fi le and replace the <hello-angular></hello-angular> custom element with our new <pomodoro-timer></pomodoro-timer> tag. You can duplicate index.html and save it under a different name if you do not want to loose the HTML side of our fancy "Hello World" component.
A note about naming custom elementsSelectors in Angular 2 are case sensitive. As we will see later in this book, components are a sub set of directives that can support a wide range of selectors. When creating components, we are supposed to set a custom tag name in the selector property by enforcing a dash-casing naming convention. When rendering that tag in our view, we should always close the tag as a non-void element. So <custom-element></custom-element> is correct, while <custom-element /> will trigger an exception. Last but not least, certain "common" camel case names might confl ict with the Angular 2 implementation, so avoid names like AppView or AppElement.
You will want to update the reference in your System.import(...) block to point to our new component as well:
System.import('built/pomodoro-timer') .then(null, console.error.bind(console));
Now, it is a good time to mention that the import method of SystemJS is asynchronous and returns a promise once the module has been successfully loaded. We can leverage this promise to throw any eventual error message to the console, which will become quite handy whenever we have to debug our code. You will see this practice later in this book.

Chapter 1
[ 25 ]
If you bring up a browser window and load this fi le, you will see a representation of the numbers defi ned in the component class. But we want to do more than just display a handful of numbers, right? We actually want them to represent a time countdown, and we can achieve that by introducing these changes. Let's fi rst introduce a function we can iterate on in order to update the countdown. Add this function after the constructor function:
tick(): void { if (--this.seconds < 0) { this.seconds = 59; if (--this.minutes < 0) { this.minutes = 24; this.seconds = 59; } }}
As you can see here, functions in TypeScript need to be annotated with the type of the value they return, or just void if none. Our function assesses the current value of both minutes and seconds, and then either decreases their value or just resets it to the initial value. Then this function is called every second by triggering a time interval from the class constructor:
constructor() { this.minutes = 24; this.seconds = 59; setInterval(() => this.tick(), 1000);}
Here, we spot for the fi rst time in our code an arrow function (also known as a lambda function, fat arrow, and so on), a new syntax for functions brought by ECMAScript 6 that we will cover in more detail in Chapter 2, Introducing TypeScript. The tick function is also marked as private, so it cannot be inspected or executed outside a PomodoroTimerComponent object instance.
So far so good! We have a working Pomodoro timer that countdowns from 25 minutes to 0, and then starts all over again. The problem is that we are replicating code here and there. So, let's refactor everything a little bit to prevent code duplication.
constructor() { this.resetPomodoro(); setInterval(() => this.tick(), 1000);}
resetPomodoro(): void { this.minutes = 24;

Creating Our Very First Component in Angular 2
[ 26 ]
this.seconds = 59;}
private tick(): void { if (--this.seconds < 0) { this.seconds = 59; if (--this.minutes < 0) { this.resetPomodoro(); } }}
We have wrapped the initialization (and reset) of minutes and seconds inside our function resetPomodoro, which is called upon instantiating the component or reaching the end of the countdown. Wait a moment though! According to the Pomodoro technique, pomodoro practitioners are allowed to rest in between pomodoros or even pause them should an unexpected circumstance gets on the way. We need to provide some sort of interactivity so the user can start, pause, and resume the current pomodoro timer.
Adding interactivity to the componentAngular 2 provides a top-notch support for events through a declarative interface that reminds the one in other frameworks such as React. Let's fi rst modify our template defi nition:
@Component({ selector: 'pomodoro-timer', template: ` <h1> {{ minutes }}:{{ seconds }} </h1> <p> <button (click)="togglePause()"> {{ buttonLabel }} </button> </p> `})
We used a multiline text string! ECMAScript 6 introduced the concept of template strings, which are string literals with support for embedded expressions, interpolated text bindings, and multiline content. We will look into them in more detail in Chapter 2, Introducing TypeScript.
Chapter 1
[ 27 ]
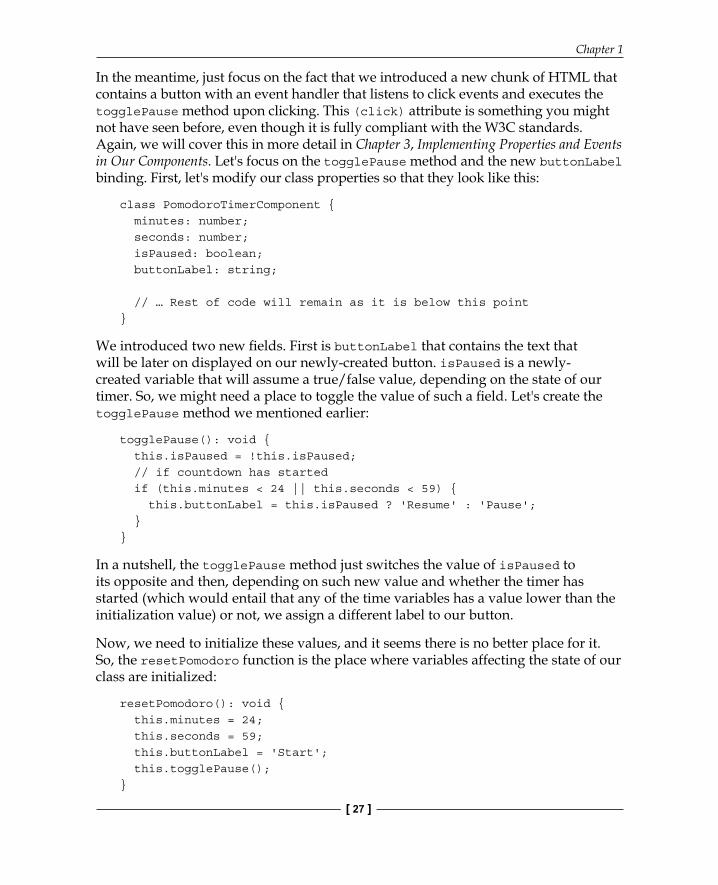
In the meantime, just focus on the fact that we introduced a new chunk of HTML that contains a button with an event handler that listens to click events and executes the togglePause method upon clicking. This (click) attribute is something you might not have seen before, even though it is fully compliant with the W3C standards. Again, we will cover this in more detail in Chapter 3, Implementing Properties and Events in Our Components. Let's focus on the togglePause method and the new buttonLabel binding. First, let's modify our class properties so that they look like this:
class PomodoroTimerComponent { minutes: number; seconds: number; isPaused: boolean; buttonLabel: string; // … Rest of code will remain as it is below this point}
We introduced two new fi elds. First is buttonLabel that contains the text that will be later on displayed on our newly-created button. isPaused is a newly-created variable that will assume a true/false value, depending on the state of our timer. So, we might need a place to toggle the value of such a fi eld. Let's create the togglePause method we mentioned earlier:
togglePause(): void { this.isPaused = !this.isPaused; // if countdown has started if (this.minutes < 24 || this.seconds < 59) { this.buttonLabel = this.isPaused ? 'Resume' : 'Pause'; }}
In a nutshell, the togglePause method just switches the value of isPaused to its opposite and then, depending on such new value and whether the timer has started (which would entail that any of the time variables has a value lower than the initialization value) or not, we assign a different label to our button.
Now, we need to initialize these values, and it seems there is no better place for it. So, the resetPomodoro function is the place where variables affecting the state of our class are initialized:
resetPomodoro(): void { this.minutes = 24; this.seconds = 59; this.buttonLabel = 'Start'; this.togglePause();}

Creating Our Very First Component in Angular 2
[ 28 ]
By executing togglePause every time, we reset the Pomodoro to make sure that whenever the Pomodoro reaches a state where it requires to be reset, the countdown behavior will switch to the opposite state it had previously. There is only one tweak left in the controller method that handles the countdown:
private tick(): void { if (!this.isPaused) { this.buttonLabel = 'Pause';
if (--this.seconds < 0) { this.seconds = 59; if (--this.minutes < 0) { this.resetPomodoro(); } } }}
Obviously, we do not want the countdown to continue when the timer is supposed to be paused, so we wrap the whole script in a conditional. In addition to this, we will want to display a different text on our button whenever the countdown is not paused and once again when the countdown reaches its end, stopping and then resetting the pomodoro to its initial values will be the expected behavior. This reinforces the need of invoking the togglePause function within resetPomodoro.
Improving the data output in the view and polishing the UISo far, we reloaded the browser and played around with the newly created toggle feature. However, there is apparently something that still requires some polishing: when the seconds counter is less than 10, it displays a single-digit number instead of the usual two-digit numbers we are used to see in digital clocks and watches. Luckily, Angular 2 implements a set of declarative helpers that format the data output in our templates. We call them Pipes, and we will cover them in detail later in Chapter 3, Implementing Properties and Events in Our Components. For the time being, let's just introduce the number pipe in our component template and confi gure it to format the seconds output to display two digits all the times. Update our template so that it looks like this:
@Component({ selector: 'pomodoro-timer', template: ` <h1> {{ minutes }}:{{ seconds | number: '2.0' }} </h1>
Chapter 1
[ 29 ]
<p> <button (click)="togglePause()"> {{ buttonLabel }} </button> </p> `
})
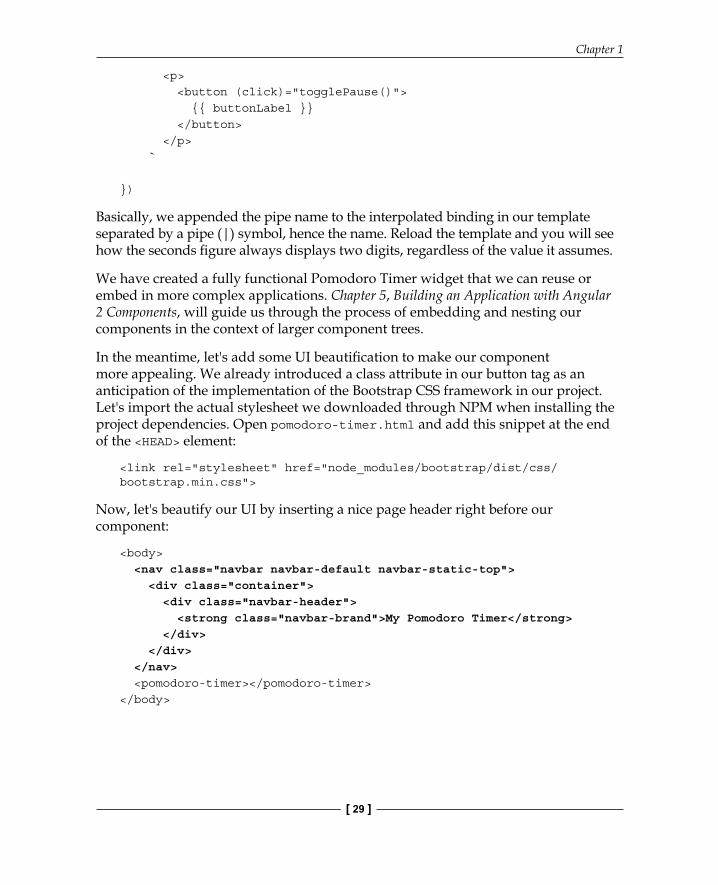
Basically, we appended the pipe name to the interpolated binding in our template separated by a pipe (|) symbol, hence the name. Reload the template and you will see how the seconds fi gure always displays two digits, regardless of the value it assumes.
We have created a fully functional Pomodoro Timer widget that we can reuse or embed in more complex applications. Chapter 5, Building an Application with Angular 2 Components, will guide us through the process of embedding and nesting our components in the context of larger component trees.
In the meantime, let's add some UI beautifi cation to make our component more appealing. We already introduced a class attribute in our button tag as an anticipation of the implementation of the Bootstrap CSS framework in our project. Let's import the actual stylesheet we downloaded through NPM when installing the project dependencies. Open pomodoro-timer.html and add this snippet at the end of the <HEAD> element:
<link rel="stylesheet" href="node_modules/bootstrap/dist/css/bootstrap.min.css">
Now, let's beautify our UI by inserting a nice page header right before our component:
<body> <nav class="navbar navbar-default navbar-static-top"> <div class="container"> <div class="navbar-header"> <strong class="navbar-brand">My Pomodoro Timer</strong> </div> </div> </nav> <pomodoro-timer></pomodoro-timer></body>

Creating Our Very First Component in Angular 2
[ 30 ]
Tweaking the component button with a Bootstrap button class will give it more personality and wrapping the whole template in a centering container and appending a nice icon at the top will defi nitely compound up the UI. So let's update the template in our template to look like this:
<div class="text-center"> <img src="assets/img/pomodoro.png" alt="Pomodoro"> <h1> {{ minutes }}:{{ seconds | number: '2.0' }} </h1> <p> <button (click)="togglePause()" class="btn btn-danger"> {{ buttonLabel }} </button> </p></div>
For the icon, we picked a bitmap icon depicting a pomodoro. You can use any bitmap image of your choice or you can just skip the icon for now, even though we will need an actual pomodoro icon in the forthcoming chapters. This is how our Pomodoro timer app looks after implementing all these visual tweaks:

Chapter 1
[ 31 ]
Downloading the example codeYou can download the example code fi les for this book from GitHub at https://github.com/deeleman/angular2-essentials.You can download the example code fi les for this book from your account at http://www.packtpub.com. If you purchased this book elsewhere, you can visit http://www.packtpub.com/support and register to have the fi les e-mailed directly to you.You can download the code fi les by following these steps:
• Log in or register to our website using your e-mail address and password.
• Hover the mouse pointer on the SUPPORT tab at the top.• Click on Code Downloads & Errata.• Enter the name of the book in the Search box.• Select the book for which you're looking to download the
code files.• Choose from the drop-down menu where you purchased
this book from.• Click on Code Download.
You can also download the code fi les by clicking on the Code Files button on the book's webpage at the Packt Publishing website. This page can be accessed by entering the book's name in the Search box. Please note that you need to be logged in to your Packt account.Once the fi le is downloaded, please make sure that you unzip or extract the folder using the latest version of:
• WinRAR / 7-Zip for Windows• Zipeg / iZip / UnRarX for Mac• 7-Zip / PeaZip for Linux
SummaryWe looked at web components according to modern web standards and how Angular 2 components provide an easy and straightforward API to build our own components. We covered TypeScript and some basic traits of its syntax as a preparation for Chapter 2, Introducing TypeScript. We saw how to set up our working space and where to go to fi nd the dependencies we need to bring TypeScript into the game and use the Angular 2 library in our projects, going through the role of each dependency in our application.

Creating Our Very First Component in Angular 2
[ 32 ]
Our fi rst component gave us the opportunity to discuss the form of a controller class containing property fi elds, constructor, and utility functions, and why metadata annotations are so important in the context of Angular 2 applications to defi ne how our component will integrate itself in the HTML environment where it will live. Now, we also know how to deploy web server tools and enhance our code editors to make our lives easier when developing Angular 2 apps, leveraging type introspection and checking on the go. Our fi rst web component features its own template and such templates host property bindings declaratively in the form of variable interpolations, conveniently formatted by pipes. Binding event listeners is now easier than ever and its syntax is standards-compliant.
The next chapter will cover, in detail, all the TypeScript features we need to know to get up to speed with Angular 2 in no time.
Where to buy this book You can buy Angular 2 Essentials from the Packt Publishing website.
Alternatively, you can buy the book from Amazon, BN.com, Computer Manuals and most internet
book retailers.
Click here for ordering and shipping details.
www.PacktPub.com
Stay Connected:
Get more information Angular 2 Essentials