and applications networker module for databases · getting started 11 nmda software ... installing...
TRANSCRIPT
EMC® NetWorker® Module for Databasesand ApplicationsVersion 9.0.x
Installation Guide302-001-784
REV 06

Copyright © 2009-2017 Dell Inc. or its subsidiaries. All rights reserved.
Published February 2017
Dell believes the information in this publication is accurate as of its publication date. The information is subject to change without notice.
THE INFORMATION IN THIS PUBLICATION IS PROVIDED “AS-IS.“ DELL MAKES NO REPRESENTATIONS OR WARRANTIES OF ANY KIND
WITH RESPECT TO THE INFORMATION IN THIS PUBLICATION, AND SPECIFICALLY DISCLAIMS IMPLIED WARRANTIES OF
MERCHANTABILITY OR FITNESS FOR A PARTICULAR PURPOSE. USE, COPYING, AND DISTRIBUTION OF ANY DELL SOFTWARE DESCRIBED
IN THIS PUBLICATION REQUIRES AN APPLICABLE SOFTWARE LICENSE.
Dell, EMC, and other trademarks are trademarks of Dell Inc. or its subsidiaries. Other trademarks may be the property of their respective owners.
Published in the USA.
EMC CorporationHopkinton, Massachusetts 01748-91031-508-435-1000 In North America 1-866-464-7381www.EMC.com
2 EMC NetWorker Module for Databases and Applications 9.0.x Installation Guide

5
7
Getting Started 11NMDA software requirements.....................................................................12
Database or application server software.........................................13NetWorker server software............................................................13NMC server software..................................................................... 13NetWorker storage node software................................................. 13NetWorker client software............................................................. 13NMDA software............................................................................. 14Replication Manager software........................................................14
Installation checklists.................................................................................. 14Documents..................................................................................... 14Installation media........................................................................... 15License enablers.............................................................................15
Accessing the NMDA software................................................................... 15Accessing NMDA from the DVD media...........................................15Accessing NMDA from the EMC website....................................... 16
Installation road maps..................................................................................17Road map to install or update NMDA on a database or applicationhost................................................................................................ 17Road map to update NMDA with the Package Manager................ 20Road map to post-installation procedures...................................... 21
UNIX and Linux Installation 23Installing NMDA on AIX systems.................................................................24Installing NMDA on HP-UX systems........................................................... 25Installing NMDA on Linux systems..............................................................26Installing NMDA on Solaris systems............................................................27Linking and unlinking NMDA in the environment on UNIX or Linux............. 28
Linking NMDA in a DB2 environment............................................. 28Linking and unlinking NMDA in an Informix environment................29Linking NMDA in a MySQL environment........................................30Linking and unlinking NMDA in an Oracle environment...................31Linking and unlinking NMDA in a Sybase ASE environment............32
Uninstalling NMDA on UNIX or Linux systems............................................ 36Uninstalling NMDA on AIX systems............................................... 36Uninstalling NMDA on HP-UX systems.......................................... 37Uninstalling NMDA on Linux systems.............................................37Uninstalling NMDA on Solaris systems...........................................38
Microsoft Windows Installation 39Installing NMDA on Microsoft Windows..................................................... 40Linking and unlinking NMDA in the environment on Windows.....................42
Tables
Preface
Chapter 1
Chapter 2
Chapter 3
CONTENTS
EMC NetWorker Module for Databases and Applications 9.0.x Installation Guide 3

Linking NMDA in a DB2 environment............................................. 42Linking and unlinking NMDA in an Informix environment................43Linking and unlinking NMDA in a Lotus Notes environment........... 44Linking and unlinking NMDA in a Sybase ASE environment........... 45
Maintaining the installation on Microsoft Windows.....................................46Uninstalling NMDA on Microsoft Windows................................................. 46
NMDA with Mixed 32-bit and 64-bit Databases and Applications49
Coexistence of 32-bit and 64-bit databases and applications.....................50Installing NMDA to enable 32-bit and 64-bit coexistence........................... 50Uninstalling 32-bit NMDA on a 32-bit/64-bit system................................. 53
Uninstalling ISM on an Informix Server 55ISM software on an Informix server............................................................56Uninstalling ISM on UNIX or Linux..............................................................56Uninstalling ISM on Microsoft Windows..................................................... 57
Uninstalling ISM on Windows with the Setup program...................57Uninstalling ISM on Windows manually..........................................58
Chapter 4
Appendix A
CONTENTS
4 EMC NetWorker Module for Databases and Applications 9.0.x Installation Guide

Revision history............................................................................................................ 7Style conventions......................................................................................................... 9Typical hosts and software in the NMDA environment................................................ 12Software directory on the DVD................................................................................... 15Zipped download file and software directory for install............................................... 17NetWorker startup commands on UNIX and Linux...................................................... 18Command to register the wizard.................................................................................22Linking and unlinking commands for Oracle library file on UNIX or Linux.................... 32Linking and unlinking commands for Sybase ASE library file on AIX, Linux, Solaris..... 33Additional steps to enable NMDA for a 32-bit application........................................... 51
12345678910
TABLES
EMC NetWorker Module for Databases and Applications 9.0.x Installation Guide 5

TABLES
6 EMC NetWorker Module for Databases and Applications 9.0.x Installation Guide

Preface
As part of an effort to improve its product lines, EMC periodically releases revisions ofits software and hardware. Therefore, some functions described in this documentmight not be supported by all versions of the software or hardware currently in use.The product release notes provide the most up-to-date information on productfeatures.
Contact your EMC technical support professional if a product does not functioncorrectly or does not function as described in this document.
Note
This document was accurate at publication time. Go to EMC Online Support (https://support.emc.com) to ensure that you are using the latest version of this document.
PurposeThis document describes how to install, update, and uninstall the EMC NetWorkerModule for Databases and Applications (NMDA) release 9.0.x.
AudienceThis document is intended for system administrators or database administrators(DBAs) who are responsible for installing software and maintaining backup andrecovery systems for databases or applications.
Users of this guide must be familiar with the following topics:
l Backup, recovery, databases, applications, and network terminology
l Backup and recovery procedures
l Disaster recovery procedures
Revision historyThe following table presents the revision history of this document.
Table 1 Revision history
Revision Date Description
06 February 15, 2017 Updated the following information:
l Road map to install or update NMDA on a database or application host onpage 17—Updated step 7 with requirements for the NetWorker RemoteExec daemon or service.
l Road map to post-installation procedures on page 21—Updated step 3with requirements for the wizard registration, and added step 4.
l Installing NMDA on AIX systems on page 24—Updated step 1, and addeddetails to step 4 about verifying the wizard registration.
l Installing NMDA on HP-UX systems on page 25—Updated step 1, andadded details to step 4 about verifying the wizard registration.
l Installing NMDA on Linux systems on page 26—Updated step 1, andadded details to step 5 about verifying the wizard registration.
EMC NetWorker Module for Databases and Applications 9.0.x Installation Guide 7

Table 1 Revision history (continued)
Revision Date Description
l Installing NMDA on Solaris systems on page 27—Updated step 1, andadded details to step 5 about verifying the wizard registration.
l Uninstalling NMDA on UNIX or Linux systems on page 36—Added step 2with a requirement for the NetWorker Remote Exec daemon.
l Installing NMDA on Microsoft Windows on page 40—Updated step 1, andadded details to step 7 about verifying the wizard registration.
l Uninstalling NMDA on Microsoft Windows on page 46—Added step 3with a requirement for the NetWorker Remote Exec service.
05 December 27, 2016 Updated the following information:
l Installing NMDA on Microsoft Windows on page 40—In step 2, addedinformation about the silent installation method, and deleted the statementthat a message appears about how to start the configuration wizard afterthe installation completes.
l Maintaining the installation on Microsoft Windows on page 46—Corrected the topic content, starting at step 5.
l Uninstalling NMDA on Microsoft Windows on page 46—In step 4, addedinformation about the silent uninstallation method.
04 June 29, 2016 Updated the following information for the release of NMDA 9.0.1:
l Changed the NMDA version number to 9.0.x in the guide title.
l Changed 9.0 references to 9.0.x throughout the guide, as appropriate.
l Accessing NMDA from the EMC website on page 16—Updated theWindows software package names in step 5.
l Installing NMDA on AIX systems on page 24—Updated the detail aboutthe lslpp command output in the first bullet in step 2.
03 April 25, 2016 Updated the following information:
l Linking NMDA in a MySQL environment on page 30—Created this topicto contain information that was previously under "Database or applicationserver software" in Chapter 1. Updated the information with details on themysqlclient library installation for MySQL 5.7.
02 November 12, 2015 Updated the following information:
l Linking NMDA to the Sybase ASE server on AIX, Linux, and Solaris on page33—Added step 4 to enable NMDA backups with Sybase 16.0 SP02 onAIX and Solaris SPARC.
01 September 24, 2015 Initial release of NMDA 9.0.
Related documentationYou can find additional EMC publications for this product release and relatedNetWorker products at EMC Online Support.
The EMC NetWorker Online Software Compatibility Matrix at http://compatibilityguide.emc.com:8080/CompGuideApp/ provides details about supportedenvironments and platforms.
Preface
8 EMC NetWorker Module for Databases and Applications 9.0.x Installation Guide

The following additional documentation might be useful:
l Database or application server documentation
l Database or application backup and recovery documentation
Special notice conventions that are used in this documentEMC uses the following conventions for special notices:
NOTICE
Identifies content that warns of potential business or data loss.
Note
Contains information that is incidental, but not essential, to the topic.
Typographical conventionsEMC uses the following type style conventions in this document:
Table 2 Style conventions
Bold Used for names of interface elements, such as names of buttons,fields, tab names, and menu paths (what the user specifically selectsor clicks)
Italic Used for full titles of publications that are referenced in text
Monospace Used for:
l System code
l System output, such as an error message or script
l Pathnames, file names, prompts, and syntax
l Commands and options
Monospace italic Used for variables
Monospace bold Used for user input
[ ] Square brackets enclose optional values
| Vertical bar indicates alternate selections - the bar means “or”
{ } Braces enclose content that the user must specify, such as x or y orz
... Ellipses indicate non-essential information that is omitted from theexample
Where to get helpEMC support, product, and licensing information can be obtained as follows:
Product informationFor documentation, release notes, software updates, or information about EMCproducts, go to EMC Online Support at https://support.emc.com.
Technical supportGo to EMC Online Support and click Service Center. Several options for contactingEMC Technical Support appear on the site. Note that to open a service request, youmust have a valid support agreement. Contact your EMC sales representative for
Preface
EMC NetWorker Module for Databases and Applications 9.0.x Installation Guide 9

details about obtaining a valid support agreement or with questions about youraccount.
Online communitiesGo to EMC Community Network at https://community.emc.com for peer contacts,conversations, and content on product support and solutions. Interactively engageonline with customers, partners, and certified professionals for all EMC products.
Your commentsYour suggestions help to improve the accuracy, organization, and overall quality of theuser publications. Send your opinions of this document to [email protected].
Preface
10 EMC NetWorker Module for Databases and Applications 9.0.x Installation Guide

CHAPTER 1
Getting Started
This chapter includes the following topics:
l NMDA software requirements............................................................................ 12l Installation checklists..........................................................................................14l Accessing the NMDA software........................................................................... 15l Installation road maps......................................................................................... 17
Getting Started 11

NMDA software requirementsEMC® NetWorker® Module for Databases and Applications (NMDA) is a NetWorkeradd-on module that provides data protection services for the supported DB2, Informix,Lotus Domino/Notes, MySQL, Oracle, and Sybase ASE databases.
The following table lists the hosts and software that you might require for NMDAservices.
Note
Before you install NMDA, install both the NetWorker base client and extended clientsoftware packages on the database server host.
Table 3 Typical hosts and software in the NMDA environment
Host Required software
NetWorker server l NetWorker base and extended client
l NetWorker storage node
l NetWorker server
NetWorker storage node l NetWorker base and extended client
l NetWorker storage node
NetWorker Management Console (NMC)server
l NetWorker base and extended client
l NMC server
Each supported database server (NMDAhost)
l Supported database or application server
l NetWorker base and extended client
l NMDA
l For snapshot operations with OracleASM, EMC Replication Manager software
Review the following software descriptions to plan the installation requirements.
The bitness (32-bit or 64-bit) of NMDA software that is required depends on thebitness of the database or application server being protected.
With one exception, you require 32-bit NMDA to support a 32-bit database orapplication server and 64-bit NMDA to support a 64-bit database or application server,regardless of the operating system bitness. The exception is that 32-bit NMDAsupports both 32-bit and 64-bit Sybase ASE on AIX and Solaris SPARC.
If only 32-bit database or application servers are installed on a 64-bit system, then youonly need to install 32-bit NMDA on the system.
If both 32-bit and 64-bit database or application servers are installed on the samesystem, refer to the sections in this guide about NMDA with mixed 32-bit and 64-bitdatabases and applications.
The EMC NetWorker Online Software Compatibility Matrix at http://compatibilityguide.emc.com:8080/CompGuideApp/ provides details about theoperating systems and software versions that are required for NMDA services.
Getting Started
12 EMC NetWorker Module for Databases and Applications 9.0.x Installation Guide

The EMC NetWorker Installation Guide describes how to install the NetWorker server,storage node, client, and NMC software.
Database or application server softwareEnsure that the supported DB2, Informix, Lotus Domino/Notes, MySQL, Oracle, orSybase ASE database or application server is installed on an operating system thatsupports the NetWorker client and NMDA version to be installed on that host.
If you install NMDA in a non-English environment, ensure that you meeting thefollowing requirements:
l The host operating system supports internationalization (I18N).l The database or application software provides the required National Language
Support (NLS) or globalization support.l The database or application software is configured with the required non-ASCII
character set.
NetWorker server softwareInstall a supported version of the NetWorker server software on the NetWorker serverhost. The NetWorker server host is usually a separate host, but the server host canalso be the NMDA host.
You might require specific NetWorker server versions to support specific NMDAfeatures as described in the EMC NetWorker Module for Databases and ApplicationsRelease 9.0.x Release Notes.
Use a supported version of the NetWorker server that works with the NetWorkerclient version installed on the NMDA host. The operating systems that are used mustsupport the NetWorker server version.
NMC server softwareInstall a supported version of the NMC software on a network host to provide a userinterface with the NetWorker software and NMDA.
NetWorker storage node softwareInstall a supported version of the NetWorker storage node software on the host thatmanages the backup storage devices. You can configure a NetWorker storage node onthe same host as the NetWorker server, on the same host as NMDA (to supportbackups to a local device), or on a separate host.
Use a supported version of the NetWorker storage node that works with theNetWorker client version that is installed on the NMDA host and the NetWorkerserver. The operating systems that are used must support the NetWorker storagenode version.
NetWorker client softwareInstall a supported version of the NetWorker client software on the supporteddatabase or application server host before you install NMDA on that host. Install boththe NetWorker base client and extended client software packages.
NMDA can use the NetWorker Snapshot Management (NSM) feature to provide ahigh-availability storage environment for snapshot backups and restores of DB2 andOracle data. To enable the snapshot-based operations, install the NetWorker baseclient and extended client software packages on both of the following hosts:
Getting Started
Database or application server software 13

l NMDA host
l A mount hostThe mount host can be either of the following hosts:
n A separate host, to offload the data transfer from the database host
n The same host as the database or application host
Note
Some operating systems and volume managers require that you configure a mounthost on a separate host from the database or application host. For example,Veritas Volume Manager (VxVM) and Linux Logical Volume Manager (LVM) do notsupport the use of the database or application host as the mount host. The EMCNetWorker Snapshot Management Integration Guide provides a full list of restrictionsand details.
NMDA softwareInstall NMDA on a supported database server or application server.
For Oracle ASM snapshot backups and restores with EMC Replication Manager, alsoinstall NMDA on the mount host.
Replication Manager softwareDue to an Oracle limitation, you cannot back up Oracle ASM by using NSM. To enablethe snapshot backups with Oracle ASM, the EMC Replication Manager serversoftware must work with the Replication Manager agent software that is installed onboth of the following hosts:
l Oracle server
l A mount host (data mover), which can be a NetWorker storage node
The EMC Replication Manager documentation describes the installation procedures.
Installation checklistsReview the following checklists to ensure that you have the required materials for theNMDA installation procedures.
DocumentsYou can find the required information in the following documents:
l EMC NetWorker Module for Databases and Applications Installation Guide for theexisting version, if you are updating from a previous NMDA version to NMDA 9.0.x
l EMC NetWorker Module for Databases and Applications Release 9.0.x Release Notes
l EMC NetWorker Module for Databases and Applications Release 9.0.x AdministrationGuide
l EMC NetWorker Administration Guide for the supported NetWorker release
l EMC NetWorker Online Software Compatibility Matrix
Getting Started
14 EMC NetWorker Module for Databases and Applications 9.0.x Installation Guide
Installation mediaUse one of the following installation media:
l DVD from the EMC Information Protection and Availability Product Families MediaKit
l If you download the software, the EMC Online Support website
License enablersEnabler codes or licenses activate the functionality of the NMDA software and aresold separately.
Note
Without an enabler code, you can only evaluate the software that is obtained from theDVD or the EMC website.
The EMC NetWorker Licensing Guide describes licensing.
The EMC Price Guide describes the licensing requirements for NetWorker modules.
Accessing the NMDA softwareThe NMDA software is distributed on DVD media and on the EMC website.
Accessing NMDA from the DVD mediaThe DVD is in the EMC Information Protection and Availability Product Families MediaKit. The kit contains the software and online documentation for related products.
You can access the NMDA software files from the NetWorker Module DVD on a hostwith a local DVD drive.
Procedure
1. Log in to the host as the root user on UNIX or Linux, or as the localadministrator user on Windows.
2. Insert and then mount the NetWorker Module DVD in the DVD drive:
l On UNIX or Linux, mount the DVD drive:
mount /dev/DVD_drive_name /mount_point
l On Windows, select the DVD drive in Windows Explorer.
3. Go to the directory that contains the software as shown in the following table.
The EMC NetWorker Online Software Compatibility Matrix at http://compatibilityguide.emc.com:8080/CompGuideApp/ provides details about theoperating systems, database software, and application software that NMDAsupports.
Table 4 Software directory on the DVD
Operating system (NMDA bitness) Software directory
AIX (32-bit) /mount_point/nmda/aixpower_32
Getting Started
Installation media 15

Table 4 Software directory on the DVD (continued)
Operating system (NMDA bitness) Software directory
AIX (64-bit) /mount_point/nmda/aixpower_64
HP Itanium (64-bit) /mount_point/nmda/hpux11_ia64
HP PA-RISC (64-bit) /mount_point/nmda/hpux11_64
Linux s390x (64-bit) /mount_point/nmda/linuxs390x
Linux x64 (64-bit) /mount_point/nmda/linux_x86_64
Linux x86 (32-bit) /mount_point/nmda/linux_x86
Solaris x64 (64-bit) /mount_point/volume_label/nmda/solaris_amd64
Solaris SPARC (32-bit) /mount_point/volume_label/nmda/solaris_32
Solaris SPARC (64-bit) /mount_point/volume_label/nmda/solaris_64
Windows x64 (64-bit) DVD_drive_letter:\nmda\win_x64
Windows x86 (32-bit) DVD_drive_letter:\nmda\win_x86
Accessing NMDA from the EMC websiteYou can download the NMDA software files from the EMC Online Support website.
Procedure
1. Log in to the host as the root user on UNIX or Linux, or as the localadministrator user on Windows.
2. Create a temporary installation download directory in a local file system withsufficient free disk space to contain both the downloaded software package andthe software installation files that are extracted from the package.
3. Go to EMC Online Support at https://support.emc.com.
The EMC NetWorker Online Software Compatibility Matrix at http://compatibilityguide.emc.com:8080/CompGuideApp/ provides details about theoperating systems and the database and application software that NMDAsupports.
Complete the following steps on EMC Online Support:
a. Select DOWNLOADS.
The Downloads page appears.
b. In the Products field, type NetWorker Module for Databases andApplications.
4. Download the NMDA release 9.0.x software file to the temporary directory thatyou created.
5. Extract the installation files from the downloaded software package:
l On UNIX or Linux:
Getting Started
16 EMC NetWorker Module for Databases and Applications 9.0.x Installation Guide

a. Uncompress the downloaded package by typing the gunzip commandwith the file_name.tar.gz name for the specific download file name:
gunzip file_name.tar.gz
b. Extract the software from the uncompressed, tarred file:
tar -xvpBf file_name.tar
The extraction lists the distribution software files on the screen.
c. Remain in the directory for the installation.
l On Windows:
a. Unzip the downloaded software package as shown in the following table.
b. Go to the correct directory as shown in the following table.
Table 5 Zipped download file and software directory for install
Downloaded software file Directory for install
nmda90x_win_x64.zip, where x is the
service pack number
win_x64
nmda90x_win_x86.zip, where x is the
service pack number
win_x86
Installation road mapsFollow the proper road map to install NMDA:
l Road map to install or update NMDA on a database or application host
l Road map to update NMDA remotely with the Package Manager
l Road map to perform the post-installation procedures
Road map to install or update NMDA on a database or application hostTo install or update NMDA on a database or application host in any of the followingconfigurations, complete the procedure as follows:
l Single host
l Active-passive cluster
l Active-active application cluster, such as DB2 Database Partitioning Feature(DPF), DB2 pureScale, Informix Multi-node Active Clusters for High Availability orHigh Availability Clusters (MACH), Oracle Real Application Clusters (RAC), andSybase ASE Cluster Edition
Note
Install NMDA on each node host in a cluster that performs backup and recoveryoperations.
Getting Started
Installation road maps 17

The EMC NetWorker Online Software Compatibility Matrix at http://compatibilityguide.emc.com:8080/CompGuideApp/ provides details about thesupported software versions and cluster environments.
Procedure
1. Review the Installation checklists on page 14 and verify that you have therequired documentation, installation media, and license information.
2. If you installed Informix Storage Manager (ISM) on the host, uninstall ISMaccording to the instructions in Uninstalling ISM on an Informix Server on page55.
3. Ensure that you have installed the NetWorker client software on the host. Theclient version must support the NMDA version to be installed.
4. Access the NMDA software as described in Accessing the NMDA software onpage 15, and then ensure that you are in the correct directory.
Note
If you do not start the installation from the correct directory, the installationmight fail.
5. Ensure that no backups or restores are running on the database server orapplication server. You do not need to shut down the database or applicationduring the installation.
6. Uninstall any previous version of NMDA according to the instructions in theinstallation guide for the module version.
NOTICE
Do not use an upgrade option on the platform, for example, the rpm -Ucommand on Linux.
7. Before the NMDA installation, ensure that the NetWorker Remote Execdaemon, nsrexecd, is running on UNIX or Linux, or the NetWorker RemoteExec service, nsrexecd.exe, is running on Windows.
To verify that the NetWorker Remote Exec daemon or service is running:
l On UNIX or Linux, type the following command
ps -ef | grep nsrexecd
l On Windows, use either Component Services or Task Manager.
If the NetWorker Remote Exec daemon or service is not running:
l To start the NetWorker Remote Exec daemon on UNIX or Linux, log in asroot, and type the appropriate startup command from the following table.
Table 6 NetWorker startup commands on UNIX and Linux
Operating system Startup command
Solaris, Linux /etc/init.d/networker start
HP-UX /sbin/init.d/networker start
Getting Started
18 EMC NetWorker Module for Databases and Applications 9.0.x Installation Guide

Table 6 NetWorker startup commands on UNIX and Linux (continued)
Operating system Startup command
AIX /etc/rc.nsr
l To start the NetWorker Remote Exec service on Windows, perform thefollowing steps:
a. Log in as a Windows Administrator.
b. Right-click My Computer, and select Manage.
c. Expand Configuration, and select Services.
d. Right-click the NetWorker Remote Exec Service, and select Start.
Note
If you do not start the NetWorker Remote Exec daemon or service before theNMDA installation, then the automatic registration of the NMDA configurationwizard might not occur and the wizard might fail to detect if NMDA is installed. Road map to post-installation procedures on page 21 describes the manualwizard registration.
8. If you want to install NMDA on a system that runs both a 32-bit and 64-bitdatabase or application that NMDA supports, follow the instructions in NMDAwith Mixed 32-bit and 64-bit Databases and Applications on page 49.
For example, follow the instructions for a mixed 32-bit/64-bit system if thesame host runs both 32-bit and 64-bit Lotus Domino or runs both 32-bit SybaseASE and 64-bit DB2.
Note
On HP Itanium, if you installed Sybase ASE 15.5 or later and Sybase ASE 15.0.3on the same system, follow the instructions in NMDA with Mixed 32-bit and 64-bit Databases and Applications on page 49. The ASE Backup Server is 64-bitin the 15.5 and later releases and the server is 32-bit in earlier releases.
If the system runs a single database or application or if the system runs multipledatabases or applications that are all supported by a single NMDA package,then skip this step.
9. If you performed step 8, then skip this step. Otherwise, install NMDA byfollowing the instructions for the operating system in the correct chapter:
l UNIX and Linux Installation on page 23
l Microsoft Windows Installation on page 39
Note
If only 32-bit database or application servers are installed on a 64-bit system,then you only need to install 32-bit NMDA on the system.
After the software installation completes, a message appears about how tostart the NMDA scheduled backup configuration wizard. The EMC NetWorkerModule for Databases and Applications Release 9.0.x Administration Guidedescribes the wizard.
Getting Started
Road map to install or update NMDA on a database or application host 19

10. Perform all the required post-installation procedures. Road map to post-installation procedures on page 21 provides details.
Road map to update NMDA with the Package ManagerYou can update NMDA on one or more NMDA hosts by using the Package Managerfeature from a centralized NetWorker server. You can perform the update with thePackage Manager or the nsrpush command. When you use the Package Manager,NMDA must not be installed on the NetWorker server.
Note
Cluster environments do not support updates with the Package Manager. You cannotuse the Package Manager to update 32-bit NMDA on a 64-bit operating system.
The EMC NetWorker Updating from a Previous Release Guide describes the PackageManager, including the following procedures:
l Viewing software that is installed on NetWorker clients.
l Performing and monitoring the updates.
l Managing the repository of media kits that the Package Manager uses to installthe software from the NetWorker server.
Note
To add an NMDA release to the Package Manager repository, follow theinstructions in the EMC NetWorker Updating from a Previous Release Guide. If youuse the nsrpush command, type the complete product name as “NetWorkerModule for Databases and Applications” with the quotation marks.
Complete the following steps to update NMDA with the Package Manager.
Procedure
1. Review the Installation checklists on page 14.
2. Ensure that you meet the following requirements:
l NMDA 1.5 or later is installed on the NMDA host, and the operating systemssupport the Package Manager. You cannot perform an update of earlierNMDA releases.
The EMC NetWorker Updating from a Previous Release Guide at EMC OnlineSupport describes the operating systems that support the Package Managerfeature on the NMDA host.
l The NMDA client host contains a supported version of the NetWorker clientsoftware.
l The remote NetWorker server is release 9.0 or later. The NetWorker clienton the NMDA host is release 8.1 or later.
l The user that performs the update is both an NMC administrator and amember of the application administrator's user group on the NetWorkerserver.
3. Before you start an update, ensure that all backups and restores are stopped onthe client to be updated.
Getting Started
20 EMC NetWorker Module for Databases and Applications 9.0.x Installation Guide

Note
The Package Manager might stop and restart the NetWorker client nsrexecddaemon or service during the installation.
4. On the NetWorker server, perform the update of the NMDA client by using thePackage Manager feature or the nsrpush command.
The EMC NetWorker Updating from a Previous Release Guide provides moreinformation.
5. Perform all the required post-installation procedures on the client host. Roadmap to post-installation procedures on page 21 provides details.
Road map to post-installation proceduresAfter you have installed or updated NMDA, either directly on a local host or by remoteinstallation with Package Manager, complete the installation by performing anyrequired post-installation procedures.
Procedure
1. If you are installing NMDA for the first time on the host, register and enableNMDA to work with the NetWorker software.
The EMC NetWorker Licensing Guide describes licensing and enabling ofsoftware.
The EMC Price Guide describes the licensing requirements for NetWorkermodules.
2. If you perform snapshot backups for Oracle ASM on the host, install and enablethe required Replication Manager agent software on the NMDA host and themount host.
The Replication Manager server software must exist on a separate host.
3. Ensure that the automatic wizard registration succeeded:
a. Log in as the root user (UNIX or Linux) or system administrator (Windows).
b. At a new command prompt, type the appropriate command:
l On UNIX or Linux, type the following command:
nsradmin -p nsrexecd
l On Windows, type the following command:
nsradmin.exe -p nsrexecd
c. At the nsradmin> prompt, type the following command:
print type: NSR remote agent
Check that the command output includes the correct values for "backuptype" (database or application type that you want to protect) and "product
Getting Started
Road map to post-installation procedures 21
version" (version of NMDA that you installed). You can run the exitcommand to return to the original console.
If the command output is missing or does not contain the correct values,then the NetWorker Remote Exec service (the nsrexecd ornsrexecd.exe program) was not running during the NMDA installation.Perform one of the following corrective actions:
l Start the NetWorker Remote Exec service, and then reinstall NMDA.
l Register the wizard manually by typing the appropriate command fromthe following table.
Note
To unregister the wizard manually, use the command from the table butreplace the -i option with -u.
Table 7 Command to register the wizard
Database or application Wizard registration command
DB2 nsrdb2ra(.exe) -i
Informix nsrifmxra(.exe) -i
Lotus nsrlotusra(.exe) -i
MySQL nsrmysqlra(.exe) -i
Oracle nsrorara(.exe) -i
Sybase ASE nsrsybra(.exe) -i
4. On UNIX or Linux, to ensure the success of backups and restores, check thatthe /nsr/apps directory and its subdirectories have the 01777 permissions.
The NMDA installation sets the permissions to 01777 for /nsr/apps and itssubdirectories. These permissions are required for non-root database users tocreate temporary files and logs during backups and restores. The sticky bit isalso set to ensure that the files can be removed only by the file owners. Forexample, the permissions appear as follows:
drwxrwxrwt 6 root root 4096 Dec 22 12:17 /nsr/apps
5. Configure the NMDA software.
The EMC NetWorker Module for Databases and Applications Release 9.0.xAdministration Guide provides details.
Getting Started
22 EMC NetWorker Module for Databases and Applications 9.0.x Installation Guide
CHAPTER 2
UNIX and Linux Installation
This chapter includes the following topics:
l Installing NMDA on AIX systems........................................................................ 24l Installing NMDA on HP-UX systems...................................................................25l Installing NMDA on Linux systems..................................................................... 26l Installing NMDA on Solaris systems................................................................... 27l Linking and unlinking NMDA in the environment on UNIX or Linux..................... 28l Uninstalling NMDA on UNIX or Linux systems....................................................36
UNIX and Linux Installation 23

Installing NMDA on AIX systemsInstall NMDA on an AIX system by running the installp command line interface(CLI) program or the AIX System Management Interface Tool (SMIT), which is agraphical user interface (GUI) program.
Procedure
1. Complete the initial steps in Installation road maps on page 17. Ensure that youmeet the following requirements:
l You are logged in as the root user.
l No backups or restores are running.
l The nsrexecd daemon is running. You can check the daemon status byrunning the ps -ef | grep nsrexecd command.
l You are in the correct directory that contains the NMDA installation files.
2. Run either the installp CLI program or the SMIT GUI program:
l To run the CLI program, type the following command:
installp -a -d /dir_pathname LGTOnmda.rte
where /dir_pathname is the complete pathname of the correct directorythat contains the installation software as described in Accessing the NMDAsoftware on page 15.
To verify that the installation succeeded, type the following command:
lslpp -L all | grep -i lgtonmda
If the lslpp command output includes LGTOnmda.rte, then the installationsucceeded.
l To run the SMIT GUI program, perform the following steps:
a. Type the following command:
smitty install_latest
b. In the Entry Field, type the location of the NMDA installation software asthe complete pathname of the directory that is described in Accessingthe NMDA software on page 15.
c. Select the option SOFTWARE to install.
d. Type yes in response to the following prompts:
Accept new license agreements?Preview new license agreements?
e. Select F4=List to display the list of the NMDA software packages.
f. Select LGTOnmda.rte to install the NMDA software.
g. Select Install and Update Software.
h. Press Enter to begin the installation.
UNIX and Linux Installation
24 EMC NetWorker Module for Databases and Applications 9.0.x Installation Guide

3. Link NMDA to the database server environment by completing the steps in Linking and unlinking NMDA in the environment on UNIX or Linux on page 28.
4. Return to the installation road map to perform any post-installation procedures.As part of these procedures, ensure that the NMDA automatic wizardregistration succeeded by using the following commands:
nsradmin -p nsrexecdnsradmin> print type: NSR remote agent
Road map to post-installation procedures on page 21 provides complete details.
Installing NMDA on HP-UX systemsInstall NMDA on an HP-UX system by using the swinstall command to run thecommand line interface (CLI) or the graphical user interface (GUI) program.
Procedure
1. Complete the initial steps in Installation road maps on page 17. Ensure that youmeet the following requirements:
l You are logged in as the root user.
l No backups or restores are running.
l The nsrexecd daemon is running. You can check the daemon status byrunning the ps -ef | grep nsrexecd command.
l You are in the correct directory that contains the NMDA installation files.
2. To run either the CLI or GUI program, type the swinstall command:
l To run the swinstall CLI program, type the following command:
swinstall -x mount_all_filesystems=false -s /dir_pathname/LGTOnmda.pkg NMDA
where /dir_pathname is the complete pathname of the directory thatcontains the software installation files as described in Accessing the NMDAsoftware on page 15.
l To run the swinstall GUI program, type the following command:
swinstall -x mount_all_filesystems=false -i -s /dir_pathname/LGTOnmda.pkg NMDA
where /dir_pathname is the complete pathname of the directory thatcontains the software installation files as described in Accessing the NMDAsoftware on page 15. Perform the following steps in the GUI program:
a. From the Actions menu, select Install (analysis).When the analysis is complete, a Ready with Warnings messageappears. The message is normal.
b. Click OK to continue the installation.
UNIX and Linux Installation
Installing NMDA on HP-UX systems 25
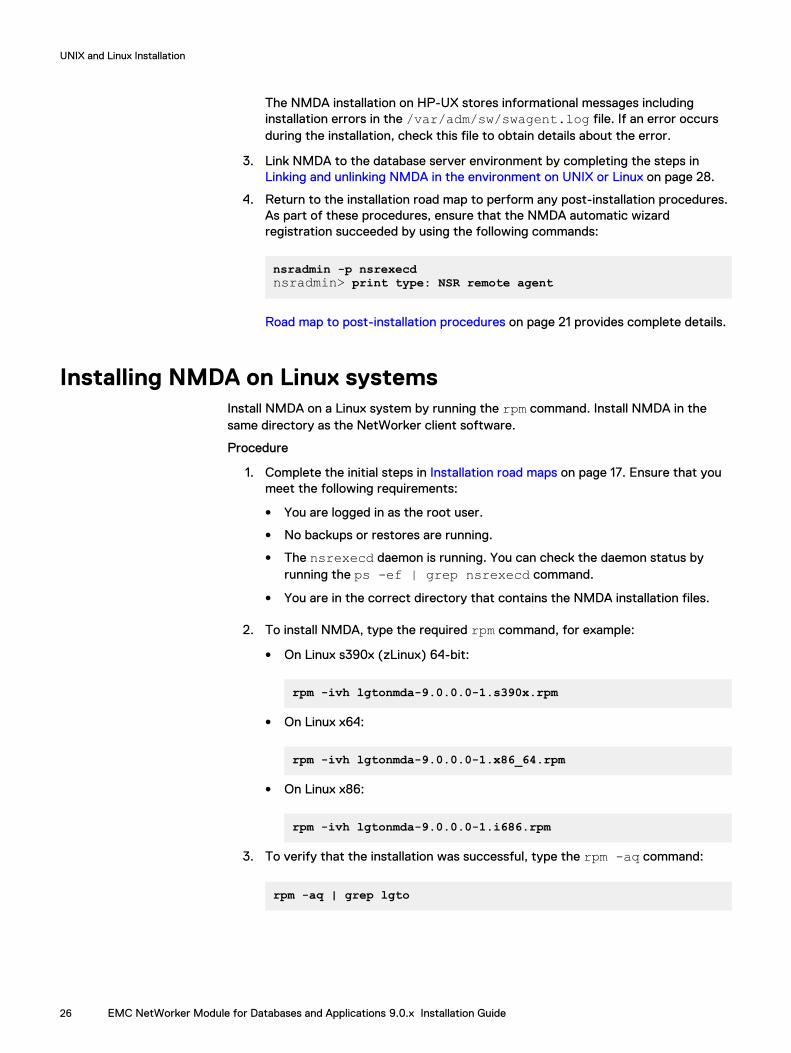
The NMDA installation on HP-UX stores informational messages includinginstallation errors in the /var/adm/sw/swagent.log file. If an error occursduring the installation, check this file to obtain details about the error.
3. Link NMDA to the database server environment by completing the steps in Linking and unlinking NMDA in the environment on UNIX or Linux on page 28.
4. Return to the installation road map to perform any post-installation procedures.As part of these procedures, ensure that the NMDA automatic wizardregistration succeeded by using the following commands:
nsradmin -p nsrexecdnsradmin> print type: NSR remote agent
Road map to post-installation procedures on page 21 provides complete details.
Installing NMDA on Linux systemsInstall NMDA on a Linux system by running the rpm command. Install NMDA in thesame directory as the NetWorker client software.
Procedure
1. Complete the initial steps in Installation road maps on page 17. Ensure that youmeet the following requirements:
l You are logged in as the root user.
l No backups or restores are running.
l The nsrexecd daemon is running. You can check the daemon status byrunning the ps -ef | grep nsrexecd command.
l You are in the correct directory that contains the NMDA installation files.
2. To install NMDA, type the required rpm command, for example:
l On Linux s390x (zLinux) 64-bit:
rpm -ivh lgtonmda-9.0.0.0-1.s390x.rpm
l On Linux x64:
rpm -ivh lgtonmda-9.0.0.0-1.x86_64.rpm
l On Linux x86:
rpm -ivh lgtonmda-9.0.0.0-1.i686.rpm
3. To verify that the installation was successful, type the rpm -aq command:
rpm -aq | grep lgto
UNIX and Linux Installation
26 EMC NetWorker Module for Databases and Applications 9.0.x Installation Guide

The command output must include the proper lines, for example:
lgtoclnt-9.0.0.0-1lgtoxtdclnt-9.0.0.0-1lgtonmda-9.0.0.0-1
4. Link NMDA to the database server environment by completing the steps in Linking and unlinking NMDA in the environment on UNIX or Linux on page 28.
5. Return to the installation road map to perform any post-installation procedures.As part of these procedures, ensure that the NMDA automatic wizardregistration succeeded by using the following commands:
nsradmin -p nsrexecdnsradmin> print type: NSR remote agent
Road map to post-installation procedures on page 21 provides complete details.
Installing NMDA on Solaris systemsInstall NMDA on a Solaris system by running the pkgadd command.
Procedure
1. Complete the initial steps in Installation road maps on page 17. Ensure that youmeet the following requirements:
l You are logged in as the root user.
l No backups or restores are running.
l The nsrexecd daemon is running. You can check the daemon status byrunning the ps -ef | grep nsrexecd command.
l You are in the correct directory that contains the NMDA installation files.
Note
If the Solaris system has Solaris zones (containers) and NMDA is to run on asparse root zone, install NMDA on the global zone and on each required sparseroot zone.
2. Type the required pkgadd command:
pkgadd -d /dir_pathname LGTOnmda
where /dir_pathname is the complete pathname of the directory thatcontains the LGTOnmda package.
3. Type y when prompted whether to continue the installation.
The system installs the software in the same directory as the NetWorker clientsoftware.
4. Link NMDA to the database server environment by completing the steps in Linking and unlinking NMDA in the environment on UNIX or Linux on page 28.
UNIX and Linux Installation
Installing NMDA on Solaris systems 27

5. Return to the installation road map to perform any post-installation procedures.As part of these procedures, ensure that the NMDA automatic wizardregistration succeeded by using the following commands:
nsradmin -p nsrexecdnsradmin> print type: NSR remote agent
Road map to post-installation procedures on page 21 provides details.
Linking and unlinking NMDA in the environment on UNIX orLinux
After you install NMDA on UNIX or Linux as described in the preceding topics of thischapter, perform an additional procedure to link NMDA to the database environment.Before you uninstall NMDA, also remove the link.
Use the correct instructions that follow to perform the linking or unlinking procedurefor the database:
l Linking NMDA in a DB2 environment
l Linking and unlinking NMDA in an Informix environment
l Linking and unlinking NMDA in an Oracle environment
l Linking and unlinking NMDA in a Sybase ASE environment
Note
In a Lotus Domino or MySQL environment, you do not require the linking or unlinkingprocedure to install or uninstall NMDA.
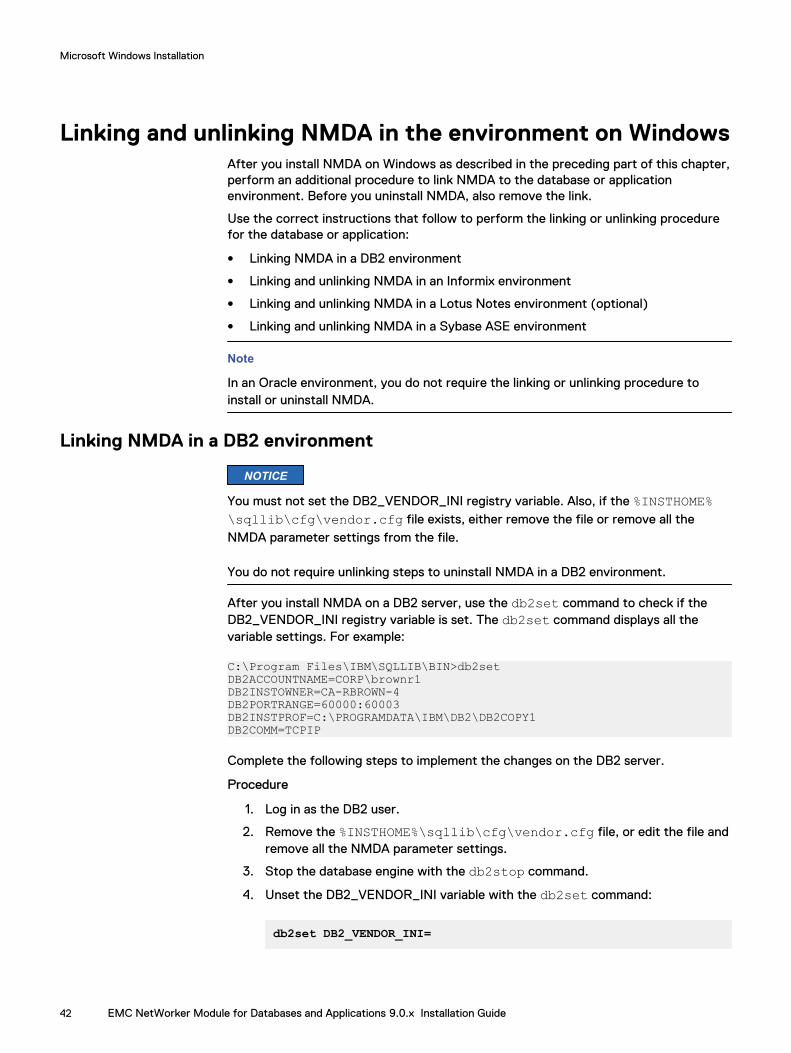
Linking NMDA in a DB2 environment
NOTICE
You must not set the DB2_VENDOR_INI registry variable. Also, if the $INSTHOME/sqllib/cfg/vendor.cfg file exists, either remove the file or remove all the NMDAparameter settings from the file.
You do not require unlinking steps to uninstall NMDA in a DB2 environment.
After you install NMDA on a DB2 server, use the db2set command to check if theDB2_VENDOR_INI registry variable is set. The db2set command displays all thevariable settings.
You must complete the required steps to implement the changes on the DB2 server.
Procedure
1. Log in as the DB2 user.
2. Remove the $INSTHOME/sqllib/cfg/vendor.cfg file, or edit the file andremove all the NMDA parameter settings.
3. Unset the DB2_VENDOR_INI variable:
a. Stop the database instance with the db2stop command.
UNIX and Linux Installation
28 EMC NetWorker Module for Databases and Applications 9.0.x Installation Guide

b. Unset the DB2_VENDOR_INI registry variable with the db2set command:
db2set DB2_VENDOR_INI=
c. Restart the database instance with the db2start command.
Linking and unlinking NMDA in an Informix environmentPerform the required link or unlink procedure in an Informix environment:
l After you install NMDA, perform the procedure to link NMDA.
l Before you uninstall NMDA, perform the procedure to unlink NMDA.
Linking NMDA to the Informix server environmentAfter you install NMDA, link NMDA to the Informix server environment.
Procedure
1. Log in as the Informix user.
2. Edit the Informix $ONCONFIG file and set the BAR_BSALIB_PATH variable tothe full pathname of the NMDA libnsrifmx (XBSA) library.
The default library pathname is /usr/lib/libnsrifmx.xx where xx is theplatform-specific extension:
l sl on HP-UX 64-bit systems
l so on Linux and other UNIX systems
3. Update the sm_versions file (Informix user password required) by typing thefollowing command:
echo "1|1.0.1|nwbsa|1">> $INFORMIXDIR/etc/sm_versions
This action updates the NMDA Informix library links. Without the requiredvalues, ON-Bar commands fail and the following message appears:
ERROR: Version 1.0.1 of the XBSA shared library is not compatible with version 1 of ON-Bar.
4. Restart the IDS server to apply the $ONCONFIG file changes.
Unlinking NMDA from the Informix server environmentBefore you uninstall NMDA, unlink NMDA from the Informix server environment.
Procedure
1. Log in as the Informix user.
2. Edit the Informix $ONCONFIG file and remove the setting from theBAR_BSALIB_PATH variable.
3. Restore the copy of the sm_versions file that Informix stored in$INFORMXIDIR/etc/sm_versions.std.
4. Restart the IDS server to apply the $ONCONFIG file changes.
UNIX and Linux Installation
Linking and unlinking NMDA in an Informix environment 29

Linking NMDA in a MySQL environmentEnsure that you meet the following requirements for MySQL support with NMDA on aMySQL database server host:
l A supported version of MySQL Enterprise Backup (MEB) software is installed onthe MySQL server host, as detailed in the technical notes in the EMC NetWorkerModule for Databases and Applications Release 9.0.x Release Notes.
l MySQL client library libmysqlclient.so version 18 is installed on the MySQLserver host, and the corresponding symbolic link is created.
Complete the following steps to install the MySQL client librarylibmysqlclient.so version 18 on the MySQL host and create thecorresponding symbolic link.
Procedure
1. To install MySQL libmysqlclient.so.18, download the appropriatepackages from MySQL, and then install the packages on the MySQL serverhost:
l For MySQL prior to version 5.7, install MySQL-shared-version.rpm orMySQL-shared-compat-version.rpm, where version depends on theLinux operating system and MySQL version in use.
l For MySQL version 5.7, install the following packages:
n mysql-commercial-servern mysql-commercial-clientn mysql-commercial-commonn mysql-commercial-libsn mysql-commercial-libs-compatThe libmysqlclient libraries are installed in /usr/lib/mysql (32-bit)or /usr/lib64/mysql (64-bit).
2. To create a symbolic link to libmysqlclient.so.18, type the appropriatecommand, depending on the MySQL version and Linux bitness:
l For MySQL prior to version 5.7:
n On 32-bit Linux, type the following command:
ln –s /usr/lib/libmysqlclient.so.18 /usr/lib/nsr/apps/libmysqlclient.so
n On 64-bit Linux, type the following command:
ln –s /usr/lib64/libmysqlclient.so.18 /usr/lib/nsr/apps/lib64/libmysqlclient.so
l For MySQL version 5.7:
n On 32-bit Linux, type the following command:
ln –s /usr/lib/mysql/libmysqlclient.so.18 /usr/lib/libmysqlclient.so
UNIX and Linux Installation
30 EMC NetWorker Module for Databases and Applications 9.0.x Installation Guide

n On 64-bit Linux, type the following command:
ln –s /usr/lib64/mysql/libmysqlclient.so.18 /usr/lib64/libmysqlclient.so
To verify the version of the installed MySQL client library, use the ls -lartcommand. For example:
l On 32-bit Linux:
ls -lart /usr/lib/libmysqlclient*
l On 64-bit Linux:
ls -lart /usr/lib64/libmysqlclient*
Linking and unlinking NMDA in an Oracle environmentPerform the required link or unlink procedure in an Oracle environment:
l After you install NMDA, perform the procedure to link NMDA.
l Before you uninstall NMDA, perform the procedure to unlink NMDA.
Linking NMDA to the Oracle server environment
Note
You do not need to shut down and restart Oracle instances to perform this procedure.
After you install NMDA, link NMDA to the Oracle server environment.
Procedure
1. Log in as the $ORACLE_HOME owner.
2. Create the symbolic link by using one of the following options:
l If you installed NMDA in the default directory, type the required commandsthat are listed in the following table.
l If you installed NMDA in a nondefault directory, perform one of the followingactions:
n Copy the libnsrora.xx library file to the default directory /usr/lib,and type the required linking commands that are listed in the followingtable.
n Without copying the libnsrora.xx library file to the defaultdirectory /usr/lib, type the linking commands that are listed in thefollowing table to link the libnsrora.xx file in the nondefaultinstallation directory /relocation_path/lib.
Note
The commands apply only to Oracle base releases. The commands might varyfor patched releases of the Oracle server.
UNIX and Linux Installation
Linking and unlinking NMDA in an Oracle environment 31

Table 8 Linking and unlinking commands for Oracle library file on UNIX or Linux
Operatingsystem
Create orremove link
Install: create the symbolic link Uninstall:remove the symbolic link
AIX Create link l % cd $ORACLE_HOME/lib
l % ln -s /usr/lib/libnsrora.a libobk.a
Remove link l % cd $ORACLE_HOME/lib
l % rm libobk.a
HP PA-RISC Create link l % cd $ORACLE_HOME/lib
l % ln -s /usr/lib/libnsrora.sl libobk.sl
Remove link l % cd $ORACLE_HOME/lib
l % rm libobk.sl
l HP Itanium
l Linux s390x
l Linux x64
l Linux x86
l Solaris SPARC
l Solaris x64
Create link % cd $ORACLE_HOME/lib
l If not relocated:% ln -s /usr/lib/libnsrora.so libobk.so
l If relocated:% ln -s /relocation_path/lib/libnsrora.so libobk.so
Remove link l % cd $ORACLE_HOME/lib
l % rm libobk.so
Unlinking NMDA from the Oracle server environmentBefore you uninstall NMDA, unlink NMDA from the Oracle server environment.
Procedure
1. Log in as the $ORACLE_HOME owner.
2. Type the required commands that are listed in Table 8 on page 32 to removethe link.
3. If you copied the libnsrora.xx library file from the installation location to thedefault directory /usr/lib, remove the library from the default directory.
Linking and unlinking NMDA in a Sybase ASE environmentPerform the required link or unlink procedure in a Sybase ASE Backup Serverenvironment:
l After you install NMDA, perform the procedure to link NMDA.
l Before you uninstall NMDA, perform the procedure to unlink NMDA.
UNIX and Linux Installation
32 EMC NetWorker Module for Databases and Applications 9.0.x Installation Guide

Linking NMDA to the Sybase ASE server on AIX, Linux, and SolarisAfter you install NMDA on a Sybase ASE server, link NMDA to the server environment.
Procedure
1. Log in as the Sybase ASE user.
2. Create the symbolic link by using one of the following options:
l If you installed NMDA in the default directory, type the required commandsthat are listed in the following table.
l If you installed NMDA in a nondefault directory, perform one of the followingactions:
n Copy the libnsrsyb.xx library file to the default directory, and typethe required linking commands that are listed in the following table.
n Without copying the libnsrsyb.xx library file to the default directory,type the linking commands that are listed in the following table to link thelibnsrsyb.xx file in the nondefault installation directory /relocation_path/lib.
Table 9 Linking and unlinking commands for Sybase ASE library file on AIX, Linux, Solaris
Operatingsystem
Create orremove link
Install: create the symbolic link
Uninstall: remove the symbolic link
AIX
Linux x64
Linux x86
Solaris SPARC
Solaris x64
Create link % cd $SYBASE/$SYBASE_ASE/lib
If not relocated:
% ln -s /usr/lib/libnsrsyb.so libnsrsyb.so
If relocated:
% ln -s /relocation_path/lib/libnsrsyb.so libnsrsyb.so
Remove link % cd $SYBASE/$SYBASE_ASE/lib
% rm libnsrsyb.so
3. On SuSE Linux, if the LANG environment variable is set to POSIX, then createthe /nsr/nsrrc file if it does not exist. Also set LANG in the file to one of thelocales that the Sybase server supports. If you do not have a preferred localevalue, set LANG to C:
# cat /nsr/nsrrcLANG=Cexport LANG
After you set the environment variable, restart the NetWorker client. The EMCNetWorker Administration Guide provides details about the NetWorker software.
4. With Sybase 16.0 SP02, Sybase delivers a 64-bit backup server in addition to a32-bit backup server. The backup server script points to the 64-bit backup
UNIX and Linux Installation
Linking and unlinking NMDA in a Sybase ASE environment 33
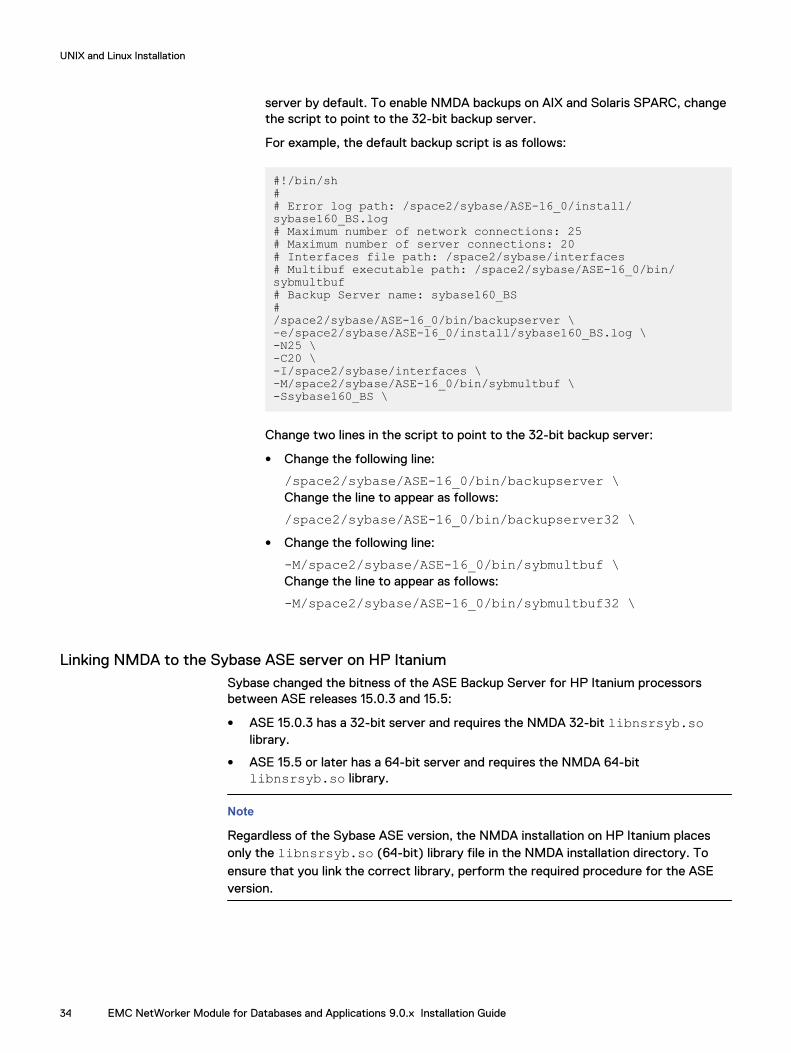
server by default. To enable NMDA backups on AIX and Solaris SPARC, changethe script to point to the 32-bit backup server.
For example, the default backup script is as follows:
#!/bin/sh## Error log path: /space2/sybase/ASE-16_0/install/sybase160_BS.log# Maximum number of network connections: 25# Maximum number of server connections: 20# Interfaces file path: /space2/sybase/interfaces# Multibuf executable path: /space2/sybase/ASE-16_0/bin/sybmultbuf# Backup Server name: sybase160_BS#/space2/sybase/ASE-16_0/bin/backupserver \-e/space2/sybase/ASE-16_0/install/sybase160_BS.log \-N25 \-C20 \-I/space2/sybase/interfaces \-M/space2/sybase/ASE-16_0/bin/sybmultbuf \-Ssybase160_BS \
Change two lines in the script to point to the 32-bit backup server:
l Change the following line:
/space2/sybase/ASE-16_0/bin/backupserver \Change the line to appear as follows:
/space2/sybase/ASE-16_0/bin/backupserver32 \l Change the following line:
-M/space2/sybase/ASE-16_0/bin/sybmultbuf \Change the line to appear as follows:
-M/space2/sybase/ASE-16_0/bin/sybmultbuf32 \
Linking NMDA to the Sybase ASE server on HP ItaniumSybase changed the bitness of the ASE Backup Server for HP Itanium processorsbetween ASE releases 15.0.3 and 15.5:
l ASE 15.0.3 has a 32-bit server and requires the NMDA 32-bit libnsrsyb.solibrary.
l ASE 15.5 or later has a 64-bit server and requires the NMDA 64-bitlibnsrsyb.so library.
Note
Regardless of the Sybase ASE version, the NMDA installation on HP Itanium placesonly the libnsrsyb.so (64-bit) library file in the NMDA installation directory. Toensure that you link the correct library, perform the required procedure for the ASEversion.
UNIX and Linux Installation
34 EMC NetWorker Module for Databases and Applications 9.0.x Installation Guide

Linking NMDA to ASE 15.0.3 on HP Itanium
The NMDA installation does not place the required 32-bit libnsrsyb32.so libraryfile in the installation directory.
Copy the libnsrsyb32.so library file to the installation directory and link the libraryfile to the Sybase ASE server.
Procedure
1. As the root user, go to the directory that contains the NMDA installation files asdescribed in Accessing the NMDA software on page 15.
2. Copy the 32-bit NMDA Sybase ASE library file to the installation directory:
cp 32-bit/sybase/libnsrsyb32.so /usr/lib/libnsrsyb32.so
Note
When you uninstall NMDA, first remove this library manually.
3. As the Sybase ASE user, type the following commands to link the library file tothe Sybase ASE server:
cd $SYBASE/$SYBASE_ASE/libln -s /usr/lib/libnsrsyb32.so libnsrsyb.so
Linking NMDA to ASE 15.5 or later on HP Itanium
The NMDA installation places the required 64-bit libnsrysb.so file in theinstallation directory.
As the Sybase ASE user, type the following commands to link the library to the SybaseASE server:
cd $SYBASE/$SYBASE_ASE/libln -s /usr/lib/libnsrsyb.so libnsrsyb.so
Unlinking NMDA from the Sybase ASE serverBefore you uninstall NMDA, unlink NMDA from the Sybase ASE server environment.
Procedure
1. Log in as the Sybase ASE user.
2. For Sybase ASE 15.0.3 on HP Itanium, remove the libnsrsyb32.so file fromthe installation directory.
3. Type the required commands from Table 9 on page 33 to remove the link.
UNIX and Linux Installation
Linking and unlinking NMDA in a Sybase ASE environment 35

Uninstalling NMDA on UNIX or Linux systems
Note
If you installed NMDA to support the coexistence of 32-bit and 64-bit databases andapplications on the same host, perform the procedure for Uninstalling 32-bit NMDA ona 32-bit/64-bit system on page 53.
To uninstall NMDA in any of the following configurations, complete the procedure asfollows:
l Single host
l Active-passive cluster
l Active-active application cluster, such as DB2 DPF, DB2 pureScale, InformixMACH, Oracle RAC, or Sybase ASE Cluster Edition
When you uninstall NMDA in a cluster, perform the uninstall procedure on each nodeof the cluster that contains the NMDA software.
Procedure
1. Ensure that no backups or restores are running.
2. Ensure that the NetWorker Remote Exec daemon, nsrexecd, is running.
Note
If the NetWorker Remote Exec daemon is not running during the uninstallation,the NMDA wizard information (not the binary) is left on the local host.
3. Unlink NMDA from the database environment according to the instructions in Linking and unlinking NMDA in the environment on UNIX or Linux on page 28.
4. As the root user, uninstall NMDA according to the following uninstallinstructions for the AIX, HP-UX, Linux, or Solaris operating system.
Note
You do not need to shut down a database to uninstall NMDA.
Uninstalling NMDA on AIX systemsUninstall NMDA on an AIX system by running the installp command or the SMITGUI program.
Procedure
1. Ensure that you have completed the steps in Uninstalling NMDA on UNIX orLinux systems on page 36 for the initial part of the uninstall procedure.
2. Use one of the following methods to uninstall NMDA:
l Use the command line interface by typing the following command:
installp -u LGTOnmda.rte
l Use the SMIT GUI program:
UNIX and Linux Installation
36 EMC NetWorker Module for Databases and Applications 9.0.x Installation Guide

a. Type the following smitty command:
smitty remove
b. Select F4=List to display a list of the installed software packages.
c. Select the package to uninstall:
LGTOnmda.rte
d. Set the PREVIEW Only option to No.
e. Press Enter to uninstall NMDA.
f. Exit the SMIT GUI program.
Uninstalling NMDA on HP-UX systemsUninstall NMDA on an HP-UX system by using the swinstall command to run thecommand line interface (CLI) or the graphical user interface (GUI) program.
Procedure
1. Ensure that you have completed the steps in Uninstalling NMDA on UNIX orLinux systems on page 36 for the initial part of the uninstall procedure.
2. Use one of the following methods to uninstall NMDA:
l Use the command line interface by typing the following command:
swremove NMDA
l Use the swremove GUI program:
a. Type the following swremove command:
swremove -i NMDA
b. Select Actions > Remove (analysis).
c. To complete the uninstall when the system analysis is complete, click OK.
d. To confirm the uninstall, click Yes.
Uninstalling NMDA on Linux systemsUninstall NMDA on a Linux system by running the rpm command.
Procedure
1. Ensure that you have completed the steps in Uninstalling NMDA on UNIX orLinux systems on page 36 for the initial part of the uninstall procedure.
2. Type the following command:
rpm -e lgtonmda
Note
On Linux, uninstall NMDA before you uninstall the NetWorker client software.
UNIX and Linux Installation
Uninstalling NMDA on HP-UX systems 37

Uninstalling NMDA on Solaris systemsUninstall NMDA on a Solaris system by running the pkgrm command.
Procedure
1. Ensure that you have completed the steps in Uninstalling NMDA on UNIX orLinux systems on page 36 for the initial part of the uninstall procedure.
Note
To uninstall NMDA on Solaris zones, first uninstall NMDA on the global zone,and then uninstall NMDA on each required sparse root zone.
2. Type the following command:
pkgrm LGTOnmda
3. Type y when prompted.
The software is uninstalled from the directory that contains the NetWorkerclient software.
UNIX and Linux Installation
38 EMC NetWorker Module for Databases and Applications 9.0.x Installation Guide
CHAPTER 3
Microsoft Windows Installation
This chapter includes the following topics:
l Installing NMDA on Microsoft Windows............................................................. 40l Linking and unlinking NMDA in the environment on Windows.............................42l Maintaining the installation on Microsoft Windows............................................ 46l Uninstalling NMDA on Microsoft Windows.........................................................46
Microsoft Windows Installation 39

Installing NMDA on Microsoft WindowsInstall NMDA on a Windows system by running the NMDA Setup program,win_x64\networkr\NMDA.exe.
Procedure
1. Complete the initial steps in Installation road maps on page 17. Ensure that youmeet the following requirements:
l You are logged in as an administrator.
l No backups or restores are running.
l The nsrexecd.exe service is running. You can check the service status byrunning either Component Services or Task Manager.
l You are in the correct directory that contains the NMDA installation files.
2. Install NMDA by using one of the following methods:
l Setup program method with installation wizard:
a. Run the NMDA Setup program, win_x64\networkr\NMDA.exe, andfollow the instructions that the installation wizard provides.
Note
If the NMDA Setup program detects no NetWorker client program files,the program displays an error message and exits without installingNMDA.
b. To exit the Setup program, click Finish.
l Silent installation method:
Run the NMDA.exe command with the appropriate command options:
NMDA.exe <installation_options>
where <installation_options> includes the following options:
n /s /q suppresses all the UI output.
n /passive displays the progress bar only during the installation.
n /repair runs a repair or (if the software is not installed) an installation.
n /l <pathname> specifies the log file pathname. Enclose <pathname> indouble quotes if it includes a space. The default directory for the log fileis C:\users\username\AppData\Local\temp.
For example, the following command performs a silent NMDA installationthat logs messages in the C:\Program Files\EMC NetWorker\nsr\logs\nmda_installation.log file:
NMDA.exe /s /q /l "C:\Program Files\EMC NetWorker\nsr\logs\nmda_installation.log"
When the NMDA package has the same bitness as the NetWorker clientpackage that is installed on the system, the NMDA program files are installed in
Microsoft Windows Installation
40 EMC NetWorker Module for Databases and Applications 9.0.x Installation Guide

the same directory as the NetWorker client program files,NetWorker_install_path\bin.
When you install a 32-bit NMDA package on 64-bit Windows with a 64-bitNetWorker client package, the NMDA program files are installed in%SystemDrive%\Program Files (x86)\Legato\nsr\bin, regardless ofwhere the NetWorker client program files are installed.
3. Verify that the system Path environment variable includes the requireddirectories, including the NetWorker client installation directory and NMDAinstallation directory. For example:
a. Browse to Control Panel > System > Advanced System Settings.
b. On the Advanced tab, click Environment Variables.
c. In the System Variables section, verify the Path variable. The Path variablemust include the following directories:
l NetWorker client installation directory, for example,NetWorker_install_dir\bin.
l NMDA installation directory, as described in step 2.
Note
The directory pathname can include spaces, but there cannot be spacesbefore or after the pathname.
d. If you modified the Path variable, restart the NetWorker Remote ExecService (the program nsrexecd.exe).
4. Restart the database server, if required:
l If you installed the NetWorker client software for the first time in aparticular directory on a DB2, Oracle, or a Sybase ASE server before youinstalled NMDA, then restart the DB2, Oracle, or Sybase ASE serverinstance.
l If you installed 32-bit NMDA for the first time with a 64-bit NetWorker clienton a Sybase ASE server and you will perform Client Direct backups to a DataDomain device, restart the Sybase ASE server.
5. If you installed a 32-bit NMDA package on 64-bit Windows with a 64-bitNetWorker client package, then restart the NetWorker Remote Exec Service(the program nsrexecd.exe).
6. Link NMDA to the database or the application server environment bycompleting the steps in Linking and unlinking NMDA in the environment onWindows on page 42.
7. Return to the installation road map to perform any post-installation procedures.As part of these procedures, ensure that the NMDA automatic wizardregistration succeeded by using the following commands:
nsradmin.exe -p nsrexecdnsradmin> print type: NSR remote agent
Road map to post-installation procedures on page 21 provides complete details.
Microsoft Windows Installation
Installing NMDA on Microsoft Windows 41
Linking and unlinking NMDA in the environment on WindowsAfter you install NMDA on Windows as described in the preceding part of this chapter,perform an additional procedure to link NMDA to the database or applicationenvironment. Before you uninstall NMDA, also remove the link.
Use the correct instructions that follow to perform the linking or unlinking procedurefor the database or application:
l Linking NMDA in a DB2 environment
l Linking and unlinking NMDA in an Informix environment
l Linking and unlinking NMDA in a Lotus Notes environment (optional)
l Linking and unlinking NMDA in a Sybase ASE environment
Note
In an Oracle environment, you do not require the linking or unlinking procedure toinstall or uninstall NMDA.
Linking NMDA in a DB2 environment
NOTICE
You must not set the DB2_VENDOR_INI registry variable. Also, if the %INSTHOME%\sqllib\cfg\vendor.cfg file exists, either remove the file or remove all theNMDA parameter settings from the file.
You do not require unlinking steps to uninstall NMDA in a DB2 environment.
After you install NMDA on a DB2 server, use the db2set command to check if theDB2_VENDOR_INI registry variable is set. The db2set command displays all thevariable settings. For example:
C:\Program Files\IBM\SQLLIB\BIN>db2setDB2ACCOUNTNAME=CORP\brownr1DB2INSTOWNER=CA-RBROWN-4DB2PORTRANGE=60000:60003DB2INSTPROF=C:\PROGRAMDATA\IBM\DB2\DB2COPY1DB2COMM=TCPIP
Complete the following steps to implement the changes on the DB2 server.
Procedure
1. Log in as the DB2 user.
2. Remove the %INSTHOME%\sqllib\cfg\vendor.cfg file, or edit the file andremove all the NMDA parameter settings.
3. Stop the database engine with the db2stop command.
4. Unset the DB2_VENDOR_INI variable with the db2set command:
db2set DB2_VENDOR_INI=
Microsoft Windows Installation
42 EMC NetWorker Module for Databases and Applications 9.0.x Installation Guide
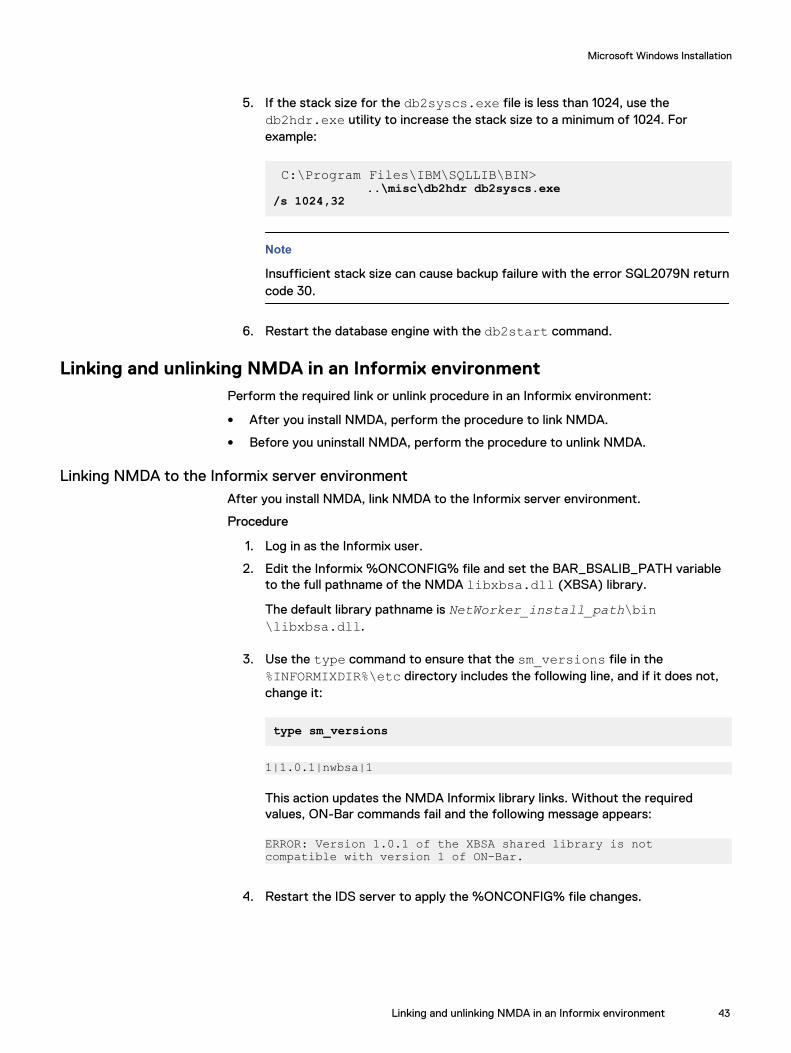
5. If the stack size for the db2syscs.exe file is less than 1024, use thedb2hdr.exe utility to increase the stack size to a minimum of 1024. Forexample:
C:\Program Files\IBM\SQLLIB\BIN> ..\misc\db2hdr db2syscs.exe/s 1024,32
Note
Insufficient stack size can cause backup failure with the error SQL2079N returncode 30.
6. Restart the database engine with the db2start command.
Linking and unlinking NMDA in an Informix environmentPerform the required link or unlink procedure in an Informix environment:
l After you install NMDA, perform the procedure to link NMDA.
l Before you uninstall NMDA, perform the procedure to unlink NMDA.
Linking NMDA to the Informix server environmentAfter you install NMDA, link NMDA to the Informix server environment.
Procedure
1. Log in as the Informix user.
2. Edit the Informix %ONCONFIG% file and set the BAR_BSALIB_PATH variableto the full pathname of the NMDA libxbsa.dll (XBSA) library.
The default library pathname is NetWorker_install_path\bin\libxbsa.dll.
3. Use the type command to ensure that the sm_versions file in the%INFORMIXDIR%\etc directory includes the following line, and if it does not,change it:
type sm_versions
1|1.0.1|nwbsa|1
This action updates the NMDA Informix library links. Without the requiredvalues, ON-Bar commands fail and the following message appears:
ERROR: Version 1.0.1 of the XBSA shared library is not compatible with version 1 of ON-Bar.
4. Restart the IDS server to apply the %ONCONFIG% file changes.
Microsoft Windows Installation
Linking and unlinking NMDA in an Informix environment 43
Unlinking NMDA from the Informix server environmentBefore you uninstall NMDA, unlink NMDA from the Informix server environment.
Procedure
1. Log in as the Informix user.
2. Edit the Informix %ONCONFIG% file and unset the BAR_BSALIB_PATHvariable.
3. Restore the copy of the sm_versions file that Informix stored in%INFORMXIDIR%\etc\sm_versions.std.
4. Restart the IDS server to apply the %ONCONFIG% file changes.
Linking and unlinking NMDA in a Lotus Notes environmentPerform the required link or unlink procedure in a Lotus Notes environment:
l After you install NMDA, perform the procedure to link NMDA.
l Before you uninstall NMDA, perform the procedure to unlink NMDA.
You require these procedures on Windows only when you want to use the NMDALotus document-level restore through the Lotus Notes client GUI to restore deleted ormodified Notes documents.
Note
The 32-bit NMDA Windows package must be installed on the Notes client host.
Linking NMDA to Lotus Notes
After you install NMDA, you can add the document-level recovery feature to the LotusNotes client software. The EMC NetWorker Module for Databases and ApplicationsRelease 9.0.x Administration Guide describes the feature.
Complete the following steps to add the document-level recovery feature.
Procedure
1. Exit the Lotus Notes client or administrator GUI.
2. Copy the nsrdoclb.dll file from the NMDA software directory to the Notesdirectory that contains the notes.ini file, which is typically %SystemDrive%\Lotus\Notes.
3. In the Notes directory, add the following line to the notes.ini file:
AddInMenus=nsrdoclb.dll
If an AddInMenus item exists, you can place a comma after it and add your itemas follows:
AddInMenus=command.dll, nsrdoclb.dll
4. Start the Lotus Notes client software.
The Lotus Notes client Actions menu displays the following choices:
Microsoft Windows Installation
44 EMC NetWorker Module for Databases and Applications 9.0.x Installation Guide

l NMDA Lotus - Restore Selected Documents
l NMDA Lotus - Restore Deleted Documents
Unlinking NMDA from Lotus NotesBefore you uninstall NMDA, remove the NMDA document-level recovery feature fromthe Notes Client software.
Procedure
1. Exit the Lotus Notes client or administrator GUI.
2. In the Notes directory, remove the following line from the notes.ini file:
AddInMenus=nsrdoclb.dll
3. Delete the nsrdoclb.dll file from the Notes directory, which is typically%SystemDrive%\Lotus\Notes.
4. Start the Lotus Notes client software.
The recovery items previously added to the Lotus Notes client Actions menuare removed.
Linking and unlinking NMDA in a Sybase ASE environmentPerform the required link or unlink procedure in a Sybase ASE Backup Serverenvironment:
l After you install NMDA, perform the procedure to link NMDA.
l Before you uninstall NMDA, perform the procedure to unlink NMDA.
Linking NMDA to the Sybase ASE server environmentCopy the libnsrsyb.dll file from the NetWorker location to the Sybase ASElocation.
Procedure
1. Go to the directory that contains the NMDA installed files,NetWorker_install_path\bin.
2. Copy the libnsrsyb.dll file to the %SYBASE%\%SYBASE_ASE%\libdirectory.
Unlinking NMDA from the Sybase ASE server environmentBefore you uninstall NMDA, remove the link to the Sybase ASE server environment.
Procedure
1. Open the %SYBASE%\%SYBASE_ASE%\lib directory.
2. Delete the libnsrsyb.dll entry.
Microsoft Windows Installation
Linking and unlinking NMDA in a Sybase ASE environment 45

Maintaining the installation on Microsoft WindowsTo repair an NMDA installation on a Microsoft Windows system, complete thefollowing steps.
Procedure
1. Log in as the Windows system local administrator user.
2. Ensure that no backups or restores are running.
3. Go to the directory that contains the NMDA installation files as described in Accessing the NMDA software on page 15.
4. Run the win_x64\networkr\NMDA.exe program.
5. In the Installation Modification dialog box, select Repair, and then clickRepair to begin the installation. The Setup program reinstalls the NMDA files asrequired.
6. In the Complete the Setup dialog box, click Finish to exit the wizard.
7. If you changed the system Path variable, restart the Windows system and verifythat any required database instances and services are restarted.
Uninstalling NMDA on Microsoft Windows
Note
If you installed NMDA to support the coexistence of 32-bit and 64-bit databases andapplications on the same host, perform the procedure for Uninstalling 32-bit NMDA ona 32-bit/64-bit system on page 53.
To uninstall NMDA in any of the following configurations, complete the procedure asfollows:
l Single host
l Active-passive cluster
l Active-active application cluster, such as DB2 DPF, Informix MACH, Oracle RAC,or Sybase ASE Cluster Edition
When you uninstall NMDA in a cluster, perform the uninstall procedure on each nodeof the cluster that contains the NMDA software.
Procedure
1. Log in as the Windows system local administrator user on the NMDA host.
2. Ensure that no backups or restores are running.
3. Ensure that the NetWorker Remote Exec service, nsrexecd.exe, is running.
Note
If the NetWorker Remote Exec service is not running during the uninstallation,the NMDA wizard information (not the binary) is left on the local host.
4. Unlink NMDA from the database or application environment according to theinstructions in Linking and unlinking NMDA in the environment on Windows onpage 42.
Microsoft Windows Installation
46 EMC NetWorker Module for Databases and Applications 9.0.x Installation Guide

5. Uninstall NMDA by using one of the following methods:
Note
You do not need to shut down a database to uninstall NMDA.
l Setup program method with installation wizard:
a. Go to the directory that contains the NMDA installation files as describedin Accessing the NMDA software on page 15, and then run thewin_x64\networkr\NMDA.exe program.
b. In the Installation Modification dialog box, select Remove, and thenclick Remove. The Setup program uninstalls the NMDA files as required.
c. In the Complete the Setup dialog box, click Finish to exit the wizard.
l Silent uninstallation method:
Run the NMDA.exe command with the appropriate command options:
NMDA.exe /uninstall <uninstallation_options>
where <uninstallation_options> includes the following options:
n /s /q suppresses all the UI output.
n /l <pathname> specifies the log file pathname. Enclose <pathname> indouble quotes if it includes a space. The default directory for the log fileis C:\users\username\AppData\Local\temp.
For example, the following command performs a silent NMDA uninstallationthat logs messages in the C:\Program Files\EMC NetWorker\nsr\logs\nmda_uninstallation.log file:
NMDA.exe /uninstall /s /q /l "C:\Program Files\EMC NetWorker\nsr\logs\nmda_uninstallation.log"
l Windows Control Panel method:
a. In the Windows Control Panel window, select Add or RemovePrograms or Programs and Features, depending on the MicrosoftWindows version.
b. In the Add or Remove Programs window, select NetWorker Module forDatabases and Applications and click Remove.
Microsoft Windows Installation
Uninstalling NMDA on Microsoft Windows 47

Microsoft Windows Installation
48 EMC NetWorker Module for Databases and Applications 9.0.x Installation Guide
CHAPTER 4
NMDA with Mixed 32-bit and 64-bit Databasesand Applications
This chapter includes the following topics:
l Coexistence of 32-bit and 64-bit databases and applications.............................50l Installing NMDA to enable 32-bit and 64-bit coexistence...................................50l Uninstalling 32-bit NMDA on a 32-bit/64-bit system......................................... 53
NMDA with Mixed 32-bit and 64-bit Databases and Applications 49

Coexistence of 32-bit and 64-bit databases and applicationsNMDA supports combinations of 32-bit and 64-bit database and application softwarethat are installed on the same 64-bit system.
For example, NMDA supports the following combinations:
l 32-bit Lotus Domino and 64-bit Lotus Domino servers on a 64-bit Linux system
l 32-bit Informix and 64-bit Oracle servers on a 64-bit Windows system
Refer to the documentation for the database or application that you are using fordetails about the versions of 32-bit and 64-bit application software that can coexist onthe same system.
The EMC NetWorker Module for Databases and Applications Release 9.0.x Release Notesdescribes additional support limitations.
The following topics describe how to install and uninstall NMDA on a system with both32-bit and 64-bit databases or applications:
l Installing NMDA to enable 32-bit and 64-bit coexistence
l Uninstalling 32-bit NMDA on a 32-bit/64-bit system
The EMC NetWorker Module for Databases and Applications Release 9.0.x AdministrationGuide provides configuration instructions and special considerations for NMDA in anenvironment with both 32-bit and 64-bit databases and applications.
Installing NMDA to enable 32-bit and 64-bit coexistenceTo install NMDA on a 64-bit operating system where both 32-bit and 64-bit databasesor applications are running, install 64-bit NMDA and enable NMDA for 32-bit use.
Procedure
1. If you install 32-bit NMDA on the system, uninstall NMDA with the requiredprocedure:
l Uninstalling NMDA on UNIX or Linux systems on page 36
l Uninstalling NMDA on Microsoft Windows on page 46
2. Install 64-bit NMDA for the operating system. The following chapters providedetails for each operating system:
l Chapter 2, UNIX and Linux Installation
l Chapter 3, Microsoft Windows Installation
After the software installation completes, a message appears about how tostart the NMDA scheduled backup configuration wizard. The EMC NetWorkerModule for Databases and Applications Release 9.0.x Administration Guidedescribes the wizard.
3. Go to the 32-bit directory under the directory that contains the NMDAinstallation package for the operating system as described in Accessing theNMDA software on page 15.
4. Manually copy the 32-bit files that are listed in the following table to thespecified location for each 32-bit database or application on the system.
5. Complete the software linking and post-installation procedures for the 32-bitNMDA software components if required:
NMDA with Mixed 32-bit and 64-bit Databases and Applications
50 EMC NetWorker Module for Databases and Applications 9.0.x Installation Guide

l Linking and unlinking NMDA in the environment on UNIX or Linux on page 28
l Linking and unlinking NMDA in the environment on Windows on page 42
l Road map to post-installation procedures on page 21
Use the program file name that is listed in the following table when performingthese steps. For example, to link the 32-bit NMDA Sybase component to theSybase ASE server on AIX:
cd $SYBASE/$SYBASE_ASE/libln -s /usr/lib/libnsrsyb32.so libnsrsyb.so
Note
l IBM does not support 32-bit DB2 software on 64-bit UNIX or Linux.
l Oracle does not support 32-bit Oracle software on 64-bit UNIX, Linux, orWindows.
Table 10 Additional steps to enable NMDA for a 32-bit application
On this 64-bitoperatingsystem
For this 32-bitapplication
Copy these 32-bit files from the 32-bitdirectory
To this directory
AIX Informix informix/libnsrifmx32.so /usr/lib
l nsrdasv32l nsrdaprobe32
/usr/bin
Lotus l nsrdasv32l nsrdaprobe32l lotus/nsrdocrc32l lotus/nsrnotesrc32
/usr/bin
Sybase ASE sybase/libnsrsyb32.so /usr/lib
l nsrdasv32l nsrdaprobe32l sybase/nsrsybcc32l sybase/nsrsybrc32l sybase/threshold.sql
/usr/bin
HP Itanium Sybase ASE sybase/libnsrsyb32.so /usr/lib
Linux x64 Informix informix/libnsrifmx32.so /usr/lib
l nsrdasv32l nsrdaprobe32
/usr/sbin1
NMDA with Mixed 32-bit and 64-bit Databases and Applications
Installing NMDA to enable 32-bit and 64-bit coexistence 51

Table 10 Additional steps to enable NMDA for a 32-bit application (continued)
On this 64-bitoperatingsystem
For this 32-bitapplication
Copy these 32-bit files from the 32-bitdirectory
To this directory
Lotus l nsrdasv32l nsrdaprobe32l lotus/nsrdocrc32l lotus/nsrnotesrc32l lotus/nsrlotusral lotus/nmlra.jarl lotus/nmlra_res.jar
/usr/sbin1
MySQL l nsrdasv32l nsrmysqlrc32
/usr/sbin1
libnsrmysql32.so /usr/lib
libmysqlapi32.so /usr/lib
Note
Rename libmysqlapi32.so in this directory
to libmysqlapi.so.
libmysqlapiwrap32.so /usr/lib
Note
Rename libmysqlapiwrap32.so in this
directory to libmysqlapiwrap.so.
Sybase ASE sybase/libnsrsyb32.so /usr/lib
l nsrdasv32l nsrdaprobe32l sybase/nsrsybcc32l sybase/nsrsybrc32
/usr/sbin1
Solaris SPARC Informix informix/libnsrifmx32.so /usr/lib
l nsrdasv32l nsrdaprobe32
/usr/sbin1
Lotus l nsrdasv32l nsrdaprobe32l lotus/nsrdocrc32l lotus/nsrnotesrc32l lotus/nsrlotusra
/usr/sbin1
NMDA with Mixed 32-bit and 64-bit Databases and Applications
52 EMC NetWorker Module for Databases and Applications 9.0.x Installation Guide

Table 10 Additional steps to enable NMDA for a 32-bit application (continued)
On this 64-bitoperatingsystem
For this 32-bitapplication
Copy these 32-bit files from the 32-bitdirectory
To this directory
l lotus/nmlra.jarl lotus/nmlra_res.jar
Sybase ASE sybase/libnsrsyb32.so /usr/lib
l nsrdasv32l nsrdaprobe32l sybase/nsrsybcc32l sybase/nsrsybrc32
/usr/sbin1
Windows x64 DB2 l 32-bit\nsrdasv32.exel 32-bit\nsrdaprobe32.exel 32-bit\db2\libnsrdb232.dlll 32-bit\db2\nsrdb2rlog32.exe
NetWorker_install_path\bin
Informix l 32-bit\nsrdasv32.exel 32-bit\nsrdaprobe32.exel 32-bit\informix\libxbsa32.dll
NetWorker_install_path\bin
Lotus l 32-bit\nsrdasv32.exel 32-bit\nsrdaprobe32.exel 32-bit\lotus\nsrdocrc32.exel 32-bit\lotus\nsrnotesrc32.exe
NetWorker_install_path\bin
Sybase ASE Not applicable. 32-bit or 64-bit Sybase ASE cannot coexist with another application on 64-bitWindows.
1 Copy the 32-bit file to /usr/sbin or to the same location where 64-bit NMDA was relocated.
Uninstalling 32-bit NMDA on a 32-bit/64-bit systemComplete the required steps to uninstall NMDA on a system where both 32-bit and64-bit databases or applications coexist.
Procedure
1. Ensure that no backups or restores are running on the NMDA host.
2. Unlink the NMDA 32-bit components that you manually installed according tothe following instructions:
l Linking and unlinking NMDA in the environment on UNIX or Linux on page 28
l Linking and unlinking NMDA in the environment on Windows on page 42
NMDA with Mixed 32-bit and 64-bit Databases and Applications
Uninstalling 32-bit NMDA on a 32-bit/64-bit system 53

3. Log in as the root user (UNIX or Linux) or system administrator (Windows).
4. Manually delete the files for the 32-bit database or application that youmanually copied during installation as shown in Table 10 on page 51.
5. Uninstall 64-bit NMDA according to the required instructions:
l Uninstalling NMDA on UNIX or Linux systems on page 36
l Uninstalling NMDA on Microsoft Windows on page 46
NMDA with Mixed 32-bit and 64-bit Databases and Applications
54 EMC NetWorker Module for Databases and Applications 9.0.x Installation Guide

APPENDIX A
Uninstalling ISM on an Informix Server
This appendix includes the following topics:
l ISM software on an Informix server................................................................... 56l Uninstalling ISM on UNIX or Linux..................................................................... 56l Uninstalling ISM on Microsoft Windows.............................................................57
Uninstalling ISM on an Informix Server 55

ISM software on an Informix serverInformix Storage Manager (ISM) is a storage management software that is packagedand installed with Informix Dynamic Server (IDS).
For Informix servers only, if you installed ISM software, uninstall the software beforeyou install NMDA by using the OS-specific instructions in the following topics:
l Uninstalling ISM on UNIX or Linux
l Uninstalling ISM on Microsoft Windows
Note
Starting with Informix 12.10, Informix Primary Storage Manager (PSM) replaces ISM.When you install NMDA with IDS 12.10, you do not need to uninstall PSM. Follow thelinking instructions in the correct linking section of this guide.
Uninstalling ISM on UNIX or LinuxComplete the required steps to uninstall ISM on an Informix server on a UNIX or Linuxhost.
Procedure
1. Log in as the root user on the NMDA host.
2. Change to the Informix directory:
# cd $INFORMIXDIR/bin
3. Shut down the ISM daemons:
# ./ism_shutdown
Note
The ism_shutdown command does not uninstall ISM. Complete the followingsteps.
4. Verify that the daemons are shut down:
# ps -ef | grep nsr
5. Move the ISM executables to a temporary directory. For example:
# mkdir ISM.TMP# mv ism* ISM.TMP# mv nsr* ISM.TMP# mv mm* ISM.TMP# mv save* ISM.TMP# mv scanner ISM.TMP
Uninstalling ISM on an Informix Server
56 EMC NetWorker Module for Databases and Applications 9.0.x Installation Guide
# mv uasm ISM.TMP# mv recover ISM.TMP# mv ansrd ISM.TMP
6. Move the ISM catalogs to a temporary directory:
# cd $INFORMIXDIR# mv ism ism.bak
7. Remove the symbolic link to the ISM catalogs:
# rm /nsr
8. Remove the call to ism_catalog from the $INFORMIXDIR/bin/onbarscript.
9. Remove any references to ISM in the environment variable PATH.
10. Edit the $INFORMIXDIR/etc/$ONCONFIG file, and comment out the followingline if it exists:
#BAR_BSALIB_PATH ISM_library
Also, comment out any references to the following parameters:
ISM_DATA_POOLISM_LOG_POOL
Uninstalling ISM on Microsoft WindowsThere are two methods to uninstall the ISM software on an Informix server that isinstalled on a Windows host. You can use the IDS Server Setup program or the manualmethod.
Uninstalling ISM on Windows with the Setup programThe recommended method to uninstall ISM on an Informix server on Windows is to usethe IDS Server Setup program, if available.
Procedure
1. Launch the IDS Server Setup program.
2. Select Modify the Installation.
3. Clear the selection Informix Storage Manager.
4. Complete the Setup program to uninstall ISM.
Uninstalling ISM on an Informix Server
Uninstalling ISM on Microsoft Windows 57

Uninstalling ISM on Windows manuallyIf the IDS Server Setup program is not available, manually uninstall ISM on an Informixserver on Windows.
Procedure
1. Log in as user informix.
2. Type the following command to set the Informix Database server environmentvariables:
database-servername.cmd
3. Change to the ISM directory. For example:
cd C:\ism\2.2\bin
4. Set the ISM path variable. For example:
set ISMDIR=C:\ism\2.2
5. Shut down the ISM services:
ism_shutdown -deinstall
6. Shut down ISM, and then verify that there are no services listed for ISM inControl Panel > Administrative Tools > Services.
7. Rename the directory that contains ISM:
rename ism ism.bak
8. Remove the call to ism_catalog from the %INFORMIXDIR%\bin\onbar.bat file.
9. Remove any references to ISM in the environment variable PATH.
Delete the %ISMDIR%\bin directory entry from the user environment variablePATH. For example, change the following PATH setting:
PATH=C:\installdir;D:\ISM\2.20\bin;C:\msdev
The changed PATH setting is as follows:
PATH=C:\installdir;C:\msdev
Uninstalling ISM on an Informix Server
58 EMC NetWorker Module for Databases and Applications 9.0.x Installation Guide

10. Edit the %INFORMIXDIR%\%ONCONFIG% file, and comment out the followingline, if it exists:
#BAR_BSALIB_PATH ISM_library
Also comment out any references to the following parameters:
ISM_DATA_POOLISM_LOG_POOL
11. Remove the ISM portmapper:
a. Stop the ISM portmapper service.
b. Type Regedit, and then delete the following entry:
HKEY_LOCAL_MACHINE\SYSTEM\CURRENTCONTROLSET\SERVICES\PORTMAP
Confirm that the Displayname is ISM Portmapper before deleting the entry.
12. Edit the registry to delete any of the following keys, if present:
NOTICE
Edit the registry with caution. Errors can corrupt the Windows system.
l Hkey_Local_Machine\Software\XBSA
l Hkey_Local_Machine\Software\Informix\ISM
l Hkey_Local_Machine\Software\Informix\Informix Storage Manager
13. Restart the computer.
Uninstalling ISM on an Informix Server
Uninstalling ISM on Windows manually 59

Uninstalling ISM on an Informix Server
60 EMC NetWorker Module for Databases and Applications 9.0.x Installation Guide

Copyright © 2015 EMC Corporation. All rights reserved. Published in USA. EMC believes the information in this publication is accurate as of its publication date. The information is subject to change without notice. The information in this publication is provided as is. EMC Corporation makes no representations or warranties of any kind with respect to the information in this publication, and specifically disclaims implied warranties of merchantability or fitness for a particular purpose. Use, copying, and distribution of any EMC software described in this publication requires an applicable software license. EMC², EMC, and the EMC logo are registered trademarks or trademarks of EMC Corporation in the United States and other countries. All other trademarks used herein are the property of their respective owners. For the most up-to-date regulatory document for your product line, go to EMC Online Support (https://support.emc.com).