an introduction to sgi unix computing: c++ or c versiontrchase/me5241/tut.pdf · · 1999-09-30an...
TRANSCRIPT
An Introduction to SGI UNIX Computing:C++ or C version
Tom Chase
September 30, 1999
This is a brief tutorial for creating and running “C++” or “C” programs on the Silicon GraphicsIRIS “Indy” workstations in room ME 3081. You will use the text editor to create a sample programto multiply two matrices, as supplied here, onto a file of your own. You will then compile and run thisprogram. This sample program should provide you with all the information you will need to use theworkstations for your course assignments.
The documentation required for this class is described first. A sample program to multiply two ma-trices is then presented in its entirety. This program is used to introduce the structure and programmingconventions used in this class.
Instructions are provided to help the first-time user log on to an SGI workstation. Some UNIXoperating system commands and procedures that you may find particularly helpful while using theworkstations are then reviewed. Using the text editor is introduced by providing detailed instructionsfor creating a working partial implementation of the sample program. Instructions are then providedfor compiling and running C programs with special reference to the sample program. Guidelines forfinishing the sample program are then provided. Finally, a method for obtaining hardcopy of yourprogram’s output is described.
An Appendix provides a convenient reference for a command list for the “vi” text editor.
Contents
1 Documentation 2
2 The Sample Program 32.1 Listing of Sample Program . . . . . . . . . . . . . . . . . . . . . . . . . . . . . . . . . . . 32.2 Observations Concerning the Sample Program . . . . . . . . . . . . . . . . . . . . . . . . . 11
3 Logging On and Logging Out 12
4 Some Useful Keys and Functions 14
5 Creating the Sample Program 165.1 Program Design and Implementation . . . . . . . . . . . . . . . . . . . . . . . . . . . . . . 165.2 Writing, Compiling and Testing the Initial Version of the Mainline . . . . . . . . . . . . . 175.3 Completing the Sample Program . . . . . . . . . . . . . . . . . . . . . . . . . . . . . . . . 24
6 Printing Your Program’s Results 281During Fall semester 1999, we expect different students may be using either “C” or “C++”. Fortunately, for the
procedural code typical of mechanical engineering, the two languages usually look much alike. The tutorial for thissemester focuses on “C” with footnotes to clarify some differences with the equivalent “C++” program. Nevertheless, thetwo dimensional arrays are handled in a “C”-like manner; the simpler “C++” equivalent is not yet used.
1
A Sample “vi” Commands 29A.1 Commands for moving the text cursor . . . . . . . . . . . . . . . . . . . . . . . . . . . . . 29A.2 Commands for scrolling text on the screen . . . . . . . . . . . . . . . . . . . . . . . . . . . 29A.3 Commands for changing text in the file . . . . . . . . . . . . . . . . . . . . . . . . . . . . 29A.4 Commands for “cutting” and “pasting” . . . . . . . . . . . . . . . . . . . . . . . . . . . . 30A.5 Other useful commands . . . . . . . . . . . . . . . . . . . . . . . . . . . . . . . . . . . . . 30
1 Documentation
Strict program documentation is being required in this course to acquaint you with the standards requiredfor “industrial quality” computer code. You are likely to find that adhering to the required format willsubstantially reduce your errors, making it worth any extra initial effort. Specifically, the following“header” will be required for all your functions:
/**********************************************************************/return_type function_name( )/**********************************************************************//* AUTHOR:** DATE:**** PURPOSE**** INPUT**** OUTPUT**** DESCRIPTION OF LOCAL VARIABLES**** FUNCTIONS CALLED*/{/*** DECLARATIONS FOR LOCAL VARIABLES*//*** START OF EXECUTABLE CODE*/}
Develop a habit of copying this file as the first step of writing a new function. Do not type in thisheader. The header has already been typed for you; it is available as file “fnchead.c” from the account“tchase”. The procedure for accessing it will be described in Section 5.
The header entries have the following significance:
Purpose A brief (1 or 2 sentence) description of the purpose of the function.
Input The names and meanings of the function’s calling arguments that must be set before calling thefunction to enable it to perform its task. In other words, the “Input” constitutes data that will beneeded by the executable code within the function. Note that “Input” does not refer to parametersset using “cin”, “scanf” or similar statements.
Output The names and meanings of the function’s calling arguments that will be output from thefunction. In other words, if the value of a calling argument is set or changed by the executablecode included within the function, that calling argument must be listed as an “Output”. If thesame calling argument serves as both an input and an output, it should be described under both
2

headings. Note that “Output” does not refer to parameters printed using “cout” or “printf”statements.
Description of Local Variables The names and meanings of variables that are used internal to thefunction only; i.e., these variables do not appear in the calling argument list.
Functions Called Names and 1-line descriptions of the functions called from this function.
Declarations for Local Variables Type statements for all variables used locally to this function only.Thus, all variables described under the “Description of Local Variables” heading are declared here2.
The sample program provided in the next section will provide examples of the header entries. Amainline header can also be constructed from this pattern by including all relevant entries.
2 The Sample Program
Use of the operating system, editor, and compiler of the UNIX workstations will be introduced bycreating a sample program that will read in and multiply two matrices. The sample program is listed inits entirety here. Some programming conventions used in this class will then be illustrated by showingtheir application in the sample program.
2.1 Listing of Sample Program
/**********************************************************************//* INCLUDE FILES *//**********************************************************************/#include <stdio.h>/**********************************************************************/int read_matrix_size( FILE* input_file, int* nrow, int* ncol )/**********************************************************************//* AUTHOR: (your name)** DATE: (today’s date)**** PURPOSE** Read in the number of rows and columns in a matrix** from a data file**** INPUT** input_file: Pointer to the input file**** OUTPUT** nrow: Number of rows in the matrix** ncol: Number of columns in the matrix** read_matrix_size: Successful read flag**** DESCRIPTION OF LOCAL VARIABLES** None**** FUNCTIONS CALLED** fscanf: Standard library function for formatted read from a file** (defined in standard header <stdio.h>)** printf: Standard library function to print to standard output** (defined in standard header <stdio.h>)
2C++ policy recommends that local variables be declared at the time that they are first used rather than at thebeginning of a function. Thus, the “Declarations for Local Variables” is not used in C++ programs.
3

*/{/*** START OF EXECUTABLE CODE**** Attempt to read row and column size from input file*/
if ( fscanf( input_file, "%d %d", nrow, ncol ) == 2 ) return 1;/*** If problem occurred, notify calling routine*/
return 0;}/**********************************************************************/int read_matrix( FILE* input_file, int nrow, int ncol,
double** matrix )/**********************************************************************//* AUTHOR: (your name)** DATE: (today’s date)**** PURPOSE** Read in a matrix of known size from a file**** INPUT** input_file: Pointer to the input file** nrow: Number of rows in the matrix** ncol: Number of columns in the matrix**** OUTPUT** matrix: Contents of the 2-dimensional matrix** NOTE: The output matrix is assumed to be implemented as** an array of pointers to one-dimensional arrays of doubles** read_matrix: Flag to indicate successful completion of read**** DESCRIPTION OF LOCAL VARIABLES** col: Column index** row: Row index**** FUNCTIONS CALLED** fscanf: Standard library function for formatted read from a file** (defined in standard header <stdio.h>)*/{/*** DECLARATIONS FOR LOCAL VARIABLES*/
int col, row;/*** START OF EXECUTABLE CODE*/
for ( row = 0; row < nrow; row++ )for ( col = 0; col < ncol; col++ )
/*** Read each element from the file
4

** (notifying calling routine if expected element is not found)*/
if ( fscanf( input_file, "%lf",&matrix[row][col] ) != 1 ) return 0;
return 1;}/**********************************************************************/void print_matrix( double** matrix, int nrow, int ncol, char* label )/**********************************************************************//* AUTHOR: (your name)** DATE: (today’s date)**** PURPOSE** Print the contents of a matrix with a header** NOTE: The input matrix is assumed to be implemented as** an array of pointers to one-dimensional arrays of doubles**** INPUT** label: Label to be printed as header of matrix** matrix: Contents of matrix to be printed** ncol: Number of columns in matrix** nrow: Number of rows in matrix**** OUTPUT** None**** DESCRIPTION OF LOCAL VARIABLES** col: Column index** row: Row index**** FUNCTIONS CALLED** printf: Standard library function to print to standard output** (defined in standard header <stdio.h>)*/{/*** DECLARATIONS FOR LOCAL VARIABLES*/
int col, row;/*** START OF EXECUTABLE CODE**** Print header*/
printf( "\n %s\n", label );/*** Print each row as one contiguous text line*/
for ( row = 0; row < nrow; row++ ){
printf( " " );/*** Print each column*/
5

for ( col = 0; col < ncol; col++ )printf( "%10.5f", matrix[ row ][ col ] );
printf( "\n" );}
}/**********************************************************************/int mat_mult( double** matrix1, int nrow1, int ncol1,
double** matrix2, int nrow2, int ncol2,double** prod_mat )
/**********************************************************************//* AUTHOR: (your name)** DATE: (today’s date)**** PURPOSE** Multiply two 2-dimensional matrices** NOTE: The input and output matrices are assumed to be implemented** as arrays of pointers to one-dimensional arrays of doubles**** INPUT** matrix1: The first input matrix** matrix2: The second input matrix** ncol1: Number of columns in the first matrix** ncol2: Number of columns in the second matrix** nrow1: Number of rows in the first matrix** nrow2: Number of rows in the second matrix**** OUTPUT** prod_mat: The resultant matrix (matrix1 X matrix2)** mat_mult: Successful completion flag** (returned as 0 = ‘‘false’’ if input matrices** are not conformable)**** DESCRIPTION OF LOCAL VARIABLES** p_col: Column index of product matrix** p_row: Row index of product matrix** sum: Sum elements of row of first matrix times column of second** term_index: Intermediate sum term index**** FUNCTIONS CALLED** None*/{/*** DECLARATIONS FOR LOCAL VARIABLES*/
double sum;int p_col, p_row, term_index;
/*** START OF EXECUTABLE CODE**** Ensure input matrices are conformable*/
if ( ncol1 != nrow2 ) return 0;/*
6

** Start of main multiplication loop...*/
for ( p_row = 0; p_row < nrow1; p_row++ )for ( p_col = 0; p_col < ncol2; p_col++ ){
/*** ...Initialize each element of product matrix*/
sum = 0.0;/*** ...Perform cumulative sum of row in matrix1 X column in matrix2*/
for ( term_index = 0; term_index < ncol1; term_index++ )sum += matrix1[ p_row ][ term_index ]
* matrix2[ term_index ][ p_col ];/*** ...Set final value of element of product matrix*/
prod_mat[ p_row ][ p_col ] = sum;}
/*** Indicate successful completion to calling routine*/
return 1;}/**********************************************************************/main( )/**********************************************************************//* AUTHOR: (your name)** DATE: (today’s date)**** PURPOSE** Read in two matrices, calculate the product of the two,** and write out the original and resultant matrices**** DESCRIPTION OF LOCAL VARIABLES** index: Generic array index** input_file: Pointer to the input data file** matrix1: The first input matrix** (Note: this two-dimensional array** is implemented as an array of pointers)** matrix2: The second input matrix** (Note: this two-dimensional array** is implemented as an array of pointers)** ncol1: Number of columns in the first input matrix** nrow1: Number of rows in the first input matrix** ncol2: Number of columns in the second input matrix** nrow2: Number of rows in the second input matrix** prod_matrix: The resultant matrix** (Note: this two-dimensional array** is implemented as an array of pointers)**** FUNCTIONS CALLED** calloc: Standard library function to dynamically allocate
7

** memory for an array** (defined in standard header <stdio.h>)** fclose: Standard library function to break a connection to a FILE** (defined in standard header <stdio.h>)** fopen: Standard library function to return a pointer to a FILE** (defined in standard header <stdio.h>)** matmult: Multiply two matrices** printf: Standard library function to print to standard output** (defined in standard header <stdio.h>)** print_matrix: Print the contents of a matrix with a header** read_matrix: Read in a matrix of known size from a file** read_matrix_size: Read in the number of rows and columns** in a matrix from a data file*/{/*** DECLARATIONS FOR LOCAL VARIABLES*/
FILE* input_file;int index, ncol1, ncol2, nrow1, nrow2;double **matrix1, **matrix2, **prod_matrix;
/*** START OF EXECUTABLE CODE**** Print program title*/
printf( "\n\n MATRIX MULTIPLICATION SAMPLE PROGRAM\n" );printf( " ------------------------------------\n" );
/*** Open input data file*/
input_file = fopen( "matfile", "r" );/*** Notify user if error occurred*/
if ( input_file == NULL ){
printf( " \n INPUT DATA FILE NOT FOUND!\n" );return 1;
}/*** Read in the number of rows and columns in the first matrix*/
if ( !read_matrix_size( input_file, &nrow1, &ncol1 ) ){
/*** Notify user if error occurred*/
printf( " \n FIRST MATRIX ROW/COLUMN SIZE NOT AVAILABLE" );printf( " FROM INPUT FILE!\n" );return 1;
}/*** Dynamically allocate memory for storing the first matrix
8

** (a 2D-array implemented as an array of pointers)...**** ...obtain memory for a pointer to each row of the matrix*/
matrix1 = (double**) calloc( nrow1, sizeof( double* ) );/*** ...obtain memory for each row, and set corresponding row pointer*/
for ( index = 0; index < nrow1; index++ )matrix1[ index ] = (double*) calloc( ncol1, sizeof( double ) );
/*** Read in the first matrix*/
if ( !read_matrix( input_file, nrow1, ncol1, matrix1 ) ){
/*** Notify user if error occurred*/
printf( " \n MATRIX ELEMENT MISSING FROM INPUT FILE!\n" );return 1;
}/*** Print the first matrix*/
print_matrix( matrix1, nrow1, ncol1," THE FIRST INPUT MATRIX IS:" );
/*** Read in the number of rows and columns in the second matrix*/
if ( !read_matrix_size( input_file, &nrow2, &ncol2 ) ){
/*** Notify user if error occurred*/
printf( " \n SECOND MATRIX ROW/COLUMN SIZE NOT AVAILABLE" );printf( " FROM INPUT FILE!\n" );return 1;
}/*** Dynamically allocate memory for storing the second matrix** (a 2D-array implemented as an array of pointers)...**** ...obtain memory for a pointer to each row of the matrix*/
matrix2 = (double**) calloc( nrow2, sizeof( double* ) );/*** ...obtain memory for each row, and set corresponding row pointer*/
for ( index = 0; index < nrow2; index++ )matrix2[ index ] = (double*) calloc( ncol2, sizeof( double ) );
/*** Read in the second matrix*/
if ( !read_matrix( input_file, nrow2, ncol2, matrix2 ) )
9

{/*** Notify user if error occurred*/
printf( " \n MATRIX ELEMENT MISSING FROM INPUT FILE!\n" );return 1;
}/*** Print the second matrix*/
print_matrix( matrix2, nrow2, ncol2," THE SECOND INPUT MATRIX IS:" );
/*** Close the input file*/
fclose( input_file );/*** Dynamically allocate memory for storing the product matrix** (a 2D-array implemented as an array of pointers)...**** ...obtain memory for a pointer to each row of the matrix*/
prod_matrix = (double**) calloc( nrow1, sizeof( double* ) );/*** ...obtain memory for each row, and set corresponding row pointer*/
for ( index = 0; index < nrow1; index++ )prod_matrix[ index ] = (double*) calloc( ncol2, sizeof( double ) );
/*** Multiply the two matrices*/
if ( !mat_mult( matrix1, nrow1, ncol1,matrix2, nrow2, ncol2,prod_matrix ) )
{/*** Notify user if error occurred*/
printf( " \n THE INPUT MATRICES ARE NOT CONFORMABLE!\n" );return 1;
}/*** Print the product matrix*/
print_matrix( prod_matrix, nrow1, ncol2," THE PRODUCT OF MATRIX 1 X MATRIX 2 IS:" );
/*** Release the dynamically allocated rows of doubles used** to store the elements of each matrix*/
for ( index = 0; index < nrow1; index++ ){
free( matrix1[ index ] );free( prod_matrix[ index ] );
10
}for ( index = 0; index < nrow2; index++ )
free( matrix2[ index ] );/*** Release dynamically allocated arrays of pointers** to all rows of the dynamically-allocated matrices*/
free( matrix1 );free( matrix2 );free( prod_matrix );return 0;
}
2.2 Observations Concerning the Sample Program
Note the following techniques that have been used to make the sample program clear, simple, and easyto extend. Try to utilize these techniques in every program that you write for this class.
1. Sub-Division of Program into Individual Tasks Using Functions
The sample program contains four functions. Each performs a well- defined sub-task of the overallprogram3: reading in the size of the matrices to be multiplied (“read matrix size”), reading inthe elements of the matrices to be multiplied (“read matrix”), printing a matrix (“print matrix”),and performing the multiplication (“mat mult”). Such “modular” programming encourages goodcoding structure, in addition to enabling you to build and troubleshoot large programs in smallpieces.
Ideally, the mainline should do little else than call a series of well-defined, single-operation functionsto carry out the program goal. A function designed to do nothing but call other functions isgenerally described as an “executive function”. This ideal was not completely realized in theexample program, as some code is included in the mainline to open the input file and dynamicallyallocate space for variable-length two-dimensional matrices. Nevertheless, always strive to make amainline an executive function.
2. “Generic” Structure of Subroutine “mat mult”
Function “mat mult” could perform matrix multiplication on virtually any pair of two-dimensionalmatrices. The function contains no code that constrains it to any particular problem or program.Also note that no read or print statements are included in this function, which would tend to makeit problem-specific. Thus, this function could be used without modification in an advanced CADprogram, such as a finite element analysis program, as well as in this simple example program.These attributes will be described as “genericness”.
As an additional example of generic coding, notice that the input and output matrices of “mat -mult” are dimensioned through calling arguments, freeing them from the size requirements of thesimple example to be run in this tutorial.
3. Comment Structure
The length of the documentation of this program far exceeds the length of the executable code.Similarly, writing the documentation typically takes as long as writing the executable code. Properdocumentation is essential in the industrial environment, when you may be handed the code of anindividual who left the company a year earlier. In addition, commenting will help you find areasof poor structure; if you have trouble explaining your code, the code could probably be writtenbetter.
Note the comments are at a “high level”. In other words, they describe the reason for eachexecutable statement rather than the mathematical specifics of each executable statement. For
3Functions are designed using a “top-down design chart”, as will be explained in lecture.
11

example, consider the comment for the first executable line of subroutine “mat mult”: “Checkconformability of the input matrices”. This comment does not say “See if ncol1 does not equalnrow2”. The first comment says why you are doing what you are doing. The second just parrotsthe statement being performed and provides no unique information.
I do not feel that code can be written to be “self documenting”. Well-written code will make themath being performed very clear; however, executable code can not tell you the reasons for themathematical operations. Therefore, in general, every one to three lines of executable code shouldbe commented.
4. Use of Error Flags
Functions “read matrix size”, “read matrix”, and “mat mult” return “error flags”. Error flags arelogical variables that indicate if the function was able to complete its objective successfully. Theyprevent your program from “crashing” in the case that a problem is encountered while executingthe function. The mainline checks the error flag immediately after executing a function that returnsone. If a problem is detected, the mainline prints an informative message describing it.
Functions “read matrix size” and “read matrix” protect against missing data in the input file.However, they do not detect all possible problems that could arise. Can you think of somethingin the input file that might still cause the program to “crash”? A more advanced implementationwould attempt to anticipate and detect all possible problems.
Professional code should be written to be “crash-proof” to the greatest possible extent, as a “crash”could lead to permanent loss of a customer.
5. Provision of User Feedback
This program provides clearly identified output when run. In addition, the program is written toprovide informative messages in the case of many common errors, such as reading from a blankinput file. While such user aids may not be essential in a program as simple as the example, theycan go a long way towards alleviating user frustration in complex programs.
6. Indenting
Indenting improves the readability of loops, especially when loops are contained within loops.For example, in subroutine “mat mult”, the statements contained within the outermost loop areindented three spaces, the statements contained within the intermediate loop are indented sixspaces, and the statements contained within the innermost loop are indented nine spaces. Indentingthe dependent statements of IF statements also improves readability.
7. Clean Structure
This program is written so that GO TO statements are unnecessary. In fact, the only “C++”or “C” language logical constructs used throughout the entire program are “if” and “for”. Youshould need nothing more than these two constructs for every program written in this class! Aseparate handout on writing “pseudo-code” will show you how.
3 Logging On and Logging Out
The UNIX workstations used for this class can be accessed either directly in room ME 308 or by remotelylogging in from another workstation or personal computer. This tutorial assumes that you will begin bylogging in directly at a workstation in ME 308. Once you are comfortable doing that, you may want totry logging in remotely, particularly if you have your own personal computer and a modem.
The procedure for obtaining an account for using the ME 308 workstations is described below.Procedures for logging on and obtaining a “window” for executing UNIX commands on your workstationscreen are then described. Finally, the non-standard procedure for logging off of the Silicon Graphicsworkstations is explained.
12

You must have a login name in order to use the UNIX workstations. A name is obtained by payingthe ITlabs computer fee4. The name is obtained through your student e-mail account, although it isactually a separate account. Instruction sheets on obtaining your account name through e-mail areavailable in the ME 308 lab.
Sit down at any of the 42 SGI workstations in the left side of ME 308. The SGI workstations remainon at all times. If the screen was initially dark, it should light up upon typing the first letter of your username. The letter will appear in a box on the screen labeled with the network name of the workstationthat you are using. Type the remaining characters of your user name, then hit the “Enter” key. Thecursor will then move to a “Password” line. Type the password for your account and hit the “Enter”key.
If your user name and password were accepted, the window that showed the network name will bereplaced with a new display. If you are using your account number for the first time, a special procedurewill automatically be initiated to “register” your account. Registration consists of following the simpledirections that will appear on your screen. You need register your account only once.
If your user name and password were not accepted, the initial display showing the workstation’snetwork name will re-appear. If this happens, be sure that the “Caps Lock” key is not locked. UNIXsystems differentiate between upper case and lower case characters! If your user name and password arerepeatedly rejected, see the lab attendant for assistance.
UNIX workstations provide a series of “windows” on your workstation screen5. After logging on, theworkstation screen may automatically open a UNIX window for you, named “winterm”. If this is thecase, you can skip the next step.
If the UNIX window is not opened automatically, you will see two or more small windows in theupper left corner of the screen. You can designate the window of your choice by moving the “mousecursor”, a small red arrow, around the screen with the “mouse” attached to the workstation. Slide themouse along the elastic pad provided in the carrel of your workstation to move the mouse cursor.
One of the upper left windows will contain entries similar to: “Desktop / Selected / Find / System/ Help”. Move the cursor over the entry labeled “Desktop”. Then, press and release the left button onthe top of the mouse. As you do this, a second “menu” will cascade off to the right of the “Desktop”entry. This will contain the entries “Desks Overview / . . . / Unix Shell / . . . ”. Move the cursor over the“Unix Shell” entry, then press and release the left mouse button.
After a pause of a few seconds, a new large window will appear. The window can be “dragged” to anyconvenient position using the mouse: move the mouse cursor over the title bar at the top of the window,press and hold down the left mouse button, drag the window to the desired position, then release theleft mouse button.
The new window will appear similar to the screen of a non-windows based computer. The displaywill contain informative messages similar to the following:
... (several lines of informational messages)Erase is deleteKill is control-U%
The messages will not be underlined on your screen. Underlining is used in this tutorial to differentiatethe entries that the system generates from the entries that you should type. The “system prompt” of apercent sign, “%”, indicates that the system is waiting for you to enter a “systems-level” command.
The symbol “ ” represents a cursor which indicates the position where text will be entered in thecurrent window. Information can only be entered in the window containing the separate mouse cursor(the red arrow). If the text cursor is hollow rather than solid, or if your typing is not echoed in thewindow you expected, be sure that the mouse cursor is positioned somewhere in the window that youwant to use.
Logging out requires a special procedure on the Silicon Graphics workstations. First, position the4This fee is automatically billed to upper division IT students.5The screen display described here may vary slightly based on the default set-up of your account. If the display is vastly
different from that described here, please see the lab attendant for help on opening a UNIX shell window.
13

mouse cursor anywhere on the background portion of the screen (outside of any window). Then, pressand hold down the right mouse button. This will cause a menu to appear, including the entries “Desktop/ Logout / . . . ”. Continue to hold the right mouse button down and slide the mouse cursor over the“Logout” entry. Release the button after placing the cursor over the “Logout” entry.
Another window will then appear on the screen with the message “Do you want to log out now?”The new window will contain two “radio buttons” labeled “Yes” and “No” below the log out message.Logging out is completed by positioning the mouse cursor anywhere over the “Yes” radio button, thenpressing and releasing the left mouse button.
** IMPORTANT **
Once you log on, you remain logged on indefinitely. Furthermore, if you type “logout” in your currentwindow, the window will be closed, but you will not be logged off of the workstation! Logging on opensyour files to anyone who takes the workstation after you. Therefore, be certain to always follow the logout procedure explained above before leaving your workstation!
You can be sure that you have logged out correctly when the original “User Name” screen re-appears.
4 Some Useful Keys and Functions
Some key functions and system commands are described here that you may find helpful when workingthrough the later sections of this tutorial.
1. Backing Up to Correct Typing Errors
Simply use the “delete” key included between the main keyboard area and the right keypad. Theusual “backspace” key will cause extraneous characters to be printed. (Correcting errors withinfiles is described on page 19.)
2. “Emergency Stopping” a Command or Program
Typing “^U” (i.e., holding down the “Control” key and simultaneously pressing key “U”) willforce most programs and utilities to terminate. This is especially helpful for stopping programs ininfinite loops.
3. Displaying the Catalog of Files on Your Account
All programs you will write must be created as files. All files you save are recorded in a catalogassociated with your username6. To list all files in the catalog, type the “ls” (“list”) command,followed by a carriage return:
% ls<CR>
where <CR> symbolizes pressing the “Enter” key. (All UNIX system commands will typically befollowed by pushing the “Enter” key. Therefore, the <CR>’s will not be explicitly shown in thistutorial from here on, unless its implied usage is not clear.) If you have not yet written any files,your directory will contain only some default files set up with your account.
4. Obtaining On-Line Help
The “man” (“manual”) command is used for obtaining on-line help for UNIX operating systemcommands. Operating system commands are identifiable in the Tutorial by being preceded by theprompt sign, “%”.
6You have access to two separate file areas: your personal area and a class area. You may save files for as long as you areenrolled at the University in your personal area, but the space is limited and can not be increased. The class area providesmore space but will be erased at the end of the quarter. I suggest you work in the class area and copy only the files youwish to save for the long term to your personal directory. The class directory is accessed by entering the command:
%cd /class/myname
where your actual user name should be substituted for “myname”.
14

The “man” command can readily be used to obtain information about system commands whosenames are known to you. For example, to obtain help about the command “cc”, type:
% man cc
The manual page printout can be stopped at any time by pressing the “q” key.
If you want to search for a command and can think of a keyword, “keyword”, likely to be relatedto it, try issuing the command:
% man -k keyword
Extensive system documentation is available on-line. Readers wishing to learn more can obtainon-line help about the “man” command itself by issuing the command:
% man man
5. Listing a File on Your Terminal
The contents of any file can be printed to the screen of your terminal by issuing the “cat” (“catalog”)command. For example, if you had a file named “fnchead.c” in your catalog, you could print thisfile by issuing the command:
% cat fnchead.c
6. Obtaining Hardcopy
A file named “filename” can be printed in room ME 308 by using the standard “lpr” (“lineprinter”)command as follows:
% lpr -Pme308b filename
Your output will then be available in the laser printer named “me308b” in ME 308. (Severalminutes may elapse between the time you issue the “lpr” command and the time your outputappears at the laser printer).
Please note that you will be charged for every page printed in the lab. Print cards good for 10pages are purchasable for $1.00, while cards good for 50 pages are purchasable for $4.00. They canbe purchased from the ME 308 lab attendant by check.
If you want to make a color print in ME 308, substitute “me308-color” for “me308b”. Pleaseconsult the lab attendant for current rates for color prints.
7. Deleting Unwanted Files
Files can be deleted from your catalog with the “rm” (“remove file”) command. Use this commandwith care, since once a file is deleted, it can not be recovered. Nevertheless, please regularly deletethe unwanted files from your account, as storing these files wastes disk space and ultimately coststhe University money. If you want to delete a file called “trash”, simply issue the command:
% rm trash
If you suffer a program “crash”, the system will automatically create a file called “core” thatincludes an image of the machine’s memory at the time of the crash. Advanced programmers canuse this file for debugging. However, core files are large and can consume much of your catalogspace. Therefore, I recommend that you delete all “core” files with the “rm” command immediately.
8. Backing Up Important Files
If you have a file that is particularly important to you, such as a class project the day beforethe project is due, we strongly suggest that you create a back up copy of the file in case youaccidentally damage or erase your working copy. This is easily accomplished using the “cp” (“copyfile”) command. For example, if you wish to create a file named “backup.c” to back up your file,“main.c”, you would issue the command:
% cp main.c backup.c
15
9. Controlling “Scrolling” of the Screen
If you print text to a window of your workstation whose length exceeds the window’s height, thetext automatically “scrolls” until all the text sent to the window is printed. If you wish to inspectoutput near the beginning of the text, it may scroll out of the window before you have a chanceto read it. This may occur while running a program or inspecting a file with the “cat” command(see item 5, above).
You can print the contents of a long file one window height at a time by “piping the file to the‘more’ utility”. (This is easier done than said.) For example, to print a file named “longfile” screenby screen, issue the command:
% more longfile
Pressing the space bar will advance the file by one window height. The listing can be terminatedat any time by pressing the “q” key.
Also note that the window containing the listing of your file has a “scroll bar” near the left border.You can scroll backwards for many lines by manipulating the scroll bar with the mouse cursor.Move the scroll bar all the way to the bottom to return to entering new commands.
5 Creating the Sample Program
Use of the SGI workstations will be introduced by showing you how to write the sample “C” programto multiply two matrices, included in subsection 2.17. The section begins by outlining a design andimplementation strategy that will enable you to develop all programs written for this class efficiently.Then, complete instructions for writing a working partial program using the “vi” editor are provided inSection5.28. Partial instructions will then be provided for you to complete the program in Section 5.3.
5.1 Program Design and Implementation
When writing a program from scratch, you should always follow the four-step structured programmingprocedure outlined in lecture:
1. Develop the overall program architecture with a top-down design chart.
2. Develop an input-output chart for every function identified in step 1.
3. Develop the logic of any computational function in pseudo-code.
4. Implement each function in “C++” or “C”, and thoroughly test it before proceeding with the nextfunction.
Steps 1 through 3 have been done for you in the example program, so we can proceed with the imple-mentation of step 4.
Implementation is also broken into small steps: add functions one at a time, and test each functionbefore proceeding with the implementation of the next. In fact, if the function is complex, you maywish to add a few executable lines at a time, and test those before proceeding. This strategy enablesyou to locate and correct any errors quickly and efficiently. You can implement the total program muchfaster this way than attempting to type and compile the entire program in one step. The latter strategyusually leads to literally pages of entangled error messages!
The first step of implementing any new program should be to print the program title. This enablesyou to see that your program starts successfully when run9. Consistent with this plan, we will begin the
7This program will work equally well in “C++”. However, “C++” compatibility is improved by replacing the “scanf”and “printf” statements with “cin” and “cout”.
8Several other editors are available on the SGI workstations. The “emacs” editor is a particularly popular choice.However, the “vi” editor is described here, since it is available on all UNIX workstations as a standard. The use of theSilicon Graphics proprietary “Jot” editor is not recommended, since it will not run on systems made by other vendors.(However, no penalty will be assessed if you choose to use “Jot”.)
9I always do this as the first step, especially when writing a long, complicated program!
16
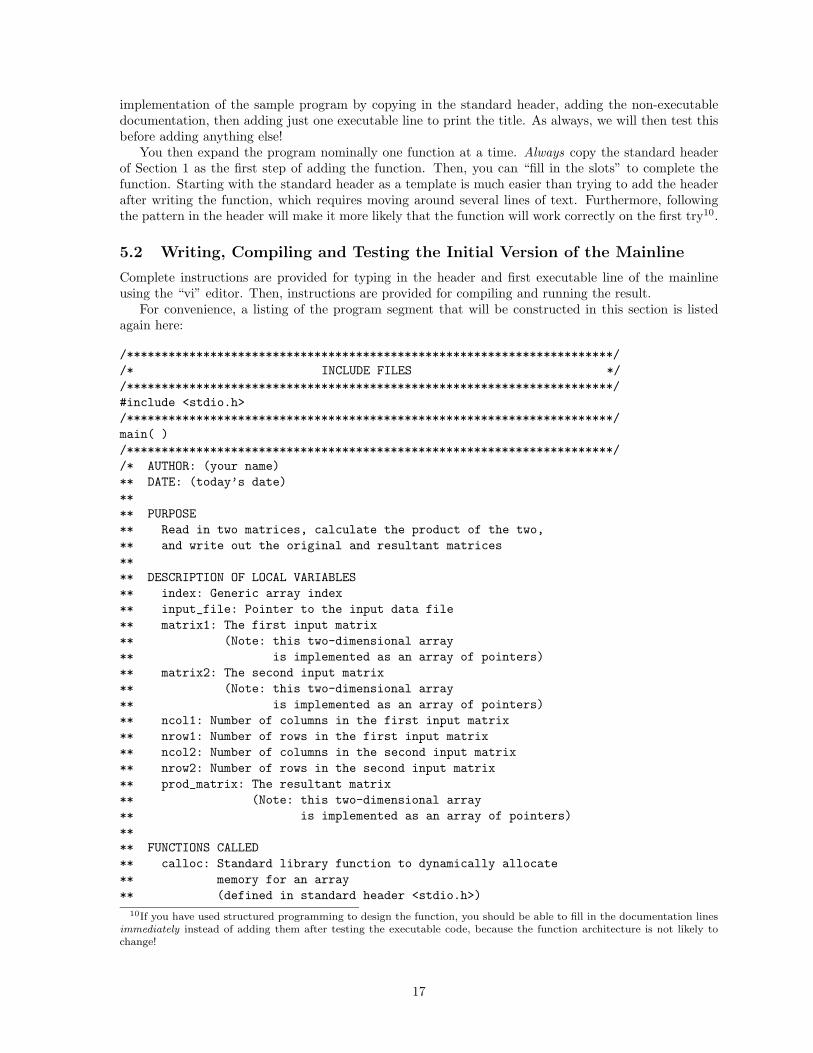
implementation of the sample program by copying in the standard header, adding the non-executabledocumentation, then adding just one executable line to print the title. As always, we will then test thisbefore adding anything else!
You then expand the program nominally one function at a time. Always copy the standard headerof Section 1 as the first step of adding the function. Then, you can “fill in the slots” to complete thefunction. Starting with the standard header as a template is much easier than trying to add the headerafter writing the function, which requires moving around several lines of text. Furthermore, followingthe pattern in the header will make it more likely that the function will work correctly on the first try10.
5.2 Writing, Compiling and Testing the Initial Version of the Mainline
Complete instructions are provided for typing in the header and first executable line of the mainlineusing the “vi” editor. Then, instructions are provided for compiling and running the result.
For convenience, a listing of the program segment that will be constructed in this section is listedagain here:
/**********************************************************************//* INCLUDE FILES *//**********************************************************************/#include <stdio.h>/**********************************************************************/main( )/**********************************************************************//* AUTHOR: (your name)** DATE: (today’s date)**** PURPOSE** Read in two matrices, calculate the product of the two,** and write out the original and resultant matrices**** DESCRIPTION OF LOCAL VARIABLES** index: Generic array index** input_file: Pointer to the input data file** matrix1: The first input matrix** (Note: this two-dimensional array** is implemented as an array of pointers)** matrix2: The second input matrix** (Note: this two-dimensional array** is implemented as an array of pointers)** ncol1: Number of columns in the first input matrix** nrow1: Number of rows in the first input matrix** ncol2: Number of columns in the second input matrix** nrow2: Number of rows in the second input matrix** prod_matrix: The resultant matrix** (Note: this two-dimensional array** is implemented as an array of pointers)**** FUNCTIONS CALLED** calloc: Standard library function to dynamically allocate** memory for an array** (defined in standard header <stdio.h>)
10If you have used structured programming to design the function, you should be able to fill in the documentation linesimmediately instead of adding them after testing the executable code, because the function architecture is not likely tochange!
17

** fclose: Standard library function to break a connection to a FILE** (defined in standard header <stdio.h>)** fopen: Standard library function to return a pointer to a FILE** (defined in standard header <stdio.h>)** matmult: Multiply two matrices** printf: Standard library function to print to standard output** (defined in standard header <stdio.h>)** print_matrix: Print the contents of a matrix with a header** read_matrix: Read in a matrix of known size from a file** read_matrix_size: Read in the number of rows and columns** in a matrix from a data file*/{/*** DECLARATIONS FOR LOCAL VARIABLES*//*** START OF EXECUTABLE CODE**** Print program title*/
printf( "\n\n MATRIX MULTIPLICATION SAMPLE PROGRAM\n" );printf( " ------------------------------------\n" );
}
The text editor is initiated with the “vi” command. The editor allows you to create a new file atthe same time the editor is invoked by typing a file name following the “vi” command. For example, ifyou would like to create a file named “main.c” to contain the first program segment, you would type thecommand:
% vi main.c
** IMPORTANT **
The “C” compiler used on the workstations requires that the file to be compiled have the suffix, “.c”!
After starting “vi”, the screen will appear similar to the following:
''...''"main.c" [New file]
The first line of the screen represents the (empty) first line of the file. The “∼” symbols representcurrently unused lines. The last line is the command line, where “vi” commands are echoed whenappropriate, and informative messages generated by “vi” are displayed.
The “vi” editor works in two modes: “command” mode and “insert” mode. In “command” mode,characters typed on the keyboard are not entered in to your file; rather, the keystrokes are interpretedas instructions to the editor. In “insert” mode, all characters typed on the keyboard are entered in toyour file. The “vi” editor will default to “command” mode when first invoked. Select commands, tobe described soon, toggle the editor to “insert” mode. Once in “insert” mode, the editor remains in“insert” mode until the “Esc” (Escape) key is pressed.
You may occasionally accidently toggle the editor to “insert” mode. If this should happen, you willquickly notice that your intended commands are not being processed. Instead, any character typed
18

will simply be added to your screen display as text. If this should happen, shift the editor back to“command” mode by pushing the “Esc” key.
Some common “vi” commands are listed in Appendix A (page 29). You do not need to fully under-stand the function of each command at this time, as you will learn how to use several of these commandsin the following sections. Furthermore, you will only use a few of these commands at the start. A sizablelist is provided in Appendix A to enable you to take better advantage of “vi” as you become comfortablewith it11. Extensive on-line documentation on “vi” is available through the “man” command (see item 4on page 14).
Before proceeding, four commands that are helpful for correcting small errors are introduced. Youmay find them useful for correcting small mistakes that could occur while you work through the instruc-tions provided below. Pressing “r” replaces the character highlighted by the cursor. Pressing “x” deletesthe character highlighted by the cursor. Pressing “i” shifts “vi” to “insert” mode, enabling you to inserttext before the cursor until the “Esc” key is pressed. Pressing “u” undoes the previous edit command.If you forget any of these commands, they are all described in Appendix A.
** IMPORTANT **
Be wary of activating the “Caps Lock” key while using vi command mode. Commands using capitalletters have a much different effect than commands with small letters! A common source of error consistsof failing to turn off the “Caps Lock” key when returning to command mode (i.e., pressing the “Escape”key) after inputting new lines.
You will begin the mainline by “reading in” a header that clearly identifies “include” file commandsin the program listing from a file named “include header.c”. This file is stored in a directory called“tchase”. The template file is retrieved by issuing the “read file” command, as follows12:
:r ∼tchase/include_header.c<CR>(Be sure not to include any spaces in the expression “∼tchase/include header.c”). Upon hitting the“Enter” key, the header file will be copied into your edit file. Your working window will then appear asfollows:
/**********************************************************************//* INCLUDE FILES *//**********************************************************************/∼∼...∼∼Note that the cursor is positioned at the first character of the text area.
The read command causes an unwanted blank line at the very top of your file. To delete it, movethe cursor to the top line by pressing the “k” key13:
/**********************************************************************//* INCLUDE FILES *//**********************************************************************/
then press “dd” to delete the line:11Appendix A lists only a small fraction of the total selection of commands supported by “vi”!12The file name is preceded by the “path name”, consisting of the hierarchy of UNIX directories leading to the directory
containing the file named “include header.c”. The “∼” preceding “tchase” causes the system to automatically determinethe path to catalog “tchase”.
13The “↑” key will also work, if you prefer. The “k” key is used because it corresponds to one of the keys used as a“home” position for the fingers of the right hand of a typist, giving easy access to experienced keyboardists.
19

/**********************************************************************//* INCLUDE FILES *//**********************************************************************/
You must include the standard “C” file entitled “stdio.h” in your program to enable printing fromit14. The “include” statement is added by first moving the cursor to the last line of your file by pressingcapital “G”:
/**********************************************************************//* INCLUDE FILES *//**********************************************************************/
Then, instruct “vi” to insert a line after the current line and simultaneously switch to “insert” mode bypressing “o”:
/**********************************************************************//* INCLUDE FILES *//**********************************************************************/
You can then type the characters “#include <stdio.h>” directly into your file:
/**********************************************************************//* INCLUDE FILES *//**********************************************************************/#include <stdio.h>
Finally, put “vi” back into “command” mode by pressing the “Esc” key.Now write a permanent copy of the file, as created so far, by issuing the command:
:w
(Press the “Enter” key after issuing any “vi” command prefaced by a colon to execute it.) This willwrite a file named “main.c” to your permanent catalog. Issuing the “:w” command periodically is highlyrecommended, as it will save everything that you have done since the last “:w” command was issued.This can save you a lot of time in the case you accidently corrupt your file.
The “read” command can be used to read the contents of a file into an existing file as well as to anempty file. When “read” is used in an existing file, the specified file is read in following the line currentlycontaining the cursor. We will use the standard function header as a starting point for documenting themainline. This is done by leaving the cursor in the last line of the file, then using the “read” commandto insert the contents of “∼tchase/fnchead.c” at the bottom of the file:
:r ∼tchase/fnchead.cThe standard header will then appear at the bottom of your screen:
/**********************************************************************//* INCLUDE FILES *//**********************************************************************/#include <stdio.h>/**********************************************************************/return type function name( )/**********************************************************************//* AUTHOR:** DATE:**** PURPOSE
14If you are using the “C++” compiler and wish to use “cin” and “cout” instead of “scanf” and “printf”, use the line:#include <iostream.h>
20

**** INPUT**** OUTPUT**** DESCRIPTION OF LOCAL VARIABLES**** FUNCTIONS CALLED*/{/*** DECLARATIONS FOR LOCAL VARIABLES*//*** START OF EXECUTABLE CODE*/}∼∼...∼∼
You will now replace the default function declarator with the standard “C++” or “C” language mainprogram declarator. Move the cursor two lines down by pressing the “j” key15 twice:
/**********************************************************************/return type function name( )/**********************************************************************/
Next, press the “R” key to put the editor in “replace” mode. “Replace” will change existing characterson the line with newly-typed characters. The “R” command also leaves the editor in “insert” mode untilthe “Esc” key is pressed. You can then simply type the characters for the main program declarator, andthey will appear directly on the display of your file:
/**********************************************************************/main( )ype function name( )/**********************************************************************/
Be sure you have pressed “Esc” to return the editor “command” mode. Move the cursor from the closingparenthesis of the main program declarator to the character “y” by pressing the “l” (small ell) key16:
/**********************************************************************/main( )ype function name( )
/**********************************************************************/
Then, delete the unwanted characters to the end of the line by pressing capital “D”:
/**********************************************************************/main( )/**********************************************************************/
Next, add your name to the “Author” line. Move the cursor down to the “Author” line with the “j”key. Then, press the “A” key to append characters to the end of the line, and type your name in the
15Remember that you must type a small “j”; a capital “J” will have a different effect! The “↓” key will also work.16The “→” key will also work.
21

appropriate position.
/**********************************************************************/main( )/**********************************************************************//* AUTHOR: (your name)
Press the “Esc” key to return to “command” mode. Then, fill in the current date by repeating the sameprocedure.
Note that new lines must be inserted into the file to provide room for the “Purpose”. This isaccomplished by first moving the cursor anywhere to the line containing the “Purpose” heading withthe “j” key:
/**********************************************************************/return type function name( )/**********************************************************************//* AUTHOR: (your name)** DATE: (today’s date)**** PURPOSE**** INPUT...
Next press the “o” key to insert a blank line following the line containing the cursor, and to shift theeditor to “insert” mode:
/**********************************************************************/return type function name( )/**********************************************************************//* AUTHOR: (your name)** DATE: (today’s date)**** PURPOSE
**** INPUT...
Note that the cursor is automatically positioned at column 1 of the new blank line. You can then simplytype in the two new lines of text (press the “Enter” key to move you from the end of the first new lineto the beginning of the second new line):
** Read in two matrices, calculate the product of the two,** and write out the original and resultant matrices
When you are through typing the text for the “Purpose”, press the “Esc” key to return “vi” to commandmode.
The mainline does not have input or output calling arguments. Therefore, the “INPUT” and “OUT-PUT” slots of the standard function header should be deleted. To do so, first move the cursor to anycharacter on the “INPUT” line by pressing the “j” key:
** INPUT
Then, issue the command “4dd” to delete four lines. Note that the “dd” command deletes a single line;prefacing the command with an integer causes it to be repeated the specified number of times. Nearlyall “vi” commands can be repeated in this manner. Your file will now appear as follows:
22

.../**********************************************************************/main( )/**********************************************************************//* AUTHOR: (your name)** DATE: (today’s date)**** PURPOSE** Read in two matrices, calculate the product of the two,** and write out the original and resultant matrices**** DESCRIPTION OF LOCAL VARIABLES...
The “Description of Local Variables” can be inserted using the same steps used for entering the“Purpose”:
1. Position the cursor anywhere on the line containing the “Description of Local Variables” label.
2. Issue the command “o” to insert a blank line for starting the variable descriptions.
3. Type in all 15 lines of the variable descriptions. (See page 17).
4. Press the “Esc” key to return to command mode.
Complete the header by filling in the list of “functions called” so that it matches the model onpage 17. This can be done using the commands presented above.
You are now ready to enter the executable code. This is easily accomplished by first moving to thelast line of your file by pressing the “G” key:
/*** START OF EXECUTABLE CODE*/}Then, press the “O” (capital oh) key to add an empty line above the line containing the cursor andsimultaneously enter “insert” mode. The two executable lines can then be entered by typing the text ason a normal typewriter:
printf( "\n\n MATRIX MULTIPLICATION SAMPLE PROGRAM\n" );printf( " ------------------------------------\n" );
Press “Esc” when you are finished.Finally, add the documentation for the first executable line. Move the cursor to the line containing
the statement “START OF EXECUTABLE CODE” by pressing the “k” key17. Then, press the “o”(small oh) key and type the two lines:
**** Print program title
followed by pressing the “Esc” key.You may wish to scroll the text in your edit window forward or backwards while completing your
mainline. A series of scroll commands are described in Appendix A.2. For example, assume that youwould like to scroll the text in your window the height of one full window backwards. First, be sure thatyou are in command, rather than insert, mode. Then press the “Control” key and holding it down whilesimultaneously pressing the “b” key.
17The “↑” key will also work.
23

When you have finished entering the mainline, you will be ready to save your new file and exit the“vi” editor. This is easily accomplished by simply typing “ZZ”. A final message line will say somethingsimilar to:
"main.c" [New file] 46 lines, 1320 characters
You will then be returned to the operating system:
%
If you made major errors while editing your file, you may not want to save your new file. You canexit the editor without saving your new file (or changes to an existing file) by issuing the command “:q!”(colon - q - exclamation point).
You can compile your program with one simple command18:
% cc main.c
The compiler will then list any errors that it detected in your program. You can fix these errors byre-starting the editor and correcting the problems noted by the compiler.
The compiler will often tell you the line number of the source file where the error occurred. Whenthis is the case, you can immediately move to the problematic line using “vi” by typing a colon followedby the line number. The problem can often be quickly identified using this technique.
Once your program compiles with no errors (indicated by a simple system prompt, “%”, beingreturned), you are ready to run it. When you compiled the program, the system automatically createda “binary” file in your catalog that is ready to run. The default name assigned to this file is “a.out*”.You may run your program by typing the name of the binary file without the trailing asterisk:
% a.out
If your program is correct, you will then obtain an output similar to:
MATRIX MULTIPLICATION SAMPLE PROGRAM
------------------------------------
If so, give yourself a pat on the back: you just completed your first successful program segment!If you would like a break, now is a good time. Remember, you must “log out” of your workstation
following the procedure described on page 13!
5.3 Completing the Sample Program
You will complete the sample program by adding the remaining functions one at a time. The programwill be tested after each function is added. You will write the function “read matrix size” from scratch;however, the remaining functions have been written for you. Therefore, you need only copy them fromexisting files and add the appropriate calls from the mainline, as described below.
Prior to adding the next function, you will add lines to the mainline to attempt to open the inputfile. You can test for the correct operation of this code before attempting to read anything from the file.
Re-start “vi” by entering the command:
% vi main.c
You will now add a declaration for the input file. Move the cursor to the line following the label “DEC-LARATIONS FOR LOCAL VARIABLES” in the main program. The “search for pattern” command,“/”, can be used to do this rapidly. The “/” command causes the editor to move to the line containingthe pattern of characters following it. Thus, typing “/DECLARATIONS” moves the cursor to the dec-larations label for the main program. Then, press “j” or “↓” to move the cursor down one more line.Finally, press “o” and type:
FILE* input_file;18Use “CC” (capital letters instead of small letters) to use the “C++” compiler instead of the “C” compiler.
24

followed by “Esc”.The code to open the input file is now added to the main program. Move to the last line of the file
by pressing “G”. Then, press “O” (capital oh) and insert the following lines:
/*** Open input data file*/
input_file = fopen( "matfile", "r" );/*** Notify user if error occurred*/
if ( input_file == NULL ){
printf( " \n INPUT DATA FILE NOT FOUND!\n" );return 1;
}
Press “Esc” when you are finished entering the new text. Exit “vi” by typing “ZZ”.Now, compile your revised program:
% cc main.c
However, note that the file named “matfile” does not yet exist on your catalog. We will take advantageof this deficiency to ensure that the error-handling code that we just entered works correctly.
To complete the test, run the program in the normal manner:
% a.out
The program should then print the following output:
MATRIX MULTIPLICATION SAMPLE PROGRAM------------------------------------
INPUT DATA FILE NOT FOUND!
Now that we know that the error-sensing code for a missing input file works, we will make the inputfile available. Copy the data file, “matfile”, from account “∼tchase” to your account using the system-level “copy” command:
% cp ∼tchase/matfile matfile
Next, run the program again:
% a.out
If the file was found correctly, the program title should be printed, but the error message, “INPUTDATA FILE NOT FOUND!”, should not appear19.
The function “read matrix size” will now be added to the program. First, re-start “vi”:
% vi main.c
Move to the line containing the text “#include <stdio.h>” by pressing the “j” or “↓” key. Then, readin the standard function header by issuing the command:
:r ∼tchase/fnchead.cThe standard header should then be inserted between the “include” command and the initial version ofthe main program.
19If the error message still appears, be sure that “matfile” was copied to your catalog by issuing the “ls” command (seepage 14).
25

Now, convert the standard header to function “read matrix size”, as shown on page 3, by filling inthe slots provided by the header. For example, move the cursor to the first character of the line:
return_type function_name()
and use the “R” (replace line) command to convert it to the actual function declaration:
int read_matrix_size( FILE* input_file, int* nrow, int* ncol )
Then, you can finish the function using the commands described in subsection 5.2. For convenience, abrief review of commands that you may need is provided here.
You can move the cursor down the file line-by-line using the “k” or “↓” keys. Your name and thedate can be appended to the end of the appropriate lines by pressing the “A” key. (Remember to press“Esc” when you have completed the line.) New lines can be inserted to describe the purpose, input,output, local variables, and functions called by moving to the appropriate header then pressing the “o”key. The unused “DECLARATIONS FOR LOCAL VARIABLES” can be deleted using “dd”. Finally,insert lines for the executable statements and their documentation using the “o” key.
New statements will now be added to the mainline to call “read matrix file”. As always, we will testto be sure the new function works before proceeding with implementing any others. Move the cursorto the line containing the “FILE*” declaration in the main program with the pattern-search command“/FILE*”. Then, add the mainline integer declaration line:
int index, ncol1, ncol2, nrow1, nrow2;
Move to the bottom of the file by pressing “G”. Then, press “O” and add the following lines:
/*** Read in the number of rows and columns in the first matrix*/
if ( !read_matrix_size( input_file, &nrow1, &ncol1 ) ){
/*** Notify user if error occurred*/
printf( " \n FIRST MATRIX ROW/COLUMN SIZE NOT AVAILABLE" );printf( " FROM INPUT FILE!\n" );return 1;
}
Then, exit the editor (“ZZ”), compile the revised program (“cc main.c”), and run it (“a.out”). If therow and column size are read correctly from the data file, only the program title should appear20.
To save you time, the functions “read matrix”, “print matrix” and “mat mult” have been writtenfor you. All you need to do is copy them from file “∼tchase” and add the executable lines to the mainprogram to call them. Brief instructions are provided below to do this.
To add “read matrix”, re-start “vi” and move the cursor to the last line of function “read matrix size”.Then, issue the command:
:r ∼tchase/read_matrix.cAdd the main program matrix declaration line:
double **matrix1, **matrix2, **prod_matrix;
Finally, add the following executable lines to the bottom of the mainline:20To thoroughly test your program, you could intentionally damage file “matfile” by editing it and deleting everything
but the first number in the file! This should cause the error statement “FIRST MATRIX ROW/COLUMN SIZE NOTAVAILABLE FROM INPUT FILE” to appear. If you try this test, you can re-copy “matfile” from account “∼tchase”when you are finished.
26
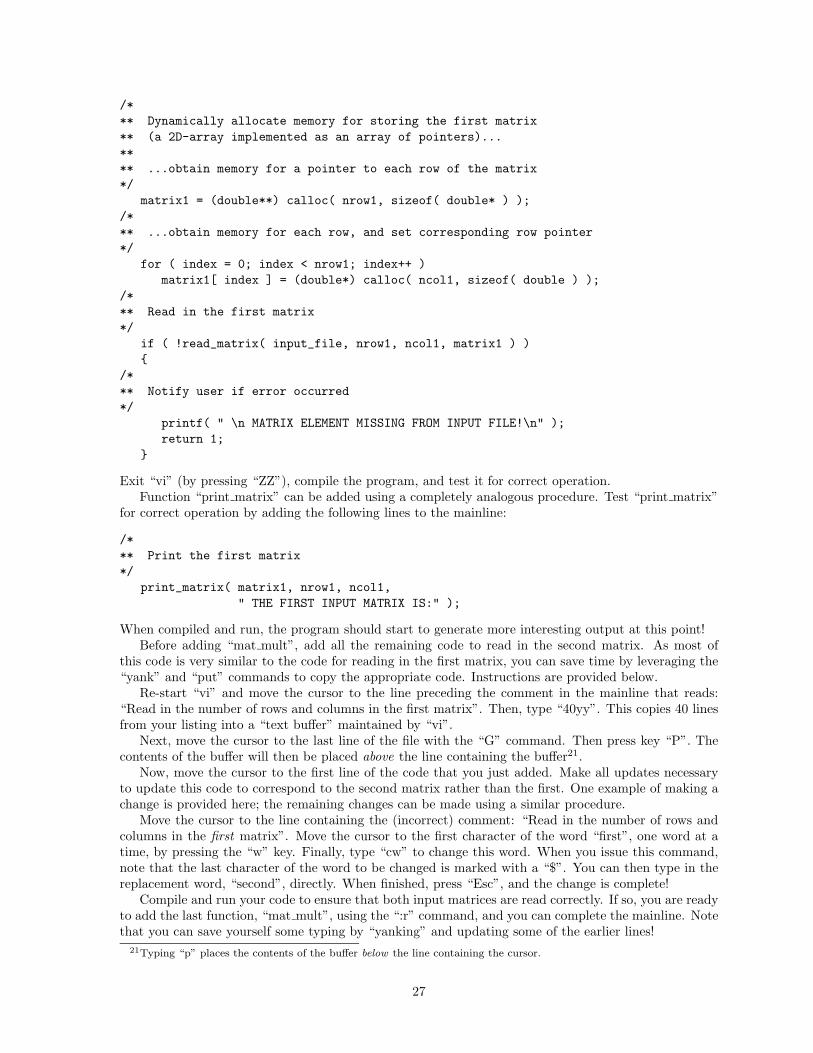
/*** Dynamically allocate memory for storing the first matrix** (a 2D-array implemented as an array of pointers)...**** ...obtain memory for a pointer to each row of the matrix*/
matrix1 = (double**) calloc( nrow1, sizeof( double* ) );/*** ...obtain memory for each row, and set corresponding row pointer*/
for ( index = 0; index < nrow1; index++ )matrix1[ index ] = (double*) calloc( ncol1, sizeof( double ) );
/*** Read in the first matrix*/
if ( !read_matrix( input_file, nrow1, ncol1, matrix1 ) ){
/*** Notify user if error occurred*/
printf( " \n MATRIX ELEMENT MISSING FROM INPUT FILE!\n" );return 1;
}
Exit “vi” (by pressing “ZZ”), compile the program, and test it for correct operation.Function “print matrix” can be added using a completely analogous procedure. Test “print matrix”
for correct operation by adding the following lines to the mainline:
/*** Print the first matrix*/
print_matrix( matrix1, nrow1, ncol1," THE FIRST INPUT MATRIX IS:" );
When compiled and run, the program should start to generate more interesting output at this point!Before adding “mat mult”, add all the remaining code to read in the second matrix. As most of
this code is very similar to the code for reading in the first matrix, you can save time by leveraging the“yank” and “put” commands to copy the appropriate code. Instructions are provided below.
Re-start “vi” and move the cursor to the line preceding the comment in the mainline that reads:“Read in the number of rows and columns in the first matrix”. Then, type “40yy”. This copies 40 linesfrom your listing into a “text buffer” maintained by “vi”.
Next, move the cursor to the last line of the file with the “G” command. Then press key “P”. Thecontents of the buffer will then be placed above the line containing the buffer21.
Now, move the cursor to the first line of the code that you just added. Make all updates necessaryto update this code to correspond to the second matrix rather than the first. One example of making achange is provided here; the remaining changes can be made using a similar procedure.
Move the cursor to the line containing the (incorrect) comment: “Read in the number of rows andcolumns in the first matrix”. Move the cursor to the first character of the word “first”, one word at atime, by pressing the “w” key. Finally, type “cw” to change this word. When you issue this command,note that the last character of the word to be changed is marked with a “$”. You can then type in thereplacement word, “second”, directly. When finished, press “Esc”, and the change is complete!
Compile and run your code to ensure that both input matrices are read correctly. If so, you are readyto add the last function, “mat mult”, using the “:r” command, and you can complete the mainline. Notethat you can save yourself some typing by “yanking” and updating some of the earlier lines!
21Typing “p” places the contents of the buffer below the line containing the cursor.
27

When compiled and run, your final program should generate the following output:
MATRIX MULTIPLICATION SAMPLE PROGRAM------------------------------------
THE FIRST INPUT MATRIX IS:1.00000 4.00000
-1.00000 2.000005.00000 -1.00000
THE SECOND INPUT MATRIX IS:3.00000 2.00000 -2.000002.00000 -1.00000 1.00000
THE PRODUCT OF MATRIX 1 X MATRIX 2 IS:11.00000 -2.00000 2.000001.00000 -4.00000 4.00000
13.00000 11.00000 -11.00000
6 Printing Your Program’s Results
A system command, “script”, is available that creates a file containing all information printed to youractive window by a run of your program. Thus, you can simply send this file to the laser printer afterrunning your program to obtain a permanent copy of your interactive input and output. The “script”command is typed at the point that you wish to begin recording your results:
% script
** IMPORTANT **
After issuing the “script” command, wait for the system prompt to re-appear before typing anythingelse on your workstation! Otherwise, the “script” command may cause your workstation to “hang”! Ifthis occurs, please ask for assistance from the lab attendant. (Re-setting the workstation yourself maylead to network problems later.)
The system will respond with a message similar to:
Script started, file is typescript
%
Everything that appears on your screen from this time on will be recorded to a file on your catalognamed “typescript”. The “script” command is terminated by typing “exit” as a system command:
% exit
The results file can then be re-named or printed. For example, to print the results of your interactiverun to the ME 308 laser printer, you would type:
% lpr -Pme308b typescript
28

A Sample “vi” Commands
Symbols used below:
∧ “Control” key. (Press down & hold while the following character is typed.)
<CR> “Enter” key.
<Esc> “Escape” key. (Upper left of keyboard.)
n Any integer.
A.1 Commands for moving the text cursor
:0 Move the cursor to the top of your file.
h Move the cursor one character to the left.
l Move the cursor one character to the right.
k Move the cursor one line up.
j Move the cursor one line down.
w Move the cursor forward to the next word.
G Move the cursor to the last line of the input file.
10G Move the cursor to line 10.
:n<CR> Move the cursor to line n.
$ Move the cursor to the last character of the line
0 (Zero) Move the cursor to the first character of the line.
A.2 Commands for scrolling text on the screen
∧b Scroll backward one screen.
∧f Scroll forward one screen.
∧u Scroll backward (“up”) one-half screen.
∧d Scroll forward (“down”) one-half screen.
A.3 Commands for changing text in the file
a Shift to “append” mode, inserting all following text after the current cursor position until the “Esc”key is pressed.
A Append at end of line containing the cursor.
i Shift to insert mode, inserting all following text before the current cursor position until the “Esc” keyis pressed.
dd Delete the entire line of text containing the cursor. (The deleted line is placed in the buffer.)
x Delete the character at the current cursor position.
o Insert (“open”) a blank line following the line currently containing the cursor, and shift to “insert”mode on the blank line.
29

O Insert (“Open”) a blank line preceding the line currently containing the cursor, and shift to “insert”mode on the blank line.
r Replace the character at the current cursor position.
R Replace characters, starting at the current cursor position, until the <Esc> key is pressed.
A.4 Commands for “cutting” and “pasting”
yy Yank the current line and place it in a text buffer.
p Put the contents of the text buffer after the cursor.
P Put the contents of the text buffer before the cursor.
D Delete from current cursor position to end of line, and place deleted characters in a text buffer.
dd Delete the entire line containing the cursor, and place it in a text buffer.
A.5 Other useful commands
<Esc> Shift the editor from “insert” to “command” mode.
∧-g Display the current line number.
:g/s1<CR> Find the first occurrence of the string s1.
/s1<CR> Find the next occurrence of the string s1.
:s/s1/s2<CR> Replace string s1 with string s2.
u Undo the last command input.
U Undoes all changes made to the current line.
ZZ Save all changes made with the editor on the permanent copy of the edit file, then quit “vi”.
:q! Do not save the changes made in the current editing session, then quit “vi”. (You may want to dothis if you made large mistakes while editing the file.)
:r name<CR> Insert the contents of file name at the current cursor position.
:w name<CR> Write the file being edited to a file called name. (Note: If name is not included, allchanges made will be permanently recorded in the file currently being edited.)
Note: Commands h, l, k, j, dd, x, o, O, and yy may be prefaced with an integer number, n, to repeatthe command n times. For example, “10h” will move the cursor 10 characters to the left.
30