advanced evaluation quickbooks teachucomp, inc
TRANSCRIPT

A Presentation of TeachUcomp Incorporated.
Copyright © TeachUcomp, Inc. 2012
Advanced QuickBooks
TeachUcomp, Inc.
…it’s all about you
Advanced
QuickBooks
Sample
- for
evalu
ation
purp
oses
only!
2 ©TeachUcomp, Inc. Advanced QuickBooks
Advanced QuickBooks
Copyright:
Copyright © 2012 by TeachUcomp, Inc. All rights reserved. This publication, or any part thereof,
may not be reproduced or stored in a retrieval system, or transmitted in any form or by any means,
electronic, mechanical, recording, photocopying, or otherwise, without the express written permission of
TeachUcomp, Inc.
For PDF manuals, TeachUcomp, Inc. allows the owner of the PDF manual to make up to 2
additional copies of the PDF manual that the owner may place on up to 2 additional non-shared computer
hard drives for ease of use when using the accompanying CD-ROM tutorials. TeachUcomp, Inc. also grants
unlimited personal printing rights to the owner, strictly limited to the purposes of not-for-profit personal or
private education or research.
The unauthorized reproduction or distribution of this copyrighted work is illegal. Criminal copyright
infringement, including infringement without monetary gain, is investigated by the FBI and is punishable by
up to five years in federal prison and a fine of $250,000.
Trademark Acknowledgements:
Intuit, Quicken, QuickBooks, QuickBooks Pro, QuickBooks Premier, Turbo Tax, EasyStep,
QuickReports, and QuickZoom are registered trademarks of Intuit, Inc. Windows, Windows Vista, Windows
7, Microsoft Word 2007, Microsoft Word 2010, Microsoft Excel 2007, Microsoft Excel 2010 and Outlook are
registered trademarks of Microsoft Corporation. Other brand names and product names are trademarks or
registered trademarks of their respective holders.
Disclaimer:
While every precaution has been made in the production of this book, TeachUcomp, Inc. assumes
no responsibility for errors or omissions. Nor is any liability assumed for damages resulting from the use of
the information contained herein. These training materials are provided without any warranty whatsoever,
including, but not limited to, the implied warranties of merchantability or fitness for a particular purpose. All
names of persons or companies in this manual are fictional, unless otherwise noted.
TeachUcomp, Inc. Phone: (877) 925-8080 Web: http://www.teachucomp.com Sa
mple- f
or ev
aluati
on pu
rpos
es on
ly!
3 ©TeachUcomp, Inc. Advanced QuickBooks
Welcome to the advanced section of Teachucomp, Inc.’s
Mastering QuickBooks Made Easy™ course. This class furthers
the student’s knowledge of Intuit’s QuickBooks application.
QuickBooks is one of the most popular accounting and
bookkeeping programs available today. The advanced section of
this class is designed to give the student with a basic skill set in
using QuickBooks further enhancements to their knowledge base.
QuickBooks is a terrific program to learn, as the skills that
you learn in QuickBooks can save valuable time and money by
automating, organizing and structuring the bookkeeping of your
company.
QuickBooks is a multi-featured program that allows you to
create invoices, create customer statements, pay your bills, write
vendor checks, track inventory, and manage your payroll, as well
as perform many other accounting and business-management
related tasks.
Introduction and Overview Sa
mple- f
or ev
aluati
on pu
rpos
es on
ly!

4 ©TeachUcomp, Inc. Advanced QuickBooks
Chapters/Lessons: Pages:
CHAPTER 15- Reporting 6
15.1- Graph and Report Preferences 7
15.2- Using QuickReports 8
15.3- Using QuickZoom 8
15.4- Preset Reports 9
15.5- Modifying a Report 10-12
15.6- Rearranging and Resizing Report Columns 12
15.7- Memorizing Reports 13
15.8- Memorized Report Groups 13
15.9- Printing Reports 14
15.10- Batch Printing Forms 14
15.11- Exporting Reports to Microsoft Excel 14
15.12- Saving Forms and Reports as PDF Files 14
Reporting- Actions 15-20
Reporting- Exercise 21
CHAPTER 16- Using Graphs 22
16.1- Using Graphs 23
Using Graphs- Actions 24
Using Graphs- Exercise 25
CHAPTER 17- Customizing Forms 26
17.1- Creating New Form Templates 27
17.2- Performing Basic Customization 28
17.3- Performing Additional Customization 29
17.4- The Layout Designer 30
17.5- Changing the Grid and Margins in the Layout Designer 31
17.6- Selecting Objects in the Layout Designer 31
17.7- Moving and Resizing Objects in the Layout Designer 32
17.8- Formatting Objects in the Layout Designer 32
17.9- Copying Objects and Formatting in the Layout Designer 33
17.10- Adding and Removing Objects in the Layout Designer 33
17.11- Aligning and Stacking Objects in the Layout Designer 34
17.12- Resizing Columns in the Layout Designer 34
Customizing Forms- Actions 35-40
Customizing Forms- Exercise 41
CHAPTER 18- Estimating 42
18.1- Creating a Job 43
18.2- Creating an Estimate 43
18.3- Duplicating Estimates 44
18.4- Invoicing from an Estimate 44-45
18.5- Updating Job Statuses 45
18.6- Inactivating Estimates 45
18.7- Making Purchases for a Job 46
18.8- Invoicing for Job Costs 46
18.9- Using Job Reports 47
Estimating- Actions 48-50
Estimating- Exercise 51
CHAPTER 19- Time Tracking 52
19.1- Tracking Time and Printing a Blank Timesheet 53
19.2- Weekly Timesheets 54
19.3- Time/Enter Single Activity 54
19.4- Invoicing from Time Data 54-55
19.5- Using Time Reports 55
19.6- Tracking Vehicle Mileage 56
19.7- Charging Customers for Mileage 57
Time Tracking- Actions 58-60
Time Tracking- Exercise 61
Table Of Contents
Chapters/Lessons: Pages:
CHAPTER 20- Payroll 62
20.1- The Payroll Process 63
20.2- Creating Payroll Items 64
20.3- Setting Employee Defaults 64
20.4- Setting Up Employee Payroll Information 64-65
20.5- Creating Payroll Schedules 66
20.6- Creating Scheduled Paychecks 66
20.7- Creating Unscheduled Paychecks 67
20.8- Creating Termination Paychecks 67
20.9- Voiding Paychecks 68
20.10- Tracking Your Tax Liabilities 68
20.11- Paying Payroll Tax Liabilities 69
20.12- Adjusting Payroll Liabilities 69
20.13- Entering Liability Refund Checks 70
20.14- Process Payroll Forms 70
20.15- Tracking Workers Compensation 71
Payroll- Actions 72-78
Payroll- Exercise 79
CHAPTER 21- Using Credit Card Accounts 80
21.1- Creating Credit Card Accounts 81
21.2- Entering Charges on Credit Cards 81-82
21.3- Reconciling and Paying Credit Cards 82
Using Credit Card Accounts- Actions 83-84
Using Credit Card Accounts- Exercise 85
CHAPTER 22- Assets and Liabilities 86
22.1- Assets and Liabilities 87
22.2- Creating and Using Other Current Asset Accounts 87-88
22.3- Removing Value from Other Current Asset Accounts 88
22.4- Creating Fixed Asset Accounts 89
22.5- Creating Liability Accounts 90
22.6- Setting the Original Cost of the Fixed Asset 90
22.7- Tracking Depreciation 90
22.8- The Loan Manager 91
22.9- The Fixed Asset Item List 92
Assets and Liabilities- Actions 93-95
Assets and Liabilities- Exercise 96-97
CHAPTER 23- Equity Accounts 98
23.1- Equity Accounts 99
23.2- Recording an Owner’s Draw 99
23.3- Recording a Capital Investment 99
Equity Accounts- Actions 100
Equity Accounts- Exercise 101
CHAPTER 24- Writing Letters with QuickBooks 102
24.1- Using the Letters and Envelopes Wizard 103
24.2- Editing Letter Templates 103
Writing Letters with QuickBooks- Actions 104
Writing Letters with QuickBooks- Exercise 105
Sample
- for
evalu
ation
purp
oses
only!

5 ©TeachUcomp, Inc. Advanced QuickBooks
Chapters/Lessons: Pages:
CHAPTER 25- Company Management 106
25.1- Viewing Your Company Information 107
25.2- Setting Up Budgets 107
25.3- Using the To Do List 107
25.4- Using Reminders and Setting Preferences 108
25.5- Making General Journal Entries 108
25.6- Using the Cash Flow Projector 109
Company Management- Actions 110-111
Company Management- Exercise 112
CHAPTER 26- Using QuickBooks Tools 113
26.1- Company File Cleanup 114
26.2- Exporting List Data to an IIF File 114
26.3- Advanced Importing of Data 114-115
26.4- Updating QuickBooks 115
26.5- Using the Calculator 115
26.6- Using Portable Company Files 115-116
26.7- Using the Calendar 116
Using QuickBooks Tools- Actions 117-119
Using QuickBooks Tools- Exercise 120
CHAPTER 27- Using the Accountant’s Review 121
27.1- Creating an Accountant’s Copy 122
27.2- Transferring an Accountant’s Copy 122
27.3- Importing Accountant’s Changes 123
27.4- Removing Restrictions 123
Using the Accountant’s Review- Actions 124-125
Using the Accountant’s Review- Exercise 126
CHAPTER 28- Using the Help Menu 127
28.1- Using Help 128
Using the Help Menu- Actions 129
Using the Help Menu- Exercise 130
QuickBooks Keyboard Shortcuts 131
Table Of Contents Sa
mple- f
or ev
aluati
on pu
rpos
es on
ly!
6 ©TeachUcomp, Inc. Advanced QuickBooks
CHAPTER 15-
Reporting
15.1- Graph and Report Preferences
15.2- Using QuickReports
15.3- Using QuickZoom
15.4- Preset Reports
15.5- Modifying a Report
15.6- Rearranging and Resizing Report Columns
15.7- Memorizing Reports
15.8- Memorized Report Groups
15.9- Printing Reports
15.10- Batch Printing Forms
15.11- Exporting Reports to Microsoft Excel
15.12- Saving Forms and Reports as PDF Files
Sample
- for
evalu
ation
purp
oses
only!
7 ©TeachUcomp, Inc. Advanced QuickBooks
Reporting
15.1- Graph and Report Preferences:
You can set the default personal and company preferences for reports and graphs created within
QuickBooks by changing the settings within the “Preferences” dialog box. You can access these settings by
selecting “Edit| Preferences…” from the Menu Bar to open the “Preferences” dialog box.
In the “Preferences” dialog box, click the “Reports & Graphs” icon in the listing of categories shown
in the list at the left side of the “Preferences” window. Then set default personal report preferences on the
“My Preferences” tab and set default company preferences on the “Company Preferences” tab.
Click the “My Preferences” tab to begin. If you want QuickBooks to prompt you to modify report
options prior to displaying a report, then check the “Prompt me to modify report options before opening a
report” checkbox. In the “Reports and Graphs” section, you select how you want QuickBooks to behave
when the data within a report needs to be refreshed. You can select either “Prompt me to refresh,” “Refresh
automatically,” or “Don’t refresh.” If you select the “Refresh automatically” option, then when you change a
report parameter, QuickBooks will refresh the report to show the change immediately. In the “Graphs Only”
section, you can check the “Draw graphs in 2D (faster)” option in order to show graphs in 2D versus 3D, if
desired. If you prefer to use patterns versus colors when rendering graphs, then you can check the “Use
patterns” checkbox.
Then click the “Company Preferences” tab. In the “Summary Reports Basis” section, you can select
how you prefer your summary reports to be displayed, by default. You can select either “Cash” or “Accrual.”
In the “Aging Reports” section, you can select which date to use as the basis for your aging reports- “Age
from due date” or “Age from transaction date.” In the “Reports- Show Items by:” section, select the desired
option button to choose how to display items within reports. In the “Reports- Show Accounts by:” section,
select the option button to choose how to display accounts within reports. For both items and accounts, you
can select to show either the “Name only,” “Description Only,” or “Name and Description.”
To choose which account balances are included in the “Operating,” “Investing,” or “Financing”
sections of the “Statement of Cash Flows” report, click the “Classify Cash…” button to open the “Classify
Cash” dialog box. Here you can select an account shown and then check either the “Operating,” “Investing,”
or “Financing” columns to assign its balance to the selected section of the “Statement of Cash Flows”
report. Make any changes that you need to here, and then click the “OK” button to return to the
“Preferences” dialog box.
You can combine multiple items within a transaction shown within a report into a single line by
default by checking the “Collapse Transactions” checkbox. Note that this may cause report generation to
take longer within QuickBooks.
You can also set the default appearance of the “Header/Footer” and “Fonts & Numbers” used within
your QuickBooks reports by clicking the “Format…” button to open the “Report Format Preferences” dialog
box. Here you can set your default report preferences for the “Header/Footer” and “Fonts & Numbers” by
clicking the desired tab and then making any changes you want to set as the defaults for your reports.
When you are finished, click the “OK” button to set the defaults. Note that if you would like to review setting
these report properties, please see lesson “15.5- Modifying a Report.”
Once you have set your default graph and report preferences as desired, you can then click the
“OK” button within the “Preferences” dialog box to apply your preferences.
Sample
- for
evalu
ation
purp
oses
only!
8 ©TeachUcomp, Inc. Advanced QuickBooks
Reporting
15.3- Using QuickZoom:
When viewing reports displayed within QuickBooks you will often see transaction data or summary
totals of those transactions. You can use the QuickZoom feature when viewing reports within QuickBooks to
display the detail data used for summary values in reports. These details will appear in a separate report
window. You can also use this feature on any transaction entry displayed within a report to open that
transaction itself in a separate window. Also, when viewing graphs in QuickBooks, you can use the
QuickZoom feature to view a breakdown of the graphic data in either a separate graph or separate report.
Basically, you can use this feature to trace report data back to its original sources. As such, this tool can be
an easy way to open transaction data from within reports when viewing them onscreen.
To use the QuickZoom feature on any report displayed in QuickBooks, hold your mouse pointer over
any line within a report until you see your mouse pointer turn into the QuickZoom symbol. The QuickZoom
symbol is a magnifying glass with a small “Z” inside of it. When you see your mouse pointer turn into this
symbol, you can double-click the report line to display the original transaction, or detail report for the
selected report line, within a separate window.
15.2- Using QuickReports:
One way to see a report on your QuickBooks data is to create a QuickReport. QuickReports are
predesigned reports that display information about the items you are currently viewing onscreen. Whenever
you have a list, a register, or a form displayed onscreen, you can click a button or hyperlink to have
QuickBooks create a QuickReport on the data displayed.
For example, if you are viewing the “Vendor List” and you want to see a transaction history for a
selected vendor, you can create a QuickReport. To do this, select the vendor’s name from the “Vendors” list
within the Vendor Center and then click the “QuickReport” hyperlink in the upper-right corner of the Vendor
Center. At that point, you will see a QuickReport appear that lists your transactions with the selected vendor
for the current accounting period.
You can also generate a QuickReport on any form displayed in QuickBooks or on any selected
record within a list by simply pressing “Ctrl + Q” on your keyboard with the form displayed or the list entry
selected. The QuickReport will display within its own window, which you may close when you are done
viewing the report by clicking the small “x” in the upper right corner of the window.
Sample
- for
evalu
ation
purp
oses
only!
9 ©TeachUcomp, Inc. Advanced QuickBooks
Reporting
15.4- Preset Reports:
In addition to the QuickReports that you can view on any selected data or any form displayed within
QuickBooks, QuickBooks also provides dozens of preset reports that you can view, customize, and then
save as your own custom reports. The preset reports include many different types of standard business
reports, such as the profit and loss report, balance sheet report, accounts receivable reports, sales reports,
accounts payable reports, inventory reports, and many other types of useful business reports.
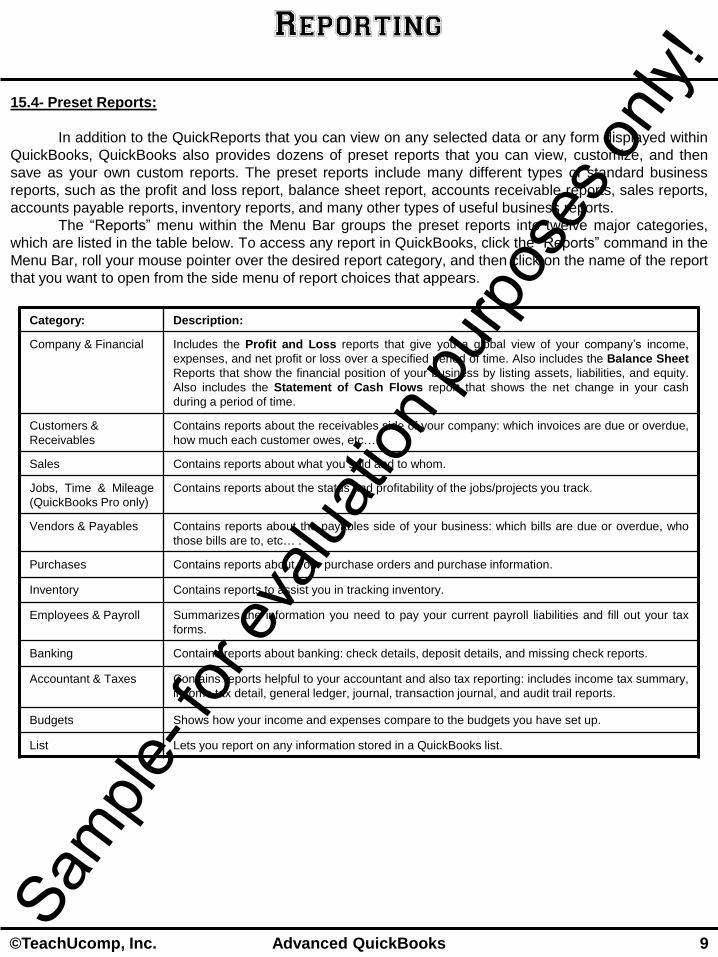
The “Reports” menu within the Menu Bar groups the preset reports into twelve major categories,
which are listed in the table below. To access any report in QuickBooks, click the “Reports” command in the
Menu Bar, roll your mouse pointer over the desired report category, and then click on the name of the report
that you want to open from the side menu of report choices that appears.
Category: Description:
Company & Financial Includes the Profit and Loss reports that give you a global view of your company’s income,
expenses, and net profit or loss over a specified period of time. Also includes the Balance Sheet
Reports that show the financial position of your business by listing assets, liabilities, and equity.
Also includes the Statement of Cash Flows report that shows the net change in your cash
during a period of time.
Customers &
Receivables
Contains reports about the receivables side of your company: which invoices are due or overdue,
how much each customer owes, etc… .
Sales Contains reports about what you sold and to whom.
Jobs, Time & Mileage
(QuickBooks Pro only)
Contains reports about the status and profitability of the jobs/projects you track.
Vendors & Payables Contains reports about the payables side of your business: which bills are due or overdue, who
those bills are to, etc… .
Purchases Contains reports about your purchase orders and purchase information.
Inventory Contains reports to assist you in tracking inventory.
Employees & Payroll Summarizes the information you need to pay your current payroll liabilities and fill out your tax
forms.
Banking Contains reports about banking: check details, deposit details, and missing check reports.
Accountant & Taxes Contains reports helpful to your accountant and also tax reporting: includes income tax summary,
income tax detail, general ledger, journal, transaction journal, and audit trail reports.
Budgets Shows how your income and expenses compare to the budgets you have set up.
List Lets you report on any information stored in a QuickBooks list.
Sample
- for
evalu
ation
purp
oses
only!
10 ©TeachUcomp, Inc. Advanced QuickBooks
Reporting
15.5- Modifying a Report:
While the preset reports provided in QuickBooks are very useful, you will probably want to create
your own custom reports for your company file. You can create reports that either detail or summarize the
data stored in your QuickBooks company file. You can create a custom transaction detail or summary report
from scratch to specify all of the report’s features, or you can modify one of the preset reports to display the
data you want. Modifying a preset report can often save you a few steps in creating a custom report,
especially if there is a preset report that closely resembles the data that you want to see. Once you have
modified the preset report, you can then memorize the report to save it as your own custom report.
Modifying a preset report is also a very good way to learn about the report customization options that are
available in QuickBooks. Once you have mastered the options available for reporting, you can then design
your own custom transaction detail and summary reports with much more confidence.
The available report customization options will change, depending on whether or not the report you
choose to modify or create is a “Transaction Detail” or “Summary” report. A “Transaction Detail” report
displays detailed transaction information about data within QuickBooks. A “Summary” report summarizes
totals from transaction details within QuickBooks. With the “Summary” reports, you have more
summarization options available. In this lesson, we will examine how to set reporting options for both
“Transaction Detail” and “Summary” reports within QuickBooks.
If you want to begin modifying a report based on a preset report, first open the desired preset report
that you want to use as the basis for your own custom report. Then click the “Customize Report” button in
the toolbar at the top of the preset report to open the “Modify Report” dialog box. You use the “Modify
Report” dialog box to customize the report settings.
If you want to create a new transaction detail or summary report from scratch within QuickBooks,
select “Reports| Custom Reports” from the Menu Bar and then choose “Transaction Detail” or “Summary.”
In the “Modify Report” dialog box that appears, you can then set all of the report’s aspects on the tabs
shown to create your own custom report from scratch.
In the “Modify Report” dialog box you will see the major categories of report customization displayed
as tabs across the top of the dialog box. These tabs are “Display,” “Filters,” “Header/Footer,” and “Fonts &
Numbers.” Generally, on the “Display” tab you can add and/or customize report columns, set summarization
options, and change the date range of the report. You use the “Filters” tab to choose which transactions are
displayed within the report. Changing the options available on the “Display” and “Filters” tabs allows you to
view anything you want to know about your QuickBooks data. Most report modification is made on these
two tabs. In addition to the “Display” and “Filters” tabs, you use the “Header/Footer” tab and the “Fonts &
Numbers” tab to control the general appearance of the report header and footer, and its text and numbers.
If you click the “Display” tab, you will see slightly different options depending upon the type of report
you are creating: “Transaction Detail” or “Summary.” For both types of reports, the “Report Date Range”
section is used to select the range of transaction dates for the report. You can use the “Dates” drop-down to
select from the most commonly used report ranges, or you can use the “From” and “To” date selectors to
specify a starting date and ending date for the records you want to use.
Also for both types of reports, you choose how the report calculates and displays income and
expenses by choosing either “Accrual” or “Cash,” as desired, from the “Report Basis” section.
The next section, “Columns,” is where you will see the primary difference between the “Transaction
Detail” and “Summary” reports within QuickBooks. If you are creating a “Transaction Detail” report, then in
the “Columns” section you can click on the name of any column shown in the scrollable listing in order to
place a checkmark next to it and add it to the report. To remove a column marked as being added to the
report, click it to remove the check from the column name and its display from your report. You can choose
how to display a total over the transactions shown by making a choice from the “Total by” drop-down menu.
Sample
- for
evalu
ation
purp
oses
only!
11 ©TeachUcomp, Inc. Advanced QuickBooks
Reporting
15.5- Modifying a Report- (cont.):
You can then use the “Sort by” drop-down to choose by which column’s values you wish to sort the report.
You can choose any report column that you have added to the report from this drop-down menu. You can
then select either “Ascending order” or “Descending order” to select the sorting method to use on the
selected column’s values.
Next, for “Transaction Detail” reports, you can click the “Advanced…” button to open the “Advanced
Options” dialog box. Here you will see the “Include” and “Open Balance / Aging” sections. In the “Include”
section, you can select either the “All” option to include all accounts, regardless of whether or not there was
any activity within the account for the date range selected, or you can select the “In Use” option to only use
accounts that had activity within the date range specified. For aging reports, you can select to view the
customer’s open balance as of the “Current” date or “As of Report Date” by selecting the desired option
button. Once you have set any advanced options, if needed, click the “OK” button in the “Advanced
Options” dialog box to apply them and return to the “Modify Report” window.
Now, for “Summary” reports, the “Columns” section within the “Display” tab looks very different. Most
“Summary” reports will show columns of totals for selected rows of data. In this section, you choose what
type of data to display within the columns of the report by making a selection from the “Display columns by”
drop-down. You can then choose the values to summarize within the rows by making a choice from the
“Display rows by” drop-down. To the right of that, you can then select to display columns for the “Amount,”
“Quantity,” or “Both” by selecting an option button below the “Display columns for” text. Then, to the right
you can choose how to sort the data by making a selection from the “Sort by” drop-down. You can then
select either to perform an “Ascending” or “Descending” sort on this data by making a choice from the “Sort
in” option button group. For some types of report date ranges, such as “This Fiscal Year,” you can also add
comparison subcolumns to the report by checking any desired checkboxes shown within the “Add
subcolumns for” section. The choices available will depend on the date range selected. Simply check the
checkboxes shown to add those summary subcolumns to your report, if desired.
Finally, if needed, you can click the “Advanced…” button to open the “Advanced Options” dialog
box. For “Summary” reports, you can choose what records to use in the report by making your choice from
the “Select Columns” and “Select Rows” sections. You can select “Active” accounts to only show data from
accounts that had activity in the selected report period; “All” accounts, regardless of activity in the selected
report period; or “Non-zero” accounts to show any account that has a non-zero balance, regardless of
activity. You can then choose the reporting period to use for your data from the “Reporting Calendar”
section. Your choices are “Fiscal Year,” “Calendar Year,” or “Income Tax Year.” Once you have set any
advanced options within the “Advanced Options” dialog box, click the “OK” button to apply them and return
to the “Display” tab within the “Modify Report” window.
For both “Transaction Detail” and “Summary” reports, the “Filters” tab within the “Modify Report”
window is used to create and modify the report filters that allow you to further refine your data selection
within the report. For example, assuming that you decided to display the “Account” data within your report
on the “Display” tab, you could then apply a filter to the account data to only display “Expense” account
types. This is simply one example of filtering the selected report data, and you can set and modify any of
the available filters shown within this tab to customize your report content to create hundreds of possible
filter variations.
If the report you are modifying already has filters applied, such as the filters applied to many of the
preset reports, you will see the current filters and their settings shown in the “Current Filter Choices” section
of the “Filters” tab. You can click on any filter shown in this list to view its settings to the left, within the
“Choose Filter” section. In this section, you can change the settings of the filter by using the options
available. Depending upon which filter you select, the options for filtering it may vary. Some filters need you
Sample
- for
evalu
ation
purp
oses
only!

12 ©TeachUcomp, Inc. Advanced QuickBooks
Reporting
15.5- Modifying a Report- (cont.):
to type a matching value, some allow you to select from a drop-down menu of choices, and some simply
allow you to select a desired option from one or two possible options.
You can add new filters to the report by selecting the name of a filter to apply from the “Choose
Filter” list, and then changing its settings as desired. If you want to read a bit more about how a filter that
you have selected can be applied, you can click the “Tell me more…” button at the bottom of this tab to
open a help file about the filter and how it can be used in reports. This is a good way to familiarize yourself
with many of the report filtering options available.
If you want to completely remove a filter that has been applied to a report, start by selecting the
name of the filter to remove from the “Current Filter Choices” list at the right side of the “Filters” tab. Then
click the “Remove Selected Filter” button to delete the filter from the report. Also note that both the “Display”
and “Filters” tabs contain a “Revert” button that will revert any changes you have made to them, if needed.
You can click the “Header/Footer” tab in the “Modify Report” window to change the display of
content within the header and footer of your report. In the “Show Header Information” section, check any
content that you want to show in the header of your report. You can then type the text to display into the
adjacent fields. You then repeat this process for the “Show Footer Information” section to display the
content you choose in the report footer area. You can then use the “Alignment” drop-down in the “Page
Layout” section to select the desired layout for your header and footer content within the report.
You can click the “Fonts & Numbers” tab in the “Modify Report” window to set the display of the font
used within the various sections of your report shown in the “Fonts” section of this tab. You can also set the
display of number values in your report within this tab. To set the font used within a report section, start by
selecting the report section to format from the “Change Font For” list. The current font used for the display of
the selected item will be shown to the right of the list. Then click the “Change Font…” button to open a
dialog box that will allow you to change the appearance of the text. Select your desired font options from the
choices shown and then click the “OK” button in the dialog box to apply them and return to the “Modify
Report” window. You then repeat this process for any other report sections whose fonts you wish to modify.
You can set the display of negative numbers within the report by making your desired selections
from the options shown in the “Show Negative Numbers” section. You can then set optional display settings
for all numbers in the “Show All Numbers” section by checking any available checkboxes, if desired.
Once you have finished modifying your report, click the “OK” button within the “Modify Report”
window to apply your report settings.
15.6- Rearranging and Resizing Report Columns:
You can rearrange the order of columns from left to right within any QuickBooks report. To do this,
first display the report you want to rearrange onscreen. Then place your mouse pointer over the name of the
column to move that appears in the column headings at the top of the report until you see your mouse
pointer change into a “hand” icon. You can then click and drag the column left or right. As you are dragging
the column, you will see a small upward-pointing red arrow appear between the column names. This arrow
indicates where the column will be placed when you release the mouse button. When it is in the desired
location, release the mouse button to move the column to the selected location.
You can also resize columns in a report by placing your mouse pointer to the right of the name of the
column that you want to resize, where the diamond icon is located, until the mouse pointer changes into a
thin vertical line intersected by a horizontal arrow. Click and drag with your mouse at that point in time to
resize the column. Then release the mouse button when the column is the size that you desire. Sample
- for
evalu
ation
purp
oses
only!
13 ©TeachUcomp, Inc. Advanced QuickBooks
Reporting
15.7- Memorizing Reports:
After you have modified a report, you can have QuickBooks memorize the report so that you can
quickly reproduce the same report in the future without having to reapply all of your customization.
To memorize a modified report, click the “Memorize” button in the toolbar at the top of the modified
report’s window to open the “Memorize Report” dialog box. Type a name for the new report into the “Name”
field. If you want to save it into a memorized report group, check the checkbox for “Save in Memorized
Report Group” and then choose the desired group to save it into from the adjacent drop-down menu. When
you are finished naming the memorized report, click the “OK” button to save it.
Note that when you memorize a report, you cannot name it the same thing as one of the preset
reports because that would overwrite them. So you will have to change the name if modifying a report that
was originally based on one of the preset reports.
Once you have memorized the report, you can access it in the future by selecting “Reports|
Memorized Reports” from the Menu Bar. You will see the names of all of your memorized reports in a side
menu from which you can select the name of the memorized report that you wish to display.
15.8- Memorized Report Groups:
As you begin to create your own custom reports within QuickBooks, you can create memorized
report groups that allow you to organize your memorized reports in a way that makes sense for your
company. Memorized report groups allow you to quickly print or view a batch of memorized reports at once.
For illustrative purposes, QuickBooks comes with a few preset memorized report groups that contain
common reporting examples for each grouping. You can add your own memorized report to these
memorized report groups, or you can create your own groups. When you create a memorized report, note
that you can click the checkbox for “Save in Memorized Report Group” and then select the desired
memorized report group to save it into from the adjacent drop-down field.
To create a new memorized report group, select “Reports| Memorized Reports| Memorized Report
List” from the Menu Bar. In the “Memorized Report List” window, click the “Memorized Report” button and
select “New Group” from the pop-up menu that appears. In the “Name” field of the “New Memorized Report
Group” window, type a name for the new report group. Click the “OK” button to have QuickBooks add this
memorized report group to the list.
Once you have added reports to the memorized report groups, you can then use the groups that
appear within the “Memorized Report List” to batch print or batch display the reports contained within a
selected group. To do this, just select the name of the memorized report group to print or display within the
“Memorized Report List.” Then click either the “Display…” or “Print…” buttons shown at the bottom of the
“Memorized Report List” to open the “Process Multiple Reports” window. In this window, you can use the
“Select Memorized Report From” drop-down at the top of the window to select the desired memorized report
group that contains the reports you wish to batch display or print. Note that you can choose the
“<Ungrouped Reports>” choice from this drop-down menu to select memorized reports that you have not
saved into a memorized report group.
For whichever grouping is selected, the reports within the group will then be displayed in the list
below. If there are reports that you do not want to batch print or display, then you can click the checkmark at
left side of their name in this list to remove the checkmark and de-select them.
When you have the reports that you want to batch print or batch display selected, then click either
the “Display” or “Print” buttons at the bottom of this window to batch display or batch print the reports. Sample
- for
evalu
ation
purp
oses
only!
14 ©TeachUcomp, Inc. Advanced QuickBooks
Reporting
15.11- Exporting Reports to Microsoft Excel:
You can export report data from QuickBooks to Microsoft Excel. You must have Excel 2000, XP,
2003, 2007, or 2010 for this feature to work and either QuickBooks Pro or Premier. Since the data is
exported to Excel, changes that you make to it in Excel will not impact the data in QuickBooks. So feel free
to change it as needed in Excel. To do this, open the report that you want to export. Then click the “Excel”
button in the toolbar at the top of the report, and select either the “Create New Worksheet” or “Update
Existing Worksheet” commands.
When you export a report to Excel in the dialog box, you can save it as a new sheet in a workbook
or create a new workbook. You can also save it as a CSV file, which would be opened using Excel. You can
also indicate whether or not you want to preserve the QuickBooks formatting by clicking the “Advanced…”
button. You can then turn on or off several Excel options, including: AutoFit, which sets column widths in
Excel wide enough to display all of the data; Freeze Panes, which allows you to scroll through information
while keeping row and column headers in view; and Show Gridlines, which shows the gridlines in Excel.
Also, you can select the option to update an existing worksheet in Excel. When you are ready, click the
“Export” button to export your report data.
15.9- Printing Reports:
You can easily print any report displayed in QuickBooks. To do this, open the report you want to
print and then click the “Print” button in the toolbar of the report. That will display the “Print Reports” window
where you can set options for the printer that you would like to use, page orientation, page breaking
behavior, the print range, and the number of copies of the report. Once you have set the options that you
would prefer, just click the “Print” button in the “Print Reports” window to print the currently displayed report.
15.10- Batch Printing Forms:
If you want to “batch print” a set of forms, like all your paychecks or all your bill payment checks, you
can. You can also print mailing labels and other assorted forms. To print forms, you can select “File| Print
Forms” from the Menu Bar. You can then select the type of form to print from the side menu of choices that
appears.
15.12- Saving Forms and Reports as PDF Files:
In QuickBooks, you can also save any report, invoice, estimate or any other form as a PDF (Portable
Document Format) file that you can then send as an e-mail attachment through your e-mail program.
To save any form or report as a PDF document, just open the form or report that you want to save
as a PDF document. Then select “File| Save as PDF…” from the Menu Bar. This will launch the “Save
document as PDF” dialog box where you can select where you want to save the PDF file and what to name
it. Just click the “Save” button when you are finished to create the PDF file.
Sample
- for
evalu
ation
purp
oses
only!
15 ©TeachUcomp, Inc. Advanced QuickBooks
ACTIONS-
Reporting SETTING GRAPH AND REPORT PREFERENCES:
1. Select “Edit| Preferences…” from the Menu Bar to open the “Preferences” dialog box.
2. In the “Preferences” dialog box, click the “Reports & Graphs” icon in the listing of categories shown at
the left side of the “Preferences” window.
3. Click the “My Preferences” tab.
4. If you want QuickBooks to prompt you to modify report options prior to displaying a report, then check
the “Prompt me to modify report options before opening a report” checkbox.
5. In the “Reports and Graphs” section, select how you want QuickBooks to behave when the data within a
report needs to be refreshed. You can select either “Prompt me to refresh,” “Refresh automatically,” or
“Don’t refresh.”
6. In the “Graphs Only” section, you can check the “Draw graphs in 2D (faster)” option in order to show
graphs in 2D versus 3D, if desired.
7. If you prefer to use patterns versus colors when rendering graphs, then you can check the “Use
patterns” checkbox.
8. Click the “Company Preferences” tab.
9. In the “Summary Reports Basis” section, select how you prefer your summary reports to be displayed,
by default. You can select either “Cash” or “Accrual.”
10. In the “Aging Reports” section, select which date to use as the basis for your aging reports- “Age from
due date” or “Age from transaction date.”
11. In the “Reports- Show Items by:” section, select the desired option button to choose how to display
items within reports.
12. In the “Reports- Show Accounts by:” section, select the option button to choose how to display accounts
within reports.
13. To choose which account balances are included in the “Operating,” “Investing,” or “Financing” sections
of the “Statement of Cash Flows” report, click the “Classify Cash…” button to open the “Classify Cash”
dialog box.
14. Here you can select an account shown and then check either the “Operating,” “Investing,” or “Financing”
columns to assign its balance to the selected section of the “Statement of Cash Flows” report.
15. Make any changes needed and then click the “OK” button to return to the “Preferences” dialog box.
16. You can combine multiple items within a transaction shown within a report into a single line by default
by checking the “Collapse Transactions” checkbox.
17. You can set the default appearance of the “Header/Footer” and “Fonts & Numbers” used within reports
by clicking the “Format…” button to open the “Report Format Preferences” dialog box.
18. Here you can set your default report preferences for the “Header/Footer” and “Fonts & Numbers” by
clicking the desired tab and then making any changes you want to set as the defaults for your reports.
19. When you are finished, click the “OK” button to set the defaults. Note that if you would like to review
setting these report properties, please see lesson “15.5- Modifying and Filtering Reports.”
20. Once you have set your default graph and report preferences as desired, you can then click the “OK”
button within the “Preferences” dialog box to apply your preferences.
Sample
- for
evalu
ation
purp
oses
only!

16 ©TeachUcomp, Inc. Advanced QuickBooks
ACTIONS-
Reporting CREATING A QUICKREPORT:
1. Select an item in a list, open a transaction form, or otherwise display the data.
2. Press “Ctrl + Q” on your keyboard.
3. The QuickReport will appear within a separate window.
4. Close the report when finished.
QUICKZOOMING DATA WITHIN A REPORT OR GRAPH:
1. Open a report or graph.
2. Put your mouse pointer on a data entry in the report or graph until a magnifying glass with a “Z” inside of
it appears.
3. Double-click on the entry.
4. The original transaction information or another report showing the transaction appears in a new window.
5. Close it when finished.
MODIFYING A REPORT:
1. To modify a report based on a preset report, open the desired preset report that you want to use as
the basis for your own custom report.
2. Click the “Customize Report” button in the toolbar at the top of the preset report to open the “Modify
Report” dialog box.
3. To create a new transaction detail or summary report from scratch, select “Reports| Custom
Reports” from the Menu Bar and then choose “Transaction Detail” or “Summary” from the side menu
that appears to open the “Modify Report” dialog box.
4. In the “Modify Report” dialog box you will see the “Display,” “Filters,” “Header/Footer,” and “Fonts &
Numbers” tabs. You use the settings on these tabs to modify the associated report content.
5. If you click the “Display” tab, you will see slightly different options depending upon the type of report you
are creating: “Transaction Detail” or “Summary.”
6. For both types of reports, in the “Report Date Range” section you can use the “Dates” drop-down to
select a commonly used report date range, or you can use the “From” and “To” date selectors to specify
a starting date and ending date for the report’s data.
7. For both types of reports, choose how the report calculates and displays income and expenses by
choosing either “Accrual” or “Cash,” as desired, from the “Report Basis” section.
8. If you are creating or modifying a “Transaction Detail” report, then in the “Columns” section click
the name of any column shown in the scrollable listing to place a checkmark next to it and add it to the
report. If you are creating or modifying a “Summary” report, skip to step #17.
9. To remove a column added to the report, click its name to remove the check from the column name and
its display from your report.
10. You can choose how to display a total over the transactions shown by making a choice from the “Total
by” drop-down menu.
11. You can then use the “Sort by” drop-down to choose by which column’s values you wish to sort the
report. You can choose any report column that you have added to the report from this drop-down menu.
12. You can then select either “Ascending order” or “Descending order” to select the sorting method to use
on the selected column’s values.
(cont’d.) Sample
- for
evalu
ation
purp
oses
only!
17 ©TeachUcomp, Inc. Advanced QuickBooks
ACTIONS-
Reporting MODIFYING A REPORT- (CONT’D.):
13. You can click the “Advanced…” button to open the “Advanced Options” dialog box.
14. In the “Include” section, you can select either the “All” option to include all accounts, regardless of
whether or not there was any activity within the account for the date range selected, or you can select
the “In Use” option to only use accounts that had activity within the date range specified.
15. For aging reports, you can select to view the customer’s open balance as of the “Current” date or “As of
Report Date” by selecting the desired option button.
16. Once you have set any advanced options, if needed, click the “OK” button in the “Advanced Options”
dialog box to apply them and return to the “Modify Report” window. You can now skip to step #27.
17. If you are creating or modifying a “Summary” report, then in the “Columns” section you choose
what type of data to display within the columns of the report by making a selection from the “Display
columns by” drop-down.
18. Choose the values to summarize within the rows by making a choice from the “Display rows by” drop-
down.
19. You can select to display columns for the “Amount,” “Quantity,” or “Both” by selecting an option button
below the “Display columns for” label.
20. You can choose how to sort the data by making a selection from the “Sort by” drop-down.
21. You can then select either to perform an “Ascending” or “Descending” sort on this data by making a
choice from the “Sort in” option button group.
22. For some types of report date ranges, you can also add comparison subcolumns to the report by
checking any desired checkboxes shown within the “Add subcolumns for” section. The choices available
will depend on the date range selected. Simply check the checkboxes shown to add those summary
subcolumns to your report, if desired.
23. If needed, you can click the “Advanced…” button to open the “Advanced Options” dialog box.
24. For “Summary” reports, you can choose what records to use in the report by making your choice from
the “Select Columns” and “Select Rows” sections. You can select “Active” accounts to only show data
from accounts that had activity in the selected report period; “All” accounts, regardless of activity in the
selected report period; or “Non-zero” accounts to show any account that has a non-zero balance,
regardless of activity.
25. You can then choose the reporting period to use for your data from the “Reporting Calendar” section.
Your choices are “Fiscal Year,” “Calendar Year,” or “Income Tax Year.”
26. Once you have set any advanced options within the “Advanced Options” dialog box, click the “OK”
button to apply them and return to the “Display” tab within the “Modify Report” window.
27. For both “Transaction Detail” and “Summary” reports, click the “Filters” tab within the “Modify
Report” window.
28. If the report you are modifying already has filters applied, you will see the current filters and their
settings shown in the “Current Filter Choices” section of the “Filters” tab.
29. You can click on any filter shown in this list to view its settings to the left, within the “Choose Filter”
section.
30. In the “Choose Filter” section, you can change the settings of the filter by using the options available.
Depending upon which filter you select, the options for filtering it may vary. Some filters need you to
type a matching value, some allow you to select from a drop-down menu of choices, and some simply
allow you to select a desired option from one or two possible options.
31. You can add new filters to the report by selecting the name of a filter to apply from the “Choose Filter”
list, and then changing its settings as desired.
(cont’d.) Sample
- for
evalu
ation
purp
oses
only!

18 ©TeachUcomp, Inc. Advanced QuickBooks
ACTIONS-
Reporting MODIFYING A REPORT- (CONT’D.):
32. If you want to read about how a filter that you have selected can be applied, you can click the “Tell me
more…” button at the bottom of the tab to open a help file about the currently selected filter.
33. To completely remove a filter that has been applied to a report, start by selecting the name of the filter to
remove from the “Current Filter Choices” list at the right side of the “Filters” tab.
34. Then click the “Remove Selected Filter” button to delete the filter from the report.
35. Also note that both the “Display” and “Filters” tabs contain a “Revert” button that will revert any changes
you have made to them, if needed.
36. Click the “Header/Footer” tab in the “Modify Report” window to change the display of content within the
header and footer of your report.
37. In the “Show Header Information” section, check any content that you want to show in the header of
your report.
38. Then type the text to display into the adjacent fields.
39. In the “Show Footer Information” section, check any content that you want to show in the footer of your
report.
40. Then type the text to display into the adjacent fields.
41. You can use the “Alignment” drop-down in the “Page Layout” section to select the desired layout for
your header and footer content within the report.
42. Click the “Fonts & Numbers” tab in the “Modify Report” window.
43. To set the font used within a report section, start by selecting the report section to format from the
“Change Font For” list.
44. The current font used for the display of the selected item will be shown to the right of the list.
45. Click the “Change Font…” button to open a dialog box that will allow you to change the appearance of
the text.
46. Select your desired font options from the choices shown and then click the “OK” button in the dialog box
to apply them and return to the “Modify Report” window.
47. Repeat steps #43 through #46 for any other report sections whose fonts you wish to modify.
48. You can set the display of negative numbers within the report by making your desired selections from
the options shown in the “Show Negative Numbers” section.
49. You can then set optional display settings for all numbers in the “Show All Numbers” section by
checking any available checkboxes, if desired.
50. Once you have finished modifying your report, click the “OK” button within the “Modify Report” window
to apply your report settings.
Sample
- for
evalu
ation
purp
oses
only!
19 ©TeachUcomp, Inc. Advanced QuickBooks
ACTIONS-
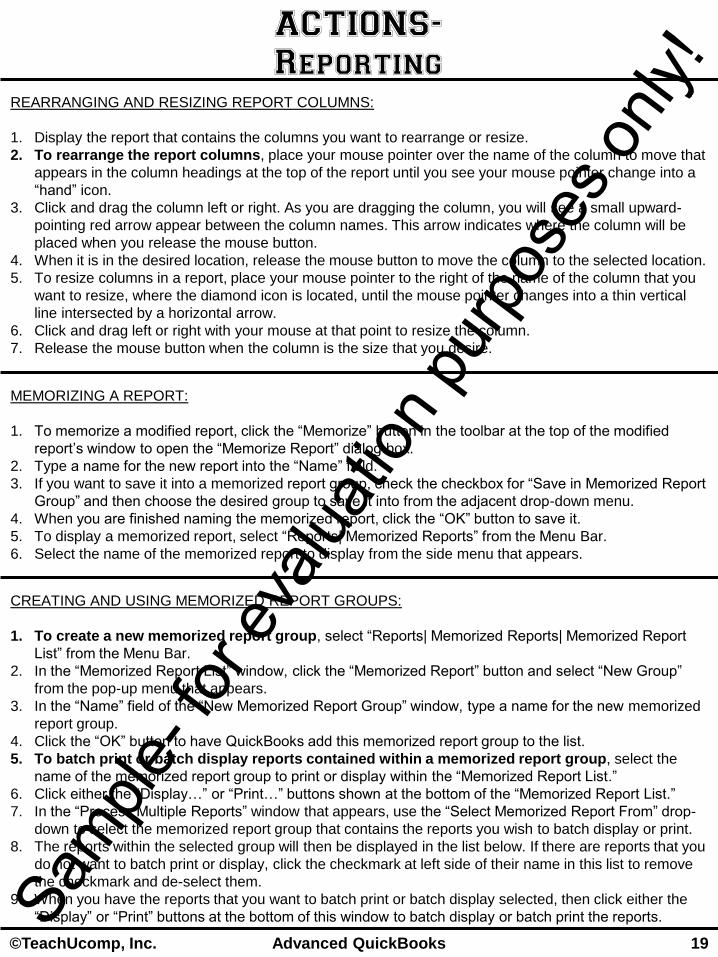
Reporting REARRANGING AND RESIZING REPORT COLUMNS:
1. Display the report that contains the columns you want to rearrange or resize.
2. To rearrange the report columns, place your mouse pointer over the name of the column to move that
appears in the column headings at the top of the report until you see your mouse pointer change into a
“hand” icon.
3. Click and drag the column left or right. As you are dragging the column, you will see a small upward-
pointing red arrow appear between the column names. This arrow indicates where the column will be
placed when you release the mouse button.
4. When it is in the desired location, release the mouse button to move the column to the selected location.
5. To resize columns in a report, place your mouse pointer to the right of the name of the column that you
want to resize, where the diamond icon is located, until the mouse pointer changes into a thin vertical
line intersected by a horizontal arrow.
6. Click and drag left or right with your mouse at that point to resize the column.
7. Release the mouse button when the column is the size that you desire.
MEMORIZING A REPORT:
1. To memorize a modified report, click the “Memorize” button in the toolbar at the top of the modified
report’s window to open the “Memorize Report” dialog box.
2. Type a name for the new report into the “Name” field.
3. If you want to save it into a memorized report group, check the checkbox for “Save in Memorized Report
Group” and then choose the desired group to save it into from the adjacent drop-down menu.
4. When you are finished naming the memorized report, click the “OK” button to save it.
5. To display a memorized report, select “Reports| Memorized Reports” from the Menu Bar.
6. Select the name of the memorized report to display from the side menu that appears.
CREATING AND USING MEMORIZED REPORT GROUPS:
1. To create a new memorized report group, select “Reports| Memorized Reports| Memorized Report
List” from the Menu Bar.
2. In the “Memorized Report List” window, click the “Memorized Report” button and select “New Group”
from the pop-up menu that appears.
3. In the “Name” field of the “New Memorized Report Group” window, type a name for the new memorized
report group.
4. Click the “OK” button to have QuickBooks add this memorized report group to the list.
5. To batch print or batch display reports contained within a memorized report group, select the
name of the memorized report group to print or display within the “Memorized Report List.”
6. Click either the “Display…” or “Print…” buttons shown at the bottom of the “Memorized Report List.”
7. In the “Process Multiple Reports” window that appears, use the “Select Memorized Report From” drop-
down to select the memorized report group that contains the reports you wish to batch display or print.
8. The reports within the selected group will then be displayed in the list below. If there are reports that you
do not want to batch print or display, click the checkmark at left side of their name in this list to remove
the checkmark and de-select them.
9. When you have the reports that you want to batch print or batch display selected, then click either the
“Display” or “Print” buttons at the bottom of this window to batch display or batch print the reports. Sample
- for
evalu
ation
purp
oses
only!

20 ©TeachUcomp, Inc. Advanced QuickBooks
ACTIONS-
Reporting PRINTING A REPORT:
1. Open the report you want to print and then click the “Print” button in the toolbar of the report.
2. In the “Print Reports” window that appears, set options for the printer that you would like to use, page
orientation, page breaking behavior, the print range, and the number of copies of the report.
3. Once you have set the printing options, click the “Print” button in the “Print Reports” window to print the
currently displayed report.
BATCH PRINTING FORMS:
1. Select “File| Print Forms” from the Menu Bar.
2. Select the type of form to print from the side menu of choices that appears.
EXPORTING A REPORT TO MICROSOFT EXCEL:
1. Open the report that you want to export.
2. Click the “Excel” button in the toolbar at the top of the report.
3. Select either the “Create New Worksheet” or “Update Existing Worksheet” commands from the drop-
down menu that appears.
4. In the “Send Report to Excel” dialog box, select the desired option button to choose how to send the
data to Excel.
5. You can click the “Advanced…” button to open the “Advanced Excel Options” dialog box where you can
enable or disable several Excel options.
6. After setting any advanced options, click the “OK” button to return to the “Send Report to Excel” dialog
box.
7. Click the “Export” button to export your report data to excel using the method selected.
SAVING A FORM OR A REPORT AS A PDF DOCUMENT:
1. Open up the form or report that you want to save as a PDF document.
2. Select “File| Save as PDF…” from the Menu Bar.
3. QuickBooks will open the “Save document as PDF” dialog box.
4. Browse to and then select the location to save the document.
5. Enter a name for the file into the “File name” field.
6. Click the “Save” button when you are finished to create the PDF file.
Sample
- for
evalu
ation
purp
oses
only!
21 ©TeachUcomp, Inc. Advanced QuickBooks
EXERCISES-
Reporting Purpose:
To be able to modify and memorize reports in QuickBooks
Exercises:
1. Open QuickBooks.
2. Select “File| Close Company” from the Menu Bar if you have a company file open to get to the “No
Company Open” dialog box.
3. Click the “Open a sample file” button, and select “Sample product-based business” from the drop-
down of choices.
4. Click “OK” on the sample file message box.
5. Select “File| Back Up Company| Create Local Backup” from the Menu Bar.
6. Use the “Create Backup” window to make a local backup of this company file, so that you may
restore the file back to its original condition when you are done using it.
7. After backing up the file, select “Reports| Customers & Receivables| Open Invoices” from the Menu
Bar.
8. Click the “Customize Report” button in the report toolbar.
9. Click the “Filters” tab.
10. In the “Current Filter Choices” section, click on the “Paid Status” field.
11. In the “Choose Filter” section, click the “Closed” option.
12. Click the “Header/Footer” tab.
13. Type “Closed Invoices” into the “Report Title” text box.
14. Click the “OK” button.
15. Click the “Memorize” button in the report toolbar.
16. Click the “OK” button.
17. Click the “X” button in the upper right corner of the report to close it.
18. Select “Reports| Memorized Reports| Closed Invoices” from the Menu Bar to open the memorized
report again.
19. Click the “X” button in the upper right corner of the report to close it again.
20. You can close the company file by selecting “File| Close Company” from the Menu Bar.
21. You can close QuickBooks by selecting “File| Exit” from the Menu Bar.
Sample
- for
evalu
ation
purp
oses
only!

22 ©TeachUcomp, Inc. Advanced QuickBooks
16.1- Using Graphs
CHAPTER 16-
Using Graphs Sa
mple- f
or ev
aluati
on pu
rpos
es on
ly!
23 ©TeachUcomp, Inc. Advanced QuickBooks
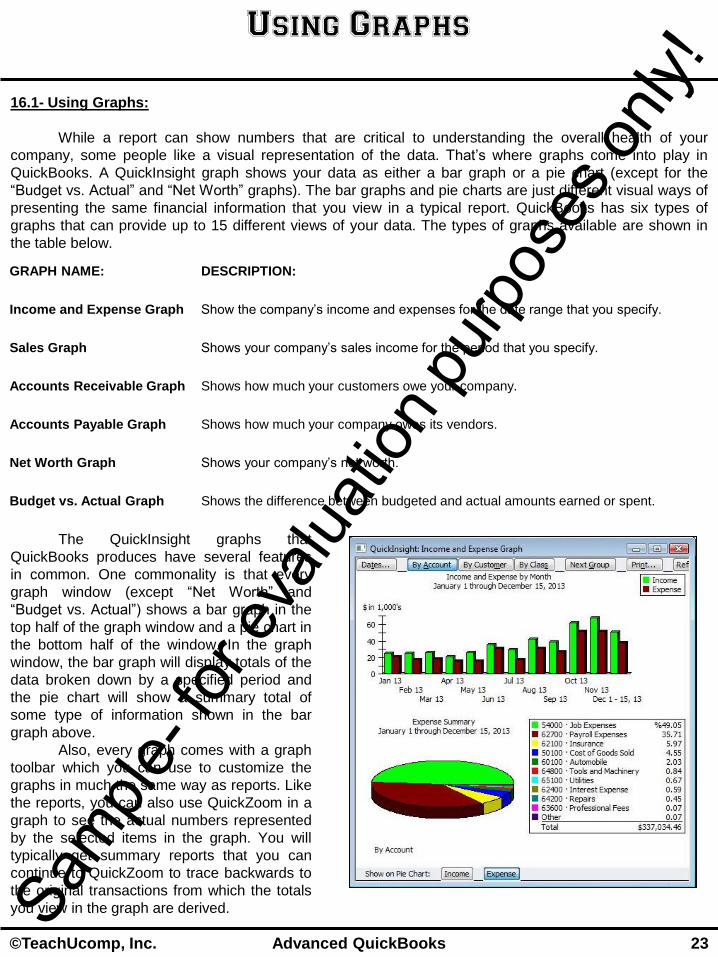
16.1- Using Graphs:
While a report can show numbers that are critical to understanding the overall health of your
company, some people like a visual representation of the data. That’s where graphs come into play in
QuickBooks. A QuickInsight graph shows your data as either a bar graph or a pie chart (except for the
“Budget vs. Actual” and “Net Worth” graphs). The bar graphs and pie charts are just different visual ways of
presenting the same financial information that you view in a typical report. QuickBooks has six types of
graphs that can provide up to 15 different views of your data. The types of graphs available are shown in
the table below.
Using Graphs
The QuickInsight graphs that
QuickBooks produces have several features
in common. One commonality is that every
graph window (except “Net Worth” and
“Budget vs. Actual”) shows a bar graph in the
top half of the graph window and a pie chart in
the bottom half of the window. In the graph
window, the bar graph will display totals of the
data broken down by a specified period and
the pie chart will show a summary total of
some type of information shown in the bar
graph above.
Also, every graph comes with a graph
toolbar which you can use to customize the
graphs in much the same way as reports. Like
the reports, you can also use QuickZoom in a
graph to see the actual numbers represented
by the selected items in the graph. You will
typically get summary reports that you can
continue to QuickZoom to trace backwards to
the original transactions from which the totals
you view in the graph are derived.
GRAPH NAME: DESCRIPTION:
Income and Expense Graph Show the company’s income and expenses for the date range that you specify.
Sales Graph Shows your company’s sales income for the period that you specify.
Accounts Receivable Graph Shows how much your customers owe your company.
Accounts Payable Graph Shows how much your company owes its vendors.
Net Worth Graph Shows your company’s net worth.
Budget vs. Actual Graph Shows the difference between budgeted and actual amounts earned or spent.
Sample
- for
evalu
ation
purp
oses
only!

24 ©TeachUcomp, Inc. Advanced QuickBooks
ACTIONS-
Using Graphs USING GRAPHS:
1. Graphs are distributed among report categories found under the “Reports” command in the Menu Bar.
2. Open the graph that you want to display.
3. Use the toolbar at the top of the graph window to change the data displayed in the graph area.
4. Set the date range used for the graph data.
5. You can double-click on any item in a graph to view the detail data using QuickZoom. This will bring up
another graph or another report which you can then also QuickZoom.
Sample
- for
evalu
ation
purp
oses
only!
25 ©TeachUcomp, Inc. Advanced QuickBooks
EXERCISES-
Using Graphs Purpose:
To be able to create and modify a graph.
Exercises:
1. Open QuickBooks.
2. Select “File| Close Company” from the Menu Bar if you have a company file open to get to the “No
Company Open” dialog box.
3. Click the “Open a sample file” button, and select “Sample product-based business” from the drop-
down of choices.
4. Click “OK” on the sample file message box.
5. Select “File| Back Up Company| Create Local Backup” from the Menu Bar.
6. Use the “Create Backup” window to make a local backup of this company file, so that you may
restore the file back to its original condition when you are done using it.
7. After backing up the file, select “Reports| Company & Financial| Income & Expense Graph” from the
Menu Bar.
8. Click the “Dates…” button in the upper left corner of the graph.
9. Use the “Graph Dates” drop-down to select “Last Quarter.”
10. Click the “OK” button.
11. Click the ”By Customer” button in the graph’s toolbar to view the data by customer.
12. In the “Show on Pie Chart” section at the bottom of the graph, click “Income.”
13. Use QuickZoom to double-click the “Income” column within the bar graph for “Aug” to view the
income summary for that month in a separate graph window.
14. Close the income summary graph window that you just opened.
15. Click the “X” in the upper right corner of the Income and Expense graph window to close it.
16. You can close the company file by selecting “File| Close Company” from the Menu Bar.
17. You can close QuickBooks by selecting “File| Exit” from the Menu Bar.
Sample
- for
evalu
ation
purp
oses
only!
26 ©TeachUcomp, Inc. Advanced QuickBooks
CHAPTER 17-
Customizing Forms
17.1- Creating New Form Templates
17.2- Performing Basic Customization
17.3- Performing Additional Customization
17.4- The Layout Designer
17.5- Changing the Grid and Margins in the Layout Designer
17.6- Selecting Objects in the Layout Designer
17.7- Moving and Resizing Objects in the Layout Designer
17.8- Formatting Objects in the Layout Designer
17.9- Copying Objects and Formatting in the Layout Designer
17.10- Adding and Removing Objects in the Layout Designer
17.11- Aligning and Stacking Objects in the Layout Designer
17.12- Resizing Columns in the Layout Designer
Sample
- for
evalu
ation
purp
oses
only!
27 ©TeachUcomp, Inc. Advanced QuickBooks
Customizing Forms
17.1- Creating New Form Templates:
Every form that you enter information into has its own layout of fields, images and labels used for
data entry and printed display. In QuickBooks, you can customize the layout of a form to better suit your
company’s needs. For example, there are three preset formats for invoices: professional, service, and
product. If these templates don’t precisely fulfill your needs, you can customize them as needed. You can
also customize much more than just invoices in QuickBooks. The forms that you can customize in
QuickBooks are: invoices, sales receipts, credit memos, statements, purchase orders, and estimates. Note
that estimates are only available in QuickBooks Pro and Premier. For each form, you can choose which
fields and columns to include, where they are placed in the form, and what they are called. Once you have
finished customizing the form, you can save the new layout as a custom template to use at your
convenience.
In QuickBooks, you use the “Basic Customization” and “Additional Customization” windows to make
general customization settings for your forms. In these windows, you decide what fields to add to your form
for both onscreen display and within the printed version. After performing the basic customization, you can
then use the “Layout Designer” to arrange the selected fields, set additional formatting options, and add text
boxes and images to the printed version of the form.
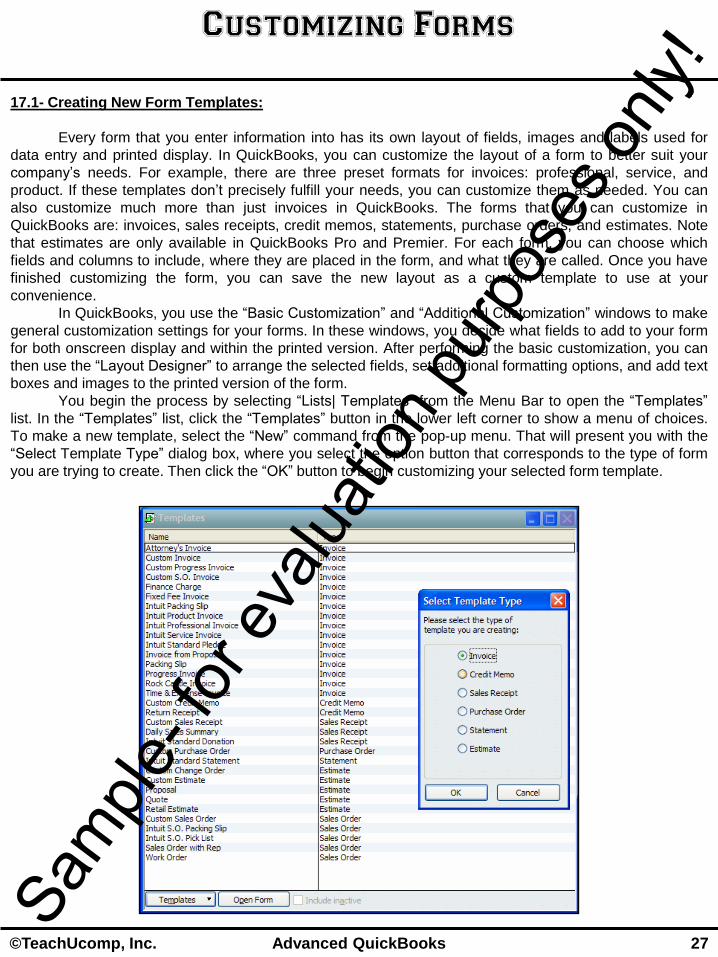
You begin the process by selecting “Lists| Templates” from the Menu Bar to open the “Templates”
list. In the “Templates” list, click the “Templates” button in the lower left corner to show a menu of choices.
To make a new template, select the “New” command from the pop-up menu. That will present you with the
“Select Template Type” dialog box, where you select the option button that corresponds to the type of form
you are trying to create. Then click the “OK” button to begin customizing your selected form template.
Sample
- for
evalu
ation
purp
oses
only!
28 ©TeachUcomp, Inc. Advanced QuickBooks
Customizing Forms
17.2- Performing Basic Customization:
Once you have selected a type of form to customize, you will then be presented with the “Basic
Customization” window. This window displays the most commonly used and basic customization options for
forms. You can make any changes to the options shown here, and then examine how your choice impacts
the preview of the form displayed at the right side of the window.
At the very top of the “Basic Customization” window, you will see the name of the new template that
you have created shown within the “Selected Template” section.
In the “Logo & Fonts” section, you can check the “Use logo” checkbox to add your company logo to
the printed version of the form. When you do this, the “Select Image” dialog box will appear. Use this dialog
box to browse for and then select the image file to use as your logo. Once it has been selected, click the
“Open” button to return to the “Basic Customization” window. You can choose a color scheme for your form
by making a selection from the “Select Color Scheme” drop-down menu. You can then click the “Apply
Color Scheme” button to apply the selected scheme to the preview shown at right. You can change the font
used within the sections of the form by selecting a section within the “Change Font For” list. Then click the
“Change Font…” button to open an “Example” dialog box where you can change the font attributes for the
selected item. When you have finished making your font choices, click the “OK” button to return to the
“Basic Customization” window. Your choices will then be displayed in the preview to the right.
In the “Company & Transaction Information” section, check the checkboxes for any company
information that you want to add to the printed version of the form. If you need to update your company
information, note that you can click the “Update Information…” button to open the “Company Information”
window where you can input any company information required. If you do this, click the “OK” button to
return to the “Basic Customization” window when finished.
Once you have completed the basic customization, you can then choose what you would like to do
next. You can click the “Additional Customization…” button to display the “Additional Customization”
window where you can set more advanced features of the template. You can click the “Layout Designer…”
button to open the “Layout Designer” window where you can change the placement of elements within the
printed version of the form. You can click the “OK” button to save the template into your Template List as it
is. You can also click the “Cancel” button, if needed, to cancel the changes as well as the creation of the
new template.
Sample
- for
evalu
ation
purp
oses
only!
29 ©TeachUcomp, Inc. Advanced QuickBooks
Customizing Forms
17.3- Performing Additional Customization:
After completing the basic form customization within a template, you can click the “Additional
Customization…” button to set additional form customization options within the “Additional Customization”
window. The “Additional Customization” window uses several tabs to display different sets of options for
customizing the various sections of the selected type of form. Each area within the form is represented by a
tab. Click on the name of the tab that corresponds to the area of the form you would like to customize.
Next, check or uncheck the checkboxes next to the names of the fields underneath the “Screen” and
“Print” columns to show or hide their display within both the “Screen” version of the form- where you perform
data entry, and the “Print” version of the form- which is the version that you print. Then enter the titles you
want to display for those fields into the adjacent text boxes. Note that for some fields you can have a field
that appears in one version but not the other, if desired. For example, if you have a custom field that you
want to enable within the screen version so that you can enter or view information, but don’t want the
customer to see this information within the printed version, then select the “Screen” checkbox for that field
and clear the “Print” checkbox.
For any tabs that display columnar information, such as the “Columns” tab, you can change the
order that the columns are displayed from left to right within the line item area of the form by typing a
number into the “Order” field. The columns will be arranged and displayed from left to right from the lowest
to the highest number.
To apply print settings to the printed version of the template, click the “Print” tab. On this tab, you
can specify default print settings for the template, if desired.
After performing additional customization on the form template, you can click the “Layout
Designer…” button to change the display of elements within the printed version of the form template within
the “Layout Designer” window. Alternately, you can click the “OK” button to return to the “Basic
Customization” window.
Sample
- for
evalu
ation
purp
oses
only!
30 ©TeachUcomp, Inc. Advanced QuickBooks
Customizing Forms
17.4- The Layout Designer:
The “Layout Designer” window lets you change the appearance and placement of data fields, text
boxes, labels, and images within the printed version of the form template. Within the “Layout Designer”
window you will see the printed version of the form within the main screen, surrounded by a ruler at the left
and top sides for measurement purposes. You should also see the margins of the printed version of the
form. There is also a grid displayed onscreen that you can use to align onscreen objects. You can scroll the
content within the window to view the objects within the printed version of the form template.
There is a toolbar at the top of the window that contains buttons that allows you to manipulate the
selected objects within the window. At the bottom of the window you will see the name of the currently
selected object, the current magnification level, the placement of the selected object onscreen, and its
dimensions. There are also two buttons, named “Margins…” and “Grid…” that allow you to control the
appearance of the margins and grid within the window. You also have a checkbox for “Show envelope
window,” which you can check in order to display two areas within the window where window envelopes will
display billing and return address information. This can assist you in placing that data within the correct
areas within the form if you intend to use window envelopes for mailing these forms.
You can change the magnification level of the “Layout Designer” window by clicking the “In” and
“Out” buttons within the “Zoom” button group in the toolbar at the top of the window to increase or decrease
the size of the area shown onscreen.
As you learn how to make changes to the objects within the “Layout Designer,” you may find that
you make a mistake or make change that you do not like. You can click the “Undo” button in the
“Undo/Redo” button group of the toolbar at the top of the window to reverse the changes that you make. If
you accidentally click the “Undo” button too many times, you can click the “Redo” button to reapply a
change you have accidentally reversed.
After making your changes within this window, you can click the “OK” button at the bottom of the
window to save the layout changes and return to either the “Basic Customization” or “Additional
Customization” window, depending upon which window you were previously viewing before you clicked the
“Layout Designer…” button. Note that you can also click the “Cancel” button, if needed, to cancel any layout
changes you made and return to the previously opened customization window. In the next few lessons
within this chapter, we will examine the tasks that you can perform within the “Layout Designer” window.
Sample
- for
evalu
ation
purp
oses
only!
31 ©TeachUcomp, Inc. Advanced QuickBooks
Customizing Forms
17.5- Changing the Grid and Margins in the Layout Designer:
Before you begin changing the layout of objects within the “Layout Designer” window, you should
ensure that the margins and the grid shown onscreen are set as needed. The margins and grid aid you in
placing the objects into the correct positions within the form so that they will appear correctly when printed.
To change the margin settings for the form, click the “Margins…” button at the bottom of the window
to open the “Margins” dialog box. Here you can input the desired margin width in inches into the “Top,”
“Bottom,” “Left,” and “Right” fields shown. After settings the margins for the printed form, click the “OK”
button to apply them to the view shown within the “Layout Designer” window.
You can change the settings of the grid shown within the “Layout Designer” window by clicking the
“Grid…” button at the bottom of the window to open the “Grid and Snap Settings” dialog box. In this dialog
box, you can hide the display of the grid within the “Layout Designer” window by removing the checkmark
from the “Show grid” checkbox. If you do not want to have the objects within the “Layout Designer” window
align themselves to the grid when moving them, then remove the checkmark from the “Snap to grid”
checkbox. This allows for more precise placement of objects onscreen, but makes aligning those same
objects more difficult. Finally, you can change the amount of spacing between the lines in the grid by
making a selection from the “Grid spacing” drop-down menu. When you have finished changing any grid
settings you want, click the “OK” button to apply them to the “Layout Designer” window.
17.6- Selecting Objects in the Layout Designer:
Before you can perform any task within the “Layout Designer” window, you must first learn how to
select the form objects shown within the window. You can select an object within the “Layout Designer”
window by clicking it to select it. You can tell when an onscreen object has been selected because it will
appear with a border comprised of slashes with eight squares around it. These squares are the resizing
handles and are used to resize the object. For some activities you perform within this window, you may also
want to select multiple objects simultaneously. When multiple objects are simultaneously selected, actions
that you perform are then applied to all selected objects. This is helpful when applying the same formatting
to multiple objects or when moving multiple objects as a single group. For example, if you want to move a
label and its associated data field from one area of the form to another, you could select them both and then
move them together to a new area within the form. To select multiple form objects, click the first object to
select it and then hold down the “Shift” key with your free hand. Then click on any other objects that you
want to select as part of the group. Then release the “Shift” key when you are finished. To de-select a
selected object or objects, simply click into the blank or empty area within the form.
Sample
- for
evalu
ation
purp
oses
only!
32 ©TeachUcomp, Inc. Advanced QuickBooks
Customizing Forms
17.7- Moving and Resizing Objects in the Layout Designer:
To move selected objects within the “Layout Designer” window, click and drag the objects from one
place to another in the form. To resize a selected object, place your mouse pointer over one of the resizing
squares until the mouse pointer turns into a double-pointed arrow. At that point, click and drag with your
mouse to resize the selected object in either direction shown by the arrows. Note that you cannot resize
multiple selected objects using this method. However, you can make multiple selected objects the same
height, the same width, or the exact same size. To do this, first simultaneously select the objects that you
want to make the same height, width, or size. Then click either the “Height,” “Width,” or “Size” buttons within
the “Make Same” button group in the toolbar at the top of the window. The selected objects will then be the
same height as the tallest, the same width as the longest, or the exact same size as the largest, depending
upon which of the three buttons you click.
17.8- Formatting Objects in the Layout Designer:
You can change the text, border, and background of a text box or data field within the “Layout
Designer” window. To do this, double-click the text box or data field that you want to format to open the
“Properties” dialog box. Alternately, you can select a text box or data field and then click the “Properties…”
button in the toolbar at the top of the “Layout Designer” window to also open the “Properties” dialog box.
Within the “Properties” dialog box you can set the appearance of the text box or data field by
changing the settings shown within the “Text,” “Border,” and “Background” tabs. For text boxes and labels,
you can enter the text to display into the text box field that appears at the top of the “Properties” dialog box.
To set the appearance of the font used to display the text within the object, click the “Text” tab. In the
“Justification” section, you can select either “Left,” “Right,” or “Center” for the “Horizontal” section and “Top,”
“Bottom,” or “Center” for the “Vertical” section to set the horizontal and vertical text alignment. Note that if
you want to indent the first line of text within a text box, then click the “Indent First Line of Text” checkbox
within the “Horizontal” section. To select the font used to display the text within the object, click the “Font…”
button to open the “Example” dialog box. Here you can change the “Font,” “Font style,” Size,” “Effects,” and
“Color” of the text within the object by making your choices from the fields within this dialog box. When you
have finished setting the font attributes, click the “OK” button to apply them and return to the “Properties”
dialog box. You can set the font color for the object within the “Text” tab by clicking the “Color” button shown
to open the “Change Color” dialog box. Here you can select any color you want for the font, and then click
the “OK” button to return to the “Properties” dialog box.
To change the border of the selected object, click the “Border” tab within the “Properties” dialog box.
Then choose the sides of the object to apply a border to by checking the “Top,” “Bottom,” “Left,” and “Right”
checkboxes, as desired. If you apply a border to the object, you can select the increment used to round the
corners of the borders by making a selection from the “Rounded Corners” section. You can select the
desired border pattern to use from the “Pattern” section, as well as select a desired border thickness from
the “Thickness” section. You can click the “Color” button to open the “Change Color” dialog box. Here you
can select a color for the border, and then click the “OK” button to return to the “Properties” dialog box.
To set a background color for the object, click the “Background” tab within the “Properties” dialog
box. Then check the “Fill Background” checkbox. After checking this checkbox, click the “Color” button
shown to open the “Change Color” dialog box. Here you can select any color you want for the background
of the object, and then click the “OK” button to return to the “Properties” dialog box.
After you have finished applying any formatting settings that you want the object to have, click the
“OK” button within the “Properties” dialog box to apply your changes to the selected text box or label. Sample
- for
evalu
ation
purp
oses
only!

33 ©TeachUcomp, Inc. Advanced QuickBooks
Customizing Forms
17.9- Copying Objects and Formatting in the Layout Designer:
You can easily copy a selected object within the “Layout Designer” window by clicking the “Copy”
button within the toolbar at the top of the window. The copy of the selected object will then appear slightly
down and to the right of the original. You can then move the copy to a new place within the window and edit
it as needed.
You can also copy the formatting properties of a selected object and then paste only the formatting
onto other objects within the “Layout Designer” window. This is a useful feature that allows you to format the
appearance of a single object and then copy that appearance onto other objects without having to manually
open the “Properties” dialog box in order to change the formatting for each item individually.
To copy the formatting of a selected object, click the “Copy Format” button within the toolbar at the
top of the window. The button will then change to the “End Format” button. You then place your mouse
pointer over the object to which you want to paste the formatting of the object whose formatting you just
copied. Note that your mouse pointer now appears as a “paint brush” icon when held over the objects within
the window. Then click on the object to paste the copied formatting. Repeat this process until you have
applied the copied formatting to all of the necessary objects within the “Layout Designer” window. When you
are finished, click the “End Formatting” button to turn this feature off and return to your normal arrow
selector mouse pointer.
17.10- Adding and Removing Objects in the Layout Designer:
You can also add additional images, data fields, and text boxes to your form by clicking the “Add”
drop-down button in the toolbar at the top of the “Layout Designer” window. From the drop-down menu that
appears, you can then choose the type of object to add to the form: “Text Box,” “Data Field,” or “Image.”
If you select the “Text Box” choice, then the “Properties” dialog box will appear onscreen. Enter the
text that you want the text box to display into the “Text” field at the top of the dialog box and then set any
formatting properties you want the text box to possess in the “Text,” “Border,” and “Background” tabs. Then
click the “OK” button to add the text box to the form.
If you select the “Data Field” choice, then the “Add Data Field” dialog box will appear onscreen. Click
on the name of the data field that you want to add to the form within this dialog box. Then click the “OK”
button to add the data field and its associated label into the form.
If you select the “Image” choice, then the “Select Image” dialog box will appear onscreen. Use this
dialog box to navigate to and then select the image that you want to add to the form. After selecting the
desired image, click the “Open” button to add the image to the form. Note that if the image is not within the
same directory as the company file, then QuickBooks will display a message informing you that the image
must be copied into the “Images” folder within the company file’s directory. Click the “OK” button within the
“Warning” message box to then copy the image to the correct folder and add the image to your form.
You can remove objects from your form by selecting them and then clicking the “Remove” button in
the toolbar at the top of the window.
Sample
- for
evalu
ation
purp
oses
only!
34 ©TeachUcomp, Inc. Advanced QuickBooks
Customizing Forms
17.11- Aligning and Stacking Objects in the Layout Designer:
In QuickBooks you must manually align objects to one another by clicking and dragging the objects
into position and using the grid for alignment of the left and right edges. You must also manually align
objects vertically by clicking and dragging the objects and using the grid for alignment. If you wish to center
two differently sized object over one another horizontally, it is possible by using the “Horz” button within the
“Center” button group in the toolbar at the top of the “Layout Designer” window.
To do this, first align the objects vertically within the form. Then select the first object and click the
“Horz” button. Doing this will align the selected object horizontally within the center of the form. Then de-
select the first object. Next, select the second object to align horizontally to the first and click the “Horz”
button again. As before, the object will align itself with the center of the form. You can then use the multiple
selection method to select both objects as a group, as they should now be centered over one another, and
then move the grouped objects as a single unit to the desired destination within the form. Note that if you
attempt to perform a multiple selection of objects and then click the “Horz” button, QuickBooks will not
center the objects in relation to each other, but rather center the objects as a single unit in relation to the
form. So if you wish to center objects in relation to each other, use the previous method described, instead.
You can also change the stacking level of objects within the form. This can be useful when dealing
with overlapping images or with text objects that contain a background fill. When you add objects to the
form, the newer objects added to the form may appear either on top of or behind older objects within the
form if they overlap. You can change the order of overlapping form objects within a stack by first selecting
the object whose stacking order you wish to change. Then right-click on the selected object and roll over the
“Order” command in the pop-up menu that appears. From the side menu of choices that then appears,
select either “Bring Forward” to move the object to the foreground of the stack or select “Send Backwards”
to send the object to the background of the stack.
Note that sometimes moving stacked objects can disrupt their stacking order. If that occurs on an
object for which you have already selected the “Send Backwards” or “Bring Forwards” command, then the
command will appear “greyed-out” or unavailable within the pop-up menu. If this occurs, you can fix it by
selecting each object within the stack individually and then choosing the “Send Backwards” or “Bring
Forwards” command, based on which command is available, on each object to reset their positions. You
can then right-click on the ones that need to be brought forward or sent backwards again and choose the
desired command from the pop-up menu, which should then be available, to reset the positions of the
necessary objects within the stack.
17.12- Resizing Columns in the Layout Designer:
You can resize the columns displayed within the line items area of your printed form, if you have
one. To do this, simply click once on the columns shown towards the bottom of the form to select the entire
table of columns. Then place your mouse pointer between any two columns to the left or right of the column
that you want to resize until your mouse pointer turns into an icon of a single vertical line intersected by a
horizontal arrow. When your mouse pointer changes, click and drag either left or right to increase or
decrease the size of the columns.
Note that you cannot select the far right or far left column borders within the table to resize those
columns. You can only resize the entire table in order to change the far right or far left borders of the table
area. Note that you should not expand the size of the table into the margins of the printed form.
Sample
- for
evalu
ation
purp
oses
only!
35 ©TeachUcomp, Inc. Advanced QuickBooks
ACTIONS-
Customizing Forms CREATING A NEW FORM TEMPLATE:
1. Select “Lists| Templates” from the Menu Bar to open the “Templates” list.
2. Click the “Templates” button in the lower left corner of the “Templates” list.
3. Select the “New” command from the pop-up menu.
4. In the “Select Template Type” dialog box, select the option button that corresponds to the type of form
template you want to create.
5. Click the “OK” button to begin customizing your selected form template.
PERFORMING BASIC CUSTOMIZATION:
1. In the “Basic Customization” window you will see the name of the new template that you have created,
or the name of the template you are editing, shown within the “Selected Template” section.
2. To add a logo to your form, check the “Use logo” checkbox in the “Logo & Fonts” section to open the
“Select Image” dialog box.
3. Use this dialog box to browse for and then select the image file to use as your logo.
4. Once it has been selected, click the “Open” button to return to the “Basic Customization” window.
5. You can choose a color scheme for your form by making a selection from the “Select Color Scheme”
drop-down menu.
6. You can then click the “Apply Color Scheme” button to apply the selected scheme to the preview shown
at right.
7. You can change the font used within the sections of the form by selecting a section within the “Change
Font For” list.
8. Then click the “Change Font…” button to open an “Example” dialog box where you can change the font
attributes for the selected item.
9. When you have finished making your font choices, click the “OK” button to return to the “Basic
Customization” window.
10. In the “Company & Transaction Information” section, check the checkboxes for any company
information that you want to add to the printed version of the form.
11. If you need to update your company information, note that you can click the “Update Information…”
button to open the “Company Information” window where you can input any company information
required.
12. If you do this, click the “OK” button to return to the “Basic Customization” window when finished.
13. After completing basic customization, choose what to do next from the following four choices.
14. You can click the “Additional Customization…” button to display the “Additional Customization” window
where you can set more advanced features of the template.
15. You can click the “Layout Designer…” button to open the “Layout Designer” window where you can
change the placement of elements within the printed version of the form.
16. You can click the “OK” button to save the template into your Template List as it is.
17. You can click the “Cancel” button, if needed, to cancel the editing changes as well as the creation of the
new template, if applicable.
Sample
- for
evalu
ation
purp
oses
only!
36 ©TeachUcomp, Inc. Advanced QuickBooks
ACTIONS-
Customizing Forms PERFORMING ADDITIONAL CUSTOMIZATION:
1. In the “Additional Customization” window, click the name of the tab that corresponds to the area of the
form you would like to customize.
2. Within the selected tab, check or uncheck the checkboxes next to the names of the fields underneath
the “Screen” and “Print” columns to show or hide their display within both the “Screen” version of the
form- where you perform data entry, and the “Print” version of the form- which is the printed version.
3. Enter the titles you want to display for those fields into the adjacent text boxes.
4. For tabs that display columnar information, such as the “Columns” tab, you can change the order that
the columns are displayed from left to right within the line item area of the form by typing a number into
the “Order” field. The columns will be arranged and displayed from left to right from the lowest to the
highest number.
5. To apply print settings to the printed version of the template, click the “Print” tab to specify default print
settings for the template, if desired.
6. After performing additional customization on the form template, you can click the “Layout Designer…”
button to change the display of elements within the printed version of the form template within the
“Layout Designer” window.
7. Alternately, you can click the “OK” button to return to the “Basic Customization” window.
USING THE LAYOUT DESIGNER WINDOW:
1. Within the “Layout Designer” window you will see the printed version of the form within the main screen,
surrounded by a ruler at the left and top sides for measurement purposes.
2. You should also see the margins of the printed version of the form.
3. There is also a grid displayed onscreen that you can use to align onscreen objects.
4. You can scroll the content within the window to view the objects within the printed version of the form.
5. There is a toolbar at the top of the window that contains buttons that allows you to manipulate the
selected objects within the window.
6. At the bottom of the window you will see the name of the currently selected object, the current
magnification level, the placement of the selected object onscreen, and its dimensions.
7. There are also two buttons, named “Margins…” and “Grid…” that allow you to control the appearance of
the margins and grid within the window.
8. You also have a checkbox for “Show envelope window,” which you can check in order to display two
areas within the window where window envelopes will display billing and return address information.
9. You can change the magnification level of the “Layout Designer” window by clicking the “In” and “Out”
buttons within the “Zoom” button group in the toolbar at the top of the window to increase or decrease
the size of the area shown onscreen.
10. You can click the “Undo” button in the “Undo/Redo” button group of the toolbar at the top of the window
to reverse the changes that you make.
11. If you accidentally click the “Undo” button too many times, you can click the “Redo” button to reapply a
change you have accidentally reversed.
12. After making changes within this window, you can click the “OK” button to save the layout changes and
return to either the “Basic Customization” or “Additional Customization” window, depending upon which
window you were previously viewing before you clicked the “Layout Designer…” button.
13. Note that you can also click the “Cancel” button, if needed, to cancel any layout changes you made and
return to the previously opened customization window. Sample
- for
evalu
ation
purp
oses
only!

37 ©TeachUcomp, Inc. Advanced QuickBooks
ACTIONS-
Customizing Forms CHANGING THE GRID AND MARGINS IN THE LAYOUT DESIGNER:
1. To change the margin settings for the form, click the “Margins…” button at the bottom of the window
to open the “Margins” dialog box.
2. Input the desired margin width in inches into the “Top,” “Bottom,” “Left,” and “Right” fields shown.
3. Click the “OK” button to apply the margins to the view shown within the “Layout Designer” window.
4. To change the settings of the grid shown within the “Layout Designer” window, click the “Grid…”
button at the bottom of the window to open the “Grid and Snap Settings” dialog box.
5. You can hide the display of the grid within the “Layout Designer” window by removing the checkmark
from the “Show grid” checkbox.
6. If you do not want to have the objects within the “Layout Designer” window align themselves to the grid
when moving them, then remove the checkmark from the “Snap to grid” checkbox.
7. You can change the amount of spacing between the lines in the grid by making a selection from the
“Grid spacing” drop-down menu.
8. Click the “OK” button to apply the grid settings to the “Layout Designer” window.
SELECTING OBJECTS IN THE LAYOUT DESIGNER:
1. To select an object within the “Layout Designer” window, by click it to select it.
2. When an onscreen object has been selected, it will appear with a border comprised of slashes with
eight squares around it.
3. To select multiple form objects, click the first object to select it.
4. Hold down the “Shift” key with your free hand.
5. Click on any other objects that you want to select as part of the group.
6. Release the “Shift” key when you are finished.
7. To de-select a selected object or objects, click into the blank or empty area within the form.
MOVING AND RESIZING OBJECTS IN THE LAYOUT DESIGNER:
1. To move selected objects within the “Layout Designer” window, click and drag the objects from one
place to another in the form.
2. To resize a selected object, place your mouse pointer over one of the resizing squares until the mouse
pointer turns into a double-pointed arrow.
3. At that point, click and drag with your mouse to resize the selected object in either direction shown by
the arrows.
4. To make multiple selected objects the same height, the same width, or the exact same size,
simultaneously select the objects that you want to make the same height, width, or size.
5. Click either the “Height,” “Width,” or “Size” buttons within the “Make Same” button group in the toolbar at
the top of the window.
6. The selected objects will then be the same height as the tallest, the same width as the longest, or the
exact same size as the largest, depending upon which of the three buttons you click.
Sample
- for
evalu
ation
purp
oses
only!
38 ©TeachUcomp, Inc. Advanced QuickBooks
ACTIONS-
Customizing Forms FORMATTING OBJECTS IN THE LAYOUT DESIGNER:
1. Double-click the text box or data field that you want to format or select a text box or data field and then
click the “Properties…” button in the toolbar at the top of the “Layout Designer” window to open the
“Properties” dialog box.
2. Within the “Properties” dialog box you can set the appearance of the text box or data field by changing
the settings shown within the “Text,” “Border,” and “Background” tabs.
3. For text boxes and labels, you can enter the text to display into the text box field that appears at the top
of the “Properties” dialog box.
4. To set the appearance of the font used to display the text within the object, click the “Text” tab.
5. In the “Justification” section, you can select either “Left,” “Right,” or “Center” for the “Horizontal” section
and “Top,” “Bottom,” or “Center” for the “Vertical” section to set the horizontal and vertical text alignment.
6. If you want to indent the first line of text within a text box, click the “Indent First Line of Text” checkbox
within the “Horizontal” section.
7. To select the font used to display the text within the object, click the “Font…” button to open the
“Example” dialog box.
8. Change the “Font,” “Font style,” Size,” “Effects,” and “Color” of the text within the object by making your
choices from the fields within this dialog box.
9. After setting the font attributes, click the “OK” button to return to the “Properties” dialog box.
10. You can set the font color for the object within the “Text” tab by clicking the “Color” button shown to
open the “Change Color” dialog box.
11. Select any font color you want, and then click the “OK” button to return to the “Properties” dialog box.
12. To change the border of the selected object, click the “Border” tab within the “Properties” dialog box.
13. Choose the sides of the object to apply a border to by checking the “Top,” “Bottom,” “Left,” and “Right”
checkboxes, as desired.
14. If you apply a border to the object, you can select the increment used to round the corners of the
borders by making a selection from the “Rounded Corners” section.
15. You can select the desired border pattern to use from the “Pattern” section.
16. You can select a desired border thickness from the “Thickness” section.
17. You can click the “Color” button to open the “Change Color” dialog box.
18. Select a color for the border, and then click the “OK” button to return to the “Properties” dialog box.
19. To set a background color for the object, click the “Background” tab within the “Properties” dialog box.
20. Check the “Fill Background” checkbox.
21. Click the “Color” button shown to open the “Change Color” dialog box.
22. Select the background color you want, and click the “OK” button to return to the “Properties” dialog box.
23. Click the “OK” button within the “Properties” dialog box to apply your changes to the selected text box or
label.
Sample
- for
evalu
ation
purp
oses
only!
39 ©TeachUcomp, Inc. Advanced QuickBooks
ACTIONS-
Customizing Forms COPYING OBJECTS AND FORMATTING IN THE LAYOUT DESIGNER:
1. To copy a selected object within the “Layout Designer” window, click the “Copy” button within the
toolbar at the top of the window.
2. To copy the formatting of a selected object, click the “Copy Format” button within the toolbar at the
top of the window. The button will then change to the “End Format” button.
3. Place your mouse pointer over the object to which you want to paste the formatting of the object whose
formatting you just copied. Note that your mouse pointer now appears as a “paint brush” icon when held
over the objects within the window.
4. Click on the object to paste the copied formatting.
5. Repeat steps #3 and #4 until you have applied the copied formatting to all of the necessary objects
within the “Layout Designer” window.
6. When you are finished, click the “End Formatting” button to turn this feature off and return to your
normal arrow selector mouse pointer.
ADDING AND REMOVING OBJECTS IN THE LAYOUT DESIGNER:
1. To add objects to the form, click the “Add” drop-down button in the toolbar at the top of the “Layout
Designer” window.
2. From the drop-down menu that appears, choose the type of object to add to the form: “Text Box,” “Data
Field,” or “Image.”
3. If you select “Text Box,” then the “Properties” dialog box will appear onscreen.
4. Enter the text that you want the text box to display into the “Text” field at the top of the dialog box and
then set any formatting properties you want the text box to possess in the “Text,” “Border,” and
“Background” tabs.
5. Click the “OK” button to add the text box to the form.
6. If you select “Data Field,” then the “Add Data Field” dialog box will appear onscreen.
7. Click on the name of the data field that you want to add to the form within this dialog box.
8. Click the “OK” button to add the data field and its associated label into the form.
9. If you select “Image,” then the “Select Image” dialog box will appear onscreen.
10. Use this dialog box to navigate to and then select the image that you want to add to the form.
11. After selecting the desired image, click the “Open” button to add the image to the form.
12. Note that if the image is not within the same directory as the company file, then QuickBooks will display
a message informing you that the image must be copied into the “Images” folder within the company
file’s directory. Click the “OK” button within the “Warning” message box to then copy the image to the
correct folder and add the image to your form.
13. To remove objects from your form, select them and then click the “Remove” button in the toolbar at
the top of the window.
Sample
- for
evalu
ation
purp
oses
only!

40 ©TeachUcomp, Inc. Advanced QuickBooks
ACTIONS-
Customizing Forms ALIGNING AND STACKING OBJECTS IN THE LAYOUT DESIGNER:
1. To align objects to one another, click and drag the objects into position using the grid for alignment of
the top, bottom, left and right edges.
2. To center align two differently sized object over one another horizontally, first align the objects
vertically within the form.
3. Select the first object and click the “Horz” button in the toolbar at the top of the “Layout Designer”
window to align the selected object horizontally within the center of the form.
4. De-select the first object.
5. Select the second object to align horizontally to the first and click the “Horz” button again to align the
object with the center of the form.
6. You can then use the multiple selection method to select both objects as a group, as they should now
be centered over one another.
7. Move the grouped objects as a single unit to the desired destination within the form.
8. To change the stacking level of objects within the form, select the object whose stacking order you
wish to change.
9. Right-click on the selected object and roll over the “Order” command in the pop-up menu that appears.
10. From the side menu of choices that then appears, select either “Bring Forward” to move the object to the
foreground of the stack or select “Send Backwards” to send the object to the background of the stack.
RESIZING COLUMNS IN THE LAYOUT DESIGNER:
1. To resize the columns displayed within the line items area of your printed form, click once on the
columns shown towards the bottom of the form to select the entire table of columns.
2. Place your mouse pointer between any two columns to the left or right of the column that you want to
resize until your mouse pointer turns into an icon of a single vertical line intersected by a horizontal
arrow.
3. When your mouse pointer changes, click and drag either left or right to increase or decrease the size of
the columns.
Sample
- for
evalu
ation
purp
oses
only!
41 ©TeachUcomp, Inc. Advanced QuickBooks
EXERCISES-
Customizing Forms Purpose:
To be able to create and modify an invoice template.
Exercises:
1. Open QuickBooks.
2. Select “File| Close Company” from the Menu Bar if you have a company file open to get to the “No
Company Open” dialog box.
3. Click the “Open a sample file” button, and select “Sample product-based business” from the drop-
down of choices.
4. Click “OK” on the sample file message box.
5. Select “File| Back Up Company| Create Local Backup” from the Menu Bar.
6. Use the “Create Backup” window to make a local backup of this company file, so that you may
restore the file back to its original condition when you are done using it.
7. After backing up the file, select “Lists| Templates” from the Menu Bar.
8. Click the “Templates” button in the lower left corner of the “Templates” list window and select the
“New” command from the pop-up menu that appears.
9. In the “Select Template Type” dialog box, click the “Invoice” option button and then click the “OK”
button.
10. Click the “Additional Customization…” button at the bottom of the “Basic Customization” window that
appears.
11. Click the “Header” tab.
12. Remove the checks for the “Screen” and “Print” columns next to the “P.O. Number” field.
13. Place checkmarks under the “Screen” and “Print” columns next to the “Due Date” field.
14. Click the “Layout Designer…” button to launch the “Layout Designer” window.
15. Double-click the “Rock Castle Construction” field in the upper left corner of the window to open the
“Properties” dialog box.
16. On the “Text” tab, click the “Color” button and select a different color for the font from the “Change
Color” dialog box.
17. Click the “OK” button within the “Change Color” dialog box to set the new color.
18. Click the “OK” button in the “Properties” dialog box to see the change applied.
19. Click the “OK” button in the Layout Designer” window.
20. Click the “OK” button in the “Additional Customization” window.
21. Click the “OK” button in the “Basic Customization” window.
22. Select “Customers| Create Invoices” from the Menu Bar to open the “Invoices” window.
23. Select the name of the invoice template that you just created from the “Templates” drop-down menu
in the upper-right corner of the “Create Invoices” window.
24. Click the drop-down arrow below the “Print” button in the “Main” tab within the Ribbon at the top of
the invoice screen and select the “Preview” command from the drop-down menu.
25. Click the “Zoom In” button in the toolbar at the top of the “Print Preview” window to view the changes
made to the “Print” version.
26. Click the “Close” button in the toolbar at the top of the “Print Preview” window.
27. Close the “Create Invoices” window and the “Templates” list window.
28. You can close the company file by selecting “File| Close Company” from the Menu Bar.
29. You can close QuickBooks by selecting “File| Exit” from the Menu Bar. Sample
- for
evalu
ation
purp
oses
only!
42 ©TeachUcomp, Inc. Advanced QuickBooks
18.1- Creating a Job
18.2- Creating an Estimate
18.3- Duplicating Estimates
18.4- Invoicing from an Estimate
18.5- Updating Job Statuses
18.6- Inactivating Estimates
18.7- Making Purchases for a Job
18.8- Invoicing for Job Costs
18.9- Using Job Reports
CHAPTER 18-
Estimating Sa
mple- f
or ev
aluati
on pu
rpos
es on
ly!
43 ©TeachUcomp, Inc. Advanced QuickBooks
18.1- Creating a Job:
Project-based businesses that want to track income and expenses for customer projects can use the
“Jobs” feature within QuickBooks to do this. You can create a job for a customer in the “Customers & Jobs”
list. To do this, open the “Customer Center” window and then select the name of the customer for whom you
want to make a job within the “Customers & Jobs” list. Then click the “New Customer & Job” button in the
upper-left corner of the Customer Center and choose the “Add Job” command from the drop-down to open
the “New Job” window. This window is just like the “New Customer” window, except that the first three tabs
in the “New Job” window will already be filled-in with the selected customer’s information. All you will need
to do is enter a name for the job into the “Job Name” field at the top of the window and then click the “Job
Info” tab to enter the specific job information. On this tab, you can enter a longer description for the job into
the “Job Description” field. You can then enter the type of job into the “Job Type” field, or choose a previous
entry made within this field from the drop-down menu. This field can help you categorize the types of
projects you perform for customers. You can use its values as a report filter so that you can see income and
expense by job type. You can then select the status of the job from the “Job Status” drop-down field. Be
sure to update the value within this field as the project progresses. When the job starts, you can enter the
start date into the “Start Date” field. You can then enter the best estimate as to when the job will be
completed into the “Projected End Date” field. When the project finally finishes, enter its actual end date into
the “End Date” field. When you are finished, click the “OK” button to add the job to the “Customers & Jobs”
list. Note that the “Jobs” for the “Customers” appear as “subaccount” entries within this list.
Once you have created a job for a customer, you can then track income and expenses for the
customer job by using the “Customer:Job” column that appears within the line items area in your forms,
such as the “Enter Bills” form, for example. You can also create estimates to give to a customer for a
proposed job within QuickBooks.
Estimating
18.2- Creating an Estimate:
An estimate is a preliminary sales proposal that is often created for a customer’s job. You can create
multiple estimates for each customer or each job. If the customer accepts an estimate, you can create an
invoice from the estimate, changing it as needed. QuickBooks allows you to create invoices from estimates
either by transferring the entire estimate amount to an invoice or by billing only a portion or percentage of
the estimate amount over several invoices. The ability to bill for only a percentage of the estimate or for
various amounts of selected items in an estimate is called progress invoicing or partial billing.
If you have a job for which you want to create an estimate, select “Customers| Create Estimates”
from the Menu Bar to open the “Estimates” window. Creating an estimate is very much like creating an
invoice, except that the amounts entered into the “Estimate” form do not affect any posting accounts within
the Chart of Accounts.
Within the “Estimates” window, select the name of the job for which you are creating the estimate
from the “Customer:Job” drop-down menu. Note that you can create estimates for customers without jobs,
but that is less common. Then select the desired estimate template to use from the “Template” drop-down.
Then enter the date the estimate is created into the “Date” field. Ensure that the correct estimate
number is displayed within the “Estimate #” field, and double-check the customer and job information. After
that, click into the “Item” column within the line item area and select the first item within the estimate. Then
enter any associated “Quantity,” “Rate,” and “Amount” information for the line item. Continue entering line
items until you have entered all of the items needed for the estimate. You can then print the estimate to
send to the customer and click either the “Save & Close” or “Save & New” button to finish. Sample
- for
evalu
ation
purp
oses
only!
44 ©TeachUcomp, Inc. Advanced QuickBooks
Estimating
18.4- Invoicing from an Estimate:
Once you have created an estimate and the customer has approved it, you can use the estimate to
invoice the customer. You can either send them an invoice for the entire amount or you can send out
several invoices for smaller portions of the estimated amount. This is called progress invoicing. Progress
invoicing, which is sometimes called progress billing or partial billing, allows you to invoice for jobs that you
work on and complete in phases. When using progress invoicing, you start by creating an estimate for the
total job. Then as you complete each phase within the job, you transfer items from the original estimate to
an invoice. You can specify which items to include on each invoice and change the estimated amounts or
percentages of each item. When you use estimates to create progress invoices, you can run reports to help
you compare your estimated cost and revenue to your actual cost and revenue.
To create an invoice from an estimate, open the “Create Invoices” window by selecting “Customers|
Create Invoices” from the Menu Bar. Then select the job for which you have created an estimate from the
“Customer:Job” drop-down field.
At that point, QuickBooks will automatically display the “Available Estimates” window, which shows
all of the available estimates for the selected job. Select the estimate from which you want to create the
invoice. Then click the “OK” button to continue.
In the “Create Progress Invoice Based on Estimate” window that then appears, select the option
button for the invoicing option that you want to use for the invoice. You can select either “Create invoice for
the entire estimate (100%),” “Create invoice for a percentage of the entire estimate,” or “Create invoice for
selected items or for different percentages of each item.” If you select the first option, then click the “OK”
button to transfer all of the items from the estimate to the invoice. If you select the second option, then enter
the percentage of the total estimate to place into the current invoice by typing the percentage to bill into the
“% of estimate” field. Then click the “OK” button to transfer the selected percentage of all amounts within the
estimate to the invoice window. If you select the third option, then click the “OK” button to open the “Specify
Invoice Amounts for Items on Estimate” window.
In this window you will see all of the items listed from the estimate. You can then enter the amounts
or percentage of each item to transfer to the invoice by entering the desired percentages, rates, and
quantities into the columns shown. Ensure that the “Show Quantity and Rate” and “Show Percentage”
checkboxes are checked to enable the display of those columns, if desired. Once you have entered the
18.3- Duplicating Estimates:
You can create multiple estimates for the same job, if needed. Perhaps you have a client that needs
a couple of different pricing options for a job, and thus needs multiple estimates for the same job. With
QuickBooks, you can easily duplicate and modify an estimate to save time. If you make a copy of an
estimate and then make modifications to the copy, as needed, you’ll probably save some typing time. To do
this, first display the estimate that you want to duplicate within the “Estimates” window. Then select “Edit|
Duplicate Estimate” from the Menu Bar to duplicate the estimate. You should see the next highest estimate
number appear within the “Estimate #” field. You can then edit the details of the estimate, as needed, by
changing the information in the line item area of the new estimate. Be sure to save the new estimate that
you create when you are finished by clicking either the “Save & Close” or “Save & New” button.
Note that if you did not want create the second estimate by duplicating an existing estimate, you can
always just create a new estimate for the same job, as well. Also, if you choose to duplicate an estimate you
should be careful when you select this command from the Menu Bar, as it is located right next to the “Delete
Estimate” command in the drop-down menu.
Sample
- for
evalu
ation
purp
oses
only!
45 ©TeachUcomp, Inc. Advanced QuickBooks
Estimating
18.4- Invoicing from an Estimate- (cont’d.):
amounts for the items you want to transfer to the invoice, click the “OK” button. Note that all of the items will
transfer to the invoice, but you can set zero amount line items to not print, if desired, by changing the
settings within the “Jobs and Estimates” category within the “Preferences” dialog box in QuickBooks.
At that point, you will then see the items that you want to bill displayed within the “Create Invoices”
window. You can then double-check and change any information needed within the invoice. After you have
done that, click either the “Save & Close” or “Save & New” buttons to finish.
18.5- Updating Job Statuses:
Each time the status of a job changes, you should update its status in the “Customers & Jobs” list
within the “Customer Center” window. For instance, if you began work on a job that was labeled “Pending,”
you should update the information for the job to reflect the fact that you have started work on it.
You can update a job status by double-clicking on the job entry within in the “Customers & Jobs” list
or by selecting the job within this list and then selecting “Edit| Edit Customer:Job” from the Menu Bar to
open the “Edit Job” window. Within this window, select the “Job Info” tab. Then use the “Job Status” drop-
down to change the job’s status. When finished, click the “OK” button to save your changes.
18.6- Inactivating Estimates:
Once you have a customer with multiple outstanding estimates for a job that accepts one of the
estimates, you should make any other estimates for that job inactive. When you make an estimate inactive,
QuickBooks keeps a record of it but removes its value from the total estimated amount for the selected job.
To inactivate the estimate, you need to display the estimate you want to inactivate within the
“Estimates” window. One way to do this is to use the “Find” feature within the “Estimates” window. Another
way to find the estimate is to open the “Customer Center” and then select the desired job for which you
have created the estimate. You should then see the estimates for the job displayed on the “Transactions”
tab at the bottom of the right side of the “Customer Center.” You can select the desired estimate to
inactivate within this list and then click the “Manage Transactions” button at the bottom of the “Transactions”
tab. Then choose the “Edit Selected Transaction” command from the pop-up menu that appears to open the
selected estimate in the “Estimates” window.
With the estimate that you want to inactivate displayed within the “Estimates” window, click the
“Mark As Inactive” button within the “Main” tab of the Ribbon at the top of the window. Then click the “Save
& Close” button to save your changes and close the window.
Sample
- for
evalu
ation
purp
oses
only!
46 ©TeachUcomp, Inc. Advanced QuickBooks
Estimating
18.7- Making Purchases for a Job:
You can assign purchases that you make to a specific customer or job, so that you can bill for the
costs later. To do this, simply use the drop-down within the “Customer:Job” column that appears in the line
item area within forms such as the “Enter Bills” window to select the name of the customer:job that you will
be billing for the purchase as you create a bill in the “Enter Bills” window.
Notice that this column appears in almost every type of transaction form within the line items area,
from the “Create Purchase Orders” and “Enter Bills” windows to the “Write Checks” and “Enter Credit Card
Charges” window. You use the “Customer:Job” column to assign line item amounts to a customer:job for
future billing or to simply record job costing amounts.
For the line items entered into many forms, if you want to bill the customer for the costs later then
ensure that there is a checkmark within the “Billable?” column within the same line item area for each line
item that you want to bill back to the customer. If you wish to make the line item non-billable to simply
record the job costing information but not be able to bill the cost, then simply click the checkbox for that line
item to remove the check from the checkbox. You can then save and close the form.
18.8- Invoicing for Job Costs:
If you assign job costs that you incur to the correct customer:job, then the next time that you create
an invoice for that customer:job, you can bill for the job costs. To do this, create an invoice by selecting
“Customers| Create Invoices” from the Menu Bar. Then use the “Customer:Job” drop-down to select the
customer:job to which you have assigned job costs.
When you do this, QuickBooks will then display the “Billable Time/Costs” window. To bill the costs,
click the “Select the outstanding billable time and costs to add to this invoice?” option button and then click
the “OK” button to continue and open the “Choose Billable Time and Costs” window. Note that even if you
select not to bill the time and costs at this moment, you can later click the “Add Time/Costs” button that
appears within the “Main” tab of the Ribbon at the top of the invoice to open the “Choose Billable Time and
Costs” window.
In the “Choose Billable Time and Costs” window, click the “Expenses” and “Items” tabs, as needed,
to display the outstanding expenses recorded and items purchased for the selected customer:job. Select
the expenses to bill to the customer by clicking the leftmost column next to each line item to mark it with a
checkmark. On the “Expenses” tab, you can even markup expenses if needed, by entering the amount or
percentage to mark up the items into the “Markup Amount or %” field. Note that if you mark up the selected
items by a percentage, then you must enter the percent sign into this field, otherwise QuickBooks will
assume it is an amount. If you mark up expenses, select the income account to which you attribute the
markup by selecting it from the “Markup Account” drop-down. If the selected expenses are taxable, check
the “Selected expenses are taxable” checkbox. In both tabs, you can check the “Print selected time and
costs as one item” checkbox to add all of the billable time and costs to the invoice as a single item, if
needed. Once you have checked the billable items and expenses, click the “OK” button to add them to the
invoice. You can then complete and save the invoice as you normally would, and close the “Create
Invoices” window when you are finished.
Sample
- for
evalu
ation
purp
oses
only!

47 ©TeachUcomp, Inc. Advanced QuickBooks
18.9- Using Job Reports:
QuickBooks provides you with various reports that display general job information, job costing
information, and estimate information. You can access these reports from the “Reports” menu within the
Menu Bar, under the “Jobs, Time & Mileage” report category in QuickBooks Pro. The names of the reports
and descriptions of their content are listed below.
Estimating
REPORT NAME: DESCRIPTION:
Job Profitability Summary Summarizes the money made from each customer’s job.
Job Profitability Detail Shows the details of how much was made for a single customer’s job.
Job Estimates vs. Actuals Summary Compares estimated cost to actual cost and estimated revenue to
actual revenue for all customers and jobs.
Job Estimates vs. Actuals Detail For a selected customer or job, compares estimated costs to actual
costs and estimated revenues to actual revenues.
Job Progress Invoices vs. Estimates Compares estimates to the estimate’s progress invoices.
Item Profitability Shows how much money has been made from each item sold.
Item Estimates vs. Actuals For each item, compares estimated cost to actual cost and estimated
revenue to actual revenue.
Profit & Loss by Job Shows how much money has been made or lost on each job.
Estimates by Job Lists all estimates by job.
Unbilled Costs by Job Shows all unbilled costs for each customer job.
Open Purchase Orders by Job Shows all open purchase orders for each customer job.
Sample
- for
evalu
ation
purp
oses
only!
48 ©TeachUcomp, Inc. Advanced QuickBooks
ACTIONS-
Estimating TO CREATE A NEW JOB:
1. Open the “Customer Center” window.
2. Select the name of the customer for whom you want to make a job within the “Customers & Jobs” list.
3. Click the “New Customer & Job” button in the upper-left corner of the Customer Center and choose the
“Add Job” command from the drop-down to open the “New Job” window.
4. Enter a name for the job into the “Job Name” field at the top of the window.
5. Click the “Job Info” tab.
6. Enter a description for the job into the “Job Description” field.
7. Enter the type of job into the “Job Type” field, or choose a previous entry made within this field from the
drop-down menu.
8. Select the status of the job from the “Job Status” drop-down field.
9. When the job starts, enter the start date into the “Start Date” field.
10. You can then enter the best estimate as to when the job will be completed into the “Projected End Date”
field.
11. When the project finally finishes, enter its actual end date into the “End Date” field.
12. Click the “OK” button to add the job to the “Customers & Jobs” list.
TO CREATE AN ESTIMATE:
1. Select “Customers| Create Estimates” from the Menu Bar to open the “Estimates” window.
2. Select the name of the job for which you are creating the estimate from the “Customer:Job” drop-down
menu. Note that you can create estimates for customers without jobs, but that is less common.
3. Select the desired estimate template to use from the “Template” drop-down.
4. Enter the date the estimate is created into the “Date” field.
5. Ensure that the correct estimate number is displayed within the “Estimate #” field, and double-check the
customer and job information.
6. Click into the “Item” column within the line item area and select the first item within the estimate.
7. Then enter any associated “Quantity,” “Rate,” and “Amount” information for the line item.
8. Repeat steps # 6 and #7 until you have entered all of the items needed for the estimate.
9. You can then print the estimate to send to the customer by clicking the “Print” button within the “Main”
tab of the Ribbon at the top of the “Estimates” window.
10. Click either the “Save & Close” or “Save & New” button to finish.
TO DUPLICATE AN ESTIMATE:
1. Display the estimate that you want to duplicate within the “Estimates” window.
2. Select “Edit| Duplicate Estimate” from the Menu Bar to duplicate the estimate. You should see the next
highest estimate number appear within the “Estimate #” field.
3. Edit the details of the estimate, as needed, by changing the information in the line item area of the new
estimate.
4. You can then print the estimate to send to the customer by clicking the “Print” button within the “Main”
tab of the Ribbon at the top of the “Estimates” window.
5. Click either the “Save & Close” or “Save & New” button. Sample
- for
evalu
ation
purp
oses
only!
49 ©TeachUcomp, Inc. Advanced QuickBooks
ACTIONS-
Estimating CREATING AN INVOICE FROM AN ESTIMATE:
1. Open the “Create Invoices” window by selecting “Customers| Create Invoices” from the Menu Bar.
2. Select the job for which you have created an estimate from the “Customer:Job” drop-down field.
3. In the “Available Estimates” window, select the estimate from which you want to create the invoice.
4. Click the “OK” button to continue.
5. In the “Create Progress Invoice Based on Estimate” window that then appears, select the option button
for the invoicing option that you want to use for the invoice. You can select either “Create invoice for the
entire estimate (100%),” “Create invoice for a percentage of the entire estimate,” or “Create invoice for
selected items or for different percentages of each item.”
6. If you select the first option, click the “OK” button to transfer all of the items from the estimate to the
invoice. Skip to step #11.
7. If you select the second option, enter the percentage of the total estimate to place into the current
invoice by typing the percentage to bill into the “% of estimate” field. Then click the “OK” button to
transfer the selected percentage of all estimate amounts to the invoice window. Skip to step #11.
8. If you select the third option, click the “OK” button to open the “Specify Invoice Amounts for Items on
Estimate” window where you will then enter the amounts or percentage of each item to transfer to the
invoice by entering the desired percentages, rates, and quantities into the columns shown.
9. Once you have entered the amounts for the items you want to transfer to the invoice, click the “OK”
button to transfer the items to the invoice.
10. At that point, you will then see the items that you want to bill displayed within the “Create Invoices”
window.
11. Double-check and change any information needed within the invoice.
12. Click either the “Save & Close” or “Save & New” buttons to finish.
UPDATING A JOB STATUS:
1. Open the “Customer Center” window.
2. Double-click on the job entry within in the “Customers & Jobs” list or select the job within the list and
then selecting “Edit| Edit Customer:Job” from the Menu Bar to open the “Edit Job” window.
3. Select the “Job Info” tab.
4. Use the “Job Status” drop-down to change the job’s status.
5. Click the “OK” button to save your changes.
INACTIVATING AN ESTIMATE:
1. Display the estimate you want to inactivate within the “Estimates” window.
2. Click the “Mark As Inactive” button within the “Main” tab of the Ribbon at the top of the window.
3. Click the “Save & Close” button to save your changes and close the window.
Sample
- for
evalu
ation
purp
oses
only!
50 ©TeachUcomp, Inc. Advanced QuickBooks
ACTIONS-
Estimating MAKING PURCHASES FOR A JOB:
1. Open the desired purchasing form, such as the “Create Purchase Orders,” “Enter Bills,” “Write Checks,”
or “Enter Credit Card Charges” window.
2. Enter the vendor information.
3. Enter the first “Item” or record the expense for the job in the line items area.
4. For each line item entered, use the drop-down within the “Customer:Job” column to select the name of
the customer:job you will be billing for the line item.
5. To bill the customer for the costs later, ensure that there is a checkmark within the “Billable?” column for
the same line item. If you wish to make the line item non-billable to record the job costing information
only, then click the checkbox for that line item to remove the check from the checkbox.
6. You can then save and close the form as normal.
INVOICING FOR JOB COSTS:
1. Create an invoice by selecting “Customers| Create Invoices” from the Menu Bar.
2. Use the “Customer:Job” drop-down to select the customer:job to which you have assigned job costs.
3. In the “Billable Time/Costs” window that appears, to enter the billable costs you can click the “Select the
outstanding billable time and costs to add to this invoice?” option button and then click the “OK” button
to continue and open the “Choose Billable Time and Costs” window.
4. Note that even if you select not to bill the time and costs at this moment, you can later click the “Add
Time/Costs” button that appears within the “Main” tab of the Ribbon at the top of the invoice to open the
“Choose Billable Time and Costs” window.
5. In the “Choose Billable Time and Costs” window, click the “Expenses” and “Items” tabs, as needed, to
display the outstanding expenses recorded and items purchased for the selected customer:job.
6. Select the expenses to bill to the customer by clicking the leftmost column next to each line item to mark
it with a checkmark.
7. On the “Expenses” tab, you can markup expenses by entering the amount or percentage to mark up the
items into the “Markup Amount or %” field. Note that to mark up selected items by a percentage, you
must enter the percent sign into this field, otherwise QuickBooks will assume it is an amount.
8. If you mark up expenses, select the income account to which you attribute the markup by selecting it
from the “Markup Account” drop-down.
9. If the selected expenses are taxable, check the “Selected expenses are taxable” checkbox.
10. In both tabs, you can check the “Print selected time and costs as one item” checkbox to add all of the
billable time and costs to the invoice as a single item, if needed.
11. Once you have checked the billable items and expenses, click the “OK” button to add them to the
invoice.
12. Complete and save the invoice, and close the “Create Invoices” window when finished.
CREATING “JOBS, TIME & MILEAGE” REPORTS:
1. Select “Reports| Jobs, Time & Mileage” from the Menu Bar.
2. Click on the name of the desired report to display within this category from the side menu of choices that
appears. Sample
- for
evalu
ation
purp
oses
only!
51 ©TeachUcomp, Inc. Advanced QuickBooks
EXERCISES-
Estimating Purpose:
To be able to create a job, an estimate, and an invoice based on an estimate.
Exercises:
1. Open QuickBooks.
2. Select “File| Close Company” from the Menu Bar if you have a company file open to get to the “No
Company Open” dialog box.
3. Click the “Open a sample file” button, and select “Sample product-based business” from the drop-
down of choices.
4. Click “OK” on the sample file message box.
5. Select “File| Back Up Company| Create Local Backup” from the Menu Bar.
6. Use the “Create Backup” window to make a local backup of this company file, so that you may
restore the file back to its original condition when you are done using it.
7. Select “Customers| Customer Center” from the Menu Bar to open the “Customer Center” window.
8. Within the “Customers & Jobs” tab, select “Natiello, Ernesto.”
9. Click the “New Customer & Job” button above the tab, and then select “Add Job” from the menu.
10. In the “New Job” window, type “Bathroom Remodel” into the “Job Name” field.
11. Click the “Job Info” tab, and enter “Bathroom Remodel” into the “Job Description” field.
12. Select “Remodel” from the “Job Type” drop-down.
13. Select “Pending” from the “Job Status” drop-down.
14. Delete the values from the “Projected End Date” and the “End Date” fields.
15. Click the “OK” button to create the new job.
16. Ensure that the “Bathroom Remodel” job is selected within the “Customers & Jobs” tab and then
select “Customers| Create Estimates” from the Menu Bar.
17. Click into the first row under the “Item” column, and type “Removal.”
18. Press the “Tab” key on your keyboard twice to move to the “Qty” column and type “40.”
19. Click the “Save & Close” button to save the estimate and close the “Estimates” window.
20. Ensure that the “Bathroom Remodel” job is selected within the “Customers & Jobs” tab and then
select “Customers| Create Invoices” from the Menu Bar.
21. Press the “Tab” key on your keyboard to exit the “Customer:Job” field.
22. In the “Available Estimates” window that appears, select the estimate and click the “OK” button.
23. In the “Create Progress Invoice Based on Estimate” dialog box, select the option button for “Create
invoice for a percentage of the entire estimate.”
24. Type “25” into the “% of estimate” text box, and then click the “OK” button to continue.
25. Use the “Template” drop-down in the upper right corner of the “Create Invoices” window to select the
“Progress Invoice” template.
26. Click the “Save & Close” button to save the progress invoice.
27. Close the “Customer Center” window.
28. You can close the company file by selecting “File| Close Company” from the Menu Bar.
29. You can close QuickBooks by selecting “File| Exit” from the Menu Bar.
Sample
- for
evalu
ation
purp
oses
only!
52 ©TeachUcomp, Inc. Advanced QuickBooks
19.1- Tracking Time and Printing a Blank Timesheet
19.2- Weekly Timesheets
19.3- Time/Enter Single Activity
19.4- Invoicing from Time Data
19.5- Using Time Reports
19.6- Tracking Vehicle Mileage
19.7- Charging Customers for Mileage
CHAPTER 19-
Time Tracking Sa
mple- f
or ev
aluati
on pu
rpos
es on
ly!

53 ©TeachUcomp, Inc. Advanced QuickBooks
19.1- Tracking Time and Printing a Blank Timesheet:
QuickBooks provides time tracking for any job. Time tracking lets you keep track of the time that a
person spends on each job. The person whose time you track can be an employee, an owner, a partner, or
a subcontractor, as long as you have created the subcontractor as a vendor within the “Vendors” list.
You can then use the time data to perform tasks like invoicing a customer for job labor, providing
hours worked on an employee’s paycheck, tracking the cost of an employee’s gross pay by job, or simply
reporting the number of hours worked by a person, on a job, or with an item, like equipment.
You can enter data into QuickBooks using the “Weekly Timesheet” window or the “Time/Enter
Single Activity” window. If you want to enter time for multiple jobs or multiple days, then the “Weekly
Timesheet” window is the best choice. If you tend to enter a lot of detailed notes about your activities or
prefer to enter time data as you complete an activity, then use the “Time/Enter Single Activity” window.
Either way, the time information that you record in one displays in the other. They are simply two different
ways of recording the same information. So- don’t enter the same data into both forms, as that would
duplicate the time data that is recorded!
Also note that you can print blank weekly timesheets to manually record hours worked by
employees or vendors on paper, which you can later transfer into QuickBooks. To do this, open the “Weekly
Timesheet” window by selecting “Employees| Enter Time| Use Weekly Timesheet” from the Menu Bar.
Within this window, you can then click the drop-down arrow that appears to the right of the “Print” button
within the toolbar at the top of the window. Then choose the “Print Blank Timesheet…” command from the
drop-down menu to open the “Print Timesheets” window. You can then click the “Print” button to print the
blank timesheets.
Time Tracking Sa
mple- f
or ev
aluati
on pu
rpos
es on
ly!

54 ©TeachUcomp, Inc. Advanced QuickBooks
19.2- Weekly Timesheets:
You can use the “Weekly Timesheet” window to enter the hours worked by a person within a week,
what they did, for which customer:job, and, optionally, how much you paid them. You can open the “Weekly
Timesheet” window by choosing “Employees| Enter Time| Use Weekly Timesheet” from the Menu Bar.
In the “Weekly Timesheet” window, use the “Name” drop-down to select the name of the individual
for whom you want to view or track time. If you want to change the week you are viewing, select any date
within the week you want to view from the calendar selector button at the top of the window. The days of the
selected week for the selected individual will then be displayed in the window.
Then enter the “Customer:Job,” “Service Item,” “Payroll Item,” if you enable your employees to enter
hours via the timesheet, “WC Code,” “Notes,” and the hours per day that the selected person spent doing
the selected type of work into the columns of the same names that are displayed.
Note that you can click the “Copy Last Sheet” button in the lower left corner of this window to copy
any hours that were entered for the selected person for the previous week forward into the currently
selected week. This can save your some time when performing data entry for individuals who tend to have
consistent timesheet entries.
After entering the information, click the “Save & Close” button to save the time recorded and close
the window when you are finished.
Time Tracking
19.3- Time/Enter Single Activity:
You can use the “Time/Enter Single Activity” timesheet to enter the hours worked by a person, what
they did, for which customer:job, and, optionally, how much you paid them to do it for a single day. You can
open the “Time/Enter Single Activity” window by selecting “Employees| Enter Time| Time / Enter Single
Activity” from the Menu Bar.
Within the “Time/Enter Single Activity” window, select the date for the activity from the “Date”
calendar selector field. Use the “Name” drop-down to select the person whose time you are entering. Then
enter the “Customer:Job,” “Service Item,” “Payroll Item,” if you enable your employees to enter hours via the
timesheet, “WC Code,” and “Notes” that you want to record into the fields of the same names. You can then
enter the duration of time to record this activity into the “Duration” field. If you prefer to actively record the
time you spend performing an activity, like “Legal Research” for example, then you can click the “Start”
button when you begin the activity, “Pause” when you want to pause the time recording, and “Stop” when
you have finished the activity in order to record the actual time as an entry in the “Duration” field. When you
are finished entering time data, just click the “Save & Close” button to save the time and close the window.
19.4- Invoicing from Time Data:
After you have recorded the time that your employees or subcontractors spend performing services
for a customer’s job, you can bill the customer for the work performed in an invoice. To do this, create an
invoice by selecting “Customers| Create Invoices” from the Menu Bar. Then use the “Customer:Job” drop-
down to select the customer:job to which you have assigned billable time.
When you do this, QuickBooks will then display the “Billable Time/Costs” window. To bill the time,
click the “Select the outstanding billable time and costs to add to this invoice?” option button and then click
the “OK” button to continue and open the “Choose Billable Time and Costs” window. Note that even if you
select not to bill the time and costs at this moment, you can later click the “Add Time/Costs” button that
appears within the “Main” tab of the Ribbon at the top of the invoice to open the “Choose Billable Time and
Sample
- for
evalu
ation
purp
oses
only!

55 ©TeachUcomp, Inc. Advanced QuickBooks
Time Tracking
19.4- Invoicing from Time Data- (cont’d.):
Costs” window.
In the “Choose Billable Time and Costs” window, click the “Time” tab to display the billable hours
that have been recorded for the selected customer:job. Select the hours to bill to the customer by clicking
the leftmost column next to each line item to mark it with a checkmark.
If you would like to choose how QuickBooks will import the timesheet data into the invoice, then click
the “Options…” button in the upper right corner of the tab to open the “Options for Transferring Billable
Time” dialog box. Here you can select the desired option button to indicate how you want the time data to
be imported. Then click the “OK” button to set your desired preference and return to the “Time” tab.
You can check the “Print selected time and costs as one item” checkbox to add all of the selected
billable time and costs to the invoice as a single item, if needed. Once you have checked the billable hours,
click the “OK” button to add them to the invoice. You can then complete and save the invoice as you
normally would, and close the “Create Invoices” window when you are finished.
19.5- Using Time Reports:
QuickBooks provides you with reports that assist you in time tracking. They can be accessed by
selecting “Reports| Jobs, Time & Mileage” from the Menu Bar in QuickBooks Pro. The following is a listing
of the names and functions of the time reports available in QuickBooks Pro 2013
REPORT NAME: DESCRIPTION:
Time by Job Summary Shows hours worked totaled by customer job, and then totaled by
service item per job.
Time by Job Detail Lists each time activity (work done by a person for a particular
customer or job on a specific date), and shows whether the work is
billed, unbilled, or not billable. The report groups and subtotals the
activities first by customer and job and then by service item.
Time by Name Shows hours worked (or tracked as sick or vacation time), subtotaled
first by the name of the person who performed the work, and then by
the customer job for whom the work was performed.
Time by Item Totals the hours by service item, and then subtotals the hours worked
by customer job.
Sample
- for
evalu
ation
purp
oses
only!

56 ©TeachUcomp, Inc. Advanced QuickBooks
Time Tracking
19.6- Tracking Vehicle Mileage:
You can track mileage for your vehicles in QuickBooks so that you have a record of your vehicle’s
mileage for tax purposes. You can also assign mileage to a specific customer job, so that you can bill the
customer for the mileage. There are some limitations to the use of this data, however. You cannot use the
data to reimburse employees or vendors for mileage. You also cannot track specific vehicle expenses like
tolls paid, gas and other types of expenses. You can work around this by simply entering these charges as
a bill, which can be charged to the customer. Also, vehicle mileage information from Quicken will not be
imported into QuickBooks.
Generally, you can use either the Standard mileage rate or the actual expenses for calculating
vehicle mileage expenses. You should consult with your tax advisor or the IRS to determine which method
you should use, if any.
To enter vehicle mileage, select “Company| Enter Vehicle Mileage…” from the Menu Bar. This will
launch the “Enter Vehicle Mileage” window. Use the “Vehicle” drop-down at the top of the window to select
for which vehicle you will be entering mileage. You can type a new vehicle description into this dialog box
and then use the “Quick Add” feature to quickly add the vehicle to the “Vehicle List.” Note that you can click
the “Vehicle List” button in the toolbar at the top of the “Enter Vehicle Mileage” window to open the list of
vehicles if you would like to enter a detailed description about the vehicles used by your company.
Next, use the “Trip Start Date” and “Trip End Date” calendar drop-down fields to input the start and
end dates of the trip you are recording. Then input the odometer start and end values into the boxes
provided. That will fill-in the “Total Miles” by subtracting the two values. You may also simply type the total
miles of the trip into the “Total Miles” box, if needed.
If you want to assign the miles to a specific customer or job, check the “Billable” checkbox in the
upper right corner of the window and then use the “Customer:Job” drop-down to select which customer or
job to assign the mileage. You can then use the “Item” drop-down to select your “Mileage” item from your
“Item List.” If you are going to be reimbursed for mileage by the customer, you will need to create a
“Mileage” item as an “Other Charge” or “Service” type item within the “Item List” so that you can use it to
collect the mileage amounts in an invoice at a later point. After entering the mileage, feel free to add any
additional notes into the “Notes” field and then click the “Save & Close” button when you are finished.
Note the “Mileage Rates” button at the top of the “Enter Vehicle Mileage” window. If you click this
button, you will be presented with the “Mileage Rates” dialog box. Here you can input the most recent
“Effective Date” of the federal mileage rate in the column available. You can also set the rate in the “Rate”
column next to the specified date. You should check with the IRS for any effective rate changes and make
sure that you keep this information current. Just click the “Close” button when you are finished entering the
mileage rates.
Sample
- for
evalu
ation
purp
oses
only!

57 ©TeachUcomp, Inc. Advanced QuickBooks
Time Tracking
19.7- Charging Customers for Mileage:
As long as you entered the vehicle mileage, marked it as billable, and assigned it to a customer job,
you can then invoice the customer:job to collect the mileage. To do this, create an invoice by selecting
“Customers| Create Invoices” from the Menu Bar. Then use the “Customer:Job” drop-down to select the
customer:job to which you have assigned billable mileage.
When you do this, QuickBooks will then display the “Billable Time/Costs” window. To bill the
mileage, click the “Select the outstanding billable time and costs to add to this invoice?” option button and
then click the “OK” button to continue and open the “Choose Billable Time and Costs” window. Note that
even if you select not to bill the mileage costs at this moment, you can later click the “Add Time/Costs”
button that appears within the “Main” tab of the Ribbon at the top of the invoice to open the “Choose Billable
Time and Costs” window.
In the “Choose Billable Time and Costs” window, click the “Mileage” tab to display the billable
mileage recorded for the selected customer:job. Select the mileage to bill to the customer by clicking the
leftmost column next to each line item to mark it with a checkmark.
If you would like to choose how QuickBooks will import the data into the invoice, click the
“Options…” button in the upper right corner of the tab to open the “Options for Transferring Billable Mileage”
dialog box. Here you can select the desired option button to indicate how you want the mileage data to be
imported. Then click the “OK” button to set your desired preference and return to the “Mileage” tab.
You can check the “Print selected time and costs as one item” checkbox to add all of the selected
billable time and costs to the invoice as a single item, if needed. Once you have checked the billable
mileage, click the “OK” button to add them to the invoice. You can then complete and save the invoice as
you normally would, and close the “Create Invoices” window when you are finished.
Sample
- for
evalu
ation
purp
oses
only!

58 ©TeachUcomp, Inc. Advanced QuickBooks
ACTIONS-
Time Tracking TO PRINT BLANK WEEKLY TIMESHEETS:
1. Select “Employees| Enter Time| Use Weekly Timesheet” from the Menu Bar.
2. Click the drop-down arrow to the right of the “Print” button within the toolbar at the top of the “Weekly
Timesheet” window.
3. Select the “Print Blank Timesheet….” command from the drop-down menu that appears.
4. In the “Print Timesheets” window that appears, click the “Print” button.
USING A WEEKLY TIMESHEET:
1. Select “Employees| Enter Time| Use Weekly Timesheet” from the Menu Bar.
2. In the “Weekly Timesheet” window, use the “Name” drop-down to select the name of the individual for
whom you want to view or track time.
3. To change the week you are viewing, select any date within the week you want to view from the
calendar selector button at the top of the window. The days of the selected week for the selected
individual will then be displayed in the window.
4. Enter the “Customer:Job,” “Service Item,” “Payroll Item,” if you enable your employees to enter hours via
the timesheet, “WC Code,” “Notes,” and the hours per day that the selected person spent doing the
selected type of work into the columns of the same names that are displayed.
5. You can click the “Copy Last Sheet” button in the lower left corner of this window to copy any hours that
were entered for the selected person for the previous week forward into the currently selected week.
6. Click the “Save & Close” button to save the time recorded and close the window when you are finished.
USING THE TIME/ENTER SINGLE ACTIVITY WINDOW:
1. Select “Employees| Enter Time| Time / Enter Single Activity” from the Menu Bar.
2. Within the “Time/Enter Single Activity” window, select the date for the activity from the “Date” calendar
selector field.
3. Use the “Name” drop-down to select the person whose time you are entering.
4. Enter the “Customer:Job,” “Service Item,” “Payroll Item,” if you enable your employees to enter hours via
the timesheet, “WC Code,” and “Notes” that you want to record into the fields of the same names.
5. Enter the duration of time to record this activity into the “Duration” field.
6. If you prefer to actively record the time you spend performing an activity, you can click the “Start” button
when you begin the activity, “Pause” when you want to pause the time recording, and “Stop” when you
have finished the activity in order to record the actual time as an entry in the “Duration” field.
7. When you are finished entering time data, just click the “Save & Close” button to save the time and
close the window.
Sample
- for
evalu
ation
purp
oses
only!
59 ©TeachUcomp, Inc. Advanced QuickBooks
ACTIONS-
Time Tracking INVOICING A CUSTOMER BASED ON TIME:
1. Select “Customers| Create Invoices” from the Menu Bar.
2. Use the “Customer:Job” drop-down to select the customer:job to which you have assigned billable time.
3. In the “Billable Time/Costs” window, click the “Select the outstanding billable time and costs to add to
this invoice?” option button and then click the “OK” button to continue and open the “Choose Billable
Time and Costs” window.
4. Note that even if you select not to bill the time and costs at this moment, you can later click the “Add
Time/Costs” button that appears within the “Main” tab of the Ribbon at the top of the invoice to open the
“Choose Billable Time and Costs” window.
5. In the “Choose Billable Time and Costs” window, click the “Time” tab to display the billable hours that
have been recorded for the selected customer:job.
6. Select the hours to bill to the customer by clicking the leftmost column next to each line item to mark it
with a checkmark.
7. If you would like to choose how QuickBooks will import the timesheet data into the invoice, click the
“Options…” button in the upper right corner of the tab to open the “Options for Transferring Billable
Time” dialog box.
8. Here you can select the desired option button to indicate how you want the time data to be imported.
9. Then click the “OK” button to set your desired preference and return to the “Time” tab.
10. You can check the “Print selected time and costs as one item” checkbox to add all of the selected
billable time and costs to the invoice as a single item, if needed.
11. Once you have checked the billable hours, click the “OK” button to add them to the invoice.
12. You can then complete and save the invoice as you normally would, and close the “Create Invoices”
window when you are finished.
DISPLAYING TIME TRACKING REPORTS:
1. Select “Reports| Jobs, Time & Mileage” from the Menu Bar.
2. In the side menu that appears, select the name of the report you want to view.
TO ENTER VEHICLE MILEAGE:
1. Select “Company| Enter Vehicle Mileage…” from the Menu Bar.
2. In the “Enter Vehicle Mileage” window, use the “Vehicle” drop-down at the top of the window to select
for which vehicle you will be entering mileage.
3. You can type a new vehicle description into this dialog box and then use the “Quick Add” feature to
quickly add the vehicle to the “Vehicle List.”
4. Note that you can click the “Vehicle List” button in the toolbar at the top of the “Enter Vehicle Mileage”
window to open the list of vehicles if you would like to enter a detailed description about the vehicles
used by your company.
5. Use the “Trip Start Date” and “Trip End Date” calendar drop-down fields to input the start and end dates
of the trip you are recording.
6. Input the odometer start and end values into the boxes provided. That will fill-in the “Total Miles” by
subtracting the two values. You may also simply type the total miles of the trip into the “Total Miles” box,
if needed.
(cont’d.) Sample
- for
evalu
ation
purp
oses
only!
60 ©TeachUcomp, Inc. Advanced QuickBooks
ACTIONS-
Time Tracking
TO INVOICE A CUSTOMER FOR BILLABLE MILEAGE:
1. Create an invoice by selecting “Customers| Create Invoices” from the Menu Bar.
2. Use the “Customer:Job” drop-down to select the customer:job to which you have assigned billable
mileage.
3. In the “Billable Time/Costs” window, click the “Select the outstanding billable time and costs to add to
this invoice?” option button and then click the “OK” button to continue and open the “Choose Billable
Time and Costs” window.
4. Note that even if you select not to bill the mileage costs at this moment, you can later click the “Add
Time/Costs” button that appears within the “Main” tab of the Ribbon at the top of the invoice to open the
“Choose Billable Time and Costs” window.
5. In the “Choose Billable Time and Costs” window, click the “Mileage” tab to display the billable mileage
recorded for the selected customer:job.
6. Select the mileage to bill to the customer by clicking the leftmost column next to each line item to mark it
with a checkmark.
7. If you would like to choose how QuickBooks will import the data into the invoice, click the “Options…”
button in the upper right corner of the tab to open the “Options for Transferring Billable Mileage” dialog
box.
8. Here you can select the desired option button to indicate how you want the mileage data to be imported.
9. Then click the “OK” button to set your desired preference and return to the “Mileage” tab.
10. You can check the “Print selected time and costs as one item” checkbox to add all of the selected
billable time and costs to the invoice as a single item, if needed.
11. Once you have checked the billable mileage, click the “OK” button to add them to the invoice.
12. You can then complete and save the invoice as you normally would, and close the “Create Invoices”
window when you are finished.
TO ENTER VEHICLE MILEAGE- (CONT’D.):
7. If you want to assign the miles to a specific customer or job, check the “Billable” checkbox in the upper
right corner of the window and then use the “Customer:Job” drop-down to select which customer or job
to assign the mileage.
8. Then use the “Item” drop-down to select your “Mileage” item from your “Item List.”
9. If you are going to be reimbursed for mileage by the customer, you will need to create a “Mileage” item
as an “Other Charge” or “Service” type item within the “Item List” so that you can use it to collect the
mileage amounts in an invoice at a later point.
10. After entering the mileage, feel free to add any additional notes into the “Notes” field.
11. Click the “Save & Close” button when you are finished.
12. To enter mileage rates, click the “Mileage Rates” button at the top of the “Enter Vehicle Mileage”
window to open the “Mileage Rates” dialog box.
13. Here you can input the most recent “Effective Date” of the federal mileage rate in the column available.
14. Enter the rate in the “Rate” column next to the specified date. Check with the IRS for any effective rate
changes and make sure that you keep this information current.
15. Click the “Close” button when you are finished entering the mileage rates.
Sample
- for
evalu
ation
purp
oses
only!

61 ©TeachUcomp, Inc. Advanced QuickBooks
EXERCISES-
Time Tracking Purpose:
To be able to enter hours worked into a weekly timesheet.
Exercises:
1. Open QuickBooks.
2. Select “File| Close Company” from the Menu Bar if you have a company file open to get to the “No
Company Open” dialog box.
3. Click the “Open a sample file” button, and select “Sample product-based business” from the drop-
down of choices.
4. Click “OK” on the sample file message box.
5. Select “File| Back Up Company| Create Local Backup” from the Menu Bar.
6. Use the “Create Backup” window to make a local backup of this company file, so that you may
restore the file back to its original condition when you are done using it.
7. After backing up the file, select “Employees| Enter Time | Use Weekly Timesheet” from the Menu
Bar.
8. Use the “Name” drop-down to select “Gregg O. Schneider” from the list.
9. Click into the next available blank row in the “Customer:Job” column and select “Natiello Ernesto:
Bathroom Remodel” from the list to select the job created in the Exercise from Chapter 18.
10. Click into the “Service Item” column, and type “Removal.”
11. Type “8” under the “Tu,” “W,” “Th,” and “F” columns to the right in that row.
12. Click the “Save & Close” button.
13. You can close the company file by selecting “File| Close Company” from the Menu Bar.
14. You can close QuickBooks by selecting “File| Exit” from the Menu Bar.
Sample
- for
evalu
ation
purp
oses
only!

62 ©TeachUcomp, Inc. Advanced QuickBooks
20.1- The Payroll Process
20.2- Creating Payroll Items
20.3- Setting Employee Defaults
20.4- Setting Up Employee Payroll Information
20.5- Creating Payroll Schedules
20.6- Creating Scheduled Paychecks
20.7- Creating Unscheduled Paychecks
20.8- Creating Termination Paychecks
20.9- Voiding Paychecks
20.10- Tracking Your Tax Liabilities
20.11- Paying Payroll Tax Liabilities
20.12- Adjusting Payroll Liabilities
20.13- Entering Liability Refund Checks
20.14- Process Payroll Forms
20.15- Tracking Workers Compensation
CHAPTER 20-
Payroll Sa
mple- f
or ev
aluati
on pu
rpos
es on
ly!

63 ©TeachUcomp, Inc. Advanced QuickBooks
20.1- The Payroll Process:
Before you can use the payroll features of QuickBooks, you must set up payroll for your company in
QuickBooks. To find out how you do this, select “Employees| Payroll| Turn on Payroll in QuickBooks” from
the Menu Bar. In the window that then appears, you can evaluate the payroll plans and purchase a payroll
plan through QuickBooks to begin the setup of your initial payroll data.
After you have purchased a payroll plan you can setup basic payroll information by selecting
“Employees| Payroll Setup” from the Menu Bar. Use the “QuickBooks Payroll Setup” wizard to input the
information that QuickBooks will need to know in order to begin processing payroll for your company file.
QuickBooks uses the tax tables that come with your payroll subscription to calculate employee payroll.
QuickBooks calculates each employee’s gross pay, taxes, deductions, and net pay. In QuickBooks, you can
write the paycheck, record the transactions for the correct accounts, print payroll forms, and keep track of
your tax liabilities.
As an employer, you must subtract taxes and other deductions before issuing an employee’s
paycheck. Some typical paycheck deductions are federal and state withholding taxes (income taxes), social
security taxes (FICA), Medicare taxes, and state unemployment insurance. You may also deduct for
benefits such as 401 (k) plan, or contributions to your company’s medical/dental plan. When you withhold
social security, Medicare, and federal withholding taxes from employee paychecks, you must submit regular
deposits of the withheld money and file quarterly forms that list the amounts withheld from each employee
paycheck. Here is an overview of the payroll process and the steps that you must complete to do payroll.
Payroll
INFORMATION: DESCRIPTION:
Enter information about your company. This includes information about your federal and state tax ID numbers.
You enter this information when you set up your QuickBooks company
in the EasyStep interview. You can later view company information by
selecting “Company| Company Information” from the Menu Bar.
Enter information about your employees. The QuickBooks “Employees” list stores general information about
your employees, and specific information related to payroll (such as
the employee’s salary or hourly rate, filing status, number of
exemptions, and miscellaneous additions, deductions, and company
contributions). You can store payroll information that most employees
have in common in employee defaults. Then, whenever you have a
new employee to add, simply enter information that’s specific to that
employee (name, address, etc…).
Enter information about your payroll items. QuickBooks maintains a “Payroll Item List” that contain items that
affect the amounts on a paycheck, including company payroll
expenses. When you specify you want to use payroll, QuickBooks
creates most payroll items for you but you add others if needed.
Tax tables for fed, state, and local withholdings. QuickBooks uses tax tables for payroll calculations. You get the
current tax tables and keep them current when you subscribe to one
of the QuickBooks payroll plans. If you choose not to subscribe to one
of these plans, you must calculate and enter payroll tax deductions
manually for each paycheck Sample
- for
evalu
ation
purp
oses
only!
64 ©TeachUcomp, Inc. Advanced QuickBooks
20.2- Creating Payroll Items:
QuickBooks maintains a list of all the items that affect payroll amounts, including payroll expenses,
in the “Payroll Item” list. There are payroll items for compensation, taxes, other additions and deductions,
and employer-paid expenses. QuickBooks uses payroll items to track individual amounts on a paycheck
and accumulated year-to-date wage and tax amounts for each employee.
When you set up payroll for your company in QuickBooks, many items are added to the list for you.
However, you can also manually create others if you need them. You can view the current set of payroll
items by selecting “Lists| Payroll Item List” from the Menu Bar. You can access the commands that you
need to manage the entries in this list by clicking the “Payroll Item” button in the lower-left corner of this list.
To add a new payroll item, click the “Payroll Item” button in the lower-left corner of the “Payroll Item
List” and then select the “New” command from the pop-up menu that appears. In the “Add new payroll item”
window, answer the questions posed to you on each screen and then click the “Next” button until you have
set up the new item. Click “Finish” when you are done to add the selected item into the “Payroll Item” list.
Payroll
20.3- Setting Employee Defaults:
You can store information you want to set as the default value when you create a new employee
record into your “employee defaults” in the “Employees” list. After setting default employee values, when
you later add a new employee, QuickBooks will automatically fill-in the default information from the
employee defaults so that you won’t have to re-enter it. All you will need to do is enter the employee-
specific information.
You can access the employee defaults within the Employee Center by selecting “Employees|
Employee Center” from the Menu Bar to open it. Then click the “Manage Employee Information” button in
the toolbar at the top of the “Employee Center” window and select the “Change New Employee Default
Settings” command.
In the “Employee Defaults” window that appears, enter any information that you would like to have
appear by default whenever you create a new employee record. You can also set default tax information, or
default sick and vacation time information, by clicking either the “Taxes…” or “Sick/Vacation…” buttons to
set default values for those categories in the separate “Taxes Defaults” and “Sick and Vacation Defaults”
dialog boxes. When you have finished setting all of your employee defaults, click the “OK” button to save
them.
20.4- Setting Up Employee Payroll Information:
You can enter employee payroll information when you add new employees to the “Employees” list
within the “New Employee” window. You can also edit the employee’s payroll data by using the “Edit
Employee” window, if the payroll info changes. In either the “New Employee” or “Edit Employee” windows,
you can enter or edit payroll information by selecting the “Payroll Info” tab at the left side of either window.
On the “Payroll Info” tab, select the payroll schedule for the employee from the “Payroll Schedule”
drop-down menu. Then enter the type of pay the employee receives by selecting a compensation “Payroll
Item” from the “Item Name” column within the “Earnings” section. To the right of that selected item, you can
then enter the amount of compensation into the “Hourly/Annual Rate” column. Then enter any additions,
deductions or company contributions in the “Additions, Deductions & Company Contributions” section by
selecting the name of the desired “Payroll Item” from the “Item Name” column. Then enter the “Amount” for
each item entered, as well as the annual “Limit” for each, if needed. If the employee uses time data entered
Sample
- for
evalu
ation
purp
oses
only!

65 ©TeachUcomp, Inc. Advanced QuickBooks
Payroll
20.4- Setting Up Employee Payroll Information- (cont’d.):
into the “Weekly Timesheet” or the “Time/Enter Single Activity” windows in order to record their hours
worked, then select the “Use time data to create paychecks” checkbox at the bottom of the tab. If the
employee is covered by a qualifying pension plan, check the “Employee is covered by a qualifying pension
plan” checkbox.
You can then set the employee’s payroll tax data by clicking the “Taxes…” button to open the
“Taxes” dialog box. Here you enter the employee’s payroll tax withholding information into the “Federal,”
“State,” and “Other” tabs. Note that the “Other” tab is used for any special state or local payroll tax
information required. Once you have entered their payroll tax information, click the “OK” button within the
“Taxes” dialog box to return to the “New Employee” or “Edit Employee” window.
You can enter the employee’s sick and vacation time by clicking the “Sick/Vacation…” button within
the “Payroll Info” tab to open the “Sick and Vacation” dialog box. In the “Sick” and “Vacation” sections, you
can use the “Accrual Period” drop-down to select how the employee accrues sick and vacation time. You
can then enter the number of hours to accrue, the maximum number of hours to accrue, as well as if and
when the number of hours are to be reset by entering the desired values into the fields available. When you
have finished entering the sick and vacation information for the employee, click the “OK” button within the
“Sick and Vacation” dialog box to return to the “New Employee” or “Edit Employee” window.
When you are finished setting up the employee’s payroll data, click the “OK” button within either the
“New Employee” or “Edit Employee” windows to close the window and save your changes.
Sample
- for
evalu
ation
purp
oses
only!

66 ©TeachUcomp, Inc. Advanced QuickBooks
Payroll
20.5- Creating Payroll Schedules:
In QuickBooks, you will most often create employee paychecks by using the scheduled payroll
feature. However, if needed, you can also print unscheduled employee paychecks as well as termination
paychecks.
Before you start a scheduled payroll, however, you must first create at least one payroll schedule.
You can create and modify payroll schedules by selecting “Employees| Add or Edit Payroll Schedules” from
the Menu Bar to open the “Payroll Schedule List.” To create a new payroll schedule, click the “Payroll
Schedule” button and then choose the “New” command.
In the “New Payroll Schedule” window that appears, enter a name for the payroll schedule into the
“What do you want to name this payroll schedule?” field. Use the next field’s drop-down to select the
frequency with which this payroll will recur. After that, use the “What is the pay period end date?” calendar
selector to select the final date in the pay period. Then use the “What date should appear on paychecks for
this pay period?” calendar selector to select the paycheck date for the payroll. If you chose to create a
semimonthly or monthly payroll, you may also need to answer a few more date-related questions in this
screen. Once you have entered the payroll schedule information, click the “OK” button. You can then follow
the onscreen prompts to assign employees with the same payroll frequency to the selected payroll
schedule.
20.6- Creating Scheduled Paychecks:
You can create and print employee paychecks for a scheduled payroll by either selecting
“Employees| Pay Employees| Scheduled Payroll” from the Menu Bar or by clicking the “Pay Employees”
button in the Home page to open the “Employee Center: Payroll Center” window.
In “Pay Employees” section of the window, select the name of the payroll schedule to pay from the
listing shown. Then click the “Start Scheduled Payroll…” button to open the “Enter Payroll Information”
window where you will see the employees assigned to the selected payroll schedule. All employees that
you want to pay on this schedule should appear here with a checkmark next to their names. You then need
to check to ensure that the data shown in the “Payroll Information” section is correct. Also review the hours
worked and amounts shown for each employee. If you need to make changes to a paycheck, click the
hyperlinked name of the employee within this list whose paycheck you wish to inspect to open their
paycheck within a “Preview Paycheck” window where you can edit the information and then click the “Save
& Close” button to finish. After reviewing the payroll information for accuracy, click the “Continue” button to
continue paying the employees.
Next, review the summary information in the “Review and Create Paychecks” window. In the
“Paycheck Options” section, you can select the option button for “Print paychecks from QuickBooks” to
create the paychecks and print them. If you are recording paychecks that have already been created, you
can select the “Assign check numbers to handwritten checks” option button and then enter the first check
number into the “First Check Number” field. You can then click the “Create Paychecks” button to create the
selected paychecks for the scheduled payroll. You can then use the “Confirmation and Next Steps” window
that appears to finish the payroll. Within this window you can click the “Print Paychecks” button to print the
paychecks that you just created if you chose to print paychecks in QuickBooks. You can click the “Print Pay
Stubs” button to print paystubs for the checks, if needed. When you are done, click the “Close” button.
Sample
- for
evalu
ation
purp
oses
only!
67 ©TeachUcomp, Inc. Advanced QuickBooks
Payroll
20.7- Creating Unscheduled Paychecks:
You can also create unscheduled paychecks for additional checks, such as bonus checks. You can
select “Employees| Pay Employees| Unscheduled Payroll” from the Menu Bar to open the “Enter Payroll
Information” window. Here you manually set the “Pay Period Ends” and “Check Date.” Then select the
account from which the funds will be withdrawn from the “Bank Account:” drop-down. You then place a
checkmark next to the names of the employees to pay. When you are ready, click the “Continue” button to
continue creating the paychecks. In the next screen, select whether the check should be printed, or
assigned a check number in the “Paycheck Options” section. You can then click on the hyperlinked name of
the employee shown within the list to open the “Preview Paycheck” window where you can review and edit
the payroll information, if needed. After entering or editing the paycheck details, click the “Save & Close”
button. Once you are ready to create the paychecks, click the “Create Paychecks” button. If you are printing
the paychecks within QuickBooks, you can then click either the “Print Paychecks” or “Print Pay Stubs”
button, as needed, and then click the “Close” button to finish.
20.8- Creating Termination Paychecks:
You can also create termination paychecks when an employee leaves. You can select “Employees|
Pay Employees| Termination Check” from the Menu Bar to open the “Enter Payroll Information” window.
Here you manually set the “Pay Period Ends” and “Check Date.” Then select the account from which the
funds will be withdrawn from the “Bank Account:” drop-down. You then place a checkmark next to the
names of the employees who need a termination check. To the right of their names, under the “Release
Date” column, enter the employee’s release date. This information will be updated within their employee
record when you create the paychecks. When you are ready, click the “Continue” button to continue
creating the paychecks. In the next screen, select whether the check should be printed, or assigned a check
number in the “Paycheck Options” section. You can then click on the hyperlinked name of the employee
shown within the list to open the “Preview Paycheck” window where you can review and edit the payroll
information, if needed. After entering or editing the paycheck details, click the “Save & Close” button. Once
you are ready to create the paychecks, click the “Create Paychecks” button. If you are printing the
paychecks within QuickBooks, you can then click either the “Print Paychecks” or “Print Pay Stubs” button,
as needed, and then click the “Close” button to finish.
Sample
- for
evalu
ation
purp
oses
only!

68 ©TeachUcomp, Inc. Advanced QuickBooks
Payroll
20.9- Voiding Paychecks:
You can void paychecks, if needed. To void a paycheck, you will need to display the paycheck that
you want to void within the “Write Checks” window or by using the appropriate checking account register.
With the desired paycheck to void displayed, select “Edit| Void Paycheck” from the Menu Bar.
20.10- Tracking Your Tax Liabilities:
As the employer, you need to track both the payroll expenses and payroll liabilities. The payroll
expenses you need to track are the employee’s gross pay and the employer’s payroll taxes. QuickBooks
uses an account called “Payroll Expenses” to track the actual costs to your company. Whatever funds you
deduct from employee paychecks aren’t shown here. Those funds are placed into an account called
“Payroll Liabilities.” That makes it easy to see what payroll taxes you owe, so that you can have the
necessary cash available for payment.
As long as you have a valid subscription to one of the QuickBooks payroll options, QuickBooks uses
the current payroll tax tables to keep track of your tax liabilities as they accrue, so that you know how much
you owe as of a given date.
When you are ready to pay your payroll liabilities, you may want to see the amount you will be
paying. You can run a “Payroll Liabilities” report to see how much you owe in payroll liabilities. You can
access this report by selecting “Reports| Employees & Payroll| Payroll Liability Balances” from the Menu
Bar.
Sample
- for
evalu
ation
purp
oses
only!

69 ©TeachUcomp, Inc. Advanced QuickBooks
Payroll
20.11- Paying Payroll Tax Liabilities:
Once you are ready to write a check for the payroll liabilities, you must write a “Liability Check.”
Don’t just write a check to cover payroll liabilities! Unless you use the method shown, QuickBooks
will not properly adjust the Payroll Liabilities account! When you write a check (or enter a General
Journal entry) against the “Payroll Liabilities” account without specifying which liabilities are adjusted, it will
take the total amount of the adjustment and disburse it amongst the individual liabilities. This will then cause
the balance of each individual liability to be incorrect! While you can fix it by making liability adjustments to
the individual liabilities, it is tedious to fix and best avoided.
When you subscribe to one of the QuickBooks payroll tax services, you set up scheduled liability
payments as part of the Payroll Setup process. You can view this information within the Payroll Center in
QuickBooks. To pay your scheduled payroll liabilities, just select “Employees| Payroll Taxes and Liabilities|
Pay Scheduled Liabilities” from the Menu Bar. You can then check the scheduled payments to make from
the listing shown in the “Pay Scheduled Liabilities” section of the “Employee Center: Payroll Center”
window. You can then click the “View/Pay” button to open the “Liability Check” window where you can
review the liability check or checks to be created. You can then click the “Save & Close” button to finish and
save the checks for printing.
If needed, you can select “Employees| Payroll Taxes and Liabilities| Create Custom Liability
Payments” to create a custom liability payment for your payroll liabilities. In the window that appears, you
select the date range of the liabilities to pay. Then click the “OK” button to view the “Pay Liabilities” window.
In the “Pay Liabilities” window, place a checkmark next to the individual payroll liabilities that you
want to pay with the custom liability payment. If you want to create checks for printing, ensure that the “To
be printed” checkbox is selected. Next, make sure that the option button for “Review liability check to enter
expenses/penalties” is selected and then click the “Create” button to create the “Liability Checks.” Note that
this type of check has a special tab at the bottom that indicates exactly which liabilities are being paid with
that check. If you have additional penalties to add, you can to that on the “Expenses” tab. If you do make
modifications to the check, save and close the check when finished to save changes that you have made.
20.12- Adjusting Payroll Liabilities:
If you are using Assisted Payroll, you can’t adjust the liability balance for liabilities paid by the payroll
service, meaning the federal and state tax liabilities. However, you can adjust the liability balance for local
or other taxes not supported by the payroll service.
If you are not using Assisted Payroll or higher, or are in the process of signing up for it, you can
enter an adjustment for any payroll item. Liability balance adjustments change the amounts that
QuickBooks shows in the payroll reports.
To adjust the liability balance, select “Employees| Payroll Taxes and Liabilities| Adjust Payroll
Liabilities” from the Menu Bar to open the “Liability Adjustment” window.
Next, in the “Date” field, enter the date for which you are making the adjustment. In the “Effective
Date” field, enter the date that you want this adjustment to affect your liability balances. QuickBooks uses
this date to calculate amounts on your Forms 940 and 941 and on the payroll liability balances report.
Then choose whether this liability adjustment is for the company or a specific employee. In the “Item
Name” field, choose the payroll liability to adjust and in the “Amount” field, enter the amount of the
adjustment. You can either enter a positive number or a negative number, as is appropriate. Click “OK”
when you are done to enter in the adjustment, which will appear as of the “Effective Date” that you entered. Sample
- for
evalu
ation
purp
oses
only!
70 ©TeachUcomp, Inc. Advanced QuickBooks
Payroll
20.13- Entering Liability Refund Checks:
If you overpay your payroll liabilities and taxes, you may receive a refund check which you would
then need to record in QuickBooks to correct your liability balance. To do this, select “Employees| Payroll
Taxes and Liabilities| Deposit Refund of Liabilities” from the Menu Bar.
QuickBooks will open the “Refund Deposit for Taxes and Liabilities” window. In this window, from
the “Vendor” drop-down list, choose the vendor from whom you received the refund check. Then in the
“Refund Date” field, enter the date that you want this refund check to enter your bank account. In the “For
Period Beginning” field, enter the beginning date of the pay period that this refund affects.
Next, indicate whether you want QuickBooks to group this payment with other undeposited funds or
deposit it directly into a bank account. In the “Item Name” column, choose the payroll liability to adjust. In
the “Amount” field, enter the amount of the refund as a positive amount. If the refund is for more than one
payroll item, enter the additional payroll items and their amounts. Just click “OK” when you are finished. If
you overpay your payroll liabilities, your liability balance is then negative. After you record the refund check,
QuickBooks increases the liability for the tax you specified which should correct the liability balance.
20.14- Process Payroll Forms:
You can print out your annual and quarterly federal payroll forms by selecting “Employees| Payroll
Tax Forms & W-2’s| Process Payroll Forms” from the Menu Bar.
At that point, you can then select the “Federal forms” option from the “Select Form Type” dialog box.
Then click “OK” to continue. In the “Select Payroll Form” dialog box, select which document you would like
to create from the list shown and then ensure that you have the correct filing period selected in the “Select
filing period” section. Then click the “OK” button to continue.
Depending upon which form you selected, a specific wizard that will then launch to pose questions
and show you information QuickBooks has collected, just like the Easy Step Interview does. Use the
wizards to enter or verify information that QuickBooks has collected and answer all of the questions on each
screen until you are finished creating the forms.
Sample
- for
evalu
ation
purp
oses
only!
71 ©TeachUcomp, Inc. Advanced QuickBooks
Payroll
20.15- Tracking Workers Compensation:
If you are using QuickBooks and also subscribe to the QuickBooks Enhanced Payroll service, then
you can take advantage of the workers compensation tracking feature to manage tracking workers
compensation hours and make the required payments. You must, however, set up the workers
compensation feature before you run a payroll. If you do not, the information may be inaccurate or
incomplete. Also, this feature must be enabled at the beginning of the insurance policy coverage year in
order to completely track the information in QuickBooks. There is no way to enter “year-to-date” data if
starting in the middle of the insurance coverage year. In that case, you must combine the data in
QuickBooks with any information you have manually tracked in order to get the correct totals for the year.
When you first sign up for the QuickBooks enhanced payroll, the workers compensation feature is
not enabled. You can turn it on by selecting “Edit| Preferences…” from the Menu Bar. This will launch the
“Preferences” dialog box, where you can select the “Payroll & Employees” icon from the scroll box at the left
side. Then click the “Company Preferences” tab. Then click the “Workers Compensation” button. You can
place a checkmark into the “Track Workers Comp” checkbox to enable the feature. You can also check the
“Display message to assign codes” checkbox to enable a classification prompt when entering employee
hours into the “Pay Employees” or time tracking windows. You can also check the “Exclude overtime
premium from Workers Comp calculation” checkbox if your workers compensation insurance company
directs you to treat all overtime hours as if they were paid at the regular wage rate. Once you have set the
desired option, click “OK” to return to the “Preferences” dialog box, where you must click “OK” once again to
set the preferences.
Now you must continue to set up workers compensation tracking by using the Workers
Compensation Setup wizard. To open this wizard, select “Employees| Workers Compensation| Set Up
Workers Comp” from the Menu Bar. The first screen will display information which you will need in order to
complete the wizard, and you can gather that information from your insurance company, if necessary. Then
enter the information into the screens and click “Next” to move through the wizard.
After you have set up the employees and what codes they are assigned by default, you can then
issue paychecks as normal and the workers compensation will be accrued as you issue paychecks. Note
that if you assign a default workers compensation code to an employee, that code will be used by default
when issuing paychecks or entering hours in a timesheet. You can also change the code used for any
earning line item in these windows, if needed. You can view the workers compensation information in the
“Preview Paycheck” window as you review the employee paychecks.
When it comes time to actually pay the workers compensation premiums, you can first run a workers
compensation report by selecting “Reports| Employees & Payroll| Workers Comp Detail” from the Menu
Bar. You can verify the amount to pay and where it came from using this report. Since workers
compensation is tracked as a payroll liability, you can pay the premium using the “Pay Liabilities” window to
create the liability check.
You can also create and modify the codes used for workers compensation classification in the
“Workers Comp List.” You can open this list by selecting “Lists| Workers Comp List” from the Menu Bar
when you have workers compensation tracking enabled. You can set up new codes and enter and edit
experience modification factors used for calculations, if needed.
Sample
- for
evalu
ation
purp
oses
only!
72 ©TeachUcomp, Inc. Advanced QuickBooks
ACTIONS-
Payroll EXPLORING PAYROLL OPTIONS:
1. Select “Employees| Payroll| Turn on Payroll in QuickBooks” from the Menu Bar.
2. Review the various methods of payroll that you can set up in QuickBooks in the window that appears.
TO SET UP PAYROLL:
1. Select “Employees| Payroll Setup” from the Menu Bar.
2. In the wizard that appears, answer the questions posed to you and provide the required information
within each screen.
VIEWING AND CREATING PAYROLL ITEMS:
1. To view the current set of payroll items, select “Lists| Payroll Item List” from the Menu Bar.
2. To add a new payroll item, click the “Payroll Item” button in the lower-left corner of the “Payroll Item
List” and then select the “New” command from the pop-up menu that appears.
3. In the “Add new payroll item” window, answer the questions posed to you on each screen and then click
the “Next” button until you have set up the new item.
4. Click “Finish” when you are done to add the selected item into the “Payroll Item” list.
SETTING EMPLOYEE DEFAULTS:
1. Select “Employees| Employee Center” from the Menu Bar.
2. Click the “Manage Employee Information” button in the toolbar at the top of the “Employee Center”
window and select the “Change New Employee Default Settings” command.
3. In the “Employee Defaults” window that appears, enter any information that you would like to have
appear by default whenever you create a new employee record.
4. You can also set default tax information, or default sick and vacation time information, by clicking either
the “Taxes…” or “Sick/Vacation…” buttons to set default values for those categories in the separate
“Taxes Defaults” and “Sick and Vacation Defaults” dialog boxes.
5. When you have finished setting all of your employee defaults, click the “OK” button to save them.
Sample
- for
evalu
ation
purp
oses
only!

73 ©TeachUcomp, Inc. Advanced QuickBooks
ACTIONS-
Payroll ENTERING EMPLOYEE PAYROLL INFO:
1. Within the “Employees” list in the “Employee Center,” open either the “New Employee” or “Edit
Employee” window.
2. In either the “New Employee” or “Edit Employee” windows, you can enter or edit payroll information by
selecting the “Payroll Info” tab at the left side of either window.
3. On the “Payroll Info” tab, select the payroll schedule for the employee from the “Payroll Schedule” drop-
down menu.
4. Enter the type of pay the employee receives by selecting a compensation “Payroll Item” from the “Item
Name” column within the “Earnings” section.
5. To the right of that selected item, you can then enter the amount of compensation into the
“Hourly/Annual Rate” column.
6. Enter any additions, deductions or company contributions in the “Additions, Deductions & Company
Contributions” section by selecting the name of the desired “Payroll Item” from the “Item Name” column.
7. Then enter the “Amount” for each item entered, as well as the annual “Limit” for each, if needed.
8. If the employee uses time data entered into the “Weekly Timesheet” or the “Time/Enter Single Activity”
windows in order to record their hours worked, then select the “Use time data to create paychecks”
checkbox at the bottom of the tab.
9. If the employee is covered by a qualifying pension plan, check the “Employee is covered by a qualifying
pension plan” checkbox.
10. You can then set the employee’s payroll tax data by clicking the “Taxes…” button to open the “Taxes”
dialog box.
11. Here you enter the employee’s payroll tax withholding information into the “Federal,” “State,” and “Other”
tabs. Note that the “Other” tab is used for any special state or local payroll tax information required.
12. Once you have entered their payroll tax information, click the “OK” button within the “Taxes” dialog box
to return to the “New Employee” or “Edit Employee” window.
13. You can enter the employee’s sick and vacation time by clicking the “Sick/Vacation…” button within the
“Payroll Info” tab to open the “Sick and Vacation” dialog box.
14. In the “Sick” and “Vacation” sections, you can use the “Accrual Period” drop-down to select how the
employee accrues sick and vacation time.
15. You can then enter the number of hours to accrue, the maximum number of hours to accrue, as well as
if and when the number of hours are to be reset by entering the desired values into the fields available.
16. When you have finished entering the sick and vacation information for the employee, click the “OK”
button within the “Sick and Vacation” dialog box to return to the “New Employee” or “Edit Employee”
window.
17. When you are finished setting up the employee’s payroll data, click the “OK” button within either the
“New Employee” or “Edit Employee” windows to close the window and save your changes.
Sample
- for
evalu
ation
purp
oses
only!
74 ©TeachUcomp, Inc. Advanced QuickBooks
ACTIONS-
Payroll CREATING A PAYROLL SCHEDULE:
1. Select “Employees| Add or Edit Payroll Schedules” from the Menu Bar to open the “Payroll Schedule
List.”
2. To create a new payroll schedule, click the “Payroll Schedule” button and then choose the “New”
command.
3. In the “New Payroll Schedule” window that appears, enter a name for the payroll schedule into the
“What do you want to name this payroll schedule?” field.
4. Use the next field’s drop-down to select the frequency with which this payroll will recur.
5. Use the “What is the pay period end date?” calendar selector to select the final date in the pay period.
6. Use the “What date should appear on paychecks for this pay period?” calendar selector to select the
paycheck date for the payroll.
7. If you chose to create a semimonthly or monthly payroll, you may also need to answer a few more date-
related questions in this screen.
8. Once you have entered the payroll schedule information, click the “OK” button.
9. You can then follow the onscreen prompts to assign employees with the same payroll frequency to the
selected payroll schedule.
CREATING SCHEDULED PAYROLL PAYCHECKS:
1. Select “Employees| Pay Employees| Scheduled Payroll” from the Menu Bar or click the “Pay
Employees” button in the Home page to open the “Employee Center: Payroll Center” window.
2. In “Pay Employees” section, select the name of the payroll schedule to pay from the listing shown.
3. Then click the “Start Scheduled Payroll…” button to open the “Enter Payroll Information” window where
you will see the employees assigned to the selected payroll schedule.
4. All employees that you want to pay on this schedule should appear here with a checkmark next to their
names.
5. Ensure that the data shown in the “Payroll Information” section is correct.
6. Review the hours worked and amounts shown for each employee.
7. If you need to make changes to a paycheck, click the hyperlinked name of the employee within this list
whose paycheck you wish to inspect to open their paycheck within a “Preview Paycheck” window.
8. Edit the information and then click the “Save & Close” button to finish.
9. After reviewing the payroll information for accuracy, click the “Continue” button to continue.
10. Review the summary information in the “Review and Create Paychecks” window.
11. In the “Paycheck Options” section, select the option button for “Print paychecks from QuickBooks” to
create the paychecks and print them.
12. If you are recording paychecks that have already been created, you can select the “Assign check
numbers to handwritten checks” option button and then enter the first check number into the “First
Check Number” field.
13. Click the “Create Paychecks” button to create the selected paychecks for the scheduled payroll.
14. Within the “Confirmation and Next Steps” window that appears, you can click the “Print Paychecks”
button to print the paychecks that you just created if you chose to print paychecks in QuickBooks.
15. You can click the “Print Pay Stubs” button to print paystubs for the checks, if needed.
16. When you are done, click the “Close” button.
Sample
- for
evalu
ation
purp
oses
only!
75 ©TeachUcomp, Inc. Advanced QuickBooks
ACTIONS-
Payroll CREATING UNSCHEDULED PAYCHECKS:
1. Select “Employees| Pay Employees| Unscheduled Payroll” from the Menu Bar to open the “Enter Payroll
Information” window.
2. Enter the “Pay Period Ends” and “Check Date” field values.
3. Select the account from which the funds will be withdrawn from the “Bank Account:” drop-down.
4. Place a checkmark next to the names of the employees to pay.
5. Click the “Continue” button to continue creating the paychecks.
6. In the next screen, select whether the check should be printed, or assigned a check number in the
“Paycheck Options” section.
7. Click on the hyperlinked name of any employee shown within the list to open the “Preview Paycheck”
window where you can review and edit the payroll information, if needed.
8. After entering or editing the paycheck details, click the “Save & Close” button.
9. Once you are ready to create the paychecks, click the “Create Paychecks” button.
10. If you are printing the paychecks within QuickBooks, you can then click either the “Print Paychecks” or
“Print Pay Stubs” button, as needed.
11. Click the “Close” button to finish.
CREATING TERMINATION PAYCHECKS:
1. Select “Employees| Pay Employees| Termination Check” from the Menu Bar to open the “Enter Payroll
Information” window.
2. Enter the “Pay Period Ends” and “Check Date” field values.
3. Select the account from which the funds will be withdrawn from the “Bank Account:” drop-down.
4. Place a checkmark next to the names of the employees who need a termination check.
5. To the right of their names, under the “Release Date” column, enter the employee’s release date. This
information will be updated within their employee record when you create the paychecks.
6. When you are ready, click the “Continue” button to continue creating the paychecks.
7. In the next screen, select whether the check should be printed, or assigned a check number in the
“Paycheck Options” section.
8. Click on the hyperlinked name of any employee shown within the list to open the “Preview Paycheck”
window where you can review and edit the payroll information, if needed.
9. After entering or editing the paycheck details, click the “Save & Close” button.
10. Once you are ready to create the paychecks, click the “Create Paychecks” button.
11. If you are printing the paychecks within QuickBooks, you can then click either the “Print Paychecks” or
“Print Pay Stubs” button, as needed.
12. Click the “Close” button to finish.
Sample
- for
evalu
ation
purp
oses
only!
76 ©TeachUcomp, Inc. Advanced QuickBooks
ACTIONS-
Payroll VOIDING PAYCHECKS:
1. Display the paycheck that you want to void within the “Write Checks” window or by using the
appropriate checking account register.
2. With the desired paycheck to void displayed, select “Edit| Void Paycheck” from the Menu Bar.
TRACKING PAYROLL TAX LIABILITIES:
1. You can double-click either the “Payroll Liabilities” or “Payroll Expenses” accounts within the “Chart of
Accounts” window to view either the account register or a QuickReport showing the account balances.
2. You can run a “Payroll Liabilities” report by selecting “Reports| Employees & Payroll| Payroll Liability
Balances” from the Menu Bar.
PAYING PAYROLL TAX LIABILITIES:
1. To pay scheduled payroll liabilities, select “Employees| Payroll Taxes and Liabilities| Pay Scheduled
Liabilities” from the Menu Bar.
2. Check the scheduled payments to make from the listing shown in the “Pay Scheduled Liabilities” section
of the “Employee Center: Payroll Center” window.
3. Click the “View/Pay” button to open the “Liability Check” window where you can review the liability
check or checks to be created.
4. Click the “Save & Close” button to finish and save the checks for printing.
5. To create a custom payroll liabilities payment, select “Employees| Payroll Taxes and Liabilities|
Create Custom Liability Payments” from the Menu Bar.
6. In the window that appears, select the date range of the liabilities to pay.
7. Click the “OK” button to view the “Pay Liabilities” window.
8. In the “Pay Liabilities” window, place a checkmark next to the individual payroll liabilities to pay with the
custom liability payment.
9. If you want to create checks for printing, ensure that the “To be printed” checkbox is selected.
10. Make sure that the option button for “Review liability check to enter expenses/penalties” is selected and
then click the “Create” button to create the “Liability Checks.”
11. Note that this type of check has a special tab at the bottom that indicates exactly which liabilities are
being paid with that check.
12. If you have additional penalties to add, you can to that on the “Expenses” tab.
13. If you do make modifications to the check, click the “Save & Close” button when you are finished to save
changes that you have made.
Sample
- for
evalu
ation
purp
oses
only!
77 ©TeachUcomp, Inc. Advanced QuickBooks
ACTIONS-
Payroll ADJUSTING A PAYROLL LIABILITY:
1. To adjust the liability balance, select “Employees| Payroll Taxes and Liabilities| Adjust Payroll Liabilities”
from the Menu Bar to open the “Liability Adjustment” window.
2. In the “Date” field, enter the date for which you are making the adjustment.
3. In the “Effective Date” field, enter the date that you want this adjustment to affect your liability balances.
4. Choose whether this liability adjustment is for the company or a specific employee.
5. In the “Item Name” field, choose the payroll liability to adjust and in the “Amount” field, enter the amount
of the adjustment. You can either enter a positive number or a negative number, as is appropriate.
6. Click “OK” when you are done to enter the adjustment.
ENTERING A PAYROLL LIABILITY REFUND CHECK:
1. Select “Employees| Payroll Taxes and Liabilities| Deposit Refund of Liabilities” from the Menu Bar.
2. In the “Refund Deposit for Taxes and Liabilities” window, choose the vendor from whom you received
the refund check from the “Vendor” drop-down list.
3. In the “Refund Date” field, enter the date that you want this refund check to enter your bank account.
4. In the “For Period Beginning” field, enter the beginning date of the pay period that this refund affects.
5. Indicate whether you want QuickBooks to group this payment with other undeposited funds or deposit it
directly into a bank account.
6. In the “Item Name” column, choose the payroll liability to adjust.
7. In the “Amount” field, enter the amount of the refund as a positive amount.
8. If the refund is for more than one payroll item, enter the additional payroll items and their amounts.
9. Click “OK” when you are finished.
PROCESSING FEDERAL PAYROLL FORMS:
1. You can print out your annual and quarterly federal payroll forms by selecting “Employees| Payroll Tax
Forms & W-2’s| Process Payroll Forms” from the Menu Bar.
2. Select the “Federal forms” option from the “Select Form Type” dialog box.
3. Click “OK” to continue.
4. In the “Select Payroll Form” dialog box, select which document you would like to create from the list
shown and ensure that you have the correct filing period selected in the “Select filing period” section.
5. Click the “OK” button to continue.
6. Depending upon which form you selected, a specific wizard that will then launch to pose questions and
show you information QuickBooks has collected. Use it to enter or verify information that QuickBooks
has collected and answer all of the questions on each screen until you are finished creating the forms.
Sample
- for
evalu
ation
purp
oses
only!
78 ©TeachUcomp, Inc. Advanced QuickBooks
ACTIONS-
Payroll TRACKING WORKERS COMPENSATION:
1. If you subscribe to the QuickBooks Enhanced Payroll service, you can turn on the workers
compensation feature by selecting “Edit| Preferences…” from the Menu Bar.
2. In the “Preferences” dialog box, select the “Payroll & Employees” icon from the scroll box at the left side.
3. Click the “Company Preferences” tab.
4. Click the “Workers Compensation” button.
5. Place a checkmark into the “Track Workers Comp” checkbox to enable the feature.
6. You can also check the “Display message to assign codes” checkbox to enable a classification prompt
when entering employee hours into the “Pay Employees” or time tracking windows.
7. You can also check the “Exclude overtime premium from Workers Comp calculation” checkbox if your
workers compensation insurance company directs you to treat all overtime hours as if they were paid at
the regular wage rate.
8. Once you have set the desired options, click “OK” to return to the “Preferences” dialog box.
9. Click “OK” once again to set the preferences.
10. Now you must continue to set up workers compensation tracking by using the Workers Compensation
Setup wizard. To open this wizard, select “Employees| Workers Compensation| Set Up Workers Comp”
from the Menu Bar.
11. The first screen will display information which you will need in order to complete the wizard, and you can
gather that information from your insurance company, if necessary.
12. Then enter the information into the screens and click “Next” to move through the wizard.
13. After you have set up the employees and what codes they are assigned by default, you can then issue
paychecks as normal and the workers compensation will be accrued as you issue paychecks.
14. Note that if you assign a default workers compensation code to an employee, that code will be used by
default when issuing paychecks or entering hours in a timesheet. You can also change the code used
for any earning line item in these windows, if needed.
15. You can view the workers compensation information in the “Preview Paycheck” window as you review
the employee paychecks.
16. When it comes time to actually pay the workers compensation premiums, you can first run a workers
compensation report by selecting “Reports| Employees & Payroll| Workers Comp Detail” from the Menu
Bar. You can verify the amount to pay and where it came from using this report.
17. Since workers compensation is tracked as a payroll liability, you pay the premium using the “Pay
Liabilities” window to create the liability check.
18. You can also create and modify the codes used for workers compensation classification in the “Workers
Comp List.” You can open this list by selecting “Lists| Workers Comp List” from the Menu Bar when you
have workers compensation tracking enabled.
19. You can set up new codes and enter and edit experience modification factors used for calculations, if
needed.
Sample
- for
evalu
ation
purp
oses
only!
79 ©TeachUcomp, Inc. Advanced QuickBooks
EXERCISES-
Payroll Purpose:
To be able to pay scheduled employees in QuickBooks.
Exercises:
1. Open QuickBooks.
2. Select “File| Close Company” from the Menu Bar if you have a company file open to get to the “No
Company Open” dialog box.
3. Click the “Open a sample file” button, and select “Sample product-based business” from the drop-
down of choices.
4. Click “OK” on the sample file message box.
5. Select “File| Back Up Company| Create Local Backup” from the Menu Bar.
6. Use the “Create Backup” window to make a local backup of this company file, so that you may
restore the file back to its original condition when you are done using it.
7. After backing up the file, select “Employees| Pay Employees| Scheduled Payroll” from the Menu Bar.
8. Click the “Start Scheduled Payroll…” button in the “Pay Employees” section of the Payroll Center.
9. To accept the default scheduled payroll, simply click the “Continue” button.
10. Ensure that the “Print paychecks from QuickBooks” option button is selected in the “Paycheck
Options” section.
11. Click the “Create Paychecks” button in the lower right corner of the screen.
12. Click the “Close” button at the bottom of the “Confirmation and Next Steps” window.
13. In the “Pay Scheduled Liabilities” section of the Payroll Center note the upcoming payroll liabilities
for the company file.
14. You can close the company file by selecting “File| Close Company” from the Menu Bar.
15. You can close QuickBooks by selecting “File| Exit” from the Menu Bar.
Sample
- for
evalu
ation
purp
oses
only!
80 ©TeachUcomp, Inc. Advanced QuickBooks
CHAPTER 21-
Using Credit Card Accounts
21.1- Creating Credit Card Accounts
21.2- Entering Charges on Credit Cards
21.3- Reconciling and Paying Credit Cards
Sample
- for
evalu
ation
purp
oses
only!
81 ©TeachUcomp, Inc. Advanced QuickBooks
Using Credit Card Accounts
21.1- Creating Credit Card Accounts:
You should set up a QuickBooks credit card account in the Chart of Accounts for each credit card
you use in your business. Like any QuickBooks account, a credit card account has its own register. The
register lists all the charges and credits you’ve recorded, as well a payments you’ve made.
To create a credit card account, open the “Chart of Accounts” window by selecting “Lists| Chart of
Accounts” from the Menu Bar. Then click the “Account” button in the lower left corner of the “Chart of
Accounts” window and select the “New” command from the pop-up menu.
In the “Add New Account: Choose Account Type” window, select the “Credit Card” option button and
then click the “Continue” button to open the “Add New Account” window. Enter the name for the account
into the “Account Name” field. You can assign an account number by entering one into the “Number” field if
account numbering is enabled within your QuickBooks company file. You can then enter the account’s
“Description” and “Credit Card Acct. No.” into the fields within the “Optional” section, if desired. Once you
have added any information you want to record, click the “Save & Close” button to create the account.
21.2- Entering Charges on Credit Cards:
QuickBooks allows you to choose when you enter your credit card charges. You can enter credit
card charges incrementally as you make charges to the credit card, or you can enter all credit card charges
in lump amounts by account once you receive the credit card bill. Your choice depends on whether you
enjoy entering information incrementally or all at once. Also, one advantage to entering the charges
incrementally as you charge items is that you can keep close track of how much you owe. Another
advantage is that if the charge is made for a particular customer:job, you can keep track of how much you
are spending on that job. Another advantage to recording charges as they are incurred is that you can then
reconcile the charges you entered against the credit card bill when it arrives, allowing you to spot errors and
non-authorized charges more easily.
To enter credit card charges incrementally as they are incurred, select “Banking| Enter Credit Card
Charges” from the Menu Bar to display the “Enter Credit Card Charges” window. Within this window, select
the credit card account that was used for the charge from the “Credit Card” drop-down menu at the top of
the window. To the right of that drop-down, ensure that the “Purchase/Charge” option button is selected.
Note that you can also record refunds and credits to a credit card account by selecting the “Refund/Credit”
option button, if needed.
Next, use the “Purchased From” drop-down to select the name of the vendor with whom you made
the purchase. Enter the date of the charge into the “Date” field. You can enter the credit card transaction
number into the “Ref. No.” field. Then enter the amount of the charge into the “Amount” field. If desired, you
can enter a note about the charge into the “Memo” field.
At the bottom of this window, just as in the “Write Checks” window, you will then attribute the amount
charges to the desired expense account or accounts by selecting an account from the “Account” column on
the “Expenses” tab. The total amount will then appear in the adjacent “Amount” column. If the charge is for
a job, you can select the name of the job form the “Customer:Job” column, and set its billing status within
the “Billable?” column. If you need to split the charge amount between multiple expense accounts, change
the “Amount” value shown, and then repeat the process in the next row until you have accounted for the
entire charge amount.
Also note that if you use this window for purchasing “Inventory Part” items, or buying “Services” from
subcontractors, then you will not enter the charge amount within the “Amount” column at the top of the form.
Instead, you will click the “Items” tab at the bottom of the window and then enter the items purchased with
Sample
- for
evalu
ation
purp
oses
only!
82 ©TeachUcomp, Inc. Advanced QuickBooks
Using Credit Card Accounts
21.2- Entering Charges on Credit Cards- (cont’d.):
the credit card charge, including their quantities and amounts. The sum value of the items purchased will
then constitute the total amount of the charge entered into the “Amount” field above.
Once you have entered the credit card charge information, you can click the “Save & Close” button
to save the transaction and close the window. After you have input the charge, QuickBooks adds the charge
amount to the credit card account’s register, increasing the total account liability by the charge amount. It
will add the same amount to the appropriate expense account once the bill for the credit card is entered or
paid.
21.3- Reconciling and Paying Credit Cards:
If you enter credit card charges incrementally, you can reconcile the entries that have been made
against the bill when it arrives. This can be helpful in preventing unauthorized charges on the card.
Reconciling a credit card account is almost identical to reconciling a bank account.
To reconcile a credit card account, open the chart of accounts and click the credit card account that
you want to reconcile to select it. From there, you will click the “Activities” button in the lower left corner of
the chart of accounts and select “Reconcile Credit Card” from the pop-up menu that appears.
That will display the “Begin Reconciliation” dialog box. Here you will input the statement date from
your credit card statement, the ending balance from your statement, any finance charges you accrued, the
date, and the account that you use to track those charges. Then click “Continue” at the bottom of the “Begin
Reconciliation” dialog box to display the “Reconcile Credit Card” window for the selected account.
In this window, you will see all of the transactions that haven’t cleared. You’ll use this window to
check off the transactions listed on your credit card statement. Click on each transaction to place a check
mark in front of each transaction that matches your credit card statement to mark it as cleared. When you
are done the “Difference” (in the lower right corner), should be zero. Click “Reconcile Now” to reconcile the
account, and to select the options for the report that you’d like to have generated.
Once you’ve reconciled your credit card account, QuickBooks gives you a chance to pay all or part
of the balance due by taking you immediately to either the “Write Checks” or “Enter Bills” window depending
on which option you select in the dialog box that appears. The bill or check will already be set to the credit
card account. The amount due for your credit card will also be entered already. You just have to select the
name of the company to whom you pay the balance and then print the check or save the bill.
Sample
- for
evalu
ation
purp
oses
only!
83 ©TeachUcomp, Inc. Advanced QuickBooks
ACTIONS-
Using Credit Card Accounts CREATING A CREDIT CARD ACCOUNT:
1. Open the “Chart of Accounts” window by selecting “Lists| Chart of Accounts” from the Menu Bar.
2. Click the “Account” button in the lower left corner of the “Chart of Accounts” window and select the
“New” command from the pop-up menu.
3. In the “Add New Account: Choose Account Type” window, select the “Credit Card” option button and
then click the “Continue” button to open the “Add New Account” window.
4. Enter the name for the account into the “Account Name” field.
5. You can assign an account number by entering one into the “Number” field if account numbering is
enabled within your QuickBooks company file.
6. You can then enter the account’s “Description” and “Credit Card Acct. No.” into the fields within the
“Optional” section, if desired.
7. Once you have added any information you want to record, click the “Save & Close” button to create the
account.
ENTERING CREDIT CARD CHARGES:
1. Select “Banking| Enter Credit Card Charges” from the Menu Bar to display the “Enter Credit Card
Charges” window.
2. Select the credit card account that was used for the charge from the “Credit Card” drop-down menu at
the top of the window.
3. To the right of that drop-down, ensure that the “Purchase/Charge” option button is selected. Note that
you can also record refunds and credits to a credit card account by selecting the “Refund/Credit” option
button, if needed.
4. Use the “Purchased From” drop-down to select the name of the vendor with whom you made the
purchase.
5. Enter the date of the charge into the “Date” field.
6. Enter the credit card transaction number into the “Ref. No.” field.
7. Enter the amount of the charge into the “Amount” field.
8. If desired, you can enter a note about the charge into the “Memo” field.
9. At the bottom of this window, attribute the amount charges to the desired expense account or accounts
by selecting an account from the “Account” column on the “Expenses” tab. The total amount will then
appear in the adjacent “Amount” column.
10. If the charge is for a job, you can select the name of the job form the “Customer:Job” column, and set its
billing status within the “Billable?” column.
11. If you need to split the charge amount between multiple expense accounts, change the “Amount” value
shown, and then repeat the process in the next row until you have accounted for the entire charge
amount.
12. If you use this window for purchasing “Inventory Part” items, or buying “Services” from subcontractors,
then you will not enter the charge amount within the “Amount” column at the top of the form. Instead,
you will click the “Items” tab at the bottom of the window and then enter the items purchased with the
credit card charge, including their quantities and amounts. The sum value of the items purchased will
then constitute the total amount of the charge entered into the “Amount” field above.
13. Once you have entered the credit card charge information, you can click the “Save & Close” button to
save the transaction and close the window. Sample
- for
evalu
ation
purp
oses
only!
84 ©TeachUcomp, Inc. Advanced QuickBooks
ACTIONS-
Using Credit Card Accounts RECONCILING A CREDIT CARD ACCOUNT:
1. After receiving the bill for the credit card account, select “Banking| Reconcile” from the Menu Bar.
2. In the “Begin Reconciliation” window, select the credit card account to reconcile with the bill you have
received by choosing it from the “Account” drop-down.
3. Enter the statement date of the credit card bill into the “Statement Date” field.
4. Enter the ending balance due from your credit card bill into the “Ending Balance” field.
5. If there are any finance charges for the credit card, enter the amount and date of the charges into the
“Finance Charge” and “Date” fields. Then use the adjacent “Account” drop-down to select the expense
account used to track finance charge amounts.
6. Click the “Continue” button to continue to the “Reconcile Credit Card” window.
7. Compare the transactions listed within the credit card bill to the uncleared transactions shown within the
“Charges and Cash Advances” section and the Payments and Credits” section. For each transaction
listed within these sections that is also found within the credit card bill, click into the leftmost
“Checkmark” column to mark the transaction as “cleared.” QuickBooks should place a checkmark to the
left of each transaction you select.
8. Assuming that there is no discrepancies between the bill and you r recorded transactions, the
“Difference” shown in the lower right corner should be zero when you have finished marking all of the
cleared transactions. If any amount is shown, try to find the error. Perhaps a charge was not entered
that should have been, or possibly there are unauthorized charges within the credit card bill. Find and
correct any errors until the “Difference” shown is zero.
9. Click the “Reconcile Now” button to display the “Select Reconciliation Report” dialog box.
10. Make sure that the “Detail” button is selected, and the click the Display” button to view the report.
11. Click “OK” at the message that QuickBooks displays.
12. After you have finished reconciling your credit card account, QuickBooks asks if you would like to enter
a bill or write a check for the balance due. Select the option button for the choice that you prefer: “Write
a check for payment now” or “Enter a bill for payment later.”
13. Click the “OK” button after making your selection.
14. Select the name of the company to pay for the credit card amount from the “Pay to the Order of” field in
the “Write Checks” window or the “Vendor” field in the “Enter Bills” window.
15. Click the “Save & Close” button to save the transaction.
Sample
- for
evalu
ation
purp
oses
only!
85 ©TeachUcomp, Inc. Advanced QuickBooks
EXERCISES-
Using Credit Card Accounts Purpose:
To be able to enter credit card charges.
Exercises:
1. Open QuickBooks.
2. Select “File| Close Company” from the Menu Bar if you have a company file open to get to the “No
Company Open” dialog box.
3. Click the “Open a sample file” button, and select “Sample product-based business” from the drop-
down of choices.
4. Click “OK” on the sample file message box.
5. Select “File| Back Up Company| Create Local Backup” from the Menu Bar.
6. Use the “Create Backup” window to make a local backup of this company file, so that you may
restore the file back to its original condition when you are done using it.
7. After backing up the file, select “Banking| Enter Credit Card Charges” from the Menu Bar.
8. Within the “Enter Credit Card Charges” window, use the “Credit Card” drop-down at the top of the
window to select the “CalOil Credit Card.”
9. In the “Purchased From” field, enter “Bayshore CalOil Service.”
10. In the “Amount” field, type “54.”
11. In the “Expenses” tab, ensure the account pre-fill of “60100 - Automobile:60110 - Fuel” is shown.
12. Click the “Save & Close” button to save the charge.
13. Select “Banking| Reconcile…” from the Menu Bar.
14. In the “Begin Reconciliation” screen, select “20600 - CalOil Card” from the “Account” drop-down.
15. For the “Statement Date,” type “01/14/18.”
16. For the “Ending Balance” type “436.62.”
17. Click the “Continue” button to continue and open the “Reconcile Credit Card” window
18. Click the “Mark All” button to mark all transactions as being cleared. The “Difference” amount shown
in the lower right corner of the window should be zero.
19. Click the “Reconcile Now” button.
20. Select the “Write a check for payment now” option button within the “Make Payment” dialog box.
21. Click the “OK” button to continue.
22. In the “Select Reconciliation Report” dialog box, choose the “Detail” option button and then click the
“Display” button.
23. Click the “OK” button within the “Reconciliation Report” dialog box to close it.
24. Click the “X” in the upper right corner of the “Reconciliation Detail” report to close it.
25. In the “Write Checks” window, use the “Pay to the Order of” drop-down field to select the “CalOil
Company.”
26. Click the “Save & Close” button within the “Write Checks” window.
27. You can close the company file by selecting “File| Close Company” from the Menu Bar.
28. You can close QuickBooks by selecting “File| Exit” from the Menu Bar.
Sample
- for
evalu
ation
purp
oses
only!

86 ©TeachUcomp, Inc. Advanced QuickBooks
CHAPTER 22-
Assets and Liabilities
22.1- Assets and Liabilities
22.2- Creating and Using Other Current Asset Accounts
22.3- Removing Value from Other Current Asset Accounts
22.4- Creating Fixed Asset Accounts
22.5- Creating Liability Accounts
22.6- Setting the Original Cost of the Fixed Asset
22.7- Tracking Depreciation
22.8- The Loan Manager
22.9- The Fixed Asset Item List
Sample
- for
evalu
ation
purp
oses
only!
87 ©TeachUcomp, Inc. Advanced QuickBooks
Assets and Liabilities
22.1- Assets and Liabilities:
QuickBooks has two account types for tracking the value of your short-term and long-term assets.
The Other Current Asset account tracks assets that are likely to be converted into cash, or used up, within
one year. Examples of “Other Current Asset” accounts include prepaid expenses and short-term notes
receivable. A Fixed Asset account tracks assets your business owns that are NOT likely to be converted
into cash or used up within a year. “Fixed Asset” accounts track the value of long-lived assets with a larger
value that assist you in performing your business. The value of these items are expensed over the “useful
life” of the asset, which will vary. Example include furniture, some office equipment, computers, and
vehicles.
QuickBooks also has two account types that track long-term and short-term liabilities. The Other
Current Liability account tracks liabilities that your company expects to pay within a year. An example
would be a short-term loan. A Long-Term Liability account tracks debt that your business is not likely to
pay off within a year. For example, when making a major purchase for your company, such as when
purchasing a vehicle, you will often take out a long-term loan. The long-term loan taken out in order to
purchase equipment is an example of a long-term liability.
As when creating any account in QuickBooks, you create all of your asset and liability accounts
within the “Chart of Accounts” window, which you can access by selecting “Lists| Chart of Accounts” from
the Menu Bar. Then click the “Account” button in the lower left corner of the window and choose the “New”
command from the pop-up menu to open the “New Account: Choose Account Type” window.
In this window, you can then select the option button for the type of account to create. Note that for
many asset and liability accounts, you may need to select the “Other Account Types” drop-down button and
then select the type of account to create from the adjacent drop-down menu. Once you have made your
choice, you can then click the “Continue” button to open the “Add Account” window.
Here you enter the “Name” and “Number” for the account into the fields of the same name shown.
Note that account numbering must be enabled within your QuickBooks company file in order to view the
“Number” field. Then enter any additional account information within the “Optional” section shown. When
you are finished, click either the “Save & Close” or “Save & New” buttons to save the account. If you choose
the “Save & New” choice, be sure to change the account type, if needed, by using the “Type” drop-down at
the top of the window to select your account type before creating the next new account.
22.2- Creating and Using Other Current Asset Accounts:
The “Other Current Asset” account type tracks assets that your company expects to use up or
convert into cash in the next year. Other current assets might include short-term notes receivable, or
prepaid expenses. Your inventory account is an example of an other current asset.
Let’s take a “Prepaid Rent” other current asset account as an example. Assume that you have
signed an agreement to lease a new office space for $1,000 per month. Also assume that you needed to
make a prepayment of 6 months worth of rent before you could move into the new office space. If you are
using the accrual accounting method, then you must attribute expense to the period it is incurred, not when
you actually pay it. So, you would NOT want to simply write a check for the next 6 months worth of rent and
then attribute the entire amount to the “Rent Expense” account for the month in which you wrote the check,
as that will not accurately reflect when the rent expense is actually incurred. Instead, you can use the other
current asset account of “Prepaid Rent” to help you show the rent expense as it is actually incurred.
To do this, you simply open the “Write Checks” window when the first payment is due by selecting
“Banking| Write Checks” from the Menu Bar. Then enter the amount of the payment (6,000) and select the
Sample
- for
evalu
ation
purp
oses
only!
88 ©TeachUcomp, Inc. Advanced QuickBooks
Assets and Liabilities
22.2- Creating and Using Other Current Asset Accounts- (cont’d.):
landlord for the vendor. On the “Expenses” tab, you can then select the “Prepaid Rent” other current asset
account. In the amount column, enter 5,000 for the account. This shows that $5,000 of the $6,000 payment
is being traded to another asset account for the prepayment of the rent. Then click into the next row on the
“Expenses” tab and select the “Rent Expense” account. QuickBooks should then attribute the remaining
1,000 to the account for the first month of rent as it is being incurred. For the next five months after this, you
will not write a check for the rent, but rather create a “General Journal Entry” that decreases the amount in
the “Prepaid Rent” other current asset account by $1,000 and increases the amount of the “Rent Expense”
account by $1,000 to show the other current asset being “used up” and to show the rent expense being
incurred in the correct accounting period.
22.3- Removing Value from Other Current Asset Accounts:
In this lesson, you will learn how to enter a “General Journal Entry” to decrease the value of an other
current asset account. Let’s use the example from the last lesson of the “Prepaid Rent” other current asset
account into which five months of prepaid rent was placed. As you later incur your monthly rent expense of
$1,000 per month over the next five months, you will use up part of the prepaid rent expense and enter
each change to the value of that account either through the “General Journal Entry” window or by making
an entry directly into the register for that account. So for each of the following five months, decrease the
amount of the rent as it is actually incurred from the “Prepaid Rent” other current asset account and assign
the value of the rent to the “Rent” expense account.
To enter a “General Journal Entry” select “Company| Make General Journal Entries…” from the
Menu Bar to open the “General Journal Entry” window. In this window, enter the date of the entry into the
“Date” field. Then enter a reference number for the entry into the “Entry No.” field. Then click into the first
row under the “Account” column and select the “Rent Expense” account. Then enter 1,000 into the adjacent
“Debit” column within that row to show the increase to the selected rent expense account. Then click into
the “Account” column in the next blank row and select the “Prepaid Rent” other current asset account.
QuickBooks should automatically attribute 1,000 to the “Credit” column, decreasing its value. If not, click
into the “Credit” column and then enter 1,000. When you are finished making the entry, click the “Save &
Close” button.
Alternately, you can create a “General Journal Entry” within the associated account register by
simply recording the increase or decrease to the selected account’s value. The advantage to this method is
that you will not need to worry about the “Credit” and “Debit” rules for the account types, as long as you
know which account should be increasing or decreasing. So using the example above, another way to
create this entry is to open the “Chart of Accounts” window by selecting “Lists| Chart of Accounts” from the
Menu Bar. Within the “Chart of Accounts” window, you can then double-click the “Prepaid Rent” account
shown in order to open its account register. Within the account register window, click into the next blank
transaction row. Enter the date of the transaction into the “Date” field. Then enter a reference code into the
“Ref” field. Then click into the “Decrease” column and enter “1,000.” You can then select the “Rent
Expense” account from the “Account” drop-down within the transaction row. You can then click the “Record”
button at the bottom of the transaction window to record the transaction. Note that QuickBooks enters the
term “GENJRN” into the “Type” field so that you can see that this is simply another way to record a general
journal entry.
Sample
- for
evalu
ation
purp
oses
only!

89 ©TeachUcomp, Inc. Advanced QuickBooks
Assets and Liabilities
22.4- Creating Fixed Asset Accounts:
A “Fixed Asset” account tracks assets that your business owns that are NOT likely to be converted
into cash within a year. A fixed asset is usually something of significant value that is necessary for the
operation of your business, like vehicles, computers, furniture and some office equipment. Many times the
purchase of a fixed asset will also incur a long-term liability, such the example of acquiring an auto loan to
purchase a new vehicle.
Fixed assets are not for immediate sale, but they do have a value. Since they are useful for a long
time, you don’t completely charge their entire cost to the year in which you purchased them. Instead, you
spread their cost over several years (called the “useful life” of the asset). However, because fixed assets
wear out or become obsolete (like computers), their value declines constantly from the day you purchase
them. When the value of fixed assets decline over a period, the amount of value that is lost is called
depreciation. The total amount of this decline over a period of time is called accumulated depreciation.
We will now examine one method for creating fixed asset accounts, noting their original value, and
also recording their accumulated depreciation. There are many ways to track fixed asset value and
depreciation and this is just one suggested method. This method works well to show the original cost, the
accumulated depreciation, and the current book value for a single fixed asset on separate lines within the
Balance Sheet for clarity of reporting. However if you are currently tracking your asset depreciation in other
ways, you can rest assured that you can continue using your own method.
When you refer to the value of a fixed asset at any point in time you are referring to its “book value.”
This is determined by subtracting its accumulated depreciation, which is the total amount of depreciation
that has occurred since the asset’s original purchase date, from its original cost.
Usually, you will want your company’s Balance Sheet to show the original cost of an asset on one
line with the accumulated depreciation subtracted from the original cost on a second line, and the current,
or “book,” value on a third line. The method you will learn in this lesson allows you to see each asset’s cost
and its accumulated depreciation separately on your balance sheet.
In order to do this, you need to create a primary fixed asset account for each asset and then create
two subaccounts under each primary fixed asset account: one for the “original cost” and one for the
“accumulated depreciation.”
First, create a new primary “Fixed Asset” account for the fixed asset. Leave the “Opening Balance”
field blank if you are purchasing the asset after your company file’s “start date,” as that value will be
determined by the two subaccounts (“original cost” and “accumulated depreciation”) that you will need to
create to track its book value.
Next, create the two “Fixed Asset” subaccounts- one for the asset’s original cost and one for the
asset’s accumulated depreciation. These two subaccounts should also be of the “Fixed Asset” account
type. When creating these accounts, ensure you click the checkbox for “Subaccount of” within the “New
Account” window and select the correct primary fixed asset account for which these subaccounts will track
the original cost and depreciation.
When creating the “Original Cost” subaccount for assets purchased BEFORE your company file’s
“start date,” enter the “Opening Balance” as the original cost of the asset. For assets purchased AFTER the
“start date,” leave the “Opening Balance” field blank as the value of the asset will come from the value of the
transactions you still need to enter, such as a loan to repay or checks to write to purchase the fixed asset.
When creating the “Accumulated Depreciation” subaccount, the amount you enter as the “Opening
Balance” also depends on whether you acquired the asset after or before your company file’s “start date.” If
you acquired the asset AFTER the “start date,” leave the “opening balance” field blank. If you acquired the
asset BEFORE your “start date,” enter the accumulated depreciation of the asset as of the start date as a
negative number. Sample
- for
evalu
ation
purp
oses
only!

90 ©TeachUcomp, Inc. Advanced QuickBooks
Assets and Liabilities
22.6- Setting the Original Cost of the Fixed Asset:
When purchasing a fixed asset, attribute any amounts spent or borrowed to buy the fixed asset
directly to the “Original Cost” subaccount. For example, if you took out a loan to buy a fixed asset, assign
the value of the loan to the “Original Cost” subaccount for the fixed asset when entering the original amount
of the loan into the associated long-term liability account register.
22.5- Creating Liability Accounts:
You can create liability accounts to track amounts you need to pay to someone else. If the liability is
to be paid off within the year, it is an “Other Current Liability.” If you have a line of credit, that would be an
example of an other current liability.
You can also create “Long Term Liability” accounts for amounts you expect to pay off in a period
greater than a year. For example, when you purchase a fixed asset like a vehicle, you typically incur a long
term liability like an auto loan.
When you make payments on the liabilities, note that the amount due will often be attributed partially
to the liability account, reducing the amount owed, and partially to interest expense. If you make the loan
payments within the “Write Checks” window by hand, be sure to record the correct amounts on the
“Expenses” tab using the associated amortization table for the loan. That way you will know how much of
each payment made will reduce the amount owed, and how much is interest expense. You can also make
use of the “Loan Manager” within QuickBooks to assist you in creating loan payments if you know the terms
of the loan.
22.7- Tracking Depreciation:
Your accountant should provide you with the amounts to enter for depreciation on your fixed assets.
They should at least double-check your depreciation entries. When you have those amounts, you can enter
them into the “Decrease” column of the “Accumulated Depreciation” subaccount’s register you created for
the fixed asset. The amount will then be attributed to an expense account like “Depreciation Expense.” The
“Accumulated Depreciation” subaccount will always have a negative balance, as it tracks the loss of value
to the fixed asset which is its parent account.
Sample
- for
evalu
ation
purp
oses
only!
91 ©TeachUcomp, Inc. Advanced QuickBooks
Assets and Liabilities
22.8- The Loan Manager:
Assuming you have all of the relevant information about your loan, you can enter the loan into the
Loan Manager to set up a payment schedule. Using the Loan Manager allows you to manage all of the
loans that you have to pay from a single screen.
To add a loan to the Loan Manager, select “Banking| Loan Manager” from the Menu Bar. This will
launch the “Loan Manager” window where you can click the “Add a Loan…” button. In the “Add a Loan”
window, select the name of the liability account that you want to add from the “Account Name” drop-down.
The balance of the account will be shown as the “Current Balance.” Use the “Lender” drop-down to select
the name of the bank who lent you the money. Then enter the “Origination Date” of the loan. This is the date
used to calculate the loan maturity date and the number of remaining payments. Enter the original amount
of the loan into the “Original Amount” field. In the “Term” section enter the terms of the loan by typing a
number and selecting the time increments from the drop-down. Then click “Next” to continue.
On the next screen, enter the due date of the next payment in the box provided. In the “Payment
Amount” field, enter the total amount of the loan payment. Then enter the “Next Payment Number,” if
desired. In the “Payment Period” drop-down, select the type of payments that you make. If the loan has an
escrow payment, select the “Yes” option button for that question and then enter the escrow amount and the
asset account used to track escrow payments. You can also leave a check in the “Alert me 10 days before a
payment is due” checkbox to have that feature applied. Then click “Next” to continue.
On the next screen, enter the interest rate here as a percentage into the “Interest Rate” text box. In
the “Compounding Period” drop-down select the type of compounding used for the loan: “Monthly,” or
“Exact Days.” If you select “Exact Days,” then select whether the lender is using a 360 or 365 day year for
their calculations from the “Compute Period” drop-down. Select the bank account from which you make the
payments in the “Payment Account” drop-down. Then use the “Interest Expense Account” to select the
expense account that you use to track loan interest payments. Use the “Fees/Charges Expense Account” to
select the expense account used to record the amounts assessed for late payments and other penalties.
When you are finished, click the “Finish” button. The loan will be added into the “Loan List” in the “Loan
Manager” window. You can click it to select it and then click the three tabs below it to view the “Summary” of
the loan, the “Payment Schedule,” or the “Contact Info” for the lender.
To set up a payment for a loan listed in the “Loan List,” select the loan in the list and then click the
“Set Up Payment…” button. This will launch the “Set Up Payment” dialog box where you first use the “This
payment is:” drop-down to select either “A regular payment,” or “An extra payment.” Double-check the
payment information to ensure that the amounts listed are correct. Then use the drop-down in the “Payment
Method” section to select the method of payment you wish to use. Click “OK” to view the loan payment as
either a check to pay now or bill that you can pay later, depending on your choice made from the drop-down
in the “Payment Method” section.
If you need to edit a loan, select the loan name in the “Loan List” section of the “Loan Manager”
window, and then click the “Edit Loan Details…” button. This will launch you through the same wizard that
you used to create the loan, allowing you to change any information as needed. To delete a loan from the
“Loan Manager,” select the name of the loan in the “Loan List” and then click the “Remove Loan…” button.
Click “Yes” in the confirmation dialog box to remove the selected loan.
In the “Loan Manager” window you can also click the “What If Scenarios…” button to launch the
“What If Scenarios” dialog box. You can use the drop-down at the top of this dialog box to answer
hypothetical questions about your loans, such as “What if I change my interest rate?” You can select a
question you wish to investigate further and enter in any requested information in the area below. This can
be a very useful tool to compare loans and make sure that you aren’t paying too much for the money you
have borrowed. Sample
- for
evalu
ation
purp
oses
only!
92 ©TeachUcomp, Inc. Advanced QuickBooks
Assets and Liabilities
22.9- The Fixed Asset Item List:
You can use the Fixed Asset Item List to track your individual fixed assets. You can use this list to
enter information about the purchase price of an asset, its purchase date, and whether the asset was new
or used at purchase. You can also enter the asset’s sale price if you decide to sell the asset at a later point
in time.
To open this list, select “Lists| Fixed Asset Item List” from the Menu Bar. To add a fixed asset item,
click the “Item” button in the lower left corner of the list and select “New” from the pop-up menu. That will
launch the “New Item” window. Enter the asset information that you wish in this screen and click “OK” when
you are finished. Note that there are custom fields available for your fixed asset list. You can create up to
five custom fields, just as you would create custom fields within the “Item List.” However, you must be in
single-user mode to do this.
Sample
- for
evalu
ation
purp
oses
only!
93 ©TeachUcomp, Inc. Advanced QuickBooks
ACTIONS-
Assets and Liabilities CREATING ASSET AND LIABILITY ACCOUNTS:
1. Display the chart of accounts by selecting “Lists| Chart of Accounts” from the Menu Bar.
2. Click the “Account” button in the lower left corner of the chart of accounts window and select “New” from
the pop-up menu that appears.
3. In the “New Account: Choose Account Type” window, select the option button that corresponds to the
type of account that you want to create. Note that for many of the asset and liability account types, you
may need to select the “Other Account Type” option button and then select the type of account to create
from the adjacent drop-down menu.
4. Then click the “Continue” button to continue to the “Add Account” window.
5. In the “Name” field, type a name for the account.
6. You can enter an account number into the “Number” field if you have enabled account numbering within
your company file.
7. If the account is to be the subaccount of another primary account you have created, check the
“Subaccount of” checkbox and then select the name of its primary account from the adjacent drop-down.
8. Enter any optional account information into the “Optional” section.
9. You can click the “Save & Close” button to create the account and close the window or you can click the
“Save & New” button to save the account but leave the “Add Account” window open. If you choose the
“Save & New” choice, be sure to change the account type, if needed, by using the “Type” drop-down at
the top of the window to select your account type before creating the next new account.
USING ACCOUNT REGISTERS TO CREATE GENERAL JOURNAL ENTRIES:
1. Display the chart of accounts by selecting “Lists| Chart of Accounts” from the Menu Bar.
2. Double-click on the desired balance sheet account (Asset or Liability) to open its account register.
3. In the next blank transaction row within the account register window, enter the date of the transaction
into the “Date” field.
4. Enter a reference number into the “Ref” field.
5. Then click into either the “Increase” or “Decrease” column and enter the amount of the transaction.
6. Select the other account that this transaction will affect from the “Account” drop-down within the
transaction row.
7. Click the “Record” button at the bottom of the transaction window to record the transaction.
CREATING A GENERAL JOURNAL ENTRY FOR TWO ACCOUNTS:
1. Select “Company| Make General Journal Entries…” from the Menu Bar to open the “General Journal
Entry” window.
2. Enter the date of the entry into the “Date” field.
3. Enter a reference number for the entry into the “Entry No.” field.
4. Then click into the first row under the “Account” column and select the account to debit.
5. Enter the amount to debit the selected account into the adjacent “Debit” column within that row.
6. Click into the “Account” column in the next blank row and select the account to credit.
7. QuickBooks should automatically attribute the balancing amount to the “Credit” column. If not, click into
the “Credit” column and then enter the balancing amount.
8. When you are finished making the entry, click the “Save & Close” button. Sample
- for
evalu
ation
purp
oses
only!

94 ©TeachUcomp, Inc. Advanced QuickBooks
ACTIONS-
Assets and Liabilities ADDING A LOAN TO THE LOAN MANAGER:
1. Select “Banking| Loan Manager” from the Menu Bar.
2. Click the “Add a Loan…” button.
3. Select the name of the liability account that you want to add from the “Account Name” drop-down.
4. Use the “Lender” drop-down to select the name of the bank who lent you the money.
5. Enter the “Origination Date” of the loan.
6. Enter the original amount of the loan into the “Original Amount” field.
7. In the “Term” section, enter the terms of the loan by typing a number and selecting the time increments
from the drop-down.
8. Click “Next” to continue.
9. Enter the due date of the next payment in the box provided.
10. In the “Payment Amount” field, enter the total amount of the loan payment.
11. Enter the “Next Payment Number,” if desired.
12. In the “Payment Period” drop-down, select the type of payments that you make.
13. If the loan has an escrow payment, select the “Yes” option button for that question and then enter the
escrow amount and the asset account used to track escrow payments.
14. Check the “Alert me 10 days before a payment is due” checkbox to have that feature applied.
15. Click “Next” to continue.
16. Enter the interest rate here as a percentage into the “Interest Rate” text box.
17. In the “Compounding Period” drop-down select the type of compounding used for the loan: “Monthly,” or
“Exact Days.” If you select “Exact Days,” then select whether the lender is using a 360 or 365 day year
for their calculations from the “Compute Period” drop-down.
18. Select the bank account from which you make the payments in the “Payment Account” drop-down.
19. Use the “Interest Expense Account” drop-down to select the expense account you use to track loan
interest payments.
20. Use the “Fees/Charges Expense Account” drop-down to select the expense account used to record the
amounts assessed for late payments and other penalties.
21. When you are finished, click the “Finish” button.
EDITING A LOAN IN THE LOAN MANAGER:
1. Select the loan name in the “Loan List” section of the “Loan Manager” window.
2. Click the “Edit Loan Details…” button.
3. This will launch you through the same wizard that you used to create the loan, allowing you to change
any information needed.
DELETING A LOAN IN THE LOAN MANAGER:
1. Select the name of the loan in the “Loan List” and then click the “Remove Loan…” button.
2. Click “Yes” in the confirmation dialog box to remove the selected loan.
Sample
- for
evalu
ation
purp
oses
only!

95 ©TeachUcomp, Inc. Advanced QuickBooks
ACTIONS-
Assets and Liabilities
ADDING FIXED ASSET ITEMS TO THE FIXED ASSET ITEMS LIST:
1. Select “Lists| Fixed Asset Item List” from the Menu Bar.
2. Click the “Item” button in the lower left corner of the list and select “New” from the pop-up menu.
3. In the “Asset Name/Number” field, type the name or number of the asset.
4. Use the “Asset Account” drop-down to select the asset account used to track the value of the asset.
5. In the “Purchase Information” section, set whether the item is “New” or “Used.”
6. You can type a purchase description into the next text box.
7. Set the purchase date in the “Date” field.
8. Enter the “Cost” of the item in that field.
9. Enter the name of the “Payee/Vendor” in the field provided.
10. Fill-in any optional information you want to track in the “Asset Information” section.
11. When you sell the asset, you can edit the item and fill-in the sales information when it is sold.
12. Click “OK” when you are finished.
RUNNING “WHAT IF” SCENARIOS IN THE LOAN MANAGER:
1. Click the “What If Scenarios…” button to launch the “What If Scenarios” dialog box.
2. Use the drop-down at the top of this dialog box to select a hypothetical question to answer.
3. Enter any requested information in the area below.
4. Click “Close” when you are finished.
Sample
- for
evalu
ation
purp
oses
only!

96 ©TeachUcomp, Inc. Advanced QuickBooks
EXERCISES-
Assets and Liabilities Purpose:
To create and use fixed asset and long term liability accounts and add a loan to the “Loan Manager.”
Exercises:
1. Open QuickBooks.
2. Select “File| Close Company” from the Menu Bar if you have a company file open to get to the “No
Company Open” dialog box.
3. Click the “Open a sample file” button, and select “Sample product-based business” from the drop-
down of choices.
4. Click “OK” on the sample file message box.
5. Select “File| Back Up Company| Create Local Backup” from the Menu Bar.
6. Use the “Create Backup” window to make a local backup of this company file, so that you may
restore the file back to its original condition when you are done using it.
7. After backing up the file, select “Lists| Chart of Accounts” from the Menu Bar.
8. Click the “Account” button in the lower left corner of the “Chart of Accounts” window and then select
the “New” command from the pop-up menu.
9. Within the “Add Account” Choose Account Type” window, select the “Fixed Asset (major
purchases)” option button and then click the “Continue” button to open the “Add Account” window.
10. Type “New Car” into the “Account Name” field.
11. Click the “Save & New” button.
12. Ensure the “Type” drop-down is still set to “Fixed Asset.”
13. Type “Original Cost” into the “Account Name” field.
14. Click the “Subaccount of” checkbox and then use the adjacent drop-down to select “New Car.”
15. Click the “Save & New” button.
16. Type “Accumulated Depreciation” into the “Account Name” field.
17. Click the “Subaccount of” checkbox and then use the adjacent drop-down to select “New Car.”
18. Click the “Save & New” button.
19. Use the “Type” drop-down at the top of the “Add Account” window to select “Long Term Liability.”
20. Type “New Car Loan.”
21. Click the “Save & Close” button.
22. Double-click on the “Original Cost” subaccount of the “New Car” fixed asset account in order to open
its account register in a new window.
23. Select “East Bayshore Auto Mall” from the “Payee” drop-down menu.
24. Enter “35000” into the “Increase” column.
25. Select the “New Car Loan” long term liability account from the “Account” drop-down.
26. Click the “Record” button to record the general journal entry through the account register.
27. Click the “X” in the upper-right corner of the “New Car:Original Cost” account register window to
close it.
28. Inspect the changes to the balances shown within the selected accounts in the “Chart of Accounts.”
29. Click the “X” in the upper-right corner of the “Chart of Accounts” window to close it.
30. Select “Banking| Loan Manger” from the Menu Bar to open the “Loan Manager” window.
31. Click the “Add a Loan…” button to open the “Add Loan” window.
32. Use the “Account Name” drop-down to select “New Car Loan.”
(cont’d.) Sample
- for
evalu
ation
purp
oses
only!
97 ©TeachUcomp, Inc. Advanced QuickBooks
EXERCISES-
Assets and Liabilities Exercises- (Cont’d.):
33. Use the “Lender” drop-down to select “Great Statewide Bank.”
34. Use the “Origination Date” calendar selector to choose “12/15/2017.”
35. Enter “35000” into the “Original Amount” field.
36. Enter “72” into the “Term” field and ensure that the adjacent drop-down is set to “Months.”
37. Click the “Next” button to continue.
38. Enter “1/15/2018” into the “Doe Date of Next Payment” field.
39. Enter “614.85” into the “Payment Amount” field.
40. Click the “Next” button to continue.
41. Enter “6” into the “Interest Rate” field.
42. Select “Checking” from the “Payment Account” drop-down menu.
43. Click the “Finish” button to add the loan to the “Loan Manager” window.
44. Click the “Close” button within the “Loan Manager” window to close it.
45. You can close the company file by selecting “File| Close Company” from the Menu Bar.
46. You can close QuickBooks by selecting “File| Exit” from the Menu Bar.
Sample
- for
evalu
ation
purp
oses
only!

98 ©TeachUcomp, Inc. Advanced QuickBooks
CHAPTER 23-
Equity Accounts
23.1- Equity Accounts
23.2- Recording an Owner’s Draw
23.3- Recording a Capital Investment
Sample
- for
evalu
ation
purp
oses
only!

99 ©TeachUcomp, Inc. Advanced QuickBooks
Equity Accounts
23.1- Equity Accounts:
Equity is basically the difference between what you have (your assets) and what you owe (your
liabilities). If you sold all your assets today and paid off your liabilities using the money received from the
sale of your assets, the money you’d have left over would be your equity.
A balance sheet shows your company assets, liabilities, and equity on a particular date. Because
equity is the difference between total assets and total liabilities, it’s also true that total assets equal the sum
of total liabilities and equity.
As you enter the opening balances of your assets and liabilities while creating the company file,
QuickBooks calculates the amount of equity and records it in an equity account called Opening Balance
Equity. In addition to the “Opening Balance Equity” account, QuickBooks often sets up another type of
equity account for you called Retained Earnings. This account tracks your company’s net income from
previous fiscal years. QuickBooks automatically transfers your profit (or loss) to Retained Earnings at the
end of each fiscal year.
If your company is a sole proprietorship, you don’t have to add any more equity accounts to your
chart of accounts. All the equity belongs to the company’s sole owner. If your business is a partnership,
you’ll probably want to set up separate equity accounts for each partner.
23.2- Recording an Owner’s Draw:
If your company is a sole proprietorship, you can take draws against the equity that you have in your
company. To record an owner’s draw, you simply create a check to yourself, which you may place in your
“Other Names” list to avoid confusion, and assign the amount of the check to the equity account that you
use to record your draws, like “Owner’s Equity:Owner’s Draws.”
23.3- Recording a Capital Investment:
As an owner of a sole proprietorship or partnership, a capital investment is personal money that you
or a business partner invests in your business. You use an equity account to track capital investments. You
may call it something like “Owner’s Equity:Owner’s Contributions.”
To create a capital investment, select “Banking| Make Deposits” from the Menu Bar. Click “Cancel”
on the “Payments to Deposit” window and any other screen that may appear, if you want to record the
investment separately, until you reach the “Make Deposits” window.
In the “Make Deposits” window, select the account into which you want to deposit the money from
the “Deposit To” drop-down. In the next blank transaction line, select the name of the person making the
investment from the “Received From” drop-down. Then select the appropriate equity account you use to
track capital investments from the “From Account” drop-down. Then enter the amount that they are
investing into the “Amount” column. Then just save the transaction by clicking the “Save & Close” button.
Sample
- for
evalu
ation
purp
oses
only!
100 ©TeachUcomp, Inc. Advanced QuickBooks
ACTIONS-
Equity Accounts MAKING AN OWNER’S DRAW:
1. Select “Banking| Write Checks” from the Menu Bar.
2. Make the check out to the owner.
3. In the “Expenses” area of the check, assign the amount of the check to the equity account you use to
record owner's draws.
4. Click “Save & Close” to save the check.
MAKING A CAPITAL INVESTMENT:
1. Select “Banking| Make Deposits” from the Menu Bar.
2. Click “Cancel” to deposit the investment check by itself.
3. In the “Make Deposits” window, choose the bank account into which you're depositing the money.
4. In the detail area, enter the name of the person from whom you received the money and the amount of
the investment.
5. From the "From account" drop-down list, choose the appropriate equity account.
6. Save the transaction.
Sample
- for
evalu
ation
purp
oses
only!
101 ©TeachUcomp, Inc. Advanced QuickBooks
EXERCISES-
Equity Accounts Purpose:
To be able to make an owner’s draw and record capital investments.
Exercises:
1. Open QuickBooks.
2. Select “File| Close Company” from the Menu Bar if you have a company file open to get to the “No
Company Open” dialog box.
3. Click the “Open a sample file” button, and select “Sample service-based business” from the drop-
down of choices.
4. Click “OK” on the sample file message box.
5. Select “File| Back Up Company| Create Local Backup” from the Menu Bar.
6. Use the “Create Backup” window to make a local backup of this company file, so that you may
restore the file back to its original condition when you are done using it.
7. After backing up the file, select “Banking| Write Checks” from the Menu Bar.
8. n the “Pay to the Order of” field, type “Larry Wadford.”
9. For the “$” field, type “100.”
10. In the “Expenses” area of the check, assign the amount of the check to “Owner’s Equity:Owner's
Draw.”
11. Click “Save & Close” to save the check.
12. Select “Banking| Make Deposits” from the Menu Bar.
13. Click “Cancel” to deposit the investment check by itself.
14. In the “Make Deposits” window, select “Checking."
15. In the first row, select “Larry Wadford” from the “Received From” drop-down.
16. From the "From account" drop-down list, choose “Owner’s Equity:Owner’s Contributions.”
17. For the “Chk No.” field, type “1234.”
18. For the “Pmt Meth.,” select “Check.”
19. For the “Amount,” type “500.”
20. Click “Save & Close.”
21. You can close the company file by selecting “File| Close Company” from the Menu Bar.
22. You can close QuickBooks by selecting “File| Exit” from the Menu Bar.
Sample
- for
evalu
ation
purp
oses
only!

102 ©TeachUcomp, Inc. Advanced QuickBooks
24.1- Using the Letters and Envelopes Wizard
24.2- Editing Letter Templates
CHAPTER 24-
Writing Letters with QuickBooks Sa
mple- f
or ev
aluati
on pu
rpos
es on
ly!

103 ©TeachUcomp, Inc. Advanced QuickBooks
24.1- Using the Letters and Envelopes Wizard:
Since you are already keeping much of your vendor and customer information in QuickBooks, it can
be useful to note that you can also send customized letters to them without having to retype much of the
information. QuickBooks provides you with a variety of different business letters that you can edit as needed
to suit your particular company.
QuickBooks uses the “Letters and Envelopes” wizard to assist you in creating these letters. To start
the “Letters and Envelopes” wizard, choose “Company| Prepare Letters with Envelopes” from the Menu Bar.
Then select the type of letters to create from the side menu of choices that appears.
In the “Letters and Envelopes” wizard that appears, answer the questions posed to you in each
screen and then click the “Next” button to continue through the screens until you are finished. Note that in
order to use this feature, you must have Microsoft Word and either QuickBooks Pro or Premier.
Writing Letters with QuickBooks
24.2- Editing Letter Templates:
While you can make small changes to each letter as you print them individually, you can also
enforce global editing changes to all future copies of a letter by editing the letter template, which is the
original copy of the letter, in order to make changes to all future copies of the letter that you produce.
When you edit the letter template, you can add and edit the body of the letter as well as change
dynamic information by using the “Add-Ins” tab in using Microsoft Word 2007 through 2010 to add more
fields of data. Be careful, though! Any changes that you make and save to the letter template will affect all
future letters based on the template.
Sample
- for
evalu
ation
purp
oses
only!

104 ©TeachUcomp, Inc. Advanced QuickBooks
ACTIONS-
Writing Letters with QuickBooks USING THE LETTERS AND ENVELOPES WIZARD:
1. Select “Company| Prepare Letters with Envelopes” from the Menu Bar.
2. From the side menu that appears, select the type of letter you want to create.
3. The “Letters and Envelopes” wizard will then appear.
4. Answer any questions posed in each screen, and click the “Next” button to proceed until finished.
5. Change the letters as needed in Microsoft Word.
6. In Microsoft Word 2007 through 2010, click the “File” tab in the Ribbon.
7. Click the “Print” command at the left side of the backstage view in Microsoft Word.
8. Set any printing options that you would like in the area to the right.
9. Click the “Print” button in the area to the right to print the documents.
EDITING THE QUICKBOOKS LETTER TEMPLATES:
1. Select “Company| Prepare Letters with Envelopes| Customize Letter Templates…” from the Menu Bar.
2. In the “Letters and Envelopes” window, select the “View or Edit Existing Letter Templates” option button.
3. Click the “Next” button.
4. In the “Types of Letters” section, chose the option button to display a listing of letters within the selected
category in the list to the right.
5. In the “Letters Templates Available” list, select the name of the letter template that you want to edit.
6. Click the “Next” button.
7. Edit the document in Microsoft Word, adding any additional fields using the “Add-Ins” tab in Microsoft
Word 2007 through 2010.
8. Click the “Save” button in the Quick Access Toolbar at the very top of the Microsoft Word 2007 or 2010
application to save your changes to the template.
9. Close Microsoft Word by clicking the “X” in the upper right corner of the application window.
Sample
- for
evalu
ation
purp
oses
only!
105 ©TeachUcomp, Inc. Advanced QuickBooks
EXERCISES-
Writing Letters with QuickBooks Purpose:
To be able to make a QuickBooks collection letter. You must have Microsoft Word installed.
Exercises:
1. Open QuickBooks.
2. Select “File| Close Company” from the Menu Bar if you have a company file open to get to the “No
Company Open” dialog box.
3. Click the “Open a sample file” button, and select “Sample product-based business” from the drop-
down of choices.
4. Click “OK” on the sample file message box.
5. Select “File| Back Up Company| Create Local Backup” from the Menu Bar.
6. Use the “Create Backup” window to make a local backup of this company file, so that you may
restore the file back to its original condition when you are done using it.
7. After backing up the file, select “Company| Prepare Letters with Envelopes| Customer Letters…”
from the Menu Bar.
8. In the “Letters and Envelopes” window, click the “Next” button to continue.
9. Click the “Accept credit app” letter.
10. Click the “Next” button to continue.
11. For the “Name,” type “Tom Ferguson.”
12. For the “Title,” type “President.”
13. Click the “Next” button to continue.
14. Click “OK” in the “QuickBooks Information Is Missing” dialog box which appears.
15. Look at the letters that Microsoft Word has created.
16. When finished, click the “X” in the upper-right corner of the Microsoft Word application to exit the
program.
17. Click the “Cancel” button within the “Letters and Envelopes” window.
18. You can close the company file by selecting “File| Close Company” from the Menu Bar.
19. You can close QuickBooks by selecting “File| Exit” from the Menu Bar.
Sample
- for
evalu
ation
purp
oses
only!

106 ©TeachUcomp, Inc. Advanced QuickBooks
25.1- Viewing Your Company Information
25.2- Setting Up Budgets
25.3- Using the To Do List
25.4- Using Reminders and Setting Preferences
25.5- Making General Journal Entries
25.6- Using the Cash Flow Projector
CHAPTER 25-
Company Management Sa
mple- f
or ev
aluati
on pu
rpos
es on
ly!
107 ©TeachUcomp, Inc. Advanced QuickBooks
25.1- Viewing Your Company Information:
If you move or get a new phone number, you’ll want to change your company’s information to reflect
that update. To update your company’s information, you can select “Company| Company Information…”
from the Menu Bar. Here you can change any information that is inaccurate and just click “OK” to save your
changes.
Company Management
25.2- Setting Up Budgets:
Budgets can be created for either Profit and Loss or Balance Sheet accounts, but they do have to be
account-based. You can create them from scratch, from actual data from the previous fiscal year, or from
the previous fiscal year's budget. A budget is uniquely identified by its fiscal year, the account type (either
Profit and Loss or Balance Sheet) and if desired, further identified by Customer:Job or Class.
To create a budget, select “Company| Planning and Budgeting| Set Up Budgets” from the Menu Bar.
If you have already created a budget, you can click the “Create New Budget” button. In the “Create New
Budget” window, choose the fiscal year for the new budget and then choose to create a budget for either
“Profit and Loss” or “Balance Sheet” accounts by clicking the desired option button. Click “Next” to continue.
If you selected a “Balance Sheet” budget, then just click “Finish” to begin entering budget data. If
you chose “Profit and Loss," you can then specify the additional criteria of segmenting it by either
“Customer:Job” or “Class," if class tracking has been turned on. You can then click “Next” again to choose
whether you want to “Create budget from scratch” or “Create budget from previous year's actual data” by
selecting the appropriate option button. Click “Finish” to create the new budget.
At that point, you can simply place the amounts that you want to spend for each account into the
months shown. When you have entered your budget, simply click “Save” to save the data. Then click “OK”
to close the budget window.
25.3- Using the To Do List:
You can remind yourself of tasks you want to complete by a certain date. You can look at your notes
in the “To Do” list at any time or you can use the “Reminders” list to see the notes whose dates are due.
To create a new “To Do” note, select “Company| To Do List” from the Menu Bar. Click the “To Do”
button and choose “New To Do” from the pop-up menu that appears. In the “Add To Do” window, select the
type of “To Do” note that you want to create from the “Type” drop-down. Select the priority from the “Priority”
drop-down. If the task requires the presence of another individual, check the “With” checkbox. Then use the
drop-down below that to select the type of individual. This can be either a “Lead,” “Customer,” “Vendor,” or
“Employee.” Then use the next drop-down to choose the name of the specific individual required. Then
enter the date that the item is due by selecting a date from the “Due” field. If you want to specify a time,
check the “Time” checkbox and then enter a time into the adjacent fields. You can then enter detailed notes
about the item into the “Details” field. Then select the status of the item by choosing one from the “Status”
drop-down. When finished, click the “OK” button to add the item to your “To Do” list.
When you complete a “To Do” item, you can double-click on its entry within the “To Do List” window
to open the “Edit To Do” window. Here you can then select “Done” from the “Status” drop-down and then
click the “OK” button. The item will then appear within the “To Do List” window with a checkmark in the far
left “Done” column. To delete an item from the list, click on its name within the “To Do List” window. Then
click the “To Do” button and choose the “Delete Selected To Do” command. Then click the “OK” button. Sample
- for
evalu
ation
purp
oses
only!

108 ©TeachUcomp, Inc. Advanced QuickBooks
Company Management
25.4- Using Reminders and Setting Preferences:
A nice feature of the QuickBooks program is that when you open it up, you can have reminders
appear to tell you if you have transactions to complete, such as paying your bills, or depositing funds. If you
don’t see the reminders window when you open up QuickBooks and you would like to, just turn it on by
selecting “Edit| Preferences…” from the Menu Bar. Select “Reminders” from the scroll box at the left side of
the dialog box and click the “My Preferences” tab. Check the “Show Reminders List when opening a
Company file” checkbox to enable the feature.
25.5- Making General Journal Entries:
You can create general journal entries to record transactions that you don’t enter through the other
forms and screens in QuickBooks. Actually, you create general journal entries when you make entries
directly into the account registers for transactions like depreciation expense transactions. While QuickBooks
is a terrific program because it simplifies accounting using the concept of checking registers, you can still
create general journal entries if you prefer to work with more traditional credits and debits.
General journal entries made in QuickBooks must use double-entry. That is, the credit and debit
amounts must balance for the transaction to be posted. To create a general journal entry, select “Company|
Make General Journal Entries…” from the Menu Bar. Then select the accounts involved in the transaction
and enter their credit or debit amounts. To post the balanced transaction, click “Save & Close.”
Sample
- for
evalu
ation
purp
oses
only!
109 ©TeachUcomp, Inc. Advanced QuickBooks
Company Management
25.6- Using the Cash Flow Projector:
You can use the data that you have already entered into QuickBooks along with the Cash Flow
Projector to create an estimate of the cash flow in your company for the next six weeks. After you set up the
information needed to create the cash forecast, you can then view the cash available in a report. You can
even go in and view how making changes to estimated receipts and disbursements could affect your future
cash balance.
To start the Cash Flow Projector, select “Company| Planning & Budgeting| Cash Flow Projector”
from the Menu Bar. This will launch the Cash Flow Projector. Read about what this tool will provide to you
on the initial screen and then click “Next” to continue.
In the second screen check any accounts that you want to use as the beginning cash balance for
your company. You can then enter any manual adjustments to that balance in the “Adjust Balance” box at
the bottom of this window. Note that this adjustment will be used each time you create the cash flow
forecast, although it can be changed later, if desired. Click “Next” to continue.
In the next screen, you can use the drop-down under the “Itemized Cash Receipts” section to select
which projection method you want to use for cash receipts. If you wish to learn more about the projection
methods, you can click the helpful hyperlinks in the upper right corner of the window. If you selected the
manual projection method then enter a date, description and amount for your cash receipts in the section
provided below the drop-down. Repeat this to enter all desired cash receipts for each week and then enter
any adjustments in the weekly summary section at the bottom of the screen. If you selected an automatic
projection method then edit the itemized cash receipts as necessary and enter any adjustments in the
weekly summary. If you have entered all your cash transactions in QuickBooks, an adjustment may not be
necessary. Click “Next” to continue.
In the next screen, you can enter any expenses that are not accounts payable. You can either enter
detailed expenses, or a summary of multiple expenses in one line. Enter these into the “Business
Expenses” section. You can also make adjustments at this time, as well. Note that each screen has a
“Preview Projection” button at the bottom that you can click to see how your changes will impact the
forecast. Then click “Next” to continue.
In the last screen, you can review the bills in your accounts payable account. Here you can adjust
the payment dates if needed. You can also adjust the weekly accounts payables summaries at the bottom
of the window, if needed. At that point, you can click the “Finish Projection” button to create the Cash Flow
Projection. This document can be printed by clicking the “Print…” button at the bottom of the window. You
can also click the “Save as PDF…” button to save it as a PDF document file. When you are finished, click
“Close” to close the projection. Then you can close the Cash Flow Projector by clicking the “Close” button.
Sample
- for
evalu
ation
purp
oses
only!
110 ©TeachUcomp, Inc. Advanced QuickBooks
ACTIONS-
Company Management VIEWING YOUR COMPANY INFORMATION:
1. Select “Company| Company Information…” from the Menu Bar.
2. Change any information needed.
3. Click “OK” to save your changes.
SETTING UP BUDGETS:
1. Select “Company| Planning & Budgeting| Set Up Budgets” from the Menu Bar.
2. Click the “Create New Budget” button.
3. In the “Create New Budget” window, choose the fiscal year for the new budget and click “Next” to
continue.
4. Then choose “Profit and Loss” or “Balance Sheet” accounts by clicking the appropriate option button,
and click “Next” to continue.
5. If you choose “Profit and Loss," you can specify additional criteria of either “Customer:Job” or “Class," if
class tracking has been turned on.
6. Then choose whether you want to “Create budget from scratch” or “Create budget from previous year's
actual data” by selecting the appropriate option button, and then clicking “Next” to continue.
7. Click “Finish” to create the new budget.
8. At that point, you can simply place the amounts that you want to spend for each account for the months
shown. When you have entered your budget, simply click “Save” to save the data.
9. Click “OK” to close the budget window.
USING THE TO DO LIST:
1. Select “Company| To Do List” from the Menu Bar.
2. Click the “To Do” button, and choose “New To Do” from the pop-up menu that appears.
3. In the “Add To Do” window, select the type of “To Do” note that you want to create from the “Type” drop-
down.
4. Select the priority from the “Priority” drop-down.
5. If the task requires the presence of another individual, check the “With” checkbox.
6. Then use the drop-down below that to select the type of individual. This can be either a “Lead,”
“Customer,” “Vendor,” or “Employee.”
7. Then use the next drop-down to choose the name of the specific individual required.
8. Then enter the date that the item is due by selecting a date from the “Due” field.
9. If you want to specify a time, check the “Time” checkbox and then enter a time into the adjacent fields.
10. You can then enter detailed notes about the item into the “Details” field.
11. Then select the status of the item by choosing one from the “Status” drop-down.
12. When finished, click the “OK” button to add the item to your “To Do” list.
13. When you complete a “To Do” item, you can double-click on its entry within the “To Do List” window to
open the “Edit To Do” window.
14. Then select “Done” from the “Status” drop-down and click the “OK” button. The item will appear within
the “To Do List” window with a checkmark in the “Done” column.
15. To delete an item from the list, click on its name within the “To Do List” window.
16. Then click the “To Do” button and choose the “Delete Selected To Do” command.
17. Then click the “OK” button. Sample
- for
evalu
ation
purp
oses
only!

111 ©TeachUcomp, Inc. Advanced QuickBooks
ACTIONS-
Company Management
USING THE CASH FLOW PROJECTOR:
1. Select “Company| Planning & Budgeting| Cash Flow Projector” from the Menu Bar.
2. Click “Next” to continue.
3. Check any accounts that you want to use as the beginning cash balance for your company. You can
then enter any manual adjustments to that balance in the “Adjust Balance” box at the bottom of this
window.
4. Click “Next” to continue.
5. Use the drop-down under the “Itemized Cash Receipts” section to select which projection method you
want to use for cash receipts.
6. If you selected the manual projection method then enter a date, description and amount for your cash
receipts in the section provided below the drop-down. Repeat this to enter all desired cash receipts for
each week and then enter any adjustments in the weekly summary section at the bottom of the screen.
7. If you selected an automatic projection method then edit the itemized cash receipts as necessary and
enter any adjustments in the weekly summary. If you have entered all your cash transactions in
QuickBooks, an adjustment may not be necessary.
8. Click “Next” to continue.
9. Enter any expenses that are not accounts payable. You can either enter detailed expenses, or a
summary of multiple expenses in one line.
10. Click “Next” to continue.
11. Review the bills in your accounts payable account. Here you can adjust the payment dates, if needed.
12. Click the “Finish Projection” button to create the Cash Flow Projection.
13. This document can be printed by clicking the “Print…” button at the bottom of the window.
14. You can also click the “Save as PDF…” button to save it as a PDF document file.
15. When you are finished, click “Close” to close the projection.
16. You can close the Cash Flow Projector by clicking the “Close” button.
USING REMINDERS AND SETTING PREFERENCES:
1. Select “Edit| Preferences…” from the Menu Bar.
2. Click “Reminders” from the scroll box at the left.
3. Click the “My Preferences” tab, and select “Show Reminders when opening a Company file” to turn it
on.
MAKING GENERAL JOURNAL ENTRIES:
1. Select “Company| Make General Journal Entries…” from the Menu Bar.
2. Select the accounts involved in the transaction and list their credit and debit amounts.
3. To post the transaction, select “Save & Close.”
Sample
- for
evalu
ation
purp
oses
only!

112 ©TeachUcomp, Inc. Advanced QuickBooks
EXERCISES-
Company Management Purpose:
To be able to manage company information.
Exercises:
1. Open QuickBooks.
2. Select “File| Close Company” from the Menu Bar if you have a company file open to get to the “No
Company Open” dialog box.
3. Click the “Open a sample file” button, and select “Sample product-based business” from the drop-
down of choices.
4. Click “OK” on the sample file message box.
5. Select “File| Back Up Company| Create Local Backup” from the Menu Bar.
6. Use the “Create Backup” window to make a local backup of this company file, so that you may
restore the file back to its original condition when you are done using it.
7. After backing up the file, select “Company| Company Information…”
8. Review the information and then click the “OK” button to close the window.
9. Select “Company| Make General Journal Entries…” from the Menu Bar.
10. Click into the first row, under the “Account” column and select “63000 - Office Supplies.”
11. In the “Debit” column, type “15.”
12. In the “Memo” field, type “Paper.”
13. In the next row, under the “Account” column, type “10400 - Petty Cash.”
14. In the “Memo” field, type “Paper.”
15. Make sure that the “Credit” column shows “15.”
16. Click “Save & Close” to post the transaction.
17. You can close the company file by selecting “File| Close Company” from the Menu Bar.
18. You can close QuickBooks by selecting “File| Exit” from the Menu Bar.
Sample
- for
evalu
ation
purp
oses
only!

113 ©TeachUcomp, Inc. Advanced QuickBooks
26.1- Company File Cleanup
26.2- Exporting List Data to an IIF File
26.3- Advanced Importing of Data
26.4- Updating QuickBooks
26.5- Using the Calculator
26.6- Using Portable Company Files
26.7- Using the Calendar
CHAPTER 26-
Using QuickBooks Tools Sa
mple- f
or ev
aluati
on pu
rpos
es on
ly!
114 ©TeachUcomp, Inc. Advanced QuickBooks
26.1- Company File Cleanup:
In QuickBooks you can condense the data in your company file to remove old transactions from your
company file. This can remove detailed transactions prior to a specified date and inactive list records from
your company file and replace them with general journal entries. This can often improve performance in
company files with a high volume of transactions entered.
You can start the wizard by selecting “File| Utilities| Condense Data…” from the Menu Bar. At that
point, simply step through the screens answering the questions posed to you and clicking the “Next” button
to continue. When you are ready to begin the backup process, click the “Begin Condense” button.
Note that during this process an additional copy of your company file- called the “archive copy” is
created. The archive copy contains a copy of your company’s data before any transactions are removed.
The archive file name will contain the date you run the condense process, your company name, and the
label "Archive Copy.” You should never use the archive copy for active data entry. You can use the archive
copy to run reports for those periods in which transactions have already been condensed.
If the condense process completes successfully the archive copy and the condensed data files co-
exist on your disk. If you want to keep a separate archive in another location, you must backup the archive
file in a separate backup process.
Using QuickBooks Tools
26.2- Exporting List Data to an IIF File:
You can export your list data into an IIF file. This file format stores list information in a text format for
transfer to another company file, or transfer to other applications that can use IIF files. You create export
files by selecting “File| Utilities| Export| Lists to IIF Files…” from the Menu Bar.
In the next screen you then choose which lists you would like to export to the IIF file. Then click “OK”
to continue and open the “Export” dialog box. Here you can select the folder into which you would like to
save the export file and what you want to name the file. When you are ready to continue, click the “Save”
button to save the IIF file with the information from the selected lists.
26.3- Advanced Importing of Data:
You can import list data into QuickBooks using Microsoft Excel. You can also easily copy and paste
data from an Excel workbook into the lists within your company file without having to perform an import. To
see how you can perform this task, please review lesson “3.11- Adding Multiple List Entries from Excel” in
the “Introductory QuickBooks” manual. However, in addition to being able to copy and paste the Excel data,
you can also perform an advanced importing of Excel data into your QuickBooks lists.
You can import information from an Excel workbook into QuickBooks’ customer, vendor, item or
account lists. To do this, select “File| Utilities| Import| Excel Files…” from the Menu Bar.
In the window that appears, click the “Advanced Import” button. On the “Set Up Import” tab, click the
“Browse…” button at the right end of the “File:” text box to launch a dialog box where you can select the
Excel file to import. Then you can select which sheet in the workbook to import from the drop-down below
the file name. If the data that you are importing has column labels, check the “This data file has header
rows” checkbox to use the topmost row of data in the selected sheet as a header.
In the “Data Mapping” section, you must then tell QuickBooks which columns in the Excel file should
be imported into which fields in the QuickBooks file. Click the “<Add New>” choice from the “Choose a
mapping:” drop-down to create a new data mapping for your Excel data. This will launch the “Mappings”
dialog box. Here you must type a name for your new data mapping into the “Mapping name:” text box. Then
Sample
- for
evalu
ation
purp
oses
only!
115 ©TeachUcomp, Inc. Advanced QuickBooks
Using QuickBooks Tools
26.3- Advanced Importing of Data (cont.):
select into which list you want to import the data from the “Import type:” drop-down. When you do, the
available fields in the list will appear in the left column. For each piece of data that has a match in your
Excel import file, click into the right column and select the name of the Excel column (if your list has
headers) to which the data corresponds. When you are finished, click “Save” to save the data mapping.
To preview the data before importing, click the “Preview” button. This will show you the data as it
would look when imported, along with any errors that would occur if the data was imported. At the bottom of
this window you can select how you want QuickBooks to handle imported rows that cause errors. When the
data looks good, click “Import” to import the data.
26.4- Updating QuickBooks:
You can ensure that your version of QuickBooks is current by selecting “Help| Update
QuickBooks…” from the Menu Bar. You can either manually or automatically have QuickBooks search for
updates. If you want to change that setting, in the “Update QuickBooks” screen click the “Options” tab. Here
you can select to turn the feature on or off by selecting “Yes” or “No” to the “Automatic Update” option. If you
have it turned off, then you have to connect to the Internet and click the “Update Now” button on the
“Overview” screen to download the updates manually.
26.5- Using the Calculator:
If you need to perform some quick calculations, you can access the calculator in QuickBooks by
selecting “Edit| Use Calculator” from the Menu Bar. That will bring up the calculator so you can double-
check numbers, or perform whatever other task for which you need a calculator.
26.6- Using Portable Company Files:
You can create a portable company file that you can take with you on portable media or e-mail to
another for use. For example, if you wanted to email a copy of your company file to your accountant, you
could send them a portable company file, which has a .QBM extension. When they open the file you sent
them, it will open the file and create a QuickBooks company file (with the .QBW file extension) from the
data. If you make changes to a portable company file, you cannot import the changes to your original
company file later without overwriting any changes made to the original company file. If you wish to still use
the original copy while someone makes changes to another copy, which you can import later, then use the
“Accountant’s Review” feature, instead.
To make a portable company file, select “File| Create Copy…” from the Menu Bar.
In the window that appears, select the “Portable company file” option button, and then click the
“Next” button to continue. In the “Save Portable Company File” dialog box, choose where you want to save
the portable copy of the company file and what you want to call it. When you are ready, click the “Save”
button. Then click “OK” at the message box that tells you QuickBooks must close and reopen the company
file first. QuickBooks will then create the portable copy for you. Click “OK” in the message box that appears.
To later open a portable company file to create a new company file that you can use, open
QuickBooks and select “File| Open or Restore Company…” from the Menu Bar. In the window that appears,
select the “Restore a portable file” option, and then click “Next” to continue. In the “Open Portable Company
Sample
- for
evalu
ation
purp
oses
only!
116 ©TeachUcomp, Inc. Advanced QuickBooks
Using QuickBooks Tools
26.6- Using Portable Company Files- (cont’d.):
File” dialog box that then appears, select the portable company file you would like to open and then click the
“Open” button to return to the “Open Portable Company File” dialog box. Here you can read the information,
and then click the “Next” button when you are ready to continue.
In the “Save Company File as” dialog box that then appears, you can enter the name and location to
which you want to save the company file that will be created from the portable copy. When that has been
accomplished, click the “Save” button to open the portable copy and create a new company file from the
data, which you can then use for data entry.
26.7- Using the Calendar:
You have a calendar feature that allows you to see company information, such as when bills are
due, in a calendar layout. You can open the calendar by clicking the “Calendar” button in the QuickBooks
toolbar, by clicking the “Calendar” icon within the Home Page, or by selecting “Company| Calendar” from
the Menu Bar.
Within the calendar, you can see the current date selected within a month-style layout. For the
selected date, you can also see the transactions that were entered, bills due, and other company
transactions shown in a listing at the bottom of the calendar window. To the right of the calendar you can
see a listing of upcoming transaction items that are due, such as to do items and bills, as well as past due
items. Note that you can open any items shown within these areas by simply double-clicking on them to
open the original transaction window.
At the top of the calendar is a toolbar that you can use to change the dates displayed. You can use
the left and right pointing arrows to move through the months shown. The name of the currently displayed
month and year is then displayed within the toolbar. If you wish to jump back to select the current date, you
can click the “Today” button within the toolbar. You can change the layout of the calendar by clicking either
the “Daily View,” “Weekly View,” or “Monthly View” buttons.
If you wish to select a particular date within the calendar, you can either click on the date shown in
the calendar view, or you can select a date from the “Select a date” calendar drop-down shown in the
toolbar at the top of the window.
You can also filter the transactions shown within the calendar by using the “Show” drop-down. The
choice selected by default is “All Transactions,” however you can choose to view only selected transactions
by making a choice from this drop-down menu.
When you are finished viewing the calendar window, simply close it by clicking the small “x” in the
upper right corner of the window or pressing the “Esc” key on your keyboard.
Sample
- for
evalu
ation
purp
oses
only!
117 ©TeachUcomp, Inc. Advanced QuickBooks
ACTIONS-
Using QuickBooks Tools CLEANING UP COMPANY DATA FILES:
1. Select “File| Utilities| Condense Data…” from the Menu Bar.
2. Choose a condense option. Be careful! If you select the second option, it will clear your company file.
3. Continue through the wizard screens, choosing items to be removed.
4. Click the “Begin Condense” button when you are sure you want to proceed.
5. Click “OK” to dismiss the message and open the “Back Up Company File” window.
6. Click “Create Back Up” and then condense your file.
EXPORTING LISTS TO AN IIF FILE:
1. Select “File| Utilities| Export| Lists to IIF Files…” from the Menu Bar.
2. Click the checkboxes for the list or lists that you want to export.
3. Click “OK.”
4. Select where to save the file, and what to call it, and then click the “Save” button to save it.
IMPORTING IIF DATA FILES:
1. Select “File| Utilities| Import| IIF Files…” from the Menu Bar.
2. Use the “Look in:” drop-down to navigate to the folder that contains the import (IIF) file.
3. Double-click on the file to import the data.
IMPORTING EXCEL DATA:
1. Select “File| Utilities| Import| Excel Files…” from the Menu Bar.
2. In the window that appears, click the “Advanced Import” button.
3. On the “Set Up Import” tab, click the “Browse…” button at the right end of the “File:” text box to launch a
dialog box where you can select the Excel file to import.
4. Select which sheet in the workbook to import from the drop-down below the file name.
5. If the imported data has column labels, check the “This data file has header rows” checkbox.
6. Click the “<Add New>” choice from the “Choose a mapping:” drop-down to create a new data mapping.
7. In the “Mappings” dialog box, type a name for your data mapping into the “Mapping name:” text box.
8. Select into which list you want to import the data from the “Import type:” drop-down.
9. For each piece of data in the left column that has a match in your Excel import file, click into the right
column and select the name of the Excel column to which the data corresponds.
10. When you are finished, click “Save” to save the data mapping.
11. To preview the data before importing, click the “Preview” button.
12. At the bottom of this window you can select how you want QuickBooks to handle import errors.
13. When the data looks good, click “Import” to import the data.
Sample
- for
evalu
ation
purp
oses
only!
118 ©TeachUcomp, Inc. Advanced QuickBooks
ACTIONS-
Using QuickBooks Tools UPDATING QUICKBOOKS MANUALLY:
1. Connect to the Internet.
2. Select “Help| Update QuickBooks…” from the Menu Bar.
3. Click the “Update Now” button to manually download and install any new updates.
4. Click the “X” in the upper right corner of the window to close it.
USING THE CALCULATOR:
1. Select “Edit| Use Calculator” from the Menu Bar.
2. Click the “X” in the upper right corner of the calculator to close it when you are finished.
CREATING PORTABLE COMPANY FILES:
1. To make a portable company file, select “File| Create Copy…” from the Menu Bar, instead.
2. In the window that appears, select the “Portable company file” option button, and then click the “Next”
button to continue.
3. In the “Save Portable Company File” dialog box, choose where you want to save the portable copy of
the company file and what you want to call it. When you are ready, click the “Save” button.
4. Then click “OK” at the message box that tells you QuickBooks must close and reopen the company file
first. QuickBooks will then create the portable copy for you.
5. Click “OK” in the message box that appears.
OPENING PORTABLE COMPANY FILES:
1. To open a portable company file to create a new company file that you can use, open QuickBooks and
select “File| Open or Restore Company…” from the Menu Bar.
2. In the window that appears, select the “Restore a portable file” option, and then click “Next” to continue.
3. In the “Open Portable Company File” dialog box that then appears, select the portable company file you
would like to open and then click the “Open” button to return to the “Open Portable Company File” dialog
box.
4. Here you can read the information, and then click the “Next” button when you are ready to continue.
5. In the “Save Company File as” dialog box that then appears, you can enter the name and location to
which you want to save the company file that will be created from the portable copy.
6. When that has been accomplished, click the “Save” button to open the portable copy and create a new
company file from the data, which you can then use for data entry.
Sample
- for
evalu
ation
purp
oses
only!
119 ©TeachUcomp, Inc. Advanced QuickBooks
ACTIONS-
Using QuickBooks Tools USING THE CALENDAR:
1. You can open the calendar by clicking the “Calendar” button in the QuickBooks toolbar, by clicking the
“Calendar” icon within the Home Page, or by selecting “Company| Calendar” from the Menu Bar.
2. You can use the left and right pointing arrows shown in the toolbar at the top of the calendar to move
through the months shown.
3. If you wish to jump back to select the current date, you can click the “Today” button within the toolbar.
4. You can change the layout of the calendar by clicking either the “Daily View,” “Weekly View,” or
“Monthly View” buttons.
5. If you wish to select a particular date within the calendar, you can either click on the date shown in the
calendar view, or you can select a date from the “Select a date” calendar drop-down shown in the
toolbar at the top of the window.
6. You can also filter the transactions shown within the calendar by using the “Show” drop-down. The
choice selected by default is “All Transactions,” however you can choose to view only selected
transactions by making a choice from this drop-down menu.
7. When you are finished viewing the calendar window, simply close it by clicking the small “x” in the upper
right corner of the window or pressing the “Esc” key on your keyboard.
Sample
- for
evalu
ation
purp
oses
only!

120 ©TeachUcomp, Inc. Advanced QuickBooks
EXERCISES-
Using QuickBooks Tools Purpose:
There are no exercises for this lesson.
Sample
- for
evalu
ation
purp
oses
only!
121 ©TeachUcomp, Inc. Advanced QuickBooks
27.1- Creating an Accountant’s Copy
27.2- Transferring an Accountant’s Copy
27.3- Importing Accountant’s Changes
27.4- Removing Restrictions
CHAPTER 27-
Using the Accountant’s Review Sa
mple- f
or ev
aluati
on pu
rpos
es on
ly!
122 ©TeachUcomp, Inc. Advanced QuickBooks
27.1- Creating an Accountant’s Copy:
You can create an accountant’s copy of your company file to give to your accountant, should they
ask for one. When an accountant’s copy is created, you can still use your company file and then later import
changes made by your accountant in the accountant’s copy back into your company file. This gives you a
bit more flexibility for data entry than the portable company file option does.
To create an accountant’s copy, open the company file for which you want to create an accountant’s
copy and then select “File| Accountant’s Copy| Save File…” from the Menu Bar. You then must click the
“Next” button in the wizard that appears and then select a dividing date. The dividing date is the date before
which your accountant can make changes, but you cannot. Once that has been selected, click the “Next”
button to continue. At that point, select the removable media to which you will be saving the copy and then
click the “Save” button to create the copy. After creating the accountant’s copy, give the saved file you
created to your accountant to make the necessary changes.
At this point, your original company file will display text that says “Accountant’s Changes Pending”
within its title bar. You can still perform normal data entry in the original company file, but note that you
cannot make some kinds of changes to the company file- such as deleting, renaming, or structurally
rearranging the existing accounts in the chart of accounts.
Using the Accountant’s Review
27.2- Transferring an Accountant’s Copy:
If you work with an accountant who uses the QuickBooks for Accountants Edition, you can use the
“File Transfer” ability within QuickBooks Pro to send an accountant’s copy to your accountant. To use this
feature you must be using QuickBooks Pro 2013 or better, have an Internet connection and an e-mail
address, and you must know your accountant’s e-mail address. This feature allows you to save the
accountant’s copy to an Intuit web server, which notifies your accountant via e-mail to download the copy.
To perform this task, select “File| Accountant’s Copy| Send to Accountant…” from the Menu Bar. In
the “Send Accountant’s Copy” window that appears, click the “Next” button to continue. In the next screen,
use the “Dividing Date” drop-down to select a dividing date for your accountant’s copy file. The dividing date
is the date before which your accountant can make changes, but you cannot. After selecting a dividing date,
click the “Next” button to continue. In the next screen, enter your accountant’s e-mail address into the
“Accountant’s e-mail address” and “Reenter accountant’s e-mail address” fields. Then enter your name and
e-mail address into the “Your name” and “Your e-mail address” fields. Then click the “Next” button to
continue. In the next screen, you can enter a password for the accountant’s copy that is stored on the web
server. Your accountant will need this password in order to access your accountant’s copy. You can enter
the same password that you use for the “Admin” account within your company file, if desired. You can also
enter your own strong password into the “Password” and “Reenter password” fields. A strong password is at
least 7 characters long with at least 1 capital letter and 1 digit. Note that you must let your accountant know
what the password is so that they can download your company file. You can then enter any additional
instructions for your accountant into the “Note” field. Then click the “Send” button to create and upload your
accountant’s copy to the web server, and be sure to let your accountant know what the password is.
Your accountant will receive an e-mail with a link that they can click in order to download and open
your accountant’s copy. Note that they will need to enter the password you created in order to do this. Also,
your original company file will display text that says “Accountant’s Changes Pending” within its title bar.
After creating the accountant’s copy, you can still perform normal data entry in the original company file, but
note that you cannot make some kinds of changes to the company file- such as deleting, renaming, or
structurally rearranging the existing accounts in the chart of accounts. Sample
- for
evalu
ation
purp
oses
only!
123 ©TeachUcomp, Inc. Advanced QuickBooks
Using the Accountant’s Review
27.3- Importing Accountant’s Changes:
After creating an accountant’s copy of your company file, later on you must import your accountant’s
changes back into your company file to restore full functionality to your original company file.
If your accountant sends you a file, insert the copy of the changes that your accountant gave to you
on the removable media (i.e. floppy disk, CD-ROM, flash drive). Then open your company file and select
“File| Accountant’s Copy| Import Accountant’s Changes from File…” from the Menu Bar. You must make a
backup before you can import the accountant’s changes. Make the backup file. Then navigate to the folder
or drive that contains the file with the changes and double-click on the file to open it and import the
changes. Note that the “Accountant’s Changes Pending” message in the title bar of the company file has
disappeared. That means that you have successfully imported the changes.
If you receive the changes from the internet by using the “File Transfer” feature, then you will receive
an e-mail from your accountant informing you that the changes to the accountant’s copy are complete and
that you have changes to import. At that point, you have 30 days to import the accountant’s changes into
your company file. To download these changes, open your company file and then select “File| Accountant’s
Copy| Import Accountant’s Changes from Web…” from the Menu Bar. After the download is completed, you
will see a listing of the accountant’s changes appear within your company file. Note that the “Accountant’s
Changes Pending” message has also disappeared from the title bar of the company file.
27.4- Removing Restrictions:
After creating an accountant’s copy of your company file, you will see the “Accountant’s Changes
Pending” message within the title bar of the company file. You may also notice that some tasks, such as
deleting accounts within the chart of accounts, cannot be performed on a company file when it is waiting for
changes from an accountant. If it turns out that you will not be importing changes from your accountant,
then you can remove the restrictions placed on your company file by creating an accountant's copy. Note
that if you do this you will not be able to import any changes to your company file from the existing
accountant’s copy, however you will be able to restore the full functionality of your company file.
To remove restrictions from a company file, open the company file and then select “File|
Accountant’s Copy| Remove Restrictions…” from the Menu Bar. In the message box that then appears
onscreen, check the checkbox and then click the “OK” button to remove the accountant’s copy restrictions.
Sample
- for
evalu
ation
purp
oses
only!

124 ©TeachUcomp, Inc. Advanced QuickBooks
ACTIONS-
Using the Accountant’s Review CREATING AN ACCOUNTANT’S COPY FILE:
1. Open the company file for which you want to create an accountant’s copy and then select “File|
Accountant’s Copy| Save File…” from the Menu Bar.
2. Click the “Next” button in the wizard that appears and then select a dividing date. The dividing date is
the date before which your accountant can make changes, but you cannot.
3. Once that has been selected, click the “Next” button to continue.
4. At that point, select the removable media to which you will be saving the copy and then click the “Save”
button to create the copy.
5. After creating the accountant’s copy, give the saved file you created to your accountant to make the
necessary changes.
6. At this point, your original company file will display text that says “Accountant’s Changes Pending”
within its title bar. You can still perform normal data entry in the original company file, but note that you
cannot make some kinds of changes to the company file- such as deleting, renaming, or structurally
rearranging the existing accounts in the chart of accounts.
TRANSFERRING AN ACCOUNTANT’S COPY:
1. Open the company file for which you want to create an accountant’s copy and then select “File|
Accountant’s Copy| Send to Accountant…” from the Menu Bar.
2. In the “Send Accountant’s Copy” window that appears, click the “Next” button to continue.
3. In the next screen, use the “Dividing Date” drop-down to select a dividing date for your accountant’s
copy. The dividing date is the date before which your accountant can make changes, but you cannot.
4. After selecting a dividing date, click the “Next” button to continue.
5. In the next screen, enter your accountant’s e-mail address into the “Accountant’s e-mail address” and
“Reenter accountant’s e-mail address” fields.
6. Then enter your name and e-mail address into the “Your name” and “Your e-mail address” fields.
7. Then click the “Next” button to continue.
8. In the next screen, you can enter a password for the accountant’s copy that is stored on the web server.
Your accountant will need this password in order to access your accountant’s copy. You can enter the
same password that you use for the “Admin” account within your company file, if desired. You can also
enter your own strong password into the “Password” and “Reenter password” fields. A strong password
is at least 7 characters long with at least 1 capital letter and 1 digit. Note that you must let your
accountant know what the password is so that they can download your company file.
9. You can then enter any additional instructions for your accountant into the “Note” field.
10. Then click the “Send” button to create and upload your accountant’s copy to the web server, and be
sure to let your accountant know what the password is.
11. Your accountant will receive an e-mail with a link that they can click in order to download and open your
accountant’s copy. Note that they will need to enter the password you created in order to do this.
12. Also, your original company file will display text that says “Accountant’s Changes Pending” within its title
bar. After creating the accountant’s copy, you can still perform normal data entry in the original company
file, but note that you cannot make some kinds of changes to the company file- such as deleting,
renaming, or structurally rearranging the existing accounts in the chart of accounts.
Sample
- for
evalu
ation
purp
oses
only!
125 ©TeachUcomp, Inc. Advanced QuickBooks
ACTIONS-
Using the Accountant’s Review IMPORTING THE ACCOUNTANT’S CHANGES:
1. If your accountant sends you a file, insert the copy of the changes that your accountant gave to you
on the removable media (i.e. floppy disk, CD-ROM, flash drive).
2. Then open your company file and select “File| Accountant’s Copy| Import Accountant’s Changes from
File…” from the Menu Bar.
3. Make a backup before you import the accountant’s changes.
4. Then navigate to the folder or drive that contains the file with the changes and double-click on the file to
open it and import the changes.
5. Note that the “Accountant’s Changes Pending” message in the title bar of the company file has
disappeared. That means that you have successfully imported the changes.
6. If you receive the changes from the internet by using the “File Transfer” feature, then you will
receive an e-mail from your accountant informing you that the changes to the accountant’s copy are
complete and that you have changes to import. At that point, you have 30 days to import the
accountant’s changes into your company file.
7. To download these changes, open your company file and then select “File| Accountant’s Copy| Import
Accountant’s Changes from Web…” from the Menu Bar.
8. After the download is completed, you will see a listing of the accountant’s changes appear within your
company file.
9. Note that the “Accountant’s Changes Pending” message has also disappeared from the title bar of the
company file.
REMOVING ACCOUNTANT’S COPY RESTRICTIONS:
1. To remove restrictions from a company file, open the company file and then select “File| Accountant’s
Copy| Remove Restrictions…” from the Menu Bar.
2. In the message box that then appears onscreen, check the checkbox and then click the “OK” button to
remove the accountant’s copy restrictions.
Sample
- for
evalu
ation
purp
oses
only!

126 ©TeachUcomp, Inc. Advanced QuickBooks
EXERCISES-
Using the Accountant’s Review Purpose:
There are no exercises for this lesson.
Sample
- for
evalu
ation
purp
oses
only!

127 ©TeachUcomp, Inc. Advanced QuickBooks
28.1- Using Help
CHAPTER 28-
Using the Help Menu Sa
mple- f
or ev
aluati
on pu
rpos
es on
ly!
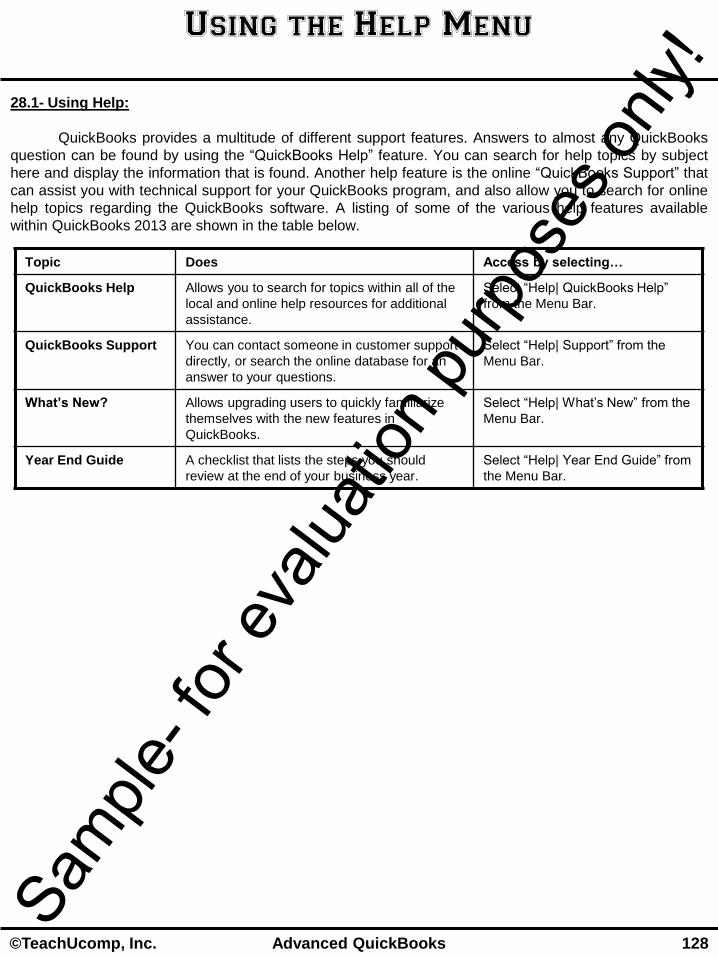
128 ©TeachUcomp, Inc. Advanced QuickBooks
28.1- Using Help:
QuickBooks provides a multitude of different support features. Answers to almost any QuickBooks
question can be found by using the “QuickBooks Help” feature. You can search for help topics by subject
here and display the information that is found. Another help feature is the online “QuickBooks Support” that
can assist you with technical support for your QuickBooks program, and also allow you to search for online
help topics regarding the QuickBooks software. A listing of some of the various help features available
within QuickBooks 2013 are shown in the table below.
Using the Help Menu
Topic Does Access by selecting…
QuickBooks Help Allows you to search for topics within all of the
local and online help resources for additional
assistance.
Select “Help| QuickBooks Help”
from the Menu Bar.
QuickBooks Support You can contact someone in customer support
directly, or search the online database for an
answer to your questions.
Select “Help| Support” from the
Menu Bar.
What’s New? Allows upgrading users to quickly familiarize
themselves with the new features in
QuickBooks.
Select “Help| What’s New” from the
Menu Bar.
Year End Guide A checklist that lists the steps you should
review at the end of your business year.
Select “Help| Year End Guide” from
the Menu Bar.
Sample
- for
evalu
ation
purp
oses
only!

129 ©TeachUcomp, Inc. Advanced QuickBooks
ACTIONS-
Using the Help Menu USING HELP:
1. Select “Help” from the Menu Bar.
2. Select the desired type of assistance to use from the drop-down menu of choices that appears to open
the help resource within a new window.
Sample
- for
evalu
ation
purp
oses
only!

130 ©TeachUcomp, Inc. Advanced QuickBooks
EXERCISES-
Using the Help Menu Purpose:
There are no exercises for this lesson.
Sample
- for
evalu
ation
purp
oses
only!
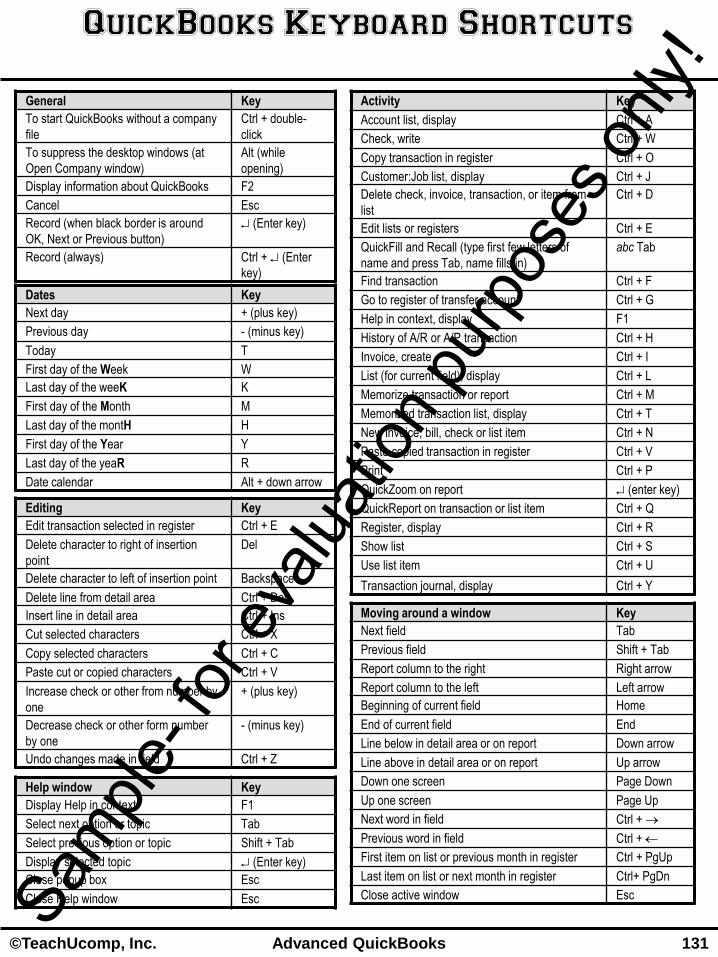
131 ©TeachUcomp, Inc. Advanced QuickBooks
QuickBooks Keyboard Shortcuts
General Key
To start QuickBooks without a company
file
Ctrl + double-
click
To suppress the desktop windows (at
Open Company window)
Alt (while
opening)
Display information about QuickBooks F2
Cancel Esc
Record (when black border is around
OK, Next or Previous button)
(Enter key)
Record (always) Ctrl + (Enter
key)
Dates Key
Next day + (plus key)
Previous day - (minus key)
Today T
First day of the Week W
Last day of the weeK K
First day of the Month M
Last day of the montH H
First day of the Year Y
Last day of the yeaR R
Date calendar Alt + down arrow
Editing Key
Edit transaction selected in register Ctrl + E
Delete character to right of insertion
point
Del
Delete character to left of insertion point Backspace
Delete line from detail area Ctrl + Del
Insert line in detail area Ctrl + Ins
Cut selected characters Ctrl + X
Copy selected characters Ctrl + C
Paste cut or copied characters Ctrl + V
Increase check or other from number by
one
+ (plus key)
Decrease check or other form number
by one
- (minus key)
Undo changes made in field Ctrl + Z
Activity Key
Account list, display Ctrl + A
Check, write Ctrl + W
Copy transaction in register Ctrl + O
Customer:Job list, display Ctrl + J
Delete check, invoice, transaction, or item from
list
Ctrl + D
Edit lists or registers Ctrl + E
QuickFill and Recall (type first few letters of
name and press Tab, name fills in)
abc Tab
Find transaction Ctrl + F
Go to register of transfer account Ctrl + G
Help in context, display F1
History of A/R or A/P transaction Ctrl + H
Invoice, create Ctrl + I
List (for current field), display Ctrl + L
Memorize transaction or report Ctrl + M
Memorized transaction list, display Ctrl + T
New invoice, bill, check or list item Ctrl + N
Paste copied transaction in register Ctrl + V
Print Ctrl + P
QuickZoom on report (enter key)
QuickReport on transaction or list item Ctrl + Q
Register, display Ctrl + R
Show list Ctrl + S
Use list item Ctrl + U
Transaction journal, display Ctrl + Y
Moving around a window Key
Next field Tab
Previous field Shift + Tab
Report column to the right Right arrow
Report column to the left Left arrow
Beginning of current field Home
End of current field End
Line below in detail area or on report Down arrow
Line above in detail area or on report Up arrow
Down one screen Page Down
Up one screen Page Up
Next word in field Ctrl +
Previous word in field Ctrl +
First item on list or previous month in register Ctrl + PgUp
Last item on list or next month in register Ctrl+ PgDn
Close active window Esc
Help window Key
Display Help in context F1
Select next option or topic Tab
Select previous option or topic Shift + Tab
Display selected topic (Enter key)
Close popup box Esc
Close Help window Esc Sample
- for
evalu
ation
purp
oses
only!