addendum 23 plugins - cinema 4dhttp.maxon.net/pub/bp2/docu/bodypaint3d_r2_addendum_e.pdf ·...
TRANSCRIPT
23 Plugins
Addendum

ADDENDUM • 1

ADDENDUM • 1
Using BodyPaint 3D with LightWaveIf you are a LightWave user, the quickest way to get your models from LightWave to BodyPaint 3D then back again once you’re done paintin, is to use the BodyPaint 3D to LightWave exchange plugin. The exchange plugin supports LightWave version 7.5.
Getting startedFirst things first, you need to do the following to get up and running:
- Start BodyPaint 3D and enter your serial number. The exchange plugin will only work if you have entered your serial number.
- Check that the following files are in LightWave’s plugins folder: “BPExchange.p” and “B3Dimport.p”.
- Check that QuickTime is installed on your system. If it isn’t, BodyPaint 3D will be unable to load various graphics files such as TIFFs with LZW compression, GIF, PNG, ...
- BodyPaint 3D uses the TIFF file format by default. However, we recommend that you switch the format to PSD instead if you use Photoshop or a paint tool that supports layered PSD files. This will ensure that maximum data is preserved in your saved texture files.
The LightWave 3D exchange pluginSending your object from LightWave to BodyPaint 3D is child’s play. Load the object in Modeler and check that you’ve assigned all the materials you’ll need (this is an important step because although you can create materials in BodyPaint 3D, you won’t be able to send them back to LightWave).
In Modeler, choose Additional > BodyPaint 3D. We recommend that you add the BodyPaint 3D and BodyPaint Prefs commands to the interface (use LightWave’s Edit Menu Layout and Edit Keyboard Shortcuts commands to do this. You’ll find these commands on the Modeler > Options menu).
Exchange Plugins

2 • ADDENDUM ADDENDUM • 3
Select the BodyPaint 3D command from the Additional menu.
The following dialog will open:
+
Default Texture Path
This is BodyPaint 3D’s default path for new textures. Enter a valid path or the file exchange will fail!
BodyPaint 3D Path
This is the location of the BodyPaint 3D application.
Object Scale
The object will be scaled by this factor in BodyPaint 3D. LightWave objects tend to be very small compared to BodyPaint 3D’s world grid. The default Object Scale of 100 usually ensures the object is a comfortable size to work with in BodyPaint 3D (the object will be 100 times larger in BodyPaint 3D than it is in LightWave).
Autoscale
If this option is enabled, the object will be scaled automatically to ensure it is a sensible size in BodyPaint 3D. Disable the option if you want to work to a specific scale.
2 • ADDENDUM ADDENDUM • 3
TGA Conversion
Unfortunately LightWave’s TGA loader has a long-standing bug: once a TGA picture has been loaded, it cannot be overwritten because LightWave’s resources won’t free it up. You can avoid this problem using TGA Conversion, which converts TGA files to TIFFs. Note that the conversion will fail if a TIFF of the same name already exists.
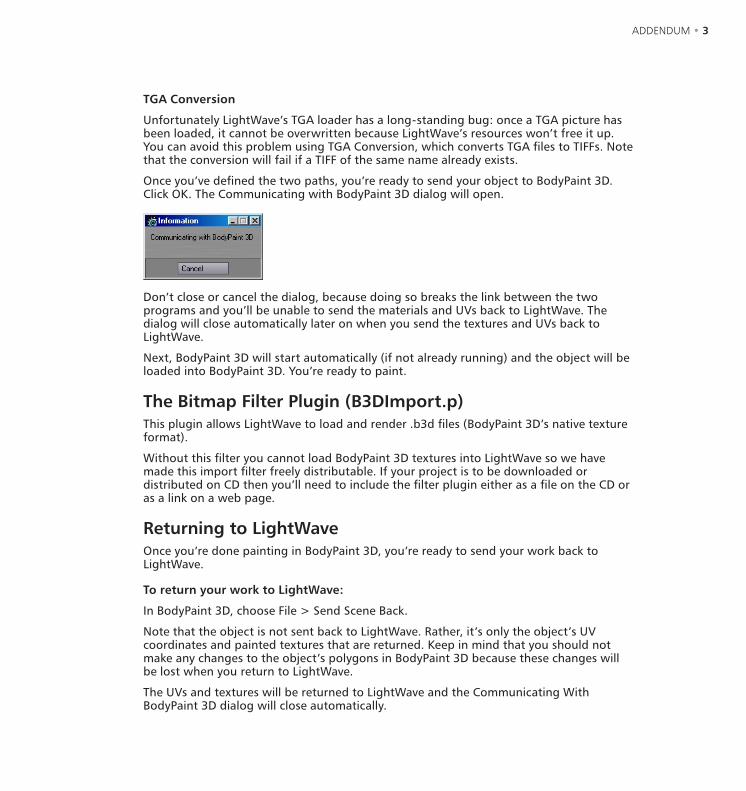
Once you’ve defined the two paths, you’re ready to send your object to BodyPaint 3D. Click OK. The Communicating with BodyPaint 3D dialog will open.
Don’t close or cancel the dialog, because doing so breaks the link between the two programs and you’ll be unable to send the materials and UVs back to LightWave. The dialog will close automatically later on when you send the textures and UVs back to LightWave.
Next, BodyPaint 3D will start automatically (if not already running) and the object will be loaded into BodyPaint 3D. You’re ready to paint.
The Bitmap Filter Plugin (B3DImport.p)This plugin allows LightWave to load and render .b3d files (BodyPaint 3D’s native texture format).
Without this filter you cannot load BodyPaint 3D textures into LightWave so we have made this import filter freely distributable. If your project is to be downloaded or distributed on CD then you’ll need to include the filter plugin either as a file on the CD or as a link on a web page.
Returning to LightWaveOnce you’re done painting in BodyPaint 3D, you’re ready to send your work back to LightWave.
To return your work to LightWave:
In BodyPaint 3D, choose File > Send Scene Back.
Note that the object is not sent back to LightWave. Rather, it’s only the object’s UV coordinates and painted textures that are returned. Keep in mind that you should not make any changes to the object’s polygons in BodyPaint 3D because these changes will be lost when you return to LightWave.
The UVs and textures will be returned to LightWave and the Communicating With BodyPaint 3D dialog will close automatically.
4 • ADDENDUM ADDENDUM • 5
Transfer RestrictionsNaturally, there are differences in the way that LightWave and BodyPaint 3D handle objects, UV coordinates and textures. Therefore the following transfer restrictions apply.
Materials- You must create all materials in LightWave before sending the object to BodyPaint 3D.
This is because new materials created in BodyPaint 3D cannot be transferred to LightWave.
- You can transfer one texture bitmap per material channel only. For example, if your LightWave object uses three texture bitmaps in the color channel, only one texture bitmap will be transferred.
- Only UV and bitmap information will be returned to LightWave. Other changes made in BodyPaint 3D such as alterations to texture’s position, scale and rotation will be lost when you return the object to LightWave.
- Procedural textures and gradients are program-dependent and will not be transferred.
- All materials in LightWave must have a unique name, otherwise the wrong texture may be changed.
Geometry- If you send a SubPatch object to BodyPaint 3D, it will be converted to a HyperNURBS
object. Weighting and selected areas are lost. The subdivsion of the mesh may be different as well.
Troubleshooting
I’m using a Mac and in LightWave my B3D file is a black texture with white text!The QuickTime plugin has activated itself. Remove the QuickTime plugin and the file will load correctly. Alternatively, use the TIFF or PSD file format instead of the B3D format.
“Can’t create exchange file”Check that you’ve set the Default Texture Path correctly.
“Not enough memory! Please check memory assignments!”This error message only appears under Mac OS 9. Increase the amount of virtual memory or reduce the amount of RAM assigned to LightWave.
“Not enough memory for that operation”This error message sometimes happens under Mac OS 9. LightWave then crashes. This is a LightWave bug, but you can work around it by switching LightWave’s 3D view from “Textured” to “Shaded”.

4 • ADDENDUM ADDENDUM • 5
Using BodyPaint 3D with 3ds maxThis exchange plugin permits the simple transfer of materials to and from these two important design programs. In these pages we will describe the usage of the exchange plugin and show you how to get the best out of the process. The exchange plugin supports 3ds max 4 and 5.
Getting startedFirst things first, you need to do the following to get up and running:
- Start BodyPaint 3D and enter your serial number. The exchange plugin will only work if you have entered your serial number.
- Check that the following two files are in the 3ds max plugins folder:“bodyex.dlu” and “b3d.bmi”
- Check that QuickTime is installed on your system. If it isn’t, BodyPaint 3D will be unable to load various graphics files such as TIFFs with LZW compression, GIF, PNG, ...
- BodyPaint 3D uses the TIFF file format by default. However, we recommend that you switch the format to PSD instead if you use Photoshop or a paint tool that supports layered PSD files. This will ensure that maximum data is preserved in your saved texture files.
The 3ds max exchange pluginSending your object or scene from 3ds max to BodyPaint 3D’s is child’s play.
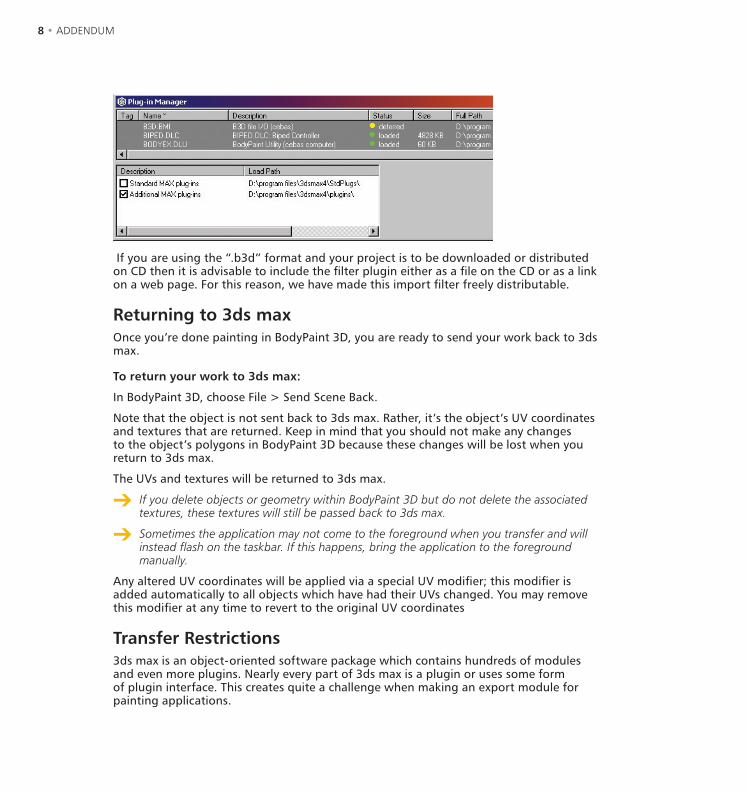
On the Utilities panel, click the More button to open the following dialog:

6 • ADDENDUM ADDENDUM • 7
Select BodyPaint 3D Exchange from the list and click OK (the list is in alphabetical order). Next you have a choice of three export functions and three other functions:
Choose one of the export functions to open a file selection dialog. Use this dialog to set the standard texture folder — this is where BodyPaint 3D will store textures by default. Use the dialog that appears to define the location of the BodyPaint 3D application: (choose the BodyPaint 3D program)

6 • ADDENDUM ADDENDUM • 7
Export Object
Use this option to export a single object from within 3ds max. The object you wish to export must be selected by using the standard pick object or select by name feature of 3ds max; the latter may be accessed using the ‘H’ shortcut.
Export Selected
Use this option to export a selection of objects from within 3ds max. Make sure that you have selected at least one object within 3ds max (using any selection method) then click the Export Selected button.
When you import objects back into 3ds max there should be no need to re-select these objects as the plugin will automatically re-select them, ready to be exported again into BodyPaint 3D.
Export Scene
Use this option to export a complete scene from within 3ds max. This will export every item in the 3ds max scene tree such as lights, cameras, objects, materials and backgrounds. Note that large, complex scenes may require some time to be fully exported. Please remain patient or export only a smaller number of selected objects.
Set BodyPaint Path
Use this command to adjust the file location of your BodyPaint 3D executable.
Set Default Texture Path
Here you can adjust the default path where BodyPaint 3D saves new textures.
Close
Click on Close to hide the plugin’s rollout menu.
The Bitmap Filter Plugin (B3D.BMI)This plugin enables you to use exchange textures using BodyPaint 3D’s native “.b3d” format. However, you may prefer to use the widely-used TIFF format instead.
8 • ADDENDUM ADDENDUM • 9
If you are using the “.b3d” format and your project is to be downloaded or distributed on CD then it is advisable to include the filter plugin either as a file on the CD or as a link on a web page. For this reason, we have made this import filter freely distributable.
Returning to 3ds maxOnce you’re done painting in BodyPaint 3D, you are ready to send your work back to 3ds max.
To return your work to 3ds max:
In BodyPaint 3D, choose File > Send Scene Back.
Note that the object is not sent back to 3ds max. Rather, it’s the object’s UV coordinates and textures that are returned. Keep in mind that you should not make any changes to the object’s polygons in BodyPaint 3D because these changes will be lost when you return to 3ds max.
The UVs and textures will be returned to 3ds max.
If you delete objects or geometry within BodyPaint 3D but do not delete the associated textures, these textures will still be passed back to 3ds max.
Sometimes the application may not come to the foreground when you transfer and will instead flash on the taskbar. If this happens, bring the application to the foreground manually.
Any altered UV coordinates will be applied via a special UV modifier; this modifier is added automatically to all objects which have had their UVs changed. You may remove this modifier at any time to revert to the original UV coordinates
Transfer Restrictions3ds max is an object-oriented software package which contains hundreds of modules and even more plugins. Nearly every part of 3ds max is a plugin or uses some form of plugin interface. This creates quite a challenge when making an export module for painting applications.

8 • ADDENDUM ADDENDUM • 9
As a consequence there are a few restrictions of which you should be aware. The first of these is that only standard 3ds max materials may be used; no Matte shadows, Raytrace materials or third party material systems can operate inside BodyPaint 3D.
Any objects which do use such materials will not be exported by this plugin, they must first have any such materials removed and have a standard one applied in its place. The only exceptions to this are Multi/Sub materials which make use of standard materials.
MaterialsBecause BodyPaint 3D does not currently support different materials on an instanced object, these may not be imported; instead you should apply these different materials to actual copies of the objects. Similarly you will be able to use only the first UV channel for each object; subsequent UV channels will be ignored. Material-based UV settings — such as tiling, rotation and offset — are not supported.
BodyPaint 3D and 3ds max use different material models. The plugin will attempt the best possible exchange:
3ds max BodyPaint 3D
Diffuse Color Color
Specular Color Specular Color
Opacity Alpha
Filter Color Transparency
Bump Bump
Displacement Displacement
Self-illumination Luminance
Objects
Advanced light properties such as attenuation and shadow types cannot be transferred.
The following objects will be correctly exported:
- Geometry
- Standard lights
- Cameras
- Background colors
- Environment object
- Helper objects
10 • ADDENDUM ADDENDUM • 11
GeometryAll 3D objects supporting the Get Render Mesh function can be transferred to BodyPaint 3D with no problems; this includes all known geometry plugins. The only 3ds max objects which you cannot paint are bones.
HierarchiesAll hierarchies should be successfully transferred between 3ds max and BodyPaint 3D. The only difference you will encounter is grouped objects in 3ds max; when exported to BodyPaint 3D these will be grouped under a null object.

10 • ADDENDUM ADDENDUM • 11
Using BodyPaint 3D with MayaThis exchange plugin enables you to texture Maya objects in BodyPaint 3D. The objects are transferred directly from Maya to BodyPaint 3D — geometry, material, light and UV data are all sent over. Once you have painted the object in BodyPaint 3D, the texture and material data is sent back to Maya and the scene is updated in Maya. The exchange plugin works with Maya Version 5.
Getting startedFirst things first, you need to do the following to get up and running:
- Start BodyPaint 3D and enter your serial number. The exchange plugin will only work if you have entered your serial number.
- Check that the following file is in Maya’s plugins folder: BodyPaintExchange.mll (Windows) or BodyPaintExchange.lib (Mac).
- Check that the following scripts:
• BodypaintExchangeLoadPlugin.mel
• BodyPaintExchangeUI.mel
• usersetup.mel
are in the folder:
“<My Documents> / Maya / 5.0 / Scripts” (Windows) or
“.. / Users / <name> / Library / Preferences / AliasWavefront / maya / 5.0 / scripts /“ (Mac)
<My Documents> and <name> represent the folder for the local Windows/Mac user.
- Check that QuickTime is installed on your system. If it isn’t, BodyPaint 3D will be unable to load various graphics files such as TIFFs with LZW compression, GIF, PNG, ...
- BodyPaint 3D uses the TIFF file format by default. However, we recommend that you switch the format to PSD instead if you use Photoshop or a paint tool that supports layered PSD files. This will ensure that maximum data is preserved in your saved texture files.
Maya -> BodyPaint 3D (“BodypaintExchange.mll/lib”)First you must assign materials to the objects in Maya. Make sure the desired properties are assigned to these materials — you won’t be able to change them in BodyPaint 3D. For example, if you assign a reflectivity texture to a Lambert material in BodyPaint 3D, when you return your work to Maya this texture cannot be applied to the material automatically.

12 • ADDENDUM ADDENDUM • 13
The objects themselves are exported as polygon objects. The plugin converts NURBS and SubdivSurface objects to polygon objects using the following MEL commands: nurbsToPoly and subdivTOPoly.
All geometry data is scaled according to the factor chosen. Polygons with more than four points are triangulated. The exporter centers the object axis system inside the objects to help make it easier to navigate the object in BodyPaint 3D.
Selection tags are created for “per-face” materials and these are assigned to the appropriate material. The camera’s current position is transferred as are all lights . All material properties are transferred (but see “Transfer Restrictions”).
You’ll find the command for exporting objects — Send to BodyPaint — on the BodyPaint 3D menu. Click the icon to open the exchange dialog.
The exchange dialog
BodyPaint 3D Path
Here you must define the location of the BodyPaint 3D application. Define the full path.
Default Texture Path
This is BodyPaint 3D’s default path for new textures. Enter a valid path or the file exchange will fail!
12 • ADDENDUM ADDENDUM • 13
Objects to Exchange
Choose whether the entire scene or just the selected objects are transferred to BodyPaint 3D.
Object Scale
The object(s) will be scaled by this factor in BodyPaint 3D. Maya objects tend to be very small compared to BodyPaint 3D’s world grid. The default Object Scale of 100 usually ensures the object is a comfortable size to work with in BodyPaint 3D (the object will be 100 times larger in BodyPaint 3D than in Maya).
NURBS -> Use Cage Points and HyperNURBS
This option converts NURBS objects to low poly models which are sent to BodyPaint 3D and placed inside a HyperNURBS object.
NURBS -> Use RebuildSurface
Only use this option if you have problems with the UV coordinates. Before the NURBS objects are sent to BodyPaint 3D, the MEL command rebuildSurface is applied to them to prevent overlapping UVs.
Resize UVs to Fit HyperNURBS
The “Use Cage Points and HyperNURBS” conversion can cause the UVs to become stretched out over too great an area. This option automatically resizes the UVs to fit the UV space (0.0,0.0 to 1.0,1.0).
Do Not Wait for BodyPaint 3D (One Way)
If the transfer is one way. i.e. if you want to send objects to BodyPaint 3D but you don’t want to return them to Maya, enable this option. Maya will then stop waiting for the data to be returned.
All settings in this dialog are saved when you save the Maya settings.
Once you click on OK, the wait window appears in Maya. The objects are transferred to BodyPaint 3D and you are ready to paint them.
BodyPaint 3D -> MayaOnce you’re done painting in BodyPaint 3D, you are ready to send your work back to Maya.
To return your work to Maya:
In BodyPaint 3D, choose File > Send Scene Back.

14 • ADDENDUM ADDENDUM • 15
The textures are saved and in Maya the texture paths are updated to point to the new texture folder. All material properties are updated. The wait window closes and Maya comes to the foreground.
Do not change the names of the objects or materials. Otherwise problems are likely when the scene is updated.
Transfer RestrictionsNaturally, there are differences in the way that Maya and BodyPaint 3D handle objects, UV coordinates and textures. Therefore the following transfer restrictions apply.
MaterialsYou must assign materials to the objects in Maya before you send the objects to BodyPaint 3D — you won’t be able to change them in BodyPaint 3D. For example, if you assign a reflectivity texture to a Lambert material in BodyPaint 3D, when you return your work to Maya this texture cannot be applied to the material automatically.
TexturesTextures you have assigned in Maya are copied to the specified texture folder when you send the object(s) to BodyPaint 3D. You can add or remove textures in BodyPaint 3D. Maya file nodes are created or deleted accordingly. Special shader or texture channels cannot be transferred. A color channel will be transferred provided it exists. You can use the color channel to create a texture in an “unknown” channel. Once this is returned to Maya, you can manually assign it to the desired channel.
UVsUVs are sent to BodyPaint 3D for all objects. However, no UVs are returned to Maya. Therefore do all your UV editing in Maya.
Troubleshooting
Error: Cannot find command “BodypaintExchange”The following file is missing from the “../Maya/bin/plug-ins/” location: “BodyPaintExchange.mll” (Windows) or “BodyPaintExchange.lib” (MacOS).
Or the plugin has not been loaded by the Plugin manager. Check if the MEL scripts are in the correct folder (see “Getting Started”).
Error: “Execute BodyPaint 3D”The exporter cannot find BodyPaint 3D. Set BodyPaint 3D Path to the correct path.

14 • ADDENDUM ADDENDUM • 15
I can’t send the entire scene to BodyPaint 3DThis is due to a MEL bug with Select All, which fails to select all the objects. To remedy, select all the objects manually and transfer the selection instead of the scene.
Note to Mac users:Under certain conditions (such as low RAM on the graphics card) you may notice display errors when sending new textures from BodyPaint 3D to Maya. For example, instead of the texture being mapped to the object, the current screen is mapped. This is not BodyPaint 3D’s fault. To avoid this problem, in Maya’s Material settings, set Texture Resolution to, say, Medium.

16 • ADDENDUM
Mouse TechniquesEnhanced mouse support, p.3BodyPaint 3D now supports mice with three, four or even five buttons. You can now define these buttons within shortcuts (see “Command Manager” on page 40).
The following shortcuts will appear in the Command manager:
Middle mouse button MMB
Fourth mouse button MX1
Fifth mouse button MX2
1 Getting to Know BodyPaint 3D