activity 3.1.1 inputs and outputs – vex · web viewactivity 3.1.1 inputs and outputs – vex...
TRANSCRIPT
Activity 3.1.1 Inputs and Outputs – VEXIntroduction
Robots are similar to humans if you consider that both use inputs and outputs to sense and react to the world.
Most humans use five senses to perceive the world. Based on the input of these senses, your brain makes decisions to activate a response. Through muscle activation, the response can take many forms, including speaking, moving your hand, or running. Robots behave similarly when the world is sensed through physical touch, ambient light intensity, or distance to a solid object. The robot processor translates these inputs and activates a response by triggering a motor or light emitter.
In this activity you will use the ROBOTC software to monitor inputs and control outputs. This will allow you to test the behavior of components before writing a program and to use it as a troubleshooting tool for analyzing program performance.
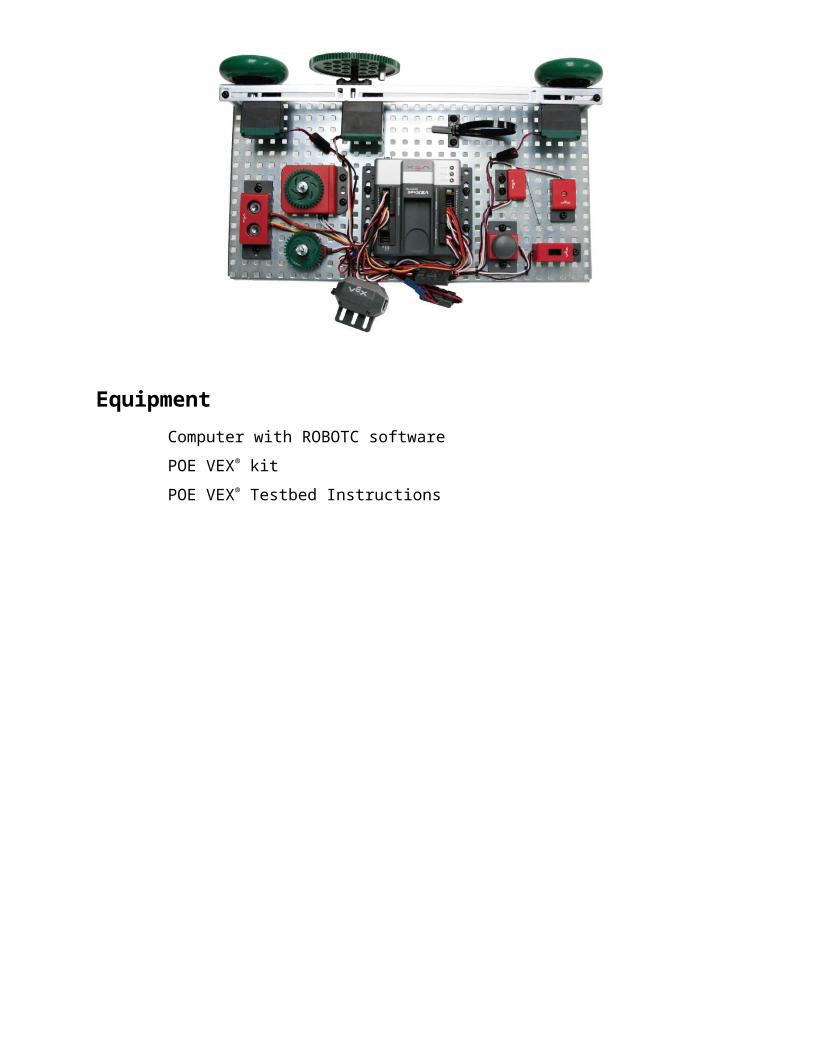
EquipmentComputer with ROBOTC softwarePOE VEX® kitPOE VEX® Testbed Instructions

Procedure1. Start the ROBOTC software.
2. Connect the testbed to the computer using the USB A-A cable.
3. Set up the motors and sensors.
a. Open the PLTW ROBOTC template:
i. Click File.
ii. Click Open Sample Program.
iii. Click PLTW folder (pathway: C:\Program Files\Robotics Academy\ROBOTC for IFI Cortex and PIC\sample programs\VEX2).
iv. Click PLTWtemplate.
v. Click Open.
b. Set platform and communications method:
i. Click View, Preferences, then Detailed Preferences. Click the drop down under Platform Type, then Innovation First (IFI), then click Natural Language Library (VEX Cortex). Natural Language should appear in the platform type window.
ii. Click the drop down under Communication Port, then click Automatic. Note that this can be changed to USB to ensure that the PC communicates to the Cortex through the USB cable.
iii. Click OK.
c. Click File, Save As, select the folder that your teacher designated, then name the file A3_1_1.
d. Complete the Project Title, Team Members, Date, and Section. Leave Task Description and Pseudocode blank.
e. Click Robot.
f. Click Motors and Sensors Set up.
g. Add the motors and sensors as shown below.
h. Save the file in the same location used earlier, A3_1_1.


Motors and Sensors Setup
4. Obtain the teacher’s approval before proceeding to the next step.
Instructor’s Signature ______________________ Date __________


5. Power on the Cortex.
6. View motor and sensor debugger windows.
a. Click Robot.
b. Click Compile and Download Program. Leave the Debug window open.
c. Click Robot, Debug Windows, then Motors.
d. If there is not a Sensor and Motors tab available at the bottom of the window, add them through the next steps. Click Robot, Debug Windows, then Sensors.
e. Increase the debugger window area at the bottom to view the motor and sensor values as shown below. Note that this window can be viewed any time by clicking Robot then Debugger.
Motor and Sensor Windows
7. Verify motor outputs.
a. Click the Motors tab at the bottom on the window.
b. Change the right motor value.
i. Click Port 2 under the Power column.

ii. Enter several values ranging from -127 to 127, then press Enter on the keyboard or click away from the value entry window.
iii. Record your observations in your engineering notebook, including the threshold power setting for the motor to turn.
Motor
c. Change the left motor value.
i. Click Port 3 under the Power column.
ii. Enter several values ranging from -127 to 127, then press Enter on the keyboard or click away from the value entry window after each value is entered.
iii. Record your observations in your engineering notebook, including the threshold power setting for the motor to turn.
8. Verify analog sensor inputs.
a. Click the Sensors tab.
b. Click Continuous to allow the sensor values to update. The dialog box will then display “Pause Refresh.”
Continuous Option
c. Observe the line follower sensor.
i. View the value shown beside the lineFollower (in1) label.
ii. Change the line follower immediate environment and observe the effect on the lineFollower value. Use a dark and light color within 1/4 - 1/8 in. to see the change in the sensor value.
iii. Record your observations in your engineering notebook.

d. Observe the potentiometer.
i. View the value shown beside the potentiometer (in2) label.
ii. Change the potentiometer setting and observe the effect on the potentiometer value. Rotate the potentiometer to change the sensor input. Do not force the potentiometer beyond the CW and CCW physical stops.
iii. Record your observations in your engineering notebook.
iv. Calculate the angle change between whole number values in your engineering notebook. Use the protractor below to measure an angle.
Potentiometer
1. Verify digital sensor inputs.
a. Verify that the Sensors tab is selected in the debugger window.
b. Observe the limit switch sensor.
i. View the value shown beside the limitSwitch (dgtl1) label.
ii. Change the limit switch environment and observe the effect on the limitSwitch value. Your finger can be used to activate the limit switch.
iii. Record your observations in your engineering notebook.

Limit Switch

c. Observe the bumper switch sensor.
i. View the value shown beside the bumpSwitch (dgtl2) label.
ii. Change the bumper switch environment and observe the effect on the bumpSwitch value. Your finger can be used to activate the bumper switch.
iii. Record your observations in your engineering notebook.
Bumper Switch
d. Observe the optical encoder sensor.
i. View the value shown beside the quad (dgtl3) label.
ii. Change the optical encoder environment and observe the effect on the quad value. Rotate the optical encoder. Note that there is no CW or CCW physical stop therefore it can be turned indefinitely in a direction.
iii. Record your observations in your engineering notebook.
Optical Encoder
e. Change the green LED light value.
i. Click the field beside green (dgtl12) under the Value column.
ii. Enter a 0 value, then press Enter on the keyboard or elsewhere in the dialog window. Did the LED respond as you expected?
iii. Enter a 1 value, then press Enter on the keyboard or click away from the value entry window. Did the LED respond as you expected?
iv. Record your observations in your engineering notebook.

2. Verify available output and inputs
a. Change the servo motor value.
i. Click Port 9 under the Power column.
ii. Enter several values ranging from -127 to 127, then press Enter on the keyboard or click away from the value entry window.
iii. Record your observations in your engineering notebook, including the servomotor physical range.
iv. Calculate the angle change between whole number values in your engineering notebook. Use the protractor above to measure an angle.
Servo Motor
b. Change the flashlight value.
i. Slide the physical switch on the flashlight to the on position.
ii. Click Port 1 under the Power column.
iii. Enter several values ranging from -127 to 127, then press Enter on the keyboard or click away from the value entry window. This allows the value to be updated. Note that the flashlight needs a negative value in the debugger window.
iv. Turn flashlight off.
v. Record your observations in your engineering notebook.
Flashlight

a. Observe the ultrasonic sensor.
i. View the value shown beside the sonar (dgtl5) label.
ii. Change the ultrasonic environment with a solid object in front of the ultrasonic sensor. Observe the effect on the sonar value.
iii. Record your observations in your engineering notebook.
Ultrasonic
b. Observe the light sensor.
i. View the value shown beside the lightSensor (in3) label.
ii. Change the light sensor’s immediate environment by activating the flashlight and shine it on the light sensor. Use your hand to shield the light to the sensor to change the sensor input. Observe the effect on the lightSensor value.
iii. Record your observations in your engineering notebook.
Light Sensor
