access for ells single-device installation instructions · pdf fileaccess for ells...
TRANSCRIPT
1 Last Revision: October 14, 2015
ACCESS for ELLs Single-Device Installation Instructions
Introduction For schools with very few English learners (ELs), it may not be feasible to install the ACCESS for ELLs
testing software as described in other documents. This document is designed to walk someone with
modest technical skills through the installation and testing of software, and the administration of
ACCESS for ELLs on a laptop or single desktop.
This type of install will not allow multiple students to test at one time, a key feature of ACCESS for ELLs
2.0. For this reason, it is inappropriate for schools which need to test more than just a handful of
students.

2 Last Revision: October 14, 2015
Contents Introduction .................................................................................................................................................. 1
Websites ....................................................................................................................................................... 3
WIDA Website ........................................................................................................................................... 3
WIDA Assessment Management System (AMS) ....................................................................................... 3
Training ......................................................................................................................................................... 3
Testing Roles ............................................................................................................................................. 3
Test Coordinators .................................................................................................................................. 3
Technology Coordinators ...................................................................................................................... 4
Test Administrators ............................................................................................................................... 4
Technology Requirements ............................................................................................................................ 4
Downloading and Installing Software ........................................................................................................... 5
DRC INSIGHT Secure Browser ............................................................................................................... 5
DRC Testing Site Manager (TSM) .......................................................................................................... 5
Downloading the Software ....................................................................................................................... 5
Installing the Software .............................................................................................................................. 6
Installing the TSM ................................................................................................................................. 6
Installing the DRC INSIGHT Secure Browser ......................................................................................... 8
TSM Setup and Configuration ................................................................................................................. 11
Create an ORG Unit in the WIDA AMS .................................................................................................... 11
ORG Unit Configuration .......................................................................................................................... 13
Linking the INSIGHT Secure Browser to the TSM.................................................................................... 14
Practice Tests .......................................................................................................................................... 14
Running the System Readiness Check .................................................................................................... 14
Future Versions of these Instructions ......................................................................................................... 15

3 Last Revision: October 14, 2015
Websites There are two websites that are required for ACCESS for ELLs administration:
WIDA Website https://www.wida.us/index.aspx
ACCESS for ELLs training materials
WIDA Assessment Management System (AMS) https://www.wida-ams.us/default.aspx
all ACCESS for ELLs test administration duties
user guides
software downloads
order paper materials
add students to test sessions
designate accommodations
create test sessions
print test tickets
monitor student progress
view/print reports
District Assessment Coordinators (DACs) should have access to both websites, and should be able to
create and modify permissions for other staff in their district involved in ACCESS for ELLs testing.
If you are a DAC and do not have access, ensure you are listed as a DAC on the DPI website (link below)
and contact [email protected] for access to the WIDA website, and [email protected] for
access to the WIDA AMS.
If you are not a DAC and do not have access, please contact your DAC. A list of DACs can be found here:
http://dpi.wi.gov/assessment/dac/update (download the DAC contact list)
Training
Testing Roles There are three roles for testing:
Test Coordinators
• responsible for the overall coordination of test administration • set up user accounts within the new WIDA Assessment Management System (WIDA AMS) • ensure everyone has access to the WIDA website (wida.us) for training • complete the Training Course and verify that Test Administrators and Technology Coordinators
have also completed their trainings and checklists
4 Last Revision: October 14, 2015
Technology Coordinators
• responsible for all technical and system setup for online testing • troubleshoot and provide tech support during testing • complete web-based trainings and checklists available through the WIDA website (wida.us)
Test Administrators
• responsible for administering ACCESS for ELLs • complete the WIDA Training Course, including review of all applicable Test Administration
Manuals and web-based modules • complete checklists that will be available through the WIDA website (wida.us)to prepare for test
administration activities You must complete the training on the WIDA.us website for the roles you will be filling. There are
additional training modules, presentations, and recorded webinars on the ACCESS for ELLs 2.0
preparation page: https://www.wida.us/assessment/access20-prep.aspx. Please note: the Technology
Coordinator roles does not have required trainings. However, there are checklists of duties, recorded
webinars, and manuals available on the ACCESS 2.0 preparation page.
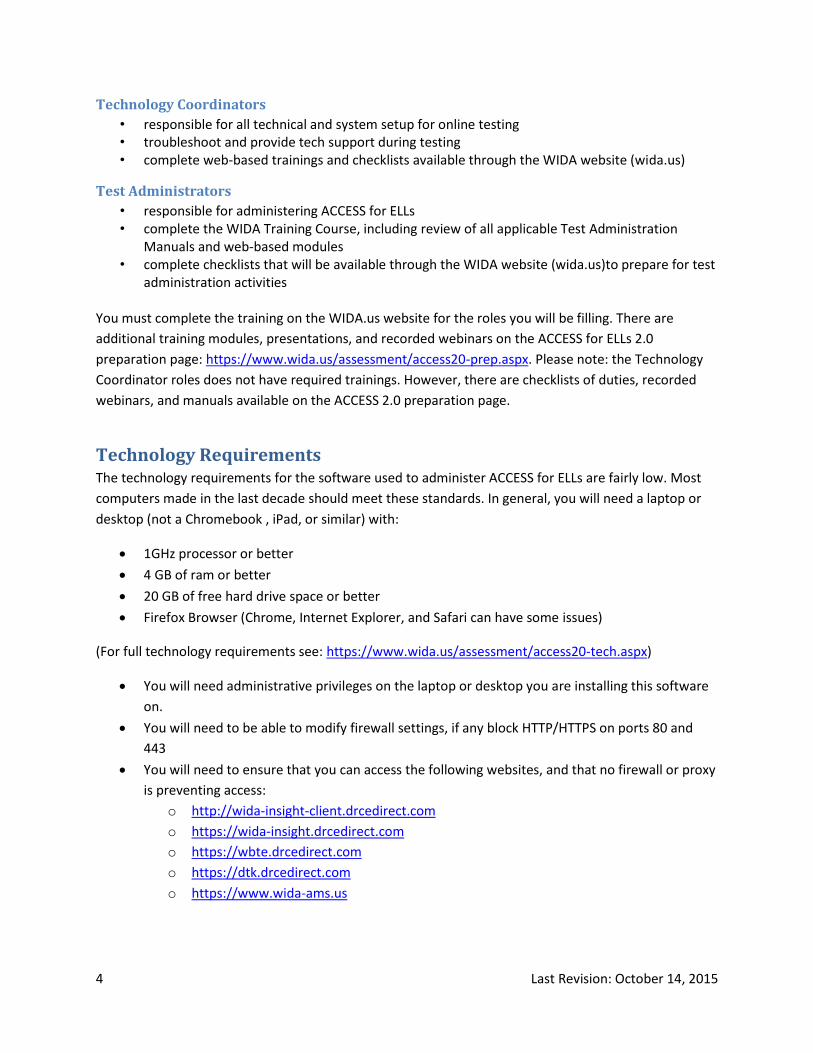
Technology Requirements The technology requirements for the software used to administer ACCESS for ELLs are fairly low. Most
computers made in the last decade should meet these standards. In general, you will need a laptop or
desktop (not a Chromebook , iPad, or similar) with:
1GHz processor or better
4 GB of ram or better
20 GB of free hard drive space or better
Firefox Browser (Chrome, Internet Explorer, and Safari can have some issues)
(For full technology requirements see: https://www.wida.us/assessment/access20-tech.aspx)
You will need administrative privileges on the laptop or desktop you are installing this software
on.
You will need to be able to modify firewall settings, if any block HTTP/HTTPS on ports 80 and
443
You will need to ensure that you can access the following websites, and that no firewall or proxy
is preventing access:
o http://wida-insight-client.drcedirect.com
o https://wida-insight.drcedirect.com
o https://wbte.drcedirect.com
o https://dtk.drcedirect.com
o https://www.wida-ams.us
5 Last Revision: October 14, 2015
Downloading and Installing Software Prior to anything else, download and install Firefox if it’s not already installed on your computer.
There are two pieces of software required to administer ACCESS for ELLs, both available on the WIDA
AMS:
DRC INSIGHT Secure Browser
students use this to take ACCESS for ELLs
DRC Testing Site Manager (TSM)
handles system readiness checks, load simulation, tech readiness checks, etc.
caching server
Downloading the Software 1. Log into the WIDA AMS (https://www.wida-ams.us/default.aspx)
a. If this is your first time visiting the site, you may be asked to accept a self-signed security
certificate. On Firefox, it comes with a scary warning about an untrusted connection.
This is ok if it is your first time visiting the site. If this warning shows after you add an
exception and accept the security certificate the first time, it may be cause for concern.
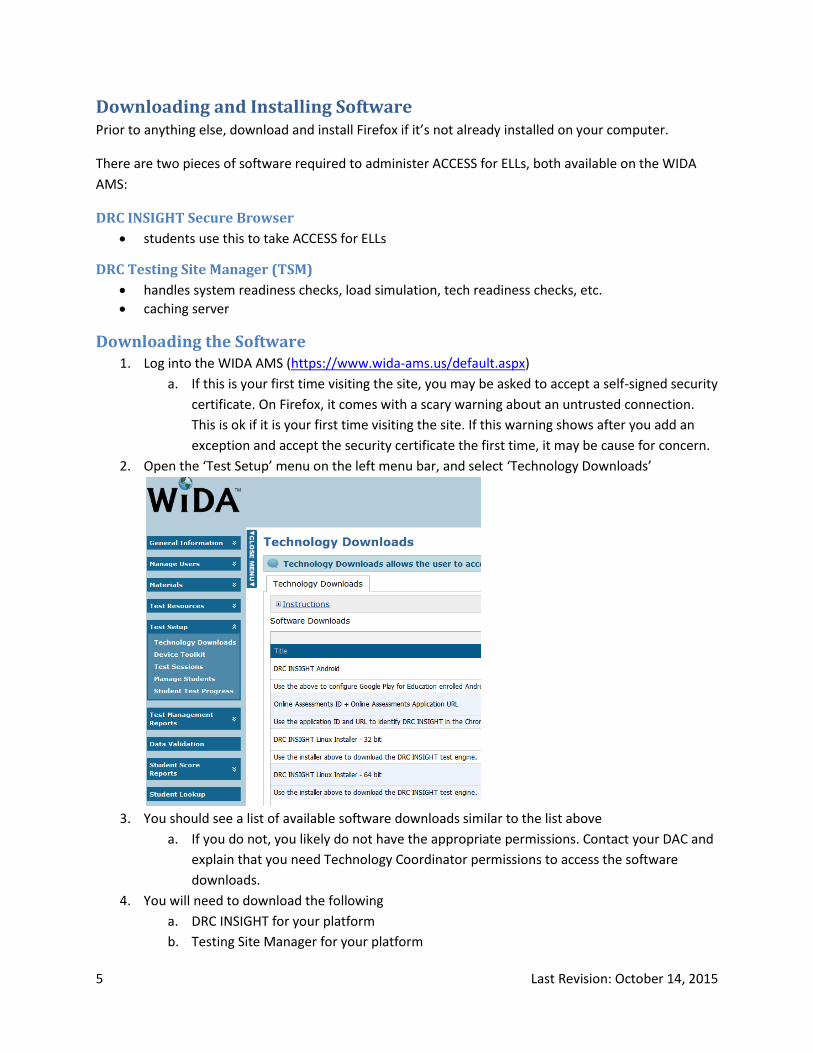
2. Open the ‘Test Setup’ menu on the left menu bar, and select ‘Technology Downloads’
3. You should see a list of available software downloads similar to the list above
a. If you do not, you likely do not have the appropriate permissions. Contact your DAC and
explain that you need Technology Coordinator permissions to access the software
downloads.
4. You will need to download the following
a. DRC INSIGHT for your platform
b. Testing Site Manager for your platform

6 Last Revision: October 14, 2015
c. (We will assume you are on a Windows platform for the remainder of these instructions.
These should be mostly similar for Mac OS X or Linux, but may differ in some places.)
5. Click on the box to the right of the software you need to download, and it should prompt you to
Save File
6. When you have downloaded both files, you can begin the installation process
Installing the Software
Installing the TSM
You will need information from the TSM in order to install the DRC INSIGHT secure browser. Begin by
installing the TSM.
1. Locate the TSM download. Double-click on it.
2. An installer window will appear
3. Click Run
4. The TSM will extract some files to prepare for installation
7 Last Revision: October 14, 2015
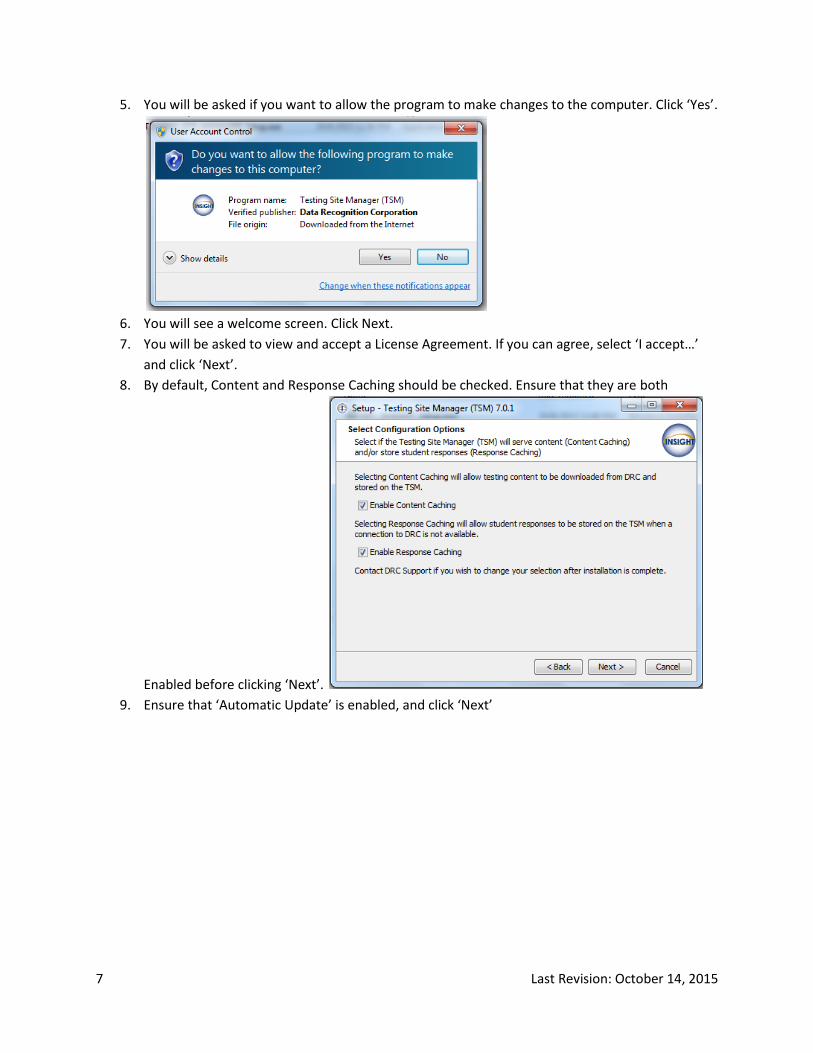
5. You will be asked if you want to allow the program to make changes to the computer. Click ‘Yes’.
6. You will see a welcome screen. Click Next.
7. You will be asked to view and accept a License Agreement. If you can agree, select ‘I accept…’
and click ‘Next’.
8. By default, Content and Response Caching should be checked. Ensure that they are both
Enabled before clicking ‘Next’.
9. Ensure that ‘Automatic Update’ is enabled, and click ‘Next’
8 Last Revision: October 14, 2015
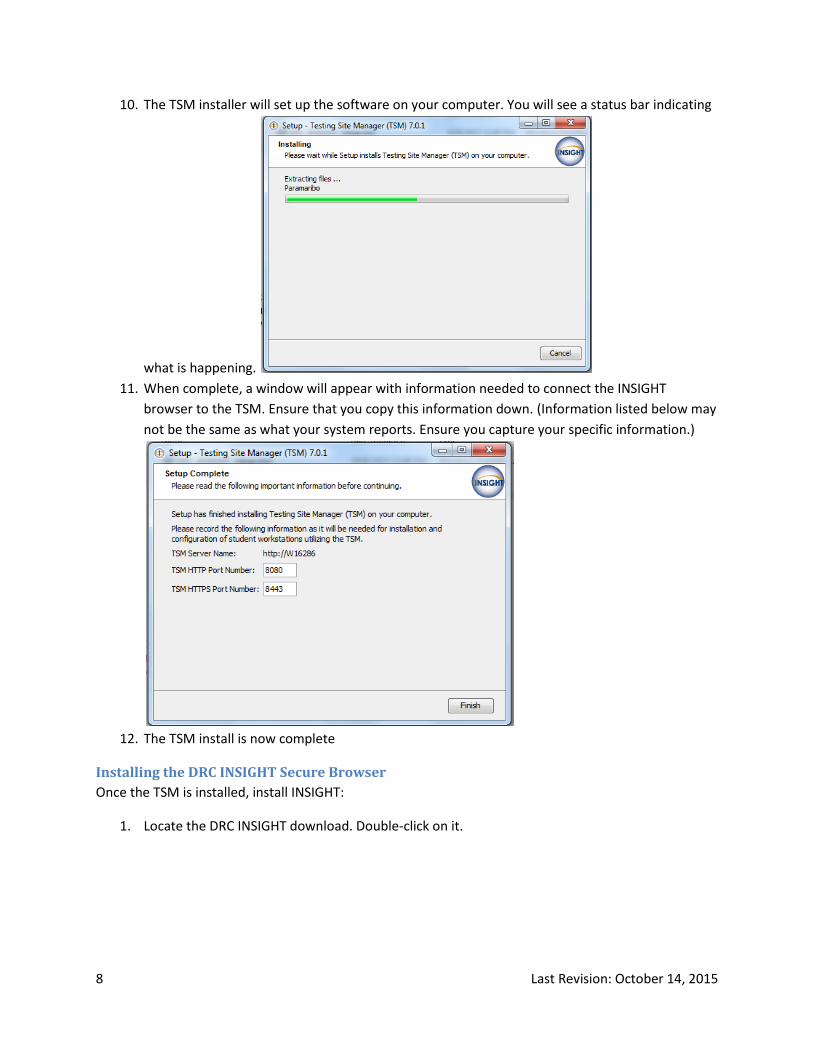
10. The TSM installer will set up the software on your computer. You will see a status bar indicating
what is happening.
11. When complete, a window will appear with information needed to connect the INSIGHT
browser to the TSM. Ensure that you copy this information down. (Information listed below may
not be the same as what your system reports. Ensure you capture your specific information.)
12. The TSM install is now complete
Installing the DRC INSIGHT Secure Browser
Once the TSM is installed, install INSIGHT:
1. Locate the DRC INSIGHT download. Double-click on it.

9 Last Revision: October 14, 2015
2. An installer window will appear
3. Click Run. DRC INSIGHT will extract some files to prepare for installation
13. You will see a welcome screen. Click Next.
14. You will be asked to view and accept a License Agreement. If you can agree, select ‘I accept…’
and click ‘Next’.
10 Last Revision: October 14, 2015
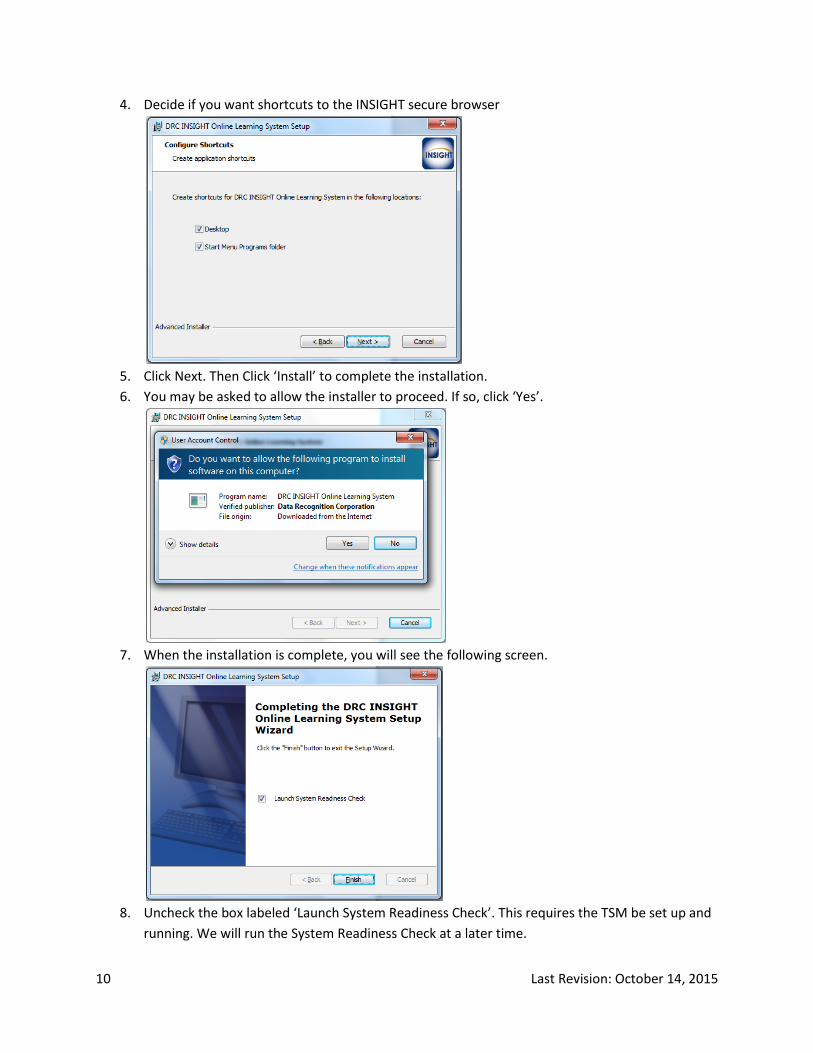
4. Decide if you want shortcuts to the INSIGHT secure browser
5. Click Next. Then Click ‘Install’ to complete the installation.
6. You may be asked to allow the installer to proceed. If so, click ‘Yes’.
7. When the installation is complete, you will see the following screen.
8. Uncheck the box labeled ‘Launch System Readiness Check’. This requires the TSM be set up and
running. We will run the System Readiness Check at a later time.

11 Last Revision: October 14, 2015
TSM Setup and Configuration This is somewhat more complicated than a normal TSM setup, as it’s likely that you will NOT have a
static IP address, especially if installing on a laptop and changing locations. Therefore you will need to be
able to find your IP address and update the TSM at each location.
1. Open the windows menu (windows key or button at the bottom left of the screen)
2. Click ‘All Programs’ > ‘TestingSiteManager’ > ‘TestingSiteManager’
a. The TSM should open in a Firefox browser window
b. Enter a name for your TSM. Be descriptive. Include District/School, and other clear
identifiers.
c. Once you click ‘Save’, the TSM will be named and you will have access to other
functions.
3. Check that the Content List is up-to-date. If it is not, click the ‘Update Content’ button.
4. Next, create an Organization Unit in the WIDA AMS.
Create an ORG Unit in the WIDA AMS 1. Log into the WIDA AMS again
12 Last Revision: October 14, 2015
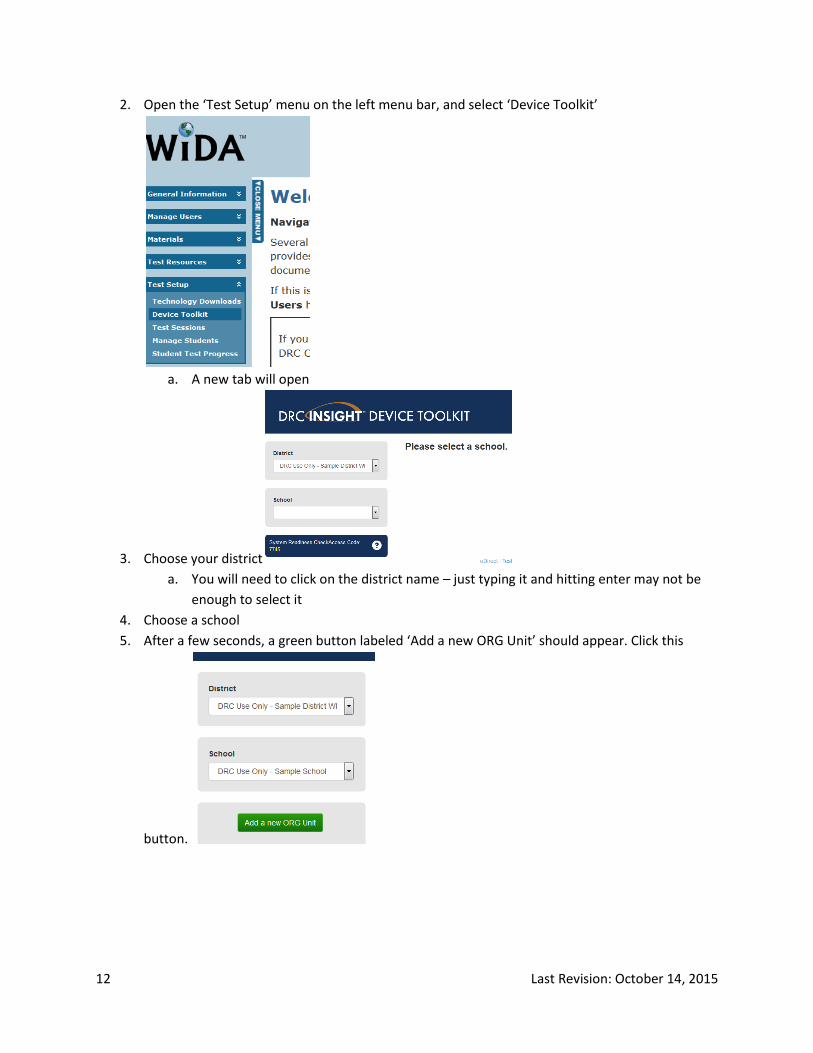
2. Open the ‘Test Setup’ menu on the left menu bar, and select ‘Device Toolkit’
a. A new tab will open
3. Choose your district
a. You will need to click on the district name – just typing it and hitting enter may not be
enough to select it
4. Choose a school
5. After a few seconds, a green button labeled ‘Add a new ORG Unit’ should appear. Click this
button.
13 Last Revision: October 14, 2015
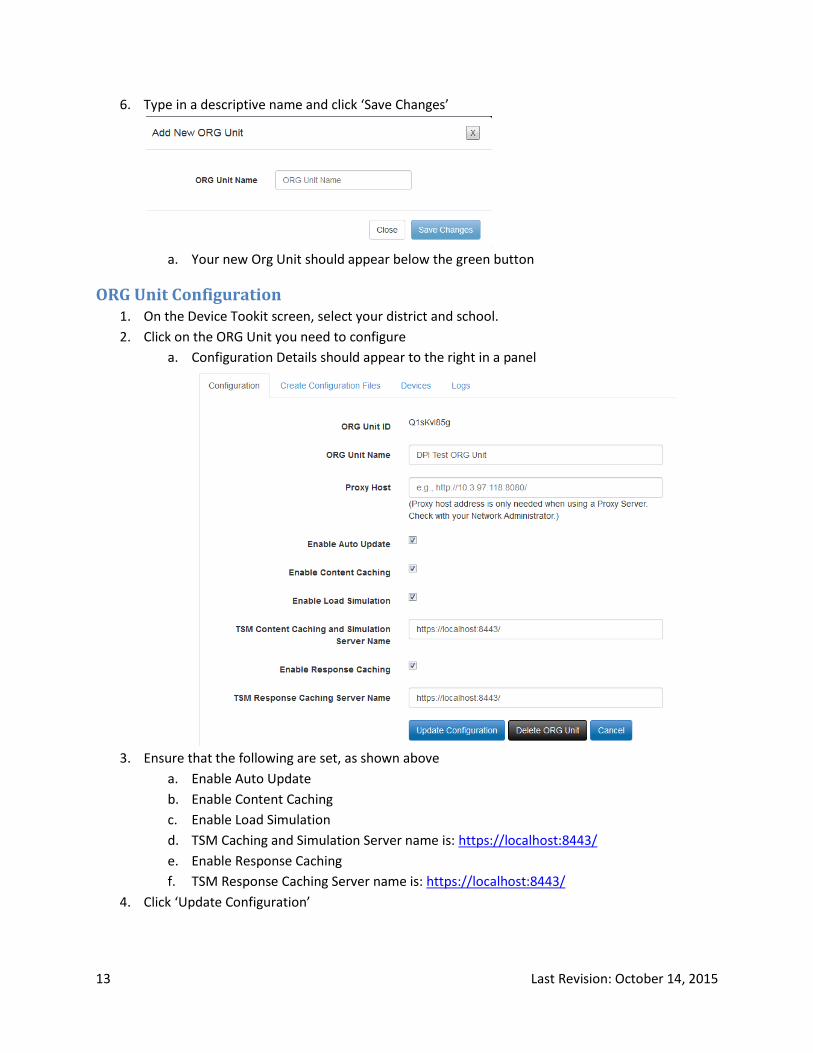
6. Type in a descriptive name and click ‘Save Changes’
a. Your new Org Unit should appear below the green button
ORG Unit Configuration 1. On the Device Tookit screen, select your district and school.
2. Click on the ORG Unit you need to configure
a. Configuration Details should appear to the right in a panel
3. Ensure that the following are set, as shown above
a. Enable Auto Update
b. Enable Content Caching
c. Enable Load Simulation
d. TSM Caching and Simulation Server name is: https://localhost:8443/
e. Enable Response Caching
f. TSM Response Caching Server name is: https://localhost:8443/
4. Click ‘Update Configuration’
14 Last Revision: October 14, 2015
Linking the INSIGHT Secure Browser to the TSM 1. In the ORG Unit that you just created, select the ‘ORG Unit ID’ at the top of the page
2. Copy this ID
3. Open the DRC INSIGHT Online Assessments program from the Windows Menu
a. DRC INSIGHT opens in a kiosk mode that you can’t alt-tab out of. Ensure you have the
ORG Unit ID copied, as you will not be able to go back and look at it.
b. DRC INSIGHT also disallows screen captures, so there will be no images for this section
4. Click ‘Assign Device to ORG Unit’
5. Paste in the ORG Unit ID you copied
6. Click ‘Add’
7. Click ‘Register’
8. You should see a screen with sample items and a practice test
Practice Tests It is extremely beneficial to run some practice tests, both for yourself and your students. It allows you to
become familiar with what the student should be seeing, and ensures that everything is working
properly.
1. Plug a headset into the computer
a. Ensure that it is installed correctly and functioning
2. Ensure that the TSM is running
3. Open the DRC INSIGHT Online Assessments program from the Windows Menu
a. If properly configured, it should open to Sample Items and Practice Tests
4. Select the appropriate grade and domain for your student
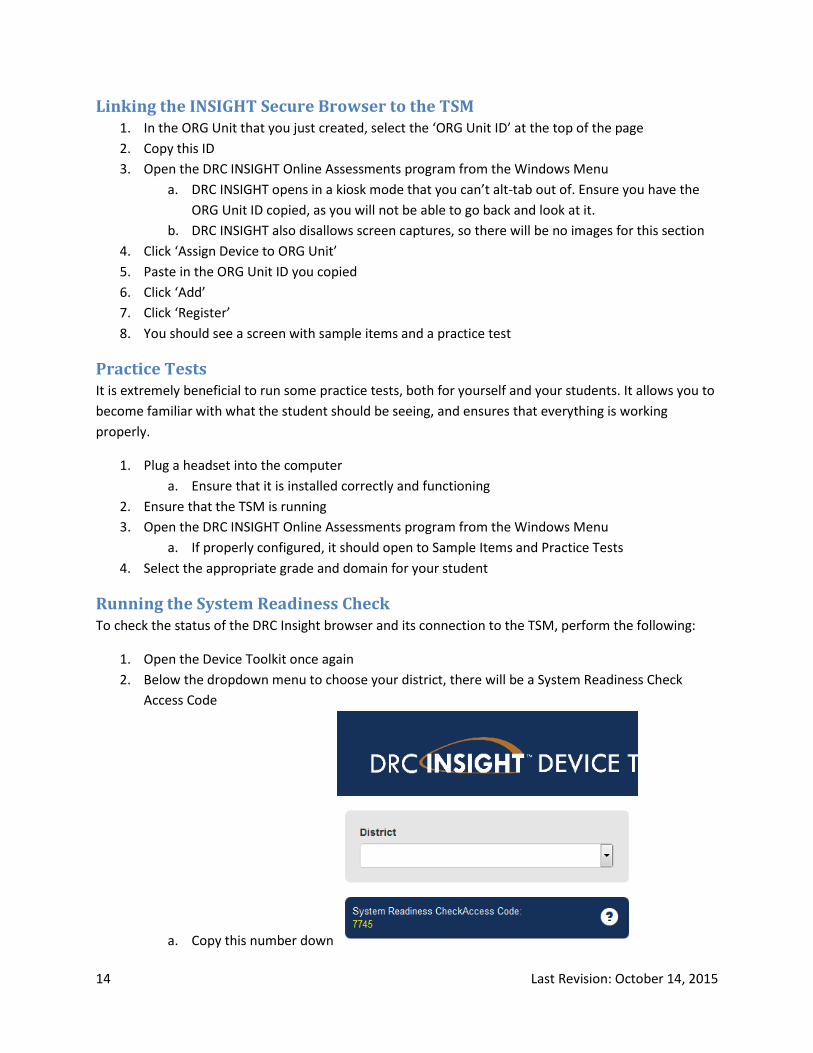
Running the System Readiness Check To check the status of the DRC Insight browser and its connection to the TSM, perform the following:
1. Open the Device Toolkit once again
2. Below the dropdown menu to choose your district, there will be a System Readiness Check
Access Code
a. Copy this number down

15 Last Revision: October 14, 2015
3. Open the Insight Browser
4. There is a check-mark near the bottom left that is nearly the same color as the background
5. Click on the check-mark
6. Enter the Access Code you copied down above
7. You will see a large amount of information that can be helpful in tracking down issues
Future Versions of these Instructions Please check the DPI website regularly throughout the fall, as this and other pieces of information will
continue to be revised and added to.