about the tutorial - tutorialspoint.com · front-end api’s like jax-rs and jax-ws. having so many...
TRANSCRIPT
i
i
About the Tutorial
In this tutorial you will learn how to use CXF to create both a web service and a client that
consumes the service. This tutorial will also walk you through the entire code development
for both server and the client.
Audience
This tutorial has been prepared to cater the needs of both the beginners and experts in
Apache CXF. The tutorial has a flow that takes you from the simpler concepts to in depth
ones and lets you gain confidence as you progress through it.
Prerequisites
This tutorial uses Apache Maven at several instances. At some instances in this tutorial,
you may come across usage of RESTful web services in Java.
If you are new to this technology, we suggest you to pick up a tutorial on these before
you move ahead with Apache CXF.
Copyright & Disclaimer
@Copyright 2019 by Tutorials Point (I) Pvt. Ltd.
All the content and graphics published in this e-book are the property of Tutorials Point (I)
Pvt. Ltd. The user of this e-book is prohibited to reuse, retain, copy, distribute or republish
any contents or a part of contents of this e-book in any manner without written consent
of the publisher.
We strive to update the contents of our website and tutorials as timely and as precisely as
possible, however, the contents may contain inaccuracies or errors. Tutorials Point (I) Pvt.
Ltd. provides no guarantee regarding the accuracy, timeliness or completeness of our
website or its contents including this tutorial. If you discover any errors on our website or
in this tutorial, please notify us at [email protected]

Apache CXF
ii
Table of Contents
About the Tutorial ................................................................................................................................ i
Audience ............................................................................................................................................... i
Prerequisites ......................................................................................................................................... i
Copyright & Disclaimer ......................................................................................................................... i
Table of Contents ................................................................................................................................. ii
1. APACHECXF – INTRODUCTION .......................................................................................... 1
2. APACHECXF – CXF WITH POJO .......................................................................................... 2
Developing Web Service ...................................................................................................................... 2
Web Service Interface .......................................................................................................................... 2
Web Service Implementation .............................................................................................................. 3
Creating Server .................................................................................................................................... 3
Setting up Maven Project .................................................................................................................... 5
Project Folder Structure ....................................................................................................................... 9
Running Server .................................................................................................................................. 10
Creating Client ................................................................................................................................... 11
Running Client ................................................................................................................................... 13
3. APACHE CXF – CXF WITH JAX-WS ................................................................................... 14
Declaring Service Interface ................................................................................................................ 14
Implementing Web Interface ............................................................................................................. 14
Developing Server .............................................................................................................................. 15
Deploying Server................................................................................................................................ 16
The Final pom.xml ............................................................................................................................. 18
Running the HelloWorld Service ........................................................................................................ 21
Developing Client ............................................................................................................................... 22

Apache CXF
iii
4. APACHE CXF – CXF WITH WSDL FIRST ............................................................................. 24
WSDL for HelloWorld ......................................................................................................................... 24
The wsdl2java Plugin ......................................................................................................................... 26
Generated Service Interface .............................................................................................................. 28
Implementing the Service Interface ................................................................................................... 29
Developing Server .............................................................................................................................. 30
Deploying Server................................................................................................................................ 32
The Final pom.xml ............................................................................................................................. 34
Running the HelloWorld Service ........................................................................................................ 38
Developing Client ............................................................................................................................... 41
5. APACHE CXF – CXF WITH JAX-RS ..................................................................................... 42
Declaring Movie Element ................................................................................................................... 42
Creating Movie Service Database....................................................................................................... 43
Developing Server .............................................................................................................................. 45
The Final pom.xml ............................................................................................................................. 46
Developing Client ............................................................................................................................... 49
Testing JAX-RS Application................................................................................................................. 50
6. APACHE CXF - CXF WITH JMS .......................................................................................... 51
Creating Service Interface .................................................................................................................. 51
Implementing Service ........................................................................................................................ 51
Creating Server .................................................................................................................................. 52
Adding Dependencies ........................................................................................................................ 54
Running Server .................................................................................................................................. 57
Creating Client ................................................................................................................................... 57
7. APACHE CXF - CONCLUSION ........................................................................................... 60

Apache CXF
ii

Apache CXF
1
In today’s environment, you can create a web service application using several options.
You can use one or more of the several standard and widely accepted protocols for
communication. For example SOAP, XML/HTTP, RESTful HTTP, and CORBA (Common
Object Request Broker Architecture, which was very popular in olden days but not so
frequently used now.
You also have a choice of different transports such as HTTP, JMS, JBI and the choice of
front-end API’s like JAX-RS and JAX-WS. Having so many options for web service
development, there is a need for an open source services framework to glue all the above
mentioned options together and that is what Apache CXF does.
In this tutorial, you will learn how to use CXF to create both a web service and a client
that consumes the service, using one or more of the options that we have listed above.
This tutorial will walk you through the entire code development for both server and the
client. As each application can use only one of the options from each category, namely
frontend, transport and protocol, considering all permutations and combinations of these
three, the number of applications will be exorbitantly high.
This tutorial discusses the development of following projects in detail:
CXF with Plain Old Java Objects (POJO)
CXF with JAX-WS
CXF with WSDL
CXF with JAX-RS
CXF with JMS
To keep it simple, we have used maven with its command line interface. You may use your
preferred IDE for creating a maven project.
In the next chapter, let us get started with the first one.
1. ApacheCXF – Introduction

Apache CXF
2
In this chapter, you will learn how to develop a simple web application that sends a
greetings message to the user. A web service project uses WSDL model. The CXF allows
you to hide this WSDL model by providing a simple frontend to map Java APIs to the
underlying WSDL.
In this simplest project, the interface of the web service will be directly exposed to the
client and the client would use native Java APIs to call the web service.
First, we will create a web service. Every service has an interface that is exposed to the
client. We may write this interface as a simple Java interface or as a WSDL document. In
this Java-First approach, we will expose our service through a Java interface.
Developing Web Service
The service that we are going to create on the web will have a single web method called
greetings. The method takes a string type argument in which we will send the user’s
name. The service will send back a greetings message to the caller with the received user
name included in the message.
Web Service Interface
To expose the interface of our web service, we will create a Java interface as follows:
//HelloWorld.java
package com.tutorialspoint.cxf.pojo;
public interface HelloWorld {
String greetings(String text);
}
The interface has only one method called greetings. The server will implement this
interface. In our trivial application, this interface is directly exposed to the client. Typically,
in a web service application, you use WSDL to describe the web service interface. In this
simple application, we will provide this direct interface to the client developer. The client
would then call the greetings message on the server object. So first let us create the web
service.
2. ApacheCXF – CXF with POJO

Apache CXF
3
Web Service Implementation
The HelloWorld interface is implemented in the HelloWorldImpl Java class as shown
below:
//HelloWorldImpl.java
package com.tutorialspoint.cxf.pojo;
public class HelloWorldImpl implements HelloWorld {
@Override
public String greetings(String text) {
return "Hi " + text;
}
}
The greetings method receives a parameter of string type, appends it to a greeting
message and returns the resultant string to the caller.
Next, we write the server application to host the HelloWorld service.
Creating Server
The server application consists of two parts:
The first part creates a factory for our web service, and
The second part writes a main method for instantiating it.
The server uses ServerFactoryBean class provided by CXF libraries to expose our
HelloWorld interface to remote clients. Thus, we first instantiate the ServerFactoryBean
class and then set its various properties:
ServerFactoryBean factory = new ServerFactoryBean();
We set the service class to be called by calling the setServiceClass method on the factory
object:
factory.setServiceClass(HelloWorld.class);
We set the URL for calling our service by calling the factory’s setAddress method. Note
that the service will be published at this URL.
factory.setAddress("http://localhost:5000/Hello");
Apache CXF
4
In this case, the service is deployed on the embedded server and will be listening to port
5000. You may opt for any port number of your choice.
Before creating the factory, you need to tell the factory about our service implementation
class. This is done by calling the setServiceBean method on the factory object as shown
here:
factory.setServiceBean(new HelloWorldImpl());
The service bean is set to the instance of our service implementation class. Finally, we
create the factory by calling its create method:
factory.create();
Now, as we have developed the factory to run our web service, we will next write a main
method to instantiate it and keep it running for some time.
Now, write a main method to instantiate the HelloServer class as follows:
public static void main(String[] args) throws Exception {
new HelloServer();
System.out.println("Listening on port 5000 ...");
Once instantiated, the HelloServer class will keep running indefinitely. For production
deployments, you will definitely keep your server running forever. In the current situation,
we would terminate the server after a predetermined time as follows:
Thread.sleep(5 * 60 * 1000);
System.out.println("Server exiting ...");
System.exit(0);
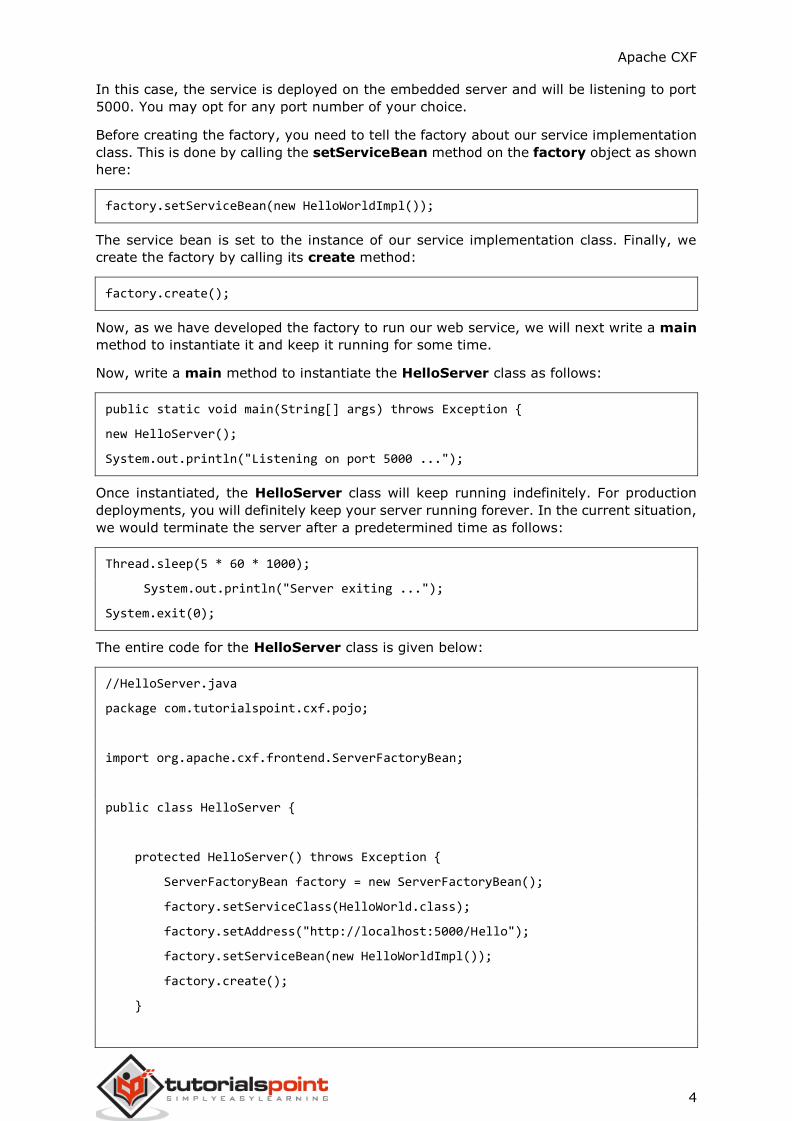
The entire code for the HelloServer class is given below:
//HelloServer.java
package com.tutorialspoint.cxf.pojo;
import org.apache.cxf.frontend.ServerFactoryBean;
public class HelloServer {
protected HelloServer() throws Exception {
ServerFactoryBean factory = new ServerFactoryBean();
factory.setServiceClass(HelloWorld.class);
factory.setAddress("http://localhost:5000/Hello");
factory.setServiceBean(new HelloWorldImpl());
factory.create();
}

Apache CXF
5
public static void main(String[] args) throws Exception {
new HelloServer();
System.out.println("Listening on port 5000 ...");
Thread.sleep(5 * 60 * 1000);
System.out.println("Server exiting ...");
System.exit(0);
}
}
The server application that we have created uses ServerFactoryBean class from CXF
libraries. We must now include these libraries in our project to successfully compile the
HelloServer class. We will use Maven to set up the project dependencies.
Setting up Maven Project
To create a Maven project, type the following command in your command-line window.
Note that we have tested this on a Mac machine. For Windows and Linux installations, the
instructions may differ at few places.
mvn archetype:generate
When asked for the properties, input the following values:
Define value for property 'groupId': : com.tutorialspoint
Define value for property 'artifactId': : cxf-pojo
Define value for property 'version': 1.0-SNAPSHOT: : 1.0
Define value for property 'package': com.tutorialspoint: :
com.tutorialspoint.cxf.pojo
On the completion of the maven command, you will find the appropriate folder structure
created in your current folder along with pom.xml file.

Apache CXF
6
The generated directory structure is shown here:
You will add the CXF dependencies in the pom.xml and also copy the above created Java
files into the appropriate folder of the maven created structure. For your ready reference,
we have given below the pom.xml file for the project that we created on our machine.
<?xml version="1.0" encoding="UTF-8"?>
<project xmlns="http://maven.apache.org/POM/4.0.0"
xmlns:xsi="http://www.w3.org/2001/XMLSchema-instance"
xsi:schemaLocation="http://maven.apache.org/POM/4.0.0
http://maven.apache.org/xsd/maven-4.0.0.xsd">
<modelVersion>4.0.0</modelVersion>
<groupId>com.tutorialspoint</groupId>
<artifactId>cxf-pojo</artifactId>
<version>1.0</version>
<packaging>jar</packaging>
<profiles>
<profile>
<id>server</id>
<build>
<defaultGoal>test</defaultGoal>
<plugins>

Apache CXF
7
<plugin>
<groupId>org.codehaus.mojo</groupId>
<artifactId>exec-maven-plugin</artifactId>
<executions>
<execution>
<phase>test</phase>
<goals>
<goal>java</goal>
</goals>
<configuration>
<mainClass>
com.tutorialspoint.cxf.pojo.HelloServer
</mainClass>
</configuration>
</execution>
</executions>
</plugin>
</plugins>
</build>
</profile>
<profile>
<id>client</id>
<build>
<defaultGoal>test</defaultGoal>
<plugins>
<plugin>
<groupId>org.codehaus.mojo</groupId>
<artifactId>exec-maven-plugin</artifactId>
<executions>
<execution>
<phase>test</phase>
<goals>
<goal>java</goal>
</goals>
<configuration>
<mainClass>
com.tutorialspoint.cxf.pojo.HelloClient
</mainClass>
</configuration>
Apache CXF
8
</execution>
</executions>
</plugin>
</plugins>
</build>
</profile>
</profiles>
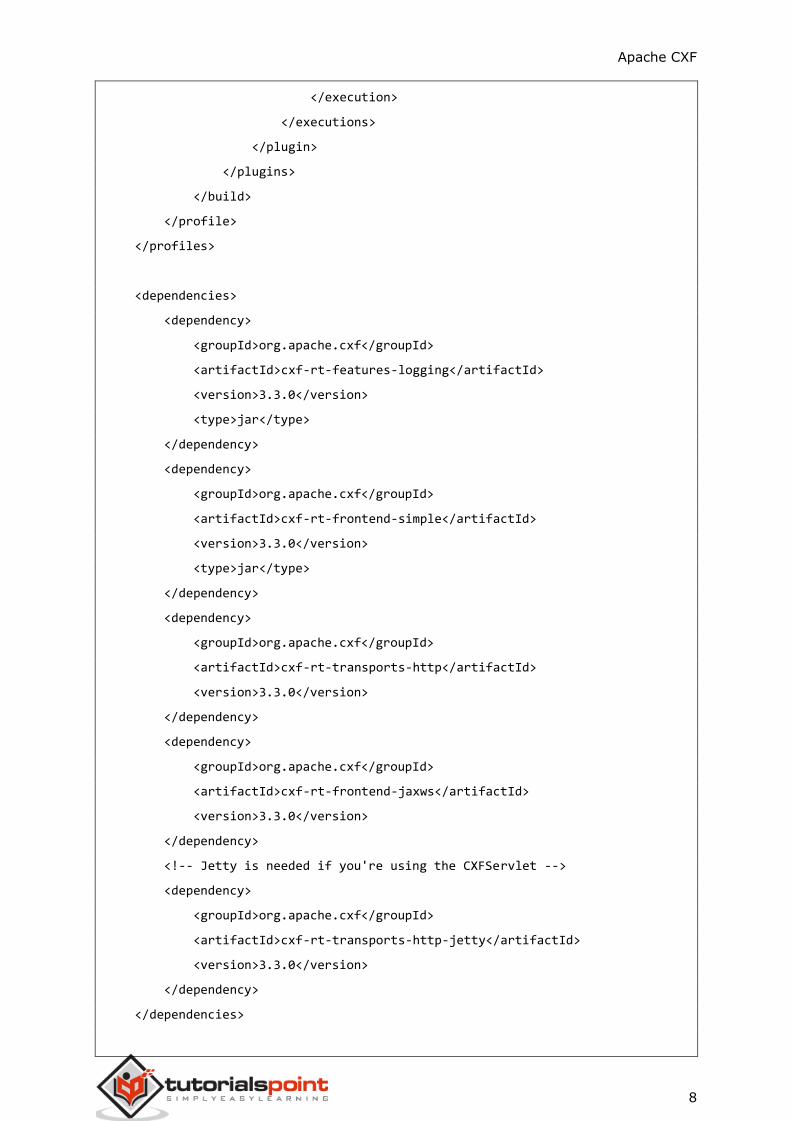
<dependencies>
<dependency>
<groupId>org.apache.cxf</groupId>
<artifactId>cxf-rt-features-logging</artifactId>
<version>3.3.0</version>
<type>jar</type>
</dependency>
<dependency>
<groupId>org.apache.cxf</groupId>
<artifactId>cxf-rt-frontend-simple</artifactId>
<version>3.3.0</version>
<type>jar</type>
</dependency>
<dependency>
<groupId>org.apache.cxf</groupId>
<artifactId>cxf-rt-transports-http</artifactId>
<version>3.3.0</version>
</dependency>
<dependency>
<groupId>org.apache.cxf</groupId>
<artifactId>cxf-rt-frontend-jaxws</artifactId>
<version>3.3.0</version>
</dependency>
<!-- Jetty is needed if you're using the CXFServlet -->
<dependency>
<groupId>org.apache.cxf</groupId>
<artifactId>cxf-rt-transports-http-jetty</artifactId>
<version>3.3.0</version>
</dependency>
</dependencies>
Apache CXF
9
<properties>
<project.build.sourceEncoding>UTF-8</project.build.sourceEncoding>
<maven.compiler.source>1.8</maven.compiler.source>
<maven.compiler.target>1.8</maven.compiler.target>
</properties>
</project>
The above pom.xml may include additional dependencies which are irrelevant to this
project, but are required for our next project in this tutorial. Anyway, there is no harm as
such in including additional dependencies.
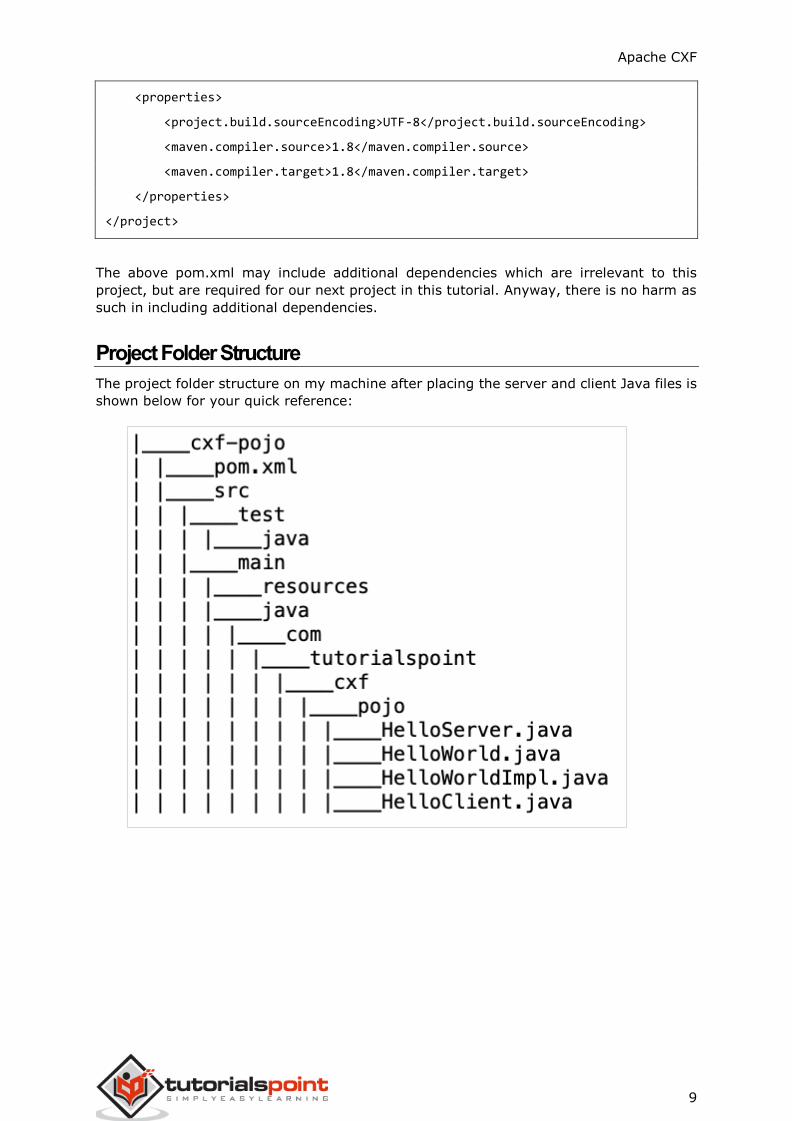
Project Folder Structure
The project folder structure on my machine after placing the server and client Java files is
shown below for your quick reference:
Apache CXF
10
Running Server
To build the project, use the following command in your command-line window:
mvn clean install
You can start the server using the following command:
mvn -Pserver
This will start the server and you will see the following prompt on the console:
INFO: Creating Service {http://pojo.cxf.tutorialspoint.com/}HelloWorld from
class com.tutorialspoint.cxf.pojo.HelloWorld
INFO: Setting the server's publish address to be http://localhost:5000/Hello
Listening on port 5000 ...
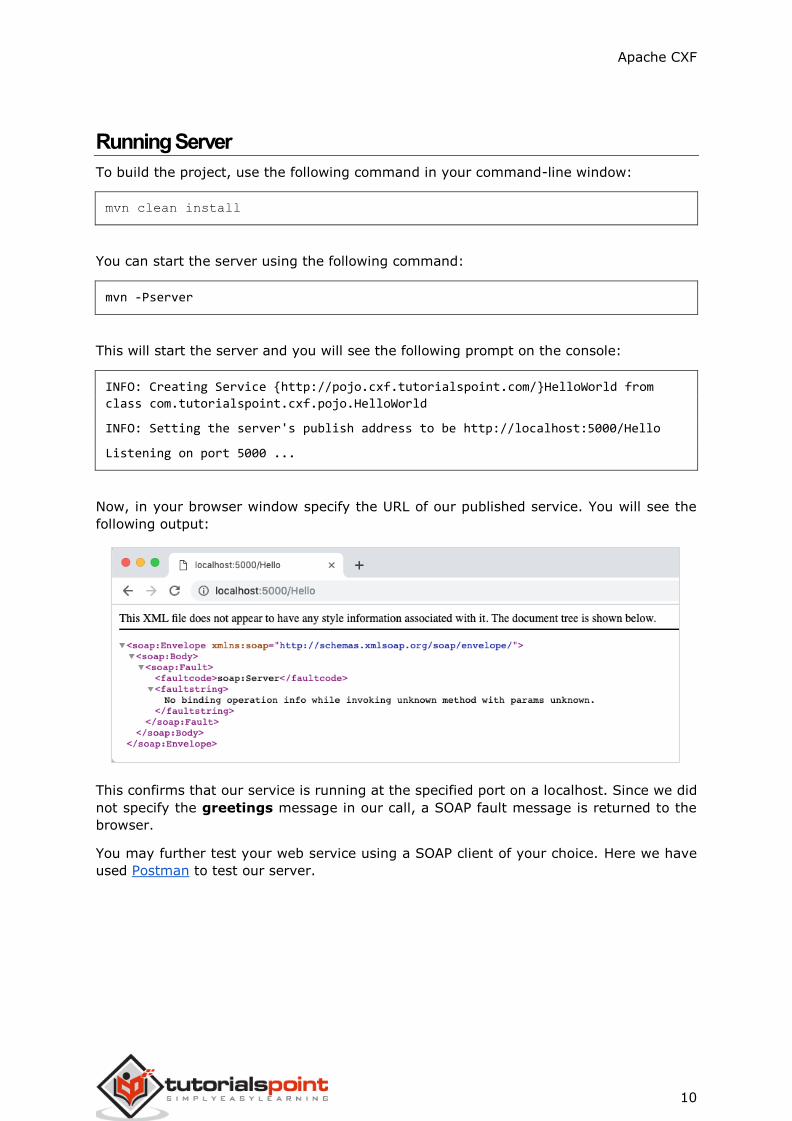
Now, in your browser window specify the URL of our published service. You will see the
following output:
This confirms that our service is running at the specified port on a localhost. Since we did
not specify the greetings message in our call, a SOAP fault message is returned to the
browser.
You may further test your web service using a SOAP client of your choice. Here we have
used Postman to test our server.
Apache CXF
11
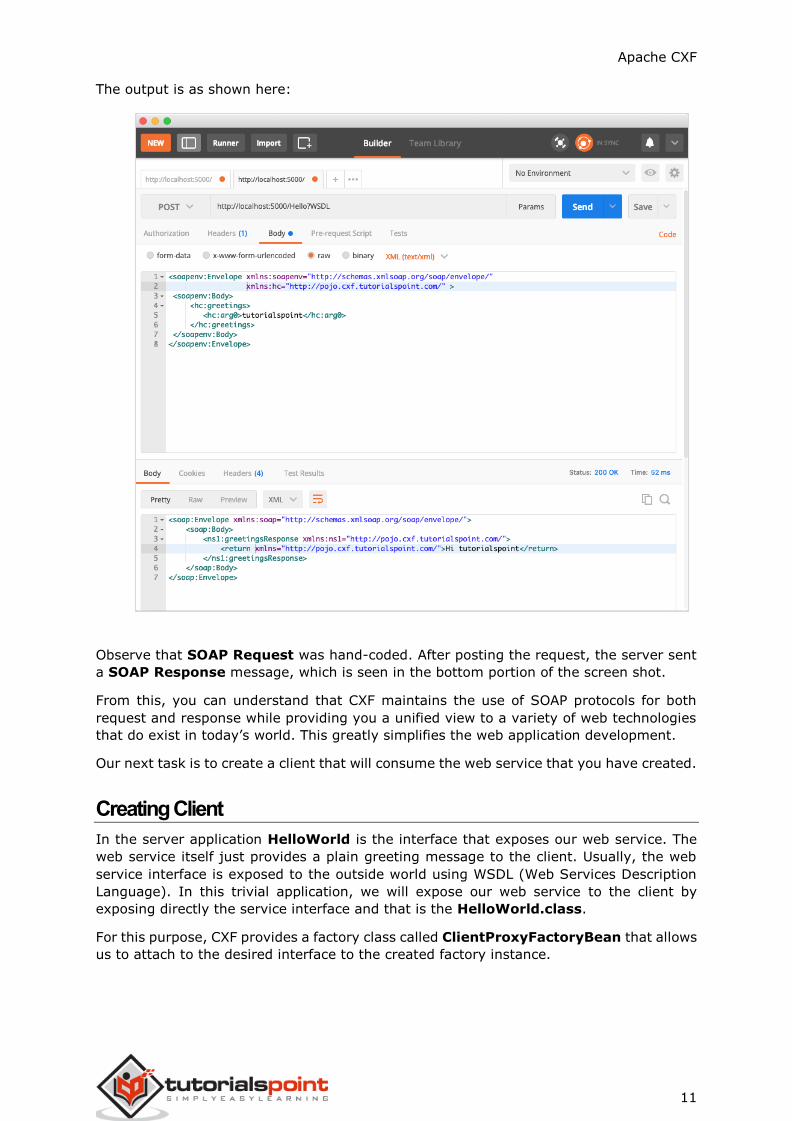
The output is as shown here:
Observe that SOAP Request was hand-coded. After posting the request, the server sent
a SOAP Response message, which is seen in the bottom portion of the screen shot.
From this, you can understand that CXF maintains the use of SOAP protocols for both
request and response while providing you a unified view to a variety of web technologies
that do exist in today’s world. This greatly simplifies the web application development.
Our next task is to create a client that will consume the web service that you have created.
Creating Client
In the server application HelloWorld is the interface that exposes our web service. The
web service itself just provides a plain greeting message to the client. Usually, the web
service interface is exposed to the outside world using WSDL (Web Services Description
Language). In this trivial application, we will expose our web service to the client by
exposing directly the service interface and that is the HelloWorld.class.
For this purpose, CXF provides a factory class called ClientProxyFactoryBean that allows
us to attach to the desired interface to the created factory instance.

Apache CXF
12
First, we create a factory bean instance as follows:
ClientProxyFactoryBean factory = new ClientProxyFactoryBean();
We call the setAddress method on the factory bean instance to set the URL by which our
web service can be invoked. In our case, we will use the URL used while creating the server
in our earlier step:
factory.setAddress("http://localhost:5000/Hello");
Next, we call the create method on the factory instance to attach our service interface
HelloWorld.class to it.
HelloWorld helloServer = factory.create(HelloWorld.class);
Finally, we call the greetings method to invoke the remote web service.
System.out.println(helloServer.greetings(System.getProperty("user.name")));
This would print a greetings message on your console.
The entire source for the client application is shown below:
//HelloClient.java
package com.tutorialspoint.cxf.pojo;
import org.apache.cxf.frontend.ClientProxyFactoryBean;
public class HelloClient {
public static void main(String[] args) throws Exception {
ClientProxyFactoryBean factory = new ClientProxyFactoryBean();
factory.setAddress("http://localhost:5000/Hello");
HelloWorld helloServer = factory.create(HelloWorld.class);
System.out.println(helloServer.greetings(System.getProperty("user.name")));
}
}

Apache CXF
13
Running Client
Make sure that the server is still running on your machine. In case, if it has timed out,
restart the server with the following command:
mvn -Pserver
You will see the following message on the console:
Listening on port 5000 …
Now, before the server times out which we have set to 5 minutes, open another command
line window and start the client with the following command:
mvn -Pclient
You will see a message similar to the following on the command line:
Hi tutorialspoint
Note that tutorialspoint is our user name. You will get a greeting with your own name.
In the next chapter, we will learn how to use CXF in a JAX-WS (Java API for XML Web
Services) project.

Apache CXF
14
In this JAX-WS application, we will use Java-first approach like the earlier POJO application.
So first we will create an interface for our web service.
Declaring Service Interface
As in the earlier case, we will create a trivial service that has only one interface method
called greetings. The code for the service interface is shown below:
//HelloWorld.java
package com.tutorialspoint.cxf.jaxws.helloworld;
import javax.jws.WebService;
@WebService
public interface HelloWorld {
String greetings(String text);
}
We annotate the interface with a @WebService tag. Next, we will implement this
interface.
Implementing Web Interface
The implementation of the web interface is shown here:
//HelloWorldImpl.java
package com.tutorialspoint.cxf.jaxws.helloworld;
public class HelloWorldImpl implements HelloWorld {
@Override
public String greetings(String name) {
return ("hi " + name);
}
}
3. Apache CXF – CXF with JAX-WS
Apache CXF
15
The greetings method is annotated with @Override tag. The method returns a “hi”
message to the caller.
Next, we will write the code for developing the server.
Developing Server
Unlike the POJO application, we will now decouple the interface by using the CXF supplied
Endpoint class to publish our service. This is done in the following two lines of code:
HelloWorld implementor = new HelloWorldImpl();
Endpoint.publish("http://localhost:9090/HelloServerPort",
implementor,
new LoggingFeature());
The first parameter of the publish method specifies the URL at which our service will be
made available to the clients. The second parameter specifies the implementation class for
our service. The entire code for the server is shown below:
//Server.java
package com.tutorialspoint.cxf.jaxws.helloworld;
import javax.xml.ws.Endpoint;
import org.apache.cxf.ext.logging.LoggingFeature;
public class Server {
public static void main(String[] args) throws Exception {
HelloWorld implementor = new HelloWorldImpl();
Endpoint.publish("http://localhost:9090/HelloServerPort",
implementor,
new LoggingFeature());
System.out.println("Server ready...");
Thread.sleep(5 * 60 * 1000);
System.out.println("Server exiting ...");
System.exit(0);
}
}
To deploy our server, you will need to make few more modifications to your project as
listed below.

Apache CXF
16
Deploying Server
Finally, to deploy the server application, you will need to make one more modification in
pom.xml to setup your application as a web application. The code that you need to add
into your pom.xml is given below:
<profiles>
<profile>
<id>server</id>
<build>
<defaultGoal>test</defaultGoal>
<plugins>
<plugin>
<groupId>org.codehaus.mojo</groupId>
<artifactId>exec-maven-plugin</artifactId>
<version>1.6.0</version>
<executions>
<execution>
<phase>test</phase>
<goals>
<goal>java</goal>
</goals>
<configuration>
<mainClass>
com.tutorialspoint.cxf.jaxws.helloworld.Server
</mainClass>
</configuration>
</execution>
</executions>
</plugin>
</plugins>
</build>
</profile>
</profiles>

Apache CXF
17
Before you deploy the application, you need to add two more files to your project. These
are shown in the screenshot below:
These files are CXF standard files which define the mapping for CXFServlet. The code
within the web.xml file is shown here for your quick reference:
//Web.xml
<?xml version="1.0" encoding="UTF-8"?>
<web-app xmlns="http://java.sun.com/xml/ns/javaee"
xmlns:xsi="http://www.w3.org/2001/XMLSchema-instance" version="2.5"
xsi:schemaLocation="http://java.sun.com/xml/ns/javaee
http://java.sun.com/xml/ns/javaee/web-app_2_5.xsd">
<display-name>cxf</display-name>
<servlet>
<description>Apache CXF Endpoint</description>
<display-name>cxf</display-name>
<servlet-name>cxf</servlet-name>
<servlet-class>
org.apache.cxf.transport.servlet.CXFServlet
</servlet-class>
<load-on-startup>1</load-on-startup>
</servlet>
<servlet-mapping>
<servlet-name>cxf</servlet-name>
<url-pattern>/services/*</url-pattern>
</servlet-mapping>
<session-config>
<session-timeout>60</session-timeout>
</session-config>
</web-app>

Apache CXF
18
In the cxf-servlet.xml, you declare the properties for your service’s endpoint. This is
shown in the code snippet below:
<beans ...>
<jaxws:endpoint xmlns:helloworld="http://tutorialspoint.com/"
id="helloHTTP"
address="http://localhost:9090/HelloServerPort"
serviceName="helloworld:HelloServiceService"
endpointName="helloworld:HelloServicePort"
>
</jaxws:endpoint>
/beans>
Here we define the id for our service endpoint, the address on which the service will be
available, the service name and the endpoint name. Now, you learnt how your service gets
routed and processed by a CXF servlet.
The Final pom.xml
The pom.xml includes a few more dependencies. Rather than describing all the
dependencies, we have included the final version of pom.xml below:
<?xml version="1.0" encoding="UTF-8"?>
<project xmlns="http://maven.apache.org/POM/4.0.0"
xmlns:xsi="http://www.w3.org/2001/XMLSchema-instance"
xsi:schemaLocation="http://maven.apache.org/POM/4.0.0
http://maven.apache.org/xsd/maven-4.0.0.xsd">
<modelVersion>4.0.0</modelVersion>
<groupId>com.tutorialspoint</groupId>
<artifactId>cxf-jaxws</artifactId>
<version>1.0</version>
<packaging>jar</packaging>
<properties>
<project.build.sourceEncoding>UTF-8</project.build.sourceEncoding>
<maven.compiler.source>1.8</maven.compiler.source>
<maven.compiler.target>1.8</maven.compiler.target>
</properties>
<profiles>

Apache CXF
19
<profile>
<id>server</id>
<build>
<defaultGoal>test</defaultGoal>
<plugins>
<plugin>
<groupId>org.codehaus.mojo</groupId>
<artifactId>exec-maven-plugin</artifactId>
<version>1.6.0</version>
<executions>
<execution>
<phase>test</phase>
<goals>
<goal>java</goal>
</goals>
<configuration>
<mainClass>
com.tutorialspoint.cxf.jaxws.helloworld.Server
</mainClass>
</configuration>
</execution>
</executions>
</plugin>
</plugins>
</build>
</profile>
<profile>
<id>client</id>
<build>
<defaultGoal>test</defaultGoal>
<plugins>
<plugin>
<groupId>org.codehaus.mojo</groupId>
<artifactId>exec-maven-plugin</artifactId>
<executions>
<execution>
<phase>test</phase>
<goals>
<goal>java</goal>

Apache CXF
20
</goals>
<configuration>
<mainClass>
com.tutorialspoint.cxf.jaxws.helloworld.Client
</mainClass>
</configuration>
</execution>
</executions>
</plugin>
</plugins>
</build>
</profile>
</profiles>
<dependencies>
<dependency>
<groupId>org.apache.cxf</groupId>
<artifactId>cxf-rt-frontend-jaxws</artifactId>
<version>3.3.0</version>
</dependency>
<dependency>
<groupId>org.apache.cxf</groupId>
<artifactId>cxf-rt-transports-http</artifactId>
<version>3.3.0</version>
</dependency>
<dependency>
<groupId>org.apache.cxf</groupId>
<artifactId>cxf-rt-features-logging</artifactId>
<version>3.3.0</version>
</dependency>
<dependency>
<groupId>org.apache.cxf</groupId>
<artifactId>cxf-rt-transports-http-jetty</artifactId>
<version>3.3.0</version>
</dependency>
</dependencies>
</project>
Apache CXF
21
Note that it also includes a profile for building client that we will be learning in the later
sections of this tutorial.
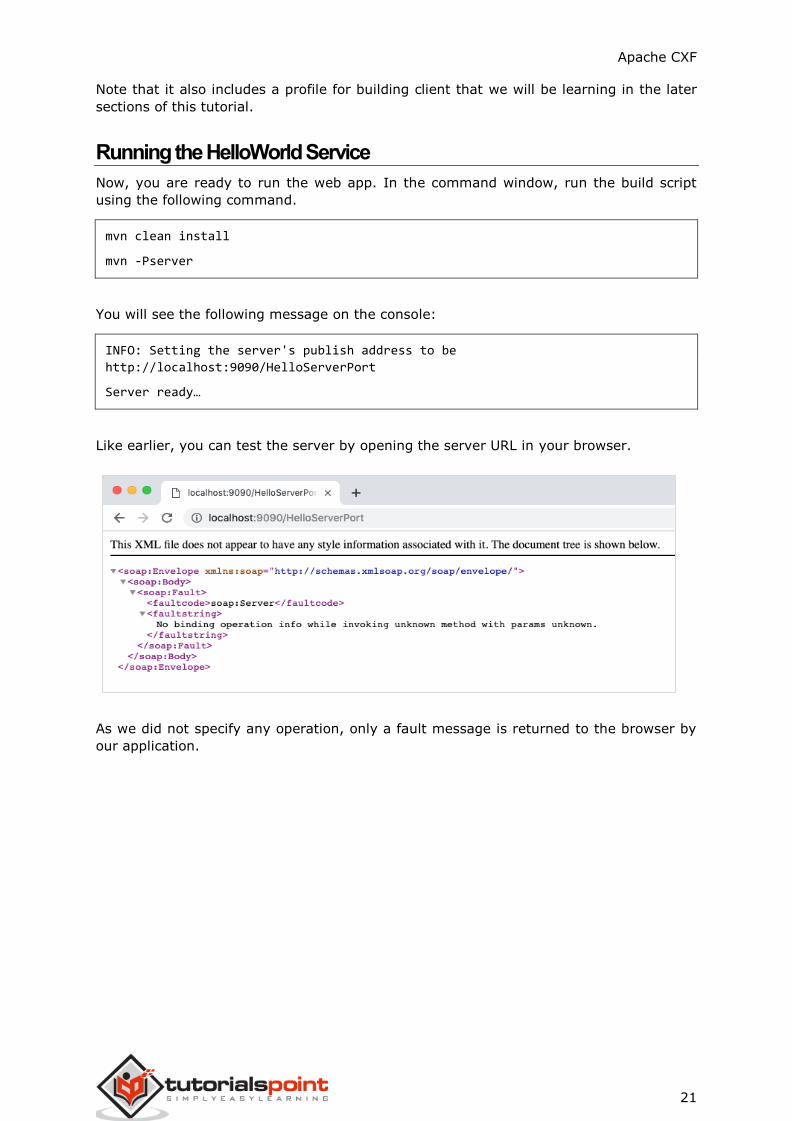
Running the HelloWorld Service
Now, you are ready to run the web app. In the command window, run the build script
using the following command.
mvn clean install
mvn -Pserver
You will see the following message on the console:
INFO: Setting the server's publish address to be
http://localhost:9090/HelloServerPort
Server ready…
Like earlier, you can test the server by opening the server URL in your browser.
As we did not specify any operation, only a fault message is returned to the browser by
our application.

Apache CXF
22
Now, try adding the ?wsdl to your URL and you will see the following output:
So our server application is running as expected. You may use the SOAP Client such as
Postman described earlier to further test your service.
In the next section, we will learn how to write a client that uses our service.
Developing Client
Writing the client in a CXF application is as trivial as writing a server. Here is the complete
code for the client:
//Client.java
package com.tutorialspoint.cxf.jaxws.helloworld;
import javax.xml.namespace.QName;
import javax.xml.ws.Service;
Apache CXF
23
import javax.xml.ws.soap.SOAPBinding;
public final class Client {
private static final QName SERVICE_NAME
= new QName("http://helloworld.jaxws.cxf.tutorialspoint.com/",
"HelloWorld");
private static final QName PORT_NAME
= new QName("http://helloworld.jaxws.cxf.tutorialspoint.com/",
"HelloWorldPort");
private Client() {
}
public static void main(String[] args) throws Exception {
Service service = Service.create(SERVICE_NAME);
System.out.println("service created");
String endpointAddress = "http://localhost:9090/HelloServerPort";
service.addPort(PORT_NAME, SOAPBinding.SOAP11HTTP_BINDING,
endpointAddress);
HelloWorld hw = service.getPort(HelloWorld.class);
System.out.println(hw.greetings("World"));
}
}
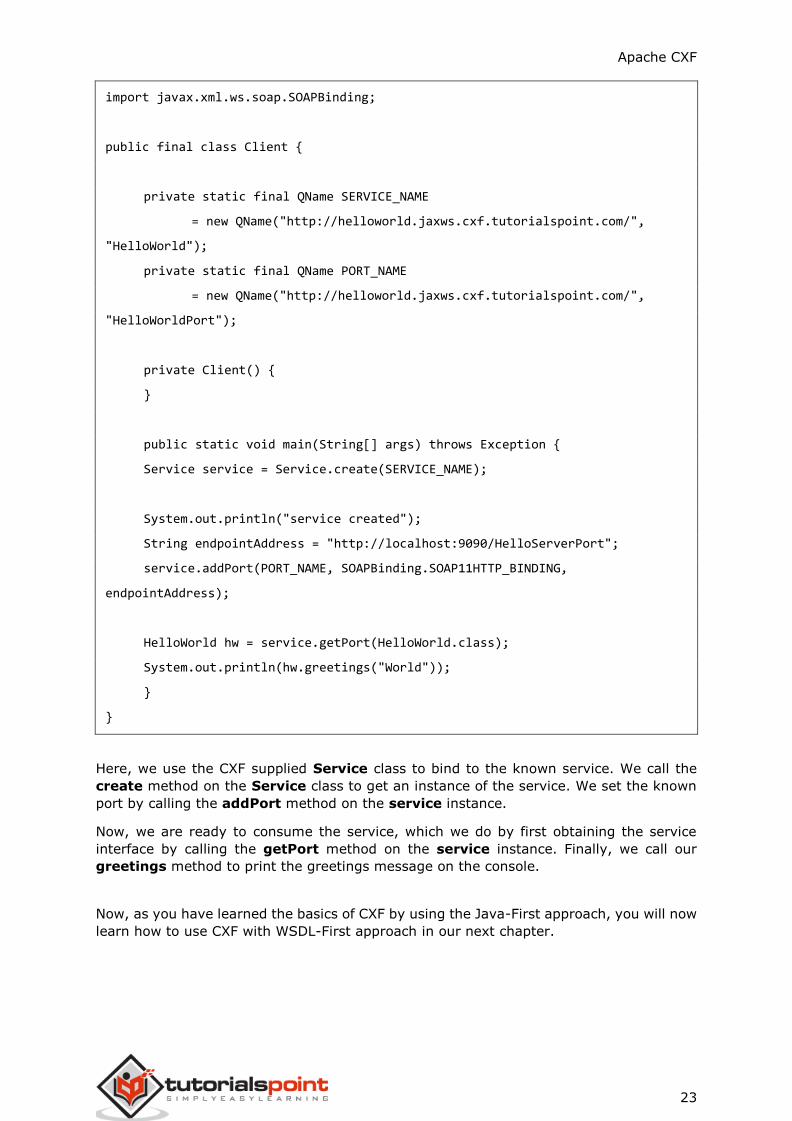
Here, we use the CXF supplied Service class to bind to the known service. We call the
create method on the Service class to get an instance of the service. We set the known
port by calling the addPort method on the service instance.
Now, we are ready to consume the service, which we do by first obtaining the service
interface by calling the getPort method on the service instance. Finally, we call our
greetings method to print the greetings message on the console.
Now, as you have learned the basics of CXF by using the Java-First approach, you will now
learn how to use CXF with WSDL-First approach in our next chapter.
Apache CXF
24
The CXF-POJO application that you have developed results in a very tight coupling between
the client and the server. Giving a direct access to the service interface can also pose
severe security threats. Thus, decoupling between the client and the server is usually
desired, which is achieved by using WSDL (Web Services Description Language).
We write the web service interface in a WSDL document which is XML-based. We will use
a tool to map this WSDL to Java interfaces which are then implemented and used by our
client and server applications. For providing decoupling, starting with a WSDL is a preferred
way. For this, you need to first learn a new language - WSDL. Writing WSDL needs a
careful approach and it would be better if you can gain some understanding on this before
you start working on it.
In this lesson, we will start by defining a web service interface in a WSDL document. We
will learn how to use CXF to create both server and client applications starting with WSDL.
We will keep the application simple to maintain focus on the use of CXF. After the server
application is created we will publish it to a desired URL using a built-in CXF class.
First, let us describe the WSDL that we are going to use.
WSDL for HelloWorld
The webservice that we are going to implement will have one single webmethod called
greetings that accepts a string parameter holding the user name and returns a string
message to the caller after appending a greetings message to the user name. The complete
wsdl is shown below:
//Hello.wsdl
<?xml version="1.0" encoding="UTF-8"?>
<wsdl:definitions xmlns:soap="http://schemas.xmlsoap.org/wsdl/soap/"
xmlns:tns="http://helloworld.tutorialspoint.com/"
xmlns:wsdl="http://schemas.xmlsoap.org/wsdl/"
xmlns:xsd="http://www.w3.org/2001/XMLSchema"
name="HelloWorld"
targetNamespace="http://helloworld.tutorialspoint.com/">
<wsdl:types>
<xsd:schema attributeFormDefault="unqualified"
elementFormDefault="qualified"
targetNamespace="http://helloworld.tutorialspoint.com/">
<xsd:element name="greetings" type="tns:greetings"/>
<xsd:complexType name="greetings">
<xsd:sequence>
<xsd:element minOccurs="0" name="arg0" type="xsd:string"/>
4. Apache CXF – CXF with WSDL first

Apache CXF
25
</xsd:sequence>
</xsd:complexType>
<xsd:element name="greetingsResponse"
type="tns:greetingsResponse"/>
<xsd:complexType name="greetingsResponse">
<xsd:sequence>
<xsd:element minOccurs="0" name="return"
type="xsd:string"/>
</xsd:sequence>
</xsd:complexType>
</xsd:schema>
</wsdl:types>
<wsdl:message name="greetings">
<wsdl:part element="tns:greetings" name="parameters">
</wsdl:part>
</wsdl:message>
<wsdl:message name="greetingsResponse">
<wsdl:part element="tns:greetingsResponse" name="parameters">
</wsdl:part>
</wsdl:message>
<wsdl:portType name="HelloWorldPortType">
<wsdl:operation name="greetings">
<wsdl:input message="tns:greetings" name="greetings">
</wsdl:input>
<wsdl:output message="tns:greetingsResponse"
name="greetingsResponse">
</wsdl:output>
</wsdl:operation>
</wsdl:portType>
<wsdl:binding name="HelloWorldSoapBinding" type="tns:HelloWorldPortType">
<soap:binding style="document"
transport="http://schemas.xmlsoap.org/soap/http"/>
<wsdl:operation name="greetings">
<soap:operation soapAction="" style="document"/>
<wsdl:input name="greetings"></wsdl:input>
<wsdl:output name="greetingsResponse">
<soap:body use="literal"/>
</wsdl:output>
</wsdl:operation>

Apache CXF
26
</wsdl:binding>
<wsdl:service name="HelloWorldService">
<wsdl:port binding="tns:HelloWorldSoapBinding" name="HelloWorldPort">
<soap:address location="http://localhost:9090/HelloServerPort"/>
</wsdl:port>
</wsdl:service>
</wsdl:definitions>
Note that writing a syntactically correct wsdl has always been a challenge to the
developers; there are many tools and online editors are available for creating a wsdl. These
editors ask for the names of messages that you want to implement along with the
parameters that you wish to pass in a message and the type of return message that you
want your client application to receive. If you know wsdl syntax, you may hand code the
entire document or use one of the editors to create your own.
In the above wsdl, we have defined a single message called greetings. The message is
delivered to the service called HelloWorldService that is running at http://localhost:9090/HelloServerPort.
With this, we will now proceed to server development. Before developing the server, we
need to generate Java interface to our web service. This is to be done from the given wsdl.
To do this, you use a tool called wsdl2java.
The wsdl2java Plugin
As we will be using maven to build the project, you will need to add the following plugin
to the pom.xml file.
<plugins>
<plugin>
<groupId>org.apache.cxf</groupId>
<artifactId>cxf-codegen-plugin</artifactId>
<version>3.3.0</version>
<executions>
<execution>
<id>generate-sources</id>
<phase>generate-sources</phase>
<configuration>
<wsdlOptions>
<wsdlOption>
<wsdl>src/main/resources/hello.wsdl</wsdl>
<faultSerialVersionUID>1</faultSerialVersionUID>
</wsdlOption>
</wsdlOptions>

Apache CXF
27
</configuration>
<goals>
<goal>wsdl2java</goal>
</goals>
</execution>
</executions>
</plugin>
</plugins>
Note that we specify the location of the wsdl file as src/main/resources/Hello.wsdl.
You will have to make sure that you create an appropriate directory structure for your
project and add the earlier shown hello.wsdl file to the specified folder.
The wsdl2java plugin will compile this wsdl and create Java classes in a pre-defined
folder. The full project structure is shown here for your ready reference.
Apache CXF
28
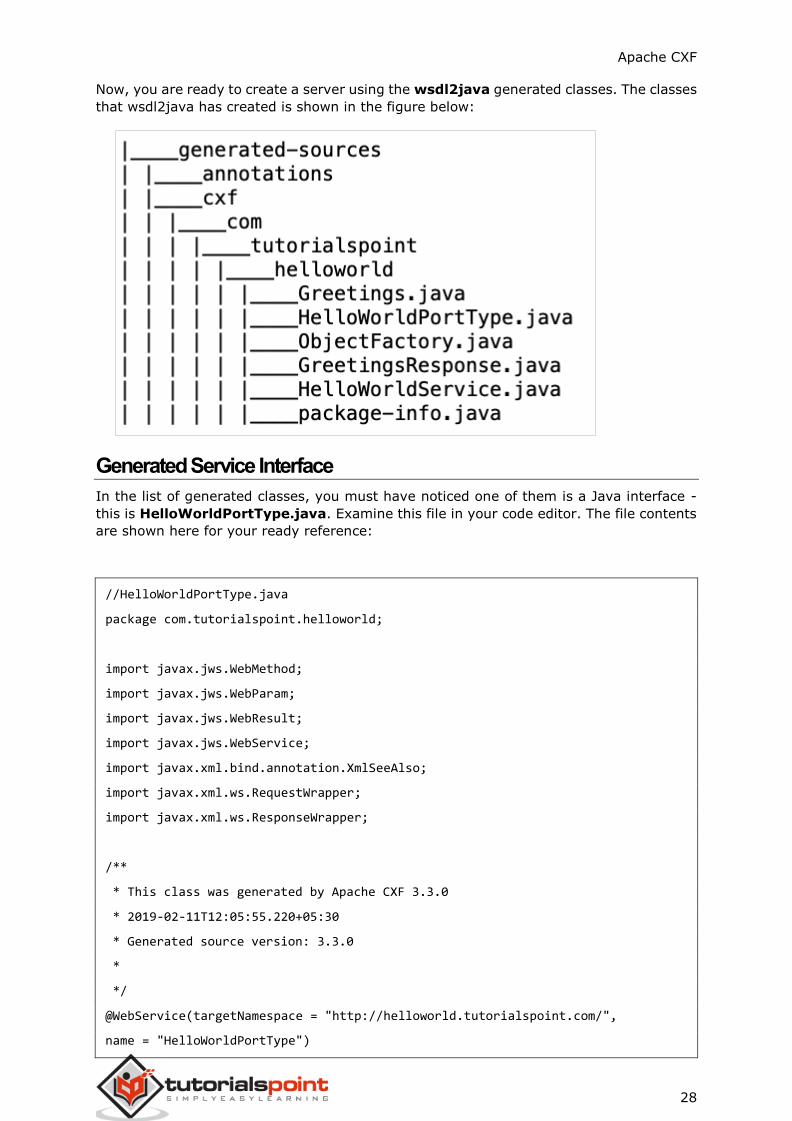
Now, you are ready to create a server using the wsdl2java generated classes. The classes
that wsdl2java has created is shown in the figure below:
Generated Service Interface
In the list of generated classes, you must have noticed one of them is a Java interface -
this is HelloWorldPortType.java. Examine this file in your code editor. The file contents
are shown here for your ready reference:
//HelloWorldPortType.java
package com.tutorialspoint.helloworld;
import javax.jws.WebMethod;
import javax.jws.WebParam;
import javax.jws.WebResult;
import javax.jws.WebService;
import javax.xml.bind.annotation.XmlSeeAlso;
import javax.xml.ws.RequestWrapper;
import javax.xml.ws.ResponseWrapper;
/**
* This class was generated by Apache CXF 3.3.0
* 2019-02-11T12:05:55.220+05:30
* Generated source version: 3.3.0
*
*/
@WebService(targetNamespace = "http://helloworld.tutorialspoint.com/",
name = "HelloWorldPortType")
Apache CXF
29
@XmlSeeAlso({ObjectFactory.class})
public interface HelloWorldPortType {
@WebMethod
@RequestWrapper(localName = "greetings", targetNamespace =
"http://helloworld.tutorialspoint.com/", className =
"com.tutorialspoint.helloworld.Greetings")
@ResponseWrapper(localName = "greetingsResponse", targetNamespace =
"http://helloworld.tutorialspoint.com/", className =
"com.tutorialspoint.helloworld.GreetingsResponse")
@WebResult(name = "return", targetNamespace =
"http://helloworld.tutorialspoint.com/")
public java.lang.String greetings(
@WebParam(name = "arg0", targetNamespace =
"http://helloworld.tutorialspoint.com/")
java.lang.String arg0
);
}
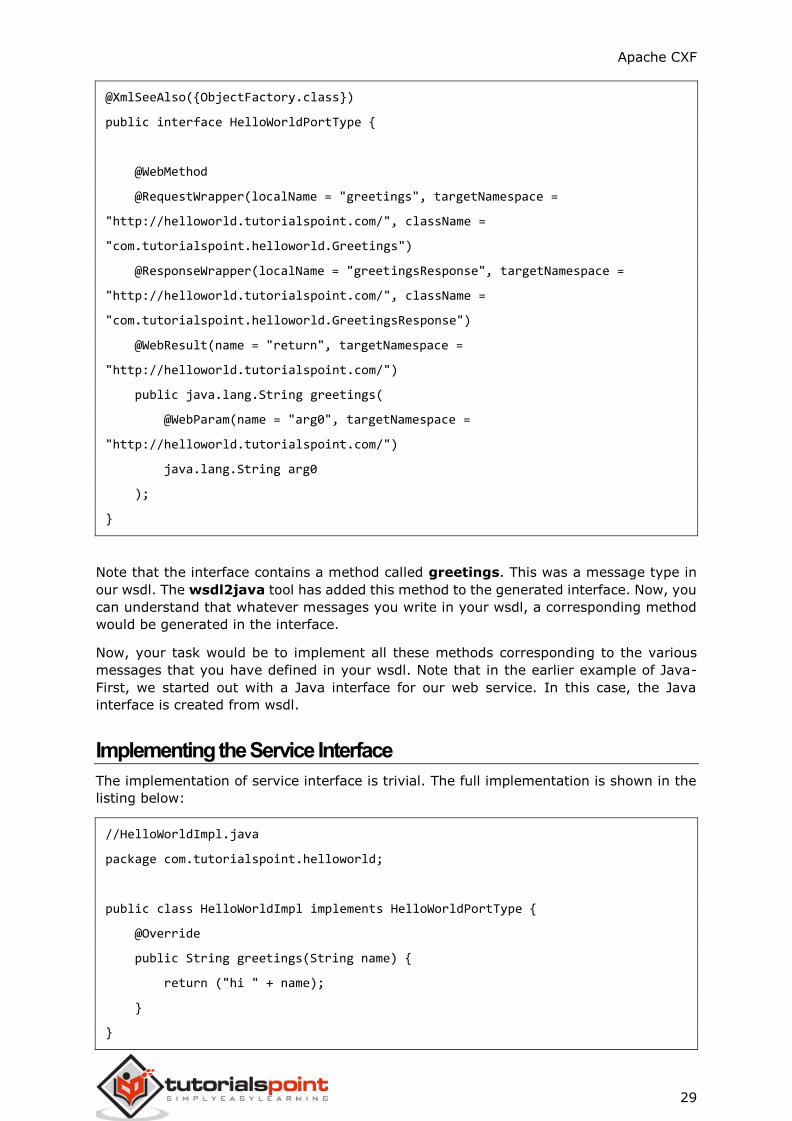
Note that the interface contains a method called greetings. This was a message type in
our wsdl. The wsdl2java tool has added this method to the generated interface. Now, you
can understand that whatever messages you write in your wsdl, a corresponding method
would be generated in the interface.
Now, your task would be to implement all these methods corresponding to the various
messages that you have defined in your wsdl. Note that in the earlier example of Java-
First, we started out with a Java interface for our web service. In this case, the Java
interface is created from wsdl.
Implementing the Service Interface
The implementation of service interface is trivial. The full implementation is shown in the
listing below:
//HelloWorldImpl.java
package com.tutorialspoint.helloworld;
public class HelloWorldImpl implements HelloWorldPortType {
@Override
public String greetings(String name) {
return ("hi " + name);
}
}
Apache CXF
30
The code implements the sole interface method called greetings. The method takes one
parameter of string type, prepends a “hi” message to it and returns the resultant string
to the caller.
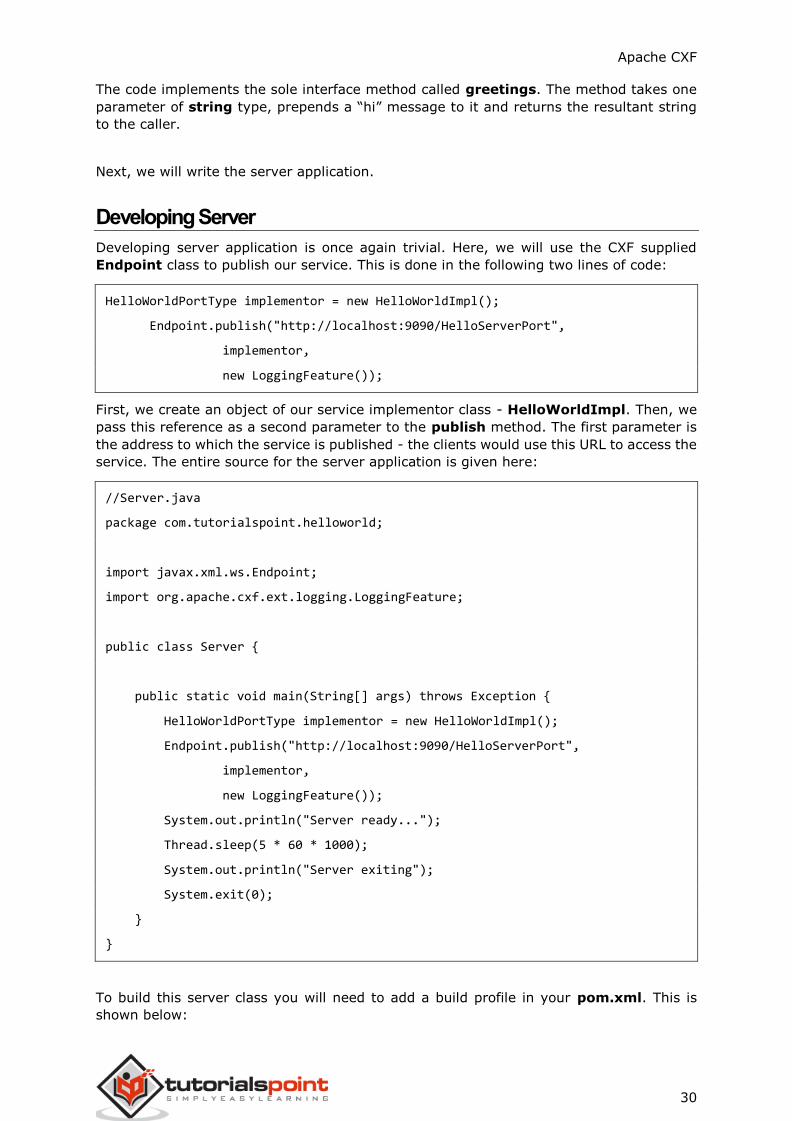
Next, we will write the server application.
Developing Server
Developing server application is once again trivial. Here, we will use the CXF supplied
Endpoint class to publish our service. This is done in the following two lines of code:
HelloWorldPortType implementor = new HelloWorldImpl();
Endpoint.publish("http://localhost:9090/HelloServerPort",
implementor,
new LoggingFeature());
First, we create an object of our service implementor class - HelloWorldImpl. Then, we
pass this reference as a second parameter to the publish method. The first parameter is
the address to which the service is published - the clients would use this URL to access the
service. The entire source for the server application is given here:
//Server.java
package com.tutorialspoint.helloworld;
import javax.xml.ws.Endpoint;
import org.apache.cxf.ext.logging.LoggingFeature;
public class Server {
public static void main(String[] args) throws Exception {
HelloWorldPortType implementor = new HelloWorldImpl();
Endpoint.publish("http://localhost:9090/HelloServerPort",
implementor,
new LoggingFeature());
System.out.println("Server ready...");
Thread.sleep(5 * 60 * 1000);
System.out.println("Server exiting");
System.exit(0);
}
}
To build this server class you will need to add a build profile in your pom.xml. This is
shown below:

Apache CXF
31
<profile>
<id>server</id>
<build>
<defaultGoal>test</defaultGoal>
<plugins>
<plugin>
<groupId>org.codehaus.mojo</groupId>
<artifactId>exec-maven-plugin</artifactId>
<version>1.6.0</version>
<executions>
<execution>
<phase>test</phase>
<goals>
<goal>java</goal>
</goals>
<configuration>
<mainClass>
com.tutorialspoint.helloworld.Server
</mainClass>
</configuration>
</execution>
</executions>
</plugin>
</plugins>
</build>
<dependencies>
<dependency>
<groupId>org.apache.cxf</groupId>
<artifactId>cxf-rt-transports-http-jetty</artifactId>
<version>3.3.0</version>
</dependency>
</dependencies>
</profile>
Note that the fully qualified name of the Server class is specified in the configuration.
Also, the dependency tag specifies that we will be using the embedded jetty web server to
deploy our server application.
Apache CXF
32
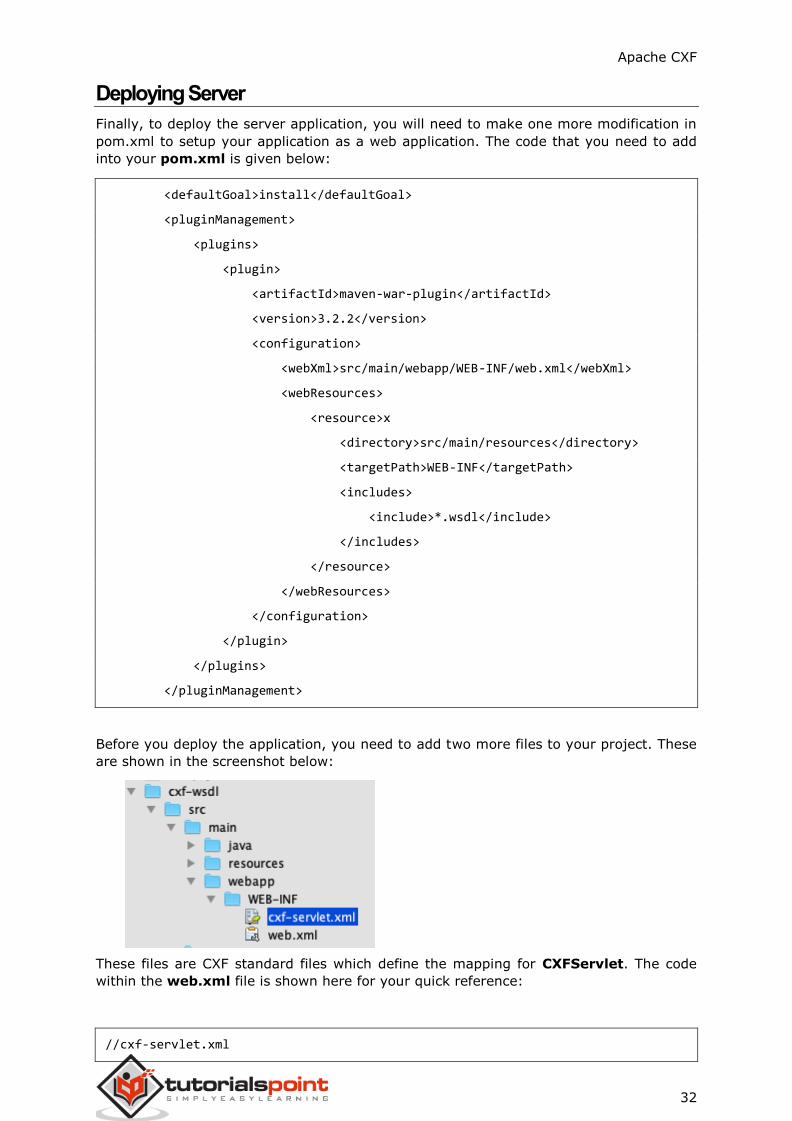
Deploying Server
Finally, to deploy the server application, you will need to make one more modification in
pom.xml to setup your application as a web application. The code that you need to add
into your pom.xml is given below:
<defaultGoal>install</defaultGoal>
<pluginManagement>
<plugins>
<plugin>
<artifactId>maven-war-plugin</artifactId>
<version>3.2.2</version>
<configuration>
<webXml>src/main/webapp/WEB-INF/web.xml</webXml>
<webResources>
<resource>x
<directory>src/main/resources</directory>
<targetPath>WEB-INF</targetPath>
<includes>
<include>*.wsdl</include>
</includes>
</resource>
</webResources>
</configuration>
</plugin>
</plugins>
</pluginManagement>
Before you deploy the application, you need to add two more files to your project. These
are shown in the screenshot below:
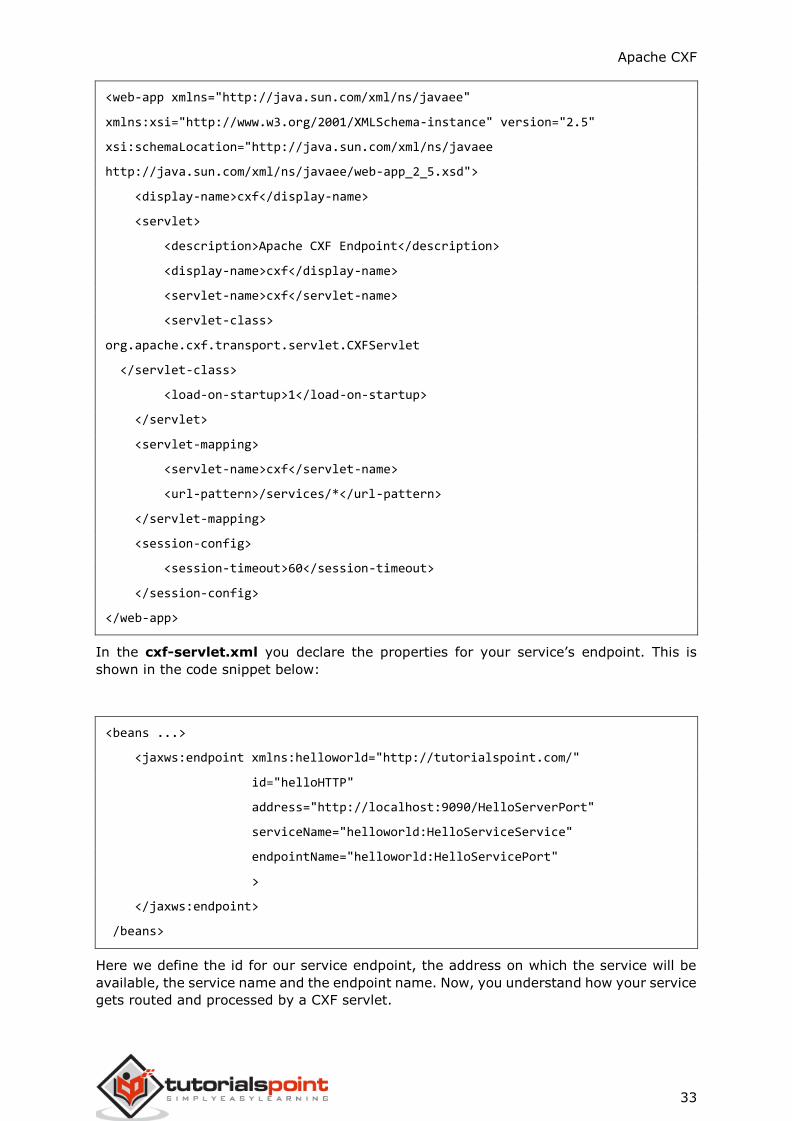
These files are CXF standard files which define the mapping for CXFServlet. The code
within the web.xml file is shown here for your quick reference:
//cxf-servlet.xml
Apache CXF
33
<web-app xmlns="http://java.sun.com/xml/ns/javaee"
xmlns:xsi="http://www.w3.org/2001/XMLSchema-instance" version="2.5"
xsi:schemaLocation="http://java.sun.com/xml/ns/javaee
http://java.sun.com/xml/ns/javaee/web-app_2_5.xsd">
<display-name>cxf</display-name>
<servlet>
<description>Apache CXF Endpoint</description>
<display-name>cxf</display-name>
<servlet-name>cxf</servlet-name>
<servlet-class>
org.apache.cxf.transport.servlet.CXFServlet
</servlet-class>
<load-on-startup>1</load-on-startup>
</servlet>
<servlet-mapping>
<servlet-name>cxf</servlet-name>
<url-pattern>/services/*</url-pattern>
</servlet-mapping>
<session-config>
<session-timeout>60</session-timeout>
</session-config>
</web-app>
In the cxf-servlet.xml you declare the properties for your service’s endpoint. This is
shown in the code snippet below:
<beans ...>
<jaxws:endpoint xmlns:helloworld="http://tutorialspoint.com/"
id="helloHTTP"
address="http://localhost:9090/HelloServerPort"
serviceName="helloworld:HelloServiceService"
endpointName="helloworld:HelloServicePort"
>
</jaxws:endpoint>
/beans>
Here we define the id for our service endpoint, the address on which the service will be
available, the service name and the endpoint name. Now, you understand how your service
gets routed and processed by a CXF servlet.
Apache CXF
34
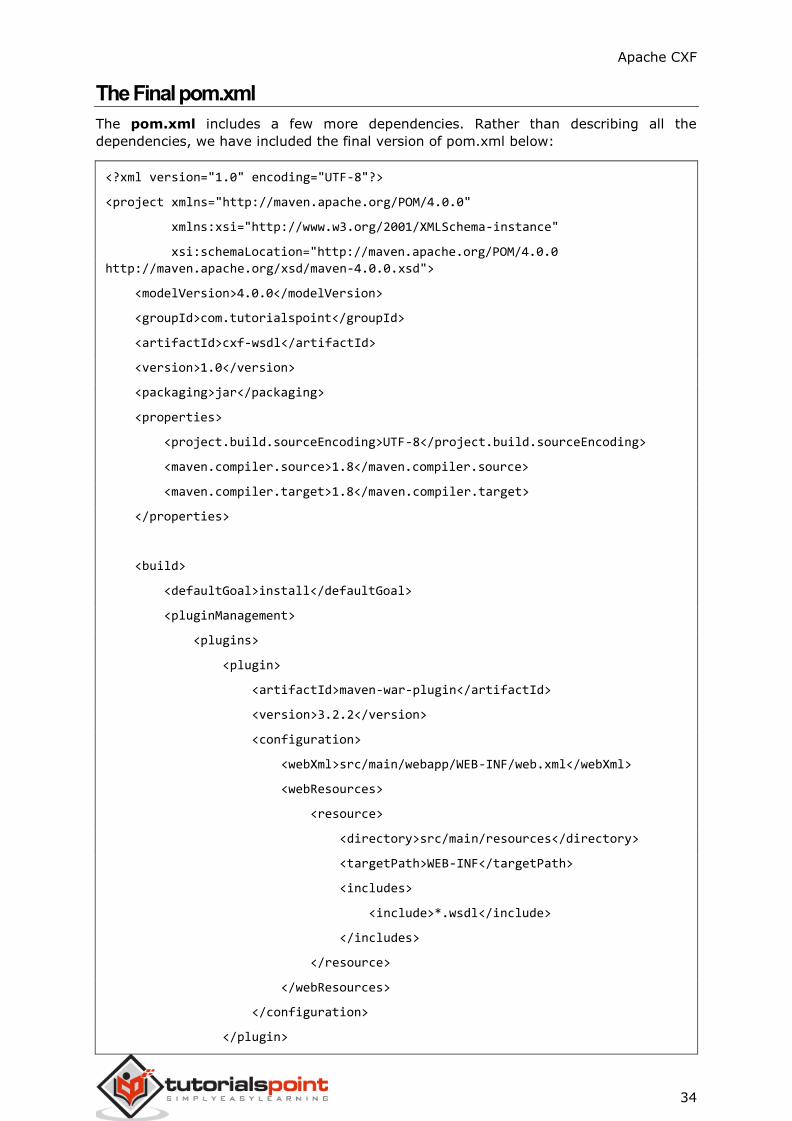
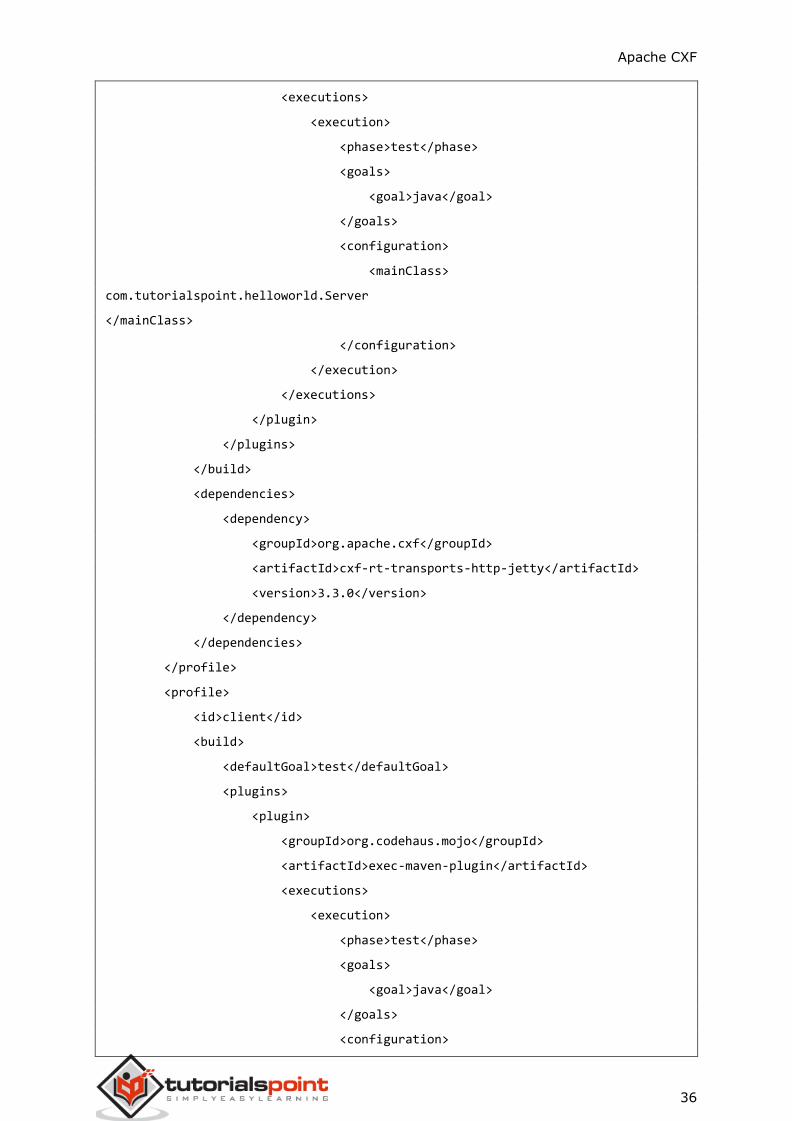
The Final pom.xml
The pom.xml includes a few more dependencies. Rather than describing all the
dependencies, we have included the final version of pom.xml below:
<?xml version="1.0" encoding="UTF-8"?>
<project xmlns="http://maven.apache.org/POM/4.0.0"
xmlns:xsi="http://www.w3.org/2001/XMLSchema-instance"
xsi:schemaLocation="http://maven.apache.org/POM/4.0.0
http://maven.apache.org/xsd/maven-4.0.0.xsd">
<modelVersion>4.0.0</modelVersion>
<groupId>com.tutorialspoint</groupId>
<artifactId>cxf-wsdl</artifactId>
<version>1.0</version>
<packaging>jar</packaging>
<properties>
<project.build.sourceEncoding>UTF-8</project.build.sourceEncoding>
<maven.compiler.source>1.8</maven.compiler.source>
<maven.compiler.target>1.8</maven.compiler.target>
</properties>
<build>
<defaultGoal>install</defaultGoal>
<pluginManagement>
<plugins>
<plugin>
<artifactId>maven-war-plugin</artifactId>
<version>3.2.2</version>
<configuration>
<webXml>src/main/webapp/WEB-INF/web.xml</webXml>
<webResources>
<resource>
<directory>src/main/resources</directory>
<targetPath>WEB-INF</targetPath>
<includes>
<include>*.wsdl</include>
</includes>
</resource>
</webResources>
</configuration>
</plugin>

Apache CXF
35
</plugins>
</pluginManagement>
<plugins>
<plugin>
<groupId>org.apache.cxf</groupId>
<artifactId>cxf-codegen-plugin</artifactId>
<version>3.3.0</version>
<executions>
<execution>
<id>generate-sources</id>
<phase>generate-sources</phase>
<configuration>
<wsdlOptions>
<wsdlOption>
<wsdl>src/main/resources/Hello.wsdl</wsdl>
<faultSerialVersionUID>1</faultSerialVersionUID>
</wsdlOption>
</wsdlOptions>
</configuration>
<goals>
<goal>wsdl2java</goal>
</goals>
</execution>
</executions>
</plugin>
</plugins>
</build>
<profiles>
<profile>
<id>server</id>
<build>
<defaultGoal>test</defaultGoal>
<plugins>
<plugin>
<groupId>org.codehaus.mojo</groupId>
<artifactId>exec-maven-plugin</artifactId>
<version>1.6.0</version>
Apache CXF
36
<executions>
<execution>
<phase>test</phase>
<goals>
<goal>java</goal>
</goals>
<configuration>
<mainClass>
com.tutorialspoint.helloworld.Server
</mainClass>
</configuration>
</execution>
</executions>
</plugin>
</plugins>
</build>
<dependencies>
<dependency>
<groupId>org.apache.cxf</groupId>
<artifactId>cxf-rt-transports-http-jetty</artifactId>
<version>3.3.0</version>
</dependency>
</dependencies>
</profile>
<profile>
<id>client</id>
<build>
<defaultGoal>test</defaultGoal>
<plugins>
<plugin>
<groupId>org.codehaus.mojo</groupId>
<artifactId>exec-maven-plugin</artifactId>
<executions>
<execution>
<phase>test</phase>
<goals>
<goal>java</goal>
</goals>
<configuration>

Apache CXF
37
<mainClass>
com.tutorialspoint.helloworld.Client
</mainClass>
</configuration>
</execution>
</executions>
</plugin>
</plugins>
</build>
</profile>
</profiles>
<dependencies>
<dependency>
<groupId>org.apache.cxf</groupId>
<artifactId>cxf-rt-frontend-jaxws</artifactId>
<version>3.3.0</version>
</dependency>
<dependency>
<groupId>org.apache.cxf</groupId>
<artifactId>cxf-rt-transports-http</artifactId>
<version>3.3.0</version>
</dependency>
<dependency>
<groupId>org.apache.cxf</groupId>
<artifactId>cxf-rt-management</artifactId>
<version>3.3.0</version>
</dependency>
<dependency>
<groupId>org.apache.cxf</groupId>
<artifactId>cxf-rt-features-metrics</artifactId>
<version>3.3.0</version>
</dependency>
<dependency>
<groupId>org.apache.cxf.xjc-utils</groupId>
<artifactId>cxf-xjc-runtime</artifactId>
<version>3.3.0</version>
</dependency>
<dependency>

Apache CXF
38
<groupId>org.apache.cxf</groupId>
<artifactId>cxf-rt-features-logging</artifactId>
<version>3.3.0</version>
</dependency>
<dependency>
<groupId>org.codehaus.mojo</groupId>
<artifactId>exec-maven-plugin</artifactId>
<version>1.6.0</version>
</dependency>
<dependency>
<groupId>org.slf4j</groupId>
<artifactId>slf4j-api</artifactId>
<version>1.8.0-beta2</version>
</dependency>
<dependency>
<groupId>org.apache.cxf</groupId>
<artifactId>cxf-rt-transports-http-jetty</artifactId>
<version>3.3.0</version>
</dependency>
</dependencies>
</project>
Note that it also includes a profile for building client that we will be learning soon in the
later sections.
Running the HelloWorld Service
Now, you are ready to run the web app. In the command window, run the build script
using the following command.
mvn clean install
This will generate the appropriate Java classes from your wsdl, compile your Java classes,
deploy the server on the embedded jetty server and run your application.
You will see the following message on the console:
INFO: Setting the server's publish address to be
http://localhost:9090/HelloServerPort
Server ready…
Apache CXF
39
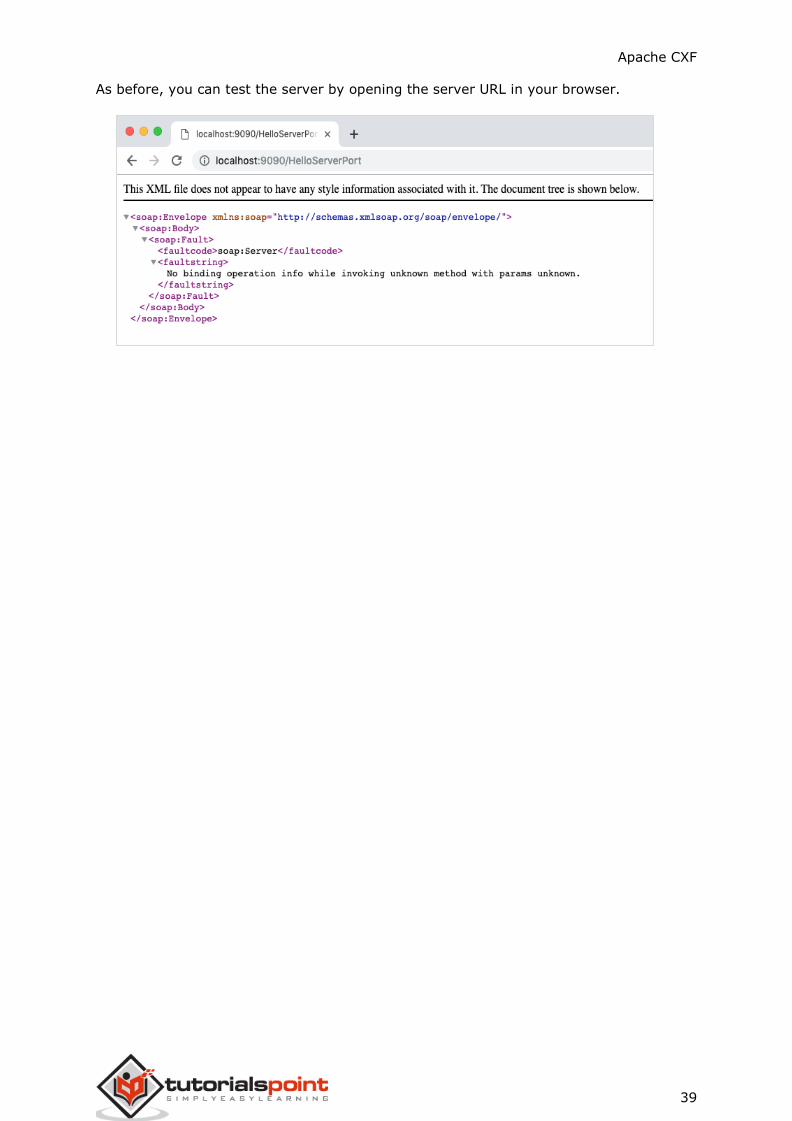
As before, you can test the server by opening the server URL in your browser.

Apache CXF
40
As we did not specify any operation, only a fault message is returned to the browser by
our application. Now, try adding the ?wsdl to your URL and you will see the following
output:
So our server application is running as expected. You may use the SOAP Client such as
Postman described earlier to further test your service.
The next part of this tutorial is to write a client that uses our service.

Apache CXF
41
Developing Client
Writing the client in a CXF application is as important as writing a server. Here is the
complete code for the client that essentially consists of only three lines, the rest of the
lines just print the service information to the user.
//Client.java
package com.tutorialspoint.helloworld;
public class Client {
public static void main(String[] args) throws Exception {
//Create the service client with its default wsdlurl
HelloWorldService helloServiceService = new HelloWorldService();
System.out.println("service: " +
helloServiceService.getServiceName());
System.out.println("wsdl location: " +
helloServiceService.getWSDLDocumentLocation());
HelloWorldPortType helloService =
helloServiceService.getHelloWorldPort();
System.out.println(helloService.greetings
(System.getProperty("user.name")));
}
}
Here, we simply create an instance of our service HelloWorldService, get its port by
calling getHelloWorldPort method, and then pass our greetings message to it. Run the
client and you will see the following output:
service: {http://helloworld.tutorialspoint.com/}HelloWorldService
wsdl location: file:/Users/drsarang/Desktop/tutorialpoint/cxf-
wsdl/src/main/resources/Hello.wsdl
hi drsarang
So far you have learned how to use CXF with Java-First and WSDL-First architectures. In
the Java-First approach, you used a POJO with ServerFactoryBean class from CXF
libraries to create a server. To create a client you used ClientProxyFactoryBean class
from CXF library. In the WSDL-First approach, you used Endpoint class to publish the
service at the desired URL and a specified implementor. You can now extend these
techniques to integrate different protocols and transports.
Apache CXF
42
Before proceeding ahead into this chapter, we assume that you know how to write a
RESTful web service in Java. I will show you how to use CXF on top of this JAX-RS (Java
API for RESTful Web Services) . We will create a web service that maintains a list of latest
movies. When the user requests a movie, he specifies the movie ID in his request, the
server will locate the movie and return it to the client. In our trivial case, we will simply
return the movie name to the client and not the actual binary MP4 file. So let us start
creating a JAX-RS application.
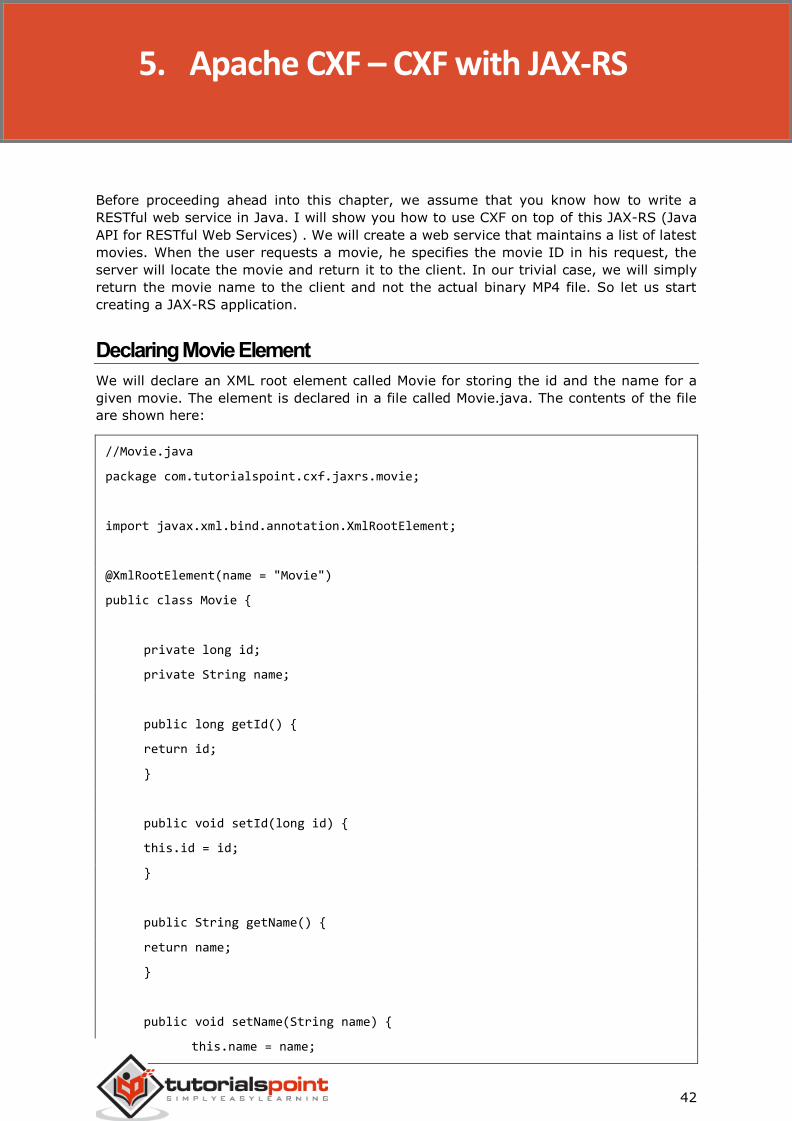
Declaring Movie Element
We will declare an XML root element called Movie for storing the id and the name for a
given movie. The element is declared in a file called Movie.java. The contents of the file
are shown here:
//Movie.java
package com.tutorialspoint.cxf.jaxrs.movie;
import javax.xml.bind.annotation.XmlRootElement;
@XmlRootElement(name = "Movie")
public class Movie {
private long id;
private String name;
public long getId() {
return id;
}
public void setId(long id) {
this.id = id;
}
public String getName() {
return name;
}
public void setName(String name) {
this.name = name;
5. Apache CXF – CXF with JAX-RS

Apache CXF
43
}
}
Note the use of XmlRootElement tag to declare the XML element for the Movie tag.
Next, we will create a service that holds the list of movies in its database.
Creating Movie Service Database
To store the list of movies we use Java supplied Map that stores the key-value pairs. If
the list is large, you will use an external database storage which will also be easier to
manage. In our trivial case, we will store only five movies in our database. The code for
the MovieService class is given below:
//MovieService.java
package com.tutorialspoint.cxf.jaxrs.movie;
import java.util.HashMap;
import java.util.Map;
import javax.ws.rs.GET;
import javax.ws.rs.Path;
import javax.ws.rs.PathParam;
import javax.ws.rs.Produces;
@Path("/movieservice/")
@Produces("text/xml")
public class MovieService {
long currentId = 123;
Map<Long, Movie> movies = new HashMap<>();
public MovieService() {
init();
}
@GET
@Path("/movie/{id}/")
public Movie getMovie(@PathParam("id") String id) {
long idNumber = Long.parseLong(id);
return movies.get(idNumber);
Apache CXF
44
}
final void init() {
Movie c1 = new Movie();
c1.setName("Aquaman");
c1.setId(1001);
movies.put(c1.getId(), c1);
Movie c2 = new Movie();
c2.setName("Mission Imposssible");
c2.setId(1002);
movies.put(c2.getId(), c2);
Movie c3 = new Movie();
c3.setName("Black Panther");
c3.setId(1003);
movies.put(c3.getId(), c3);
Movie c4 = new Movie();
c4.setName("A Star is Born");
c4.setId(1004);
movies.put(c4.getId(), c4);
Movie c5 = new Movie();
c5.setName("The Meg");
c5.setId(1005);
movies.put(c5.getId(), c5);
}
}
Note that we use the following two annotations to specify the URL path for our movie
service and its return type:
@Path("/movieservice/")
@Produces("text/xml")
We use the @GET and @Path annotations to specify the URL for the GET request as follows:
Apache CXF
45
@GET
@Path("/movie/{id}/")
The movie database itself is initialized in the init method, where we add five movie items
to the database.
Our next task is to write a server application.
Developing Server
To create a server, we use CXF supplied JAXRSServerFactoryBean class.
JAXRSServerFactoryBean factory = new JAXRSServerFactoryBean();
We set its resource classes by calling the setResourceClasses method.
factory.setResourceClasses(Movie.class);
factory.setResourceClasses(MovieService.class);
We set the service provider by calling the setResourceProvider method.
factory.setResourceProvider(MovieService.class,
new SingletonResourceProvider(new MovieService()));
We set the desired publish address by calling the aetAddress method:
factory.setAddress("http://localhost:9000/");
Finally, we publish the server by calling the create method on the factory instance.
factory.create();
The entire code for the server application is given below:
//Server.java
package com.tutorialspoint.cxf.jaxrs.movie;
import org.apache.cxf.jaxrs.JAXRSServerFactoryBean;
import org.apache.cxf.jaxrs.lifecycle.SingletonResourceProvider;
public class Server {
public static void main(String[] args) throws Exception {

Apache CXF
46
JAXRSServerFactoryBean factory = new JAXRSServerFactoryBean();
factory.setResourceClasses(Movie.class);
factory.setResourceClasses(MovieService.class);
factory.setResourceProvider(MovieService.class,
new SingletonResourceProvider(new MovieService()));
factory.setAddress("http://localhost:9000/");
factory.create();
System.out.println("Server ready...");
Thread.sleep(5 * 60 * 1000);
System.out.println("Server exiting ...");
System.exit(0);
}
}
The Final pom.xml
Here we have included the final version of pom.xml below:
<?xml version="1.0" encoding="UTF-8"?>
<project xmlns="http://maven.apache.org/POM/4.0.0"
xmlns:xsi="http://www.w3.org/2001/XMLSchema-instance"
xsi:schemaLocation="http://maven.apache.org/POM/4.0.0
http://maven.apache.org/xsd/maven-4.0.0.xsd">
<modelVersion>4.0.0</modelVersion>
<groupId>com.tutorialspoint</groupId>
<artifactId>cxf-jaxrs</artifactId>
<version>1.0</version>
<packaging>jar</packaging>
<properties>
<project.build.sourceEncoding>UTF-8</project.build.sourceEncoding>
<maven.compiler.source>1.8</maven.compiler.source>
<maven.compiler.target>1.8</maven.compiler.target>
</properties>
<profiles>

Apache CXF
47
<profile>
<id>server</id>
<build>
<defaultGoal>test</defaultGoal>
<plugins>
<plugin>
<groupId>org.codehaus.mojo</groupId>
<artifactId>exec-maven-plugin</artifactId>
<version>1.6.0</version>
<executions>
<execution>
<phase>test</phase>
<goals>
<goal>java</goal>
</goals>
<configuration>
<mainClass>
com.tutorialspoint.cxf.jaxrs.movie.Server
</mainClass>
</configuration>
</execution>
</executions>
</plugin>
</plugins>
</build>
<dependencies>
<dependency>
<groupId>org.apache.cxf</groupId>
<artifactId>cxf-rt-transports-http-jetty</artifactId>
<version>3.3.0</version>
</dependency>
</dependencies>
</profile>
<profile>
<id>client</id>
<build>
<defaultGoal>test</defaultGoal>
<plugins>
<plugin>

Apache CXF
48
<groupId>org.codehaus.mojo</groupId>
<artifactId>exec-maven-plugin</artifactId>
<executions>
<execution>
<phase>test</phase>
<goals>
<goal>java</goal>
</goals>
<configuration>
<mainClass>
com.tutorialspoint.cxf.jaxrs.movie.Client
</mainClass>
</configuration>
</execution>
</executions>
</plugin>
</plugins>
</build>
</profile>
</profiles>
<dependencies>
<dependency>
<groupId>org.apache.cxf</groupId>
<artifactId>cxf-rt-transports-http</artifactId>
<version>3.3.0</version>
</dependency>
<dependency>
<groupId>org.apache.cxf</groupId>
<artifactId>cxf-rt-transports-http-jetty</artifactId>
<version>3.3.0</version>
</dependency>
<dependency>
<groupId>org.apache.cxf</groupId>
<artifactId>cxf-rt-frontend-jaxrs</artifactId>
<version>3.3.0</version>
</dependency>
<dependency>
<groupId>jakarta.ws.rs</groupId>

Apache CXF
49
<artifactId>jakarta.ws.rs-api</artifactId>
<version>2.1.5</version>
</dependency>
<dependency>
<groupId>org.apache.httpcomponents</groupId>
<artifactId>httpclient</artifactId>
<version>4.5.7</version>
</dependency>
</dependencies>
</project>
Developing Client
Writing the RS client is trivial. We simply create a URL object and open its stream. We use
CXF supplied IOUtils class to copy the contents of input stream to a local stream.
URL url = new URL("http://localhost:9000/movieservice/movie/1002");
try (InputStream instream = url.openStream();
CachedOutputStream outstream = new CachedOutputStream()) {
IOUtils.copy(instream, outstream);
The entire code for the client application is given below:
//Client.java
package com.tutorialspoint.cxf.jaxrs.movie;
import java.io.InputStream;
import java.net.URL;
import org.apache.cxf.helpers.IOUtils;
import org.apache.cxf.io.CachedOutputStream;
public class Client {
public static void main(String[] args) throws Exception {
URL url
= new URL("http://localhost:9000/movieservice/movie/1002");
try (InputStream instream = url.openStream();
CachedOutputStream outstream = new CachedOutputStream()) {
IOUtils.copy(instream, outstream);
String str = outstream.getOut().toString();
Apache CXF
50
System.out.println(str);
}
}
}
Testing JAX-RS Application
Run the server using the following command in the command-line window:
mvn -Pserver
Now, you will see the following message on the console:
INFO: Setting the server's publish address to be http://localhost:9000
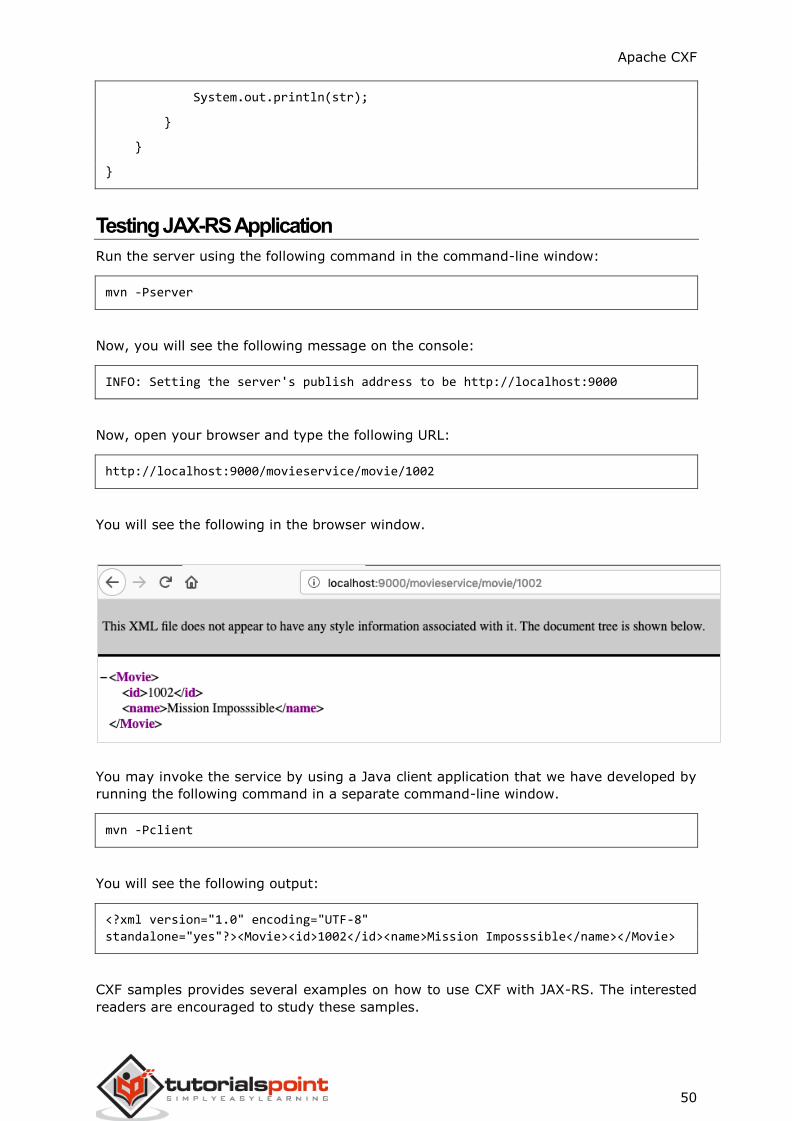
Now, open your browser and type the following URL:
http://localhost:9000/movieservice/movie/1002
You will see the following in the browser window.
You may invoke the service by using a Java client application that we have developed by
running the following command in a separate command-line window.
mvn -Pclient
You will see the following output:
<?xml version="1.0" encoding="UTF-8"
standalone="yes"?><Movie><id>1002</id><name>Mission Imposssible</name></Movie>
CXF samples provides several examples on how to use CXF with JAX-RS. The interested
readers are encouraged to study these samples.
Apache CXF
51
As mentioned earlier, you can use CXF with JMS transport. In this case, the client will send
a JMS message to a known Messaging Server. Our server application is continuously
listening to the messaging server for the incoming messages. When the message arrives,
it processes the message, executes the client request and sends the response as another
message to the client.
As earlier, we will first create a sample server application that provides a singular web
method called sayHi.
Creating Service Interface
The service interface for our HelloWorld service is shown here:
//HelloWorld.java
package com.tutorialspoint.service;
import javax.jws.WebMethod;
import javax.jws.WebParam;
import javax.jws.WebService;
@WebService
public interface HelloWorld {
@WebMethod
String sayHi(@WebParam(name = "name") String name);
}
Implementing Service
The implementation of the service interface is defined as follows:
//HelloWorldImpl.java
package com.tutorialspoint.service.impl;
import javax.jws.WebService;
import com.tutorialspoint.service.HelloWorld;
@WebService
6. Apache CXF - CXF with JMS
Apache CXF
52
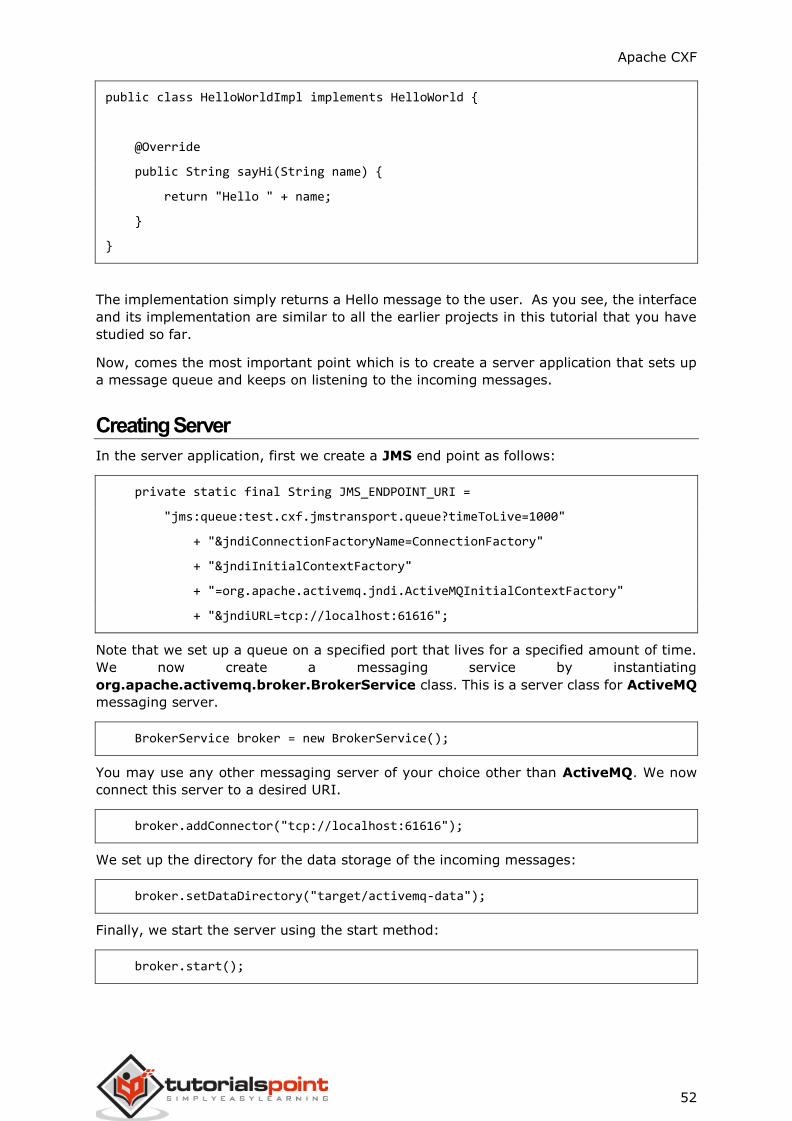
public class HelloWorldImpl implements HelloWorld {
@Override
public String sayHi(String name) {
return "Hello " + name;
}
}
The implementation simply returns a Hello message to the user. As you see, the interface
and its implementation are similar to all the earlier projects in this tutorial that you have
studied so far.
Now, comes the most important point which is to create a server application that sets up
a message queue and keeps on listening to the incoming messages.
Creating Server
In the server application, first we create a JMS end point as follows:
private static final String JMS_ENDPOINT_URI =
"jms:queue:test.cxf.jmstransport.queue?timeToLive=1000"
+ "&jndiConnectionFactoryName=ConnectionFactory"
+ "&jndiInitialContextFactory"
+ "=org.apache.activemq.jndi.ActiveMQInitialContextFactory"
+ "&jndiURL=tcp://localhost:61616";
Note that we set up a queue on a specified port that lives for a specified amount of time.
We now create a messaging service by instantiating
org.apache.activemq.broker.BrokerService class. This is a server class for ActiveMQ
messaging server.
BrokerService broker = new BrokerService();
You may use any other messaging server of your choice other than ActiveMQ. We now
connect this server to a desired URI.
broker.addConnector("tcp://localhost:61616");
We set up the directory for the data storage of the incoming messages:
broker.setDataDirectory("target/activemq-data");
Finally, we start the server using the start method:
broker.start();

Apache CXF
53
Next, we create an instance of our service bean HelloWorld using the server factory bean
class as used in our earlier POJO application:
Object implementor = new HelloWorldImpl();
JaxWsServerFactoryBean factory = new JaxWsServerFactoryBean();
factory.setServiceClass(HelloWorld.class);
Next, we set up the JMS endpoint on the factory so that the factory will keep on listening
to the incoming messages:
factory.setTransportId
(JMSSpecConstants.SOAP_JMS_SPECIFICATION_TRANSPORTID);
factory.setAddress(JMS_ENDPOINT_URI);
Finally, we set up the implementer class in the factory and start running it:
factory.setServiceBean(implementor);
factory.create();
At this point your server is up and running. Note that since we have used the factory bean
class as in the POJO application, the need for CXFServlet and the web.xml file is not
required.
The full server application code is shown here:
//ServerJMS.java
package com.tutorialspoint.server;
import java.util.Collections;
import org.apache.cxf.ext.logging.LoggingFeature;
import org.apache.cxf.jaxws.JaxWsServerFactoryBean;
import org.apache.cxf.transport.jms.spec.JMSSpecConstants;
import com.tutorialspoint.service.HelloWorld;
import com.tutorialspoint.service.impl.HelloWorldImpl;
import org.apache.activemq.broker.BrokerService;
public final class ServerJMS {
private static final String JMS_ENDPOINT_URI =
"jms:queue:test.cxf.jmstransport.queue?timeToLive=1000"
+ "&jndiConnectionFactoryName=ConnectionFactory"
+ "&jndiInitialContextFactory"

Apache CXF
54
+ "=org.apache.activemq.jndi.ActiveMQInitialContextFactory"
+ "&jndiURL=tcp://localhost:61616";
public static void main(String[] args) throws Exception {
BrokerService broker = new BrokerService();
broker.addConnector("tcp://localhost:61616");
broker.setDataDirectory("target/activemq-data");
broker.start();
Object implementor = new HelloWorldImpl();
JaxWsServerFactoryBean factory = new JaxWsServerFactoryBean();
factory.setServiceClass(HelloWorld.class);
factory.setTransportId
(JMSSpecConstants.SOAP_JMS_SPECIFICATION_TRANSPORTID);
factory.setAddress(JMS_ENDPOINT_URI);
factory.setServiceBean(implementor);
factory.setFeatures(Collections.singletonList(new
LoggingFeature()));
factory.create();
System.out.println("Server ready...");
Thread.sleep(5 * 60 * 1000);
System.out.println("Server exiting");
System.exit(0);
}
}
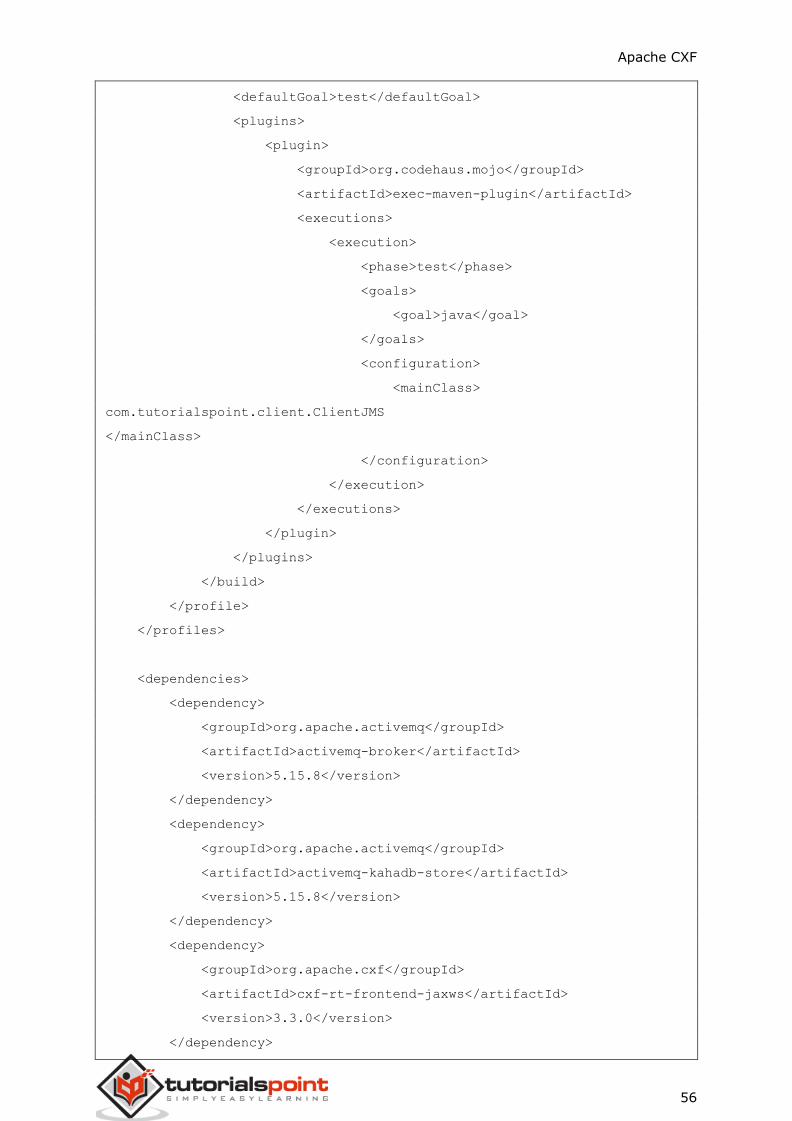
Adding Dependencies
The server application that we have created uses ActiveMQ messaging server. Thus, you
will need to add few more dependencies to your project. The complete pom.xml file is
shown here for you to understand the additional needed dependencies.
<?xml version="1.0" encoding="UTF-8"?>
<project xmlns="http://maven.apache.org/POM/4.0.0"
xmlns:xsi="http://www.w3.org/2001/XMLSchema-instance"
xsi:schemaLocation="http://maven.apache.org/POM/4.0.0
http://maven.apache.org/xsd/maven-4.0.0.xsd">
<modelVersion>4.0.0</modelVersion>
<groupId>com.tutorialspoint</groupId>
<artifactId>cxf-jms</artifactId>

Apache CXF
55
<version>1.0</version>
<packaging>jar</packaging>
<properties>
<project.build.sourceEncoding>UTF-
8</project.build.sourceEncoding>
<maven.compiler.source>1.8</maven.compiler.source>
<maven.compiler.target>1.8</maven.compiler.target>
</properties>
<profiles>
<profile>
<id>server</id>
<build>
<defaultGoal>test</defaultGoal>
<plugins>
<plugin>
<groupId>org.codehaus.mojo</groupId>
<artifactId>exec-maven-plugin</artifactId>
<version>1.6.0</version>
<executions>
<execution>
<phase>test</phase>
<goals>
<goal>java</goal>
</goals>
<configuration>
<mainClass>
com.tutorialspoint.server.ServerJMS
</mainClass>
</configuration>
</execution>
</executions>
</plugin>
</plugins>
</build>
</profile>
<profile>
<id>client</id>
<build>
Apache CXF
56
<defaultGoal>test</defaultGoal>
<plugins>
<plugin>
<groupId>org.codehaus.mojo</groupId>
<artifactId>exec-maven-plugin</artifactId>
<executions>
<execution>
<phase>test</phase>
<goals>
<goal>java</goal>
</goals>
<configuration>
<mainClass>
com.tutorialspoint.client.ClientJMS
</mainClass>
</configuration>
</execution>
</executions>
</plugin>
</plugins>
</build>
</profile>
</profiles>
<dependencies>
<dependency>
<groupId>org.apache.activemq</groupId>
<artifactId>activemq-broker</artifactId>
<version>5.15.8</version>
</dependency>
<dependency>
<groupId>org.apache.activemq</groupId>
<artifactId>activemq-kahadb-store</artifactId>
<version>5.15.8</version>
</dependency>
<dependency>
<groupId>org.apache.cxf</groupId>
<artifactId>cxf-rt-frontend-jaxws</artifactId>
<version>3.3.0</version>
</dependency>

Apache CXF
57
<dependency>
<groupId>org.apache.cxf</groupId>
<artifactId>cxf-rt-transports-jms</artifactId>
<version>3.3.0</version>
</dependency>
<dependency>
<groupId>org.apache.cxf</groupId>
<artifactId>cxf-rt-features-logging</artifactId>
<version>3.3.0</version>
</dependency>
<dependency>
<groupId>org.apache.cxf</groupId>
<artifactId>cxf-rt-transports-http-jetty</artifactId>
<version>3.3.0</version>
</dependency>
</dependencies>
</project>
Running Server
To start running the server, as in the earlier cases, type the following command in your
command window:
mvn -Pserver
This will start the ActiveMQ message server, set up the messaging queue and create a
factory bean that keeps listening to this queue.
Our next task is to create a client application.
Creating Client
In the client application, first we set up the JMS endpoint same as the one used in the
server application:
private static final String JMS_ENDPOINT_URI =
"jms:queue:test.cxf.jmstransport.queue?timeToLive=1000"
+ "&jndiConnectionFactoryName=ConnectionFactory"
+ "&jndiInitialContextFactory"
+ "=org.apache.activemq.jndi.ActiveMQInitialContextFactory"
+ "&jndiURL=tcp://localhost:61616";
We create a factory as in the POJO application.

Apache CXF
58
JaxWsProxyFactoryBean factory = new JaxWsProxyFactoryBean();
We set the endpoint URI and the implementer class as follows:
factory.setTransportId
(JMSSpecConstants.SOAP_JMS_SPECIFICATION_TRANSPORTID);
factory.setAddress(JMS_ENDPOINT_URI);
HelloWorld client = factory.create(HelloWorld.class);
Finally, we call the service method and print its resultant output:
String reply = client.sayHi("TutorialsPoint");
System.out.println(reply);
The complete client code is given below:
// ClientJMS.java
package com.tutorialspoint.client;
import com.tutorialspoint.service.HelloWorld;
import org.apache.cxf.jaxws.JaxWsProxyFactoryBean;
import org.apache.cxf.transport.jms.spec.JMSSpecConstants;
public final class ClientJMS {
private static final String JMS_ENDPOINT_URI =
"jms:queue:test.cxf.jmstransport.queue?timeToLive=1000"
+ "&jndiConnectionFactoryName=ConnectionFactory"
+ "&jndiInitialContextFactory"
+ "=org.apache.activemq.jndi.ActiveMQInitialContextFactory"
+ "&jndiURL=tcp://localhost:61616";
public static void main(String[] args) throws Exception {
JaxWsProxyFactoryBean factory = new JaxWsProxyFactoryBean();
factory.setTransportId
(JMSSpecConstants.SOAP_JMS_SPECIFICATION_TRANSPORTID);
factory.setAddress(JMS_ENDPOINT_URI);
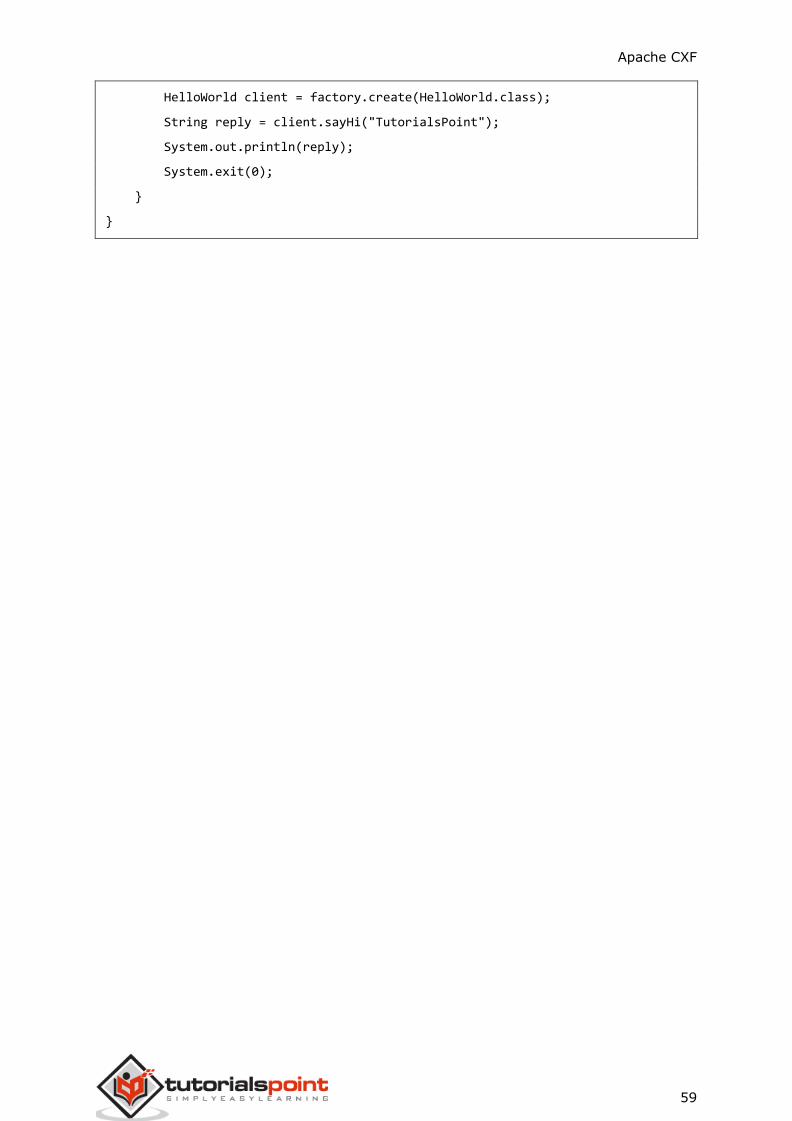
Apache CXF
59
HelloWorld client = factory.create(HelloWorld.class);
String reply = client.sayHi("TutorialsPoint");
System.out.println(reply);
System.exit(0);
}
}
Apache CXF
60
CXF provides a unified approach to mix-n-match several web protocols and transports that
exist in today’s world for creating web applications. You learned how to start with a
traditional Java interface to create a web application that uses CXF. Next, you learned how
to create a web application and its client starting with WSDL.
The WSDL provides an XML representation of your service interface. You used wsdl2java
tool to create Java interfaces from WSDL and finally wrote both the server and the client
using the created interfaces. The tutorial also briefly introduced you to use CXF in your
RESTful web service application. Finally, we also discussed how CXF can be used with JMS.
You may now refer to CXF-samples for further study.
Note: The entire project source code may be downloaded from here.
7. Apache CXF - Conclusion