a step by step guide to the vocal warm up exercises · a step by step guide to the vocal warm up...
TRANSCRIPT
A Step By Step GuideTo The Vocal Warm Up Exercises
The lawyer who tries a case in a courtroom has similar demands placed on the voice that the actor in the theatre faces. Both must have a voice that can be heard. Both must have a voice that can last for hours at a time for days and weeks on end. Both must have a voice that is placed in the body in such a way that the voice is both pleasing to the listener and won’t wear out. Both must find the true voice with which to communicate, rather than a habitual voice which they have used through most of their lives in public situations. Both must be able to enunciate clearly so that jurors and audience alike can understand what is being said.
Also, the actor and the attorney must be relaxed when working on their feet—neither should be complacent about the task, but in order to get the butterflies to straighten up and fly in formation for someone either in the courtroom or on the stage takes a kind of centered relaxation that is needed by both.
The attorney, like the actor, can achieve this through a vocal warm up. Classically trained actors learn how to warm up and use their voices and how to use these exercises to improve their voices and to keep them relaxed before going onstage.
“The Step by Step Guide To The Vocal Warm Up” documented here has been developed and gleaned from many sources over decades spent in the theatre and working with the specific vocal and relaxation needs of attorneys. You may have first been introduced to our vocal work through attending one of our workshops or through one of our products. This step by step guide is meant to be followed as a “written out” version of what you either experience with us in person or through one or more of the following: DVD 4, Online School #4 and Advanced Vocal Skills, Breather, Warm Up Home and Office or Warm Up in the Car. As you work with our vocal warm up programs on a consistent basis, you should be well on your way to making your voice what you want it to be—strong, supple, well placed and pleasing to the ear. You should also have a grasp of how to begin a trial as relaxed as you normally are in the middle of the third day.
ACT of COMMUNICATION • 5354 Etheldo Ave., Culver City, CA 90230www.actofcommunication.com
®ACT of COMMUNICATION • 5354 Etheldo Ave., Culver City, CA 90230www.actofcommunication.com
®
A Step By Step Guide To
The Exercises
Table Of Contents
Exercise 1
The Basic Stance • 3-4
Exercise 2
The Vocal Check • 5
Exercise 3
Shoulder Raises • 6
Exercise 4
Head Rolls • 7-8
Exercise 5
The Drop Down • 9-10
Exercise 6
Touching Sound • 11-12
Exercise 7
The Hum • 13-14
Exercise 8
The Hum & Head Rolls The Hum & The Drop Down Opening The Sound •15
Exercise 9
Vocal Landing • 16
Exercise 10
Putting It All Together • 17
Exercise 11
The Articulators • 18-20
ACT of COMMUNICATION • 5354 Etheldo Ave., Culver City, CA 90230www.actofcommunication.com
®
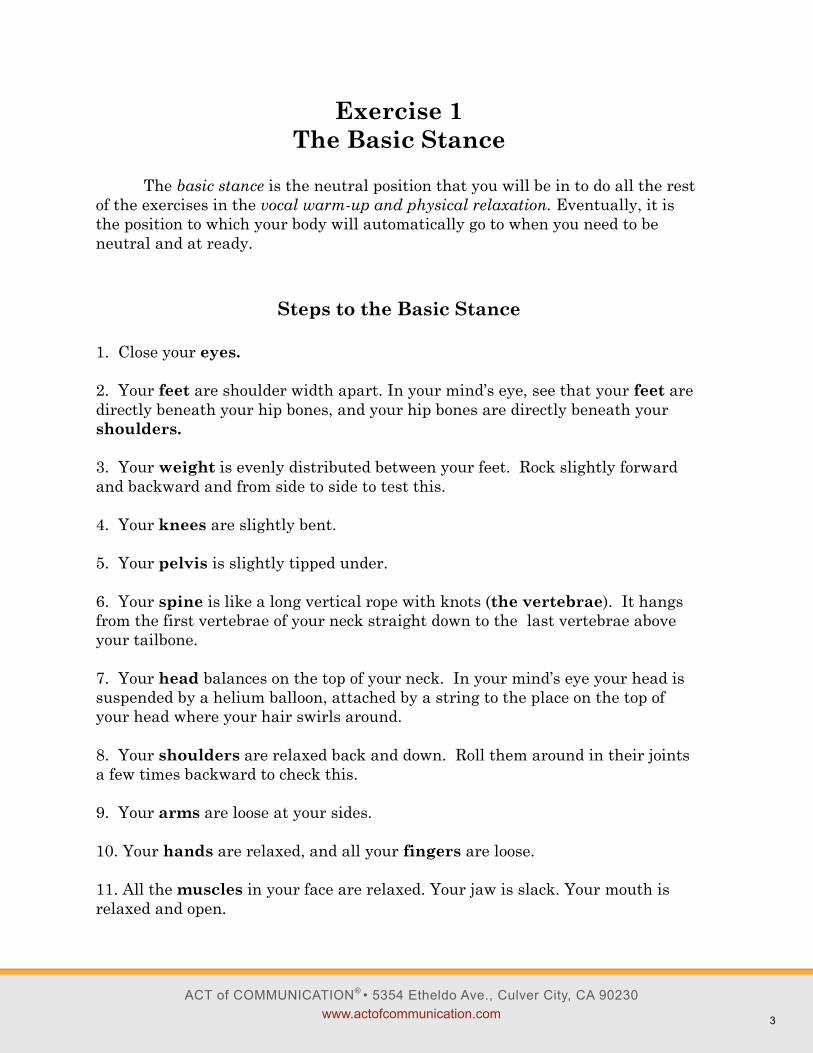
Exercise 1
The Basic Stance
The basic stance is the neutral position that you will be in to do all the rest
of the exercises in the vocal warm-up and physical relaxation. Eventually, it is
the position to which your body will automatically go to when you need to be
neutral and at ready.
Steps to the Basic Stance
1. Close your eyes.
2. Your feet are shoulder width apart. In your mind’s eye, see that your feet are
directly beneath your hip bones, and your hip bones are directly beneath your
shoulders.
3. Your weight is evenly distributed between your feet. Rock slightly forward
and backward and from side to side to test this.
4. Your knees are slightly bent.
5. Your pelvis is slightly tipped under.
6. Your spine is like a long vertical rope with knots (the vertebrae). It hangs
from the first vertebrae of your neck straight down to the last vertebrae above
your tailbone.
7. Your head balances on the top of your neck. In your mind’s eye your head is
suspended by a helium balloon, attached by a string to the place on the top of
your head where your hair swirls around.
8. Your shoulders are relaxed back and down. Roll them around in their joints
a few times backward to check this.
9. Your arms are loose at your sides.
10. Your hands are relaxed, and all your fingers are loose.
11. All the muscles in your face are relaxed. Your jaw is slack. Your mouth is
relaxed and open.
ACT of COMMUNICATION • 5354 Etheldo Ave., Culver City, CA 90230www.actofcommunication.com
®
3
12. You are breathing through your mouth.
13. Your stomach is loose, fat and flabby. In your mind’s eye, see the air come in
cool over your tongue, go all the way down the inside of your torso into your fat,
flabby relaxed stomach and come back up and out warm as you exhale.
14. Take a deep, relaxing inhalation and let out a deep, relaxing exhalation.
ACT of COMMUNICATION • 5354 Etheldo Ave., Culver City, CA 90230www.actofcommunication.com
®
4
Exercise 2
The Vocal Check
The vocal check gives you a beginning point in this particular run of the
vocal warm-up and physical relaxation at this particular time on this particular
day. It is a sentence that you say at this initial part of the process, and which you
will repeat at the end.
A standard sentence for a vocal check is ―Good morning, ladies and
gentlemen of the jury . . . my name is (your name).‖ You can, and should, vary
the text of your vocal check from day to day. Perhaps one day it is a sentence you
know you will be using in a telephone negotiation. On another day it could be a
declaration you are going to make in a settlement conference. Perhaps today it is
the first sentence of your opening statement.
Steps to the Vocal Check
1. Get into the basic stance, keeping your eyes closed.
2. Inhale, through your mouth into your fat, flabby, relaxed stomach.
3. Exhale through your mouth and as you do so, say your vocal check.
4. Make a mental note of how relaxed your voice sounded, where it was placed,
and how rich it was.
5. Slowly inhale and exhale.
ACT of COMMUNICATION • 5354 Etheldo Ave., Culver City, CA 90230www.actofcommunication.com
®
5
Exercise 3
Shoulder Raises
Tension wreaks havoc not only with your general state of relaxation, but
with your voice as well. The first place that tension goes is into the shoulders.
All you have to do is imagine that you are late, you are in a car, you are driving,
and you are stuck at a traffic light. Your shoulders automatically start to climb
up and hunch over. Your voice gets tight, thin, and (in some people) high when
the shoulders are tensed up.
This exercise is not only for general use in the vocal warm-up and physical
relaxation. It is for the next time you are in court and the opposing counsel has
said, ―Objection, your honor.‖ just one too many times and you find your shoulders
up around your ears, your heart beating, your dander up, and your voice sounding
like Minnie Mouse in a blender.
Steps to Shoulder Raises
1. Get into the basic stance.
2. Raise your shoulders until you feel them envelope your neck and touch your
ears. Leave them this way for a slow count of 15.
Please note:
As you do this, make sure you are not holding your breath, and that you are
tensing nothing but your shoulders. Do not tense any other muscles in your body
except those in your shoulders.
3. Inhale, and as you exhale, drop your shoulders.
Please note:
Do not place your shoulders, simply drop them. Your neck will now feel longer.
Your shoulders will be ―down‖ and ―back‖ and ―relaxed.‖
4. Check to see if there is any tension in any part of your body. If there is,
inhale into the tension, and exhale it out of your body.
ACT of COMMUNICATION • 5354 Etheldo Ave., Culver City, CA 90230www.actofcommunication.com
®
6
Exercise 4
Head Rolls
The head roll is a familiar part of many other physical disciplines for many
of our seminar participants. Some have learned it as a part of football, still others
as a part of Yoga, and a few from their doctors after a neck injury. It is one of the
best known ways to loosen up the tension in the neck, and prevent injury. If you
follow the steps below, it is the surest way to slow yourself down and become the
relaxed you that we have found.
It also releases and loosens all of the muscles around the vocal chords.
These muscles, when tension has crept into them, tend to tighten around the
chords and make the voice thin, edgy and unpleasant.
Steps to Head Rolls
1. Get into the basic stance.
2. Drop your head forward so that your chin is resting on your chest. This is
called ―center.‖
3. Roll your head so that your right ear is over your right shoulder. Roll your
head back to ―center.‖
Please note:
Do not bring your shoulder up to meet your ear. It should still be down and
released (see shoulder raises). Do not put your nose over your shoulder. If your
nose is over your shoulder, you will not get the same gentle stretching of the
muscles that you will feel if your ear is over your shoulder.
4. Roll your head so that your left ear is over your left shoulder. Roll your
head back to ―center.‖ See “Please note . . .” in step 3.
5. Repeat steps 3 and 4 several times, slowing the steps and your breath down as
you do this. Your inhalations will be getting slower and slower and deeper and
deeper. So, too, will your exhalations.
6. Drop your head back so that the base of your skull is resting on the top of
your upper back. This is called ―back center.‖
ACT of COMMUNICATION • 5354 Etheldo Ave., Culver City, CA 90230www.actofcommunication.com
®
7
7. Roll your head so that your right ear is over your right shoulder. Roll your
head back to ―back center.‖ See “Please note . . .”in step 3.
8. Roll your head so that your left ear is over your left shoulder. Roll your
head back to ―back center.‖ See “Please note . . .” in step 3.
9. Repeat steps 7 and 8 several times. See step 5.
10. Check to see if there is any tension in any part of your body. If there is,
inhale into the tension, and exhale it out of your body.
ACT of COMMUNICATION • 5354 Etheldo Ave., Culver City, CA 90230www.actofcommunication.com
®
8
Exercise 5
The Drop Down You are well on your way to breathing correctly—through your mouth and
all the way down into your diaphragm. A full relaxed breath is not only vital for
your relaxation, it is vital for your voice. The breath is the ―fuel‖ on which the
―car‖ that is the spoken word ―runs.‖
The drop down is the best way to make sure that the breath is being taken
all the way down into the intercostal muscles (the muscles in the rib cage) and not
just into the upper chest. Once you are able to breathe fully in the drop down,
you will want to keep that full breath working for you in the positions in which
you will be speaking—sitting up and standing.
Steps to the Drop Down
1. Get into the basic stance.
2. Drop your head forward so that your chin is resting on your chest.
3. Grasp your hands and put them behind your head, with fingers on the back
of your skull and palms resting on the sides.
4. Allow the weight of your hands to carry your head all the way down
until your spine is fully released. Drop your hands and let your arms and
hands dangle. In this position your body should form a relaxed inverted ―V‖: your
feet are flat on the ground, your knees are bent, your rear end is the highest
point, and the upper part of your body is dangling ―upside down‖ with the top of
your head pointing at the floor.
Please note:
This is not a Charles Atlas contest. If your fingers are touching the ground in this
position, great. If they are only as far as your knees, great. If they are barely past
your chest, great. You only need to go as far as you are truly capable of going.
Instead of ―no pain, no gain‖ think ―If I am feeling pain, I am not only putting back
a lot of tension into my body, but I am giving myself a voice that sounds horrible.‖
5. Take several full inhalations and exhalations in this position. You should be
able to feel your breath going all the way into the small of your back, filling up
your ribs. If you want to check this, place your hands on your back between
ACT of COMMUNICATION • 5354 Etheldo Ave., Culver City, CA 90230www.actofcommunication.com
®
9

your rib cage and your tailbone. You should feel this part of your back expand
as you inhale and contract again as you exhale.
Please note:
Your legs may very well start to shake. This is a good thing. It is not something to
be ashamed of. It will allow you to breathe even more deeply if you just let it.
Remember, this is not a gym class where you are going to flunk because you are
not perfect.
6. Take a full breath in and sigh it out on pure air.
7. In slow motion (triple slow motion for some people), build back up again to a
standing position exactly in reverse of how you got down. Do this one vertebra at
a time, starting with the one just above your tailbone through the last one at the
top of your neck. Stack them up as you would knots on a rope, or records on a
turntable. Your arms and shoulders will fall back into the basic stance position
as you get to those last seven vertebrae of the neck. Last, float your head up so
that it balances on the top of your neck.
Please note:
Keep the same relationship with your breath during this whole
process that you had when you were in the drop down. If at any point in this step
you find that you have lost that connection, stop and take a full inhalation and
exhalation to allow your breath back into the bottoms of your ribs and the
small of your back again. Also, your head comes last. Do not pick up your head.
It’s a natural response half-way through this step. If you need to keep your hands
clasped on the back of your head for a few times, like you did in steps 3 and 4 until
your body lets you do this, please feel free.
8. You are now back in the basic stance. Take a deep inhalation and
exhalation.
9. Check to see if there is any tension in any part of your body. If
there is, inhale into the tension, and exhale it out of your body.
ACT of COMMUNICATION • 5354 Etheldo Ave., Culver City, CA 90230www.actofcommunication.com
®
10
Exercise 6
Touching Sound When you are relaxed, both in body and in breath, you are ready to add
sound to the vocal warm-up and physical relaxation. If you add sound before this,
chances are you will add tension back in. Which, at this point, you know is bad for
both relaxation and voice.
The sound that you want to make when touching sound is free, easy, and
relaxed. It is not forced from the diaphragm in a football huddle declaration of
victory, it is not squeezed through the throat in a scream or shout, and it is not
formed into some vocally perfect Metropolitan Opera trill. It is a released, open
sound that comes from way deep inside of you—that place you have been
exploring with your breath only up until now. It may sound ―ugly‖ in your mind’s
ear or ―too low‖ or ―from someone else.‖
It is your sound, coming from you, without all the incumbency of tension,
―propriety,‖ and your own personal vocal history. It is the pure sound upon which
your new found voice will be built.
Steps to Touching Sound
1. Get into the basic stance.
Please note:
Remember, you are breathing through your mouth.
2. With your mind’s eye, imagine there is a PVC pipe that goes from the back of
your tongue, and leads directly down to the middle of the bottom of your
torso. If you drew an imaginary line from your belly button to your tailbone, the
pipe would be resting on that line.
3. With your mind’s eye, watch the air come in cool over your tongue, go down
the PVC pipe and pour into a large, cool, blue pool of sound. Then as you exhale,
see that bubbles come up the PVC pipe and pour out warm over your tongue and
out of your mouth.
4. Repeat step 3 several times, allowing your breath to slow down and relax you.
As you do, notice that each of the bubbles has a pure, tiny sound in it. The sound
in each bubble is “huh.”
ACT of COMMUNICATION • 5354 Etheldo Ave., Culver City, CA 90230www.actofcommunication.com
®
11
5. This time, as you are exhaling, allow one of the bubbles to gently pop open as
it leaves your mouth and say, “huh.”
Please note:
This is only loud enough for you to hear it. Do not ―kick it‖ with your diaphragm.
But also, don’t let it just be pure air rasping through your chords. To check if it is
just air, put your hand in front of your mouth about three inches from the opening,
with your palm facing your mouth. You should feel warmth, but no air as you say,
“huh,” and you should hear the sound. If you feel a force of air and hear a breathy
rasp of wind, you need to gently repeat the process until your are getting more
sound than air before proceeding with the next step.
6. Repeat step 5 several times, one bubble of “huh” per exhalation. Keep it light,
relaxed and easy.
7. Now, allow two bubbles of sound to pop open. Say, “huh-huh.”
8. Keep adding “huh” bubbles, one at a time, to your exhalations. Build up your
series first to 3, then 4, then 5, all the way up to 10.
9. Now, allow three bubbles of sound to escape, but with a twist. As the third
bubble pops, you close your lips together gently, forming and voicing a “hum.”
Please note:
Don’t clench your jaw, or clamp your teeth together. You should still have your
upper and lower teeth apart, as they have been up until now. Your jaw should be
slack. The only thing you have done is close your lips.
10. Repeat step 9 three times.
Please note:
Use all the air of your exhalation. Most of it will be in the “hum.”
11. Now, allow only two bubbles to escape. The first bubble is a short “huh,” but
the second, which you turn into a “hum” by closing your lips is long.
12. Repeat step 11 three times. See “Please note” in step 10.
13. Now, there is only one bubble of sound and it is one long “hum” with no
preceding “huh” bubble. This one long “hum” takes up your whole exhalation.
ACT of COMMUNICATION • 5354 Etheldo Ave., Culver City, CA 90230www.actofcommunication.com
®
12
Exercise 7
The Hum The hum, as you have just learned to produce in exercise 6, touching sound,
is one of the best and most useful exercises you will ever learn.
Do you have a limited number of notes in your vocal range? Use the hum to
expand your own personal ―scale‖ so that you not only have more notes, but all of
the notes are clear and strong.
Is your voice too thin—that is, does it lack a rich resonance? The hum makes the
voice broader and richer by pushing the sound vibrations into a ―rounder‖ tone.
Is your voice placed too high or too low? Or are you stuck with a voice that is only
in your chest and you want to be able to use your head voice and vice versa? The
hum increases not only the notes or your ―scale,‖ but the areas in which you can
put those notes as well, until you can resonate in your head, your chest, your
whole torso—whatever you want and need in the moment.
Is your voice ―tired,‖ or have you even got laryngitis? The hum is the most
beneficial thing you can do for your voice other than complete vocal silence. The
hum has even been known to cure nodes on the vocal chords.
Do you hate that very first moment in court when you’ve been sitting still for
hours without speaking and suddenly you are supposed to stand up and say full
out, ―Your honor . . .‖ You know, the moment when your voice sounds like gravel
and is always placed in your head when you want it coming from your chest? If
you practice the hum just loud enough for you to hear as you are sitting there, you
will never again suffer from ―Litigation Voice.‖ Just think of how much more
relaxed you’ll be at that moment in court which is often your most tense.
Steps to the Hum
1. Work into the hum using exercise 6, touching sound. You are now inhaling,
and as you exhale, you are humming.
2. To expand resonance you need to warm up all of the areas of your body in
which the sound can bounce around and resonate. These areas are the forehead,
the mask, the mouth, the throat, the chest, the lower torso, and the feet.
First, feel the sound wave vibrations that the hum creates bouncing around the
ACT of COMMUNICATION • 5354 Etheldo Ave., Culver City, CA 90230www.actofcommunication.com
®
13
cavity of your mouth and tickling your lips. Now, drift the hum up into your
head across your nose and upper cheeks. This is called the ―mask.‖ Then,
drift the hum up into your forehead and even the top of your head.
Please note:
It often helps to rub your fingers on the parts of your face where you want the
sound to vibrate as you hum into that resonating area. For example, when
warming up the mask, rub the cheeks and nose vigorously with a bit of pressure.
Now, drift down from the forehead to the mask and then to the mouth. Now,
drift it down to the throat.
Please note:
Use this resonating area with extreme caution. It is very easy to
grate through the vocal chords with a force of air as you exhale,
causing more damage than benefit. If you are someone who tends to place the
voice in the throat to begin with, you probably already have some damage here.
Tread lightly!
Now, drift down from the throat to the chest. Feel the vibrations of the hum fill
the front, the back, and the great imaginary space in between. Drift to the lower
torso. Imagine that your entire torso is a huge empty vibrating barrel. Drift
through the legs down to the feet. Feel the sound vibrations you are making
through the soles of your feet on the floor.
Please note:
If you can’t feel the vibrations on the floor, don’t knock yourself out trying to do it.
Maybe you can’t at this point. You will be able to at some future point as you
continue with your vocal work. A pitfall of this exercise is grinding your voice and
tensing yourself up to try to get those vibrations or die trying. Remember, this is
a vocal warm-up and physical relaxation, not a vocal grind-down and physical
wind-up.
Drift back up through your legs, lower torso, chest, throat and mouth.
3. To expand vocal range you need to choose a new note every time you take a
new inhalation, and exhale that new note through your hum. Don’t do this
arbitrarily, but follow notes as if your voice were a keyboard and you were playing
the white keys and black keys in a scale. First, expand the notes lower and lower.
Then reverse this process and go higher and higher.
Please note:
Don’t go ―off voice‖ into a vocal chord wrenching gasp.
As low or high as you can go today is fine.
ACT of COMMUNICATION • 5354 Etheldo Ave., Culver City, CA 90230www.actofcommunication.com
®
14
Exercise 8
The Hum and Head Rolls
The Hum and The Drop Down
Opening the Sound It is now time to combine what you have warmed up so far and prepare for
being heard and understood in the courtroom.
Steps to Humming and Opening the Sound
1. Get into the basic stance and into the hum.
2. While doing the hum, follow all the steps of exercise 4, head rolls. Feel the
sound vibrations bounce around in your head. Make a note of how they move
around.
3. Again follow the steps of exercise 4, head rolls. This time, roll once to the left,
once to the right, and then allow your lips to fall open and say, “m-uh-uh . . .” Be
sure to do this with both ―front‖ and ―back‖ head rolls.
Please note:
Keep the sound open and full. It should be exactly the same as the sound you
discovered in exercise 6, touching sound. Just louder, but not more forced.
4. While doing the hum, follow all the steps of exercise 5, the drop down. Feel the
sound vibrations bounce through your head and the rest of your body as you make
your descent and ascent. Make a note of how they move around.
5. Again follow the steps of exercise 5, the drop down. When you reach the
bottom, open your eyes and look through your legs at a spot behind you, about
three feet away or so. Let your lips fall open and let the sound pour out of you
and onto that spot as you say, “m-uh-uh-uh . . .” Go back again to doing the hum
and build your way up your spine. When you reach the top, open your eyes, and
find a spot about three feet away or so from your face. Let your lips fall open and
the sound pour out of you and onto that spot as you say, “m-uh-uh-uh . . .”
ACT of COMMUNICATION • 5354 Etheldo Ave., Culver City, CA 90230www.actofcommunication.com
®
15
Exercise 9
Vocal Landing Many attorneys have voices that don’t reach the ears of the jurors. Still
others have voices which reach past the ears of the jurors and blast them into
deafness. You may know this problem by the name ―projection.‖ But the word
―projection‖ often conjures up a mental image of forcing the voice into some
unnatural screeching or shouting mode. This does nothing to help the voice, or the
relaxation of the attorney . . . to say nothing of what it does to the jurors.
In the previous exercise, exercise 8, opening the sound, you have taken the first
step in Vocal Landing, which is the term we use for ―pro-jection.‖ You need to
learn to use as much , but only as much, voice as you require to reach the ears of
the jurors, the judge, or to whomever you are speaking.
Steps to Vocal Landing
1. Get in the basic stance. Complete exercise 8, opening the sound.
2. Go into the hum. Pick a spot on the floor. Let your lips fall open and let the
sound pour out of you and onto that spot as you say, “m-uh-uh-uh . . .”
3. Go back into the hum. Pick a spot on the ceiling. Let your lips fall open and let
the sound pour out of you and onto that spot as you say, “m-uh-uh-uh . . .”
4. Go back into the hum. Pick a spot across the room, as far away as you can. Let
your lips fall open and let the sound pour out of you and onto that spot as you say,
“m-uh-uh-uh . . .”
If you have a problem with overshooting or undershooting the ears of the jurors,
please add the following steps:
5. Go to a wall in the room. Stand one foot away from the wall. Go back into the
hum. Pick a spot on the wall in front of you, let your lips fall open and let
the sound pour out of you and onto that spot. Feel the vibrations bounce off the
wall and back at you, but not past you.
6. Repeat step 5 taking one step back each time until you get to the other side of
the room.
ACT of COMMUNICATION • 5354 Etheldo Ave., Culver City, CA 90230www.actofcommunication.com
®
16
Exercise 10
Putting It All Together
Now it’s time to put together most of the steps one more time before the
final check.
1. Get into the basic stance.
2. Pull up your shoulders into a series of shoulder raises. Scrunch your face into
a fist and open it wide. Let your shoulders fall finally and take a sigh.
3. Start a hum. Do a series of head rolls, both front and back.
4. Still humming, do a drop down. When you are upside down, open your eyes,
find a spot between your legs behind you, and open the sound, pouring it into that
spot.
5. Get back into a hum, build your way back up from the drop down, and when
you reach the top, find a spot on the wall opposite you and open the sound,
pouring it into that spot.
6. Check to make sure you are in the basic stance.
7. Check to see if there is any tension in any part of your body. If there is, inhale
into the tension, and exhale it out of your body.
8. Repeat exercise 2: the vocal check. Be sure that you use the same phrase that
you used at the beginning of this particular session of the vocal warm-up and
physical relaxation. Make a note of the changes in your voice from the beginning
of this particular session to this, the ending point.
ACT of COMMUNICATION • 5354 Etheldo Ave., Culver City, CA 90230www.actofcommunication.com
®
17
Exercise 11
The Articulators
Once you have a good grasp of exercises 1 - 10, you should be relaxed, have your
voice warmed up, and properly placed. You are now ready to learn the next step
in vocal excellence: Articulation.
You are now ready to learn how to warm up your articulators. These are the parts
of your face and head that you use in order to form words from that clear, free
“uh” that you now have control over. The articulators are: the teeth, the jaw, the
tongue and the lips.
Why? Because if you don’t use the articulators properly, no one is going to be able
to understand what you are saying. At first, jurors may lean in and try to get your
message, but sooner or later, to the detriment of you client, they will tune you out.
Also, a sure way of putting tension back into your newly relaxed body is to use the
articulators incorrectly.
Many people don’t use their lips to form words. Still others can’t be heard or
understood because their jaws are clenched so tightly that they can’t form clear
words. A whole other group has tongues that are almost atrophied from lack of
use in clearly forming words.
The only articulator you can’t loosen and warm up are your teeth. However, they
are a good test of whether or not your jaw is relaxed or tense. If they are touching
the whole time you are speaking, you are clenching.
When you are ready, add the following set of exercises to your warm up.
Steps to Exercising the Articulators
1. Get into the basic stance.
2. Scrunch your face into a teeny, tiny fist, as if you have just bit into a lemon.
3. Open it up wide—big mouth, wide jaw, huge eyes.
4. Repeat steps 2 and 3 several times.
5. Lift your index finger to two inches in front of your lips (as if to hush
ACT of COMMUNICATION • 5354 Etheldo Ave., Culver City, CA 90230www.actofcommunication.com
®
18
someone). Try to kiss your finger with your lips, forming an ―O‖ with your
mouth.
6. Now pull your lips back into a wide grin, as if you were posing for a Bert
Parks photo opportunity.
7. Repeat steps 5 and 6 several times, increasing your speed.
8. Clench your jaw as tightly as you can, until you feel that your lowers are
going into your uppers.
9. With your hands, find the jawhinge muscles on either side of your face.
These are the muscles that join your lower jaw to the rest of your face. When
they are clenched they will feel like anything from little mounds of tense muscle
to golf balls depending on how loose or tight your jawhinge muscles are.
10. Keeping your fingers on the jawhinge muscles, release the jaw, letting
your lips fall open and your jaw drop. With the heels of your palms, stroke
downward firmly on your jawhinge muscles, encouraging them to release even
more.
11. With your lips open and your jaw hanging slack, remove your hands from
your jawhinge muscles. Put your hands together with the ―outer‖ sides of the
thumbs touching each other. Bend your thumbs to the first knuckle forming a
right angle. Place this double-thumb-knuckle corner you have just formed in
the half-moon of your chin, which is located between your mouth and the bottom
of your chin.
12. Press back lightly and gently with your thumbs on your jaw. Do not force!
You will be able to move your jaw back about 1/8 or 1/4 of an inch only. Think of
just suggesting to your jaw that you want it to loosen up.
13. Keeping the same loose lower jaw that you now have, let your hands drop
to your sides and close your lips. Your lower jaw will naturally come up a bit
toward your upper jaw, but you should be able to retain quite a bit of the
looseness you have just introduced to the jawhinge muscles.
14. Keeping the jaw you have in step 13, blow through your lips. As young ones,
this exercise is also known as: the motorboat.
15. Keeping the jaw you have in step 15 still, put your tongue between your lips
and blow again. At another point in you life, you may have learned this exercise
by another name: the raspberries.
ACT of COMMUNICATION • 5354 Etheldo Ave., Culver City, CA 90230www.actofcommunication.com
®
19
16. Now, let your lips fall open with your jaw nice and relaxed. Catch the tip of
your tongue behind your lower front teeth. Now try to throw the back of
your tongue out of your mouth.
17. Let all the muscles in your face release, drop your chin onto your chest, and
shake out your face as if it were a dog who just pulled itself out of a cold lake.
18. Now it is time to exercise the articulators you have just warmed up with –
tongue twisters. Repeat any or all of these slowly and then build up more and
more speed, while retaining the looseness and relaxation that you have achieved
in the rest of the warm-up thus far:
a. Red Leather, Yellow Leather.
b. Budda Gudda.
c. Gudda Budda.
d. Susie Sells Sea Shells By The Seashore
e. Rubber Baby Buggy Bumpers.
f. Sushi Chef.
g. Wheel Reel
h. Start traps
i. The phrase in the case you are opening today that is
making you the most crazy because it is the biggest
mouthful you have ever had to say in your entire life.
19. Check to see if there is any tension in any part of your body. If there is,
inhale into the tension, and exhale it out of your body.
ACT of COMMUNICATION • 5354 Etheldo Ave., Culver City, CA 90230www.actofcommunication.com
®
20