a practical introduction to sensor network programming · a practical introduction to sensor...
TRANSCRIPT
A Practical Introduction toSensor Network ProgrammingWireless Communication andNetworked Embedded Systems, VT 2011
Frederik Hermans,Communication Research, Uppsala Universitet
Overview● Sensor node hardware: Zolertia Z1● TinyOS & nesC
● Components & Interfaces● A first TinyOS program: Blink● Networking in TinyOS: Active messages
● Contiki● Protothreads● A first Contiki program: Blink● Networking in Contiki: The Rime stack
● Wrap-up

Zolertia Z1● General purpose sensor node for research● Low power consumption
● Months to years on two AA batteries● Specs
● 16 MHz, 8 kB RAM● Radio: 250 kbps @ 2.4 GHz● Three LEDs● Accelerometer● Temperature sensor

Some perspective on the specs
Clock speed 16 MHz 4 MHz 1024 MHz
RAM 8 kB 8 kB 589824 kB
Program size 92 kB 8192 kB ~ 409600 kB
Radio 250 kbps N/A 55296 kbps
Lifetime Months to years
A few days A few days
TinyOS● OS designed for low-power
wireless devices● Large community● Open source (BSD license)
● Event-based● Split-phase operations instead of blocking
● TinyOS programs are written in nesC● Allows to create really tiny programs
● Heavy optimization for size
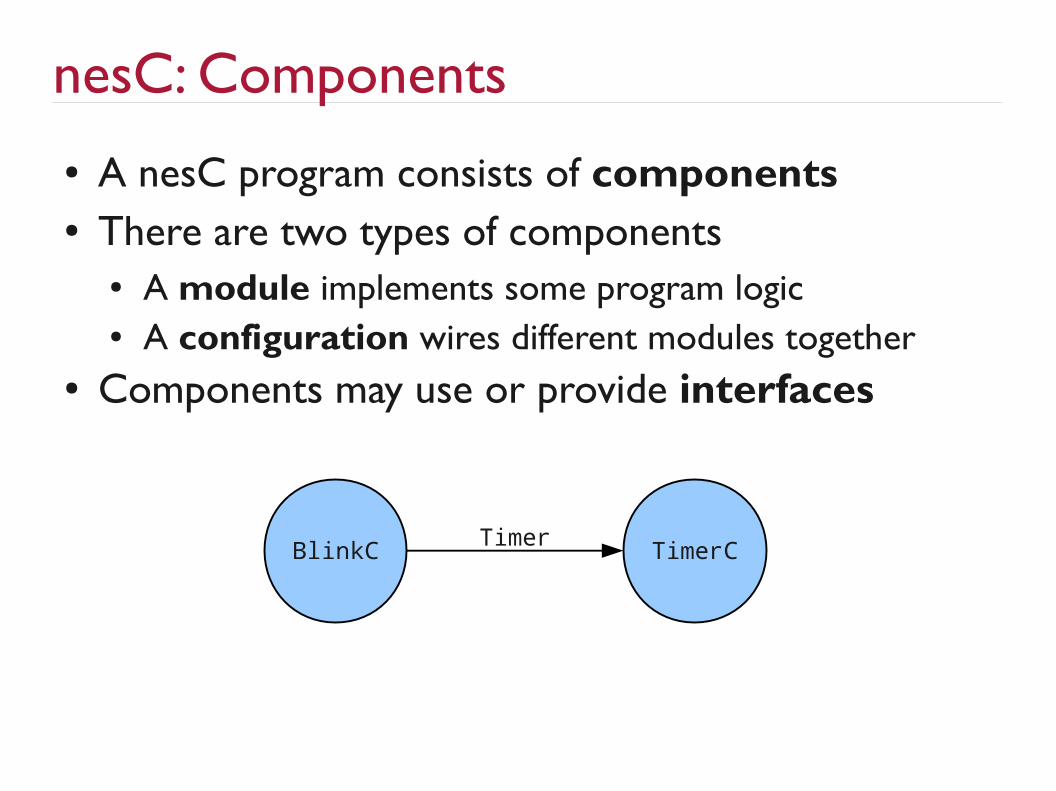
nesC: Components● A nesC program consists of components● There are two types of components
● A module implements some program logic● A configuration wires different modules together
● Components may use or provide interfaces
BlinkC TimerCTimer
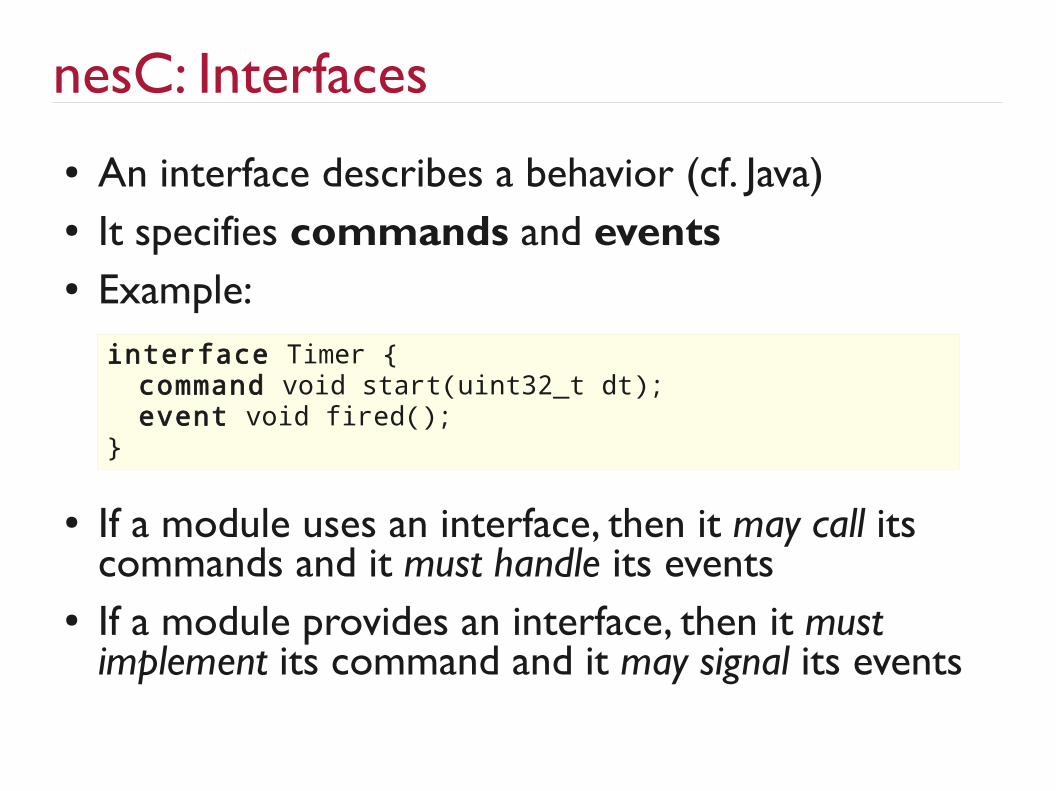
nesC: Interfaces● An interface describes a behavior (cf. Java)● It specifies commands and events● Example:
● If a module uses an interface, then it may call its commands and it must handle its events
● If a module provides an interface, then it must implement its command and it may signal its events
interface Timer { command void start(uint32_t dt); event void fired();}

A first TinyOS program: Blink● Increase a counter every second● Make LEDs show last three bits of counter
● Need to write two components● A module to contain our program logic● A configuration that wires our module to other
modules in TinyOS
4 2 10
4 2 11
4 2 12
4 2 13
4 2 14
4 2 15

module BlinkC { uses interface Boot; uses interface Timer<TMilli>; uses interface Leds;}
implementation { int counter = 0;
event void Boot.booted() { call Timer.startPeriodic(1024); } event void Timer.fired() { counter++; call Leds.set(counter); }}
BlinkC: The module
Boot interface will tellus when the node booted
Timer interface to generatean event every second
For controlling LEDs
Gets called when Bootsignals boot() event
Call commandstartPeriodic(...)
Gets called when Timersignals fired() event
Increase counter andcall command set(...)
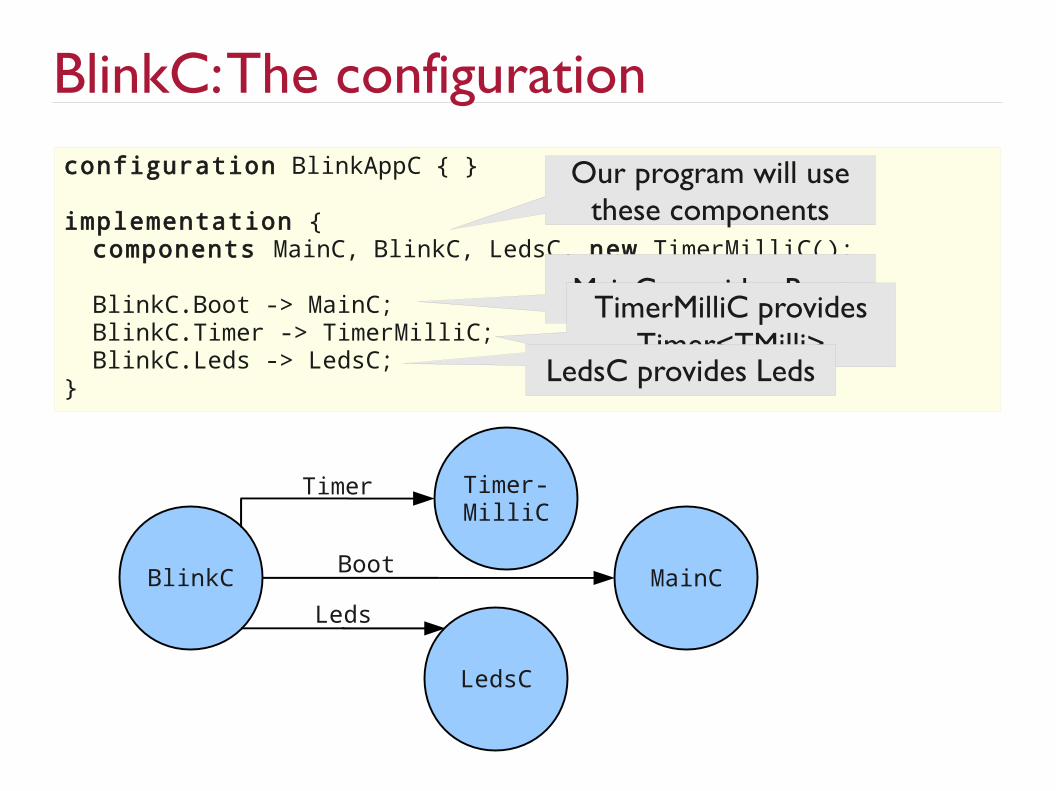
configuration BlinkAppC { }
implementation { components MainC, BlinkC, LedsC, new TimerMilliC(); BlinkC.Boot -> MainC; BlinkC.Timer -> TimerMilliC; BlinkC.Leds -> LedsC;}
BlinkC: The configuration
BlinkC
Timer-MilliC
Timer
MainC
LedsC
Leds
Boot
Our program will usethese components
MainC provides BootTimerMilliC providesTimer<TMilli>
LedsC provides Leds
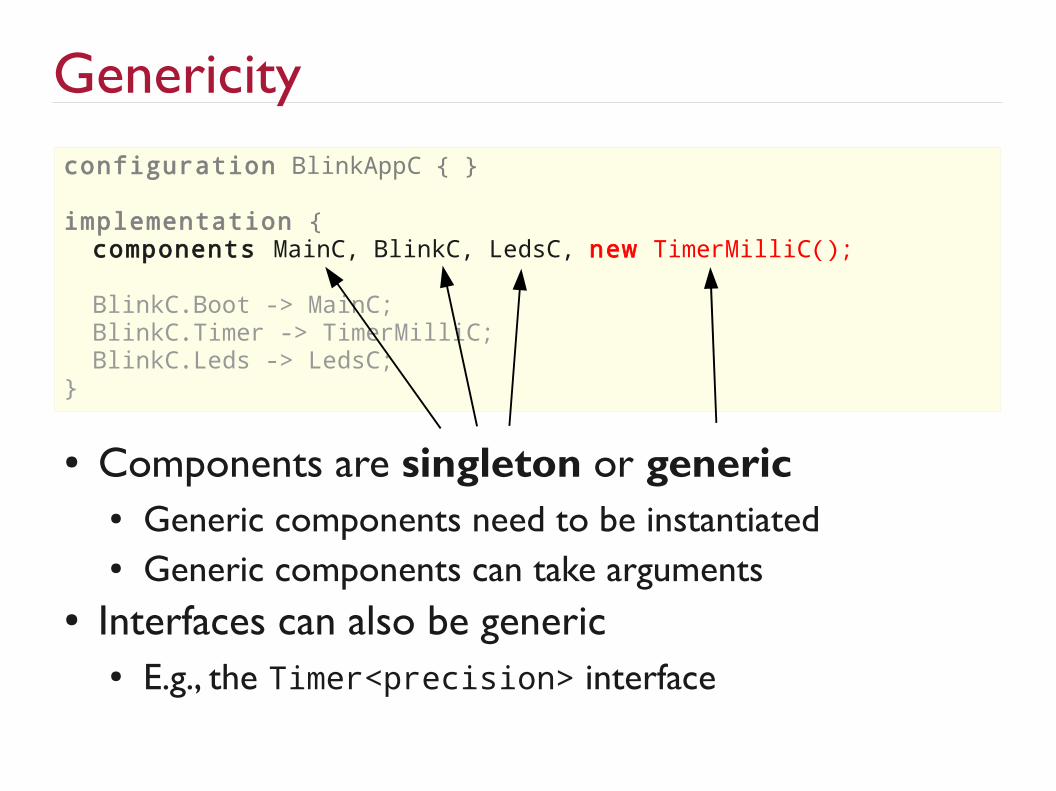
configuration BlinkAppC { }
implementation { components MainC, BlinkC, LedsC, new TimerMilliC(); BlinkC.Boot -> MainC; BlinkC.Timer -> TimerMilliC; BlinkC.Leds -> LedsC;}
Genericity
● Components are singleton or generic● Generic components need to be instantiated● Generic components can take arguments
● Interfaces can also be generic● E.g., the Timer<precision> interface
Blink: Programming nodes● Next steps: Build and upload
● Need a compiler and linker suitable for target architecture
● Need a standard library for our target architecture● Need TinyOS sources
● Virtual machine image with everything pre-installed● Will be uploaded to the course page soon™● Use it!
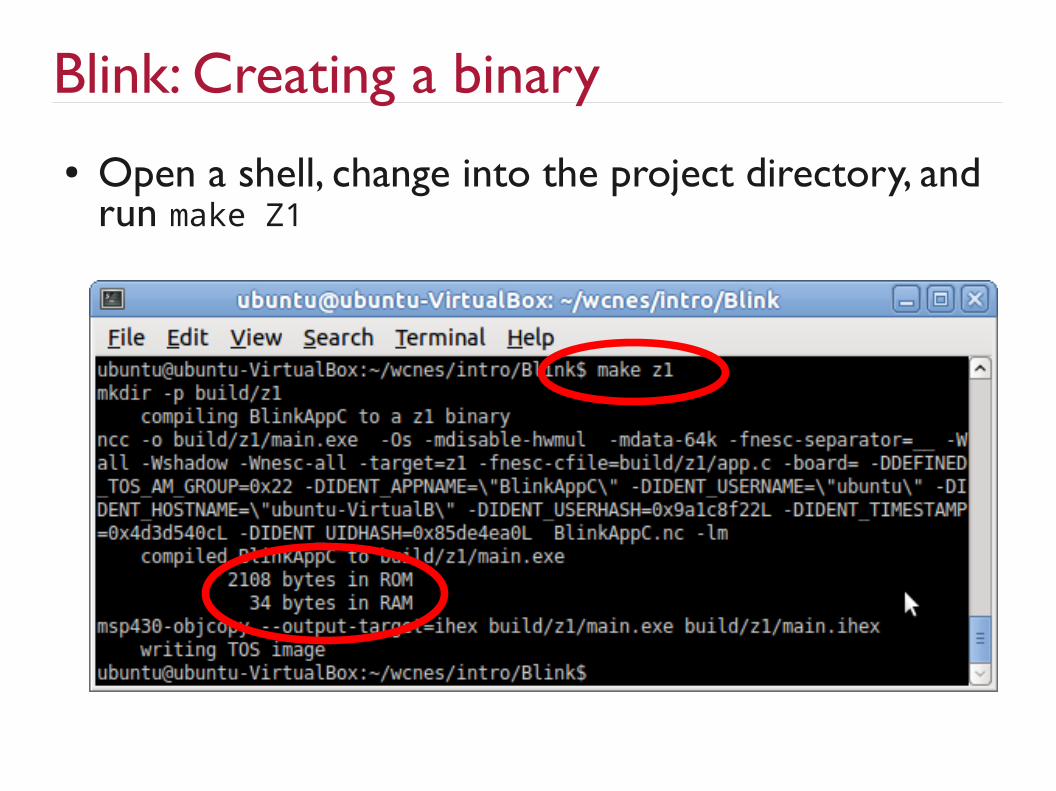
Blink: Creating a binary● Open a shell, change into the project directory, and
run make Z1
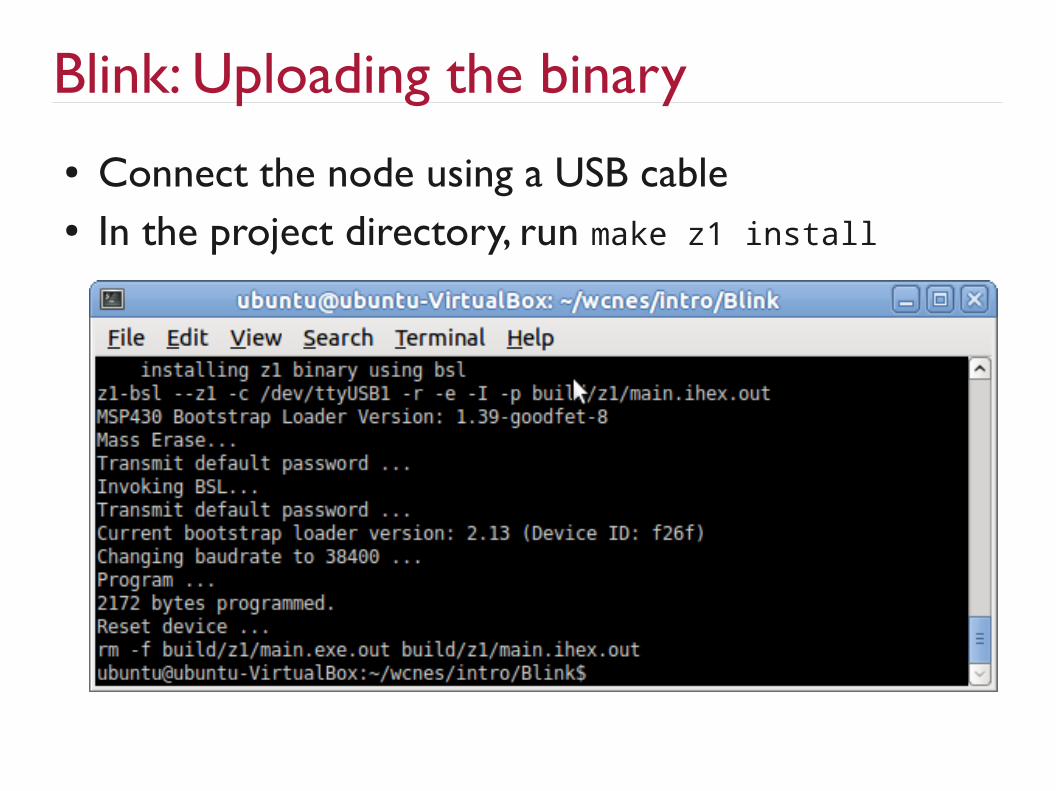
Blink: Uploading the binary● Connect the node using a USB cable● In the project directory, run make z1 install

Overview● Sensor node hardware: Zolertia Z1● TinyOS & nesC
● Components & Interfaces● A first TinyOS program: Blink● Networking in TinyOS: Active messages
● Contiki● Protothreads● A first Contiki program: Blink● Networking in Contiki: The Rime stack
● Wrap-up

A first networked TinyOS program● Clickers are real products
● Used for audience response
● How does our simple clicker work?● Learn about TinyOS networking● Two types of nodes
– Clients, base station● We need to
– Turn on radio, send, and receive messages
*click*
*click*

TinyOS active messages● Basic networking abstraction: Active message
● Single-hop, best-effort radio communication● Each active message has (among other stuff)
– Destination address– Type (similar to UDP port)– Payload
● Building block for more complex communication services
● Interfaces to turn on/off radio, manipulate, send and receive active messages

Active messages: Interfaces● Relevant interfaces
● SplitControl – start/stop the radio● Packet – manipulate a packet● AMSend – send packets● Receive – receive packets
● For details, see TEP 116
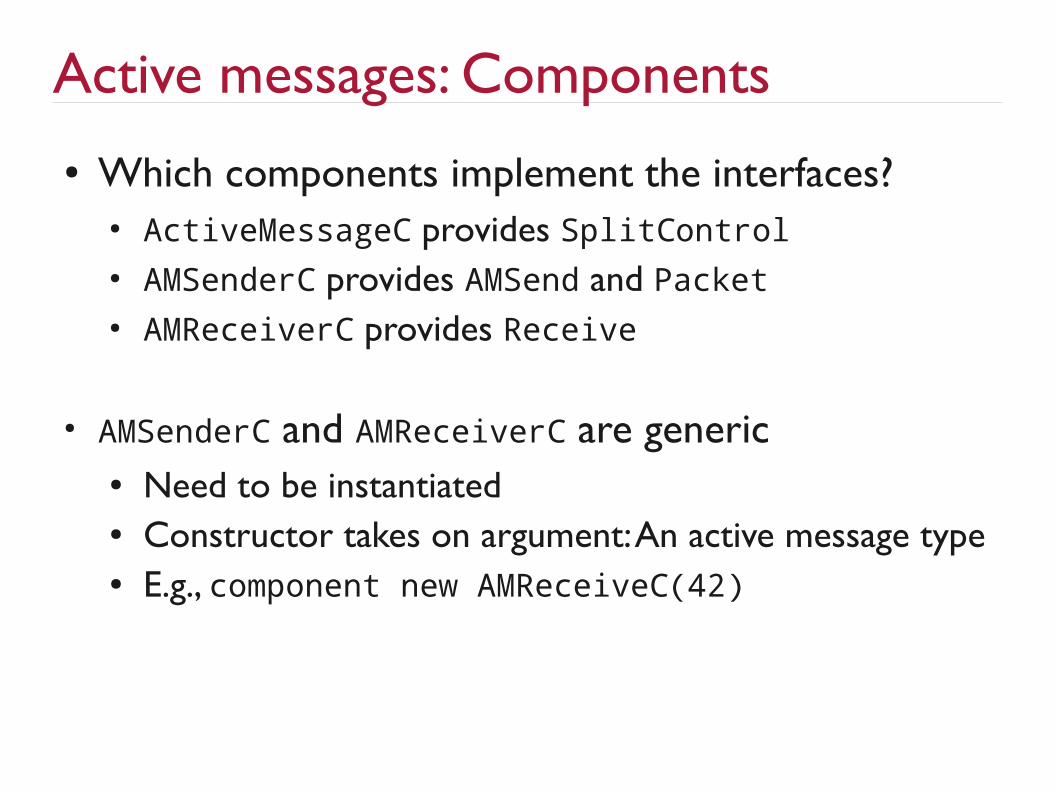
Active messages: Components● Which components implement the interfaces?
● ActiveMessageC provides SplitControl● AMSenderC provides AMSend and Packet● AMReceiverC provides Receive
● AMSenderC and AMReceiverC are generic● Need to be instantiated● Constructor takes on argument: An active message type● E.g., component new AMReceiveC(42)
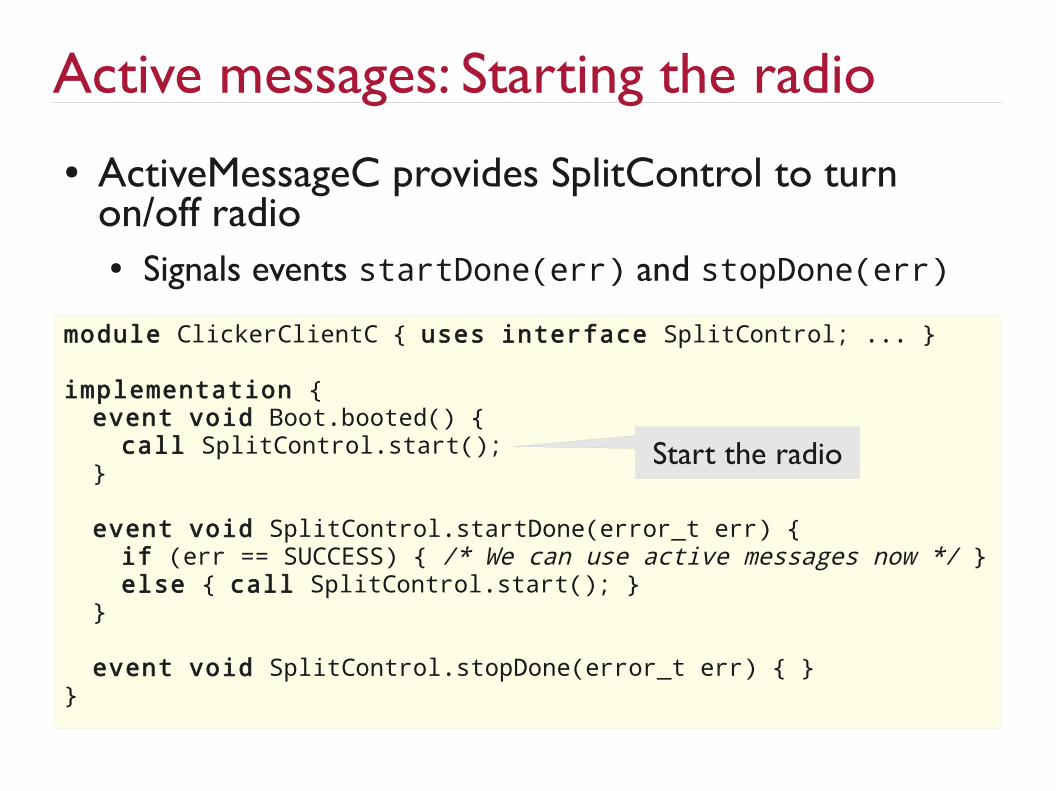
Active messages: Starting the radio● ActiveMessageC provides SplitControl to turn
on/off radio● Signals events startDone(err) and stopDone(err)
module ClickerClientC { uses interface SplitControl; ... }
implementation { event void Boot.booted() { call SplitControl.start(); }
event void SplitControl.startDone(error_t err) { if (err == SUCCESS) { /* We can use active messages now */ } else { call SplitControl.start(); } }
event void SplitControl.stopDone(error_t err) { }}
Start the radio
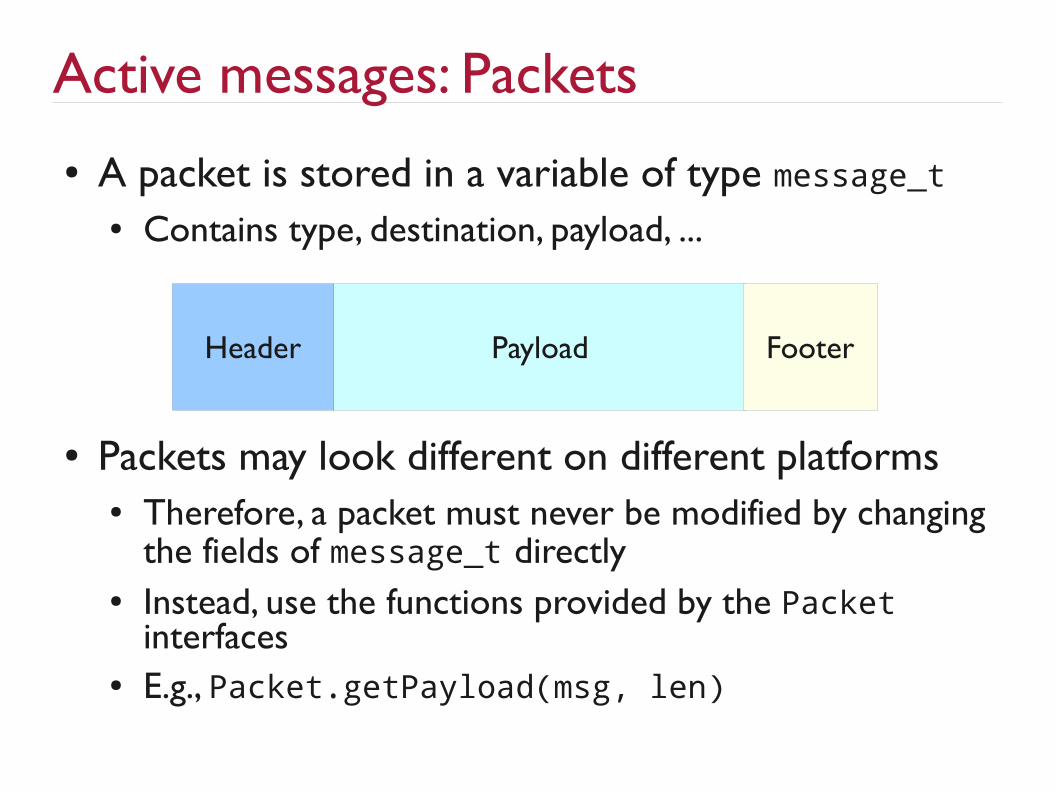
Active messages: Packets● A packet is stored in a variable of type message_t
● Contains type, destination, payload, ...
● Packets may look different on different platforms● Therefore, a packet must never be modified by changing
the fields of message_t directly● Instead, use the functions provided by the Packet
interfaces● E.g., Packet.getPayload(msg, len)
Header Payload Footer
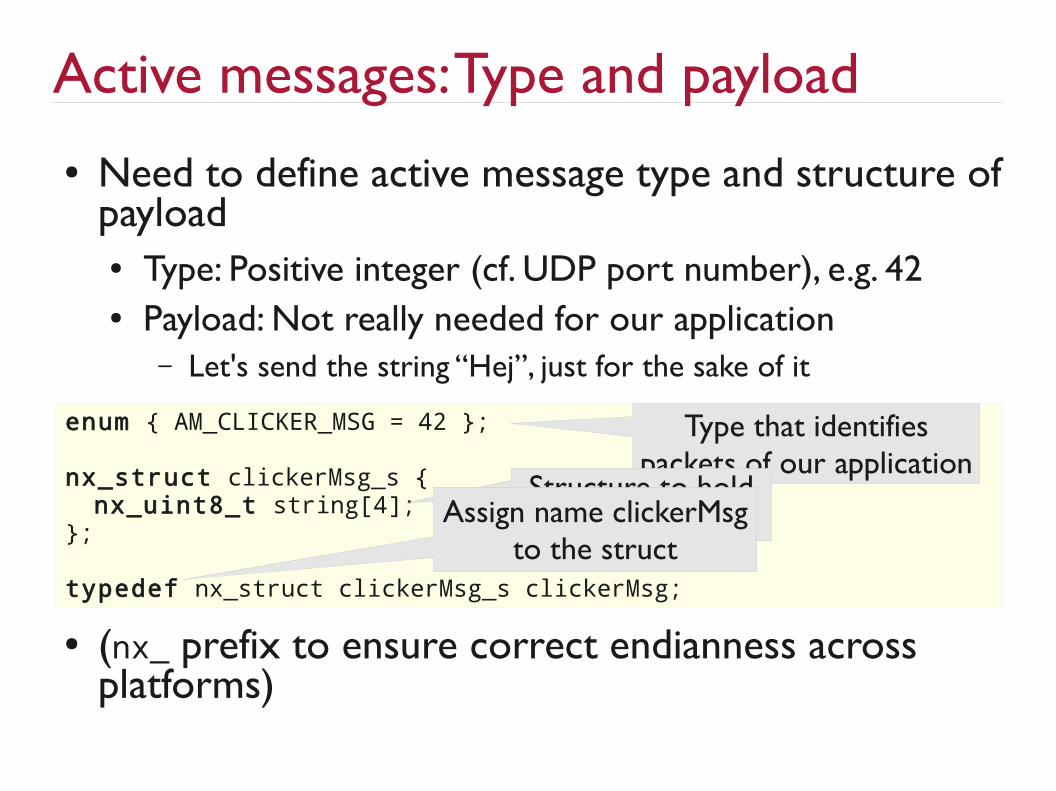
Active messages: Type and payload ● Need to define active message type and structure of
payload● Type: Positive integer (cf. UDP port number), e.g. 42● Payload: Not really needed for our application
– Let's send the string “Hej”, just for the sake of it
● (nx_ prefix to ensure correct endianness across platforms)
enum { AM_CLICKER_MSG = 42 };
nx_struct clickerMsg_s { nx_uint8_t string[4];};
typedef nx_struct clickerMsg_s clickerMsg;
Type that identifiespackets of our application
Structure to holdour payloadAssign name clickerMsg
to the struct

Active messages: Sending a packet● AMSend provides command error_t send(...)
● Note: send(...) immediately returns whether initiating the sending was successful
● Split-phase operation, signals event void sendDone() on completion
● Need to make sure we're not sending another packet, while a packet is still in transmission

Active messages: Sending a packet, pt. 2implementation { bool radioBusy = FALSE; message_t pkt;
void send() { error_t result; ClickerMsg *clickPl;
if (radioBusy) return;
clickPl = (ClickerMsg *) (call Packet.getPayload(&pkt, sizeof(ClickerMsg))); memcpy(clickPl->string, “Hej”, 4);
result = call AMSend.send(AM_BROADCAST_ADDR, &pkt, sizeof(ClickerMsg));
if (result == SUCCESS) radioBusy = TRUE; }
...
Keep track of whetherwe're sending alreadyPacket to be sent
To store whether initiatingsend succeeded
Pointer to packet payloadAre we sending already?Set clickPl to point to
the payload of pkt
Header Payload Footer
clickPl
pkt
Copy “Hej” to the packetBroadcast the packet
Update radio state

Active messages: Sending a packet, pt. 3● Still need to handle sendDone() event ... event void AMSend.sendDone(message_t *p, uint8_t len) { if (p == &pkt) { radioBusy = FALSE; } }}

User button● Need to send a packet when button pressed● Component UserButtonC provides interface Notify<button_state_t>● command error_t enable()● event void notify(button_state_t state)
– state: BUTTON_PRESSED or BUTTON_RELEASED
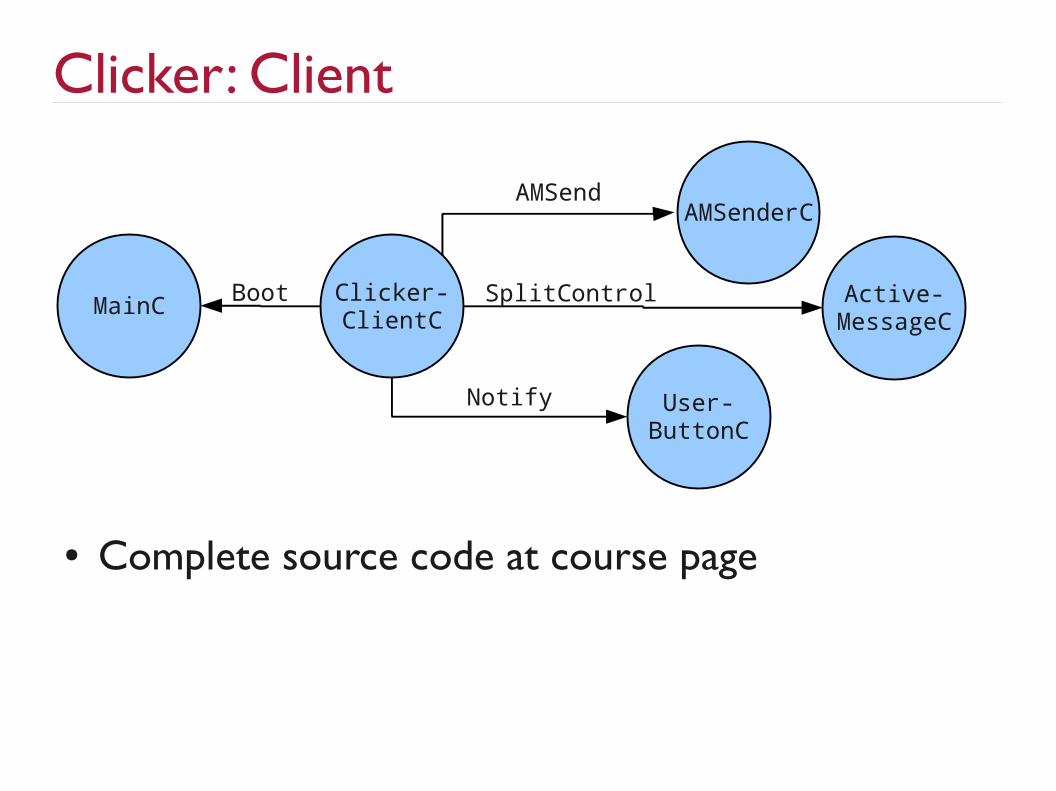
Clicker: Client
● Complete source code at course page
Clicker-ClientC
AMSenderCAMSend
Active-MessageC
User-ButtonC
Notify
SplitControl MainC Boot
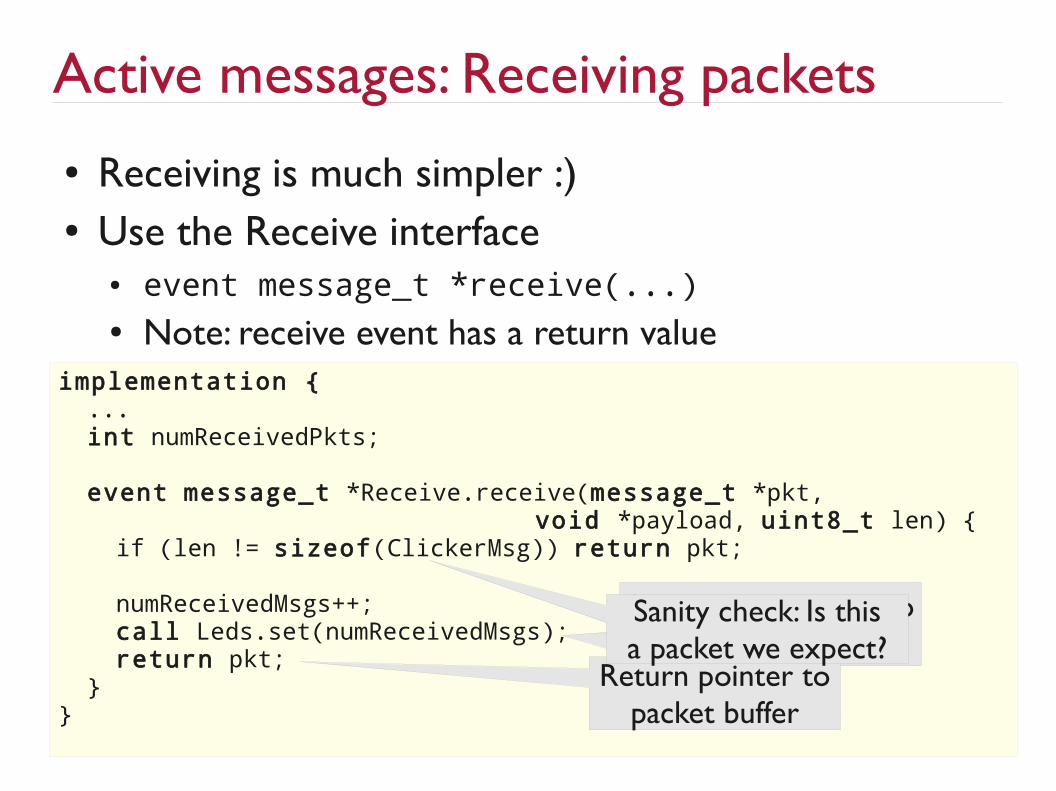
Active messages: Receiving packets● Receiving is much simpler :)● Use the Receive interface
● event message_t *receive(...)● Note: receive event has a return value
implementation { ... int numReceivedPkts;
event message_t *Receive.receive(message_t *pkt, void *payload, uint8_t len) { if (len != sizeof(ClickerMsg)) return pkt; numReceivedMsgs++; call Leds.set(numReceivedMsgs); return pkt; }}
Set LEDs according tonumber of packets
Return pointer topacket buffer
Sanity check: Is thisa packet we expect?

Overview● Sensor node hardware: Zolertia Z1● TinyOS & nesC
● Components & Interfaces● A first TinyOS program: Blink● Networking in TinyOS: Active messages
● Contiki● Protothreads● A first Contiki program: Blink● Networking in Contiki: The Rime stack
● Wrap-up

Contiki● OS for low-memory networked embedded systems
● Developed primarily at SICS● Open source (BSD license)
● Key features● Protothreads allow thread-style programming● Strong support for IPv4 and IPv6
● Contiki programs are written in C● No need to learn a new language● But some preprocessor “magic” involved

Protothreads: Motivation● Problem: Complex flow of control in an event-
driven program● Example: Stop-and-wait sender
void reliableSend(pkt) { call Unreliable.send(pkt);}
event void Unreliable.sendDone(pkt) { call Timer.start(timeout);}
event void Timer.fired() { call Unreliable.send(pkt);}
event void Receiver.receive(r) { if (is_ack(r)) call Timer.stop();}
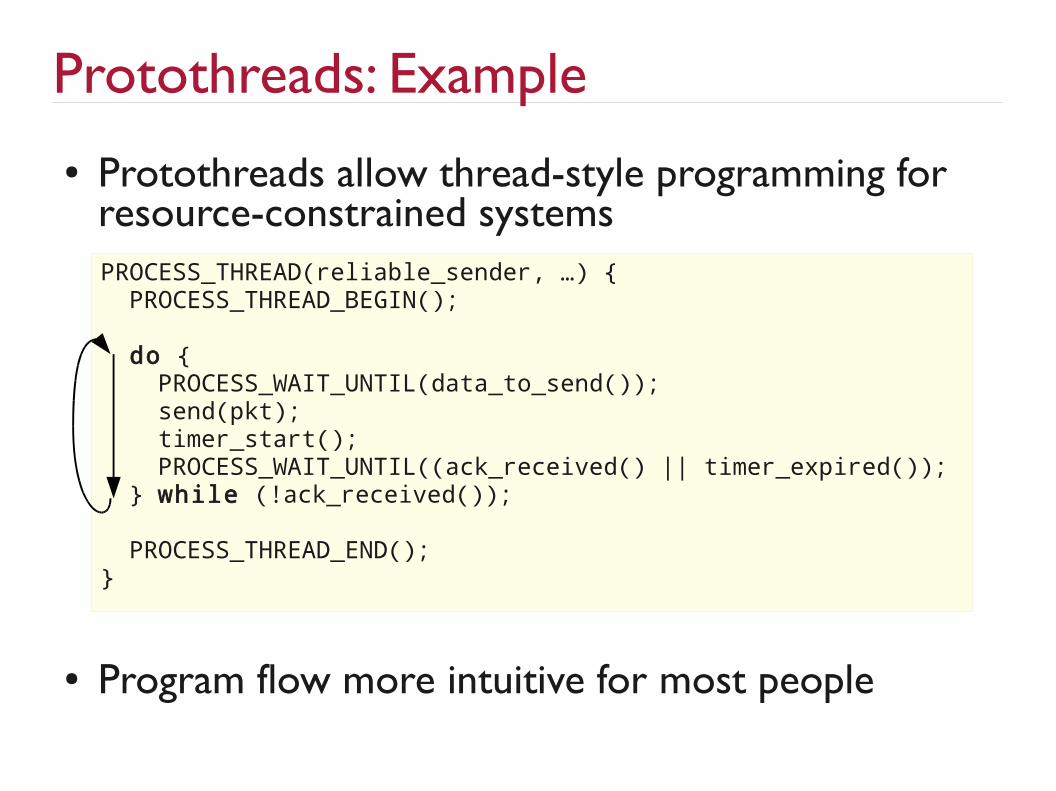
Protothreads: Example● Protothreads allow thread-style programming for
resource-constrained systems
● Program flow more intuitive for most people
PROCESS_THREAD(reliable_sender, …) { PROCESS_THREAD_BEGIN();
do { PROCESS_WAIT_UNTIL(data_to_send()); send(pkt); timer_start(); PROCESS_WAIT_UNTIL((ack_received() || timer_expired()); } while (!ack_received());
PROCESS_THREAD_END();}

Protothreads● Regular threads are resource demanding
● At least if you only have 8 kB of RAM● Require OS too keep state of all threads
● Protothreads are very light-weight● Threads don't have their own stack!● Only two bytes of RAM overhead per thread● Suitable for a sensor node with 8 kB of RAM
● Cave: Threads don't have their own stack!● Values of local variable are not preserved when a thread
is scheduled again ...● unless variables are declared static (on the heap)
A first Contiki program: Blink● Same as our first TinyOS program● Need to write a C source file with one process
● Increase counter● Set LEDs accordingly● Sleep for one second

A first Contiki program: BlinkPROCESS(blink_process, "Blink!");
AUTOSTART_PROCESSES(&blink_process);
PROCESS_THREAD(blink_process, ev, data) { PROCESS_BEGIN(); static struct etimer et; static int counter = 0; while (true) { counter++; leds_red(counter & 1); leds_green(counter & 2); leds_blue(counter & 4);
etimer_set(&et, CLOCK_SECOND); PROCESS_WAIT_EVENT_UNTIL(etimer_expired(&et)); } PROCESS_END();}
Declare our process
Define the process
Every process endswith PROCESS_END()
Start process on boot
Every process beginswith PROCESS_BEGIN()
Need a timerand a counter
Increase counterand set LEDs
Set the timerWait until timerhas expired
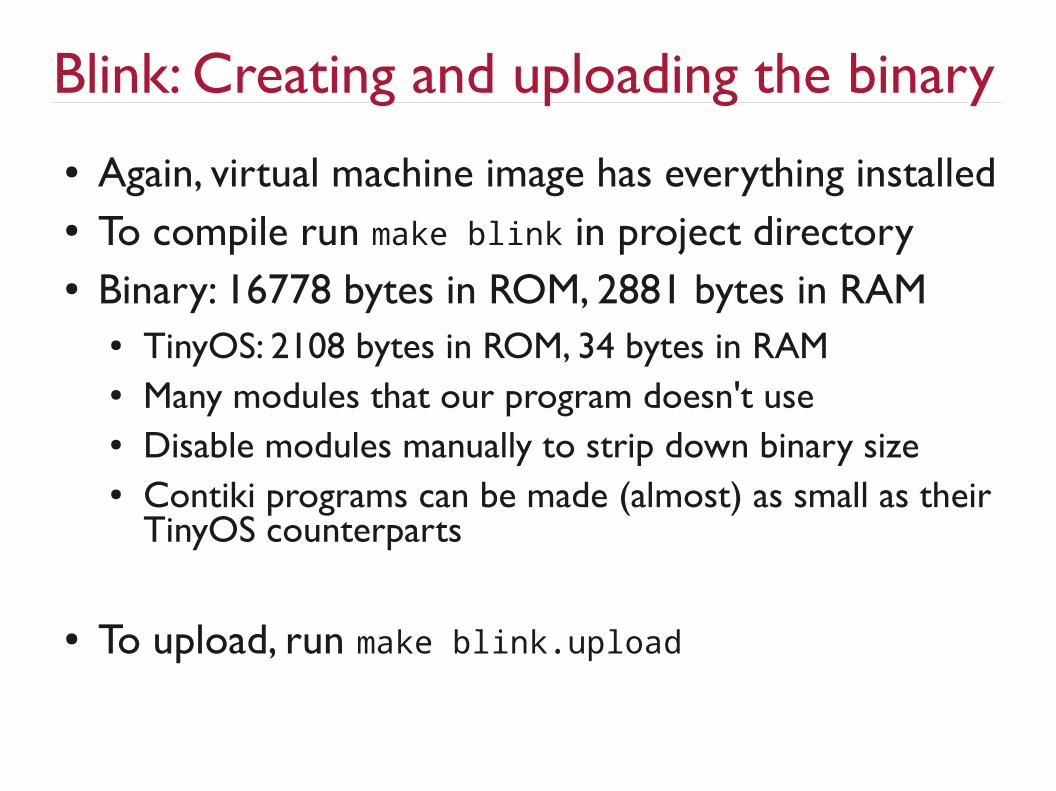
Blink: Creating and uploading the binary● Again, virtual machine image has everything installed● To compile run make blink in project directory● Binary: 16778 bytes in ROM, 2881 bytes in RAM
● TinyOS: 2108 bytes in ROM, 34 bytes in RAM● Many modules that our program doesn't use● Disable modules manually to strip down binary size● Contiki programs can be made (almost) as small as their
TinyOS counterparts
● To upload, run make blink.upload
Overview● Sensor node hardware: Zolertia Z1● TinyOS & nesC
● Components & Interfaces● A first TinyOS program: Blink● Networking in TinyOS: Active messages
● Contiki● Protothreads● A first Contiki program: Blink● Networking in Contiki: The Rime stack
● Wrap-up

Networking in Contiki● Contiki has multiple network stacks
● IPv4 and IPv6, enables seamless Internet connectivity● Rime, a more “classical” sensor network stack
● Rime is a set of communication primitives that are built on top of each other
anonymousbroadcast
(identified)broadcast unicast reliable
unicast
routediscovery
...
...
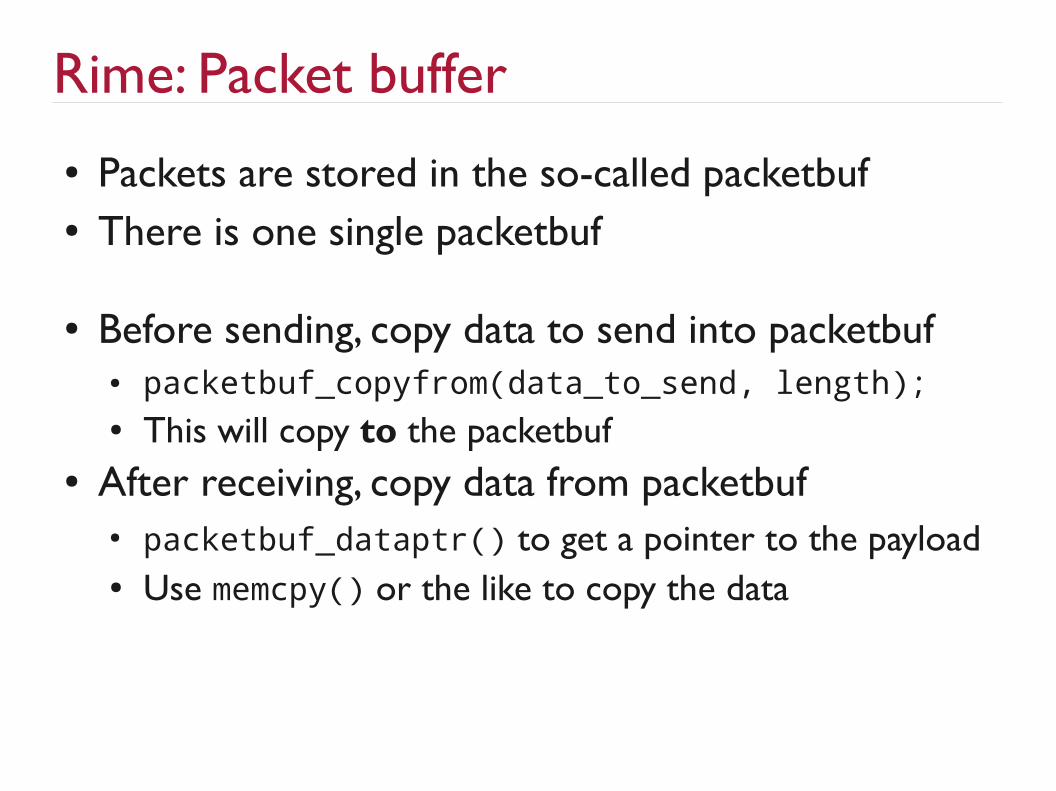
Rime: Packet buffer● Packets are stored in the so-called packetbuf● There is one single packetbuf
● Before sending, copy data to send into packetbuf● packetbuf_copyfrom(data_to_send, length);● This will copy to the packetbuf
● After receiving, copy data from packetbuf● packetbuf_dataptr() to get a pointer to the payload● Use memcpy() or the like to copy the data

Rime: Broadcast module● Broadcast module offers single-hop, best-effort
broadcast communication● Sender is identified (source address in every packet)● Representative for other Rime modules
● API● broadcast_open(...) - Initialize a broadcast handle● broadcast_close(...) - Close a broadcast handle● broadcast_send(...) - Send a packet
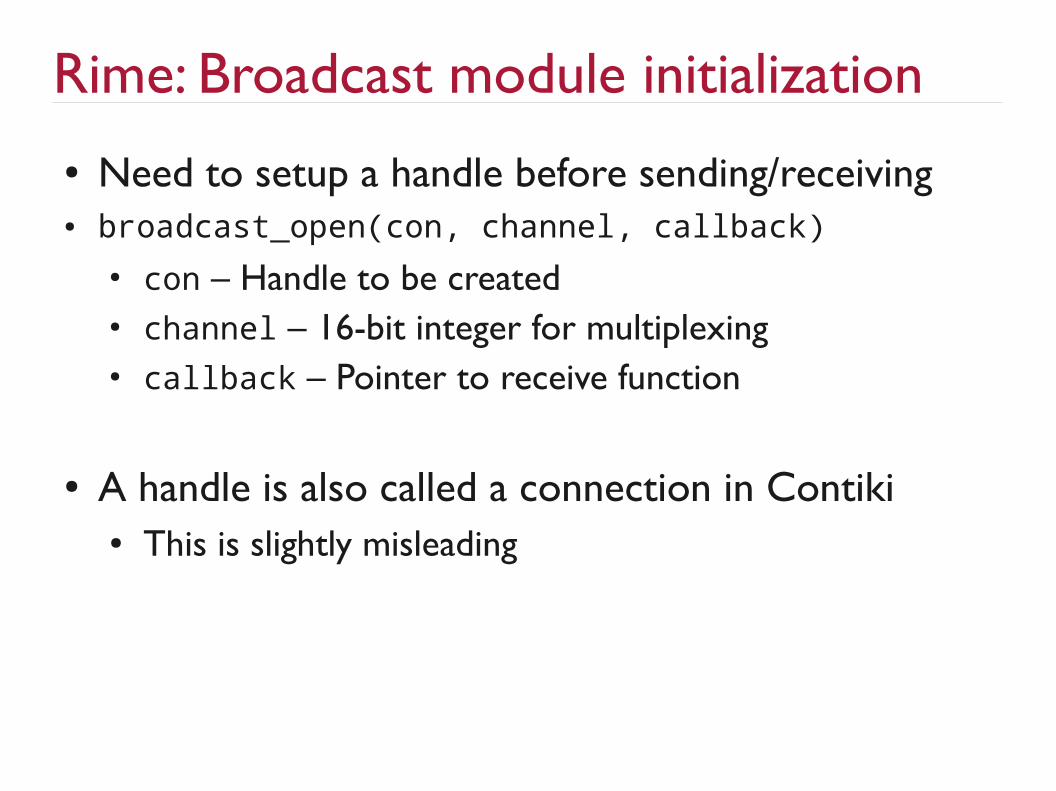
Rime: Broadcast module initialization● Need to setup a handle before sending/receiving● broadcast_open(con, channel, callback)
● con – Handle to be created● channel – 16-bit integer for multiplexing● callback – Pointer to receive function
● A handle is also called a connection in Contiki● This is slightly misleading

Rime: Broadcast setup and receiving● Set up handler and receive packetsvoid recv(struct broadcast_conn *, const rimeaddr_t);
struct broadcast_conn con;struct broadcast_callbacks callback = { recv };
PROCESS_THREAD(main_process, ev, data) { ... broadcast_open(&con, 1234, &callback); ...}
void recv(struct broadcast_conn *con, const rimeaddr_t sender) { uint16_t code; memcpy(&code, packetbuf_dataptr(), sizeof(code));
if (code == 200) leds_on(LEDS_RED);}
Declare a function to becalled for receiving
Declare abroadcast handle
Declare a broadcastcallback pointing to recv()In the “main process”
initialize the handleDefine the recv() function
Copy data from packetbufinto the variable codeTurn on red LEDif code is 200

Rime: Sending a broadcast packet● Sending a packet is simple
● Copy data to be sent to packetbuf● Call broadcast_send(...)
● Usage of other Rime modules is similar
PROCESS_THREAD(main_process, ev, data) { ... broadcast_open(&con, 1234, &callback); ... static uint16_t code = 200; packetbuf_copyfrom(&code, sizeof(code)); broadcast_send(&con); ...}

Wrap-up● TinyOS and Contiki
● Operating systems for resource-constrained, wireless devices
● Basic program structure● nesC modules, configurations and interfaces● Contiki Protothreads
● Basic networking● Active messages in TinyOS● Rime in Contiki
● Have a look at the code! Read more example code!
Advice for the labs & projects● Programming embedded systems can be challenging
● Little resources, no memory protection (in plain TinyOS, Contiki), debugging is hard ...
● Can be a lot of fun, too :)
● Think before you start programming!● What are you going to do? How?
● Discuss with each other!● Use on-line resources
● Not only course page, but TinyOS/Contiki web site, Zolertia web site, mailing list ...

Enjoy the labs!
The end.