a jarring experience - hobby lobbyprojects.hobbylobby.com/media/hl-224048.pdf · beautiful sight!...
TRANSCRIPT
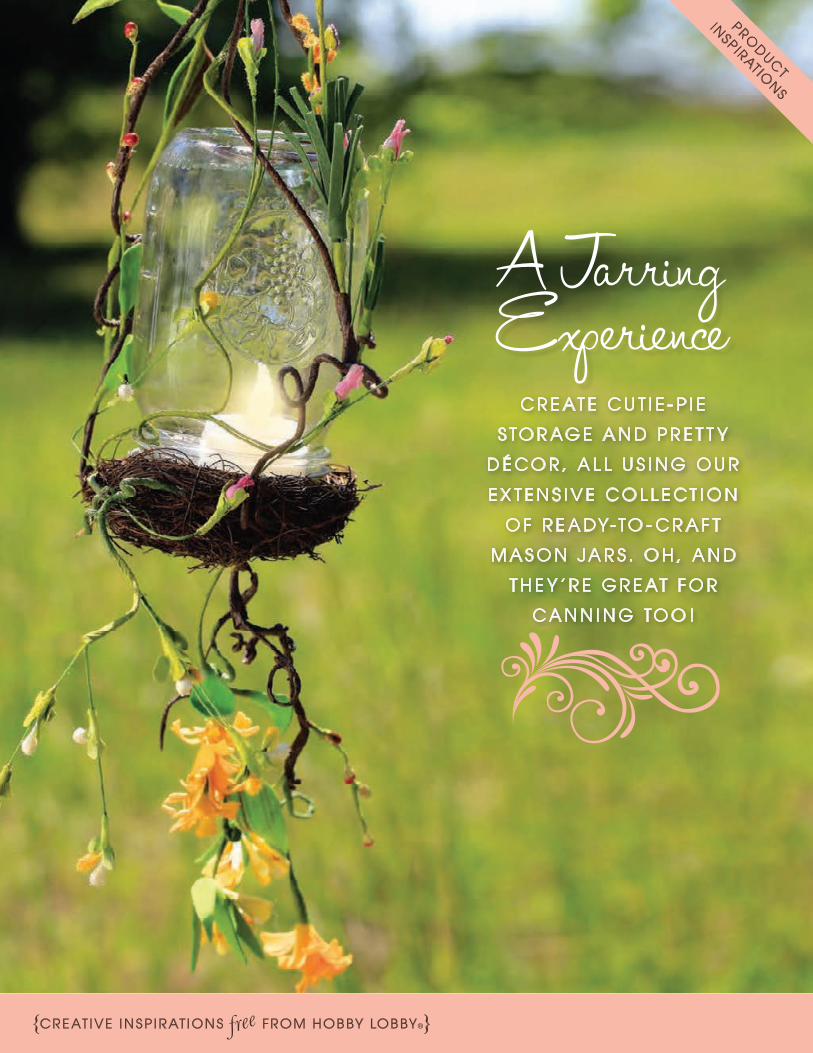
{CREAT IVE IN S P IR AT ION S FROM HOB BY LOB BY®}free
PROD
UCT
INSP IRAT IO
NS
C R E AT E C U T I E - P I E
S TO R AG E A N D P R E T T Y
D É C O R , A L L U S I N G O U R
E X T E N S I V E C O L L E C T I O N
O F R E A DY- TO - C R A F T
M A S O N J A R S . O H , A N D
T H E Y ’ R E G R E AT F O R
C A N N I N G TO O !
A Jarring Experience

2 Hobby Lobby Product Inspirations
Simple alterations add so much style! We embellished these jars with fabric scraps, beaded trims, altered jewelry components and more. Then we wrapped them with wire and hung them from a branch. Instant outdoor ambiance!
Votive Vessel

Zippy Sippy »
Jazz up a drinking jar by adding a custom-embellished lid! We used a non-toxic acrylic paint to color the outside of the lid. Then we put on some polka dots. And to finish? We added a brown glaze for just a little antique appeal.
Tip: Make a place for a straw by punching a hole in the metal with a heavy-duty eyelet punch.
Hobby Lobby Product Inspirations 3

« Fresh FunctionPretty with a purpose? Precisely! Dress up a jar for everyday use by creating a designer-style soap dispenser. We tinted the inside of the jar with glass stain, and we added glitter while the glass was still wet. Then we placed the soap bottle (available in the Craft Department) inside, filling in the extra space with glass gems, silk flowers and more.
Tip: To make a hole in the jar lid for the pump, use a heavy-duty eyelet punch.
4 Hobby Lobby Product Inspirations

Insect ArtMake some high-flying, terrarium-style décor! We filled a good-sized Mason
jar with soft moss, a miniature fence, and a trio of wooden pegs (painted and
glittered to represent toadstools). Then, we painted the lid and topped it with
a finial before perching the piece on a simple wooden candlestick. Let’s bring
on the bugs!
Hobby Lobby Product Inspirations 5

Garden Grace
Use a heavy-duty eyelet punch to cut four holes in the jar lid. Next, thread floral wire through the holes to anchor on a miniature bird’s nest (available in the Floral Department). Glue a round craft mirror over the exposed wire, and place a battery-operated votive on the mirror before screwing the inverted jar back into place. Now display as you please…and enjoy! Perfect project for outdoor picnics, showers and weddings!
Romantic décor for an outdoor gathering? Quite light! Make these Mason jar chandelier lamps with a collection of easy-to-find supplies. This
pretty project is not as complicated as it looks!
6 Hobby Lobby Product Inspirations

« True ColorsReflecting the light…such a beautiful sight! Apply stained glass paint (available in the
Craft Department) to a simple jar to create a gorgeous, one-of-a-kind accent. And if you wish, wrap the mouth of the jar with bead-embellished wire and hang to display.
This beautiful floral design was created with enamel paint. After it’s baked according to the manufacturer’s instructions, the paint is ready for everyday wear and tear…and it’s dishwasher safe too. Tip: If you’re not comfortable with freehand painting, look to stencils to help you create the perfect design.
Painted Over«
Hobby Lobby Product Inspirations 7

8 Hobby Lobby Product Inspirations
Remove the flat metal lids from a trio of simple Mason jars…and what have you got? The makings for imaginative bouquets turned memory holders! For this look, insert a small, cylinder-shaped vase into each jar—a little hot glue will hold it in place. Then fill in around the vase with floral beads and family photos. And finally, fill the vases with fresh-picked daisies!
Vase Place

Try dressing up a jar with a handmade jar sleeve. They’re easy to make—we didn’t even use a pattern. And they’re temporary too. That’s right, you can change your jar to suit your mood. Feeling scrumptiously scrappy? Try a rag quilt-style covering. It turned this simple jar into sweet, casual storage.
Scrumptious Scraps
Hobby Lobby Product Inspirations 9

So FlakyThe bird is the word in this adorable handmade snow globe. And we made it using an ordinary Mason jar! We combined handmade polymer clay elements (the iceberg and the waves) with a store-bought figurine (penguin) for this imaginative project. The pieces are glued together with waterproof silicone adhesive, and the glitter “snow” floats in a mixture of water and glycerin.
10 Hobby Lobby Product Inspirations

Hobby Lobby Product Inspirations 11
Sweet TreatHave we got a treat for you! You’re gonna love this colorful candy dispenser. Especially when you find that you can make it yourself. Just follow our easy step-by-step instructions on the following page. The perfect dispenser to use at a kid's party…they'll get a little giggle everytime they use it!

1. Carefully remove the hinges to separate the mirrored
lid from the box.
2. Pull out the drawer, and carefully saw off the handle.
3. Paint box, drawer and wooden knob with acrylic paint; allow to dry. Then découpage patterned paper to the sides of the box as well as the front and inside of the drawer.
4. Age the edges of the box and the drawer using brown ink.
• Mason Jar• Bare Wood Jewelry Box• Wooden Knob• Assorted Scrapbook Papers • Découpage Medium • Acrylic Paint
• Circle Punch• Brown Ink• Double-Sided Adhesive• Foam Brush • Handsaw• Hammer & Nails
• Electric Drill• Craft Knife• Miniature Screwdriver• File
Supplies:
12 Hobby Lobby Product Inspirations

8. Close the drawer. Then carefully hammer two nails into the top of the box, as shown. The nails will prevent the drawer from sliding completely out of the box.
6. Drill a small hole in the top of the box, as shown. File as needed. Then use circle punch to cut a corresponding hole in a pre-measured square of paper. Découpage the paper onto the box top.
7. Use double-sided adhesive to secure the jar’s metal ring to the box top, as shown.
9. Fill the jar with the candy of your choice. Then, invert the box to screw the metal ring into place.
And you’re all done! It’s a custom-made candy jar! Just slowly pull out the drawer to dispense the sweets.
©2011 Hobby Lobby® - Photography by Sanford Mauldin • Crafts - 224048
DO NOT ALLOW CHILDREN TO COMPLETE PROJECTS ALONE. ADULT SUPERVISION REQUIRED.
www.hobbylobby.com • • www.getinspiredbyhl.com
5. Drill a hole through drawer for the wooden knob, as shown. Push the knob into place.