4. using cura to set up your auto- leveling probe and...
TRANSCRIPT

4. Using Cura to Set Up Your Auto-
Leveling Probe and Create Your First
Written By: Printrbot Support
4. Using Cura to Set Up Your Auto-Leveling Probe and Create Your First Print
© 2015 help.printrbot.com Page 1 of 13
Step 1 — 4. Using Cura to Set Up Your Auto-Leveling Probe and CreateYour First Print
Be sure you have gone through the Cura setup guide here.
If you have an assembled Printrbot, it was already calibrated and tested before leaving our
shop. However, the Auto-Leveling Probe may need some adjustment from time to time.
The photos in this guide use the Simple Metal (Model 1403) as the example. However, the
steps for calibration are the same for any Printrbot with an Auto-Leveling Probe.
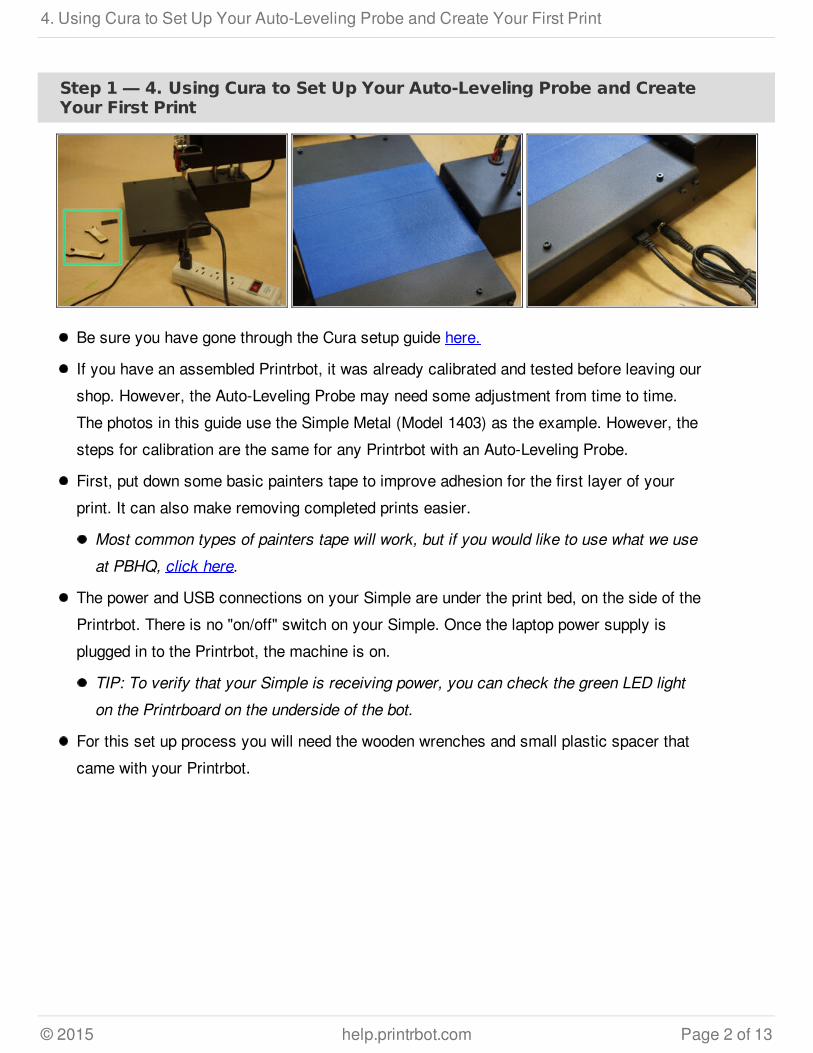
First, put down some basic painters tape to improve adhesion for the first layer of your
print. It can also make removing completed prints easier.
Most common types of painters tape will work, but if you would like to use what we use
at PBHQ, click here.
The power and USB connections on your Simple are under the print bed, on the side of the
Printrbot. There is no "on/off" switch on your Simple. Once the laptop power supply is
plugged in to the Printrbot, the machine is on.
TIP: To verify that your Simple is receiving power, you can check the green LED light
on the Printrboard on the underside of the bot.�
For this set up process you will need the wooden wrenches and small plastic spacer that
came with your Printrbot.
4. Using Cura to Set Up Your Auto-Leveling Probe and Create Your First Print
© 2015 help.printrbot.com Page 2 of 13

Step 2
Open Cura, and load the 3mm Box STL file by selecting "File", "Load Model File", and then
opening the 3mm Box file from your hard drive.
The 3mm Box STL file can be found at the Printrbot Knowledge Base under "Files and
Downloads".
The 3mm Box model will appear on the "platform" in Cura.
4. Using Cura to Set Up Your Auto-Leveling Probe and Create Your First Print
© 2015 help.printrbot.com Page 3 of 13

Step 3
To open the Pronterface UI (user interface), Click the "Print with USB" icon in the upper
left hand corner of the screen.
Pronterface will appear and begin connecting to your Printrbot.
Once connected, click the "Home X" and "Home Y" icons, in that order. This will home the
X and Y axes on your Printrbot.
Next click "10" under the "+Z" icon three times. This will raise the Z axis of your Printrbot
30mm.
Enter "210" in the "Temperature" command bar. Tab out of this field. This will begin to bring
the hot end to 210 degrees celsius. You will see the graph reflect the rise in temperature.
Enter "M501" (case sensitive) into the command line. This will display the settings on your
Printrbot.
To calibrate the Auto-Leveling Probe, the "Z" value of the "M212" line will have to be
adjusted. In this example, the Z value is zero.
Don't worry if you are having trouble reading the lines in Pronterface, we will zoom in on
them throughout the rest of the guide. If you would like to be able to zoom in on your
own screen, Apple users may be interested in the "Zoom It" app. Click here for more
info. Windows users, click here.
4. Using Cura to Set Up Your Auto-Leveling Probe and Create Your First Print
© 2015 help.printrbot.com Page 4 of 13

Step 4
Once the hot end is "at temp" (210C), insert the filament.
Compress the extruder spring.
Guide the filament into the top of the extruder, past the drive gear and down the guide
into the hot end.
Be sure that the filament sits in the teeth of the drive gear and is feeding straight into
the hot end.
BE CAREFUL - THE HOT END WILL BE HOT!
4. Using Cura to Set Up Your Auto-Leveling Probe and Create Your First Print
© 2015 help.printrbot.com Page 5 of 13

Step 5
Manually feed the filament through the hot end by compressing the extruder spring and
pushing the filament down further into the extruder. The filament should feel a little
"mushy" as it is fed through the hot end.
TIP: Do not be alarmed if the filament coming out of the hot end is a different color than
what you are pushing in. We test and calibrate each assembled model. There will
probably be left-over filament in the nozzle from testing.
4. Using Cura to Set Up Your Auto-Leveling Probe and Create Your First Print
© 2015 help.printrbot.com Page 6 of 13

Step 6
Turn the threaded rod (Z axis) counter clockwise to touch the hot end tip on the bed.
TIP: For best results, the hot end should be brought to temp so that all of the metal has
expanded to the size that it will be when you are printing.
The plastic spacer should fit "snug" under the Auto-Leveling Probe. You may notice that
the LED on the probe lights up as it nears the print bed. The light indicates that the probe
is sensing metal.
You can adjust the height of the probe by turning both nuts with your wooden wrenches. If
you ordered an assembled unit, you will probably not need to adjust the height of your
probe.
TIP: To raise the sensor undo the lower nut and push up the sensor to the required
height and then tighten the upper nut. To lower the sensor undo the top nut and lower
the sensor to the required height and then tighten the lower nut.
BE CAREFUL - THE HOT END WILL BE HOT
4. Using Cura to Set Up Your Auto-Leveling Probe and Create Your First Print
© 2015 help.printrbot.com Page 7 of 13

Step 7
Click "Print" and monitor your Printrbot.
To reduce the risk of scraping your print bed, be ready to kill the power on your Printrbot
as the print is starting.
TIP: Plug your Printrbot into a power strip so that you can turn the on/off switch quickly
if needed.
Do not be discouraged if your first attempt goes poorly. The print will likely be stringy. If
this is the case, the probe is not adjusted correctly. We will do this in the next step by
changing the Z value.
4. Using Cura to Set Up Your Auto-Leveling Probe and Create Your First Print
© 2015 help.printrbot.com Page 8 of 13

Step 8
Now try entering the G-Code command:
M212 Z-0.2
TIP: This G-code command sets the Z axis home position at negative 0.2mm.
M500
TIP: This G code command saves the new value to the Printrbot.
M501
TIP: This G code commands displays the current settings of the Printrbot.
4. Using Cura to Set Up Your Auto-Leveling Probe and Create Your First Print
© 2015 help.printrbot.com Page 9 of 13

Step 9
M501 will display your current
settings, which should be "M212
X25.00 Y0.00 Z-0.20".
The more that you decrement the
negative value, the lower the hot
end will drop before the leveling
probe senses the metal bed.
For example, if you want the Z
axis to home lower, try a value
of -0.4. If you want the Z axis to
home higher, try a Z value of
0.0, or a positive value of 0.2.
WARNING - Adjusting the Z value
too dramatically could result in
gouging your print bed. Make
adjustments 0.2mm at a time.
4. Using Cura to Set Up Your Auto-Leveling Probe and Create Your First Print
© 2015 help.printrbot.com Page 10 of 13

Step 10
If the negative Z value is set too far
negative, the print layers will look
flat or smashed.
If this is the case, work the other
way by giving a value closer to
zero. Please note that the Z
adjustments are not cumulative. If
Z-0.1 does not work, try Z-0.15 etc.
M212 Z0 or M212 Z-.1
If your M212 value is set at Z0
and the layers still appear
smashed, try using the wood
wrenches to adjust the leveling
probe closer to the bed.
TIP: The auto-leveling probe is
inductive and usually detects the
bed a few mm before actually
touching it.
4. Using Cura to Set Up Your Auto-Leveling Probe and Create Your First Print
© 2015 help.printrbot.com Page 11 of 13

Step 11
Keep experimenting with the negative Z value (M212 command) until you find the correct
setting for your printer. It can seem like a tedious process, but be patient. The greater care
you take now, the better your results in the long run.
Great job! To remove the print, some users prefer using a putty knife to pry the print up
from the bed.
4. Using Cura to Set Up Your Auto-Leveling Probe and Create Your First Print
© 2015 help.printrbot.com Page 12 of 13
This document was last generated on 2015-02-19 04:17:14 PM.
Step 12
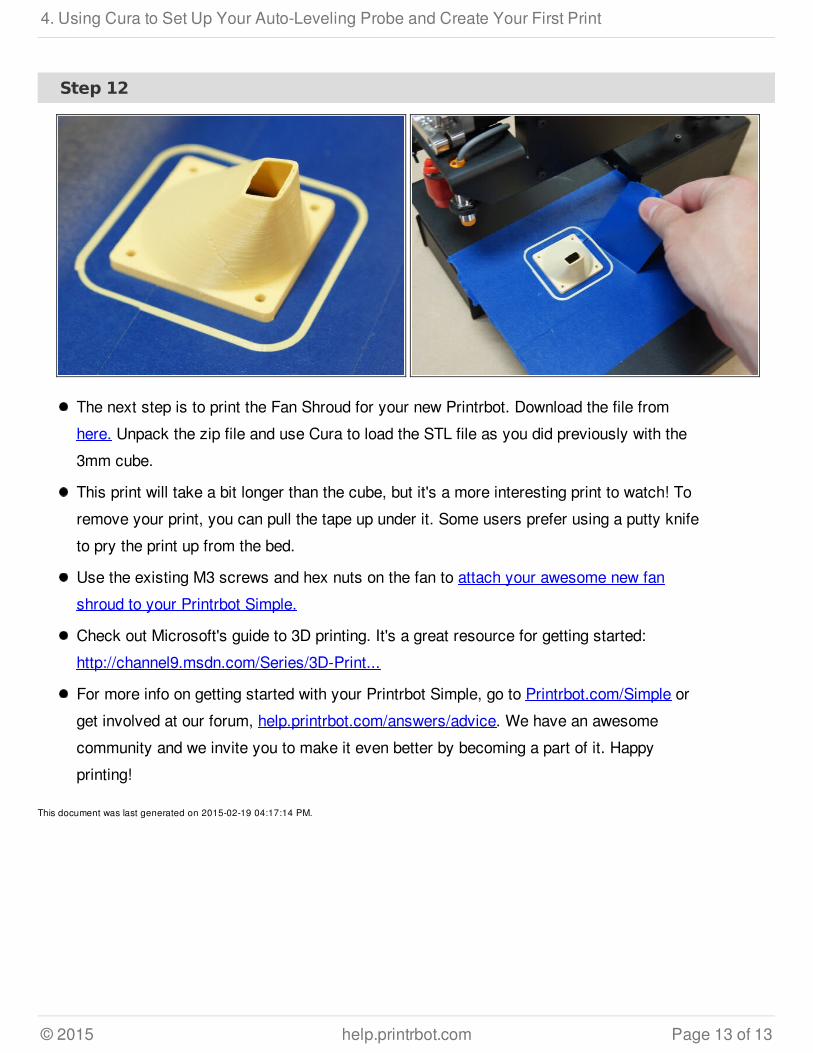
The next step is to print the Fan Shroud for your new Printrbot. Download the file from
here. Unpack the zip file and use Cura to load the STL file as you did previously with the
3mm cube.
This print will take a bit longer than the cube, but it's a more interesting print to watch! To
remove your print, you can pull the tape up under it. Some users prefer using a putty knife
to pry the print up from the bed.
Use the existing M3 screws and hex nuts on the fan to attach your awesome new fan
shroud to your Printrbot Simple.
Check out Microsoft's guide to 3D printing. It's a great resource for getting started:
http://channel9.msdn.com/Series/3D-Print...
For more info on getting started with your Printrbot Simple, go to Printrbot.com/Simple or
get involved at our forum, help.printrbot.com/answers/advice. We have an awesome
community and we invite you to make it even better by becoming a part of it. Happy
printing!
4. Using Cura to Set Up Your Auto-Leveling Probe and Create Your First Print
© 2015 help.printrbot.com Page 13 of 13