4-h woodworking series exploring woodworking › agriculture › rural...4-h woodworking series...
TRANSCRIPT
Meet Pip!
Pip the Plank will tell you
neat and important
information throughout
your manual.
Table of Contents
Introduction 1
Project Summary 2
Skill Builder 1:
Safety First
3
Skill Builder 2:
Measure Twice
6
Skill Builder 3:
Hammerhead
9
Skill Builder 4:
No Screws Loose
12
Skill Builder 5:
Keep It Together
15
Skill Builder 6:
A Strong Finish
18
Showcase
Challenge
21
Portfolio Page 23
- Draft 2010 -
4-H Woodworking Series
Exploring Woodworking
Introduction
Do you wish you could turn a plank like myself into something you could
use? Or maybe you want to make a wooden gift for a friend. Or perhaps
you just want to learn how to use some tools. If so, this is the 4-H project
book for you.
With this manual you will learn basic techniques for
common tools. You will have the opportunity to build
different projects including stilts and a paddlewheel boat.
There are six different sections called Skill Builders
where a specific topic is focused on. Each Skill Builder
has activities that will help you develop your skills.
Once all the Skill Builders have been finished, there is a
Showcase Challenge which allows you to exhibit the
skills you have gained in any way you want to.
Find your protective eye goggles, ear plugs, and dust
mask. We don’t want any accidents. Once you are all
suited up, lets start building our skills!
Learning is 3D!
To help you get the most out of
your learning, each project
meeting has the following parts:
Dream it! Plan for success
Do it! Hands on learning
Dig it! What did you learn?
Do It
Dig It
Dream It
Woodn’t You Know?
This Woodn’t You Know? box will appear throughout the
manual. Check out the great website link ideas wherever you
see Woodn’t You Know? These links will lead you to fun
online content to help you with your 4-H project.
2
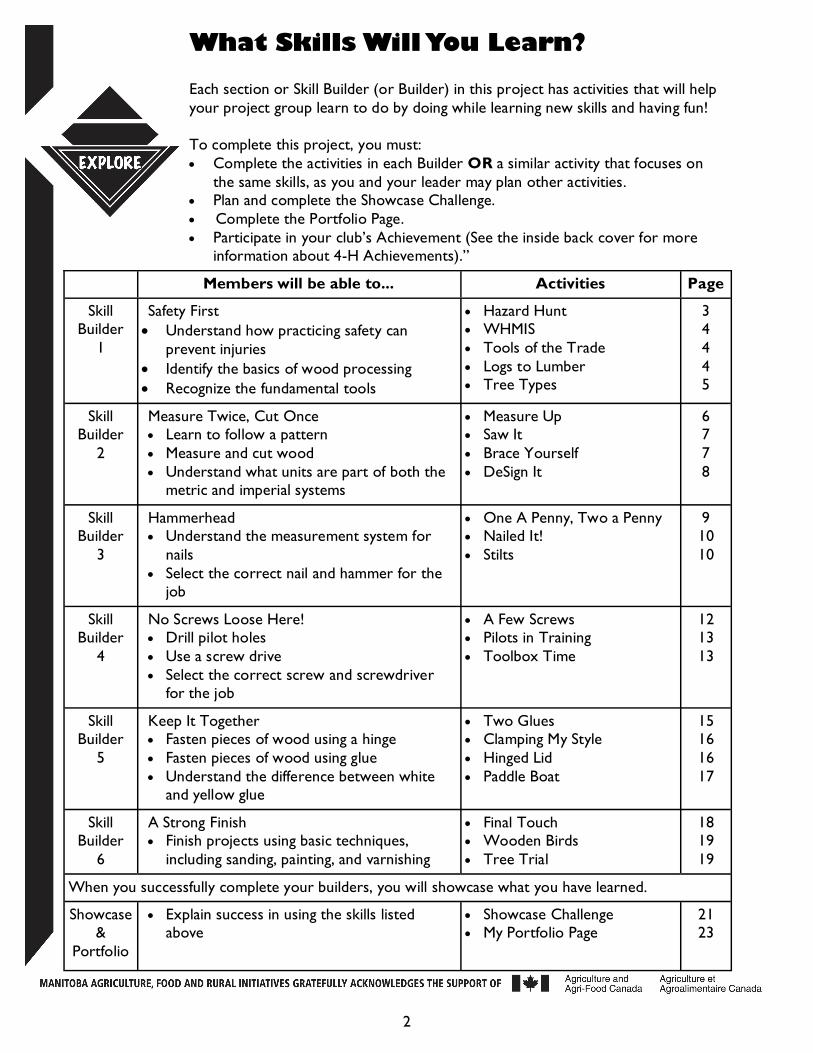
What Skills Will You Learn?
Each section or Skill Builder (or Builder) in this project has activities that will help
your project group learn to do by doing while learning new skills and having fun!
To complete this project, you must:
Complete the activities in each Builder OR a similar activity that focuses on
the same skills, as you and your leader may plan other activities.
Plan and complete the Showcase Challenge.
Complete the Portfolio Page.
Participate in your club’s Achievement (See the inside back cover for more
information about 4-H Achievements).”
Members will be able to... Activities Page
Skill
Builder
1
Safety First
Understand how practicing safety can
prevent injuries
Identify the basics of wood processing
Recognize the fundamental tools
Hazard Hunt
WHMIS
Tools of the Trade
Logs to Lumber
Tree Types
3
4
4
4
5
Skill
Builder
2
Measure Twice, Cut Once
Learn to follow a pattern
Measure and cut wood
Understand what units are part of both the
metric and imperial systems
Measure Up
Saw It
Brace Yourself
DeSign It
6
7
7
8
Skill
Builder
3
Hammerhead
Understand the measurement system for
nails
Select the correct nail and hammer for the
job
One A Penny, Two a Penny
Nailed It!
Stilts
9
10
10
Skill
Builder
4
No Screws Loose Here!
Drill pilot holes
Use a screw drive
Select the correct screw and screwdriver
for the job
A Few Screws
Pilots in Training
Toolbox Time
12
13
13
Skill
Builder
5
Keep It Together
Fasten pieces of wood using a hinge
Fasten pieces of wood using glue
Understand the difference between white
and yellow glue
Two Glues
Clamping My Style
Hinged Lid
Paddle Boat
15
16
16
17
Skill
Builder
6
A Strong Finish
Finish projects using basic techniques,
including sanding, painting, and varnishing
Final Touch
Wooden Birds
Tree Trial
18
19
19
When you successfully complete your builders, you will showcase what you have learned.
Showcase
&
Portfolio
Explain success in using the skills listed
above
Showcase Challenge
My Portfolio Page
21
23
Skill Builder 1: Safety First
SKILLS CHECKLIST
Understand how practicing safety can
prevent injuries
Identify the basics of wood processing
Recognize the fundamental tools
Dream it!
To begin any project and be successful you need to plan. In Dream It! you will begin thinking about
the topic that the builder explores.
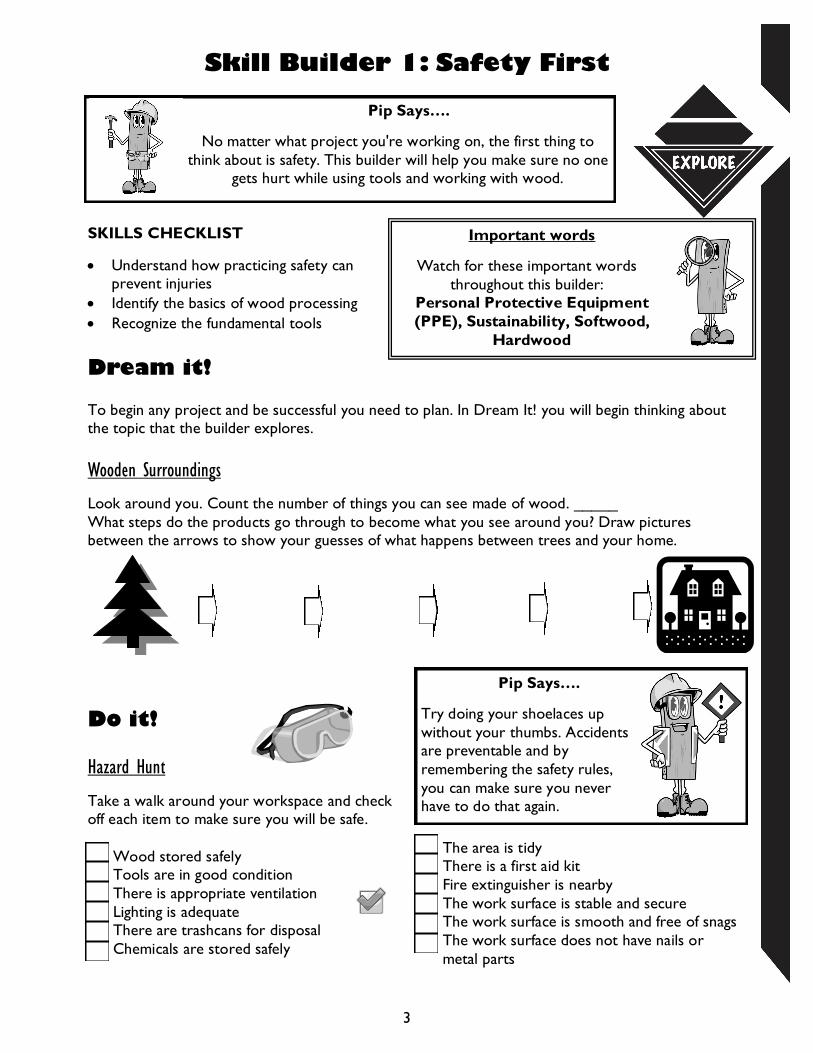
Wooden Surroundings
Look around you. Count the number of things you can see made of wood. _____
What steps do the products go through to become what you see around you? Draw pictures
between the arrows to show your guesses of what happens between trees and your home.
Do it!
Hazard Hunt
Take a walk around your workspace and check
off each item to make sure you will be safe.
Wood stored safely
Tools are in good condition
There is appropriate ventilation
Lighting is adequate
There are trashcans for disposal
Chemicals are stored safely
Pip Says….
No matter what project you're working on, the first thing to
think about is safety. This builder will help you make sure no one
gets hurt while using tools and working with wood.
Important words
Watch for these important words
throughout this builder:
Personal Protective Equipment
(PPE), Sustainability, Softwood,
Hardwood
3
Pip Says….
Try doing your shoelaces up
without your thumbs. Accidents
are preventable and by
remembering the safety rules,
you can make sure you never
have to do that again.
The area is tidy
There is a first aid kit
Fire extinguisher is nearby
The work surface is stable and secure
The work surface is smooth and free of snags
The work surface does not have nails or
metal parts
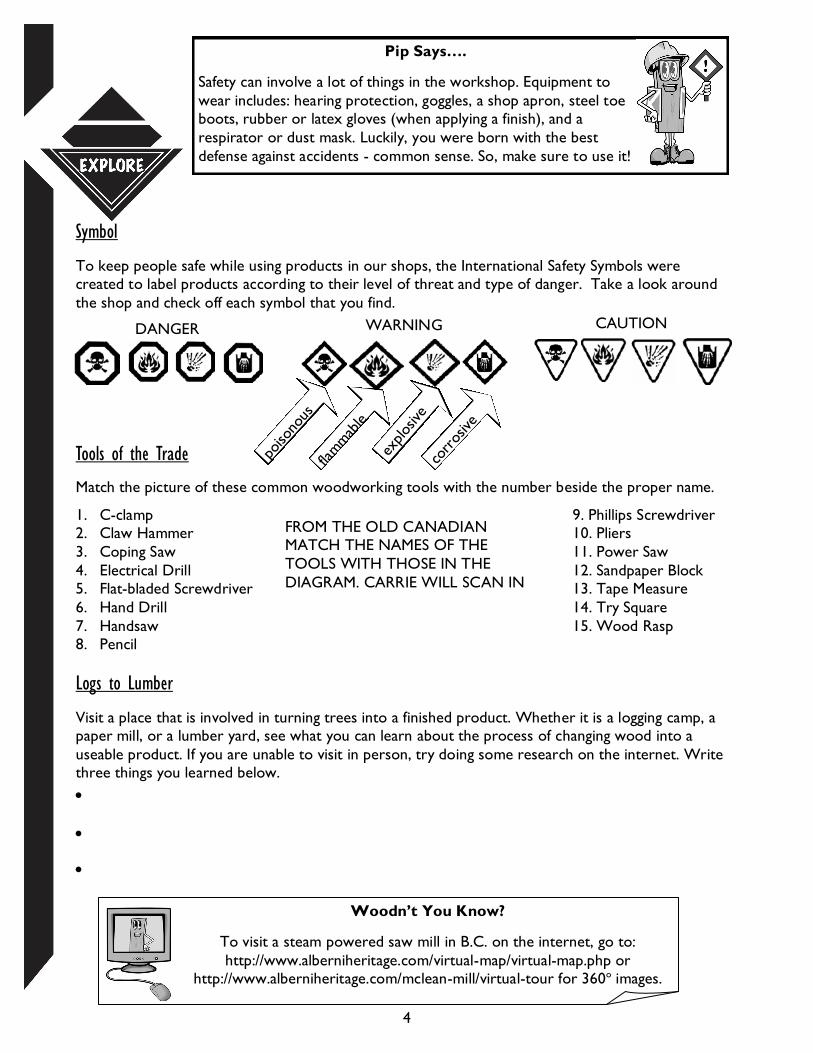
Symbol
To keep people safe while using products in our shops, the International Safety Symbols were
created to label products according to their level of threat and type of danger. Take a look around
the shop and check off each symbol that you find.
Tools of the Trade
Match the picture of these common woodworking tools with the number beside the proper name.
Logs to Lumber
Visit a place that is involved in turning trees into a finished product. Whether it is a logging camp, a
paper mill, or a lumber yard, see what you can learn about the process of changing wood into a
useable product. If you are unable to visit in person, try doing some research on the internet. Write
three things you learned below.
Woodn’t You Know?
To visit a steam powered saw mill in B.C. on the internet, go to:
http://www.alberniheritage.com/virtual-map/virtual-map.php or
http://www.alberniheritage.com/mclean-mill/virtual-tour for 360o images.
Pip Says….
Safety can involve a lot of things in the workshop. Equipment to
wear includes: hearing protection, goggles, a shop apron, steel toe
boots, rubber or latex gloves (when applying a finish), and a
respirator or dust mask. Luckily, you were born with the best
defense against accidents - common sense. So, make sure to use it!
FROM THE OLD CANADIAN
MATCH THE NAMES OF THE
TOOLS WITH THOSE IN THE
DIAGRAM. CARRIE WILL SCAN IN
1. C-clamp
2. Claw Hammer
3. Coping Saw
4. Electrical Drill
5. Flat-bladed Screwdriver
6. Hand Drill
7. Handsaw
8. Pencil
9. Phillips Screwdriver
10. Pliers
11. Power Saw
12. Sandpaper Block
13. Tape Measure
14. Try Square
15. Wood Rasp
DANGER CAUTION fla
mm
able
corr
osive
poiso
nous
explos
ive
WARNING
4
5
Tree Types
Trees are classified depending on their hardness, and are usually labeled as hardwood or
softwood. Hardwood comes from deciduous trees (the ones with big bushy leaves that
lose their leaves in the fall) like ash, birch, hickory, oak, maple, poplar, rosewood,
and walnut. Softwood comes from coniferous trees (the ones with needles or thin
leaves) like cedar, cypress, fir, pine, redwood, and spruce. Softwoods are cheaper than
hardwoods and are usually a good choice for a beginning woodworker. To test if a
piece of wood is hardwood or softwood, you can push a ball point pen into it and see how
easily it dents. The easier it dents, the softer the wood. Pick two types of wood to research and
fill in the chart below. Ask your local hardware shop about the costs. An example has been
done for you.
Dig it!
How can you make sure you stay safe during this project? Make a safety
goal to help you keep all ten fingers and all ten toes.
Other safety symbols used in the shop are WHMIS (Workplace Hazardous Material
Information System). If you see any of these symbols of products you are using, make
sure to talk with your leader about extra safety precautions.
What’s next?
Skill Builder 2 will help you learn to follow a pattern through careful measurement. You
will also learn to use the handsaw, coping saw, and brace and bit, as well as make a sign!
Species Hardness Colour Major Use Cost($)/Board Foot
Mahogany Hardwood Reddish Furniture
My Safety Goal:
6
SKILLS CHECKLIST
Learn to follow a pattern
Measure and cut wood
Understand what units are part of
both the metric and imperial systems
Skill Builder 2: Measure Twice, Cut Once
Important Words
Look out for these important words in
this builder:
Saw, Clamp, Kerf, Metric, Imperial,
Drill, Utility Square, Try Square,
Framing Square, Combination Square
Dream it!
How Do You Measure?
Circle the answer to the first two questions and write what you think for the last question:
1) What units do you measure your weight in? pounds kilograms ounces grams
2) What units do you measure your height in? feet metres inches centimeters
3) How would you measure a piece of wood?
Pip Says….
Measuring carefully is a big part of being a master woodworker.
Canadians have used the Metric System where everything is based in
multiples of 10 since 1970 but Americans still use the Imperial
System. This is why we need tools in both inches and centimeters.
Do it!
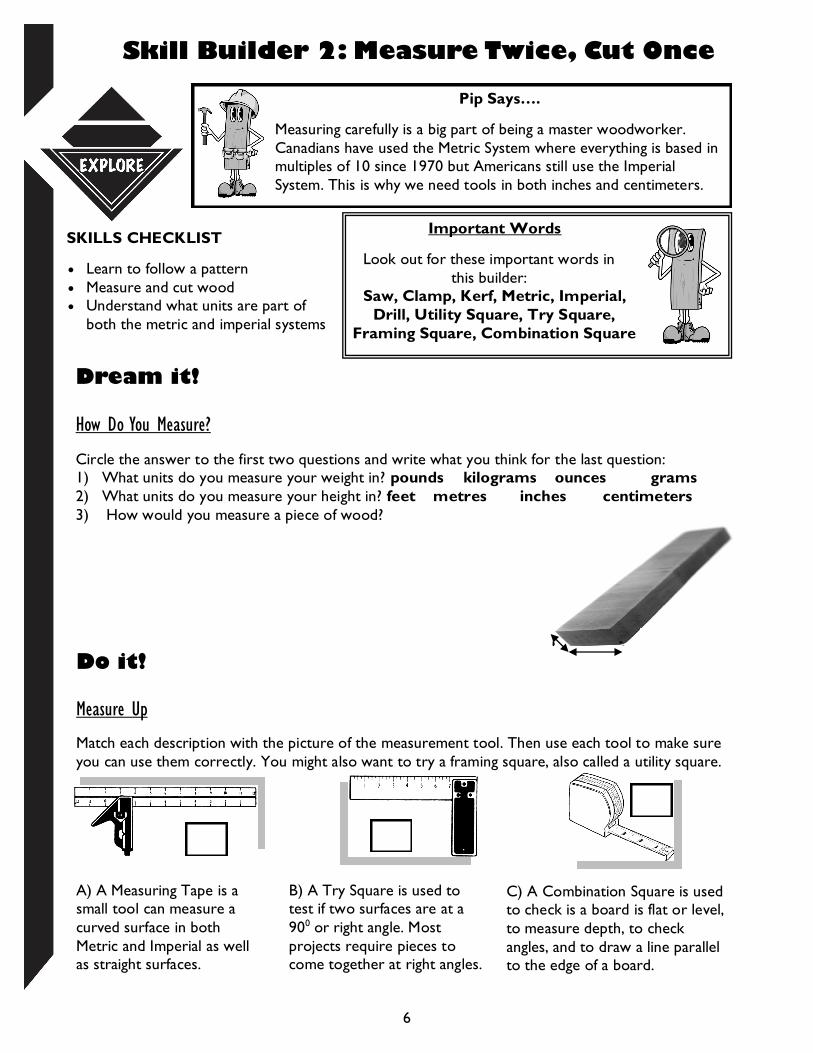
Measure Up
Match each description with the picture of the measurement tool. Then use each tool to make sure
you can use them correctly. You might also want to try a framing square, also called a utility square.
B) A Try Square is used to
test if two surfaces are at a
900 or right angle. Most
projects require pieces to
come together at right angles.
C) A Combination Square is used
to check is a board is flat or level,
to measure depth, to check
angles, and to draw a line parallel
to the edge of a board.
A) A Measuring Tape is a
small tool can measure a
curved surface in both
Metric and Imperial as well
as straight surfaces.
2”x4”
2” 4”
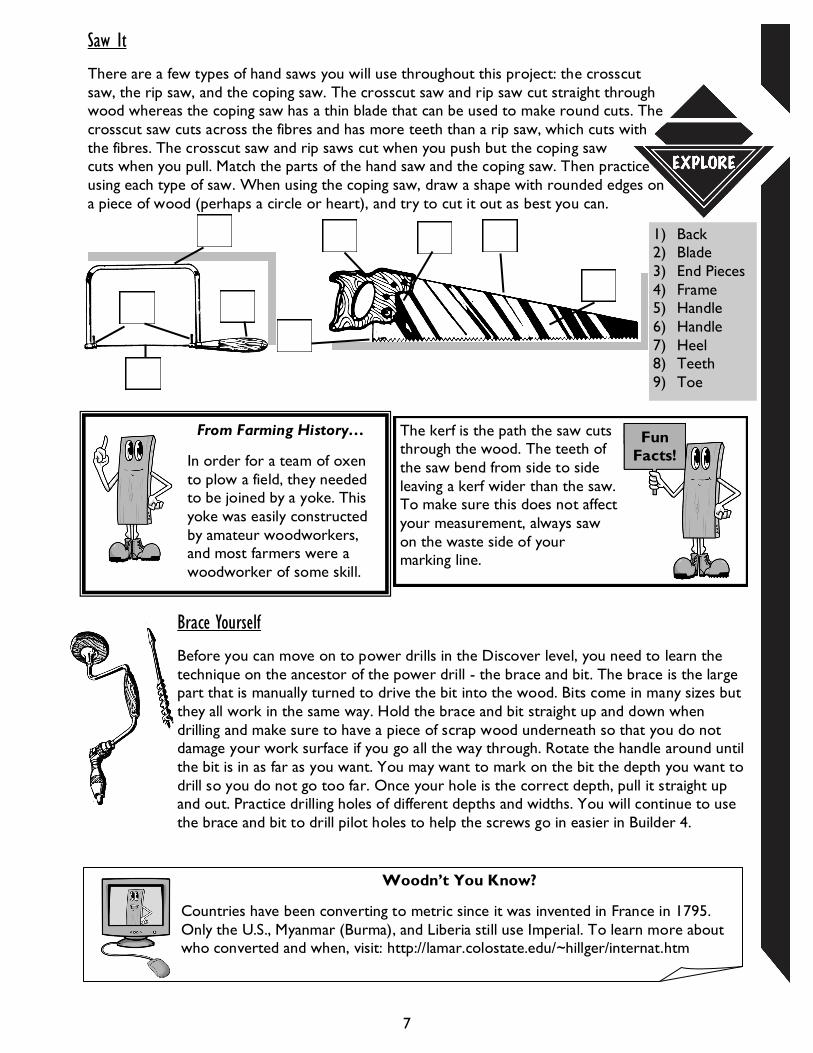
Saw It
There are a few types of hand saws you will use throughout this project: the crosscut
saw, the rip saw, and the coping saw. The crosscut saw and rip saw cut straight through
wood whereas the coping saw has a thin blade that can be used to make round cuts. The
crosscut saw cuts across the fibres and has more teeth than a rip saw, which cuts with
the fibres. The crosscut saw and rip saws cut when you push but the coping saw
cuts when you pull. Match the parts of the hand saw and the coping saw. Then practice
using each type of saw. When using the coping saw, draw a shape with rounded edges on
a piece of wood (perhaps a circle or heart), and try to cut it out as best you can.
Brace Yourself
Before you can move on to power drills in the Discover level, you need to learn the
technique on the ancestor of the power drill - the brace and bit. The brace is the large
part that is manually turned to drive the bit into the wood. Bits come in many sizes but
they all work in the same way. Hold the brace and bit straight up and down when
drilling and make sure to have a piece of scrap wood underneath so that you do not
damage your work surface if you go all the way through. Rotate the handle around until
the bit is in as far as you want. You may want to mark on the bit the depth you want to
drill so you do not go too far. Once your hole is the correct depth, pull it straight up
and out. Practice drilling holes of different depths and widths. You will continue to use
the brace and bit to drill pilot holes to help the screws go in easier in Builder 4.
7
Woodn’t You Know?
Countries have been converting to metric since it was invented in France in 1795.
Only the U.S., Myanmar (Burma), and Liberia still use Imperial. To learn more about
who converted and when, visit: http://lamar.colostate.edu/~hillger/internat.htm
The kerf is the path the saw cuts
through the wood. The teeth of
the saw bend from side to side
leaving a kerf wider than the saw.
To make sure this does not affect
your measurement, always saw
on the waste side of your
marking line.
Fun
Facts!
1) Back
2) Blade
3) End Pieces
4) Frame
5) Handle
6) Handle
7) Heel
8) Teeth
9) Toe
From Farming History…
In order for a team of oxen
to plow a field, they needed
to be joined by a yoke. This
yoke was easily constructed
by amateur woodworkers,
and most farmers were a
woodworker of some skill.
What’s next?
Hammers and nails are one of the most common tools to put pieces of wood together.
You will also build a pair of stilts that you can use to walk around on.
8
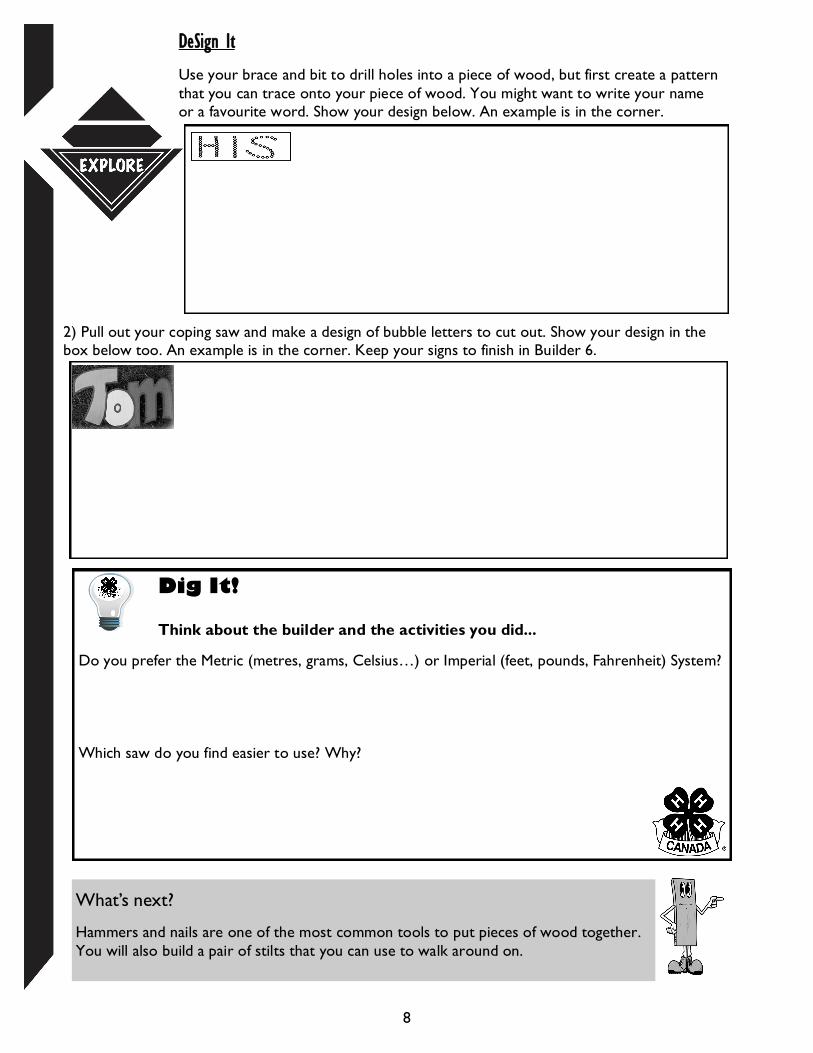
DeSign It
Use your brace and bit to drill holes into a piece of wood, but first create a pattern
that you can trace onto your piece of wood. You might want to write your name
or a favourite word. Show your design below. An example is in the corner.
Dig It!
Think about the builder and the activities you did...
Do you prefer the Metric (metres, grams, Celsius…) or Imperial (feet, pounds, Fahrenheit) System?
Which saw do you find easier to use? Why?
2) Pull out your coping saw and make a design of bubble letters to cut out. Show your design in the
box below too. An example is in the corner. Keep your signs to finish in Builder 6.

9
Dream it!
Nail Knowledge
Fill out the know and want to know boxes about hammers and nails. The learned box will be filled
out in the Dig It! section of this Builder.
Do it!
One a Penny, Two a Penny
Nails are measured in a system called penny, represented by the letter "d". A 1.5 inch long nail is
also known as 1.5 d. However, nails that are shorter than 2 inches long are also measured by wire
gauge between 17 and 20, with the bigger the number being, the thinner the nail. Two types of nails
you will use in your project are the common nail and finishing nail. The common nail has a larger
head than the finishing nail. A nail set is used to push the finishing nail further into the wood so that
the hole can be covered
with putty.
Work with your leader to
organize nails according
to their size and
discussing how they are
labeled.
Important Words
Watch out for these
important words in this builder:
Hammer, Nail, Penny,
Common nail, Finishing
nail, Clamp
SKILLS CHECKLIST
Understand the measurement system for nails
Select the correct nail and hammer for the job
Pip Says….
Hammers are one of the oldest tools in the world, dating back to
2, 600, 000 BC. The modern claw hammer can be used to pound
nails in or pull them out using the other side of the head. You
should always wear safety goggles when using a hammer!
Skill Builder 3: Hammerhead
Know Want to Know Learned
A Nail Set
To straighten a bent nail, hold a block of wood against
the nail and then tap the nail repeatedly against the
block. Don’t try to straighten it all in one swing, unless it
only has a very small bend. Nails go into dry wood more
easily if they have been dipped in a bit of wax. You can
drill a small hole in the end of your hammer and fill it
with melted paraffin, so the wax is always handy for you!
Fun
Facts!
10
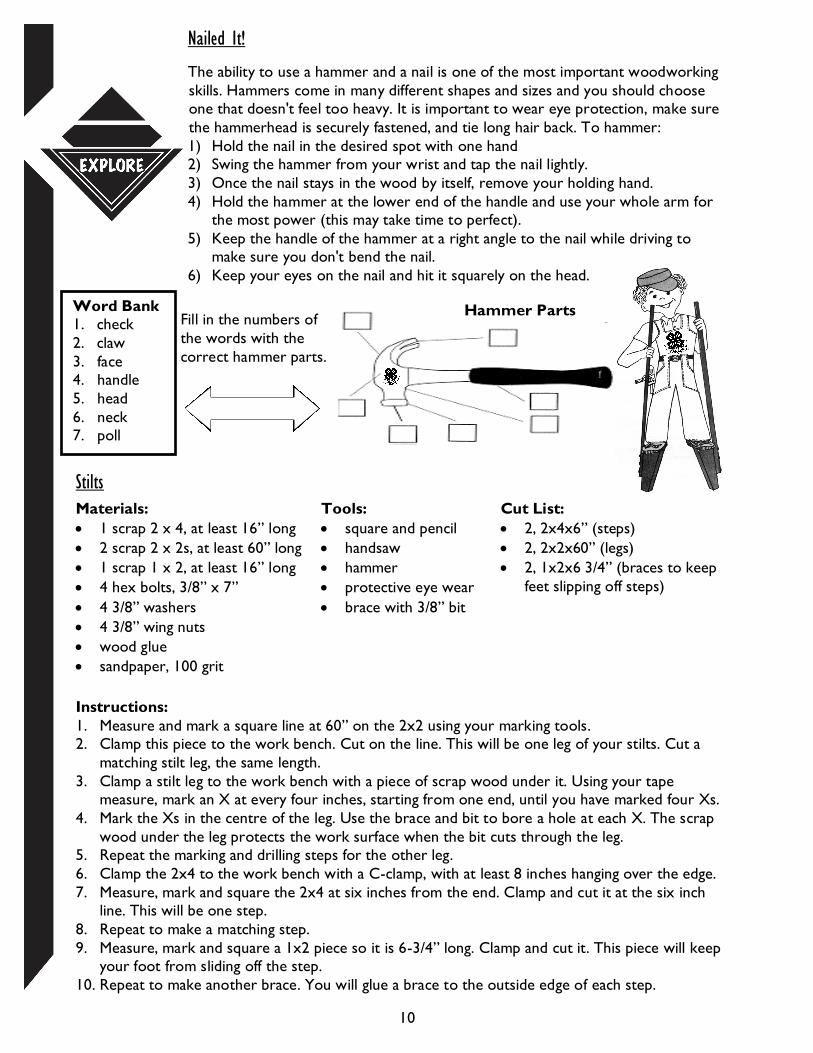
Nailed It!
The ability to use a hammer and a nail is one of the most important woodworking
skills. Hammers come in many different shapes and sizes and you should choose
one that doesn't feel too heavy. It is important to wear eye protection, make sure
the hammerhead is securely fastened, and tie long hair back. To hammer:
1) Hold the nail in the desired spot with one hand
2) Swing the hammer from your wrist and tap the nail lightly.
3) Once the nail stays in the wood by itself, remove your holding hand.
4) Hold the hammer at the lower end of the handle and use your whole arm for
the most power (this may take time to perfect).
5) Keep the handle of the hammer at a right angle to the nail while driving to
make sure you don't bend the nail.
6) Keep your eyes on the nail and hit it squarely on the head.
Fill in the numbers of
the words with the
correct hammer parts.
Stilts
Instructions:
1. Measure and mark a square line at 60” on the 2x2 using your marking tools.
2. Clamp this piece to the work bench. Cut on the line. This will be one leg of your stilts. Cut a
matching stilt leg, the same length.
3. Clamp a stilt leg to the work bench with a piece of scrap wood under it. Using your tape
measure, mark an X at every four inches, starting from one end, until you have marked four Xs.
4. Mark the Xs in the centre of the leg. Use the brace and bit to bore a hole at each X. The scrap
wood under the leg protects the work surface when the bit cuts through the leg.
5. Repeat the marking and drilling steps for the other leg.
6. Clamp the 2x4 to the work bench with a C-clamp, with at least 8 inches hanging over the edge.
7. Measure, mark and square the 2x4 at six inches from the end. Clamp and cut it at the six inch
line. This will be one step.
8. Repeat to make a matching step.
9. Measure, mark and square a 1x2 piece so it is 6-3/4” long. Clamp and cut it. This piece will keep
your foot from sliding off the step.
10. Repeat to make another brace. You will glue a brace to the outside edge of each step.
Materials:
1 scrap 2 x 4, at least 16” long
2 scrap 2 x 2s, at least 60” long
1 scrap 1 x 2, at least 16” long
4 hex bolts, 3/8” x 7”
4 3/8” washers
4 3/8” wing nuts
wood glue
sandpaper, 100 grit
Tools:
square and pencil
handsaw
hammer
protective eye wear
brace with 3/8” bit
Cut List:
2, 2x4x6” (steps)
2, 2x2x60” (legs)
2, 1x2x6 3/4” (braces to keep
feet slipping off steps)
Word Bank
1. check
2. claw
3. face
4. handle
5. head
6. neck
7. poll
Hammer Parts
Dig it!
Go back to page 9 and fill in the Learned Column. Attach a picture of you on your stilts below!
What’s next?
If you could twist a nail, you would end up with a screw. The next Builder looks at
how to use a screw and screwdriver and how to drill pilot holes so that you don't
split your piece of wood. You will also build your own tool box.
11
In this picture ______________________________________________________________
I want you to notice: _________________________________________________________
11. Hammer a finishing nail through the brace and into the step, at either end. Place the nails near the
ends so that there will be room to bore holes for the bolts that hold everything together.
12. Repeat step 10 for the other step and brace.
13. Mark where the bolts will go through this way. Place the step/brace piece on the
workbench with the brace on the bottom. One edge of the step will face up. Measuring
from the end of the step that is even with the brace, mark two marks on the steps edge, at
1” and at 5”.
14. Square across the step’s edge at each mark. Pencil an X at the centre of each line.
15. Clamp one step/brace piece to the work surface, with a piece of scrap wood underneath.
Use a brace and 3/8” bit, drill a hole all the way through both X marks. Hold the brace and
bit straight up and down so the hole does not come out the side.
16. Repeat step 13 for the other step/brace.
17. Sand all the pieces well, especially the legs where you will be holding on.
18. Assemble your stilts, making sure that the step/brace piece is right side up! Decide what
set of holes to use. Push the bolts through the step/brace until they come out the other
side of the leg. Put a washer and wing nut on each bolt and tighten.

12
SKILLS CHECKLIST
Drill pilot holes
Use a screw drive
Select the correct screw and
screwdriver for the job
Dream it!
Nails With A Twist
When would you want to use a screw instead of a nail? Look around you and find three places
where screws are used instead of nails, What do they all have in common?
Do it!
A Few Screws
The screw is a useful tool as it is used both in construction and finishing. Screws
have three parts - the head, the shank, and the spiral threads. Screws hold the
wood together by gripping the wood with the threads. Screws come in many
different shapes and sizes. In the diagram on the right, 1) is a flathead, 2) is an oval
head, 3) is a round head, and 4) is Fillister-head. Thickness of the screw
shank ranges from #0 to #12, with #8 being the most common. Three common
screwdrivers are the slot or flathead screwdriver, the Phillips or star head
screwdriver, and the Robertson or square socket screwdriver. Be
careful not to let the screwdriver slip out of the screw or it could
damage your piece of wood. Your leader will give you a box of
screws. Can you sort them according to their names (flathead, oval
head, round head, Fillister-head)? Also take a look at the different
types of screwdrivers and try removing a few screws from a piece of
wood as well as putting them back in.
Important Words
Watch out for these important words in this
builder:
Screw, Screwdriver, Pilot hole, Roundhead,
Flathead, Oval, Panhead, Slotted, Phillips,
Robertson, Countersink, Rasp
Pip Says….
What's stronger than a nail? A screw! Screws are easily removed from
any project. However screws require a special tool called a screw-
driver to insert them into the wood. Screws are measured by length
(in inches) and the diameter (a gauge number between 0 and 24).
Skill Builder 4: No Screws Loose Here!
I found screws in:
1.
2.
3.
I think screws should be used instead of nails …
Pilots In Training
Screwing a screw into a piece of wood can sometimes cause the wood to split. To make sure
this doesn't happen, a pilot hole is drilled first. You can use the brace and bit or a power drill
to make a hole for your screw to start going into. The pilot hole should always be smaller
than the size of your screw so that the screw has something to hold onto. Practice
drilling your own pilot holes and then screwing in different sized screws.
Toolbox Time
Materials:
1 1” x 8” x 18” (Bottom)
2 1” x 4” x 18 (Sides)
1 1” x 4” x 10 (Ends)
1 1” x 6” x 18” (Handle)
4 #8, 1/2 “ flathead wood screws
25 #8, 2” flathead wood screws
fine grit sandpaper
Instructions:
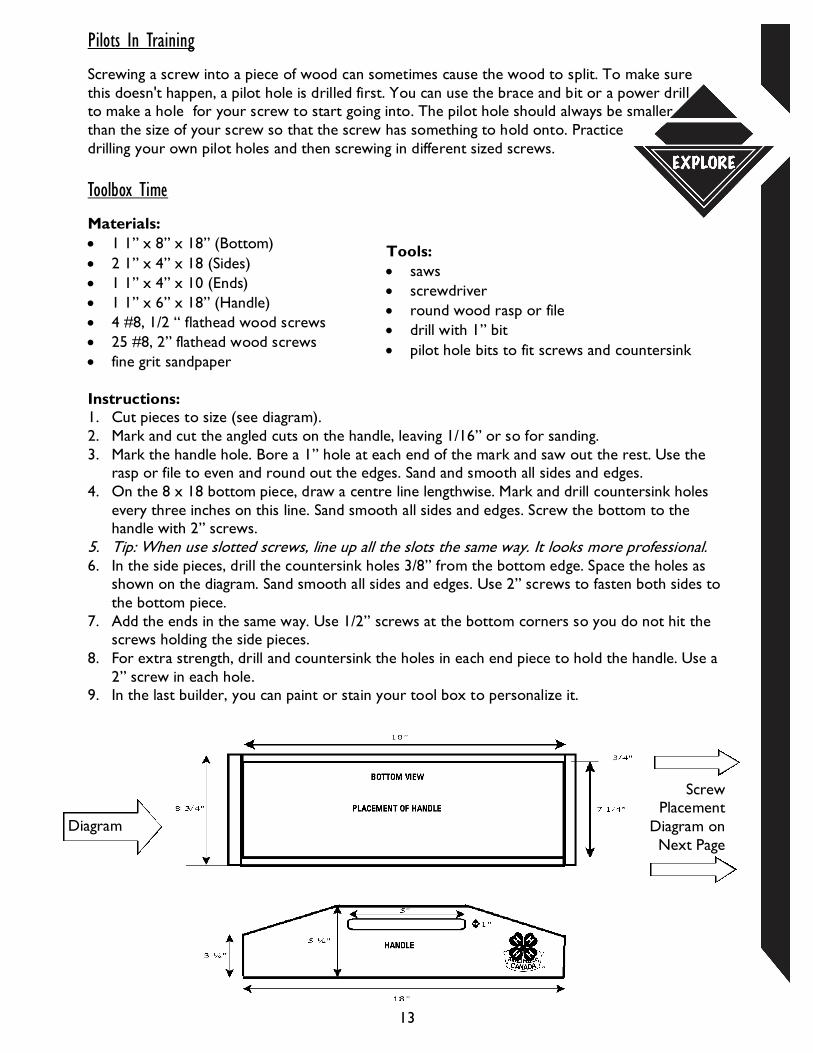
1. Cut pieces to size (see diagram).
2. Mark and cut the angled cuts on the handle, leaving 1/16” or so for sanding.
3. Mark the handle hole. Bore a 1” hole at each end of the mark and saw out the rest. Use the
rasp or file to even and round out the edges. Sand and smooth all sides and edges.
4. On the 8 x 18 bottom piece, draw a centre line lengthwise. Mark and drill countersink holes
every three inches on this line. Sand smooth all sides and edges. Screw the bottom to the
handle with 2” screws.
5. Tip: When use slotted screws, line up all the slots the same way. It looks more professional. 6. In the side pieces, drill the countersink holes 3/8” from the bottom edge. Space the holes as
shown on the diagram. Sand smooth all sides and edges. Use 2” screws to fasten both sides to
the bottom piece.
7. Add the ends in the same way. Use 1/2” screws at the bottom corners so you do not hit the
screws holding the side pieces.
8. For extra strength, drill and countersink the holes in each end piece to hold the handle. Use a
2” screw in each hole.
9. In the last builder, you can paint or stain your tool box to personalize it.
13
Tools:
saws
screwdriver
round wood rasp or file
drill with 1” bit
pilot hole bits to fit screws and countersink
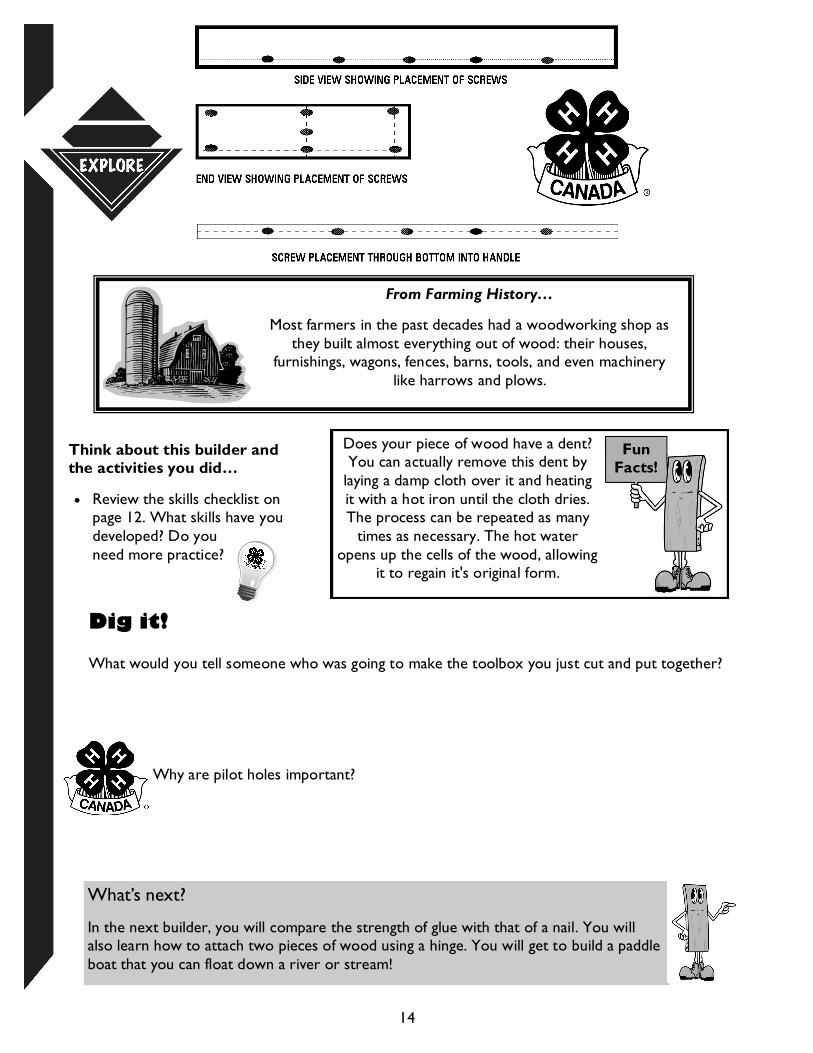
Diagram
Screw
Placement
Diagram on
Next Page
Think about this builder and
the activities you did…
Review the skills checklist on
page 12. What skills have you
developed? Do you
need more practice?
What’s next?
In the next builder, you will compare the strength of glue with that of a nail. You will
also learn how to attach two pieces of wood using a hinge. You will get to build a paddle
boat that you can float down a river or stream!
14
Dig it!
What would you tell someone who was going to make the toolbox you just cut and put together?
Why are pilot holes important?
Does your piece of wood have a dent?
You can actually remove this dent by
laying a damp cloth over it and heating
it with a hot iron until the cloth dries.
The process can be repeated as many
times as necessary. The hot water
opens up the cells of the wood, allowing
it to regain it's original form.
Fun
Facts!
From Farming History…
Most farmers in the past decades had a woodworking shop as
they built almost everything out of wood: their houses,
furnishings, wagons, fences, barns, tools, and even machinery
like harrows and plows.
Skill Builder 5: Keep It Together
Dream it!
The Power In Glue
Your leader will give you two pieces of wood that have been glued together and two pieces
that have been nailed together.
Warm up your muscles and try and pull them apart. Record what you think will be stronger
and what actually is.
Do it!
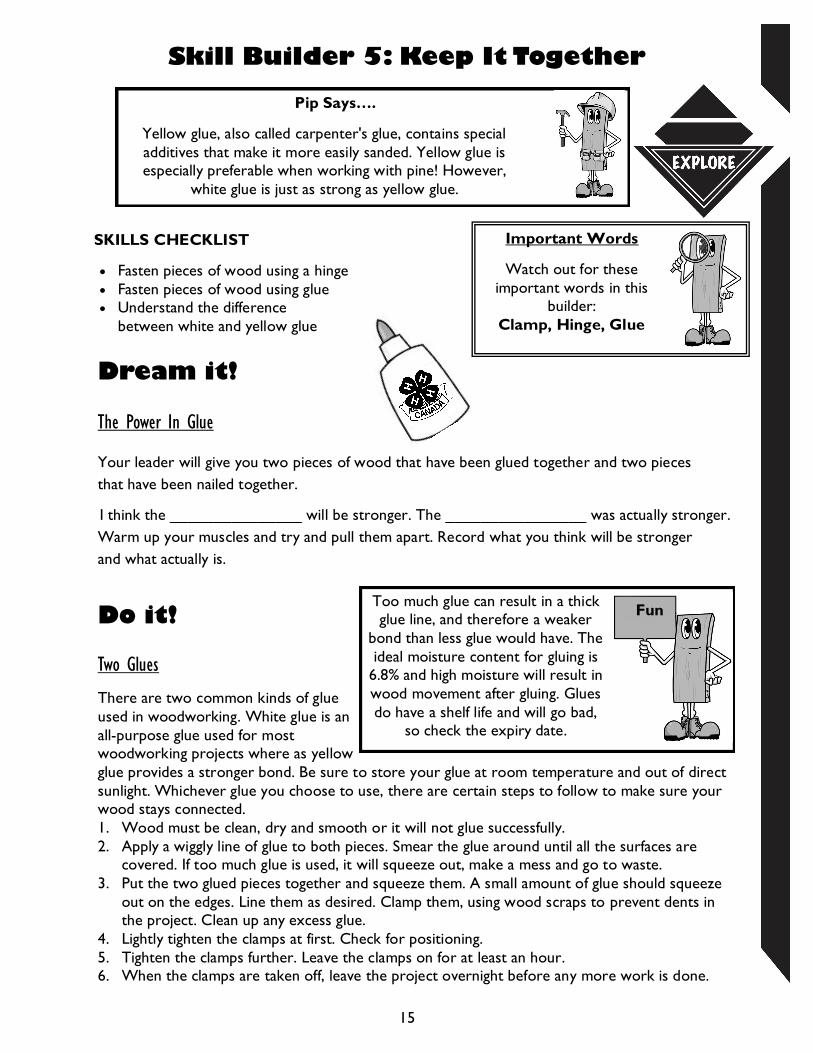
Two Glues
There are two common kinds of glue
used in woodworking. White glue is an
all-purpose glue used for most
woodworking projects where as yellow
glue provides a stronger bond. Be sure to store your glue at room temperature and out of direct
sunlight. Whichever glue you choose to use, there are certain steps to follow to make sure your
wood stays connected.
1. Wood must be clean, dry and smooth or it will not glue successfully.
2. Apply a wiggly line of glue to both pieces. Smear the glue around until all the surfaces are
covered. If too much glue is used, it will squeeze out, make a mess and go to waste.
3. Put the two glued pieces together and squeeze them. A small amount of glue should squeeze
out on the edges. Line them as desired. Clamp them, using wood scraps to prevent dents in
the project. Clean up any excess glue.
4. Lightly tighten the clamps at first. Check for positioning.
5. Tighten the clamps further. Leave the clamps on for at least an hour.
6. When the clamps are taken off, leave the project overnight before any more work is done.
SKILLS CHECKLIST
Fasten pieces of wood using a hinge
Fasten pieces of wood using glue
Understand the difference
between white and yellow glue
15
Pip Says….
Yellow glue, also called carpenter's glue, contains special
additives that make it more easily sanded. Yellow glue is
especially preferable when working with pine! However,
white glue is just as strong as yellow glue.
Important Words
Watch out for these
important words in this
builder:
Clamp, Hinge, Glue
Too much glue can result in a thick
glue line, and therefore a weaker
bond than less glue would have. The
ideal moisture content for gluing is
6.8% and high moisture will result in
wood movement after gluing. Glues
do have a shelf life and will go bad,
so check the expiry date.
Fun
I think the _______________ will be stronger. The ________________ was actually stronger.
Clamping My Style
Try this experiment, using white and yellow glue in steps 1- 3, to see when glue works best.
1. Glue two dirty or greasy pieces of wood together. Clamp and let dry.
2. Glue two clean pieces of wood together. Clamp and let dry.
3. Glue two pieces of painted wood together. Clamp and let dry.
4. Compare the strength of the examples at the next meeting.
How will these joints stand up over time?
5. Practice gluing pieces of wood together and determining how much
glue is enough. Practice cleaning off excess glue with a warm, damp,
clean cloth. Maybe later you can practice staining this piece and see
how the glue affects the staining process.
6. Compare the types of glues that you have. What differences do you notice in how the glue
flows, sticks, smoothes out and bonds?
Circle when glue is stronger: a) Dirty Wood Clean Wood Painted Wood
b) After 24 hours After 1 month
c) White Glue Yellow Glue
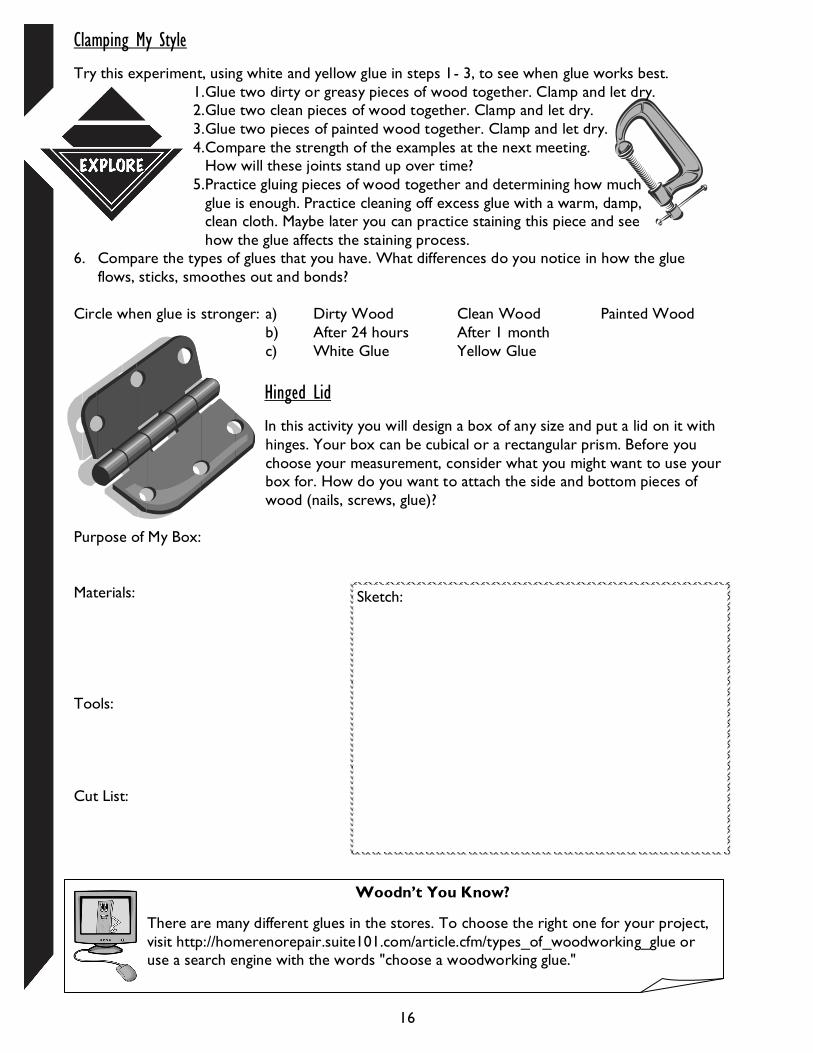
Hinged Lid
In this activity you will design a box of any size and put a lid on it with
hinges. Your box can be cubical or a rectangular prism. Before you
choose your measurement, consider what you might want to use your
box for. How do you want to attach the side and bottom pieces of
wood (nails, screws, glue)?
Purpose of My Box:
Materials:
Tools:
Cut List:
16
Woodn’t You Know?
There are many different glues in the stores. To choose the right one for your project,
visit http://homerenorepair.suite101.com/article.cfm/types_of_woodworking_glue or
use a search engine with the words "choose a woodworking glue."
Sketch:
What’s next?
The final Builder looks at finishing your projects. Wood products last longer when
they have a finish applied to them. This includes sanding it smooth, and applying either
coats of varnish or paint. The Tree Trial activity will require some pre-painting.
Dig it!
What is the best way to attach two pieces of wood - glue, screws, nails, …?
Why do you think this is?
What is the best way to avoid leaving clamp marks on a project?
17
Tools:
Pencil
Coping saw
Hand saw
Rasp
Chisel
Sandpaper 80-grit and 220-grit
Paint brush
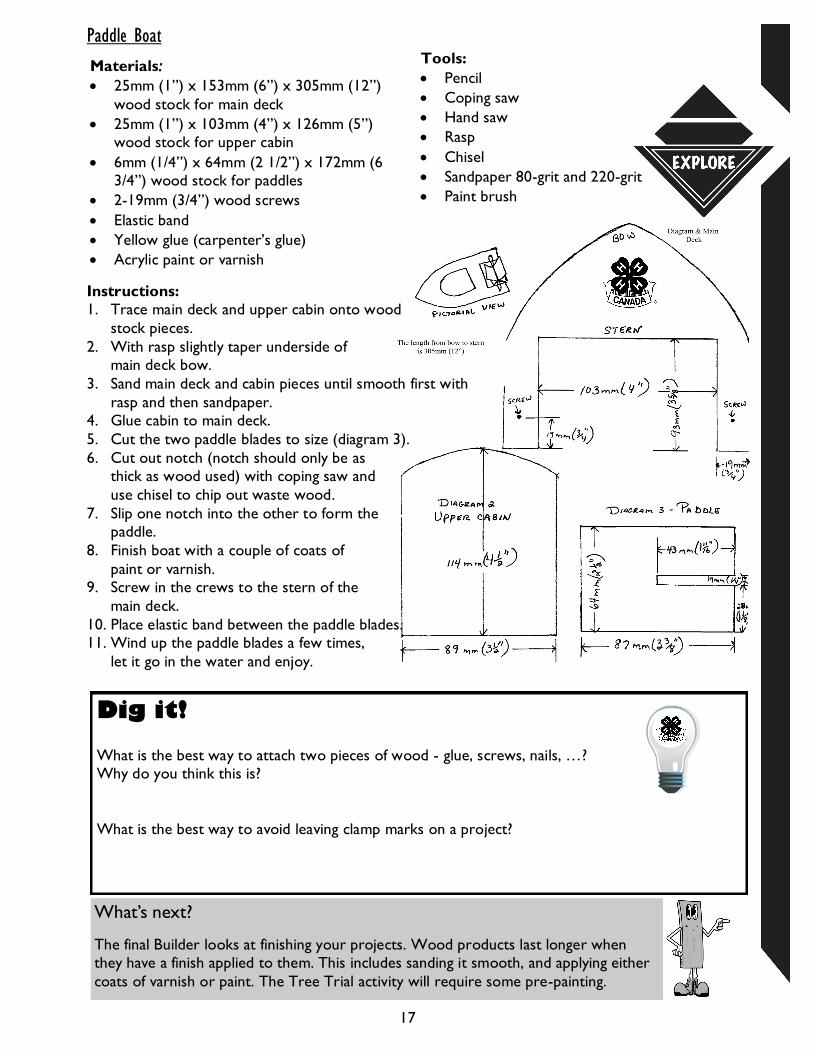
Materials:
25mm (1”) x 153mm (6”) x 305mm (12”)
wood stock for main deck
25mm (1”) x 103mm (4”) x 126mm (5”)
wood stock for upper cabin
6mm (1/4”) x 64mm (2 1/2”) x 172mm (6
3/4”) wood stock for paddles
2-19mm (3/4”) wood screws
Elastic band
Yellow glue (carpenter’s glue)
Acrylic paint or varnish
Paddle Boat
Instructions:
1. Trace main deck and upper cabin onto wood
stock pieces.
2. With rasp slightly taper underside of
main deck bow.
3. Sand main deck and cabin pieces until smooth first with
rasp and then sandpaper.
4. Glue cabin to main deck.
5. Cut the two paddle blades to size (diagram 3).
6. Cut out notch (notch should only be as
thick as wood used) with coping saw and
use chisel to chip out waste wood.
7. Slip one notch into the other to form the
paddle.
8. Finish boat with a couple of coats of
paint or varnish.
9. Screw in the crews to the stern of the
main deck.
10. Place elastic band between the paddle blades.
11. Wind up the paddle blades a few times,
let it go in the water and enjoy.
18
Skill Builder 6: A Strong Finish
Do it!
Final Touch
Dream it!
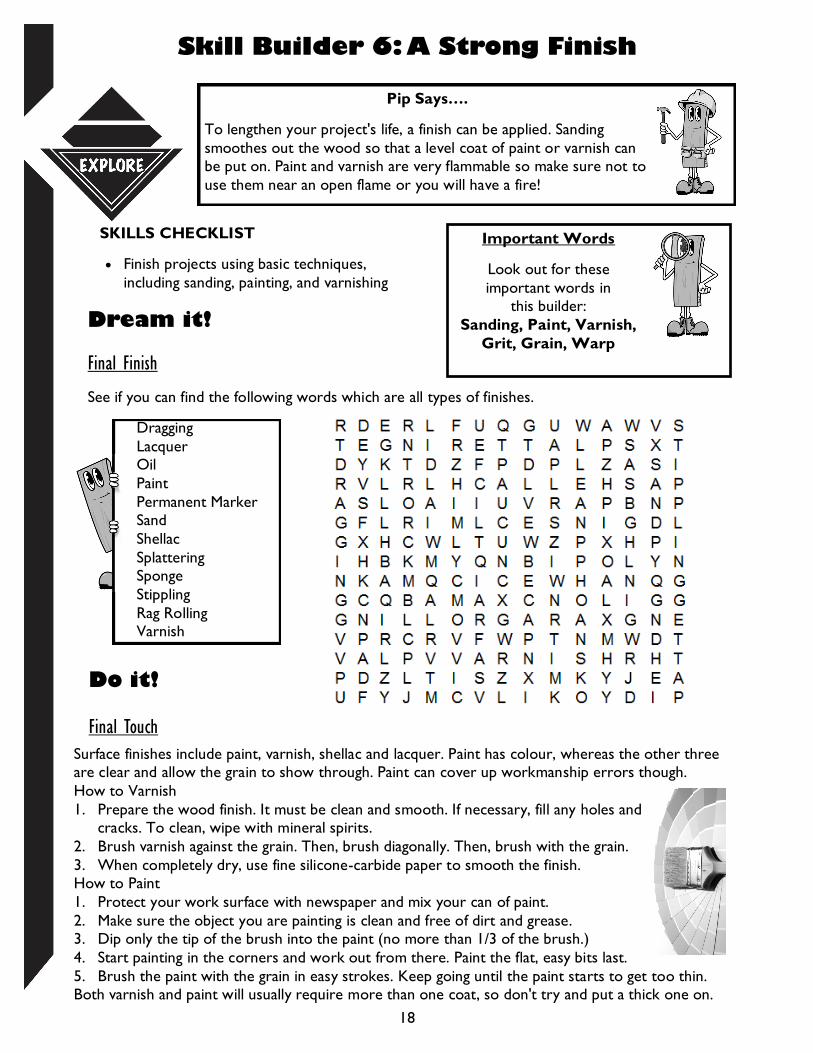
Final Finish
See if you can find the following words which are all types of finishes.
Dragging
Lacquer
Oil
Paint
Permanent Marker
Sand
Shellac
Splattering
Sponge
Stippling
Rag Rolling
Varnish
Pip Says….
To lengthen your project's life, a finish can be applied. Sanding
smoothes out the wood so that a level coat of paint or varnish can
be put on. Paint and varnish are very flammable so make sure not to
use them near an open flame or you will have a fire!
SKILLS CHECKLIST
Finish projects using basic techniques,
including sanding, painting, and varnishing
Important Words
Look out for these
important words in
this builder:
Sanding, Paint, Varnish,
Grit, Grain, Warp
Surface finishes include paint, varnish, shellac and lacquer. Paint has colour, whereas the other three
are clear and allow the grain to show through. Paint can cover up workmanship errors though.
How to Varnish
1. Prepare the wood finish. It must be clean and smooth. If necessary, fill any holes and
cracks. To clean, wipe with mineral spirits.
2. Brush varnish against the grain. Then, brush diagonally. Then, brush with the grain.
3. When completely dry, use fine silicone-carbide paper to smooth the finish.
How to Paint
1. Protect your work surface with newspaper and mix your can of paint.
2. Make sure the object you are painting is clean and free of dirt and grease.
3. Dip only the tip of the brush into the paint (no more than 1/3 of the brush.)
4. Start painting in the corners and work out from there. Paint the flat, easy bits last.
5. Brush the paint with the grain in easy strokes. Keep going until the paint starts to get too thin.
Both varnish and paint will usually require more than one coat, so don't try and put a thick one on.
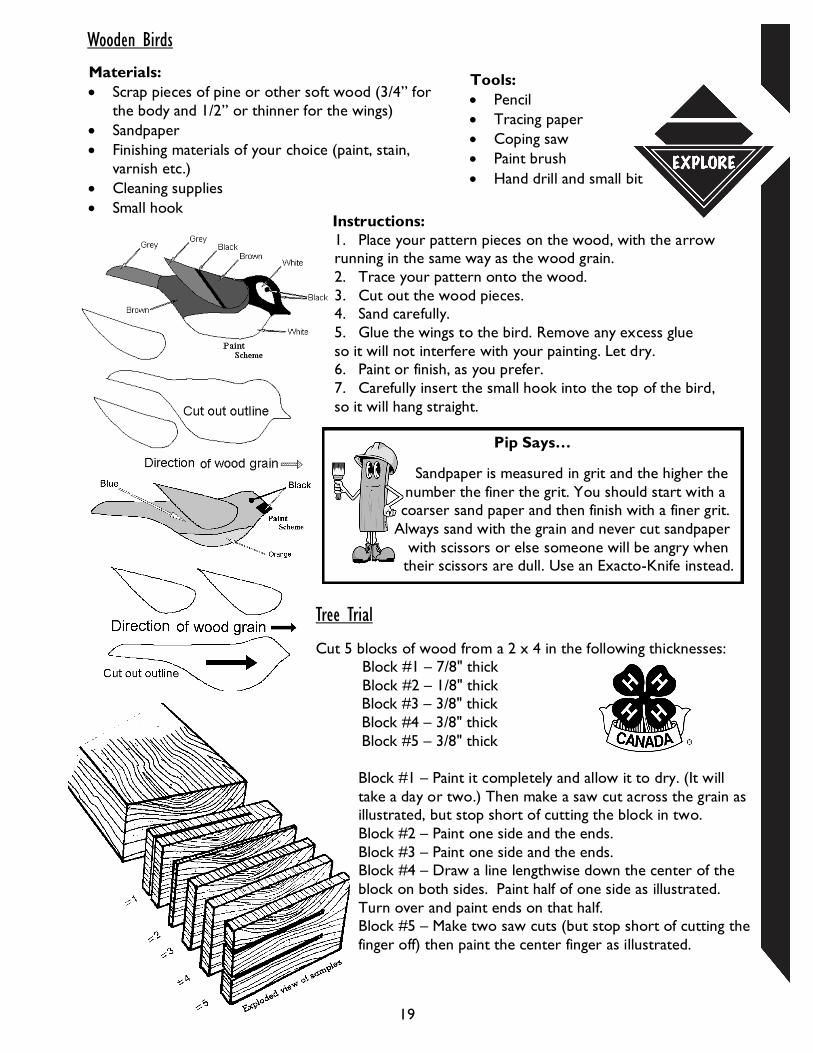
Materials:
Scrap pieces of pine or other soft wood (3/4” for
the body and 1/2” or thinner for the wings)
Sandpaper
Finishing materials of your choice (paint, stain,
varnish etc.)
Cleaning supplies
Small hook
Tree Trial
Cut 5 blocks of wood from a 2 x 4 in the following thicknesses:
Block #1 – 7/8" thick
Block #2 – 1/8" thick
Block #3 – 3/8" thick
Block #4 – 3/8" thick
Block #5 – 3/8" thick
Block #1 – Paint it completely and allow it to dry. (It will
take a day or two.) Then make a saw cut across the grain as
illustrated, but stop short of cutting the block in two.
Block #2 – Paint one side and the ends.
Block #3 – Paint one side and the ends.
Block #4 – Draw a line lengthwise down the center of the
block on both sides. Paint half of one side as illustrated.
Turn over and paint ends on that half.
Block #5 – Make two saw cuts (but stop short of cutting the
finger off) then paint the center finger as illustrated.
Wooden Birds
Instructions:
1. Place your pattern pieces on the wood, with the arrow
running in the same way as the wood grain.
2. Trace your pattern onto the wood.
3. Cut out the wood pieces.
4. Sand carefully.
5. Glue the wings to the bird. Remove any excess glue
so it will not interfere with your painting. Let dry.
6. Paint or finish, as you prefer.
7. Carefully insert the small hook into the top of the bird,
so it will hang straight.
19
Tools:
Pencil
Tracing paper
Coping saw
Paint brush
Hand drill and small bit
Pip Says…
Sandpaper is measured in grit and the higher the
number the finer the grit. You should start with a
coarser sand paper and then finish with a finer grit.
Always sand with the grain and never cut sandpaper
with scissors or else someone will be angry when
their scissors are dull. Use an Exacto-Knife instead.
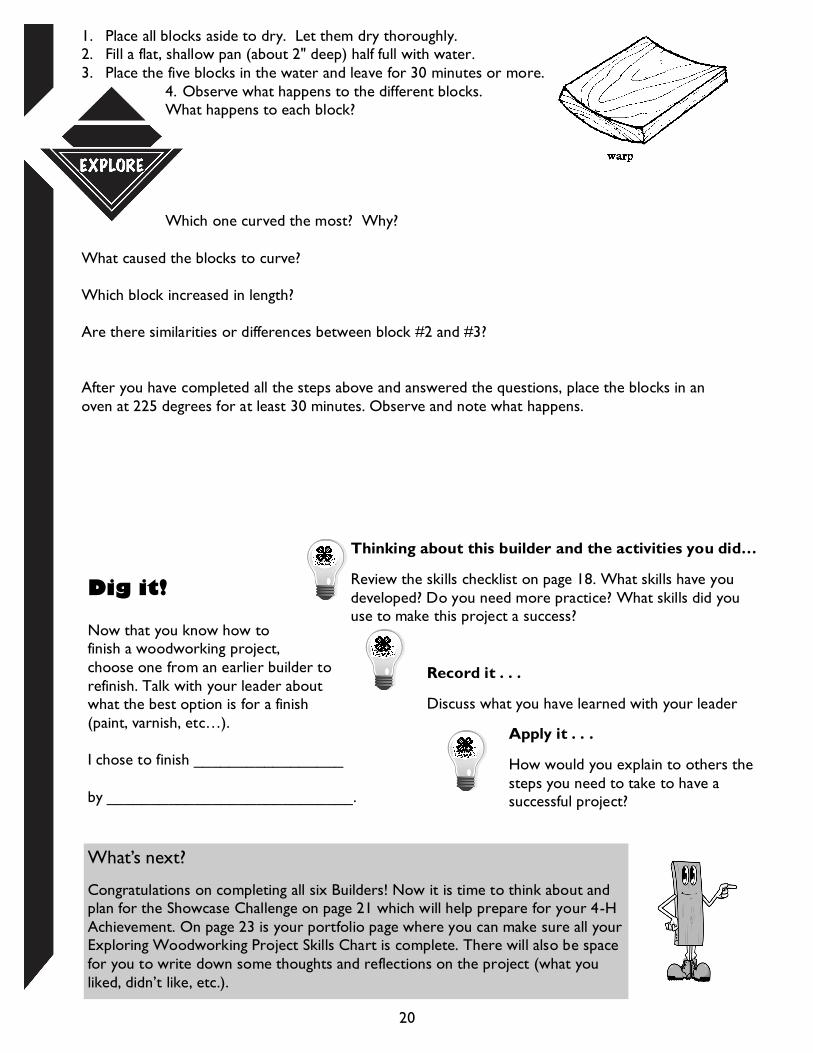
1. Place all blocks aside to dry. Let them dry thoroughly.
2. Fill a flat, shallow pan (about 2" deep) half full with water.
3. Place the five blocks in the water and leave for 30 minutes or more.
4. Observe what happens to the different blocks.
What happens to each block?
Which one curved the most? Why?
What caused the blocks to curve?
Which block increased in length?
Are there similarities or differences between block #2 and #3?
After you have completed all the steps above and answered the questions, place the blocks in an
oven at 225 degrees for at least 30 minutes. Observe and note what happens.
Dig it!
Now that you know how to
finish a woodworking project,
choose one from an earlier builder to
refinish. Talk with your leader about
what the best option is for a finish
(paint, varnish, etc…).
I chose to finish _________________
by ____________________________.
What’s next?
Congratulations on completing all six Builders! Now it is time to think about and
plan for the Showcase Challenge on page 21 which will help prepare for your 4-H
Achievement. On page 23 is your portfolio page where you can make sure all your
Exploring Woodworking Project Skills Chart is complete. There will also be space
for you to write down some thoughts and reflections on the project (what you
liked, didn’t like, etc.).
20
Apply it . . .
How would you explain to others the
steps you need to take to have a
successful project?
Record it . . .
Discuss what you have learned with your leader
Thinking about this builder and the activities you did…
Review the skills checklist on page 18. What skills have you
developed? Do you need more practice? What skills did you
use to make this project a success?
Now that you have finished this project, it is time to think about how you will
share your experiences and knowledge with others. You may put your new skills
to work by helping at a community event or at your club Achievement or
teaching others about your topic. The goal of the Showcase Challenge is to help
highlight your new skills and help you understand how you can use them. It can
be an opportunity to receive feedback from others on your project. So go back
through your manual and find some highlights of your learning (what you are
proud of) and think about how you will “showcase” it.
Showcase Challenge
Bringing it all together!
Demonstrate something you made
or learned about
Make a poster or display
Make a pamphlet Make a computer presentation (e.g.
PowerPoint)
Give a speech Create a picture book
Use your new skills to help with the
Club Achievement plans
Or come up with your own idea. It is
up to you and your leader!
Dream It!
Here are some Showcase Challenge Suggestions:
21
My Showcase Challenge Plan
My showcase idea: __________________________________________________________
________________________________________________________________________
What materials and resources do I need? _________________________________________
________________________________________________________________________
Who do I need to help me? ___________________________________________________
________________________________________________________________________
When do I need to have things done by? _________________________________________
________________________________________________________________________
22
Do It!
Insert or attach your finished product or a photo of you sharing your skills in
your Showcase Challenge.
Dig It!
Now that you have showcased your project skills;
How did your Showcase Challenge go?
What would you do differently next time?
How will you use your new skills in the future? (in different situations?)
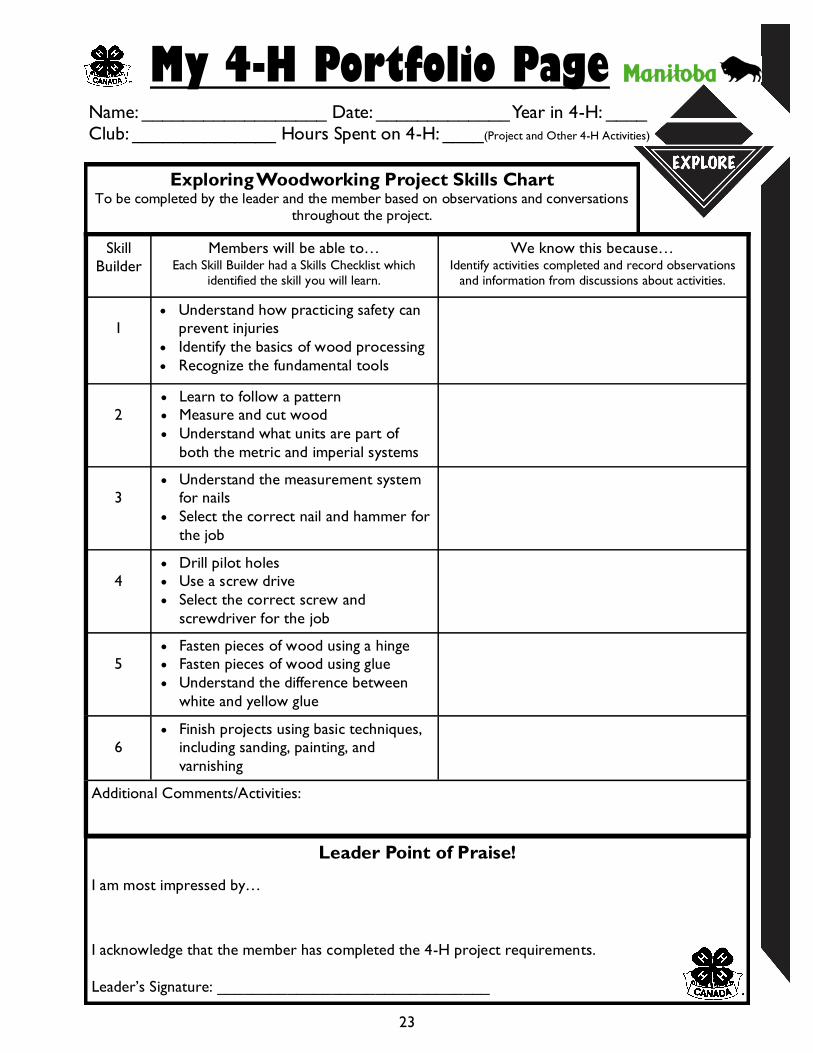
Name: __________________ Date: _____________ Year in 4-H: ____
Club: ______________ Hours Spent on 4-H: ____(Project and Other 4-H Activities)
23
Exploring Woodworking Project Skills Chart To be completed by the leader and the member based on observations and conversations
throughout the project.
Skill
Builder
Members will be able to… Each Skill Builder had a Skills Checklist which
identified the skill you will learn.
We know this because… Identify activities completed and record observations
and information from discussions about activities.
1
Understand how practicing safety can
prevent injuries
Identify the basics of wood processing
Recognize the fundamental tools
2
Learn to follow a pattern
Measure and cut wood
Understand what units are part of
both the metric and imperial systems
3
Understand the measurement system
for nails
Select the correct nail and hammer for
the job
4
Drill pilot holes
Use a screw drive
Select the correct screw and
screwdriver for the job
5
Fasten pieces of wood using a hinge
Fasten pieces of wood using glue
Understand the difference between
white and yellow glue
6
Finish projects using basic techniques,
including sanding, painting, and
varnishing
Additional Comments/Activities:
My 4-H Portfolio Page
Leader Point of Praise!
I am most impressed by…
I acknowledge that the member has completed the 4-H project requirements.
Leader’s Signature: _______________________________
24
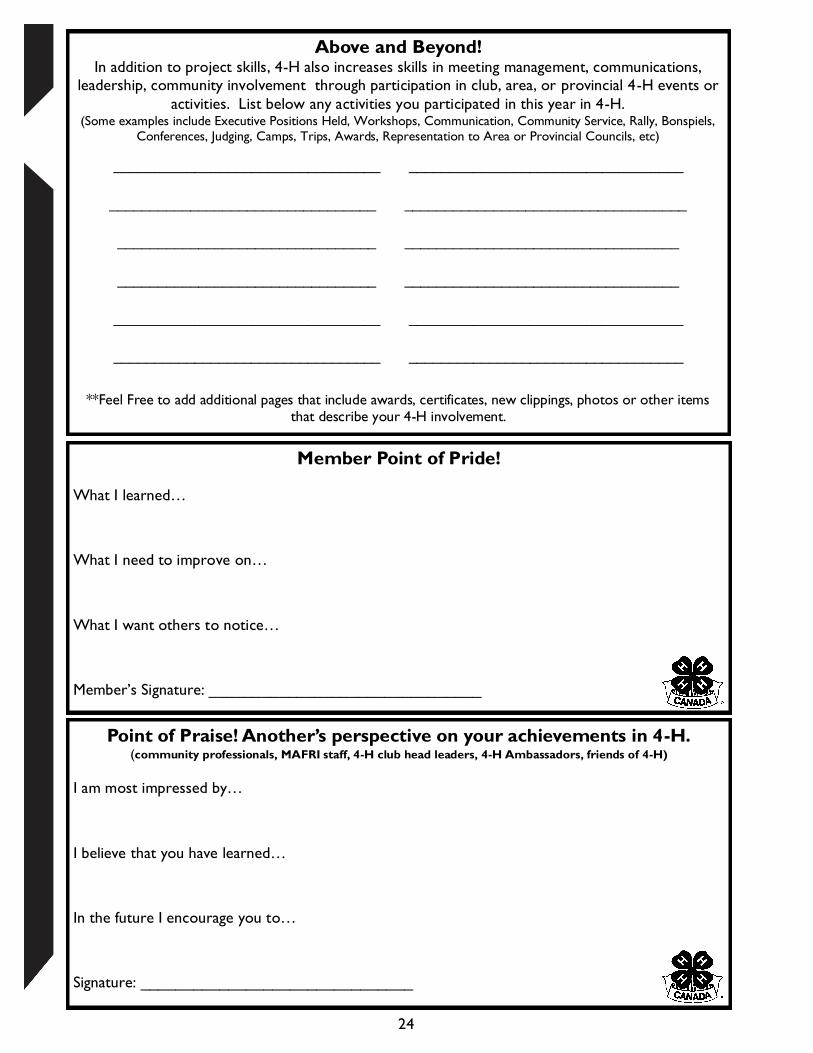
Member Point of Pride!
What I learned…
What I need to improve on…
What I want others to notice…
Member’s Signature: _______________________________
Above and Beyond! In addition to project skills, 4-H also increases skills in meeting management, communications,
leadership, community involvement through participation in club, area, or provincial 4-H events or
activities. List below any activities you participated in this year in 4-H. (Some examples include Executive Positions Held, Workshops, Communication, Community Service, Rally, Bonspiels,
Conferences, Judging, Camps, Trips, Awards, Representation to Area or Provincial Councils, etc)
_________________________________ __________________________________
_________________________________ ___________________________________
________________________________ __________________________________
________________________________ __________________________________
_________________________________ __________________________________
_________________________________ __________________________________
**Feel Free to add additional pages that include awards, certificates, new clippings, photos or other items
that describe your 4-H involvement.
Point of Praise! Another’s perspective on your achievements in 4-H. (community professionals, MAFRI staff, 4-H club head leaders, 4-H Ambassadors, friends of 4-H)
I am most impressed by…
I believe that you have learned…
In the future I encourage you to…
Signature: _______________________________

4-H Achievement
4-H Achievement is… a 4-H club celebration when
members have completed their projects. Achievements
are planned by the club to give recognition to members
and leaders for their accomplishments in their 4-H
projects and club activities.
A 4-H Achievement can take many different formats: from choosing a theme, to
member project displays, to members using their new skills for the event
(entertainment, food, decorating, photographer, etc.), to members presenting their
project to the whole group, the options are endless and open to the creativity of
the members and leaders in each club!
Clubs may also plan their Achievement to promote 4-H to the community or to recognize
sponsors and others who have helped the club.
Members and leaders - be sure to check your project books for the project completion
requirements, so you will be ready for your club’s Achievement celebration!
For more information about 4-H and the many
4-H opportunities available please visit
http://www.gov.mb.ca/agriculture/4-h/
If you have any questions, comments or suggestions
for this or other 4-H projects contact:
Manitoba 4-H Projects
Manitoba Agriculture Food and Rural Initiatives
1129 Queens Avenue
Brandon, MB R7A 1L9
Email: [email protected]
Phone: 204-726-6613
Fax: 204-726-6260
This manual is for educational use only and is not intended as professional advice.
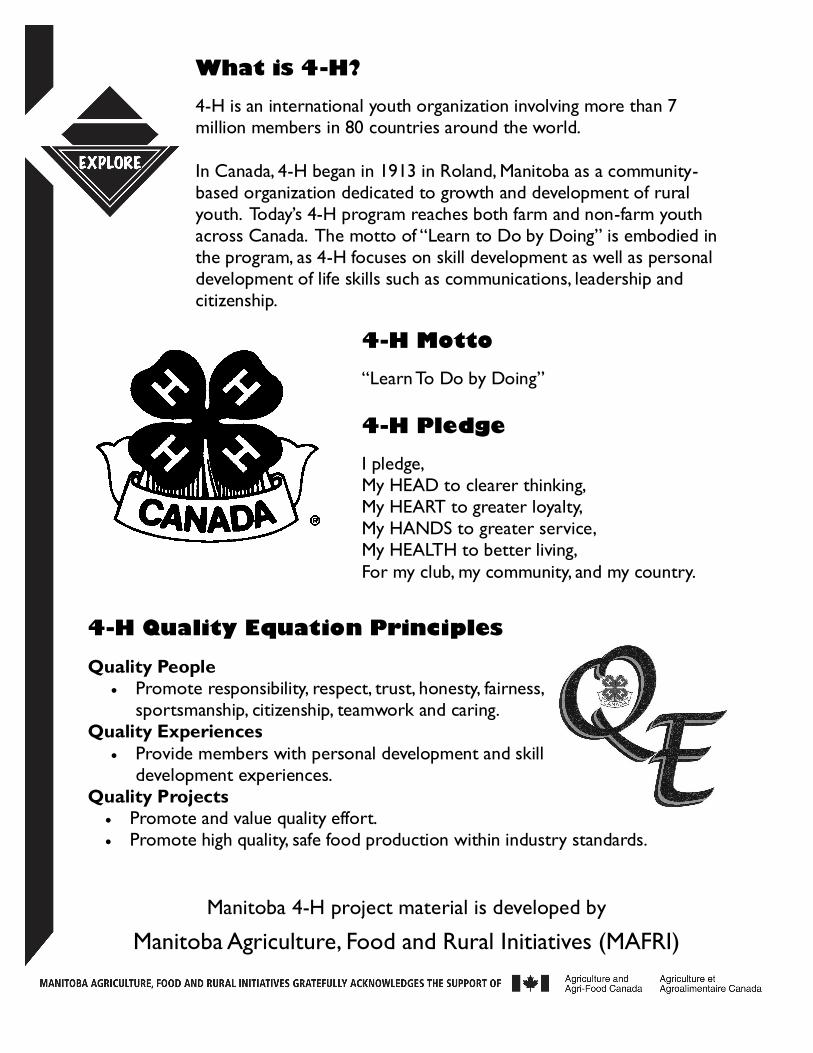
4-H Motto
“Learn To Do by Doing”
4-H Pledge
I pledge,
My HEAD to clearer thinking,
My HEART to greater loyalty,
My HANDS to greater service,
My HEALTH to better living,
For my club, my community, and my country.
What is 4-H?
4-H is an international youth organization involving more than 7
million members in 80 countries around the world.
In Canada, 4-H began in 1913 in Roland, Manitoba as a community-
based organization dedicated to growth and development of rural
youth. Today’s 4-H program reaches both farm and non-farm youth
across Canada. The motto of “Learn to Do by Doing” is embodied in
the program, as 4-H focuses on skill development as well as personal
development of life skills such as communications, leadership and
citizenship.
Manitoba 4-H project material is developed by
Manitoba Agriculture, Food and Rural Initiatives (MAFRI)
4-H Quality Equation Principles
Quality People
Promote responsibility, respect, trust, honesty, fairness,
sportsmanship, citizenship, teamwork and caring.
Quality Experiences
Provide members with personal development and skill
development experiences.
Quality Projects
Promote and value quality effort.
Promote high quality, safe food production within industry standards.