4-h technology series: mastering digital photography · · 2013-06-204-h technology series:...
TRANSCRIPT
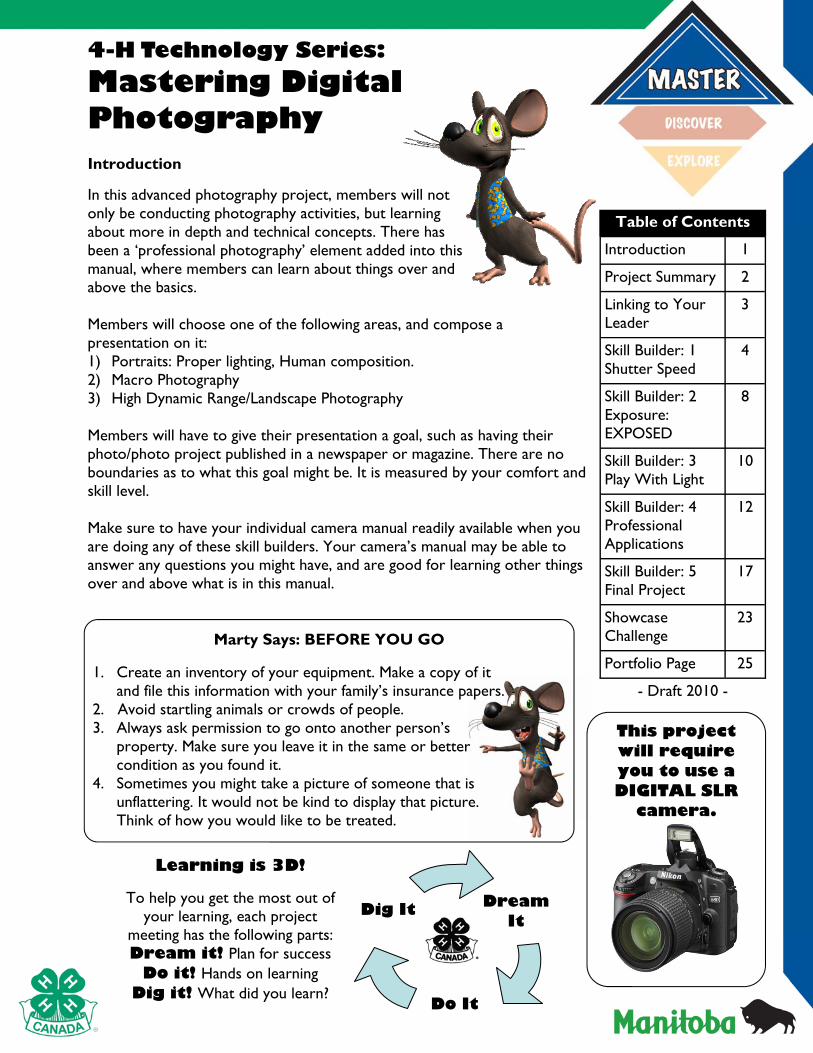
4-H Technology Series:
Mastering Digital Photography Introduction
In this advanced photography project, members will not only be conducting photography activities, but learning about more in depth and technical concepts. There has been a ‘professional photography’ element added into this manual, where members can learn about things over and above the basics. Members will choose one of the following areas, and compose a presentation on it: 1) Portraits: Proper lighting, Human composition. 2) Macro Photography 3) High Dynamic Range/Landscape Photography Members will have to give their presentation a goal, such as having their photo/photo project published in a newspaper or magazine. There are no boundaries as to what this goal might be. It is measured by your comfort and skill level. Make sure to have your individual camera manual readily available when you are doing any of these skill builders. Your camera’s manual may be able to answer any questions you might have, and are good for learning other things over and above what is in this manual.
This project will require you to use a DIGITAL SLR
camera.
Dream It
Do It
Dig It
Learning is 3D!
To help you get the most out of your learning, each project
meeting has the following parts: Dream it! Plan for success
Do it! Hands on learning Dig it! What did you learn?
Marty Says: BEFORE YOU GO
1. Create an inventory of your equipment. Make a copy of it and file this information with your family’s insurance papers.
2. Avoid startling animals or crowds of people. 3. Always ask permission to go onto another person’s
property. Make sure you leave it in the same or better condition as you found it.
4. Sometimes you might take a picture of someone that is unflattering. It would not be kind to display that picture. Think of how you would like to be treated.
Table of Contents
Introduction 1
Project Summary 2
Skill Builder: 1 Shutter Speed
4
Skill Builder: 2 Exposure: EXPOSED
8
Skill Builder: 3 Play With Light
10
Skill Builder: 4 Professional Applications
12
Skill Builder: 5 Final Project
17
Showcase Challenge
23
- Draft 2010 -
Portfolio Page 25
Linking to Your Leader
3
2
What Skills Will You Learn? Each section or Skill Builder (or Builder) in this project has activities that will help your project group learn to do by doing while learning new skills and having fun! To complete this project, you must
Complete the activities in each ‘Builder’ OR a similar activity that focuses on the same skills as you and your leader may plan other activities
Plan and complete the Final Project Complete the project Participate in your club’s Achievement. (See the inside back cover for more
information about 4-H Achievements.)
Members will be able to... Activities Page
Skill Builder
1
Shutter Speed
Adjust for appropriate shutter speed Blur subjects and backgrounds Freeze subjects and backgrounds
Shutter Sight Subject Motion Photo’s
4 4 5
Skill Builder
2
Exposure: EXPOSED
Adjust for proper ISO setting Adjust for proper aperture settings Capture photographs at night
A Camera’s Eye View Exposing Your Camera Painting With Light
8 9 9
Skill Builder
3
Play With Light
Set up an artificially lit scene Take photos using a flash and without flash Set the camera using manual settings
Studio Lighting Setup Using Umbrellas Identifying Sources
10 10 11
Builder 4
Professional Applications
Use professional photography applications Use filters while taking pictures Control the depth of field Use different photographic lenses Manually focus pictures
Equipment Check Applications - Learn to do
by doing
12 16
Builder 5
Final Project Choose a project topic Set SMART Goals Develop a plan Evaluate success
Selecting and Developing a Project Topic
Project Goal Setting 4-H Project Plan Learn to do by doing Evaluating Success
18
19 21 21 22
When you successfully complete your builders, you will showcase what you have learned.
Showcase Challenge /Portfolio
Explain success in using the skills listed above
Showcase Challenge My Portfolio Page
23 25
3
Linking to Your Leader What kind of support should members doing this Master level project have/expect? Supports for the project may include a 4-H club leader, community leaders and MAFRI GO centre/office staff, 4-H leaders, MAFRI staff and community leaders may all be acting as your “coach” or “mentor”.
Mentors are valuable people in our lives that support and encourage us and point us in the right direction. A mentor is a person that invests time, energy and knowledge into contributing to another person’s growth. The majority of mentor relationships are informal and often go undetected. Think for a moment. Can you identify someone who has contributed to your personal growth? Have you been a mentor by being a coach or role model to your peers, younger acquaintances or the adults in your life? You can likely identify mentor relationships that you have already been in but have not necessarily viewed from that perspective.
Mentors can serve a variety of roles in the lives of their mentees (the person they are mentoring). Some of these roles may include:
Listening - Not talking but really listening to what the mentee has to say. Role modeling - Setting an example by behaving and accomplishing tasks appropriately as
opposed to just talking about it. Leading by example is a powerful teaching tool. Building self-confidence - Offering encouragement and appropriate praise can be very
empowering to those receiving it. Providing challenges - Planting the seed of inspiration to strive for and expand on a personal
best through a variety of growth experiences. This is often referred to as coaching. Offering perspective - Helping the mentee to see the big picture. This is often done through
helping the mentee identify their feelings and providing feedback that gives them both accurate information and encouraging them to explore the options available to them.
Places of Mentorship
4-H events
Taking part in Club, Area, Provincial, and National 4-H programs can be great opportunities to meet friends, have fun, and develop leadership skills. Check out www.4h.mb.ca to find information about upcoming events!
Cooperative Youth Leadership Seminar
Cooperative Youth Leadership Seminar offers a chance for Manitoba youth to learn more about the world around them, their peers and most importantly, themselves. Youth will develop leadership skills, and learn about cross cultural issues and values affecting society, global development and the co-operative movement. Co-ops and credit unions throughout the province sponsor youth to attend the seminars. For more information please visit: http://www.manitobayouth.coop/
Mentors
4
SKILLS CHECKLIST
Adjust for appropriate shutter speed
Blur subjects and backgrounds Freeze subjects and backgrounds
Important words
Watch for these important words throughout this builder:
Shutter Speed, Focus, Background
Marty Says…
Have you seen a photograph taken at night that showed long streaks of lights on roads where cars have gone by? How about a picture of water droplets frozen in mid-air? This is all due to the shutter speed.
Dream It!
Shutter Sight
How does a shutter affect a camera’s image? Try this activity to get your eyes seeing like a camera.
1. Keep your eyes closed for a few seconds, then open them very briefly and stare straight ahead, ideally with something moving nearby (for about as long as it takes to count to one) . Close them immediately. Can you remember what you saw?
2. This time open your eyes for about as long as it takes to blink. What did you see?
You probably noticed that the longer your eyes were open, the more detail you could recall. If they were open long enough you may have even noticed something moving. When your eyes only blink open and close quickly, you get a darker and less detailed image, and if something was moving you may have only seen it stationary (if you were really fast).
This is how a camera sees. The longer the shutter (your eyelid) is open, the more light is let in which gives your eyes more information and details to read. When you see movement, your brain constantly updates what you see so that you can see something moving. A camera can only store information not update it,, so moving objects appear as a smear or a blur.
Do It!
Subject Motion
1. Set up your camera and tripod. Using a slow shutter speed, photograph your subject doing an activity within the frame of the shot. Examples of activities that would capture interesting motion include someone typing on the keyboard, doing jumping jacks, writing their name on a piece of paper or a picture of flowing water.
Marty’s Links
At www.slrphotographyguide.com you can learn how use your digital SLR camera to its full potential. This website serves as a free SLR Photography Guide that will help you understand your camera better.
Skill Builder 1: Shutter Speed
5
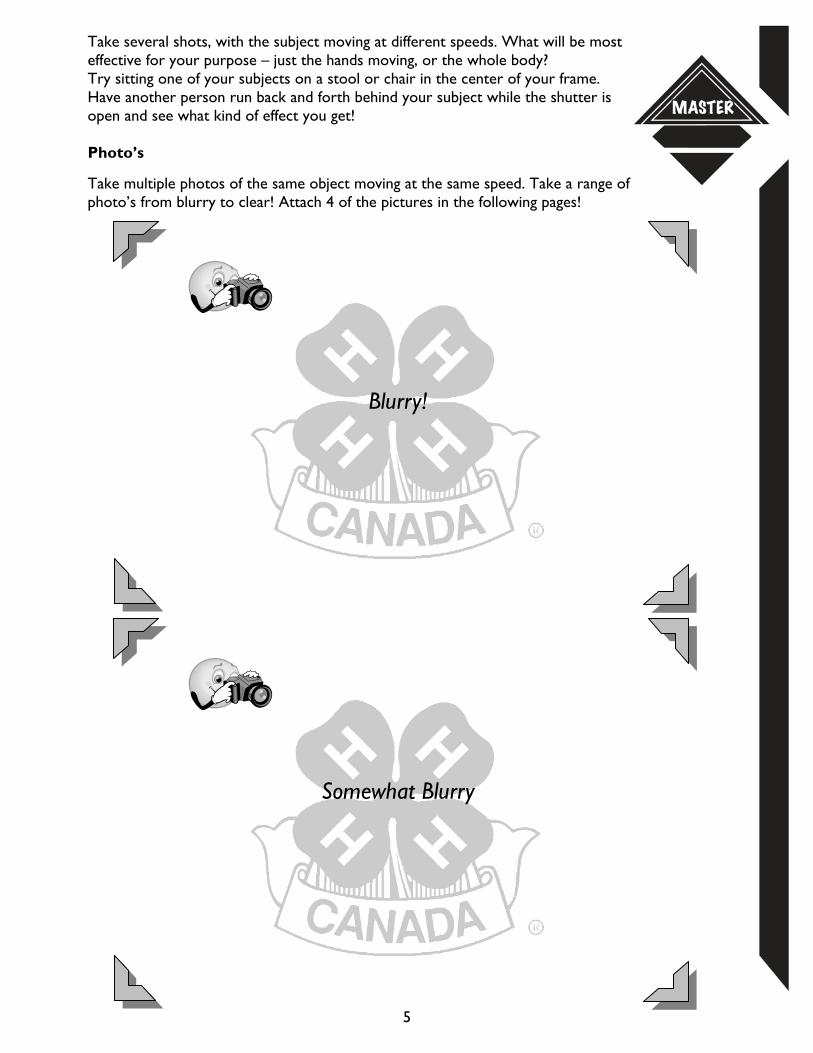
Take several shots, with the subject moving at different speeds. What will be most effective for your purpose – just the hands moving, or the whole body? Try sitting one of your subjects on a stool or chair in the center of your frame. Have another person run back and forth behind your subject while the shutter is open and see what kind of effect you get! Photo’s
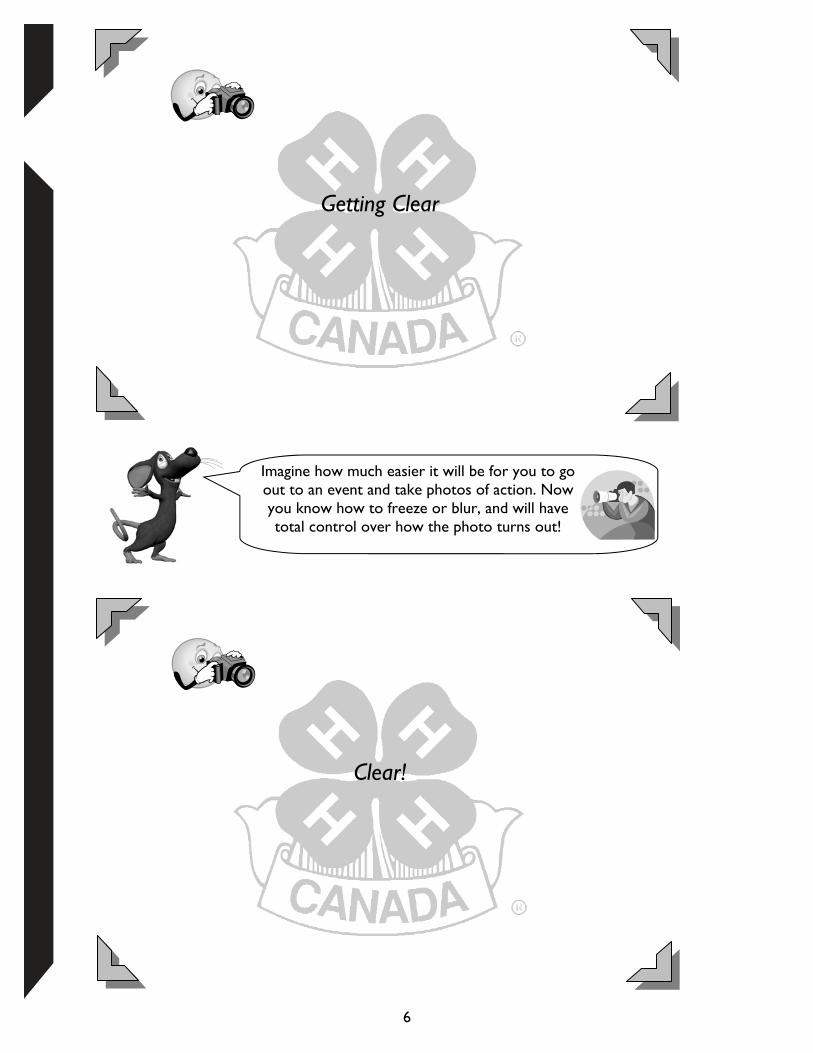
Take multiple photos of the same object moving at the same speed. Take a range of photo’s from blurry to clear! Attach 4 of the pictures in the following pages!
Blurry!
Somewhat Blurry
6
Getting Clear
Clear!
Imagine how much easier it will be for you to go out to an event and take photos of action. Now you know how to freeze or blur, and will have total control over how the photo turns out!
7
There are so many interesting subjects and scenes out there, but
many times people just say “I don’t know what to take pictures of!”.
Here are three ideas that may help you out:
1. Photography involves having a special ‘eye’. This means a good
photographer sees pictures everywhere. No matter where they
go they instinctively look for striking scenes, subjects, or angles.
2. Take outdoor pictures on interesting days using the elements to
ad interest, like wind or rain. Cloudy days are the hardest, but are
sometimes neat to take black and white pictures on. The
afternoon sun gives off the most complimentary light.
3. Play with the camera settings (like the shutter speed). Sometimes
you will find a certain setting that gives the photo an effect that
you like. Remember, if you feel like you made a mistake, you can
always default settings.
Dig it!
Why does the subject in your photo appear to be moving? ______________________________
_________________________________________________________________________
How did the speed of your subject affect the amount of motion blur? _____________________
_________________________________________________________________________
In what other situations would this technique work well?_______________________________
_________________________________________________________________________
What’s Next
In the next builder, you will talk about the effect exposure has on your pictures.
Marty’s Links
Check out: www.betterphoto.com/photography-for-kids.asp This section at BetterPhoto.com is dedicated to kids and young adults interested in the art of taking pictures.
Whether you have been snapping pictures for a while or you are just picking up a camera for the first time, this site is for you!
8
SKILLS CHECKLIST
Adjust for proper ISO setting Adjust for proper aperture settings Capture photographs at night
Important words
Watch for these important words throughout this
builder: ISO, Exposure, Aperture, F-Stop
Marty Says…
This builder will help you see how you can adjust your camera to change the way that it responds to light, and how you can use this technique to take pictures that would be very difficult to capture otherwise.
Dream it!
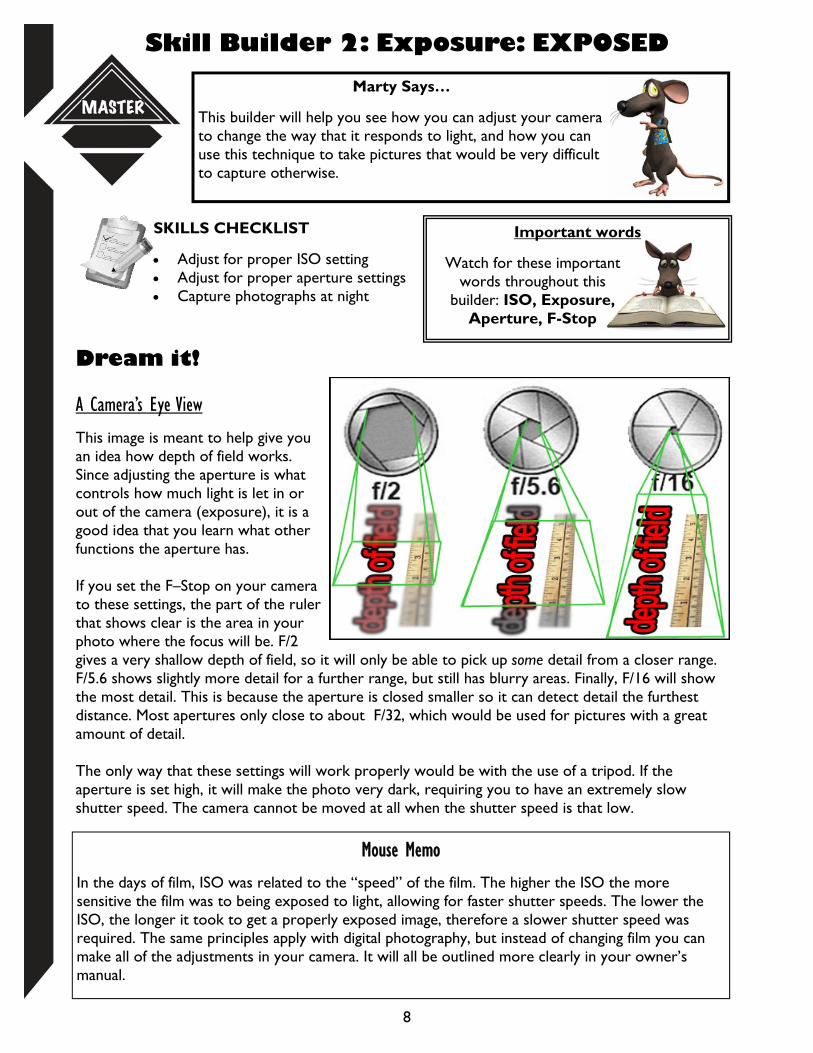
A Camera’s Eye View
This image is meant to help give you an idea how depth of field works. Since adjusting the aperture is what controls how much light is let in or out of the camera (exposure), it is a good idea that you learn what other functions the aperture has. If you set the F–Stop on your camera to these settings, the part of the ruler that shows clear is the area in your photo where the focus will be. F/2 gives a very shallow depth of field, so it will only be able to pick up some detail from a closer range. F/5.6 shows slightly more detail for a further range, but still has blurry areas. Finally, F/16 will show the most detail. This is because the aperture is closed smaller so it can detect detail the furthest distance. Most apertures only close to about F/32, which would be used for pictures with a great amount of detail. The only way that these settings will work properly would be with the use of a tripod. If the aperture is set high, it will make the photo very dark, requiring you to have an extremely slow shutter speed. The camera cannot be moved at all when the shutter speed is that low.
Skill Builder 2: Exposure: EXPOSED
Mouse Memo
In the days of film, ISO was related to the “speed” of the film. The higher the ISO the more sensitive the film was to being exposed to light, allowing for faster shutter speeds. The lower the ISO, the longer it took to get a properly exposed image, therefore a slower shutter speed was required. The same principles apply with digital photography, but instead of changing film you can make all of the adjustments in your camera. It will all be outlined more clearly in your owner’s manual.
9
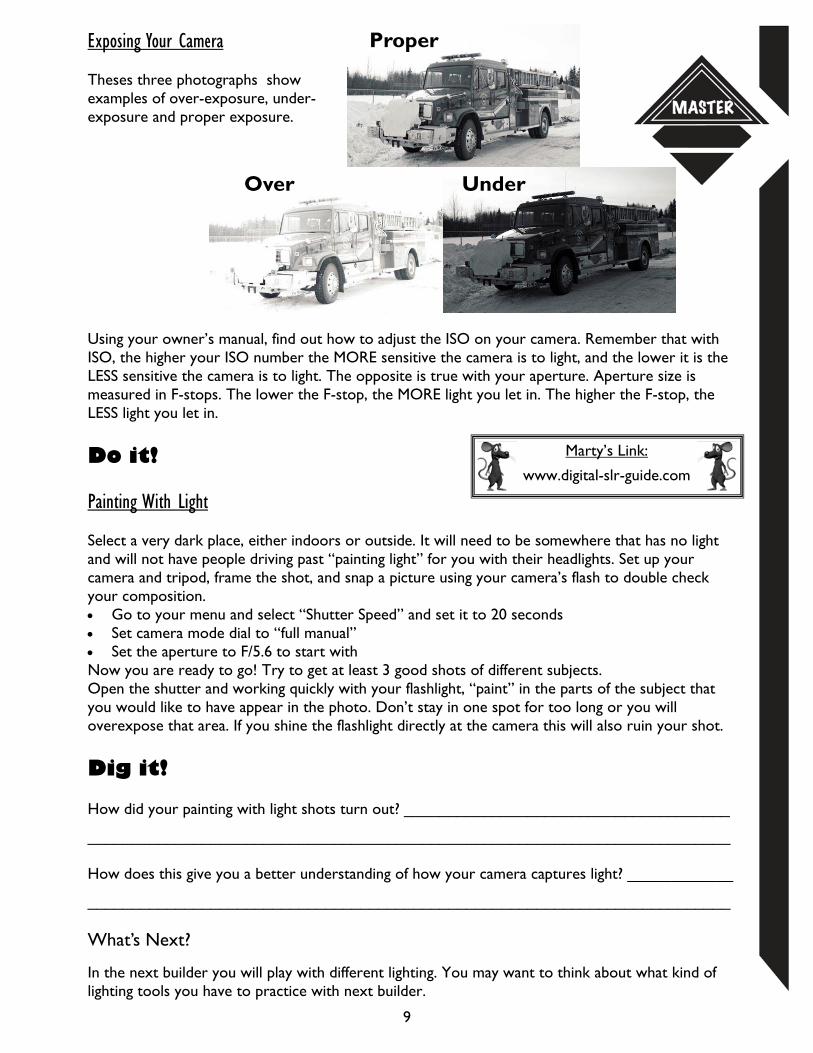
Exposing Your Camera Theses three photographs show examples of over-exposure, under-exposure and proper exposure. Using your owner’s manual, find out how to adjust the ISO on your camera. Remember that with ISO, the higher your ISO number the MORE sensitive the camera is to light, and the lower it is the LESS sensitive the camera is to light. The opposite is true with your aperture. Aperture size is measured in F-stops. The lower the F-stop, the MORE light you let in. The higher the F-stop, the LESS light you let in.
Do it!
Painting With Light Select a very dark place, either indoors or outside. It will need to be somewhere that has no light and will not have people driving past “painting light” for you with their headlights. Set up your camera and tripod, frame the shot, and snap a picture using your camera’s flash to double check your composition. Go to your menu and select “Shutter Speed” and set it to 20 seconds Set camera mode dial to “full manual” Set the aperture to F/5.6 to start with Now you are ready to go! Try to get at least 3 good shots of different subjects. Open the shutter and working quickly with your flashlight, “paint” in the parts of the subject that you would like to have appear in the photo. Don’t stay in one spot for too long or you will overexpose that area. If you shine the flashlight directly at the camera this will also ruin your shot.
Dig it! How did your painting with light shots turn out? _____________________________________
_________________________________________________________________________ How does this give you a better understanding of how your camera captures light? ____________
_________________________________________________________________________ What’s Next?
In the next builder you will play with different lighting. You may want to think about what kind of lighting tools you have to practice with next builder.
Marty’s Link:
www.digital-slr-guide.com
Over Under
Proper
10
Skill Builder 3: Play With Light
SKILLS CHECKLIST
Set up an artificially lit scene Take photos using a flash and without
flash Set the camera using manual settings
Important words
Watch for these important words throughout this
builder: Portrait, Light Source, Subject
Dream It!
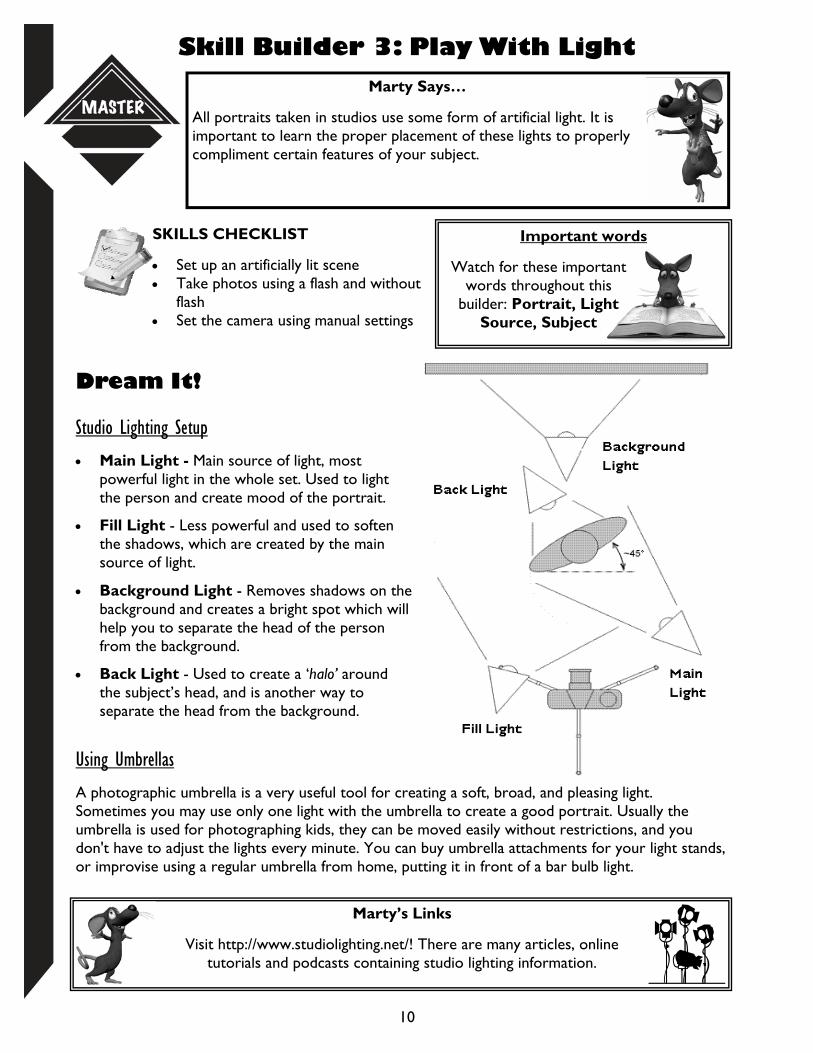
Studio Lighting Setup
Main Light - Main source of light, most powerful light in the whole set. Used to light the person and create mood of the portrait.
Fill Light - Less powerful and used to soften the shadows, which are created by the main source of light.
Background Light - Removes shadows on the background and creates a bright spot which will help you to separate the head of the person from the background.
Back Light - Used to create a ‘halo’ around the subject’s head, and is another way to separate the head from the background.
Using Umbrellas
A photographic umbrella is a very useful tool for creating a soft, broad, and pleasing light. Sometimes you may use only one light with the umbrella to create a good portrait. Usually the umbrella is used for photographing kids, they can be moved easily without restrictions, and you don't have to adjust the lights every minute. You can buy umbrella attachments for your light stands, or improvise using a regular umbrella from home, putting it in front of a bar bulb light.
Marty’s Links
Visit http://www.studiolighting.net/! There are many articles, online tutorials and podcasts containing studio lighting information.
Marty Says…
All portraits taken in studios use some form of artificial light. It is important to learn the proper placement of these lights to properly compliment certain features of your subject.
11
Do it!
Identifying Light Sources
In some cases, the main light and the key light may be switched around to give the photograph a certain look, or depending upon which direction the subject is facing. Remember: Whichever side the main light is on, the back light must face it from the opposite side. Look through personal pictures that you have, or find some online. Identifying which light is hitting the object. Attach one of the photo’s below and label all the types of light that you can identify.
Dig it! What did you observe? Do you prefer working alone, or would this be easier with a group? How will you go about setting up lights in the future?
Get Up And Set Up Take what you have learned to try and set up your own lighting system. You’re not expected to have a professional lighting kit, but any light sources will do. Try lamps, someone holding a flashlight, anything you want to achieve an interesting portrait. Remember, your background should be plain if you are using a Background Light.
Mouse Memo
If you use a flash when you are using other light sources, the picture will have a washed out flat look. You do not need to use the factory flash on your camera at all when doing this activity. Some photographers use a flash diffuser which is an attachment for the camera that can help soften the flash.
Marty Says…
Remember, default camera settings are always
1/125 , F/5.6
12
Skill Builder 4: Professional Applications Marty Says…
Once you have decided whether photography is for you or not, you might decide to get into more of the in depth methods. This skill builder is to help members learn and ‘master’ applications on the professional side of things.
Dream it!
Equipment Check
What equipment do you have? What equipment can you borrow? Make an inventory list of your camera, lenses, filters and camera accessories. Creating an inventory can help you recognize what you have and allow you to make decisions about what type of photo’s you can take. Also, the inventory can be used for insurances purposes. Finally, creating a list of all your supplies can help you realize what you might want to purchase. Do you have a wish list? What is white balance?
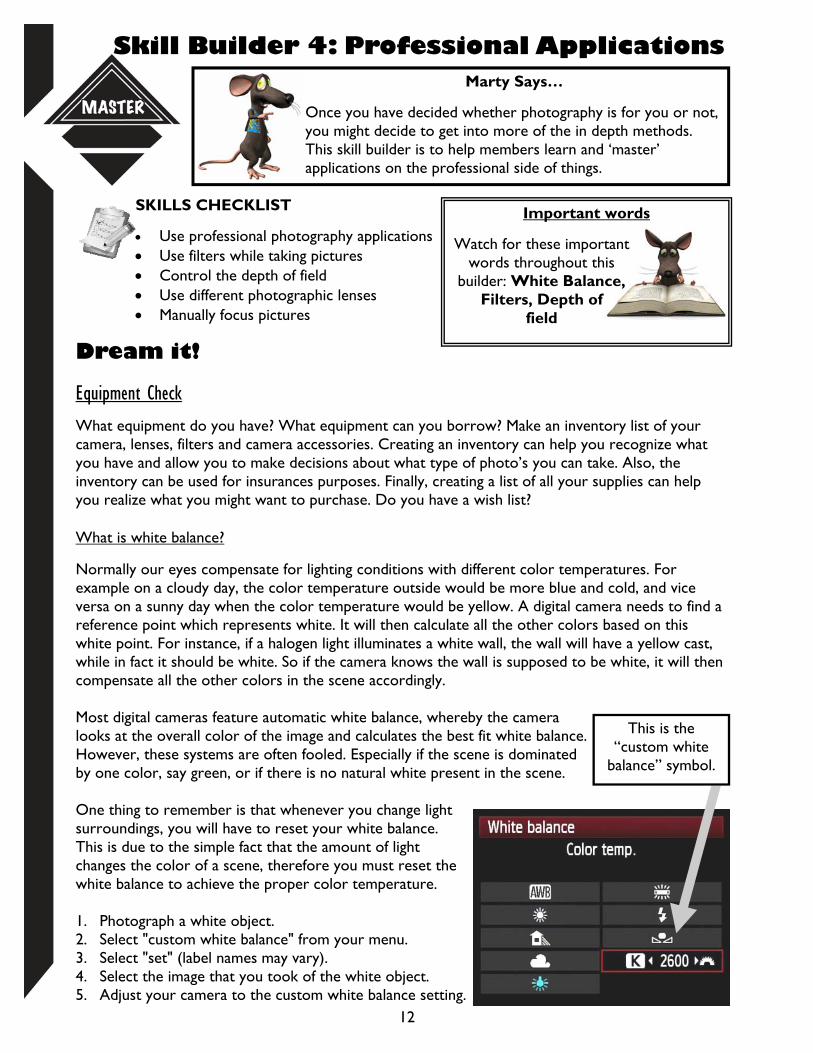
Normally our eyes compensate for lighting conditions with different color temperatures. For example on a cloudy day, the color temperature outside would be more blue and cold, and vice versa on a sunny day when the color temperature would be yellow. A digital camera needs to find a reference point which represents white. It will then calculate all the other colors based on this white point. For instance, if a halogen light illuminates a white wall, the wall will have a yellow cast, while in fact it should be white. So if the camera knows the wall is supposed to be white, it will then compensate all the other colors in the scene accordingly. Most digital cameras feature automatic white balance, whereby the camera looks at the overall color of the image and calculates the best fit white balance. However, these systems are often fooled. Especially if the scene is dominated by one color, say green, or if there is no natural white present in the scene. One thing to remember is that whenever you change light surroundings, you will have to reset your white balance. This is due to the simple fact that the amount of light changes the color of a scene, therefore you must reset the white balance to achieve the proper color temperature. 1. Photograph a white object. 2. Select "custom white balance" from your menu. 3. Select "set" (label names may vary). 4. Select the image that you took of the white object. 5. Adjust your camera to the custom white balance setting.
SKILLS CHECKLIST
Use professional photography applications Use filters while taking pictures Control the depth of field Use different photographic lenses Manually focus pictures
Important words
Watch for these important words throughout this
builder: White Balance, Filters, Depth of
field
This is the “custom white
balance” symbol.
13
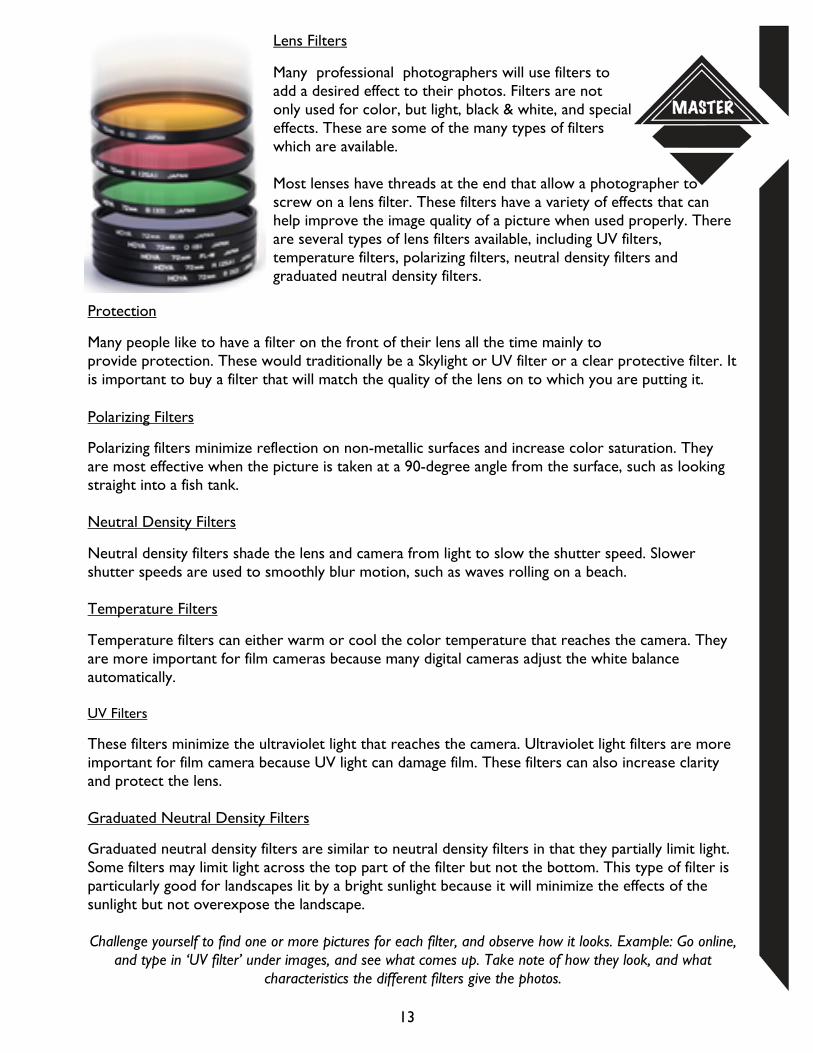
Protection
Many people like to have a filter on the front of their lens all the time mainly to provide protection. These would traditionally be a Skylight or UV filter or a clear protective filter. It is important to buy a filter that will match the quality of the lens on to which you are putting it. Polarizing Filters
Polarizing filters minimize reflection on non-metallic surfaces and increase color saturation. They are most effective when the picture is taken at a 90-degree angle from the surface, such as looking straight into a fish tank. Neutral Density Filters
Neutral density filters shade the lens and camera from light to slow the shutter speed. Slower shutter speeds are used to smoothly blur motion, such as waves rolling on a beach. Temperature Filters
Temperature filters can either warm or cool the color temperature that reaches the camera. They are more important for film cameras because many digital cameras adjust the white balance automatically. UV Filters
These filters minimize the ultraviolet light that reaches the camera. Ultraviolet light filters are more important for film camera because UV light can damage film. These filters can also increase clarity and protect the lens. Graduated Neutral Density Filters
Graduated neutral density filters are similar to neutral density filters in that they partially limit light. Some filters may limit light across the top part of the filter but not the bottom. This type of filter is particularly good for landscapes lit by a bright sunlight because it will minimize the effects of the sunlight but not overexpose the landscape. Challenge yourself to find one or more pictures for each filter, and observe how it looks. Example: Go online,
and type in ‘UV filter’ under images, and see what comes up. Take note of how they look, and what characteristics the different filters give the photos.
Lens Filters
Many professional photographers will use filters to add a desired effect to their photos. Filters are not only used for color, but light, black & white, and special effects. These are some of the many types of filters which are available. Most lenses have threads at the end that allow a photographer to screw on a lens filter. These filters have a variety of effects that can help improve the image quality of a picture when used properly. There are several types of lens filters available, including UV filters, temperature filters, polarizing filters, neutral density filters and graduated neutral density filters.
14
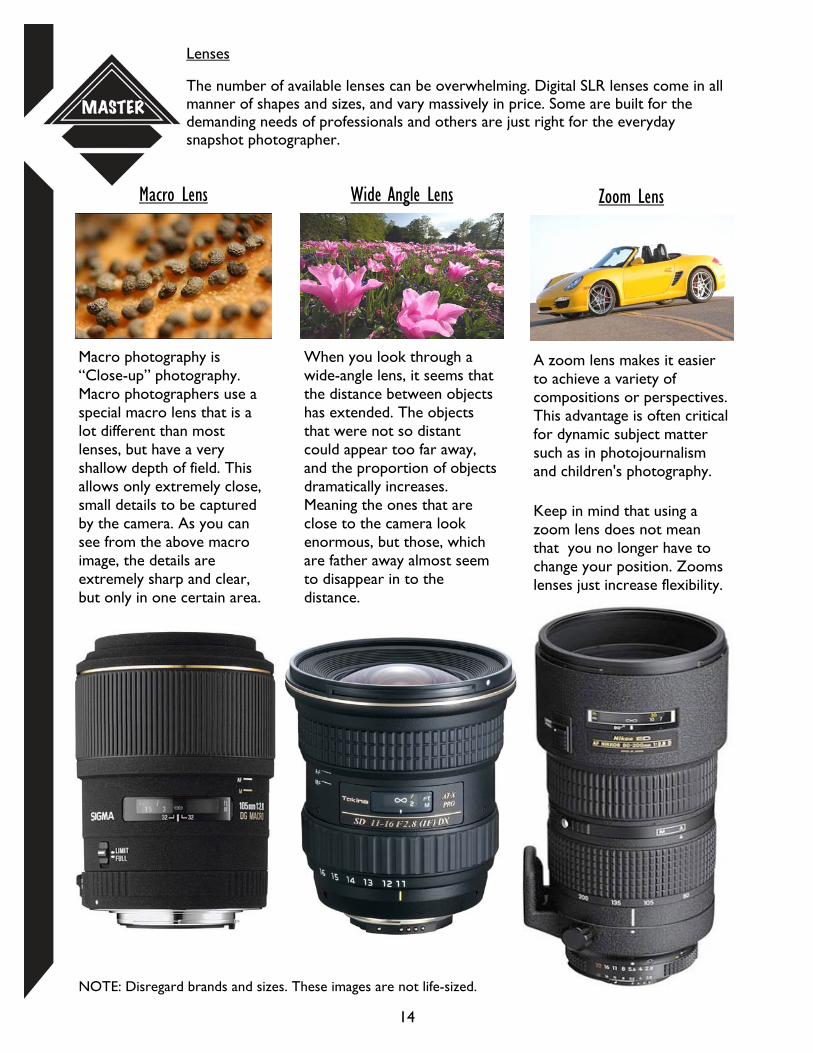
Lenses
The number of available lenses can be overwhelming. Digital SLR lenses come in all manner of shapes and sizes, and vary massively in price. Some are built for the demanding needs of professionals and others are just right for the everyday snapshot photographer.
Macro Lens Wide Angle Lens
Macro photography is “Close-up” photography. Macro photographers use a special macro lens that is a lot different than most lenses, but have a very shallow depth of field. This allows only extremely close, small details to be captured by the camera. As you can see from the above macro image, the details are extremely sharp and clear, but only in one certain area.
When you look through a wide-angle lens, it seems that the distance between objects has extended. The objects that were not so distant could appear too far away, and the proportion of objects dramatically increases. Meaning the ones that are close to the camera look enormous, but those, which are father away almost seem to disappear in to the distance.
A zoom lens makes it easier to achieve a variety of compositions or perspectives. This advantage is often critical for dynamic subject matter such as in photojournalism and children's photography. Keep in mind that using a zoom lens does not mean that you no longer have to change your position. Zooms lenses just increase flexibility.
Zoom Lens
NOTE: Disregard brands and sizes. These images are not life-sized.
15
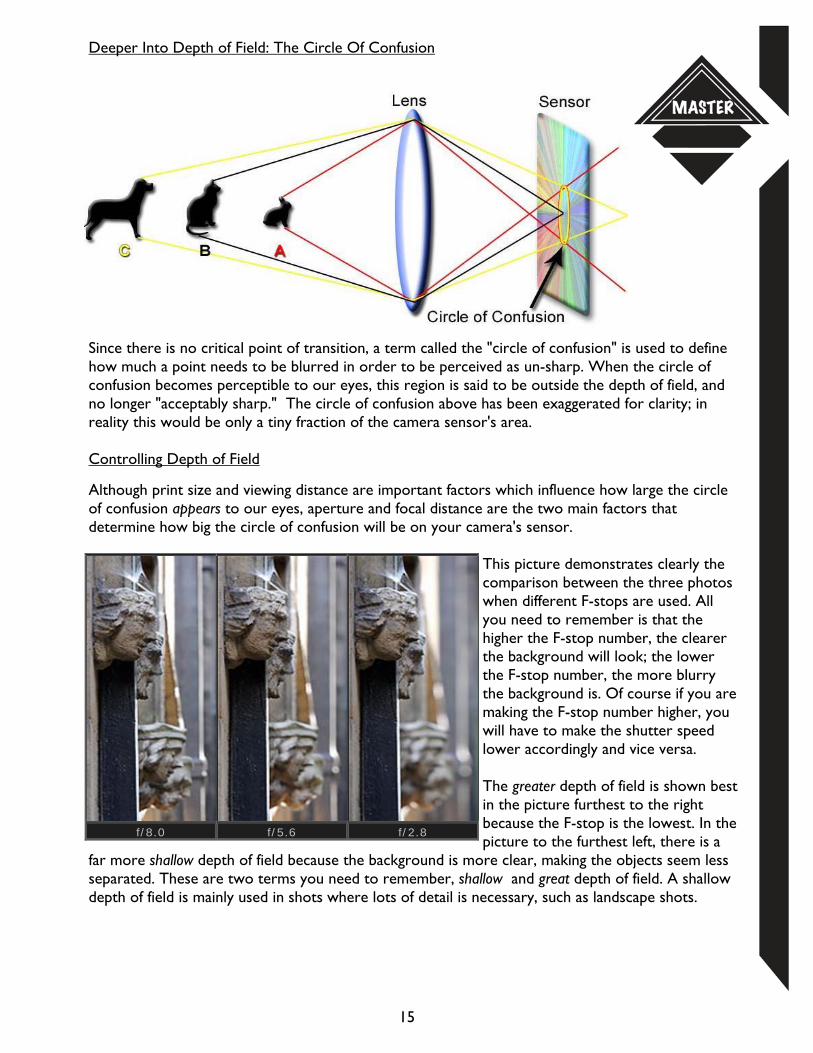
Deeper Into Depth of Field: The Circle Of Confusion
Since there is no critical point of transition, a term called the "circle of confusion" is used to define how much a point needs to be blurred in order to be perceived as un-sharp. When the circle of confusion becomes perceptible to our eyes, this region is said to be outside the depth of field, and no longer "acceptably sharp." The circle of confusion above has been exaggerated for clarity; in reality this would be only a tiny fraction of the camera sensor's area. Controlling Depth of Field
Although print size and viewing distance are important factors which influence how large the circle of confusion appears to our eyes, aperture and focal distance are the two main factors that determine how big the circle of confusion will be on your camera's sensor.
This picture demonstrates clearly the comparison between the three photos when different F-stops are used. All you need to remember is that the higher the F-stop number, the clearer the background will look; the lower the F-stop number, the more blurry the background is. Of course if you are making the F-stop number higher, you will have to make the shutter speed lower accordingly and vice versa. The greater depth of field is shown best in the picture furthest to the right because the F-stop is the lowest. In the picture to the furthest left, there is a
far more shallow depth of field because the background is more clear, making the objects seem less separated. These are two terms you need to remember, shallow and great depth of field. A shallow depth of field is mainly used in shots where lots of detail is necessary, such as landscape shots.
f/8.0 f/5.6 f/2.8
16
Do it!
Applications - Learn to Do By Doing
Take a series of pictures but play with: The filters The field of depth The lens The focus And, the aperture See what types of interesting looks you can come up with! Have a series of pictures (2-3) to showcase each of the applications listed above that you are manipulating. Label these photo’s and keep them with your manual.
Focus
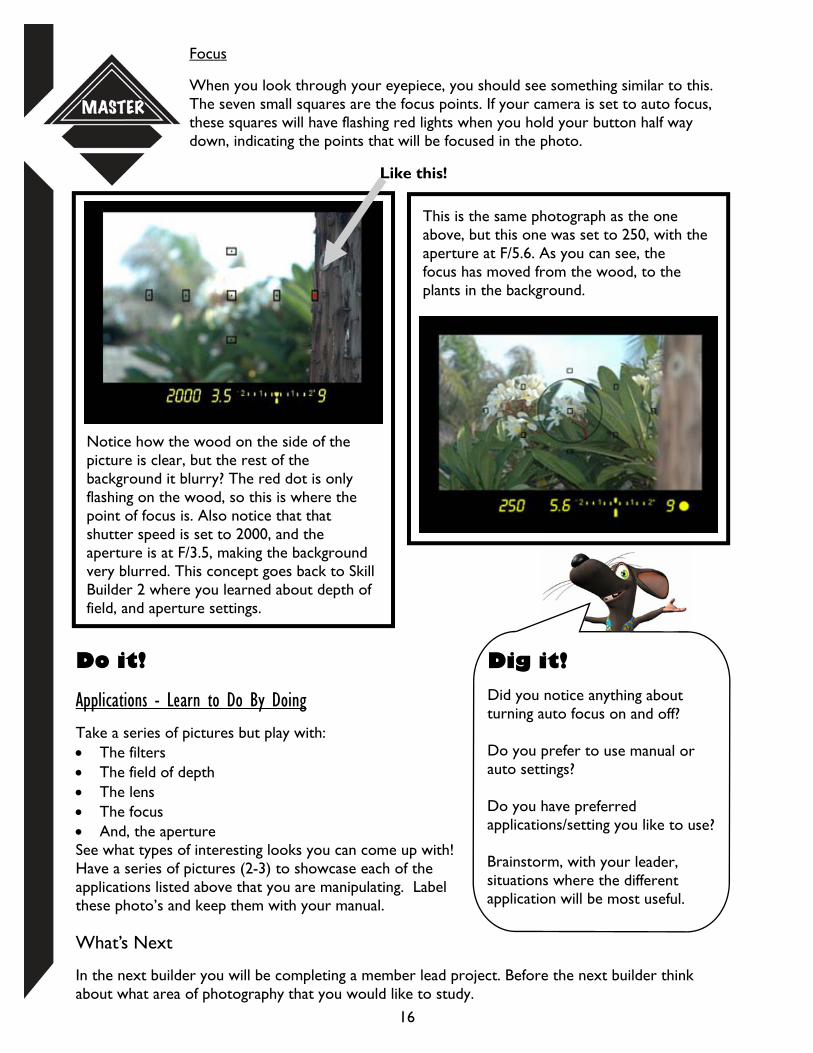
When you look through your eyepiece, you should see something similar to this. The seven small squares are the focus points. If your camera is set to auto focus, these squares will have flashing red lights when you hold your button half way down, indicating the points that will be focused in the photo.
Notice how the wood on the side of the picture is clear, but the rest of the background it blurry? The red dot is only flashing on the wood, so this is where the point of focus is. Also notice that that shutter speed is set to 2000, and the aperture is at F/3.5, making the background very blurred. This concept goes back to Skill Builder 2 where you learned about depth of field, and aperture settings.
Like this!
This is the same photograph as the one above, but this one was set to 250, with the aperture at F/5.6. As you can see, the focus has moved from the wood, to the plants in the background.
Dig it!
Did you notice anything about turning auto focus on and off? Do you prefer to use manual or auto settings? Do you have preferred applications/setting you like to use? Brainstorm, with your leader, situations where the different application will be most useful.
What’s Next
In the next builder you will be completing a member lead project. Before the next builder think about what area of photography that you would like to study.
17
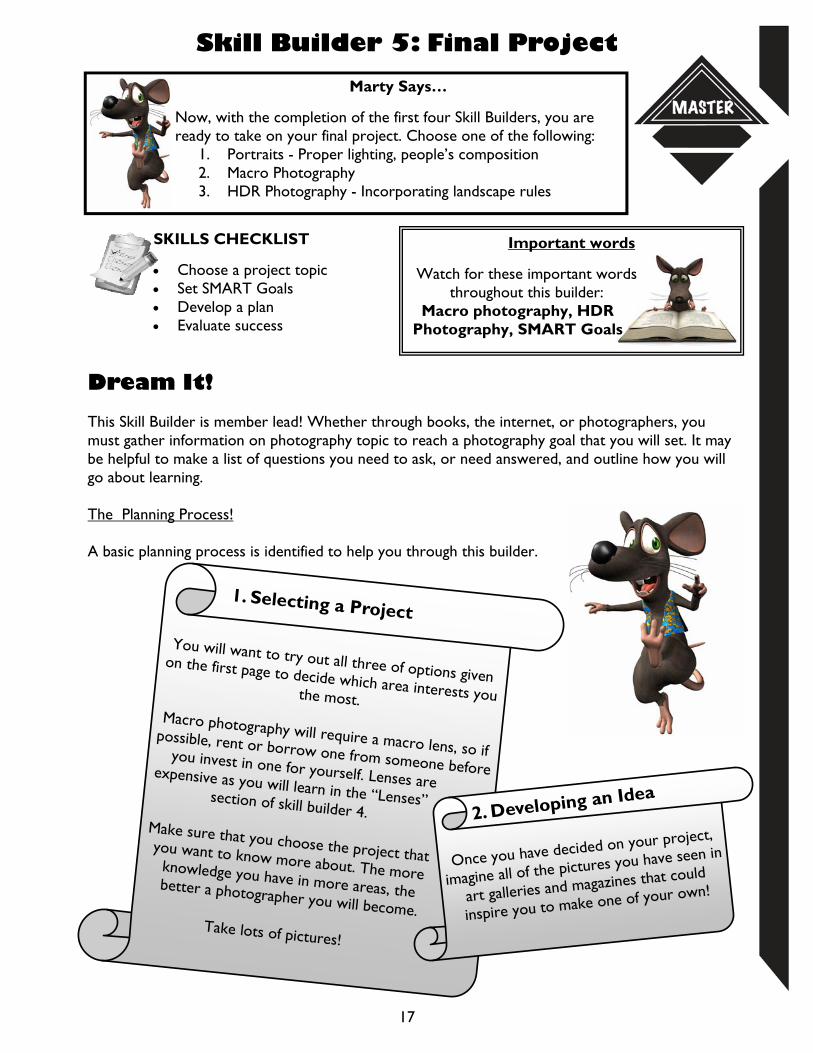
Skill Builder 5: Final Project
Dream It! This Skill Builder is member lead! Whether through books, the internet, or photographers, you must gather information on photography topic to reach a photography goal that you will set. It may be helpful to make a list of questions you need to ask, or need answered, and outline how you will go about learning. The Planning Process! A basic planning process is identified to help you through this builder.
SKILLS CHECKLIST
Choose a project topic Set SMART Goals Develop a plan Evaluate success
Important words
Watch for these important words throughout this builder:
Macro photography, HDR Photography, SMART Goals
Marty Says…
Now, with the completion of the first four Skill Builders, you are ready to take on your final project. Choose one of the following:
1. Portraits - Proper lighting, people’s composition 2. Macro Photography 3. HDR Photography - Incorporating landscape rules
You will want to try out all three of options given on the first page to decide which area interests you the most.
Macro photography will require a macro lens, so if possible, rent or borrow one from someone before
you invest in one for yourself. Lenses are expensive as you will learn in the “Lenses” section of skill builder 4.
Make sure that you choose the project that you want to know more about. The more knowledge you have in more areas, the better a photographer you will become.
Take lots of pictures!
1. Selecting a Project
Once you have decided on your project,
imagine all of the pictures you have seen in
art galleries and magazines that could
inspire you to make one of your own!
2. Developing an Idea

18
“Learning to do by doing” is the most effective method of developing high quality photographs. Fine tune your skills and develop new ones by putting them into action.
Magazines, websites, books, and videos can provide valuable information and support. Observing other people’s methods and work can help you achieve your goals. Even exchanging ideas with other members can be of benefit as well. Use your network of people to help make your project a success.
5. Accomplishing your goals
What do you want to accomplish within your photograph? How will your end product benefit from organizing your ideas before hand? By setting clear goals for yourself,
you will know what targets to aim for and when you have reached them.
3. Setting Goals
Keeping records of your actions,
accomplishments and thoughts
throughout the year will help you to
reflect back on what you have learnt
and how successful you have been in
accomplishing your original goals.
6. Evaluating Your Success
Selecting and Developing a Project Topic
1) The project I am choosing to do is:
□ Portraits (Studio Photos) □ Macro Photography □ HDR Photography (High Dynamic Range)
2) Here are some of my ideas for my project (add your ideas):
Develop a framework for successful
achievement of your goals by identifying
what actions you need to take and what
resources you might need to reach your
goals.
Also, establish a timeline for completion
of these goals to help you keep on track.
4. Developing a Plan
An example of ideas for your project might include to contact a magazine and ask to have your photo published in a
small readers’ spotlight section. Always have a back-up plan though, just in case.
Sometimes it helps to explain the situation briefly to whoever you contact, because people will be more likely to consider if
they are better informed.
Get a phot
o publi
shed!
Family Photo’s
Photography business
Comparing techniques
Photo Stories
Photography
Exhibition
19
Project Goal Setting
Setting and achieving goals is important. People set goals for themselves in a variety of situations. What are your 4-H project goals? You might have one goal or many goals that you would like to accomplish this year. Writing down your project goals will help you plan your progress and will help you measure your success. Goals are most effective when they are SMART goals. SMART goals are:
S – Is the goal Specific? A specific goal has a much greater chance of being accomplished than a general goal. Does it tell who, what, where, when, why and how? Goals should be straightforward and emphasize what you want to happen. Specifics help us to focus our efforts and clearly define what we are going to do.
M – Is it Measurable? Can you tell when you have achieved it? Establish concrete criteria for measuring progress. When you measure your progress you stay on track, reach your target dates, and experience the exhilaration of achievement that spurs you on to continued effort required to reach your goal. To determine if your goal is measurable, ask questions such as......How much? How many? How will I know when it is accomplished? Choose a goal with measurable progress, so you can see the change occur.
A – Is it Attainable? Is your goal within your reach given your current situation? You can attain most any goal you set when you plan your steps wisely and establish a time frame that allows you to carry out those steps. When you identify goals that are most important to you, you begin to figure out ways you can make them come true. You develop the attitudes, abilities, skills, and financial capacity to reach them.
R – Is it Realistic? - To be realistic, a goal must represent something that you are willing and able to complete. Your goal is probably realistic if you truly believe that it can be accomplished. Additional ways to know if your goal is realistic is to determine if you have accomplished anything similar in the past or ask yourself what conditions would have to exist to accomplish this goal.
T – Is it Timely? - A goal should be grounded within a time frame. When do you want to complete your goal by? Setting a timeframe sets your mind in motion to begin working on the goal. If you don't set a time, the commitment is too vague. Work tends not to happen because you feel you can start at any time. Without a time limit, there's no urgency to start taking action now. Putting an end point on your goal gives you a clear target to work towards.
EXAMPLE: A general goal would be, "Take good pictures." But a SMART goal would say, "I will Join a 4-H Photography Club on Monday and attend
meetings once every two weeks for four months with the help of a 4-H leader to prepare for a 4-H Photography Show."
SMART
Goals
20
Are you ready to set your project goals? Step 1: Set your goals. (HINT: Use a pencil, in case you
need to change it slightly after you SMART test it.) Step 2: Do the SMART test. Step 3: Did the SMART test show that you need to revise your goal? If it did,
revise the goal to pass the SMART test.
Step 1 – Goal: _________________________________________________ _________________________________________________________________________ _________________________________________________________________________ _________________________________________________________________________ Step 2 – Did it pass the SMART test?
Specific? Yes No
Measurable? Yes No
Attainable? Yes No
Realistic? Yes No
Timely? Yes No Step 3 – If you answered no to any of the above, erase and/or revise the goal so it will pass the SMART test.
Marty’s Links - Prairieview School Of Photography
Learn the essential elements of digital and traditional photography in a state-of-the-art facility. Master the tools, techniques, aesthetics and business fundamentals needed to enter the photographic industry.
Prairieview School of Photography offer many courses and
workshops, including some specialized for teenagers. For more information visit: http://prairieview.ca/
Diploma in Professional Photography Program
In the future you may want to consider getting a Diploma in Professional Photography. Prairieview School of Photography’s course is a comprehensive 10–month program. Graduates
can go on to work in a wide variety of positions throughout the photographic industry and beyond.
What do you want to learn
about?

21
Project Plan Specific Project Topic:_________________________________________
Goal #1:______________________________________________________
____________________________________________________________
____________________________________________________________
Steps to be done Equipment Needed People to Help Timeline
Example: Find macro photography instructions/information
Example: Computer, library books, & camera manual
Example: 4-H leader, librarian
Example: Within one week
Learn to Do By Doing Have fun, research, study, learn and complete your goal!
Dig It! This is the end result of my work: (You may paste the picture/article/award etc. in the space below, make a photocopy, or write down how your goal was achieved in words)
22
Evaluating Success
Evaluation is an important step to learning and to be able to celebrate your successes. You need to know what you were successful at to be able to celebrate it!
What changes would you make if you were doing this again? _________________________
_________________________
_________________________
_________________________
Did you achieve your goals? If you were unable to meet some goals, what goals were you unable to meet and why? __________________________
__________________________
__________________________
Did your plan change? If yes, how did it change? _______________________________
_______________________________
_______________________________
_______________________________
What was the most successful part of your project? _______________________________
_______________________________
_______________________________
What did you learn by doing your project? ________________________
________________________
________________________
________________________
What was the most challenging part of your project? ________________________________
________________________________
________________________________
What’s Next
The showcase challenge is next. Get ready to share what you have learned with others!
Marty’s Links - Photography Programs
Red Rive College Professional Photography: Gain the knowledge and skills required to develop technical and creative aspects of
digital imaging and processing. Gain hands-on skills in digital image manipulation, lighting, SLR operation, exposure, composition,
printing, editing, retouching and processing, as well as foundational business skills.
For information check out: www.rrc.mb.ca
23
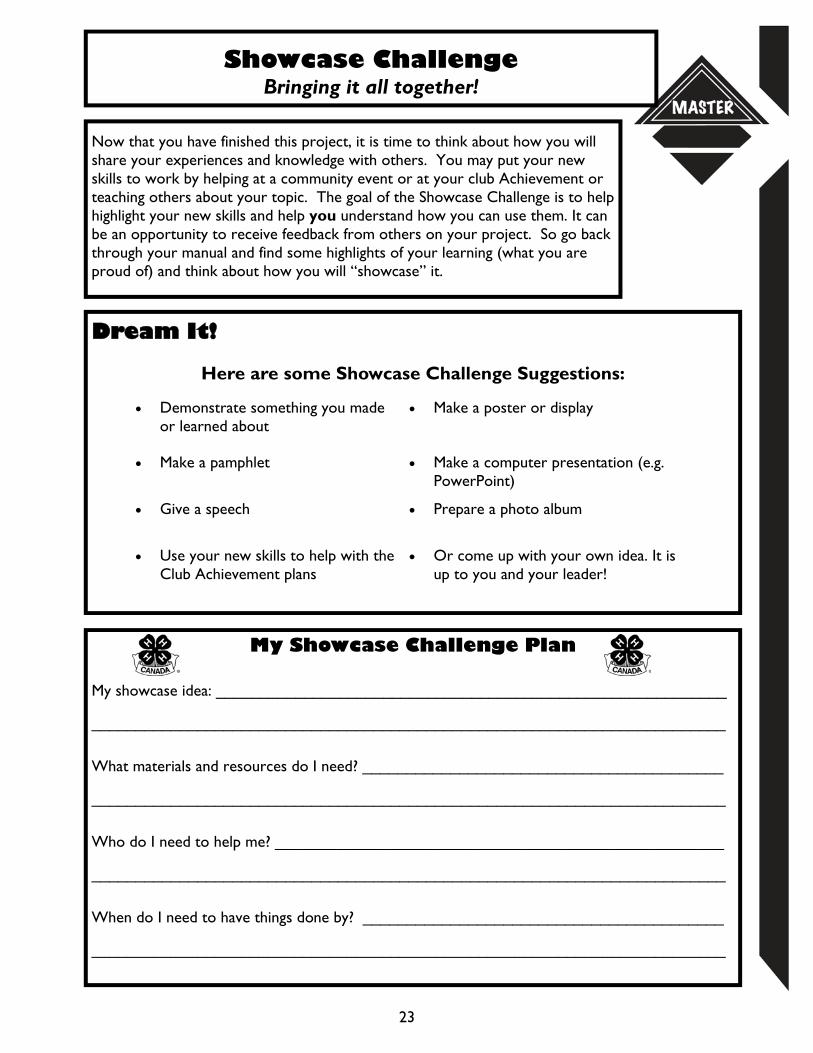
Now that you have finished this project, it is time to think about how you will share your experiences and knowledge with others. You may put your new skills to work by helping at a community event or at your club Achievement or teaching others about your topic. The goal of the Showcase Challenge is to help highlight your new skills and help you understand how you can use them. It can be an opportunity to receive feedback from others on your project. So go back through your manual and find some highlights of your learning (what you are proud of) and think about how you will “showcase” it.
Showcase Challenge Bringing it all together!
Demonstrate something you made or learned about
Make a poster or display
Make a pamphlet Make a computer presentation (e.g. PowerPoint)
Give a speech Prepare a photo album
Use your new skills to help with the Club Achievement plans
Or come up with your own idea. It is up to you and your leader!
Dream It!
Here are some Showcase Challenge Suggestions:
My Showcase Challenge Plan My showcase idea: __________________________________________________________
________________________________________________________________________
What materials and resources do I need? _________________________________________
________________________________________________________________________
Who do I need to help me? ___________________________________________________
________________________________________________________________________
When do I need to have things done by? _________________________________________
________________________________________________________________________
24
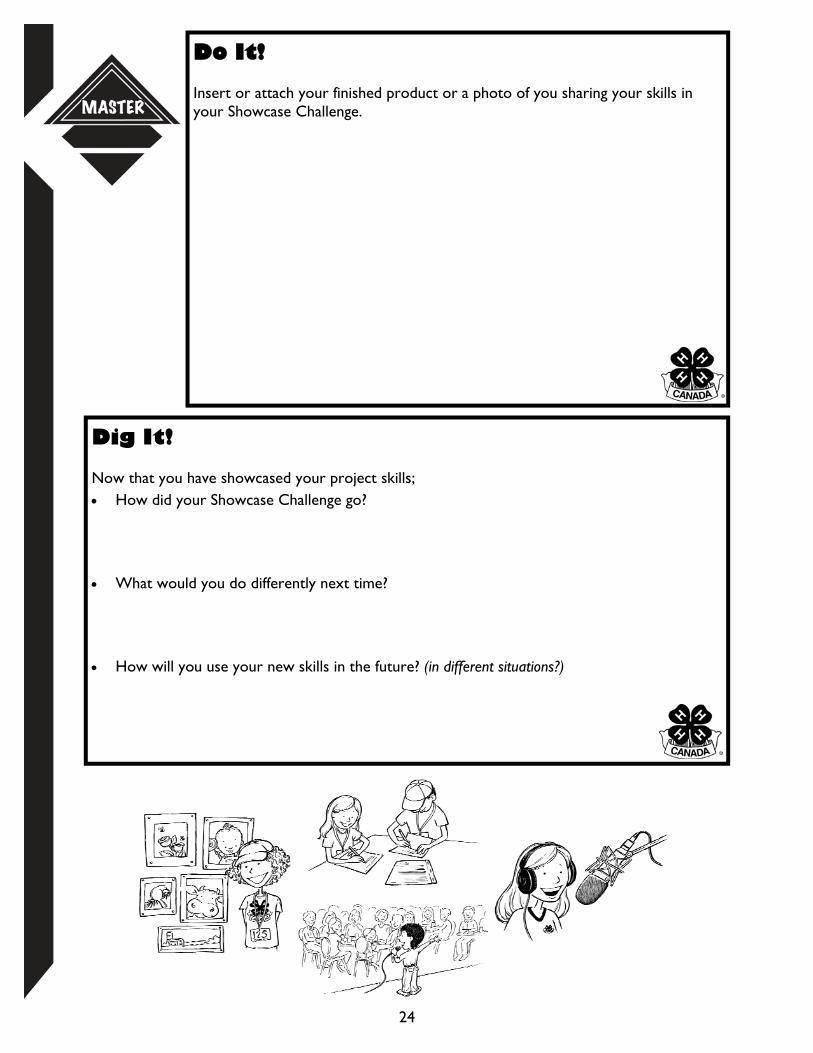
Do It! Insert or attach your finished product or a photo of you sharing your skills in your Showcase Challenge.
Dig It! Now that you have showcased your project skills; How did your Showcase Challenge go?
What would you do differently next time?
How will you use your new skills in the future? (in different situations?)
25
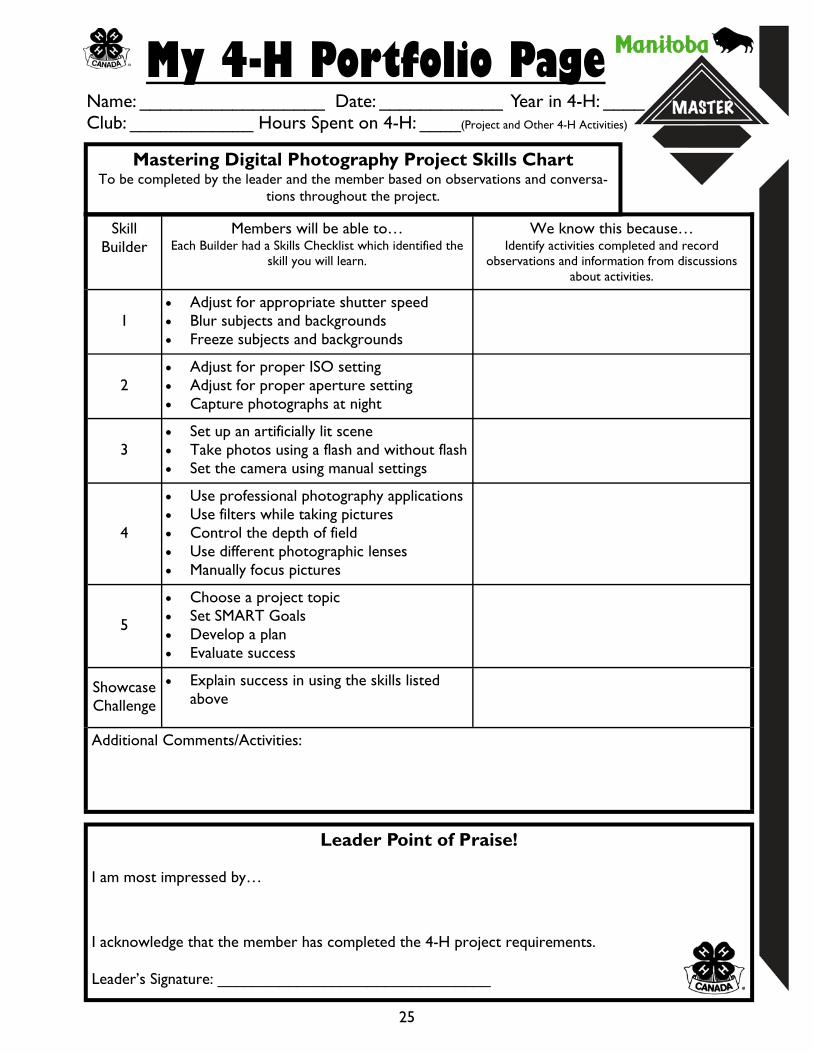
Name: __________________ Date: ____________ Year in 4-H: ____ Club: ____________ Hours Spent on 4-H: ____(Project and Other 4-H Activities)
Mastering Digital Photography Project Skills Chart To be completed by the leader and the member based on observations and conversa-
tions throughout the project.
Skill Builder
Members will be able to… Each Builder had a Skills Checklist which identified the
skill you will learn.
We know this because… Identify activities completed and record
observations and information from discussions about activities.
1 Adjust for appropriate shutter speed Blur subjects and backgrounds Freeze subjects and backgrounds
2 Adjust for proper ISO setting Adjust for proper aperture setting Capture photographs at night
3 Set up an artificially lit scene Take photos using a flash and without flash Set the camera using manual settings
4
Use professional photography applications Use filters while taking pictures Control the depth of field Use different photographic lenses Manually focus pictures
5
Choose a project topic Set SMART Goals Develop a plan Evaluate success
Showcase Challenge
Explain success in using the skills listed above
Additional Comments/Activities:
My 4-H Portfolio Page
Leader Point of Praise!
I am most impressed by… I acknowledge that the member has completed the 4-H project requirements. Leader’s Signature: _______________________________
26
Member Point of Pride!
What I learned… What I need to improve on… What I want others to notice… Member’s Signature: _______________________________
Above and Beyond! In addition to project skills, 4-H also increases skills in meeting management, communications,
leadership, community involvement through participation in club, area, or provincial 4-H events or activities. List below any activities you participated in this year in 4-H.
(Some examples include Executive Positions Held, Workshops, Communication, Community Service, Rally, Bonspiels, Conferences, Judging, Camps, Trips, Awards, Representation to Area or Provincial Councils, etc)
_____________________________________ _______________________________________
_____________________________________ _______________________________________
_____________________________________ _______________________________________
_____________________________________ _______________________________________
_____________________________________ _______________________________________
_____________________________________ _______________________________________
**Feel Free to add additional pages that include awards, certificates, new clippings, photos or other items that describe your 4-H involvement.
Point of Praise! Another’s perspective on your achievements in 4-H. (community professionals, MAFRI staff, 4-H club head leaders, 4-H Ambassadors, friends of 4-H)
I am most impressed by… I believe that you have learned… In the future I encourage you to… Signature: _______________________________

27
4-H Achievement
4-H Achievement is… a 4-H club celebration when members have completed their projects. Achievements are planned by the club to give recognition to members and leaders for their accomplishments in their 4-H projects and club activities.
A 4-H Achievement can take many different formats: from choosing a theme, to member project displays, to members using their new skills for the event (entertainment, food, decorating, photographer, etc.), to members presenting their project to the whole group, the options are endless and open to the creativity of the members and leaders in each club! Clubs may also plan their Achievement to promote 4-H to the community or to recognize sponsors and others who have helped the club. Members and leaders - be sure to check your project books for the project completion requirements, so you will be ready for your club’s Achievement celebration!
For more information about 4-H and the many 4-H opportunities available please visit
http://www.gov.mb.ca/agriculture/4-h/
If you have any questions, comments or suggestions for this or other 4-H projects contact:
Manitoba 4-H Projects
Manitoba Agriculture Food and Rural Initiatives 1129 Queens Avenue
Brandon, MB R7A 1L9
Email: [email protected]
Phone: 204-726-6613 Fax: 204-726-6260
This manual is for educational use only and is not intended as professional advice.
28
4-H Motto
“Learn To Do by Doing” 4-H Pledge
I pledge, My HEAD to clearer thinking, My HEART to greater loyalty, My HANDS to greater service, My HEALTH to better living, For my club, my community, and my country.
What is 4-H?
4-H is an international youth organization involving more than 7 million members in 80 countries around the world. In Canada, 4-H began in 1913 in Roland, Manitoba as a community-based organization dedicated to growth and development of rural youth. Today’s 4-H program reaches both farm and non-farm youth across Canada. The motto of “Learn to Do by Doing” is embodied in the program, as 4-H focuses on skill development as well as personal development of life skills such as communications, leadership and citizenship.
Manitoba 4-H project material is developed by
Manitoba Agriculture, Food and Rural Initiatives (MAFRI)
4-H Quality Equation Principles
Quality People Promote responsibility, respect, trust, honesty, fairness,
sportsmanship, citizenship, teamwork and caring. Quality Experiences
Provide members with personal development and skill development experiences.
Quality Projects Promote and value quality effort. Promote high quality, safe food production within industry standards.