3dsmax: multi sub object
DESCRIPTION
Designing a multi sub object with 3ds max material editor.TRANSCRIPT

Setting up a multi sub object material
Adding multiple materials to a single shape.
Step 1: Create a box, right click on it and go to Convert to > Editable Poly.
Step 2: Activate the polygons by clicking the polygon image on the right.
Step 3: with the poly selected, click on a face of your object, it should turn red. Now, scroll down the properties until you see a section called ‘Polygon Properties’.

Step 4: By clicking each face separately you can give an ID number to each side, this will make it easier when we want to change the colour of each side (type in a number and press enter).
Step 5: Click the yellow tab in the modifier list to turn off your ‘Edit Poly’ when each side is numbered.
Step 6: Press ‘M’ to show your Material editor, select and drag and drop the first ball onto your shape. Instead of using a standard material which would be one colour, we want a Multi colour object. Slick the standard button (centre right).
This activates your Material Map Browser. Select ‘Multi/Sub Object.
Step 7: Click discard old object.

Step 8: This changes your interface; you are now on layer 2 of the materials options. Click and enter the Material marked ID 1.
Step 9: By selecting the yellow button (above) you can now change the material/colour of any face of your object labeled #1.
You don’t need to set another Multi/Sub Object map; you can simply click the back button (below) and go into another ID number.
Step 10: Go into ID #2 and do the same. Keep using the back button if you get lost or stuck.

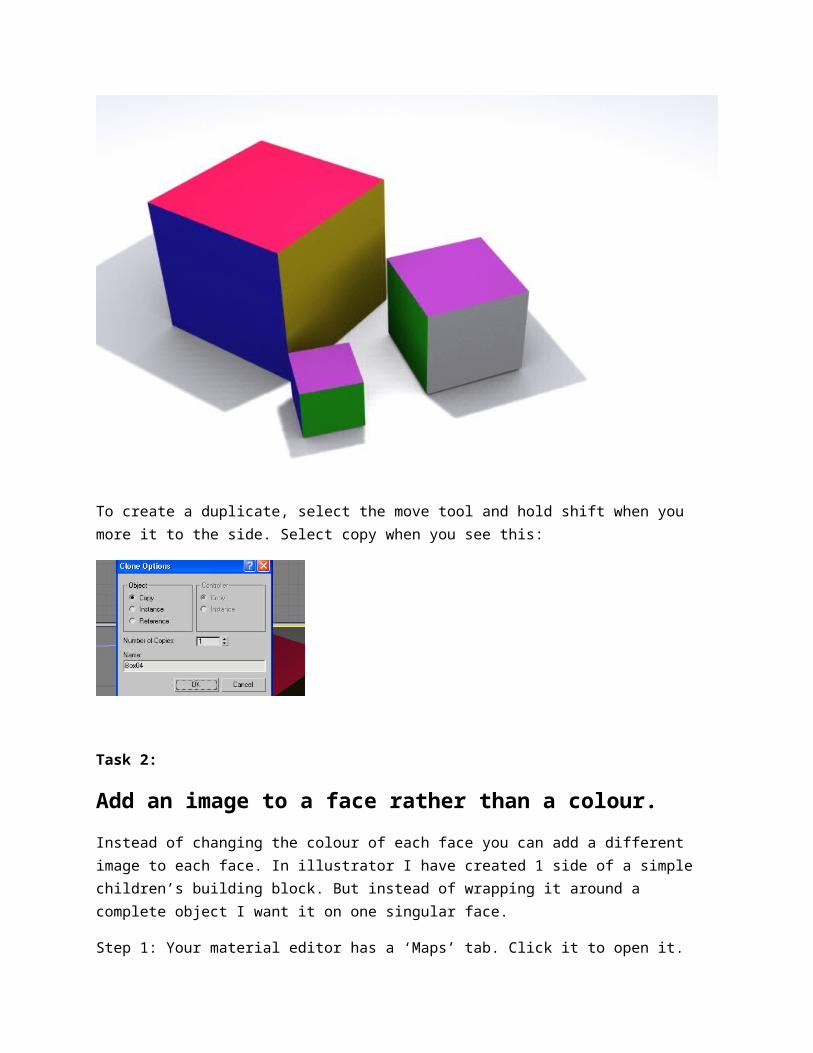
Finally: You should have a material with different colours on each side and your material edited sphere should have multiple colours on it.
Render no.1

Render no. 2
To create a duplicate, select the move tool and hold shift when you more it to the side. Select copy when you see this:
Task 2:
Add an image to a face rather than a colour.
Instead of changing the colour of each face you can add a different image to each face. In illustrator I have created 1 side of a simple children’s building block. But instead of wrapping it around a complete object I want it on one singular face.
Step 1: Your material editor has a ‘Maps’ tab. Click it to open it.
Step 2: You currently have a ‘Diffuse’ colour on the face of your object, we are going to swap the colour for an image.
Click on diffuse and then on the empty box to the right.

This brings up your Map browser again. Go to ‘Bitmap’ and find your image, in this case my numbered square Jpeg.
You then find yourself in layer 3 of the ‘Multi Sub Object’, so you can now see all sorts of options (below). Keep in mind your back button is you get lost (curved back arrow).
I didn’t change only of my tiling options but they can be found at this stage in your material editor coordinates (below right).
If you apply a picture instead of a colour to each ID number, you should end up with a render like this. Don’t worry if not, it can get confusing… Ask Dom.
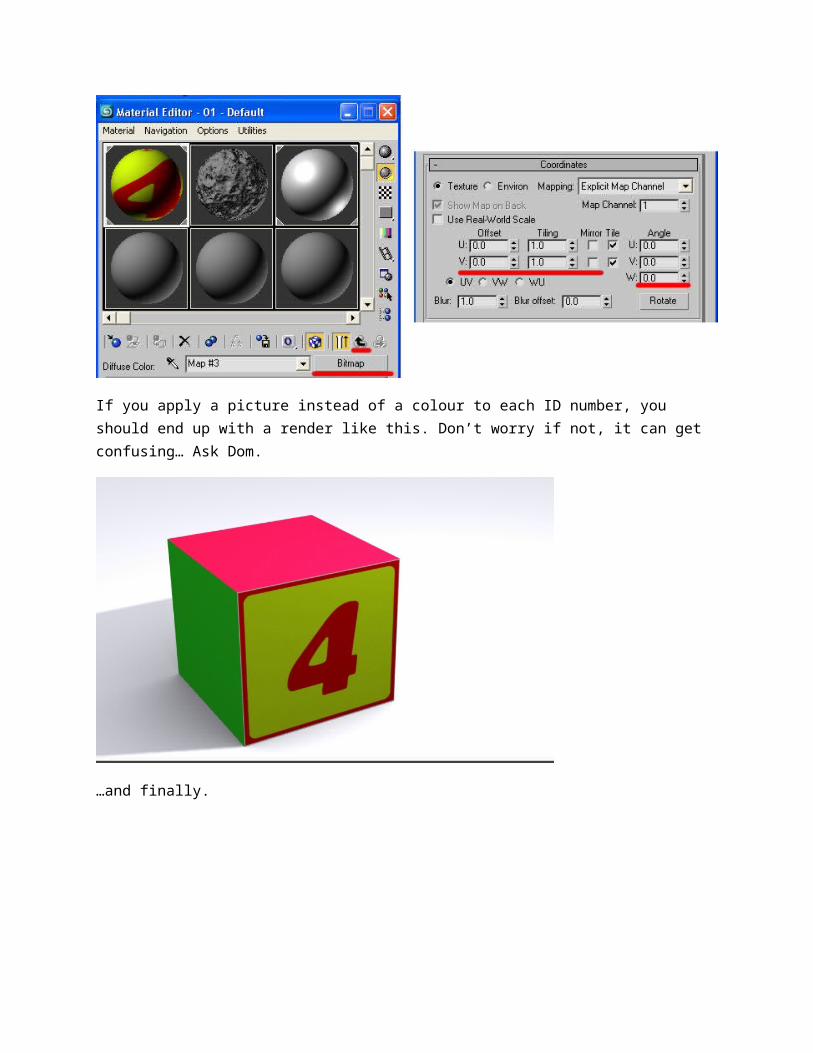
…and finally.