3dcreative magazine introduces the ‘challenge’ section of ... · 5th daddydoom 4th ragecage 6th...
TRANSCRIPT

In Association with
3DCreative Magazine introduces the
‘Challenge’ section of the mag. Every
month we will run the challenges, available
for anyone to enter for prizes and goodies
from the www.3dtotal.com shop, and to
also get featured in this very magazine!
The 2D Challenge runs in the ConceptArt.
org forums, and the 3D Challenge runs
in the Threedy.com forums. Here we will
display the winners from the previous
month’s challenges, and the Making Ofs
from the month before that...
HyenaStylised Animal challenge
In Association with
page 2www.3dcreativemag.com Issue 027 November 2007
Stylised Animal Challenge Hyena
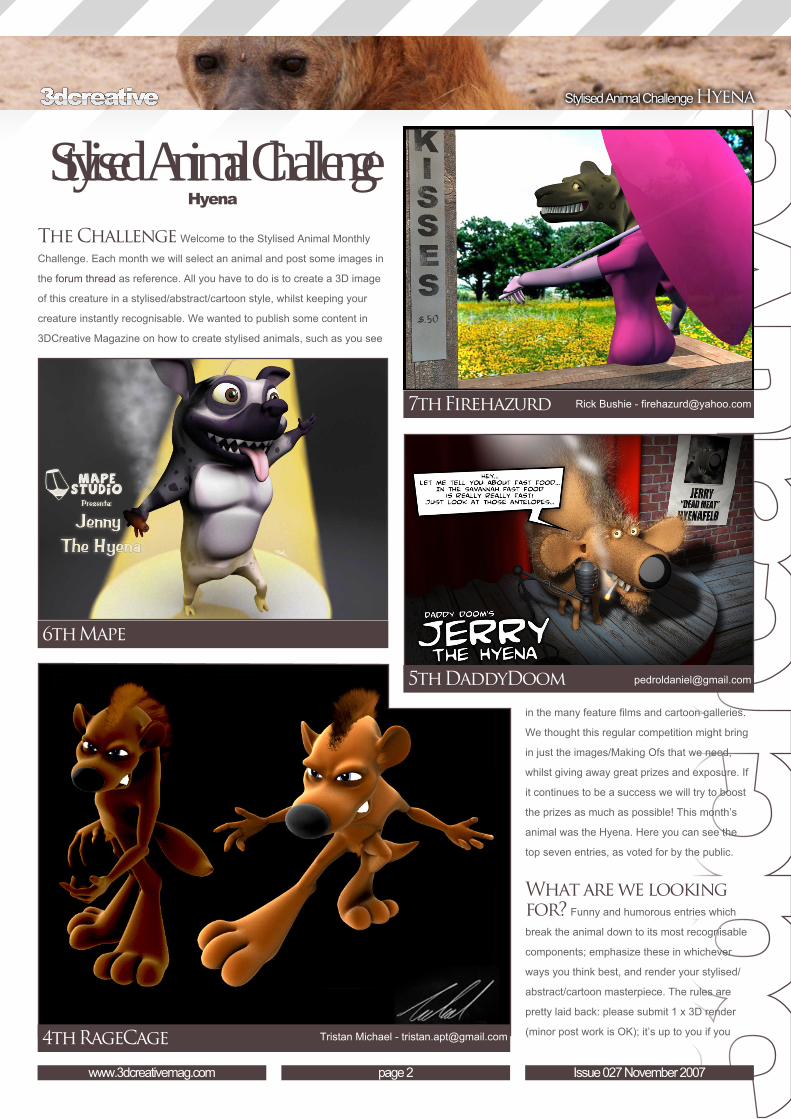
The Challenge Welcome to the Stylised Animal Monthly
Challenge. Each month we will select an animal and post some images in
the forum thread as reference. All you have to do is to create a 3D image
of this creature in a stylised/abstract/cartoon style, whilst keeping your
creature instantly recognisable. We wanted to publish some content in
3DCreative Magazine on how to create stylised animals, such as you see
Stylised Animal Challenge Hyena
5th DaddyDoom
4th RageCage
6th Mape
in the many feature films and cartoon galleries.
We thought this regular competition might bring
in just the images/Making Ofs that we need,
whilst giving away great prizes and exposure. If
it continues to be a success we will try to boost
the prizes as much as possible! This month’s
animal was the Hyena. Here you can see the
top seven entries, as voted for by the public.
What are we looking for? Funny and humorous entries which
break the animal down to its most recognisable
components; emphasize these in whichever
ways you think best, and render your stylised/
abstract/cartoon masterpiece. The rules are
pretty laid back: please submit 1 x 3D render
(minor post work is OK); it’s up to you if you
7th Firehazurd
Rick Bushie - [email protected]
Tristan Michael - [email protected]

Stylised Animal Challenge Hyena
page 3www.3dcreativemag.com Issue 02007
Hyena Stylised Animal Challenge
3rd Husam 2nd Zinkete
1st XineoF
want to have a background or wish to include some graphical elements or text on your image.
Renders of the 800 pixel dimension sound about right, but the winners will be featured in 3DCreative
Magazine so if you can create some higher resolution images too, all the better! There will be one
competition per month, with the deadline being the end of the month (GMT). For a valid entry, just
make sure your final image is posted in the main competition thread before the deadline. We require
the top 3 winners to submit Making Of overview articles that will be shown on either 3DTotal.com or
in 3DCreative Magazine. These need to show the stages of your creation, different elements, and
some brief explanation text of why, and how, you did what you did. We will format this into some
nice-looking pages to give you some great exposure, and us some quality content. Each competition
will have one main thread which starts with the brief at the top. All entrants should post all WIPs,
give feedback, and generally laugh at the crazy ideas that are emerging each month!
Alexandre Aillet - [email protected]
[email protected] Moises Montes - [email protected]
page �www.3dcreativemag.com Issue 027 November 2007
Stylised Animal Challenge Hyena
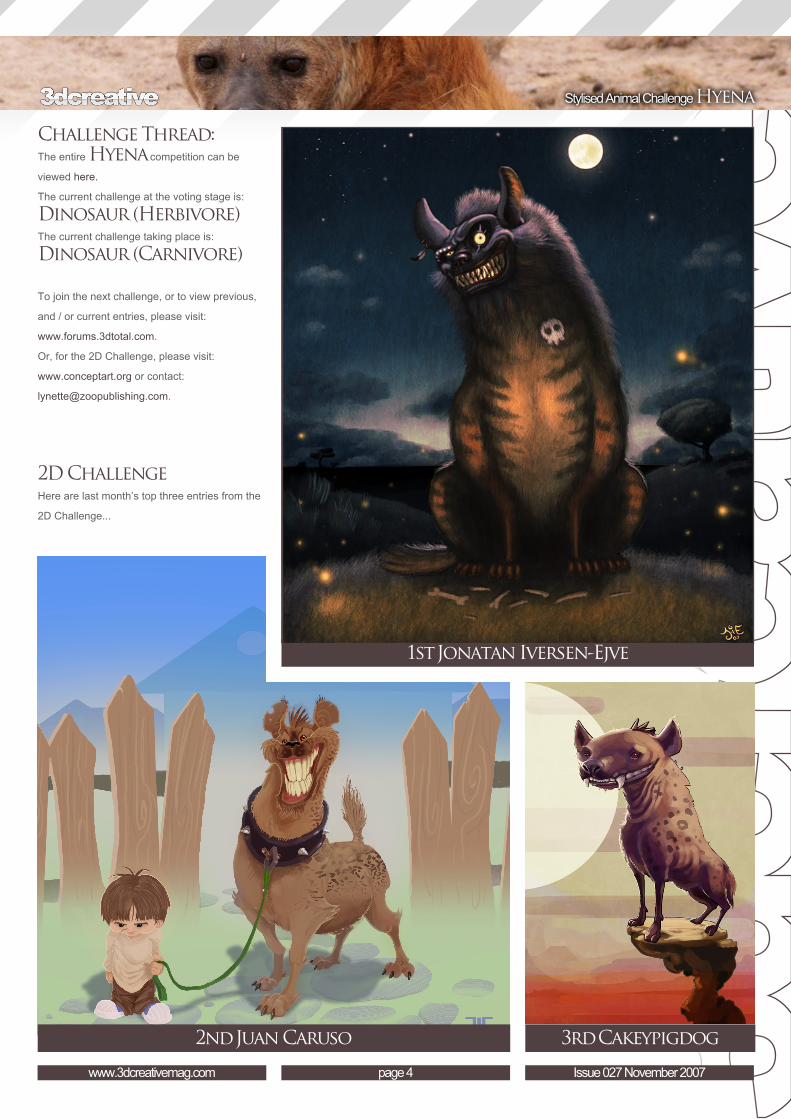
3rd Cakeypigdog
1st Jonatan Iversen-Ejve
Challenge Thread:The entire Hyena competition can be
viewed here.
The current challenge at the voting stage is:
Dinosaur (Herbivore)The current challenge taking place is:
Dinosaur (Carnivore)
To join the next challenge, or to view previous,
and / or current entries, please visit:
www.forums.3dtotal.com.
Or, for the 2D Challenge, please visit:
www.conceptart.org or contact:
2D ChallengeHere are last month’s top three entries from the
2D Challenge...
2nd Juan Caruso

Stylised Animal Challenge Hyena
page �www.3dcreativemag.com Issue 02007
Hyena Stylised Animal Challenge
Making OfsHere are the Making Ofs from last month’s top 3
winning entries...
3rd - Shahin Fathi DjalaliHere is a short overview of what I did to make
this goofy crocodile...
Character ConceptWell, although I started this one rather late, the
idea of a kind and funny-looking crocodile was in
my mind throughout the month leading up to the
deadline... So I sketched some different styles
of this creature over the month during my spare
time at work, until I was satisfied with my fat &
goofy one (Fig01).
ModellingAs is my usual style of poly modelling, I began by modelling the head
from a sphere (Fig02). After the head was almost complete, I extruded the
body’s volume from bottom of the head. Actually, he has no neck, so the
body and the head intersect with each other directly. The tail was created
by extruding some polygons from the back area (Fig03).
When the overall volume was created, I began modelling the front
sections of the body by modifying the polygons and extruding them both
inside and out. A bit more work, such as deleting some polygons and

page �www.3dcreativemag.com Issue 027 November 2007
Stylised Animal Challenge Hyena
to be finished. I have to confess that this is one of the cleanest meshes
I’ve ever made! One big difference with model compared to the sketch, is
that the 3D model has much more energy than the lazy one in my original
sketch.
TexturesSince I didn’t have much time to spend on my entry this time round,
I made all of my textures in 3ds Max with its own 3D maps, like
smoke, planet and stucco. This method was actually much easier than
unwrapping UV manually (Fig0�). However, there was one problem: if you
want to do any animations with modifiers, like bones and skin, these 3D
maps don’t act like textures. I therefore had to bake textures from them.
I rendered these 3D maps to texture them one by one. Actually, I left the
unwrapping process to 3ds Max itself! Because I didn’t want any lighting
affecting the textures, I had to set the self-illumination of the materials to
the maximum level. (You can see the diffuse map in Fig0�.) After baking
vertex welding, was done in the mouth area to
achieve a clean mesh. This time, also hiding
the other polygons helped me. I then I extruded
the hands and feet from body. The hands are
actually positioned a little lower than they should
be, and I think this helps in making him look
much goofier (Fig04).
With the previous work done, and after some
vertices adjustments, I considered the model

Stylised Animal Challenge Hyena
page 7www.3dcreativemag.com Issue 02007
Hyena Stylised Animal Challenge
textures for the diffuse and bump maps, my
final material was a translucent shader with the
textures as seen in Fig07.
RiggingAlthough this challenge was not about
animation, I always prefer to rig my models
and pose them after modelling. This way I can
play with various poses and even make simple
animations later on! The rigging of this particular
model was very simple and I used the Biped
system for the skeleton (Fig08).
SceneryI didn’t have any special ideas for the scenery,
but when the model was completely finished, I
came up with the idea of how a silly crocodile
would look if he saw a handbag made out of
crocodile skin.
I quickly modelled a bag with some primitive
objects, like box and Torus, and basic modifiers
like bend and taper, and composed the scene
as can be seen.
The lighting setup of the scene was very simple,
as well: one Sky light plus a light tracer plug-in
for the overall lighting, and a Spot light with ray
trace shadows for the highlights.
Shahin Fathi DjalaliFor more work by this artist contact them:

page 8www.3dcreativemag.com Issue 027 November 2007
Stylised Animal Challenge Hyena
2nd - Alhaitham JassarThere are many ways to stylise an animal, but
the one I like the most is keeping the animal’s
anatomy as close to the real thing as possible.
So what makes the animal cartoon-like if it
looks like the real one? Well, I believe it’s all in
the eyes and the expressions. In this piece, I
wanted to tell the story of a goofy crocodile that
had never caught a fish in his life, and I tried
to capture the moment of him attempting to
surprise the fish. This was the job of the sketch
(Fig01).
The CrocWhen I started to model the croc, I found it
funnier to make his head big in comparison to
the body. The method used to model him was
the box modelling method; starting from a box
and then building up the form. I kept it simple
and without details at this early stage (Fig02
- Fig0�).
I then had to UV unwrap the model so that I could sculpt it in Mudbox
and paint the textures in Photoshop (the previous modelling was done in
Blender). Luckily for me, unwrapping a model in Blender is very easy and
effective. To unwrap the model, I marked the seams, then in Edit mode I
selected the desired edges and pressed Ctrl + E to mark them seams. I
then switched to UV Face Select mode and pressed U, then from the pop-
up menu I selected Unwrap. Blender automatically unwrapped the model,
Stylised Animal Challenge Hyena
page �www.3dcreativemag.com Issue 02007
Hyena Stylised Animal Challenge
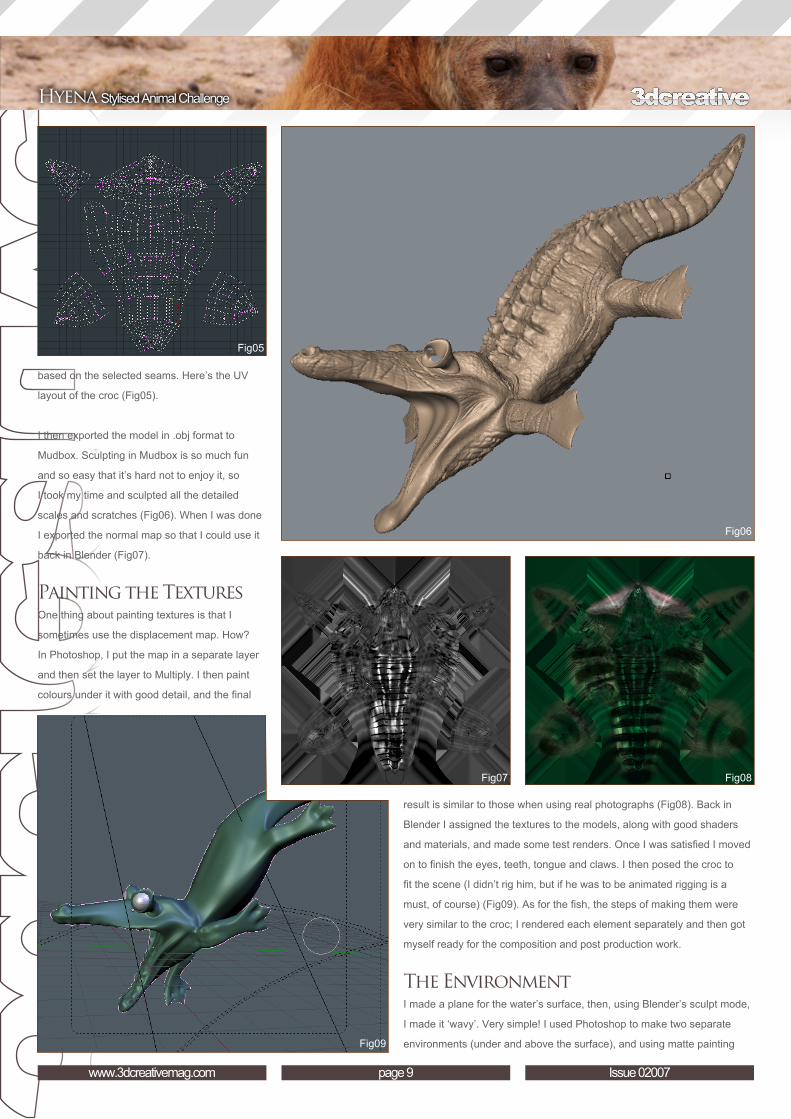
based on the selected seams. Here’s the UV
layout of the croc (Fig0�).
I then exported the model in .obj format to
Mudbox. Sculpting in Mudbox is so much fun
and so easy that it’s hard not to enjoy it, so
I took my time and sculpted all the detailed
scales and scratches (Fig0�). When I was done
I exported the normal map so that I could use it
back in Blender (Fig07).
Painting the TexturesOne thing about painting textures is that I
sometimes use the displacement map. How?
In Photoshop, I put the map in a separate layer
and then set the layer to Multiply. I then paint
colours under it with good detail, and the final
result is similar to those when using real photographs (Fig08). Back in
Blender I assigned the textures to the models, along with good shaders
and materials, and made some test renders. Once I was satisfied I moved
on to finish the eyes, teeth, tongue and claws. I then posed the croc to
fit the scene (I didn’t rig him, but if he was to be animated rigging is a
must, of course) (Fig09). As for the fish, the steps of making them were
very similar to the croc; I rendered each element separately and then got
myself ready for the composition and post production work.
The EnvironmentI made a plane for the water’s surface, then, using Blender’s sculpt mode,
I made it ‘wavy’. Very simple! I used Photoshop to make two separate
environments (under and above the surface), and using matte painting

page 10www.3dcreativemag.com Issue 027 November 2007
Stylised Animal Challenge Hyena
methods, some trees were hand-painted and
some were real photographs from the Total
Textures V10: Trees and Plants Collection
(Fig10a). The mountain was cut from a
photograph and blended with the other elements
(Fig10b). The entire scene was nearly done
at this point, but it still needed some colour
correction and balancing, so I did that.
Fig11 shows most of the elements and how
they were combined. Calling this piece done, I
safely went to drink a cup of coffee! Thanks for
reading.
Alhaitham JassarFor more work by this artist please visit:
www.jassarbrush.com
Or contact them at:

Stylised Animal Challenge Hyena
page 11www.3dcreativemag.com Issue 02007
Hyena Stylised Animal Challenge
1st - Zinkete
ModellingFirst of all, I started with a sketch which gave me
the general idea about the proportions and form
that I wanted my crocodile to have (Fig01).
I then started modelling poly by poly, based on
the sketch as a reference, creating the anatomy
of the head. I then filled in the holes until I had
the head finished (Fig02).
I later modelled the body, taking into account
that it had to be a rather fat animal. I thought
that with small arms it would seem like an
obese animal (Fig03). To finish the modelling, I
added panties, pink socks, a cap, and very long
eyelashes to the eyes, which all helped to finish
off my cute and fat female crocodille (Fig0�).
page 12www.3dcreativemag.com Issue 027 November 2007
Stylised Animal Challenge Hyena
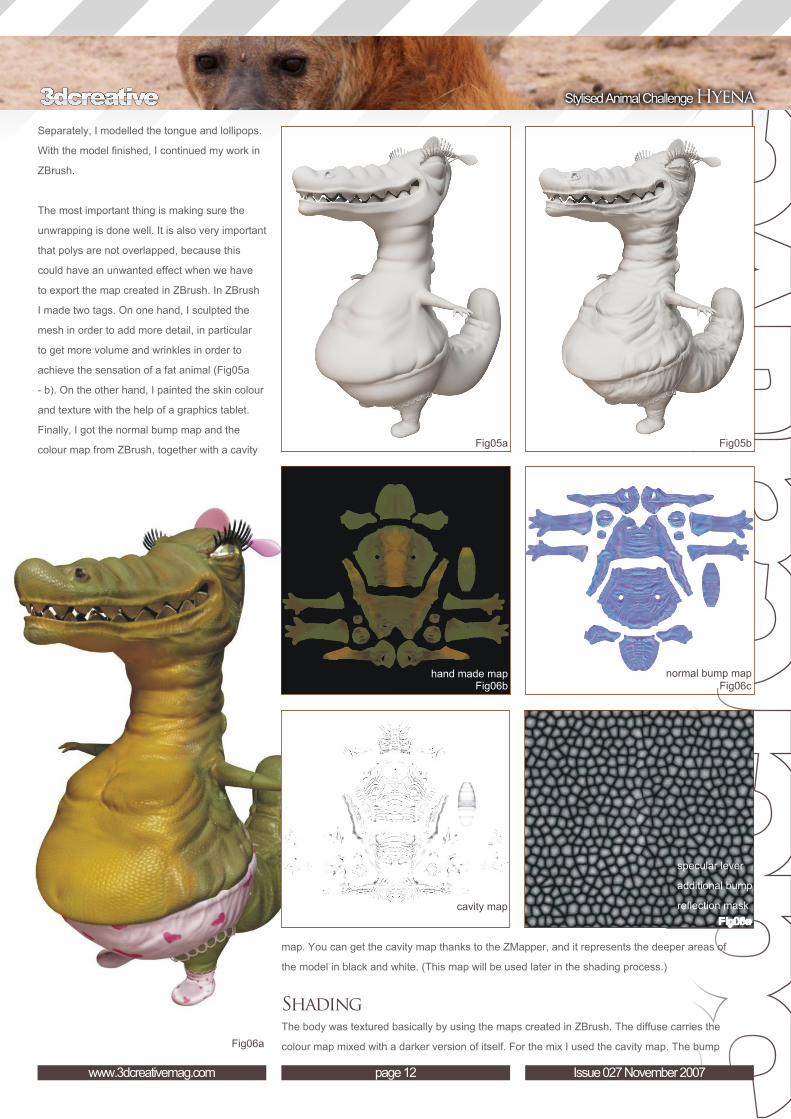
Separately, I modelled the tongue and lollipops.
With the model finished, I continued my work in
ZBrush.
The most important thing is making sure the
unwrapping is done well. It is also very important
that polys are not overlapped, because this
could have an unwanted effect when we have
to export the map created in ZBrush. In ZBrush
I made two tags. On one hand, I sculpted the
mesh in order to add more detail, in particular
to get more volume and wrinkles in order to
achieve the sensation of a fat animal (Fig0�a
- b). On the other hand, I painted the skin colour
and texture with the help of a graphics tablet.
Finally, I got the normal bump map and the
colour map from ZBrush, together with a cavity
map. You can get the cavity map thanks to the ZMapper, and it represents the deeper areas of
the model in black and white. (This map will be used later in the shading process.)
ShadingThe body was textured basically by using the maps created in ZBrush. The diffuse carries the
colour map mixed with a darker version of itself. For the mix I used the cavity map. The bump
Stylised Animal Challenge Hyena
page 13www.3dcreativemag.com Issue 02007
Hyena Stylised Animal Challenge
carries the normal bump map and an additional
scales bump map. The specular carries the
former scales map. Finally, it was given a vray
reflection, masked also with the same scale to
avoid a homogeneous reflection (Fig06a - e).
The tongue is basically a vray material with
glossiness and reflections and a normal bump
map made in ZBrush, plus an additional bump
map. The panties carry the normal bump map I
got in ZBrush, plus a hand-made ‘hearts’ diffuse
map (Fig07).
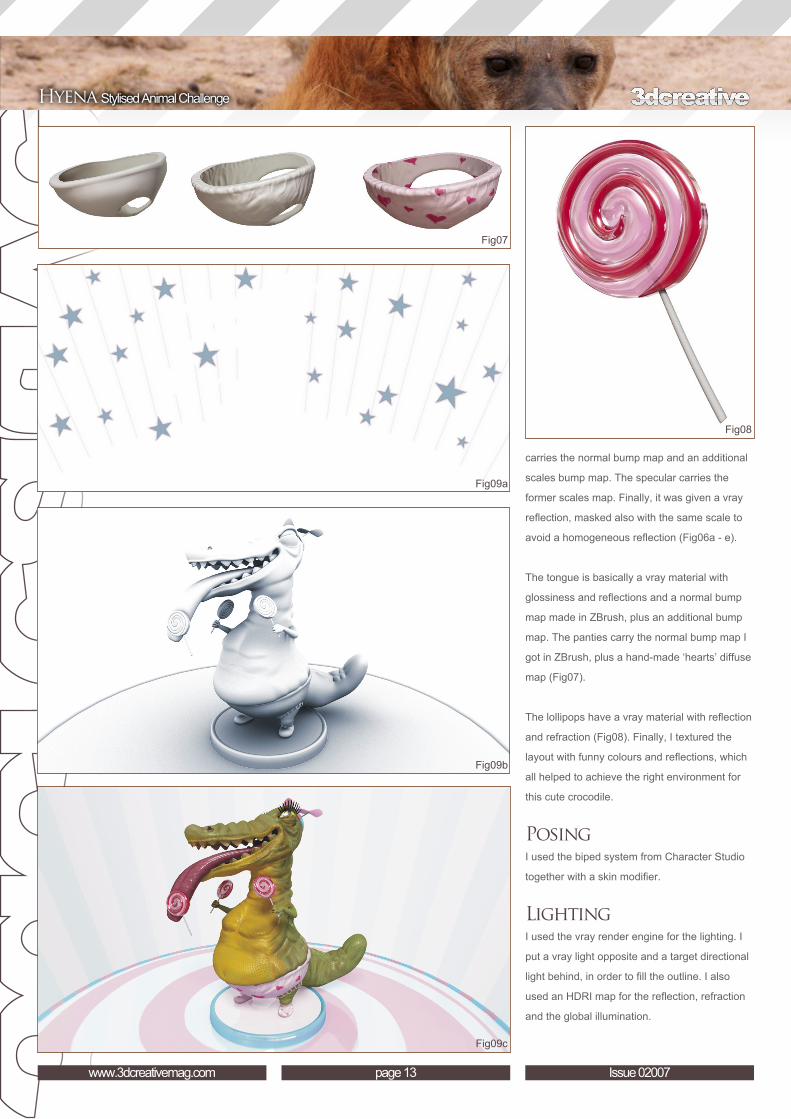
The lollipops have a vray material with reflection
and refraction (Fig08). Finally, I textured the
layout with funny colours and reflections, which
all helped to achieve the right environment for
this cute crocodile.
PosingI used the biped system from Character Studio
together with a skin modifier.
LightingI used the vray render engine for the lighting. I
put a vray light opposite and a target directional
light behind, in order to fill the outline. I also
used an HDRI map for the reflection, refraction
and the global illumination.

CompositionI made two render passes: One was a general
render and the other was an occlusion pass.
On the general render, I retouched the levels,
hue, contrast and so on to get a better finish.
Over this layer I applied the occlusion pass, with
Multiply as the layer mode. I also added vector
elements, such as stars and lines (Fig0�a - c).
ZinketeFor more work by this artist please visit:
www.zinkete.i.am
Or contact them at:
