3d printing in chemistry teaching from a submicroscopic
TRANSCRIPT
World Journal of Chemical Education, 2019, Vol. 7, No. 2, 72-83 Available online at http://pubs.sciepub.com/wjce/7/2/6 Published by Science and Education Publishing DOI:10.12691/wjce-7-2-6
3D Printing in Chemistry Teaching: From a Submicroscopic Molecule to Macroscopic
Functions - Development of a Molecular Model Set and Experimental Analysis of the Filaments
Michael Scheid, Kristina Hock, Stefan Schwarzer*
Ludwig-Maximilians-Universität München, Department of Chemistry, Chemistry Education, Munich, Germany *Corresponding author: [email protected]
Received January 12, 2019; Revised February 24, 2019; Accepted March 16, 2019
Abstract In the last few years high quality 3D printing has become quite inexpensive. Therefore, a look at its possible applications in school chemistry teaching seems worthwhile. This article deals with a project to engage upper school students in the development and production of their own molecular model set using a computer-aided design (CAD) program and a 3D printer. The presented teaching unit can be integrated into regular chemistry classes with six to eight lessons or can be offered as an elective lesson course. Part of this teaching unit is the investigation of different 3D print filaments to elaborate their chemical structure-properties-relations. The filaments are characterized by their melting behavior and by further chemical analysis.
Keywords: 3D printing, molecular model set, project work, CAD software, structure-properties-relations
Cite This Article: Michael Scheid, Kristina Hock, and Stefan Schwarzer, “3D Printing in Chemistry Teaching: From a Submicroscopic Molecule to Macroscopic Functions - Development of a Molecular Model Set and Experimental Analysis of the Filaments.” World Journal of Chemical Education, vol. 7, no. 2 (2019): 72-83. doi: 10.12691/wjce-7-2-6.
1. Introduction
Fifty-eight years ago the physician and science fiction writer Arthur Clarke hit on the idea [1] of printing items in three dimensions. Back then, the idea sounded like science fiction but has been reality for over twenty-five years. Since 2018, even the guardsmen of the Swiss Guard have been wearing helmets made by 3D printing: The so-called Morion (Figure 1) is made of polyvinyl chloride (PVA) and weighs only 570 grams [2].
Figure 1. Morion made by 3D printing © KNA
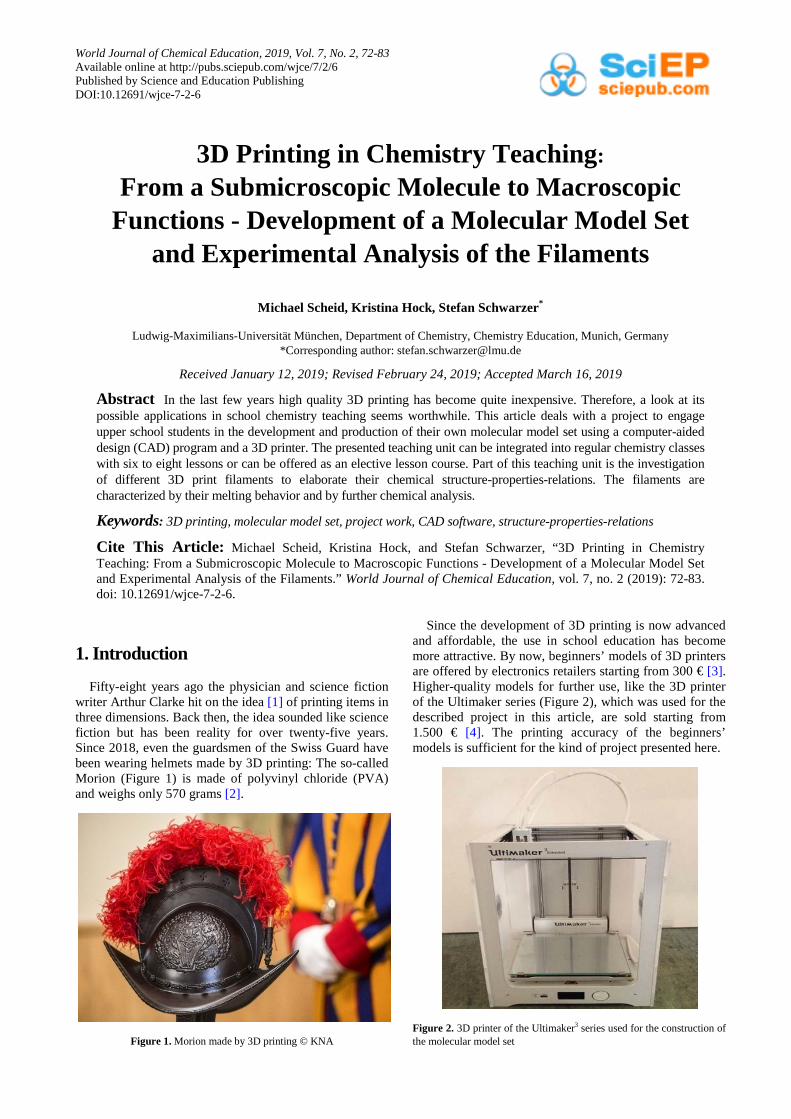
Since the development of 3D printing is now advanced and affordable, the use in school education has become more attractive. By now, beginners’ models of 3D printers are offered by electronics retailers starting from 300 € [3]. Higher-quality models for further use, like the 3D printer of the Ultimaker series (Figure 2), which was used for the described project in this article, are sold starting from 1.500 € [4]. The printing accuracy of the beginners’ models is sufficient for the kind of project presented here.
Figure 2. 3D printer of the Ultimaker3 series used for the construction of the molecular model set

World Journal of Chemical Education 73
The aim of the project is to engage upper school students in the fabrication of their own molecular model set. Until the 3D printed product is completed (Figure 3) the students undergo the entire process from developing to 3D printing, using a computer-aided design (CAD) program (see also Figure 11). The whole process is under supervision of the students, reflecting their favored ideas regarding color design and plug connection (Figure 4). A convenient advantage in comparison to purchased molecular model sets is that lost "atoms" can be reproduced, if necessary.
The components for the model are printed either directly in school or in the FabLabs (short form for "fabrication laboratory") which are available in many places. FabLabs offer, for a contribution toward costs, the possibility to use 3D printers as well as courses on printing for beginners and non-beginners. These labs are located in all major cities worldwide [5].
Figure 3. Student-developed, 3D printer-generated model of bromomethane
Figure 4. CAD-Design (left), prototypes of self-developed models of “atoms” and “binding electron pairs” (right)
During the project, the printing filaments are examined in student experiments regarding their melting behavior. In addition, the printing filament ABS (copolymer of acrylonitrile-butadiene-styrene) is chemically analyzed. Based on the findings important printing parameters such as printing temperature can be set for the printing process. Students’ prior knowledge on polymers, the valence shell electron pair repulsion model (VSEPR-Model) and of covalent bonding is required for the presented teaching unit, see paragraph 3.
Until now, 3D printing in chemistry classes has been used by teachers to print larger models of molecules (proteins, DNA, the layered structure of graphite), orbitals or potential energy surfaces [6,7,8] to provide illustrative material in class. In physics and mathematics school
lessons, it is conceivable to use 3D printing for illustrating models of waves or geometric objects [9,10].
Only in rare cases, students were allowed to use 3D printing on their own responsibility independently. Thus, they seldom receive the chance to use 3D printing for their own projects [8]. The presented project is different and could be motivating for students, because it fosters valuable insights into an entire process of development and production. In an educational environment like school, interdisciplinary projects may arise, where different subjects like art [11] or physics cooperate. Furthermore, models of molecules for teaching or the illustration of measurement results during experiments, such as printed interference images, can be made permanently available for students by 3D printing. Even children with inclusion requirements such as blind or visually impaired benefit from such haptic models.
2. Principles of 3D Printing
3D printing objects are generated by applying the filament layer-by-layer (additive manufacturing). The most common, and for school teaching relevant printing technique is the "Fused Depositing Modeling" because it’s the only affordable 3D printing technology nowadays. It is based on the printing of a heated thermoplastic applying a print head, the so-called extruder. For that reason, the filament is heated to its specific melting temperature. The print head applies it stepwise on a construction platform that is movable in most cases while the filament sets immediately after printing (Figure 5). A majority of semiprofessional 3D printers are based on this process, which can be explained by the low acquisition and operating costs along with the low maintenance and great flexibility compared to other 3D printing processes. 3D printers can emit fumes and ultrafine particles when printing. To prevent health risks, 3D printers should be used only in fume hoods or well-ventilated rooms.
Figure 5. Single printed layers of a 3D printed object
2.1. Recent Developments in 3D Printing Next to the fused deposition modeling (FDM) procedure
outlined above other techniques like laser-sintered tools or polymers cured by use of stereo lithography within the

74 World Journal of Chemical Education
additive-assembly method were developed. Furthermore, the filaments become more and more diverse as to their chemical composition. An amount of metals in the filament causes small batches to become firmer and more conductive. Filaments made of polyvinyl alcohol are water-soluble and can be used as a support structure. The Table 1 provides an insight into different 3D printing materials [7].
It has become common practice to completely create individual hearing aids and dental implants via 3D printing. In addition to artificial replacements, temporarily aids such as orthosis for leg injuries has become cheaper and easier to print. As another aspect, 3D models are used by Physicians for preoperative training. For example, magnetic resonance imaging (MRI) scans or ultrasound images are uploaded to printing services, e.g. BIOMODEX®. The printed model will be received within few days. Bones, ligaments, tendons and cartilage are printed in different colors and flexibilities in order to show the diverse properties in such a model. In this way, preoperative training of surgery skills is possible [12].
Another field of research for 3D printing is the extraction of cartilage, to cultivate and to multiply cells. Following those cells are transferred onto a printed scaffold made of biocompatible filaments. After prolonged cultivation, the cartilage grows over the filament, which undergoes more and more degradation. The cartilage, of an auricle for example, originated this way is then ready to be implanted [13].
Spanish scientists succeeded in reprinting the layers of human skin through 3D printing. They extracted fibroblasts
and keratinocytes from patients. In combination with blood plasma they were able to build various kinds of bio-ink. The outmost skin layer, the epidermis, was printed with the keratinocyte ink on a special substratum. On top of this, a layer of fibroblasts, that were responsible for the support structure, was set. The skin thus produced can then be transplanted. Following this procedure, patients with burns can be helped much faster since printing 100 cm2 skin replacement only takes 35 minutes, whereas in a conventional way the skin tissue had to be grown in a culture dish for weeks [14].
A worthwhile area of operations seems to be the synthesis of hair follicles. In this field, research aims on the printing of a follicle consisting of 15 different cell types as a viable organ with its surrounding cell layer. If cultivation were successful, the next target would be to transplant these individual hair follicles [15].
Even in the pharmaceutical industry, 3D printing seems to be a promising method: drugs individualized to the patient and the combination of different active substances in one pill are the targets. This is especially advantageous for patients that cannot swallow many pills or children for whom purchased pills are too highly dosed [16].
In the food industry, there are manifold opportunities through 3D printing: chocolates, pasta or creatively designed French fries can be printed in small series [17].
There are even advantages through 3D printing in the building industry. In 2017, a house completely printed of cement was built within 24 hours in additive manufacturing close to Moscow. In this way housing could be provided easily and cheaply [18].
Table 1. Selection of different materials for 3D printing (modified after [7])
Material Type Description Appropriate for use in school
Plastic filament PLA (Poly lactic acid) biodegradable often used, cheap, multiple colors
ABS (Acrylonitrile butadiene styrene) durable, fine structures laboratory hood for printing is recommendable, warp effect, cheap, multiple colors
PVA (Polyvinyl alcohol) water soluble used for support structure, printers with dual nozzles suggested
Acrylic Plastic translucent to clear finish fine features can be brittle, cannot do models with cavities
Resin Epoxide resin UV curable (405 nm) SLA (stereolithographic) or DLP (Digital Light Processing) printer
Silicon One or two component silicon UV curable DLP -(Digital Light Printer)
Carbone mixture with different plastic compounds, up to 20% of carbon fiber extreme light and durable Steel instead of brass nozzle is recommended,
because of higher wearing
Moldlay Castable Wax accurate to shape prototyping, printing of lost mold for jewelry design, easy follow up treatment, molds for cast metal
Metal /plastic Polyamid with metal durst (Al, Ti or Fe) Parts for automotive, aviation or medical purpose
printertype: lasersinter, special for vocational school
metal and precious metal silver, gold thin structures can be printed Expensive, selective laser melting
Powder Gypsum Calcium sulfate hemihydrate with binding material and colored ink
Art instruction: 3D printing of architecture models
Paper office paper
Layers of paper are printed with a regular printer, the 3D print nozzle adds glue to the sheet and cuts the shape
Cheap, multiple colors, special ink-printer-3D-Printcombination required

World Journal of Chemical Education 75
2.2. Filaments Due to the large number of available filaments, the features
of the printed product can be easily adjusted to particular demands. The three most commonly used filaments are polylactic acid (PLA), acrylonitrile-butadiene-styrene (ABS) and polyvinyl alcohol (PVA) as material for supporting structures.
PLA. Polylactide synthetics, commonly known as polylactic acid, short PLA, are built of intertwined lactic acid molecules (see structural formula) and chemically belong to the polyester group. PLA is made of renewable resources such as corn or sugar cane, it has a melting temperature between 145 °C and 160 °C [19]. It’s suitable as a filament especially for beginners in 3D printing since it keeps its shape during printing. This synthetic is food-safe and used particularly for foils, cartons and thin plastic trays.
ABS. Acrylonitrile-butadiene-styrene was developed in 1946 in the USA and is nowadays one of the most important industrial synthetics worldwide and being used in a large number of applications [20]. Since it consists of the three monomers, mentioned below with their structural formula, acrylonitrile, butadiene and styrene, it is a so-called terpolymer. ABS belongs to thermoplastics and is suitable as a filament in 3D printing with extruder technology due to its melting temperature of 220 - 240°C [21]. ABS can be fabricated in any desired color by adding dyes. The synthetic has a high hardness, a good resistance to chemicals as well as a high scratch resistance; it is food-safe and compatible with other synthetics. Based on these features, this synthetic is widely used in automobiles, electrical and toy industry and is used for the popular LEGO® bricks. ABS can be coated with metals such as chromium, which is used especially in the automotive industry. ABS is produced by blending, which means the mixture of the two synthetics styrene-acrylonitrile, short SAN, and acrylonitrile-butadiene-rubber, or by a graft copolymerization [20]. In the graft copolymerization, monomers of one or more types are attached to the polymer whereby a copolymer with a comb-like structure is built [22].
PVA. Polyvinyl alcohol (see structural formula below) is a thermoplastic made by the hydrolysis of polyvinyl acetate. Due to its solubility in water, this synthetic is used to print support structures on overhangs. Because of its hygroscopic properties the filament is unsuitable for permanent use. To print similarly the PVA as well as the actual print filament a 3D dualextruder printer is necessary.
PLA and ABS compared. PLA is preferable for beginners in 3D printing because of its better printability. This derives from the fact that PLA does not lose its shape when cooling down. This so called “Warp effect” occurs frequently at ABS filament because of different cooling temperatures of each component and every layer that leads to inner tensions in the printed object. It can be controlled by using a heated sample plate.
Since PLA is harder and more brittle than ABS, ABS lends itself better to build plug connections that can be easily solved and plugged together repeatedly.
Figure 6. The Warp effect is clearly recognizable on the bottom side of this object made of ABS
2.3. Structure-properties-relations of the Filaments
When performing the experiments described in this article, prior chemical knowledge of polymers is necessary for understanding. For example, some German school curricula contain around ten lessons in the a field of "structure and features of synthetics" in which the "structures and features of thermoplastics, thermosets and elastomers" are explicitly mentioned [23]. The following students’ experiments demonstrate these structure and features. Student experiment 1: Qualitative determination of filament melting ranges (See also attached student worksheets)
The three printing filaments PVA, PLA and ABS have different melting temperatures. This fact is important for parameter adjusting of the 3D printer. The melting point of PVA is 200 °C, of PLA 150 °C and ABS 230 °C. To prove this difference, one piece of equal length of each filament are clamped side by side and a weight of 20 g is attached (Figure 7, Figure 8). While the experiment is set

76 World Journal of Chemical Education
up, students can observe the varying flexibility of the different filaments.
Figure 7. Experimental setup for melting range determination
Now, the filaments are heated evenly with a heat gun. Since ABS has the least flexibility, it stays in its original bent shape as it has been winded on the round filament coil. Applying the heat gun, PLA becomes liquid first (Figure 8). PVA filament becomes liquid second and the ABS filament at last. In this experiment, the students can easily comprehend why various temperatures of the pressure jet at the 3D printer must be set while using different filaments.
Figure 8. Filaments prior and after heating. Left: PVA; Middle: PLA; Right: ABS
After the melting temperature sequence has been carried in experiment 1 out, the filament ABS will be separated into its chemical components during the following experiment two. Student experiment 2: Analysis of ABS (See also attached worksheets)
This experiment is carried out in two steps. Based on made observations during this experiment students’ can conclude that ABS must consist of several components. The practical work relates to the instruction "composition of ABS" [24], was evaluated with students several times and then optimized during this process. The entire practical work is adapted for the stock of chemicals and laboratory equipment that are mostly available at schools. A used drying cabinet can be substituted with a normal
oven, which is set to the temperature written in the worksheet. As a replacement for an automatic centrifuge a simple manual centrifuge can be used.
Step 1: ABS is dissolved in acetone and the resulting product is centrifuged. The supernatant solution is drained off and stored for the further experiment. The precipitate is dried completely in a drying cabinet. The dried residue of the centrifugation is polybutadiene and exhibits the expected toughness and elastic features of ABS (Figure 9).
Figure 9. Precipitate 1 - Polybutadiene
Step 2: The stored solution is added dropwise into water and the resulting precipitate is filtered of and dried in a drying cabinet as well. The resulting product of the precipitation 2 is a styrene-acrylonitrile graft copolymer, which shows the hardness and firmness of ABS while being brittle and chalky (Figure 10).
Figure 10. Precipitate 2 - Styrene-acrylonitrile
Within the provided worksheet, two core points are emphasized. On the one hand it contains clear instructions that make the students follow step by step the separation process. On the other hand, in order to develop an understanding of what every sub step is for, the students are asked frequently certain questions to find explanations for their observations.
3. Teaching Unit
A chemistry teaching unit is described in the following section. The unit can be carried out in regular chemistry lessons as well as a part of a project seminar, e.g. on modern materials. Depending on the available time, more or less topics, e.g. printing of a storage box, can be addressed. Core student tasks, which are essential for successfully creating a molecular model set, are listed in Figure 11. Each task should be elaborated by one of the five student groups. The entire program can be carried out in at least six school lessons (Figure 11):

World Journal of Chemical Education 77
Figure 11. Suggested project phases of a teaching unit on 3D printing, numbers indicate the proposed quantity of lessons
Selection of the printing filament: The first group of students has to look up information of advantages and disadvantages, e.g. price, colors, melting temperature, safety aspects, of commercially available printing filaments through research on the internet, available literature and product data sheets. In cooperation with the group ‘development of the plug connection’ and together with the design group a decision on the printing filament should be made collectively covering the specific requirements of the molecule model set. Chemical analysis of the printing filaments: The
participants of this group have to determine the melting temperature of the three filaments ABS, PLA and PVA (see student experiment 1 and worksheet 1). The printing temperature of the extruder has to be set exactly to get optimal printing results. Development of the model plug connection: The
students in this group develop a plug connection that provides a stable linking and allows several disassembles of "atoms" and “electron pairs”. In order to give students some ideas of already existing products, different molecular sets are offered for viewing (see also Info box). Design of the atom models: This group selects colors
and connections of their desired atom models. Additionally, they have to work out the amount and configuration of bonding possibilities of each atom model. In this phase students have to apply their basic chemical knowledge. Creation of the printing files using a CAD software:
The group dealing with the CAD program have to work out the designed model. This group works in close cooperation with the groups ‘Development of the model plug connection’ and ‘Design of the atom models’.
4. Practical Evaluation and Outlook
As described the presented project fits well into regular chemistry lessons on the topic "polymers" and in addition it can be linked interdisciplinary to many curriculum contents on the subject of computer applications using the potentially motivating 3D printing technology. The purchase of a 3D printer seems to be a worthwhile investment, especially since 3D printing can be used in school for other projects and courses as mentioned.
Offering the project for a longer period of time, further assignments can be involved such as a creation of an appropriate packaging through 3D printing for the molecular model set or the developing of a marketing strategy for the set. Furthermore, the development process of the plug connection can be repeated several times until an optimal result is achieved.
The proposed teaching unit fosters the application of students’ theoretical and experimental knowledge of polymers and was tested with 16 students of an eleventh grade class of a German academic high school. Students were asked about their experiences during the unit. It turned out, that the described project fits into a unit of six lessons, though it might be advisable to give more time to the entire project, as pointed out by the students.
Following some more statements of the students are given:
“I liked the many independent project parts and the attempts to chemically split the plastic.”
“I did not like the sometimes short time and the lack of communication among the groups.”
“Working together with my chemistry class was an interesting successful experience and different from ordinary lessons.”
In addition, first tendencies have been found, showing that the integration of 3D printing has increased the motivation of the students for chemistry class in general as well as for the specific topic of polymers. Further investigations have to prove these first findings, which are based on a very limited number of students.
Additional information: Plug connection An important step in creating a molecular model set is
the development of a suitable plug connection. The main features for such a connection are that it provides a stable link and allows several disassembles of "atoms" and “electron pairs”. The proposed connection (Figure 13) is certainly just one of several possible solutions.
For the linking, the atom models get cylindrical connections with a rounding on the top. The "binding pair of electrons" in form of tubes is attached to these cylinders. For these "binding pair of electrons" silicone hoses of 4 millimeters internal and 6 millimeters external diameter are used which are available for sale in the specialist trade in aquaristics by the meter [25]. After a few test prints, the

78 World Journal of Chemical Education
diameter of the cylinder of 4.05 millimeters turned out to be the most favorable one.
Using silicone tube pieces of different lengths, various bond lengths can be displayed. An “atom diameter” of 15-20 millimeters seems to be particularly suitable.
Printing the atom models can be done in two ways. For one thing, the "atoms" can be printed as a whole with the help of supporting structures (Figure 12).
Figure 12. "Sulfur atom" made of PLA with supporting structure of PVA
In this way, an almost perfect ball shape arises and the connecting cylinders can be printed with overhangs as well. If no 3D printer with dual extruder is available the "atoms" have to be printed in halves since only overhangs of maximum 60° can be printed (Figure 13).
Figure 13. "Atom halves" with connecting dowel pin
The cut surface through the center of the sphere serves as a base for 3D printing, the halves are glued together with a plastic adhesive after printing. Both of the variants of printing are shown opposite.
To create the printing files, the free 3D program 123D-Design is well-suited [26]. This software is accessible in an English language version, must be installed on computers and llows the concrete setting of angles, which can not be realized in many other 3D programs.
References [1] Arthur C. Clarke Predicts the Internet, 3D Printers and Trained
Monkey Servants, www.openculture.com/2014/06/in-1964-arthur-c-clarke-predicts-the-internet-3d-printers-and-trained-monkey-servants.html (accessed: 01/2019).
[2] The Vatican´s Swiss Guards are now using 3D printed helmets, https://www.theverge.com/2019/2/24/18238786/vatican-swiss-guards-3d-printed-helmets (accessed: 02/2019).
[3] Ender 3 Pro, https://www.3djake.uk/creality-3d-printers-spare-parts/ender-3-pro (accessed: 02/2019).
[4] 3D printer Ultimaker 3, https://www.dream3d.co.uk/product/ultimaker-3-offer/ (accessed: 02/2019).
[5] Map of fabrication laboratories (FabLabs) worldwide, https://www.fablabs.io/labs/map (accessed: 01/2019).
[6] Schilde, U.; Kloevekorn, F.: Molecular models of chemical compounds made by 3D printing (Molekülmodelle chemischer Verbindungen mittels 3D-Druck). Praxis der Naturwissenschaften - Chemie in der Schule 64 (2015) No. 5, 18-24.
[7] Jones, O.; Spencer, M.: A Simplified Method for the 3D Printing of Molecular Models for Chemical Education. Journal of Chemical Education 95 (2018), 88-96.
[8] Violante, L.; Nunez, D.; Ryan, S.: 3D Printing in the Chemistry Curriculum: Inspiring Millennial Students To Be Creative Innovators. Adressing the Millennial Student in Undergraduate Chemistry (2014) No. 1180, 125-146.
[9] Heusler, S.: New ways of expression for physics education - The potential of 3D printer in physics teaching (Neue Ausdrucksformen für die Physikdidaktik - Das Potential von 3D-Druckern für den Physikunterricht), http://www.phydid.de/index.php/phydid-b/article/view/506/653 (accessed: 01/2019).
[10] Lindmeier, A.; Rach, S.: 3D printing - Hands and minds on! From the spatial construction to a printed model (3D-Druck - Hands and minds on! Von der räumlichen Konstruktion zum gedruckten Modell). Mathematik lehren 32 (2015) No. 190, 18-21.
[11] Qualitäts- und Unterstützungs Agentur - Landesinstitut für Schule des Landes Nordrhein-Westfalen (QUA-LiS NRW): Information and orientation to get into 3D printing at school (3-D-Druck in der Schule. Informationen und Orientierung für den Einstieg in den Unterricht), https://www.qua-lis.nrw.de/cms/upload/service/flyer/d-3D-Druck-in-der-Schule.pdf (accessed: 01/2019).
[12] 3D printing in medicine (3D-Druck in der Medizin), https://www.3dnatives.com/de/3d-druck-in-der-medizin-170720181/ (accessed: 01/2019).
[13] Scientists print an ear that survives and grows in the human body (Wissenschaftler drucken ein Ohr, das im Körper überlebt und wächst), https://www.3d-grenzenlos.de/magazin/zukunft-visionen/ohr-aus-3d-drucker-ueberlebt-und-waechst-27351713/ (accessed: 01/2019).
[14] First time printing human skin by a 3D printer (Erstmals menschliche Haut aus dem 3D Drucker), https://www.ingenieur.de/technik/fachbereiche/3d-druck/erstmals-menschliche-haut-3d-drucker/ (accessed: 01/2019).
[15] L'Oreal and Poietis: Partnership against hair loss through 3D bioprinting (L'Oreal und Poietis: Partnerschaft zur Bekämpfung von Haarausfall mit 3D-Bioprinting), https://www.3dnatives.com/de/loreal-poietis-bekampfung-von-haarausfall-mit-3d-bioprinting-061020161/ (accessed: 01/2019).
[16] 3D printing in medicine (3D-Drucker(er) in der Medizin), https://www.3d-grenzenlos.de/magazin/thema/medizin-3d-drucker (accessed: 01/2019).
[17] Foods made by 3D printing (Lebensmittel aus dem 3D Drucker), https://3druck.com/tags/lebensmittel-3d-drucker/(accessed: 01/2019).
[18] Your house made by 3D printing (Dein Haus aus dem 3D-Drucker zum Spotpreis), https://manonamission.de/dein-haus-aus-dem-3d-drucker-zum-spottpreis (accessed: 01/2019).
[19] PLA filament, https://shop.3dfilaprint.com/23kg-filaprint-iron-grey-premium-pla-175mm-3d-printer-filament-10082-p.asp (accessed: 02/2019).
[20] Everything You Need to Know Abaout ABS Plastic, https://www.creativemechanisms.com/blog/everything-you-need-to-know-about-abs-plastic (accessed: 02/2019).
[21] ABS filament, https://shop.3dfilaprint.com/abs-extrafill-cobalt-blue-175mm-3d-printer-filament-8294-p.asp (accessed: 02/2019).
[22] Cowie, J.; Arrighi, V.: Polymers, Chemistry and physics of modern materials, CRC Press, 2007.
[23] Bavarian high school curriculum 11/12. School subject chemistry, www.isb-gym8-lehrplan.de/contentserv/3.1.neu/ g8.de/?StoryID=26195 (accessed: 01/2019).
[24] Acrylonitrile-butadiene-styrene (Acrylnitril-Butadien-Styrol (ABS)), http://daten.didaktikchemie.uni-bayreuth.de/umat/abs/abs.htm (accessed: 01/2019).
[25] Silicone air hose, https://fish.aquaristic.net/en/Aquarium-Air-Pump/ Evolution-Silicone-air-hose-5-m-4-6-mm.html (accessed: 02/2019).
[26] 3D software 123D-Design, https://www.heise.de/download/product/123d-design-89217 (accessed: 01/2019).
[27] FDM 3D printing: ABS or PLA? What are the differences? (FDM-3D-Druck: ABS oder PLA? Was sind die Unterschiede?), https://3druck.com/lieferanten-haendler/fdm-3d-druck-abs-oder-pla-sind-die-unterschiede-2020380 (accessed: 01/2019).

World Journal of Chemical Education 79
Worksheet 1: Melting behavior of 3D print filaments
Equipment: Stand material 3 small weights to weight (20 g each) 1 Temperature sensor (T> 200 °C) with display device 1 Heat gun Chemicals:
Printing filaments of various synthetics (for example polyvinyl alcohol PVA, polylactic acid PLA, acrylonitrile-butadiene-styrene ABS) Experimental part:
Pieces of equal length are cut off (15 cm) from the filaments. These are attached to the stand as illustrated in the picture and weighted at the bottom (20 g). It has been proven to attach these with a short section of a silicone tube to the filament. Thereafter, the filaments are heated evenly with a heat gun.
Observation: The diverging elasticity of the filaments can be detected before heating by the differing degree of deflection. PLA reaches its glass-transition temperature as the first synthetic and softens at approx. 130 °C. If heated further, the
synthetic melts and the lower weighted piece falls off. As the temperature increases further, the PVA filament elongates and then the ABS filament as well.
Theory: The synthetics used have different softening and melting temperatures. In order to achieve optimum results in 3D
printing, this must also be taken into account when setting the pressure jet temperature. The glass or softening temperature is the temperature at which the synthetic just becomes rubbery and begins to deform. The jet of the printer is heated approximately to the melting temperature. The exact printing temperature depends on the diameter of the jet and the printing speed.
Table 2. Glass or melting temperature of the examined filaments [modified after 27]
Filament features ABS PLA PVA Melting index MVI (in section) [cm³/10min] 9,7 10,3 ns
Glass temperature Softening temperature [°C] 110 – 125 70 – 80 85 Melting temperature [°C] 210 – 240 160 – 190 180 - 205
Printing speed 40 - 80 mm/s starting from 20 mm/s like ABS or PLA

80 World Journal of Chemical Education
Table 3. Mechanical and physical features of ABS and PLA [27]
Features ABS PLA
Break resistance [MPa] ~ 70 ~ 60
Elasticity E-Module [MPa] ~ 2300 ~ 3500
Notched impact strength (IZOD) [kJ/m²] 5 – 50 2 – 40
Resistance to weather good moderate
Toxicity irritant not irritant
UV resistance medium high
Surface hardness medium high
Threshold (extrudate swell) high medium
Warp effect high low
Flammability flammable non-flammable
Possibilities for subsequent treatment (drilling, milling, refining, etc.) good medium
Friction resistance low medium
Disposal:
The filaments can be disposed of with household waste.

World Journal of Chemical Education 81
Worksheet 2: Analysis of a polymer filament for 3D printing
To 3D print the atoms for this molecular model set, a suitable filament is required, which allows a stable plug connection, based on the proposed internet research, a synthetic filament is selected.
The chemical properties of the filament polymer will be examined in the following experiments. Read the entire experiment instruction carefully before performing the experiment. If you are unsure about anything or
you have any question, please ask your teacher or your advisor! Write down your observations!
Equipment: 1 Magnetic stirrer with magnetic stir bar 1 Glass beaker about. 100 mL 1 Measuring cylinder 100 mL 1 Erlenmeyer flask 200 mL 1 Glass funnel big and 1 glass funnel small 2-4 Centrifuge tube (total 50 mL) Drying cabinet (oven) Centrifuge (centrifuge for manual usage)
1 Folded filter paper (d = 185 mm) PE film (cling film) 1 Spatula 2 Glass pipette with hat 2 Watch glasses Paper towels or cellulose
Chemicals:
5 cm of ABS filament (pretest) and 0,8 g - sample to be analyzed Distilled water, acetone (technical grade) , ethyl acetate .
Pretests:
In a solvent-filled snap cap glass, test whether the samples are soluble. Add 1-2 mL of solvent to the lever lid glass and add two 1 cm pieces of the filament. Close the lever lid glass and shake. Observe color changes and dissolving behavior for ½ an hour.
Pretest 1: Water solubility Filament solves in water PVA (Polyvinyl alcohol) Filament solves not in water continue with pretest 2 Pretest 2: Solubility in ethyl acetate: Filament solves in ethyl acetate PLA (Polylactic acid) Filament solves not in ethyl acetate continue with experiment 1

82 World Journal of Chemical Education
Experimental part:
Experiment 1 (with filament from pretest 2) Experimental procedure:
50 mL of acetone are measured using the measuring cylinder and placed in the 150 mL lever lid glass. Cut 0.8 g of the sample substance as small as possible and add it to the acetone in the lever lid glass. Stir the suspension on the magnetic stirrer for 15 minutes (do not forget the flea!).
Observation: - Filament dissolves only partially. - The solution takes on the color of the filament.
Experiment 2 – Product 1 Experimental procedure:
After the magnetic stir bar is removed, the solution formed in Experiment 1 is distributed evenly on the centrifuge tubes. The balanced tubes are placed symmetrically in the centrifuge. In the presence of the advisor, the solution is centrifuged for about 5 minutes.
The supernatant solution is poured into a 100 mL beaker and set aside. The sediment from the centrifuge tube is applied to a PE film, which is spread on the watch glass, and dried for 15 minutes at 70 °C in a drying cabinet.
Observation: - The weight is significantly lower than it was measured out. - After drying, the residue is tough and not very elastic.
Exercise: Examine the residue by looking and feeling! Compare its consistency and the amount of the resulting substance with
that of the original sample.

World Journal of Chemical Education 83
Observation: - The weight is significantly lower than it was measured out. - After drying, the residue is tough and not very elastic.
Explanation:
The examined filament consists of ABS. ABS is a mixed polymer of an acetone-soluble component and an acetone-insoluble component.
Experiment 3 Experimental procedure:
60 mL of distilled water are measured using the measuring cylinder and placed in a clean 100 mL beaker. With stirring (with the aid of a clean flea and the magnetic stirrer), about half of the supernatant obtained in Experiment 2 is slowly added dropwise with the pipette (product 2).
Observation: - In the aqueous solution colored flakes precipitate.
Explanation:
The component dissolved in acetone and precipitates in aqueous solution.
Experiment 4 – Product 2 Experimental procedure:
The flakes produced in experiment 3 are now filtered using folded filters and glass funnels (takes about 10 minutes). The glass funnel is placed in the 200 mL Erlenmeyer flask and the folded filter placed in the glass funnel. The suspension to be filtered is then added in portions.
The mass retained in the pleated filter is placed on a watch glass and dried in a drying cabinet at 70 °C for 15 minutes. A piece of PE film is placed on a crystal and 3-4 mL of the filtrate dripped thereon. The sample is also dried in the
drying cabinet.
Exercise: Analyze the dried mass and the dried filtrate for its consistency.
Observation: - The residue remains flaky.
- The filtrate is baked to a brittle foil.
Explanation:
The filament can be separated by dissolving it in acetone into two components. The acetone-soluble component is a styrene-acrylonitrile graft copolymer (SAN). This is fibrous and brittle in the dried state and provides in the filament for the hardness and strength of the synthetic. The component precipitated in acetone (product 1) is a polybutadiene. This butadiene rubber is flexible and tough when dried. It ensures the tenacity and flexibility of the filament.
Disposal:
The filtrates are placed in the organic solvent waste container and the residues and dried samples disposed of in the household waste.
References:
modified of Morawitz Katrin (2011), Thermoplastic features of ABS http://daten.didaktikchemie.uni-bayreuth.de/umat/abs/abs.htm.
© The Author(s) 2019. This article is an open access article distributed under the terms and conditions of the Creative Commons Attribution (CC BY) license (http://creativecommons.org/licenses/by/4.0/).