3532 – 4758 ghb and bhb supplement to g12-210 owners manual · pdf file ·...
TRANSCRIPT
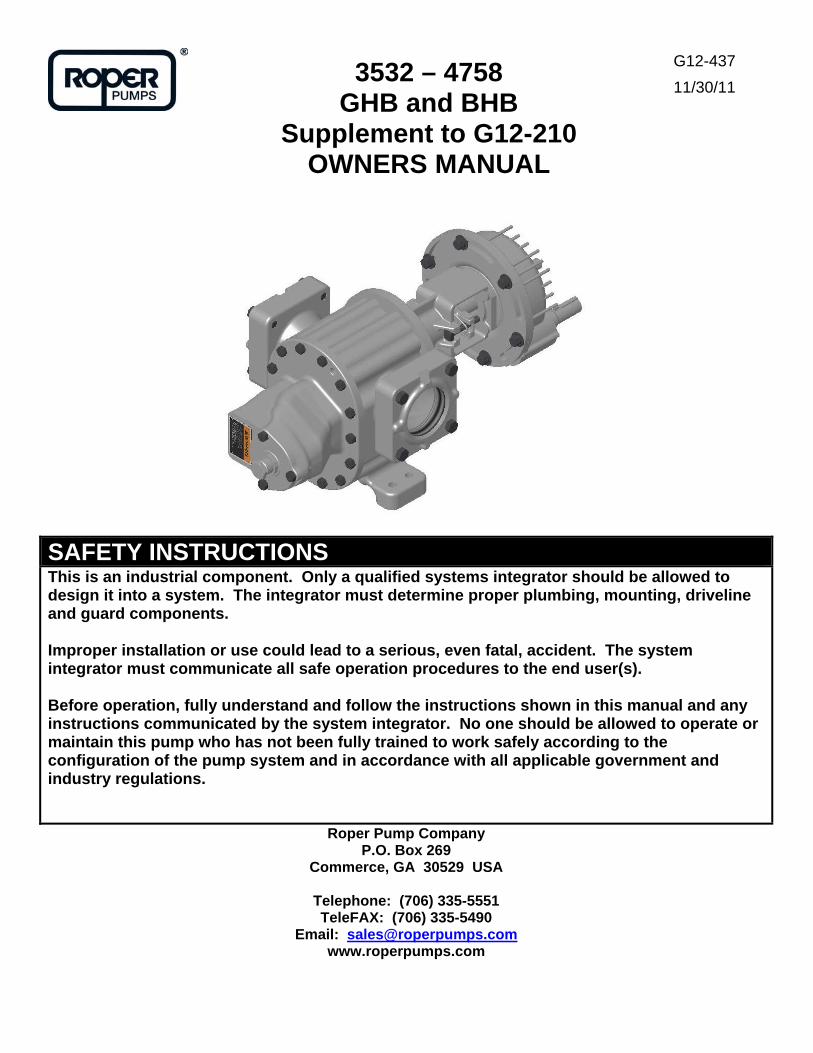
3532 – 4758 GHB and BHB
Supplement to G12-210 OWNERS MANUAL
G12-437
11/30/11
SAFETY INSTRUCTIONS This is an industrial component. Only a qualified systems integrator should be allowed to design it into a system. The integrator must determine proper plumbing, mounting, driveline and guard components. Improper installation or use could lead to a serious, even fatal, accident. The system integrator must communicate all safe operation procedures to the end user(s). Before operation, fully understand and follow the instructions shown in this manual and any instructions communicated by the system integrator. No one should be allowed to operate or maintain this pump who has not been fully trained to work safely according to the configuration of the pump system and in accordance with all applicable government and industry regulations.
Roper Pump Company P.O. Box 269
Commerce, GA 30529 USA
Telephone: (706) 335-5551 TeleFAX: (706) 335-5490
Email: [email protected] www.roperpumps.com

2
Plumbing 1. The inlet pipe should be as short and straight as possible to minimize
suction pressure losses. Excessive restrictions at the inlet can cause cavitation resulting in poor performance, noise, vibration, or pump damage.
2. Slope the inlet plumbing appropriately to avoid air pockets. 3. Plumbing weight, misalignment with the ports or thermal expansion can
exert excessive force on the pump. Plumbing must be properly supported and aligned with expansion joints, if required, to minimize these forces.
4. To prevent over pressure situations, install a relief valve as close to the pump outlet as possible. Install the relief valve before any shut-off valves.
____________________________________________________________
Separate Pump and Drive Assemblies Driveline Guards 1. Assure adequate guards have been installed to prevent personnel
contacting moving components. 2. Follow all OSHA, Federal, state and local codes.
Check Alignment of Pump to Driveline Excessive misalignment can overload the pump input shaft and cause
premature failure. The figures below show parallel and angular misalignments.
Over-pressure may burst pump or system components. Always include a relief valve in installation. Do not over pressurize pump or block discharge line while running.
Parallel Angular
Mounting Base 1. Mount the unit on a rigid, heavy base to provide support and absorb
shock. Bases should be designed for high rigidity, not just strength. 2. The pump feet were not designed for mounting to concrete and do not
have enough contact area to prevent concrete from failing. When mounting to cement or concrete, use a steel base plate (supplied by others) to distribute the mounting stress over an area large enough to prevent the cement from failing. The base plate should be at least as thick as the pump feet. Grout it in place.
___________________________________________________________
Roper Pumps’ Close Coupled Drives Hydraulic drive units where the drive mounts directly to the pump Driveline is not exposed and does not require guards. Alignment between pump and drive line is maintained by the assembly. Because the assembly absorbs reaction forces of the driveline, the
mounting base does not need to be as robust. The level of rigidity and strength is determined by the piping stresses from the system.
Injection Hazard: Do not try to stop a leak with your hand! Avoid any close contact with hydraulic fluid jets. Escaping fluid can penetrate skin, causing serious injury. In case of accident, see a doctor immediately for removal of fluid.

3
WARNING
Operating without guards could result in serious injury or death. Machinery in operation can grab, crush, cut, mangle and dismember. Do not operate without adequate guards in place.

4
INSTALLATION Check Ports Vs Rotation: Make sure the inlet and discharge ports have been correctly plumbed corresponding to the direction of rotation and the relief valve, if present, is properly positioned. See following drawings for various configurations.
DIRECTION OF ROTATION FOR GHB PUMP CONFIGURATIONS USING THE RV STYLE RELIEF VALVE
Figure A

5
DIRECTION OF ROTATION FOR BHB PUMP CONFIGURATIONS USING THE RV STYLE RELIEF VALVE Figure B

6
1. RECOMMENDED TOOL LIST
NOTE: Tools not furnished with pump. Tools for all Pumps:
(1) Safety Glasses (1) Rubber Mallet (1) ¾” Combination Wrench (1) 6” Adjustable Wrench (1) CG-45 Snap-On Tool Bearing Puller (1) 6” to 10” Three Square File (1) Pliers (1) ½ “ Combination Wrench
Additional Tools for Pumps with an RV Type Relief Valve:
(1) 1-3/8” Combination Wrench (1) 1-5/8” Combination Wrench
Additional Tools for Pumps with Flanges:
(2) 15/16” Combination Wrench
Additional Tools for Pumps with Shaft Packing:
Packing Hook for .41” square packing rings
Additional Tools for Pumps with Mechanical Seals:
(1) 0400 External Retaining Ring Pliers
Additional Tools for BHB Pumps:
(1) 5/16” Hex Key
Snap-On is a registered trademark of Snap-On Tool Corporation

7
2. INSTRUCTIONS FOR PUMP DISASSEMBLY Refer to Section 7, PARTS LIST, (Figures 7.1 and 7.2).
1. Read WARNINGS before starting to disassemble pump. While disassembling pump, always inspect disassembled parts and adjacent parts to see if further disassembly is needed. Replace worn or damaged parts as required.
2. If you do not know which pump arrangement you have, collect nameplate data and refer to the Owners Manual for 3532-58 (G12-210) to determine what you have. Consult a Roper distributor or Roper Pump Company if you have any questions.
3. When cleaning or lubricating, use only cleaning solutions and lubricants that are compatible with products being pumped and with sealing elastomers. DO NOT use petroleum base products with seals with EPR elastomers. Use a nonpetroleum base lubricant with EPR elastomers.
4. Turn off pump and lock out energy source to driver. DO NOT proceed further with disassembly of pump if there is the slightest possibility that driver may be started.
5. If used, turn off and disconnect flush from mechanical seal.
6. Close inlet and discharge valves.
7. Remove guard and disconnect coupling between driver and pump.
8. Drain inlet and discharge lines. Disconnect lines from pump inlet and discharge.
9. Follow the procedure in the Owners Manual for 3532-58 (G12-210), INSTRUCTIONS FOR DRAINING PUMP.
10. A.) For 3500-4700 “BHB” pumps, go to Section 4, INSTRUCTIONS FOR DISASSEMBLY OF A TYPE “BHB” HYDRAULIC DRIVE. After disassembling hydraulic drive, return to this section and follow steps 11 – 20.
B.) For 3500-4700 “GHB” gear reduction unit, follow steps 21 – 32. After disassembling gear reduction unit, return to this section and follow steps 11 – 20.
C.) For 3500-4700 “GHBO” pumps, follow steps 11 – 20.
11. Remove fourteen hex head cap screws (L) for the 35 and 58 size pumps or eight hex head cap screws (L) for the 32, 43, and 48 size pumps securing faceplate (23A, B, C) to case (19A, B, C). Remove faceplate (23A, B, C).
12. Remove two dowel pins (J) from case.
13. Remove case gaskets (20).
14. Remove drive gear (34) and key (B1) from drive shaft (32).
15. Remove idler gear (35) and key (B2) from idler shaft (33). Remove idler shaft.
16. Remove fourteen hex head cap screws (L) for the 35 and 58 size pumps or eight hex head cap screws (L) for the 32, 43, and 48 size pumps securing backplate (6A, B) to case (19A, B, C). Separate parts.
17. Remove case gaskets (20) from opposite side of case (19A, B, C).
18. Remove two dowel pins (J) from opposite sides of case (19A, B, C).
19. Remove drive key (A) from drive shaft (32).
20. A.) For 3600/4600 “BHB”, “GHB”, and “GHBO” pumps, follow steps 33 – 40.
B.) For 3500/4500 or 3700/4700 “BHB”, “GHB”, and “GHBO” pumps, follow steps 41 – 47.

8
3500 THRU 4700 “GHB” Gear Reduction Unit (See Figures 7.1 and 7.2)
21. Drain oil from gear reduction unit.
22. Remove drive key (A). Remove four hex head cap screws (U) and four lock-washers (V). Slide seal retainer (37) assembled with lip seal (39) off end of pinion shaft (42).
23. Remove seal retainer gasket (38) between seal retainer (37) and gear case (44).
24. Remove pinion shaft (42) assembly with ball bearing (41) and retaining ring (40).
25. Remove six hex head cap screws (W), twelve flat washers (X), and six lock-washers (Y).
26. Remove gear case (44). Remove gear case gasket (48).
27. Remove needle bearing (43). This bearing is installed with a press fit.
28. Remove retaining ring (45).
29. Remove drive gear (46). A gear puller may be necessary in removing gear, as a close fit is maintained between gear and shaft.
30. Remove drive gear key (Z).
31. Remove four socket head cap screws (AD) securing cover (49) to backplate (6A, B). Remove cover gasket (50).
32. Remove spacer (47).
3600/4600 “GHB”, “GHBO” and “BHB” Pumps (See Figure 7.1)
33. Remove retaining ring (3) securing ball bearing (2) in place.
34. Remove two locknuts (F) from square head bolts (G) securing packing gland (14) in place. Remove packing gland clip (13), packing gland (14), spring clip (15), and two square head bolts (G).
35. Remove packing rings (16) and packing washer (18). Remove lantern ring (17) if used. Packing hooks are commercially available to assist in removal of packing.
36. Remove drive shaft (32) along with ball bearing (2) from backplate (6A, B).
37. Remove ball bearing (2) from drive shaft (32).
38. Remove lip seal (5) from backplate (6A, B) and discard. It will be damaged during disassembly.
39. Clean drive shaft and adjacent parts. Examine shaft. Replace drive shaft if excessively worn or scored.
40. Visually inspect all parts. Replace all worn or damaged parts before reassembling pump. It is recommended that new gaskets (20, 22, 38, 48, 50) and new lip seals (5, 39) be installed each time the pump is disassembled and reassembled.

9
3500/4500 or 3700/4700 “GHB”, “GHBO” and “BHB” Pumps (See Figure 7.1)
41. Remove retaining ring (3) securing ball bearing (2) in place.
42. Clean and lubricate drive shaft (32) with a compatible lubricant prior to removing mechanical seal or triple lip seal (10), making sure that drive shaft is smooth and free from all burrs. Loosen setscrew (if present) on mechanical seal. Remove seal (11). If 3700/4700 pump, inspect sealing surfaces of stationary seal face and inspect rotating element of mechanical seals. If 3500/4500 pump, remove packing washer (18) and triple lip seal (10). It is recommended that new gaskets (20, 22, 25) be installed each time pump is disassembled and re assembled. Triple lip seal (10) must be replaced any time it is removed from backplate (6A, 6B). Remove retaining ring (12) from drive shaft (32), if applicable.
43. Remove drive shaft (32) along with ball bearing (2) from backplate (6A, B).
44. Remove ball bearing (2) from drive shaft (32).
45. Remove lip seal (5) from backplate (6A, B) and discard. It will be damaged during disassembly.
46. Remove two locknuts (F) from square head bolts (G) securing seal retainer (9) to backplate (6A, B). Remove seal retainer (9).
47. Visually inspect all parts. Replace all worn or damaged parts before reassembling pump. It is recommended that new gaskets (20, 22, 25, if applicable) and new lip seals (5, 10, 39) be installed each time pump is disassembled and reassembled.

10
3. INSTRUCTIONS FOR PUMP ASSEMBLY Refer to Section 7, PARTS LIST. Refer to Section titled “Check Ports Versus Rotation” (Figures A and B) to assure proper configuration for pump rotation, port location, and relief valve position prior to assembling pump.
1. Read and understand all safety instructions and warnings before assembling pump. Visually inspect all parts during assembly. Replace all worn or damaged parts. Although they may appear reusable, it is recommended that new gaskets (20, 22, if applicable, 38, 48, 50) and lip seals (5, 39) be installed when pump is being reassembled.
WARNING! Only use genuine Roper gaskets. Gasket thickness determines proper clearances. Always check quantity of gaskets removed and replace with exact quantity. Proper material must be used based on application.
2. When cleaning or lubricating, only use products that are compatible with product being pumped and elastomers within pump. DO NOT use petroleum base products with seals with EPR elastomers. Clean and lubricate parts with light oil unless EPR elastomers are used. Use a nonpetroleum base lubricant with EPR elastomers.
3. Mechanical seals are precision pieces of equipment. Use extreme care not to damage seal faces or elastomers during assembly.
4. Install two dowel pins (J) on each side of case (19A, B, C). Place appropriate number of case gaskets (20) on faceplate side of case. Align faceplate (23A, B, C,) on dowel pins (J). Secure faceplate to case using fourteen hex head cap screws (L) for the 35 and 58 size pumps or eight hex head cap screws (L) for the 32, 43, and 48 size pumps.
5. Place idler gear (35) into case bore. Install key (B2) in keyway on idler shaft (33). Slide idler shaft into I.D. of idler gear.
6. A.) For 3600/4600 “GHBO,” “GHB,” and “BHB” pumps with shaft packing, follow steps 7 – 17.
B.) For 3500/4500 or 3700/4700 “GHBO,” “GHB,” and “BHB” pumps with a triple lip seal or a standard mechanical seal, follow steps 27 – 36.
C.) For 3700/4700 “GHBO,” “GHB,” and “BHB” pumps with a positive drive mechanical seal, follow steps 37 – 50.

11
3600/4600 “GHB” “GHBO” and “BHB” Pumps (See Figure 7.1)
7. Place drive gear (34) into case bore. Install key (B1) in keyway of drive shaft (32). Slide drive shaft into bore of drive gear.
8. Place appropriate number of case gaskets (20) on backplate side of case (19A, B, C). Align backplate (6A, B) on dowel pins (J). Secure backplate to case using fourteen hex head cap screws (L) for the 35 and 58 size pumps or eight hex head cap screws (L) for the 32, 43, and 48 size pumps.
9. Install packing washer (18) over drive shaft (32) into packing bore of backplate.
10. Install packing rings (16) and lantern ring (17), if used, in packing bore of backplate. Stagger joints on each ring 180 apart. Seat each ring before adding next ring. Rings must not be tamped or seated too tightly.
11. Check drive shaft (32) for free movement after each ring is installed.
12. When packing box is sufficiently full to allow entry of packing gland (14) about ¼ of an inch [6 mm], reassemble packing gland.
13. Place one square head bolt (G) through each slot in backplate (6A, B) and through each hole in packing gland (14). Install packing gland (14) into packing box about ¼ of an inch [6 mm]. Slide packing gland clip (13) over square head bolts (G). Using two locknuts (F), secure packing gland (14) in place. Install spring clip (15) across square head bolts (G). Draw locknuts up evenly on packing gland to assure proper seating of packing (16), then loosen locknuts about ½ turn. DO NOT cock packing gland. This could cause binding or heating of drive shaft.
14. Install lip seal (5) in backplate (6A, B).
15. Install ball bearing (2) on drive shaft (32) and into backplate (6A, B) using retaining ring (3) to secure ball bearing (2) in place as shown in the sectional drawing (Figure 7.1). The fit between the drive shaft and ball bearing may be a light press fit. DO NOT strike or press on the outer race of the bearing. This could damage the bearing.
16. Install spacer (47).
17. A.) For “GHB” gear reduction unit, follow steps 18 – 26.
B.) For “BHB” hydraulic drive assembly, go to Section 5, INSTRUCTIONS FOR ASSEMBLY OF A TYPE “BHB” HYDRAULIC DRIVE.
3500 THRU 4700 “GHB” Gear Reduction Unit (See Figure 7.2)
18. Install cover gasket (50) and cover (49) on backplate (6A, B) using four socket head cap screws (AD).
19. Install key (Z) in keyway of drive shaft (32). Place drive gear (46) on drive shaft (32). Secure in place using retaining ring (45).
20. Install needle bearing (43). The needle bearing is a press fit bore.
21. Install gear case (44) and gear case gasket (48) using six hex head cap screws (W), twelve flat washers (X), and six lockwashers (Y).
22. Press ball bearing (41) onto pinion shaft (42) and install retaining ring (40).
23. Install pinion shaft assembly by sliding small end of pinion shaft into needle bearing (43) at same time gears are meshed together.
24. Slide bearing retainer (37) assembled with lip seal (39) and bearing retainer gasket (38) into place. Secure bearing retainer (37) to gear case (44) using four hex head cap screws (U) and four lockwashers (V).
25. Install drive key (A).
26. Read and understand all safety instructions and warnings before installing and operating pump.

12
3500/4500 or 3700/4700 “GHB”, “GHBO”, and “BHB” Pumps (Std Mech Seal or Triple Lip Seal) (See Figure 7.1) 27. Place drive gear (34) into case bore. Install key (B1) in keyway of drive shaft (32). Slide drive shaft into bore of
drive gear.
28. Place appropriate number of case gaskets (20) on backplate side of case (19A, B, C). Align backplate (6A, B) on dowel pins (J). Secure backplate to case using fourteen hex head cap screws (L) for the 35 and 58 size pumps or eight hex head cap screws (L) for the 32, 43, and 48 size pumps.
29. Carefully remove all burrs and sharp edges from shaft over which rotating element of the mechanical seal or triple lip seal will slide.
30. A.) If 3500/4500 pump, place triple lip seal (10) with two lips facing toward seal chamber onto opening of seal chamber in backplate (6A, B). Press triple lip seal into seal chamber until back side of seal is flush with face of seal chamber. Take care to use a tool that will not damage or distort seal casing. Install one packing washer (18).
B.) If 3700/4700 pump, install retaining ring (12) on drive shaft (25). Lubricate drive shaft and mechanical seal bore with a compatible lubricant. Install mechanical seal (11) on drive shaft and position seal back against retaining ring (12). Care must be taken not to nick o-ring. Be sure lapped (polished) faces of stationary seal face and rotating element are together.
31. Install lip seal (5) in backplate (6A, B).
32. Install ball bearing (2) on drive shaft (32) and into backplate (6A, B). DO NOT strike or press on the outer race of the bearing. This could damage the bearing. Install retaining ring (3) to secure ball bearing (2) in place. The fit between drive shaft and ball bearing may be a light press fit. DO NOT damage seal parts while pressing ball bearing on drive shaft.
33. Place one square head bolt (G) through each slot in backplate (6A, B) and through each hole in seal retainer (9). Secure seal retainer against backplate using two locknuts (F).
34. Install spacer (47).
35. A.) For “GHB” gear reduction unit follow steps 18 – 26.
B.) For “BHB” hydraulic drive assembly, go to Section 5, INSTRUCTIONS FOR ASSEMBLY OF A TYPE “BHB” HYDRAULIC DRIVE.

13
3700/4700 “GHBO,” “GHB,” and “BHB” Pumps (Positive Drive Mech Seal) (See Figure 7.1)
36. Place drive gear (34) into case bore.
37. Install retaining ring (12) on drive shaft (32) to locate mechanical seal.
38. Carefully remove all burrs and sharp edges on shaft over which the rotating element of seal will slide.
39. Apply a compatible lubricant to seal I.D. and O.D. of drive shaft (32).
40. Slide rotating element of mechanical seal (11) onto drive shaft (32) before removing three or four clips that are taped to rotating element. Push rotating element back against retaining ring (12), tighten set screws in seal, and remove clips that are taped to seal.
41. Slide faceplate end of drive shaft (32), with mechanical seal attached, into backplate (6A, B) through bore for ball bearing (2).
42. Place appropriate number of case gaskets (20) on backplate side of case (19A, B, C). Install key (B1) in keyway of drive shaft (32). Slide drive shaft into bore of drive gear while aligning backplate (6A, B) on dowel pins (J). Secure backplate (6A, B) to case (19A, B, C) using fourteen hex head cap screws (L) for the 35 and 58 size pumps or eight hex head cap screws (L) for the 32, 43, and 48 size pumps.
43. Lubricate o-ring on stationary seal face and seal chamber bore with a compatible lubricant. Slide stationary seal face over keyway end of drive shaft (32) and down to seal chamber. Be sure lapped (polished) face is toward rotating member of seal. Push stationary seal face into seal chamber.
44. Install lip seal (5) in backplate (6A, B).
45. Install ball bearing (2) on drive shaft (32) and into backplate (6A, B) using retaining ring (3) to secure ball bearing (2) in place. The fit between drive shaft and ball bearing may be a light press fit. DO NOT damage seal parts while pressing ball bearing on drive shaft.
46. Install anti-rotation pin (T) in locator ring (60).
47. Position locator ring (60) with anti-rotation pin (T) toward seal face. Align anti-rotation pin (T) with slot in back of stationary seal face and push into counter-bore of backplate (6A, B).
48. Place one square head bolt (G) through each slot in backplate (6A, B) and through each hole in seal retainer (9). Secure seal retainer against backplate using two locknuts (F).
49. A.) For 3700/4700 “GHB” gear reduction unit, follow steps 18 – 26.
B.) For 3700/4700 “BHB” hydraulic drive assembly, go to Section 5, INSTRUCTIONS FOR ASSEMBLY OF A TYPE “BHB” HYDRAULIC DRIVE.

14
4. INSTRUCTIONS FOR DISASSEMBLY OF A TYPE “BHB” HYDRAULIC DRIVE
Refer to Section 7, PARTS LIST, (Figures 7.1 and 7.3).
1. Read and understand all safety instructions and warnings before starting to disassemble hydraulic drive components from pump. While disassembling, always inspect disassembled parts and adjacent parts to see if further disassembly is needed. Replace worn or damaged parts as required.
2. Turn off pump and lock out energy source to hydraulic motor. DO NOT proceed further with disassembly of pump if there is the slightest possibility that hydraulic motor may be started.
3. Close inlet and discharge valves.
4. A.) Refer to Section 7, (Figure 7.1), pump sectional drawing for “GHBFORV”.
B.) If used, turn off and disconnect flush for packing or mechanical seal.
C.) To drain pump, follow the procedures in the Owners Manual for 3632-58 (G12-210), INSTRUCTIONS FOR DRAINING PUMP.
D.) Disconnect lines from pump inlet and discharge.
5. Remove six socket head cap screws (AE) and six lock-washers (AF) that secure bracket (51) and bracket (52) together. Slide apart.
6. Remove cap screws that secure hydraulic motor to bracket (52).
7. Rotate bracket (52) until hole for loosening setscrew lines up with setscrew in coupling half (54). Loosen setscrew and remove coupling half.
8. Remove coupling spider (55).
9. Rotate drive shaft of pump (32) until setscrew in coupling half (53) lines up with hole for loosening setscrew. Loosen setscrew. Remove retaining ring (45) from drive shaft and remove coupling half.
10. Remove drive key (Z).
11. Remove four socket head cap screws (AD) that secure bracket (51) to backplate (6A, B). Remove bracket.
12. For further disassembly of the pump, refer to Section 2, INSTRUCTIONS FOR PUMP DISASSEMBLY, steps 1 - 20. Also, refer to steps 33 - 40 for pumps with packing, or steps 41 - 47 for pumps with mechanical or triple lip seals.

15
5. INSTRUCTIONS FOR ASSEMBLY OF A TYPE “BHB” HYDRAULIC DRIVE
1. Refer to Section 3, INSTRUCTIONS FOR PUMP ASSEMBLY, steps 1 - 6. For installing packing, refer to steps 7 - 17. For installing mechanical or triple lip seal, refer to steps 27 - 36.
2. Refer to Section 7, (Figure 7.3), sectional drawing for TYPE “BHB” HYDRAULIC DRIVE COUPLING ASSEMBLY.
3. Secure bracket (51) to backplate (6A, B) using four socket head cap screws (AD).
4. Install key (Z) in shaft keyway. Place coupling half (53) on drive shaft (32). Install retaining ring (45). Rotate drive shaft (32) until setscrew lines up with hole in bracket (51), then tighten setscrew.
5. Install coupling spider (55).
6. Place bracket (52) onto pilot of hydraulic motor. DO NOT secure bracket into place at this time.
7. Place coupling half (54) onto shaft of hydraulic motor to dimension shown. Rotate bracket (52) until hole in bracket lines up with setscrew on coupling half. Tighten setscrew.
8. Rotate bracket on motor to line up motor mounting holes with bracket holes. Secure bracket (52) to hydraulic motor using appropriate fasteners.
9. Secure bracket (52) to bracket (51) using six socket head cap screws (AE) and six lock-washers (AF).
10. Read and understand all safety instructions and warnings before installing and operating pump.

16
6. GEAR REDUCTION UNIT
ALIGNING GHB PINION SHAFT HEIGHT, Refer to Section 7, PARTS LIST, (Figure 7.2). The pinion shaft of the GHB gear reducer can be positioned at any location over a full 360. This must be done before the gear reducer oil is added. The pinion shaft can be positioned in the following manner.
1. Loosen six hex head cap screws (W).
2. Rotate gear case (44) on six slots in cover (49).
3. If pinion shaft (42) cannot be moved to proper position at this point, remove six hex head cap screws (W) along with washers (X and Y).
4. Rotate pinion shaft to desired position and reinstall and tighten six hex head cap screws (W) along with six flat washers (X) and six lock-washers (Y).
5. If six threaded holes in gear case (44) are not fully visible within cast slots on cover (49), gear reducer will have to be partially disassembled so that cover (49) can be rotated.
6. Slide gear case (44) off of cover (49).
7. Remove retaining ring (45) from end of pump drive shaft (32).
8. Remove drive gear (46). A gear puller may be necessary.
9. Remove four socket head cap screws (AD).
10. Rotate cover (49) 90 and reinstall and tighten four socket head cap screws.
11. Install drive gear (46) on drive shaft (32).
12. Install retaining ring (45).
13. Replace gasket (48) and slip gear case (44) complete with pinion assembly onto cover (49).
14. Rotate pinion to desired position. Install and tighten six hex head cap screws (W) along with six flat washers (X) and six lock-washers (Y).
15. If necessary, reposition plugs (AA), petcock (AC), and oil cup (AB). Oil cup should be at uppermost point and petcock at second hole from bottom.
16. Refill with oil to level of petcock (AC) using Gulf Senate 375, Mobile 600 W Cylinder Oil, or AGMA No. 7 compounded oil.
LUBRICATION INSTRUCTIONS FOR INITIAL START-UP The oil cup (AB) is shipped separately to prevent breakage. Before placing the gear reduction unit in operation, install the oil cup (AB) and check the oil level in unit. The oil level should be maintained even with petcock (AC) at all times. SERVICING INSTRUCTIONS The oil should be clean and free from sludge at all times and should be changed at regular intervals. A drain plug (AA) has been provided near the bottom of the gear case (44) for this purpose. The oil (Gulf Senate 374, Mobil 600 W Cylinder Oil, or AGMA No. 7 compounded oil) should be changed every 1000 hours or every four months, whichever comes first. Where operating conditions are severe, such as rapid rise and fall of temperature, or the atmosphere is moist or dusty, it may be necessary to change the oil every one or two months or sooner. The oil cup (AB) at the front of the gear case (44) is for filling the unit with oil and also serves as a breather. DO NOT allow the oil cup (AB) to become clogged. This could cause excessive pressure inside the gear case (44). Gulf is a registered trademark of Gulf Oil Company Mobil is a registered trademark of Mobil Oil Corporation

17
CHANGING RATIO OF GEAR REDUCTION UNIT Refer to appropriate sectional drawing (Figure 7.2) showing internal construction of the gear reduction assembly. The internal construction for all ratios are identical, except for the drive gear (46) and pinion shaft (42), which determines the gear ratio of that particular unit. The drive gear (46) and pinion shaft (42) are interchangeable in pairs only. See GEAR RATIO CHART for ratios available. It is recommended that new gaskets (38, 48) and new lip seal (39) be installed each time unit is disassembled and reassembled.
1. Turn off pump and lock out energy source to driver. DO NOT proceed further with disassembly of gear reduction unit if there is the slightest possibility that driver may be started.
2. Drain oil from gear reduction unit.
3. If unit is assembled on a baseplate, directly connected to a motor, it will be necessary to remove flexible coupling as follows:
A.) Loosen setscrew on motor half of coupling.
B.) Slide motor coupling half towards motor to clear pump coupling half. (In case coupling cannot be removed in this manner, it will be necessary to remove either motor or pump in order to remove pump coupling half.)
4. Loosen six hex head cap screws (W) and rotate gear case (44) in slots provided until pump coupling half is clear of motor coupling half.
5. Remove pump coupling half.
6. Remove drive key (A). Remove four hex head cap screws (U) and four lock-washers (V). Slide seal retainer (37) assembled with lip seal (39) off the end of pinion shaft (42).
7. Remove seal retainer gasket (38) between seal retainer (37) and gear case (44).
8. Remove pinion shaft (42) assembly with ball bearing (41) and retaining ring (40).
9. Remove six hex head cap screws (W), twelve flat washers (X), and six lock-washers (Y).
10. Remove gear case (44). Remove gear case gasket (48).
11. Remove retaining ring (45).
12. Remove drive gear (46). A gear puller may be necessary in removing gear, as a close fit is maintained between gear and shaft.
13. Refer to gear ratio chart to select desired gear ratio.
14. Slide drive gear (46) on drive shaft (32) securing in place using retaining ring (45). Make sure key (Z) and spacer (47) are in place. The number of teeth is stamped on drive gear (46).
15. Install gear case (44) and gear case gasket (48) using six hex head cap screws (W), twelve flat washers (X), and six lock-washers (Y).
16. Press ball bearing (41) onto pinion shaft (42) and install retaining ring (40). DO NOT strike or press on the outer race of the bearing. This could damage the bearing.
17. Install pinion shaft assembly by sliding small end of pinion shaft into needle bearing (43) at same time gears are meshed together.
18. Slide bearing retainer (37) assembled with lip seal (39) and bearing retainer gasket (38) into place. Secure bearing retainer (37) to gear case (44) using four hex head cap screws (U) and four lock-washers (V).
19. Install drive key (A).
20. Install pump coupling half and tighten setscrews on drive key (A).
21. Rotate gear case (44) until coupling halves are accurately aligned. Tighten six hex head cap screws (W). Assemble coupling and tighten setscrew in motor coupling half.

18
22. Refill with oil to level of petcock (AC) using Gulf Senate 375, Mobil 600 W Cylinder Oil, or AGMA No. 7 compounded oil.
GEAR REDUCTION RATIOS AND CAPABILITIES Gear reducers are rated to transmit up to the horsepower’s (kW) shown below. Three interchangeable gear ratios are available.
GEAR RATIO CHART
60 HZ OPERATION 50 HZ OPERATION
PUMP MODELS
GEAR RATIOS
MOTOR RPM
PUMP RPM
MAX. HP ALLOWED
MOTOR RPM
PUMP RPM
MAX. KW ALLOWED
3532 THROUGH
4758
5.66:1
580
102 4.1
485
86 2.7
4.88:1 119 4.9 99 3.2
4.26:1 136 5.5 114 3.6
5.66:1
870
154 6.3
730
129 4.2
4.88:1 178 7.3 150 4.9
4.26:1 204 8.5 171 5.6
5.66:1
1150
203 8.5
950
168 5.8
4.88:1 235 10.0 194 6.6
4.26:1 270 11.0 223 7.3
5.66:1
1750
309 13.0
1450
256 8.6
4.88:1 360 15.0 297 9.9
4.26:1 410 15.0 340 10.0
5.66:1 3450 609 15.0 2850 54 10.0

19
7. PARTS LIST .2. Ball Bearing 3. Retaining Ring, Bearing Cage 5. Lip Seal (GHB) 6. Backplate A. Standard B. Jacketed 7. Bearing, Short 8. Bearing, Long 9. Seal Retainer 10. Triple Lip Seal 11. Mechanical Seal 12. Retaining Ring, Mechanical Seal 13. Packing Gland Clip 14. Packing Gland 15. Spring Clip 16. Packing Ring 17. Lantern Ring (Not Shown) 18. Packing Washer 19. Case A. Threaded Port Case – Right Angle B. Flanged Case – Right Angle C. Flanged Case – Straight Through 20. Case Gasket 21. Flange 22. Flange Gasket 23. Faceplate A. Plain B. RV Style Relief Valve C. Jacketed RV Style Relief Valve 24. Relief Valve Cap 25. Relief Valve Cap, O-ring 26. Adjusting Screw 27. Nut, Lock and Seal
29. Spring 30. Poppet/Spring Guide 32. Drive Shaft 33. Idler Shaft 34. Drive Gear 35. Idler Gear 57. Expansion Washer 60. Locator Ring WRN2 Warning Plate, RV Style Relief Valve WRN3 Warning Plate, RV Style Relief Valve WRN4 Warning Plate, RV Style Relief Valve A. Drive Key B1. Key, Drive Gear B2. Key, Idler Gear D. Lube Fitting E. Hex Head Cap Screw, Seal Retainer to Backplate F. Locknut G. Square Head Bolt H. Pipe Plug, Backplate J. Dowel Pin L. Hex Head Cap Screw, Endplates to Case M. Hex Head Cap Screw, Flange N. Nut, Flange S. Pipe Plug, Faceplate T. Anti-rotation Pin AG. Stud AH. Hex Head Cap Screw AJ. Drive Screw AK. Nut

20
Gear Reduction Assembly only 37. Bearing Retainer 38. Bearing Retainer Gasket 39. Lip Seal 40. Retaining Ring, Ball Bearing 41. Ball Bearing 42. Pinion Gear and Shaft 43. Needle Bearing 44. Gear Case 45. Retaining Ring, Drive Gear 46. Drive Gear 47. Spacer 48. Gear Case Gasket 49. Cover 50. Cover Gasket U. Hex Head Cap Screw, Bearing Retainer to Gear Case V. Lock-washer, Bearing Retainer W. Hex Head Cap Screw, Cover to Gear Case X. Flat Washer, Gear Case Y. Lock-washer, Gear Case Z. Key, Drive Gear AA. Pipe Plug, Gear Case AB. Oil Cup, Gear Case AC. Petcock, Gear Case AD. Socket Head Cap Screw, Cover to Backplate
Type BHB Hydraulic Drive Bracket Assembly only 51. Bracket Half, Pump 52. Bracket Half, Motor 53. Coupling Half, Pump 54. Coupling Half, Motor 55. Spider Coupling AE. Socket Head Cap Screw, Bracket to Bracket AF. Lock-washer

21
GHBFORV FIGURE 7.1

22
GEAR REDUCTION ASSEMBLY FIGURE 7.2

23
TYPE BHB HYDRAULIC DRIVE COUPLING ASSEMBLY
FIGURE 7.3

24
8. INDEX
A Aligning GHB Pinion Shaft Height, 16 Assembly Instructions All, 10 3500 thru 4700 “GHB” Gear Reduction Unit, 11 3600/4600 “GHB”, “GHBO”, and “BHB”, 11 3500/4500 or 3700/4700 “GHB”, “GHBO”, and “BHB” - Std Mech Seal or Triple Lip Seal, 12 3700/4700 “GHB”, “GHBO”, and “BHB” - Positive Drive Mech Seal, 13 Type “BHB” Hydraulic Drive, 15
C Conversions Changing Ratio of Gear Reduction Unit, 17
D Disassembly Instructions All, 17 3500/4700 “GHB” Gear Reduction Unit, 8 3500/4500 and 3700/4700 “GHB”, “GHBO” and “BHB”, 9 3600/4600 “GHB”, “GHBO” and “BHB”, 8 Type “BHB” Hydraulic Drive, 14
F Figure A, 4 Figure B, 5 Figure 7.1, 21 Figure 7.2, 22 Figure 7.3, 23
G Gear Reduction Unit, 16 - 18
L Lubrication Gear Reduction Unit, 16
M Mechanical Seals,
Installation of a Standard Mechanical Seal (John Crane Type 21), 12 Installation of a Positive Drive Seal (John Crane Type 8-1 and Type 9), 13
P Plumbing, 2
R Ratings
Gear Reduction Unit, 18 Rotation
Direction of Rotation for “GHB” Pump Configurations using the RV Style Relief Valve, 4 Direction of Rotation for “BHB” Pump Configurations using the RV Style Relief Valve, 5
T Tools, 6 Triple Lip Seal Installation, 12