2d profile cutting - stinger cnc - isu...
TRANSCRIPT

2D Profile Cutting - Stinger CNCDigital Fabrication Lab | College of Design, Iowa State University

2D Profile Cutting- Guidelines- The following steps will guide the user on how to transfer digital work from a design software to setting up the cut-files, and finally cutting the vec-tor linework using a Computer Numerical Controlled (CNC) router.- The 2D Profile Cut can only be made in the typical X-Y (Horizontal or Forward-Backward + Side-Side) Plane and Z (Vertical or Up-Down) Plane.- All materials need to be cut down to 24in. x 36in. prior to CNC milling.- Some materials might need to screwed down to the CNC Spoil Board to avoid displacement.

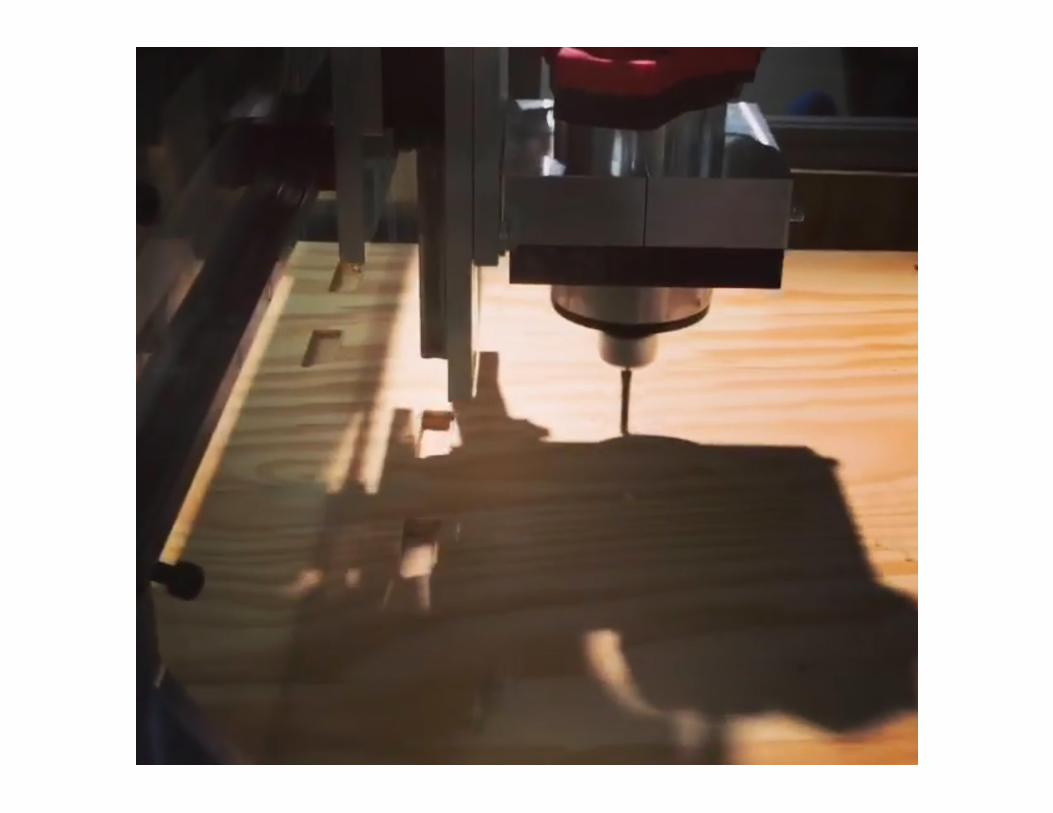
Stinger CNC- Cut tool- 2D and 3D cutting, drilling, engraving etc.- Turn On once the files are ready to be cut.- Does not need to be turned ON/OFF between cuts unless manually handling CNC parts.
Air Filtration System- Filtering dust particles from CNC- Needs to remain On at all times while working in the CNC room.
Oneida Dust Collector- Collect Dust from the CNC during cut.- Connected to the CNC router through suction ducts. - Must be turned on before cutting.
Hardware

Black Box Vacuum- Hold material down through suction- Must be turned on during cut and turned off after cut is complete.
Shop-vac- Clean saw dust or other material residue- It is important to clean residue around hot machinery regularly to avoid fires.
Hardware

Design Setup- Rhino3D, AutoCAD, Illustrator etc.- A range of software can be used to setup the initial design files to be milled.
Cut Path Setup- Cut2D Pro- Used to setup the toolpaths for the cut.- Only for 2D cutting, drilling, pocket-cutting, engraving etc.
CNC Setup- CAMaster WinCNC- Used to operate the CNC.
Software

Design Setup- Rhino3D, AutoCAD, Illustrator etc.- Irrespective of the design software used, the geometry needs to be converted to two-dimensional linework.- The 2D linework needs to be exported as .DXF file format.- The geometry to be cut needs to fit within a 24in. x 36 in. boundary. - If the geometry does not fit within the 24in. x 36in. boundary, divide the geometry and export as separate files.

Cut Path Setup - Cut2D Pro- Opening and Job Setup- Open the .DXF file. File > (File Location) > (FileName).DXF- Job Setup (As noted in the image below):1. Job Size - must be always set to the dimen-sions of the material (24in. x 36 in.)
2. Material Thickness: Select the appropriate material thickness.
3. XY Datum Position: Un-check “Use Offset”.
4. Units: Inches (unless mm is required)
5. Design Scaling: Un-check “Scale design with job size”.
6. Hit OK.1
2
3
4
5

Cut Path Setup - Cut2D Pro- Editing Objects- Select the objects that needs to be edited.- Under the Edit Objects menu, the options allow for rotating, moving, trimming the object(s) selected, along with other similar options.

Cut Path Setup - Cut2D Pro- Toolpath Setup1. Material Setup: Used to setup the material properties. To assign these properties, hit SET and select the accurate properties.
2. Profile Toolpath Settings
3. Preview Toolpath
4. Save Toolpath
1
2
4
3

Cut Path Setup - Cut2D Pro- Profile Toolpath Settings1. Cutting Depth: Start Depth = 0.0 inches Cut Depth = Thickness of material or desired final depth of cut
2. Tool: Bit type and Bit size. Change these settings by hitting Select.The number of Tool Passes can be selected by hitting “Edit Passes ...” (Recommended that the number of Tool Passes given by the software is kept, to preserve the longevity of drill bit.)
3. Machine Vectors: Path of the tool path. (Outside/Right option recommended)
1
2
3

Cut Path Setup - Cut2D Pro- Profile Toolpath Settings (Continued)4. Add Tabs: Tabs can be added to smaller pieces to avoid displacement of object (this step needs to be completed after the Vector Selection, Step 5, has been made).
5. Vector Selection: To select the vectors that needs to be cut hit “Selector”.
4
5
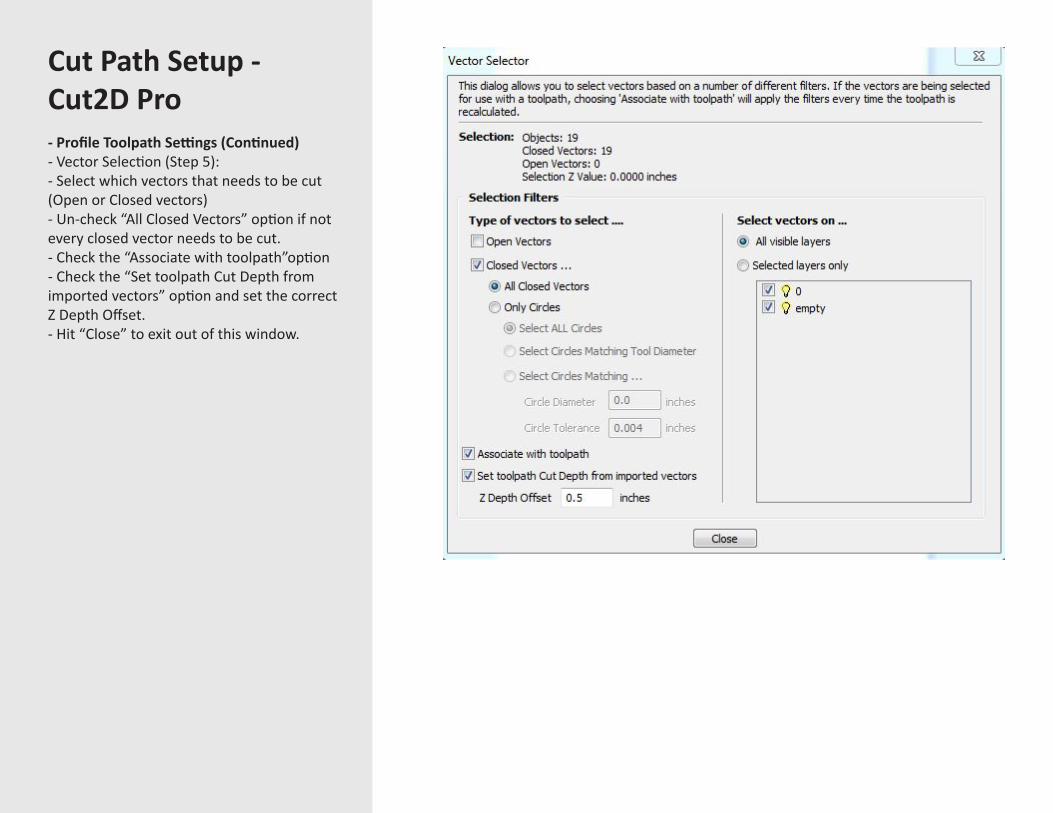
Cut Path Setup - Cut2D Pro- Profile Toolpath Settings (Continued)- Vector Selection (Step 5):- Select which vectors that needs to be cut (Open or Closed vectors)- Un-check “All Closed Vectors” option if not every closed vector needs to be cut.- Check the “Associate with toolpath”option- Check the “Set toolpath Cut Depth from imported vectors” option and set the correct Z Depth Offset.- Hit “Close” to exit out of this window.

Cut Path Setup - Cut2D Pro- Profile Toolpath Settings (Continued)- Add Tabs (Step 4):- Once the Vector Selection is complete, tabs may be added to smaller objects that might come off the board.- To check the “Add Tabs to toolpath” option from the 2D Profile Toolpath” settings menu.- To manually control the tabs click “Edit Tabs”. - To manually add tabs click on the vectors where tabs needs to added.- If every vector needs tabs, click “Add Tabs” from the Toolpath Tabs menu.- Do not click “Add Tabs” if manually adding tabs.- Once tabs are added, click “Close” to go back to the “2D Profile Toolpath” settings menu.

Cut Path Setup - Cut2D Pro- Profile Toolpath Settings (Continued)- Review every setting.- Click “Calculate” for the software to calculate the input settings.

Cut Path Setup - Cut2D Pro- Preview Toolpath- Click “Play” for a preview of the cut.- The animation can be reset by clicking “Reset Preview”.- If everything looks good, click “Close”. - Note that the view has now switched to “3D View”, to go back to Vector View click the (FileName)tab on the top-left corner if needed.

Cut Path Setup - Cut2D Pro- Save Toolpath- Click the “Save Toolpath” Icon (Circled in Red) to open the Save menu. - Under “Post Processor” the select the file type- The file should always be saved as “WINCNC GCode (inch) (*.tap)”- Click “Save Toolpath(s)”. This selects every toolpath from the Toolpath List. - To select a certain toolpath, select the Toolpath from the Toolpath List before clicking “Save Toolpath(s)”.

CNC Setup - CAMaster WinCNC- Initial Configurations- Once the CNC has been turned on, open the CAMaster WinCNC software.- “Initialize” the CNC.- The “Home” position or the “X0 Y0 Z0” positions have already been setup. - Unless needed keep these settings.- To change the “X0 Y0” position manually move the bit by clicking Y “UP” or “DOWN” and X “UP” or “DOWN” keys.- Once the bit has been moved to desired location, click “Zero XY”.- Similarly the bit height can be adjusted by moving the bit in the Z axis, followed by Zero Z.- Once the material has been placed over the CNC Spoil Board, move the bit to any location over the material. - Place the “Z Zero Plate” under the bit (Image: Bottom-Left).-Click “Touch Top” (This gives the CNC the Start Depth of the material).- Once the Touch Top operation is complete, remove Z Zero Plate from the cut area, and close the lift gate.
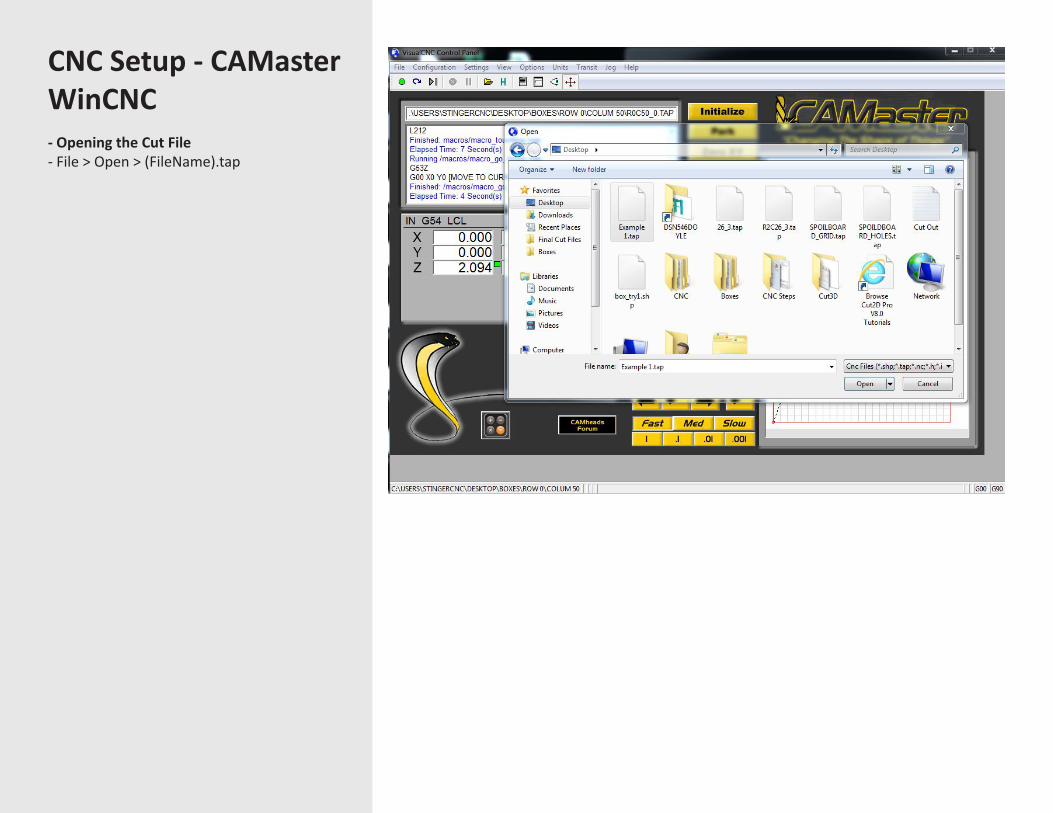
CNC Setup - CAMaster WinCNC- Opening the Cut File- File > Open > (FileName).tap

CNC Setup - CAMaster WinCNC- Viewing the Cut File- Opening the file does not show the file on the screen.- To view the file: File > View (Ctrl + V)

CNC Setup - CAMaster WinCNC- Simulation- To simulate the Cut File settings imported from Cut 2D Pro: File > Simulate (Ctrl + S)- If all the settings look like the image to the right, the file is ready to be cut. - Z Min is the only value that should appear in Red. - Click OK.

CNC Setup - CAMaster WinCNC- Cutting the File- After the Simulation is complete, turn the Spindle On. - After a slight pause (Once the Spindle is up to speed), the circle under the File menu turns green.- Press Enter to start cutting. - NOTE: It is important to turn the spindle on before pressing Enter or else it might ruin the bit.- In case of emergency, Press the Emergency STOP button on the CNC or the ESC key on the keyboard.- Once the file is cut, turn the Spindle OFF before opening the gates.