2.5” strut spacer lift - suspension lift kits | bds...
TRANSCRIPT

2.5” Strut Spacer Lift
Toyota Tacoma 4WD | 2005-2014
Rev. 040314
Part#: 028251
491 W. Garfield Ave., Coldwater, MI 49036 . Phone: 517-279-2135
Web/live chat: www.bds-suspension.com . E-mail: [email protected]
2 | 028251
Read And Understand All Instructions And Warnings Prior To Installation Of
System And Operation Of Vehicle.
BEFORE YOU STARTBDS Suspension Co. recommends this system be installed by a professional technician. In addition to these instructions, professional knowledge of disassembly/ reassembly procedures and post installation checks must be known.
FOR YOUR SAFETYCertain BDS Suspension products are intended to improve off-road performance. Modifying your vehicle for off-road use may result in the vehicle handling differently than a factory equipped vehicle. Extreme care must be used to prevent loss of control or vehicle rollover. Failure to drive your modified vehicle safely may result in serious injury or death. BDS Suspension Co. does not recommend the combined use of suspension lifts, body lifts, or other lifting devices. You should never operate your modified vehicle under the influence of alcohol or drugs. Always drive your modified vehicle at reduced speeds to ensure your ability to control your vehicle under all driving conditions. Always wear your seat belt.
BEFORE INSTALLATION• Special literature required:OEServiceManual formodel/yearofvehicle.
Refertomanualforproperdisassembly/reassemblyproceduresofOEandrelated components.
• Adhere to recommendationswhen replacement fasteners, retainersandkeepersarecalledoutintheOEmanual.
• Larger rim and tire combinationsmay increase leverageon suspension,steering, and related components. When selecting combinations larger thanOE,considertheadditionalstressyoucouldbeinducingontheOEand related components.
• Post suspension system vehicles may experience drive line vibrations.Angles may require tuning, slider on shaft may require replacement, shafts may need to be lengthened or trued, and U-joints may need to be replaced.
• Secureandproperlyblockvehicleprior to installationofBDSSuspensioncomponents. Always wear safety glasses when using power tools.
• If installation is to be performed without a hoist, BDS Suspension Co.recommends rear alterations first.
• Duetopayloadoptionsandinitialrideheightvariances,theamountofliftis a base figure. Final ride height dimensions may vary in accordance to original vehicle attitude. Always measure the attitude prior to beginning installation.
Your truck is about to be fitted with the best suspension system on the market today. That means you will be driving the baddest looking truck in the neighborhood, and you’ll have the warranty to ensure that it stays that way for years to come.
Thank you for choosing BDS Suspension!
BEFORE YOU DRIVECheck all fasteners for proper torque. Check to ensure for adequate clearance between all rotating, mobile, fixed, and heated members. Verify clearance between exhaust and brake lines, fuel lines, fuel tank, floor boards and wiring harness. Check steering gear for clearance. Test and inspect brake system.
Performsteeringsweeptoensurefrontbrakehoseshaveadequateslackanddo not contact any rotating, mobile or heated members. Inspect rear brake hoses at full extension for adequate slack. Failure to perform hose check/ replacementmay result in component failure. Longer replacement hoses, ifneeded can be purchased from a local parts supplier.
Performheadlightcheckandadjustment.
Re-torque all fasteners after 500 miles. Always inspect fasteners and components during routine servicing.
FITMENT GUIDE 265/75R17 Tire5-1/4” Backspace

028251 | 3
Box Kit
Part # Qty Description
2 Front Strut Spacer
1 BoltPack-Front-#629

4 | 028251
FRONT INSTALLATION1. Parkthevehicleonaclean,flatsurfaceandblocktherearwheels
for safety.
2. Raise the front of the vehicle and support with jack stands under the frame rails, behind the suspension.
3. Remove the front wheels.
4. Locatetheloweralignmentcambolts.(Fig.1)Loosenthebolts(2perarm-4total).Thiswillallowthelowercontrolarmtoswingdownand out of the way when the strut is disconnected.
Figure 1
5. Removethe2lowerballjointmountboltsfromthesteeringknuckle.(Fig.2) Save bolts.
6. Removethelowerstrutmountboltatthelowercontrolarm.(Fig.2) Swing the lower control arm down and out of the way. Save hardware.
Figure 2
7. Locatethe3upperstrutmountnuts.(Fig3)Removethenutsandremovethestrutfromthevehicle.Donotremovethecenterstrutrodnut. It is under extreme pressure. Save nuts.
Cut-offToolorGrinder(step8)

028251 | 5
Figure 3
8. The tips of the factory mounting studs need to be trimmed off approximately 1/8”. This can be done with a grinder or cut-off tool. Trim-mingthestudswillensuretheendssetbelowthetopsurfaceofthenewspaceronceitisinstalled.(Fig.4A/B)
Figure 4A
Figure 4B
9. Locateoneofthesuppliedstrutspacersandinstallonthefactoryupperstrutmountstuds.Fastenwiththeoriginalnutsandtightensecurely(Approx.45ft-lbs).(Fig.5)
Mounting hardware is located in hardware pack #629.
Figure 5
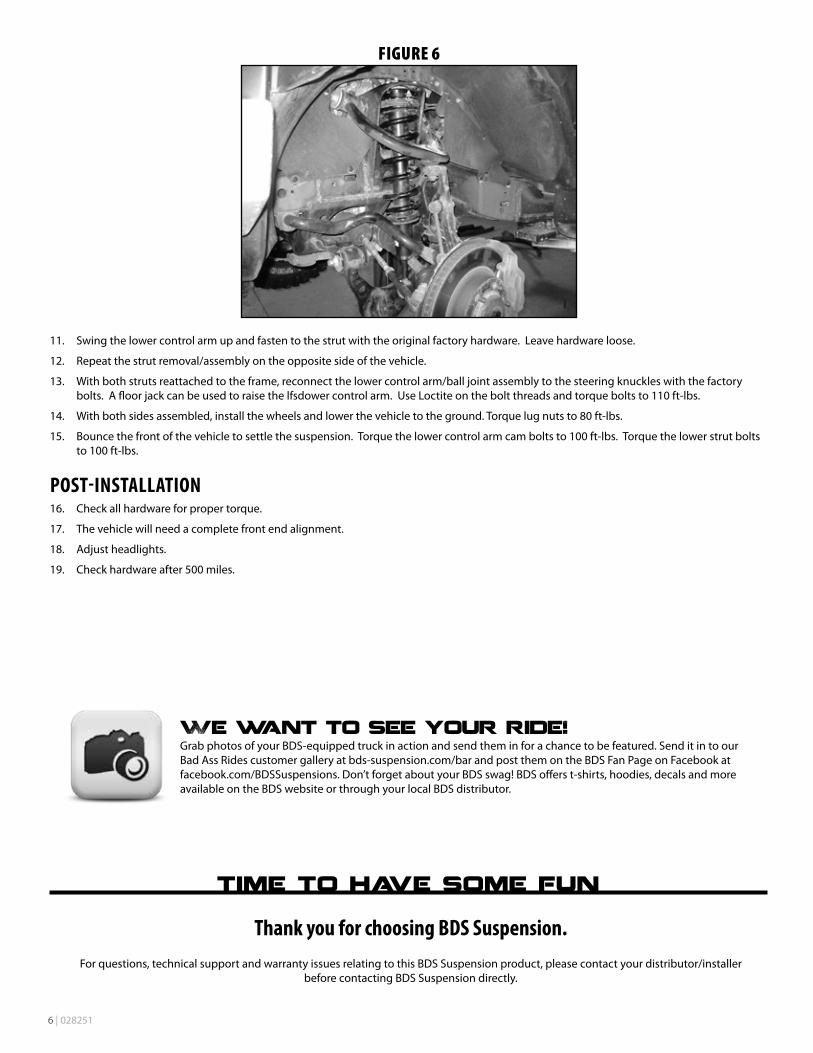
10. Installthestrutassemblybackinthevehicleandfastentotheoriginalframemountwiththeprovided10mmnutsandwashers.(Fig.6)Torque nuts to 45 ft-lbs.
6 | 028251
Figure 6
11. Swingthelowercontrolarmupandfastentothestrutwiththeoriginalfactoryhardware.Leavehardwareloose.
12. Repeat the strut removal/assembly on the opposite side of the vehicle.
13. With both struts reattached to the frame, reconnect the lower control arm/ball joint assembly to the steering knuckles with the factory bolts.Afloorjackcanbeusedtoraisethelfsdowercontrolarm.UseLoctiteontheboltthreadsandtorqueboltsto110ft-lbs.
14. With both sides assembled, install the wheels and lower the vehicle to the ground. Torque lug nuts to 80 ft-lbs.
15. Bounce the front of the vehicle to settle the suspension. Torque the lower control arm cam bolts to 100 ft-lbs. Torque the lower strut bolts to 100 ft-lbs.
POST-INSTALLATION16. Check all hardware for proper torque.
17. The vehicle will need a complete front end alignment.
18. Adjust headlights.
19. Check hardware after 500 miles.
Thank you for choosing BDS Suspension.For questions, technical support and warranty issues relating to this BDS Suspension product, please contact your distributor/installer
before contacting BDS Suspension directly.