1.cdn.edl.io · web viewalto and tenor saxophones should be parallel to the ground, while the...
TRANSCRIPT

The Elkhart High School
BIG RED Band
MarchingFundamentals

Handbook“Strive for excellence”
“Good Enough is NEVER Good Enough”
This handbook is a reference guide for the Elkhart High School BIG RED Band in Elkhart, TX. This book will spell out our fundamental marching techniques, common terms, rehearsal techniques and traditions. If there is ever a question of how we do things in our marching phase, please refer to this handbook as a starting point. All BIG RED Band members should know the contents of this book. Let’s begin:
The Position of Attention
The position of attention is the centerpiece of our marching fundamentals. We do ALL fundamental moves from the position of attention. It is, without a doubt, the most important fundamental that we learn. Our position of attention teaches us proper posture, uniformity in stance and form, and serves as a platform to display the pride that we have in ourselves and in the BIG RED Band.
Vocal Command All vocal commands are in 4/4 time signature and will consume 1 full measure or 4 beats of time to complete. The tempo will vary.

The vocal command for the position of Attention is, “Detail – Ten Hut” to which the band responds: “Pride!” The command and response has the following rhythm to it:
“Detail (rest) Ten - Hut” | “Pride!”
1 & 2 3 4 1
All vocal commands are staccato in nature, as are any and all vocal responses from the band.
The Posture of Attention When we are standing at Attention, the band must look uniform and professional with absolutely NO MOVEMENT. In order to learn the position of attention correctly, we will start at the bottom and work our way up. Feet – Our foot position is very important. We use “second position” as foot placement. Place your heels together and have your toes apart, with roughly the space of your fist between your toes. Knees/Legs – Stand with your legs straight. This is fairly simple. Your feet are together and you are just standing up straight and tall in a relaxed, comfortable manner. DO NOT LOCK YOUR KNEES! By squeezing the quad muscle in your thigh, this pulls your knee into a “locked” position, cutting off return blood flow from the legs and creating a very dangerous situation. If you lock your knees for an extended period of time, you will become light-headed and will possibly faint. Please avoid this situation. Hips – Your hips/pelvis should be facing forward, keeping your spine in alignment with your feet and legs. Do not “ride back” on your hips. That creates a leaning backward look that is not natural or appropriate for our position of attention.

Stomach – The stomach should be pulled inward. While we teach that the stomach should be “in”, we are not teaching to hold your stomach in as if you were “sucking in” and holding your breath. This is used more in conjunction with the chest position. With the chest in the proper position, the stomach will naturally be “in”. Chest – The chest is to be held out and up from your body. Imagine a string attached to your sternum and is being pulled out and up away from you at a 45 degree angle. That’s the position that we are looking for. When you pull your chest out and up, it will automatically pull your stomach in. Standing up tall with your chest out and up communicates a high level of pride. It will and should feel very “prideful” when standing with your chest out and up. “Pull Up” – The chest position is key to creating the look and feel that we are after. We will refer to this fundamental of the position of Attention many times throughout the marching year. The phrase “Pull Up” refers to pulling your chest back into correct “up and out” position. When we get lazy with our position of attention, two things generally happen. We sag our shoulders and lean back onto our hips. Both or either of these errors destroys the position of Attention Shoulders – We will hold our shoulders back. This fundamental is not to be overdone, as holding your shoulders as far back as possible makes holding and manipulating your instrument much more difficult, but a distinct pulling back of your shoulders is correct. This builds on having your stomach in and your chest out. Shoulders back will help make those two fundamentals better. Head – We hold our head and chin up when we are at the position of Attention. Again, uniformity and a look of pride are the main concerns here. When looking straight ahead, you should have to “look down your nose” to see. There are several reasons for this: Our uniform hat, or Shako, is designed with a brim that blocks the forward view when standing “normally”. In order to see straight ahead with our hats on, you have to lift your chin up and look down your nose. Another reason is instrument position. Forward facing brass players especially will need to lift their head to play with proper horn angle. We use a “slightly above parallel” instrument position (horn angle) for forward facing brass, so a head up position is necessary to maintain a proper

embouchure and mouthpiece placement. The bottom line on why we do place our head in the up position is that it looks good, looks uniform, and is imposing when done correctly. Keep your head up! Eyes – Your eyes should not be looking around when at the position of Attention. Just like the rest of your body at the position of Attention, your eyes DO NOT MOVE. They should be focused and full of pride. What does “eyes full of pride” mean? Well, that means different things to different people, but to sum it up, your eyes should communicate the level of pride that you have with this organization. A stoic, almost mean look to your eyes is completely acceptable. With all of these fundamental checkpoints corrected, the final thing is to be still. There is NO MOVEMENT at all when standing at the position of Attention.
Drill Position of Attention The position of Attention’s main goal is to allow proper posture while marching and playing your instrument, as well as maintain uniformity in our presentation. There are several specific checkpoints that we want to constantly check. We do this with a command called “Drill Position of Attention.”
The command and response is:
Drum Major Command Band ResponseHow are your… Heels? “Together!”
Stomach? “In!” Chest? “Out!” Shoulders? “Back!”
Chin? “Up!” Eyes? “With Pride!”

Eyes? “With Pride!” When we call a drill position of Attention, not only do we want a loud and unified response from the band, but we want each individual to double check each area of the position of Attention to make sure that these checkpoints are being done correctly. It wouldn’t do us much good if you yelled “Together” and your feet were shoulder width apart, would it? The “Eyes? …With Pride!” section is repeated because pride is a very large component in our marching band. Reiterating “with pride” is just another way that we remind ourselves that we are to take pride in our band. The entire position of Attention can be summed up with that one word, pride.
Instrument Placement at the position of Attention
We hold our instruments perpendicular to the ground directly out in front of you. The instrument should be far enough away that when we give a “Horns Up” command, the process of bringing the instrument up is smooth and efficient. The elbows should NEVER tuck into your ribcage for support. You must hold all of the instrument’s weight with your arms. With few exceptions (saxophone/sousaphone), the mouthpiece of the instrument will be at eye level and the instrument is at a 90 degree angle to the ground and parallel to your body. In other words, the instrument will mimic your position of attention. Saxophone players will hold their instruments across their body with the mouthpiece to their left with their hands in proper hand position. Sousaphone players will just hold their instruments normally with their right hand on the valves and their left hand across the instrument holding the neck of the sousaphone where the bits connect to the mouthpiece.

Snare Drum and Tenor Drum players will stand with the sticks together in front of them at their waist. Bass Drum players will stand facing 90 degrees from the rest of the band. The bass drum head will face forward to the sideline while the actual drum will point toward the “end zone” section of the field. Sticks are held vertically next to the rim. The sticks must be perpendicular to the ground, facing straight up.
ALL FUNDAMENTALS MENTIONED FROM THIS POINT FORWARD IN
THIS HANDBOOK ARE CONDUCTED FROM THE POSITION
OF ATTENTION!
Variations of the Position of Attention There is no real variation to our position of Attention, but there is a variation on how we call it up and how we use it from time to time. Instead of the time consuming “Detail – Ten Hut” call to attention, more times than not we use a simple command called “Set”. This means to set immediately to attention. There is no band vocal response, and the movement is instantaneous. It saves time and energy during rehearsals. Generally speaking, we use the entire Attention vocalization at the beginning and the end of a rehearsal, and use “Set” everywhere in between. The vocal command “Check” refers to a relaxed version of the Position of Attention. It is used when working a smaller part of the band for a short amount of time. “Check” means that your right foot does not move and you DO NOT talk. The rest of your body can be in a relaxed position.

The stationary right foot keeps you in the form of the drill and close to your spot as well as keeps students from roaming around the field. We do not talk because when the band is in “Check”, there is teaching going on somewhere and talking would distract from that. When called to “Check”, always be ready for a call to “Set” as soon as possible. We will use this command at the beginning of parades when we are waiting to start, immediately before halftime while waiting to take the field for performance, or any other time when the call to Attention could be at any moment.
Horns Up/Down
Instrument placement in both the up and down position is very important to achieve both a uniform look and to maintain proper posture while marching. The “horns down” position was covered in the position of Attention section, but we will cover that fundamental in more depth here.
Horns Down This version of horns down is primarily used for fundamental marching rehearsal. The vocal command for horns down is, “Detail – Horns Down” to which the band answers with a sizzle sound; “Tssst!” The command and response has the following rhythm to it:
“Detail (rest) Horns - Down” | “Tssst!”1 & 2 3 4 1

The response for horns up and horns down is the same sizzle sound. The instrument is an extension of your hands and arms. It should be a very natural feel to manipulate the instrument up and down with a little practice. Awkwardness at first is natural, but that is true of all of the marching fundamentals covered in this handbook. Flute/Piccolo – The instrument is held out in front of you at a 90 degree angle to the ground (pointing up and down). The instrument mimics your position of Attention. The lip plate should be level with your eyes. Your hands should be in proper playing hand position on the instrument. Clarinet – The instrument is held out in front of you at a 90 degree angle to the ground (pointing up and down). The instrument mimics your position of Attention. The mouthpiece and reed should be level with your eyes. Your hands should be in proper playing hand position on the instrument. Alto/Tenor/Baritone Saxophone – The instrument is held by its neck-strap hanging facing sideways with the mouthpiece to your left. This should be how the instrument hangs normally from its strap. Alto and tenor Saxophones should be parallel to the ground, while the baritone saxophone will have a slight angle. Your hands should be in proper playing hand position on the instrument. All Forward Facing Brass (Trumpet/Mellophone/Trombone/Marching Baritone) – The instrument is held out in front of you at a 90 degree angle to the ground with the bell facing downward. The instrument mimics your position of Attention. The mouthpiece should be level with your eyes. Your hands should be in proper playing hand position on the instrument. Sousaphone – The instrument will be located on the left shoulder where the back tube goes across the shoulder and part of your back. The tube should NOT be placed perpendicular to the shoulder. The right hand should be on the valves and the left hand holding the neck where the bits and mouthpiece meet.

Snare/Tenor Drum – The instrument should be adjusted through the carrier to allow drum head to be at waist level. The drum should not be so high as to create an awkward angle of your elbows to play the drum, but also not low enough to straighten the arm too much. Sticks are held side to side with the beads facing the opposite way. Snare drum will use the either traditional grip or matched grip, depending on the show, while the tenors will use matched grip. Bass Drum – The instrument should be adjusted through the carrier to allow the top of the drum to be at eye level. Sticks are held in matched grip with the stick touching the rim of the drum closest to the player. The stick should be in a straight up and down position (90 degrees from the ground) with the head of the stick facing upward. When going from horns up to horns down, the sticks will actually make a clack sound on the rim of the drum.
Variations of Horns Down When we are marching, a horns down is generally built into the last move that we make, or is placed somewhere in the music when a section has an extended period of rests. These horn movements will vary from show to show, but there is one common variant that heeds mention. An example of this horns down would be when we play the last note of a song and it ends on beat one, then beat two would be considered “and” and beat three would be “down”. So the song would be 1-2-3-4-1-and-down. During the “and” part of the beat, the instrument is quickly and sharply removed from the mouth so that the snap of the horns down doesn’t damage their lips. This is not a big move and isn’t considered a visual move since it really shouldn’t be seen from a distance. The purpose of “and” is simply to give the mouthpiece some room to move during the “down” part. During the “down” part of this move, the instrument is snapped to the down position as quickly as possible. This particular horns down is very abrupt and harsh. This part of the move is the visual statement. The “and – down” movement is used at the end of our fundamental

marching formations such as “Box Drill” and “Diamond Drill”. Vocalizing “and down” is sometimes used to punctuate the move during a show or to help teach the move during rehearsal. If vocalizations are used, they are to be sharp and staccato.
Horns Up This version of horns up is primarily used for fundamental marching rehearsal. The vocal command for horns up is, “Detail – Horns Up” to which the band answers with a sizzle sound; “Tssst!” The command and response has the following rhythm to it:
“Detail (rest) Horns - Up” | “Tssst!”1 & 2 3 4 1
Again, the response for horns up and horns down is the same sizzle sound. Flute/Piccolo – The instrument is up in a playing position with the instrument perfectly parallel with the ground. A slight tilting down of the flute may be proper for concert band, but the marching band instrument position is flat and level. Your hands should be in proper playing hand position on the instrument. Clarinet – The instrument is held out in front in normal playing position. The angle of the instrument will change, however. Because our position of attention has your head up, the instrument’s position will feel slightly farther away from you. We try to maintain a 45 degree angle from the instrument’s mouthpiece to the ground. Remember: we achieve the 45 degree angle as a result of our “head up” head position. If your head is in the right place and you are using a proper clarinet mouthpiece angle, then the 45 degree instrument angle will take care of itself. Your hands should be in proper playing hand position on the instrument.

Alto Saxophone– The instrument is held by its neck-strap directly out in front of you. The instrument will be straight up and down. This will feel normal for alto saxophone players that play “down the middle”. On the marching field, the alto sax is never played “off to the side” as it may be played in concert band. Your hands should be in proper playing hand position on the instrument. Tenor Saxophone/Baritone Saxophone – The instrument is held by its neck-strap hanging to your right. This is the normal position for tenor or baritone saxophone player. Your hands should be in proper playing hand position on the instrument. All Forward Facing Brass (Trumpet/Mellophone/Trombone/Marching Baritone) – The instrument is held up in a “slightly above parallel” position to the ground. If the mouthpiece placement, instrument angle and embouchure are correct, this should be a natural playing position if you have your head in the correct “up” position. Your hands should be in proper playing hand position on the instrument. Sousaphone – There is no horns up/horns down difference on the sousaphone. Snare/Tenor Drum – The instrument should be adjusted through the carrier to allow drum head to be at waist level. The drum should not be so high as to create an awkward angle of your elbows to play the drum, but also not low enough to straighten the arm too much. Sticks snap to a 45 degree angle from the player. When the tips of the sticks meet, they should form a 90 degree angle. Bass Drum – The instrument should be adjusted through the carrier to allow the top of the drum to be at eye level. Sticks are held in matched grip with the stick touching the rim of the drum closest to the player. The mallets snap to a 45 degree angle when viewed from the side. Both hands move together…NEVER will one hand do a horns up while the other maintains a horns down position. The two mallets are “locked” together and with the exception of playing, will always move horns up and down together.

Variations of Horns Up There are many variations of horns up as well. The show will dictate many of these horns up moves, as the move will follow the mood of the music. The most common variant is the subdivided horns up. The band will get a count-off, whether vocal or via metronome (also called “the met”). The first 4 beats are used for tempo purposes. Beats 5, 6 & 7 (1, 2, & 3 in the next measure) are subdivided vocally by the band while they are bringing their instruments to the up position. This is a slower, smoother, more deliberate variant of the horns up maneuver. The vocalization is subdivided eighth notes and would go like this: (The count-off) One, Two, Three, Four (The vocalization) dut, dut, dut, dut, Lock The “dut” is the equivalent of one eighth note, so the counts for “dut, dut, dut, dut, Lock” would be 1 - & - 2 - & - 3 and the band would then breathe on beat 4 (total beat eight of the countoff) to play on beat one. The band moves their instruments smoothly to the “up” positions during the “dut” subdivision. They are to use all of those beats to bring their instrument up and the instrument is “locked” into the proper up position when they vocalize “lock”. This allows the vocalization to keep alignment of instruments uniform. This count-off/horns up combination is basically a two measure prep to play. We use the two measure count-off to start our marching performances, so this is an extension of that. The first measure of count-off gives the tempo, the band uses the vocalization to both time the horns up together and to internalize the tempo via subdivision. The subdivided horns up is the most common horns up we use outside of fundamental marching rehearsal. We use this variation of horns up in our shows, in parades, at pep rallies and in the stands at football games.

Mark Time Mark Time is simply marching in place. The feet move, but the placement on the field is stationary. We use this fundamental for visual effect on the field, keeping the feet moving in tempo when the band has to come to a stop (i.e. parades), and for learning how to be “in step” during our summer band fundamental camp. The vocal command for Mark Time is, “Mark Time - Mark” to which the band responds with “Squeeze and Step”. The command and response has the following rhythm to it:
“Mark Time Mark” – “Squeeze and | Step” 1 2 3 4 & 1
“Mark Time” is said at the eighth note level, followed by a rest on beat 2 and “Mark” on beat 3. On beat 4 is our traditional “Squeeze and Step” on beats 4 & 1. When we vocalize “Squeeze”, this refers to a tightening of the right thigh muscle (the quad, if you will) which acts to steady and balance the body when we do our kick off with the left leg. The “And” part of the response relates to the knee moving outward and the heel being lifted off of the ground. The toes remain planted during “Mark Time”. The bottom of the left heel should come up to the top of the ankle bone on the right foot…and vice versa with the right heel lifting higher than the left ankle bone. When the heel contacts the ground is the tempo, not when the heel is in the air. For subdivision purposes during “Mark Time”, we concentrate on the bending of the knee outward on the & of the beat. This creates a “1 & 2 & 3 & 4 &” feel to our “Mark Time” as well as our general marching fundamentals. To break down this subdivision further, the left heel hits the ground on 1, the right knee is at full bend on the & of 1 and the right heel hits the ground on 2. The left knee is at full bend on the & of 2 and the

left heel hits the ground on 3. The right knee is at full bend on the & of 3 and the right heel hits the ground on 4. The left knee is at full bend on the & of 4 and then it starts all over again. To end a “Mark Time”, we use our “Band Halt” command.
Halt Halt is used to halt any movement of the band, whether it be a mark time, forward march, backward march or any other movement command. The vocal command for Halt is “Detail Halt” to which the band responds with “Freeze Close”. The command and response has the following rhythm to it:
“Detail (rest) Halt” “Freeze | Close1 & 2 3 4 1
The Freeze Close response is a vocal response of what their feet are doing. On the word “Freeze”, they are planting their right foot squarely on the ground in front of them. Sometimes, it requires a strange angle depending on their heading and the proximity of the sideline. This is addressed on a case-by-case basis. On the word “Close”, the student brings their left foot directly along side of their right foot, effectively stopping their movement and resuming the Position of Attention. The response “Freeze Close” is what we use any time we are going from any type of movement to a halt.
4 Count Turns
We use 2 different 4 count turns: Right and Left. These turns are used in the place of right and left flanks as a traditional military

marching band would do. We use this command to change the direction of the band in an organized and professional manner.
4 Count Turn to the Right This fundamental changes the band’s heading 90 degrees to the right. The vocal command for our “4 Count Turn to the Right” is, “4 Count Turn to the Right - Move” to which the band responds by using all 4 counts equally as they slowly make the turn to the right while counting aloud. The vocal response is: “1 2 3 Freeze Close”. The command and response has the following rhythm to it:
“Four Count Turn to the Right – Move” | “1 2 3 Freeze | Close” 1 & 2 & a 3 4 1 2 3 4
1
4 Count Turn to the Left This fundamental changes the band’s heading 90 degrees to the left. The vocal command for our “4 Count Turn to the Left” is, “4 Count Turn to the Left - Move” to which the band responds by using all 4 counts equally as they slowly make the turn to the Left while counting aloud. The vocal response is: “1 2 3 Freeze Close”. The command and response has the following rhythm to it:
“Four Count Turn to the Left – Move” | “1 2 3 Freeze | Close"1 & 2 & a 3 4 1 2 3 4 1
Both variants of our 4 Count Turns must be consistent. On beat 2, the student will have turned 45 degrees to either the right or the left. Each beat is equal and consistent. A student should not be fully turned earlier (or later) than beat 4. Beat 4 is when all the students

should finalize their facing.
About Face Our About Face command is a slower, smoother version of About Face than what is customarily used. (This command can also be referred to as an 8 count turn to the left) This command changes the facing of the band 180 degrees so that they are facing the opposite direction than they started. Movement will be to the left for easier footwork. The vocal command for our “About Face” is, “Detail – About Face” to which the band responds by using all 8 counts equally as they slowly make the turn to the left while counting aloud. The vocal response is: “1 2 3 4 5 6 7 Freeze Close”. The command and response has the following rhythm to it:
“Detail (rest) A - bout Face” | “1 2 3 Half - way 5 6 7
Freeze | Close 1 & (2) & 3 4 1 2 3 & 4 1 2
3 4 1 The turning speed and “step size” must be consistent. On beat 4, the student will have turned 90 degrees to the left and they should be halfway around. This is why we added the “halfway” vocalization to the response. Each beat is equal and consistent. A student should not be fully turned earlier (or later) than beat 8. Beat 8 is when all the students should finalize their facing.
Forward & Backward March Forward March and Backward March is the command we use to start the band in motion. These basic fundamentals are used in every marching situation, including our halftime contest performance as well as parades. These are the most used and arguably the most important fundamentals in marching band.

Forward March Forward March is a fundamental that we use to move in a forward motion, including forward facing slides. Anytime our lower body is marching in a forward motion, it is considered a part of the Forward March command. The vocal command for Forward March is, “Forward - March” to which the band responds with “Squeeze and Step”. The command and response has the following rhythm to it:
“For - ward (rest) March” – “Squeeze and | Step”1 & 2 3 4 & 1
When we say “Squeeze”, this refers to a tightening of the right thigh muscle (just like our Mark Time) which acts to steady and balance the body when we do our kick off with the left leg. The “And” part of the response relates to the left leg moving forward, keeping the leg straight (no bent knee) and the Step portion is when the left heel makes contact with the ground.
Kick Off The first movement associated with Forward March is the Kick Off. We do what is referred to as a “Straight-Leg Kick Off”, meaning that when the left leg starts the forward march, a concerted effort is made to keep that leg straight. Neither the knee nor the ankle should bend at all during the Kick Off. With the leg straight and the ankle not bending, the overall look should be consistent and the “heels down – toes up” concept pretty much natural. The Kick Off helps to establish balance, establish tempo and to make sure you start on the correct foot. The left foot starts all movement. Any and all forward movement will begin with the fundamental of the Kick Off.

Marching In-Step Marching In-Step refers to the correct foot hitting the ground on the correct beat. Generally speaking, the left heel hits the ground on 1 and 3, while the right heel hits the ground on 2 and 4. This is obviously different if we are marching in a 3/4 or 5/4 type time signature. A key point to remember is that the beat happens when the heel touches the ground, not when the whole foot is planted or when the toes are on the ground. In order to further help consistency and uniformity of Marching In-Step, when we subdivide the beat to the eighth note level, the feet should pass each other on the “&” of the beat. In other words, your left heel hits the ground on 1 and on the “&” of 1, the right foot should be directly beside the left. The right heel should make contact with the ground on 2 and the left foot will be beside the right foot on the “&” of 2 and so on. Out of step marching (not marching In-Step) is a major concern and a primary reason for low contest rankings. Mastering Marching In-Step is a very important fundamental.
Marching In-Phase Marching In-Phase refers to the heel of the foot hitting the ground on the beat. This is regardless of whether you are In Step or not. Being out of phase means that your heel is hitting the ground on some subdivision of the beat that is NOT 1, 2, 3, or 4. Generally speaking, out of phase marchers are simply marching out of tempo. Marching In-Phase requires the feet and legs to move in tempo with the music. When a student struggles with being out of phase, counting out loud and subdividing the beat while marching will go a long way to make it easier to master.

While marching out of step is very bad in terms of our consistency and uniformity of fundamental marching, being out of phase is absolutely devastating. An out of phase marcher cannot be hidden and is unacceptable on the competition marching field.
Glide Step (Forward March) The Glide Step is another fundamental that contributes to the consistency and uniformity of our fundamental marching. It is also a very important fundamental in terms of keeping the upper body from bouncing. Our upper body must remain perfectly still and smooth as we move. All movement is made from the hips down. When we don’t use the correct glide step, and audible beat can be heard through the instrument and thus creates problems in our full band sound. The most common phrase in regards to our Glide Step is “rolling your feet”. This refers to the physical motion of stepping on the ground with your heel first (on the beat, of course), then rolling along the outside of your foot until you are back on your toes and stepping away from your spot. It should be like you are trying to squeeze toothpaste from the bottom of the tube to the top with your foot. The heel should stay low to the ground when marching and thus the toes should be as high in the air as they can be. Every person is different, and the toe heights will vary from person to person, but for consistency’s sake, we try to get the toes as high as we can. Our reminder phrase is “heels down”. This reminds the student to lower the heel while at the same time getting the toes in the air. When the student is executing a proper glide step, they should look and feel as though they are floating from the waist up. The lower body (i.e. feet, ankles, knees, and hips) does 100% of the work while marching. Never allow the upper body to get involved in the fundamental marching process. The upper body remains at the Position of Attention at all times.
Backward March

Backward March is a fundamental that we use to move backfield while maintaining our forward facing instrument position including backward slides. Anytime our lower body is marching in a backward motion, it is considered a part of the Backward March command. The vocal command for Backward March is, “Backward - March” to which the band responds with “Up and Step”. The command and response has the following rhythm to it:
“Back - ward (rest) March” – “Up and | Step”1 & 2 3 4 & 1
Kick Off The “Up and Step” is a vocal response that deals with the physical act of leaning slightly forward and going up onto your tip-toes to prepare to march backward. “Up and Step” is the Backward March equivalent of the Kick-Off. The backward march is done exclusively on the toes. The heels never come in contact with the ground on a backward march. In addition, using the “Up and Step” creates a very unique visual impact of the band (or a section of the band) getting taller one count before performing a backward march. The “Up” part occurs one beat before the actual move starts, generally on count 4 before stepping on beat 1.
Glide Step (Backward March) We use a straight-leg backward march. The knee does only the minimal amount of movement while maintaining the appearance of keeping the leg straight. The toes should lightly drag the ground when moving backward. The sound of the drag should occur on the “&” of each beat. The larger the backward step, the more the knee will have to bend in

order to complete the step. Performing the backward march on the toes helps to keep the leg straight. Marching In-Step and In-Phase also must be accomplished in backward march. Marching In-Phase is self-explanatory. You must move your legs and feet to the beat of the music. Marching In-Step, however, is a little more detailed. The beat of the music occurs when the foot stops its backward “drag” motion and you put your weight on that toe. The up-on-the-toes, straight-legged backward march is the backward march equivalent of the glide step. Just like the forward march, we must move backward with NO upper body movement. If you stay up on your toes and keep your leg straight, then the upper body will not bounce up and down. Bending your ankle at any time during a backward march may also introduce bounce into your marching fundamentals. If your heel contacts the ground at any time, then the upper body will follow. In addition to facilitating a glide step, keeping your heel in the air helps you maintain your balance. When the heel hits the ground, you may stumble backward creating an “out-of-step” and/or “out-of-phase” marching situation or you may actually lose your balance completely resulting in falling down. While backward marching, pay special attention to your center of gravity and lean forward a little bit to help keep you from stumbling backward. You must constantly manipulate your center of gravity (balance) in order to execute a backward march.
Slides Slides are very important to our marching style. In order to maintain a “horns to the front” position, we utilize slides. Because we use this fundamental to keep the horns to the front, we do not utilize a slide when the horns are down. Slides are only performed when horns are in the up position. A slide is accomplished when you swivel your hips facing whichever

direction you need to go while keeping your shoulders and chest facing the sideline as if you were facing that direction. In other words, the upper body always faces forward and the lower body faces the direction it is going. This move is what we call a slide. There are four basic slides: Forward Slide Right, Forward Slide Left, Backward Slide Right and Backward Slide Left. In the fundamental block, these slides are executed at a 90 degree angle. In reality, most slides are done at a much smaller angle and easier to perform. Our “Box Drill” utilizes all 4 slides done at a full 90 degree angle.
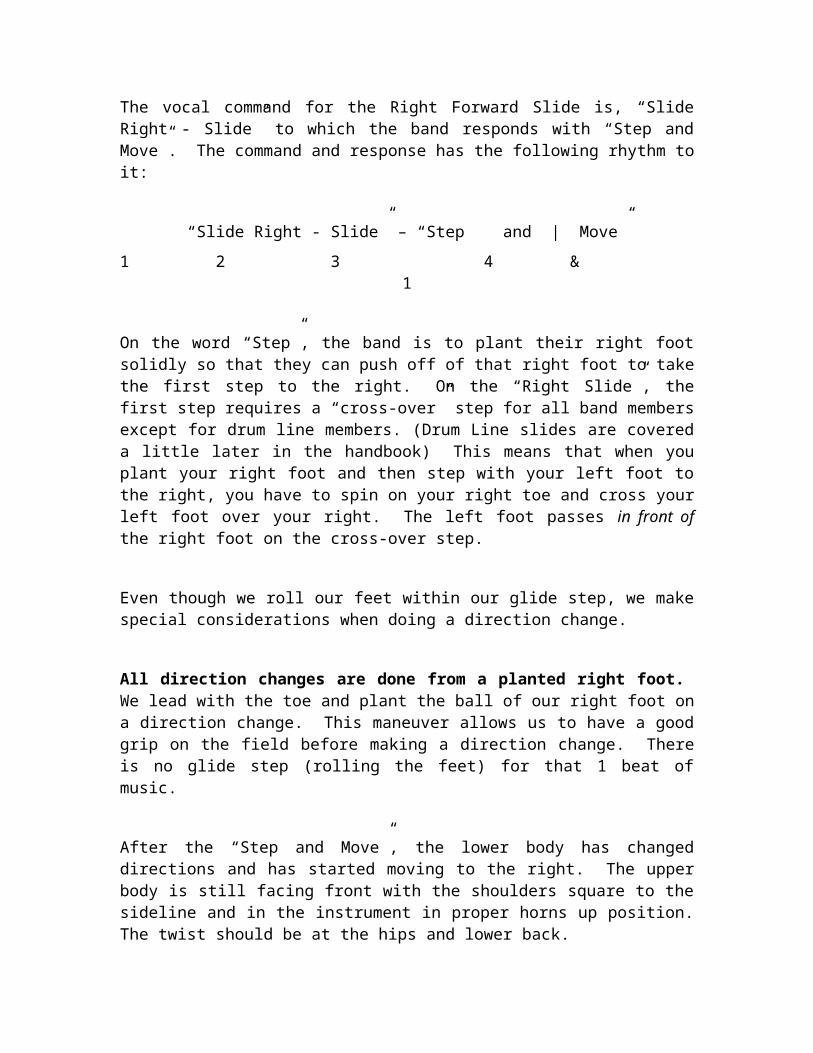
Fundamental Slides Forward Slide - RightThis fundamental is used to move to the right while maintaining a forward march and a forward facing instrument position. The vocal command for the Right Forward Slide is, “Slide Right - Slide” to which the band responds with “Step and Move”. The command and response has the following rhythm to it:
“Slide Right - Slide” – “Step and | Move”1 2 3 4 & 1
On the word “Step”, the band is to plant their right foot solidly so that they can push off of that right foot to take the first step to the right. On the “Right Slide”, the first step requires a “cross-over” step for all band members except for drum line members. (Drum Line slides are covered a little later in the handbook) This means that when you plant your right foot and then step with your left foot to the right, you have to spin on your right toe and cross your left foot over your right. The left foot passes in front of the right foot on the cross-over step. Even though we roll our feet within our glide step, we make special considerations when doing a direction change. All direction changes are done from a planted right foot. We

lead with the toe and plant the ball of our right foot on a direction change. This maneuver allows us to have a good grip on the field before making a direction change. There is no glide step (rolling the feet) for that 1 beat of music. After the “Step and Move”, the lower body has changed directions and has started moving to the right. The upper body is still facing front with the shoulders square to the sideline and in the instrument in proper horns up position. The twist should be at the hips and lower back. DO NOT turn the shoulders in the direction of travel and just swivel the instrument toward the sideline. That is not a slide. Full 90 degree slides are hard work and if it feels comfortable and natural, you probably aren’t doing it correctly. Forward Slide - LeftThis fundamental is used to move to the right while maintaining a forward march and a forward facing instrument position. The vocal command for the Left Forward Slide is, “Slide Left - Slide” to which the band responds with “Step and Move”. The command and response has the following rhythm to it:
“Slide Left - Slide” – “Step and | Move”1 2 3 4 & 1
On the word “Step”, the band is to plant their right foot solidly so that they can push off of that right foot to take the first step to the left. We make the same special considerations when doing a direction change on left slides as we do on right slides. There is no “cross-over” step in a Left Slide. Backward Slide – Right & LeftThe command for either backward slide is the same as the equivalent forward slide command. If you were in the process of forward marching when you hear a slide command, then you would execute a

forward slide. If you were in the process of backward marching when you hear a slide command, then you would execute a backward slide. The same “planting and pushing off of the right foot” happens on a backward slide as well. * Drum Line SlidesDrum Line members do a slide a little differently, meaning that they really don’t do a slide at all. The command, response and initial footwork remain the same, but because of the drum and carrier, there is no way to twist at the hips and swivel to do a proper slide, so Drum Line members have to do what we call the “Crab Walk”. This is essentially a forward facing sideways marching where the shoulders, hips and feet face the sideline while stepping sideways. The entire body stays facing forward while the lower body moves in either direction (left or right). If the slide is forward in nature or directly sideways, then the cross-over step occurs IN FRONT OF the stationary leg. If the overall movement is backward, then the cross-over step must occur behind the stationary leg.
Other Fundamentals
Rock Step The transition between a forward march to a backward march in the opposite direction (or backward march to forward march) is called a Rock Step. This refers to the rocking motion that we make with our feet when changing direction. If you are marching backward and you must transition to a forward march, then you plant your right foot behind you, rock back on it and move forward with your left foot. If you are marching forward and you must transition to a backward march, then you plant your right foot in front of you, rock forward on

it up to your tip-toes and move backward with your left foot. Not only is it a visual maneuver, but it also helps to keep you in-step while making that transition.
Corps Style Marching Concepts
While playing music during a field show, the band makes a series of formations, called drill, on the field, which may be pictures, geometric shapes, curvilinear designs, or blocks of musicians, although sometimes it may be pure abstract designs using no specific form. Typically, each band member has an assigned position in each formation. In many show bands and most drum corps, these positions are illustrated in a handheld booklet called drill charts. Drill charts show where each person stands during each set of the show. The drill charts include yard lines and hashes as they would be on an actual football field, which shows the band members where to stand in relation to the yard lines and hashes. There are many ways of getting from one formation to the next:
- Each member can move independently – this is called scattering or "scatter drill"
- All the members can move together without deforming the picture – this is called floating
- The members can stay in their lines and arcs, but slowly deform the picture – this is sometimes called rotating, expanding, or condensing

- The members can break into ranks or squads, each of which performs a maneuver (such as a follow-the-leader) which may or may not be scripted
- Each member may have a specifically scripted move to perform – in these cases, the desired visual effect is often the move itself and not the ending formation
Many bands use a combination of many or all of the above techniques, sometimes adding dance choreography that is done in place or while marching. Players may point the bells of their instruments in the direction they are moving, or slide with all the bells facing in the same direction. Bands that march in time with the music typically also synchronize the direction of individuals' turns, and maintain even spacing between individuals in formations (called intervals). Sometimes bands will specifically have wind players turn their instruments away from the audience in order to emphasize the dynamics of the music. Auxiliaries can also add to the visual effect. Backdrops and props may be used on the field that fit the theme of the show or the music being performed. Color Guard is the main Auxiliary at Elkhart High School.
The Grid We use a grid on our practice field. Please remember that there is no grid on a performance field, but the concepts that we learn from our grid will transfer to a “normal” playing field. The grid is a small dot located every 4 paces on the football field. This dot locates “halfway in between” yard lines, as well as locating 4, 8, 12, 16, etc. paces from the sideline. This gives us a “3-D” feel of our practice field and teaches us what 4 paces from the sideline or a yard line looks like. The grid aids in setting drill and maintains consistent drill while cleaning. We will, at times, “snap to grid” in order to make a set of drill easier to find. This simply means that we will move from our choreographed spot from the drill charts to the closest grid dot.

Spacing Our spacing on the field is a very important component to Corps Style marching band. This refers to the space between members of the band. Most of the time, the space between each member should be uniform throughout the band. There are instances when the spacing in one section is different than another section, but the spacing is equal from section to section. When we are marching a “block”, then the spacing should be equal front to back as well as side to side. When we march lines, then our emphasis should change to adjusting to the player on each side (to the right and to the left). You can’t be closer to the student on your right and farther away from the person on you left…that is the definition of bad spacing.
Cover Down The term “Cover Down” refers to the active movement that it takes to make a line straight. When standing in straight lines, you must put yourself in that line by looking down the line and placing the person directly in front of you “on top of” the person on the other side of them. In other words, you should only see the person directly beside/in front of you. If you can see the person beside them, then you are out of line. The second person in the line will set the angle of the line. This is the most important position when we are trying to set a straight line. The first person needs to be correct, but it’s the second person in the line that will set the angle of the line. Depending on the length of the line, a 6 inch mistake by the second person in line can turn into a 10 yard mistake by the end of that line. The second person needs to be accurate.
Forms Forms are the pictures or shapes that we make on the field as a part of our field show. Each form, called a set, has a certain number of counts that it takes to arrive at the form. Sometimes, we will stop on a set and show the picture for an extended period of time. This is called a hold. When we hold on a set, the form must be accurate and symmetrical…meaning the spacing between members must be consistent and equal, as well as each line, curve, or block looking smooth and accurate. On forms that we do not execute a hold on, the form is used as a common transition point for the band. In this form, the actual “picture” that we form is not the most important thing. The consistent movement and individual spacing moving to the picture then the transition away from the picture is the main concern. This “consistent movement” to and from the form includes spacing, being in-step and being in-phase with our feet.
Transitions Transitions are the point in which we move from set to set. The transition point is the set. Most of our transitions are done off of our right foot. We use a roll step during normal marching, but we will use a toe down, planted right foot in order to do the transition. Sometimes the transition will move you in the same direction…in this case, you will simply “march through” the set, but if you change direction from set to set you must plant the right foot firmly. The right foot is the key to a good, clean transition.
Plus-1/Minus-1

We will use the “Plus-1” and “Minus-1” in order to get proper footwork transitions learned while learning/cleaning drill. This is simply the beat before we start and the beat after we end. Both Plus-1 and Minus-1 are used in set-to-set marching only. It is not an active part of our marching show, but a teaching technique that we use to learn flow from one set to another. Plus-1 is when we add one beat to our rehearsal set and take that one step toward the next set. This aids transition between multiple sets. The plus-1 should be a roll step and should stop immediately on that roll step. At the end of the set, the student will freeze on the Plus-1 with their toes in the air. This is to simulate moving on to the next set. Minus-1 is when we add one beat before the step off. The Minus-1 takes the place of the normal “Kick Off” and is a step in whatever direction you would have been coming from if we were marching the drill continuously and the Minus-1 step is on the “Lock” part of our normal “Horns Up” vocalization. This maneuver varies from set to set and helps to simulate moving in to the current set from the set before.
Fundamental Drills
Warm-Up/Box Drill As a part of our everyday playing warm-up, we incorporate a fundamental marching drill that we call the box drill. The first part of our warm-up consists of about 3-4 minutes of stretching, followed by our playing warm-up (variations taken from the book, “Fundamentals for Superior Performance). As we finish up our Foundations warm-up,

we play our Chorale (Psych Warm-Up) and the box drill is set to this chorale. The box drill contains the following maneuvers in this order: Forward March (8 counts), Forward Slide Left (8 counts), Backward March (8 counts), Backward Slide Right (8 counts), Forward March (8 counts), Forward Slide Right (8 counts), Backward Slide (8 counts), Backward Slide Left (8 counts), and a Forward March (8 counts) then a Halt. At the end of the Box Drill, you should end up 8 steps (5 yards) in front of where you started. This drill incorporates both Forward and Backward march with left and right Slide variations of each. In other words, every moving fundamental that we will use in our show is used in this drill. Make this drill and the individual fundamental techniques that it contains a very high priority.
Diamond Drill We use this drill primarily in our Summer Band Camp. This drill teaches oblique marching fundamentals. To perform a Diamond Drill, you will kick off marching at a 45 degree angle to your left (12 steps to the yard line). You will pass through our grid marking in 6 steps. The next move will be at a 45 degree angle to your right back to the yard line that you started on (again…12 steps to the yard line, through the grid dot). The next move is a backward slide to the right on a 45 degree angle (12 steps, through the grid) followed by a backward slide to the left on a 45 degree angle (12 steps through the grid) back to your original starting spot. We use an 8 count forward march and a halt to end this drill. The overall picture of this move is a large diamond…thus the name.
Triangle Drill

We use this drill primarily in our Summer Band Camp. This drill teaches oblique marching fundamentals in combination with slides and backward marching and the transitions of each.
The Triangle Drill consists of a squad of 5 members. The first member starts at a grid dot that is at least 10 yards away from the sideline. The first move is a 16 count oblique move to the student's left that covers 10 yards forward and 5 yards to the left moving through the appropriate grid dot in 8 counts. This move transitions to a forward slide-right for 8 counts followed by a backward march 16 counts to return to their original starting position. After the first student starts the Triangle Drill, the next student moves into that position and starts 8 counts later, followed by the next student and the next until they are all in the drill, 8 counts apart. This drill is a continuous movement drill until halted.
There are several variations of the Triangle Drill. One version has the first student starting to their right as a first move with a forward slide-left to complete the triangle. You can also substitute backward slide-right or left to get some practice of that fundamental.
Zig-Zags
A Zig-Zag is a fundamental routine that uses combinations of forward march and slide-left and right.
The students perform an 8 count forward march followed by an 8 count slide-right, then 8 counts forward and an 8 count slide-left. This continues until halted. The overall effect is forward 8, slide-right 8, forward 8, slide-left 8 (to get back onto the original plane), then forward 8 and it starts all over again. This drill can be done as a primarily forward or primarily backward fundamental.
8's and 8's

This is a very simple fundamental. It consists of a forward (or backward) march of 8 counts followed by 8 counts of Mark Time, then it starts all over again.
Traditions
We have created and maintained many traditions in the Elkhart BIG RED Band. We believe that traditions add to our program’s level of pride and commitment. Listed below are a couple of traditions that our marching band follows.
The Elkhart Mile
This is literal. During summer band, we will march a mile on our track. While we do work into the mile (the Elkhart Quarter Mile, the Elkhart Half Mile, the Elkhart Three-Quarters of a Mile), we march that mile daily. It is a grind, but it is the greatest teacher of marching in-step and in-phase for us. It is also a source of pride and accomplishment within the band. We work hard, and the Elkhart Mile is our benchmark.
Drill Downs / Squad Comps At the end of every Summer Band outside marching rehearsal, we will end with a Drill Down. This is a series of fundamentals called out by the drum major(s) or band director(s). The overall goal of the Drill Down is to get everyone reacting to and understanding how to implement our core fundamentals quickly. This is as much a mental activity as it is a physical one. All band members start in the fundamental block. As the fundamentals are called out, they must execute the fundamental correctly and in tempo. If a mistake is made (mistakes start off as large mistakes and gradually get more specific and detailed), then that student is out. This means that they are to move quickly to the sideline, do 10 pushups and then stand at attention and watch the rest

of the Drill Down. The winner of the Drill Down is the last band member left on the field. The winner will sometimes get a prize for their effort, but the main reward is a job well done. Winning the Drill Down is a big deal, and we make it a priority.
Squad Comps are basically drill downs with squads competing instead of individuals. The best squad wins...
OOSAW OOSAW is the acronym for Out-Of-Step Awareness Week. We will dedicate an entire week to OOSAW once the entire drill is on the field and we’ve had a few weeks to clean it. Not only do we hammer the concept of being in-step, but this is the week that individuals corrected for being out-of-step. This is not a fun week for students who struggle with marching in-step, but we feel that it’s a necessary evil to making our overall show presentation acceptable. This week shows our all-out, complete and total commitment to marching in-step. Out-of-step marchers will be required to do calisthenics whenever they are out-of-step. This could range from push-ups to sit-ups to jumping jacks or laps. Anything that we can use to help will be used. We reserve the right to use other stupid acronyms as needed.
Our Role as Marching Band
Our main objective and purpose is to provide spirit and pride through music at the football games. What this means is that we are there to support our football team. We watch the game, cheer when appropriate and do our very best to be “in” the game. Win or lose, those are our boys out there playing for Elkhart…we WILL support them!

Friday Night Football Games We are responsible for the School Song before the game, the Fight Song when our football team runs out, and the National Anthem at home games. We also play the Fight Song at every Elkhart score. These 3 songs are of utmost importance, because they represent our community and our nation. Learn them and learn them right! During halftime, we march our contest show in order to entertain the audience. We want to do everything in excellence on Friday night so that it brings pride to our community. UIL Marching Contest is not our primary goal! While we do use football game halftimes as a “contest dress rehearsal”, but we must never forget that Friday Night Football games are our main performance objectives. The community of Elkhart does not traditionally come out to our contests, so this is where the general public determines its opinion of our band.
Other Music (The Book) In addition to the School Song, Fight Song, National Anthem and our Marching Show Music, we will also play what we call “Stand Tunes”. The sum total of our marching music is called “The Book”. Learning the book is the responsibility of the student. Stand tunes are short arrangements of popular music. The book remains fairly consistent from year to year, but there will be a few additions and subtractions to the book every year. We will play our stand tunes in between quarters, during time-outs, and when we are on defense. We do NOT play when we are on offense, with one exception: When we get a first down, we play “Tag”, which is the very end of our Fight Song. During the game, you must pay attention and always be at the ready for playing Tag. Tag is very short and must be done before the offense gets ready to run its next play.

Discipline We use push-ups, sit-ups, jumping jacks or running laps as a physical way of training ourselves to do things the right way. Here are a few examples of what and why we do what we do:
Late to rehearsal: Get to the field and do 10 push-ups, then get into the form as quickly and quietly as you can. Keep in mind that lateness to a major after-school rehearsal will also deduct points from your grade. You need to learn that being early is to be on time, to be on time is to be late, and to be late is totally unacceptable. Forgetting your drill chart: If you get to the field without your drill chart, then you must do 10 push-ups every time we reference our drill chart as well as run a lap after rehearsal. You need to learn to remember your equipment and the drill chart is a very importance piece of equipment for marching band. Talking during rehearsal: There is always a small amount of talking, but when the talking is not about the drill, the music or anything related to marching band, it is a distraction and is not tolerated. This could result in anything from push-ups to laps depending on the consistency of your disruption. You must learn the amount of self-control you need in order to have the amount of discipline and pride that we require in our group. These are just a few examples of common discipline techniques that we have used in the past. All disciplinary action is subject to change. Strangely enough, our high level of discipline is also a source of pride in our band. We will simply be disciplined in our actions and we will place a lot of effort and pride in doing so. Drink lots of water, and earn that PE credit!!!
last update - 8/1/18