16.05 may condensed - wordpress.com · and .032”music wire. horizontallymountyour...
TRANSCRIPT
The JournalDivision 5, NCR, NMRA
Andy Keeney, SuperintendentClerk and Editor: Mark Cowles
All Photos are by the editor unless otherwise credited
May 2016
5
The Next Event is on Saturday, May 14 at 1:00 p.m., in the basement meeting rooms of the Lansing Public Library, downtown.
http://div5.ncr-nmra.org/
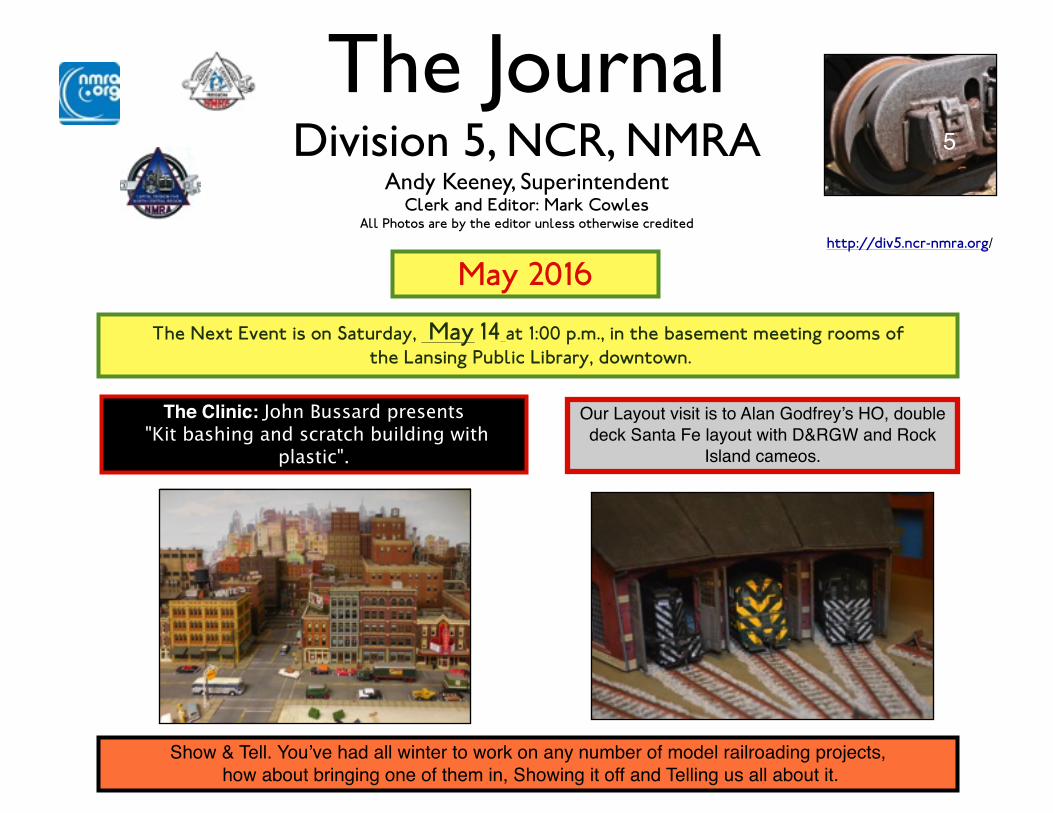
The Clinic: John Bussard presents "Kit bashing and scratch building with
plastic".
Show & Tell. You’ve had all winter to work on any number of model railroading projects, how about bringing one of them in, Showing it off and Telling us all about it.
Our Layout visit is to Alan Godfrey’s HO, double deck Santa Fe layout with D&RGW and Rock
Island cameos.
Upcoming Clinics & Layout Visits for This Year
JuneHowell Trip - Meet for Lunch
Visit Howell’s Ann Arbor Depot & ex GTW caboose.Have dessert at an ex ATSF caboose & more.
June Mark Cowles: PAT RR in N
Howard Ziegel - O Traction
To be scheduled:
Summer Layout Tour
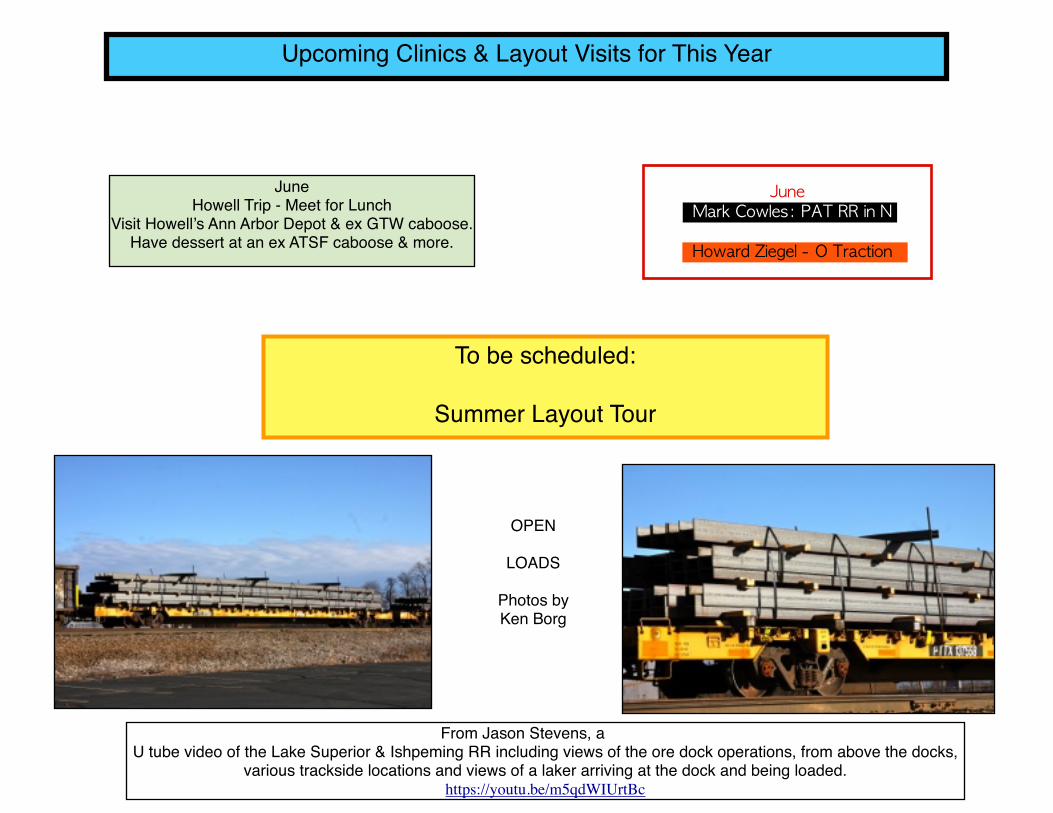
From Jason Stevens, a U tube video of the Lake Superior & Ishpeming RR including views of the ore dock operations, from above the docks,
various trackside locations and views of a laker arriving at the dock and being loaded.https://youtu.be/m5qdWIUrtBc
OPEN
LOADS
Photos byKen Borg
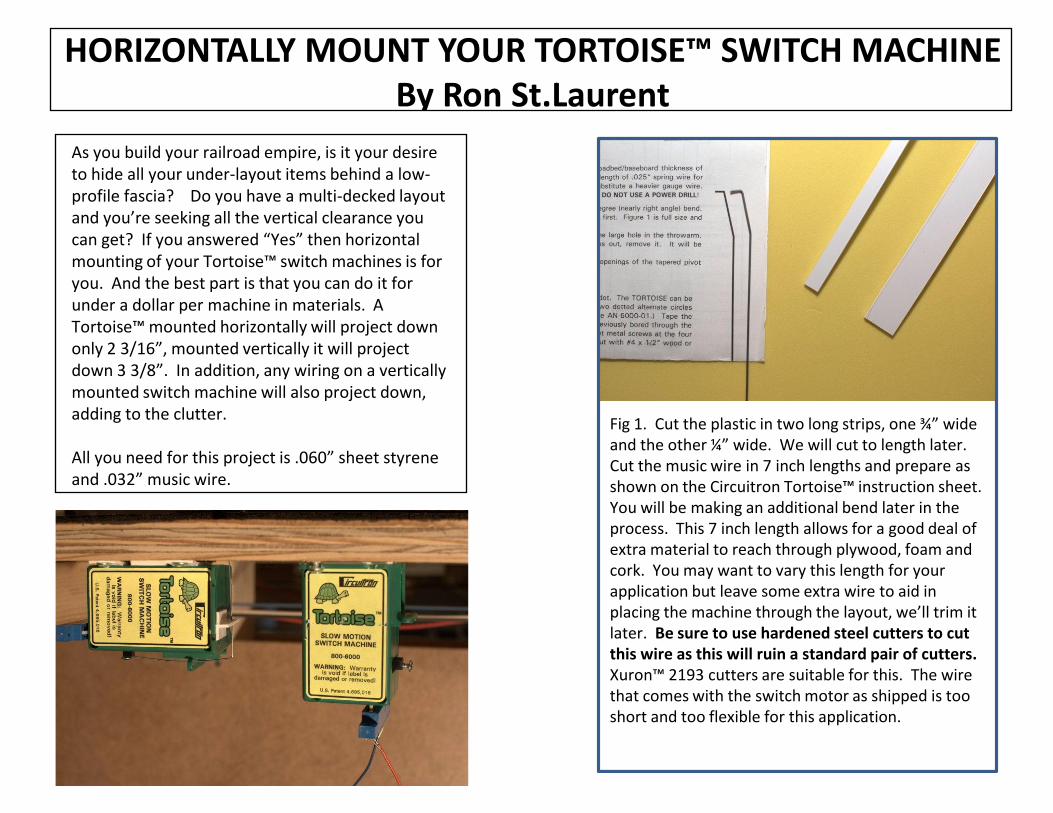
HORIZONTALLY MOUNT YOUR TORTOISE™ SWITCH MACHINE By Ron St.Laurent
Fig 1. Cut the plastic in two long strips, one ¾” wide and the other ¼” wide. We will cut to length later. Cut the music wire in 7 inch lengths and prepare as shown on the Circuitron Tortoise™ instruction sheet. You will be making an additional bend later in the process. This 7 inch length allows for a good deal of extra material to reach through plywood, foam and cork. You may want to vary this length for your application but leave some extra wire to aid in placing the machine through the layout, we’ll trim it later. Be sure to use hardened steel cutters to cut this wire as this will ruin a standard pair of cutters. Xuron™ 2193 cutters are suitable for this. The wire that comes with the switch motor as shipped is too short and too flexible for this application.
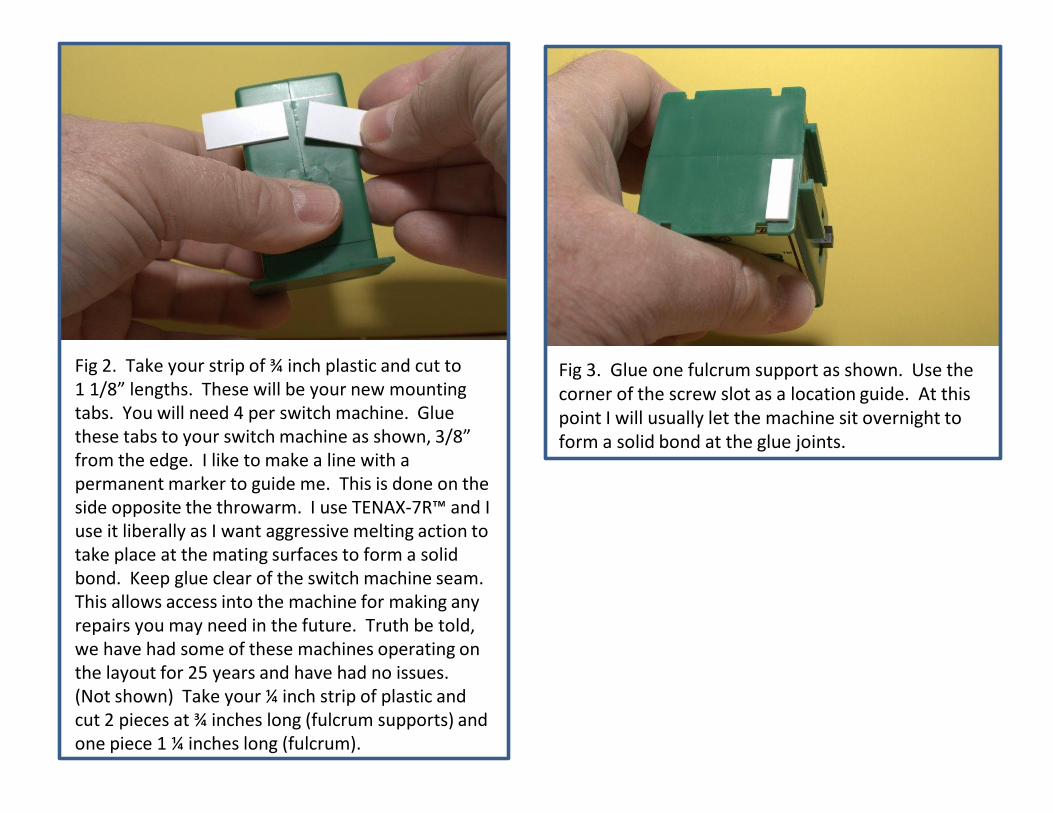
Fig 2. Take your strip of ¾ inch plastic and cut to 1 1/8” lengths. These will be your new mounting tabs. You will need 4 per switch machine. Glue these tabs to your switch machine as shown, 3/8” from the edge. I like to make a line with a permanent marker to guide me. This is done on the side opposite the throwarm. I use TENAX-7R™ and I use it liberally as I want aggressive melting action to take place at the mating surfaces to form a solid bond. Keep glue clear of the switch machine seam. This allows access into the machine for making any repairs you may need in the future. Truth be told, we have had some of these machines operating on the layout for 25 years and have had no issues. (Not shown) Take your ¼ inch strip of plastic and cut 2 pieces at ¾ inches long (fulcrum supports) and one piece 1 ¼ inches long (fulcrum).
As you build your railroad empire, is it your desire to hide all your under-layout items behind a low-profile fascia? Do you have a multi-decked layout and you’re seeking all the vertical clearance you can get? If you answered “Yes” then horizontal mounting of your Tortoise™ switch machines is for you. And the best part is that you can do it for under a dollar per machine in materials. A Tortoise™ mounted horizontally will project down only 2 3/16”, mounted vertically it will project down 3 3/8”. In addition, any wiring on a vertically mounted switch machine will also project down, adding to the clutter. All you need for this project is .060” sheet styrene and .032” music wire.
HORIZONTALLY MOUNT YOUR TORTOISE™ SWITCH MACHINE By Ron St.Laurent
Fig 1. Cut the plastic in two long strips, one ¾” wide and the other ¼” wide. We will cut to length later. Cut the music wire in 7 inch lengths and prepare as shown on the Circuitron Tortoise™ instruction sheet. You will be making an additional bend later in the process. This 7 inch length allows for a good deal of extra material to reach through plywood, foam and cork. You may want to vary this length for your application but leave some extra wire to aid in placing the machine through the layout, we’ll trim it later. Be sure to use hardened steel cutters to cut this wire as this will ruin a standard pair of cutters. Xuron™ 2193 cutters are suitable for this. The wire that comes with the switch motor as shipped is too short and too flexible for this application.
Fig 2. Take your strip of ¾ inch plastic and cut to 1 1/8” lengths. These will be your new mounting tabs. You will need 4 per switch machine. Glue these tabs to your switch machine as shown, 3/8” from the edge. I like to make a line with a permanent marker to guide me. This is done on the side opposite the throwarm. I use TENAX-7R™ and I use it liberally as I want aggressive melting action to take place at the mating surfaces to form a solid bond. Keep glue clear of the switch machine seam. This allows access into the machine for making any repairs you may need in the future. Truth be told, we have had some of these machines operating on the layout for 25 years and have had no issues. (Not shown) Take your ¼ inch strip of plastic and cut 2 pieces at ¾ inches long (fulcrum supports) and one piece 1 ¼ inches long (fulcrum).
As you build your railroad empire, is it your desire to hide all your under-layout items behind a low-profile fascia? Do you have a multi-decked layout and you’re seeking all the vertical clearance you can get? If you answered “Yes” then horizontal mounting of your Tortoise™ switch machines is for you. And the best part is that you can do it for under a dollar per machine in materials. A Tortoise™ mounted horizontally will project down only 2 3/16”, mounted vertically it will project down 3 3/8”. In addition, any wiring on a vertically mounted switch machine will also project down, adding to the clutter. All you need for this project is .060” sheet styrene and .032” music wire.
Fig 3. Glue one fulcrum support as shown. Use the corner of the screw slot as a location guide. At this point I will usually let the machine sit overnight to form a solid bond at the glue joints.
Fig 4. Using a pin vise, enlarge the hole in the Tortoise™ throwarm with a #66 drill bit to accommodate the .032” wire.
Fig 5. Mount the green fulcrum to the machine as shown. Take your prepared wire and mount it to the machine securing it with the provided screw. Manually and slowly move the output arm to the center position. You will have to apply a little force to do this. You will now add a 90 degree bend to the wire. I like to mount the wire to the switch machine and place my pliers at the appropriate location for the bend.
Fig 6. & Fig 7. The loose end of the wire must parallel the machine case as shown and rest above the machine by 1/8 inch. You may have to do this a couple of times but wire is cheap and you will get better as you gain experience. Once you have a good fully formed wire, you may want to use it as your template for subsequent wires.
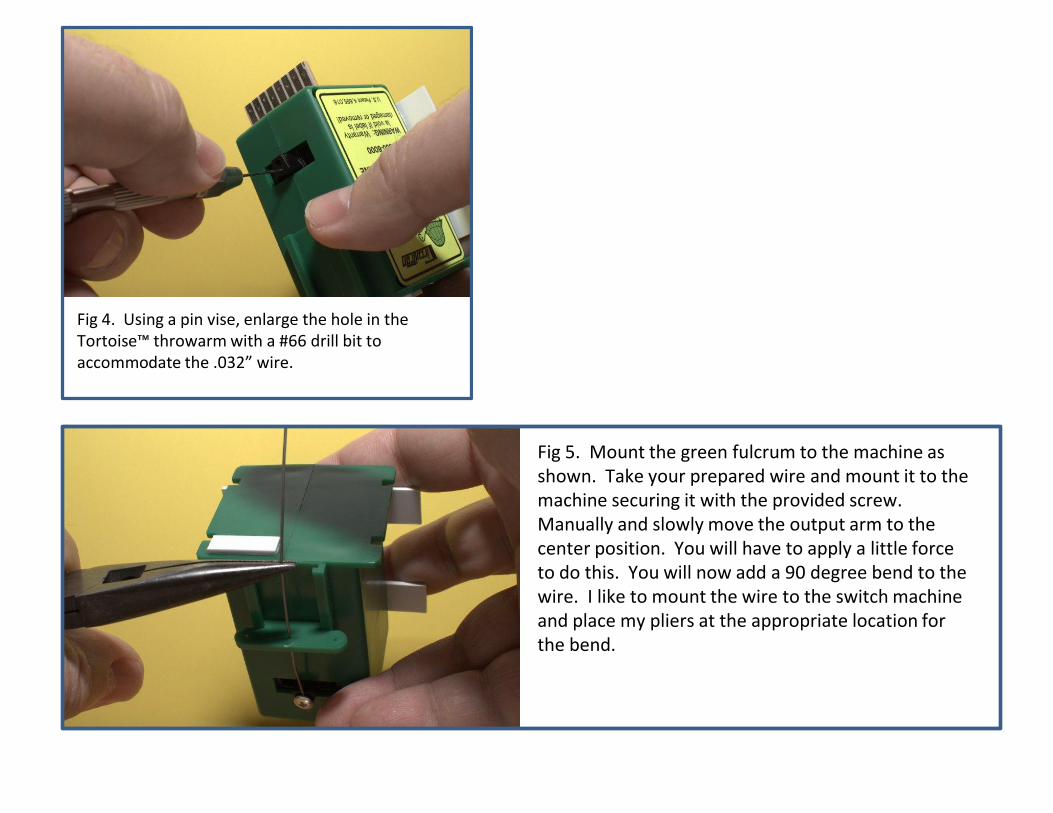
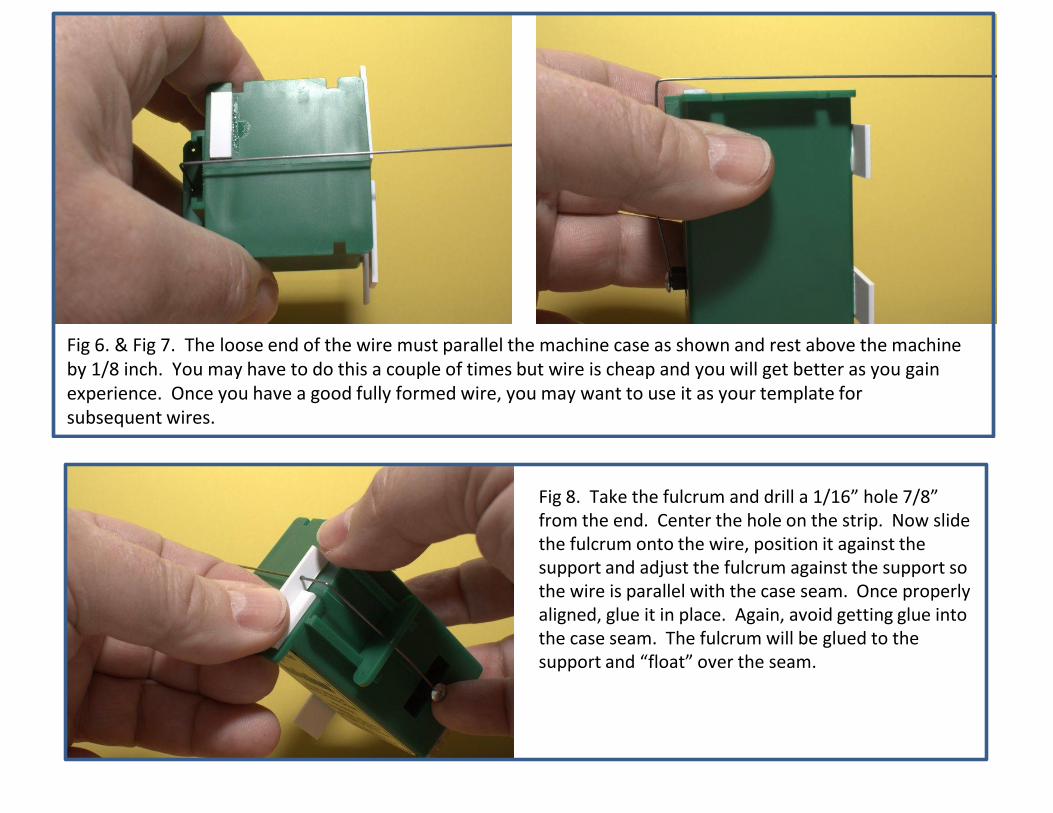
Fig 8. Take the fulcrum and drill a 1/16” hole 7/8” from the end. Center the hole on the strip. Now slide the fulcrum onto the wire, position it against the support and adjust the fulcrum against the support so the wire is parallel with the case seam. Once properly aligned, glue it in place. Again, avoid getting glue into the case seam. The fulcrum will be glued to the support and “float” over the seam.
Fig 9. Now glue in your second support. Fig 10. Prepare the holes in your mounting tabs. I like to drill 1/16” pilot holes followed up with 1/8” holes for mounting the machines.
Fig 11. Your switch machine is now complete, ready to be installed.
Fig 12. Throw adjustment may be made by moving the green fulcrum up and down. I find centered works well for me. Using this build method, the fulcrum is fully accessible under the layout.
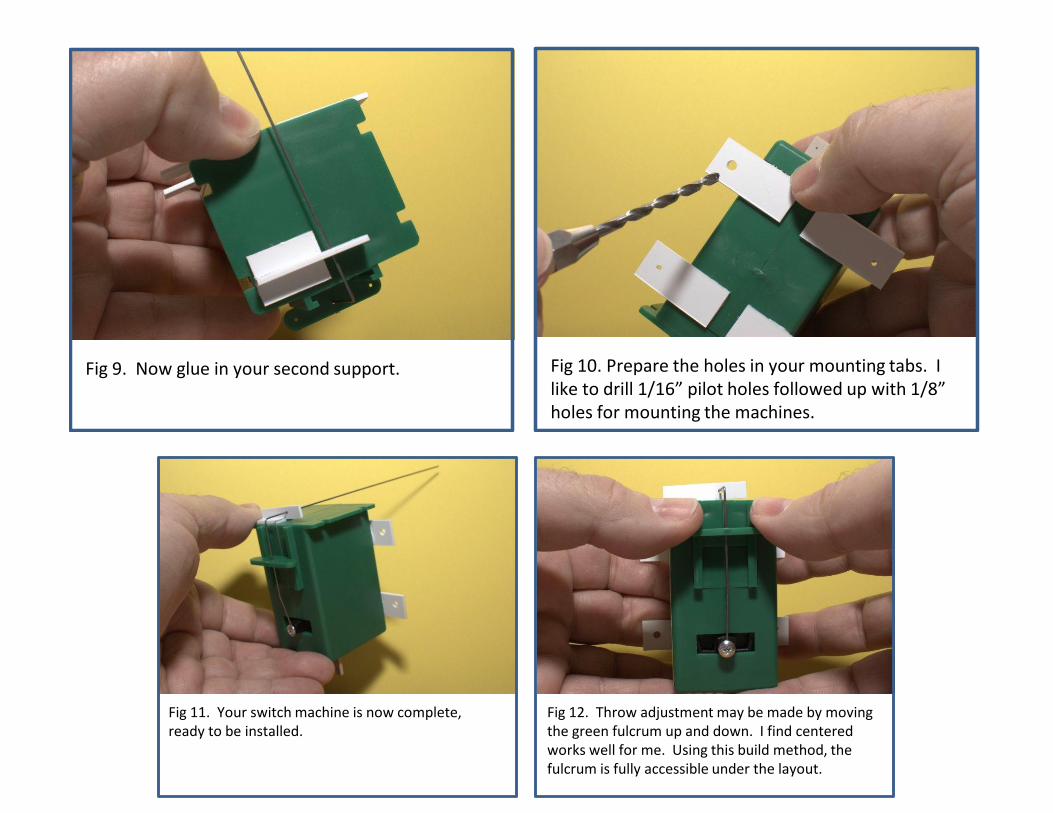
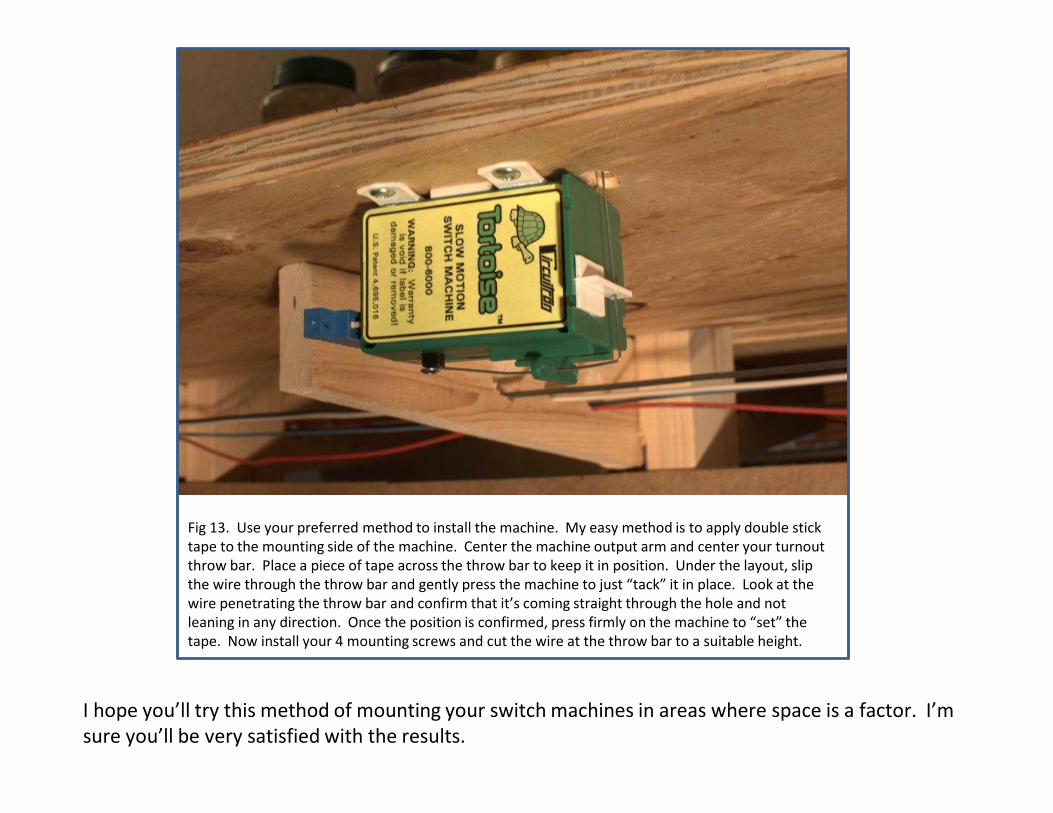
Fig 13. Use your preferred method to install the machine. My easy method is to apply double stick tape to the mounting side of the machine. Center the machine output arm and center your turnout throw bar. Place a piece of tape across the throw bar to keep it in position. Under the layout, slip the wire through the throw bar and gently press the machine to just “tack” it in place. Look at the wire penetrating the throw bar and confirm that it’s coming straight through the hole and not leaning in any direction. Once the position is confirmed, press firmly on the machine to “set” the tape. Now install your 4 mounting screws and cut the wire at the throw bar to a suitable height.
I hope you’ll try this method of mounting your switch machines in areas where space is a factor. I’m sure you’ll be very satisfied with the results.
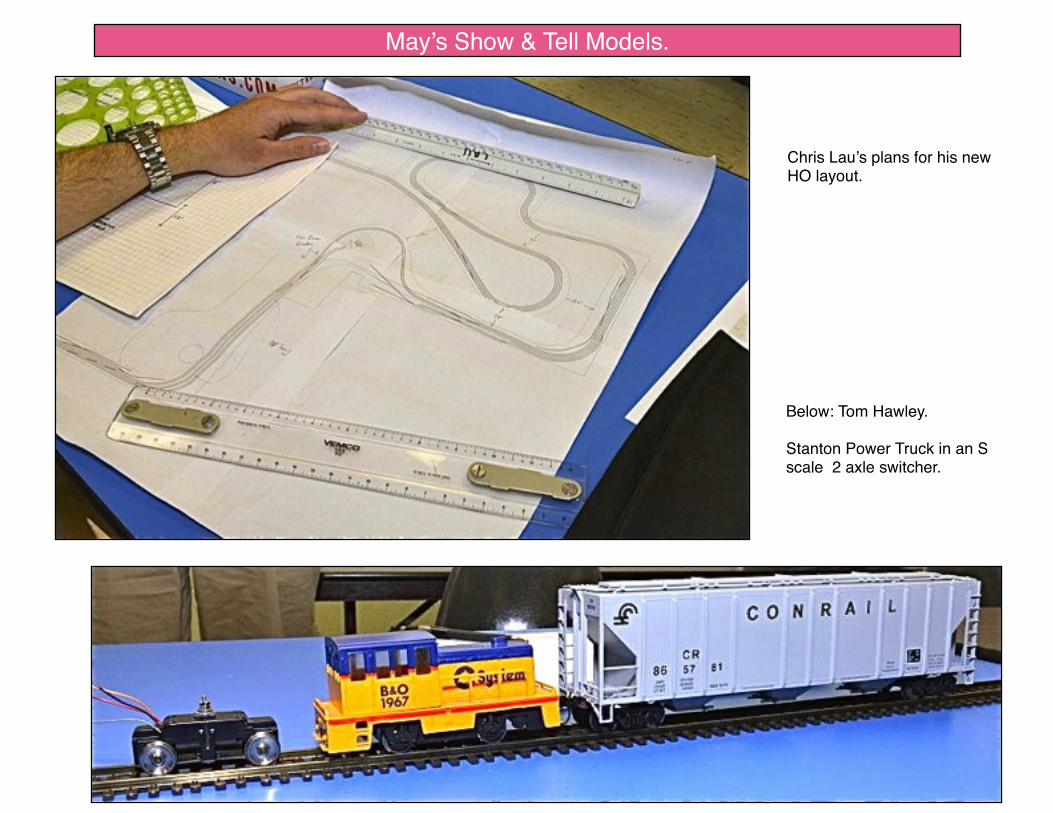
May’s Show & Tell Models.
Chris Lau’s plans for his new HO layout.
Below: Tom Hawley.
Stanton Power Truck in an S scale 2 axle switcher.
3’
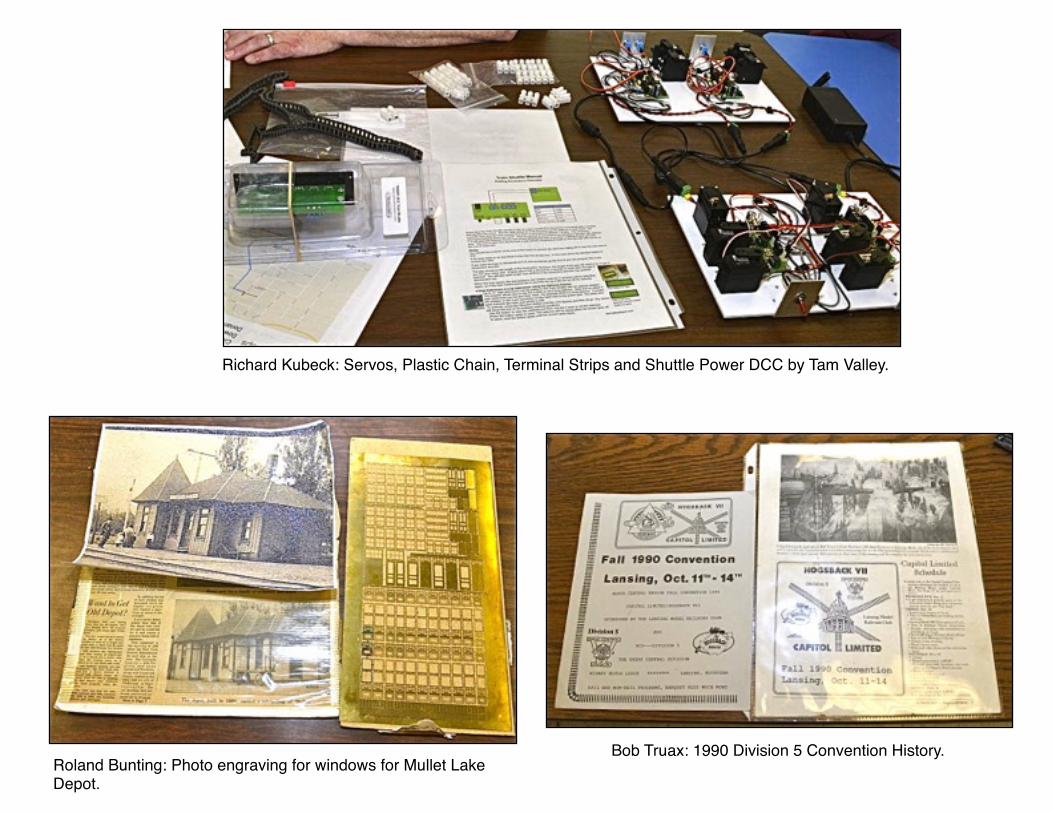
Richard Kubeck: Servos, Plastic Chain, Terminal Strips and Shuttle Power DCC by Tam Valley.
Roland Bunting: Photo engraving for windows for Mullet Lake Depot.
Bob Truax: 1990 Division 5 Convention History.
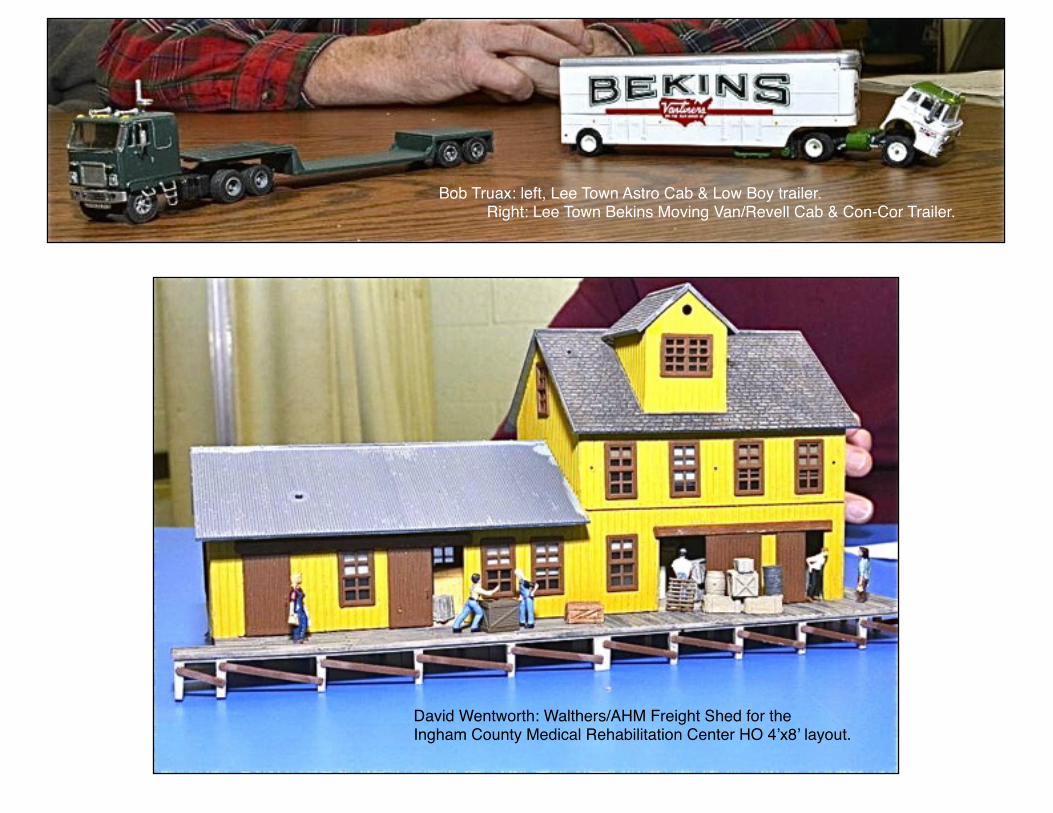
Bob Truax: left, Lee Town Astro Cab & Low Boy trailer.! Right: Lee Town Bekins Moving Van/Revell Cab & Con-Cor Trailer.
David Wentworth: Walthers/AHM Freight Shed for the Ingham County Medical Rehabilitation Center HO 4’x8’ layout.
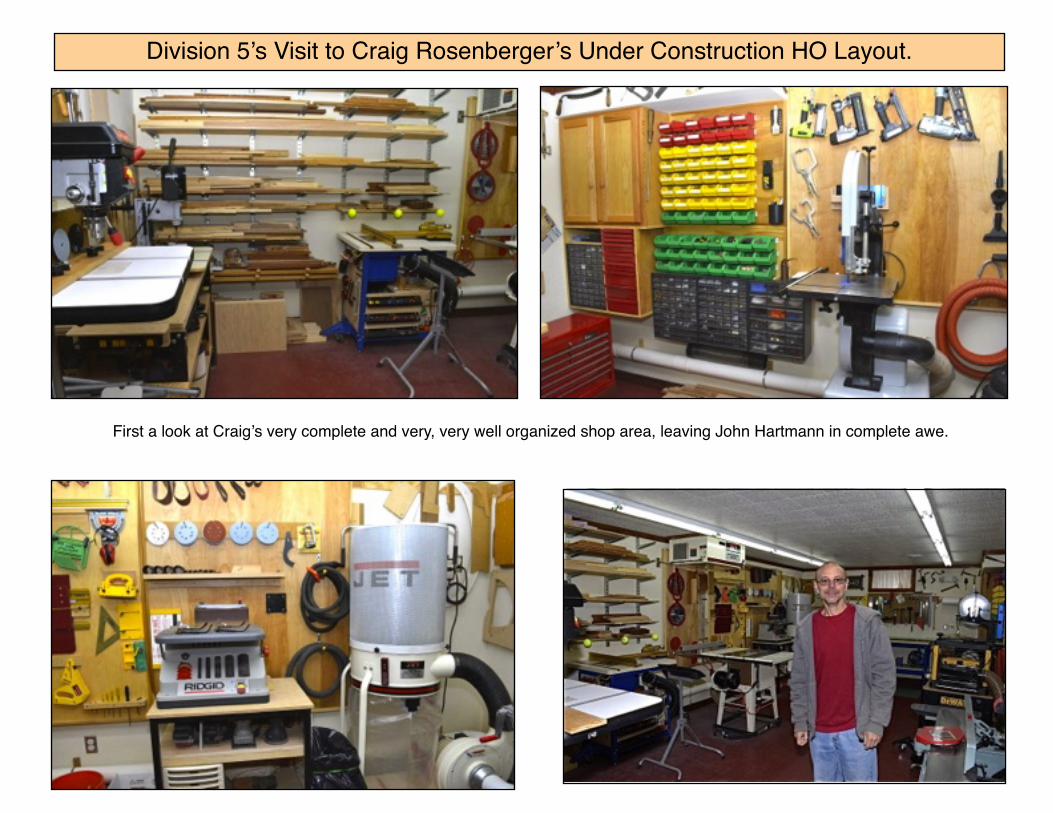
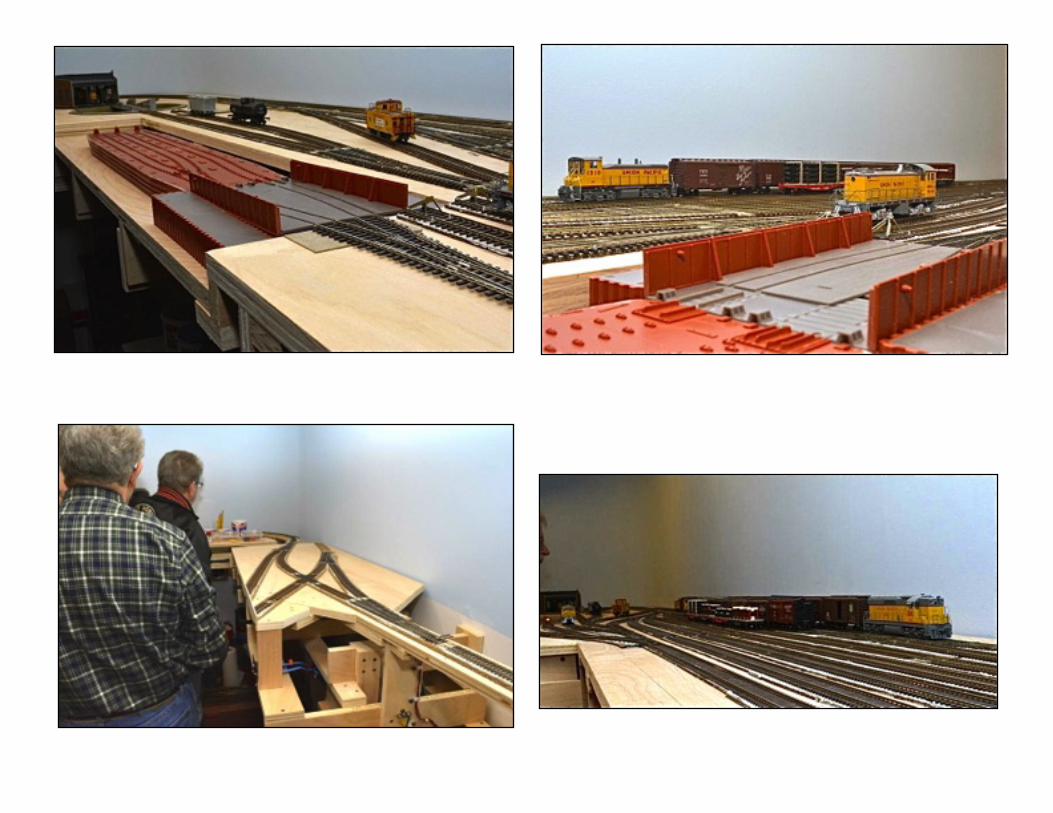
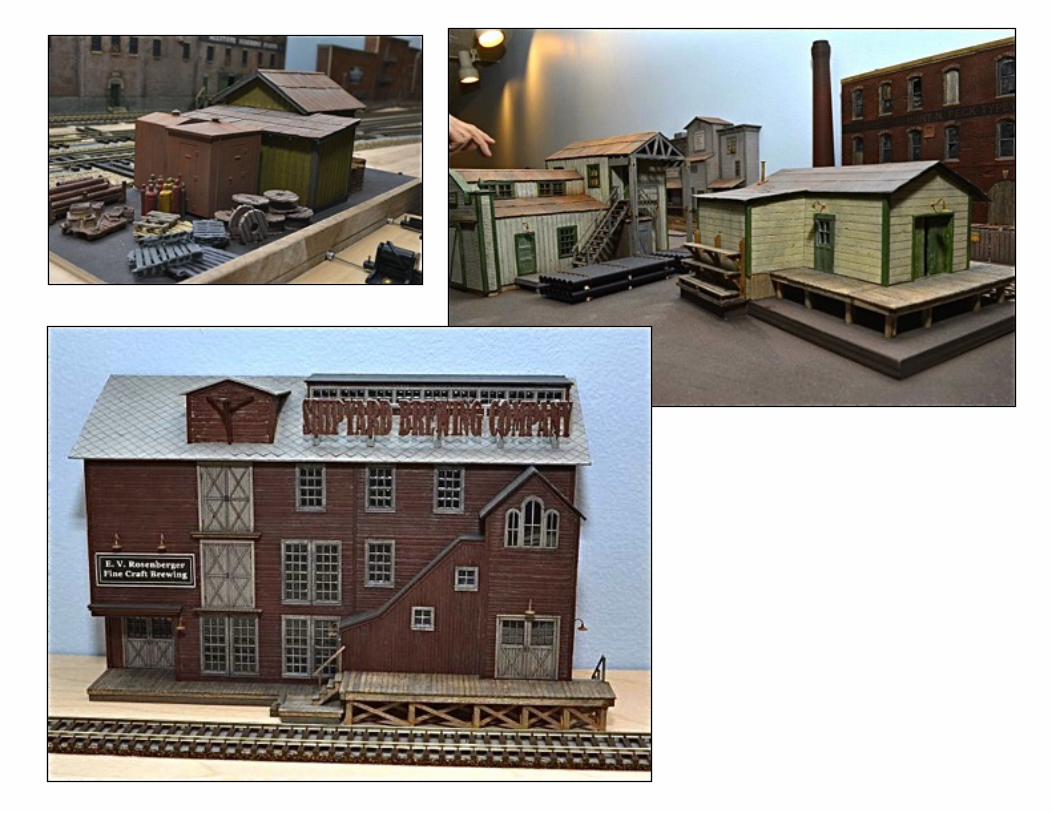
Division 5’s Visit to Craig Rosenberger’s Under Construction HO Layout.
First a look at Craig’s very complete and very, very well organized shop area, leaving John Hartmann in complete awe.
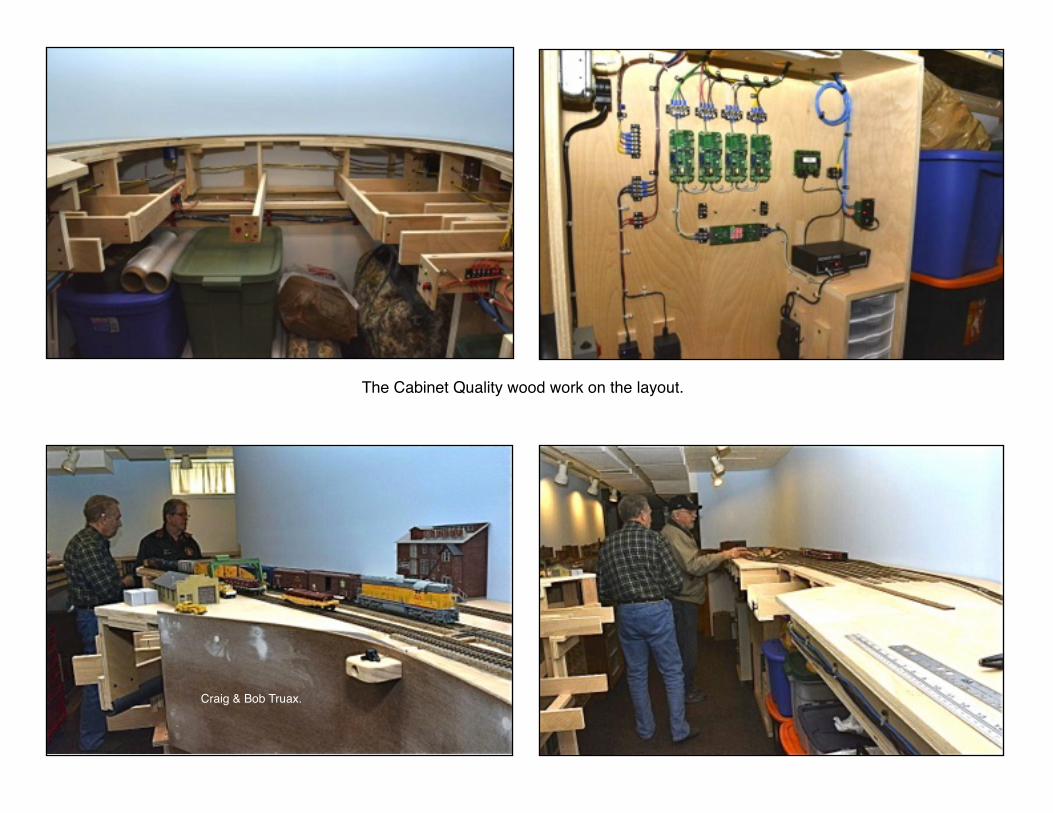
Craig & Bob Truax.
The Cabinet Quality wood work on the layout.
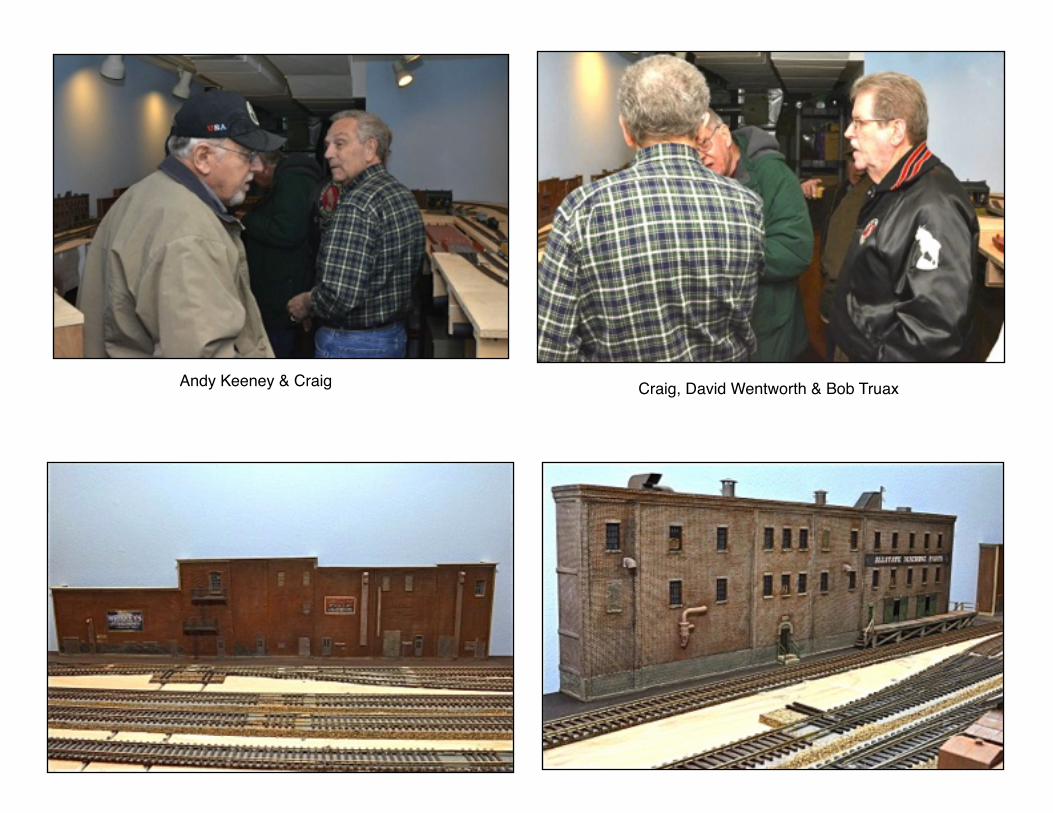
Andy Keeney & Craig Craig, David Wentworth & Bob Truax
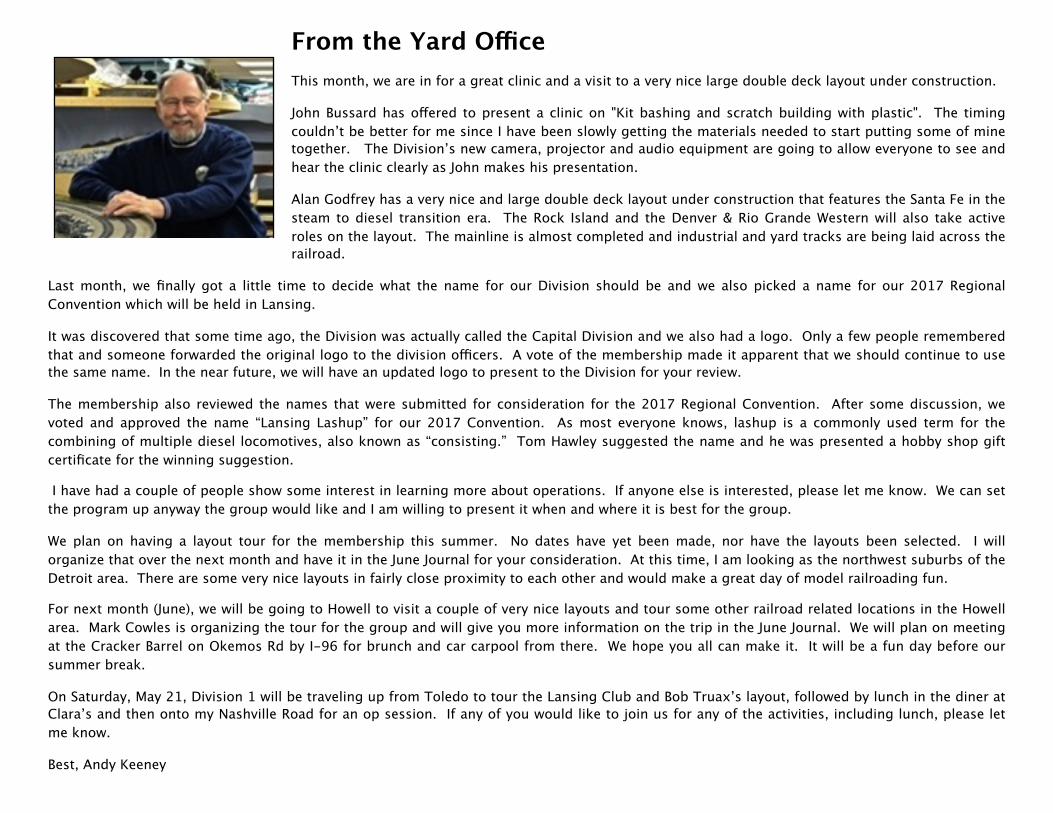
From the Yard OfficeThis month, we are in for a great clinic and a visit to a very nice large double deck layout under construction.
John Bussard has offered to present a clinic on "Kit bashing and scratch building with plastic". The timing couldn’t be better for me since I have been slowly getting the materials needed to start putting some of mine together. The Division’s new camera, projector and audio equipment are going to allow everyone to see and hear the clinic clearly as John makes his presentation.
Alan Godfrey has a very nice and large double deck layout under construction that features the Santa Fe in the steam to diesel transition era. The Rock Island and the Denver & Rio Grande Western will also take active roles on the layout. The mainline is almost completed and industrial and yard tracks are being laid across the railroad.
Last month, we finally got a little time to decide what the name for our Division should be and we also picked a name for our 2017 Regional Convention which will be held in Lansing.
It was discovered that some time ago, the Division was actually called the Capital Division and we also had a logo. Only a few people remembered that and someone forwarded the original logo to the division officers. A vote of the membership made it apparent that we should continue to use the same name. In the near future, we will have an updated logo to present to the Division for your review.
The membership also reviewed the names that were submitted for consideration for the 2017 Regional Convention. After some discussion, we voted and approved the name “Lansing Lashup” for our 2017 Convention. As most everyone knows, lashup is a commonly used term for the combining of multiple diesel locomotives, also known as “consisting.” Tom Hawley suggested the name and he was presented a hobby shop gift certificate for the winning suggestion.
I have had a couple of people show some interest in learning more about operations. If anyone else is interested, please let me know. We can set the program up anyway the group would like and I am willing to present it when and where it is best for the group.
We plan on having a layout tour for the membership this summer. No dates have yet been made, nor have the layouts been selected. I will organize that over the next month and have it in the June Journal for your consideration. At this time, I am looking as the northwest suburbs of the Detroit area. There are some very nice layouts in fairly close proximity to each other and would make a great day of model railroading fun.
For next month (June), we will be going to Howell to visit a couple of very nice layouts and tour some other railroad related locations in the Howell area. Mark Cowles is organizing the tour for the group and will give you more information on the trip in the June Journal. We will plan on meeting at the Cracker Barrel on Okemos Rd by I-96 for brunch and car carpool from there. We hope you all can make it. It will be a fun day before our summer break.
On Saturday, May 21, Division 1 will be traveling up from Toledo to tour the Lansing Club and Bob Truax’s layout, followed by lunch in the diner at Clara’s and then onto my Nashville Road for an op session. If any of you would like to join us for any of the activities, including lunch, please let me know.
Best, Andy Keeney
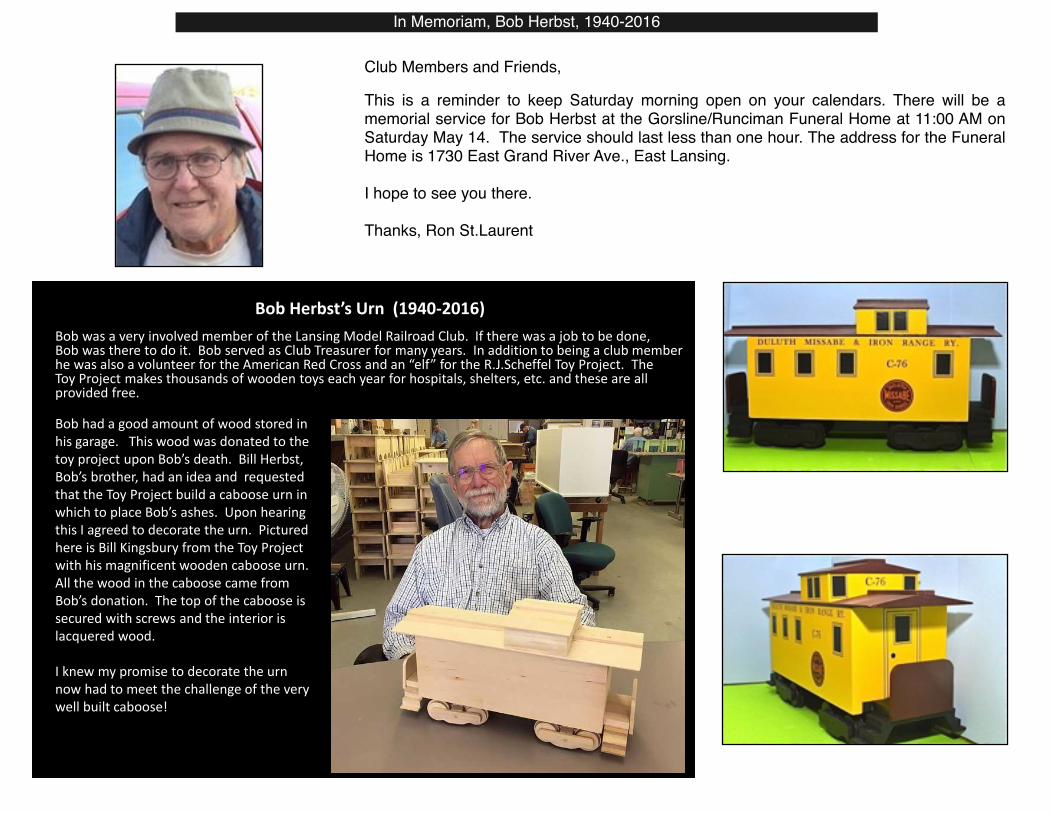
Bob Herbst’s Urn (1940-2016) Bob was a very involved member of the Lansing Model Railroad Club. If there was a job to be done, Bob was there to do it. Bob served as Club Treasurer for many years. In addition to being a club member he was also a volunteer for the American Red Cross and an “elf” for the R.J.Scheffel Toy Project. The Toy Project makes thousands of wooden toys each year for hospitals, shelters, etc. and these are all provided free.
Bob had a good amount of wood stored in his garage. This wood was donated to the toy project upon Bob’s death. Bill Herbst, Bob’s brother, had an idea and requested that the Toy Project build a caboose urn in which to place Bob’s ashes. Upon hearing this I agreed to decorate the urn. Pictured here is Bill Kingsbury from the Toy Project with his magnificent wooden caboose urn. All the wood in the caboose came from Bob’s donation. The top of the caboose is secured with screws and the interior is lacquered wood. I knew my promise to decorate the urn now had to meet the challenge of the very well built caboose!
Club Members and Friends,
This is a reminder to keep Saturday morning open on your calendars. There will be a memorial service for Bob Herbst at the Gorsline/Runciman Funeral Home at 11:00 AM on Saturday May 14. The service should last less than one hour. The address for the Funeral Home is 1730 East Grand River Ave., East Lansing.
I hope to see you there.
Thanks, Ron St.Laurent
In Memoriam, Bob Herbst, 1940-2016
Announcing the 2nd Annual Michigan Railfan Trip to OhioThis year’s trip is to visit and railfan
Bellevue and The Mad River & NKP Museum.
Last year’s trips to Fostoria’s Iron Triangle and the New York Central museum were enough of a success for us to set up another similar trip.
This Spring’s destination is Bellevue, OH and the Mad River & Nickel Plate Railroad Museum set for Saturday, May 21.
This trip also is going to be a drive yourself or carpool with friends trip. This provides a number of advantages. No cost of bus, and right now gas prices are good, you can arrive and leave the site as suits your own schedule, you can choose when and where to eat and you can decide to come, or to cancel at the last minute, if your plans change.
Bellevue is located about one hour southeast of Toledo, south of Cedar Point. The trip can be made either via the Ohio Turnpike or east from Toledo on US 20. The difference between routes in either time or distance is minimal.
The museum is open between Noon and 4 and the admission cost is: adults, $7; seniors, $6 and children 3-12 $4.
The museum has a collection of diesel locomotives, the first dome car, an PRR RPO car, a restored station, museum buildings and a collection of other freight and passenger cars and miscellaneous railroad equipment and memorabilia.
In addition, there is a viewing platform, open 24 hours, across from the preserved PRR tower at the intersection of the NS and W&LE lines, with tracks heading off in four directions.
Just east of town, OH route 4 crosses over the NS yard, with a view of the shops and hump as well as yard tracks. While there is no parking allowed on the bridge, it does have very wide shoulders available for photographers. It is a couple of hundred yard walk from the parking areas to the center of the bridge, however, there are a number of other level crossings in the area of the museum, with spots to park, to get train photos in addition to the viewing platform.
Bellevue has a number of eateries ranging from fast food, to bar/lounges to sit down restaurants. Lodging is also available in the area for those who want to arrive early or stay over night.
For those of you opting to drive rte. 20, Fremont, west of Bellevue, has three stations, 2 passenger and a freight near the intersection of Napoleon and N.Monroe to the south of rte. 20 .
Both Bellevue and the Museum have web sites for more information.Mark [email protected]

THE CABOOSE PAGE
Division 5 Officers - March 2015 - March 2017
Superintendent -Andy Keeney 517 316 5660 [email protected]
Assistant Superintend - Mark Frechette
Paymaster - Alan Godfrey 517 881 1363 [email protected]
Clerk & Editor - Mark Cowles 517 546 5241 [email protected]
Webmaster - Craig Rosenberger
Ex NKP/N&W caboose next to the depot at Lake, MI, just west of the former PM concrete coaling tower.
