1/16/2018 - katpo.org · manual a-scan print-out immersion a-scan print-out ... •refraction of...
TRANSCRIPT
1/16/2018
1
Copyright © 2015 Association of Technical Personnel in Ophthalmology® (ATPO®). All rights reserved
COT Certification
Written Exam
Review, Part 2February 24, 2018
Presenter: Laura Lee Hopkins, COMT, OCT-C, ROUB
COMPUTER-BASED EXAM
▪ 200 Questions Scored.
▪ There are 10-25 questions which are not scored. You will not be able to identify these questions.
▪ Three hours to complete the exam.
▪ Four distracters for each question.
▪ Each question has “ONE BEST” response.
▪ While taking the exam, you can:
Let’s Get Started! (Reminder)
- Answer the question. - Mark the question for review at the end of the
exam.
Assisting in Surgical Procedures
(6% of Exam)
• In the OR
• In the Laser Room (YAG- Capsulotomy or Iridotomy; Argon)
• In the Refractive Laser Center
• In the Minor Room
• In the Exam Lane
Assisting with Surgical Procedures
• Steps taken to reduce the risk of bloodborne infection
✓Includes washing hands before and after contact with patients
✓Gloves, masks, gowns in situations with the possibility of contact with body fluids
✓Needles should never be recapped, bent or clipped
Universal Precautions• Disinfection
– Reduce microorganisms or inanimate surfaces with chemical or physical agents (Cleaning instruments, spills, etc.)
• Sterilization
– Rendered free of living microorganisms with autoclave, ethylene oxide gas, chemical, dry heat and ionizing radiation (Sterilizing reusables)
• Non-sterile: not free of living microorganisms
• Surgically clean: reduced number of microorganisms
Disinfection and Sterilization
• Don’t touch what isn’t sterile
• Don’t drop hands below table level
• Nothing behind you is sterile
• Don’t pick up fallen objects
• Avoid skin contact
• You must acknowledge/mention violation of sterile field
Aseptic Technique
• Time-out
• Verify patient, doctor, procedure and which eye, what location
Surgical Site Identification
• Intravitreal injections
• Sub-Conjunctival injections
• Intra-cameral injections
• Various anesthesia injections: Retro-bulbar, peri-bulbar, etc.
Intraocular Injections

1/16/2018
2
• Protective Equipment:
– Eye protection
– Limited number of people present in the room
– Calibrations preformed
– Equipment in good working order
– Turn off the laser when not in use
Laser Safety
• Basic understanding of options
– LASIK
– LASEK
– PRK
– RK
• Laser Cataract Surgery: Arcuate Incisions correct astigmatism (plus corneal incisions, capsulotomy, and lens fragmentation)
Refractive Surgery
• PTK (Phototherapeutic keratectomy)
• YAG PI, Capsulotomy
• Argon Laser
• Focal Laser
• Pan Retinal Laser
• Laser Cataract Surgery: Primary corneal incisions, capsulotomy, lens fragmentation, (and arcuate incisions)
Non-Refractive Laser Surgeries
• Surgeries which are typically performed in the doctor’s office.
• Examples: chalazion excision, lid lesion excision, lacrimal duct probe and irrigation
Minor Surgery
• Cryo – uses cold– Ex: retinal tears, lesions
• Cautery – uses heat– Stops bleeding
• Laser – uses focused amplified light– Retinopathy, glaucoma, PCO
Minor Surgery
• Assisting the surgeon
– Anesthetics
– Preparing the patient
– Instruments/supplies
• Instructing the patient
– Consent
– Expectations
Minor Surgery
• Phacoemulsifier- cataract surgery
• Vitrectomy units- for vitrectomies
• Laser automated keratometer
Common Surgical Equipment
Ophthalmic Patient Services and Education
(7% of Exam)
• Basic understanding of systemic conditions and how they may affect the eye
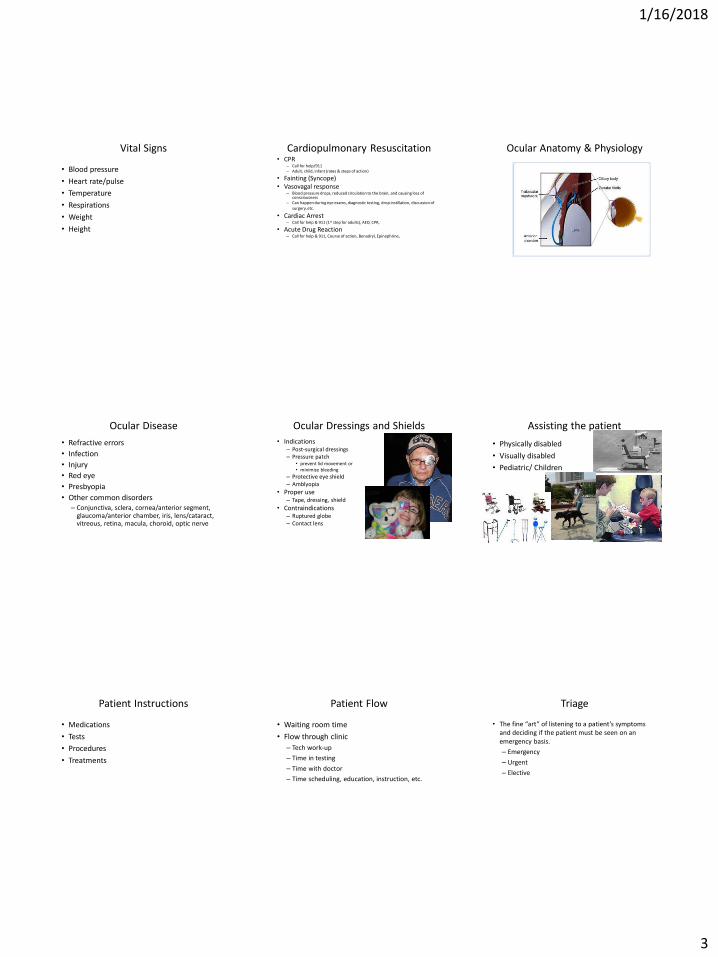
Anatomy & Physiology
1/16/2018
3
• Blood pressure
• Heart rate/pulse
• Temperature
• Respirations
• Weight
• Height
Vital Signs• CPR
– Call for help/911– Adult, child, infant (rates & steps of action)
• Fainting (Syncope)• Vasovagal response
– Blood pressure drops, reduced circulation to the brain, and causing loss of consciousness
– Can happen during eye exams, diagnostic testing, drop instillation, discussion of
surgery, etc.
• Cardiac Arrest– Call for help & 911 (1st step for adults), AED, CPR,
• Acute Drug Reaction– Call for help & 911, Course of action, Benadryl, Epinephrine,
Cardiopulmonary Resuscitation Ocular Anatomy & Physiology
• Refractive errors
• Infection
• Injury
• Red eye
• Presbyopia
• Other common disorders– Conjunctiva, sclera, cornea/anterior segment,
glaucoma/anterior chamber, iris, lens/cataract, vitreous, retina, macula, choroid, optic nerve
Ocular Disease
• Indications– Post-surgical dressings– Pressure patch
• prevent lid movement or • minimize bleeding
– Protective eye shield– Amblyopia
• Proper use– Tape, dressing, shield
• Contraindications– Ruptured globe– Contact lens
Ocular Dressings and Shields
• Physically disabled
• Visually disabled
• Pediatric/ Children
Assisting the patient
• Medications
• Tests
• Procedures
• Treatments
Patient Instructions
• Waiting room time
• Flow through clinic
– Tech work-up
– Time in testing
– Time with doctor
– Time scheduling, education, instruction, etc.
Patient Flow
• The fine “art” of listening to a patient’s symptoms and deciding if the patient must be seen on an emergency basis.
– Emergency
– Urgent
– Elective
Triage
1/16/2018
4
• First aid– Chemical injuries
– Blunt forces trauma injuries
– Perforating injuries
– Abrasive injuries
– Glaucoma emergencies
– Retinal emergencies
• Management in the absence of the physician
• Triage
Ocular Emergencies
• Training and Education
– For patients
– For technicians/staff
Forms and Manuals
• HIPAA
• Consent forms for surgery, procedures, services, products
• Medicaid/Medicare
• BWC forms/services
• Disability forms
• FMLA forms
Legal Forms & Government Services
Ophthalmic Imaging(7% of Exam)
• Basics of Photography
• Fundus Photography
• Defects/ Artifacts (false results)
Photography
• Film (speed, ISO, color vs. B&W)• F-Stops• Exposure (utilize flash, gain & gamma changes to avoid under- or
over exposure)• Focal length• Depth of field (aperture)• Synchronization (shutter speed and flash)• Beam splitters (image split between reviewers)• Reticles (focus)• Ocular (focus first)• Focus (reticle and image clear simultaneously)• Video• Astigmatic correction
Basics of Photography
• Used to document dermatochalasis, chalazions, cysts and lesions of the lids, ptosis, etc.
External Photography Slit lamp photography
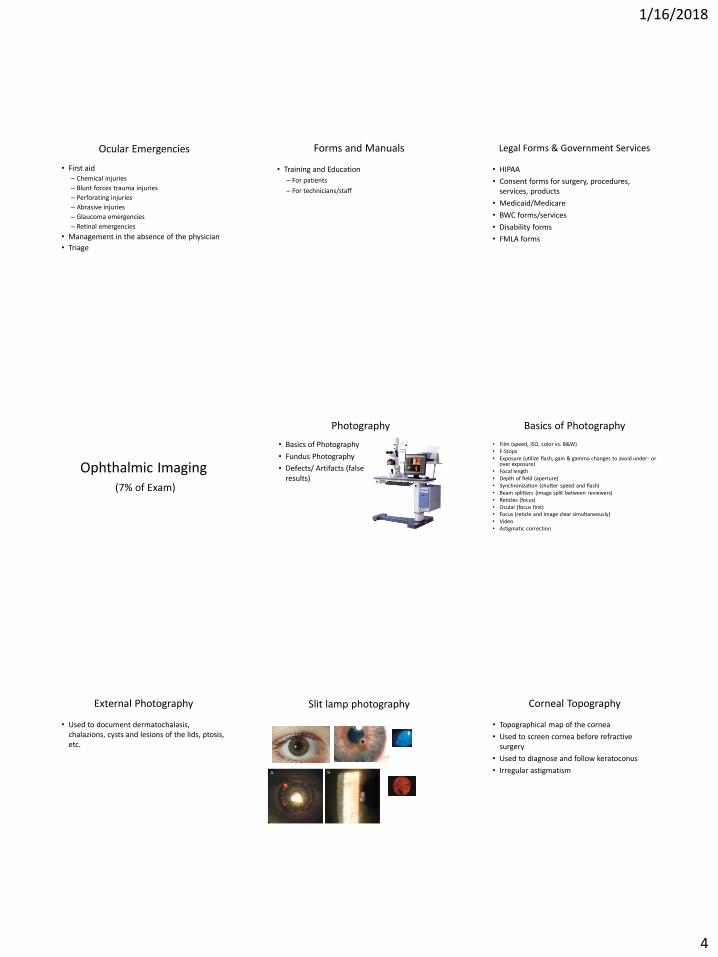
• Topographical map of the cornea
• Used to screen cornea before refractive surgery
• Used to diagnose and follow keratoconus
• Irregular astigmatism
Corneal Topography

1/16/2018
5
• Axial length• Length of the eye from front of cornea to front of
retina (in mm)
• Average size of adult eye= 23.00mm
• Similarity between the two eyes
• Myopic eyes are longer/steeper
• Hyperopic eyes are shorter/ flatter
A-scan Biometry
• Manual A-scan has a probe that touches central cornea.
• Immersion A-scan probe does not touch the eye; Prager shell/water bath combo is used.
• Portable units available, used in surgery
A-Scan Ultrasonography
Phakic Scans: Cornea, anterior lens, posterior lens, retina/sclera/orbital fat.
Manual A-scan print-out
Aphakic Scans: Cornea, capsule remnant
(sometimes), retina/sclera/orbital fat.
Manual A-scan print-out
Pseudophakic Scans: Cornea, IOL, echo with reverberations, retina/sclera/orbital fat.
Manual A-scan print-out Immersion A-scan print-out
• IOL Master
• LenStar
• Aladdin
A-scan Biometry
• HRT
– Heidelberg Retina Tomograph (optic nerve head)
• GDX
– Laser Diagnostic Technologies (Nerve fiber layer)
• OCT
– Optical Coherence Tomographer (RNFL, Macula & Optic Disc)
Scanning Laser Tests for Glaucoma/Retina/Optic Nerve
Normal Macular on OCT
1/16/2018
6
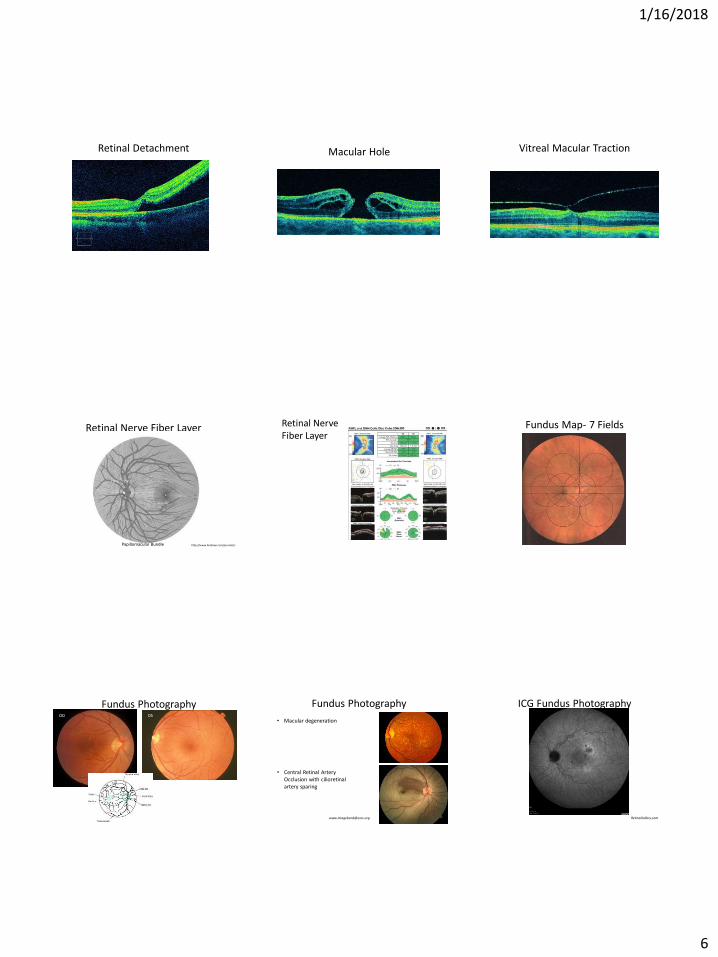
Retinal Detachment Macular Hole Vitreal Macular Traction
Retinal Nerve Fiber Layer
Papillomacular Bundle http://www.hindawi.com/journals/
Retinal NerveFiber Layer
Fundus Map- 7 Fields
Fundus PhotographyOD OS
Fundus Photography
• Macular degeneration
• Central Retinal Artery Occlusion with cilioretinalartery sparing
ICG Fundus Photography
RetinaGallery.com

1/16/2018
7
Stereo Disc Photos• Focus- eyepiece; too close/not
close enough
• Anatomical obstacles/Patient blink Alignment-pupil, lids/lashes, centration
• Patient fixation-instruction important
• Dust/material on lenses
• Shutter/synch off
• Inappropriate filtration
• Wrong flash setting or film speed for best image
Defects and Artifacts
Intravenous Fluorescein Angiography (IVFA) is a diagnostic test that is used to capture the blood flow
in the back of the eye, allowing physicians to diagnose different types of retinal disease. It is
particularly helpful in the diagnosis and management of Diabetic Retinopathy, Macular Degeneration, and
Vein/Artery Occlusions.
Fluorescein Angiography
There are 3 basic phases of a Fluorescein Angiogram:
1. The early phase (transit phase)- this usually occurs in just over 10 seconds after the injection of dye. In this phase, you will see
the first presence of dye in the choroid.
Filling of the retinal arteries and veins are the next part of the early phase of the angiogram. Typically,
these vessels are completely full at around 30 seconds.
Arteries fill, then the veins fill…
2. The mid phase (recirculation phase)– in this phase, the brightness of the fluorescence is less intense now, as much of
the fluorescein is removed from the bloodstream after the first pass through the kidneys.
3. The late phase – shows the gradual elimination of dye from the retinal and choroidal vasculature.
Ultrasound Image of the eye allowing imaging of the vitreous, choroid, and retina
Normal vs. Retinal Detachment
B-Scan
Refractometry(7% of Exam)
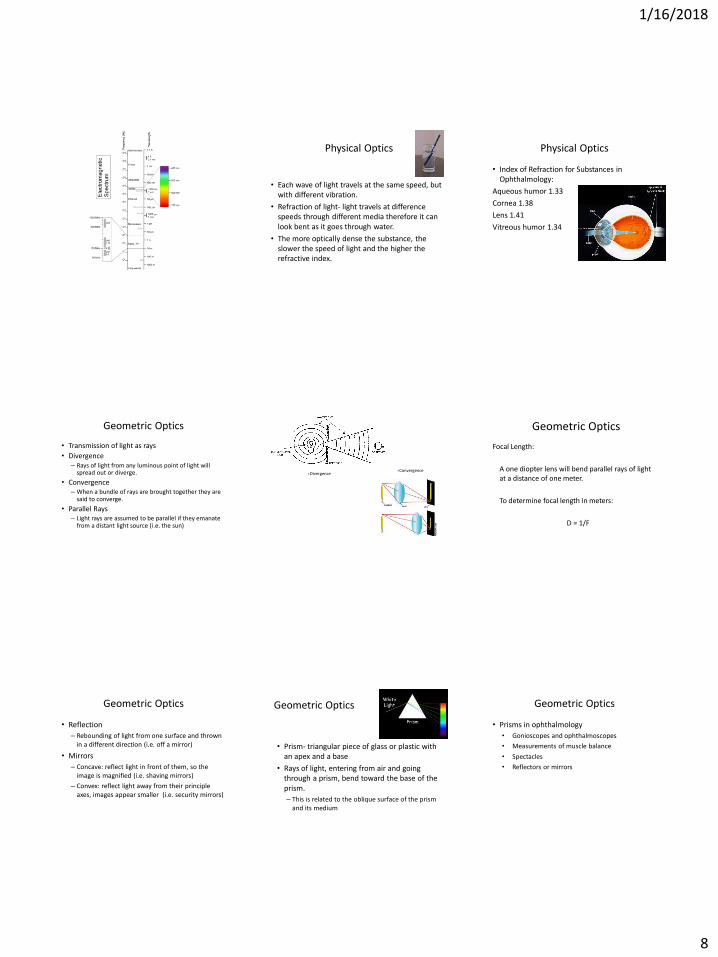
• The eye responds to wavelengths of 400-800nm.
• White light is a mixture of all colors
• White light isn’t broken unless it travels through a different medium like water or glass
• Each wavelength range has a particular color hue:– Red has longest wavelength
– Violet has the shortest wavelength
Physical Optics
1/16/2018
8
• Each wave of light travels at the same speed, but with different vibration.
• Refraction of light- light travels at difference speeds through different media therefore it can look bent as it goes through water.
• The more optically dense the substance, the slower the speed of light and the higher the refractive index.
Physical Optics
• Index of Refraction for Substances in Ophthalmology:
Aqueous humor 1.33
Cornea 1.38
Lens 1.41
Vitreous humor 1.34
Physical Optics
• Transmission of light as rays
• Divergence– Rays of light from any luminous point of light will
spread out or diverge.
• Convergence– When a bundle of rays are brought together they are
said to converge.
• Parallel Rays– Light rays are assumed to be parallel if they emanate
from a distant light source (i.e. the sun)
Geometric Optics
ConvergenceDivergence
Geometric Optics
Focal Length:
A one diopter lens will bend parallel rays of light at a distance of one meter.
To determine focal length in meters:
D = 1/F
• Reflection
– Rebounding of light from one surface and thrown in a different direction (i.e. off a mirror)
• Mirrors
– Concave: reflect light in front of them, so the image is magnified (i.e. shaving mirrors)
– Convex: reflect light away from their principle axes, images appear smaller (i.e. security mirrors)
Geometric Optics
• Prism- triangular piece of glass or plastic with an apex and a base
• Rays of light, entering from air and going through a prism, bend toward the base of the prism.
– This is related to the oblique surface of the prism and its medium
Geometric Optics
• Prisms in ophthalmology
• Gonioscopes and ophthalmoscopes
• Measurements of muscle balance
• Spectacles
• Reflectors or mirrors
Geometric Optics

1/16/2018
9
• Lenses
– Convex- one or both surfaces of the lens are curved outward (two prisms base to base)
– Plus lenses converge rays of light to a focus behind the lens
– Concave-one or both surfaces of the lens are curved inward (two prisms are apex to apex)
– Negative lenses diverge rays of light
Geometric OpticsMinus Lens
Plus Lens
• The ray penetrating the center of the lens is undeviated, but all the rays on either side (paraxial rays) will converge to or from a point.– Central ray travels along the principle axis
• Focal Point– Paraxial rays converge to a point on the principle axis
• Focal Length– Distance of the focal point to the center of the lens
• Power of a lens– Equals the reciprocal of its focal distance measured in
meters. Power is expressed in diopters. (D= 1/F)
Geometric Optics
• Occlude the fellow eye on the phoropter
• Refine the sphere power
• Position the Jackson Cross Cylinder to assess axis
• Refine the cylinder axis
• Position the JCC to assess cylinder power
• Refine the cylinder power
• Refine the sphere power
Steps in Performing Refractometry
• Fogging method
• Duochrome and fogging technique
• Alternate occlusion method
• Prism dissociation method
Binocular Balancing
• Prepare for retinoscopy- adjust for proper working distance
• Position the Patient and Phoropter
• Identify the two meridians with you retinoscope
• Determine the sphere power
• Set and determine the cylinder axis
• Determine cylinder power
• Subtract working distance from final results
• Document your results
Steps in Performing Retinoscopy
Retinoscopy
• With Motion: add plus
• Against Motion: add minus
• Neutral: no movement, pupil full
• Better to leave slightly with motion
• Avoid the against motion
Optical Cross
+1.00 at 90°
+2.25 at 180°
Rx is +1.00 +1.25 x90° or+2.25 -1.25 x180°
Useful in retinoscopy and manual lensometry
Spectacle Skills(3% of Exam)
1/16/2018
10
Change a prescription from
(+) cylinder to (-) cylinder
or from
(–) cylinder to (+) cylinder.
Transposition
Ex: -1.00 -2.00 x 80°
-1.00 + (-2.00) = -3.00
Step 1)Take the cylinder of the Rx and add it algebraically to the sphere.
Ex: -1.00 – 2.00 x 80°
-2.00 becomes +2.00
Step 2)Change the sign of the cylinder (+ to –) or (– to +).
In this case, ADD 90° to the axis to ensure the axis is ≤ 180°
Ex: -1.00 -2.00 x 80°
80° + 90° = 170°
New Rx: -3.00 +2.00 x170 °
Step 3) Change the axis by 90°
If the original axis is more than 90° then,
Subtract 90° to the axis to ensure the axis is ≤ 180°.
Ex: -1.00 – 2.00 x 180°
180° - 90° = 90°
New Rx: -3.00 +2.00 x90 °
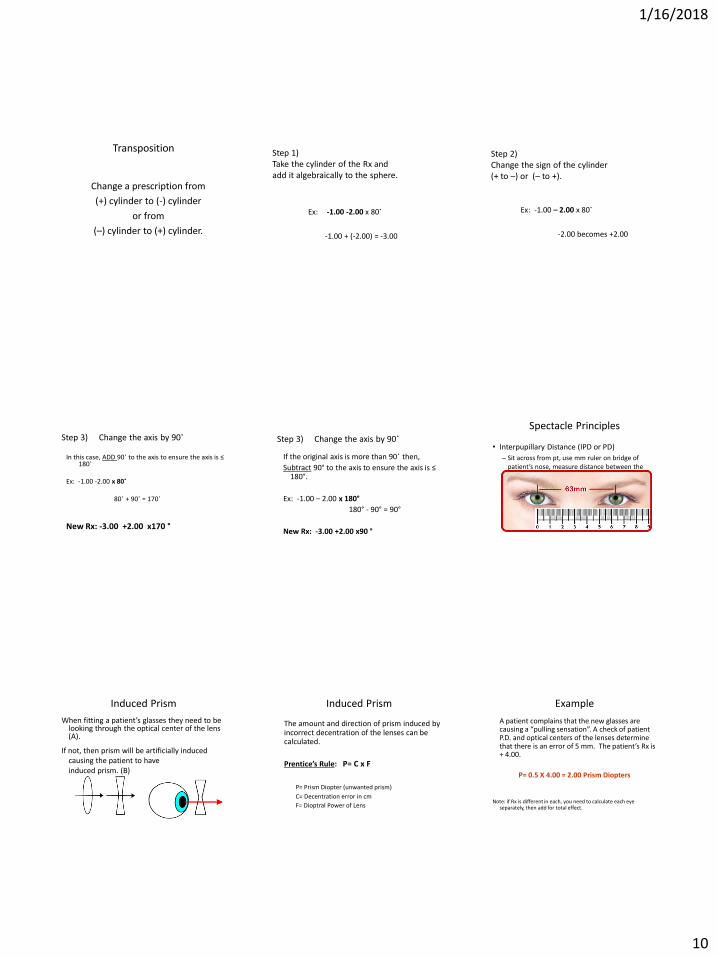
Step 3) Change the axis by 90°• Interpupillary Distance (IPD or PD)
– Sit across from pt, use mm ruler on bridge of patient’s nose, measure distance between the centers of the patient’s pupils
Spectacle Principles
Induced Prism
When fitting a patient’s glasses they need to be looking through the optical center of the lens (A).
If not, then prism will be artificially inducedcausing the patient to haveinduced prism. (B)
Induced Prism
The amount and direction of prism induced by incorrect decentration of the lenses can be calculated.
Prentice’s Rule: P= C x F
P= Prism Diopter (unwanted prism)
C= Decentration error in cm
F= Dioptral Power of Lens
Example
A patient complains that the new glasses are causing a “pulling sensation”. A check of patient P.D. and optical centers of the lenses determine that there is an error of 5 mm. The patient’s Rx is + 4.00.
P= 0.5 X 4.00 = 2.00 Prism Diopters
Note: if Rx is different in each, you need to calculate each eye separately, then add for total effect.
1/16/2018
11
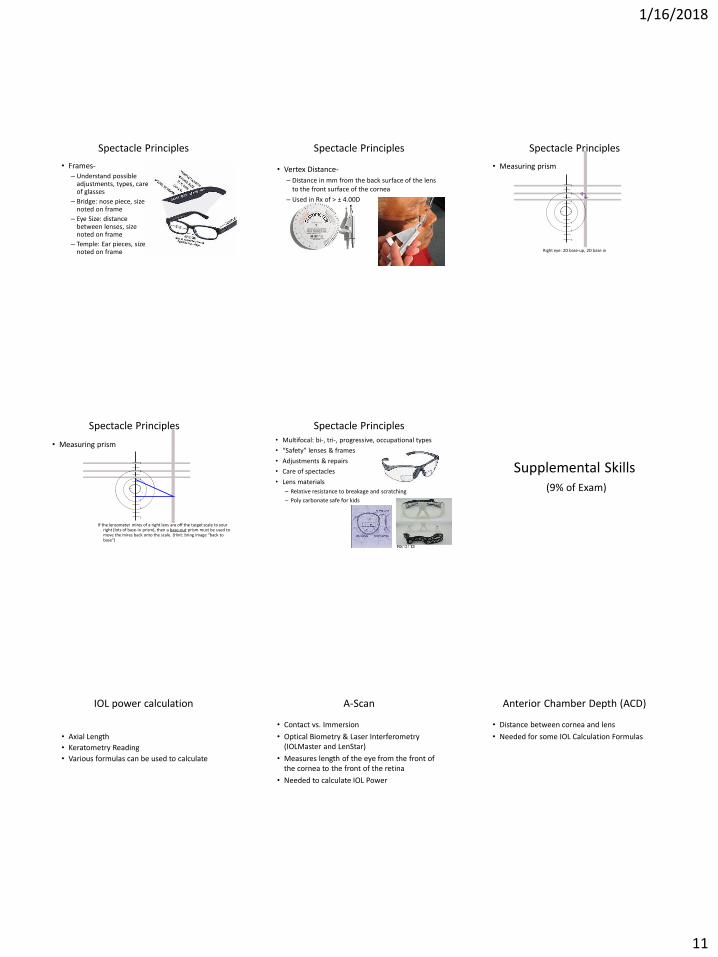
• Frames-– Understand possible
adjustments, types, care of glasses
– Bridge: nose piece, size noted on frame
– Eye Size: distance between lenses, size noted on frame
– Temple: Ear pieces, size noted on frame
Spectacle Principles
• Vertex Distance-
– Distance in mm from the back surface of the lens to the front surface of the cornea
– Used in Rx of > ± 4.00D
Spectacle Principles
• Measuring prism
Spectacle Principles
3
2
1
3
2
1
Right eye: 2D base-up, 2D base in
Spectacle Principles
• Measuring prism
3
2
1
3
2
1
If the lensometer mires of a right lens are off the target scale to your right (lots of base-in prism), then a base-out prism must be used to move the mires back onto the scale. (Hint: bring image “back to base”)
• Multifocal: bi-, tri-, progressive, occupational types
• “Safety” lenses & frames
• Adjustments & repairs
• Care of spectacles
• Lens materials
– Relative resistance to breakage and scratching
– Poly carbonate safe for kids
Spectacle Principles
Supplemental Skills(9% of Exam)
• Axial Length
• Keratometry Reading
• Various formulas can be used to calculate
IOL power calculation
• Contact vs. Immersion
• Optical Biometry & Laser Interferometry (IOLMaster and LenStar)
• Measures length of the eye from the front of the cornea to the front of the retina
• Needed to calculate IOL Power
A-Scan
• Distance between cornea and lens
• Needed for some IOL Calculation Formulas
Anterior Chamber Depth (ACD)
1/16/2018
12
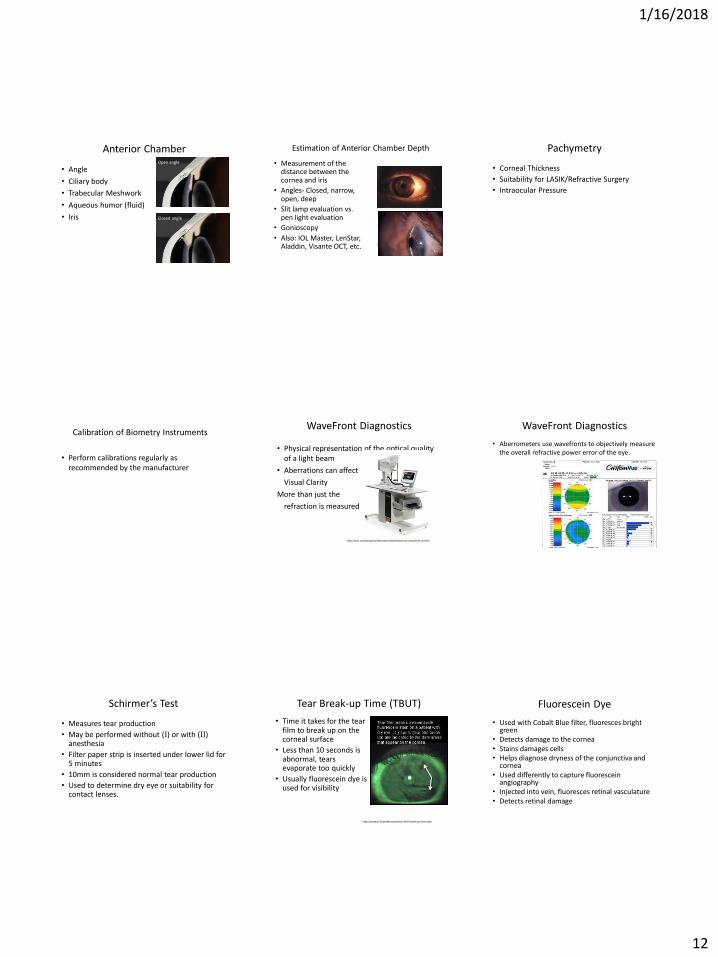
• Angle
• Ciliary body
• Trabecular Meshwork
• Aqueous humor (fluid)
• Iris
Anterior ChamberOpen angle
Closed angle
• Measurement of the distance between the cornea and iris
• Angles- Closed, narrow, open, deep
• Slit lamp evaluation vs. pen light evaluation
• Gonioscopy
• Also: IOL Master, LenStar, Aladdin, Visante OCT, etc.
Estimation of Anterior Chamber Depth
• Corneal Thickness
• Suitability for LASIK/Refractive Surgery
• Intraocular Pressure
Pachymetry
• Perform calibrations regularly as recommended by the manufacturer
Calibration of Biometry Instruments
• Physical representation of the optical quality of a light beam
• Aberrations can affect
Visual Clarity
More than just the
refraction is measured
WaveFront Diagnostics
http://visx.com/products/refractive/ilasik/wavescan-wavefront-system
• Aberrometers use wavefronts to objectively measure the overall refractive power error of the eye.
WaveFront Diagnostics
• Measures tear production
• May be performed without (I) or with (II) anesthesia
• Filter paper strip is inserted under lower lid for 5 minutes
• 10mm is considered normal tear production
• Used to determine dry eye or suitability for contact lenses.
Schirmer’s Test
• Time it takes for the tear film to break up on the corneal surface
• Less than 10 seconds is abnormal, tears evaporate too quickly
• Usually fluorescein dye is used for visibility
Tear Break-up Time (TBUT)
http://systane.in/professional/tear-film-break-up-time.aspx
• Used with Cobalt Blue filter, fluoresces bright green
• Detects damage to the cornea• Stains damages cells• Helps diagnose dryness of the conjunctiva and
cornea• Used differently to capture fluorescein
angiography• Injected into vein, fluoresces retinal vasculature• Detects retinal damage
Fluorescein Dye

1/16/2018
13
• Adheres to degenerating epithelium
• Stains damaged cells
• Helps diagnose dryness of the conjunctiva and cornea
• Patients say it burns/stings more than fluorescein
Rose Bengal
• Stains damaged conjunctival cells
• Helps diagnose dryness/damage of the conjunctiva and cornea
Lissamine Green Dye
http://visioncareeducation.com/archive/om/images/OM_Suppl_May_A01_Fig03.jpg
• Corneal and Lenticular opacities may induce glare
• The affects of glare on vision can be measured
• BAT (Brightness Acuity Test)
• Other: pen light, transilluminator
Glare Testing
• Used to evaluate color blindness and degrees of color blindness
• Congenital Defects Cone Dystrophy Retinitis pigmentosa Toxic amblyopias
• Defects from Disease– Macular Changes– Optic neuritis– Multiple Sclerosis
• Medication Toxicity: Plaquenil, Hydroxychloroquine
Color Vision Testing
• Color is perceived by the cones.
• Located in the central retina.
• Normal cones have three photosensitive pigments: red, green, blue
Physiology of Color Vision Ishihara Color TestResults For Ishihara Test(above)
Normal Color Vision Red-Green Color Blind
Left Right Left Right
Top 25 29 Top 25 Spots
Middle 45 56 Middle Spots 56
Bottom 6 8 Bottom Spots Spots
HRR Color Plates
• Hardy-Rand-Ritter
–Circles, triangles and crosses of color on neutral gray background
FM D-15 Test & FM 100-Hue Test
• 15 pastel chips are arranged in a color sequence and scored
D-15

1/16/2018
14
• Has 85 rainbow colored caps in four trays
• Patients are asked to arrange the caps and then the trays are scored
• Time consuming and difficult to score
Farnsworth-Munsell 100 Hue • The process of measuring and assessing the
forward protrusion of the eye with an instrument called the exophthalmometer
• Recording exophthalmoscopy results, in mm from lateral orbital rim to the corneal apex
Exophthalmometry• Measurement of tear production over period
of specific time (usually 5 minutes)
• Test strip placement
• Without (I) or with (II) anesthesia
• Recording Schirmer Tear Test results
Schirmer Tear Test
Wrong:central/nasal Correct: slightly temporal
http://webeye.ophth.uiowa.edu/eyeforum/atlas/photos/Schirmer-test.jpg
http://2.bp.blogspot.com/_r9cF_v-_1Oo/R0hmK0twB8I/AAAAAAAAAB4/omrQWOXj_bQ/s400/Schirmers-test_dryeyes.gif
• Measures areas on the cornea that have lost sensitivity
• Leads to less blinking and exposure issues
Corneal Sensitivity Testing
Tonometry(5% of Exam)
Applanation – measures the force necessary to flatten the central cornea• Goldmann• Perkins hand held• Tonopen (some indentation properties)• Non-contact, “air puff” (some indentation properties)
Indentation – measures the force necessary to indent the surface of the central cornea• Schiötz• [Tonopen]• [Non-contact (air puff)]
Types of Tonometers
Goldmann Tonometer
Double prism
Rod
Housing
Force-adjustment knob
Perkins Hand Held Tonometer Tonopen

1/16/2018
15
Schiötz Tonometer Applanation
• Too much/too little fluorescein• Semicircles not in the middle of the field• Examiners fingers resting on the globe instead of
the brow bone• Patient squeezing their eyes• Patients holding their breath• Astigmatism greater than 3 diopters• Collar too tight• Obese patient can make it difficult to obtain a
reading
Sources of Error
Mires too far to the right, Move Slit Lamp to the right
Uneven mires Move slit lamp up
IOP too low, increase the pressure on the dial
Pressure still to low Mires on top of each other
IOP too high, decrease the pressure on the dial
Correct end point
Sources of Error
Indentation• Scleral rigidity – in high myopes and young patients,
there is more elasticity causing greater indentation. This can cause a false low pressure
• Poor technique – pressure on the globe or tense patient can elevate the pressure
• Tight collar
• Corneal deformities
Sources of Error
Non-contact Tonometer
• Patient squeezes or closes their eye
• Tight collar
Sources of Error
Applanation
• Accurate
Indentation
• Instruments are portable
Non- contact
• Doesn’t touch the cornea
Advantages
Applanation
• use 3% hydrogen peroxide or 1:10 bleach/water solution for 10 minutes
• Rinse and dry
Indentation
• Disassemble & clean all parts with alcohol and pipe cleaner soaked in alcohol
Cleaning
Corneal thickness • Thin corneas - can cause the reading to be
artificially low
• Thick corneas – can cause the reading to be artificially high
Diurnal variations• IOP will vary at different times of the day
• Usually will be highest in the morning
Pearls
Herpes Zoster in or around the eye
Corneal abrasions
Foreign body
Penetrating injury
Infection
Contraindications For Tonometry

1/16/2018
16
• The clear fluid that is between the iris and the cornea
• It is produced by the ciliary processes in the ciliary body
Maintain the IOP and the metabolism of the cornea, trabecular meshwork and lens
Aqueous Humor
AC->TM->Canal of Schlemm->Deep Scleral Plexus
• Basic mechanisms
• Angle closure
• Cupping
• Basic medical management
• Basic surgical management
Glaucoma
• Types of Glaucoma
– Angle Closure – Caused by a mechanical obstruction (usually the iris)
– Open Angle Glaucoma – Anterior chamber appears normal, asymptomatic
– Secondary Glaucoma – Caused by another ocular disease
– Congenital – Occurs in infants
Glaucoma
• Tonometry
• Gonioscopy
• Visual Fields
• Scanning Laser
• Stereo Disc Photos
• Optic Nerve Evaluation
Ocular Examination for Glaucoma
• Eye drops
• Laser
• Surgery
• Shunts/Stents
Management of Glaucoma Optic Nerve Cupping
http://www.glaucoma.org/uploads/optic-nerve-comparison_290.jpg
Visual Assessment(6% of Exam)
• Distance & Near acuity
• Children & Non-Verbal
• Low vision
• Illumination of target & background
• Pinhole
• Artifacts
• Contrast Sensitivity
• Recording
Method of Measuring/Recording Acuity
• Early Treatment of Diabetic Retinopathy Study
• Standardization of eye charts and VA testing
• Often used in research studies
• Each optotype has a value of 0.02, each row is 0.1 log units
ETDRS Vision Chart
http://www.healthandcare.co.uk/user/products/large/logmar-4m-etdrs-1-revised-chart.jpg

1/16/2018
17
• Electronic Visual Acuity Tester
• Computerized optotypes:– EVA
– Stimuli Acuity System (SAS) by Accommodata Corp
– Smart System PC (SS) by M&S Technologies
EVA
• Infant:– Fixation behavior: CSM, F&F
– Preferential looking
• Toddler (As soon as child can talk)– Pictures
• Pre-School:– Matching: HOTV, Lea
– Tumbling E
– Landolt rings
• As soon as possible:– Snellen letters
– Numbers
Testing VA in children & Non-verbal adults:
https://visionaryeyecare.files.wordpress.com/2008/10/tumblingesjpg1.jpg
https://toddlerglasses.files.wordpress.com/2009/05/leaflipchartsmall1.jpg
• Move patient closer to the chart: – The 20/200 “E” recorded at feet seen: 5ft/200
• Count fingers recorded at feet seen: CF@2ft
• Hand Motion: HM
• Accurate Light Projection: ALP
• Light Perception: LP With or without projection
No Light Perception: NLP
Low Vision Measurement
• Measures potential vision
• Performed at slit lamp
Potential Acuity Meter (PAM)
• Measured at 14-16 inches
• Use a “near” card
• Snellen types recorded as 14/14 (seen at 14 inches)
• Jaeger card recorded as J1, J1+, J4 etc.
• Measured in room light
Near Acuity
• Eliminates peripheral rays of light, allowing remaining light to focus on the retina.
• Helps differentiate between refractive errors and disease.
• Shows potential best corrected acuity.
Pinhole
Visual Fields(6% of Exam)
• Questions here may be equipment or disease related!
• Remember that even Amsler Grid and CVF are types of visual fields
• Measures the expanse and sensitivity of a patient’s vision
• Visual field defects coincide with optic disc damage
Visual Fields
• Retina
• Retinal nerve fiber layer
• Optic Nerve
• Chiasm
• Optic tract
• Lateral geniculate body
• Optic radiation
• Occipital cortex
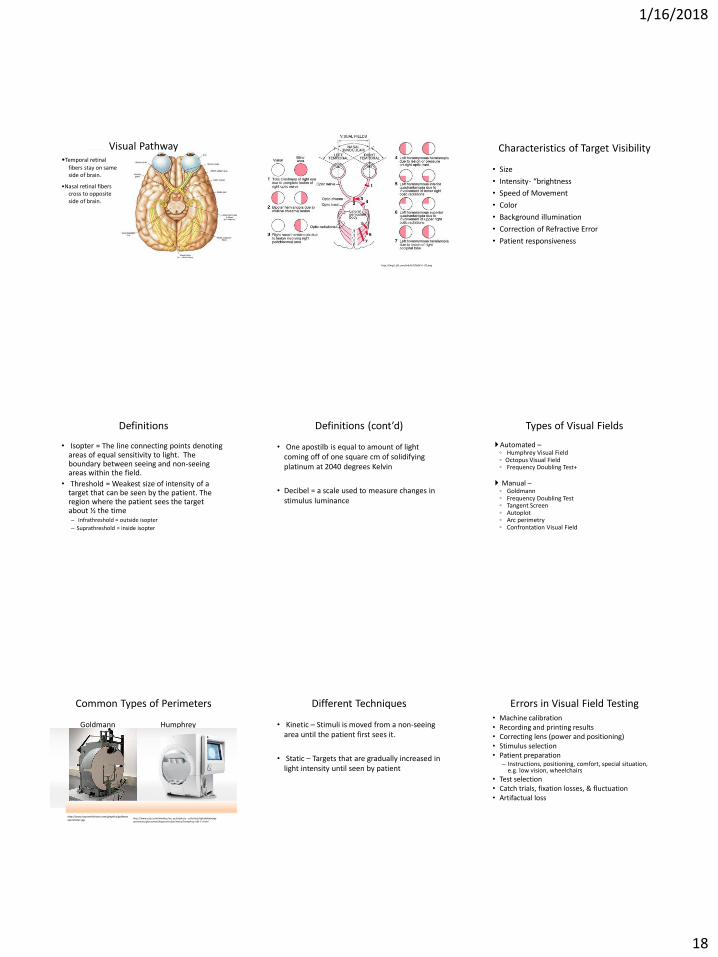
Visual Pathways
1/16/2018
18
•Temporal retinal
fibers stay on same side of brain.
•Nasal retinal fibers cross to opposite side of brain.
Visual Pathway
http://img2.tfd.com/mk/H/X2604-H-20.png
• Size
• Intensity- “brightness
• Speed of Movement
• Color
• Background illumination
• Correction of Refractive Error
• Patient responsiveness
Characteristics of Target Visibility
• Isopter = The line connecting points denoting areas of equal sensitivity to light. The boundary between seeing and non-seeing areas within the field.
• Threshold = Weakest size of intensity of a target that can be seen by the patient. The region where the patient sees the target about ½ the time– Infrathreshold = outside isopter
– Suprathreshold = inside isopter
Definitions
• One apostilb is equal to amount of light coming off of one square cm of solidifying platinum at 2040 degrees Kelvin
• Decibel = a scale used to measure changes in stimulus luminance
Definitions (cont’d)
Automated –◦ Humphrey Visual Field◦ Octopus Visual Field◦ Frequency Doubling Test+
Manual –◦ Goldmann◦ Frequency Doubling Test◦ Tangent Screen◦ Autoplot◦ Arc perimetry◦ Confrontation Visual Field
Types of Visual Fields
Common Types of Perimeters
Goldmann Humphrey
http://www.zeiss.com/meditec/en_us/products---solutions/ophthalmology-optometry/glaucoma/diagnostics/perimetry/humphrey-hfa-ii-i.html
http://www.boyssmithvision.com/graphics/goldmannperimeter.jpg
• Kinetic – Stimuli is moved from a non-seeing area until the patient first sees it.
• Static – Targets that are gradually increased in light intensity until seen by patient
Different Techniques• Machine calibration• Recording and printing results• Correcting lens (power and positioning)• Stimulus selection• Patient preparation
– Instructions, positioning, comfort, special situation, e.g. low vision, wheelchairs
• Test selection• Catch trials, fixation losses, & fluctuation• Artifactual loss
Errors in Visual Field Testing

1/16/2018
19
Retinal disease◦ Rod-Cone Dystrophy
Glaucoma◦ Generalized depression◦ Enlarged blind spot◦ Arcuate defects◦ Paracentral scotomas◦ Nasal step
Neurological ◦ Papilledema – enlarged blind spot◦ Optic Neuritis – any defect possible◦ Pituitary Tumor – asymmetric or symmetric bitemporal loss
Visual Field Defects from Disease
➢ Static Test – put your hand into position then present fingers.➢Check centrally and in all quadrants➢Push outer boundaries of VF
➢ Kinetic Test – move from outside view to within patients view.
➢Document: FTFC vs. FTHM, or identify the defects found
Confrontation Fields
• Targets– Roman Numerals - object size, I, II, III, IV, V
• Size V is the largest
– Numbers – brightness of target that changes in whole log units, 1, 2, 3, 4• 4 is the brightest target and 1 is the dimmest
– Small Letters – for brightness changes in 0.1 log units, a, b, c, d, e• “e” is the brightest and “a” is the dimmest
• Example– V4e, III4e, ll
Goldmann Visual Field
• Age in Years:
– under 30 no add needed
– 30-39 +1.00 over distance correction
– 40-44 +1.50 over distance correction
– 45-49 +2.00 over distance correction
– 50-54 +2.50 over distance correction
– 55-59 +3.00 over distance correction
– 60+ +3.50 over distance correction
Add for Age (Both HVF and GVF)
Add is based on patient’s age not bifocal power
Exceptions to the add for age is:◦ pseudophakia◦ aphakia◦ cycloplegic drops
The Humphrey will automatically put in the add for age.
The Goldmann requires you to do the add manually.
Add for Age (Both HVF and GVF)
Measures central 20° Card should be held at approximately 14” from the
eyes, with good lighting.
Wear reading correction if needed.
Each eye is checked separately
Cover one eye and look at the center dot. With the uncovered eye note any visual disturbance, such as wavy, blurred or distorted lines or scotomata.
Recording Amsler grid results
Amsler grid
Amsler Grid
http://php5.mydns.net.nz/eyesurgeryassociates.co.nz/wp-content/uploads/2014/07/amsler-grid.jpg
• Measures central 30° at 1m
• Used for hysterics or malingerers
• Test each eye at both 1 and 2 meters
• Record results after each isopter
• Test one entire side at a time – do not cross over in front of the patient
• Watch the patient’s eye and not the chart
Tangent Screen Tangent Screen

1/16/2018
20
Bibliography Ophthalmic Medical Assisting, An Independent Study Course, (E.
Newmark & M.A. O’Hara, 5th Edition, 2012, AAO)
The Ophthalmic Assistant, (H.A. Stein, R.M. Stein and M.I. Freeman, Eighth Edition, 9th Edition, 2013, Elsevier Inc.)
Fundamentals for Ophthalmic Technical Personnel, (B. Cassin, 1995, W.B. Sanders Company)
Certified Ophthalmic Technician Exam Review Manual, J. K. Ledford, 2nd
Edition, Slack.
Certified Ophthalmic Assistant Exam Review Manual, J. K. Ledford, 3rd
Edition, Slack.
Atlas of Strabismus, (G. VonNoorden & E. Maumenee, 4th Edition, 1983, C.V. Mosby Co.)
• Laura Lee Hopkins, COMT OCT-c, ROUB
– 806-781-1122
Contact Information
• Study the areas you feel weakest
• Form a study group
• Borrow/purchase additional resources
• Create your own study aides
• Attend in-services
• Ask for assistance
Get Certified!
What’s Your Next Step?