,1~!1~1!~~,docs.neu.edu.tr/library/6009417511.pdffigure 1.5s7-200plc 1.5.2s7-300ands7-400...
TRANSCRIPT

NEAR EAST UNIVERSITY
Faculty of Engineering
Department of Electrical and ElectronicsEngineering
PROGRAMMABLE LOGIC CONTROLLER(SIEMENS S7 FAMILY)
Graduation ProjectEE-400
Student: Muhammad Tariq Rasool
Supervisor: Mr. ÖZGÜR CEMAL ÖZERDEM
•
Lefkoşa - 2003
,1~!1~1!~~,NEU

TABLE OF CONTENTS
r--.......t)J
:.'i:ı.~
AKNOWLEDGEMENT i
ABSTRACT ii
INTRODUCTION iii
1. BASICS OF PLCs 1
1.1 PLC 1
1.2 Basic PLC operation 1
1.3 Hard-Wire control 3
1.4 Advantages of PLCs 3
1.5 SIEMENS PLCs 4
1.5.1 S7-200 4
1.5.2 S7-300 and S7-400 4
1.6 Terminology 6
1.6.1 Sensor 6
1.6.2 Actuators 7
1.6.3 Discrete input 7
1.6.4 Analog input 9
"1.6.5 Discrete outputs 10
1.6.6 Analog outputs • 10
1.6.7 CPU 11
1.7 Basic requirement 12
1.7.1 PLC 13
1.7.2 Programming devices 13

1.7 .3 Software
1.7.4 Connection cables (PPI)
1.8 Number System
1.8.1 Decimal System
1.8.2 Binary System
1.9 Converting Binary to Decimal
1.10 Bits, Bytes and World
1.11 Logic O, Logic 1
1.12 BCD
1.13 Hexadecimal
1.14 Conversion ofNumber
1.15 Programming
1.15 .1 Ladder Logic
1.15 .2 Ladder Logic Diagram
1.15 .3 Statement List
1.15 .4 Function Block Diagram
1.15.5 PLC Scan
1.15.6 Software
1.15. 7 Hardware
1.16 Memory Size
1.16.l RAM
1.16.2 ROM
1.16.3 EPROM
1.16.4 Firmware
"'
14
15
18
18
18
19
20
21
21
22
23
25
25
25
26
27
28
28
28
29 ••
30
30
30
31

I. I 7 Putting it Together
2. S7-200 MICRO PLC
2. I S7-200 Models
2.2 S7-200 Features
2.3 Mode Switch and Analog Adjustment
2.4 Optional Cartridge
2.5 Expansion Modules
2.6 Available Expansion
2.7 Status Indicators
2.8 Installing
2.9 External Power Supply Source
2.10 I/O Numbering
2.11 Inputs
2. I I. I Input Simulator
2.12 Outputs
2.13 Operational Connector
2. I4 Removable Terminal
2.15 Super Capacitor "
2. 16 Connecting External Devices
2.16.1 TD 200
2.16.2 Freeport Mode
2.16.3 Printer
2 .16.4 Interconnection
31
33
33
34
37
37
38
39
40
41
42
43
44
45
46
47
48
49
50
51
51
52
53

3. PROGRAMMING APPLICATION 54
3 .1 Standard Instructions 54
3 .2 Special Instructions 54
3.3 High Speed Instruction 54
3.4 Symbols 55
3 .4.1 Contacts 55
3.4.2 Coils 56
3.4.3 Boxes 56
3.5 Entering Elements 57
3.6 An AND Operation 57
3.7 An OR Operation 59
3.8 Testing a Program 61
3.9 Status Functions 61
3 .1 O Forcing 62
3 .11 Program instructions 64
3 .12 Motor Starter Example 65
3.12.1 Program Instruction 67
3 .12.2 Expending the Application 71"'
3.12.3 Adding a limit Switch 72
3.13 Application Example • 74•
3.14 Timers 75
3.14.1 S7-200 Timer 77
3.14.2 On-Delay (TON) 77
3.14.3 Retentive On-Delay (TONR) 80

3.14.4 Off-Delay (TOF) 81
3.14.5 S7-200 Timers 82
3.14.6 Timer Examples 82
3 .15 Counters 83
3.15.1 S7-200 Counter 84
3.15.2 Up-Counters 85
3.15.3 Down Counters 86
3 .15.4 Up/Down Counter 86
3 .15 .5 Counter Examples 86
4. PRACTICAL 88
4 .1 Statement List 89
4 .2 Ladder diagram 90
4.3 Applications of PLC 93
CONCLUSION 94
REFERENCES 95
••

ACKNOWLEDGMENTS
First of all I am veıy thankful to ALLAH ALL MIGHTY, as thy blessed me with
strength and helped me mentally and physically to achieve my goal.
I also want to thank Mr. ÖZGÜR CEMAL ÖZERDEM to be my advisor. I
successfully overcome many difficulties and learn a lot about Programmable
Controllers. In each discussion, he explained my questions patiently, and I felt quick
progress from his advises. He always helped me a lot in my study. I asked him many
questions in electrical and electronics and he always answered my questions quickly
and in detail.
Special thanks to my friend Muhammad Aamir Khan with him make my four years in
NEU full of fun.
Finally, I want to thanks my family, especially my grandfather and my parents.
Without their endless affection and everlasting prayers it shouldn't be possible for me'to be at this stage.
•
1

ABSTRACT
The need for low cost, versatile and commission controller has resulted in the
development of programmable control system standard units based on a hardware
CPU and memory for the control of machines or processes. Originally designed as a
replacement for the hard wired relay and timer logic to be found in traditional control
panels. PLCs provide ease and flexibility of control based on programming and
executing simple logic instructions in the form of ladder diagram. PLCs has internal
functions such as timers, counters and shift registers make sophisticated control
possible using even the smallest PLC.
There are many types of PLCs available in the market in theses days and can choose
by different properties of doing job. Micro PLCs are use for simple system with
limited I/O points. And medium/large PLCs are used for complex systems.
SIEMENS have many types of PLCs but in S7 family there are three types of PLCs,
S7-200, S7-300 and S7-400.
The S7-200 is referred to as a MICROPLC because of its small size. It has brick
design which means that the power supply and I/O points are on board. The S7 can be
used on smaller, stand-alone application.
The S7-300 and S7-400 PLCs are used in complex application with a greater numbers
of I/O points. Both PLCs are modular and expandable. These types of PLCs power
supply and I/O consist of separate modules connected to the PLCs. Choosing either
the S7-300 or S7 400 depends on the complexity of the task and possible future
expansion.
Now a days PLCs are use in very widely range in daily life use and also industrial•
applications. Fourth chapter is about the application example of PLC.There is a
program from which we are controlling a motor which rnns for 5 sec. and then stop
for 5 sec. After repeating this process twice the process will be stop.
11

INTRODUCTION
A PLC is a 'digital electronic device that use a programmable memoıy to store
instructions and to implement specific functions such as logic, sequence, timing,
counting and arithmetic to control machines and process'.
The internal operation of any PLC is essentially similar to any other microprocessor
base system. Differences occur in the manner of input/output handling and the
interface hardware providing. PLCs are specially design to connect to most common
industrial control systems, which are hardware specific, but they offer great flexibility
through programming.
Now days virtually eveıy manufacturer of electronic control equipment markets a
range of programmable controllers with facilities ranging from simple switched I/O
through sophisticated continuous control. Development in this area is continuing at a
rate almost equal to the field of personal computing. Because of this, the power and
operating speed of all programmable controllers is constantly improving.
The first chapter has general information about PLCs.Identifies the major components
of PLCs and describes their functions.Conversion of numbers from decimal to binary,
BCD and hexadecimal. Terminologies of PLCs. Identify typical discrete and analog
inputs and outputs.Basic of ladder diagram and statement list.
Second chapter about SIEMENS S7-200 PLC.The operation of S7-200 and the
operational differences between different S7-200 models.Connect a simple discrete
input and out put to S7-200. parts of S7-200,Expension of S7-200,Installing and
loading a program in S7-200 type PLC.~
Third chapter about the basics of programming, Elements of ladder diagram, Logic
shown in ladder diagram, the use of timers, counters.Some daily life examples and
controlling of a electric motor with a PLC.
Fourth chapter devoted to the practical, implementation and writing the PLCs
program for S7-200
ııı

1. BASICS OF PLCS
1.1 PLCs
Programmable Logic Controllers (PLCs), also referred to as programmable controllers,
are in the computer :fu.mily. They are used in commercial and industıial applications.
A PLC monitors inputs, makes decisions based on its program, and controls outputs to
automate a process or machine.
( p ı S
Drlw Malıaf1I
I
Figure 1.1 Basic PLC
1.2 Basic PLC Operation
PLCs consist of input modules or points, a Central Processing Unit (CPU), and output
modules or points. An input accepts a variety of digital or analog signals from various
field devices (sensors) and converts them into a logic signal that can be used by the
CPU. The CPU makes decisions and executes control instructions based on program
instructions in memory. Output modules convert control instructions from the CPU
1

into a digital or analog signal that can be used to control various field devices
(actuators). A programming device is used to input the desired instructions. These
instructions determine what the PLC will do for a specific input. An operator interface
device allows process information to be displayed and new control parameters to be
entered.
-+CPU
Cııntıwl PmcııNNUnlt -+ Oı.ıtpıt
Mıdıle
. ·.
Figure 1.2 Basic operation of PLC
Pushbuttons (sensors), in this simple example, connected to PLC inputs, can be used
to start and stop a motor connected to a PLC through a motor starter (actuator).
PLC
\ınr.ıı.ıt
Figure 1.3 PLC with pushbutton sensor
2

1.3 Hard-Wired Control
Prior to PLCs, many of these control tasks were solved with contactor or relay
controls. This is often referred to as hardwired control. Circuit diagrams had to be
designed, electrical components specified and installed, and wiring lists
created.Electricians would then wire the components necessary to perform a specific
task. If an error was made the wires had to be reconnected correctly. A change in
function or system expansion required extensive component changes and rewiring.
,,,,Figure 1.4 Circuit diagram of motor control
1.4 Advantages of PLCs
The same, as well as more complex tasks, can be done with a PLC. Wiring between
devices and relay contacts is done in the PLC program. Hard-wiring, though still
required to connect field devices, is less intensive. Modifying the, application and.correcting errors are easier to handle. It is easier to create and change a program in a
PLC than it is to wire and rewire a circuit.
Following are just a few of the advantages of PLCs:
• Smaller physical size than hard-wire solutions.
3

• Easier and faster to make changes.
• PLCs have integrated diagnostics and override functions.
• Diagnostics are centrally available.
• Applications can be immediately documented.
• Applications can be duplicated faster and less expensively.
1.5 Siemens PLCs
Siemens makes several PLC product lines in the SIMATIC® S7
Family. They are:
S7-200,
S7-300,
And S7-400.
1.~.1S7-200
The S7-200 is referred to as a micro PLC because of its small size. The S7-200 has a
brick design which means fb-at the power supply and I/O are on-board. The S7-200
can be used on smaller, stand-alone applications such as elevators, car washes, or
mixing machines. It can also be used on more complex industrial applications such as.bottling and packaging machines.
4

Figure 1.5 S7-200 PLC
1.5.2 S7-300 and S7-400
Tiıe S7-300 and S7-400 PLCs are used iıı more complex applications that support a
greater number of I/O points. Both PLCs are modular and expandable. The power
supply and I/O consist of separate modules connected to the CPU. Choosing either the
S7-300 or S7-400 depends on the complexity of the task and possible füture
expansion. Your Siemens sales representative can provide you with additional
information on any of the Siemens PLCs.
5

Figure 1.6 S7-300 and S7400 PLCs
1.6 Terminology
The language of PLCs consists of a commonly used set of terms; many of which are
unique to PLCs. In order to understand the ideas and concepts of PLCs, an
understanding of these terms is necessary.
1.6.1 Sensor
A sensor is a device that converts a physical condition into an electriçal signal for use•
by the PLC. Sensors are connected tothe input of a PLC. A pushbutton is one example
of a sensor that is connected to the PLC input. An electrical signal is sent from the
pushbutton to the PLC indicating the condition (open/ closed) of the pushbutton
contacts.
6

Figure 1.7 Pushbutton sensor
1.6.2 Actuators
Actuators convert an electrical signal from the PLC into a physical condition.
Actuators are connected to the PLC output. A motor starter is one example of an
actuator that is connected to the PLC output. Depending on the output PLC signal
theınotor starter will either start or stop the motor.
ı~,ı .Figure 1.8 Motor starter actuator
•
1.6.3 Discrete Input
A discrete input, also referred to as a digital input, is an input that is either in an ON
or OFF condition. Pushbuttons, toggle switches, limit switches, proximity switches,
and contact closures are examples of discrete sensors which are connected to the
PLCs discrete or digital inputs. In the ON condition a discrete input may be referred
7

to as a logic 1 or a logic high. In the OFF condition a discrete input may be referred to
as a logic O or a logic low.
Namıılt, Oı-nOxıtmt
I- V-
- ı
~ F'LC•lnııı,ıtıı
I:I .V A'I
Figure 1.9 Discrete inputs of PLC
A Normally Open (NO) pushbutton is used in the following example. One side of the
pushbutton is connected to the first PLC input. The other side of the pushbutton is
connected to an internal 24 VDC power supply. Many PLCs require a separate power
supply to power the inputs. In the open state, no voltage is present at the PLC input.
This is the OFF condition. \Vb.en the pushbutton is depressed, 24 VDC is applied to
the PLC input. This is the ON condition.
••
8

Off
PLC
u:ıaıeo. lnputı
I I2"'.\IDC----
OPII .,..,-----
p~- I qıııt i
IAQlc 1I I
~\IOC
Figure 1.10 NC and NO switches
1.6.4 Analog Input
An analog input is an input signal that has a continuous signal. Typical analog inputs
may vaıy from O to 20 milliamps, 4 to 20 milliamps, or O to 1 O volts. In the following
example, a level transmitter monitors the level of liquid in a tank. Depending on the
level transmitter, the signal to the PLC can either increase or decrease as the level
increases or decreases.
Figure 1.11 PLC input by level sensor
9

1.6.5 Discrete Outputs
A discrete output is an output that is either in an ON or OFF condition. Solenoids,
contactor coils, and lamps are examples of actuator devices connected to discrete
outputs. Discrete outputs may also be referred to as digital outputs. In the following
example, a lamp can be turned on or off by tlıe PLC output it is connected to.
,_/PLCOı.ııpı.ıttı
/~, IJdıt
Figure 1.12 Output of PLC
1.6.6 Analog Outputs
An analog output is an output signal that has a continuous signal. Tiıe output may be
as simple as a 0-1O VDC level that drives an analog meter. Examples of analog meter
outputs are speed, weight, and temperature. The output signal may also be used on
more complex applications stıch as a current-topneumatic transducer that controls an
air-operated flow-control valve.•
10

Figure 1.13 Analog output of PLC
1.6.7CPU
The central processor unit (CPU) is a microprocessor system that contains the system
memory and is the PLC decisionmaking unit The CPU monitors the inputs and makes
decisions based on instructions held in the program memory. The CPU performs relay,
counting, timing, data comparison, and sequential operations.
••
Figure 1.14 CPU of PLC
11

1.7 Basic Requirements
In order to create or change a program, the following items are needed:
•PLC
• Programming Device
• Programming Software
• Connector Cable
S7-ZOOPLC
Figure 1.15 PLC connect with PC
•
12

1.7.1 PLC
Throughout this course we will be using the S7-200 because of its ease of use.
Figure 1.16 Basic PLC
1.7.2 Programming Devices
The program is created in a programming device (PG) and then transferred to the PLC.
The program for the S7-200 can be created using a dedicated Siemens SIMATIC S7
programming device, such as a PG 720 (not shown) or PG 740, if STEP 7 Micro/WIN
software is installed.
•••
D
Figure 1.17 PLC connect with programming devaice
13

A personal computer (PC), with STEP 7 Micro/WIN installed, can also be used as a
programming device with the S7-200.
Figure 1.18 PLC connect with programming device
1.7.3 Software
A software program is required in order to tell the PLC what instructions it must
follow. Programming software is typically PLC specific. A software package for one
PLC, or one family of PLCs, such as the S7 family, would not be useful on other
PLCs. The S7-200 uses a"' Windows based software program called STEP 7-
Micro/WIN32. The PG 720 and PG 740 have STEP 7 software pre-installed.
Micro!WIN32 is installed on a personal computer in a similar manner to any other
computer software.
14

Figure 1.19 Writing a PLC program
1.7.4 Connector Cables PPI (Point-to-Point Interface)
Connector cables are required to transfer data from the programming device to the
PLC. Communication can only take place when the two devices speak the same
language or protocol. Communication between a Siemens programming device and
the S7-200 is referred to as PPI protocol (pointto-point interface). An appropriate
cable is required for a programming device such as a PG 720 or PG 740. The S7-200
uses a 9-pin, D-connector. This is a straight-through serial device that is compatible
with Siemens programming devices (MPI port) and is a standard connector for other
serial interfaces.
•
15

•••
DI
Programming !)e.,·k:eıCabla
Figure 1.20 Programming device cable
A special cable, referred to as a PC/PPI cable, is needed when a personal computer is
used as a programming device. This cable allows the serial interface of the PLC to
communicate with the RS-232 serial interface of a personal computer. DIP switches
on the PC/PPI cable are used to select an appropriate speed (baud rate) at which
information is passed between the PLC and the computer.
•
16

I••••••••••••••••
Figure 1.21 PLC PC/PPI cable
17

1.8 Number system
a computer, it stores information in the form of On or Off conditions (1 or O),
referred to as binary digits (bits).Sometimes binary digits are used individually and
sometimes they are used to represent numerical values.
1.8.1 Decimal System
Various number systems are used by PLCs. All number systems have the same three
characteristics: digits, base, weight. The decimal system, which is commonly used in
eveıyday life, has the following characteristics:
Ten digits 1,2,3,4,5,6,7,8,9
Base 10
Weights 1, 10, 100, 1000,
1.8.2 Binary System
The binary system is used by programmable controllers. The binary system has the
following characteristics:
Two digits O, I
Base 2
Weights Powers ofbase 2 (1, 2, 4, 8, 16, ... )
In the binary system 1 s and Ôs are arranged into columns. Each column is weighted.
The first column has a binary weight of 20. This is equivalent to a decimal 1. This is.,referred to as the least significant bit. The binaryweight is doubled with each
succeeding column. The next column, for example, has a weight of 21, which is
equivalent to a decimal 2. The decimal value is doubled in each successive column.
The number in the far left hand column is referred to as the most significant bit. In
this example, the most significant bit has a binary weight of 27. This is equivalent to a
decimal 128.
18

Moet Sl(Jılbrıt Bit ı.-.t.S91bıt aıı:J, J.2,T 2" zi 2• .23 2z 21 XI
128 04 82 IQ I 4 2 ,I o I o I o I 1 I 1 I o I o ı o
Figure 1.22 Binary system
1.9 Converting Binary to Decimal
The following steps can be used to interpret a decimal number from a binary value.
1)Search from least to most significant bit for 1 s.
2) Write down the decimal representation of each column containing a 1.
3) Add the column values.In the following example, the fourth and fifth columns from
the right contain a 1. The decimal value of the fourth column from the right is 8, and
the decimal value of the fifth column from the right is 16. The decimal equivalent of
this binary number is 24. The sum of all the weighted columns that contain a I is the
decimal number that the PLC has stored.
128 84 32 18 8 4 2
I I I ı I I I I ••o o C ' 1 o ı, o
I I8
-ı- ıe24
Figure 1.23 Converting Binary to Decimal
19

In the following example the fourth and sixth columns from the right contain a 1. Tiıe
decimal value of the fourth column from the right is 8, and the decimal value of the
sixth column from the right is 32. The decimal equivalent oftlıis binary number is 40.
128 Bl 32 18 8 • 2
l0l0l1 l0! 1 lolo joI I
8
+.!t"'°
Figure 1.24 Converting Binary to Decimal
1.10 Bits, Bytes, and Words
Each binaıy piece of data is a bit. Eight bits make up one byte.Two bytes, or 16 bits,
make up one word.
!ojo!oj tj 1jc!olaJolo!oj ı! tjcı!olojlt ı------ Byte ----ı
•
Figure 1.25 Bits, Bytes, and Words
20

1.11 Logic O, Logic 1
Programmable controllers can only understand a signal that is On or Off (present or
not present). The binary system is a system in which there are only two numbers, l
and O. Binary 1 indicates that a signal is present, or the switch is On. Binary O
indicates that the signal is not present, or the switch is Off.
orrPLC
Loglcl)
_ lrıput 1
I I24WC-
OnI ,,--
f'LC- ln~1
u:ıgle1
I
I I24YDC
Figure 1.26 Logic O, Logic I
1.12 BCD
Binary-Coded Decimal (BCh>) are decimal numbers where each digit is represented
by a four-bit binary number. BCD is commonly used with input and output devices. A
thumbwheel switch is one example of an input device that uses BCD. Tiıe binary
numbers are broken into groups of four bits, each group representing a decimal
equivalent. A four-digit thumbwheel switch, like the one shown here, would control
16 (4 x4) PLC inputs.
21

t)eıcjı,w BCDNumt.ıı Numı»,s
o 0000
l®®®®Iı 000,z 00103 oım
/ I \'-. 4 crıoo5 0101
!OOOOl!D010!!0000!I 01011 e oııo7 1)'1118 10009 100I
Figure 1.27 Binary-Coded Decimal
1.13 Hexadecimal
Hexadecimal is another system used in PLCs. The hexadecimal system has the
following characteristics:
16 digits 0,1,2,3,4,5,6,7,8,9,A,B,C,D,E,F
Base 16
Weights Powers ofbase 16 (1, 16,256, 4096 ... )
The ten digits of the decimal system are used for the first ten digits of the hexadecimal
system. The first six letters of the alphabet are used for the remaining six digits.
A=IOD=l3
B = 11 E= 14
••C= 12 F= 15
The hexadecimal system is used in PLCs because it allows the status of a large
number of binary bits to be represented in a small space such as on a computer screen
or programming device display. Each hexadecimal digit represents the exact status of
four binary bits. To convert a decimal number to a hexadecimal number the decimal
22

number is divided by the base of 16. To convert decimal 28, for example, to
hexadecimal:
1 r 1216) 28
Decimal 28 divided by 16 is 1 with a remainder of 12. Twelve is equivalent to Cin
hexadecimal. The hexadecimal equivalent of decimal 28 is 1 C.
The decimal value of a hexadecimal number is obtained by multiplying the individual
hexadecimal digits by the base 16 weight and then adding the results. In the following
example the hexadecimal number 2B is converted to its decimal equivalent of 43.
160 = 1
161 = 16
B= 11
~
t I ııx,.,,~2K15-.!_
43
•
23

1.14 Conversion ofNumbers
The following chart shows a few numeric values in decimal.binary, BCD, and
hexadecimal representation.
Table 1.1 Conversions of Numbers
Decimal Binary BCD Hexadecimal
o o 0000 ol l 0001 l
2 1 0010 2
3 11 0011 3
4 100 0100 4
5 101 0101 5
6 110 0110 6
7 111 0111 7
8 1000 1000 8
9 1001 1001 9
10 1010 0001 0000 A
11 1011 0001 0001 B
12 1100 0001 0010 C
13 1101 0001 0011 D
14 1110 0001 0100 E
15 1111 0001 0101 F
16 10000 0001 0110 10
17 1 0001 - 0001 0111 11
18 10010 00011000 12
19 10011 00011901 13 •20 10100 00010000 14
126 1111110 0001 0010 0110 7E
127 1111111 000100100111 7F
24

511 111111111 0101 0001 0001 lFE
512 10 0000 0000 0101 0001 0010 200
1.15 Programming
A program consists of one or more instructions that accomplish a task. Programming
a PLC is simply constructing a set of instructions. There are several ways to look at a
program such as ladder logic, statement lists, or function block diagrams.
1.15.1 Ladder Logic
Ladder logic (LAD) is one programming language used with PLCs. Ladder logic uses
components that resemble elements used in a line diagram format to describe hard
wired control.
1.15.2 Ladder Logic Diagram
The left vertical line of a ladder logic diagram represents the power or energized
conductor. The output element or instruction represents the neutral Ör return path of
the circuit. The right vertical line, which represents the return path on a hard-wired
control line diagram, is omitted. Ladder logic diagrams are read from left-to-right,
top-to-bottom. Rungs are sometimes referred to as networks. A network may have
several control elements,but only one output coil.
25

Nelwcrt ı 10.D I0.1 00.0
H H. )-OLltplltElımıntor lnatrııctiOıı
NGtworU lo.A 00.1
)
Figure 1.28 Ladder Logic Diagram
In the example program shown example IO.O, IO. l and QO.O represent the first
instruction combination. If inputs IO.O and IO.I are energized, output relay QO.O
energizes. The inputs could be switches, pushbuttons, or contact closures. I0.4, I0.5,
and Q1. 1 represent the second instruction combination. If either input IO .4 or IO. 5 are
energized, output relay Q0.1 energizes.
1.15.3 Statement list
A statement list (STL) provides another view of a set ofinstmctions. The operation,
what is to be done, is shown on the left. The operand, the item to be operated on by
the operation,is shown on the right. A comparison between the statement list shown
below, and the ladder logic shown on the previous page, reveals a similar structure.
The set of instructions in this statement list perform the same task as the ladder
diagram.
26

NEnNORKıLO 10.0A 10.1;;; co.o
NETWORK2LO 10.4o I0.5- 00.1
Figure 1.29 Statement list
1.15.4 Function Block Diagrams
Function Block Diagrams (FBD) provide another view of a set of instructions. Each
function has a name to designate its specific task. Functions are indicated by a
rectangle. hıputs are shown on the left-hand side of the rectangle and outputs are
shown on the right-hand side. The function block diagram shown below performs the
same function as shown by the ladder diagram and statement list.
NET\ıVORK 1
NeTWORK2
••
Figure 1.30 Function Block Diagrams
27
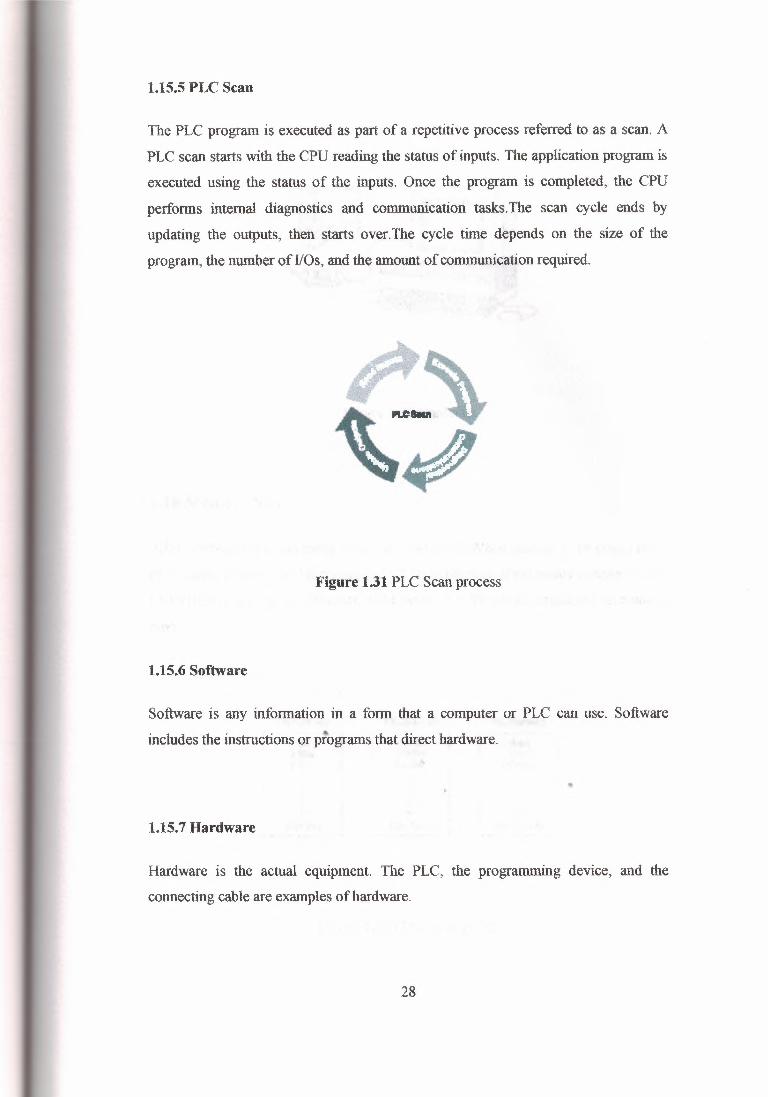
1.15.5 PLC Scan
The PLC program is executed as part of a repetitive process referred to as a scan. A
PLC scan starts with the CPU reading the status of inputs. The application program is
executed using the status of the inputs. Once the program is completed, the CPU
performs internal diagnostics and communication tasks.The scan cycle ends by
updating the outputs, then starts over.The cycle time depends on the size of the
program, the number of I/Os, and the amount of communication required.
Figure 1.31 PLC Scan process
1.15.6 Software
Software is any information in a form that a computer or PLC can use. Software
includes the instructions or plograms that direct hardware.
"'
1.15.7 Hardware
Hardware is the actual equipment. The PLC, the prograımning device, and the
connecting cable are examples of hardware.
28

o
Figure 1.32 Hardware
1.16 Memory Size
Kilo, abbreviated K, normally refers to 1000 units. When taiking about computer or
PLC memory, however, IK means 1024. This is because of the binary number system
(210=1024). This can be 1024 bits, 1024 bytes, or 1024 words, depending on memory
type.
IKMıınor, , ı: lllııııoıy ,ı:......,ı Bit 1~ 1Wcıd2B1'ts 2Byta 2Wan:lı3BiW 3Bvbıı 3~
1 l 1 I •
1«MB1'ts 10Z4Bytu 10:MWısdı
Figure 1.33 PLC memory size
29

1.16.1 RAM
Random Access Memory (RAM) is memory where data can be directly accessed at
any address. Data can be written to and read from RAM. RAM is used as a temporary
storage area.RAM is volatile, meaning that the data stored in RAM will be lost if
power is lost. A battery backup is required to avoid losing data in the event of a power
loss.
1.16.2 ROM
Read Only Memory (ROM) is a type of memory that data can be read from but not
written to. This type of memory is used to protect data or programs from accidental
erasure. ROM memory is nonvolatile. This means a user program will not lose data
during a loss of electrical power. ROM is normally used to store the programs that
define the capabilities of the PLC.
1.16.3 EPROM
Erasable Programmable Read Only Memory (EPROM) provides some level of
security against unauthorized or unwanted changes in a program. EPROMs are
designed so that data stored in them can be read, but not easily altered. Changing
EPROM data requires a special effort. UVEPROMs (ultraviolet erasable
programmable read only memory) can only be erased with an ultraviolet light.••
EEPROM (electronically erasable programmable read only memory), can only be
erased electronically."'
30

1.16.4 Firmware
Firmware is user or application specific software burned into EPROM and delivered
as part of the hardware. Firmware gives the PLC its basic functionality.
Figure 1.34 Memory chip of PLC
1.17 Putting it together
The memory of the S?-200 is divided into three areas: program space, data space, and
configurable parameter space.
• Program space stores the ladder logic (LAD) or statement list (STL) program
instructions. This area of memory controlsthe way data space and 1/0 points
are used. LAD or STL instructions are written using a programming device
such as a PC, then lo<\{led. into program memory of the PLC.
• Data space is used as a working area, and includes memory locations for
calculations, temporary storage of intermediate results and •.constants. Data.space includes memory locations for devices such as timers, counters, high
speed counters, and analog inputs and outputs. Data space can be accessed
under program control.
• Configurable parameter space, or memory, stores either the default or
modified configuration parameters.
31

Figure 1.35 Loading of program in the PLC
32
•

2S7-200 Micro PLCs
The S7-200 Micro PLC is the smallest member of the SIMATIC S7 family of
programmable controllers. The central processing unit (CPU) is internal to the PLC.
Inputs and outputs (I/O) are the system control points. Inputs monitor field devices,
such as switches and sensors. Outputs control other devices, such as motors and
pumps. The programming port is the connection to the programming device.
Figure 2.1 S7-200 Micro PLC
2.2 S7-200 Models
There are four S7-200 CPU types: S7-221, S7-222, S7-224,S7-226, and S7-226XM
and three power supply confiıurations for each type.
••
Table 2.1 Types of S7-200
Model Description Power Supply Input types Output Types
221 DC/DC/DC 20.4-28.8 VDC 6 DC Inputs 4DCOutputs221 AC/DC/Relay 85-264 VAC, 6 DC Inputs 4 Relay Outputs
47-63 Hz
33

222 DC/DC DC 20.4-28.8 VDC 8 DC Inputs 6 DC Outputs222 AC/DC/Relay 85-264 VDC, 8 DC Inputs 6 Relay Outputs
47-63 Hz224 DC/DC/DC 20.4-28.8 VDC 14 DC Inputs 1 O DC Outputs224 AC/DC/Relay 85-264 VDC, 14 DC Inputs 1 O Relay Outputs
47-63 Hz226/226XM 20.4-28.8 VDC 24 DC Inputs 16 DC OutputsDC/DC/DC I226/226XM 85-264 VDC, 24 DC Outputs 16 Relay Outputs ıAC/DC/Relav 47-63 HZ
The model description indicates the type of CPU, the power supply, the type of input,
and the type of output.
2.2 S7-200 Features
The S7-200 family includes a wide variety of CPUs and features. This variety
provides a range of features to aid in designing a cost-effective automation solution.
The following table provides a summary of the major features, many of which will
be covered in this course. "
••
34

Table 2.2 S7-200 family
Feature CPU CPU222 CPU224 CPU CPU221 226 226XM
MemoryProgram 2048 2048 words 4096 words 4096 8192
words words wordsUser Data 1024 1024 words 2560 words 2560 5120
words words wordsMemoıytype EEPRO EEPROM EEPROM EEPRO EEPROM
M MMemoıy EEPRO EEPROM EEPROM EEPRO EEPROMcartridge M MData backup 50 50 hours 190 hours 190 190 hours
hours hoursJ/0Local digital 6 In/4 8 In/6 out 14 In/10 out 24 In/16 24 In/16J/0 out out outMaximum None 2 7 7 7number ofexpansionmodulesMax. digital 6 In/4 40 In/38 out 94 in/74 out 128 128I/O with out In/120 In/120 outexpansion outMax. analog None 8 in/2 out or 28 In/7 out or 28 In/7 28 In/7I/O with O In/4 out O In/14 out out or out orexpansion O In/14 O in/14 out
outInstructionsBoolean 0.37 0.37 µs/Inst. 0.37 J.lS/InSt. 0.37 0.37execution speed µs/Inst. µs/Inst. µs/Inst.
Internal relays 256 256 256 256 256Counters 256 "256 256 256 256Timers 256 256 256 256 256Sequential 256 256 256 256 256control relays •••For/Next loop Yes Yes Yes Yes YesInteger math (+ Yes Yes Yes Yes Yes- * /)Real math (+ - Yes Yes j Yes Yes Yes* /)Enhanced featuresBuilt-In high 4 (30 4 (30 KHz) 6 (30 KHz) ı 6 (30 6 (30speed counter KHz) KHz) KHz)
35

Analog 1 1 2 2 2adjustmentsPulse output 2 (20 2 (20 KHz, 2 (20KHz, 2 (20 2 (20
KHz, DC) DC) KHz,DC) KHz, DC)DC)
Communication I I transmit/2 I transmit/2 I Iinterrupt transmit receive receive transmit/2 transmit/2
/2 receive receıvereceıve
Timed 2 (lms- 2 (lms- 2 (lms- 2 (lms- 2 (lms-intemmts 255ms) 255ms) 255ms) 255ms) 255ms)Hardware input 4 4 4 4 4interruptReal time clock Yes Yes Yes (built- Yes Yes
(cartridg (cartridge) in) (built-in) (built-in)e)
Password Yes Yes Yes Yes YesprotectionCommunicationNumber of port I (RS- I (RS-485) 1 (RS-485) 2 (RS- 2 (RS-
485) 485) 485)Protocols PPI,MP PPI,MPI PPI,MPI PPI,MPI PPI,MPIsupported port I slave, slave, slave, slave, slave,
Freeport Freeport Freeport Freeport FreeportProfibus peer- (NETR/ (NETR/ (NETR/ (NETR/ (NETR/to-peer NETW) NETW NETW NETW NETW
•
36

2.3 Mode Switch and Analog Adjustment
When the mode switch is in the RUN position the CPU is in the run mode and
executing the program. When the mode switch is in the STOP position the CPU is
stopped. When the mode switch is in the TERM position the programming device
can select the operating mode.The analog adjustment is used to increase or decrease
values stored in special memory. These values can be used to update the value of a
timer or counter, or can be used to set limits.
.Joi .1 ace
aaaI
Figure 2.1 Mode Switch
2.4 Optional Cartridge
The S7-200 supports an optional memoıy cartridge that provides a portable
EEPROM storage for your program. The cartridge can be used to copy a program
from one S7-200 PLC to a like S7-200 PLC. In addition, two other cartridges are
available. A real-time clock with battery is available for use on the S7-221 and S7-
222. The battery provides up to 200 days of data retention time in the event of a
37

power loss. Tiıe S7-224 and S7-226 have a real-time clock built in. Another
cartridge is available with a batteıy only.
Figure 2.3 S7-200 cartridge
2.5 Expansion Modules
The S7-200 PLCs are expandable. Expansion modules contain additional inputs and
outputs. These are connected to the base unit using a ribbon connector.
Figure 2.4 Expansion modules
38

The ribbon connector is protected by a cover on the base unit.Side-by-side mounting
completely encloses and protects the ribbon connector.
Figure 2.5 Expansion modules
The ribbon connector is protected by a cover on the base unit.Side-by-side mounting
completely encloses and protects the ribbon connector.
2.6 Available Expansion
The S7-221 comes with 6 digital inputs and 4 digital outputs.These are not
expandable. The S7-222 comes with 8 digital inputs and 6 digital outputs. The 222
will accept up to 2 expansion modules. The S7-224 comes with 14 digital inputs and
10 digital outputs. The 224 will accept up to 7 expansion modules. The S7-226 and
S7-226XM come with 24 digital inputs and 16 digital outputs. The 226 and 226XM
will accept up to 7 expansion modules.
39

ı-:::-ı e Inputs. 4 OuiılutSCJ No Expınıitrı Moduln <EM)
1-- I EM I™ I B lnputı, 8 OUIJIUflAccepts up ID 2Eıq:ıanııicn Modulaa
1--1 ™ I EM I ·M I EM I EM I EM I EM Iı:~ı EM I EM I EM I EM I EM I EM I ™ I
Figure 2.6 Available Expansion
2.7 Status Indicators
14 lnpuıs. 10 OutputsAccepıa up to 7l?xpanıicın McdulN
24 Inputs, ts OutputsAccepta up ta 7Expansion McdulH
The CPU status indicators reflect the current mode of CPU operation. If, for
example, the mode switch is set to the RUN position, the green RUN indicator is lit.
When the mode switch is set to the STOP position, the yellow STOP indicator is lit.
40
•

Figure 2.7 Status indicator
The I/O status indicators represent the On or Off status of corresponding inputs and
outputs. When the CPU senses an input is on, the corresponding green indicator is lit.
2.8 Installing
The S7-200 can be installed in one of two ways. A DIN clip allows installation on a
standard DIN rail. Tlıe DIN clip snaps open to allow installation and snaps closed to
secure the unit on the rail. The S7-200 can also be panel mounted using installation
holes located behind the access covers.
••
41
•••••,----..f •.•.•.•
+i(ıH
Figure 2.8 installation of PLC
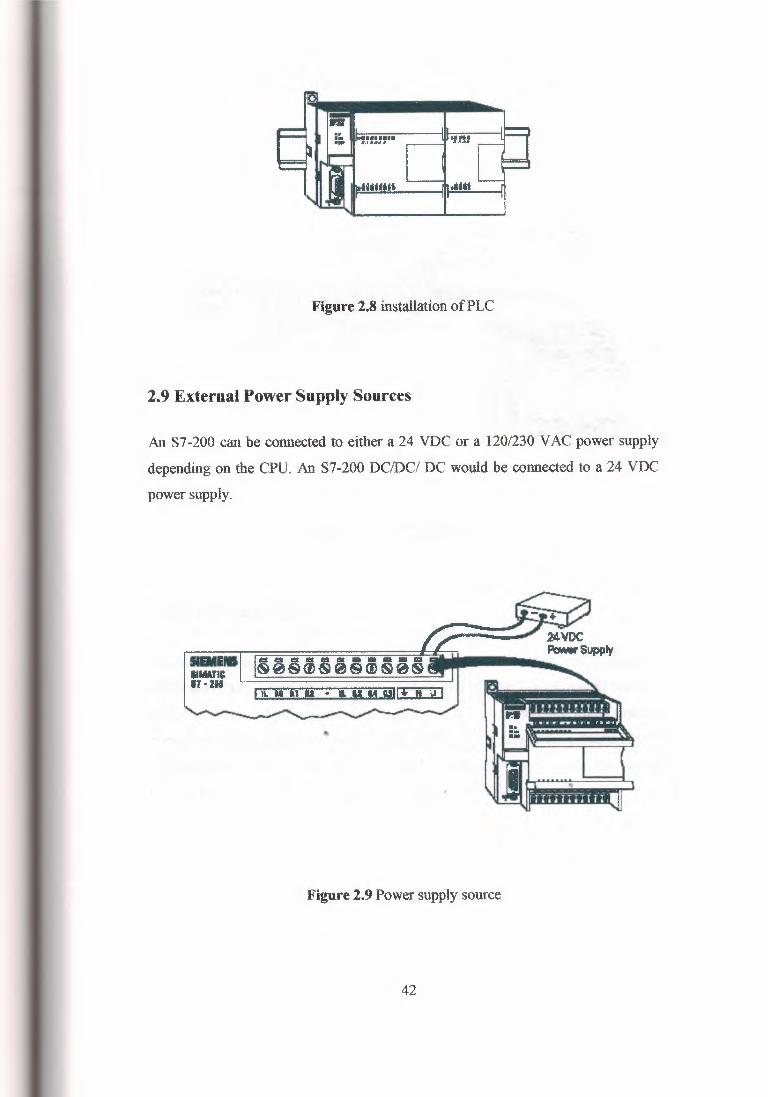
2.9 External Power Supply Sources
An S7-200 can be connected to either a 24 VDC or a 120/230 VAC power supply
depending on the CPU. An S7-200 DC/DC/ DC would be connected to a 24 VDC
power supply.
SIIW'IÇ17-ffl
ı=ıaııııııaıııaı:ıı:ı.ı:ııı:ıı-·
Figure 2.9 Power supply source
42

An S7-200 AC/DC/Relay would be connected to a 120 or 230 VAC power supply.
IIMATICST- IIIO
Figure 2.10 S7-200 AC/DC/Relay
2.101/0 Numbering
S7-200 inputs and outputs are labeled at the wiring terminations and next to the
status indicators. These alphanumeric symbols identify the I/O address to which a
device is connected. This address is used by the CPU to determine which input is
present and which output needs to be turned on or off. I designates a discrete input
and Q designates a discrete output. The first number identifies the byte, the second
munber identifies the bit. Input IO.O, for example-is byte O, bit O. "'
IO.O= Byte O, Bit O
IO.I = Byte O, Bit 1
II.O= Byte 1, Bit O
43

II.I= Byte 1, Bit 1
The following table identifies the input and output designations.
IO.O ILO 9ıninput QO.O l" output QI.O 9u• outputIO.I II.I 10 input QO.l 2n output Q 1.1 10 outputI0.2 Il.2I0.3 11.3I0.4 Il.410.5 I 11.5I0.6I0.7
2.11 Inputs
Table 2.3 I/O numberring
Input devices, such as switches, pushbuttons, and other sensor devices are connected
to the terminal strip under the bottom cover of the PLC.
••
44

Figure 2.11 Inputs of PLC
2.11.1 Input Simulator
A convenient method of testing a program is to wire toggle switches to the inputs.
Input simulators with prewired toggle switches are available for the S7-200s.
Switches are wired between the 24 VDC power supply (L+) and the inputs.
Forexample, the switch on the far left is wired between the first input (O.O) and L+.
When the switch is closed, 24 VDC is applied to the input. This is referred to as a
logic 1. When the switch is open, O VDC is applied to the input. This is referred to
as a logic O.
"'
45

Figure 2.12 toggle switches
2.12 Outputs
Output devices, such as relays, are connected to the tenniııal strip under the top
cover of the PLC. When testiııg a program, it is not necessary to connect output
devices. The LED status indicators signal if an output is active.
••
46

Figure 2.13 Output terminal strip
2.13 Optional Connector
An optional fan-out connector allows for field wiring connections to remain fixed
when removing or replacing an S7-221 or 222.The appropriate connector slides into
either the input, output, or expansion module terminals.
•
47

Field Wiring
Figure 2.14 fan-out connector
2.14 Removable Terminal Strip
The S7-224 and S7-226 do not have an optional fan-out connector. Instead, the
terminal strips are removable. This allows the field wiring connections to remain
fixed when removing or replacing the S7-224 and S7-226.
48

Figure 2.15 wiring connections
2.15 Super Capacitor
A super capacitor, so named because of its ability to maintain a charge for a long
period of time, protects data stored in RAM in the event of a power loss. The RAM
memory is typically backed up on the S7-221 and 222 for 50 hours, and on the S7-
224 and 226 for 190 hours.
•
49

SuperCapacita
EEPIIDM Opllun•I EEPROMMınııııyCutrldp
Figure 2.16 Super Capacitor
2.16Connecting External Devices
2.16.1 TD200
The S7-200 programming poıt can be used to cornımnıicate with a variety of
external devices. One such device is the TD200 text display unit The TD200
displays messages read from the S?-200, allows adjustment of designated program
variables,provides the ability to force, and permits setting of the time and date. The
TD200 can be connected to an external power supply or receive its power from the
S7-200. -
•
50

Figure 2.17 S7-200 programming port
2.16.2 Freeport Mode
The programming port has a mode called freeport mode. Freeport mode allows
connectivity to various intelligent sensing devices such as a bar code reader.
' RS--186 to RS-232.lnı.fıı:e •
Figure 2.18 Freeport mode
51

2.16.3 Printer
Freeport mode can also be used to connect to a non-SIMATIC printer.
Sariıl tc fwsllal.,..O::ırMırter
Figure 2.19 Freepoıt mode with 11011-SIMATICprinter
••
52

2.16.4 Interconnection
It is possible to use one programming device to address multiple S7-200 devices on
the same communication cable. A total of 31 units can be interconnected without a
repeater.
DI IBM«IBM Canpııtlble PC
Figure 2.20 Interconnection
53
•

3. PROGRAMMING APPLICATION
STEP 7-Micro/WIN32 is the program software used with the S7-200 PLC to create
the PLC operating program. STEP 7 consists of a number of instructions that must be
arranged in a logical order to obtain the desired PLC operation. These instructions are
divided into three groups: standard instructions, special instructions, and high-speed
instructions.
3.1 Standard Instructions
Standard instructions consist of instructions that are found in most programs.
Standard instructions include; timer, counter, math,logical,increment/decrement/invert,
move, and block instructions.
3.2 Special Instructions
Special instructions are used to manipulate data. Special instructions include shift,
table, find, conversion, for/next, and real-time instructions.
3.3 High-Speed Instructions
High-speed instructions allow for events and interrupts to occur independent of the
PLC scan time. These include high-speed counters, interrupts, output, and transmit
instructions. ••
54

3.4 Symbols
In order to understand the instructions a PLC is to carry out, an understanding of the
language is necessary. The language of PLC ladder logic consists of a commonly used
set of symbols that represent control components and instructions.
3.4.1 Contacts
One of the most confusing aspects of PLC prograımning for first-time users is the
relationship between the device that controls a status bit and the programming
function that uses a status bit. Two of the most common programming functions are
the normally open (NO) contact and the normally closed (NC) contact. Symbolically,
power flows through these contacts when they are closed. The normally open contact
(NO) is true (closed) when the input or output status bit controlling the contact is 1.
The normally closed contact (NC) is true (closed) when the input or output status bit
controlling the contact is O.
Figure 3.1 Contacts
55

3.4.2 Coils
Coils represent relays that are energized when power flows to them. When a coil is
energized, it causes a corresponding output to nun on by changing the state of the
status bit controlling that output to 1. That same output status bit may be used to
control normally open and normally closed contacts elsewhere in the program.
-{ )
Figure 3.2 coil
3.4.3 Boxes
Boxes represent various instructions or ftnıctions that are executed when power flows
to the box. Typical box functions are timers, counters, and math operations.
Figure 3.3 Boxes
56

3.5 Entering Elements
Control elements are entered in the ladder diagram by positioning the cursor and
selecting the element from lists. In the following example the cursor has been placed
in the position to the right of I0.2. A coil was selected from a pull down list and
inserted in this position.
~v.ıorlt 1
10.0 o.ı 00.0
H H)
Figure 3.4 Control elements
3.6 An AND Operation
Each rung or network on a ladder represents a logic operation. The following••
prograımning example demonstrates an AND operation. Two contact closures and
one output coil are placed on network 1. They were assigned addresses IO.O, 10.1, and
QO.O. Note that in the statement list a new logic operation always begins with a load
instruction (LD). In this example IO.O (input 1) and (A in the statement list) I0.1 (input
2) must be tme in order for output QO.O (output 1) to be tme. It can also be seen That
57

IO.O and IO.I must be true for QO.O to be true by looking at the function block diagram
representation.
I~,ı ~H..,H ...9)
..._. Llıl llıpııııstakm
Nılwatk1lD IO-~A ICJ.1
Qı,.o
Pıınchn 1111*D&ıınnı Rııpıwıtıııllvn
~1
ıo.~ıo.~ mo
..Figure 3.5 And operation
Another way to see how an AND function works is with a Boolean logic diagram. In
Boolean logic an AND gate is represented by a number of inputs on the left side. In
this case there are two inputs. The output is represented on the right side. It can be
seen from the table that both inputs must be a logic 1 in order for the output to be a
logic 1.
58

And lAl Funetıon And ll\.l Ftıoc-ıiorı
ln.ı;ut1~lnput2~0utp<.1t 1
Kl.O~QO.O
Kl.1~
Input 1 lnpmZ Ouıııut 1() () ()
o 1 o·ı o ol 1 1
10.0 o.ı 00.0o o oo 1 oI o ol 1 1
Figure 3.6 And fünction
3.7 An OR Operation
In this example an OR operation is used in network 1. It can be seen that if either
input I0.2 (input 3) or (O in the statement list) input I0.3 (input 4), or both are true,
then output Q0.1 (output 2) will be true.
Networlc:1
I0.2
I0.3
00.1
)•
Figure 3.7(a) An OR operation
59

8mlaımıtı.ı.tllııpiM1iDIIM
Nllt\olıfertıLD 10~o Kl)• 00.1
Figure 3.7(b) An OR operation
Another way to see how an OR function works is with a Boolean logic diagram. The
symbol differs slightly from an AND function. The OR function is represented by a
number of inputs on the left side. In this case there are two inputs. The output isrepresentedon the right side. It can be seen from the table that any input can be alogic 1 in order for the output to be a logic 1.
Or JO) FıırctKın
lnpl.lt :3 ----ı~ Oııqmt 2
lnput4~
o- 10) Fıınctı
0.,1----ı~I0.§~00.1
lrıpııt3 lnpvt4 Output2 10.<I 10.5 O(Ho o oo 1 11 o ;1 1 ı
oo
o1o1
ol1
•Figure 3.8 OR function
60

3.8 Testing a Program
Once a program has been written it needs to be tested and debugged. One way this
can be done is to simulate the field inputs with an input simulator, such as the one
made for the S7-200. The program is first downloaded from the programming device
to the CPU. The selector switch is placed in the RUN position. The simulator switches
are operated and the resulting indication is observed on the output status indicator
lamps.
3.9 Status Functions
After a program has been loaded and is running in the PLC, the actual status ofladder
elements can be monitored using STEP 7 Micro/WIN32 software. The standard
method of showing a ladder element is by indicating the circuit condition it
produceswhen the device is in the deenergized or non operated state.In the following
illustration input I (IO.O) is programmed as a normally open (NO) contact. In this
condition, power will not flow through the contacts to the output (QO.O).
CPUıa.o co.o
1111Ul I-+ I "i H ) I-+ I Ovtpııt
•
Figure 3.9 statuses of ladder elements
61

When viewing the ladder diagram in the status mode, control elements that are active,
or true (logic 1 ), are lıiglıliglıted. In the example shown the toggle switch connected to
input 1 has been closed. Power can now flow through the control element associated
with input 1 (IO.O) and activate the output (QO.O). The lamp will illuminate.
CPt.ıIC.O 00.0
Figure 3.10 control elements
3.10 Forcing
Forcing is another useful tool in the commissioning of an application. It can be used
to temporarily override the input or output status of the application in order to test and
debug the program. The force function can also be used to override discrete output
points. The force function can be used to skip portions of a program by enabling a"'jump instruction with a forced memory bit. Under normal circumstances the toggle
switch, shown in the illustration below, would have to be closed to enable input 1•
(IO.O) and hım on the output light. Forcing enables input 1 even tlıouglı the input
toggle switch is open.With input 1 forced high the output light will illuminate. When
a function is forced the control bit identifier is highlighted. The element is also
lıiglıliglıted because it is on.
62

lıpı.ıl
lrıpLlt [-+
CF'UIOb DO.O
-to I -i H ) !-to ı CııtpJt
Lamp
Figure 3.11 Forcing
I.Amp
Figure 3.12 Forcing
•
63

The following table shows the appearance of ladder elements in the Off, forced, and
On condition.
Table 3.1 Appearance ofladder elements
Sta1ı.ıı Bit Orı Sfımı•Bit Ol!' ~Bit SMlıııı Bitcamaııtı Qı:ıılJd Qıntıcıs Oparı Fon:mOn foRıııdOff.....,. ~Oı.,eeıd ~Opııın-- I mc:.ıt&ıCa 10.0 10.0
I 11 I IStııı.a Bfı On Staı:ıllt Off' Sfatı.sBlt S1111U9Blt
c«ıtdclıt Oo«ı Crm1:aı:t& ao.d ~Ori FM:edoıtO:ırıtııı:t3Opırı CcMıcıs aaı.cı
lllııınılycı.ıııCıfın1e.* 10.1 ı>.ı ımıı ırv1 I v1
9t.n.ıı Bit On Staıı.ıa Bit Ol!' Staıı.ıa Bit SlmısBltCı:ıil l;rıerp,d CQI Deı:ını,ıgiil8d f<ıı'cıed On ı=--Off
Col Erı•911d Coll DııınııglıııdOutputCıııllı 01).CJ 00.0 tll ED
( ) ( ).
3.11 Program Instruction
When the switch is open the CPU receives a logic O from input IO.O. The CPU sends
a logic O to output QO.O and the light is off.
64

Nttwcrt. 1~~i (OU) LD to.oDel.O •
Figure 3.13 Network
When the switch is closed the CPU receives a logic 1 from input IO.O. The CPU sends
a logic 1 to output QO.O, thus activating QO.O. The light turns on.
ıo.o 00.0
LD l>.O00.0
~igure 3.14 Active network
•3.12 Motor Starter Example
The following example involves a motor start and stop circuit. The line diagram
illustrates how a normally open and a normally closed pushbutton might be used in a
control circuit. In this example a motor started (M) is wired in series with a normally
65

open momentary pushbutton (Start), a nomıally closed momentary pushbutton (Stop),
and the normally closed contacts of an overload relay (OL).
Figure 3.15 Circuit diagram of motor control
Momentarily depressing the Start pushbutton completes the path of current flow and
energizes the motor starter (M).
•
Figure 3.16 Energizes the motor starter
66

This closes tlıe associated Mand Ma (auxiliary contact located in the motor starter)
contacts. When the Start button is released a holding circuit exists to the M contactor
through the auxiliary contacts Ma. The motor will run until the normally closed Stop
button is depressed, or the overload relay opens the OL contacts, breaking the path of
current flow to the motor starter and opening the associated M and Ma contacts.
L3 I I tl: *"l
1L'i .•,----
Figure 3.17 Motor in running position
This control task can also be accomplished with a PLC.
3.12.l Program Instruction
A normally open Start pushbutton is wired to the first input (IO.O), a normally closed•
Stop pushbutton is wired to the second input (IO.l), and normally closed overload
relay contacts (part of the motor starter) are connected to the third input (10.2).The
first input (IO.O), second input (IO.I), and third input (I0.2) form an AND circuit and
are used to control normally open programming function contacts on Network 1. IO.I
67

status bit is a logic l because the normally closed (NC) Stop Pushbutton is closed.
I0.2 status bit is a logic 1 because the normally closed (NC) overload relay (OL)
contacts are closed. Output QO.O is also programmed on Network 1. In addition, a
normally open set of contacts associated with QO.O is programmed on Network 1 to
form an OR circuit. A motor starter is comıected to output QO.O.
St:ııı'tlNOJ~1~~~· ID.Cl KJ.1 ID.2 ao.o I co.,~ •• -.
Stcp(NCj r-( )ltJ.1
OL Iır.ı.2 00.0
LCPU Oııput
Figure 3.18 Program Instruction
When the Start pushbutton is depressed the CPU receives a logic 1 from input IO.O.
This causes the IO.O contact to close.All three inputs are now a logic 1. The CPU
sends a logic 1 to output QO.O. The motor starter is energized and the motor starts.
68

Natwıın: 1
Ill.OIO.C IC.I ICU QO.O .... ~ •.-
Slı:ıp (NCİ I r StıımırID.1
OL ı10.2 00.0
Llıııııt QI.I Output
Figure 3.19(a) Staıt pushbutton is depressed
When the Start pushbutton is pressed, output QO.O is now true and on the next scan,
when normally open contact QO.O is solved, tlıe contact will close and output QO.O
will stay on even if the Start pushbutton has been released.
Stırt{NOI~;-Jm• ,-,I 11).!J ltU I0.2 00.0 I ı CJ:1.0 ~taMcıwrSI.apt.ta II fTI m ~
Stıwt«10.1
OL I',,.IU · ··oo.o
LCPU Ouıput
"'Figure 3.19(b) QO.O is active
The motor will continue to run until the Stop pushbutton is depressed. Input 10.1 will
now be a logic O (false). The CPU will send a binary O to output QO.O. The motor will
turn off.
69

Stıırt a«>I_ı_ Nfıtwıx1c. 1o iti.O
~~
ıo.o ıo.1 ıo.2 00.C I ""'"rg+"-ııu r~ )
CL
10.2 00./J
LCPU Oı.ıqıut
Figure 3.20 Stop pushbutton is depressed
When the Stop pushbutton is released 10.1 logic function will again be true and the
program ready for the next time the Start pushbutton is pressed.
sı.tlNO)
__ı__o--110,Co
.stı,~I0.1
~ l,o.2
no 10.1 n2 oo.c
~)
a.o.a
CPU OLıpııt
•Figure 3.21 Motor is stopped
70

3.12.2 Expanding the Application
The application can be easily expanded to include indicator lights for RUN and STOP
conditions. In this example a RUN indicator light is connected to output Q0.1 and a
STOP indicator light is connected to output Q0.2.It can be seen from the ladder logic
that a normally open output QO.O is connected on Network 2 to output Q0.1 and a
normally closed QO.O contact is connected to output Q0.2 on network 3. In a stopped
condition output QO.O is off. The normally open QO.O contacts on Network 2 are open
and the RUN indicator, connected to output Q0.1 light is off. The normally closed
Q0.1 on Network 3 lights are closed and the STOP indicator light, connected to output
Q0.2 is on.
Steıt(NOlNıtwrıılt:1~-+· ."
QO.O I •... ~ ..-~O'«:! )
10.100.1 K ) RUN lnıilımırIIOL I
10.2 c».o I au 1--<1 sroıı lndlGatar~ifflırk.2
lrııM OIJlpllt......... (l0.1)
CPU
Figure 3.22 Indicator lights for RUN and STOP
71

When the PLC starts the motor output QO.O is now a logic high (On). The normally
open QO.O contacts on Network 2 now switch to a logic 1 (closed) and output Q0.1
turns the RUN indicator on. The normally closed QO.O contacts on Network 3 switch
to a logic O (open) and the STOP indicator light connected to output Q0.2 is now off.
SttTttNOI
~~
Natwıııt1o lfl.0
StııplNQJO,.O I0.1 n.2 no.a 11 oo.oH )-+10 Muı.ıır
I0.1 rOl I 11 ao.,I0.2 co.o
~2 ıı:HlsmP-lnPII! ı ı ___ -·
c».z)
CPU
Figure 3.23 Indicate light for RUN
3.12.3 Adding a Limit Switch
The application can be further expanded by adding a limit switch with normally open
contacts to input I0.3.A limit switch could be used to stop the motor or prevent the
motor from being started. An access door to the motor, or its associated equipment, is
one example of a limit switch's use. If the access door is open, the normally open
contacts of LS1 connected to input IO .3 are open and the motor will not start.
72

Stert(NOI
__ı_o-110.cII
~···lıl.2LS1
~~lrıpııt
t.ı.twaıt 1
ta.O 10.1 10.2 10.3 ~..O
r-11-{ )
Sll)p lrıdJı:ııtorO.Cl.2
01.11pıt
CPU
Figure 3.24 Indicate light for STOP
When the access door is closed, the normally open contacts on the limit switch (LS I)
are closed. Input I0.3 is now on (logic 1), and the motor will start when the Start
pushbutton is pressed.
••
73

3.13 Application Example
A field device that measures a varying value is typically connected to a transducer. In
the following example a scale is connected to a load cell. A load cell is a device that
takes a varying value and converts it to a variable voltage or current output. In this
example the load cell is converting a value of weight into a O - 10 VDC output. The
output value depends entirely on the manufactured specifications for the device.This
load cell output O - I O VDC for a O - 500 Lbs input. The O - I O VDC load cell output
is connected to the input of an analog expansion module.
Figure 3.25 load cell
The example application can be expanded to include a conveyor system with a gate to
direct packages of varying weight.As packages move along the conveyor they are
weighed. A package that weighs at or greater than a specified value is routed along
74

one conveyor path. A package that weighs less than a specified value is routed along
another conveyor path, where it will later be inspected for missing contents.
Figure 3.26 conveyor system
3.14 Timers
Timers are devices that count increments of time. Traffic lights are one example
where timers are used. In this example timers are used to control the length of time
between signal changes.
•
75

_J
Figure 3.27 Traffic lights
Timers are represented by boxes in ladder logic. When a timer receives an enable, the
timer starts to time. The timer compares its current time with the preset time. The
output of the timer is a logic O as long as the current time is less than the preset time.
When the current time is greater than the preset time the timer output is a logic 1. S?-
200 uses three types of timers: On-Delay (TON), Retentive On-Delay (TONR), and
Off-Delay (TOF).
IN TON IN 'TIJNR IN TOF
••PT PT PT
Figure 3.28 Types of timers
76

3.14.1 S7-200 Timers
S7-200 timers are provided with resolutions of I millisecond,10 milliseconds, and
100 milliseconds. The maximum value of these timers is 32.767 seconds, 327.67
seconds, and 3276.7 seconds, respectively. By adding program elements, logic can be
programmed for much greater time intervals.
3.14.2 On-Delay (TON)
When the On-Delay timer (TON) receives an enable (logic 1) at its input (IN), a
predetermined amount of time (preset time - PT) passes before the timer bit (T-bit)
nuns on. The T-bit is a logic function internal to the timer and is not shown on the
symbol. The timer resets to the starting time when the enabling input goes to a logic O.
IN TON
PT
Figure 3.29 ON-Delay timers
In the following simple timer example, a switch is connected to input 10.3, and a light
is connected to output QO .1. •
77

Figure 3.30 Switch is comıected to input
When the switch is closed input 4 becomes a logic 1, which is loaded into timer T37.
T37 lıas a time base of 100 ms (.100 seconds). The preset time (PT) value has been set
to 150. This is equivalent to 15 seconds (.100 x 150 ). The light will turn on 15
seconds after the input switch is closed. If the switch were opened before 15 seconds
had passed, then reclosed, the timer would again begin timing at O.
78
•

10.3 r37
ml ( )Q0.1
Figure 3.31 Ladder diagram
A small sample of the flexibility of PLCs is shown in the following program logic. By
reprogramming the T37 contact as a normally closed contact, the fünction of the
circuit is changed to cause the indicator light to tum off only when the timer times out.
This function change was accomplished without changing or rewiring VO devices.
I0.3 r31
T37 00.1
I ( }
Figure 3.32 T37 contact as a normally closed contact
79

3.14.3 Retentive On-Delay (TONR)
The Retentive On-Delay timer (TONR) functions in a similar manner to the On-Delay
timer (TON). Th.ere is one difference. The Retentive On-Delay timer times as long as
the enabling input is on, but does not reset when the input goes off The timer must be
reset with a RESET (R) instruction.
IN iONA
PT
Figure 3.33 Retentive On-Delay timer (TONR)
The same example used with the On-Delay timer will be used with the Retentive On
Delay timer. When the switch is closed at input I0.3, timer TS (Retentive timer)
begins timing.If, for example, after 10 seconds input I0.3 is opened the timer stops.
When input I0.3 is closed the timer will begin timing at 10 seconds. The light will
turn on 5 seconds after input I0.3 has been closed the second time. A RESET (R)
instruction can be added. Here a pushbutton is connected to input IO .2. If after 1 Oseconds input I0.3 were opened, TS can be reset by momentarily closing input I0.2.
"T5 will be reset to O and begin timing from O when input I0.3 is closed again .
•
80

103 rs
T5 00.
I ( )
Figure 3.34 Ladder diagram of On-Delay timer
3.14.4 Off-Delay (TOF)
The Off-Delay timer is used to delay an output off for a fixed period of time after the
input turns off. When the enabling bit turns on the timer bit turns on immediately and
tlıe value is set to O. When the input turns off,tlıe timer counts until the preset time has
elapsed before the timer bit turns off
rxxxror
PT
Figure 3.35 off-Delay timers
81

3.14.5 S7-200 Timers
The S7-200s have 256 timers. The specific T number chosen for the timer determines
its time base and whether it is TON, TONR or TOF.
Table3.2 Types of timers
Timer Type Resolution Maximum Value Timer Number
Toner 1 ms 32.767 Second TO,T64
lOms 327.67 Second Tl,T4,T65-T68
lOOms 3276.7 Second T5,T31,T69,T95
TON, TOF 1 ms 327.67 Second T33-T36,T97-T100
lOms 327.67 Second T33-T36,T97-T100
lOOms 3276.7 Second T37-T63,T101-T225
3.14.6 Timer Example
In the following example a tank will be filled with two chemicals, mixed, and then
drained. When the Start Button is pressed at input IO.O, the program starts pump 1
controlled by output QO.O. Pump 1 runs for 5 seconds, filling the tank with the first
chemical, then shuts off. The program then starts pump 2, controlled by output QO .1.
Pump 2 runs for 3 seconds filling the tank with the second chemical. After 3 seconds
pump 2 shuts off.The program starts the mixer motor, connected to''output Q0.2 and
mixes the two chemicals for 60 seconds. The program then opens the drain valve
controlled by output Q0.3, and starts pump 3 controlled by output Q0.4. Pump 3 shuts
off after 8 seconds and the process stops. A manual Stop switch is also provided at
input IO.I.
82

P\ıı'ıp2100.1)
Figure 3.36 Tank system
3.15 Counters
Counters used in PLCs serve the same :function as mechanical counters. Counters
compare an accumulated value to a preset value to control circuit :functions. Control
applications that commonly use counters include the following:
• Count to a preset value and cause an event to occur
• Cause an event to occur until the count reaches a preset value
A bottling machine, for example, may use a counter to count bottles into groups of six
for packaging.
83

Figure 3.37 A bottling machine
Counters are represented by boxes in ladder logic. Counters increment/decrement one
count each time the input transitions from off (logic O) to on (logic 1). The counters
are reset when a RESET instruction is executed. S7-200 uses three types of counters:
up counter (CTU), down counter (CTD), and up/down counter (CTUD).
3.15.1 S7-200 Counters
There are 256 counters in the S7-200, munbered CO through C255. The same munber
cannot be assigned to more than one counter. For example, if an up counter is
assigned number 45, a down counter cannot also be assigned number 45. The
maximum count value ofa counter is ±32,767.
••
84

3.15.2 Up Counter
The up counter counts up from a current value to a preset value (PV). Input CU is the
count input Each time CU transitions from a logic O to a logic l the counter
increments by a count of I.Input R is the reset. A preset count value is stored in PV
input.If the current count is equal to or greater than the preset value stored in PV, theoutput bit (Q) turns on (not shown).
crucu
R
Figure 3.38 up Counter
3.15.3 Down Counter
The down counter counts down from the preset value (PV) each time CD transitions
from a logic O to a logic I. When the current value is equal to zero the counter output
bit (Q) turns on (not shown). The counter resets and loads the current value with the
preset value (PV) when the load input (LD) is enabled.
85

3.15.4 Up/Down Counter
The up/down counter counts up or down from the preset value each time either CD or
CU transitions from a logic O to a logic I.When the current value is equal to the preset
value, the output QU turns on. When the current value (CV) is equal to zero, the
output QD turns on. The counter loads the current value (CV) with the preset value
(PV) when the load input (LD) is enabled. Similarly, the counter resets and loads the
current value (CV) with zero when the reset (R) is enabled. The counter stops
counting when it reaches preset or zero.
ClUD
CD
cu RLI)PV
Figure 3.39 Up/Down Counter
3.15.5 Counter Example
A counter might be used to keep track of the number of vehicles in a parking lot. As
vehicles enter the lot through an entrance gate, the counter counts up.As vehicles exit
the lot through an exit gate, the counter counts down. When the lot is full a sign at the
entrance gate turns on indicating the lot is full.
86

Figure 3.40 Count Vehicles in a parking
Up/down counter C48 is used in this example. A switch, connected to the entrance
gate, has been wired to input IO.O.A switch, connected to the exit gate, has been wired
to input IO .1. A reset switch, located at the collection booth, has been wired to input
I0.2. The parking lot has 150 parking spaces. This value has been stored in the preset
value (PV). The counter output has been directed to output Q0.1. Output 2 is
connected to a "Parking Lot Full" sign. As cars enter the lot the entrance gate opens.
Input IO.O transitions from a logic O to a logic 1, incrementing the count by one. As
cars leave the lot the exit gate opens. Input IO .1 transitions from a logic O to a logic 1,
decrementing the count by 1. When the count has reached 150 output QO.1 transitions
from a logic O to a logic 1. The "Parking Lot Full" sign illuminates. When a car exits,
decrementing the count to 149, the sign turns off
•
87

C48ICU cruo
coI
lw!OJ}
I Iıu
00 oo.ı
I ( )
Figure 3.41 Ladder diagram of count vehicles in a parking
..
•
88

4. PRACTICAL
CONTROL A MOTOR WITH THE SIMATIC S7-200
Write a PLC program for S7 200, which starts a motor for 5 seconds and then turns itoff. This process is repeated twice and stops the process.
INPUTS
IO.O Push button for system turns onI0.1 Resetfor counter
Outputs
QO.O system onQ0 .1 motor output (on)
TIMERS
T37, T38 (Time on delay)
COUNTERS
CO, Cl, C2 (counter up)
•
88

1 //MOTOR CONTROL 2 II 3 //LADDER DIAGRAM 4 II 5 II 6 7 NETWORK 18 II 9 II 10 LD IO.O 11 o QO.O 12 AN co 13 = Q0.0 14 15 NETWORK 2 16 LD Q0.0 17 AN C2 18 AN T37 19 = QO.l 20 21 NETWORK 3 22 LD Q0.1 23 AN CZ 24 TON T37, +50 25 26 NETWORK 4 27 LDN Cl 28 AN Q0.1 29 TON T38, +50 30 31 NETWORK 5 32 LD T37 33 LD co 34 A IO.O 35 o IO.l 36 CTU co, +2 37 38 NETWORK 6 39 LD T38 40 LDN Q0.1 41 CTU Cl, +1 42 43 NETWORK 7 44 LD T37 45 LD T38 46 CTU C2, +1 47 48 NETWORK 8 49 MEND
•
89

MOTOR CONTROL
LADDER DIAGRAM
Network 1
IO.O
QOOr
Network 2
QO.O C2 T37 Q0.1
I 111 111 C)
Network 3
QO.l C2 T37
I I j I • ' IIN TONI +SO~PT"-----
90
•

Network 4
Cl QO.l T38
I I I l I ]IN TOl',ll+50 PT.____ _,
Network 5
T37 co
co
I cu CTU I
IO.O
I I I RI
+2- PVI
10.1
Network 6
ClT38jcu croI
•QO.l
J~ II I
91

Network 7
T37 C2
I fcu cm
T38
I J~Network 8
92
••

4.3 Applications of PLCs
We can find PLCs following applications
• Counting and Batching System
• Pick and Place Units
• Rejected machine System
• Production Line Control
• Start/stop Motor Control
• Motor Speed Control
• On/off Temperature Control
• Mixing Unit
• Car Wash System
93
•

CONCLUSION
In today's competitive world, a company must be efficient, cost effective and flexible
if it wishes to survive. In the manufacturing and process industries, this has resulted in
a greatly increased demand for industrial control system in order to stream line
operations in terms of speed, reliability, and versatility and material throughput.
Established control media including relay, logic and computer systems can do and
provide effective control of industrial process and plant. However each of the above
control media has limitations or disadvantages that may often be overcome through
the use of a programmable logic controller.
The increased rate of application of programmable controllers in the process industry
has encouraged manufacturers to develop whole families of available PLCs now
extends from small self-contained units with 20 digital input/output points and 500
programs steps up to sophisticated modular system with a range of add on function
modules for tasks such as analog input/output and communication. This modular
approach allows the expansion or upgrading of a control system with minimum coast
and disturbance.
Staff may operate most modern computer controlled devices with relatively little
knowledge of the underlying technologies that makeup the system, and programmable
controllers are at the forefront of 'user friendliness' in this respect. However it
requires a greater insight than this to select the best controller or control system for a
particular application and then to design successfülly and produce the necessary
control programs. The engineering requires an understanding of the operation and
capabilities of the different programmable controllers available, together with an
appreciation of common programming facilities and their use in various applications.
A modern programmable logic controller is a simple control system, which is easy to
use and versatile. Most automated factories employ programmable logic controllers in
the control of production and assembly processes.
94

REFERENCES
[l] ÖZGÜR CEMAL ÖZERDEM "Programmable Logic Controllers and
Programming' neu press, 2001
[2] Siemens Step 2000 Series "Basics of PLCsl'
[3] Siemens Step 2000 Series "Basics of Control Components"
[4] Siemens System Manual "Simatıc S7-200 Programmable Controller System"
ONLINE SOURCES
[1] www.google.com
[2] www.ask.com
[3] www.controlsystem.com
[4] www.siemens.com.uk
95