1 · web view2.9 media 10 2.10 standard software configuration 10 2.11 standard hardware...
TRANSCRIPT

SunScreen SPF-200 Design, Implementation and Maintenance Document – 4/7/98
SunScreen SPF-200
Design, Implementation, and Maintenance Plan
Wednesday, October 6, 1998
Revision 3.0
Abstract:
This document outlines the processes and procedures for the design, implementation, and maintenance of the Sun Microsystems SunScreen SPF-200 network security software system.
1

SunScreen SPF-200 Design, Implementation and Maintenance Document – 4/7/98
Table of Contents
1.0 INTRODUCTION.......................................................................................................................... 41.1 Background............................................................................................................................... 41.2 Purpose..................................................................................................................................... 41.3 Scope......................................................................................................................................... 41.4 Overview................................................................................................................................... 41.5 How to Use This Document........................................................................................................ 5
2.0 DESIGN...................................................................................................................................... 62.1 Product Description................................................................................................................... 62.2 System Architecture and Topology.............................................................................................62.3 Standard Operating Code (Versions Control).............................................................................72.4 Product and Service Availability................................................................................................72.5 Engineering Design Review Process..........................................................................................72.6 SunScreen Naming Guidelines...................................................................................................82.7 Addressing Guidelines............................................................................................................... 92.8 Bridging Protocols..................................................................................................................... 92.9 Media...................................................................................................................................... 102.10 Standard Software Configuration...........................................................................................102.11 Standard Hardware Configuration.........................................................................................102.12 Standard Operating Code (Versions Control).........................................................................122.13 Room Space........................................................................................................................... 122.14 Rack Requirements.................................................................................................................132.15 Power & Environmental Requirements...................................................................................13
3.0 IMPLEMENTATION..................................................................................................................... 143.1 Installation Tools..................................................................................................................... 14
3.1.1 Procedures to Build an Admin Station...............................................................................................143.1.2 Procedures to Build a Screen.............................................................................................................363.1.3 Adding a Screen’s to an existing Admin Station................................................................................40
3.2 Mounting................................................................................................................................. 423.3 Cabling.................................................................................................................................... 423.4 Labeling................................................................................................................................... 433.5 Configuration Procedures........................................................................................................43
3.5.1 SunScreen Operational Procedures....................................................................................................433.5.2 Web Interfaces..................................................................................................................................443.5.2 Configuration Style Guide.................................................................................................................453.5.2.1 Netscape........................................................................................................................................453.5.2.2 SAS_MAIN, SAS_MAIN.REAL and CO_MAIN...........................................................................483.5.3 Redundant SunScreen Configuration.................................................................................................51
3.6 Template Test Plan & Testing..................................................................................................523.7 Cut-Over Considerations.......................................................................................................... 523.8 SNM & NAMS.......................................................................................................................... 533.9 Outages/WIA............................................................................................................................ 53
4.0 MAINTENANCE......................................................................................................................... 554.1 Desktop Troubleshooting.......................................................................................................... 55
4.1.1 Troubleshooting Tools......................................................................................................................554.1.2 Problem Escalation...........................................................................................................................57
4.2 Network Management..............................................................................................................584.3 Map Icons/Menus..................................................................................................................... 594.4 Configuration and Performance Data Collection and Thresholds.............................................594.5 Failure Times........................................................................................................................... 60
4.5.1 MEAN-TIME-TO-REPAIR (MTTR).................................................................................................604.5.2 MEAN-TIME-BETWEEN-FAILURE (MTBF).................................................................................60
4.6 Password Recovery.................................................................................................................. 614.7 Recovery Scenarios.................................................................................................................. 61
4.7.1 To Recover From a Broken Screen....................................................................................................61
2

SunScreen SPF-200 Design, Implementation and Maintenance Document – 4/7/98
4.7.2 To Recover From a Broken Admin Station........................................................................................624.7.3 To Remotely Reset a SunScreen........................................................................................................63
4.8 Sparing.................................................................................................................................... 634.9 Time Synchronization...............................................................................................................644.10 Backups................................................................................................................................. 654.11 Logging and Log files............................................................................................................. 674.12 Change Process..................................................................................................................... 694.13 Hotline Customer Request Template.......................................................................................71
5.0 TRAINING................................................................................................................................ 726.0 DOCUMENTATION AND REFERENCES.........................................................................................73
APPENDICES:..................................................................................................................................... 74
A. COMMAND LINE INTERFACE........................................................................................................... 74B. SUN SOLARIS 2.5.1 HARDENING FOR SUNSCREEN ADMIN STATIONS...............................................75C. ETHERNET INTERFACE CONFIGURATION AND VERIFICATION...........................................................77D. CURRENT SUNSCREEN 100/200 SYSTEM DESCRIPTIONS..................................................................79E. SUNSCREEN SNMP MIB................................................................................................................79F. SUNSCREEN CMI SYSTEM SNMP TRAPS.........................................................................................81G. OTHER RESOURCES AND INFORMATION..........................................................................................96H. SUNSCREEN SPF200 THROUGHPUT TEST RESULTS.........................................................................96
1. SunScreen 167MHz Processor Testing.......................................................................................962. SunScreen 300MHz Processor Testing.......................................................................................98
I. Contacts/System Support.............................................................................................................. 101
3

SunScreen SPF-200 Design, Implementation and Maintenance Document – 4/7/98
1.0 Introduction
1.1 Background
The Sun Microsystems SunScreen SPF-200 is an IP-Only network security system that is described as a stateful dynamic packet filter. The SPF-200’s architecture has two primary pieces. There is a component that is known as the “Screen” that is the packet filter itself. There is also a component known as the “Admin Station” that remotely controls the Screen with the use of an encrypted link. The Admin Station runs commands on the Screen with windows-based interfaces, and a web browser. There are also command-line utilities that can perform all of the functions that can be performed with the Windows tools. The encryption method that is used is known as SKIP (Simple Key-Management for Internet Protocols). These two types of systems work together to create a security system that has high performance, a high level of security, and is highly scaleable.
1.2 Purpose
The purpose of this document is to certify that the SunScreen SPF-200 network security system satisfies all of the requirements for use within the computing and networking environments.
The purpose of the SunScreen SPF-200 is to provide network security for the company Security Perimeter. These systems filter packets based on its configured to guarantee that the security policies of company are enforced.
1.3 Scope
This document’s scope includes discussion of the SunScreen SPF-200 software. This document details the design, planning, installation, and maintenance required to fully support the deployment of SPF-200 systems in the company security perimeter.
Even though this document contains references to the Sun Solaris operating system and the Sun UltraSPARC line of computers, it does not attempt to fully describe these items. These items are beyond the scope of this document. References made to Sun hardware and operating systems are purely made in order to support the SunScreen SPF-200 software. The use of Sun hardware and operating systems are merely a requirement for the functioning of the SunScreen SPF-200 software. This document is not attempting to certify the Solaris operating system for use within company.
1.4 Overview
This document is broken into three primary sections, namely: design, implementation, and maintenance. The section on design focuses on larger topics related to the SunScreen SPF-200s. This is where documentation of the overall architecture for the SPF-200s is described. The implementation sections provide details on how to install and configure the SPF-200s. Since the configurations of the SPF-200s are vital to the security of the network, this section is of the utmost importance. The maintenance sections deal with the operational aspects of the SPF-200s. These sections describe how the systems can be supported in their production role of
4

SunScreen SPF-200 Design, Implementation and Maintenance Document – 4/7/98
providing network security to the company networks. The appendices provide additional reference information that is important to the operations of the SPF-200s.
1.5 How to Use This Document
This document is meant to be a living document and will be constantly changing as the implementation of the SunScreens changes over time. Because the information within this document will change as new processes, procedures, and software releases are available, this document will need to be kept current.
This document is also intended to be the primary training material for learning about how the SPF-200s are implemented and maintained within company.
5

SunScreen SPF-200 Design, Implementation and Maintenance Document – 4/7/98
2.0 Design
2.1 Product Description
The SunScreen SPF-200 security solution is an IP Only network perimeter defense system. Its strength is in stealthing which means that no IP address is used or seen on it interfaces. Stealthing makes SunScreen SPF essentially impenetrable from the Internet because an intruder cannot address the machine. The SunScreen SPF product also scales to a level that supports high-speed, secure communication over the Internet.
The SunScreen SPF Solution offers stealthing to help protect an organization from network attacks. The SPF-200 system supports 100Mbps interfaces and supports a multithreaded encryption engine (SKIP) to meet high-end needs. The SPF-200s also offer remote administration. The system that performs the packet filtering is located in the data-center while the system that is used to perform configuration can be located anywhere on the internal network. There is an encrypted link between what is known as the Admin Station and the packet filter (Screen or SunScreen).
We have modified to architecture to include a configuration management server to help assist in the maintenance of the SunScreens. We have also created a system on keeping the rulebases on the SunScreens synchronized through the use of a common SunScreen.
The stealth design which makes SunScreen SPF not addressable with an IP address provides two benefits. First, stealthing makes a SunScreen SPF system more secure because potential intruders can not address the machine running SunScreen SPF, possibly compromising the machine. Second, installation of SunScreen SPF into the network is easy since the administrator can install it without changing routing tables. The stealth design "hardens" the OS and turns the system into a dedicated SunScreen SPF system that only runs SunScreen SPF. Hardening the OS enhances security. Since other applications do not run on the system, there is less exposure. SunScreen SPF systems use a separate administration station that can be any SPARC machine and need not be dedicated.
SunScreen SPF covers both TCP and UDP services (IP-Only). In regards to UDP, SunScreen SPF maintains state to improve security and performance. The SunScreen SPF allows flexibility in logging what has passed or failed through the screen. To provide additional protection for the internal network, Network Address Translation (NAT) converts internal (locally administered/private) addresses to public addresses. NAT supports both static and dynamic translation of internal addresses to public addresses. Since outsiders do not know the internal addresses of hosts, attacks are minimized.
2.2 System Architecture and Topology
The architecture and topology was previously detailed in the “Security Perimeter Architecture” BENTAG OA 13.1 (04/23/97). This document details the security requirements and recommendations for the use of packet filters on the company Security perimeter. This document will serve as the model with which the SunScreen SPF-200s are designed and implemented.
6

SunScreen SPF-200 Design, Implementation and Maintenance Document – 4/7/98
2.3 Standard Operating Code (Versions Control)
The current version of the software is SunScreen SPF-200 Version 1.0. This is the most current release of the software from Sun Microsystems. There will be upgrades to this product and these may be available after the first quarter of 1998. The version of the Solaris operating system that is used for the Admin Stations is Solaris 2.5.1 (8/97). Patches are then loaded to bring this configuration to the current standards. We will migrate to Solaris 2.6 when we have fully tested it within laboratories to not have adverse security effects.
As for version control, we are developing a change control and revision control process that will help us maintain versions for the various configurations for the SPF-200s. These SunScreen version control systems are described below.
2.4 Product and Service Availability
The SunScreen SPF-200 system is available from Sun Microsystems. The company currently has Platinum service support contracts on all of the hardware and software for the SPF-200 systems. This support level gives company access to round-the-clock support for both the hardware and software. The company also has access to service and support personnel through the SunService program. The channels for support are by phone, e-mail, and web. These contacts and contract numbers are listed in the Appendices of this document.
2.5 Engineering Design Review Process
For the SPF-200s, all design will be required to go through the Design Review Board (DRB). Once approved by DRB, the standard InterNet Change Board (ICB) approval will be required. Standard engineering design process will be followed. These procedures might even include a presentation to the Central Site Design (CSD) Review.
Below is the DRB process as it is defined in the weekly minutes of the DRB.
Submittal requirements:
Reviews are scheduled and conducted Mondays at 08:30 a.m. Approved designs are delivered to the Internet Change Board Chair-person. DRB chairman or alternate is to be contacted directly if an emergency external access review team session is required.
Submittal criteria remains as follows:1.) A complete package consists of :a.) Four copies of the proposed design, and one additional copy in view foil for each sheet.b.) Security representative is required to review designs.c.) An external access bridge and router form must be completed to include: planned installation dates. if responding to an open ticket fill in space for criticality. all portions of the form complete with signatures include all networks/systems affected. router/bridge configuration, all changes bolded and underlined. new service must include before and after illustrations.d.) A complete/proposed services support agreement.The chairman will sign all approved packages and/or contact the proposer on packages not approved within twenty four hours of submittal.
7

SunScreen SPF-200 Design, Implementation and Maintenance Document – 4/7/98
Note: For presentation purposes to the DRB…Make a presentation package (one copy) with foils. Once approved (if changes are necessary) provide a clean package for final signature by DRB chair and follow the procedure above.
Note: working areas - (i.e. 24 hour notice for outages outages five business days, scheduled ahead anytime in advance)
e.) Router configurations that are unique for external access, will be published and distributed in related technical bulletins through DNI.
2.) External access designs that don’t require company Internet access are proposed to be reviewed based on the following criteria:a.) One copy of the proposed design.b.) Designs must have security site focal sign off.c.) Non-standard products must have entered the system through the external communications process, and logged with product management for a requirements review.d.) A complete proposed services support agreement.
Note: DRB chair is responsible to hand the ICB the design packages and provide one copy to GDN for the map builds.
After the above-detailed process is followed and signed off on, the system can be put in place.
It is also important to mention the existence of the “Packet Filter Panel”. This is a group with regular weekly meetings that discuss SunScreen changes and review the rulebases in the SunScreen. This is a type of change board that focuses on maintaining the SunScreen and ensuring that they provide consistent and reliable service for the multiple company perimeters.
2.6 SunScreen Naming Guidelines
In the past we have used a naming convention that has not scaled well with the growth of the company security perimeter. In the past, the naming convention that we have used started with the letters “ss-“ to signify SunScreen(SS). This was followed by the type of system it was (Either “spf” for SunScreen, or “admin” for administration station) and ending with a unique number. Below is the old naming convention followed by examples.
ss-<System_Type>-<Number>
Example:ss-spf-2ss-admin-5
(Further examples can be found in Appendix D)
The current and future naming convention for SunScreen SPF-200 systems start with the company 3-letter site location code. This is then followed by a dash, the letters “spf”, another dash, and a unique 2 digit number. Below is the new naming convention followed by examples.
<Site Code>-spf-XX
Example:blv-spf-01stl-spf-01
8

SunScreen SPF-200 Design, Implementation and Maintenance Document – 4/7/98
slb-spf-01
Note: The new naming convention does not differentiate between Admin Stations and SunScreens. Initially, the only Admin Stations for the SPF-200s will be located at the Bellevue location. The new Bellevue Admin Stations will have names that follow the following naming convention:
<Site Code>-spfadmin-XX
Example:blv-spfadmin-01stl-spfadmin-01slb-spfadmin-01
The use of naming conventions that were similar to the company standardized router naming conventions was considered for use by SunScreens. However, due to the small numbers of SunScreen packet filters that will be deployed, the above-mentioned naming convention was chosen.
For the common configuration SunScreen, we use the name:
Blv-spfcommon-01
For the configuration management server, we selected the name:
Blv-spf-config.ns.cs.company.com
Both these names are scalable if the need arises to change the architecture and have multiples of these systems with these functions.
2.7 Addressing Guidelines
We use TCP/IP addresses for the SunScreen’s administrative interface and the Admin Station’s Network Interface Card (NIC). The TCP/IP address is not important, so long as there is network connectivity between the SunScreen and the Admin Station so that they can communicate via their SKIP encrypted link.
The SunScreen should be given an IP address that is on a more trusted network than its external interface points towards. In fact, this network should have an IP address that is located on the company intranet. In order to provide the maximum security for the SunScreen and its encrypted SKIP link, these packets should flow over the company intranet. This will be the case even when remote security perimeters are deployed.
Since the SunScreen acts like a bridge (its NICs do not have IP addresses) the only NIC that needs an IP address is the one that will be used for encrypted SKIP communications to the Admin Station.
2.8 Bridging Protocols
The SunScreen SPF-200s do not perform traditional bridging functions. Even though the network interfaces are forwarding packets based on MAC address that the SunScreen has learned from listening to ARPs, it is not running the 802.1d spanning tree protocol. The SPF-200’s NICs do not send out BPDUs or explorer packets to find other bridges or hosts.
9

SunScreen SPF-200 Design, Implementation and Maintenance Document – 4/7/98
Because the SPF-200s do not run the spanning tree algorithm, they can not be placed back to back or along-side each other. This configuration can produce bridging or routing loops and cause problems for network traffic. Therefore, the redundant designs have been architected to take this into consideration. These redundant designs are mentioned below.
2.9 Media
The media that the SPF-200 SunScreen systems use is standard Ethernet. This includes 10BaseT – Ethernet that uses Category 3 copper cables, and 100BaseTX - Fast Ethernet that uses Category 5 copper cables. These connections utilize the 10/100 Sun Microsystems HME NICs with speed/mode auto-negotiation. We discuss more about this later on in this document when we discuss how to over-ride the auto-negotiation. The SPF-200s then plug into either Cisco Catalyst 5000 switches, or Synoptics hubs.
2.10 Standard Software Configuration
The standard software configuration is already preprogrammed with the configuration of the SunScreen and the Admin Station. In the implementation sections of this document we detail the standard build steps for both Screens and Admin Stations. When the Screen is built, it configures itself from the Sun-provided CDROM. This process cannot be interrupted and it produces a computer system that has been hardened from a security standpoint. Since we make very few modifications to this (detailed in the configuration sections of this document), we are essentially working with the standard version.
2.11 Standard Hardware Configuration
The desired configuration for a SunScreen SPF-200 system is as follows:
Ultra SPARC 2 EnterpriseSuperScalar SPARC™ Version 9, Ultra SPARC-I 167 MHz (or 300MHz)Quad hme network interfaceOne CD-ROM drive2 X 2.1 GB disk drivesNo monitor, keyboard, or mouse is required for the Screen
Below is a diagram of the back of this UltraSPARC 2 system.
10

SunScreen SPF-200 Design, Implementation and Maintenance Document – 4/7/98
The hardware configuration for a SPF-200 Admin Station is quite a bit more lenient. The basic requirements are for a SunSPARC system that runs at least the Solaris 2.5 operating system and is capable of powering the graphical interfaces needed to communicate with the SunScreens. The system should also have enough horsepower to quickly encrypt and decrypt messages exchanges with the SunScreen via the SKIP link. Therefore, we are standardizing on the following configuration:
Ultra SPARC 1 CreatorOne CD-ROM drive1 X 2.1 GB disk driveSun monitor, keyboard, and mouse.
Below is a diagram of an UltraSPARC 1.
11

SunScreen SPF-200 Design, Implementation and Maintenance Document – 4/7/98
2.12 Standard Operating Code (Versions Control)
The version of the Solaris operating system that is recommended for the SunScreen SPF-200 Admin Stations is Solaris version 2.5.1. This is the software that the SunScreen is based on and the Admin Stations will have this version of the operating system. We have developed hardening procedures for the Admin Stations and these can be found in Appendix B. However, the SunScreens themselves will have their own operating system version that is not user-controllable. This is because the system is build when the SunScreen software is installed. The kernel is hardened and the operating system is stripped of software that could make the SunScreen vulnerable to security attacks. For this reason, the SunScreen’s operating system is actually a proprietary installed kernel that cannot be changed by the administrator.
2.13 Room Space
The SunScreen SPF-200s require only a small amount of rack space. Since a monitor is not required and the keyboard and mouse are optional, the systems are fully rack mountable. This is the way that the Screens are meant to be deployed. The SunScreens do not have mounting brackets, but are supposed to be supported by a shelf that can be rack mounted. The width of the SunScreen SPF-200 system UltraSPARC 2 should be capable of fitting comfortably into a 19” rack. Since the floppy and the CDROM drive will eject out the front, this should be an acceptable mounting method.
Here are the UltraSPARC 2 dimensions:Height - 13.0 cm (5.12 in.)Width - 45.0 cm (17.72 in.)Depth - 45.2 cm (17.94 in.)Shipping weight - 12.27 to 15.88 Kg (27.0 to 35.0 lb.)
Less without the monitor, keyboard, mouse, …
12

SunScreen SPF-200 Design, Implementation and Maintenance Document – 4/7/98
The Admin Stations require desk space sufficient to contain the Admin Stations itself, the large Sun Monitor(CRT), keyboard, and mouse.
2.14 Rack Requirements
Key physical specifications - Environment requirements (i.e., footprint, weight) provide a great deal of flexibility equipment location.
The below-listed dimensions show that the SunScreen can be rack mounted on a shelf in either a 19 inch or 23 inch rack.
UltraSPARC 2 dimensions:Height - 13.0 cm (5.12 in.)Width - 45.0 cm (17.72 in.)Depth - 45.2 cm (17.94 in.)Shipping weight - 12.27 to 15.88 Kg (27.0 to 35.0 lb.)
Less without the monitor, keyboard, mouse, …
Note: Admin Stations are not designed to be rack mounted and will be located on a desk for ease of use. The Admin Station could be rack mounted, if there were shelves or systems to handle the inclusion of the monitor, keyboard, and mouse in addition to the CPU.
2.15 Power & Environmental Requirements
The SunScreen SPF-200 systems with the UltraSPARC 2 Enterprise footprint will have the following power requirements.
Input Voltage, AC power supply 100 to 240VACCurrent 0.4 K VAFrequency 47 to 63 HzPower dissipation 180W (max.), 135.5 BTUs/hr
The environmental requirements for this system should be the same as a standard PC or other small host computer.
13
SunScreen SPF-200 Design, Implementation and Maintenance Document – 4/7/98
3.0 Implementation
3.1 Installation Tools
3.1.1 Procedures to Build an Admin Station
These are the procedures to build a SunScreen Admin Station from the ground up. These are also the procedures that would need to be performed to recover from a failed Admin Station or to add a new Admin Station to an existing set of systems.
Before you begin, it is important to have all of the resources necessary to create an Admin Station. Below is a list of the things that are required for installation.
Admin Station’s ERMS number.Admin Station's IP address. (Get from NAMS – put in ns.cs.company.com domain)Network (drop) cable in place.The IP address of the default router.The IP addresses of the DNS servers to use.Admin Station’s hostname.IP address of network time servers that you want to use.What SKIP encryption parameters you will want to use.Install media for:Solaris 2.5.1 (11/97) SunScreen SPF-200 CDsSKIP (US/Canada Domestic North America Upgrade)Netscape (Any version)SunScreen Jumbo Patch install diskette (105047-17)
You need to start with a Sun computer and load the Solaris 2.5.1 (equivalent to SunOS 5.5.1) operating system on it. This is done by following the procedures. You need to insert the CD into the computer and turn it on to boot from the Solaris 2.5.1 (11/97) CD. However, to get the CD into a computer that is turned off, will require some additional steps. You can turn on the system, and quickly press the eject button on the CDROM drive, insert the CD and press “Stop-A” (This is done by pressing the “Stop” key on the left side of the keyboard and then the “A” key and holding them down at the same time for an instant.)
Note: If the system does not automatically boot from the CD then, at the “OK>” prompt enter
boot cdrom
If the system already has Solaris on it and you want to do a clean install then, as root, type halt or use the “Stop-A” technique mentioned above to get to the “OK>” prompt. To get to the OK> prompt, you can press “Stop-A”.
Once the OS installation has begun, you need to click on the “continue” button to continue and press continue once more until prompted for the hostname. You will be asked for the hostname of the system you want to create. The naming standard set thus far is detailed above in Section 2.6. Select “hme0” as the primary network interface. You should answer “Yes” to the question of the computer being networked and enter the system’s IP address. You will then click Yes-Ok to enter the IP address, click “continue” when done with that selection, and click “OK” once you select “other” as the name resolution method (do not select NIS or NIS+). You will need to click
14

SunScreen SPF-200 Design, Implementation and Maintenance Document – 4/7/98
on “continue” to confirm the selection of “other”. You will need to click on “continue/Yes” and agree that this network is part of a subnet. The standard subnet address is “255.255.255.0”. The time should be assigned by “geographic region” equal to “US – Pacific”. Make these selections and click continue to move to the next configuration question. Check the date for correctness and press “continue”. You should choose to perform an “Initial” installation and choose a system type of “standalone”. When prompted, you should select to install the “Entire Distribution plus OEM support”. You should then add all "Available Disks" to "Selected Disks". Do this by highlighting the disk drives in the left column and clicking on the “add” button to move them into the area on the right. This document assumes there is no data to preserve so select “continue”. You should choose “Autolayout” as the type of disk partitions. You should also click on all of the partition types and create all file-systems (/, swap, /usr, /opt, /usr/openwin, and /var). Make sure that all of the selected file-system types have been highlighted (dark). You should then choose to “customize” the partition table, and do that in the following way.
On a two disk system use the following settings
Disk 1/ 42 MBswap 128 MBoverlay 2048 MB/usr/openwin 200 MB/var 500 MB/usr 590 MB/tmp 300 MB-------------------------------Free 265 MB
Disk 2/export/home 200 MBoverlay 2048 MBswap 128 MB/opt 1024 MB-------------------------------Free 675 MB
This dialog box will be used to configure and customize the file-system disk partitions for this Admin Station. You will need to delete certain partitions by highlighting the text and sizes and using the delete key or type over the entries to customize them. Note that the “tab” key does not work like it may work on other systems. The best way is to use the mouse to select the different cells within the tables. You don’t need to be concerned with the order of the partitions, but make sure not to change the “overlay” partitions. You will also notice that you will first need to delete partitions to free up space so that the size of other partitions can be increased. An error message will appear if you are trying to over-allocate disk space. Note: Be careful that the partition on disk 2 “/export/home0” should be removed in favor of creating one called “/export/home”.
Select “OK” when you are done with the partition table. Click “continue” when it mentions that there is unused disk space on the drives. You should also choose to bypass mounting remote systems and then select to begin the installation of the operating system. Click on “begin installation” and ignore further warnings about unused disk space. One last thing that you will be prompted for is to choose to reboot the system. After the system reboots enter in root's password. If you desire, you can modify root’s default login shell in the /etc/passwd or make any other reasonable modifications to suit your tastes. You will want to change the root shell to be /bin/ksh.
15
SunScreen SPF-200 Design, Implementation and Maintenance Document – 4/7/98
Now is a good time to add the IP address of any Screens and other administration stations required to the /etc/hosts file. Below is a sample of what that table might look like:
## Internet host table#127.0.0.1 localhost192.168.139.202 ss-admin-5 ss-admin-5.ns.cs.company.com loghost#192.168.51.43 ss-admin-3192.168.5.28 ss-admin-6192.168.139.129 ss-admin-test1##192.168.51.31 ss-spf-4192.168.51.42 ss-spf-5#192.168.21.4 blv-spf-01192.168.21.7 blv-spf-02192.168.51.10 blv-spf-04192.168.21.10 blv-spf-05192.168.70.154 blv-spf-06192.168.56.7 blv-spf-10192.168.21.18 blv-spfcommon-01192.168.139.119 blv-spfcommon-01a#192.168.13.11 slb-spf-01192.168.13.12 slb-spf-02192.168.13.13 slb-spf-03#192.76.190.11 stl-spf-01192.76.190.12 stl-spf-02192.76.190.13 stl-spf-03#192.168.51.21 intruder192.168.28.12 splinter.company.com # company mail server192.48.21.15 blv-spf-config blv-spf-config.ns.cs.company.com config
After the OS is loaded, you will need to add a default route with the command:
route add default <Router’s_Nearest_Interface_IP_Address> 1
Example: If the Admin Station's IP is 131.49.129.45 then the router IP is 131.49.129.1The syntax of using the “<” and “>” should not be read literally. This is true throughout this document.
This will get the system started, but the system will lose this configuration after a reboot. Therefore, you should also create a file named “/etc/defaultrouter” that contains only the IP address of the default router. The system will look for this file when it reboots in order to retain this information. A good way to do this is to
echo “Router's IP address” > /etc/defaultrouter
Note: You will need to install perl 5.03 or greater on the Admin Station. It is possible to tar up the distribution from another Admin Station and move it to this new Admin Station. Don’t forget to make the appropriate symbolic links.
16

SunScreen SPF-200 Design, Implementation and Maintenance Document – 4/7/98
At this point, it is time to install the SPF-200 software. You will want to insert the CD (labeled Solaris SunScreen SPF-200 install disk – Global Version) into the drive, login as root, and run:
volcheck
Then change directories.
cd /cdrom/cdrom0/s0/Solaris_2.5.1_SunScreen
The command you will want to run to install the software is:
/usr/sbin/pkgadd -d . SICG* SUNWicgSA
You should answer “Yes” to continue and continue to answer Yes to all questions. When it is done installing the software, you should:
cd /eject cdrom
Then reboot the computer by typing:
init 6
The SunScreen SPF-200 software is then installed.
An additional step in the configuration of an Admin Station that will be accessing domestic US and Canadian SPF-200 Screen’s is to install the SunScreen SKIP upgrade. This upgrade will allow the Admin Station to use stronger authentication (keys > 512 bytes) for SKIP links to Screen’s. This is required for all Admin Stations currently being implemented. To install this software, you will want to insert the CD into the drive, and change directories.
cd /cdrom/cdrom0/sparc
To install the software, you will run the command:
/usr/sbin/pkgadd -d ‘pwd’
Note: Single quotes around pwd are actually back tics and are used to resolve the “pwd” (print working directory) command in the install. Make sure the back tics around pwd expand the command into the command line. You will want to answer “all” to the question of which modules you want to install. Then, when it comes back with the prompt, answer “q” to quit out of the installation. The SKIP domestic upgrade software is now installed.
As mentioned above, it is important to add systems to the “/etc/hosts” file. The IP address of the Screen’s administrative interface and other systems should be in here. The Admin Stations should resolve DNS names at this time so this file is essential to a properly functioning Admin Station. You will need to reboot the Admin station when this is complete. Since DNS is required and helpful for Admin Stations, then you should create a file named “/etc/resolv.conf” and fill it with the following contents.
; sample /etc/resolv.conf; Name serverssearch ns.cs.company.com. ca.company.com. company.com. ds.company.com. ks.company.com. cs.company.com.;nameserver 127.0.0.1nameserver 192.168.5.12
17
SunScreen SPF-200 Design, Implementation and Maintenance Document – 4/7/98
nameserver 192.168.5.14nameserver 192.168.28.11
You will also need to modify the “/etc/nsswitch.conf” file. The hosts line needs to be modified in the following way.
hosts: files dns
This tells the computer to look up hostnames using the /etc/hosts file first, and if it doesn’t find its answer, to then use DNS for resolving the name to an IP address.
It is a good idea to put all other SPF-200 Screens and Admin Stations in the /etc/hosts file with their appropriate names. This way, you can refer to other SPF-200 systems by name and not IP address
If you want to improve the command-line interface for the Admin Station when logged on as root, you will want to put certain directories into the search paths. As mentioned above, you should change the default login shell for the user root in the /etc/passwd file and make the appropriate changes to the .login, .profile, .kshrc files. You should copy a .profile for the root user on the Admin Server. This is done with the use of the command:
cp /etc/skel/local.profile /.profile
This file will need to be edited with VI and the PATH and the MANPATH should be updated with these directories. (You may also want to set “export EDITOR=vi”)
stty istripstty erase '^H'PATH=/opt/SUNWicg/SunScreenAdmin/bin:/usr/bin:/bin:/usr/sbin:/usr/ucb:/etc:/opt/nav:/opt/SUNWicg/bin:/usr/openwin/bin:/opt/bin:/opt/gnu/binMANPATH=/usr/man:/opt/SUNWicg/man:/opt/SUNWicg/SunScreenAdmin/man:/opt/perl/manexport PATH MANPATHexport EDITOR=viset -o vialias ll='ls -l'PS1="`hostname`# "alias opt='cd /opt/SUNWicg/SunScreenAdmin/bin'
Be sure to remove the “.” at the end of the PATH statement. This will prevent the root user from being used for security breaches.
You can also do a “set –o vi” to set the editor to vi for command line editing.
You should then enter ksh by typing:
ksh
You can then run the new .profile by typing:
. /.profile
At this point, you should be able to perform man commands and execute commands without having to be in the directory of the command.
18

SunScreen SPF-200 Design, Implementation and Maintenance Document – 4/7/98
These above procedures may change if we build a depot server. These files will then be downloaded (FTP) to the Admin Station in an automated way.
Another step should be to comment out (with adding a “#” at the beginning of the line) the “#Console=/dev/console” line in the file “/etc/default/login” on the Admin Station. This permits the root user to telnet or login from other locations. This line must be re-instated when the server is fully functional and goes through the hardening phase developed later on.
You should also create user accounts for the various administrators that need access to the system. Two of these accounts should be created for each administrator. The first one is a normal user account that has a login name of the users three initials. The second account will have the name “root_xyz” where “xyz” are the administrators three initials. This second account should have UID=0.
The next step in configuring a SunScreen Admin Station is to start to configure the SKIP connection that will be used to talk to the Screen. SKIP is the encryption system that is used to create secure communications between Admin Stations and Screens. SKIP version 1 packets are used with the SPF-100s and SKIP version 2 is used with SPF-200s. SKIPv1 packets are IP packets of type 79, and SKIPv2 packets are IP packets of type 57. There are five key components necessary to make a SKIP connection function.
1. A key size is required (512, 1024, or 2048). – 2048 is the preferable key size for company.2. A type of certificate - signed (Verisign - not used at company), Unsigned Diffie-Hellman
(UDH).3. An encryption algorithm (kij - DES EDE), (data - rc2-40, rc4-40, des-cbc), and (mac - MD5
hash of Diffie-Hellman public value key ID).4. Time synchronization each hour.5. Tunneling permitted on each end of the communications.
These parameters need to be consistent on both ends of the SKIP connection in order for communication to take place. However, different types of links can be used within the same system (Admin Station) to different systems (Screens). There will be a several to many relationship between Admin Stations to Screens.
Note: Typically, the defaults are to be taken on the installation, unless otherwise noted.
To start the SKIP configuration process, SKIP must be enabled on the desired network interface. This is done with the “skipif” command. Use the following command to enable SKIP:
skipif –a
SKIP is now enabled on all network interfaces currently plugged in. You should type:
skipif -l -v
to verify the SKIP configuration of the system’s network interfaces. The output of this command may only show hme0 (the port on the motherboard of the Sun computer) if that is the only network port that is currently plugged in. After running these commands, the system should be rebooted. This can be done with the “reboot” command.
reboot
One of the first steps to configuring a SKIP connection is the creation of the system’s key. This is done with the use of the following command:
skiplocal keygen
19
SunScreen SPF-200 Design, Implementation and Maintenance Document – 4/7/98
As already mentioned, a new key can be created for the Admin Station by running the command “skiplocal keygen”. When using this program, you should follow the prompts to create the appropriate type of key. The default modulus (key) size will be 2048 bit key, DES-EDE-K3 key algorithm, MD5 mac algorithm, and DES-CBC as the data algorithm if you have installed the SKIP domestic upgrade. Just follow the directions and prompts for this command for entering key strokes to make the keys more random if you want.
You should type the following command to show the key that has been generated:
skiplocal export
As mentioned above, you can run the command “skiplocal export” to see the command and the key to run on the remote systems you want to establish a SKIP connection with. The important part of this output to note is the Admin Stations public key sequence. The important part comes after the “-R” parameter and starts with “0x”. After this is done, a reboot of the Admin Station is necessary.
The output of the “skiplocal export” command is a skiphost command that can be run on the remote system to enable communications. However, the method we will use to manually exchange keys between the Admin Station and future Screens involves the use of graphical utilities. The skiphost command is the manual way to configure SKIP connections. Instead, we will be using other graphical tools that are easier to use. To establish the SKIP connection, the remote system will need to know the local system’s key and visa-versa. Again, this is the manual approach to creating a SKIP connection. The system should be rebooted after the “skiplocal keygen” and “skiplocal export” commands are run.
reboot
After the system reboots, you can run the “skipif -l -v” command to view the SKIP interface configuration of the Admin Station. This output will list both the Receiver ID (Screen’s public key) and the Sender ID (Admin Station public key) when the SKIP link is configured properly.
If you are building a fresh Admin Station that will be used to configure a new Screen, then this is all that needs to be completed for the SKIP configuration. There are more tasks that need to be done to fully configure the Admin Station, but, as for SKIP, this is it. Eventually, when you go to build up a Screen (Chapter 3.0) you will run the “spf_admin_install” command. (Note: Don’t run this command now, we are just describing the process at this point to show you where this is all headed.) This command will put the Admin Station’s public key on the installation diskette that will be used to configure the Screen. The Screen will then know the Admin Station’s public key and the SKIP link will be setup that way. You will want to continue these steps below with the installation of Netscape and making other modifications to the Admin Station.
SKIP connections are created when keys are exchanged between systems. When the Admin Station creates the installation diskette for a Screen, it puts its own key somewhere on that disk. When the Screen gets installed, then it knows about and permits communications between itself and the Admin Station. The Screen also keeps a registry of which Admin Stations it wants to talk to. This is maintained through the use of the “sas_registry (screen name)” graphical tool. The use of this command is explained below.
The Admin Station also has the ability to enable or disable the Certificate Discovery Protocol (CDP) on the Screens. This is done with the Netscape tool on the default rules page. When this is enabled, systems will automatically exchange their public keys to start SKIP communications. The Certificate Discovery Protocol is enabled by default, and nothing needs to be done with this configuration option.
20

SunScreen SPF-200 Design, Implementation and Maintenance Document – 4/7/98
However, If you are building up an Admin Station to work along side other existing Admins, you should perform the following steps. At this point, from an existing Admin Station, you can run
sas_registry <Screen_Name> &
to put this new Admin Station’s public key into the Screen’s configuration. (Example “sas_registry ss-spf-4”) You will want to add a new entry that has the name of the new Admin Station, define it as a “peer” system with the appropriate key types (always Diffie Hellman (8)) and the Admin’s Key into the dialog box. Click “save” when this is done. You will also need to add the new Admin Station to the “admin-group” with the sas_registry tool. Select the admin_group and click on the Admin entry you just added followed by the add button “->” arrow to add it to the group. When this is done, you will want to click on “save”. To exit the sas_registry tool, simply click on “cancel”. The Screen has now been configured with the public key of the new Admin Station you are building up.
The next step in configuring SKIP on a new Admin Station is to run
skiptool &
on the Admin Station itself. Skiptool provides a method for an Admin Station to control which Screens it talks to along with other non-SKIP hosts, networks, and nomadic systems. This tool should have “access control enabled” and can be used to configure SKIP connections. Go ahead and add any other items that the systems recommends. We will want to add a new host of the skip variety which will be the Screen. (Note: that this step is only required if the Screen already exists.) To do this, you will want to click on the “add” menu at the bottom of the dialog box, select host, and type “skip”. A dialog box will appear where you will enter information about the Screen that this Admin Station will be monitoring. The name of the Screen is required for both the name and the tunnel IP address. If the Screen has been entered properly into the /etc/hosts file, this will work fine. The “whole packet” should be selected, the Screen’s key should be entered, the local Admin’s ID will be loaded automatically, and the appropriate key types should be selected followed by clicking on the apply button. Again, this is DES-EDE-K3, MD5, and DES-CBC for SKIP links that will be using the SKIP domestic upgrade. It is important to mention that hosts can be added as authorized hosts (Off or not using encryption). If you want to telnet to this Admin Station from any other system, you should also add a host of type “Off” with the name “default”. After all this, it is very important to click on the “Save” menu option to save this configuration. If you want to check the configuration of the SKIP link, you can run:
skipif -l –v
You can also test that the SKIP connection is functioning properly by running:
ss_client <Screen_Name> ss_traffic_stats
This command will send back the Screen’s traffic statistics to the Admin Station over the SKIP connection. To begin to configure the Screen over the SKIP connection you can run:
sas_main <Screen_Name> &
Netscape (Version 2.0 or later) will need to be loaded on the Admin Station because it does not come with it by default. Any version seems to be acceptable. To do this, insert the Netscape Fast-Track Server CD into the drive and:
cd /cdrom/cdrom0/solaris/nav
You should make a directory to put the software. This can be done with:
21

SunScreen SPF-200 Design, Implementation and Maintenance Document – 4/7/98
mkdir /opt/nav
cp *.tar /opt/nav
To move the tar file to the new directory we just made the following commands should be entered. To extract and install the software, type the follwing:
cd /opt/nav tar -xvf nav202.tar
To run Netscape now, simply type:
./netscape &
You can put this /opt/nav directory into the appropriate paths to make it easy to run. Any other method of loading a Netscape browser on the Admin Station would also be acceptable. However, we want to standardize on having the command “/opt/nav/netscape &” run the Netscape browser. This can be done with the use of a symbolic link. This looks like:
mkdir /opt/navln –s /opt/netscape2.0.2/netscape /opt/nav/netscape
It is important to load the SunScreen Jumbo patch (105047-17) on the Admin Station as well as the SunScreens (we will talk about loading it on the SunScreens in 3.1.2). You will need to insert the install diskette into the floppy drive and type:
volcheck
Then type the following:
cd /floppy/floppy0/Patches105047-17/installpatch 105047-17cd /eject floppy
One change that needs to be made to all Admin Stations is a modification for Sendmail to function properly. The file that needs to be modified is the “/etc/mail/sendmail.cf” file. It is best if this file is taken from a certified source (another Admin Station) and overwritten on top of the original “/etc/mail/sendmail.cf” file. This configuration will force outgoing mail from the Admin Station to automatically be sent to the server “relay.company.com” and be properly sent to its destination. In order for this to take effect, the Sendmail daemon must be restarted. Once this is done, the change will take effect.
ps –ef | grep sendmail
Take the process ID of the Sendmail process and use it as a parameter for this next command.
kill –HUP <ProcessID>
The Admin Stations need to have accurate system clocks. This is done by making a modification to the root crontab file on the Admin Station. You can use “crontab –e” while logged in as root and add the following line at the end of the file.
crontab -e
0 0 * * * /bin/rdate blvnts.services.company.com > /dev/null 2>&1
22

SunScreen SPF-200 Design, Implementation and Maintenance Document – 4/7/98
It is also important to remember that you need to add an entry to the time server in skiptool and that DNS needs to be set up for the time server host.
skiptool &
In skiptool, create a host of type “off” with the name “blvnts.services.company.com” and don’t forget to do a File - > Save menu item selection when completed.
We also want to enable system user accounting on Admin Stations.
cd /etc/rc2.d
You need to run the command:
ln –s ../init.d/acct S22acct
Then you will need to go to the “/etc/rc0.d” directory.
cd /etc/rc0.d
And run the command:
ln –s /usr/lib/acct/shutacct K22acct
The system will then need to be rebooted for this to take effect. After this is done, you can check up on commands users run with reports and commands like “lastcomm”. The accounting files and reports are kept in the “/var/adm” directory and “/var/adm/acct” directory.
It is very important that you follow the procedures laid out for hardening the Sun Solaris 2.5.1 operating system for Admin Stations. These procedures can be found in (Appendix B) of this document. You may not want to configure these procedures until everything has been configured and tested as working properly, but this needs to be done immediately after this installation is completed.
There are also a few shell scripts that you will want to load on the Admin Station. These can be loaded off of the configuration management server, diskette, or software depot. You can also retype them. These shell scripts include backup, build_screen, chk_time, set_time, push_log, dump_config, copy_config, push_stat, send_file, receive_file, restart, restore, mirror_config, get_stats, and several others. These shell scripts are described in later chapters. These scripts should be placed in the /opt/SUNWicg/SunScreenAdmin/bin directory. These shell scripts are used for logging, configuration management, and other tasks.
There are additional modifications to an Admin Station that are required for use with logging and configuration management with the configuration management server. Below are the modifications that are necessary to permit these functions to work properly.
Create users:
Edit and add the following to /etc/passwd:cfgbot:x:201:1:SunScreen Configuration Retriever Robot:/usr/home/cfgbot:logbot:x:202:1:SunScreen Logfile Retriever Robot:/usr/home/logbot:
Edit and add the following to /etc/shadow:cfgbot:NP:6445::::::
23

SunScreen SPF-200 Design, Implementation and Maintenance Document – 4/7/98
logbot:NP:6445::::::
Edit and add the following to /etc/groupsys::3:root,bin,sys,adm,cfgbot,logbot
Configuration Management:
Create directory:mkdir /usr/home/cfgbot
Create .forward file"| /usr/home/cfgbot/sendcfg"
Create file /usr/home/cfgbot/sendcfg:#!/opt/perl/bin/perl -w@date=localtime(time);undef $/;$in = <STDIN>;$in =~ /Subject:\s*(\S+)\s+(\S+)\s+(\S+)\s+(\S+)/gmix;$ENV{'PATH'}="";system("/opt/SUNWicg/SunScreenAdmin/bin/ss_client $1 ss_configuration default export $2 | /usr/bin/tee /tmp/test | /usr/bin/mailx –s \”$2.date[5]$date[4]$date[3]$date[2]$date[1] $3 $4\” cfgbot\@config.ns.cs);
Change file permissions:chown cfgbot .chmod 500 .chmod 440 .forwardchmod 750 sendcfg
Logging:
Create directory:mkdir /usr/home/logbot
Create .forward file:"| /usr/home/logbot/sendlog"
Create file /usr/home/logbot/sendlog:#!/opt/perl/bin/perl -wundef $/;$in = <STDIN>;$in =~ /Subject:\s*(\S+)\s+(\S+)/gmix;$ENV{'PATH'}="";# Get and send log filesystem("/opt/SUNWicg/SunScreenAdmin/bin/ss_client $1 ss_log get > /tmp/$2");system("/opt/SUNWicg/SunScreenAdmin/bin/sas_logdump -ta -i /tmp/$2 >/tmp/$2.tmp");system("/usr/bin/tail -5000 /tmp/$2.tmp | /bin/mailx -s \"$2\" logbot\@config.ns.cs");system("/usr/bin/rm -f /tmp/$2 /tmp/$2.tmp");
Change file permissions:chown logbot .chmod 500 .chmod 440 .forward
24

SunScreen SPF-200 Design, Implementation and Maintenance Document – 4/7/98
chmod 750 sendlog
On the Admin – Create the file push_log#!/bin/shDATE=`date +%y%m%d`/opt/SUNWicg/SunScreenAdmin/bin/ss_client $1 ss_log get_and_clear > /tmp/$1.$DATEuuencode /tmp/$1.$DATE xxx | mailx -s $1.$DATE logbot@intruderrm -f /tmp/$1.$DATE
Performance Statistics:
Run crontab –e and add the following lines:2,7,12,17,22,27,32,37,42,47,52,57 * * * * /opt/SUNWicg/SunScreenAdmin/bin/push_stat ss-spf-4 >/dev/null 2>&12,7,12,17,22,27,32,37,42,47,52,57 * * * * /opt/SUNWicg/SunScreenAdmin/bin/push_stat ss-spf-5 >/dev/null 2>&1
On the Admin - Create file /opt/SUNWicg/SunScreenAdmin/bin/push_stat:#!/bin/sh/opt/SUNWicg/SunScreenAdmin/bin/ss_client $1 ss_traffic_stats > /tmp/$1.traffic/opt/SUNWicg/SunScreenAdmin/bin/ss_client $1 vmstat | head –2 > /tmp/$1.vmstat/opt/SUNWicg/SunScreenAdmin/bin/ss_client $1 vmstat 2 2 | tail -1 >> /tmp/$1.vmstatmailx -s $1.traffic statbot@cleo < /tmp/$1.trafficmailx -s $1.vmstat statbot@cleo < /tmp/$1.vmstatrm -f /tmp/$1.vmstatrm -f /tmp/$1.traffic
Change file permissions:chmod 755 push_stat
In addition to the above modification of a SPF-200 Admin Station, there will also need to be modifications for Time Synchronization. For this it is important to refer to the chapter in this document that describes the shell scripts and other files that perform this function.
Another scripts that should be added to all Admin Stations in the mirror_config script. The mirror_config script takes the configuration from one Screen (master) and copies it to its redundant partner screen. This script should be used with caution because it will wipe out the configuration of the second (slave) screen. This script is detailed in the section of this document that addresses the redundant configurations of SunScreens.
Additional modifications to Admin Stations are required to allow them to manage Screens that are located in remote security perimeters. These communications will need to be performed over the company Intranet and will need to be encrypted and secure file transfers. The rest of this section details the modifications that are required on the Admin Stations to allow for this remote-configuration capability.
For the SNMP traps script to function properly, the snmpd perl scripts, Stephen Knapp’s super ping program, and trapsend need to be located in the /opt/SUNWicg/SunScreenAdmin/bin directory on the Admin Station. These programs can be found from other Admin Stations. You can read more about the trap script “snmpd” in Appendix F.
Several programs and shell scripts will need to be added to /opt/SUNWicg/SunScreenAdmin/bin. These are
25

SunScreen SPF-200 Design, Implementation and Maintenance Document – 4/7/98
build_screen (this is the script that launches the build process)send_file (sends a file to the Screen)receive_file (retrieves a file from the Screen)put_file (puts file on the Screen)get_file (gets file from the Screen)config_backup (backs up the configuration of the Screen)backup (described in the backup section below)restore (described in the backup section below)chk_time (described below in the section on time synchronization)set_time (described below in the section on time synchronization)restart (remotely reboots the Screen)sas_main.real (original sas_main)sas_main (remidns administrator to use co_main and lock Screens)co_main (sas_main that checks for lock by administrator)revert_config (reverts back to a Screen’s previous configuration)sync_common (syncs up SunScreens with the common database)push_common (pushes out common configuration toa new SunScreen)
Build_screen:#!/bin/ksh# USAGE build_screen <screen name>PATH=/usr/bin:/bin:/usr/sbin:/usr/ucb:/etc:/opt/nav:/opt/SUNWicg/bin:/opt/SUNWicg/SunScreenAdmin/binecho " "echo "Sending files to Screen..."echo " "echo "Please wait ..."echo " "# send the appropriate build files to the Screenfor i in /opt/SUNWicg/SunScreenAdmin/build/*; do send_file $1 $i;done# perform final modifications on screenss_client $1 modify.shecho "The Screen is now built."ss-admin-6#
Send_file:#!/opt/perl/bin/perl -w# Prepare file for transport$filename=`echo $ARGV[1] | awk -F/ '{print \$NF}'`;$filename =~ s/\n//g; # Strip newlinesystem("cp -fp $ARGV[1] /tmp/$filename.$$; compress -f /tmp/$filename.$$");system("uuencode /tmp/$filename.$$.Z /opt/SUNWicg/SunScreen/bin/$filename.Z >/tmp/$$");# Send the file via ss_clientopen IN, "/tmp/$$" || die "Cannot open temporary file";while(<IN>) { $_ =~ s/'/**quote**/g; # Escape quote characters $_ =~ s/\\/**backslash**/g; # Escape backslash characters $_ =~ s/\n//g; # Strip trailing newline system("ss_client $ARGV[0] receive '$_' $$");}close IN;
26

SunScreen SPF-200 Design, Implementation and Maintenance Document – 4/7/98
# Clean upsystem("rm -f /tmp/$$");system("rm -f /tmp/$filename.$$.Z");
Receive_file:#!/bin/kshss_client $1 send $2 | uudecode
Put_file:#!/bin/ksh# Usage: put_file <Screen_Name> <Filename>tar cf - $2 | ss_client $1 put
Get_file:#!/bin/ksh# Usage: get_file <Screen_Name> <SunScreen_Filename>ss_client $1 get $2 | tar xf - > $2
Config_backup:#!/bin/ksh# USAGE config_backup <screen name>DATE=`date +%y%m%d`ss_client $1 ss_backup > /tmp/$1.$DATE.$$
Restart:#!/bin/ksh# Usage: restart <Screen_Name>echo "Warning! This program is about to reboot $1."echo ""echo "Do you want to continue?"ANSWER=""while [ "$ANSWER" = "" ] ; do read ANSWER ANSWER=`echo $ANSWER | tr yn YN` if [ "$ANSWER" = "Y" ] ; then ss_client $1 restart elif [ "$ANSWER" = "N" ] ; then exit else ANSWER="" echo "Please answer Y or N: " fidone
Sas_main.real:Copy the real sas_main to sas_main.real by typing:cd /opt/SUNWicg/SunScreenAdmin/binmv sas_main sas_main.real
27

SunScreen SPF-200 Design, Implementation and Maintenance Document – 4/7/98
Sas_main:#!/bin/kshecho Please lock the SunScreens and use co_main.echo If you really need to use sas_main, it has been renamedecho to sas_main.real
Co_main:#!/bin/ksh ftp -n blv-spf-config.ns.cs.company.com <<END user cfgbot bargl&it cd /export/home/changes get lock /tmp/lock quitEND if [ ! -f /tmp/lock ]; then echo Error: No one has a lock on the SunScreens or communication errorelse USER=`cat /tmp/lock` if [ "$LOGNAME" == "$USER" ]; then sas_main.real $1 else echo Error: $USER has locked the SunScreens fi rm -f /tmp/lockfi
Revert_config:#!/bin/ksh# Usage: revert_config <Screen_Name> <Archive_Filename> # Verify command line argumentsif [ "$1" = "" -o "$2" = "" ]; then echo usage: $0 \<Screen-Name\> \<Config-Filename\> exitfi echo "Warning! This program is about to destroy all current configuration"echo "information on $1 and replace it with $2."echo ""echo "Do you want to continue? (Y/N)"ANSWER=""while [ "$ANSWER" = "" ] ; do read ANSWER ANSWER=`echo $ANSWER | tr yn YN` if [ "$ANSWER" = "Y" ] ; then echo Please wait... # dump screen's config; Screen's name equals screen's configuration name ss_client $1 ss_configuration default export $1 >/tmp/$1.tmp # put header on the cleanse/push file echo "#!/bin/ksh -f" > /tmp/$1.sh echo "set -f" >> /tmp/$1.sh echo "config='$1'" >> /tmp/$1.sh echo "ss_configuration default create \${config}" >> /tmp/$1.sh # Prepare screen's configuration for deletion sed "s/ add / del /" /tmp/$1.tmp | sed "/^$/d" | awk -F\" '{print $1"\""$2"\""}' | \ grep -v ss_rule | grep -v ss_access | grep -v \"hme | grep -v ss_certificate | \
28

SunScreen SPF-200 Design, Implementation and Maintenance Document – 4/7/98
tail +5 >> /tmp/$1.sh # Download the backup file form config server ftp -n config >/dev/null 2>&1 <<END user cfgbot bargl&it lcd /tmp bi cd /export/home/configs get $2 $2.tmp quitEND # Prepare screen's configuration for copying grep ss_configuration /tmp/$2.tmp >>/tmp/$1.sh grep ss_action /tmp/$2.tmp >>/tmp/$1.sh grep ss_address /tmp/$2.tmp | sed "s/ add / add_nocheck /g" >>/tmp/$1.sh grep ss_service /tmp/$2.tmp | sed "s/ add / add_nocheck /g" >>/tmp/$1.sh grep ss_rule /tmp/$2.tmp >>/tmp/$1.sh chmod 755 /tmp/$1.sh # Send script to screen and execute (cleanse the Screen) echo Sending new config to $1 \(this could take a while\)... send_file $1 /tmp/$1.sh echo Restoring ... ss_client $1 $1.sh >/dev/null 2>&1 ss_client $1 ss_compile default "$1" ss_client $1 ss_active_config activate default "$1" rm -f /tmp/$1.tmp /tmp/$1.sh /tmp/$2.tmp echo Done. elif [ "$ANSWER" = "N" ] ; then exit else ANSWER="" echo "Please answer Y or N: " fidone
Sync_common:
**** add new script here when completed#!/bin/ksh## This script propagates the common configuration from the common sunscreen to all# specified screens in company.## User defined variablesCOMMON="ss-spf-test4"# Check to make sure current user has the lock for the SunScreenscd /tmpget /export/home/changes lockif [ ! -f lock ]; then echo Error: No one has a lock on the SunScreens or communication error exit 2else USER=`cat lock` if [ "$LOGNAME" != "$USER" ]; then echo Error: $USER has locked the SunScreens rm lock
29

SunScreen SPF-200 Design, Implementation and Maintenance Document – 4/7/98
exit 2 fifiecho Downloading necessary files from configuration management server...mkdir /tmp/sync_common.$$cd /tmp/sync_common.$$get /export/home/common "company_screens common.lastall"# Set environment variable for list of company screensSCREENS=`cat company_screens` # Set $SCREENS to all company SunScreens# Compile the configuration on the common SunScreenecho Compiling configuration on $COMMONss_client $COMMON ss_compile default "$1" if [ $? -ne 0 ] ; then echo Configuration for $COMMON does not compile cleanup; exit 2;fielse echo Successful# Get confirmationecho "Warning! This program is about propagate the latest changes to the common"echo "configuration to the following sunscreen(s): $SCREENS"echo ""echo "Do you want to continue? (Y/N)"ANSWER=""while [ "$ANSWER" = "" ] ; do read ANSWER ANSWER=`echo $ANSWER | tr yn YN` if [ "$ANSWER" = "Y" ] ; thenecho Please wait until script is finished before submitting changes on the web. ss_client $COMMON ss_configuration default export "$COMMON" >common.latest for i in ($SCREENS); do echo -------------- $i: >>alldiffs push_changes $i common.latest $i.latest; # diff / compile / activate #for i in ($DIFFS) # grep -v "$ACTUAL_DIFF" alldiffs >alldiffs #done # ftp $i's config to /export/home/configs on config server ss_client $i ss_configuration default export "$i" >$i.config diff common.latest $i.config >>alldiffs put /export/home/configs $i.config $i.`date +%y%m%d%H%M`.$$ done mv common.latest common.lastall# put all diffs in /export/home/changes/change.log get /export/home/changes change.log DATE=`date` HOSTNAME=`hostname` cat <<END >change.log.tmp*** Change to common screens on $DATE ***Changed using: $HOSTNAMEPerson making change: $LOGNAMEDifference between new (<) and old (>) configurations:END cat alldiffs >>change.log.tmp # Append diffs of each screen echo >>change.log.tmp # Add blank line cat change.log >>change.log.tmp # Append original change log to entry put /export/home/changes change.log.tmp change.log
30

SunScreen SPF-200 Design, Implementation and Maintenance Document – 4/7/98
echo Okay to submit change form for the common server now.elif [ "$ANSWER" = "N" ] ; then cleanup; exit else ANSWER="" echo "Please answer Y or N: " fidonefunction push_changes { screen=$1 # Name of screen new_config=$2 # Name of new configuration old_config=$3 # Name of old configuration# Create shell script to execute on screen echo '#!/bin/sh -f' >commands.$$ echo set -f >commands.$$ echo config=\'$screen\' >>commands.$$# Find difference between configurations diff $new_config $old_config >diff.$$ # Process items to be deleted grep '^>' diff.$$ | sed "s/^> \(.*\) add \"\(.*\)\"/\1 del \"\2\"/" >>commands.$$ # Process ss_action commands grep '^< ss_action' diff.$$ | sed "s/^< //" >>commands.$$ # Process ss_address commands grep '^< ss_address' diff.$$ | grep -v "\"[hme,qfe].\{1,2\}\"" |\ sed "s/^< \(.*\) add \(.*\)/\1 add_nocheck \2/" >>commands.$$ # Process ss_service commands grep '^< ss_service' diff.$$ | \ sed "s/^< \(.*\) add \(.*\)/\1 add_nocheck \2/" >>commands.$$# Add compile/activate commands to script echo ss_compile default "$screen" >>commands.$$ echo 'if [ ! "$?" = "0" ] ; then' >>commands.$$ echo echo Configuration for $COMMON does not compile >>commands.$$ echo exit 2 >>commands.$$ echo fi >>commands.$$ echo ss_active_config activate default "$screen" >>commands.$$# Send script to screen and compile/activate echo "echo Updating $screen" >> commands.$$ chmod 755 commands.$$ put_file $screen commands.$$ ss_client $screen commands.$RAND ss_client $screen ksh -c "/bin/rm /opt/SUNWicg/SunScreen/bin/commands.$RAND"}function cleanup { # First send essential files back to config server put /export/home/common "common.lastall *.latest" "."# Remove temporary files cd / # rm -rf /tmp/sync_common.$$}function get { dir=$1 # Name of directory to retrieve files from file=$2 # Remote file to retrieve ftp -in blv-spf-config.ns.cs.company.com <<END user cfgbot bargl&it bi
31

SunScreen SPF-200 Design, Implementation and Maintenance Document – 4/7/98
cd $1 mget $2 quitEND}function put { dir=$1 # Name of directory to put file(s) src_file=$2 # Local filename dst_file=$3 # Remote filename ftp -in blv-spf-config.ns.cs.company.com <<END user cfgbot bargl&it bi cd $dir mput $src_file $dst_file quitEND}
Push_common:
**** add new script here when completed#!/bin/ksh## This script pushes the common configuration from blv-spfcommon-01 to the# specified screen.## Check for command-line parameterif [ "$1" = "" ]; then echo Usage: push_common \<screen name\> exit 2;fi# Download the latest config from config serverexport RAND=$$NEW='blv-spfcommon-01.last-push'ftp -n config <<ENDuser cfgbot bargl&itbicd /export/home/configsget $NEW /tmp/$NEWquitEND# Strip the addresses, services, actions, and hme definitions from the configecho '#!/bin/ksh' >>/tmp/commands.$RANDecho set -f >>/tmp/commands.$RANDgrep ss_address /tmp/$NEW | grep -v "\"hme.\{1,2\}\"" | sed "s/\(.*\)\(\${config}\) add \(.*\)/\1$1 add_nocheck \3/"\ >>/tmp/commands.$RANDgrep ss_service /tmp/$NEW | sed "s/\(.*\)\(\${config}\) add \(.*\)/\1$1 add_nocheck \3/"\ >>/tmp/commands.$RANDgrep ss_action /tmp/$NEW | sed "s/\(.*\)\(\${config}\) add \(.*\)/\1$1 add \3/"\ >>/tmp/commands.$RANDecho ss_compile default "$1" >>/tmp/commands.$RANDecho 'if [ ! "$?" = "0" ] ; then' >>/tmp/commands.$RAND
32

SunScreen SPF-200 Design, Implementation and Maintenance Document – 4/7/98
echo echo Error compiling configuration >>/tmp/commands.$RANDecho else >>/tmp/commands.$RANDecho "ss_plumb_interface -a" >>/tmp/commands.$RANDecho "ss_default_drop -a" >>/tmp/commands.$RANDecho "ss_load_group -a" >>/tmp/commands.$RANDecho ss_active_config activate default "$1" >>/tmp/commands.$RANDecho fi >>/tmp/commands.$RAND# Execute commands on each SunScreenchmod 755 /tmp/commands.$RANDecho Sending common configuration to $1...send_file $1 /tmp/commands.$RANDecho Running configuration script \(this may take several minutes\)...ss_client $1 commands.$RANDss_client $1 ksh -c "/bin/rm /opt/SUNWicg/SunScreen/bin/commands.$RAND"# Clean uprm -f /tmp/diff.$RAND /tmp/$NEW /tmp/files.$RAND /tmp/commands.$RAND
You will also need to create a directory named /opt/SUNWicg/SunScreenAdmin/build that contains the files that will be “pushed” down to the Screen as part of the “patch-diskette” process. To do this type:
mkdir /opt/SUNWicg/SunScreenAdmin/build
The files that will be in this directory are:
send (file required to send file to the Screen)receive (file required to send file to the Screen)get (required to send files to the Admin Station)put (required to receive files from the Admin Station)nic_chk (Described in the sections on NIC drivers below in this document)nic_set (Described in the sections on NIC drivers below in this document)restart (reboots the screen)shadow (This is a shadow file to help change the root password on the Screen itself)modify.sh (performs the final build procedures on the Screen)
Another directory that will need to be created on the Admin Station is a backup directory that will contain the backed up configurations of the remote Screens. To create this directory type:
mkdir /opt/SUNWicg/SunScreenAdmin/backup
Here are the contents of these shell scripts:
Send:#!/bin/ksh/usr/bin/uuencode /opt/SUNWicg/SunScreen/bin/$1 $1
Receive:#!/bin/kshexport PATH=/usr/bin# Dump input to fileecho "$1" | sed "s/\*\*backslash\*\*/\\\/g" | sed "s/\*\*quote\*\*/'/g" >>/opt/SUNWicg/SunScreen/bin/$2# uudecode when we reach the end of the fileif [ "`echo $1 | egrep -ce "^end"`" == "1" ]; then
33

SunScreen SPF-200 Design, Implementation and Maintenance Document – 4/7/98
cd /opt/SUNWicg/SunScreen/bin uudecode $2 uncompress -f `grep begin $2 | awk '{print $3}'` rm -f /opt/SUNWicg/SunScreen/bin/$2fi
Get:#!/bin/ksh# Usage: get <SunScreen_Filename>export PATH=/usr/bin:/usr/sbintar cf - -C /opt/SUNWicg/SunScreen/bin $1
Put:#!/bin/ksh# Usage: put <Filename>export PATH=/usr/bin:/usr/sbincd /opt/SUNWicg/SunScreen/bintar xf -
Restart:#!/bin/ksh/usr/sbin/init 6
Modify.sh#!/bin/kshexport PATH=/usr/bin:/usr/sbincd /opt/SUNWicg/SunScreen/binln -sf /usr/bin/date . > /dev/null 2>&1ln -sf /usr/bin/vmstat . > /dev/null 2>&1ln -sf /usr/sbin/snoop . > /dev/null 2>&1ln -sf /usr/bin/ksh . > /dev/null 2>&1ln -sf /usr/bin/uptime . > /dev/null 2>&1mv -f shadow /etc/shadowrm -f modify.sh
You will also want to make sure that the Admin Station has the proper entries in the crontab. To check/list the crontab you can enter the command:
crontab –l
If you want to edit the crontab file for root on the Admin Station, you should use the command:
crontab –e
Here is what the crontab file should look like for ss-admin-6.ns.cs.company.com:
#ident "@(#)root 1.12 94/03/24 SMI" /* SVr4.0 1.1.3.1 */## The root crontab should be used to perform accounting data collection.#
34

SunScreen SPF-200 Design, Implementation and Maintenance Document – 4/7/98
# The rtc command is run to adjust the real time clock if and when# daylight savings time changes.#0 2 * * 0,4 /etc/cron.d/logchecker5 4 * * 6 /usr/lib/newsyslog15 3 * * * /usr/lib/fs/nfs/nfsfind1 2 * * * [ -x /usr/sbin/rtc ] && /usr/sbin/rtc -c > /dev/null 2>&1# Start SunScreen Section0 0 * * * /bin/rdate blvnts.services.company.com > /dev/null 2>&1# Push_Log0 0,6,12,18 * * * /opt/SUNWicg/SunScreenAdmin/bin/push_log ss-spf-5 >/dev/null 2>&10 0,6,12,18 * * * /opt/SUNWicg/SunScreenAdmin/bin/push_log blv-spf-01 >/dev/null 2>&10 0,6,12,18 * * * /opt/SUNWicg/SunScreenAdmin/bin/push_log blv-spf-02 >/dev/null 2>&10 0,6,12,18 * * * /opt/SUNWicg/SunScreenAdmin/bin/push_log blv-spf-04 >/dev/null 2>&10 0,6,12,18 * * * /opt/SUNWicg/SunScreenAdmin/bin/push_log blv-spf-05 >/dev/null 2>&10 0,6,12,18 * * * /opt/SUNWicg/SunScreenAdmin/bin/push_log blv-spf-10 >/dev/null 2>&10 0,6,12,18 * * * /opt/SUNWicg/SunScreenAdmin/bin/push_log slb-spf-01 >/dev/null 2>&10 0,6,12,18 * * * /opt/SUNWicg/SunScreenAdmin/bin/push_log slb-spf-02 >/dev/null 2>&10 0,6,12,18 * * * /opt/SUNWicg/SunScreenAdmin/bin/push_log slb-spf-03 >/dev/null 2>&10 0,6,12,18 * * * /opt/SUNWicg/SunScreenAdmin/bin/push_log stl-spf-01 >/dev/null 2>&10 0,6,12,18 * * * /opt/SUNWicg/SunScreenAdmin/bin/push_log stl-spf-02 >/dev/null 2>&10 0,6,12,18 * * * /opt/SUNWicg/SunScreenAdmin/bin/push_log stl-spf-03 >/dev/null 2>&1# Push_Stat4,9,14,19,24,29,34,39,44,49,54,59 * * * * /opt/SUNWicg/SunScreenAdmin/bin/push_stat ss-spf-54,9,14,19,24,29,34,39,44,49,54,59 * * * * /opt/SUNWicg/SunScreenAdmin/bin/push_stat blv-spf-01 4,9,14,19,24,29,34,39,44,49,54,59 * * * * /opt/SUNWicg/SunScreenAdmin/bin/push_stat blv-spf-024,9,14,19,24,29,34,39,44,49,54,59 * * * * /opt/SUNWicg/SunScreenAdmin/bin/push_stat blv-spf-04 4,9,14,19,24,29,34,39,44,49,54,59 * * * * /opt/SUNWicg/SunScreenAdmin/bin/push_stat blv-spf-05 4,9,14,19,24,29,34,39,44,49,54,59 * * * * /opt/SUNWicg/SunScreenAdmin/bin/push_stat blv-spf-10 4,9,14,19,24,29,34,39,44,49,54,59 * * * * /opt/SUNWicg/SunScreenAdmin/bin/push_stat slb-spf-01 4,9,14,19,24,29,34,39,44,49,54,59 * * * * /opt/SUNWicg/SunScreenAdmin/bin/push_stat slb-spf-02 4,9,14,19,24,29,34,39,44,49,54,59 * * * * /opt/SUNWicg/SunScreenAdmin/bin/push_stat slb-spf-03 4,9,14,19,24,29,34,39,44,49,54,59 * * * * /opt/SUNWicg/SunScreenAdmin/bin/push_stat stl-spf-01 4,9,14,19,24,29,34,39,44,49,54,59 * * * * /opt/SUNWicg/SunScreenAdmin/bin/push_stat stl-spf-02 4,9,14,19,24,29,34,39,44,49,54,59 * * * * /opt/SUNWicg/SunScreenAdmin/bin/push_stat stl-spf-03 # Set_Time0 1 * * * /opt/SUNWicg/SunScreenAdmin/bin/set_time ss-spf-5 >/dev/null 2>&10 1 * * * /opt/SUNWicg/SunScreenAdmin/bin/set_time blv-spf-01 >/dev/null 2>&10 1 * * * /opt/SUNWicg/SunScreenAdmin/bin/set_time blv-spf-02 >/dev/null 2>&10 1 * * * /opt/SUNWicg/SunScreenAdmin/bin/set_time blv-spf-04 >/dev/null 2>&10 1 * * * /opt/SUNWicg/SunScreenAdmin/bin/set_time blv-spf-05 >/dev/null 2>&10 1 * * * /opt/SUNWicg/SunScreenAdmin/bin/set_time blv-spf-10 >/dev/null 2>&10 1 * * * /opt/SUNWicg/SunScreenAdmin/bin/set_time slb-spf-01 >/dev/null 2>&10 1 * * * /opt/SUNWicg/SunScreenAdmin/bin/set_time slb-spf-02 >/dev/null 2>&10 1 * * * /opt/SUNWicg/SunScreenAdmin/bin/set_time slb-spf-03 >/dev/null 2>&1
35

SunScreen SPF-200 Design, Implementation and Maintenance Document – 4/7/98
#0 1 * * * /opt/SUNWicg/SunScreenAdmin/bin/set_time stl-spf-01 >/dev/null 2>&1#0 1 * * * /opt/SUNWicg/SunScreenAdmin/bin/set_time stl-spf-02 >/dev/null 2>&1#0 1 * * * /opt/SUNWicg/SunScreenAdmin/bin/set_time stl-spf-03 >/dev/null 2>&1
Note: One SunScreen Admin Station should be considered as the primary Admin Station. Only one system should be running some of these commands. All Admin Stations should be identical, but they may differ by what entries in the crontab are commented and uncommented. It has been our practice to make ss-admin-6 the primary Admin Station. Therefore, other Admin Stations may have similar looking crontab files, but they will have many of these features commented out, but ready for use.
3.1.2 Procedures to Build a Screen
For this procedure, you will need the following equipment and pieces of information:One blank IBM format floppy diskette.The IP address of the new SunScreen – must have ERMS number to enter into NAMS.The new hostname for the new SunScreen.Jumbo patch (105047-17)HME/QFE patch (105410-04)company patch disketteMultimedia CDROM of SunScreen Training (Book I – SunScreen Installation and Recovery)
In order to build a new SunScreen system, you should follow the procedures described below. However, some of these steps cannot be performed because the Screen does not exist at this point. After building up an Admin Station, the “spf_admin_install” command should be run in order to create the installation floppy for the new Screen. First login to ss-admin-6 (primary Admin Station) as root and type the following:
spf_admin_install
Follow the prompts as follows. Press “y” to continue, enter the appropriate key length. Select 2048 as the default that company systems should be using and press “return”. If 2048 is being used, then the SKIP upgrade disk will need to be inserted in the CD-ROM drive of the Admin Station.
Be sure that you are using the appropriate SKIP upgrade CD. The SKIP upgrade CD that has part number 704-5601-10 only produces keys with a maximum modulus size of 1024 bits. Don’t use this one. The one that should be used has part number 704-5602-10 and can produce keys with a maximum modulus size of 2048 bits.
Press the appropriate number key (1,2,…) (Usually 1) to select the appropriate modulus size (key size). If prompted, enter the appropriate encryption types such as UDH otherwise take the defaults. The hme0 interface should be entered as the administrative port for the new Screen. The new Screen hostname should be entered. The naming conventions used for Screens are detailed in Section 2.6 in this DIM document. The IP address of the administrative interface of the Screen should be entered, and the mask of 255.255.255.0. The default router should be entered for the Screen and DNS should be no. Answer “Y” to timezone use, and “Y” to question if this is correct. Insert floppy and accept “Y” to erase the data. At this point you will need to reboot the Admin - answer “yes”. The Admin Station will then reboot.
At this time it is important to label this diskette. This label should also indicate which SPF-200 Admin Station was used to create this floppy. The need for good labeling will become evident when this disk is used to recover a Screen in the event of a failure.
36

SunScreen SPF-200 Design, Implementation and Maintenance Document – 4/7/98
At this point, it is important to make a backup of the install floppy diskette we just made and put the tar file on the configuration management server. You can do this from an Admin Station such as the one we just built this diskette on (after it reboots). You can put in the install diskette and type:
volcheckcd /floppy/floppy0tar cvf /tmp/<Screen_Name>.tar *
Note: replace <Screen_Name> in the previous like to be the name of the SunScreen.
You should then verify that the tar file was made correctly by typing:
tar tvf /tmp/<Sccreen_Name>.tar
If the file was created properly, it will list its contents with no difficulty. Next you must ftp this file to the configuration management server (blv-spf-config.ns.cs.company.com) and place the file in the /export/home/install directory.
You will then take this diskette along with the SunScreen SPF-200 installation CD for the SunScreen Software and put them in the new Screen. If this is the first time you are installing a system to be a SunScreen, put the install diskette you just made into the floppy drive. Make sure the SunScreen SPF-200 CD is in the CD-ROM drive. Then turn the power on and wait for it to install the SPF-200 software. It will reboot itself several times and then the voice will tell you to put the install disk in a safe place. This installation procedure should take about 10-15 minutes, so patience is a virtue. The diskette will be ejected and when you hear the woman’s voice, the system in fully installed. Be sure to place the installation diskette in a secure location that can easily be retrieved in the event of a Screen failure.
If this Screen is a system that was once an Admin Station or some other type of computer running Solaris (with a console or Sun Monitor and keyboard) follow these instructions. Boot up the system and do a “Stop-A” (Press the “STOP” key on the left side of the Sun keyboard at the same time you press the “A” key). This will put you at the “OK>” prompt.
You can also use a dump terminal connected to the TTYA port on the back of the SunScreen. To perform a Stop-A on a dump terminal, you can turn the dumb terminal off and then on again while it is plugged into the TTYA port. This will drop DTR and cause the Stop-A signal. You could also do a Ctrl-Break on some terminals.
You will need to tell the system to boot off of the CDROM drive. Enter:
setenv boot-device cdrom
followed by the command:
boot
It will reboot itself several times and then the voice will tell you to put the install disk in a safe place. The diskette will be ejected and when you hear the gong sound, the system in fully installed.
Because you built the Screen with this Admin Station (ss-admin-6), they will be configured to talk over a SKIP connection. If you want to, you can run “skiptool” on the Admin Station to verify that this is configured properly. At this point, you will want to put the name of the Screen in the /etc/hosts file on the Admin Station. This will make entering future commands easier.
37

SunScreen SPF-200 Design, Implementation and Maintenance Document – 4/7/98
Some other modifications necessary for Screens is to run the following commands. You will need to connect a console or a dumb-terminal connected to Console port “A” (RS-232, 9600, N, 8, 1, null modem cable) of the Screen to perform some configurations on the Screen itself. You will need to log in as root and initially, the password is “SrIOiff!”.
We will now want to insert the Jumbo Patch and reboot the system. You can do this in several ways. You can type “reboot” at the root user prompt or “boot” at the OK Stop-A prompt. The SunScreen will reboot several times, load the patch, eject the diskette, and reboot one final time.
The next patch to load is the HME/QFE patch diskette. This is applied in the same way as the previous patch.
After this first part of the installation has been done, the next step in building up a Screen is to use the “company patch diskette”. This diskette helps to automate the configuration and management of the SunScreen. These procedures automate this configuration and allow for changes to take place on the Screen remotely without having to use diskettes to move files between Admin Stations and Screens.
First, insert the “patch diskette” into the floppy drive of the Screen, and then with the dumb-terminal on the Screen, type the following:
volcheck
Then type:
/floppy/floppy0/install.sh
This shell script will copy the receive file to /opt/SUNWicg/SunScreen/bin.Then type:
eject floppy
It is a good idea to place the patch diskette in the same secure location that the installation diskette is located.
You will need to go to the Admin that built the original install diskette (should be written on the install diskette) and connect via SKIP. Verify the SKIP connection is up and running. Try to run the Netscape and sas_main commands to verify SKIP connectivity. To do this, type:
sas_main <Screen_Name> &
Or
netscape &And enter the URL (e.g. http://blv-spf-04:3852)
You can then run the build_screen shell script by typing:
build_screen <Screen_Name>
It will take a while for this script to push all of the files to the Screen, so be very patient.
This shell script (build_screen) will copy the appropriate maintenance files to the Screen.These files are located in /opt/SUNWicg/SunScreenAdmin/build.These files are described in the previous section that details the build procedures for an Admin Station. These file should be located on the Admin prior to building the Screen.
38

SunScreen SPF-200 Design, Implementation and Maintenance Document – 4/7/98
These files to be transferred are named:
backup_screen (This file won’t need to be sent once all SunScreens are using the Jumbo Patch, the Admin Stations have been upgraded to the jumbo Patch, and the backup.new program is being used.) The same goes for restore_screen.modify.shnic_setreceiverestore_screenshadowgetnic_chkputrestartsend
The Admin Station will need to have the following shell scripts on it (/opt/SUNWicg/SunScreenAdmin/bin) to make this happen:
send_filereceive_filebuild_screen (and appropriate build/distribution directories)config_backupmirror_configbackuprestorerestartchk_timeset_time
The Admin Station will also need to have the directory /opt/SUNWicg/SunScreenAdmin/build that contains all of the appropriate files that will be sent to the Screen.
The Admin Station will also need to have a directory /opt/SUNWicg/SunScreenAdmin/backup that will contain the backup tar files for the screens that have been backed up. This directory and these files will need to be accessed if these procedures are being used to restore a failed screen.
Note: These install procedures are the same as the procedures required for rebuilding a failed SunScreen.
To continue the proper configuration of the NICs on the Screen, you will need to modify the /opt/SUNWicg/SunScreen/bin/nic_set script to meet the needs of this particular SunScreen installation. (See Appendix C for more information.) You can edit the “nic_set” script to meet the particular needs of the Screen. Look over the script at this point and confirm the settings – make sure the nic_set file is exactly as the Screen requires. If there are more /dev/hme interfaces or other types of Ethernet interfaces, then these shell scripts will need to be modified. Simply take sections and cut and paste them with the “vi” editor. Make sure that nic_chk gets modified to report the status of these different types of /dev/hme interfaces.
Note: These procedures are intended to work with /dev/hme interfaces. If you have other combinations of different types of Ethernet interfaces, then these techniques can be applied to your particular needs. However, these procedures and shell scripts were created with /dev/hme interfaces in mind.
At this point, you can connect the Screen to the Cisco Catalyst or other hub/concentrator device and reboot it with the “reboot” command. When the computer reboots, you will see the
39

SunScreen SPF-200 Design, Implementation and Maintenance Document – 4/7/98
messages appear on the terminal’s monitor for the system startup. After the “machine is a router” message, you should see the following messages:
hme instance 1hme instance 2hme instance 3hme instance 4
Note:If you are using qfe interfaces, then this should say “qfe instance X” instead.
After the system reboots, you can use the “nic_chk” command to verify that the configuration is the way you want. You can do many iterations of these procedures to get the configurations correct. If there are speed and mode mismatches, it can cause performance problems which may include a large number of frame check sequence (FCS) errors, alignment errors, and other errors on the Ethernet link.
You are now ready to run Netscape and enter the URL as the name of the Screen to port 3852 (e.g. http://blv-spf-02:3852 ). You can launch Netscape by typing form the Admin Station:
/opt/nav/netscape &
You should also test to make sure that the “sas_main (screen name) &” command works properly for configurations.
sas_main <Screen_Name> &
At this point you can start to configure the Screen with its addresses, actions, services, and rules. You should configure the interfaces on the Screen with the Admin’s Netscape interface. The start address should be the network number and you should use the appropriate netmask. The other network interfaces should be created, named, and configured with the appropriate address group, logging and reject actions. Within the Netscape interface, the default access rules need to be defined. Routing should be No, Name service should be None, and Certificate Discovery should be Yes. On this Screen, you can also make sure that the encryption techniques are configured properly. It is important to make sure that these are consistent between SKIP systems. It would be a good idea to refer to the Configuration Style Guide in section 3.5.2 in this document.
3.1.3 Adding a Screen’s to an existing Admin Station
Once you have built an Admin Station and you have created many Screens, you may want to have multiple Admin Stations. These procedures describe how to generate a new key on an Admin Station to support a Screen that it did not generate the install disk for. These procedures also discuss how you may need to create a key of a different length than the other keys that have been created on the Admin Station. These procedures do not require the installation of new software, just the configuration of the Admin Station and the Screen.
What we are doing is manually exchanging the keys between the Screen and the Admin Station.
Note: This is not the Admin Station that built up the Screen’s install disk. The Admin Station that built a screen’s install disk will automatically have the keys exchanged.
This procedure to configure the SKIP link between the Admin Station and the Screen requires you to run this command on the Admin Station:
40

SunScreen SPF-200 Design, Implementation and Maintenance Document – 4/7/98
skiptool &
You will need to click on the “add” button at the bottom of the dialog box, select “host”, and select type “skip”. You can enter the name of the Screen, and choose “whole packet”. The name of the screen should be known to this Admin Station in its /etc/hosts file. You will need to enter the remote key with type MD5. This remote key is the SKIP key of the Screen. You can determine this from looking at skiptool, or “skipif –l –v” of another Admin Station. You should enter the sender’s key and the appropriate encryption algorithms. The sender’s key should be the new one that you have just created with “skiplocal keygen”, or an existing Admin Station key, depending on if you have dissimilar key lengths/types. The way you can check which key you want to use here is to run on the Admin Station:
skipif –l –v
To add the Admin Station’s key to the screen, the last step to configure the SKIP link is to make sure that the Screen knows that the new Admin Station is a valid SKIP host that has the ability to manage the Screen. The way this is done is with the use of the “sas_registry” command on an Admin Station that already has a SKIP connection with the Screen.
sas_registry <Screen_Name> &
You can use this command to create a new Admin Station key. Just enter in the new Admin Station’s name and define it as a “peer” of type “Diffie Hellman (8)”. You will then have to enter the key of the Admin Station. You can look this up on the new Admin Station with the above-mentioned “skipif –l –v” command. Once this is done, click on the “save” button. You will then want to choose “select” and go to the “admin-group”. This group is the group of systems defined with this sas_registry tool that have the ability to manage this Screen. You will simply need to select the new Admin Station and add it to the admin-group by clicking on the “add” button. Once this is done, you should click “save” and then “cancel to exit this program.
After you have done this, you will need to run:
skiptool &
On the Admin Station to make sure that the correct key is used. If you have generated two different key types on the Admin Station, you will need to reboot the Admin Station once more. You can then return to skiptool on the Admin Station and select the correct key with the down arrow next to the Admin’s key. This may be confusing, but it is the way that skiptool works with an Admin Station configured with different key types/lengths.
The SKIP connection between our new Admin Station and the Screen should now be complete. You can test this functionality by running:
ss_client <Screen_Name> ss_traffic_stats
This command gets back the traffic statistics from the Screen using the SKIP link. You can also try to run the “sas_main <Screen Name>” command to start to make configuration changes to the Screen.
sas_main <Screen_Name> &
To exit sas_main, simply click on the window title with the left mouse button and select quit from the menu.
41

SunScreen SPF-200 Design, Implementation and Maintenance Document – 4/7/98
You can also use Netscape to confirm the proper functioning of the new SKIP link. Just type the following:
/opt/nav/netscape &
If these commands work, then the procedure worked. If not, then go back through them a second time.
3.2 Mounting
The SPF-200 is mounted in a rack in the same manner as other Sun devices. The SunScreen itself can be placed on a shelf in either a 19 or 23 inch rack. Since it has no monitor or keyboard, it is designed to fit in a rack or cabinet in a physically secure location.
Below are the dimensions and weight for the Sun UltraSPARC 2 Enterprise computer.
Height - 13.0 cm (5.12 in.)Width - 45.0 cm (17.72 in.)Depth - 45.2 cm (17.94 in.)
Weight: - 12.27 to 15.88 Kg (27.0 to 35.0 lb.)
3.3 Cabling
The SunScreen does not have any particular cabling requirements. A typical SunScreen would have an hme 10/100 Ethernet controller on the motherboard. This port is known as “hme0”. This port is located in the bottom row of connectors on the back of the unit. This Ethernet port (as well as the others) accepts a RJ-45 connector for its Category 5 Ethernet cable connection.
The other ports for the hme interfaces for the UltraSPARC 2 are located in a row on an adapter card that is connected to the Sun Bus. The numbering for these interfaces starts, from left to right, hme1, hme2, hme3, hme4. If there are more than one hme 10/100 Ethernet card in the computer, then the lower row to the left is hme1-4 and other ports would be numbered hme5-8.
The cables should have labels on both ends. Each end should contain information about what the other end is and what it should be connected to.
Standard company procedures should be followed when cabling these systems. If it is required, a rolled (roll-over) Ethernet cable should be used when the transmit and receive pairs need to be reversed.
Admin Stations are connected to the company network infrastructure with 10BaseT Half-duplex interfaces. These interfaces have the capability for doing 100Mbps Fast Ethernet Full-duplex, but this is not necessary.
Note: When cabling up a SunScreen in a rack or shelf it is important to secure the power cord. These cords can be quite heavy and let gravity put a strain on the connection to the SunScreen. It is critical that these power cords are secured with some type of tie-wrap or cable-tie to prevent the power cable from coming loose.
42
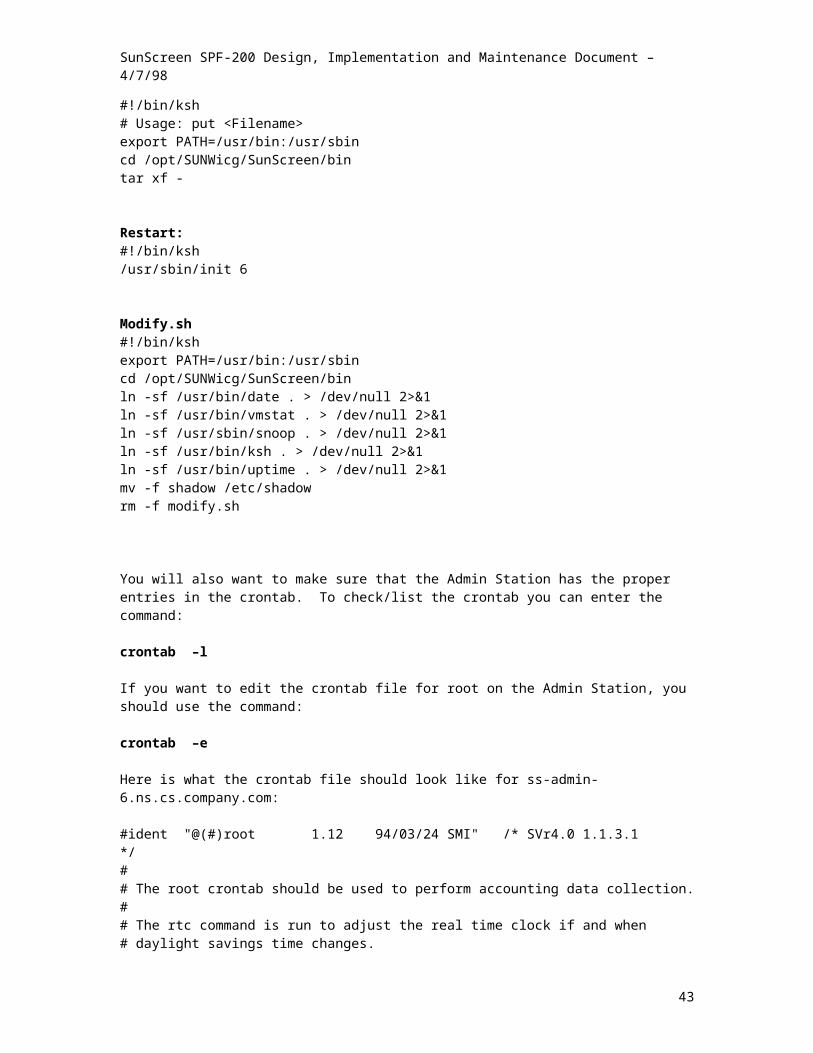
SunScreen SPF-200 Design, Implementation and Maintenance Document – 4/7/98
3.4 Labeling
All SPF-200s will be labeled to indicate their device name and IP address of the administration hme port. This should be clearly visible from the front of the unit when mounted in a rack.
In addition, each RJ-45 terminated Category 5 Ethernet cable that is plugged into the back of the SunScreen should also be labeled. This label should contain the name of the system that that hme interface supports.
Admin Stations will only need to have labels on their front’s that indicate their hostnames and IP addresses.
3.5 Configuration Procedures
3.5.1 SunScreen Operational Procedures
This section of the document details methods for how we go about configuring the SunScreens on a regular basis.
You can also use Netscape to inspect the Screen and perform additional configuration tasks.Run Netscape and type in the URL for the Screen for port 3852 (i.e. “http://blv-spf-01:3852”). To launch Netscape, simply enter the following.
netscape &
Typically, in order to change the addresses, actions, services, and rules of the Screen, the “sas_main” command can be run from the Admin Station.
sas_main <Screen_Name> &
This utility is a graphical interface that lets you build addresses and address groups, services, actions, and combine these into rules that define the required security policy for the SPF-200 system. To exit out of this tool, exit out of all of the client windows and then click with the left mouse button on the quit menu item.
Because we are using a locking mechanism on the web page (http://blv-spf-config.ns.cs.company.com) the new version of sas_main is now called co_main. It can be run by typing:
co_main <Screen_Name>
If you have created a lock in the administrative section of the SunScreen web page, then this program will allow you to proceed with the change.
First, when you are making a change, you should decide if the change you need to make is to the common SunScreen that contains the common database of configuration addresses, services, and actions. If so, then you should run the boe-main command on the common SunScreen (blv-spfcommon-01). Here you can follow the common naming and configuration guidelines to make the change to the common SunScreen that will be propagated out to all production SunScreens.
Once the change is done, you can then run the Admin Station command:
sync_common
43

SunScreen SPF-200 Design, Implementation and Maintenance Document – 4/7/98
This command will take the differences between the old version of the common configuration and the new changes you made and send them out to all of the production SunScreens. These SunScreens will then have their configurations automatically compiled and activated with the new changes. The output of “sync_common” might contain error messages that are important to not if the change was made incorrectly. Once this is done, you should go to the SunScreen tools web page, click on administrative tools, login, and click on and comment your changes you made to the common SunScreen. After you are done, click “Submit” and these changes will be added to the change.log historical change log file.
If you are making changes to rules (as opposed to addresses, services, and actions) on a specific SunScreen, then you can make these changes with the “co_main” command mentioned above. After this type of change is made, it is important to also go to the SunScreen tools change form and fill out another change for the SunScreen rule you just modified.
The rule is: If you make a change to any SunScreen (common or production), you must documented in on the SunScreen change form web page.
By submitting changes on the web page, the backups and revision control mechanisms are automatically taken care of for you by the configuration management server. This will be very important if a backup/recovery is needed.
Anything that can be done with a GUI tool can be performed with the use of command-line utilities. One of the most important of these commands is the “ss_client” set of commands. This command can be run with the name of the Screen as the first parameter followed by the command that needs to be run on the Screen. This will then send the command to the Screen from the Admin via the SKIP connection to be run on the Screen. The resulting output will return to the console/terminal window of the Admin Station.
Some important directories to remember for SPF-200 commands are:
SunScreen:/opt/SUNWicg/bin/opt/SUNWicg/SunScreen/bin
Admin Station:/opt/SUNWicg/bin/opt/SUNWicg/SunScreenAdmin/bin
However, these directories should already be entered into the PATH for you.
3.5.2 Web Interfaces
There are also web pages that can be used when making changes to SPF-200s. These web pages will be communicating sensitive information and therefore use SSL to encrypt the contents. These pages require special authentication that is maintained by the Packet Filter group.
There is a web page that can provide valuable information of the current status of a SunScreen and allow one to view the current configuration. The URL is https://blv-spf-config.ns.cs.company.com . This page has sections that let one download the current configuration of a SunScreen from any of the available Admin Stations. The reason you can choose different Admin Stations is that in the event that one is unavailable, there are alternate Admin Stations that can be used. The received configuration is beautified and then displayed. You can also view the last 5000 lines of the logs with this page. This is useful in up-to-the-minute troubleshooting of a SunScreen. If either of these two actions return valid information, then the
44

SunScreen SPF-200 Design, Implementation and Maintenance Document – 4/7/98
SunScreen is functioning properly and communicating well with the selected Admin Station. This page also provides a link to all the necessary documentation for the SPF-200s. This page will be constantly updated and will continue to add functionality for troubleshooting, training, and contact information.
Additional web pages allow you to enter SPF-200 specific changes. The Administration Tools part of the web page allow you to enter changes for the SPF-100 that are still in service. On these pages, you simply enter the appropriate fields and then click on the submit button. The change.log file can also be viewed through these pages. If you are entering a change for a SPF-200, this web page will go out to the Screen and collect its configuration, make a comparison to the previously saved version of the configuration, and display the “diff” differences between the files and include this into the change.log (history of changes). This is not done for the SPF-100s, hence the two separate forms.
You can access the change.log (history) web page directly. This Web page is useful when making changes to the Screen and can be accessed from the above-mentioned pages. This change.log page displays the change log of all other changes made to the SunScreens. It is useful for determining if changes have already been made and also for troubleshooting new changes.
3.5.2 Configuration Style Guide
There are standard conventions that should be followed when configuring a SunScreen System. These standard conventions will make the configurations of the Screen’s easy to understand and modify. These conventions will help to improve understanding of the types of TCP/IP services that are permitted to flow through the Screens and help to reduce the probability of errors being made in configurations.
The two methods mentioned earlier that are necessary to configure SPF-200 Screens are “sas_main <Screen Name> &” and the Netscape interface.
3.5.2.1 Netscape
The Netscape interface is fairly intuitive. This is launched by using a Netscape browser on an Admin Station and using “http://<Screen Name>:3852”. (For Example: http://blv-spf-09:3852) (See Naming Conventions section 2.6). By clicking on the regions of the header, you can move to different views and see how the Screen is configured. The web pages that we are mostly concerned with for configuration purposes are the pages labeled “configs”, “interfaces”, “default Rules”, and “logs”. Below are listed the different sections of the Netscape interface and the typical standardized configuration style.
Info:This page has little value. You can choose to enter a description about the purpose,
location, and contact information about this particular Screen, but it is not necessary.
Interfaces:This screen is very important. It defines the network interfaces for the Screen. The
“start address” should be configured with the IP subnet number for the network of the administrative interface for the screen (typically hme0). Its network mask should typically be 255.255.255.0.
The lower section defines the actual interfaces and their attributes. When the Screen is first configured the table looks like the following.
Interface Address Group SNMP Alerts Logging Rejecthme0 Admin hme0 none none none Router
45

SunScreen SPF-200 Design, Implementation and Maintenance Document – 4/7/98
You can click on the “Add new interface” link at the bottom of this page to add new interfaces. Simply enter the fields and then click “Add” when complete. This table should look like the following table with the following entries.
Interface Address Group SNMP Alerts Logging Rejecthme0 Admin hme0 none none none Routerhme1 SPF hme1 none Summary none Routerhme2 SPF hme2 none Summary none Routerhme3 SPF hme3 none Summary none Router
“None” is chosen for the Reject message because the SunScreens are security devices and should not be giving any information back on the dropping of packets. This information could give information back to a potential attacker that could lead to the un-stealthing of the SunScreen. Issues of performance, anti-smurfing, and others are the reasons we have selected “none” for this configuration item.
Configs:When a SunScreen is initially loaded, there is an “Initial” configuration. You may want to
delete this if it bothers you. After a configuration has been created with the use of the “sas_main” command there should be a configuration with the name and number of the Screen such as “spf-5”. That is the naming convention of the configurations that we would like to use.
DefaultRules:Within this page is contained settings that have impacts on the entire SunScreen despite
rules or other settings. The choice for “Routing” should be set to “Yes”. The Selection for “Name Service “ should be set to “DNS”. “Certificate Discovery” should also be set to “Yes”.
At the bottom of this page there is a table for the SunScreen Administration Access Control. We want to leave this table unmodified from the default. We have chosen to use 2048 bit domestic keys. This table should look like the following:
Address Group SunScreen Access Type Version Key Algorithm Data MAC* admin-group Local ALL SKIP skip_version_2 DES EDE K3 DES CBC MD5
There should be no need to utilize the “Add new access control” link.
Admin users:This page allows you to set up administrative users. However, any user configured with
this privelage can make modifications to the Screen. Therefore, we want to keep the only active user as “Admin”, but we want to change the password from its default.
SNMP Alerts:We don’t need to modify this item from the default (None).
Logs:This page lets you “get”, “get_and_clear”, and “clear” the logs on the Screen. This
screen should not be used to perform a “get_and_clear” because this would not allow the nightly archival of logs to occur properly. You can, however us the “get” function to save the log file to a local filename and then run the “sas_logdump” command on this binary file to change it into ASCII-readable text. However, there is a web page on the configuration management server that was designed for this purpose that downloads the entire log file, but only displays the last 1000 lines for troubleshooting purposes. Furthermore, the “clear” option should not be used unless there are other problems related to the logs, such as the log file has gotten corrupted or is too large to download for some reason.
Key Statistics:
46

SunScreen SPF-200 Design, Implementation and Maintenance Document – 4/7/98
This screen lists interesting statistics on the exchanging of keys for the SKIP interfaces on the Screen and their usage.
Traffic Statistics:This page is useful for looking at the amount of traffic that is flowing on the network
interfaces that have been configured on the Screen. Below are descriptions for the different statistics provided.
Input packets:The total number of packets seen on the network interface. This number includes packets processed by the SunScreen and intra-net traffic. Because this counter countes more than just the packets through the SunScreen interface, the number may be much higher than the passes plus dropped packet numbers.
Output packets:The number of packets sent out from the SunScreen. These are packets that were previously passed and counted by other interfaces.
Passed packets:The number of packets that have matched exactly a PASS rule and have been sent on through one of the SunScreen interfaces. These are received packets that match a permit/pass rule. These packets will be counted again as output packets on the outgoing interface of this SunScreen.
Logged packets:The number of packets that have been logged by the SunScreen, according to the actions in the active configuration.
Alerts sent:The number of packets that caused an SNMP alert to be generated.
Dropped packets:The number of packets that have been dropped, either as a result of matching exactly a FAIL rule, or not matching any rule and being dropped as the default action of the SunScreen.
Alloc failures:Error counter for packets lost owing to the lack of resources. This indicates if packets are discarded due to performance problems and heavy load.
NoCanPut:Error counter for packets lost due to lack of stream flow control. This indicates if packets are discarded due to performance problems and heavy load.
Bad packets:Error counter for packets lost due to errors.
3.5.2.2 SAS_MAIN, SAS_MAIN.REAL and CO_MAIN
This configuration user interface is launched by running “sas_main <Screen Name> &” on an Admin Station. You should also use “co_main” if the SunScreen is locked for a configuration session by one of the packet filter team.
It is important to differentiate the standard build sas_main routine that comes with the SunScreens and the sas_main that gets loaded as part of the Jumbo Patch for Admin Stations.
47

SunScreen SPF-200 Design, Implementation and Maintenance Document – 4/7/98
The patched sas_main program allows for the sorting of rules by service, to, from, and action. This is helpful when dealing with large configurations such as our company’s.
Due to the locking mechanism that we have created on the configuration management server’s web page, we have sas_main.real and co_main instead of sas_main. Co_main checks for the lock to be set; we should all use this instead of sas_main. Sas_main.real is used for those times when co_main breaks and you must have access to the configurations.
We are striving to use standard naming conventions when defining address hosts, ranges, services, actions, and groups. This section will detail some of the standard ways that the rule-set size can be minimized and, more importantly, simplified. This section recommends certain guidelines that should be followed when configuring SunScreen systems. Failure to use these standard naming-conventions and styles can result in having to reconfigure the SunScreens at least and at worst security vulnerabilities.
It is important to note that when naming objects within the configuration, you are limited to being able to view only 20 characters of the name when working with the “sas_main <Screen Name> ” interface. You can enter more than 20 characters, but you can only view 20 characters in the rule configuration. Therefore, it is recommended that unique names less than or equal to 20 characters be used.
Another element of style for the configurations is to not have any spaces within the names of objects. For readability, hyphens, periods, or underlines could be used to simulate the use of a space within the name. The reason this convention is used is to simplify the creation of tools to analyze the configuration objects. The parsing of names is easier when names are separated by white-space and hyphens, periods, and underlines are used within names. However, in the text files that contain the configurations for Screens, the strings are surrounded by double-quotes. Therefore, the use of other characters to cover up white-space is not a hard-and-fast rule, but merely a suggestion.
It is important to go to the web page (http://blv-spf-config.ns.cs.company.com) and check out the diagrams for SunScreen naming conventions. These flow charts help to determine the proper naming of addresses and services for inclusion into the “common” SunScreen database. These pages also give a list of common names to be used in creating configuration objects.
In order to maintain common naming and protect services at multiple security perimeters, we have instituted the common configuration concept. These changes to these rule-base objects are to be made to the “common” SunScreen and then propagated out to the other SunScreens with the use of the “sync_common” and push_common” commands. This will synchronize the SunScreens at multiple perimeters, maintain common naming, guarantee that similar services are being are being treated consistently across multiple perimeters, increase reliability, and improve troubleshooting.
Addresses:TCP/IP addresses can be added to the SunScreen configuration as either hosts, ranges, or lists/groups of these types. When naming an individual host, the name of the host can be used as the name of the configuration object followed by the part of the domain-name that precedes the “company.com”. In other words, the “BIP” names should be used to identify hosts and their associated IP addresses (sans the “company.com” part). An example of this would be to create a host named “hostname.ns.cs” with an IP address to configure the address object. Since the “company.com” part of fully-qualified hostnames is redundant, it is left off due to the 20-character limit on viewing object names. Hosts can also be named based on their functions. For example, the MS Exchange servers all start with the prefix “xch”. This is an easy way to describe the function of the host and leave room to uniquely identify it. However, the standard naming conventions that company currently uses to uniquely name hosts should be sufficient to describe a host address configuration object.
48

SunScreen SPF-200 Design, Implementation and Maintenance Document – 4/7/98
The style that we have standardized on for hosts should be consistent with NAMS. When naming end-user workstations, it is useful to name the host with the ERMS number so that these hosts can be tracked. This will tie the workstation to a user tracked within the NAMS system. For any other servers or other hosts, the name that is used in SAS_MAIN should be the same that is used in NAMS. This can be the BIP name and address or can be found in DNS. This consistency should help with troubleshooting.
You can create a range of IP addresses like a subnet or an even larger range (supernet) as an address object. When you name these, it is a good idea to name the subnet with a brief acronym followed by the subnet number. An example of this would be “BINT_1.2.3.0” to represent a subnet within the company Intranet that has the IP address range 1.2.3.0 to 1.2.3.255.
You can create groups of the previously-mentioned types of address objects. This is a great way to simplify the rules and reduce their numbers. It is easier to add hosts to a group and only permit the services and actions required for that network interaction than having separate rules for many hosts running multiple applications between them. You can create groups of servers that are described by their functions. For example, groups named like “DNS_clients”, “DNS_servers”, “Internal_DNS_servers”, “External_DNS_servers” can help identify the purposes of the rules and simplify configuration. If a new DNS server is created, it only needs to be added to the group it belongs and no additional rules need to be created. Similarly, you can create groups like “Mail_Admin_Workstations”, “Internal_mail_servers”, and “Interlock_firewalls”.
You can also create groups of networks. As mentioned before, you can create ranges with names like "INT_1.2.3.0". You can create groups of these ranges to signify entire networks. You can create a group called “company_Intranet” that contains a list of all of the “INT_X.X.X.0” address objects. Similarly, you can create groups like “Company_Nets”, and “FS_Nets”.
You can have groups that contain other groups. This is a powerful way to help reduce the size of the rules and simplify the configuration. If additions or changes need to be made it would require just an address change and not a rule change. This is where the power of object-oriented packet filter configuration is realized.
It is important to understand how to treat network interfaces for the SunScreens. Within the configuration are the hme and qfe definitions. It is important to not put any address definitions right into these objects. You want to create a separate object and the put that object into the hme/qfe interfaces list.
Use the comment field on address objects where appropriate. Good times to do this are when the object is a PC and you want to enter the user’s name and contact information.
Actions:The default action defined is “normal”. There are a few others that should be defined. These are “fail” which is just a fail action, “Fail-N-Log” which fails the packet but logs its occurrence, and “Pass-N-Log” which passes the packet, and logs its occurrence. Other actions can be defined, but probably will not be needed.
Services:There are a large number of standard services that exist in “sas_main” by default. New services, or groups of services can be created.. This is a great way to control access and simplify the rules. Common ways to create groups of services are to create groups named after their functions and applications that utilize them.
For instance, You can create a group called “UDP-Netbios” which contains the UDP ports 137, 138, and 139. There are specific Microsoft functions that require these services. You can also distinguish this by creating a group called “TCP-Netbios” for the TCP version of these port
49

SunScreen SPF-200 Design, Implementation and Maintenance Document – 4/7/98
numbers. Furthermore, you can create a group called “All-Netbios” that contains both the “TCP-Netbios” and “UDP-Netbios” groups. You can also do the same by creating a group called “Domain” that contains both “TCP-Domain” and “UDP-domain” for DNS port 53. These are examples of how you can have granularity of security and simplify the rules when needed.
Another example of this would be naming a service group “mail-admin-services”, or “blv-outlook-01-admin-services” that contain SMTP, Telnet, FTP, Ping, and traceroute services. This would prevent several rules from being added for the same function and reduce it down to just one simple rule.
You can create services that identify their usage and also use the service name to be descriptive. An example of this would be a service like “tcp-forward-1634” You can also create a group of services called “Time-services” that contains all of the services necessary to synchronize the clocks on different hosts.
These are all examples of how services can be named and grouped to help reduce the total number of rules within the SunScreen configurations. Reducing the number of rules simplifies the configuration and maintenance of the Screen.
Rules:There is really no standard naming convention for rules. However, we want to make sure that the rules are as simple and as few as possible. It is far easier to just make changes to the addresses and services that make up rules on a daily basis than to be constantly adding new rules. If standards and discipline are not used when configuring SunScreens, then configuration and maintenance of the SunScreens becomes more difficult. The next time a rule needs to be added, it is harder to find out what others have added, and how you can leverage the address and service groups that have been defined before. It pays large dividends to take a few extra minutes to consider the rule-change request in the context of the currently defined address and service groups. Standardized and optimal rule-sets will make the SunScreen more reliable and perform better under high loads.
Note: We may also want to define guidelines for using upper and lower case when defining addresses and services in the sas_main GUI. Since the sas_main program sorts the addresses and services in different ways depending on the view you are in, it may be beneficial to use upper and lower case to ease sorting and finding items that have been entered into the configuration. Therefore, it is recommended that upper-case be used for customized or added entries and the system defaults will be mostly lower-case.
3.5.3 Redundant SunScreen Configuration
It is possible for the SunScreen SPF-200 packet filters to be configured in a redundant architecture. This is done with two SunScreen that are working in parallel to support a common set of host systems. These SunScreens will share a common network on one side of their interfaces. These SunScreens will have identical configurations and be able to handle traffic for the connected hosts no matter which Screen their traffic is going through.
The hosts that sit on the common network between two redundant SunScreens will need to make sure that they can take full advantage of the redundancy. These hosts need to be configured with one of several methods that allow them to adapt to network failures. These techniques would include multiple default gateways, Cisco’s Hot Standby Router Protocol (HSRP), passive RIP routing, or static routes. The choice of technique is up to the discretion of the administrator for the host, however, detailed testing must be performed to insure that the fail-over works properly. Of the above-mentioned methods, it is recommended that a combination of either HSRP or static routes be used to achieve this redundancy. Our experience and testing showed that multiple default gateways required more testing, and passive RIP (in.routed) required a large
50

SunScreen SPF-200 Design, Implementation and Maintenance Document – 4/7/98
amount of configuration and maintenance on the host. In addition, there is always the added option of having the service that the host provides redundant between different computers in different locations as well.
Note: It is important to note that the two redundant SunScreens should each only have one of their interfaces that are on the same subnet. If the two SunScreens share both internal and external interfaces, there will be packets that loop around the interfaces. This is due to the fact that the SunScreens do not run spanning-tree software that would ensure a loop-less configuration and shutdown ports that could lead to loops.
A critical element to this redundancy is the synchronization of the configurations between the two SunScreens. Below is a script that helps with this process. The mirror_config script takes the configuration from one Screen (master) and copies it to its redundant partner screen.
Note: This script should be used with caution because it will wipe out the configuration of the second (slave) screen.
Mirror_config:#!/bin/ksh# Verify command line argumentsif [ "$1" = "" -o "$2" = "" ]; then echo usage: $0 \<definitive screen\> \<mirroring screen\> exitfiecho Mirroring screens.echo Please wait...# Download configurations from both screens for processingss_client $1 ss_configuration default export $1 >/tmp/$1.tmpss_client $2 ss_configuration default export $2 >/tmp/$2.tmp# Prepare mirroring screen's configuration for deletionsed "s/ add / del /g" /tmp/$2.tmp | awk '{print $1" "$2" "$3" "$4" "$5}' | \ grep -v ss_rule | grep -v ss_access | grep -v \"hme | grep -v ss_certificate \ >/tmp/mtemp.sh# Prepare difinitive screen's configuration for copyinggrep ss_configuration /tmp/$1.tmp >>/tmp/mtemp.shgrep ss_action /tmp/$1.tmp >>/tmp/mtemp.shgrep ss_address /tmp/$1.tmp | sed "s/ add / add_nocheck /g" >>/tmp/mtemp.shgrep ss_service /tmp/$1.tmp | sed "s/ add / add_nocheck /g" >>/tmp/mtemp.shgrep ss_rule /tmp/$1.tmp >>/tmp/mtemp.shchmod 755 /tmp/mtemp.sh# Remove all hme referencesgrep -v \"hme /tmp/mtemp.sh >/tmp/mirror.sh# Send script to mirroring screen and executesend_file $2 /tmp/mirror.shss_client $2 mirror.shss_client $2 ss_compile default "$2"ss_client $2 ss_active_config activate default "$2"rm -f /tmp/mirror.sh /tmp/$1.tmp /tmp/$2.tmp /tmp/mtemp.shecho Done.
3.6 Template Test Plan & Testing
Testing occurs throughout the buildup, installation, and configuration of the SunScreen components. These are detailed in the operational buildup procedures that are located earlier in
51

SunScreen SPF-200 Design, Implementation and Maintenance Document – 4/7/98
this document. In addition, all of these build procedures and shell scripts have been rigorously tested in laboratories at company.
The SKIP link can be tested with the use of the following command:
ss_client <Screen_Name> ss_traffic_stats
You can also verify that the Netscape interface works properly by starting a Netscape browser and entering the URL http://<Screen_Name>:3852. (e.g. http://blv-spf-03:3852)
If the Screen does not seem to be communicating with the Admin Station, it would be helpful to know if that problems exists with other Admin Stations. If all Admin Stations cannot communicate with the Screen, then it would be helpful to try to send traffic through the Screen. This could be done with a Ping or a Telnet (this depends on the configuration of the Screen’s rulebase).
The web interfaces documented in Section 3.5.2 should also be used to validate the proper operations of the SunScreen. These web pages are capable of providing troubleshooting functions as well as validation that the SPF-200s are working properly.
It is also important for configuration changes to be tested right after they are made. This testing depends on the change that was made and the systems that were affected. It is also important to mention that the individual system owners are responsible for testing the functionality of their servers. Coordination will occur when changes to SPF-200s will effect any server or user. Again, the test plans will vary depending on the changes made.
3.7 Cut-Over Considerations
There are fewer considerations with the cut-over of the SunScreen SPF-200s. This is due in part to the fact that they act like bridges. Because the SPF-200 interfaces do not have IP addresses and are not doing traditional routing, but rather transparent listening and forwarding at the MAC layer, they can be plugged in and out without much disruption.
If the SPF-200 SunScreen needs to be taken out of the network configuration, it simply needs to be unplugged and bypassed with the cabling that already exists. This will bypass all of the security protection and filtering that the SunScreen is capable of offering, so this procedure is not to be taken lightly. However, this is not recommended because of security issues!
When deploying a new SunScreen, the connections should be just starting being turned-up and nothing significant will be disrupted during the SunScreen installation. However, if one SunScreen is being cut-over to a new SunScreen, the new SunScreen can be configured and placed right next to the functioning SunScreen. If the configuration is correct, then there can be a scheduled time for the cut-over. All system-owners should be notified of the maintenance window. The RJ-45 Ethernet connectors can be disconnected from the existing SunScreen and moved to the new SunScreen. This should only take a minute and is a great way to minimize the risks associated with a cut-over.
3.8 SNM & NAMS
The SPF-200 systems will be located within the current SunNetManager (SNM) configuration maps. There are technical difficulties related to the fact that the SunScreen’s interfaces do not have IP addresses. Therefore, the hme interfaces on the SunScreen cannot be contacted with either “ping” or SNMP from the SNM systems. In addition, even the administrative interface
52

SunScreen SPF-200 Design, Implementation and Maintenance Document – 4/7/98
(hme0) on the Screens can not be communicated with, even though it has an IP address. Since this interface is running the SKIP protocol, the only systems that it will talk to are ones that it has been configured to speak SKIP to. Therefore, the icons will be unmanaged.
The Admin Stations, however, do have the capabilities to communicate and be pinged by the SNM systems. Since the Admin Stations also run the SKIP protocol, the SNM systems will need to be configured within the Admin Station as a host that is authorized to communicate with the Admin Station without the use of the SKIP encryption protocol.
A way to detect the failure of a SunScreen system is by the fact that all systems beyond that packet filter will not be able to be contacted. It is important to be aware of the SunScreens and their locations in relation to the rest of the maps in SNM. Currently, the SNM systems contact systems through the packet filters with ping and SNMP. If the systems beyond a packet filter cannot be reached, then it might be a packet filter or other network problem.
The SPF-200s systems should be entered into NAMS within the ns.cs.company.com domain. The current SunScreen systems should be listed in Appendix D. NAMS has been updated to reflect all of the current information. As new systems are deployed, they must also be entered into NAMS with the appropriate naming convention.
3.9 Outages/WIA
If changes that may disrupt the normal flow of traffic need to be made to the SunScreens, outages or Work-in-Areas (WIA) will need to be declared. Any change that requires the plugging or unplugging of the hme Ethernet interfaces could require an outage or WIA to be declared. This depends on the criticality of the systems that are attached to that interface. The hme0 administrative interface for the Screen is not critical to the flow of traffic and can be moved without disrupting traffic flows. Configuration changes, such as the addition of permit rules will not adversely effect the passing of traffic through the SunScreen do not require outages or WIAs to be declared.
Admin Stations can be worked on without declaration of an outage(service-impact) or a Work-in-Area. This is aided by the fact that there are multiple hot-backups for the Admin Stations. Since multiple Admin Stations exist, an Admin Station failure will not affect the SunScreen and its ability to pass traffic. In addition, configuration changes can be made from other Admin Stations with no down-time or inconvenience.
Note: Working areas - (i.e. 24 hour notice for outages outages, five business days, scheduled ahead anytime in advance)
To schedule an outage, go to the web page and submit the form:
http://wheel.ca.company.com/prodmgmt/cspf/outage.html
You can enter “pending DRB approval” into the form.
The hotline phone number is 425-865-3900.
53

SunScreen SPF-200 Design, Implementation and Maintenance Document – 4/7/98
4.0 Maintenance
4.1 Desktop Troubleshooting
4.1.1 Troubleshooting Tools
Physical Inspection:You can make a very quick estimate of the health of the SPF-200 systems by looking at the lights on the computer and the lights on the network hubs/switches. If the light on the computer is on solid, then this could be an indication that it is having trouble. You can also look at collision lights on hubs and switches to gauge general health of these systems. These light will give some indication that the system is operational.
Connect a Dumb-Terminal to the Console:It is possible to connect a console to the Screen’s console port (TTYA, 9600, No Parity, 8 data bits, 1 stop bit). This is a method that can be used to make sure that the Screen is functioning. It is possible to run some simple Solaris commands to determine the health of the SunScreen. Note: Do not plug in a dumb-terminal and then turn the terminal on. This is the equivalent of typing a “Stop-A”. This will halt the SunScreen. The proper way to attach a terminal is to turn in on, and then connect it to the TTYA console port. You can switch a dumb-terminal between SunScreen console ports without any difficulty as long as the terminal is not powered off while it is connected to the SunScreen.
Snoop Command:On the Screen’s console you can use the snoop command to see all of the connections/packets that the Screen is permitting. The syntax of this command is:
snoop -d <interface_name_hme/qfe0,1,2,3,4>
You can also perform this command remotely from an Admin Station with the following command:
ss_client <Screen_Name> snoop -d <interface_name>
You can exit out of this program by pressing “Ctrl-C” once or twice.
Communication from the Admin Station to the Screen:You can try to run a command-line utility to determine if the Admin Station is talking through the SKIP tunnel to the Screen. A simple command that can be use:
ss_client <Screen_Name> ss_traffic_stats
This command will give back the network interface statistics if the SKIP connection is working properly. You can run this command several times with different time intervals to validate the amount of traffic that is being forwarded on the SunScreen’s various interfaces.
Ping or Traceroute Through the Screen:It is important to verify if data traffic is passing through the SunScreen’s interfaces. It is possible for the Screen to lose contact with its Admin Station, but still be forwarding packets. To test this, you can use “/usr/sbin/ping” and “traceroute” on the Admin Stations, on another computer, or a router . These utilities are pretty standard for TCP/IP network troubleshooting. If you can ping or
54
SunScreen SPF-200 Design, Implementation and Maintenance Document – 4/7/98
traceroute to systems beyond or through the Screen, then it is clear that the packet filter is forwarding packets. You can use the (https://blv-spf-config.ns.cs.company.com) web page to assist with the pinging of SunScreen interfaces. This tool will also help to quickly find hosts or systems beyond the different SunScreen interfaces and automate the running of a ping through the SunScreen.Note: It is important to check to see if ping and traceroute are permitted through the SPF-200. This depends on the security policy on the SunScreen and is dependent on the SunScreen’s rules. Ping and traceroute should be permitted, but it is important to check just to make sure.
Web Based SunScreen Tools:As mentioned above, you can use a variety of web pages to look at the configurations and logs of the SunScreens. These tools are mentioned above in the sections on “operational procedures” and “logging”. These can help with troubleshooting. These URLs are listed above and in the resources/TOOLS appendix. The two main web pages that would be useful to SunScreen troubleshooting at the https://blv-spf-config.ns.cs.company.com page and the http://nmcsweb2.ca.company.com/cgi-bin/WebObjects/WOApps/ExtStats web page. The SunScreen Tools web page provides tools for troubleshooting SunScreens as well as other useful documentation. The External Data Networks User Access Statistics web page provides performance information on the various SunScreens and their interfaces.
An extremely useful web page for assisting with the troubleshooting of the SunSceens can be found at https://blv-spf-config.ns.cs.company.com. This page provides a wide variety of tools to test the Screens. 1) This page provides the ability to download the current configuration from the Screen. This
item actually lets you download the configuration from the SunScreen in “real-time”. If this fails, then the Admin Station selected may not be communicating with the Screen. You can select different Admin Stations to download from in the event that an Admin Station is unavailable. This can be a useful test in verifying that the SunScreen is communicating with the Admin Station. It is possible that the SunScreen has lost its encrypted link between the Admin Station, but it is still forwarding data traffic normally. More testing is required.
2) The same goes for the downloading of the logs. The web page provides a method of downloading the most recent 5000 lines from the logs of the SunScreen. This actually requests a download from the SunScreen for its logs and then stripes off the bottom 5000 lines. This may take a while depending on how large the logs are. However, if this fails, then the Screen may not be communicating with the selected Admin Station.
3) As previously mentioned, this web page also provides the ability to ping through the Screen to help validate if it is still passing traffic correctly. This is an easy way to test the forwarding of traffic over a SunScreen’s interfaces. This can be used in conjunction with the SunNetManager systems and other network management systems to validate that the Screen can be communicated through.
4) This page also provides a log of recent “history” of SunScreen changes. The most recent changes are on the top of this listing. These can help correlate problems with recent modifications of the Screen’s configuration. This may help to correlate a problem’s origin and speed problem isolation and recovery.
5) This page provides a way to look at SPF-100 configurations. These may be helpful in troubleshooting the remaining SPF-100s until they can be upgraded to SPF-200s.
6) This web page also provides other types of useful information. Contact information is available and hardware/location information is listed on this web page. A current copy of this DIM document will be available for viewing.
7) This web page will also provide for ways to contact personnel identified in the escalation procedures either through pagers, or group exchange mailboxes. Be sure to reference the escalation procedures when using these active links on this web page.
SunNetManager:The SunScreens are currently shown on the SunNetManager maps. These maps can be useful in understanding the systems that are connected to the SunScreens. If other devices cannot be
55

SunScreen SPF-200 Design, Implementation and Maintenance Document – 4/7/98
contacted through SNMP from SunNetManager, and the SunScreen is involved, it may be an indication that the SunScreen can be failing.
Tabular Display:Various groups within company use what is known as the “Tabular Display” to list the current alarms and critical network and system events. The Admin Stations and Screens will be sending alarms to these displays when problems occur. This can be useful in helping with fault isolation. At some point, the SunScreen Tools web page will also provide a log of recent alarms to help improve troubleshooting.
Using Tools in Combination:It is possible to correlate information received from the above-mentioned tools to help isolate problems with the SunScreens. It is possible to verify that the Admin Stations are communicating with the SunScreens. This can be done by downloading the configurations, retrieving the logs, or from the Admin Station itself. If this seems to be failing, it would then be important to check that traffic is flowing through the SunScreen. If a ping or traceroute indicates that the SunScreen is failing, then this problem should be escalated immediately to a group that has physical access to the system or can take action to repair the failed SunScreen.
As a last resort for troubleshooting you can run the command “super_diag” from the Admin Station for a SunScreen. This is a shell script that was provided by Sun to gather information for their support staff. You can run this shell script and then mail the output file to SunService as part of a trouble escalation call.
4.1.2 Problem Escalation
This section of the document will illustrate the procedures for the escalation of SunScreen problems. It is important that all groups are aware of these procedures and understand their hand-off points to speed problem resolution.
Service Resource Center (SRC):The SRC will be one of the first points of contact for users or others who might be experiencing problems related to a SunScreen failure. Phone calls will cause the SRC to respond to problems and create ATEMS trouble tickets. The SRC will be able to ask questions of user’s experiences and enter those important elements into the trouble ticket background. The SRC will help identify if the types of problems seem to be SunScreen related or network related. If this determination cannot be made, then the SRC should escalate the problem to DNM for further study.
Data Network Management (DNM):DNM gets many inputs that feed them information about network failures. DNM will receive direct phone calls in addition to the information provided by the network management systems. SunNetManager is a useful tool that helps the DNM to quickly identify the root-cause of problems. Since the SunScreens appear on the SunNetManager maps, network failures can be seen in relation to how they are cabled in the datacenters. In addition, the “Tabular Display” feeds them information about network and system alarms. The SPF-200 Admin Stations will be sending traps to the CMI systems and will be constantly be providing status. DNM will be aware of both SunScreen and Admin Station failures. DNM will be able to make the determination if they require more information about a SunScreen failure or if they know who to escalate the problem to. If the DNM need to work with the NCC or field support groups, they will get them involved and work with the ATEMS to forward the trouble tickets.
Network Control Center (NCC) or Field Support:There will be SunScreens in several locations within company and these groups will have responsibility for these facilities. These groups will have physical access to the SunScreens and be able to take action based on the type of problems that the SunScreens might be experiencing.
56

SunScreen SPF-200 Design, Implementation and Maintenance Document – 4/7/98
These groups will be able to see if the fan is turning, if the lights are on, and several other actions. This group will be able to determine if the SunScreen has experienced a hardware failure and involve Central System Administration. The Administrators will work with the NCC to repair the hardware and restore service as quickly as possible. If the NCC or field support groups need additional assistance or other information, they can involve DNTS for additional network troubleshooting. These groups will work in conjunction with each other to quickly resolve the problem or escalate it to the appropriate groups. This escalation will occur in the form of phone calls, pagers, and the ATEMS system. The field support groups may have additional responsibilities of assisting the actual replacement of hardware recovery of SunScreen failures.
Distributed Network Technical Services (DNTS):DNTS will have problems brought to their attention from a number of sources. This group will be monitoring the SunNetManager and Tabular Displays in addition to having other useful tools to perform network component testing. The ATEMS systems will alert DNTS to other problems and provide additional information about related problems. This group will be able to perform advanced troubleshooting of the SunScreens and assist with the proper escalation of SunScreen failures. DNTS will escalate SunScreen problems to Central System Administration or to GNA directly.
Central System Administration (CSA):Central System Administration is responsible of the SunScreen system’s hardware and software. This group will implement, configure, and maintain the SunScreen hardware, underlying operating systems, and SPF-200 software. This group will have the authorization to make rule changes on the SunScreens and will have physical access to the Admin Stations. This group will coordinate and assist with the replacement of Sun Microsystems hardware and log service calls with Sun. This group will be a focal for SunService support contracts. Central System Administration will perform the actual hardware repairs in Bellevue and assist with the hardware repairs of SunScreens in other locations. This group will work with the GNA packet filter group for advanced SPF-200 problem resolution. GNA will also work with these administrators when upgrades or migrations are required.
Global Network Access (GNA) Packet Filter Group:The GNA packet filter groups will have responsibility for the design, implementation, and maintenance of the SunScreen systems. This involves the SPF-100s and SPF-200s. This groups will also be the group that will test and certify upgrades and new features for the SunScreens through the appropriate boards. The GNA packet filter group will also work with the DRB for approval for external access SunScreen changes. GNA will be the “last-line-of-defense” for handling SunScreen problems. GNA will work with all appropriate groups to ensure that SunScreen problems are resolved quickly and SunScreen failures are minimized.
4.2 Network Management
The SPF-200 SunScreen systems are not necessarily managed by the traditional network management systems at company. As mentioned above, the SunScreens cannot be accessed with either SNMP or ping. In addition, there are inherent security risks in performing SNMP queries or sending traps to/from a security device. SNMP Version 1 communicates its “community strings” in clear-text within the TCP/IP packet. Since Version 2 devices are not manageable under the current company network management platform, we have decided to not perform any network fault management of the SPF-200 system with SNMP. However, the SPF-200s will appear on the SunNetManager maps for location in relation to other devices.
Other systems will be used to manage the SunScreen SPF-200s. We can manage the systems using the previously-mentioned web-based graphical utilities. In addition, we have developed
57

SunScreen SPF-200 Design, Implementation and Maintenance Document – 4/7/98
systems that can monitor and report on the performance and availability of the SunScreens. See section 4.4 on how performance statistics are gathered from the SPF-200s. We can also use the logs that the SunScreens create to manage them and help troubleshoot the traffic flows through the SPF-200s. Lastly, there are web-based management utilities that have been developed to help test and manage the SunScreens.
As far as fault management goes, the SunScreen Admin Stations will monitor the Screens and flag an alarm to the CMI event managers. This will be done with SNMP traps. In addition, Sun has built in the ability to forward SNMP traps (not SNMP polling) to a SNMP management system. Therefore, the SPF-200 Screens will be configured to send SNMP traps to the company CMI alarm systems. These traps are detailed in an Appendix within this document.
As mentioned earlier in this document, it is possible for the network management systems to contact systems beyond and through the Screens. If these pings and SNMP packets are not being forwarded and there seems to be problems contacting all of the systems beyond a SPF-200, then there is need to further investigate the SPF-200’s functions.
4.3 Map Icons/Menus
The SunScreen SPF-200 systems will appear on the SunNetManager maps. Unmanaged icons will be used due to the fact that the SunScreens cannot be pinged or SNMP polled. However, it is important that the relationships between SPF-200s and other network devices be accurately diagramed. Since the icons are unmanaged, no additional Menus need to be added to the network management system to support the SunScreen systems.
In the future, we hope that Sun provides both secure performance monitoring and fault management for the SPF-200s. Then we can integrate them more easily into the network management systems at company. In addition, there may also be opportunities to integrate SunScreen software into menus within the new Hewlett Packard OpenView network management platform being developed.
4.4 Configuration and Performance Data Collection and Thresholds
Configuration data collection is performed by the Admin Stations. In conjunction with the configuration management server, revision control and backups are possible for all of the deployed SunScreens. These procedures and systems are described elsewhere in this document.
There is a system in place that gathers performance data from the SunScreens and makes various reports available via the Web. Gary Thompson has developed a system that will gather performance statistics at 5 minute intervals from the configuration management server. These statistics are sent there from the Admin Stations. Gary’s software then analyses and creates reports from the data and makes that information available on the company intranet. Below is the URL for this page. Simply select “Packet Filter Use Stats" and this will launch another web browser page where you can enter in dates and SunScreens to get the desired report.
http://nmcsweb2.ca.company.com
These rolled-up fault alarms are utilized to determine availability statistics for the SPF-200 SunScreens. These can be combined with SNMP traps currently collected on Admin Stations for informative analysis of SunScreens.
58

SunScreen SPF-200 Design, Implementation and Maintenance Document – 4/7/98
As for the thresholds for the performance of the SPF-200s. Duke Trevino documented the performance of the SPF-200s for DNI. This performance information is listed in Appendix F towards the end of this document.
4.5 Failure Times
4.5.1 MEAN-TIME-TO-REPAIR (MTTR)
These times are the same whether the failed SunScreen is located in Bellevue or elsewhere.
These times disregard the time it takes to detect the system failure.
Cold and warm spares will be available in every location where SunScreens are deployed.
If cold-spare is available: - 2 hours to ½ dayTime is required to get the hardware checked out. This should be nil in this case and the
cold-spare should be right next to the old unit ready to just swing over the network cables. The CD needs to be inserted and the SPF-200 software installed; the configuration will then need to be restored and this can be done quickly with diskettes or via our remote configuration methods. These procedures are simple enough to walk someone with very limited computer experience through.
It is company policy that cold spares will be required for each location that will have SunScreen SPF-200 systems deployed. This will significantly reduce company’s exposure to losses due to lack of services compared to not having cold spares.
The following scenarios are for situations where a cold-spare has not been stocked.
The MTTR for an Admin Station is allowed to be longer, because we have backups of the Admin Stations. Since we have hot-spares in a dual Admin Station environment, we will not be out of service for changes or management of SunScreens.
Note: These estimates for the MTTR listed above are pessimistic. company currently has 4 hour hardware replacement as part of the SunService Platinum service contract that we have on all SPF-200 systems. In some cases, we can actually repair the systems faster, due to improvements in our recovery processes and the ability to have some cold-spare hardware on site.
4.5.2 MEAN-TIME-BETWEEN-FAILURE (MTBF)
Below are some MTBF numbers for the following hardware platforms.
Admin Station:UltraSPARC 1 Creator, 167MHz, 2 X 2.1GB hard drives, CDROM,. floppy, Sun monitor, keyboard, and mouse.MTBF = 17,500 hours
Standard Screen System:UltraSPARC 2 Enterprise, 167 MHz, 2 X 2.1GB hard drives, CDROM, floppy, quad FastEthernet HME NIC.MTBF = 14,600 hours
Future Standard Screen System:UltraSPARC 2 Enterprise, 300 MHz, 2 X 2.1GB hard drives, CDROM, floppy, quad FastEthernet HME NIC.
59

SunScreen SPF-200 Design, Implementation and Maintenance Document – 4/7/98
MTBF = 15,300 hours
4.6 Password Recovery
These systems have single passwords for the Admin Station and the Screen. However, these have been changed from the default and are not found in any of the larger password cracker databases.
However, the loss of the password would be rare. Enough people know the passwords that it would be highly unlikely that everyone would forget the password at the same time.
The GNA group maintains a list of people who are authorized to access the SSL web pages for maintaining and inspecting the SPF-200s. When the password changes, the people on that list are notified.
Each SunScreen administrator should have their own login ID to the Admin Stations. This login ID should be the administrator’s three initials. The Administrator can the “su” to a root account that has the login name “root_abc”, where “abc” are the user’s three initials. This will allow administrators to run SunScreen commands and allow for tracking of different commands that are being run from the Admin Stations.
It is important to note that no password recovery is possible because it is a security device. The loss of the password requires that the SPF-200 software be re-installed from scratch. Since authorized company personnel have access to the Screen’s physically secure location, then they have the ability to recover the password through a reinstallation and recovery.
4.7 Recovery Scenarios
4.7.1 To Recover From a Broken Screen
You can refer to this document, the web page mentioned in this document or the multimedia CDROM of SunScreen training to help restore a SunScreen. If you need assistance, don’t hesitate to call the packet filter group (look in the contact info of this document).
You should check on the web page: http://blv-spf-config.ns.cs.company.com for recovery commands and restoration procedures.
You will need to rebuild the Screen by reinstalling the SunScreen software. To do this, simply insert the SunScreen SPF-200 CD and installation disk into the Screen and reboot it. Since this diskette should have been labeled with the name of the Admin Station that generated this install diskette, the SunScreen will then be able to be initially controlled via that Admin Station. After the Screen is rebuilt, then the SKIP configuration should be tested between the existing Admin. This will be done with the “build_screen” program, and the “backup” command. All other additional operations of the Screen and Admin should then be tested.
If you do not have a copy of the install diskette, one can be created from the backup made at installation on the configuration management server. You can ftp to the config server (blv-spf-config.ns.cs.company.com) and download the appropriate tar file from the /export/home/install directory for the appropriate SunScreen. Insert a new floppy diskette and type:
volcheckcd /floppy/floppy
60

SunScreen SPF-200 Design, Implementation and Maintenance Document – 4/7/98
tar xvf /tmp/<Screen_Name>.tar
You should label this diskette as a restored copy of the install diskette for the named SunScreen. You can now take this diskette and follow the procedures mentioned above to recover a SunScreen. Put it in the SunScreen along with the SunScreen software CD and reboot.
After installation is complete, you will want to load the two jumbo patches. These procedures are detailed in this document in the section on building up a screen. The procedures to restore a screen are the same for installing it for the first time.
The next step is to insert the patch diskette and run the “install.sh” shell script. These procedures are the same as for building up a Screen initially. These procedures are listed above in the sections on installation of the Screen.
Once the patch disk has been run, the “build_screen” process should be followed to install the updates to the Screen. At this point, the Screen can be restored from a previously stored configuration on the configuration management server. This will be done with the “restore <Screen_Name>” command. You could also restore the Screen’s configuration from a floppy, but the diskless method is preferred.
Other SunScreen patches need to be loaded such as the hme/qfe patch and the Jumbo Patch.
To restore the SunScreen’s configuration, you will need to refer to the SunScreen tools web page and find the tar file for the last time the SunScreen was backed up. You will need to run the command:
restore <Screen_Name> <Tar filename>
This should restore the configuration and other changes for the SunScreen and put it back to the proper configuration.
If there were changes made between the time the SunScreen was backed up, then the configuration will need to be restored again. This is done by going to the SunScreen tools web page and looking for the most-recent configuration file with the newest time stamp. Then run the Admin Station command:
revert_config <Screen_Name> <Config_filename>
When this is done, the Screen should be fully recovered and back in its original working condition.
4.7.2 To Recover From a Broken Admin Station
A Broken Admin Station can be recovered from the periodic tape backups that we make of these systems. However, there is nothing on these systems that can’t be duplicated. The installation procedures for an Admin Station do not require a large amount of time and will restore the software to a determinate state. The procedures to do this are detailed above in the installation sections. However, the recovery scenarios for Admin Stations are not as critical as those for SunScreens because we have hot-spares. There would only be issues if both Admin Stations failed at the same time. It has been determined that the probability of this is so remote that it is not worth considering. In other words, lightning doesn’t strike twice at the same time in two SunScreen Admin Stations.
We are using netbackup for backing up our Admin Stations and configuration management server. This system backs up the servers over the network and then archives them and creates
61
SunScreen SPF-200 Design, Implementation and Maintenance Document – 4/7/98
an off-site storage system. CSA should know how to recover a system after failure from a netbackup server.
4.7.3 To Remotely Reset a SunScreen
There are procedures to restart a Screen from and Admin Station. To do this, simply type:
restart <Screen_Name>
The script will then ask if this is in fact what you want to do and then the Screen will reboot. You will not be able to connect to the Screen for several minutes while it reboots and reestablishes the SKIP connection. After rebooting, it is important to make sure that SKIP connections to the Admin Station have been restored and that the Screen is functioning as expected.
Below are the scripts to remotely restart a Screen
Restart (on Admin Station):#!/bin/ksh# Usage: restart <Screen_Name>echo "Warning! This program is about to reboot $1."echo ""echo "Do you want to continue?"ANSWER=""while [ "$ANSWER" = "" ] ; do read ANSWER ANSWER=`echo $ANSWER | tr yn YN` if [ "$ANSWER" = "Y" ] ; then ss_client $1 restart elif [ "$ANSWER" = "N" ] ; then exit else ANSWER="" echo "Please answer Y or N: " fidone
Restart (on Screen):#!/bin/ksh/usr/sbin/init 6
4.8 Sparing
It is company’s policy to have at least one cold spare for each piece of equipment in production in every site. The SunScreen SPF-200s will be no exception to this rule. There will be at least one cold-spare in place in each location where a SunScreen SPF-200 is installed.
company is also relying on the 4-hour response Platinum service contract that we have for the hardware and SPF-200 software. The recovery of a Screen is mentioned above in addition to the Mean-Time-To-Repair (MTTR) however, due to the fact that we have cold spares, the time is less than if we didn’t have spares.
Admin Stations do not require a sparing model because we have two Admin Stations that are both up and running at the same time. They are essentially “hot-spares” for each other. If one
62

SunScreen SPF-200 Design, Implementation and Maintenance Document – 4/7/98
fails, then the other one can be used without delay. The broken system can be repaired at our leisure.
4.9 Time Synchronization
It is important to keep the clocks of Admin Stations and Screens not only set to the correct time, but synchronized together. In this document we mention how to set the clock of the Admin Station with the correct time by using the rdate command to the server blvnts.services.company.com. This was mentioned in the installation procedures for the Admin Station. However, we want to keep the SunScreen and the Admin Station synchronized. In order to do this, we have created a couple of shell scripts to be placed in the /opt/SUNWicg/SunScreenAdmin/bin directory on the Admin Stations.
A modification of the Screen is also required to make these shell scripts work. You will need to link the date command to the /opt/SUNWicg/SunScreen/bin directory from /usr/bin. This should have been done when the build_screen process took place during installation of the SunScreen.
Below is the shell script that sets the time from the Admin Station to the Screen using the date command. This script should adjust for the time difference in St. Louis.
Set_time:#!/bin/ksh# Usage: set_time <Screen_Name># This scripts is dependent on the fact that it is run in cron before 8PM (PST) on the hour# SunScreens must be in the continental USss_client $1 ksh -c "/bin/echo \$TZ" > /tmp/set_time.$$ 2>&1#ADMINTIME=`date +%m%d%H%M`mon=`date +%m`day=`date +%d`hor=`date +%H`min=`date +%M`#echo "Admin Time" $mon$day$hor$minif [ `grep -c "US/Central" /tmp/set_time.$$` = 1 ]; then let hor="hor + 2"fi#echo "Screen Time" $mon$day$hor$min/opt/SUNWicg/SunScreenAdmin/bin/ss_client $1 date $mon$day$hor$minrm /tmp/set_time.$$
Below is a shell script that lets you confirm that the clocks on the Admin Station and the Screen are properly synchronized.
Chk_time:#!/bin/shADMINTIME=`date +%m%d%H%M`ADMINSECS=`date +%S`echo "AdminTime: "$ADMINTIME.$ADMINSECSSCREENTIME=`ss_client $1 date +%m%d%H%M`SCREENSECS=`ss_client $1 date +%S`echo "ScreenTime: "$SCREENTIME.$SCREENSECS
You will also need to modify root’s crontab file on the Admin Station that is going to be doing the synchronization. This modification should be done on all Admin Stations, but commented out on
63

SunScreen SPF-200 Design, Implementation and Maintenance Document – 4/7/98
those that are not the favored Admin Station. (The “favored” Admin Station is the Admin Stations that exists in the NCC in the Bellevue Data center) Below are examples of what the crontab entries should look like. In order to make these modifications on the Admin Station, simply enter the following command.
crontab -e
0 1 * * * /opt/SUNWicg/SunScreenAdmin/bin/set_time ss-spf-test1 >/dev/null 2>&10 1 * * * /opt/SUNWicg/SunScreenAdmin/bin/set_time ss-spf-4 >/dev/null 2>&10 1 * * * /opt/SUNWicg/SunScreenAdmin/bin/set_time ss-spf-5 >/dev/null 2>&1
Note: If there are problems synchronizing the clocks between Admin Stations and SunScreens, there could also be problems with SKIP. Since the SKIP protocol requires that the clocks of the two systems be within certain tolerances, time differences could lead to SKIP failure. If the date is not properly set, the date could be drastically off. This could cause the SKIP link to stop functioning due to the tie between the encryption algorithms and the current date and time.
4.10 Backups
The preferred method for making backups of remote Screens and restoring those backups are detailed in this section of the DIM.
The current procedures to backup a Screen after a configuration change has been made is to use the following command.
backup <Screen_Name>
This script will take a tar file that is created on the Screen and place it in the /opt/SUNWicg/SunScreenAdmin/backup directory with the screen’s hostname followed by the .tar file extension. This “backup” script is the same functionally as the spf_backup command, only it does not use a diskette, but uses the SKIP link to send the file back to the Admin Station.
In order to restore the configuration, you will need to enter the following command:
restore <Screen_Name>
This script copies the backup tar file (screen_name.tar) to the Screen and then prompts the user if this is really their intent. The scripts then restore the configuration, including certificates and keys, onto the Screen and then reboots the Screen. Once the Screen reboots, the configuration should be restored. At this point, it is important to make sure that the Screen is communicating (via SKIP) with the Admin Station and is operating properly.
Below are the scripts for the backup and restoration of a remote Screen’s configuration.
Backup:#!/bin/ksh# Usage: backup <Screen_Name>DATE=`date +%y%m%d%H%M`# tell the screen to prepare its backup filesecho Backing up $1.../opt/SUNWicg/SunScreenAdmin/bin/spf_remote_backup $1 /tmp/$1.tar# get the tar file from the Screencd /tmpftp -n config <<END
64
SunScreen SPF-200 Design, Implementation and Maintenance Document – 4/7/98
user cfgbot bargl&it bi cd /export/home/backup put $1.tar $1.$DATE.tar quitENDrm -f $1.tar
Restore:#!/bin/ksh# Usage: restore <screen_name> <filename>echo "Warning! This program is about to destroy all current configuration"echo "information on $1 and replace it with $2."echo ""echo "Do you want to continue?"ANSWER=""while [ "$ANSWER" = "" ] ; do read ANSWER ANSWER=`echo $ANSWER | tr yn YN` if [ "$ANSWER" = "Y" ] ; then # Download the backup file form config server ftp -n config <<END user cfgbot bargl&it lcd /tmp bi cd /export/home/backup get $2 quitEND# Tell the screen to restore its backup tar file echo Restoring $2... /opt/SUNWicg/SunScreenAdmin/bin/spf_remote_restore $1 /tmp/$2 rm -f /tmp/$2 elif [ "$ANSWER" = "N" ] ; then exit else ANSWER="" echo "Please answer Y or N: " fidone
With the advent of the new Jumbo Patch (105047-17) it is possible to use the spf_remote_backup and spf_remote_restore command to remotely backup and restore the configs on SunScreens. These commands can be used from the different Admin Stations. The method described above with the backup and restore command are the preferred methods.
For Screens, backups of the configurations can also be made with the use of the spf_backup command. This method uses a floppy disk to store the configuration. Even though this method works, it is recommended that the above-mentioned method be used. The diskless method described above will allow for easier remote recovery of the Screen’s configuration, certificates, and interface definitions. However, we will still mention how to perform the floppy disk method here. This is run from the Admin Station as follows:
ss_client <Screen_Name> spf_backup
65

SunScreen SPF-200 Design, Implementation and Maintenance Document – 4/7/98
You will need to put a diskette in the floppy drive of the Screen. This diskette will then contain the Screen’s certificate information, addresses, services, actions, access information, network, router, rules, interfaces, and all other configurations. This diskette will be automatically ejected when it is done writing the information.
In order to perform a restore with this diskette, you will need to use the Screen’s installation diskette and boot up the Screen. This will create a blank working Screen. Once the Screen has booted and functioning with its SKIP certificate, the Admin should be able to talk to it. At this point, put in the backup floppy disk and run the command:
ss_client <Screen_Name> spf_restore
This will take the information off of the backup diskette and reconfigure the Screen. This is the method for restoring a Screen in the event of a full system failure.
Other backups using the “spf_backup” command can be performed monthly or whenever a network interface is added/removed on a Screen. These diskettes are also good for backing up the configuration and other SKIP configuration information.
You can also use the “dump_config” command that was created to write the configuration, rules/addresses/actions/services of a Screen to the hard drive of the Admin Station. This is the command that is used to dump the configuration for display on the “Configuration Management” web page. However, the preferred method for backing up and restoring Screens should be the “backup” and “restore” commands that perform the diskless backups of configurations, addresses, rules, services, actions, and certificates.
There will also be a shell script called “revert_config” that will provide for the roll-back to a previous configuration stored on the configuration management server. This will be documented here when it is completed and fully tested.
For backing up Admin Stations, it is necessary to connect a tape drive to the SCSI port and reboot the system. The tape drive will be used to make a full-system tape backup. This is what will be used to restore from if there is a serious problem with the Admin Station. Admin Stations should also be backup up monthly to improve the time-to-repair. Since the rebuild would take ½ a day, it would be faster to simply restore the Admin Station from tape. We also use netbackup for Admin Stations and configuration management servers. This is a good method for recovering these systems in the event of a failure.
4.11 Logging and Log files
In order to look at the log files for the SPF-200 system, they must be dumped from the Screen to the Admin Station’s hard drive. This can be done with the use of the Netscape interface. You can either get the logs, get and clear the logs, or just clear them, whichever is appropriate. It is recommended that the logs not be cleared, but for troubleshooting, a simple “get” should be performed, not a “get-and-clear”. Next, tell Netscape which directory to save them to. Pick a saved log name that is simple and reusable such as “log”. Next, you will need to run a command on this saved file in order to make it readable. To do this, you should use:
sas_logdump -ta -i (saved_log_name) > (new_output_file_name)
This command takes the saved file from the Screen and creates a new output file with the readable log entries. Make sure that you are following the naming conventions that ensure the uniqueness of the logs. To view the logs, you can then:
66

SunScreen SPF-200 Design, Implementation and Maintenance Document – 4/7/98
more <output_file_name>
You can also use tools such as tail, head, grep, or vi at this point. The “sas_logdump” command might take a while to run depending on the size of the logfile that is retrieved from the Screen.
There have been shell-scripts created to automate the dumping and processing of the logs for the SunScreens. Below are two scripts that get the logs and get and then clear the logs respectively.
Below is the script named “get_logs”.
#!/bin/shDATE=`date +%y%m%d`/opt/SUNWicg/SunScreenAdmin/bin/ss_client $1 ss_log get > /export/home/logs/$1.$DATE.$$
Below is the script named “get_clear_logs”.
#!/bin/shDATE=`date +%y%m%d`/opt/SUNWicg/SunScreenAdmin/bin/ss_client $1 ss_log get_and_clear > \/export/home/logs/$1.$$
It is preferable that one uses the get_logs shell script to look at the log file in the middle of the day. That way, in the evening, the logs can be archived to a logging server.
The shell script that makes this happen on an Admin Station is shown below. The shell script gets and clears the logs and converts them into ASCII format. The log file is then mailed to the logging server for analysis and the temporary files are deleted. The “/opt/SUNWicg/SunScreenAdmin/bin/push_log” shell script looks like the following:
#!/bin/shDATE=`date +%y%m%d`/opt/SUNWicg/SunScreenAdmin/bin/ss_client $1 ss_log get_and_clear > /tmp/$1.$DATEuuencode /tmp/$1.$DATE xxx | mailx -s $1.$DATE [email protected] -f /tmp/$1.$DATE
This script is kicked off nightly to the logging archiver server. In the crontab file on the admin station, the following lines should be added:
59 23 * * * /opt/SUNWicg/SunScreenAdmin/bin/push_log ss-spf-4 >/dev/null 2>&159 23 * * * /opt/SUNWicg/SunScreenAdmin/bin/push_log ss-spf-5 >/dev/null 2>&1
On the configuration management server there is a user called “logbot” that will receive the log and run a script that puts the file in the proper directory. The entry in the /etc/passwd file looks like the following:
logbot:x:200:200:SPF-200 log robot:/home/logbot:/bin/false
The group file entry looks like the following:
logbot::200:
67
SunScreen SPF-200 Design, Implementation and Maintenance Document – 4/7/98
The logbot user has a “.forward” file in its user directory that contains the following exact shell script to handle incoming mail:
"| /home/logbot/processlogs"
The “processlogs” shell script contains the following commands:
#!/bin/ksh# Don't allow a file to be overwrittencat - >/disk1/SPF200logs/tmplog FILENAME=/disk1/SPF200logs/`grep -i subject /disk1/SPF200logs/tmplog | awk '{print $2}'`if [ -e $FILENAME ]; then FILENAME=$FILENAME.$$fi# Save the fileuudecode -p /disk1/SPF200logs/tmplog >$FILENAMErm -f /disk1/SPF200logs/tmplog
You also need to copy the “sas_logdump” command from an Admin Station to the log server. The logs are shipped to the log server in a binary format and expanded to ASCII format with the sas_logdump utility. This command is also placed in logbot’s home directory.
There is also a way to view the logs in “real-time” from a web page while not disturbing their contents for the nightly. The URL for that page is https://blv-spf-config.ns.cs.company.com. You can select the SunScreen and the Admin Station to use to download the current logs. This will be helpful when troubleshooting problems or verifying that a Screen is up an running. It currently shows the last 5000 lines of the logs for better performance. This will generally contain between 10 and 20 minutes of logs.
4.12 Change Process
Here are the change processes for the SPF-200 SunScreens.
Major Changes: Change Board Approval (DRB) required. New SunScreen installation SunScreen device changes (i.e. new networks and systems, major configuration changes) Significant rule changes (i.e. new services accessible via an external network)
Maintenance Changes: No DRB Change Board approval required - individual system change control procedures apply & are communicated via the system focals. Maintenance rule changes (i.e. address & administrative services changes as requested by
the system focal, normal maintenance of the rule set, as required)
SunScreen SPF-200 Change Procedure:1. Receive Change Request: Support personnel receive change requests via the change board
or system focals. Changes are made on a best effort basis depending on the nature & priority of the change. Same day service is the normal time frame for completing requests. These changes should be verified so that the change is consistent and accurate. The addresses, services, actions and rules should be well-defined before the change process proceeds.
2. Check for previously undocumented changes (rogue changes) with the SunScreen tools web page.
68

SunScreen SPF-200 Design, Implementation and Maintenance Document – 4/7/98
3. Lock the SunScreens by going to the SunScreen tools web page and selecting you user ID.
4. First, determine if the change requires a change to the common database of addresses, services, and actions. If so, then you will need to run “co_main” for the common SunScreen.
5. Next you will want to run “sync_common” to propagate the changes to all of the SunScreens.
6. If the change requires changes to the rules of a particular SunScreen, then you must run “co_main” for the SunScreen.
7. After the SunScreens ruleset is compiled and activated, you should document you change to any SunScreens that have changed. This is done from the Admin Station through the use of the Netscape interface within the “config” page. To launch Netscape, simply enter “netscape &” at the UNIX prompt when logged in as root. The URL to enter is http://<Screen_Name>:3852 (e.g. http://blv-spf-04:3852). That means both the SunScreen itself and the common SunScreen changes need to be documented. To update the SunScreen Change Log Web Page: Go to the web page http://blv-spf-config.ns.cs.company.com (administration tools page) and click on SPF-200 change form. Enter the appropriate information and click “Submit” Make sure you look over the differences in the configurations to validate the changes you made.
SunScreen Logging: SunScreen on-line logs are reviewed by the support personnel on a daily basis. The support staff maintains a weekly rotational schedule for monitoring the SunScreen log files. Rule failures are analyzed and either corrected and/or are reported to the system focals for corrective action.
SunScreen Auditing: The audit points are:1. Change board (DRB) approval documentation and weekly meeting minutes2. Individual system change control documentation maintained by the system focals3. SunScreen Configuration Files maintained on the primary SunScreen Administration Station
and on the log server.4. SunScreen Change Log web site should be used to document change.5. SunScreen On-line Audit Logs maintained daily on the log server.
69

SunScreen SPF-200 Design, Implementation and Maintenance Document – 4/7/98
4.13 Hotline Customer Request Template
========================================================================= HOTLINE CUSTOMER REQUEST TEMPLATE=========================================================================# Lines where the keywords are in upper case (eg. CALL TYPE:)# must be filled in. Others are optional## Please note: ## For SunSpectrum Services accounts, the ScheduleID is mandatory.## For Personal AnswerLine and AnswerLine accounts, the Authorized # Contact Name is mandatory.#
Template #: V1.1 ( Do not change )
DESTINATION: [email protected]
Contract ID: |> SC45818 <|
CALL TYPE: SOFTWARE
SEVERITY CODE: |> 2 <|
COMPANY NAME: |> company Information & Support Services <|
AUTHORIZED CONTACT: |> Name <|
PHONE NUMBER: |> (XXX) YYY-ZZZZ <|
Email Address: |> [email protected] <|
PRODUCT NAME: |> SunScreen SPF200 <|
System Serial Number: |> <|
HOST SYSTEM TYPE: |> Ultra 2 <|
SYSTEM TYPE: |> Server <|
OS RELEASE: |> Solaris 2.5.1 <|
SUMMARY: |> add key word problem summary statement here <|
DETAILED DESCRIPTION: |>
70

SunScreen SPF-200 Design, Implementation and Maintenance Document – 4/7/98
5.0 Training
Training has and will be performed on the operations and support of the SunScreen SPF-200 systems.
Service Response Center (SRC):The SRC needs to be able to quickly identify and categorize problems and get the appropriate support people involved to provide for quick problem resolution. Therefore, training needs to be performed so that the SRC personnel will know where the SPF-200s fit in relation to other pieces of network equipment. The SunNetManager(SNM) maps and CMI alarms will help with the quick problem determination. The SRC will also have detailed Windows On-Line Help (WOH) scripts to help them quickly escalate problems to the appropriate support group. In addition, due to the fact that new personnel will be added to the SRC, reminder training will be conducted every 6 months on the SunScreen systems by the GNA packet filter team.
Data Network Management (DNM):The NMC will have the same training as the SRC in terms of the SunScreen SPF-200s. This group will have access to the SNM maps and CMI alarm systems. The NMC will also have access to the WOH scripts and know exactly who to contact in the event of a possible failure or problem resolution relating to the SPF-200 systems. This group will also receive bi-annual training on the SunScreen Packet filters from the GNA packet filter team.
Network Control Center (NCC):The NCC will have even more detailed information on the SunScreen SPF-200 systems. This groups should be keenly aware of the location of the SunScreens and their connections and the systems and data flows related to the SPF-200s. This group will be trained on a bi-annual basis on the technical aspects of troubleshooting and escalating problems related to the SPF-200s.
Distributed Network Technical Services (DNTS):DNTS will be provided detailed training on the location, connections, hardware, software, and troubleshooting procedures for the SPF-200s. This training will also be conducted bi-annually by the GNA packet filter team. This groups will be extremely skilled in the troubleshooting of the SPF-200s systems.
Central System Administration:There is a significant amount of training for new SPF-200 system administrators and packet filter team members. This document is a good step in the right direction, however fully training an administrator requires additional reading and hands-on training. This is provided by the GNA packet filter team mentioned on the first page of this document. This group should have the skills and resources necessary to troubleshoot and repair SPF-200 hardware and software.
Global Network Access (GNA) Packet Filter Team:The GNA packet filter team will be responsible for providing the training to the other groups supporting the SPF-200 systems. New packet filter team members will be brought up to speed with detailed training, SunScreen SPF-200 manuals, and hands-on training. Rigorous training will be performed to make sure that packet filter team members can fully support all other organizations that support the SunScreen systems. In addition, the packet filter team members will be training in troubleshooting procedures so that they are able to be the last line of defense for packet filter problems.
Global Network Design (GND):Training can be performed to the folks within the GND group as well. These folks will need similar training as DNTS. This group will be provided detailed troubleshooting training and also
71

SunScreen SPF-200 Design, Implementation and Maintenance Document – 4/7/98
intimate understanding of how configuration changes are made to the SunScreens. Training will be conducted to these individuals when other training classes are scheduled or as new members join GND.
Additional resources of information are provided in the Appendices of this document and on the various web pages listed throughout this document.
The SPF-200 Packet Filter team will also seek the assistance of the company Delivery Systems Certification and Training group. This group will help to coordinate training between the various groups mentioned above. This group helps to build training that needs to be performed periodically and makes sure that as new company employees are added, they are fully trained on production systems such as the SPF-200. This group will coordinate training to be performed to the various groups so that the training meets the individual group’s needs.
6.0 Documentation and References
The Appendices list the different documentation and references required for support of the SPF-200 SunScreens. Various web pages that can be used to support the packet filters are listed below. This document mentions web pages that are both internal and external to company, such as the pages hosted by Sun Microsystems. This document contains additional documentation that is provided with the SPF-200 software in addition to Sun contacts for questions and service and repair.
Here are the documents that come with the SunScreen SPF-200 software license:SunScreen SPF-200 Installation GuideSunScreen SPF-200 Configuration and Management GuideSunScreen SKIP User’s Guide for Solaris
Note: If anyone is interested in looking at a set of these manuals, we would be happy to lend them to you.
72

SunScreen SPF-200 Design, Implementation and Maintenance Document – 4/7/98
Appendices:
A. Command Line Interface
There are several commands that can be used on the Admin Stations that affect the Screen. Below is a list of these commands.
Command Descriptionsas_logdump Interprets SunScreen logs and displays their contents.spf_admin_install Configures an Administration Station and creates a Screen installation diskette. This
command is only used to install Screens.spf_backup Provides the ability to backup SunScreen configurations and encryption information.spf_restore Restores SunScreen configuration and encryption information from the backup
diskette.
There are many ss_client commands that can be run from the Admin Station on the Screen. All of these commands follow the syntax of:
ss_client <screen_name> <command> <command_parameters>
Here is a list of the commands and their functions.
Command Descriptionss_access Creates, deletes, and lists administrative access to the Screenss_action Creates, deletes, renames, lists, and modifies action definitions in the SunScreen
configurations.ss_active_config Used to either activate a SunScreen configuration or to get information about the
current active configuraiton.ss_address Creates, deletes, renames, lists, and modifies address definitions in the
SunScreen configurations.ss_admin_user Modifies, adds, or deletes administrative users and passwords.ss_alerts Manages the list of hosts to receive SNMP traps from the SunScreen.ss_algorithm Lists algorithm names supported by SKIP.ss_certificate Creates, deletes, renames, lists, and modifies Certificate Registry definitions.ss_client Executes commands on the Screen from the Admin Station.ss_compile Compiles SunScreen configurations.ss_configuration Creates, deletes, lists, renames, and exports SunScreen configurations.ss_debug_level Manipulates the level of SunScreen debugging output.ss_default_drop Sets the default reject action for the specified interface.ss_defaultrouter Displays and updates the default router on the Screen.ss_dns Displays and updates the DNS information on the Screen.ss_domain Creates, deletes, and lists SunScreen configuration domains.ss_interfaces Used to manage the interfaces controlled by the Screen.ss_load_group Loads SunScreen Certificate Groups.ss_log Used to manage the SunScreen log file.ss_nat Creates, deletes, lists and modifies SunScreen Network Address Translation
entries.ss_network Sets the network partitioned by the Screen.ss_router Maintains the default router or routers for each Screen’s interface.ss_rule Creates, deletes, lists, and modifies rule definitions in SunScreen configurations.ss_service Creates, deletes, renames, and lists service definitions in SunScreen
73

SunScreen SPF-200 Design, Implementation and Maintenance Document – 4/7/98
configurations.ss_stateengine Lists state engine names supported by the packet filter.ss_sys_info Returns information about the Screen.ss_traffic_stats Reports summary information about the traffic flowing through the Screen by
interface.super_diag Dumps the entire configuration and state tables for debugging by SunServicespf_remote_backup Remotely backs up a SunScreen to the Admin Station.spf_remote_restore Remotely restores a SunScreen configuration from an Admin Station.
You can perform a:
man <command_name>
To look at manual pages on many commands on the Admin Station. The man page will give the command syntax along with any required and optional parameters.
B. Sun Solaris 2.5.1 Hardening for SunScreen Admin Stations
Remove the ability for root to login over the network. This is done by removing the comment in the “/etc/default/login” file to allow root login.
Harden the systems that are defined in the “skiptool” utility. The host of type “Off” named “default” should be removed. This entry allows any computer to be able to communicate with the Admin Station and thereby telnet to it. We want to restrict the communication with the Admin Station to only those hosts that are defined in “skiptool”. We also want to maximize the use of SKIP encrypted communication channels where possible.
The systems that should be defined in the “skiptool” interface for an Admin Station are:Screens that this Admin Station can administerDNS servers (see “/etc/resolv.conf” file)Configuration Management serverLogging server
Harden the “/etc/inetd.conf” file by eliminating TCP/IP applications from being initiated as processes when certain types of packets arrive. We want to comment out ALL entries in the “/etc/inetd.conf” file. We do not need any TCP/IP applications to be launched by asynchronous connections to the Admin Station. With all of these commented out, very little should be running. Make sure that these ports are tested by trying to telnet to the ports assigned to these functions and verifying that the functionality has been stopped. We can perform a port scan to make sure nothing else is running.
We will also want to remove certain daemons from running at the time the Admin Station boots. There are programs in the “/etc/rc2.d” directory. We can also find these startup shell scripts in the “/etc/init.d” directory. The normal “/etc/rc2.d” directory listing looks like the following:
K20lp S22acct S71rpc S75cron S91agaconfigK60nfs.server S30sysid.net S71sysid.sys S76nscd S91leoconfigREADME S47asppp S72autoinstall S80PRESERVE S92rtvc-configS01MOUNTFSYS S62skipkey S72inetsvc S80lp S92volmgtS05RMTMPFILES S63skipes S73nfs.client S88sendmail S93cacheos.finishS20sysetup S69inet S74autofs S88utmpd S99auditS21perf S70uucp S74syslog S89bdconfig
However, we will want to REMOVE the following files from the “/etc/rc2.d” directory:
74

SunScreen SPF-200 Design, Implementation and Maintenance Document – 4/7/98
K20lp, S71sysid.sys, K60nfs.server, S30sysid.net, S72autoinstall, README, S76nscd, S47asppp, S92volmgt, S70uucp, S73nfs.client, S80PRESERVE, S93cacheos.finish, S05RMTMPFILES, S71rpc, S74autofs, S80lp
Note: At some point, we will eliminate the running of inetd all together. Eventually, this list will also contain S69inet.
This is a listing of the default files located in the “/etc/init.d” directory:ANNOUNCE buttons_n_dials-setup lp skipkeyMOUNTFSYS cacheos mkdtab standardmountsPRESERVE cacheos.finish nfs.client sysetupREADME cron nfs.server sysid.netRMTMPFILES devlinks nscd sysid.sysacct drvconfig pcmcia syslogagaconfig envctrl perf ufs_quotaasppp inetinit rootusr utmpdaudit inetsvc rpc uucpautofs initpcmcia rtvc-config volmgtautoinstall keymap sendmailbuildmnttab leoconfig skipes
In the “/etc/init.d” directory, we want to remove everything EXCEPT the following programs:acct, MOUNTFSYS, audit, buildmnttab, cron, devlinks, drvconfig, inetinit, inetsvc, rootusr, standardmounts, sysetup, syslog, ufs_quota, utmpd, sendmail, agaconfig, keymap, leoconfig, rtvc-config, skipes, skipkey, volmgt
In other words, this will involve the REMOVING the following items from “/etc/init.d”:ANNOUNCE, autofs, mkdtab, autoinstall, nfs.client, PRESERVE, nfs.server, uucp, README, cacheos, nscd, sysid.net, RMTMPFILES, cacheos.finish, sysid.sys, lp, rpc, asppp, buttons_n_dials-setup, initpcmcia, mkdtab, pcmcia, perf,
After removing these daemons and programs from starting automatically, the following processes that originally were seen with using the “ps –ef” command will now be absent from the listing of running daemons and processes.
NFS:/usr/lib/nfs/lockd/usr/lib/nfs/statd
RPC:/usr/sbin/rpcbindrpc.ttdbserverdrpc.rstatd
Printing:lpNet/usr/lib/lpsched
Other:/usr/sbin/kerbd
We will also want to remove any services in the “/etc/services” file that we don’t want the Admin Station to communicate with. We will want the following single entry to remain in the “/etc/services” file.
smtp 25/tcp mail
Note: We need to decide if this is even necessary since Sendmail is running as a daemon instead of being triggered by inetd.
75

SunScreen SPF-200 Design, Implementation and Maintenance Document – 4/7/98
As part of securing the Admin Station, we will want to install any appropriate patches onto the Admin Station. The list of these may vary as new vulnerabilities are discovered and bugs are fixed within the operating system.
Remove unneeded users from “/etc/passwd” and “/etc/shadow” files.Remove the users uucp, and lp.
We will also want to limit the exposure of the Admin Station’s network interface by running the following commands.
ndd –set /dev/ip ip_forwarding 0ndd –set /dev/ip ip_forward_src_routed 0ndd –set /dev/ip ip_forward_directed_broadcasts 0
To prevent root from FTPing to the Admin Station, we will want to create a file named “/etc/ftpusers” and enter root on the first line of this file.
The Admin Station should also be updated with any and all Solaris 2.5.1 patches available to date. The Year 2000 patches should also be loaded.
C. Ethernet Interface Configuration and Verification
This set of “ndd” commands can be used to configure the settings of the /dev/hme or /dev/qfe network interfaces on a Sun computer.
Below is another set of commands to set and check the configuration of a Sun’s network cards. This can be useful for determining if there are speed and mode mismatches between pieces of networking equipment. This command outputs ones and zeros based on the currently configured parameters. Here is the legend for the results of the link speed and mode:
Link_speed = “0” for 10Mbps and “1” for 100MbpsLink_mode = “0” for half duplex and “1” for full duplex
The shell script “nic_chk” looks like the following:
#!/bin/kshexport PATH=/usr/sbin:/bin let count=0while (( count < 9 )); do /usr/sbin/ndd -set /dev/hme instance $count > /tmp/nic_chk.$$ 2>&1if [ `grep -c "operation failed" /tmp/nic_chk.$$` == 0 -a \ `grep -c "No such device" /tmp/nic_chk.$$` == 0 ]; then cat /tmp/nic_chk.$$ /usr/ucb/echo "hme instance " $count /usr/ucb/echo -n " autoneg: "; ndd -get /dev/hme adv_autoneg_cap /usr/ucb/echo -n " link-speed: "; ndd -get /dev/hme link_speed /usr/ucb/echo -n " link-mode: "; ndd -get /dev/hme link_modefi /usr/sbin/ndd -set /dev/qfe instance $count > /tmp/nic_chk.$$ 2>&1if [ `grep -c "operation failed" /tmp/nic_chk.$$` == 0 -a \ `grep -c "No such device" /tmp/nic_chk.$$` == 0 ]; then cat /tmp/nic_chk.$$ /usr/ucb/echo "qfe instance " $count /usr/ucb/echo -n " autoneg: "; ndd -get /dev/hme adv_autoneg_cap
76

SunScreen SPF-200 Design, Implementation and Maintenance Document – 4/7/98
/usr/ucb/echo -n " link-speed: "; ndd -get /dev/hme link_speed /usr/ucb/echo -n " link-mode: "; ndd -get /dev/hme link_modefi let count=count+1donerm /tmp/nic_chk.$$
As the following script indicates, a one is placed after the options that are desired to be set. The adv_autoneg_cap is for defining if autonegotiation should be activated. It is important to note that options to be turned “off” should be listed first, followed by options to be turned “on”.
The “nic_set” shell script looks like the following:Note: this script can and should be modified if you are using qfe interfaces instead. Just replace all occurrences of hme with qfe.
echo "configuring:"#echo "hme instance 0"#ndd -set /dev/hme instance 0#ndd -set /dev/hme adv_autoneg_cap 0#ndd -set /dev/hme adv_100fdx_cap 0#ndd -set /dev/hme adv_100hdx_cap 0#ndd -set /dev/hme adv_10fdx_cap 0#ndd -set /dev/hme adv_10hdx_cap 0#ndd -set /dev/hme adv_100fdx_cap 1echo "hme instance 1"ndd -set /dev/hme instance 1ndd -set /dev/hme adv_autoneg_cap 0ndd -set /dev/hme adv_100fdx_cap 0ndd -set /dev/hme adv_100hdx_cap 0ndd -set /dev/hme adv_10fdx_cap 0ndd -set /dev/hme adv_10hdx_cap 0ndd -set /dev/hme adv_100fdx_cap 1echo "hme instance 2"ndd -set /dev/hme instance 2ndd -set /dev/hme adv_autoneg_cap 0ndd -set /dev/hme adv_100fdx_cap 0ndd -set /dev/hme adv_100hdx_cap 0ndd -set /dev/hme adv_10fdx_cap 0ndd -set /dev/hme adv_10hdx_cap 0ndd -set /dev/hme adv_100fdx_cap 1echo "hme instance 3"ndd -set /dev/hme instance 3ndd -set /dev/hme adv_autoneg_cap 0ndd -set /dev/hme adv_100fdx_cap 0ndd -set /dev/hme adv_100hdx_cap 0ndd -set /dev/hme adv_10fdx_cap 0ndd -set /dev/hme adv_10hdx_cap 0ndd -set /dev/hme adv_100fdx_cap 1echo "hme instance 4"ndd -set /dev/hme instance 4ndd -set /dev/hme adv_autoneg_cap 0ndd -set /dev/hme adv_100fdx_cap 0ndd -set /dev/hme adv_100hdx_cap 0ndd -set /dev/hme adv_10fdx_cap 0ndd -set /dev/hme adv_10hdx_cap 0ndd -set /dev/hme adv_100fdx_cap 1
77

SunScreen SPF-200 Design, Implementation and Maintenance Document – 4/7/98
D. Current SunScreen 100/200 System Descriptions
E. SunScreen SNMP MIB
-- SunScreen(tm) MIB-- @(#)sunscreen.mib 1.6 97/04/07-- Copyright 1995, 1996, 1997 Sun Microsystems, Inc.---- This mib covers the SunScreen(tm) SPF and EFS product lines. ---- The SNMP traps output by the original SPF-100 product contain the-- interface in the form of a interface number and use the "interface" object.-- (0 corresponds to qe0 .... 3 corresponds to qe3)---- The SNMP traps output by the products released after the SPF-100-- contain the interface in the form of a string and use the-- "interfaceName" object.
SUN-SUNSCREEN
DEFINITIONS ::= BEGIN
IMPORTS enterprises FROM RFC1155-SMI;
sunNode OBJECT IDENTIFIER ::= { enterprises 42 } sunProducts OBJECT IDENTIFIER ::= { sunNode 2 } sunScreen OBJECT IDENTIFIER ::= { sunProducts 11 } sunScreenTrap OBJECT IDENTIFIER ::= { sunScreen 1 }
interface OBJECT-TYPE SYNTAX INTEGER ACCESS read-only STATUS mandatory DESCRIPTION "The SunScreen(tm) network interface on which the packet was received" ::= { sunScreenTrap 1 }
interfaceName OBJECT-TYPE SYNTAX DisplayString ACCESS read-only STATUS mandatory DESCRIPTION "The SunScreen(tm) network interface on which the packet was received"
78

SunScreen SPF-200 Design, Implementation and Maintenance Document – 4/7/98
::= { sunScreenTrap 6 }
errorReason OBJECT-TYPE SYNTAX INTEGER {
passed(1), -- packet was passednoRule(256), -- no rule for packetnoState(257), -- no state entry foundnoMemory(258), -- no memory lefttooManySessions(259), -- too many sessionsinvalidPort(260), -- invalid portinvalidFormat(261), -- invalid formatinvalidDirection(262), -- wrong direction (req vs rsp)tooManyResponses(263), -- too many responses receivedtooShort(264), -- packet too shortinvalidProtocol(265), -- invalid protocolnoPortmapEntry(266), -- no portmap entry foundinvalidPortMapEntry(267), -- invalid port map entryinvalidPolicy(270), -- src/dst/service ok, but policy
wronginvalidSourceAddress(272) -- invalid source address
} ACCESS read-only STATUS mandatory DESCRIPTION "The reason the SunScreen(tm) alert was generated" ::= { sunScreenTrap 2 }
packetLength OBJECT-TYPE SYNTAX INTEGER ACCESS read-only STATUS mandatory DESCRIPTION "The actual length of the packet in bytes" ::= { sunScreenTrap 3 }
lengthLogged OBJECT-TYPE SYNTAX INTEGER ACCESS read-only STATUS mandatory DESCRIPTION "The length of the data logged in bytes" ::= { sunScreenTrap 4 }
packetData OBJECT-TYPE SYNTAX OCTET STRING ACCESS read-only STATUS mandatory DESCRIPTION "The packet data" ::= { sunScreenTrap 5 }
packetAlert TRAP-TYPEENTERPRISE sunNodeVARIABLES { interface, errorReason, packetLength, lengthLogged,
packetData }
79

SunScreen SPF-200 Design, Implementation and Maintenance Document – 4/7/98
DESCRIPTION"Packet was received that triggered alert."
::= 6
END
F. SunScreen CMI system SNMP Traps
Below is the software that will send the traps from the Admin Stations to the CMI systems and on to the “Tabular Display”. It is a Perl script that will run as a daemon on all Admin Stations and watch the SunScreens. In the event of a failure, or an exceeded threshold, a SNMP trap will be sent to the SNMP Management systems. Documented in the Perl software are the text strings that will be used in the SNMP Traps. It is possible to view the output of this Trap program on the SunScreen web page: http://blv-spf-config.ns.cs.company.com. You can look through the list of traps with time stamps for certain events when troubleshooting.
#!/opt/perl/bin/perl -w
## SNMP Trap daemon for the SPF-200 # # Sends SNMP traps to the NMC (DNM)#
## User defined thresholds and configurable values#
# List of SunScreens to monitor and the machines to ping on each interface$blv_spf_01 = { # User configurable section name => "blv-spf-01", # IP addresses of machines behind each interface of screen ping => [("cax33-03f1-12bb5-b.ns.cs.company.com")], # Non-user configurable section cpu_warn_set => 0, cpu_alert_set => 0, mem_warn_set => 0, ncp_warn_set => 0, ncp_alert_set => 0, af_warn_set => 0, af_alert_set => 0, dp_warn_set => 0, dp_alert_set => 0, uptime_set => 0, no_comm_set => 0, no_ping_set => 0, screen_down_set => 0, no_passed_set => 0, uptime => 0, vmstat => { ('cpu', 0, 'mem', 0) }, new_traffic_stats => { ('passed', 0, 'dp', 0, 'af', 0, 'ncp', 0) }, old_traffic_stats => { ('passed', 1, 'dp', 1, 'af', 1, 'ncp', 1) },};$blv_spf_02 = { # User configurable section name => "blv-spf-02", # IP addresses of machines behind each interface of screen ping => [("cax33-03f1-12bb5-d.ns.cs.company.com")], # Non-user configurable section cpu_warn_set => 0, cpu_alert_set => 0, mem_warn_set => 0,
80
SunScreen SPF-200 Design, Implementation and Maintenance Document – 4/7/98
ncp_warn_set => 0, ncp_alert_set => 0, af_warn_set => 0, af_alert_set => 0, dp_warn_set => 0, dp_alert_set => 0, uptime_set => 0, no_comm_set => 0, no_ping_set => 0, screen_down_set => 0, no_passed_set => 0, uptime => 0, vmstat => { ('cpu', 0, 'mem', 0) }, new_traffic_stats => { ('passed', 0, 'dp', 0, 'af', 0, 'ncp', 0) }, old_traffic_stats => { ('passed', 1, 'dp', 1, 'af', 1, 'ncp', 1) },};$blv_spf_04 = { # User configurable section name => "blv-spf-04", # IP addresses of machines behind each interface of screen ping => [("192.168.225.5")], # Non-user configurable section cpu_warn_set => 0, cpu_alert_set => 0, mem_warn_set => 0, ncp_warn_set => 0, ncp_alert_set => 0, af_warn_set => 0, af_alert_set => 0, dp_warn_set => 0, dp_alert_set => 0, uptime_set => 0, no_comm_set => 0, no_ping_set => 0, screen_down_set => 0, no_passed_set => 0, uptime => 0, vmstat => { ('cpu', 0, 'mem', 0) }, new_traffic_stats => { ('passed', 0, 'dp', 0, 'af', 0, 'ncp', 0) }, old_traffic_stats => { ('passed', 1, 'dp', 1, 'af', 1, 'ncp', 1) },};$blv_spf_05 = { # User configurable section name => "blv-spf-05", # IP addresses of machines behind each interface of screen ping => [("cax33-03f1-12bb5-e.ns.cs.company.com")], # Non-user configurable section cpu_warn_set => 0, cpu_alert_set => 0, mem_warn_set => 0, ncp_warn_set => 0, ncp_alert_set => 0, af_warn_set => 0, af_alert_set => 0, dp_warn_set => 0, dp_alert_set => 0, uptime_set => 0, no_comm_set => 0, no_ping_set => 0, screen_down_set => 0, no_passed_set => 0, uptime => 0, vmstat => { ('cpu', 0, 'mem', 0) }, new_traffic_stats => { ('passed', 0, 'dp', 0, 'af', 0, 'ncp', 0) }, old_traffic_stats => { ('passed', 1, 'dp', 1, 'af', 1, 'ncp', 1) },};$blv_spf_10 = { # User configurable section name => "blv-spf-10", # IP addresses of machines behind each interface of screen ping => [("cah7-341f4-42c5-b.ns.cs.company.com")], # Non-user configurable section
81

SunScreen SPF-200 Design, Implementation and Maintenance Document – 4/7/98
cpu_warn_set => 0, cpu_alert_set => 0, mem_warn_set => 0, ncp_warn_set => 0, ncp_alert_set => 0, af_warn_set => 0, af_alert_set => 0, dp_warn_set => 0, dp_alert_set => 0, uptime_set => 0, no_comm_set => 0, no_ping_set => 0, screen_down_set => 0, no_passed_set => 0, uptime => 0, vmstat => { ('cpu', 0, 'mem', 0) }, new_traffic_stats => { ('passed', 0, 'dp', 0, 'af', 0, 'ncp', 0) }, old_traffic_stats => { ('passed', 1, 'dp', 1, 'af', 1, 'ncp', 1) },};$slb_spf_01 = { # User configurable section name => "slb-spf-01", # IP addresses of machines behind each interface of screen ping => [("localhost")], # Non-user configurable section cpu_warn_set => 0, cpu_alert_set => 0, mem_warn_set => 0, ncp_warn_set => 0, ncp_alert_set => 0, af_warn_set => 0, af_alert_set => 0, dp_warn_set => 0, dp_alert_set => 0, uptime_set => 0, no_comm_set => 0, no_ping_set => 0, screen_down_set => 0, no_passed_set => 0, uptime => 0, vmstat => { ('cpu', 0, 'mem', 0) }, new_traffic_stats => { ('passed', 0, 'dp', 0, 'af', 0, 'ncp', 0) }, old_traffic_stats => { ('passed', 1, 'dp', 1, 'af', 1, 'ncp', 1) },};$slb_spf_02 = { # User configurable section name => "slb-spf-02", # IP addresses of machines behind each interface of screen ping => [("localhost")], # Non-user configurable section cpu_warn_set => 0, cpu_alert_set => 0, mem_warn_set => 0, ncp_warn_set => 0, ncp_alert_set => 0, af_warn_set => 0, af_alert_set => 0, dp_warn_set => 0, dp_alert_set => 0, uptime_set => 0, no_comm_set => 0, no_ping_set => 0, screen_down_set => 0, no_passed_set => 0, uptime => 0, vmstat => { ('cpu', 0, 'mem', 0) }, new_traffic_stats => { ('passed', 0, 'dp', 0, 'af', 0, 'ncp', 0) }, old_traffic_stats => { ('passed', 1, 'dp', 1, 'af', 1, 'ncp', 1) },};$slb_spf_03 = { # User configurable section name => "slb-spf-03",
82
SunScreen SPF-200 Design, Implementation and Maintenance Document – 4/7/98
# IP addresses of machines behind each interface of screen ping => [("localhost")], # Non-user configurable section cpu_warn_set => 0, cpu_alert_set => 0, mem_warn_set => 0, ncp_warn_set => 0, ncp_alert_set => 0, af_warn_set => 0, af_alert_set => 0, dp_warn_set => 0, dp_alert_set => 0, uptime_set => 0, no_comm_set => 0, no_ping_set => 0, screen_down_set => 0, no_passed_set => 0, uptime => 0, vmstat => { ('cpu', 0, 'mem', 0) }, new_traffic_stats => { ('passed', 0, 'dp', 0, 'af', 0, 'ncp', 0) }, old_traffic_stats => { ('passed', 1, 'dp', 1, 'af', 1, 'ncp', 1) },};$stl_spf_01 = { # User configurable section name => "stl-spf-01", # IP addresses of machines behind each interface of screen ping => [("localhost")], # Non-user configurable section cpu_warn_set => 0, cpu_alert_set => 0, mem_warn_set => 0, ncp_warn_set => 0, ncp_alert_set => 0, af_warn_set => 0, af_alert_set => 0, dp_warn_set => 0, dp_alert_set => 0, uptime_set => 0, no_comm_set => 0, no_ping_set => 0, screen_down_set => 0, no_passed_set => 0, uptime => 0, vmstat => { ('cpu', 0, 'mem', 0) }, new_traffic_stats => { ('passed', 0, 'dp', 0, 'af', 0, 'ncp', 0) }, old_traffic_stats => { ('passed', 1, 'dp', 1, 'af', 1, 'ncp', 1) },};$stl_spf_02 = { # User configurable section name => "stl-spf-02", # IP addresses of machines behind each interface of screen ping => [("localhost")], # Non-user configurable section cpu_warn_set => 0, cpu_alert_set => 0, mem_warn_set => 0, ncp_warn_set => 0, ncp_alert_set => 0, af_warn_set => 0, af_alert_set => 0, dp_warn_set => 0, dp_alert_set => 0, uptime_set => 0, no_comm_set => 0, no_ping_set => 0, screen_down_set => 0, no_passed_set => 0, uptime => 0, vmstat => { ('cpu', 0, 'mem', 0) }, new_traffic_stats => { ('passed', 0, 'dp', 0, 'af', 0, 'ncp', 0) }, old_traffic_stats => { ('passed', 1, 'dp', 1, 'af', 1, 'ncp', 1) },};
83

SunScreen SPF-200 Design, Implementation and Maintenance Document – 4/7/98
$stl_spf_03 = { # User configurable section name => "stl-spf-03", # IP addresses of machines behind each interface of screen ping => [("localhost")], # Non-user configurable section cpu_warn_set => 0, cpu_alert_set => 0, mem_warn_set => 0, ncp_warn_set => 0, ncp_alert_set => 0, af_warn_set => 0, af_alert_set => 0, dp_warn_set => 0, dp_alert_set => 0, uptime_set => 0, no_comm_set => 0, no_ping_set => 0, screen_down_set => 0, no_passed_set => 0, uptime => 0, vmstat => { ('cpu', 0, 'mem', 0) }, new_traffic_stats => { ('passed', 0, 'dp', 0, 'af', 0, 'ncp', 0) }, old_traffic_stats => { ('passed', 1, 'dp', 1, 'af', 1, 'ncp', 1) },};$ss_spf_5 = { # User configurable section name => "ss-spf-5", # IP addresses of machines behind each interface of screen ping => [("cav33-03f1-12bb5-d.ns.cs", "outlook.ca", "blv-smtpin-01.company.com","blv-smtpout-01.company.com")], # Non-user configurable section cpu_warn_set => 0, cpu_alert_set => 0, mem_warn_set => 0, ncp_warn_set => 0, ncp_alert_set => 0, af_warn_set => 0, af_alert_set => 0, dp_warn_set => 0, dp_alert_set => 0, uptime_set => 0, no_comm_set => 0, no_ping_set => 0, screen_down_set => 0, no_passed_set => 0, uptime => 0, vmstat => { ('cpu', 0, 'mem', 0) }, new_traffic_stats => { ('passed', 0, 'dp', 0, 'af', 0, 'ncp', 0) }, old_traffic_stats => { ('passed', 1, 'dp', 1, 'af', 1, 'ncp', 1) },};@screens = ( $blv_spf_01, $blv_spf_02, $blv_spf_04, $blv_spf_05, $blv_spf_10, $slb_spf_01, $slb_spf_02, $slb_spf_03, $stl_spf_01, $stl_spf_02, $stl_spf_03, $ss_spf_5 );
# SNMP text field (contact information)$text = "See http://blv-spf-config.ns.cs.company.com for contact and ". "troubleshooting information";
# Specifies how often the screens are polled$poll_time = 5; # Minutes between polling (must be greater than 0)
# Send trap when snmpd (this script) starts$snmpd_up_text = "SNMP trap daemon started";$snmpd_up_level = "clear";
# Alive# Sends a heartbeat trap$alive_time = 30; # Minutes between alive messages$alive_level = "clear"; # clear, minor, major, critical$alive_text = "SunScreen responded to ALIVE probe";
84

SunScreen SPF-200 Design, Implementation and Maintenance Document – 4/7/98
# CPU Utilization# Sends a trap (or CLEAR trap) if the CPU utilization exceeds (or drops below) # specified percentages.$cpu_warn = 85; # 0 - 100%$cpu_warn_clear = 75; # 0 - 100%$cpu_warn_level = "minor"; # minor, major, critical$cpu_warn_text = "CPU utilization over $cpu_warn percent";$cpu_alert = 97; # 0 - 100%$cpu_alert_clear = 90; # 0 - 100%$cpu_alert_level = "major"; # minor, major, critical$cpu_alert_text = "CPU utilization over $cpu_alert percent"; # Memory Swap Scan (monitors 'sr' value of vmstat)# Sends a trap (or CLEAR trap) if the memory swap scans exceeds (or drops below)# the specified value.$mem_warn = 200; # 0 - infinity (200 is the SUN recommended value # for adding new memory)$mem_warn_clear = 150; # 0 - infinity$mem_warn_level = "minor"; # minor, major, critical$mem_warn_text = "Memory page scan rate over $mem_warn (box thrashing?)";
# NoCanPut# Sends a trap if the number of NoCanPut packets exceeds the predetermined # value in a $poll_time minute interval. Also sends a trap if the number of # NoCanPut packets exceeds a predetermined percentage of the total passed # packets in a $poll_time minute interval. Sends CLEAR traps if values drop # below 'clear' thresholds.$ncp_warn = 500; # 0 - infinity (# of packets)$ncp_warn_clear = 300; # 0 - infinity (# of packets)$ncp_warn_level = "minor"; # minor, major, critical$ncp_warn_text = "Unusual number of dropped packets (NoCanPut)";$ncp_alert = 50; # 0 - 100%$ncp_alert_clear = 40; # 0 - 100%$ncp_alert_level = "major"; # minor, major, critical$ncp_alert_text = "Too many dropped packets (NoCanPut)";
# AllocFailure# Sends a trap if the number of AllocFailure packets exceeds a# predetermined value in a $poll_time minute interval. Also sends a trap if the # number of AllocFailure packets exceeds a predetermined percentage of the total# passed packets in a $poll_time minute interval. Sends CLEAR traps when values# drop below specified values.$af_warn = 500; # 0 - infinity (# of packets)$af_warn_clear = 300; # 0 - infinity (# of packets)$af_warn_level = "minor"; # minor, major, critical$af_warn_text = "Unusual number of dropped packets (AllocFailure)";$af_alert = 50; # 0 - 100%$af_alert_clear = 40; # 0 - 100%$af_alert_level = "major"; # minor, major, critical$af_alert_text = "Too many dropped packets (AllocFailure)";
## Dropped Packets## Sends traps if the number of dropped packets exceeds predetermined ## percentages of the total passed packets in a $poll_time minute interval. ## Clears traps if number of packets drops below another predefined value.#$dp_warn = 10; # 0 - 100%#$dp_warn_clear = 5; # 0 - 100%#$dp_warn_level = "minor"; # minor, major, critical#$dp_warn_text = "Unusual number of dropped packets";#$dp_alert = 80; # 0 - 100%#$dp_alert_clear = 70; # 0 - 100%#$dp_alert_level = "major"; # minor, major, critical#$dp_alert_text = "Too many dropped packets";
# Uptime# Sends a trap if uptime is approaching the 248 day limit for SUN# machines$uptime_warn = 21; # 0 - 248 (days to warn in advance of 248 deadline)$uptime_level = "minor"; # minor, major, critical$uptime_text = "Warning: SunScreen requires a reboot within $uptime_warn days";
# Can't communicate
85

SunScreen SPF-200 Design, Implementation and Maintenance Document – 4/7/98
# Sends a trap if the admin station can't communicate with a SunScreen$no_comm_level = "minor"; # minor, major, critical$no_comm_text = "Lost administrative link";
# Can't ping# Sends a trap if pings don't go through the sunscreen$no_ping_level = "minor"; # minor, major, critical$no_ping_text = "Can't ping through SunScreen";
# Possible SunScreen Down# Sends a trap if the admin station can't communicate with a SunScreen AND# pings don't go through.$screen_down_level = "critical"; # minor, major, critical$screen_down_text = "No response from SunScreen (screen down?)";
# SunScreen Restart# Sends a trap if the difference between the current and previous passed packet# count is < 0.$screen_restart_text = "SunScreen restarted";$screen_restart_level = "minor"; # 'minor', 'major', 'critical'
# No Passed Packets# Sends a trap if there haven't been any passed packets in the last $poll_time# minutes.$no_passed_level = "minor"; #minor, major, critical$no_passed_text = "No packets to pass (interfaces down?)";
## End of user configurable section#
######################################################################### ## Main code for SNMP Trap daemon ## #########################################################################
# Send notification that snmpd (this script) has startedsend_trap("snmpd", "SPF_snmpd_up", $snmpd_up_text, "", $snmpd_up_level);
# Put some meaningful numbers in old data so we won't trigger alarms at startupforeach $screen (@screens) { get_traffic_stats($screen); save_data($screen);}
# Loop forever, sending ALIVE messages every $alive_time minutesfor( $counter=0; ; $counter = ($counter+1) % int($alive_time / $poll_time) ) { # Perform ping through/communication check for each SunScreen and # send ALIVE message (with uptime) every $alive_time minutesprint "Entering alive_check\n"; alive_check($counter);
# Collect data from SunScreens / alarmprint "Entering threshold_alarms\n"; threshold_alarms();
# Send alarm if uptime is less than $uptime_warn days before 248 day # limit (see SUN bug #1261674 on http://sunsolve.sun.com)print "Entering check_uptime\n"; check_uptime();
# Save traffic_stat data for delta calculations foreach $screen (@screens) {print "Entering save_data\n"; save_data($screen); }
# Sleep for $poll_time minutesprint "Sleeping...\n"; sleep($poll_time*60);print "Done sleeping.\n";
86

SunScreen SPF-200 Design, Implementation and Maintenance Document – 4/7/98
#sleep(3);}
######################################################################### ## Helper functions (get_vmstat, get_uptime_info, alive_check, ## send_trap, clear_trap, get_traffic_stats, etc.) ## #########################################################################
# Ping through/communication check for each SunScreen; ALIVE messagesub alive_check {print "See if each screen is alive\n"; foreach $i (@screens) { # Try to ping through each screenprint "Pinging through ".get_name($i)."\n"; if (!ping_screen($i)) { send_trap(get_name($i), "SPF_no_ping", $no_ping_text, "Pings from internal network to devices on far side of each ". "interface failed", $no_ping_level); set_no_ping($i); } if (no_ping_set($i) && ping_screen($i)) { clear_trap(get_name($i), "SPF_no_ping", $no_ping_text, "Pings through at least one interface are now successful"); clear_no_ping($i); }
# Try to communicate with each screen over the admin portprint "Getting vmstat info (check comm link) for ".get_name($i)."\n"; if (!get_vmstat($i)) { send_trap(get_name($i), "SPF_no_comm", $no_comm_text, "", $no_comm_level); set_no_comm($i); }print "Getting vmstat info again (check comm link) for ".get_name($i)."\n"; if (no_comm_set($i) && get_vmstat($i)) { clear_trap(get_name($i), "SPF_no_comm", $no_comm_text, ""); clear_no_comm($i); }
# Send alarm if can't communicate AND can't ping through if (no_ping_set($i) && no_comm_set($i)) { send_trap(get_name($i), "SPF_possible_screen_down", $screen_down_text, "Can't ping through or communicate with screen", $screen_down_level); set_screen_down($i); } if ((!no_ping_set($i) || !no_comm_set($i)) && screen_down_set($i)) { clear_trap(get_name($i), "SPF_possible_screen_down", $screen_down_text, ""); clear_screen_down($i); }
# Get uptime info and traffic stats if we have communication if (!no_comm_set($i)) {print "Getting uptime info for ".get_name($i)."\n"; get_uptime_info($i);print "Getting traffic_stat info for ".get_name($i)."\n"; get_traffic_stats($i); }
# Send ALIVE message when $counter is 0 # include uptime, CPU %, memory, dropped, passed, NoCanPut, AllocFailure if ($_[0] == 0 && !no_comm_set($i)) { $value = "Uptime: ".get_uptime($i)." days, CPU utilization: ".get_cpu($i). "%, Memory page scans: ". get_mem($i). ", Stats for last $poll_time minutes: Passed packets: ". get_passed($i). ", Dropped packets: ". get_dp($i). ", NoCanPut: ". get_ncp($i). ", AllocFailure: ". get_af($i); send_trap(get_name($i), "SPF_heartbeat", $alive_text, $value,
87

SunScreen SPF-200 Design, Implementation and Maintenance Document – 4/7/98
$alive_level); }print "Finished with ".get_name($i)."\n"; }print "Finished with alive_check\n";}
# Collect data from each SunScreen; alarm if thresholds exceededsub threshold_alarms { foreach $i (@screens) { # Make sure we have data if (no_comm_set($i)) { next; }
# Check for SunScreen restart if (rebooted($i)) { send_trap(get_name($i), "SPF_screen_restart", $screen_restart_text, "", $screen_restart_level); next; }
# CPU utilization if (($value=get_cpu($i)) > $cpu_alert) { send_trap(get_name($i), "SPF_cpu_alert", $cpu_alert_text, $value, $cpu_alert_level); set_cpu_alert($i); } elsif (($value=get_cpu($i)) > $cpu_warn) { send_trap(get_name($i), "SPF_cpu_warn", $cpu_warn_text, $value, $cpu_warn_level); set_cpu_warn($i); } if (($value=get_cpu($i)) <= $cpu_warn_clear && cpu_warn_set($i)) { clear_trap(get_name($i), "SPF_cpu_warn", $cpu_warn_text, $value); clear_cpu_warn($i); } if (($value=get_cpu($i)) <= $cpu_alert_clear && cpu_alert_set($i)) { clear_trap(get_name($i), "SPF_cpu_alert", $cpu_alert_text, $value); clear_cpu_alert($i); }
# Memory if (($value=get_mem($i)) > $mem_warn) { send_trap(get_name($i), "SPF_mem_warn", $mem_warn_text, $value, $mem_warn_level); set_mem_warn($i); } if (($value=get_mem($i)) <= $mem_warn_clear && mem_warn_set($i)) { clear_trap(get_name($i), "SPF_mem_warn", $mem_warn_text, $value); clear_mem_warn($i); }
# Packet thresholds if (get_passed($i) == 0) { send_trap(get_name($i), "SPF_no_passed", $no_passed_text, "I don't see any normal packets on any interface", $no_passed_level); set_no_passed($i); next; } if (get_passed($i) != 0 && no_passed_set($i)) { clear_trap(get_name($i), "SPF_no_passed", $no_passed_text, ""); clear_no_passed($i); } # NoCanPut if ((($value=get_ncp($i)) / get_passed($i) * 100) > $ncp_alert) { send_trap(get_name($i), "SPF_ncp_alert", $ncp_alert_text, $value, $ncp_alert_level); set_ncp_alert($i); }
88

SunScreen SPF-200 Design, Implementation and Maintenance Document – 4/7/98
elsif (($value=get_ncp($i)) > $ncp_warn) { send_trap(get_name($i), "SPF_ncp_warn", $ncp_warn_text, $value, $ncp_warn_level); set_ncp_warn($i); } if (($value=get_ncp($i)) <= $ncp_warn_clear && ncp_warn_set($i)) { clear_trap(get_name($i), "SPF_ncp_warn", $ncp_warn_text, $value); clear_ncp_warn($i); } if ((($value=get_ncp($i)) / get_passed($i) * 100) <= $ncp_alert_clear && ncp_alert_set($i)) { clear_trap(get_name($i), "SPF_ncp_alert", $ncp_alert_text, $value); clear_ncp_alert($i); } # AllocFailure if ( (($value=get_af($i)) / get_passed($i) * 100) > $af_alert) { send_trap(get_name($i), "SPF_af_alert", $af_alert_text, $value, $af_alert_level); set_af_alert($i); } elsif ( ($value=get_af($i)) > $af_warn ) { send_trap(get_name($i), "SPF_af_warn", $af_warn_text, $value, $af_warn_level); set_af_warn($i); } if ( ($value=get_af($i)) <= $af_warn_clear && af_warn_set($i) ) { clear_trap(get_name($i), "SPF_af_warn", $af_warn_text, $value); clear_af_warn($i); } if ( (($value=get_af($i)) / get_passed($i) * 100) <= $af_alert_clear && af_alert_set($i) ) { clear_trap(get_name($i), "SPF_af_alert", $af_alert_text, $value); clear_af_alert($i); } # Dropped #if ( (($value=get_dp($i)) / get_passed($i) * 100) > $dp_alert) { # send_trap(get_name($i), "SPF_dp_alert", $dp_alert_text, $value, # $dp_alert_level); # set_dp_alert($i); #} #elsif ( (($value=get_dp($i)) / get_passed($i) * 100) > $dp_warn) { # send_trap(get_name($i), "SPF_dp_warn", $dp_warn_text, $value, # $dp_warn_level); # set_dp_warn($i); #} #if ( (($value=get_dp($i)) / get_passed($i) * 100) <= # $dp_warn_clear && dp_warn_set($i)) { # clear_trap(get_name($i), "SPF_dp_warn", $dp_warn_text, $value); # clear_dp_warn($i); #} #if ( (($value=get_dp($i)) / get_passed($i) * 100) <= # $dp_alert_clear && dp_alert_set($i) ) { # clear_trap(get_name($i), "SPF_dp_alert", $dp_alert_text, $value); # clear_dp_alert($i); #} }}
# Send minor alarm if uptime >= (248 - $uptime_warn) days before 248 day # deadline. See SUN bug #1261674 on http://sunsolve.sun.comsub check_uptime { foreach $i (@screens) { # Make sure we have data if (no_comm_set($i)) { next; }
if (($value=get_uptime($i)) >= (248 - $uptime_warn)) { send_trap(get_name($i), "SPF_uptime_warn", $uptime_text, $value, $uptime_level); set_uptime($i);
89

SunScreen SPF-200 Design, Implementation and Maintenance Document – 4/7/98
} if (($value=get_uptime($i)) < (248 - $uptime_warn) && uptime_set($i)) { clear_trap(get_name($i), "SPF_uptime_warn", $uptime_text, $value); clear_uptime($i); } }}
# Send an SNMP trap; return success/failure# $_[0]=name, $_[1]=id, $_[2]=description, $_[3]=value, $_[4]=severitysub send_trap { $date = localtime; print "$date SPF_$_[0]|$_[4]|$_[1]|$_[2] <actual: $_[3]>\n"; system("trapsend -v1 haji.ns.cs.company.com public 6 6 1.3.6.1.4.1.73 ". "1234567 1.3.6.1.2.1.1.1.0 -D \"SPF_$_[0]|$_[4]|$_[1]|". "$_[2] <actual: $_[3]> $text\""); system("echo \"$date SPF_$_[0]|$_[4]|$_[1]|$_[2] <actual: $_[3]>\" ". "| mailx trapbot\@blv-spf-config");}
# Clear an SNMP trap; return success/failure# $_[0]=name, $_[1]=id, $_[2]=description, $_[3]=valuesub clear_trap { $date = localtime; print "$date SPF_$_[0]|clear|$_[1]|$_[2] <actual: $_[3]>\n"; system("trapsend -v1 haji.ns.cs.company.com public 6 6 1.3.6.1.4.1.73 ". "1234567 1.3.6.1.2.1.1.1.0 -D \"SPF_$_[0]|clear|$_[1]|". "$_[2] <actual: $_[3]> $text\""); system("echo \"$date SPF_$_[0]|clear|$_[1]|$_[2] <actual: $_[3]>\" ". "| mailx trapbot\@blv-spf-config");}
# Ping through each interface of a screen and return false if ALL pings failsub ping_screen { $rc = 0xffff; foreach $address (get_ping($_[0])) { $rc &= system("ping -F -k 1 $address >/dev/null 2>&1"); } if ($rc == 0) {return 1}; return 0;}
# Get uptime information from screen and return number of up dayssub get_uptime_info { $uptime=`ss_client $_[0]->{name} uptime 2>&1`; if ($uptime =~ /exiting/ ) { return 0; }
$uptime =~ /\s+\S+\s+\S+\s+(\S+)/; if ($1 =~ /:/) { set_uptime_value($_[0],0); } else { set_uptime_value($_[0], $1); } return 1;}
# Get vmstat information from screen and return success or failuresub get_vmstat { # Check to make sure we can communicate with the screen $vmstat=`ss_client $_[0]->{name} vmstat 2 2 2>&1 | tail -1`; if ($vmstat =~ /exiting/ ) { return 0; }
# Parse CPU and memory values $vmstat =~ /\s+(\S+\s+){11}?(\S+)\s+(\S+\s+){9}?(\S+)/; set_mem($_[0], $2); set_cpu($_[0], 100-$4); return 1;}
# Get traffic_stats from screen and return success or failuresub get_traffic_stats { # Retrieve traffic_stat information $traffic=`ss_client $_[0]->{name} ss_traffic_stats -Z 2>&1`; if ($traffic =~ /exiting/ ) { return 0; }
90

SunScreen SPF-200 Design, Implementation and Maintenance Document – 4/7/98
system("ss_client $_[0]->{name} ss_traffic_stats -Z >/tmp/traffic.$$ 2>&1");
# Parse packet statistics $passed = $dp = $af = $ncp = 0; open IN, "/tmp/traffic.$$" || die "Error opening temporary file"; while( <IN> =~ /\S+\s\S+\s\S+\s(\S+)\s\S+\s\S+\s(\S+)\s(\S+)\s(\S+)\s/ ) { $passed += $1; $dp += $2; $af += $3; $ncp += $4; } close IN; set_passed($_[0], $passed); set_dp($_[0], $dp); set_af($_[0], $af); set_ncp($_[0], $ncp); return 1;}
######################################################################### ## This section deals with the parsing of the vmstat and ## ss_traffic_stat information from a screen, and provides all the ## functions to access variables in the screen records. You could ## think of these functions as the member functions of a screen class. ## #########################################################################
# Save new_traffic_stats info for delta calculationssub save_data { while (($key,$value) = each %{$_[0]->{new_traffic_stats}}) { $_[0]->{old_traffic_stats}{$key} = $value; }}
# Check if screen was rebooted since last iterationsub rebooted { if ($_[0]->{new_traffic_stats}{'passed'} - $_[0]->{old_traffic_stats}{'passed'} < 0 ) { return 1; } return 0;}
# Set CPU utilizationsub set_cpu { $_[0]->{vmstat}{'cpu'} = $_[1];}
# Set memory utilizationsub set_mem { $_[0]->{vmstat}{'mem'} = $_[1];}
# Set passed packetssub set_passed { $_[0]->{new_traffic_stats}{'passed'} = $_[1];}
# Set dropped packetssub set_dp { $_[0]->{new_traffic_stats}{'dp'} = $_[1];}
# Set NoCanPut packetssub set_ncp { $_[0]->{new_traffic_stats}{'ncp'} = $_[1];}
# Set AllocFailure packetssub set_af { $_[0]->{new_traffic_stats}{'af'} = $_[1];
91

SunScreen SPF-200 Design, Implementation and Maintenance Document – 4/7/98
}
# Set uptimesub set_uptime_value { $_[0]->{uptime} = $_[1];}
# Return CPU utilizationsub get_cpu { return $_[0]->{vmstat}{'cpu'};}
# Return Memory usagesub get_mem { return $_[0]->{vmstat}{'mem'};}
# Return number of passed packetssub get_passed { return $_[0]->{new_traffic_stats}{'passed'} - $_[0]->{old_traffic_stats}{'passed'};}
# Return number of dropped packetssub get_dp { return $_[0]->{new_traffic_stats}{'dp'} - $_[0]->{old_traffic_stats}{'dp'};}
# Return number of NoCanPut packetssub get_ncp { return $_[0]->{new_traffic_stats}{'ncp'} - $_[0]->{old_traffic_stats}{'ncp'};}
# Return number of AllocFailure packetssub get_af { return $_[0]->{new_traffic_stats}{'af'} - $_[0]->{old_traffic_stats}{'af'};}
# Return uptimesub get_uptime { return $_[0]->{uptime};}
# Return the name of the SunScreensub get_name { return $_[0]->{name};}
# Return an array containing all the IP address for pingingsub get_ping { return @{$_[0]->{ping}};}
# Set cpu_warn trap for a screensub set_cpu_warn { ($_[0])->{cpu_warn_set} = 1;}
# Clear cpu_warn trap for a screensub clear_cpu_warn { ($_[0])->{cpu_warn_set} = 0;}
# Return state of cpu_warn trap for a screensub cpu_warn_set { return ($_[0])->{cpu_warn_set};}
# Set cpu_alert trap for a screen
92

SunScreen SPF-200 Design, Implementation and Maintenance Document – 4/7/98
sub set_cpu_alert { ($_[0])->{cpu_alert_set} = 1;}
# Clear cpu_alert trap for a screensub clear_cpu_alert { ($_[0])->{cpu_alert_set} = 0;}
# Return state of cpu_alert trap for a screensub cpu_alert_set { return ($_[0])->{cpu_alert_set};}
# Set mem_warn trap for a screensub set_mem_warn { ($_[0])->{mem_warn_set} = 1;}
# Clear mem_warn trap for a screensub clear_mem_warn { ($_[0])->{mem_warn_set} = 0;}
# Return state of mem_warn trap for a screensub mem_warn_set { return ($_[0])->{mem_warn_set};}
# Set ncp_warn trap for a screensub set_ncp_warn { ($_[0])->{ncp_warn_set} = 1;}
# Clear ncp_warn trap for a screensub clear_ncp_warn { ($_[0])->{ncp_warn_set} = 0;}
# Return state of ncp_warn trap for a screensub ncp_warn_set { return ($_[0])->{ncp_warn_set};}
# Set ncp_alert trap for a screensub set_ncp_alert { ($_[0])->{ncp_alert_set} = 1;}
# Clear ncp_alert trap for a screensub clear_ncp_alert { ($_[0])->{ncp_alert_set} = 0;}
# Return state of ncp_alert trap for a screensub ncp_alert_set { return ($_[0])->{ncp_alert_set};}
# Set af_warn trap for a screensub set_af_warn { ($_[0])->{af_warn_set} = 1;}
# Clear af_warn trap for a screensub clear_af_warn { ($_[0])->{af_warn_set} = 0;}
# Return state of af_warn trap for a screensub af_warn_set { return ($_[0])->{af_warn_set};
93

SunScreen SPF-200 Design, Implementation and Maintenance Document – 4/7/98
}
# Set af_alert trap for a screensub set_af_alert { ($_[0])->{af_alert_set} = 1;}
# Clear af_alert trap for a screensub clear_af_alert { ($_[0])->{af_alert_set} = 0;}
# Return state of af_alert trap for a screensub af_alert_set { return ($_[0])->{af_alert_set};}
# Set dp_warn trap for a screensub set_dp_warn { ($_[0])->{dp_warn_set} = 1;}
# Clear dp_warn trap for a screensub clear_dp_warn { ($_[0])->{dp_warn_set} = 0;}
# Return state of dp_warn trap for a screensub dp_warn_set { return ($_[0])->{dp_warn_set};}
# Set dp_alert trap for a screensub set_dp_alert { ($_[0])->{dp_alert_set} = 1;}
# Clear dp_alert trap for a screensub clear_dp_alert { ($_[0])->{dp_alert_set} = 0;}
# Return state of dp_alert trap for a screensub dp_alert_set { return ($_[0])->{dp_alert_set};}
# Set uptime trap for a screensub set_uptime { ($_[0])->{uptime_set} = 1;}
# Clear uptime trap for a screensub clear_uptime { ($_[0])->{uptime_set} = 0;}
# Return state of uptime trap for a screensub uptime_set { return ($_[0])->{uptime_set};}
# Set no_comm trap for a screensub set_no_comm { ($_[0])->{no_comm_set} = 1;}
# Clear no_comm trap for a screensub clear_no_comm { ($_[0])->{no_comm_set} = 0;}
94

SunScreen SPF-200 Design, Implementation and Maintenance Document – 4/7/98
# Return state of no_comm trap for a screensub no_comm_set { return ($_[0])->{no_comm_set};}
# Set no_ping trap for a screensub set_no_ping { ($_[0])->{no_ping_set} = 1;}
# Clear no_ping trap for a screensub clear_no_ping { ($_[0])->{no_ping_set} = 0;}
# Return state of no_ping trap for a screensub no_ping_set { return ($_[0])->{no_ping_set};}
# Set screen_down trap for a screensub set_screen_down { ($_[0])->{screen_down_set} = 1;}
# Clear screen_down trap for a screensub clear_screen_down { ($_[0])->{screen_down_set} = 0;}
# Return state of screen_down trap for a screensub screen_down_set { return ($_[0])->{screen_down_set};}
# Set no_passed trap for a screensub set_no_passed { ($_[0])->{no_passed_set} = 1;}
# Clear no_passed trap for a screensub clear_no_passed { ($_[0])->{no_passed_set} = 0;}
# Return state of no_passed trap for a screensub no_passed_set { return ($_[0])->{no_passed_set};}
G. Other Resources and Information
SunScreen SPF-200 Installation GuideSunScreen SPF-200 Configuration and Management GuideSunScreen SKIP User’s Guide for Solaris
http://www.sun.com
http://sunsolve1.sun.com
Tools:
SunScreen current logs, change log, and current configurations page:http://blv-spf-config.ns.cs.company.com
95

SunScreen SPF-200 Design, Implementation and Maintenance Document – 4/7/98
company External Data Networks performance and problem notification:http://nmcsweb2.ca.company.com/
H. SunScreen SPF200 Throughput Test Results
1. SunScreen 167MHz Processor Testing
Purpose:
The purpose of this test was to determine the system’s network throughput capabilities, which includes a SPF200 and VLAN configured Catalyst.
Objective:
The objective was to configure a test environment which represents the planned production deployment configuration of the SPF and the supporting Cisco Catalyst 5000 switching hub.
System Description and Configuration:
SPF200 H/W: Sun Ultra 2, 167Mhz. CPU, 128 MB RAM, 10/100 Sun Quad Ethernet (hme)SPF200 S/W: SPF200
Cisco Catalyst H/W: Catalyst 5002, 10/100BaseT ModuleCisco Catalyst S/W: McpSW 2.3
Netcom Systems (SmartBits): 10/100 BaseT Transmitter/Receiver, SmartWindows Ver. 6.1
Figure 1-1 provides the test system connectivity.
96

SunScreen SPF-200 Design, Implementation and Maintenance Document – 4/7/98
Test Description and Results:
The throughput test environment was configured utilizing the SmartBits as the transmitter and receiver, source and destination, of the data. The transmitter and receiver were each attached to VLAN1 and VLAN2 which were configured on the Cisco Catalyst 5000 switching hub. Two of the four 10/100 Sun Quad Ethernet (hme) interfaces were individually connected to VLAN1 and VLAN2 thus allowing the SPF200 to bridge between the two defined VLANs, VLAN1 and VLAN2. Since network performance was of main concern, all systems involved in this test were configured for 100Mb/s Full Duplex operation. The SPF200 “IP ALL” service rule was defined to allowed all IP traffic to pass from VLAN1 to VLAN2 thru the SPF200. Since the Smartbits generates MAC layer packets by default, it was necessary to create a legitimate MAC and IP layer packet utilizing the SmartBits packet editor utility. A Sniffer network analyzer was utilized to verify the packet’s integrity.
Once the test system was determined to be operational, the throughput results were observed by recording the receive rates of the SmartBits receiver. The following summarizes the configuration and intent of the three test cases:
Test Case 1 configured the SPF200 with the single “IP ALL” rule. Five packet sizes were identified to create five test scenarios. For each of the scenarios, the SmartBits’ transmit packet size was defined per table 1-1. The intent of this test was to obtain maximum throughput results for a minimally configured SPF200. Table 1-1 provides the Test Case 1 packet sizes and observed receive rates.
Test Case 2 configured the SPF200 with an additional “RIP” rule which allowed RIP packet passage thru the SPF200. The intent of this test was to acquire the performance overhead associated with a single SPF200 rule. The observed throughput with the additional rule was so slight that there was essentially no performance delta between Test Cases 1 and 2.
97

SunScreen SPF-200 Design, Implementation and Maintenance Document – 4/7/98
Test Case 3 provided the same configuration as Test Case 2 with the addition of Detailed Rule Logging enabled. Enabling this feature causes the SPF200 to fully log packet information associated with packets allowed to pass. The intent of this test was to obtain throughput results, which could be compared to Test Case 1 to determine the impact of logging verses not logging. Table 1-2 provides the Test Case 3 packet sizes and observed receive rates.
Packet Size (bytes) Throughput Rate (Megabits/sec)
Throughput Rate (packets/sec)
1,500 98.29 8,1911,000 97.46 12,183536 60.33 14,070270 30.4 14,07564 7.26 14,180
Table 1-1 SPF200 Throughput Results (w/o logging)
Packet Sizes (bytes) Throughput Rate (Megabits/sec)
Throughput Rate (packets/sec)
1,500 98.29 8,1911,000 82.32 10,290536 45.92 10,710270 24.19 11,20064 6.02 11,754
Table 1-2 SPF200 Throughput Results (w/ logging)
Conclusion:
It was observed that near wire speed (100 Mb/s throughput) is attainable as observed with the 1500 byte packet size. The system’s throughput is severely impacted as the number of packets per second increases. The SPF200’s performance could probably be improved to provide a more linear throughput across the packet size spectrum by utilizing Sun’s latest Ultra 2 300 Mhz. CPU. This machine is also available with two (2) CPUs. The Ultra 2 167 Mhz. CPU machines used for this test and for the Teledesic deployment are approximately a year and half old.
M. Duke Trevino, G-4795Distributed Systems Interconnect(425) [email protected] 24, 1997
2. SunScreen 300MHz Processor Testing
Purpose:
There is a need to perform some testing on the SunScreen SPF-200 packet filtering devices. This need comes from a requirement from BENTAG that prior to approval of the DIM document for SunScreen SPF-200s, certain testing be performed. We are going to certify a 300Mhz version of the SunScreen platform and we would like to perform some better testing on the throughput and latency of the system. It is a requirement to determine how the rule-sets in the device effect the maximum performance ceiling of the system. These test are critical to the design of company’s security perimeter architecture implementation.
98

SunScreen SPF-200 Design, Implementation and Maintenance Document – 4/7/98
Test Plan:
Below is a diagram of the devices that would be required to perform the testing.
The above-detailed diagram shows how the transmit and receive interfaces on the SmartBits or DA-30C can be used to give us performance data based on IP traffic injected into the system. This diagram shows how the same interfaces on the SmartBits can be used to fully load the SunScreen with data to determine its total forwarding capability. The test will involve sending various packets with different IP source and destination addresses to test the performance as the packet matches the different rule-sets in the SunScreen. The SmartBits and DA-30C will be able to quantify the throughput and latency of the devices. The Catalyst switch will be used to concentrate traffic destined for the ports of the test devices and limit the test to only those devices in the test-bed. We will perform different tests with different sets of rules and determine how rules effect the throughput of the system.
Results:
When we performed these tests, we received the following results. We found that we got strange results when we used the Catalyst 5000 to perform our tests. Therefore, from that point on we determined that we should test the SunScreen when it was directly connected to the test tool. The graph displayed below shows how the line for the test performed with the Catalyst is different than others. We also performed a test where we tested the DA-30C itself. We looped a network cable between its interfaces. This line on the graph illustrates the maximum throughput achieved as a result of using the tool given Fast Ethernet and a standard inter-packet gap.
99

SunScreen SPF-200 Design, Implementation and Maintenance Document – 4/7/98
The other lines show how different rule sets affect performance. We tested a ruleset where the source and destination addresses were identical and we varied the rules by the type of service. We tested a ruleset where we varied the destination address while keeping the source address and the service consistent. We also tested a ruleset where we varied the source address and maintained the same service and destination address constant. These rulesets had about 50 entries each. We also tested the ruleset that is currently being used in a pilot SPF-200. This ruleset has around 150 rules and is roughly the equivalent to a 16,000 line Cisco extended access control list. The results we collected for this ruleset were similar to the previous rulesets. The test results showed that the complex hashing algorithms within the SunScreen software are very efficient and scale well.
We also performed a test where we used multiple transmit and receive ports on the SmartBits to try to test the total aggregate bandwidth capable of being carried by the SunScreen. We found that with 1518byte packets, we were able to forward a total of 268Mbps through the system. This shows that the SunScreen is capable of handling a large amount of traffic among and between its interfaces.
Conclusions:
We determined from the results that the types of rules, or the size of the ruleset have little impact on the performance of the SunScreen
We determined that the 300MHz processors show a definite improvement over the 167MHz processors. Therefore, the 300MHz processors will be the preferred platform for SunScreen deployed in the future.
We determined that the SunScreen performs at wire speed for packets equal to or greater than 512 bytes. Since the average packet size for perimeter systems is between 256 and 512 bytes, then we can conclude that the SunScreen performs very well.
In addition, we determined that the SunScreen has a large amount of aggregate bandwidth capability. From this we can conclude that the SunScreen is qualified to handle the intended load of security perimeter data traffic.
100
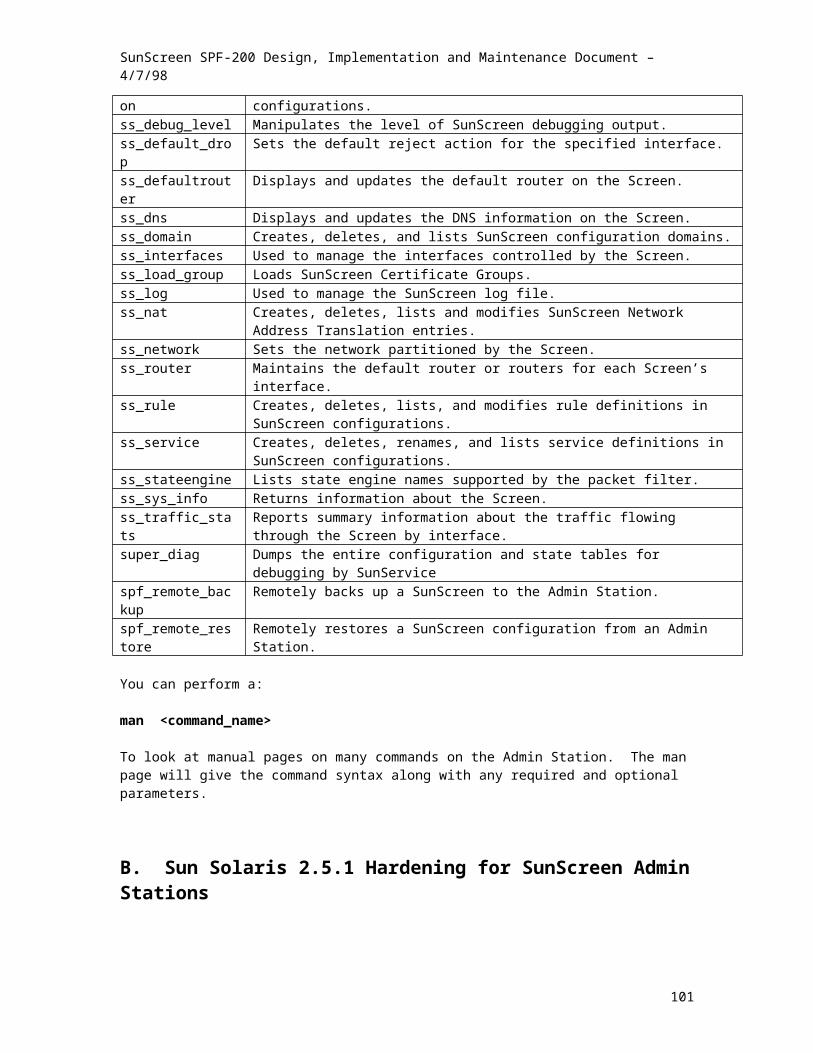
SunScreen SPF-200 Design, Implementation and Maintenance Document – 4/7/98
I. Contacts/System Support
101

SunScreen SPF-200 Design, Implementation and Maintenance Document – 4/7/98
Index
B
build_screen...........................23, 26, 39, 62, 64
C
Catalyst........................................10, 40, 96, 97cfgbot............................................................24chk_time.......................................................64copy_config...................................................23crontab..................................23, 25, 64, 65, 68
D
defaultrouter...........................................16, 74dump_config...........................................23, 67
G
get_clear_logs................................................68get_file.....................................................26, 27get_logs.........................................................68
L
logbot...........................................24, 25, 68, 69
N
nic_chk....................................................40, 77NIC_SET.................................................39, 78
P
PATH......................................................18, 44ping....................................................53, 55, 58pkgadd..........................................................17processlogs....................................................69push_common................................................26push_log..................................................23, 68push_stat.......................................................25put_file....................................................26, 27
R
resolv.conf...............................................17, 75revert_config......................................26, 28, 67
S
sas_logdump..........................47, 67, 68, 69, 74sas_main...............21, 40, 42, 43, 45, 46, 48, 50sas_registry.......................................20, 21, 41sendcfg..........................................................24sendlog....................................................24, 25SENDMAIL.CF.............................................22set_time...................................................64, 65skipif............................................19, 20, 21, 41skiplocal..................................................20, 41skiptool..................................21, 23, 38, 41, 75
snoop.............................................................55spf_admin_install...............................20, 36, 74spf_backup........................................66, 67, 74spf_restore..............................................67, 74sync_common................................................26
T
traceroute.......................................................55
U
UltraSPARC 2....................................12, 13, 42
V
volcheck........................................................17
102

SunScreen SPF-200 Design, Implementation and Maintenance Document – 4/7/98
103