1. using array - lo chi wing's personal web site · 2010-06-14 · 1. using array 1. start the...
TRANSCRIPT

I154-1-A: Introduction to Visual Basic and Visual C++
Copyright © 2010 Lo Chi Wing 1
1. Using Array 1. Start the Microsoft Visual Studio and start a new Visual Basic Project MyFirstArray. From
the Toolbox, drag a Textbox and Button control onto the form and customize the properties. Object Name Property Property Value
Form frmMain Text Array Demo Text Box txtInput Text (Blank) Button btnDisplay Text Display
2. In the Click event procedure of the btnDisplay control, add the following code:
' Declare the array
Dim student() As String = { "Dan", "Mary", "John", "Cherry", _
"LuLu", "Ken", "Jay", "Sam", "Robert"}
' Display the result
MsgBox(student(txtinput.Text) & " is in the Class.")
I154-1-A: Introduction to Visual Basic and Visual C++
Copyright © 2010 Lo Chi Wing 2
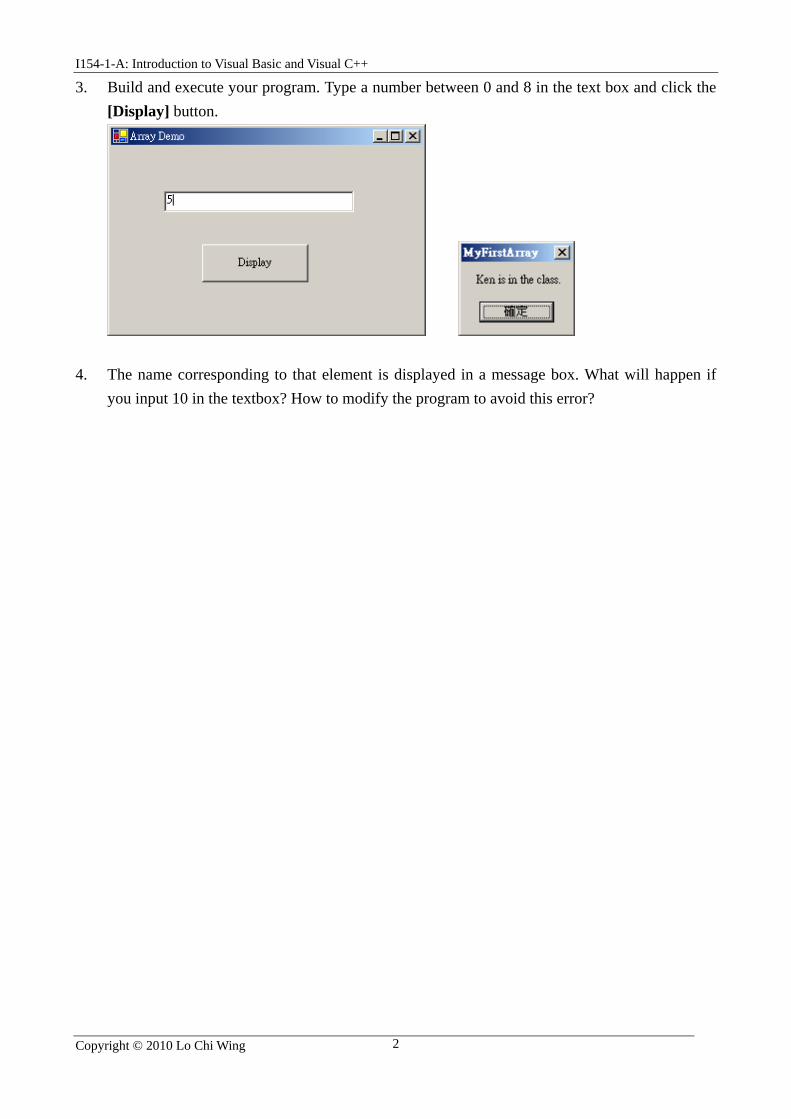
3. Build and execute your program. Type a number between 0 and 8 in the text box and click the [Display] button.
4. The name corresponding to that element is displayed in a message box. What will happen if you input 10 in the textbox? How to modify the program to avoid this error?

I154-1-A: Introduction to Visual Basic and Visual C++
Copyright © 2010 Lo Chi Wing 3
2. Message Box 1. Start the Microsoft Visual Studio and start a new Visual Basic Project MessageBoxDemo.
From the Toolbox, drag a Button controls onto the form and customize the properties. Object Name Property Property Value
Form frmMain Text Message Demo Button btnDisplay Text Display
2. In the Click event procedure of the button control (frmDisplay), add the following code. MessageBox.Show(“Message Text Content”, _
“Title”, _
MessageBoxButtons.OKCancel, _
MessageBoxIcon.Information, _
MessageBoxDefaultButton.Button1, _
MessageBoxOptions.DefaultDesktopOnly)
I154-1-A: Introduction to Visual Basic and Visual C++
Copyright © 2010 Lo Chi Wing 4
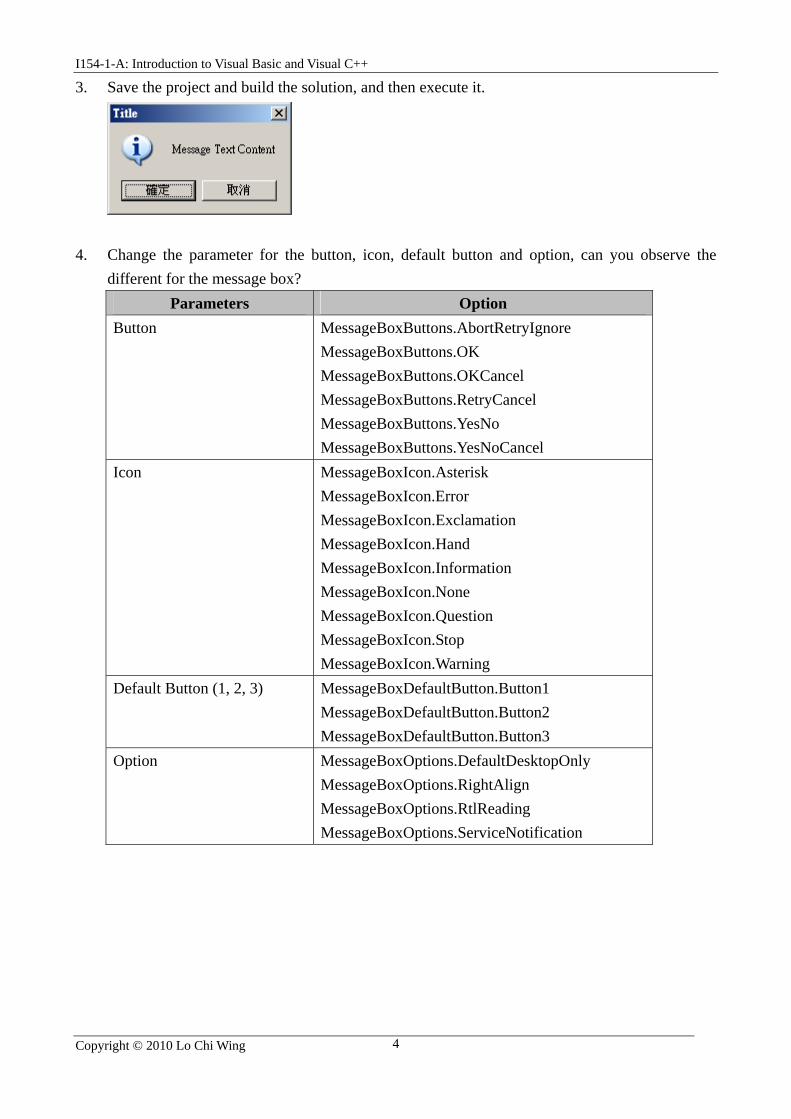
3. Save the project and build the solution, and then execute it.
4. Change the parameter for the button, icon, default button and option, can you observe the
different for the message box? Parameters Option
Button MessageBoxButtons.AbortRetryIgnore MessageBoxButtons.OK MessageBoxButtons.OKCancel MessageBoxButtons.RetryCancel MessageBoxButtons.YesNo MessageBoxButtons.YesNoCancel
Icon MessageBoxIcon.Asterisk MessageBoxIcon.Error MessageBoxIcon.Exclamation MessageBoxIcon.Hand MessageBoxIcon.Information MessageBoxIcon.None MessageBoxIcon.Question MessageBoxIcon.Stop MessageBoxIcon.Warning
Default Button (1, 2, 3) MessageBoxDefaultButton.Button1 MessageBoxDefaultButton.Button2 MessageBoxDefaultButton.Button3
Option MessageBoxOptions.DefaultDesktopOnly MessageBoxOptions.RightAlign MessageBoxOptions.RtlReading MessageBoxOptions.ServiceNotification

I154-1-A: Introduction to Visual Basic and Visual C++
Copyright © 2010 Lo Chi Wing 5
3. Drawing 1. Open the Microsoft Visual Studio and start a new Visual Basic Project named as Drawing and
customize the form properties. Object Name Property Property Value
Form frmMain Text Drawing 2. In the Paint event procedure of the Form (frmMain), add the following code
Dim Graphics As System.Drawing.Graphics
Dim Color As New System.Drawing.Pen(System.Drawing.Color.Red)
Dim Color2 As New System.Drawing.Pen(System.Drawing.Color.Blue)
Dim Color3 As New System.Drawing.Pen(System.Drawing.Color.Green)
Dim Brush As New SolidBrush(System.Drawing.Color.Blue)
Try
Graphics = Me.CreateGraphics()
Graphics.DrawLine(Color, 20, 30, 100, 80)
Graphics.DrawEllipse(Color2, 10, 120, 200, 160)
Graphics.DrawRectangle(Color3, 10, 120, 200, 160)
Graphics.FillRectangle(Brush, 150, 10, 250, 100)
Catch ex As Exception
MsgBox("Error drawing shapes!")
Application.Exit() End Try
3. Save the project and build the solution, and then execute it.
I154-1-A: Introduction to Visual Basic and Visual C++
Copyright © 2010 Lo Chi Wing 6
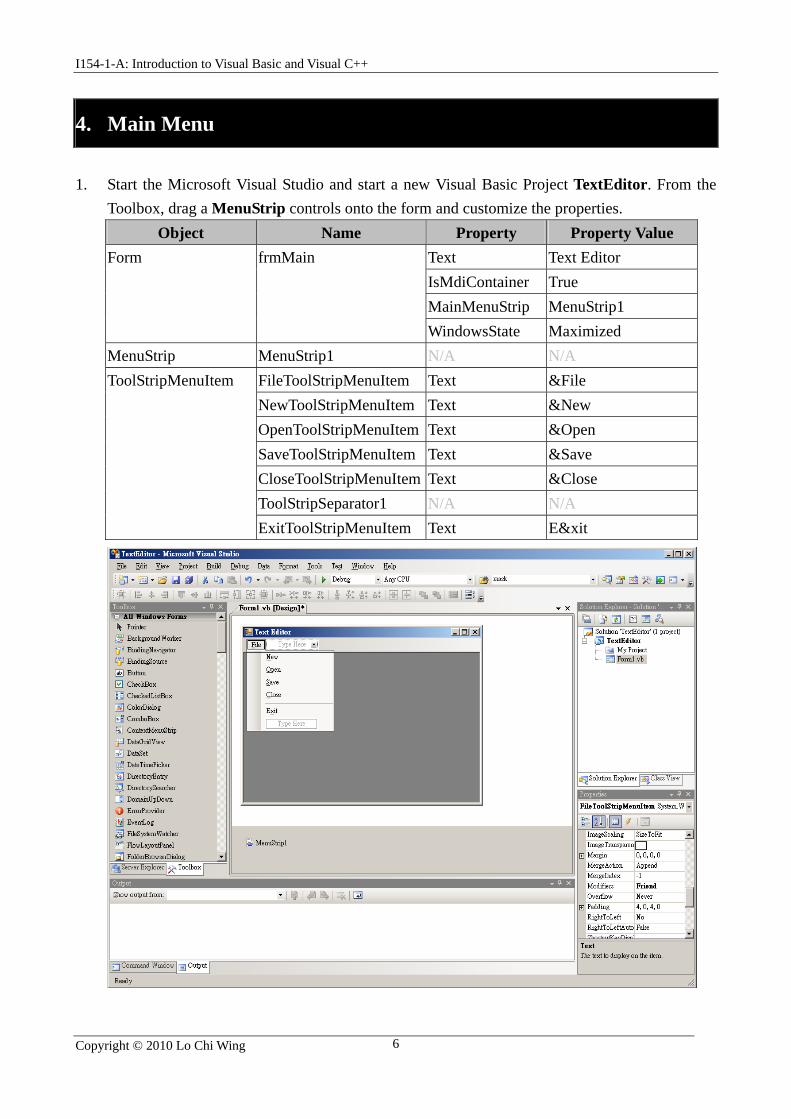
4. Main Menu 1. Start the Microsoft Visual Studio and start a new Visual Basic Project TextEditor. From the
Toolbox, drag a MenuStrip controls onto the form and customize the properties. Object Name Property Property Value
Form frmMain Text Text Editor IsMdiContainer True MainMenuStrip MenuStrip1 WindowsState Maximized MenuStrip MenuStrip1 N/A N/A ToolStripMenuItem FileToolStripMenuItem Text &File NewToolStripMenuItem Text &New OpenToolStripMenuItem Text &Open SaveToolStripMenuItem Text &Save CloseToolStripMenuItem Text &Close ToolStripSeparator1 N/A N/A ExitToolStripMenuItem Text E&xit

I154-1-A: Introduction to Visual Basic and Visual C++
Copyright © 2010 Lo Chi Wing 7
2. In the Click event procedure of the Exit menu item control (ExitToolStripMenuItem), add the following code. ' Exit the application and close all form
Application.Exit( )
3. Save the project and build the solution, and then execute it, you can click the [Exit] button to
quit the program.

I154-1-A: Introduction to Visual Basic and Visual C++
Copyright © 2010 Lo Chi Wing 8
5. Status Bar
1. Start the Microsoft Visual Studio and open the previous Visual Basic Project TextEditor. From the Toolbox, drag a StatusStrip controls onto the form and customize the properties.
Object Name Property Property Value StatusStrip StatusStrip1 N/A N/A
2. Save the project and build the solution, and then execute it, you can see the status bar on the
bottom of the Form.

I154-1-A: Introduction to Visual Basic and Visual C++
Copyright © 2010 Lo Chi Wing 9
6. Rich Text Box 1. Start the Microsoft Visual Studio and open the previous Visual Basic Project TextEditor. In
Solution Explorer, right-click the project, point to Add, and then select Add New Item.
2. In the Add New Item dialog box, select Windows Form in from the Templates pane. Click
the Open button to add the form (Form2) to the project.

I154-1-A: Introduction to Visual Basic and Visual C++
Copyright © 2010 Lo Chi Wing 10
3. From the Toolbox, drag a Rich Text Box controls onto the form and customize the properties. Object Name Property Property Value
Form frmChild Text Untitled RichTextBox RichTextBox1 Text (Blank) Dock Fill
4. Go back to frmMain (Form1.vb), create a new procedure NewDocument. Private Sub NewDocument()
' Declare a MDI child object
Dim NewMDIChild As New frmChild
' Set the Parent Form of the Child window.
NewMDIChild.MdiParent = Me
' Display the new form.
NewMDIChild.Show()
End Sub
5. In the Load event procedure of the Main From (frmMain), add the following code.
Call NewDocument()

I154-1-A: Introduction to Visual Basic and Visual C++
Copyright © 2010 Lo Chi Wing 11
6. In the Click event procedure of the New menu item control (NewToolStripMenuItem), add the following code. Call NewDocument()
7. In the Click event procedure of the Close menu item control (CloseToolStripMenuItem), add
the following code. ' Capture the active child Form
Dim activeChild As Form = Me.ActiveMdiChild
' Close the child form
activeChild.Close()
8. Save the project and build the solution, and then execute it, you can click the File New
button to create new document.

I154-1-A: Introduction to Visual Basic and Visual C++
Copyright © 2010 Lo Chi Wing 12
7. Open Text File 1. Start the Microsoft Visual Studio and open the previous Visual Basic Project TextEditor. From
the Toolbox, drag an OpenFileDialog controls onto the form frmMain and customize the properties.
Object Name Property Property Value OpenFileDialog OpenFileDialog1 Filter Text files (*.txt)|*.txt|All files (*.*)|*.* Filename (Blank)

I154-1-A: Introduction to Visual Basic and Visual C++
Copyright © 2010 Lo Chi Wing 13
2. In the Click event procedure of the Open menu item control (OpenToolStripMenuItem), add the following code. If OpenFileDialog1.ShowDialog() = Windows.Forms.DialogResult.OK Then
' Declare a MDI child object
Dim NewMDIChild As New frmChild
' Set the Parent Form of the Child window.
NewMDIChild.MdiParent = Me
' Set the file to open and read the file the user has selected
Dim sr As New System.IO.StreamReader(OpenFileDialog1.FileName)
' Read the contents of the file and assign the contents to String
NewMDIChild.RichTextBox1.Text = sr.ReadToEnd
' The contents of the File have been read, so now Close the File
sr.Close()
' Show the file name in the status bar
NewMDIChild.Text() = OpenFileDialog1.FileName
' Display the new form.
NewMDIChild.Show()
End If
3. Save the project and build the solution, and then execute it. Click File Open to open
existing text file

I154-1-A: Introduction to Visual Basic and Visual C++
Copyright © 2010 Lo Chi Wing 14
8. Save Text File 1. Start the Microsoft Visual Studio and open the previous Visual Basic Project TextEditor. From
the Toolbox, drag an SaveFileDialog controls onto the form frmMain and customize the properties.
Object Name Property Property Value SaveFileDialog SaveFileDialog1 Filter Text files (*.txt)|*.txt|All files (*.*)|*.* Filename (Blank)

I154-1-A: Introduction to Visual Basic and Visual C++
Copyright © 2010 Lo Chi Wing 15
2. In the Click event procedure of the Save menu item control (SaveToolStripMenuItem), add the following code. ' Capture the active child Form
Dim activeChild As frmChild = Me.ActiveMdiChild
' Default the file name
SaveFileDialog1.FileName = activeChild.Text()
If SaveFileDialog1.ShowDialog() = Windows.Forms.DialogResult.OK Then
' Set the File to be written to as the FileName in the Save File Dialog
Dim sw As New System.IO.StreamWriter(SaveFileDialog1.FileName)
' Write the contents of the RichTextBox to the File
sw.Write(activeChild.RichTextBox1.Text)
' Close the Stream Writer and the File
sw.Close()
' Show the file name in the status bar
activeChild.Text() = SaveFileDialog1.FileName
End If
3. Save the project and build the solution, and then execute it. Click File Open to select and
open the text file, and then click File Save to save the text file.

I154-1-A: Introduction to Visual Basic and Visual C++
Copyright © 2010 Lo Chi Wing 16
9. Set the Color 1. Start the Microsoft Visual Studio and open the previous Visual Basic Project TextEditor. Add
three menu items to the form frmMain, and customize the properties. Object Name Property Property Value
ToolStripMenuItem StyleToolStripMenuItem Text &Style ColorToolStripMenuItem Text &Color FontToolStripMenuItem Text &Font

I154-1-A: Introduction to Visual Basic and Visual C++
Copyright © 2010 Lo Chi Wing 17
2. From the Toolbox, drag a Color Dialog controls onto the form frmMain and customize the properties.
Object Name Property Property Value ColorDialog ColorDialog1 N/A N/A
3. In the Click event procedure of the Color menu item control (ColorToolStripMenuItem), add
the following code. ' Capture the active child Form
Dim activeChild As frmChild = Me.ActiveMdiChild
If ColorDialog1.ShowDialog() = Windows.Forms.DialogResult.OK Then
' Set the fore color for the rich text box
activeChild.RichTextBox1.ForeColor = ColorDialog1.Color
End If
I154-1-A: Introduction to Visual Basic and Visual C++
Copyright © 2010 Lo Chi Wing 18
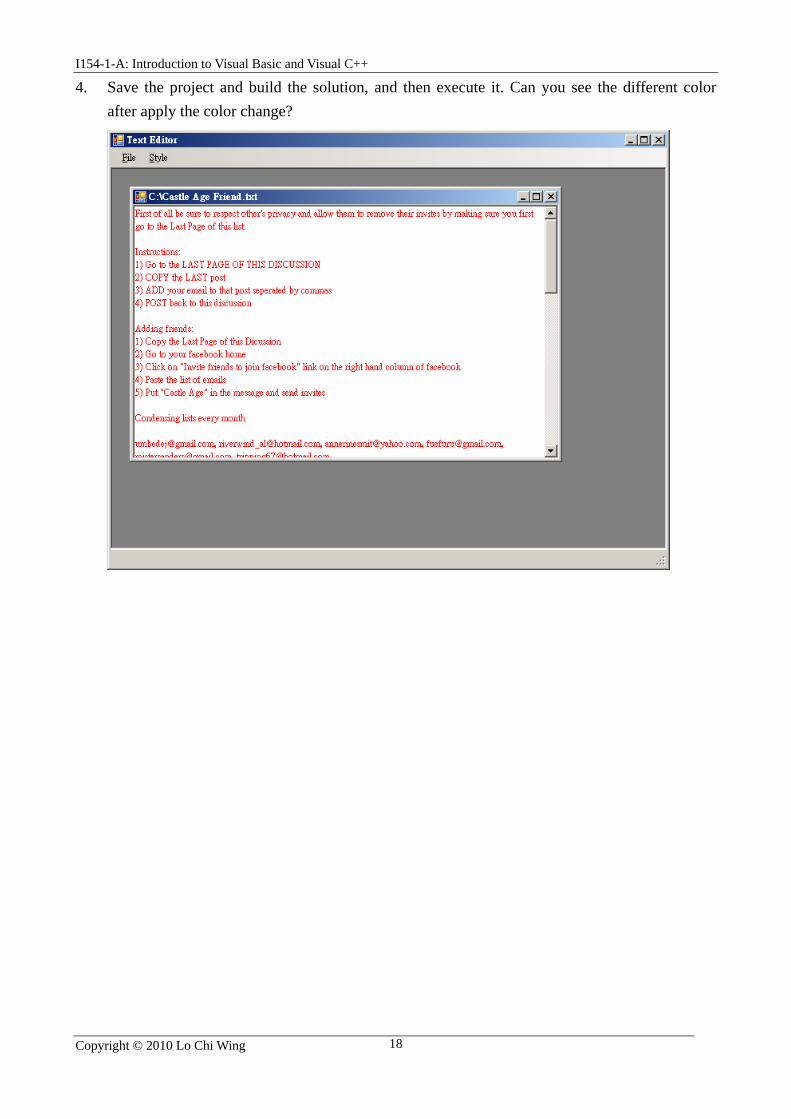
4. Save the project and build the solution, and then execute it. Can you see the different color after apply the color change?

I154-1-A: Introduction to Visual Basic and Visual C++
Copyright © 2010 Lo Chi Wing 19
10. Set the Font Style 1. Start the Microsoft Visual Studio and open the previous Visual Basic Project TextEditor. From
the Toolbox, drag a Font Dialog controls onto the form frmMain and customize the properties.
Object Name Property Property Value FontDialog FontDialog1 N/A N/A
2. In the Click event procedure of the Font menu item control (FontToolStripMenuItem), add
the following code. 'Capture the active child Form
Dim activeChild As frmChild = Me.ActiveMdiChild
If FontDialog1.ShowDialog() = Windows.Forms.DialogResult.OK Then
' Set the font style
activeChild.RichTextBox1.Font = FontDialog1.Font()
End If

I154-1-A: Introduction to Visual Basic and Visual C++
Copyright © 2010 Lo Chi Wing 20
3. Save the project and build the solution, and then execute it. Can you obtain the different after modify the font?
I154-1-A: Introduction to Visual Basic and Visual C++
Copyright © 2010 Lo Chi Wing 21
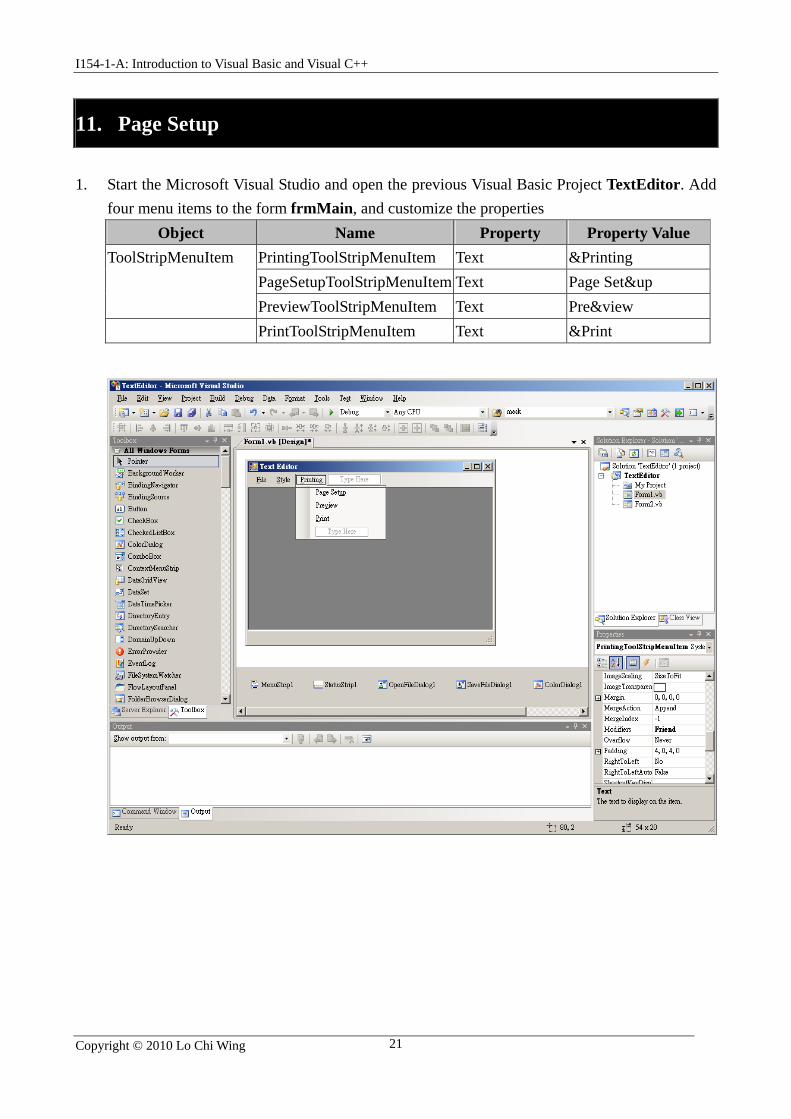
11. Page Setup 1. Start the Microsoft Visual Studio and open the previous Visual Basic Project TextEditor. Add
four menu items to the form frmMain, and customize the properties Object Name Property Property Value
ToolStripMenuItem PrintingToolStripMenuItem Text &Printing PageSetupToolStripMenuItem Text Page Set&up PreviewToolStripMenuItem Text Pre&view PrintToolStripMenuItem Text &Print
I154-1-A: Introduction to Visual Basic and Visual C++
Copyright © 2010 Lo Chi Wing 22
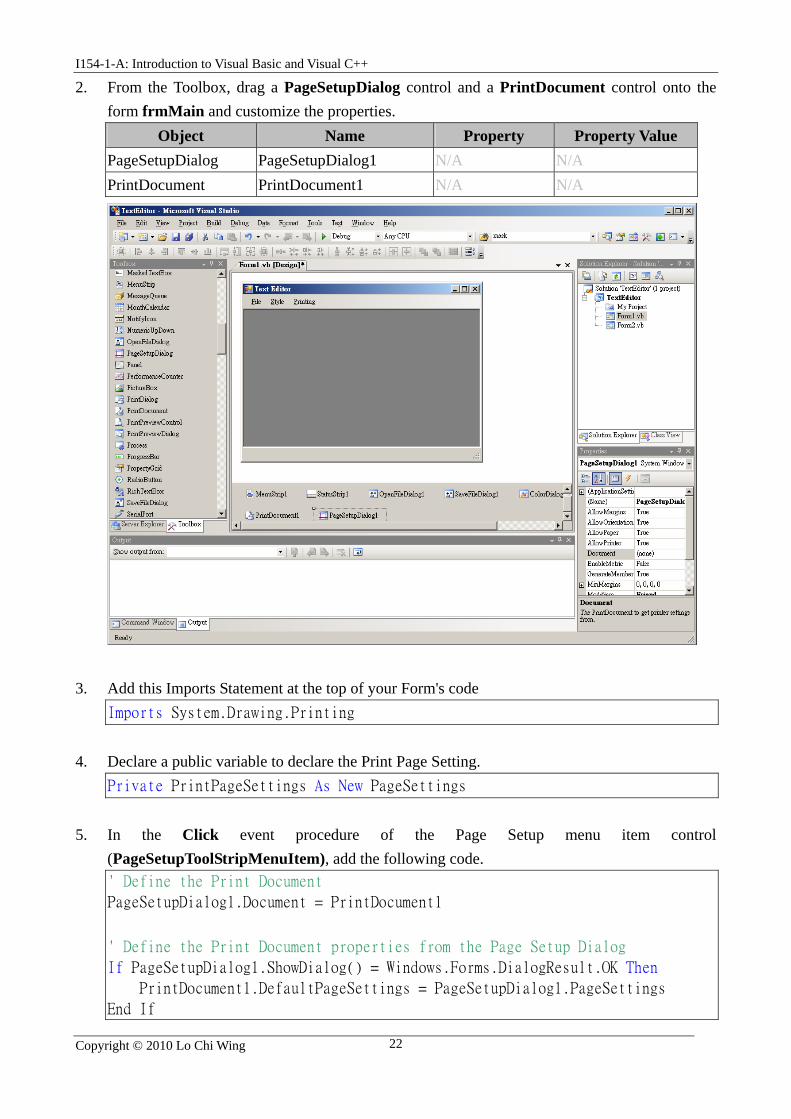
2. From the Toolbox, drag a PageSetupDialog control and a PrintDocument control onto the form frmMain and customize the properties.
Object Name Property Property Value PageSetupDialog PageSetupDialog1 N/A N/A PrintDocument PrintDocument1 N/A N/A
3. Add this Imports Statement at the top of your Form's code Imports System.Drawing.Printing
4. Declare a public variable to declare the Print Page Setting.
Private PrintPageSettings As New PageSettings
5. In the Click event procedure of the Page Setup menu item control
(PageSetupToolStripMenuItem), add the following code. ' Define the Print Document
PageSetupDialog1.Document = PrintDocument1
' Define the Print Document properties from the Page Setup Dialog
If PageSetupDialog1.ShowDialog() = Windows.Forms.DialogResult.OK Then
PrintDocument1.DefaultPageSettings = PageSetupDialog1.PageSettings
End If

I154-1-A: Introduction to Visual Basic and Visual C++
Copyright © 2010 Lo Chi Wing 23
6. In the PrintPage event procedure of the Page Setup menu item control (PrintDocument1), add the following code ' Capture the active child Form
Dim activeChild As frmChild = Me.ActiveMdiChild
' This gathers the default settings of the document,
' or when changed in the Page Setup hold the new margin values.
Dim rectDraw As New RectangleF( e.MarginBounds.Left, _
e.MarginBounds.Top, _
e.MarginBounds.Width, _
e.MarginBounds.Height)
e.Graphics.DrawString(activeChild.RichTextBox1.Text, _
activeChild.RichTextBox1.Font, _
Brushes.Black, _
e.MarginBounds.Left, _
e.MarginBounds.Top)
7. Save the project and build the solution, and then execute it. Now you can adjust the page
setting using the Page Setup button.
I154-1-A: Introduction to Visual Basic and Visual C++
Copyright © 2010 Lo Chi Wing 24
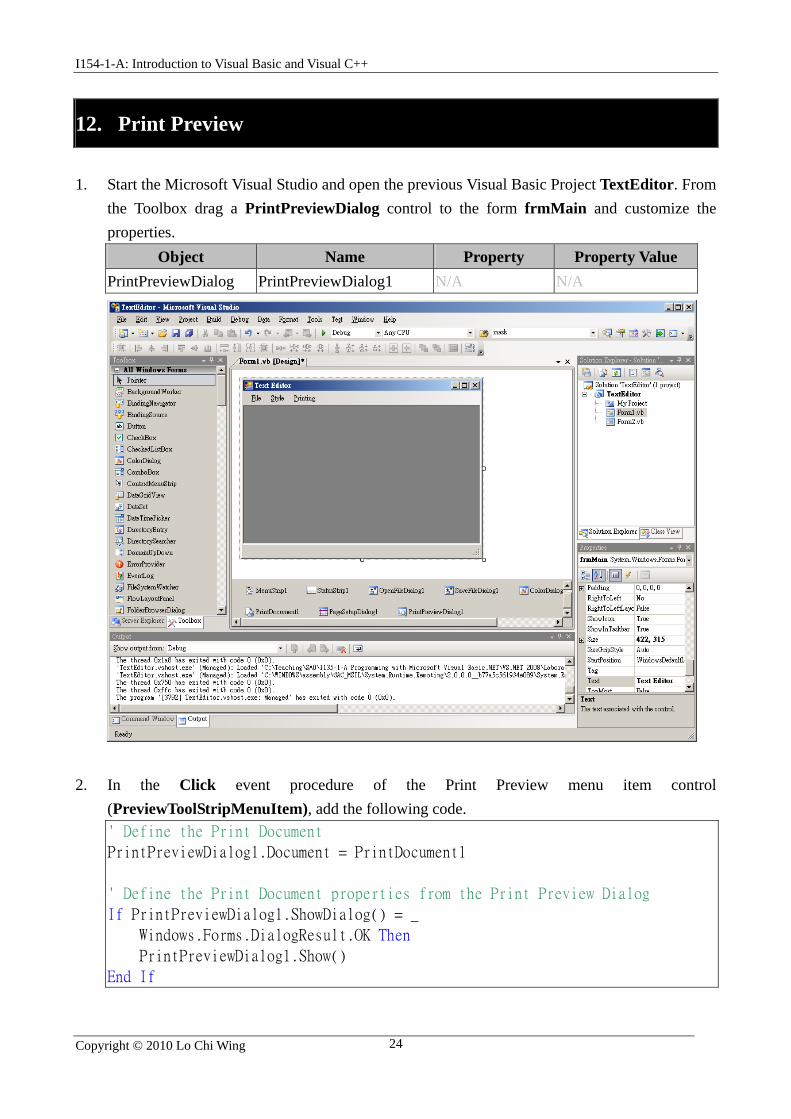
12. Print Preview 1. Start the Microsoft Visual Studio and open the previous Visual Basic Project TextEditor. From
the Toolbox drag a PrintPreviewDialog control to the form frmMain and customize the properties.
Object Name Property Property Value PrintPreviewDialog PrintPreviewDialog1 N/A N/A
2. In the Click event procedure of the Print Preview menu item control (PreviewToolStripMenuItem), add the following code. ' Define the Print Document
PrintPreviewDialog1.Document = PrintDocument1
' Define the Print Document properties from the Print Preview Dialog
If PrintPreviewDialog1.ShowDialog() = _
Windows.Forms.DialogResult.OK Then
PrintPreviewDialog1.Show()
End If
I154-1-A: Introduction to Visual Basic and Visual C++
Copyright © 2010 Lo Chi Wing 25
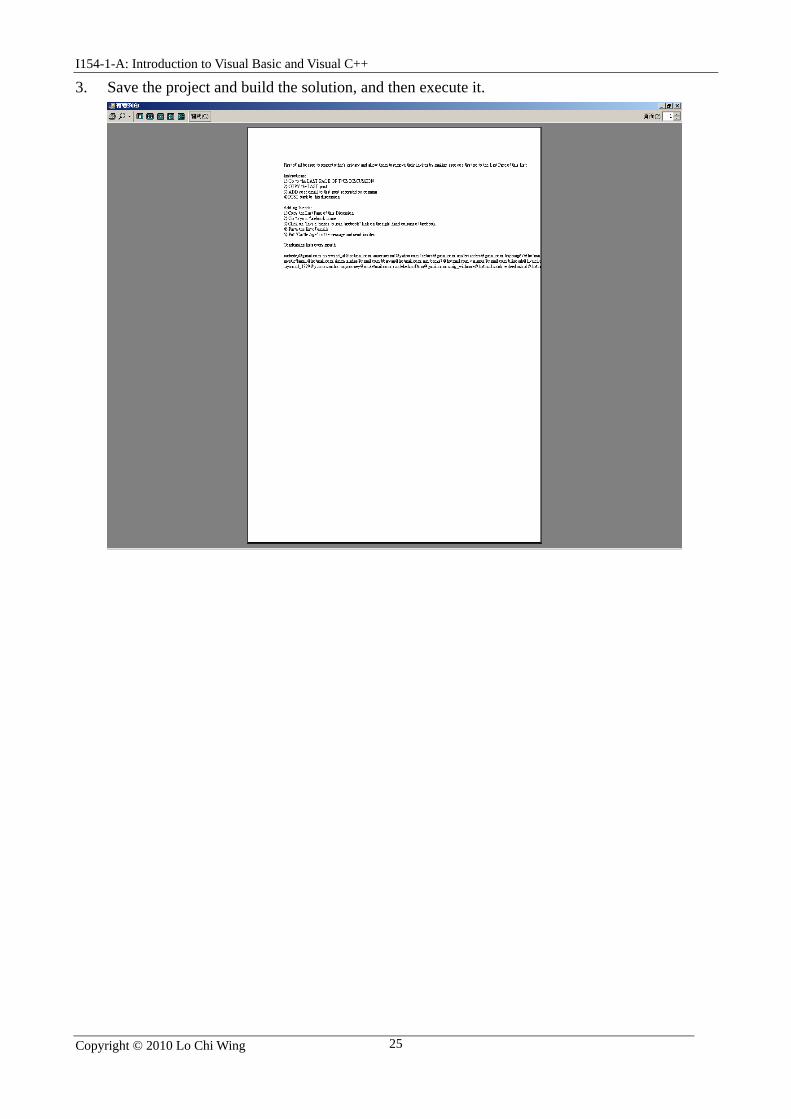
3. Save the project and build the solution, and then execute it.

I154-1-A: Introduction to Visual Basic and Visual C++
Copyright © 2010 Lo Chi Wing 26
13. Print Document 1. Start the Microsoft Visual Studio and open the previous Visual Basic Project TextEditor. From
the Toolbox drag a PrintDialog control to the form frmMain and customize the properties. Object Name Property Property Value
PrintDialog PrintDialog1 N/A N/A
2. In the Click event procedure of the Print menu item control (PrintToolStripMenuItem), add
the following code. ' Define the Print Document
PrintDialog1.Document = PrintDocument1
' Define the Print Document properties from the Print Preview Dialog
If PrintDialog1.ShowDialog() = Windows.Forms.DialogResult.OK Then
PrintDocument1.Print()
End If

I154-1-A: Introduction to Visual Basic and Visual C++
Copyright © 2010 Lo Chi Wing 27
3. Save the project and build the solution, and then execute it.
I154-1-A: Introduction to Visual Basic and Visual C++
Copyright © 2010 Lo Chi Wing 28
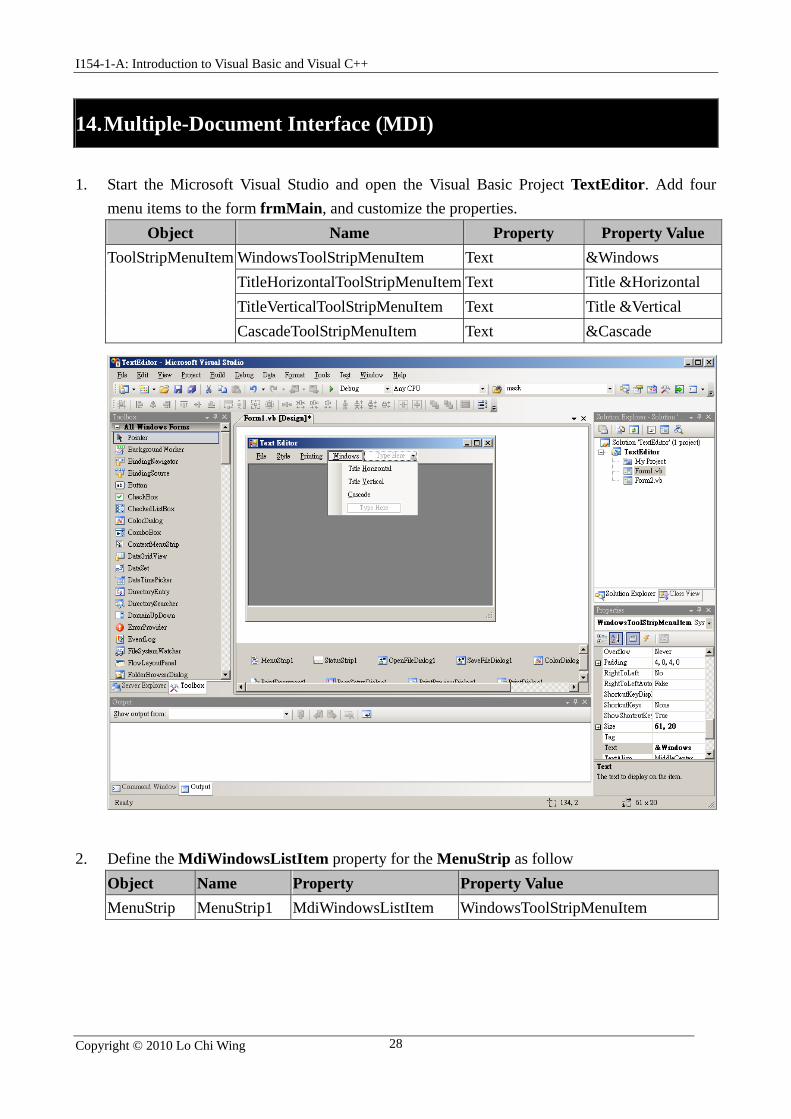
14. Multiple-Document Interface (MDI) 1. Start the Microsoft Visual Studio and open the Visual Basic Project TextEditor. Add four
menu items to the form frmMain, and customize the properties. Object Name Property Property Value
ToolStripMenuItem WindowsToolStripMenuItem Text &Windows TitleHorizontalToolStripMenuItem Text Title &Horizontal TitleVerticalToolStripMenuItem Text Title &Vertical CascadeToolStripMenuItem Text &Cascade
2. Define the MdiWindowsListItem property for the MenuStrip as follow
Object Name Property Property Value MenuStrip MenuStrip1 MdiWindowsListItem WindowsToolStripMenuItem
I154-1-A: Introduction to Visual Basic and Visual C++
Copyright © 2010 Lo Chi Wing 29
3. In the Click event procedure of the Title Horizontal menu item control (TitleHorizontalToolStripMenuItem), add the following code. 'Arrange the Windows to Title Horizontal
Me.LayoutMdi(System.Windows.Forms.MdiLayout.TileHorizontal)
4. In the Click event procedure of the Title Vertical menu item control
(TitleVerticalToolStripMenuItem), add the following code. 'Arrange the Windows to Title Vertical
Me.LayoutMdi(System.Windows.Forms.MdiLayout.TileVertical)
5. In the Click event procedure of the Cascade menu item control (CascadeToolStripMenuItem),
add the following code. 'Arrange the Windows to Cascade
Me.LayoutMdi(System.Windows.Forms.MdiLayout.Cascade)
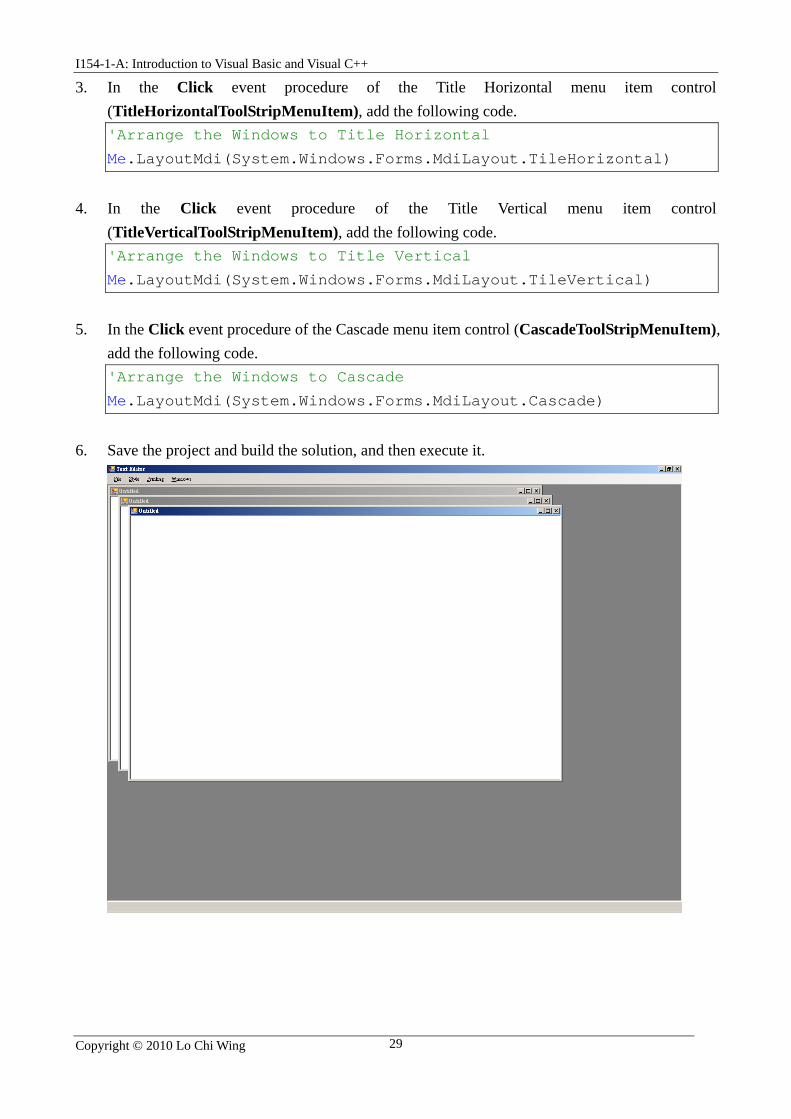
6. Save the project and build the solution, and then execute it.
I154-1-A: Introduction to Visual Basic and Visual C++
Copyright © 2010 Lo Chi Wing 30
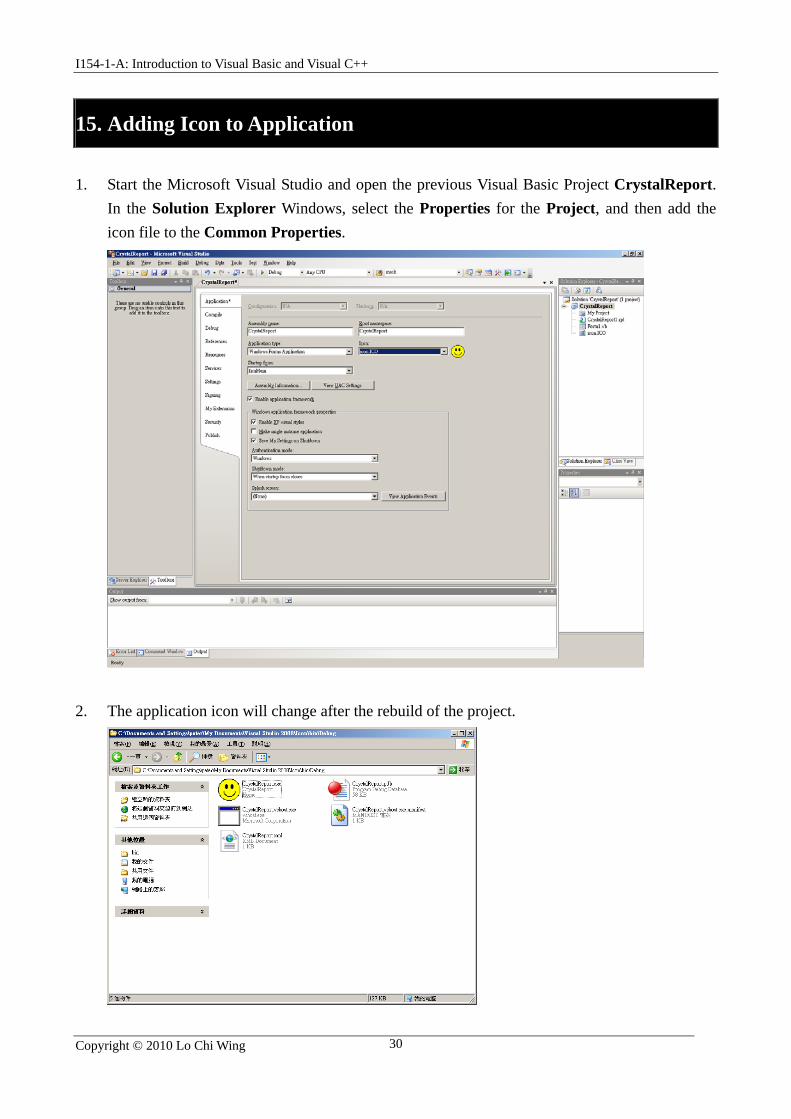
15. Adding Icon to Application 1. Start the Microsoft Visual Studio and open the previous Visual Basic Project CrystalReport.
In the Solution Explorer Windows, select the Properties for the Project, and then add the icon file to the Common Properties.
2. The application icon will change after the rebuild of the project.

I154-1-A: Introduction to Visual Basic and Visual C++
Copyright © 2010 Lo Chi Wing 31
3. In the Solution Explorer Windows, select the Properties for the Project, and then add the icon file to the Common Properties.
4. Save the project and build the solution, and then execute it. The icon for the form is changed.

I154-1-A: Introduction to Visual Basic and Visual C++
Copyright © 2010 Lo Chi Wing 32
16. Deployment – ClickOne 1. Start the Microsoft Visual Studio and open the previous Visual Basic Project CrystalReport.
Select Build Publish for ClickOne deployment.
2. Input the location for the application to be published. If you define it in a URL, the deployed
application can get the update from the website.

I154-1-A: Introduction to Visual Basic and Visual C++
Copyright © 2010 Lo Chi Wing 33
3. Define the method that user install the application, you need to specify From a CD-ROM or DVD-ROM if it is published in a file.
4. You can define the update option if a website is used for published.