1 freebsd installation isoc/afnog michuki mwangi (original materials by hervey allen – nsrc)
TRANSCRIPT
1
FreeBSD Installation
ISOC/AfNOG
Michuki Mwangi (Original materials by Hervey Allen – NSRC)
2
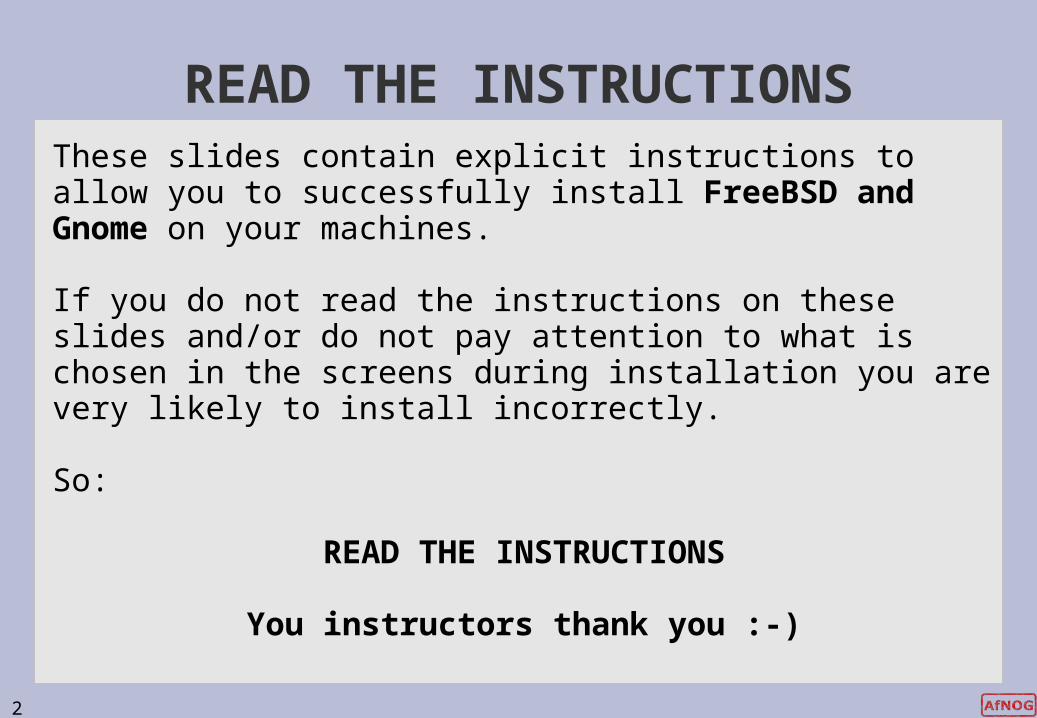
READ THE INSTRUCTIONSThese slides contain explicit instructions to allow you to successfully install FreeBSD and Gnome on your machines.
If you do not read the instructions on these slides and/or do not pay attention to what is chosen in the screens during installation you are very likely to install incorrectly.
So:
READ THE INSTRUCTIONS
You instructors thank you :-)
3
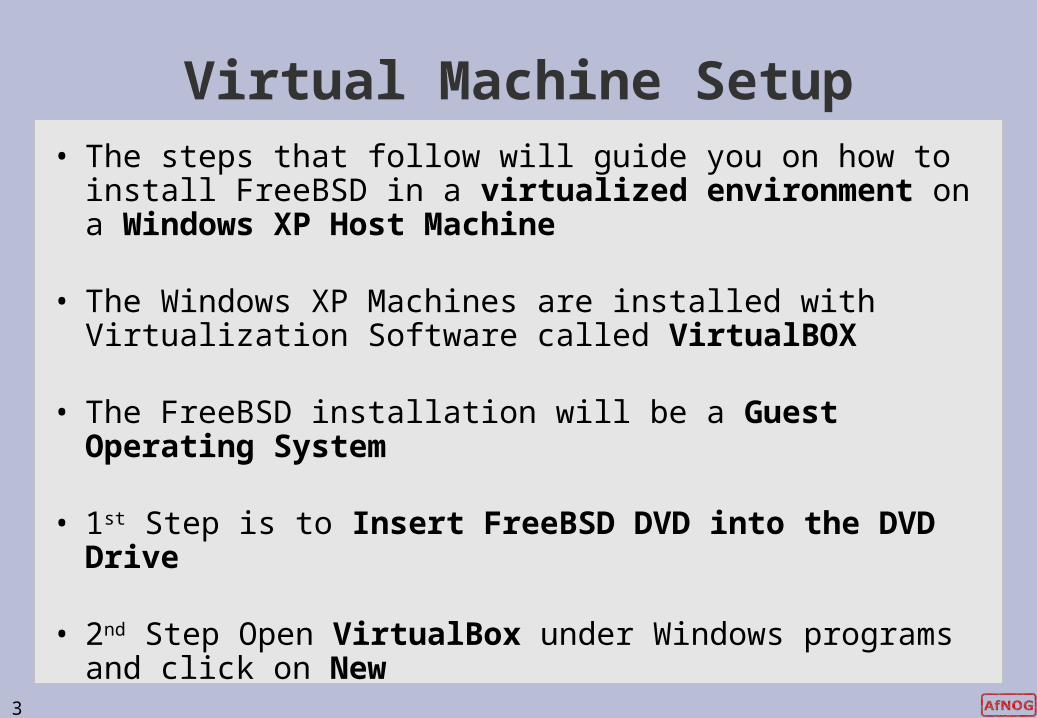
Virtual Machine Setup• The steps that follow will guide you on how to install
FreeBSD in a virtualized environment on a Windows XP Host Machine
• The Windows XP Machines are installed with Virtualization Software called VirtualBOX
• The FreeBSD installation will be a Guest Operating System
• 1st Step is to Insert FreeBSD DVD into the DVD Drive
• 2nd Step Open VirtualBox under Windows programs and click on New
4
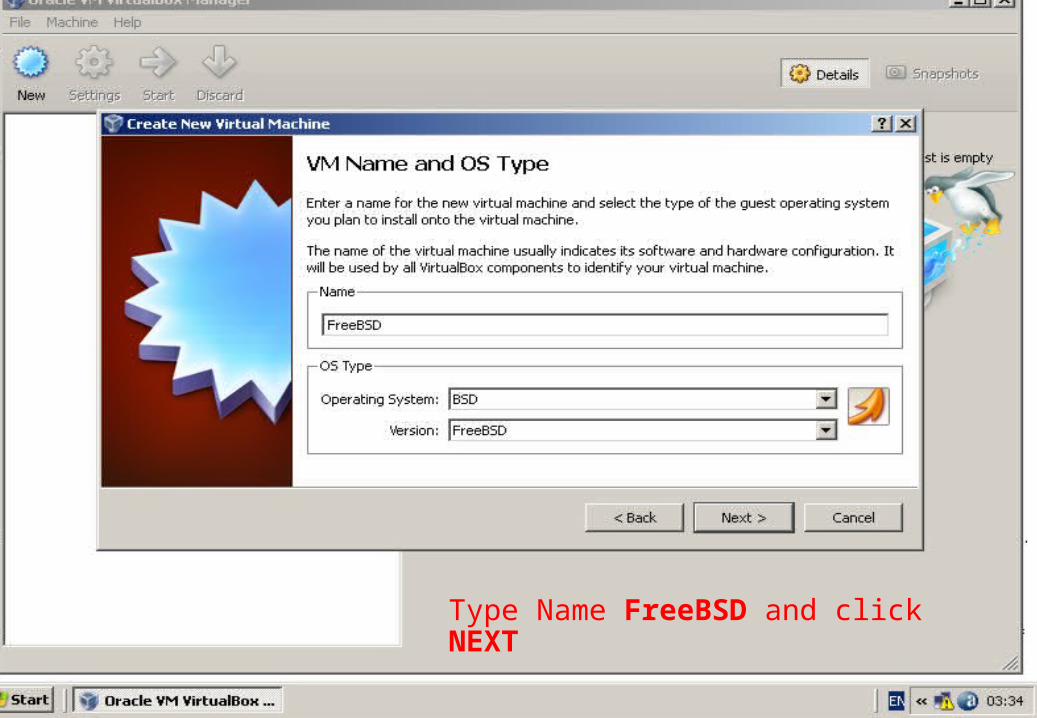
Type Name FreeBSD and click NEXT
5
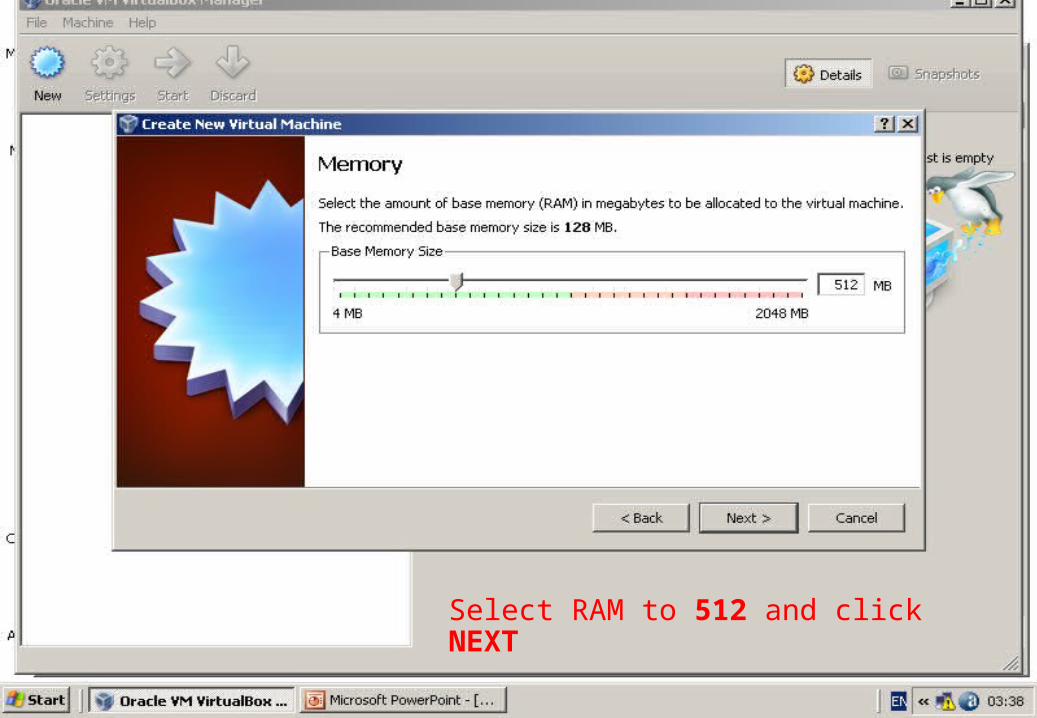
Select RAM to 512 and click NEXT
6
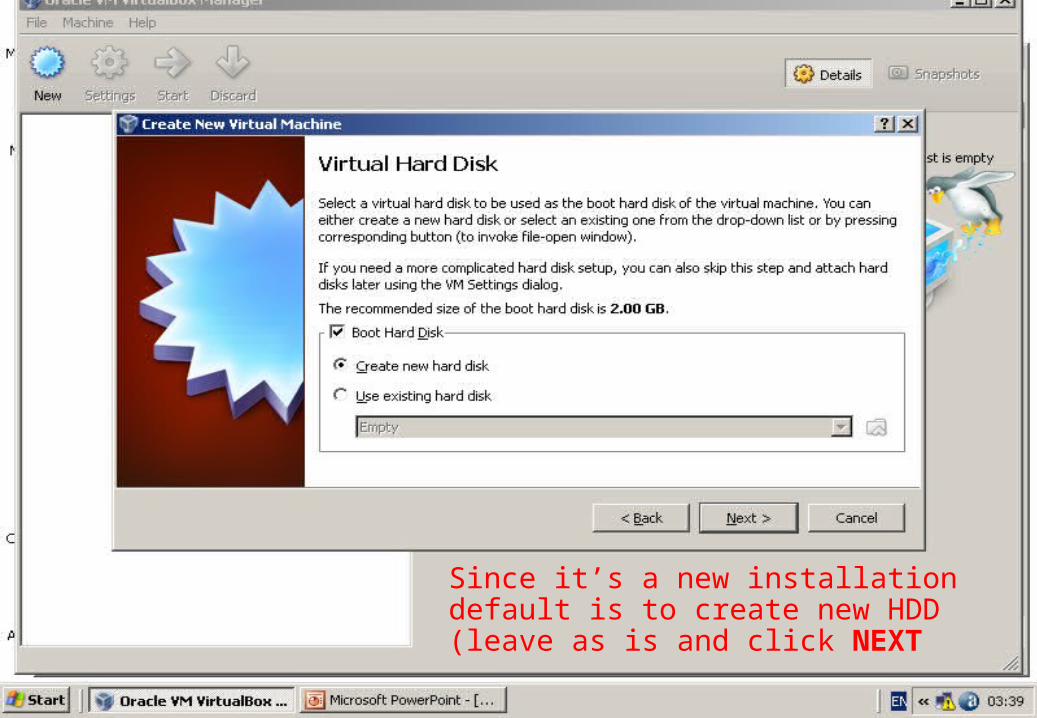
Since it’s a new installation default is to create new HDD (leave as is and click NEXT
7
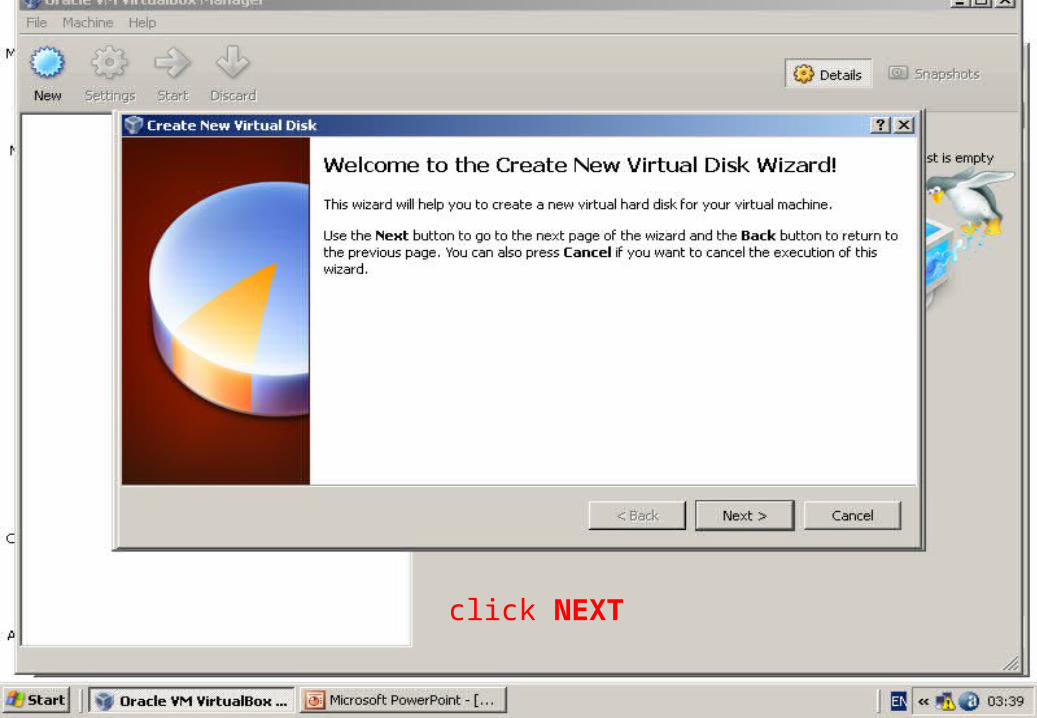
click NEXT

8
Select Dynamic expanding storage and click NEXT
9
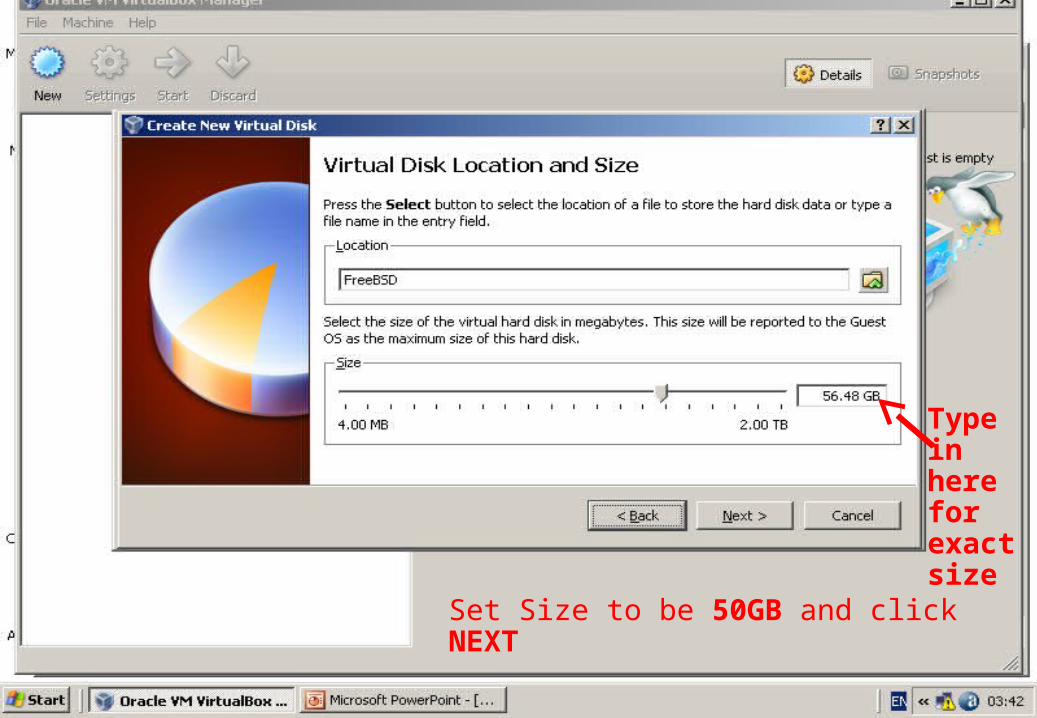
Set Size to be 50GB and click NEXT
Type in here for exact size

10
Set Size to be 50GB and click NEXT
Click here to set location of the file.
11
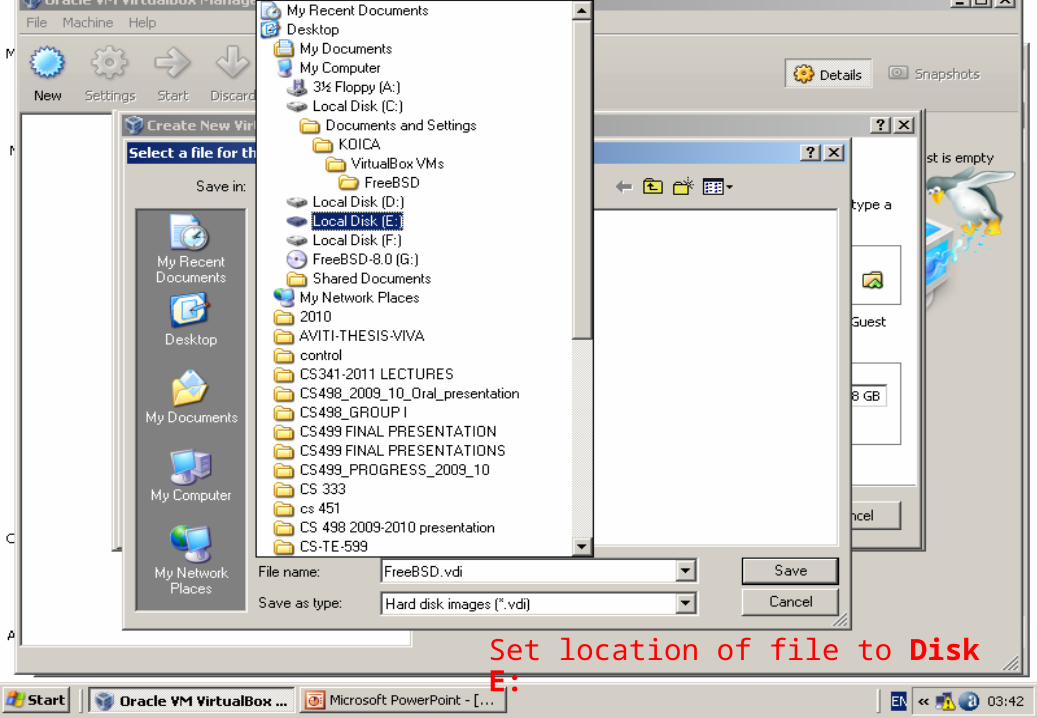
Set location of file to Disk E:

12
Verify that location is E:\FreeBSD.vdi and size is 50GB click NEXT
13
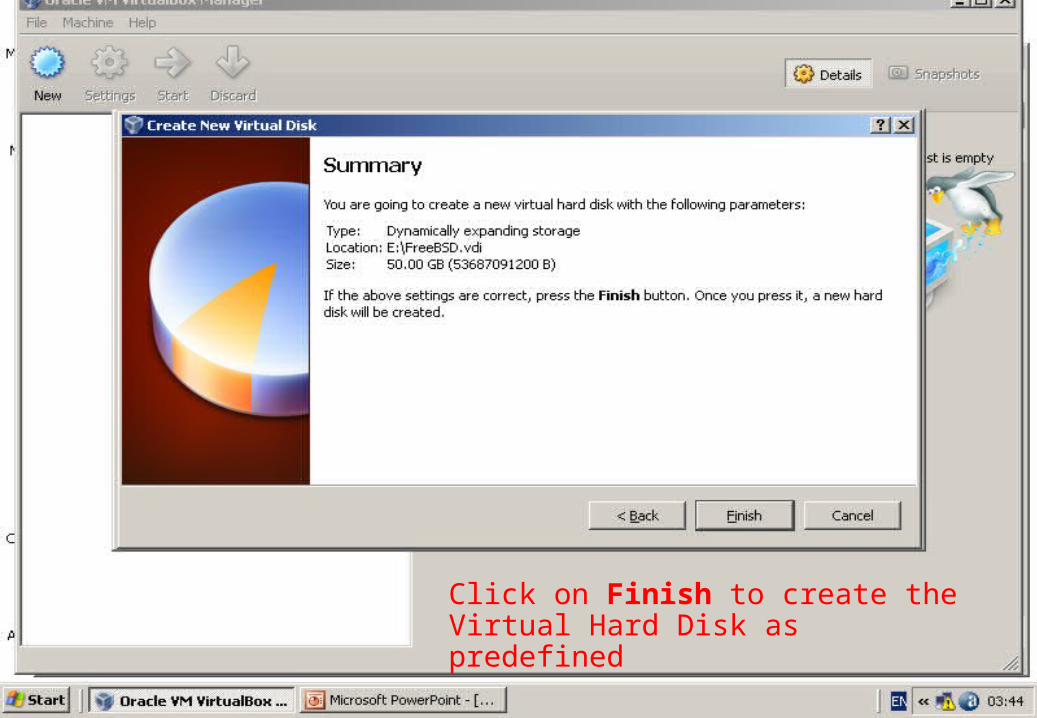
Click on Finish to create the Virtual Hard Disk as predefined

14
Click on Finish to create the new Virtual Machine as predefined
15
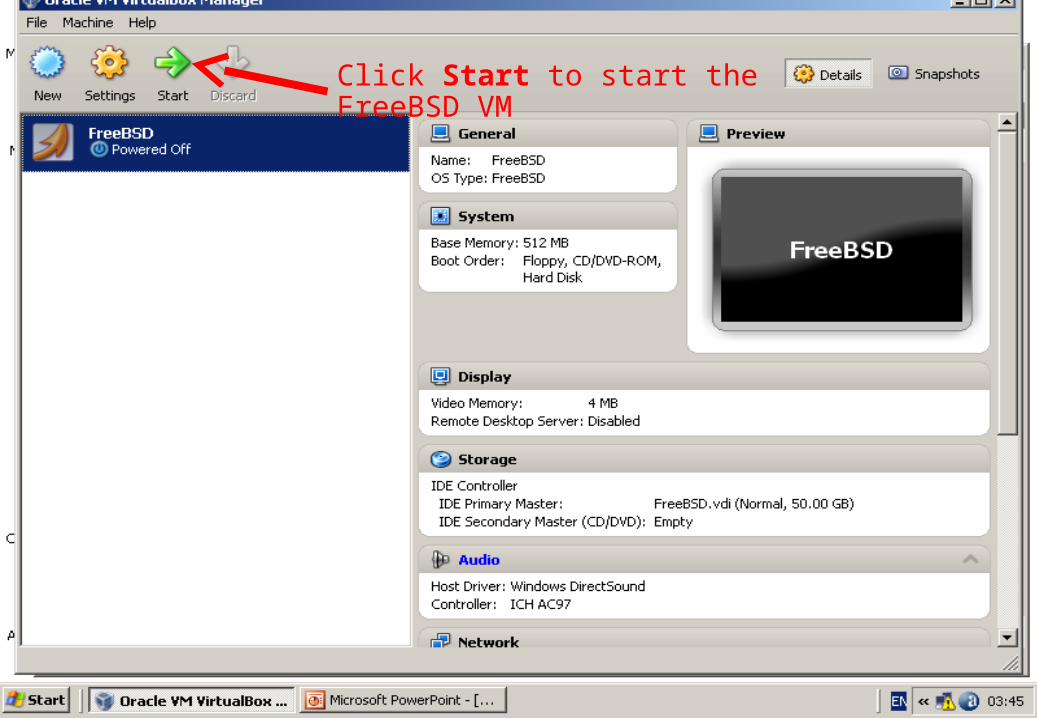
Click Start to start the FreeBSD VM
16
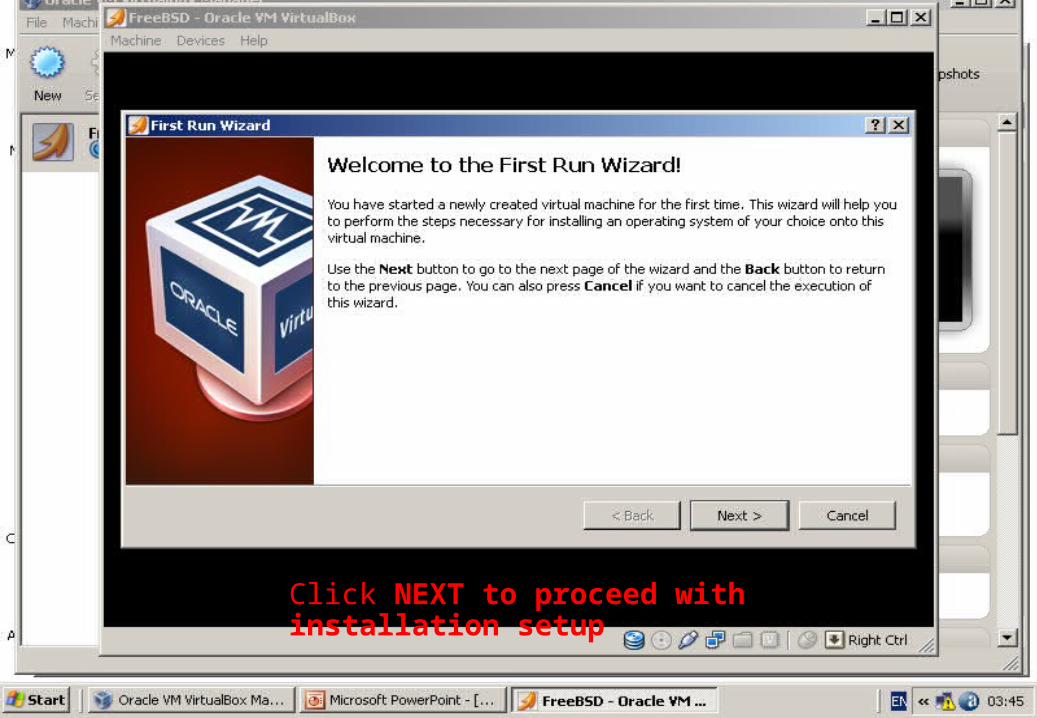
Click NEXT to proceed with installation setup
17
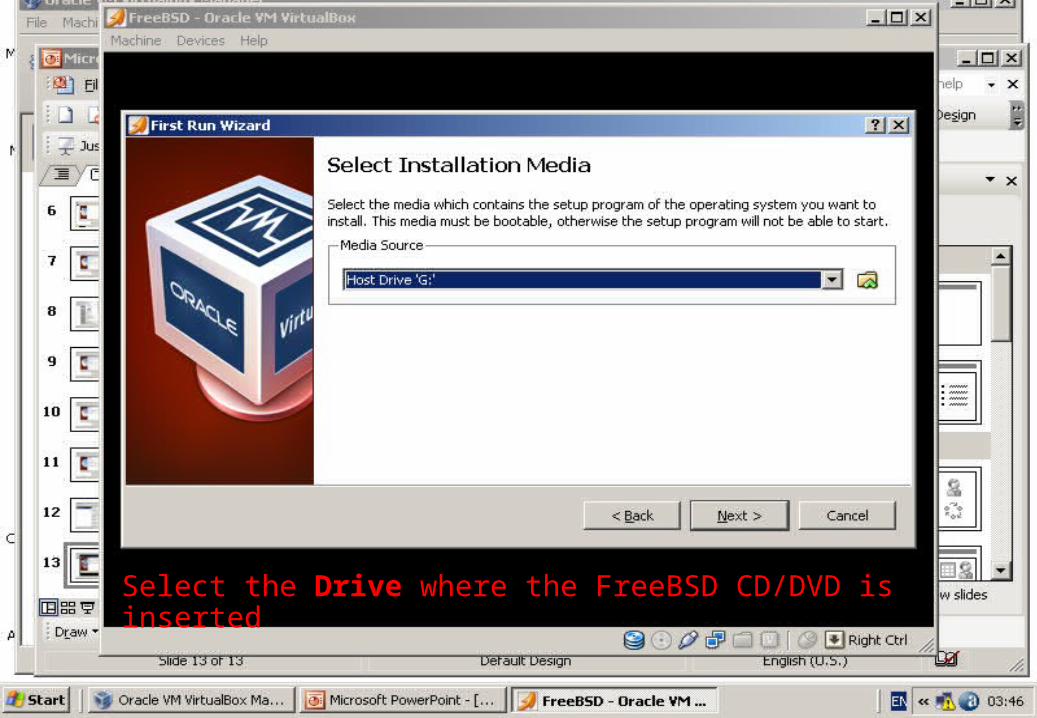
Select the Drive where the FreeBSD CD/DVD is inserted

18
Since it’s a CD/DVD install verify and click FINISH

19
Capture & Screen The Keyboard and Mouse are captured automatically
when you click onto the VirtualBox/VM instance
To release the Keyboard & Mouse from the Virtual Machine press on the keyboard the RIGHT CTRL Key
To view the VM in full screen select from Menu Full Screen
To return VM in window mode press Rigth CTRL + F
20
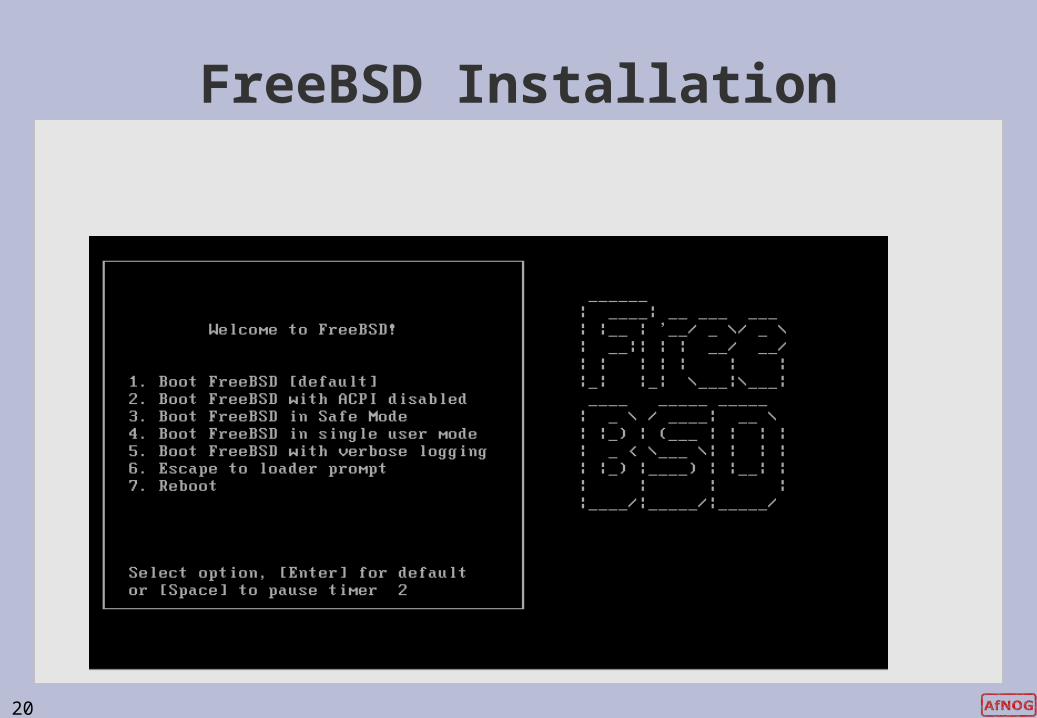
FreeBSD Installation
21
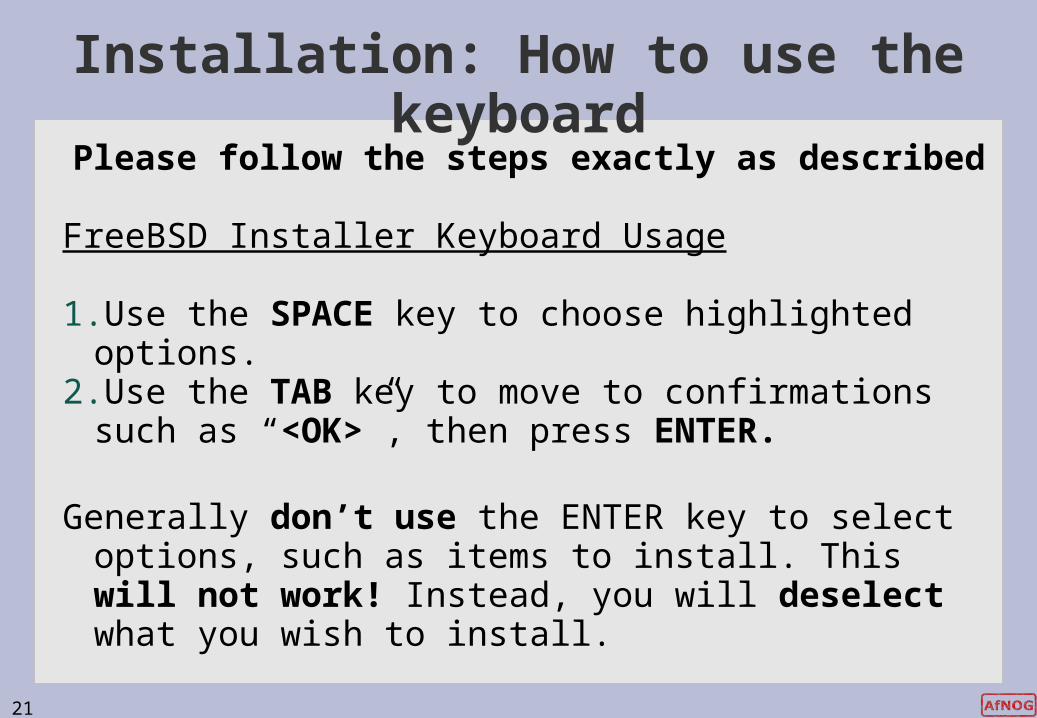
Installation: How to use the keyboardPlease follow the steps exactly as described
FreeBSD Installer Keyboard Usage
1. Use the SPACE key to choose highlighted options.2. Use the TAB key to move to confirmations such as “<OK>”, then
press ENTER.
Generally don’t use the ENTER key to select options, such as items to install. This will not work! Instead, you will deselect what you wish to install.

22
Installation: How to use the KeyboardPlease follow the steps exactly as described
FreeBSD Installer Keyboard Usage
1. Use the SPACE key to choose highlighted options.2. Use the TAB key to move to confirmations such as “<OK>”, then
press ENTER.
Generally don’t use the ENTER key to select options, such as items to install. This will not work! Instead, you will deselect what you wish to install.
23
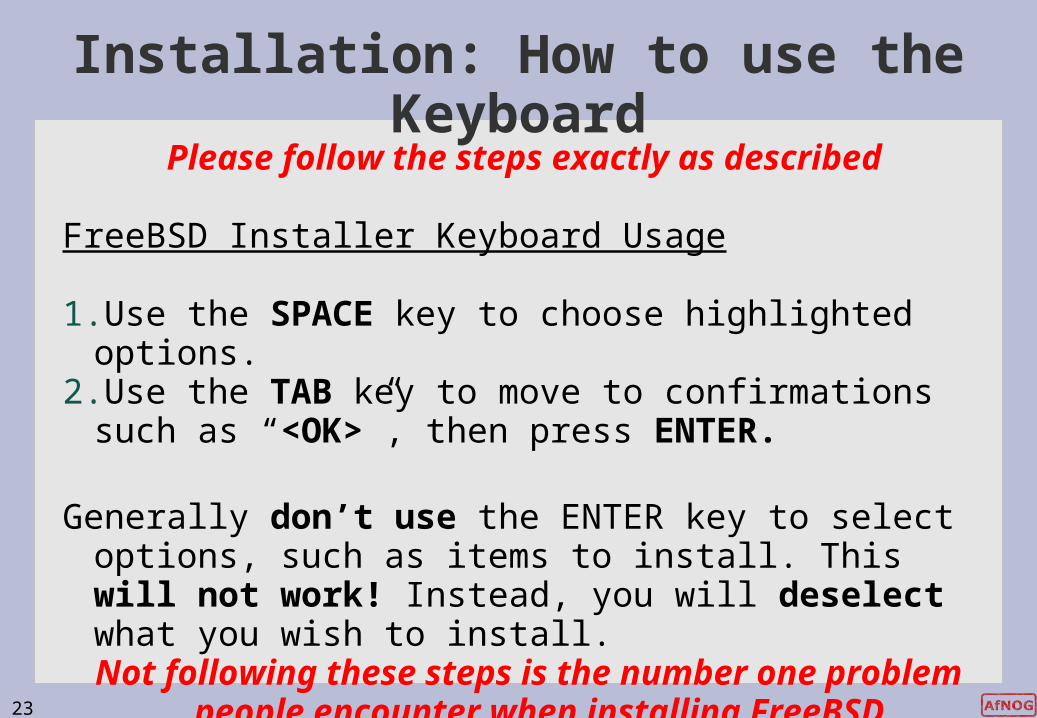
Installation: How to use the KeyboardPlease follow the steps exactly as described
FreeBSD Installer Keyboard Usage
1. Use the SPACE key to choose highlighted options.2. Use the TAB key to move to confirmations such as “<OK>”, then
press ENTER.
Generally don’t use the ENTER key to select options, such as items to install. This will not work! Instead, you will deselect what you wish to install.Not following these steps is the number one problem people
encounter when installing FreeBSD.

24

25
Select Keyboard
26
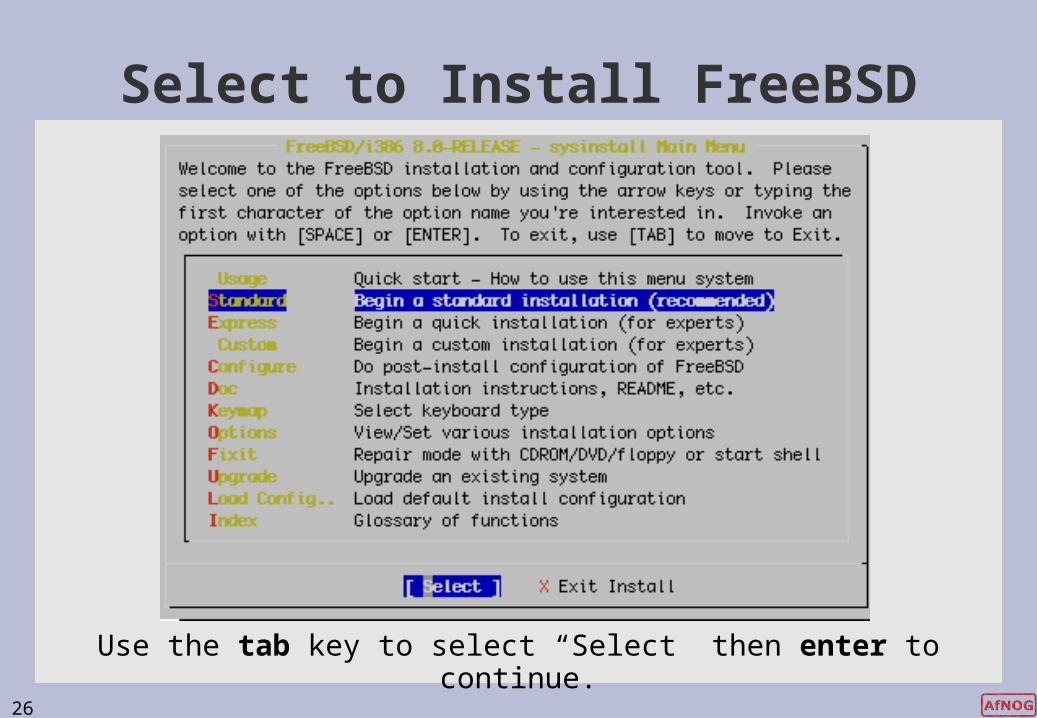
Select to Install FreeBSD
Use the tab key to select “Select” then enter to continue.

27
Click OK to continue

28
How Much of the Disk to Use
We will use our Entire Disk. Press “A” to do this.
29
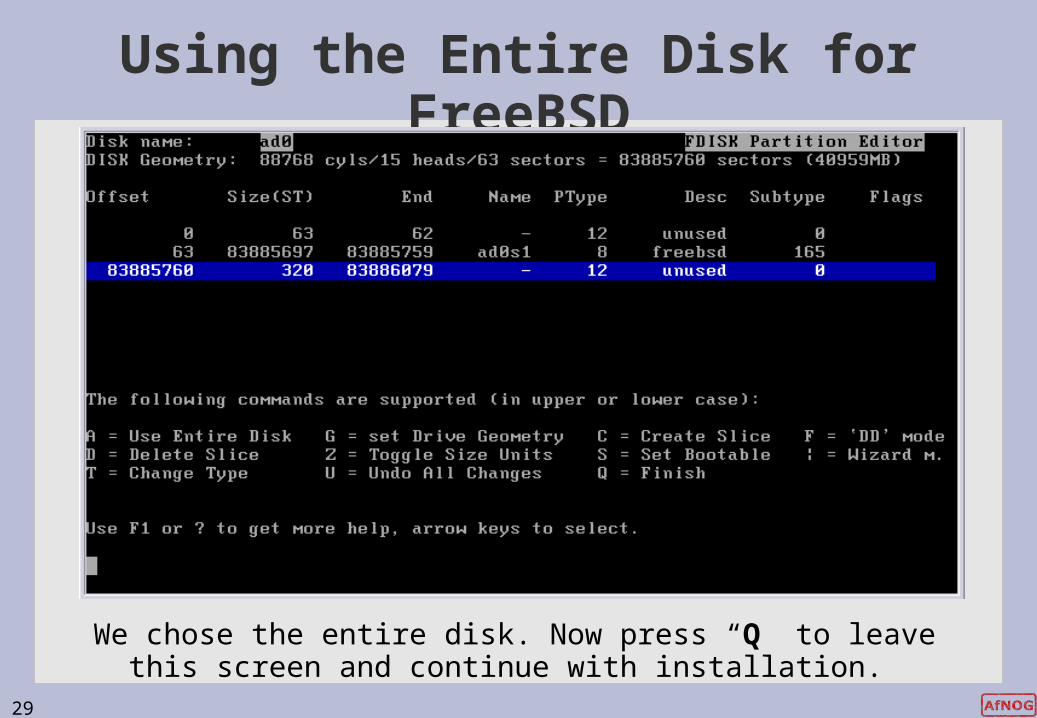
Using the Entire Disk for FreeBSD
We chose the entire disk. Now press “Q” to leave this screen and continue with installation.
30
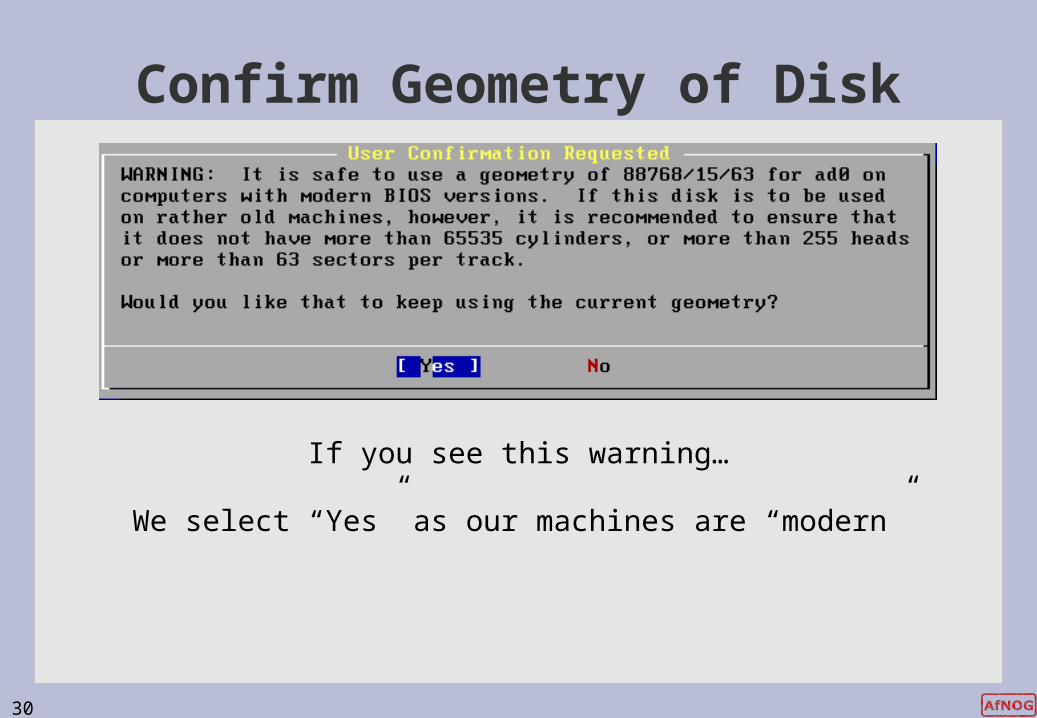
Confirm Geometry of Disk
If you see this warning…
We select “Yes” as our machines are “modern”
31
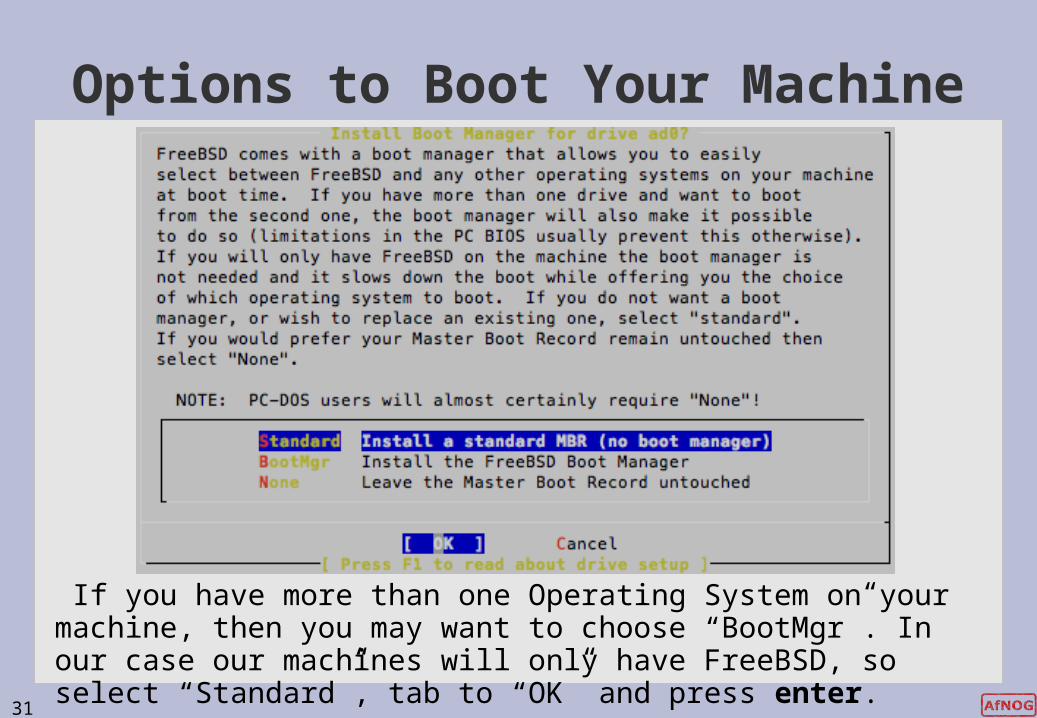
Options to Boot Your Machine
If you have more than one Operating System on your machine, then you may want to choose “BootMgr”. In our case our machines will only have FreeBSD, so select “Standard”, tab to “OK” and press enter.
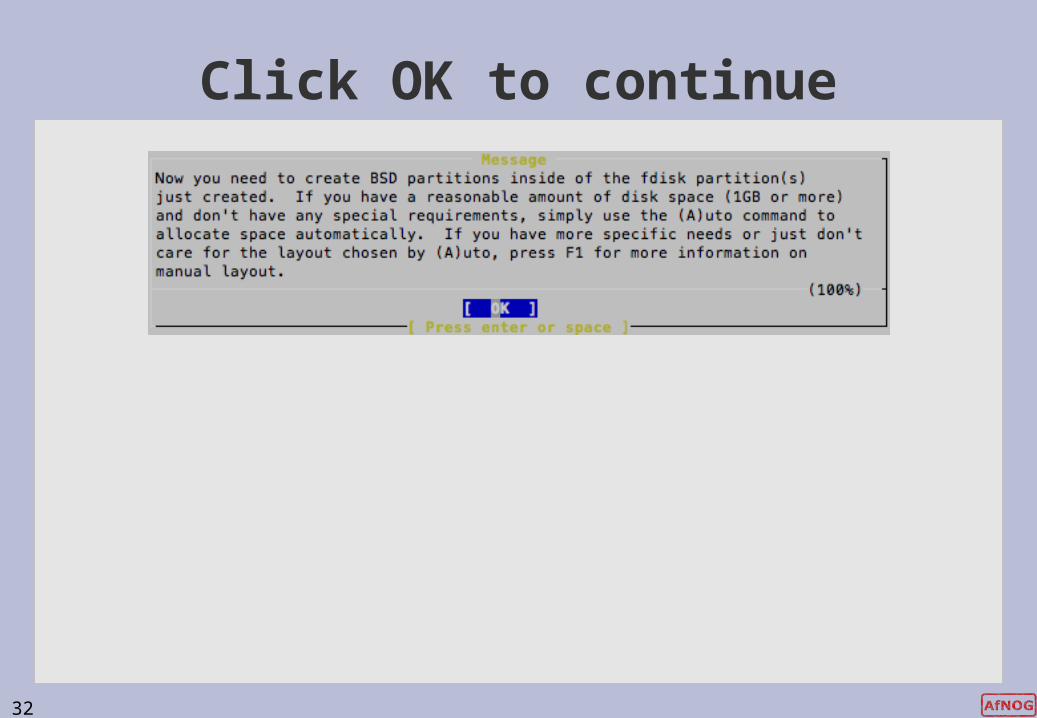
32
Click OK to continue

33
Now “Slice Up” your Disk (Partition)
The entire Disk is our FreeBSD partition. We now slice up our partition. Note that “ad0” is chosen by default.

34
Now “Slice Up” your Disk (Partition)
Choose “Auto Defaults” by pressing “A”, then exit the screen by pressing “Q”. We will let the installer partition our slice for us. But, you can specify this any way you want. This is a very important step in the installation.

35
Install Kern-Developer
CAREFUL! You must do these steps exactly as follows:1) Select “Kern-Developer”2) Press the SPACE bar (Do not press enter!)

36
Install English Documentation
1) Move your cursor to “English Documentation” and press the SPACE bar (not enter!)2) Press the TAB key to highlight “OK” and then press ENTER

37
Install Ports – BIG Software Collection
Select “Yes” and press enter.

38
Choosing Distribution Part 2
Now we are returned to our Distribution selection menu Select “X Exit” Now use the tab key to select “OK” and press enter.
39
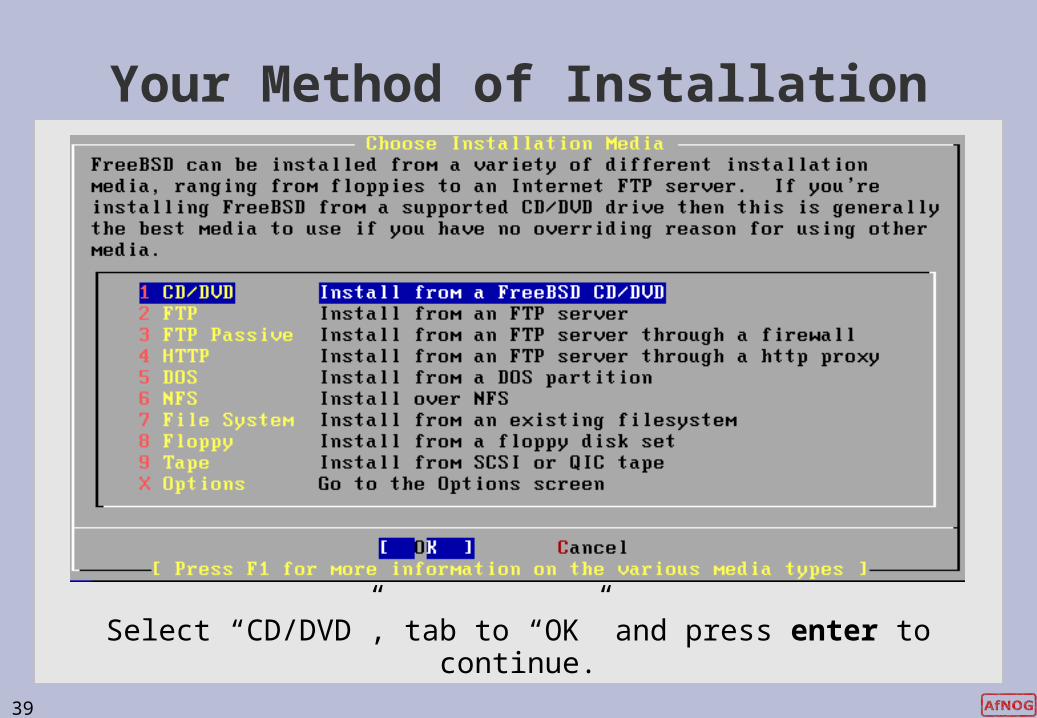
Your Method of Installation
Select “CD/DVD”, tab to “OK” and press enter to continue.
40
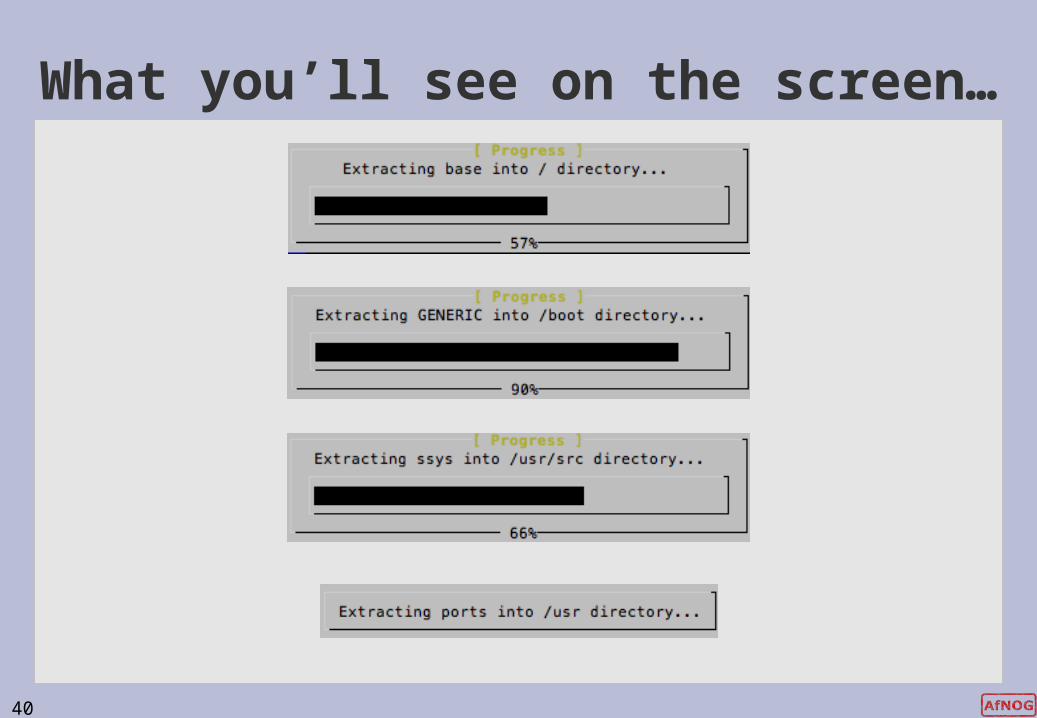
What you’ll see on the screen…

41
Initial install finishes
Press ENTER to continue with configuration.

42
Post Install Configuration
Be sure “Yes” is chosen and press enter to continue
We are now presented with a series of questions about items to configure after installation. Make the selections as shown.
43
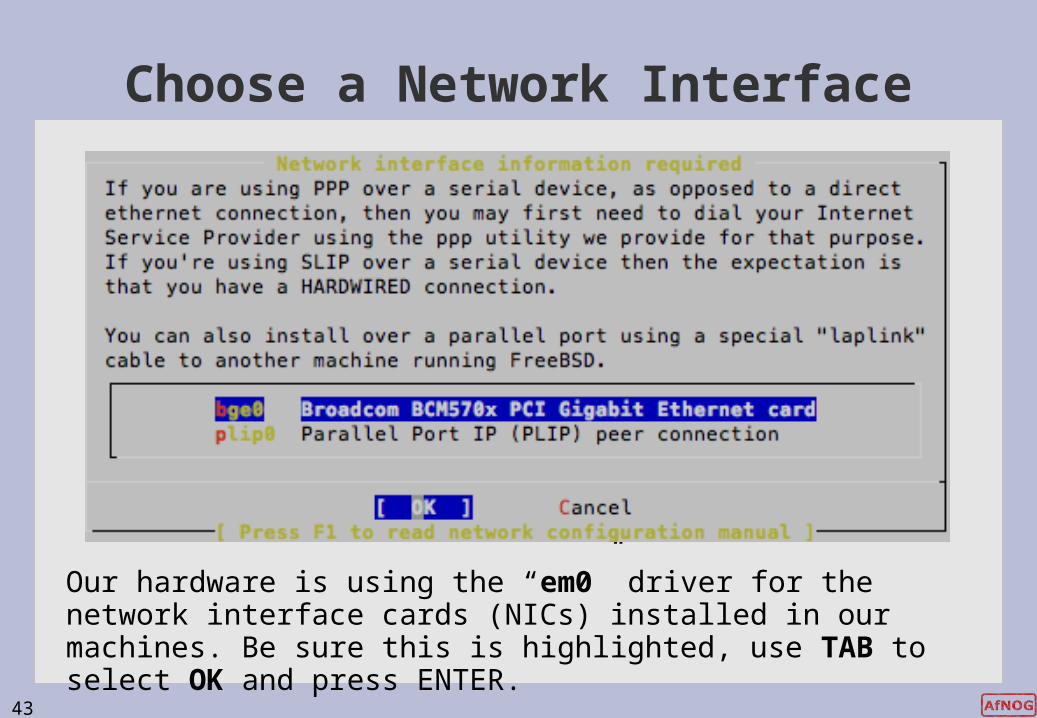
Choose a Network Interface
Our hardware is using the “em0” driver for the network interface cards (NICs) installed in our machines. Be sure this is highlighted, use TAB to select OK and press ENTER.
44
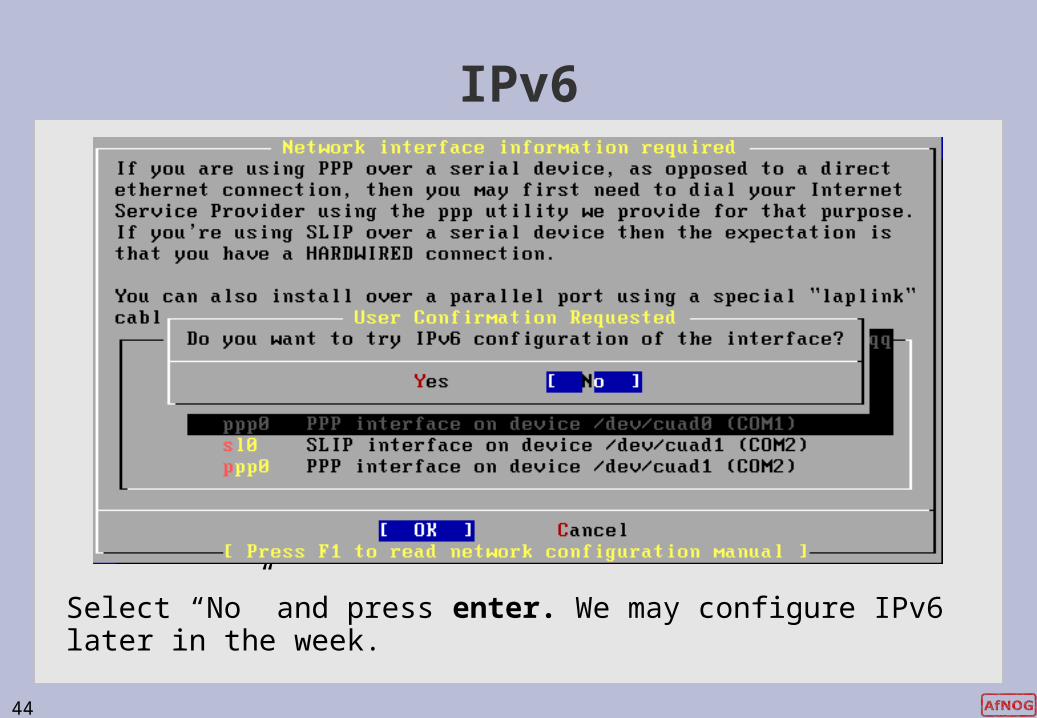
IPv6
Select “No” and press enter. We may configure IPv6 later in the week.

45
Use DHCP for Network?
Select “No” and press enter. We will manually configure our network information as our machines are servers.
46
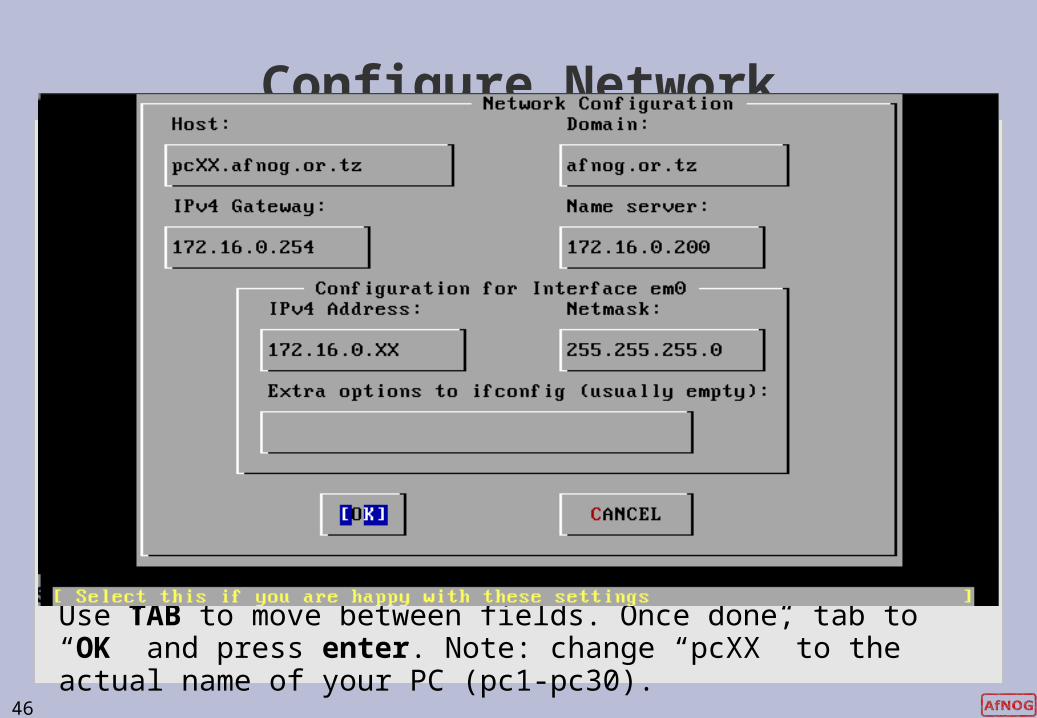
Configure Network
Use TAB to move between fields. Once done, tab to “OK” and press enter. Note: change “pcXX” to the actual name of your PC (pc1-pc30).

47
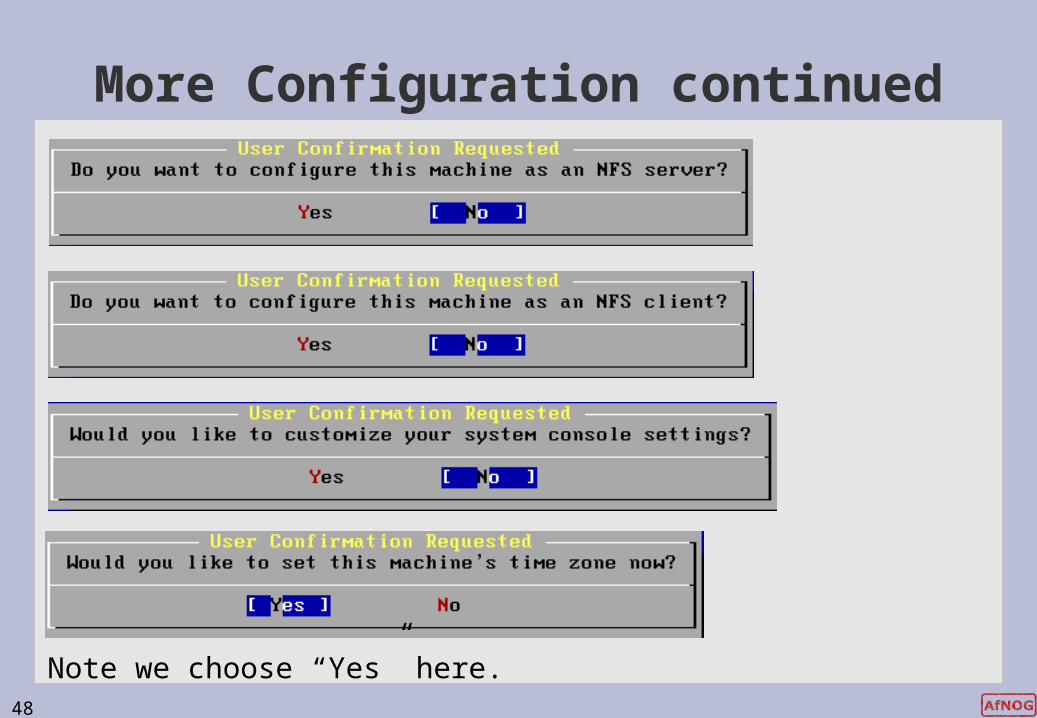
More Configuration
<== Choose “Yes” here.
<= Choose “Yes”
48
More Configuration continued
Note we choose “Yes” here.
49
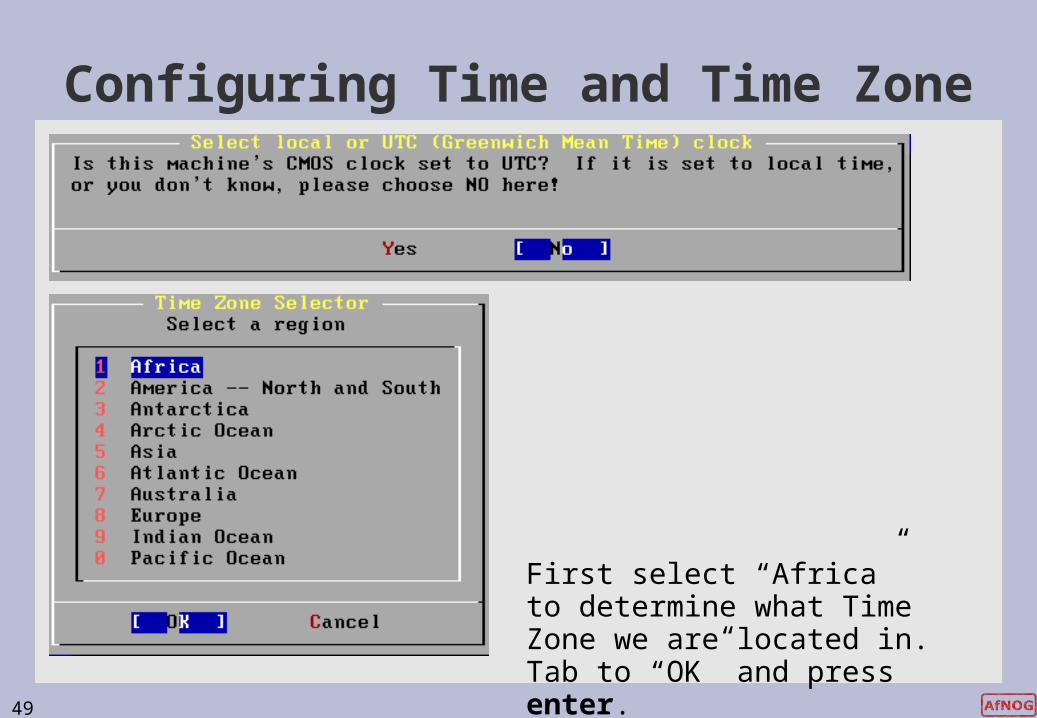
Configuring Time and Time Zone
First select “Africa” to determine what Time Zone we are located in. Tab to “OK” and press enter.

50
51
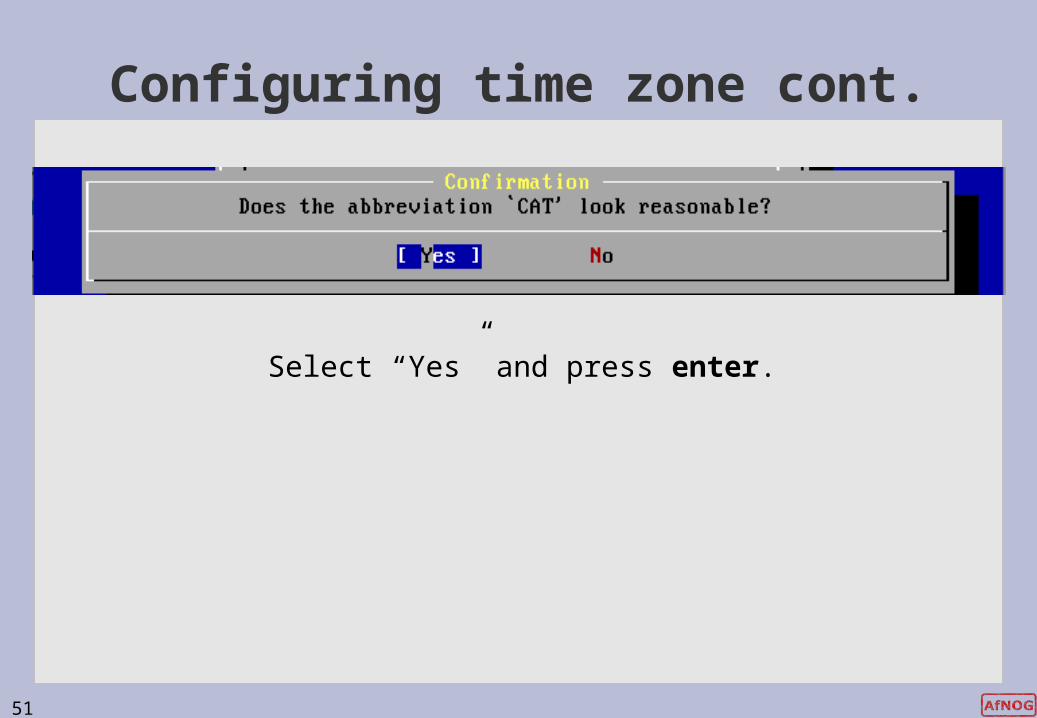
Configuring time zone cont.
Select “Yes” and press enter.

52
Select “Yes” and press enter.
53
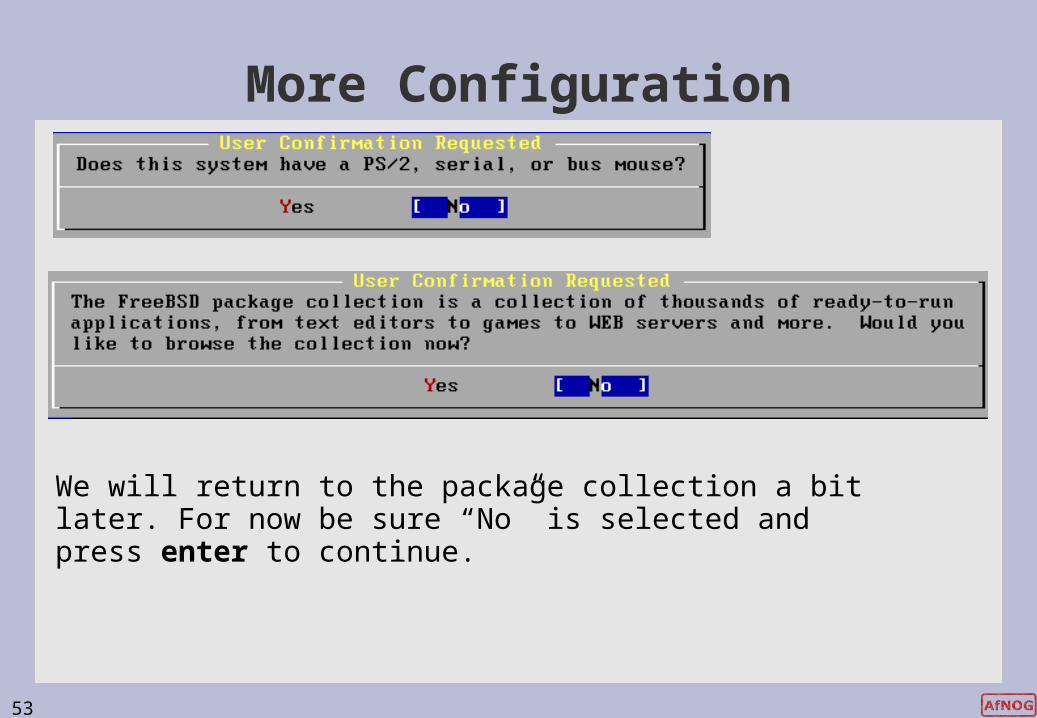
More Configuration
We will return to the package collection a bit later. For now be sure “No” is selected and press enter to continue.

54
User Configuration
We will create an initial user a bit later. Choose “No” for now.
Your class instructor will give you the password.
55
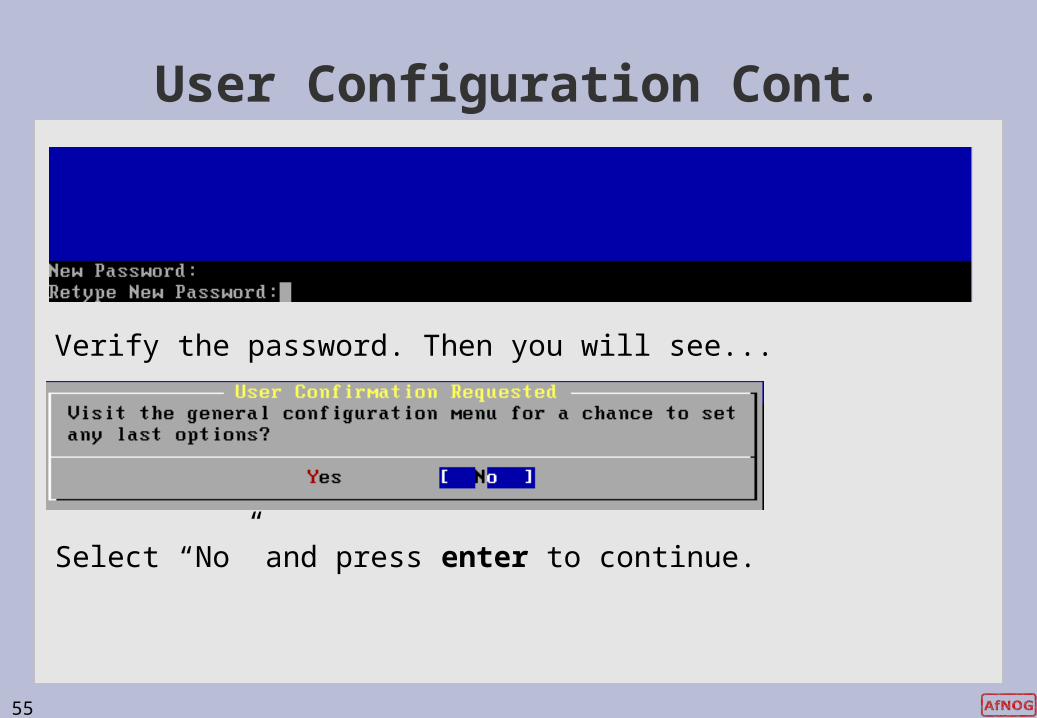
User Configuration Cont.
Verify the password. Then you will see...
Select “No” and press enter to continue.

56
Finishing Installation
We are back at our original screen. As we are done, select “Exit Install” and press enter.

57
Finishing Installation
Select “Yes” and press enter. Be sure to remove your FreeBSD 8.0 DVD-ROM from your machine.
After rebooting you can log in as “root” with the password you were given in class.
Our next set of instructions will lead you through the installation of the GNOME desktop manager, the xorg server and a current version of the Firefox web browser.

58
This page intentionally left blank.

59
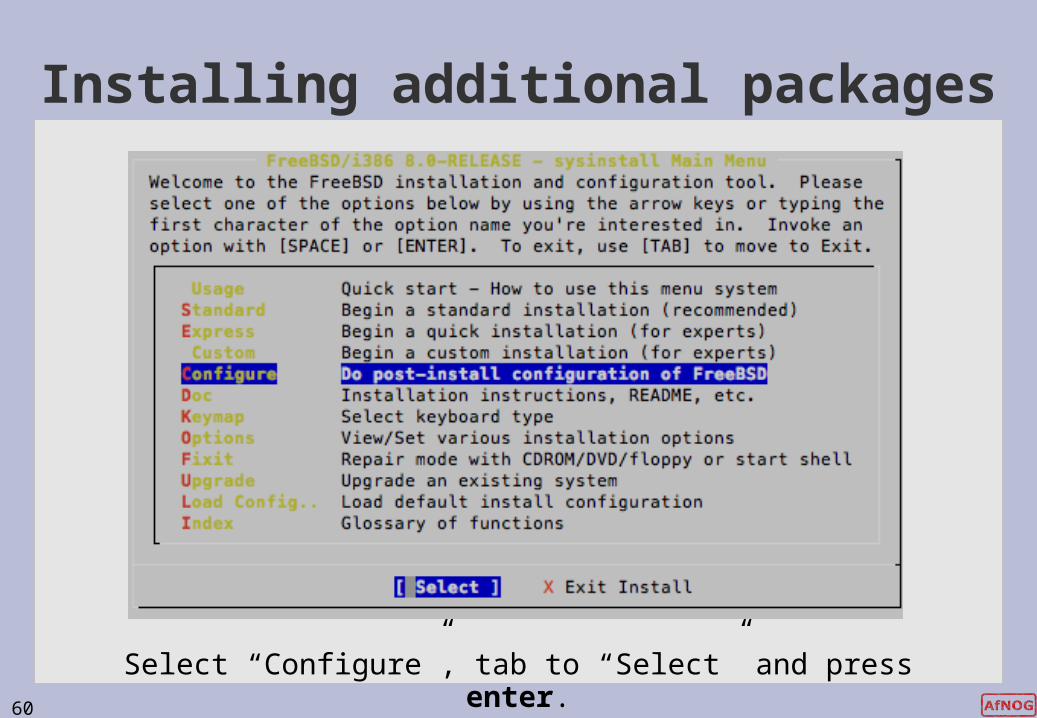
Installing additional packagesAfter you have logged in on your machine as the “root” user
you will be presented with a “#” prompt. At this prompt type the command:
# sysinstall
You will be presented with the same menu that you saw when starting your FreeBSD installation. This time, however, we are going to do some “post-install configuration of FreeBSD”.
Continue ==>
60
Installing additional packages
Select “Configure”, tab to “Select” and press enter.
61
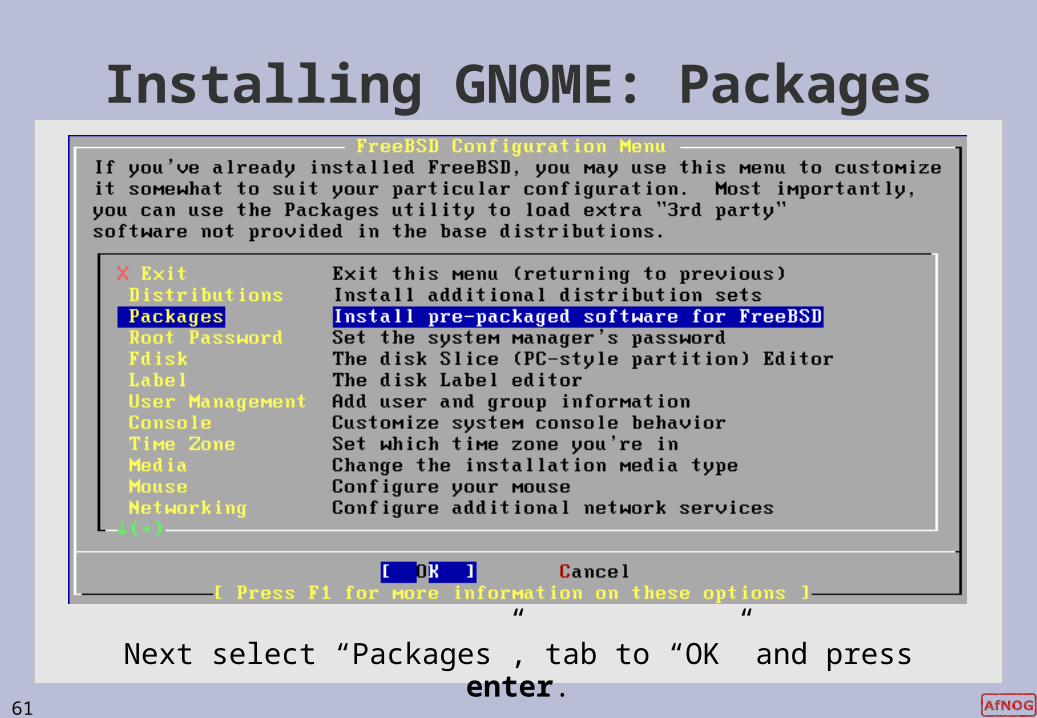
Installing GNOME: Packages
Next select “Packages”, tab to “OK” and press enter.

62
Additional packages: Install Media
Select “CD/DVD”, tab to “OK” and press enter.

63
Installing GNOME: Package Selection
Move down the list of packages, Select “gnome”, tab to “OK” and press enter.

64
Installing GNOME: Package Selection
There are a lot of Gnome packages. We are looking for the meta package, or “gnome2-2.26.3”. Move your cursor to this line and then press the space bar to select this. Notice Dependencies are also selected by this action.

65
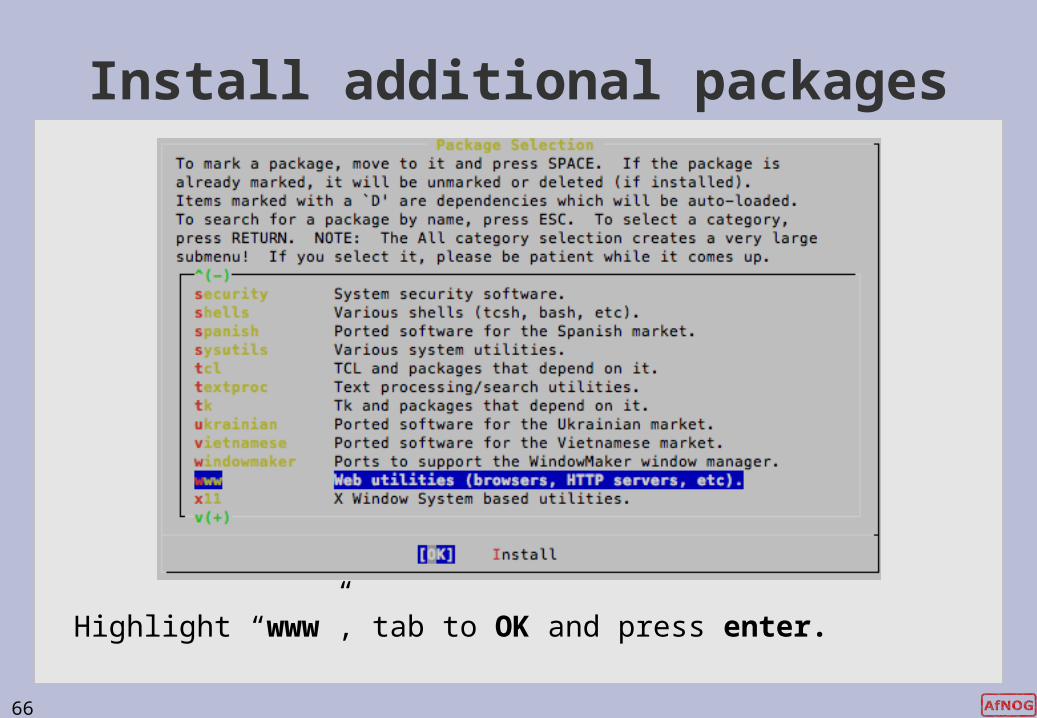
Installing additional packages
You are returned to the Package Selection screen. Don’t choose Install yet. Now scroll down to the “www” category…
66
Install additional packages
Highlight “www”, tab to OK and press enter.

67
Install Firefox 3.5
Scroll down the list of packages until you find “firefox-3.5.4,1”, press the space bar to select the package then tab to OK and press enter.

68
Additional packages cont.
You will be returned to the category list with www highlighted. Again, don’t press install, instead start scrolling down the list until…

69
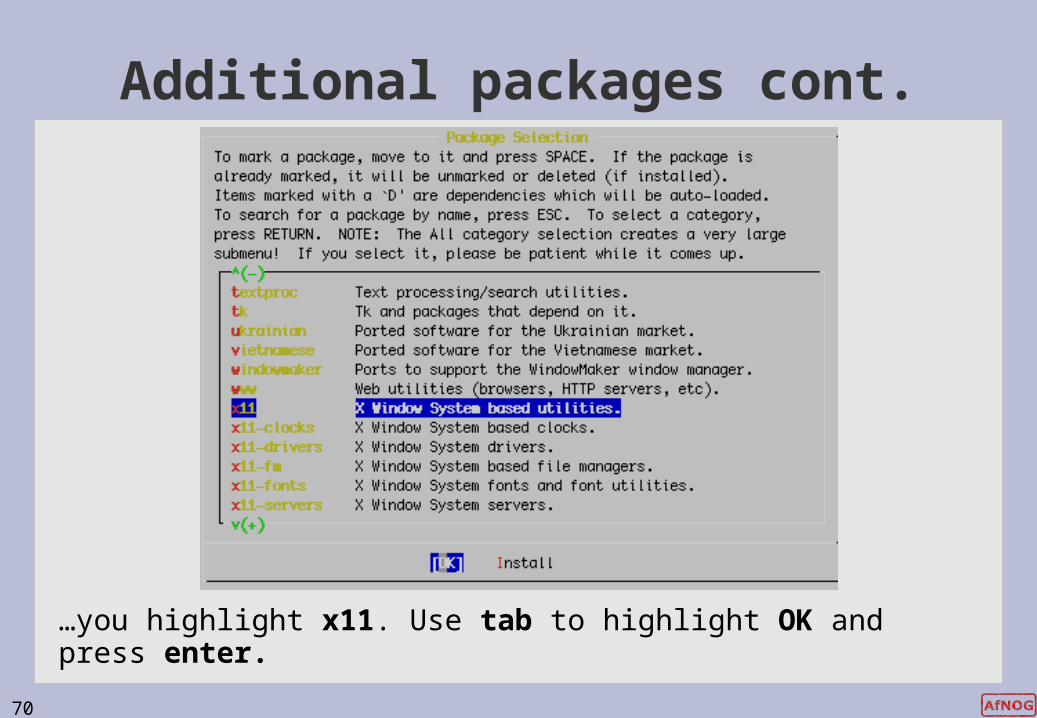
Additional packages cont.
You are returned to the Package Selection screen. Don’t choose Install yet. Now scroll down to the “x11” category…
70
Additional packages cont.
…you highlight x11. Use tab to highlight OK and press enter.

71
Additional packages: xorg
Scroll down the list to the meta-package “xorg-7.4_2” – Press the space bar to select the package, then tab to OK and press enter.
72
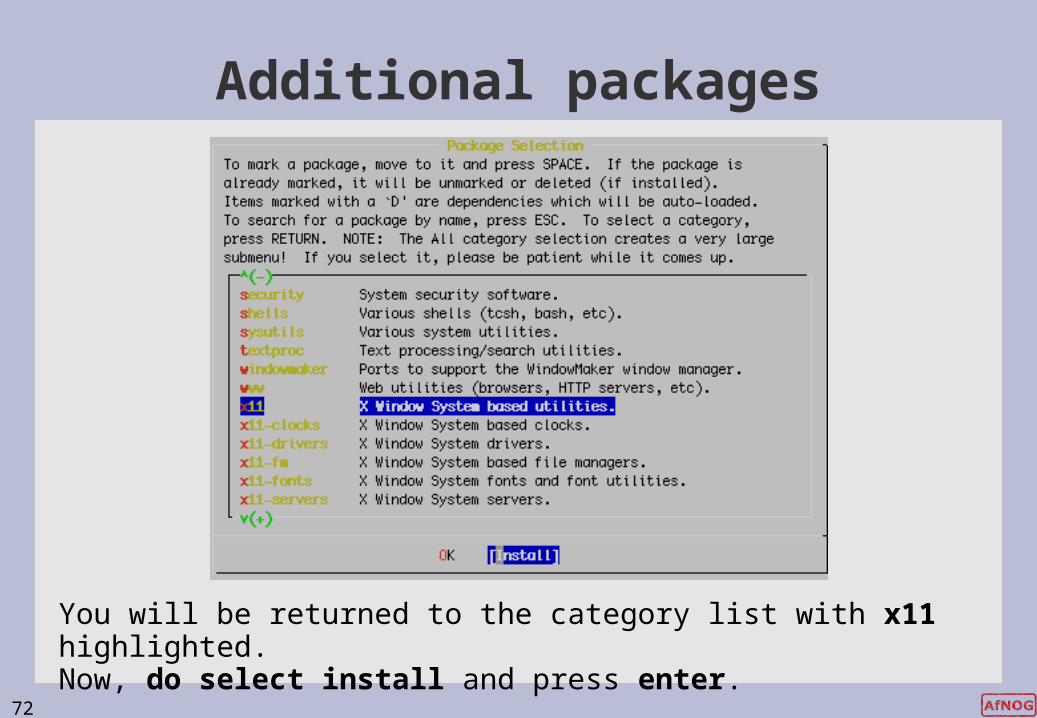
Additional packages
You will be returned to the category list with x11 highlighted. Now, do select install and press enter.
73
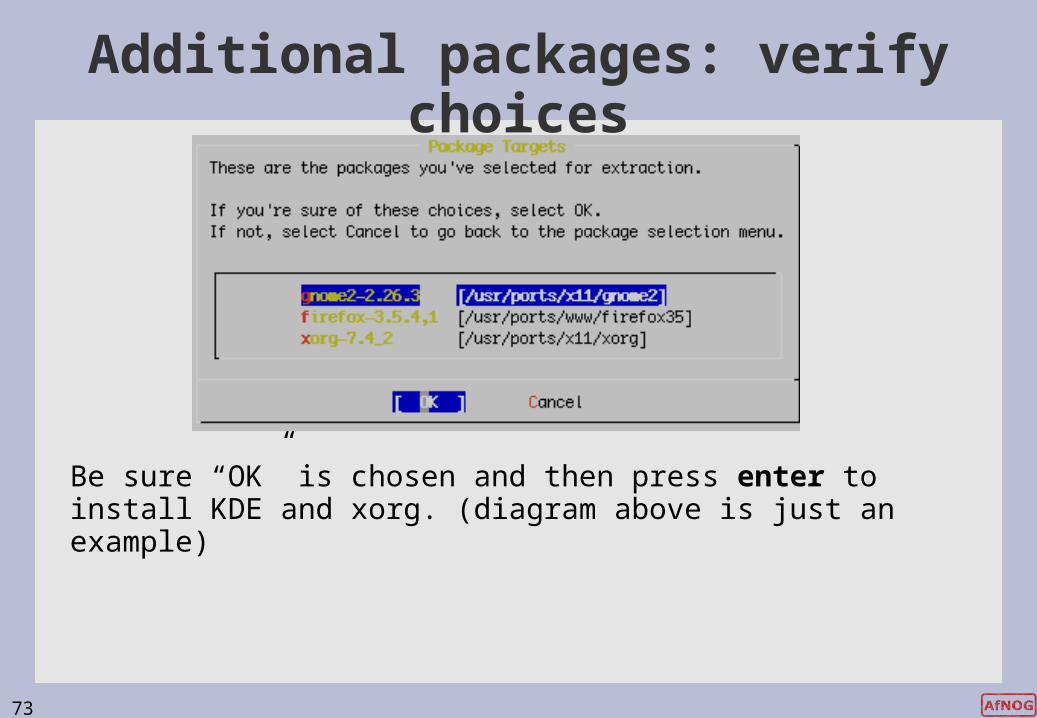
Additional packages: verify choices
Be sure “OK” is chosen and then press enter to install KDE and xorg. (diagram above is just an example)

74
Additional packages: installing
You will see a lot of packages being installed. Installation will take a few minutes. Once installation has completed you will see the original sysinstall screens again…
Note: installation of these packages may take close to an hour. If this is the case we may do something else in class while they are installing.
75
Installing GNOME: Config Menu
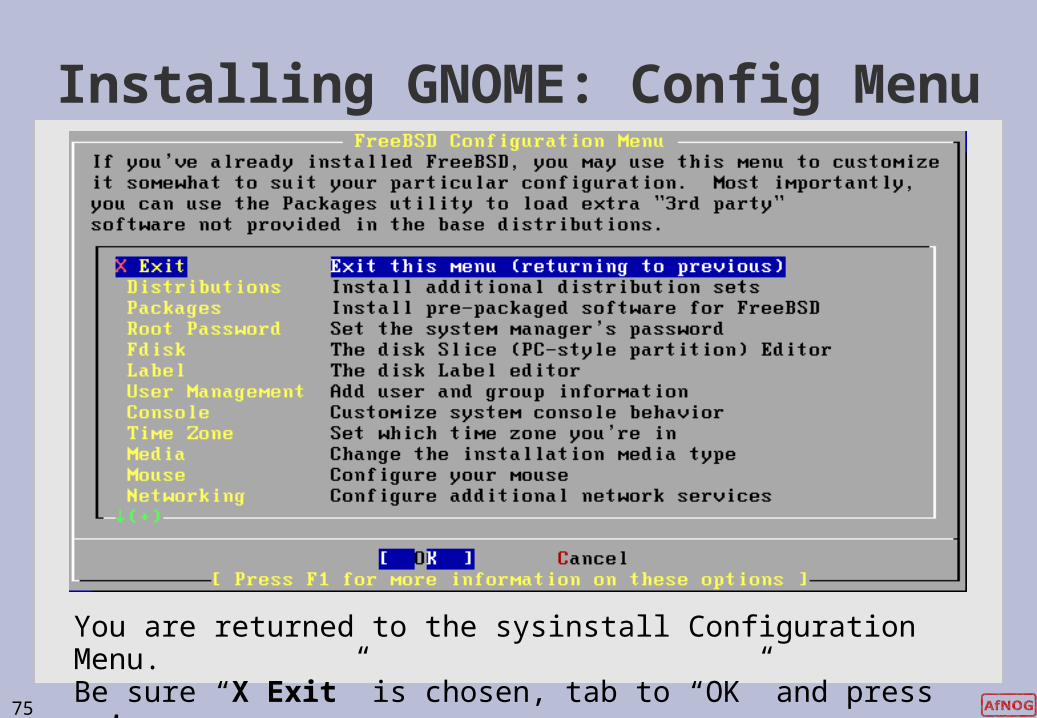
You are returned to the sysinstall Configuration Menu. Be sure “X Exit” is chosen, tab to “OK” and press enter.
76
Installing GNOME: Exit Menu
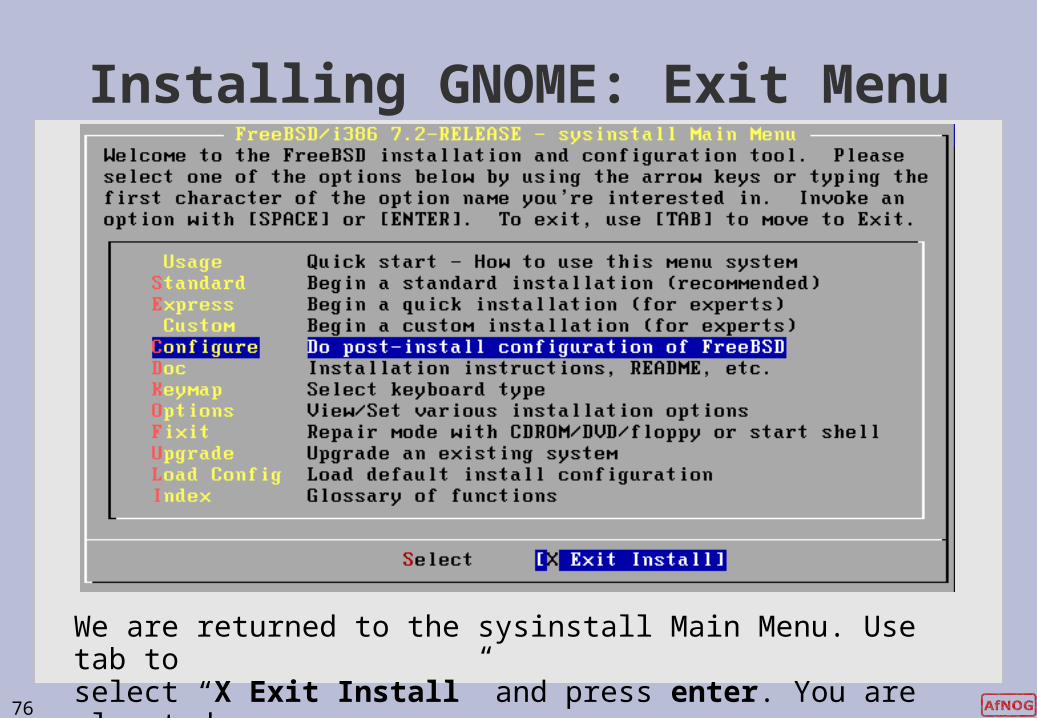
We are returned to the sysinstall Main Menu. Use tab to select “X Exit Install” and press enter. You are almost done.
77
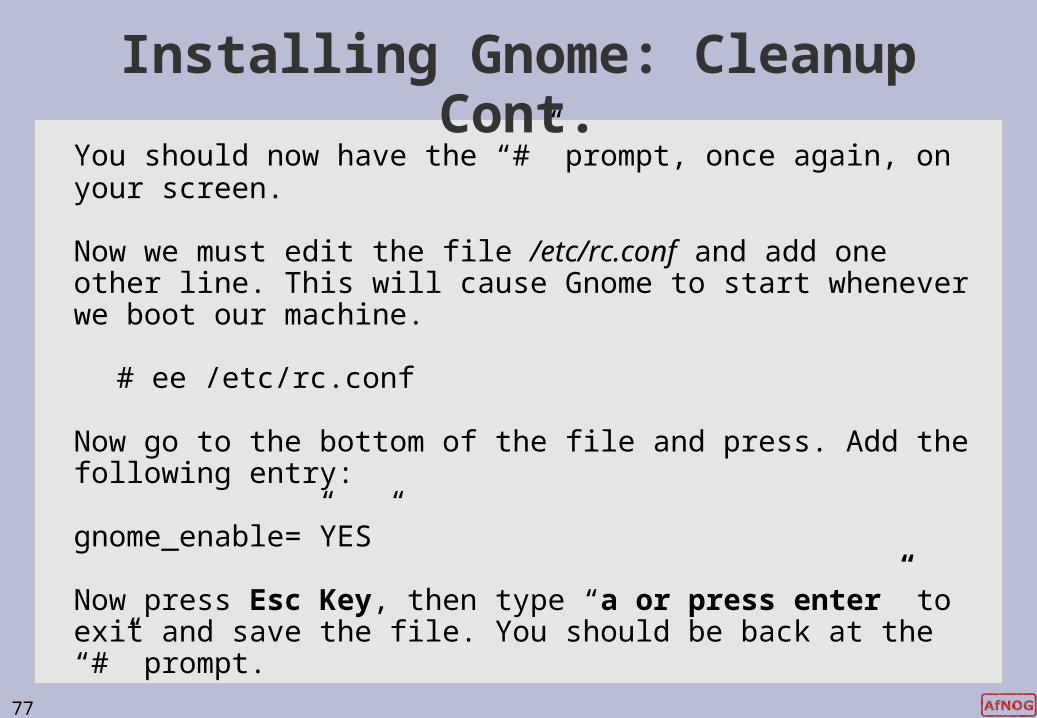
Installing Gnome: Cleanup Cont.You should now have the “#” prompt, once again, on your screen.
Now we must edit the file /etc/rc.conf and add one other line. This will cause Gnome to start whenever we boot our machine.
# ee /etc/rc.conf
Now go to the bottom of the file and press. Add the following entry:
gnome_enable=”YES”
Now press Esc Key, then type “a or press enter” to exit and save the file. You should be back at the “#” prompt.

78
Installing Gnome: FinishNow we will create a user other than root that we will use when logging in with Gnome. We will call this user afnog and this will be our administrative user that we use throughout the workshop.
# pw useradd afnog -m -s /usr/local/bin/bash -G wheel
This user has a home directory, uses bash as its default shell and belongs to the wheel group. Be sure to set a password for this user:
# passwd afnog (Use the password given in class)
While not necessary, we will now reboot our machine so that you can see the new default behaviour. At the prompt type:
# shutdown -r now
Upon rebooting you should be presented with the Gnome graphical login prompt. Don't log in as the root user, rather use the afnog user to log in at this point. Enjoy!