03.12.2015copyrigth (c) product managment leister 1 january 2010 varimat v2 instruction manual...
TRANSCRIPT

18.04.23 Copyrigth (c) Product Managment Leister
1
January 2010
VARIMAT V2Instruction manual
Bitumen Kit
Product Marketing Manager
Roland Beeler
October 2013
18.04.23Page 2Copyrigth (c) Product Managment Leister
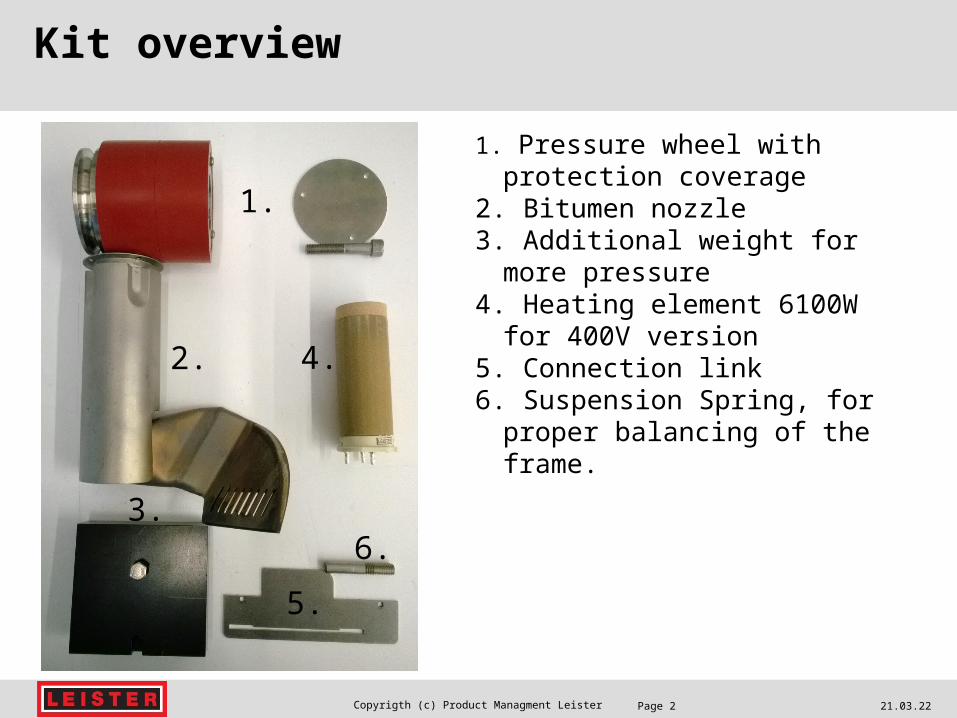
Kit overview
1. Pressure wheel with protection coverage
2. Bitumen nozzle3. Additional weight for more
pressure4. Heating element 6100W for 400V
version5. Connection link 6. Suspension Spring, for proper
balancing of the frame.
1.
2.
3.
4.
5.
6.
18.04.23Page 3Copyrigth (c) Product Managment Leister
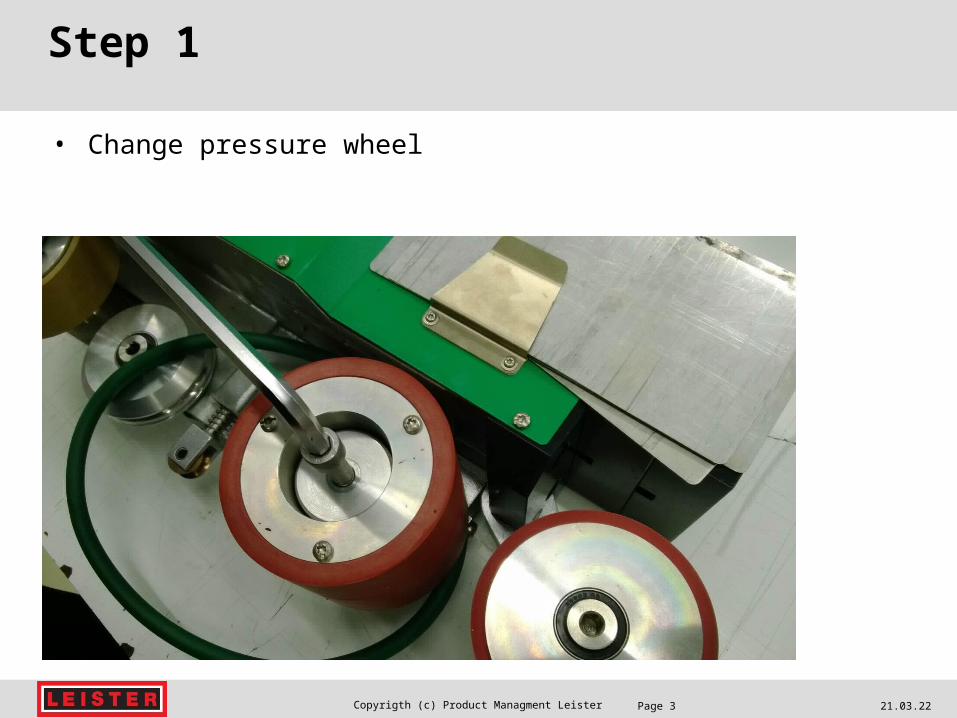
Step 1
• Change pressure wheel

18.04.23Page 4Copyrigth (c) Product Managment Leister
Step 2
• Install protection coverage

18.04.23Page 5Copyrigth (c) Product Managment Leister
Step 3
• Swing the air dam pulley down to expose the suspension spring. Remove the standard spring assembly. Insert the new suspension spring assembly into the tapped hole in the underside of the VARIMAT V2. The spring must be installed for proper balancing of the frame.

18.04.23Page 6Copyrigth (c) Product Managment Leister
Step 4
• Replace the air dam belt: Slide the green air dam belt over the Wide Weld pressure wheel so that it sits in the groove at the bottom of the Wide Weld pressure wheel. Ensure the air dam belt is not twisted. Pull the air dam belt to the rear air dam pulley, ensuring that the air dam belt is in the track grooves of the two intermediate pressure wheels.

18.04.23Page 7Copyrigth (c) Product Managment Leister
Step 5
• Remove the back-roller slide-plate knob.• Install connection link

18.04.23Page 8Copyrigth (c) Product Managment Leister
Step 6
• Change heating element for 400V version

18.04.23Page 9Copyrigth (c) Product Managment Leister
Step 7
• Carefully slide the new nozzle over the mica tube and use the four mounting screws that were on the 40-mm nozzle. Ensure the ground wire is reconnected.

18.04.23Page 10Copyrigth (c) Product Managment Leister
Step 8
• Do the nozzle alignment if necessary

18.04.23Page 11Copyrigth (c) Product Managment Leister
Thanks for your
attention