03 -07 ford 6.0l power strokequadzillapower.com/.../legacy...08-6.0-ford_cs4_02.pdf · 2 03 -07...
TRANSCRIPT
98.5
- 02 D
odge C
ummin
s
www.QuadzillaPower.com
1
03 -0
7 F
OR
D 6
.0L P
ow
er S
troke
03 -07 FORD 6.0L Power Stroke

2
03 -07 F
OR
D 6
.0L P
ow
er S
troke
www.QuadzillaPower.com
THIS IS A HIGH PERFORMANCE PRODUCT. USE AT YOUR OWN RISK. Be sure to read the disclaimer before beginning any installations of this product.
ADRENALINE Engine Controle System
Thanks for your purchase of a Quadzilla product. We know you’ll be more than satisfied with the increased performance our product provides. Be sure to tell your fellow diesel truck owners about Quadzilla.
This is a high performance product and we suggest that you also install Exhaust Gas Temperature (EGT) and boost gauges with all Quadzilla products. This prod-uct may alter the technician’s ability to use diagnostic equipment
Please remove the Quadzilla product when taking your truck into a service facility.
The Installation of this product indicates the BUYER has read and understands this agreement and the ‘Disclaim-er of liability’ agreement contained at the end of this manual and accepts its terms and conditions.
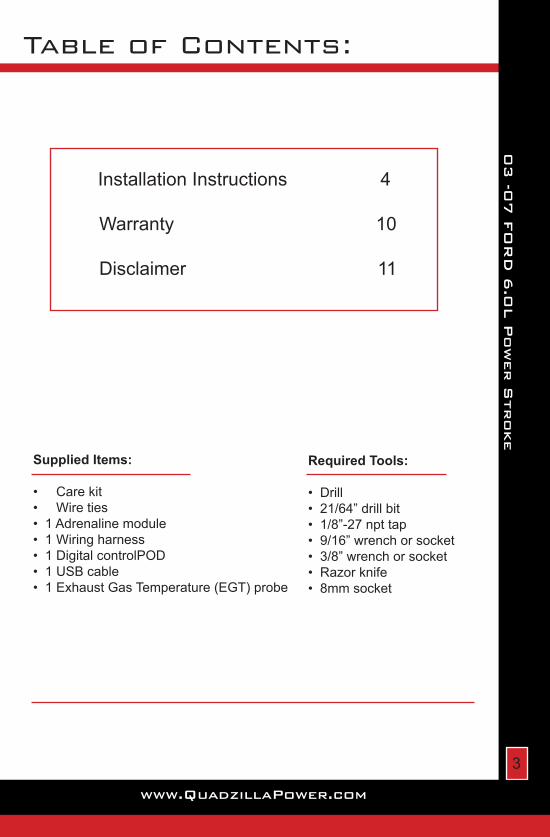
Supplied Items:
• Carekit• Wireties• 1Adrenalinemodule• 1Wiringharness• 1DigitalcontrolPOD• 1USBcable• 1ExhaustGasTemperature(EGT)probe
3
03 -0
7 F
OR
D 6
.0L P
ow
er S
troke
www.QuadzillaPower.com
Required Tools:
• Drill• 21/64”drillbit• 1/8”-27npttap• 9/16”wrenchorsocket• 3/8”wrenchorsocket• Razorknife• 8mmsocket
Table of Contents:
InstallationInstructions4
Warranty10
Disclaimer11
Supplied Items:
• Carekit• Wireties• 1Adrenalinemodule• 1Wiringharness• 1DigitalcontrolPOD• 1USBcable• 1ExhaustGasTemperature(EGT)probe
4
03 -07 F
OR
D 6
.0L P
ow
er S
troke
www.QuadzillaPower.com
Installation
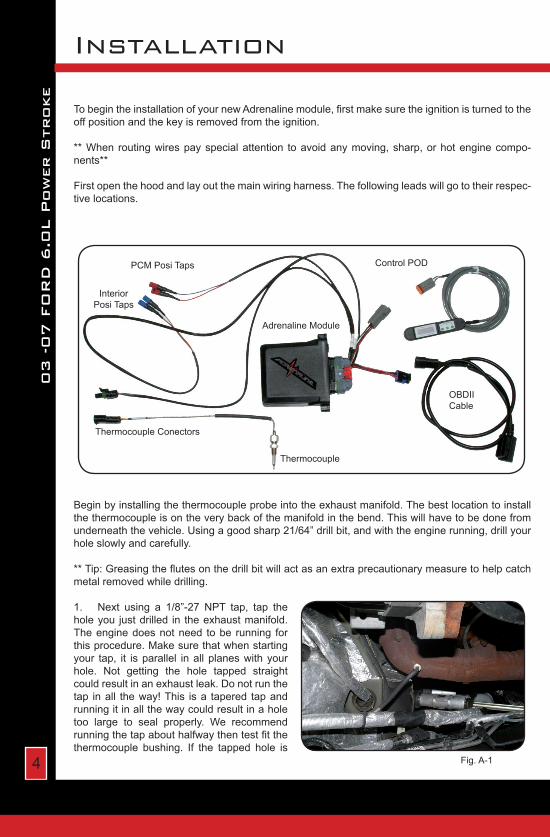
TobegintheinstallationofyournewAdrenalinemodule,firstmakesuretheignitionisturnedtotheoffpositionandthekeyisremovedfromtheignition.
**When routingwirespayspecialattention toavoidanymoving,sharp,orhotenginecompo-nents**
Firstopenthehoodandlayoutthemainwiringharness.Thefollowingleadswillgototheirrespec-tivelocations.
Beginbyinstallingthethermocoupleprobeintotheexhaustmanifold.Thebestlocationtoinstallthethermocoupleisontheverybackofthemanifoldinthebend.Thiswillhavetobedonefromunderneaththevehicle.Usingagoodsharp21/64”drillbit,andwiththeenginerunning,drillyourholeslowlyandcarefully. **Tip:Greasingtheflutesonthedrillbitwillactasanextraprecautionarymeasuretohelpcatchmetalremovedwhiledrilling.
1. Next using a 1/8”-27 NPT tap, tap theholeyou justdrilled in theexhaustmanifold.Theenginedoesnotneed tobe running forthisprocedure.Makesurethatwhenstartingyour tap, it isparallel inallplaneswithyourhole. Not getting the hole tapped straightcouldresultinanexhaustleak.Donotrunthetap inall theway!This isa tapered tapandrunningitinallthewaycouldresultinaholetoo large to seal properly. We recommendrunningthetapabouthalfwaythentestfitthethermocouple bushing. If the tapped hole is
ControlPOD
Thermocouple
AdrenalineModule
OBDIICable
PCMPosiTaps
ThermocoupleConectors
InteriorPosiTaps
Fig.A-1

5
03 -0
7 F
OR
D 6
.0L P
ow
er S
troke
www.QuadzillaPower.com
continue:Installationnotlargeenoughtostartthreadingthebushingin,reinstallthetapandcontinuetoabout¾to7/8ofitslength.Usinga9/16”wrenchtightenthebushing,itonlyneedstobesnug,overtighteningmaycausetheexhaustmanifoldtocrackorthebushingtocrack.Followingthebushinginstal-lation, install thethermocoupleprobeinthebushingandtightenusinga5/8´wrench.Routetheblackandorangeleadwireswiththeblacktwo-pinconnector,fromtheAdrenalinemainharnesstothethermocoupleleadwires(yellowandredwithablacktwo-pinfemaleconnector)andconnect.(See Fig. A-1)
2. Next locate the driver side battery. Using an8mmsocketorwrenchloosenthenutsonthebatteryterminal clamps and remove both the positive andnegativecables.Oncethecablesareremovedyoucanpullthebatterycoveroffbypullingup.Thecoverissnappedintothelowerhalfofthebatterybox.Youcangrabthecoveronthesidesandpullup.
3. Usinga8mmsocketandextensionremovethebatteryholddown.Theholddown is located in thecenterofthelengthofthebatterybetweenitandthefender.OncethisisremovedyoucanpullthebatteryouttogainaccesstothevehiclesPCM.
4. Once the PCM is accessible disconnect thecenterplugbypushingthegraylockinglatchtowardsthepassengersideof the truck. (See fig. A-2).Us-ingasmallpocketscrewdriverorapickremovetheblackplasticcoverthatcoversthebatterysideoftheconnector(See figure A-3).Thecoverisclippedon4smallclipsonthetopandbottomsidesofthecon-nector. Once the cover has been removed flip theconnectorovertoviewthewiresontheundersideoftheconnector.
5. Withtheconnectorflippedoverremovesomeofthetapecov-eringthewiresnearesttheconnector.Ontherighthandsideoftheconnectorlocatetheredwirewithagreentracerandthelightbluewirewithawhitetracer.Thelightbluewirewillbelocateddirectlybelowthered.(See Fig A-4)
6. RoutetheredandbluewireswiththeredPosi-Tapsontheendstothebatteryboxarea.Avoidanyhot,sharp,ormovingcomponents.
7. Attheendoftheredandbluewiresonthewir-ingharness,unscrewtheendsofthetwoPosi-Taps.Placethemontheredw/greentracerandthebluew/ white tracer wires located in the previous step,about1-2 inchesfromtheconnector.Arrangethemasshown(See Fig. A-5)
Fig.A-2
Fig.A-3
Fig.A-4
Fig.A-5
6
03 -07 F
OR
D 6
.0L P
ow
er S
troke
www.QuadzillaPower.com
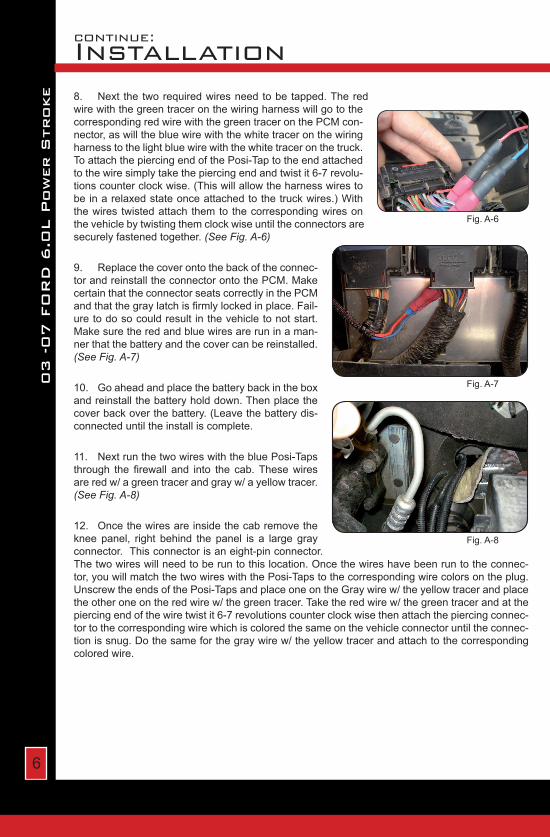
continue:Installation8. Next the tworequiredwiresneedtobetapped.TheredwirewiththegreentraceronthewiringharnesswillgotothecorrespondingredwirewiththegreentraceronthePCMcon-nector,aswillthebluewirewiththewhitetraceronthewiringharnesstothelightbluewirewiththewhitetraceronthetruck.ToattachthepiercingendofthePosi-Taptotheendattachedtothewiresimplytakethepiercingendandtwistit6-7revolu-tionscounterclockwise.(Thiswillallowtheharnesswirestobeinarelaxedstateonceattachedtothetruckwires.)Withthewires twistedattachthemto thecorrespondingwiresonthevehiclebytwistingthemclockwiseuntiltheconnectorsaresecurelyfastenedtogether.(See Fig. A-6)
9. Replacethecoverontothebackoftheconnec-torandreinstalltheconnectorontothePCM.MakecertainthattheconnectorseatscorrectlyinthePCMandthatthegraylatchisfirmlylockedinplace.Fail-uretodosocouldresult inthevehicletonotstart.Makesuretheredandbluewiresareruninaman-nerthatthebatteryandthecovercanbereinstalled.(See Fig. A-7)
10. Goaheadandplacethebatterybackintheboxandreinstallthebatteryholddown.Thenplacethecoverbackoverthebattery.(Leavethebatterydis-connecteduntiltheinstalliscomplete.
11. NextrunthetwowireswiththebluePosi-Tapsthrough the firewall and into the cab.Thesewiresareredw/agreentracerandgrayw/ayellowtracer.(See Fig. A-8)
12. Oncethewiresareinsidethecabremovetheknee panel, right behind the panel is a large grayconnector.Thisconnectorisaneight-pinconnector.Thetwowireswillneedtoberuntothislocation.Oncethewireshavebeenruntotheconnec-tor,youwillmatchthetwowireswiththePosi-Tapstothecorrespondingwirecolorsontheplug.UnscrewtheendsofthePosi-TapsandplaceoneontheGraywirew/theyellowtracerandplacetheotheroneontheredwirew/thegreentracer.Taketheredwirew/thegreentracerandatthepiercingendofthewiretwistit6-7revolutionscounterclockwisethenattachthepiercingconnec-tortothecorrespondingwirewhichiscoloredthesameonthevehicleconnectoruntiltheconnec-tionissnug.Dothesameforthegraywirew/theyellowtracerandattachtothecorrespondingcoloredwire.
Fig.A-7
Fig.A-8
Fig.A-6

7
03 -0
7 F
OR
D 6
.0L P
ow
er S
troke
www.QuadzillaPower.com
continue:Installation13. Oncethewiresareinsidethecabremovethekneepanel, rightbehind thepanel isa largegrayconnectorthisconnectorisaneightpinconnector.The twowireswill need tobe run to this location.Oncethewireshavebeenrantotheconnector,youwillmatch the twowireswith thePosi-Taps to thecorresponding wire colors on the plug. *Unscrew the ends of the Posi-Taps and place one on the Gray wire w/ the yellow tracer and place the oth-er one on the red wire w/ the green tracer. Take the red wire w/ the green tracer and at the pierc-ing end of the wire, twist it 6-7 revolutions coun-ter clock wise then attach the piercing connector to the corresponding wire which is col-ored the same on the vehicle connector, until the connection is snug. Do the same for the gray wire w/ the yellow tracer and attach to the corresponding colored wire.(See Figs. A-9) *Note: Some 03-04 Trucks will have a tan wire with yellow tracer instead of red wire with green tracer.
14. NextyouwillneedtoplugtheOBDIIcableintotheOBDII to port.Once the cable is connected totheportyouwillneedtorunthismodulethroughthefirewall and into the engine compartment, where itwillbeconnectedtotheblackfourpinconnectoronthemainharness.(See Fig. A-10)
15. NextfindagoodlocationtomounttheControl-POD.Wehavefoundthefrontofthedashpanelonleftsideofthesteeringcolumnbelowthelightswitchtobeanideallocation,butitcanbemountedanywhereyoudesire.
16. IfyouareinstallingtheAdrenalinewiththePulsethenthepulsecaneitherbemountedonthetopofthedashnexttothepillaroronthepillaritselfifyoupurchasedthepillarmount.Goaheadandmountthepulsetothelocationdesiredthenroutetheharnesscabledownandunderneaththedashthroughthefirewallintotheenginecompartment.PlugthePulseconnectorintothecor-respondinggrayconnectorontheAdrenalinemainharness.
17. Checkoverallconnectionstobesureallofthemaresecurelyfastenedtogether.OncethishasbeendonegoaheadandconnectyourAdrenalinemoduletotheharnessandreconnectbothbatteryterminals.ThebestlocationtomounttheAdrenalinemoduleisontopofthefusepanelnexttothedriver’ssidefender.UsethealcoholwipesuppliedinthekittocleananydirtordebrisfromthetopofthefusepaneltoinsuretheVelcrowillstickandhold.Goaheadandmountthemoduletothetopofthefusepanel.
18. TurnthekeyonandchecktomakesuretheControlPODorthePulsepowersup.Ifnotgobackovertheconnectionsagaintoinsureallconnectionsaresecure.IfyouarestillhavingissuescallTechSupportat1-888-842-6572.
19. IfthePODorthePulsepowersup,goaheadandstartthevehicleandenjoyyournewfoundpower.
Fig.A-9
Fig.A-10
8
03 -07 F
OR
D 6
.0L P
ow
er S
troke
www.QuadzillaPower.com
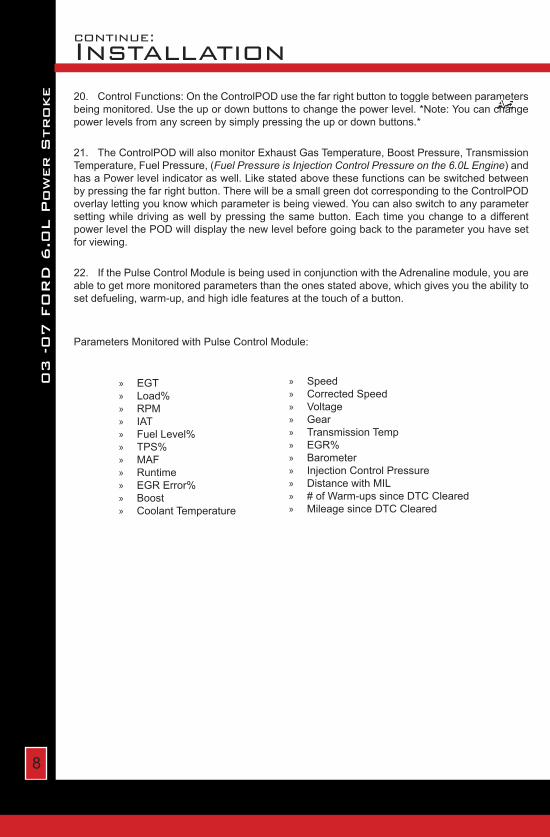
continue:Installation20. ControlFunctions:OntheControlPODusethefarrightbuttontotogglebetweenparametersbeingmonitored.Usetheupordownbuttonstochangethepowerlevel.*Note:Youcanchangepowerlevelsfromanyscreenbysimplypressingtheupordownbuttons.*
21. TheControlPODwillalsomonitorExhaustGasTemperature,BoostPressure,TransmissionTemperature,FuelPressure,(Fuel Pressure is Injection Control Pressure on the 6.0L Engine)andhasaPowerlevelindicatoraswell.Likestatedabovethesefunctionscanbeswitchedbetweenbypressingthefarrightbutton.TherewillbeasmallgreendotcorrespondingtotheControlPODoverlaylettingyouknowwhichparameterisbeingviewed.Youcanalsoswitchtoanyparametersettingwhiledrivingaswellbypressingthesamebutton.EachtimeyouchangetoadifferentpowerlevelthePODwilldisplaythenewlevelbeforegoingbacktotheparameteryouhavesetforviewing.
22. IfthePulseControlModuleisbeingusedinconjunctionwiththeAdrenalinemodule,youareabletogetmoremonitoredparametersthantheonesstatedabove,whichgivesyoutheabilitytosetdefueling,warm-up,andhighidlefeaturesatthetouchofabutton.
ParametersMonitoredwithPulseControlModule:
» EGT » Load% » RPM » IAT » FuelLevel% » TPS% » MAF » Runtime » EGRError% » Boost » CoolantTemperature
» Speed » CorrectedSpeed » Voltage » Gear » TransmissionTemp » EGR% » Barometer » InjectionControlPressure » DistancewithMIL » #ofWarm-upssinceDTCCleared » MileagesinceDTCCleared
A-5

9
03 -0
7 F
OR
D 6
.0L P
ow
er S
troke
www.QuadzillaPower.com
Notes:
10
03 -07 F
OR
D 6
.0L P
ow
er S
troke
www.QuadzillaPower.com
All QUADZILLA Performance Modules/Tuners Diesel Performance Enhancement Software- as specified below - is warranted against defective materials or workmanship for one million miles or ten years from date of purchase, whichever comes first. The Performance Modules/Tuners hardware units are covered by a one year unlimited mileage warranty.
WHAT IS WARRANTED:Any Performance Modules/Tuners Diesel Performance Enhancement Software specified for and Cummins, Powerstroke, and, Duramax diesel engines, except those units sold exclusively for racing and/or off-road use.
WHO IS COVERED BY WARRANTY: The original purchaser of a Performance Modules/Tuners who has completed the required warranty registration and provided proper proof of the original retail purchase and all other required information.
WHAT IS NOT WARRANTED: Any Performance Modules/Tuners used for any type of racing or competition, any off-road use, custom or modified applica-tions, any non-legal or industrial applications. (These units are covered by a one year unlimited mileage warranty for both Software and Hardware.)
WHAT VOIDS THE WARRANTY:Incorrect Installation: The Performance Modules/Tuners must be installed following Quadzilla installation procedure as outlined in the product literature that accompanies the Performance Modules/Tuners. Physical damage to the unit due to improper care in installation or removal will not be covered under this warranty. No Registration: Failure to register your prod-uct within 90 days of purchase will void the one year unlimited mileage warranty. No Proof of Purchase: At time of warranty claim, buyer must provide proof of purchase (original receipt or invoice). Incorrect Use: Any damaged, abused or modified Performance Modules/Tuners will not be warranted.
EXTENT OF WARRANTY:Any defective Performance Modules/Tuners properly returned to QUADZILLA will be replaced or repaired by QUADZILLA. QUADZILLA will not be responsible for any other expenses incurred by the customer under the terms of this warranty, nor shall it be responsible for any damages consequential, special, contingent, or otherwise; or expenses or injury arising directly or indirectly from the use of the Performance Modules/Tuners unit or software. Any Performance Modules/Tuners returned to QUADZILLA must be sent at the customer’s expense along with proof of purchase. QUADZILLA reserves the right to determine whether the terms of the warranty, set out above, have been properly complied with. In the event that the terms are not complied with, QUADZILLA shall be under no obligation to honor this warranty.
SHORTAGES AND DAMAGED GOODS:It is the responsibility of the customer to inspect and count products upon receipt. Any shortages or errors must be reported to Quadzilla immediately. Claims for shortages or damaged goods must be received within 3 days of receipt of the product. All merchandise is inspected before packing. Any damaged goods should be reported to the freight carrier immediately. All packaging of damaged goods must be kept for inspection by the freight carrier.
RETURNS AND EXCHANGES: An RMA (return merchandise authorization) must accompany all returns and exchanges. Returns must include a copy of the original invoice. Returns and exchanges must be shipped pre-paid or they will be refused.
Returned or exchanged products must be undamaged, or in “like new” condition. Damage occurred during freight due to improper packing is the responsibility of the customer. Unauthorized or refused merchandise are subject to a 10% restocking fee.
Warranty:

11
03 -0
7 F
OR
D 6
.0L P
ow
er S
troke
www.QuadzillaPower.com
THIS IS A HIGH PERFORMANCE PRODUCT. USE AT YOUR OWN RISK
Do not use this product until you have carefully read the following agreement.
This sets forth the terms and conditions for the use of this product. The installation of this product indicates that the BUYER has read and understands this agreement and accepts the terms and conditions.
DISCLAIMER OF LIABILITY
Quadzilla Performance Technologies, Inc. and its distributors, jobbers and dealers (hereafter SELLER) shall in no way be responsible for the product’s proper use and service. THE BUYER HEREBY WAIVES ALL LIABILTY CLAIMS.
The BUYER acknowledges that he/she is not relying on the SELLER’s skill or judgment to select or furnish goods suitable for any particular purpose and that there are no liabilities which extend beyond the description on the face hereof and the BUYER hereby waives all remedies or liabilities, expressed or implied arising by law or otherwise, (including without any obligations of the SELLER with respect to fitness, merchantability and consequential damages) or whether or not occasioned by the SELLER’s negligence.
The SELLER disclaims any warranty and expressly disclaims any liability for personal injury or damages. The BUYER acknowledges and agrees that the disclaimer of any liability for personal injury is a material term for this agreement and the BUYER agrees to indemnify the SELLER and to hold the SELLER harmless from any claim related to the item of the equip-ment purchased. Under no circumstances will the SELLER be liable for any damages or expenses by reason of use or sales of such equipment.
The SELLER assumes no liability regarding the improper installation or misapplication of its products. It is the installer’s responsibility to check for proper installation and if in doubt, contact the manufacturer.
LIMITATION OF WARRANTY
Quadzilla Performance Technologies, Inc. (hereafter “SELLER”) gives limited warranty as to description, quality, merchantabil-ity, fitness for any product’s purpose, productiveness, or any other matter of SELLER’s product herewith. The SELLER shall be in no way responsible for the product’s open use and service and the BUYER hereby waives all rights other than those expressly written herein. This warranty shall not be extended or varied in, except by a written instrument signed by SELLER and BUYER.
The warranty is limited to one (1) year from the date of sale and limited solely to the parts contained within the product’s kit. All products that are in question of Warranty must be returned shipping prepaid to the SELLER and must be accompanied by a dated proof of purchase receipt. All warranty claims are subject to approval by Quadzilla Performance Technologies, Inc.
Under no circumstances shall the SELLER be liable for any labor charged or travel time incurred in diagnosis for defects, removal, or reinstallation of this product, or any other contingent expenses.
Under no circumstances shall the SELLER be liable for any damages or expenses insured by reason of the use of sale of any such equipment.
IN THE EVENT THAT THE BUYER DOES NOT AGREE WITH THIS AGREEMENT: THE BUYER MAY PROMTLY RETURN THIS PRODUCT, IN A NEW AND UNUSED CONDITION WITH A DATED PROOF OF PURCHASE TO THE PLACE OF PURCHASE WITHIN THIRTY (30) DAYS FROM THE DATE OF PURCHASE FOR A FULL REFUND.
THE INSTALLATION OF THIS PRODUCT INDICATES THAT THE BUYER HAS READ AND UNDERSTANDS THIS AGREE-MENT AND ACCEPTS ITS TERMS AND CONDITIONS.
Disclaimer:
*Legal in California only for racing vehicles which may never be used upon a highway.

98.5
- 0
2 D
odge C
ummin
s
www.QuadzillaPower.com
12
www.QuadzillaPower.com
6032 Jacksboro Hwy. Fort Worth, TX. 76135Toll Free: 1-888-842-6572