01_wenjie
DESCRIPTION
Week 1 JournalTRANSCRIPT

Week 1 Journal Wenjie Cai
2 WEEK 1 JOURNAL
In this week’s tutorial we used the given materials, bricks and woods, to build a tower and make it as high as we can and also keep it stable.
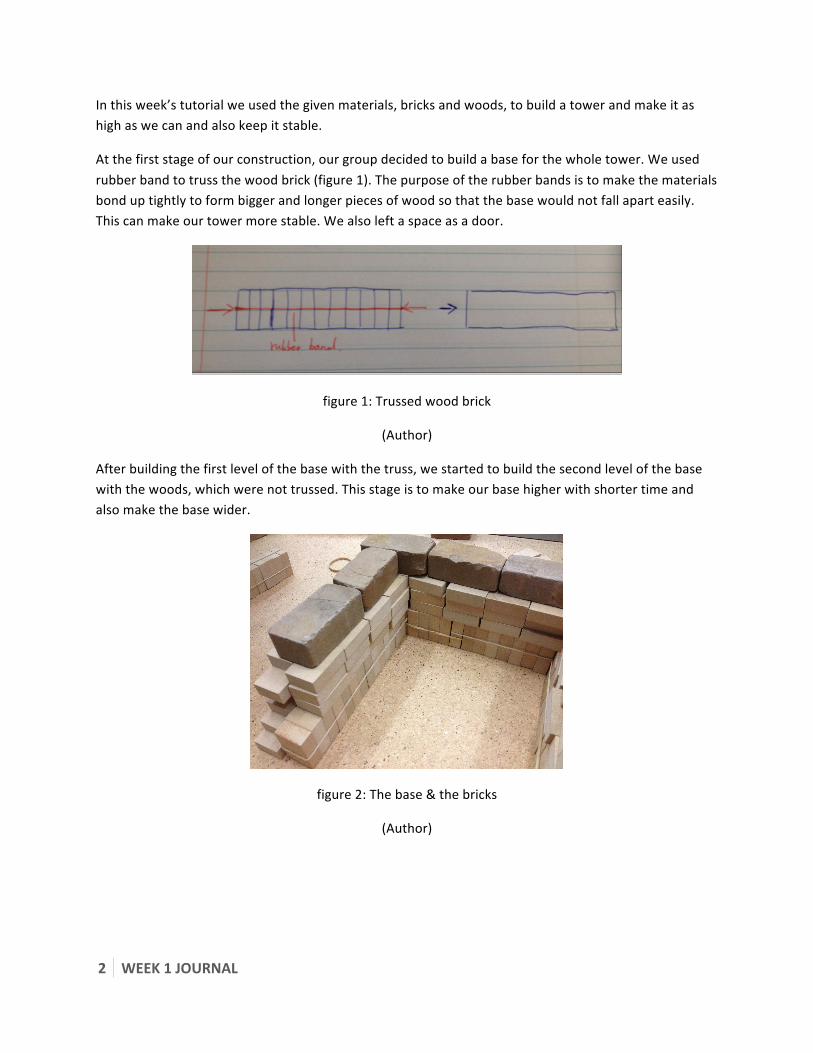
At the first stage of our construction, our group decided to build a base for the whole tower. We used rubber band to truss the wood brick (figure 1). The purpose of the rubber bands is to make the materials bond up tightly to form bigger and longer pieces of wood so that the base would not fall apart easily. This can make our tower more stable. We also left a space as a door.
figure 1: Trussed wood brick
(Author)
After building the first level of the base with the truss, we started to build the second level of the base with the woods, which were not trussed. This stage is to make our base higher with shorter time and also make the base wider.
figure 2: The base & the bricks
(Author)

WEEK 1 JOURNAL 3
figure 3: purpose of the bricks
(Author)
As we did not use any special constructing method for the second level of the base, the base became very unstable. Therefore, after finishing the base, we put bricks on it. The bricks are much heavier than the wood so that the compression by the bricks can make the woods and the floor bond much more tightly so that the base is stable enough (figure 3). This has strengthened the stability of the tower. Also, the bricks are thicker than other materials so they make the tower higher.
figure 4: Different construction
(Author)

4 WEEK 1 JOURNAL
figure 5: The bricks
(Author)
We continued to build the tower on the bricks with similar method as the second level of the base, no rubber band, and only wood bricks. However, the constructions are different. For the second level of the base, we only put one wood bricks on another and make it higher. For this stage, we put one wood brick on the other two to make it more stable (figure 4.) However, as the heavy bricks are thinner than the base, we can only build a thin wall on them (figure 5). This caused a problem. The construction of this level has weakened the tower’s stability as it is not thick enough, when it gets higher, it will be less stable with a thin wall. For building a higher tower, we decided to put the trussed woods on the thin wall to form a flat structure. Figure 6 is the vertical view of the flat structure, the blue drawing represents the woods below and the red drawing represents the upper ones.
figure 6: Vertical view of the flat structure
(Author)
WEEK 1 JOURNAL 5
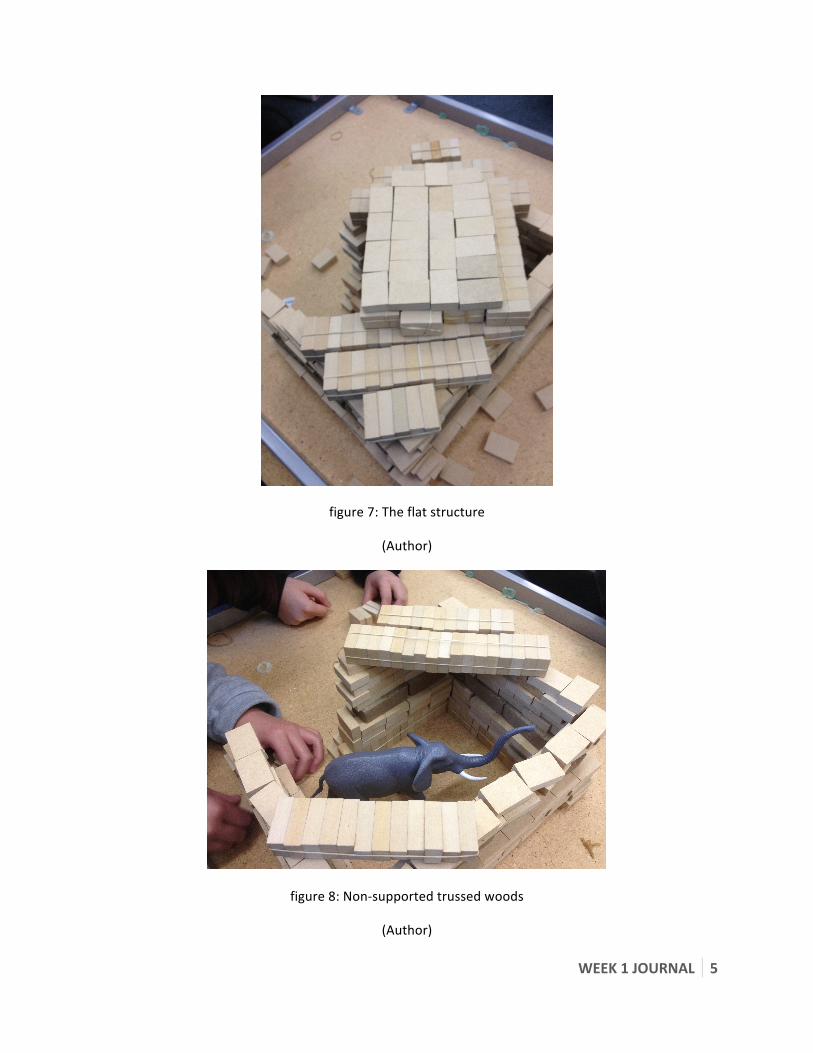
figure 7: The flat structure
(Author)
figure 8: Non-‐supported trussed woods
(Author)

6 WEEK 1 JOURNAL
figure 9: Forces break the truss
(Author)
When we finished it, which is shown by figure 7, we start to focus on the height on the upper-‐trussed wood. We built as fast as we can to make the tower higher, however, on our half way of our work, we found a critical problem that stop us from constructing. There is no support under the flat structure (figure 8&9). As the tower became higher, this structure cannot support the weight of the tower. The shape of them changed and seems likely to break and fall. We deconstructed it and tried to find a better way. No support was the main reason for the failure; therefore we change our method of putting the trussed woods. We put 2 ‘long woods’ on the top of the back wall and put another 2 on these two (figure 10). This instruction avoid the problem caused by non-‐supported as the 2 ‘long woods’ below support the upper 2.
figure 10: vertical view of the tower
(Author)

WEEK 1 JOURNAL 7
figure 11: Squares on the flat structure
(Author)
Finally, we started to make it higher, we used the method that is similar to the method 2 shown by figure 4. we built it in the way figure 11 shown.
Figure 12: The top of the tower
(Author)

8 WEEK 1 JOURNAL
figure 13: The final appearance of the tower
(Author)
After constructing, we needed to shake the table to test its stability. By shaking the table, parts of them were fallen but the tower still stood (figure 14).
figure 14: The tower after shaking
(Author)

WEEK 1 JOURNAL 9
When we was building it, we have expected those materials would fall as we did not use anything to strengthen their bonding.
By the activities during our studio, I have gained some knowledge of constructing. Higher building needs thicker walls the support. Strengthen the bonding of the building material is also very important for the stability.