0.1 2016/4/1 chris chen initial draft 0.2 2018/4/1 chris
TRANSCRIPT
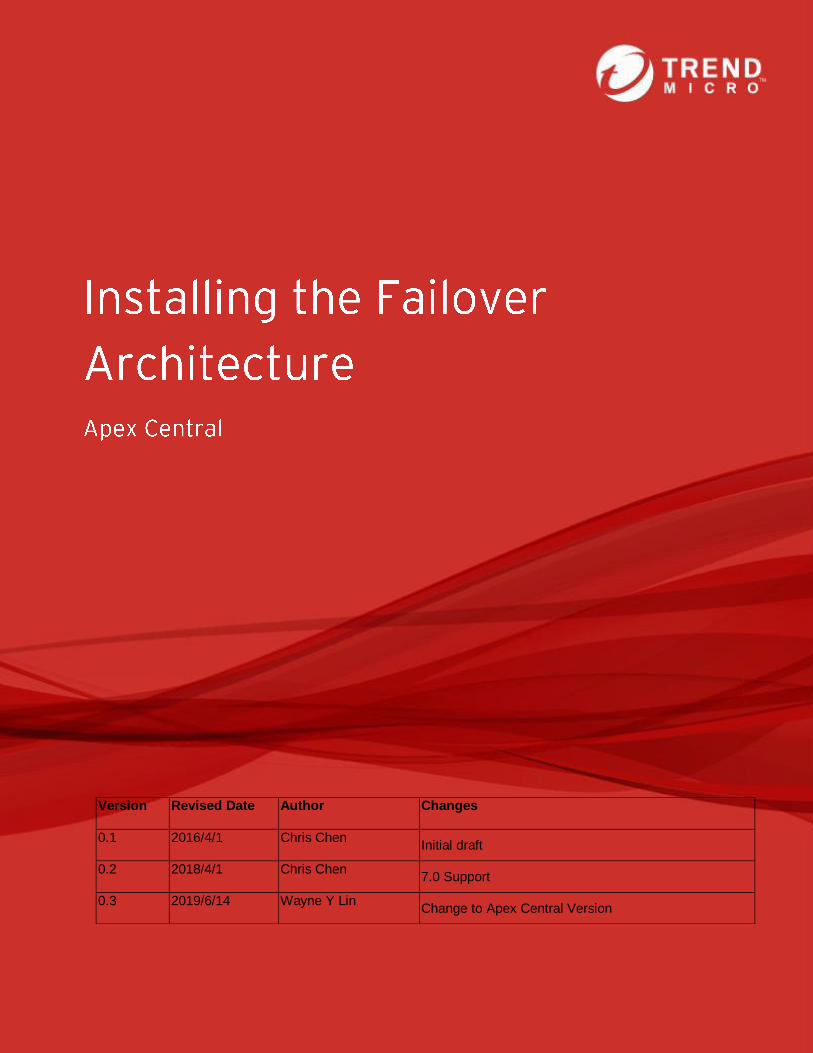
Version Revised Date Author Changes
0.1 2016/4/1 Chris Chen Initial draft
0.2 2018/4/1 Chris Chen 7.0 Support
0.3 2019/6/14 Wayne Y Lin Change to Apex Central Version

Installing the Failover Architecture | June 2019
Page 2 of 16| Trend Micro Installing the Failover Architecture
Contents Apex Central Failover Architecture Overview ........................................................................................... 3
Apex Central Failover Architecture Components ...................................................................................... 5
Installing the Production Apex Central Server .......................................................................................... 6
Installing the Contingency Apex Central Server ........................................................................................ 9
Switching the Production Apex Central Server ....................................................................................... 11
Patching the Apex Central Servers ......................................................................................................... 12
One Time Sync File List .......................................................................................................................... 13
Schedule Replicate File List .................................................................................................................... 14
Evaluating the File Replication Frequency .............................................................................................. 15

Installing the Failover Architecture | June 2019
Page 3 of 16| Trend Micro Installing the Failover Architecture
Apex Central Failover Architecture Overview
The concept of an Apex Central Failover Architecture (FA) is to set up 2 or more Apex Central servers and
host, on a data synced or replicated SQL Server. This Apex Central FA allows administrators to set up
multiple contingency Apex Central servers in the same datacenter, in different datacenters, or both. This
document does not provide detailed procedures for synchronizing or replicating the SQL Server data.
Administrators can choose different methods to synchronize or replicate SQL Server data according to
their needs. For example, administrators may use the Symmetric Remote Data Facility (SRDF), SQL Server
AlwaysOn, or simply back up and transport the data to the contingency Apex Central server for manual
import.
Apex Central FA uses two or more standalone Apex Central servers. Each Apex Central server must remain
in either Active or Standby mode. The Apex Central server with all services running becomes the Active
Apex Central server, and the other Apex Central servers become the Standby Apex Central servers and
must be switched to Standby mode. All services on Standby Apex Central servers must be stopped because
an L4 switch may direct the traffic to the wrong Apex Central server. Running two or more Active Apex
Central servers simultaneously may also lead to data corruption on the production database.
Apex Central uses an encryption key pairs to secure the service and product connections. Since Apex
Central servers in the group may take turns being Active and Standby Apex Central servers, these have to
serve the same registered Trend Micro Products, for example Trend Micro Deep Discovery Inspector (DDI),
Deep Discovery Analyzer (DDAN) and OfficeScan (OSCE). Administrators must copy and synchronize the
keys immediately after installing the Apex Central servers to ensure that the keys are identical on all Apex
Central servers and that all registered products can connect without interruption.
During runtime, Apex Central keeps certain settings in XML files and generates files such as reports and
Trend Micro Data Loss Prevention (DLP) templates. To ensure that all functions use the same settings and
keep the same runtime files on all Apex Central servers, administrators will also need to synchronize these
files regularly.
In this deployment, all Apex Central servers and managed product servers, such as those for DDI, DDAN,
or OSCE, and administrators are required to use a defined fully qualified domain name (FQDN) to connect
to Apex Central. Apex Central must also use the FQDN to connect to the managed product servers. The
Apex Central FQDN points to the L4 switch VIP for managed product servers and user browsers. If the
production site fails, follow the procedure to switch the production Apex Central server.

Installing the Failover Architecture | June 2019
Page 4 of 16| Trend Micro Installing the Failover Architecture

Installing the Failover Architecture | June 2019
Page 5 of 16| Trend Micro Installing the Failover Architecture
Apex Central Failover Architecture Components
The components of the Apex Central Failover Architecture include:
1. Apex Central Server The server that installs the Apex Central program.
2. Standby Database *Contingency Apex Central always connect to its own Standby Database. The standby database is a database that is used by the standby Apex Central. Each Apex Central instance has its own standby database. The standby database schema is the same as the active database except it does not contain any data. The purpose of the standby database is to reduce maintenance effort. When applying service packs, patches, or hotfixes, administrators can simply download a single package from the Trend Micro Download Center and to apply on all active/standby Apex Central servers. Different download packages and installation steps for active/standby Apex Central servers are not required.
3. Production Database *Production Apex Central always connect to Production Database. The Production Database is the database for the Active Apex Central and stores all production data. Apex Central servers that switch from Standby mode to Active mode need to connect to this database.
4. DBConfig Tool This tool is provided in the Apex Central installation folder. When switching a Apex Central server between the Active mode and Standby mode, use this tool to switch the database between the Standby Database and Active Database.

Installing the Failover Architecture | June 2019
Page 6 of 16| Trend Micro Installing the Failover Architecture
Installing the Production Apex Central Server
To install the Production Apex Central server:
1. Define the Apex Central FQDN. The FQDN should point to the L4 switch VIP, and the L4 switch
VIP should map to the Production Apex Central IP address and Contingency Apex Central IP
address.
2. If your company requires a web server certificate, then install it on the L4 switch.
3. Run the Apex Central installation program.
1. On the step of Specifying Apex Central Web Server Settings, specify the FQDN name in
the IP address. (This step is important because managed product servers use the FQDN
to connect to the Apex Central server.)
2. On the step of Configuring Database Information, you can choose to install the provided
SQLEXPRESS database version as the Standby Database on the Apex Central server.
NOTE: If the Standby Database server is a remote SQL Server, the SQL account requires
the “DBCreator” Server Role for Apex Central installation. After successfully installing
the remote SQL Server, the DBCreator Role can be removed from the SQL account.
4. After successfully installing the Production Apex Central, install all required service packs,
patches, and hotfixes.
5. Copy the Standby Database to the Production SQL Server:
a. Stop Apex Central Services
o Trend Micro Apex Central
o Trend Micro Management Infrastructure (TMI)
o World Wide Web Pushing Service
b. For instructions on how to copy the db_ApexCentral Standby Database to the
Production SQL Server, see: https://docs.microsoft.com/en-us/sql/relational-
databases/databases/use-the-copy-database-wizard
c. Make sure the database in Production SQL Server restores successfully.

Installing the Failover Architecture | June 2019
Page 7 of 16| Trend Micro Installing the Failover Architecture
6. Use the DBConfig tool to transfer the Apex Central to connect to Production SQL Server.
a. Run the command prompt as an administrator.
b. Change the directory to the DBConfig folder in the Apex Central installation directory.
By default, the DBConfig tool is located at: C:\Program files (x84)\Trend Micro\Control
Manager\DBConfig
c. Execute the DBConfig tool using the following parameters:
o DBName - Apex Central database instance name, default is db_ApexCenral
o DBAccount - Production SQL Server SQL account for Apex Central
o DBPassword - Production SQL Server SQL account password for Apex Central
o DBHost - the Production SQL Server Name or IP address
o CMServiceRemainStopped - whether Apex Central services should be stopped
after DBConfig.exe completed.
Sample command:
DBConfig -DBName="db_ApexCentral" -DBAccount="sqlact" -DBPassword="sqlPwd" -
Mode="SQL" -DBHost="SQLSrvName" -CMServiceRemainStopped=TRUE
o If the command prompt displays “Rollback Setting”, then the command was
unsuccessful and the configuration setting has been rolled back.
o Verify that the system registry contains the Production SQL Server Name:
[HKEY_LOCAL_MACHINE\SOFTWARE\Wow6432Node\TrendMicro\TVCS\SQLSer
ver]
o If the command is still unsuccessful, then check the parameters, network and
other configuration settings, and try executing the DBConfig tool again.
7. Set the FQDN to "windows\system32\drivers\etc\hosts" and specify the Apex Central server IP
address to map to the FQDN. (Some Apex Central services require performing a callback to
query data, so if the request is coming from Apex Central itself, the FQDN needs to be resolved
with the Apex Central server IP address. Administrators can also specify different DNS servers
for Apex Central and managed products in order to resolve the VIP for managed products and to
resolve the Apex Central server IP address for Apex Central.)
8. Configure the following settings in the "SystemConfiguration.xml" file, save changes, and close
the file.
1. \Trend Micro\Control Manager\SystemConfiguration.xml
Name Value
Name="m_strLoopBackIP” Set the value to 127.0.0.1
Name="m_strWebServer_HostName" Set the value to FQDN

Installing the Failover Architecture | June 2019
Page 8 of 16| Trend Micro Installing the Failover Architecture
9. Start the Apex Central services.
Trend Micro Apex Central
Trend Micro Management Infrastructure (TMI)
World Wide Web Pushing Service
10. Verify the Apex Central installation.
a. Register products (for example, OSCE, DDI, and DDAN ) to the Production Apex Central
server from the FQDN/L4 switch.
b. Log on to Apex Central.
c. Go to Directories > Products, select the OfficeScan (OSCE) or Deep Discovery Inspector
(DDI) or Deep Discovery Analyzer (DDAN) server, and then click Configure > Single Sign
On.
d. Go to Administration > Managed Servers > Server Registration, select the OSCE or DDI
or DDAN server, and click the link in the Server column to single sign on.
e. Ensure that the OSCE/DDI/DDAN console pages open in a browser window.
f. Create test users: "Test1" and "Test2".
g. Log on as "Test1". Organize the dashboard and then add/delete some widgets and tabs.
h. Generate the following test reports and click View to verify.
i. "TestReport1" in PDF format
j. "TestReport2" in HTML format
k. Check if the suspicious object (SO) list has been uploaded.
l. Log off from "Test1", log on as "Test2", and repeat steps for organizing the dashboard
and generating reports.
11. Stop the following services:
Trend Micro Apex Central
Trend Micro Management Infrastructure (TMI)
World Wide Web Pushing Service
Copy and back up the “One Time Sync File List” and “Schedule Replicate File List” from the Production
Apex Central. Refer to Sections 7 and 8 for the complete file lists.

Installing the Failover Architecture | June 2019
Page 9 of 16| Trend Micro Installing the Failover Architecture
Installing the Contingency Apex Central Server
Install the Contingency Apex Central:
1. Define the Standby Database location: The Standby Database can be a SQL Express database on
the Apex Central server. If you don’t want to install a SQL Express database on the Apex Central
server, you can use a remote SQL Server for the Standby Database.
2. The FQDN you use to install the Contingency Apex Central must be exactly the same as FQDN for
the Production Apex Central. The FQDN on the Contingency Apex Central must resolve the
Contingency Apex Central’s IP address, but it should not resolve the L4 switch VIP or the
Production Apex Central IP address on contingency Apex Central.
3. If the DNS server that the Contingency Apex Central is pointing to cannot resolve the FQDN with
the Contingency Apex Central IP address, then configure the FQDN in the Windows hosts file,
"windows\system32\drivers\etc\hosts", and then specify the Contingency Apex Central IP
address to map to the FQDN.
4. Ping FQDN on the contingency Apex Central, make sure the contingency Apex Central IP is
resolved.
5. Run the Apex Central installation program on the Contingency Apex Central server.
On the step of Specifying Apex Central Web Server Settings, specify the FQDN name in
the IP address. (This step is important because managed product servers use the FQDN
to connect to the Apex Central server.)
On the step of Configuring Database Information, you can choose to install the provided
SQLEXPRESS database version as the Standby Database on the Apex Central server.
NOTE: If the Standby Database server is a remote SQL Server, the SQL account requires
the “DBCreator” Server Role for Apex Central installation. After successfully installing
the remote SQL Server, the DBCreator Role can be removed from the SQL account.
6. Install the same Apex Central version, service packs, patches, and hotfixes that are installed on
the Production Apex Central.
7. Stop the following services:
Trend Micro Apex Central
Trend Micro Management Infrastructure (TMI)
World Wide Web Pushing Service

Installing the Failover Architecture | June 2019
Page 10 of 16| Trend Micro Installing the Failover Architecture
8. Configure the following settings in the "SystemConfiguration.xml" file, save changes, and
close the file.
\Trend Micro\Control Manager\SystemConfiguration.xml
Name Value
Name="m_strLoopBackIP” *If the IIS host heard has been set, please set this value to
FQDN,too
Set the value to
127.0.0.1
Name="m_strWebServer_HostName" Set the value to FQDN
Name="m_apiKey"
Set the value the same
as Production Apex
Central
9. Start the following services on the Contingency Apex Central:
Trend Micro Apex Central
Trend Micro Management Infrastructure (TMI)
World Wide Web Pushing Service
10. Using the FQDN, log on to the Contingency Apex Central and verify that all screens are working
properly.
11. Stop the following services:
Trend Micro Apex Central
Trend Micro Management Infrastructure (TMI)
World Wide Web Pushing Service
12. The Contingency Apex Central is in the Standby state (All services are stopped and Apex Central
connects to the standby database).

Installing the Failover Architecture | June 2019
Page 11 of 16| Trend Micro Installing the Failover Architecture
Switching the Production Apex Central Server
Use the following procedure to switch the Production Apex Central to a Contingency Apex Central.
1. Stop the following services on the Production Apex Central:
World Wide Web Pushing Service
2. Open Computer Management > Message Queuing > Private Queues, wait for all “Number of
Messages” and “Number of Journal Messages” are processed to 0.
3. Stop the following services on the Production Apex Central:
Trend Micro Apex Central
Trend Micro Management Infrastructure (TMI)
4. Replicate all “Schedule Replicate files” from the Production Apex Central to the Contingency Apex Central.
5. Using the DBConfig tool, transfer the Production Database to the Standby Database. (NOTE: Please set -CMServiceRemainStopped=TRUE)
6. Make sure the following services are stopped.
Trend Micro Apex Central
Trend Micro Management Infrastructure (TMI)
World Wide Web Pushing Service
7. The Production Apex Central is in the Standby state. (All services are stopped and Apex Central connects to the standby database).
8. Log on to the Contingency Apex Central Server.
9. Back up and overwrite all “One Time Sync files” and “Schedule Replicate files” copied from the Production Apex Central server.
10. Using the DBConfig tool, transfer the Standby Database to the Production Database (the Production Database can be a replicated database by SRDF, a backup file, or an instance of SQL AlwaysOn). Sample command: (Do NOT set –CMServiceRemainStopped parameter) DBConfig -DBName="db_ApexCentral" -DBAccount="sqlact" -DBPassword="sqlPwd" -Mode="SQL" -DBHost="SQLSrvName"
11. Make sure the following services are started.
Trend Micro Apex Central
Trend Micro Management Infrastructure (TMI)
World Wide Web Pushing Service

Installing the Failover Architecture | June 2019
Page 12 of 16| Trend Micro Installing the Failover Architecture
12. Log on to the current Active Apex Central console and verify that the information
matches the information from the previous Active Apex Central console. For example, you may check the following screens:
Product Directory (Directories > Products)
Log Query (Detections > Logs > Log Query)
Virtual Analyzer Suspicious Objects (Threat Intel > Virtual Analyzer Objects)
User-Defined Suspicious Objects (Threat Intel > Custom Intelligence > User-Defined Objects)
Distribution Settings (Threat Intel > Distribution Settings)
13. If this is a drill test, then check the following items previously performed on the Production Apex Central.
The registered DDI, OSCE, and DDAN servers are the same
Successfully single sign-on (SSO) to DDI, OSCE, and DDAN
Users "Test1" and "Test2" can log on and all settings are the same
View generated reports
The uploaded suspicious object list is still available and suspicious objects can still be uploaded from DDAN and deployed to OSCE/DDI
14. Switching the Production Apex Central is complete.
Patching the Apex Central Servers
If there a service pack, patch, or hotfix needs to be applied:
1. Apply the service pack, patch, or hotfix on the Production Apex Central. 2. Apply the same service pack, patch, or hotfix on the Contingency Apex Central 3. Replace Production Apex Central standby database file by Contingency Apex Central
Standby database file.
Ensure that the Production Apex Central and all Contingency Apex Central servers have the
same service packs, patches, and hotfixes.

Installing the Failover Architecture | June 2019
Page 13 of 16| Trend Micro Installing the Failover Architecture
One Time Sync File List
No File / Folder
1 \Trend Micro\CmKeyBackup\ (Folder)
2 \Trend Micro\COMMON\TMI\mrf_entity.dat
3 \Trend Micro\COMMON\TMI\mrf_server.dat
4 \Trend Micro\COMMON\TMI\mrf_SSLcert.pem
5 \Trend Micro\COMMON\TMI\mrf_SSLpri.pem
6 \Trend Micro\COMMON\TMI\TMI.cfg
7 \Trend Micro\Control Manager\Certificate\SSO_PKI_PrivateKey.pem
8 \Trend Micro\Control Manager\WebUI\download\E2EPublic.dat
9 \Trend Micro\Control Manager\WebUI\download\SSO_PKI_PublicKey.pem

Installing the Failover Architecture | June 2019
Page 14 of 16| Trend Micro Installing the Failover Architecture
Schedule Replicate File List
No File / Folder
1 \Trend Micro\Control Manager\ProductClass\ (Folder)
2 \Trend Micro\Control Manager\Agent.ini
3 \Trend Micro\Control Manager\CasServerSetting.xml
4 \Trend Micro\Control Manager\DMRegisterInfo.xml
5 \Trend Micro\Control Manager\IDMapping.xml
6 \Trend Micro\Control Manager\ProductInfo.xml
7 \Trend Micro\Control Manager\ProductInfo.dtd
8 \Trend Micro\Control Manager\ProductInfos.xml
9 \Trend Micro\Control Manager\StringTable.xml
10 \Trend Micro\Control Manager\WebUI\exports\ (Folder)
11 \Trend Micro\Control Manager\WebUI\ProductUI\ (Folder)
12 \Trend Micro\Control Manager\WebUI\WebApp\App_Data\IDMapping.xml
13 \Trend Micro\Control Manager\WebUI\WebApp\App_Data\ProductInfos.xml
14 \Trend Micro\Control Manager\WebUI\WebApp\App_Data\ProductInfos.xsd
15 \Trend Micro\Control Manager\WebUI\WebApp\App_Data\StringTable.xml
16 \Trend Micro\Control Manager\WebUI\WebApp\TreeIcons\Icons\ (Folder)
17 \Trend Micro\Control Manager\WebUI\WebApp\widget\ (Folder)
18 C:\Program Files (x86)\Trend Micro\Control Manager\WebUI\download\dlp

Installing the Failover Architecture | June 2019
Page 15 of 16| Trend Micro Installing the Failover Architecture
Evaluating the File Replication Frequency
The following actions modify system files. Consider the following actions when creating the file
replication schedule.
Registering a new product type or version, for example, a newly released OfficeScan version
Applying a service pack, patch, or hotfix
Logging on using a new user account for the first time
Generating a new report template or instance
Creating a new DLP template or identifiers
Implementing Apex Central Cascading mode (this is not related to Suspicious Object Hub mode)
No File / Folder Action
1 \Trend Micro\Control Manager\ProductClass\ (Folder)
New Product type or version registered
2 \Trend Micro\Control Manager\Agent.ini Make Apex Central Cascading
3 \Trend Micro\Control Manager\CasServerSetting.xml
Make Apex Central Cascading
4 \Trend Micro\Control Manager\DMRegisterInfo.xml
Make Apex Central Cascading
5 \Trend Micro\Control Manager\IDMapping.xml
New Product type or New Product version registered
6 \Trend Micro\Control Manager\ProductInfo.xml
New Product type or New Product version registered
7 \Trend Micro\Control Manager\ProductInfo.dtd
New Product type or New Product version registered
8 \Trend Micro\Control Manager\ProductInfos.xml
New Product type or New Product version registered
9 \Trend Micro\Control Manager\StringTable.xml
New Product type or New Product version registered
10 \Trend Micro\Control Manager\WebUI\exports\ (Folder)
New Report template/instance generated
11 \Trend Micro\Control Manager\WebUI\ProductUI\ (Folder)
New Product type or New Product version registered
12 \Trend Micro\Control Manager\WebUI\WebApp\App_Data\IDMapping.xml
New Product type or New Product version registered
13 \Trend Micro\Control Manager\WebUI\WebApp\App_Data\ProductInfos.xml
New Product type or New Product version registered

Installing the Failover Architecture | June 2019
Page 16 of 16| Trend Micro Installing the Failover Architecture
14 \Trend Micro\Control Manager\WebUI\WebApp\App_Data\ProductInfos.xsd
New Product type or New Product version registered
15 \Trend Micro\Control Manager\WebUI\WebApp\App_Data\StringTable.xml
New Product type or New Product version registered
16 \Trend Micro\Control Manager\WebUI\WebApp\TreeIcons\Icons\ (Folder)
New Product type or New Product version registered
17 \Trend Micro\Control Manager\WebUI\WebApp\widget\ (Foler)
New User Create