get document - fort lee & combined arms support ... · web viewtable of contents 1)...
TRANSCRIPT

WINTER SAFETY

Winter Safety Guide Table of Contents
1) Traffic Safety 3
Winter Driving Safety
Winter’s Shadowy Danger – Black Ice Aviation Operational Hazards 2) Cold Weather Injury Prevention 15
1) Cold Weather (know the threat)
2) Cold Weather Chart
3) Wind Chill Chart
4) The Scoop on Snow Shoveling
3) Chain Saw Safety 20
4) Fire Safety 22 Home Heating Fire Places Heaters and Stoves Fire Evacuation Plans Static Electricity/Gas Pump Fires Fire Extinguisher Safety 5) Electrical Hazards 29 Extension Cords Power Calculations Cord Basics General Lighting Safety Installation Safety Power Outages/Generator Safety Candle Safety
6) Space Heaters/Field Environment 34
7) Carbon Monoxide Poisoning 36 Symptoms, Causes, Cures
8) Recreational Safety 38
1) Hunting and Tree Stand Safety 2) Winter Sporting Activities
Skating Skiing and Snowboarding Snowshoeing
3) Snowmobile Safety Tips Don’t Drive and Ride Night Riding Ice Riding Hypothermia Snow Blindness Frost Bite Wind Chill Dress Properly
9) Holiday Safety Tips 47 Tips for responsible Drinking Food Safety Christmas Tree/Toy Safety
10) Shopping Safety/Home Security 52 If you are shopping If you are shopping with Children Secure Your Car
2
References 55
“WINTER DRIVING SAFETY”
***The Number one cause of winter driving accidents is driving too fast.***
***Motor vehicle accidents are the No. 1 cause of deaths in winter storms.***
Winter is a beautiful time of the year, especially when a fresh layer of new snow covers everything. Winter can also be a dangerous time of the year. If you plan to travel during the winter, it pays to be prepared for the unexpected. Getting stranded during a winter storm can be a matter of life and death. Following a few simple driving habits like planning ahead, driving a safe and legal speed, driving alert and sober and buckling up could ensure that you safely make it to your destination. The following provides information to help you prepare for winter driving.
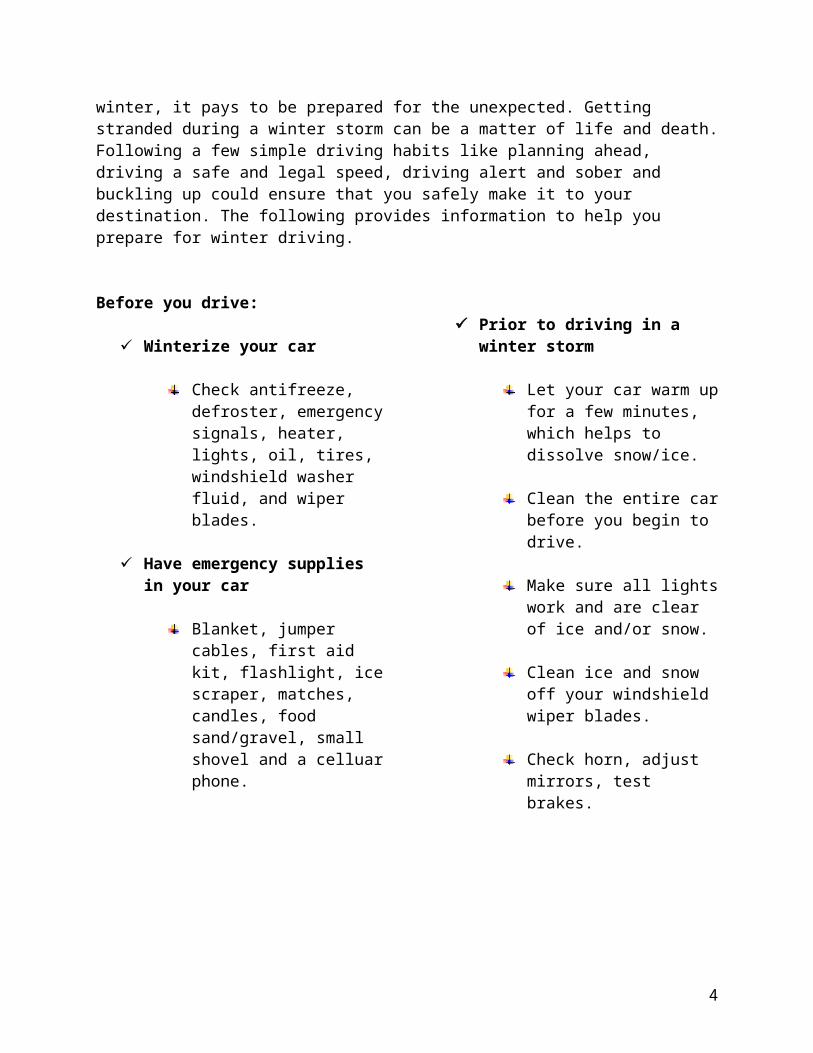
Before you drive:
Winterize your car
Check antifreeze, defroster, emergency signals, heater, lights, oil, tires, windshield washer fluid, and wiper blades.
Have emergency supplies in your car
Blanket, jumper cables, first aid kit, flashlight, ice scraper, matches, candles, food sand/gravel, small shovel and a celluar phone.
Prior to driving in a winter storm
Let your car warm up for a few minutes, which helps to dissolve snow/ice.
Clean the entire car before you begin to drive.
Make sure all lights work and are clear of ice and/or snow.
Clean ice and snow off your windshield wiper blades.
Check horn, adjust mirrors, test brakes.
3
Maintain “SPACE”
Speed – The No. 1 cause of winter driving accidents is driving too fast.
Patience and courtesy save lives.
Awareness of other vehicles and your environment is essential.
Concentration – The increased hazards of winter driving make this important
Exit – Always leave yourself an out
Following Distance
Normal (Dry Road) Driving – 3 seconds
Winter Driving – 6 or more seconds
Stopping Distance
Rain – 50% more than dry
Snow – 2x normal stopping distance
Ice – 3x normal stopping distance.
Braking
Gently tap and release brake pedal in a pumping motion.
Drivers with ABS/disk brakes should apply steady gentle pressure to the pedal – do not pump brakes
Safe Driving Skills
Skids
Front wheel drive – Slowly remove your foot from the accelerator until you feel your vehicle regain traction.
Steer in the direction that you want your front wheels to go.
Rear wheel drive – remove foot from accelerator.
Steer in the direction that you want the car to go.
If you are still skidding out of control, counter-steer until your vehicle is pointing in the right direction.
4
DO this BEFORE you leave home and/or the office

Winter’s Shadowy Danger: Black Ice
Picture yourself driving on a farm road; the one you’ve literally driven thousands of times. You practically know the layout of every turn, hill, and maybe even how many jolting potholes you encounter on your journey. But, during the cold season, one weather phenomenon can form and lay hidden in your unsuspecting path. The possibility of detection is very small, and usually comes too late. Glaze, commonly known as “black ice” contributes to tens of thousands of automobile accidents and associated deaths and injuries every year throughout the United States. It is considered to be the most significant wintertime danger to transportation.
Simply put, black ice is a thin formation that occurs when water freezes on a road surface. Because it is so thin and clear, the dark underlying road surface easily shows through, lending to its common name. The icing of a road surface can happen due to several reasons, some of which are obvious and some not. Freezing rain and drizzle are the most common forms of glazing, which most people understand to be a serious driving danger. Freezing rain is a weather phenomenon that can be predicted with reasonable accuracy, therefore, the majority of drivers who venture out in an ice storm, are aware that slow and careful travel is the
best way to go. Many choose to delay their trips until better weather.
Ice can also form on days that have been free of precipitation. These are the times that can turn what is supposed to be a smooth road trip into a not so smooth skating trip! Often after a sunny winter day, melted snow that has trickled across roadways will re-freeze into patches of ice once the sun goes down. This is especially true where roads are shaded by extensive tree cover or behind the shadow of a hill. In those areas where solar radiation may have been blocked for several hours, the air and road temperatures will be first to dip below the freezing point causing any standing water on them to freeze. Icing can also be formed on roads by the differences in the temperature and dew point between the lowest few inches of the atmosphere and the road surface. On clear and cold nights, the surface of the earth radiates heat back into space faster than the surrounding air mass. As this happens, the air just above the road will cool, and eventually reach its dew point temperature. The dew point provides a measure of the actual amount of water vapor in the air. It is the temperature to which the air must be cooled in order for that air to be saturated. When the temperature reaches the dew point in those few inches above the road surface, the air can no longer hold moisture and any
5
Cars are expendable, LIVES are not

water vapor will be forced to condense out. This will cause a layer of fine water drops to be deposited on the road surface. Because the road is below freezing, these drops will freeze to form a thin layer of clear, hard ice. Black ice can form at any temperature at or below freezing, but it is favored to form when the road surface is between 25F and 32F. In many cases of severe black icing, the actual air temperature can even be above freezing. Remember that the warmer the air, the more water it can hold, therefore, temperatures above freezing can hold more water than those below freezing. With more water vapor in the air, there is a better potential for more condensation and more ice formation on the road. Also, fog is formed in a similar manner to black ice by cooling air temperature to its dew point. Anytime you are driving on a night with fog and a temperature around or below 32F, anticipate areas of black ice.
Now that we know a little about the different types of black ice, what can be done to better prepare for it? In most cases, black ice is impossible to predict and is very hard to observe until it is encountered. By then it is too late to react. The best defense against running into black ice is to practice good winter driving skills and be aware of the temperatures, which may be affected by the time of day and other weather conditions. Was it sunny today and did any snow melt? Was it clear, cold and foggy last night? These are all good things to ask yourself
before driving in the winter. When on the road, it may help to pay attention to any changes in color or reflectivity of a road surface. Generally, it’s a good idea to slow down and be ready for possible icy roads anytime the temperature is below freezing and the roads are wet. Sometimes, if you are traveling on a wet road, and suddenly it looks dry and clear, this could be black ice. Sparkling or shiny road surfaces could be frost or black ice. Because cold air can circulate around bridges and overpasses, they freeze first and may have black ice on them.
Remember that it takes twice as much distance to stop on ice than under normal driving circumstances, so be prepared to slow down early before intersections and other scheduled stops. Obey posted speed limits and keep a safe two to three car lengths distance between you and other vehicles. If you see a patch of black ice before you reach it, try to slow down on the approach, but never brake on the ice. This will put your car into a skid. Try to coast through the area. Four wheel or all wheel drive won’t provide any additional traction benefit on ice, so don’t count on it. Always be sure to plan ahead for your trip. NOAA Weather Radio, the voice of the National Weather Service, is a good way to get the last weather information. Your preparation can save the lives of you, your family and other motorists.
6

Aviation Operational Hazards:
The following is a compilation of risk factors to consider with flight operations.
These factors should be considered prior to and during flight.
Environment
Wind, sand, dust, snow WX, brownouts, and whiteouts. Operating in harsh flight environments certainly increases the risk of an accident and is exacerbated through lack of preparedness, poor decision-making, and inexperience. There is no substitute for frequent and realistic training in like environments. Know your limitations.
Weather Issues
VRF vs. IFR: Intentional flight into adverse weather conditions, improper flight planning, inadequate in-flight decision making, and failure to maintain adequate terrain clearance are factors that will increase the probability of aviation accidents occurring during winter months. A Controlled Flight into Terrain (CFIT) accidents is likely to occur when a crew elects to continue VFR flights after encountering instrument meteorological conditions or low ceiling and limited visibility. Brownouts and Whiteouts: Whiteouts generally occur over an unbroken snow cover or where loosely packed snow accumulates. Aircraft landing, taking off, or especially when hovering may encounter this phenomena as visibility is significantly decreased and the aircraft is engulfed in blowing snow. Brownout is a similar phenomena involving blowing sand or dust. Pilots must be aware and anticipate these phenomena. Moreover, pilots must adequately train in the proper techniques for operating in these types of environments. Likewise, pilots must exercise extreme caution and judgment regarding mission accomplishment and safety.
7

Restrictions to Visibility: Rain showers, low clouds, fog, and in selective parts of the world, blowing sand and dust. All of these weather phenomena restrict the pilot’s ability to maintain visual reference and situational awareness. Sustained or frequent operations in this type of environment significantly increase the potential for weather related accidents and must be avoided. Strict adherence to ceiling and visibility requirements outlined in the applicable regulations is imperative. Leaders must brief weather abort criteria and Emergency/Vertical Helicopter Instrument Recovery Procedures (E/VHIRP) when weather is a factor.
Icing: Small aircraft do not deal well with ice accumulations, even in seemingly insignificant quantities. Once the airfoil is covered with even a thin layer of ice, lift is lost. Rime ice is particularly hazardous. It forms rapidly and causes and airfoil to change shape and lose lift. Clear ice is difficult to see, it is virtually transparent and flows back forming a clear glaze over the aircraft structure. You should never run-up or take off with frost, snow, or ice accumulation on your aircraft. Asymmetrical ice shedding may cause severe vibrations, damage the aircraft, and is a danger to ground personnel. Likewise, if your aircraft is not certified for flight into known icing conditions, it is important to stay out of such conditions. Your aircraft operator’s manual lists those things you need to do to prepare the aircraft for winter operations.
Ground Handling and Movement of Aircraft: Moving and parking aircraft on the flight line, taxing, run-ups, and refueling is more difficult when the surface is covered with ice and snow. Aviation crewmembers
and maintenance support personnel must be aware of the hazards, exercise extreme caution and ensure movement is slower and more deliberate in this type of environment. Maintaining situational awareness is also relevant to this particular hazard. Conducting walk-a-rounds, adhering to speed limits for towing, and always using the required number of ground guides will help eliminate this type hazard.
Maintenance and Pre-Flight: In addition to limited hours of daylight, another human factor element that must be considered is performing adequate maintenance and thorough aircraft pre-flights during temperature extremes. The practical amount of exposure time to the elements while performing these tasks is severely limited. Warming tents, hangars, clamshells, and work breaks must be used in order to reduce exposure time and risk of shortcuts.
ALSE: Aviation Life Support Equipment must be inspected, functional, and made available to crewmembers during missions conducted in temperature extremes. Forced landings and accidents may be exacerbated in terms of severity without proper precautions being taken to mitigate this hazard.Obstructions: (Tree & Wires): Unfortunately, the long-term aviation accident experience indicates our propensity for running into trees, wires and other obstructions. This trend must be curtailed. Aviation leaders at every level must emphasize this fact during safety briefings, mission briefs, classroom, and in the cockpit. We cannot continue to lose personnel and equipment to this type of preventable accident.
Blade Strikes: (Objects vs. M/R & T/R; M/R & T/R vs. Objects): We must always
8

maintain situational awareness while operating in and around running aircraft. Aviation personnel must police areas for FOD i.e., aircraft parts such as doors, covers and other debris. Likewise, pilots must always maintain sufficient clearance while rotor blades are turning. We must reemphasize this requirement to crewmembers and maintenance personnel.
Airfields and FARPS: Airfields and FARPS must be established and maintained IAW applicable regulations. Both fall into disrepair as a result of complacency. Aviation ASOs must survey these sites and maintain current hazard logs regarding safety issues. Reintegration into those locations that have been temporarily closed may require an additional measure of preparation and maintenance.
General Petroleum Safety
Handling petroleum products presents unique safety hazards. However, handling POL products correctly is very safe. Explosions and fires caused by ignition of combustible mixtures of POL vapors and air cause some of the most serious POL-related accidents. Thus, controlling POL vapors formation and ignition sources at all times is critical. Safety training is the key to preventing accidents. Safety training must start during the soldier’s initial entry training and it must continue throughout his military service. All fuel handlers should know about petroleum. They must also know the safety principles for handling and using petroleum products. In addition, they should know the self-care techniques, fire prevention, and first aid and emergency safety procedures.
Ignition Sources
Fires and explosions need an ignition source to start. Petroleum storage and handling sites
require constant monitoring to detect and eliminate ignition sources. Some common ignition sources are as follows.
Smoking and Matches: Smoking and matches are the greatest single cause of fires. Units operating Class III supply points should prohibit any smoking-related materials in the supply point. Collect all smoking materials at the entrance checkpoint. Return these items at the exit checkpoint. Post NO SMOKING WITHIN 50 FEET signs at all petroleum handling, storage, and transfer areas.
Poor Housekeeping: Relatively small heat sources easily ignite trash, rags, scrap wood and other such items. Place such materials in closed metal containers. Dispose of them appropriately each day. Use only fire resistant wall lockers cupboards for storage in petroleum supply areas. Never store newspapers or rags in them. Discard petroleum waste in an environmentally safe manner IAW local procedures. Label safety cans or other flammable liquid waste containers with a flash point below 100o F (37.8o C) (such as gasoline or JP-4) IAW 49CFR Part 172. Do not use waste cans larger than 10 gallons. Take steps to control grass and weeds in POL supply points.
Mechanical or Friction Sparks: Friction or impact between metals and other hard substances can cause sparks. These sparks can ignite flammable products and rubbish. Carefully control spark sources such as tools and grinding wheels around petroleum products and vapors.
9

Non-sparking tools may cause sparks in certain uses. If available, use them; however, treat them as a potential source of spark also.
Electrical Equipment: Electrical equipment and wires create fire hazards when they produce exposed currents (arcs and sparks) or when they create excessive amounts of heat. An arc is a continuous current stream through the air (similar to lighting). Operating knife switches and circuit breakers often produce arcs. The rotating parts of motors, generators, and similar machines produce arcs and sparks when operating. Overloaded electrical circuits produce hazards in two ways. One is by the large amounts of heat that they produce. This heat may be enough to ignite a petroleum vapor mixture. The second is by arcing through worn or thin insulation. An oil-insulated switch or circuit breaker, designed to quench arcs from interrupted current, becomes a hazard when overloaded because the insulating oil becomes vaporized. Never put a penny or other conductive materials on the back of a blown plug fuse. A circuit overload can result. Likewise, never use fuses with a higher capacity than the circuit needs. Fixed and portable lights, generators, power tools, and extension cords present the same hazards. Use only explosion-proof electrical equipment where flammable vapors exist. This equipment should comply with Underwriters’ Laboratory Incorporated standards. Also, all wiring and grounding must comply with the National Electric Code.
Permit only licensed operators to operate generators. Allow absolutely no one to work on a vehicle’s or aircraft’s electrical system during refueling operations. This includes touching or moving batteries or using battery chargers. Allow vehicle or aircraft radios to be on to receive messages during refueling. However, do not allow radio transmissions due to the danger of arcing.
Static Electricity: Static electricity is an electrical charge built up in a material by friction with another electrically dissimilar material. You can create static electricity on yourself by rubbing your feet across a carpet. On a low humidity day, you can dissipate the charge by touching something metal such as a doorknob or car door. This produces a spark and a shock to you as the charge dissipates. In the military, the flow of petroleum through hoses and pumps and into and out of metal tanks produces static electricity. Also, the flow of steam, air, and other gases through tank, pump and hose systems produces these charges. Aircraft or vehicles moving through the air or along roads produce static electrical buildup into a charge that can spark. Petroleum handlers should assume the presence of static electricity during all petroleum transfer operations. They can prevent sparking by two methods: bonding and grounding. Operator must properly bond and ground all equipment involved in a petroleum transfer operation before the start of the operation. Effective bonding and grounding must continue for the entire operation.
10

Petroleum handlers should inspect ground wires and rods daily. They should repair any damage immediately. They should test the grounding systems every five years. They should also test it after repairing damage. Static drag chains used on civilian vehicles to dissipate static electricity are not authorized on military vehicles.
Spontaneous Heating: Spontaneous heating of a combustible material takes place when its characteristics and the right environmental conditions cause a heat-producing chemical reaction. The heat can build to the point where the material ignites on its own. This is called spontaneous combustion. It may happen even if the material is not exposed to an external heat source. One common source of spontaneous heating is oil-or paint soaked waste or rags, particularly those soaked with linseed oil and paint dryers. Petroleum handlers should consult MSDSs for the product they handle to see if they are subject to spontaneous heating and combustion, and if so, under what conditions. Many factors affect the start and speed spontaneous heating and combustion. The process may take seconds or weeks with the same end result. Oxygen in the air or in oxygen producing chemicals (oxidizers) accelerates the process. Here are several ways to help prevent spontaneous heating and combustion.
Closely follow storage and safety instructions on all MSDSs.
Keep storage and handling areas for petroleum and petroleum-based items properly ventilated.
Do not use lockers or supply cupboard to store oily waste and rags. Instead, place them in airtight metal containers. Discard them as soon as possible IAW environmentally-safe local procedures.
Welding and Cutting: All welding methods present fire hazards. Welding-associated heat causes petroleum vaporization. Welding throws off molten metal that can ignite the vapors or liquid petroleum. Welding equipment’s open flame can ignite vapors. Welding may not ignite vapors immediately; however, it can start smoldering fires in materials near the area. Eliminating these hazards completely is difficult or impossible. However, those involved in welding near petroleum products or equipment must closely control the welding process to prevent fires or explosions. Thoroughly clean and reduce vapors to acceptable safety levels in storage tanks, tank cars, tank vehicles, drums, and vehicle fuel tanks before cutting or welding them. Check local policies for doing such work.
11

Usually you must get a permit from the local fire marshal before starting.
Static Electricity Control Measures
Static electricity is impossible to eliminate. However, there are several safety measures for controlling it and its effects. Petroleum handlers should always assume that static electricity is present during all phases of operations. This includes long-term storage. Sparking (and a subsequent fire and explosion) from static electricity is a real and ever-present danger in petroleum transfer operations. The two primary static electricity control methods are bonding and grounding.
Bonding: Bonding is connecting two electrically conductive objects to equalize electrical potential (static charges) on them. Bonding does not dissipate static electricity. It equalizes the charge on two objects to stop the sparking in the presence of flammable vapors. This will most likely occur when a vehicle or aircraft is being refueled. In this case, the fuel handler should bond the refueling vehicle to the vehicle being fueled. Do this by touching the fuel nozzle to the vehicle before the nozzle dust cap or vehicle fuel tank cap is
removed. Maintain the bond until the refuel operation is completed and the nozzle dust cap and vehicle fuel cap are replaced. This will reduce vapors in case a spark occurs when the nozzle touches. Bond all equipment being used in a petroleum handling operation.
Grounding: The earth, particularly soft damp earth, can accept electrical charges. The charges then dissipate harmlessly. To ground equipment, you must provide a conductive electrical path into the ground. This prevents a static charge from collecting on the surface of equipment where it could discharge as a spark. Fuel handlers form this path by connecting a conductive cable from the piece of equipment to a conductive metal rod driven into the earth to the level of permanent ground moisture. The connection to the equipment must be to a clean unpainted, non-oxidized metal surface. Frozen soil (a particular problem in the arctic regions) makes it difficult to get a good ground. Fuel handlers may need to drive in grounding rods at several different locations to as great a depth as possible to ground a single piece of equipment. Another solution is to try to locate a grounding system near a heat source. If there
12

are metal buildings or underground pipes nearby, a ground connection may be made to them. Rocky or sandy soils are poor grounds because they have low conductivity. Chemicals can be used to condition the soil and raise it conductivity. Magnesium sulfate (Epson salts), copper sulfate (blue vitriol), calcium chloride, sodium chloride (common table salt), and potassium nitrate (saltpeter) are some of the chemicals used for soils conditioning. Table salt will probably be the easiest to get in the field. To use salt, prepare a grounding site by digging a hole about 1 foot deep and 3 feet across. Mix 5 pounds of salt with 5 gallons of water. Pour the mixture into the hole, and allow it to seep in. Install the ground rod and wire, and keep the soil around the rod moist. Ground rods are usually made of galvanized steel, or copper-weld steel.
Grounding and Bonding Teat Methods
No quick or easy way exists to test a ground’s
adequacy. The required test equipment is bulky and expensive. For
these reasons, approved grounding and bonding
methods and levels that meet the Army’s various
operational needs are given below.
Method 1: Equipment is grounded to a rod with a measured resistance to or less than 10,000 ohms. These rod (or rods) ground both the refueling system or tanker and the vehicle or aircraft being refueled. In addition, the fuel handler bonds the refueling nozzle to the aircraft or vehicle he is refueling. Method 1 is the only acceptable grounding method, unless granted exceptions by appropriate authorities, at any fixed airfield or refueling point. It is the safest method.
Method 2: In some instances, equipment is not available to test resistance to ground. In such cases, fuel handlers can ground refueling equipment to untested grounding systems, subject to certain constraints. The unit commander authorizes this method when the location, tactical situation, or type of operation makes it impossible to test ground rods or to mark them in the manner appropriate for fixed rods. The grounding rod or rods are driven to a specific depth in the ground depending on the type of soil at the site. The depth is determined by the normal depth of permanent ground
13

moisture in the various soil types. The fuel handler grounds the refueler and the vehicle or aircraft being refueled are then grounded, and the nozzle is bonded to the aircraft. Use this method only when it is absolutely impossible to use the first method.
Method 3: In situations
where the climate, terrain, or tactical condition make it impossible to secure a satisfactory ground rod, the authorizing commander may waive requirements to ground the aircraft or vehicle being refueled and fuel dispenser (system or refueler). The authorizing commander is the commander one level above the operating unit. However, he cannot waive the requirement to bond the fuel dispenser to the vehicle or aircraft under any circumstances. Method 3 relies on bonding alone. A bond is made between the aircraft and the refueling system or refueler and between the nozzle and the aircraft. A contact between an un-bonded object and the system could produce a spark that could set off an explosion or fire. This is the least desirable method since it does nothing to dissipate electrical charges (ground).
Static Electricity on Personnel and Clothing
The human body conducts electricity. In a very dry atmosphere, a person can build and hold a charge of several thousand volts when walking over rugs or working in certain manufacturing operations.
Charge Formation: Outer clothing, especially if it is made of wool or synthetic fiber, builds a charge not only by absorbing part of the body charge but also by rubbing against the body or underwear. When the wearer takes the charged clothes off or moves them away from the body, the electrical tension or voltage increases to the danger point. If the clothes are wet with fuel, they may burst into flames when removed due to the dissipation of static electricity. Exposed nails on worn footwear can also cause sparks. This is a serious danger since fuel spills in refueling areas are common and fuel vapors near the ground ignite easily.
Safety Measures: Before operating aircraft or vehicle fuel ports or doing any other operation that would let fuel vapors escape into the air, fuel handlers should bond themselves to the container by taking hold of it with a bare hand. If it is an aircraft or piece of metal equipment, they should take hold of a bare metal part with both hands for a few seconds. Although this type of bonding will not completely discharge static electricity, it will equalize the charge of the body with the charge on the equipment. Do not remove any piece of clothing within 50 feet of a refueling operation or in an area where a flammable vapor-air mixture may exist. Do not enter a flammable atmosphere after removing a
14

garment. Wait at least 10 minutes before carrying the garment into such an atmosphere. If a fuel handler gets fuel on his clothes, he should leave the refueling areas as soon as refueling is completed. He should then wet the clothes with water before taking them off. If there is not enough water at the site to wet the clothes thoroughly, he should ground himself to a piece of grounded equipment by taking hold of it before taking off the clothes. A skin
irritation from fuel is not fatal; the fire that may follow a static discharge from clothes can be.
If you don’t know the threat, you really can’t fight a battle well. The threat of cold weather is no exception; many generals have lost the battle of the cold. Napoleon learned this in 1812 when, during his retreat from Russia, he lost 250,000 soldiers as a result of the cold. In the Crimean War, (1852-1856), 5,215 French soldiers succumbed to the cold – 1,178 died. During the same war at the battle of Sevastepol, 2,800 British soldiers suffered horrible cold weather injuries – 900 died.
Things didn’t get much better early in the 20th century. During World War I, the British had 115,000 cases of all types of cold injuries. During the Dardanelles Campaign, the British had 14,500 cold weather casualties. In World War II, the Germans failed to learn from Napoleon. On the Eastern Front between December 1941 and January 1942, 100,000 soldiers suffered frostbite – 15,000 of those required amputations.
The U.S. Army has not been immune. During World War II, records show 46,000 cold injuries in the European theater from autumn 1944 to spring 1945. In the Korean War, it is estimated that nearly 10 percent of all wounds were cold injuries.
The good news is that we learned valuable lessons from those incidents. Today we have better equipment and training: cold injuries, even during initial deployment to places like Bosnia and Kosovo, are rare indeed. However, they will stay rare only if you know the threat.
That’s when a leader’s job of protecting soldiers gets tough. Leaders must watch for early signs of cold weather stress in their soldiers.
Plan for the coldThe most important thing is planning for the cold. Make sure you have accurate weather information for the area and time of the mission. Be particularly aware of rain, snow
15

and winds (wet conditions and wind-chill greatly increase chance of injury). Ensure soldiers have appropriate cold weather clothing. If the tactical situation permits, use covered vehicles for troop transport. Have warming tents or areas available if possible. Have warm food and drinks on hand.
Wear the right clothes the right way:The most important individual preventive measure is the proper wearing of cold weather clothing and boots. Some soldiers think wearing every article of cold weather clothing issued is the way to go. Wrong! This can cause overheating and dehydration, or restrict circulation in the extremities which can increase the risk of frostbite. All cold weather clothing should be worn loose and in layers. This allows for insulation by air trapped between the layers. Socks should be changed frequently and boots rotated. Proper wear of boots is important. You don’t wear jungle boots in the snow, and you shouldn’t wear intermediate cold weather boots (Gore-TexTM lined, like Matterhorn boots) indoors and out, year round. Wet or damp boots need to be dried with warm air whenever possible. If boots are removed at night and moisture in them freezes, it can be just like sticking your feet in ice cubes the next day – a perfect set-up for a cold injury.
It is important to protect the hands and fingers by wearing proper gloves. Nomex aviator gloves may be light and flexible and look cool, but they are designed to protect from fires, not extreme cold, and will do little to protect your hands when they are wet. Unless specially authorized, they should not be worn.
Other contributing factors and preventive techniques
By knowing some of the other factors that contribute to or prevent cold injury, you can further protect yourself.
Previous cold injuries: Soldiers with previous cold injuries are more susceptible to another one. These soldiers must be identified, and first-line supervisors should monitor them closely
Tobacco: Nicotine, regardless if it comes from a cigarette, snuff, pipe, or cigar causes blood vessels to constrict. This is particularly dangerous in the hands and feet and can lead to, or worsen, a cold.
Alcohol & caffeine: These can lead to increased urination, and subsequent dehydration.
Meals: If you skip meals, the first thing the body does is to slow its metabolism. Slower metabolism means less heat production and increased chance of cold injury.
Activity: Huddling up and not moving is the wrong thing to do. The more you move, the more heat
16

you produce. Decreased activity decreases the time it takes to get an injury.
Buddy system: The buddy system is an effective tool to help prevent injuries if soldiers are trained to know what to look for.
Self-checks: A simple self-check is to pinch the fingernail and watch how fast the blood returns to them. The slower the return, the higher the potential for a cold injury to the fingers and toes.
Prevention is key: All cold weather injuries are preventable! Prevention is the responsibility of leaders at all levels, as well as the individual soldier. We have learned the lessons of un-preparedness from soldiers who have gone before us. Cold injuries are always a threat in cold environments; however, only by proper planning and training for cold weather operations can we beat it.
The following chart provides vital and useful information that may be used in an effort to prevent and/or treat those injuries that are associated with cold weather.
17

Wind chill in many cases is a contributing factor and plays a direct role in cold-related injuries. The chart below provides information on wind and temperatures as they relate to cold weather injury.
18

THE SCOOP ABOUT SNOW SHOVELING
19

Shoveling snow can be dangerous. Each year, this event causes untold numbers of minor and in some cases major fatal injuries. The following tips can help you get a handle on safe shoveling.
Individuals over the age of 40, or those who are relatively inactive, should be especially careful. If you have a history of heart trouble, do not shovel without a doctor’s permission.
Take it slow! Shoveling (like lifting weights) can raise your heart rate and blood pressure dramatically, so pace yourself. Be sure to stretch and warm up before taking on the task.
Try to shovel fresh snow. Freshly fallen, powdery snow is easier to shovel than the wet, packed-down variety
Push the snow as you shovel. It’s easier on your back than lifting the snow out of the way.
Do not pick up too much at once. Use a small shovel, or fill only one-fourth or one-half of a large one.
Lift with your legs [bent] not your back. Keep your back straight. By bending and “sitting” into the movement, you’ll keep your spine upright and less stressed. Your shoulders, torso and thighs can do the work for you.
Do not work to the point of exhaustion. If you run out of breathe, take a break. If you feel tightness in your chest, stop immediately.
Dress warmly. Remember that extremities, such as nose, ears, hands and feet, need extra attention during winter’s cold. Wear a turtleneck sweater, cap, face protection, mittens, wool socks and waterproof boots.
20
Chain Saw SafetyA woodsman quickly reduces a large tree to manageable pieces. Inexperienced chain saw operators can gain some of these skills with training and using safe, efficient cutting practices. Even seasoned woodcutters should revise techniques that are hazardous. One analysis of chain saw accidents revealed that 70 percent of those injured had more than one year’s experience. To avoid injuries, possibly even death, practice safe woodcutting while clearing, thinning, cutting firewood or cleaning up trees downed by a storm. You should be well prepared before going into the woods. Cutting firewood, thinning timber stands or clearing is worthwhile and rewarding if done properly, but they can also be dangerous. Felling, limbing, bucking and trimming trees are hazardous tasks if not done carefully. This fact sheet gives basic precautions for reducing common woodcutting hazards. Each year a number of serious injuries to operators can be prevented by following fairly simple precautions. Preparing to Use the Saw
You should be well-prepared before using a chainsaw. Know how to operate the saw before you use it. Read and understand the operator’s manual. Observe an experienced
operator in action. Then use a saw for a period of time with supervision. Obtain the following personal protection while sawing.
A hard hat to protect your head from falling limbs or branches. The best helmets have a face guard
Safety glasses or goggles to prevent injury from flying wood chips. Wear these during wood splitting also, to preserve your eyesight.
Ear muffs of ear plugs to protect ears from permanent injury. Noise from some gasoline-powered chain saws can exceed 100 decibels.
Lightweight gloves, preferably leather, to protect hands from abrasions and cuts.
Heavy work boots or shoes with high tops and steel toes.
Trim-fitting clothing free of ragged edges. Loose clothing will readily snag on limbs or get caught in the saw. Woodcutter’s chaps are recommended to give leg protection during a mishap.
Fueling the Saw
21

Good fire safety practices are necessary when refueling the chain saw. Refuel the saw in an open area after it has cooled, at least 10 feet away from where you wish to restart the saw and resume cutting. Fuel the saw at least 20 feet away from fires and lighted cigarettes. Use proper funnels and spouts to prevent spills. Wipe the saw dry of any spilled fuel before cranking it.
Starting the Saw
Place the saw on a clear, firm, flat surface as close to the work area as possible. Get a good footing. Follow the owner’s manual recommendation for starting the chain saw. Place your foot in the handle to restrain the saw if designed with this intention. Never start the saw on your knee; too many experienced woodsmen have slipped and cut their legs.
Felling the Tree
Plan a safe approach to cutting the tree. Size up the tree. Note the wind and the way the tree is leaning. If the tree is leaning, try to fell the tree in that direction when the wind is not blowing against it. If you are inexperienced, try to fell only trees that will fall in a predictable, safe direction. Examine trees for loose, dead limbs before felling. Loose limbs that fall onto the tree cutter are a common cause of serious injuries and fatalities. Either remove the limb first or fell the tree from a position where the limb could not strike you if it was dislodged. Clear a safe work area around the base of the tree. Remove limbs, underbrush and other obstructions. Be sure to have several
open pathways away from the tree for an escape route when the tree begins to fall. Be sure that clearance in the intended direction is adequate for the tree to fall completely to the ground. A lodged tree is very dangerous. Experienced loggers are often killed by trees that hang up or snag in adjacent trees. A tree springing back from the weight of a falling tree can whip a broken limb toward the cutter with tremendous speed
Splitting the Wood
Splitting wood is a skill that improves with experience. Having the proper tools makes the job easier. Tools used to split firewood include a splitting ax, a sledgehammer, a splitting maul and wedges.
The quickest way to split small, easy-to-split pieces is with an ax. An ax can get stuck, however, in larger pieces. A splitting maul makes the job easier. A splitting maul is a combination of an ax and a maul, with a wedge on one side and a hammer on the other. Use the wedge side just as you would an ax. The broader wedge keeps the blade from jamming as easily in wood. The hammer side can be used to pound the occasional wedge. You may need a sledgehammer and wedges for larger pieces that are hard to split.
Felling trees, cutting firewood and operating a chain saw have a high risk of injury. Anyone near these activities should be alert to the hazards and communicate intentions. Use a sharp chain saw, follow safe practices, maintain clear escape routes and plan ahead to work safely and profitably.
22

According to the National Fire Protection Association, home fires cause more than 4,000 deaths and tens of thousands of injuries each year in the United States. Many of those incidents are caused from fireplaces, space heaters, and stoves. Any fuel-burning system should be serviced by a professional at the beginning of the heating season to make sure that all systems are operating properly. The damper, vents, and chimney should be checked regularly to ensure proper operation. And always keep a fire extinguisher handy wherever there is a risk of fire. Here are some other suggestions for keeping the home fires safe.
Fire Places
Burn only wood. Paper or pine boughs can float out the chimney and ignite your roof or neighboring homes. Also, plastic, charcoal or Styrofoam can produce toxic gases!
Always use a sturdy screen when fireplaces are in use.
Never close the damper with hot ashes in the fireplace and be sure the fire is out before retiring for the evening.
Follow the directions on the package if you use man-made logs. Never break a man-made log apart to quicken the fire.
Portable Space Heaters
Be sure your heater is in good working condition. All room heaters need frequent checkups and cleaning. A dirty or neglected heater is a critical fire hazard.
Maintain adequate clearance (at least 3 feet) in all directions around space heaters.
Never leave an operating heater unattended, especially near children and pets.
Never dry clothes or other combustibles near heaters.
Check electric heaters for frayed wires and evidence of overheating.
23

Kerosene Heaters
Use only water-clear 1-K grade kerosene. The wrong fuel could burn hotter than equipment’s design limits.
Never use gasoline. Even small amounts of gasoline or other volatile fuels or solvents mixed with kerosene can substantially increase the risk of a fire or an explosion.
Never refuel the heater inside the home. Fill the tank outdoors, away from combustible materials, and only after the heater has been turned off and allowed to cool. Do not fill the tank above the FULL mark. The space above the FULL mark is to allow for expansion without causing leakage when the heater is operating. Wipe up fuel spills immediately.
In case of a flare-up, activate the manual shut-off switch. If this does not extinguish the fire, leave the house immediately and call the fire department. Don’t move the heater or use water or a
blanket to stop the fire.
Use only in well-vented rooms, and open an outside window approximately one inch to permit fresh air to effectively dilute the
pollutants below a level of concern.
Always keep the wick clean and properly adjusted according to the manufacturer’s instructions.
Stoves (wood and gas)
Be sure the stove bears the label of a recognized testing laboratory and meets local fire codes.
Follow the manufacturer’s recommendations for proper installation, use, and maintenance.
Periodically inspect and clean the chimney connections and flues.
Never use a gas range or an oven to heat your home. Any un-vented, fuel-burning appliance is capable of producing high levels of carbon monoxide.
Check with local fire department and code officials before installing a wood stove.
Fire Evacuation Plan
Install smoke detector. Test them monthly and change the batteries yearly in models requiring them.
24

Make an escape plan. There’s no time to waste in the fear, darkness, confusion, blinding smoke, and searing heat of a home fire. Plan ahead and at least twice a year; practice your fire-safety plan. Run some of the drills in the darkness. Make sure plans include knowing two ways out of every room, especially bedrooms.
Get out fast. Don’t stop to do anything. Don’t stop to call the fire department. Do that from a neighbor’s house. Don’t try to take possessions, just leave.
Stay low. Crawl low under smoke because it contains deadly gases, which rise and fill rooms from the top down. The best air will be 12 to 24 inches off the floor.
Close all doors. If you get trapped, close doors between you and the fire. Stuff the cracks around doors and cover vents to keep the smoke out. Wait at a window and signal for help (if it’s dark, use a flashlight). If
there’s a phone in the room where you are trapped, call the fire department and tell them exactly where you are.
Test every door. Before opening a door, make sure there’s no fire on the other side. Kneel or crouch at the door, reach up high, and use the back of your hand to touch the door. Also touch the doorknob and the space between the door and the frame. If any of these areas feel hot, use another way out. If everything feels cool, brace your shoulder against the door and open it carefully, being ready to slam it shut if heat or smoke rushes in. As you leave, close all doors behind you, which will slow down the spread of fire and smoke.
Don’t use elevators. In an apartment or office building, use stairways to leave the building. Never get in an elevator during fire; it may stop between floors or even take you to the floor where the fire is burning.
25
Static Electricity/Gas Pump FiresHave you noticed the signs on gas pumps about the dangers of static electricity while refueling your car? These warnings are not a gimmick. Static electricity can spark a fire or explosion so consumers need to be careful and heed the warnings.
Static electricity is an electric charge caused by an imbalance of electrons on the surface of a material. It is most commonly caused by the contact and separation of materials. The area of contact, the speed of the separation, relative humidity and other factors determine the amount of charge created. One example of this is a person walking across a carpeted floor. Static electricity is generated as the shoe soles contact and separate from the carpet.
“Static electricity can build up when a person exits and re-enters a vehicle, particularly in cool and dry weather conditions.”
“When you exit and re-enter your vehicle while refueling, there is the potential for sufficient static electricity to build up that a spark can discharge between your body and the fuel nozzle. In rare circumstances, the spark can ignite gasoline vapors around the fill spout, causing a brief flash fire.”
Once vapors ignite, the fire will continue until the fuel supply is shut off. In most
cases, damage and injuries are minor, but serious personal injury and major property damage may occur when the fuel supply from the dispenser is not stopped.
In most cases, when people pull into a gas station to refuel a vehicle, they open the car door, slide out of the seat, open the fuel pipe cover of the vehicle, touch the nozzle on the gas pump, and perhaps touch the pump to use a credit card – all before they insert the nozzle into the filler pipe. Any static charge that was picked up in the car is dissipated several times.
A new static charge can be picked up if you get back into the car after the refueling has started. The synthetic materials of the car seats and clothing add to the possibility of picking up a static charge. If you don’t touch metal before returning to the nozzle and fuel pipe, that static charge can be transferred when you touch the nozzle, thus creating the potential for a flash fire.
According to the Petroleum Equipment Institute there are three causes of static electricity fires at gas pumps:
50 percent are caused when a person returns to a vehicle during refueling and doesn’t shut the door or touch other metal when leaving the car to
26

remove gas pump nozzle from the car’s fuel pipe.
29 percent are caused when a person unscrews the gas cap.
21 percent occur for other reasons
There are several theories about why static fires at gas pumps are increasing. One is the almost universal switch to self-serve pumps, which requires millions of people who are unfamiliar with the volatility of gasoline to handle it once or twice a week.
Also, today’s vehicles have more electronics – CD players, geopositioning systems, satellite radios, cruise control, on-board diagnostics and electronically controlled fuel injection. These elements combined with nylon seat covers could create more static.
Other theories include the use of cold weather formulated fuels that are more volatile, tires made with less carbon and more silica, having fill pipe cover releases inside the vehicle and automobile parts made of dissimilar materials such as plastic and metal.
If people will follow the following safety guidelines when refueling, they will reduce the chances for sparking a fire.
Always turn off your vehicle while refueling.
Stay near the vehicle fueling point during the process.
Never smoke, light matches or use lighters while refueling.
Don’t get back into the vehicle while refueling – even when using the nozzle’s automatic hold-open latch. If you must re-enter the vehicle, discharge static electricity build up when you get out by touching the outside metal portion of the vehicle, away from the filling point, before attempting to remove the nozzle.
Don’t overfill or top off your tank. The fuel dispenser will shut off automatically when the tank is full.
27

The time to have knowledge of fire extinguisher use is not when a fire emergency occurs. The following information is provided for your education and protection.
Types of Fires
Class “A” - Trash Wood Paper
- Wood- Cloth- Paper - Rubber- Many Plastics
Class “B” - Liquids Grease
- Oil- Grease- Tar- Oil-based- Paint- Lacquer- Flammable- Gases
Class “C” – Energized Electrical Equipment
Class “D” – Combustible
- Magnesium - Sodium- Potassium- Titanium- Zirconium- Other flammable metals
Fire Extinguisher Types
Pressurized Water
- Class “A” fires only- 2.5 gal. of water at 150-175
psi (up to 1 minute discharge time)
- Has pressure gauge to allow visual capacity check
- 30-40 ft. maximum effective range
- Can be started and stopped as necessary
- Extinguishes by Cooling burning material below the ignition point
Multipurpose Dry Chemical
- Class “A”, “B”, or “C” fires- 2.5-2.0 lb. dry chemical
(ammonium phosphate) pressurized to 50-200 psi by nitrogen gas (8-25 seconds discharge time)
- Has pressure gauge to allow visual capacity check
- 5-20 ft. maximum effective range
- Extinguishes by smoldering burning materials
Wet Chemical
- Class “A”, “C”, and “K” fires- 1.5 gal. of stored pressure
PRX wet chemical
28

- extinguishing agent (40 sec. discharge time)
- 10-12 ft. maximum effective range
- On class “K” fires, don’t use until after extinguishing system has activated
- Extinguishes by cooling and forming foam blanket to prevent re-ignition
Halon
- Class “A”, “B”, or “C” fires (smaller sizes ineffective against Class “A”).
- 9-17 lb. Halon 1121 (pressurized liquid) released as vapor (8-18 seconds discharge time).
- Has pressure gauge to allow visual capacity check.
- 9-16 ft. maximum effective range
- Works best in confined area-ideal for electronics fire due to lack of residue
- Extinguishes by smoldering burning materials
- Fumes toxic if inhaled- Halon is ozone depleting
chemical production halted in Jan. 94
Carbon Dioxide
- Class “B” or “C” fires- 2.5-100 lb. of CO2 gas at
150-200 psi (8-30 seconds discharge time)
- Has NO pressure gauge capacity verified by weight
- 3-8 ft. maximum effective range
- Extinguishes by smoldering burning materials
- Effectiveness decreases as temperature of burning material increases
Combustible Metals
- Class “D” combustible metal fires only
- 30 lb. pressurized dry powder optimized for specific combustible metal (also available in bulk containers for hand scooping onto fire to extinguisher)
- 6-8 ft. maximum effective range
- To operate, must first open nitrogen cylinder on back
Extension Cords
29

Use only UL or FM approved
Always INSPECT for damage
- Look for damaged insulation, splices, or loose plugs
NEVER run through doorways or under rugs
- Insulation can become damaged - Potential fire or shock hazard
Match plugs with outlets
- Never force a 3 – prong plug into 2 prong socket
Store cords indoors when not in use
- Outdoor conditions can deteriorate cord over time
Never use indoors cords outdoors
Know cord rating and total load placed on it
- Cord gauge based on American Wire Gauge (AWG) system
- The larger the wire, the smaller the AWG #
- A 12 AWG cord can power more than 14 AWG
Sample cord ratings (always read cord label):
- 18 AWG – 8 Amps- 16 AWG – 13 Amps (typical outdoor lawn cord)- 14 AWG – 15 Amps- 12 AWG – 20 Amps (industrial applications)
Cord Length
- A cord, based on its gauge, can power a certain wattage at specific distances (as the cord gets longer, the current carrying capacity of the cord gets lower)
- A 16 gauge cord less than 50’ will power 1625W
- Over 50’ cord length good for only 1250W
Always be aware of the power being used by your light display
- Most smaller displays stay well within the limit of cord ratings
Consider replacing larger bulbs that burn hotter with cooler burning miniature lights
Power Calculations
Most bulbs list power draw in watts
For example, the larger C-7 bulbs typically pull 5 watts per bulb
Simply count the number of bulbsand multiply by wattage value
- 250 C-7 bulbs * 5W/bulb = 1250W
A 16AWG cord will support, but …….
- Don’t forget about cord length, deterioration, and other factors
Don’t overlook power draw on smaller light sets
30

- Mini-lights are touted for their efficiency and low-cost power usage- Be cautious of the math!
A standard mini-light set of 100 lights uses 40 watts (about .34 amps)
- A large outdoor tree decorated with minis may use up to 2,000 lights (800W)
- If powering this tree on same cord as house decorations, you can easily overload the cord and/or outlet
Cord Basics
If in doubt, simply feel the cord after power has been applied for 20-30 minutes
- If warm to the touch, decrease the load!
Use of an Amp Clamp to measure exact loads is safest method
Avoid “daisy-changing” multiple cords and light strands
- Not because OSHA frowns on it, but because you will run a higher risk of fireoverload, etc.
Keep it Simple. Keep it Safe.
General Lighting Safety
Use only lights tested
Check light strands for broken sockets, frayed or bare wires, or loose connections
NEVER use indoor lights outside
- Green label = indoor use; Red label = outdoor
Turn off all lights when you go to bed or leave the house
For added shock/electrocution protection
- Plug lights into circuits protected by Ground Fault Circuit Interrupters (GFCI)
Installation Safety
Avoid using tacks, nails or metal staples to secure strands
- Use insulated staples - Pre-install hooks are safe and
convenient
Install lights with power unplugged
- Avoids shock if you touch overlooked exposed wire
Fasten outdoor lights securely to protect from wind damage
31

Power Outages/Generator SafetyMore than two-thirds of all power outages in the U.S. are caused by weather-related events including thunderstorms, ice storms, heavy winds, and lighting strikes, as well as other natural disasters like floods, hurricanes, or tornadoes. Animals contacting wires, auto accidents damaging poles or other equipment, and other unknown factors can also cause power outages.
The following information is provides tips on preparing for and/or contending with such occurrences should they happen.
Preparing for a Power Outage
Assemble essential supplies, including: Flashlight Batteries Portable radio At least one gallon of water A small supply of food
If you have space in your refrigerator or freezer, consider filling plastic containers with water leaving about an inch of space inside each one. (Remember, water expands as it freezes, so it is important to leave room in the container for the expanded water). Place the containers in the refrigerator and freezer. This chilled or frozen water will help keep food cold if the power goes out, by displacing air that can warm quickly with water or ice that keeps cold for several hours with additional refrigeration.
If you use medication that requires refrigeration, most can be kept in a closed refrigerator for several hours without a problem. If unsure, check with your physician or pharmacist.
If you use a computer, keep files and operating systems backed up regularly. Consider buying extra batteries and a power converter if you use a laptop computer. A power converter allows most laptops (12 volt or less) to be operated from the cigarette lighter of a vehicle. Also, turn off all computers, monitors, printers, copiers, scanners and other devices when they’re not being used. That way, if the power goes out, this equipment will have already been safely shut down. Get a high quality surge protector for all of your computer equipment. If you use the computer a lot, such as for a home business, consider purchasing and installing an un-interruptible power supply (UPS).
If you have an electric garage door opener, find out where the manual release lever is located and learn how to operate it. Sometimes garage doors can be heavy, so get help to lift it. If you regularly use the garage as the primary means of entering your home upon return from work, be sure to keep a key to your house with you, in case the garage door will not open.
If you have a telephone instrument or system at home or at work that requires electricity to work (such as a cordless phone or answering machine), plan for alternate communication, including having a standard telephone handset, cellular telephone, radio, or pager. Remember, too, that some voice mail systems and remote dial-up servers for computer networks may not operate when the power is out where these systems are located. So even if you have power, your access to remote technology might be interrupted if the power that serves those areas is disrupted. Check with remote service providers to see if they have backup power systems, and how long those systems will operate.
32

Keep your car fuel tank at least half full because gas stations rely on electricity to power their pumps.
Follow energy conservation measures to keep the use of electricity as low as possible, which can help power company(ies) avoid rolling blackouts.
People with Disabilities
If you use a battery-operated wheelchair, or other power-dependent equipment, call your power company before rolling blackouts happen. Many utility companies keep a list and map of the locations of power-dependent customers in case of an emergency. Ask them what alternatives are available in your area. Contact the customer service department of your local utility company(ies) to learn if this service is available in your community.
If you use a motorized wheelchair or scooter, have an extra battery. A car battery also can be used with a wheelchair but will not last as long as a wheelchair’s deep-cycle battery. If available, store a lightweight manual wheelchair for backup.
If you are blind or have a visual disability, store a Braille clock or large-print timepiece with extra batteries.
If you are Deaf or have hearing loss, consider getting a small portable battery-operated television set. Emergency broadcasters may give information in American Sign Language (ASL) or open captioning.
Using a Generator
If you are considering obtaining a generator, get advice from a licensed professional, such as an electrician. Make sure the generator is
listed with Underwriter’s Laboratories or a similar organization. Some municipalities, Air Quality Districts, or states have “air quality permit” requirements. A licensed electrician will be able to give you more information on these matters. Always plan to keep the generator outdoors -- never operate it inside, including the basement or garage. They produce CO while consuming fuel and producing electricity. Do not hook up a generator directly to your home’s wiring. The safest thing to do is to connect the equipment you want to power directly to the outlets on the generator. Connecting a cord from the generator to a point on the permanent wiring system and back feeding power to your home is an unsafe method to supply a building during a power outage.
Other pre-cautions to take
Turn off or disconnect any appliances, equipment (like air conditioners) or electronics you were using when the power went out. When power comes back on, it may come back on momentarily “surges” or “spikes” that can damage equipment such as computers and motors in appliances like the air conditioner, refrigerator, washer, or furnace.
Leave one light turned on so you’ll know when your power returns.
Leave the doors of your refrigerator closed to keep your food as fresh as possible. If you must eat food that was refrigerated or frozen, check it carefully for signs of spoilage.
Use the phone for emergencies only. Listening to a portable radio can provide the latest information. Do not call 9-1-1 for information -- only call to report a life threatening emergency.
33

Don’t use candles for lighting
Avoid using candles during power outages – the risk of fire is too great. If you must use candles, place them on a stable surface away from combustible materials, and keep a close eye on children and pets.
NEVER leave a candle burning when leaving a room or going to bed.
Keep candle wick trimmed down to ¼ inch. Trimming the wick keeps the burning slower with less smoke.
When a candle’s flame gets too high, blow it out, let it cool, trim it again to ¼”, and then relight it.
NEVER place candles near windows or exits.
34

1. Commanders should only allow the use of U.S. Army approved vented heaters. These meet all military field requirements. They are multi-fueled, non-powered, portable heaters that vent potentially harmful (and potentially deadly) gases to the outside and are proven safe and effective. An overview and description the new family of space heaters [e.g., H-45 Space Heater Medium, Space Heater Artic (SHA), Space Heater Small (SHS), Space Heater Convective (SHC), and Thermoelectric Fan (TEF) can be obtained at the following Product Manager Force Sustainment Systems ((PMFSS) website: https://peocscss.tacom.army.mil/pmFP/pm_fss/product_areas.htm#F An article on the New Family of Space Heaters (FOSH) can be found in the October 2003 issue of Countermeasure: http:www.safety.army.mil/home.html
To obtain these heaters via a funded requisition, units should use the following Defense Supply Center Philadelphia website:
http://www.dscp.dla.mil/gi/general/ols.htm 2. All heaters, both vented and un-vented (not ducted), if improperly used and maintained, pose a risk of fire and carbon monoxide (CO) poisoning. To ensure safe heater operation inside tents or other enclosed areas, slightly open a flap, door or window to allow the introduction of fresh make up air and/or use in accordance with the Technical Manual.
Personnel that set up and operate heaters must be trained and licensed in accordance with Chapters 6 and 7 of Army Regulation 600-55, 31 Dec 93, Motor Vehicle and Equipment Operator Selection, Training, Testing and Licensing. The responsible unit fire or safety representative must inspect each heater before use.
3. Acquisition of commercial nonstandard heaters is justifiable only in mission-critical circumstances. If nonstandard heaters are used, the first general officer in the unit’s chain of command should approve the purchase and or use of nonstandard heaters.
a. Personal (individually owned) heaters and commercial portable gas (e.g., propane, natural gas, etc.) heaters must not be used under any circumstances.
b. Un-vented kerosene heater use is restricted to areas where people do not sleep (such as guard house, ranges, or training areas) or when approved by the Commander as interim emergency heating.
4. If operational necessity demands that Commanders accept the risk of using an
35

un-vented kerosene heater in tents or other enclosed shelters, a complete risk assessment should be done (balancing the risk of cold stress and risks of using the heater), and the acquisition and use of approved by safety and health, and fire protection personnel. At a minimum, implement the following steps when using un-vented kerosene heaters:
a. Inspect, set up, operate, and maintain the heater in accordance with the manufacturer’s instructions.
b. Ensure the heater meets the standard requirements of and bears the label of the Underwriters Laboratories (UL), Inc. and the National Kerosene Heater Association (NKHA).
c. Use only water-clear No. 1-K Kerosene in the heater. When No. 1-K Kerosene is unavailable, JA-1 or JP-8 fuel may be used, but then only as an interim fuel, and only when an effort is made to quickly obtain No. 1-K Kerosene to replace the JP-8 and JA-1 fuel.
d. Store kerosene outside (and a minimum of 50 feet from tents, shelters, and vehicles) and in a sealed container labeled “No. 1-K Kerosene.”
e. Do not place the heater directly on the fabric floor of the tent; place on firm and level fireproof base (e.g., sheet metal sand box) located in a marked area free of and a reasonable distance from clothing or other materials that can burn (e.g., bedding, people)
f. Operate the heater only when a fire guard/watch is on duty; otherwise, ensure the heater is turned off before going to sleep or leaving the tent or
shelter. Brief the fire watch on the procedures for fire fighting and how to recognize signs of CO poisoning.
g. Use the heater in well-ventilated enclosed structures.
h. Have the air measured (by safety or health personnel) for CO the first time the heater is used, and periodically thereafter. Personnel are also encouraged to use continuous CO detectors/alarms inside their tents or other enclosed shelters, such as those that are UL2034 listed for Recreational Vehicles (RVs) and unconditioned areas (such as attics and garages) or other CO detectors/alarms if they are similar or superior performance in the environments and conditions encountered, the tactical situation warrants whether this recommendation should be followed.
5. Safety and Health Training on Use of Tents, Enclosed Shelters, and Heaters. Ensure that units are trained in the associated safety and health issues. Training should include the recommendations, above, and include the following subjects: Proper tent ventilation; corrective actions to take under extreme weather conditions (e.g., such as clearing built-up snow from around small tents and shelters to ensure proper air infiltration into them); and the recognition, prevention, and control of fire and CO hazards when using heaters. Training should include fire drills. Train all individuals to recognize potential sources and symptoms of CO poisoning.
36

Carbon Monoxide (CO) poisoning is more common than you think. You can’t smell it, and you can’t see it, but carbon monoxide might be making you sick. CO is absorbed through the lungs and transported to by the bloodstream to all parts of the body. It prevents the blood from carrying oxygen to the tissues of the body. The brain and the heart are especially sensitive to lack of oxygen.
CHRONIC CO EXPOSURE can lead to the “Chronic CO Syndrome.” Symptoms include: headaches, muscle pain, fatigue, nausea, memory loss, multi-task problems, verbal – visual deficit, irritability, depression, personality changes, blurry vision, double vision.
Where does carbon monoxide come from?
CO is a byproduct of combustion. Fuels that can cause carbon monoxide poisoning include natural gas, kerosene, propane, heating oil, wood, and charcoal. Fireplaces, gas stoves, wood burning stoves, water heaters, space heaters, room heaters, furnaces, or any other appliance that burns fuel are all potential sources of carbon monoxide. When fuel is not burning cleanly, carbon monoxide can result. That is why it is essential to properly maintain your appliances, fireplaces, and vehicle. New homes are being built with an emphasis on better insulation, resulting in homes that are almost airtight. When the weather gets cooler, furnaces are turned on and people stay indoors more. With less ventilation in the house, the risk of carbon monoxide poisoning increases. Frequently a person
will leave the house for work or school and feel better, but then get sick upon returning home. If the car exhaust is bad, a person is ill when driving for distances, especially if the windows are closed. Once they get out of the car and into fresh air, they start to feel better again. Other sources include structural fires, car exhaust and cigarette smoke. People who smoke already have measurable amounts of carbon monoxide in their blood. Smokers develop problems with smaller exposures to carbon monoxide.
What are the symptoms of CO poisoning?
The initial symptoms are much like the flu and include headache, dizziness, drowsiness, fatigue, shortness of breathe, nausea and vomiting. Symptoms may progress to fainting, unconsciousness, heart problems or even death. Many people die in their sleep, never realizing that carbon monoxide levels have risen to a dangerous level. The severity of the symptoms depends on the concentration of the carbon monoxide, the duration of the exposure and the size of the area. If a person is in a small, enclosed area without ventilation, they are more likely to have a more severe case.
How is CO poisoning diagnosed?
Infants, small children, pets, pregnant women (more specifically the unborn baby) and people with heart disease are at greatest risk for carbon monoxide poisoning. If a pregnant woman is exposed to carbon monoxide, the baby absorbs more CO from mom’s blood that mom does herself. Mom may not have many symptoms but the baby may be seriously affected. Pregnant moms must be very careful to prevent exposure. CO
37
Carbon Monoxide Poisoning – Symptoms, Causes, Cures

is diagnosed by a special blood test. It is not detected by routine blood tests. If you suspect carbon monoxide poisoning, you need to be tested while you are ill. Carbon monoxide does not stay in the blood stream long. If you are tested when you do not have symptoms, chances are that the carbon monoxide will not be detected. Treatment depends on the amount of carbon monoxide found in the blood and the symptoms.
How is carbon monoxide poisoning treated?
Oxygen is the antidote for carbon monoxide. Fresh air is the main treatment for very mild cases of carbon monoxide in healthy people. As you breathe in fresh air, you are also breathing out carbon monoxide. For more serious cases, oxygen is administered at the hospital to increase the elimination of carbon monoxide from the body. People with heart disease or serious exposures need heart monitoring or an electrocardiogram to make sure that the heart has not been injured. Hyperbaric oxygen may be used in critical cases.
Prevention Tips
Have your heating system inspected and serviced once a year. Utility workers can diagnose problems but not fix them.
Have your chimney and vents checked regularly.
Have your fireplace or wood stove inspected and cleaned once a year.
Have appliances installed and serviced by professionals.
Have your car exhaust checked routinely.
Never burn charcoal indoors, in the garage or in a tent or van while camping. Burning charcoal indoors can kill you!
Never use a gas range or oven for heating a room.
Never operate un-vented gas burning appliances in a closed room.
Never leave a car running in a garage.
Install a quality carbon monoxide detector in your home.
A note on CO detectorsCarbon monoxide detectors can be purchased at most home centers and hardware stores. Make sure the product is listed by the Underwriters Laboratories standard. Get a detector that is easily self-testes and easy to reset. Install it on a wall where it is easily accessible: not in the ceiling. There are battery operated and hard-wired detectors. If you have a hard time remembering to replace batteries, consider getting a detector that is installed as part of the house’s electrical system. If you have a detector and the alarm sounds, pay attention to it and ventilate the house. Leaving the house is better. Call your utility company and have them confirm the carbon monoxide level and check your house for possible sources.
38

Hunting with a rifle or shotgun is a dangerous sport under any circumstances, but it can be downright deadly for humans when hunters are not well trained or properly prepared. If you are among the millions of Americans who take to the fields with a loaded weapon, keep these things in mind.
Before you pick up a gun….
Begin your hunting experience by taking a firearms safety course available in your area. In some states, they are required before you can obtain a license. These courses can be valuable whether you are a novice or an experienced hunter.
Firearm basics
Keep firearms unloaded and keep the action open until you are hunting. Carry guns in their cases to the shooting area. This is the law in most states.
Always assume every firearm is loaded and dangerous. Respect it for the harm it can inflict.
Never take someone else’s word that a firearm is not loaded. Always check it for yourself.
Never engage in horseplay with a firearm. Guns are deadly business and should be treated with a serious, cautious manner.
Always point the muzzle in a “safe” direction. A safe direction is one in which, if fired accidentally, a weapon will not cause injury or damage. Never point a gun at anything that you don’t intend to shoot.
Be sure the barrel and mechanism are clear of obstructions. This is best done by looking down the breech end of the weapon.
Be sure that you use the proper ammunition for the weapon you are using, and know the maximum range of you ammunition.
In the hunting areaWhen carrying a gun, follow these simple rules
Keep the muzzle under control and pointed away from yourself and others.
Be certain the safety is “on.” Keep your finger outside the
trigger guard. Clearly identify your target
before you shoot. If you are not sure of your target, do not shoot.
Know what’s beyond your target. For example, because you cannot see what’s in the distance, don’t shoot an animal standing on the horizon of a hill.
Never shoot at a patch or color
When a shell does not fire, keep the muzzle pointed in safe direction for at least 45 seconds and then remove the cartridge.
Don’t climb fences or trees, cross slippery areas, or jump ditches or creeks while carrying a loaded gun. Unload the firearm first. It takes only a few seconds, and
39

it could save someone’s life. If you are hunting with a partner, hand your gun to him/her before crossing the obstacle.
Never pull a firearm toward you by the muzzle.
Handguns should be carried in a holster.
Do not shoot at flat, hard surfaces or at water. Bullets will ricochet off surfaces out of control. Remember, a bullet or shotgun shells are your responsibility from the time it leaves your gun.
Always shout to alert other hunters of your presence as they approach you. Never assume you are the only hunter in the area.
Be especially careful at the end of the day as you become tired and the firearm you are carrying becomes heavier. This fatigue can make you careless. If you feel tired – stop, unload your weapon, and rest.
Do not use alcohol, drugs, or medication which may impair your judgment and dull your senses.
Never pick up unexploded ordnance.
Follow established policies and procedures on military installations.
Tree-StandsTree-stands can be very a valuable tool for hunters, but only if they are used correctly and safely. Nationally, one in three hunting injuries involves tree-stands. Most of the incidents could have been prevented if the
user of the tree-stand had followed these safety precautions.
Be sure to conduct pre-season and daily inspections of your tree-stand and related equipment before using it, especially those items that are removable.
-Paint removable bolts and wing-nuts a bright color, so if you drop them, you will be able to find them easily at the tree base.
- Carry spare bolts and connectors. The strength of the “biting end” of your tree-stand depends on all the hardware being present. Always use a safety belt when
hunting from tree-stands. They are best used when climbing up or down a tree. Safety belts should be the first and last thing used.
Note: Although wearing of a safety belt does not eliminate the possibility of being involved in tree-stand accident, it should minimize the potential for serious injury.
Never use a rope to replace a safety belt.
Never climb up or down a tree with a gun or bow
Make sure guns are unloaded, broadheads are covered, and arrows are not notched prior to raising or lowering weapons with a haul line.
High winds, rain, sleet and snow will increase the hazards tree-stand hunting. A slippery platform will reduce the climber’s ability to “bite” the tree while climbing or descending.
Always let someone know where you plan to hunt and when you will return.
40

Be a good sportsman. Use good judgment and exercise all safety precautions.
Tick-Borne Diseases:
Ticks are excellent vectors for disease transmission. More than 800 species of these obligate blood-sucking creatures inhabit the planet. They are second only to mosquitoes as vectors of human disease, both infectious and toxic.
From the perspective of transmission to humans, the essential characteristics of ticks is their need to ingest a blood meal to transform to their next stage of development. Not picky in their eating habits, they take their requisite blood meal from all classes of vertebrates (e.g., mammals, birds, reptiles), with the exception of fish.
Ticks feed by perching in low vegetation and waiting for a susceptible host on which they can attach and feed. Once on a host, the tick attaches its hypostome, a central piercing element with hooks, into the host’s skin. Some ticks secrete a cementing material to fasten themselves to the host. In addition, Ixodes ticks secrete anticoagulant, immunosuppressive, and anti-inflammatory substances into the area of the tick bite. These substances presumably help the tick to obtain a blood meal without the host noticing. These same substances also help any freeloading pathogens to establish a foothold in the host.
Ticks can carry and transmit a remarkable array of pathogens, such as bacteria, spirochetes, rickettsiae, protozoa, viruses, nematodes, and toxins. A single tick bite can transmit multiple pathogens, a phenomenon
that led to atypical presentations of some classic tick-borne diseases.
In North America, the following diseases are caused by tick bites: Lyme Disease, Human Granulocytic and Monocytic Ehrlichiosis, Babesiosis, Relapsing Fever, Rocky Mountain Spotted Fever, Colorado Tick Fever, Tularemia, Q Fever, and Tick Paralysis. Secondary infections and allergic reactions to proteins in tick saliva are also possible.
Prevention of Tick-Borne Diseases
Prevention of all tick-borne diseases can be divided into several strategies. These are environmental, personal, and prophylactic (after the tick bite has occurred).
Environmental strategies (control of the population of deer and other vectors and tick control measures) are beyond this section.
Personal strategies include avoiding grassy areas with shrubs that attract ticks, wearing white or light colored clothing so that attached ticks can be seen easily and removed, tucking pant legs into socks, walking in the center of paths to avoid vegetation on which ticks lie in wait of a host, applying lotion containing diethyltoluamide to skin (avoiding face and hands), applying permethrin to clothing, and performing daily tick checks and removing ticks as soon as they are detected.
Tick removal is best accomplished by grabbing the tick as close to the skin as possible with a very fine forceps and pulling it gradually, but firmly, out of the skin. Gloves
41

should be worn when removing ticks, and the bite should be thoroughly disinfected with alcohol or another skin antiseptic solution. Care should be taken to avoid squeezing the tick during removal, since squeezing may inject infectious material into the skin. Use of gasoline, petroleum, and other organic solvents to suffocate ticks, as well as burning the tick with a match, should be avoided. Often, the complete mouthparts do not come out with the rest of the tick. Leaving these in do not increase the risk of disease transmission, but they may cause a local infection or foreign body reaction
Prophylactic measures include the use of vaccines, which are available for some tick-borne diseases.
42

Winter sports usually involve activities on ice or snow and, for the most part, involve propelling the body much faster than it usually goes. Thus, equipment that allows for sufficient control at these speeds is important. Many different activities fall into the area of winter sports, but among the most popular are down-hill and cross-country (or Nordic) skiing; snowboarding; figure, speed, and hockey skating; and snowshoeing.
The most important piece of equipment for most winter sports is the boot. Not only must the boot keep the foot warm and protected from snow and ice, but it must also be the point of control. The boot must be comfortable, yet snug, with no loss of circulation to the foot (i.e., the foot is well supported, but relaxed). Toes should be able to move up and down, but not sideways. When boots are laced or snapped in place, there should be no heel movement. In order to have boots fit properly, adult boots are usually ½ to 1- ½ sizes smaller than regular shoes, while children boots are usually ½ size smaller. The reason for a smaller boot is so the boot functions as an extension of the foot and leg, allowing the body control of the boot, and therefore, the ski or skate. Most other equipment is sport specific.
SkatingThe different activities within skating have different skate boots and blade lengths in response to the need for speed and maneuverability in the sport. For instance, long-track speed skaters (who skate on a 400- meter oval) have minimal direction changes and want to go as fast as possible, so their skates have long, flat blades with low-cut boots. Hockey players, however,
need to maximize maneuverability and require maximal ankle support since their sport requires frequent changes of speed and direction. Hockey skates need to have short curved blades with high-cut boots. The demands on figure skaters are between those of hockey and speed skaters. Figure skaters have high boots and medium-length blades. Short – track speed skaters (who skate 110-meter ovals on hockey rinks) have skates that have much shorter blades than long-track speed skaters and high-top boots due to the many required turns.
After the stick and puck, the other equipment needs in hockey are purely for protection. A helmet with a full-face guard should fit properly, with no wobble when the head is moved from side to side. Shoulder pads, pants, shin guards, elbow pads and gloves are all recommended for additional protection. Like hockey players, short-track speed skaters need to wear elbow and knee pads and a helmet to protect them when they fall.
Skiing and SnowboardingSnowboarding is one of the newer winter sports, with a board like a short, fat ski. Freestyle boards are wide and flexible; alpine/racing boards are stiff, strong and narrow; and free-riding boards fall between the two in shape and size. The board has two bindings (one for each foot) and also a stomp (or non-skid) pad. Three styles of boots are generally available for snowboarding: soft boots, which are soft, flexible, allow plenty of ankle movement and use high-back buckle bindings; hard boots, which have sturdy plastic shells for greater control and use a mouse trap-type plate binding; and hybrid step-in boots
43
Winter Sporting Activities

which are soft boots that use a step-in binding. All snowboarders should use a leash, which attaches the front leg to the front binding, preventing the board from sliding away should the boots come out of the bindings.
Downhill skiing requires skis, boots, bindings and poles. The higher end skis provide more stability at high speeds by dampening the vibration; however, if high speeds are not obtained, lower end skis are fine. An individual’s body weight and ability determine bindings for downhill skis, so being honest on both accounts will ensure proper bindings.
Cross-country (or Nordic) skiing has evolved into a number of different activities, including classic striding/touring and skating. Classic skis are generally longer and wider than skating skis. Traction during cross-country skiing is obtained by applying wax to the ski or using waxless skis. The binding and boot combination are dependent on the type of skiing, with classic boots generally low cut and skating boots generally high-cut. The poles are used throughout the length of the stride. For classic skiing, the pole is shorter than for skate skiing, where the pole is planted further back with the skating stride.
Clothing for skiing and snowboarding should include polypropylene clothes next to the body, with layers of clothes on top of that. For downhill skiing and snowboarding, waterproof and wind-resistant clothing should be the outer layer. Waterproof gloves are also necessary, and a helmet is recommended (especially for snowboarding). Cross-country skiers should wear wind-resistant clothing, light gloves, and a hat (depending on the environmental conditions).
SnowshoeingSnowshoeing is increasing in popularity, which has led to many advances in the sport. Snowshoes are now made of wood, aluminum and plastic frames. Frame design, webbing, size, weight and toe turn-up are all important factors in determining proper snowshoes. Bindings connect the boot to the snowshoe and must allow the heel to rise and the foot to hinge in the up-and-down direction with the snowshoe. To assist with both ascents and descents, some kind of traction device must be attached to the bottom of the snowshoe. As with skiing, poles can assist with snowshoeing. Recommended clothing for snowshoeing is similar to that of skiing and depends on environmental conditions.
Winter sports can be very fast and exciting, but most equipment is quite expensive. Proper fit is crucial not only for safety purposes, but also to reduce expenses. Shortcuts cannot be taken in boots, blades, skis, boards or helmets, as injury may occur.
Winter Walking Tips
After a snow or ice storm, pedestrian traffic increases significantly, but “walking in a Winter Wonderland” can create potentially fatal pedestrian safety problems that are often ignored or overlooked by traffic safety experts. Snow drifts can cover signs and landmarks or block corners, crosswalks, and handicap access ramps. Walkways may not be cleared, forcing pedestrians to walk in the street. The snow and ice can turn familiar territory into an alien landscape for pedestrians and motorists.
Everyone is a pedestrian, but there are things you can do to be a smart pedestrian – especially during the winter months. Before
44

you take one step onto that slippery sidewalk, consider the following safety tips.
If the sidewalks and walkways are impassable and you have to walk in the street, walk against traffic and as close to the curb as you can.
Proper gear is a must, but wearing dark “winter” colors can make it hard for motorists to see you, especially if they aren’t expecting you. Consider wearing a brightly-colored scarf or hat, or reflective gear, especially if you have to work in the street. And don’t forget gloves, and shoes or boots with non-slip soles.
Snow that has accumulated into drifts can muffle the sounds of approaching motor vehicles. Wearing hats and scarves that cover your ears can also distort or even eliminate these sounds. Keep warm, but make sure you can hear what’s going on around you.
If you can, shop before the storm hits! If you have to shop, don’t buy more than you can easily carry. Remember – the street may be slippery and carrying heavy packages can impair your balance.
When traveling with babies or small children, make sure they are dressed in brightly colored or reflective clothing. If you have to push a stroller or walk in the street, the child should be in front of you and as close to the curb as possible
Because of road conditions, motorists may be unable to stop at traffic signals or slow down for
pedestrians. Before you step off the curb into the street, make sure that any approaching vehicles have come to a complete stop.
Bending your knees a little and taking slower steps can greatly reduce your chances of falling.
Have Fun – Be Safe!
45

Snowmobile Safety Tips
Always be alert of potential danger. Your helmet and engine noise can impair your hearing. Visibility is also reduced in conditions of snowfall, blowing snow and night driving. Never assume what another snowmobiler will do. Do all that you can to ensure your safety and that of other riders. Expect the unexpected!
Watch out for: Thin ice and open water Grooming equipment Oncoming snowmobiles Unforeseen obstacles beneath snow Unexpected corners, intersections
and stops Road and railway crossings Logging/Forestry operations Snow banks and drifting snow Trees and branches on the trail Bridges and approaches Wildlife and domestic animals Other trail users (skiers, hikers)
Don’t Drink and Ride
1. Snowmobiling requires alertness, caution and attention. Your reaction time and ability to control your sled can be drastically affected after consuming even small amounts of alcohol. Alcohol can affect
perception, reaction time, and response to unexpected situations. Alcohol is also involved in over 70% of snowmobile fatalities.
2. Alcohol increases your susceptibility to cold and hypothermia. Snowmobilers often have access to remote locations miles away from help. If a situation should occur where help is needed, your chances of survival and treatment of injury can be greatly affected. Don’t let alcohol be a contributing factor to your fate.
Night Riding
A disproportionate number of snowmobiling incidents, including nine out of ten fatalities, occur after dark.
Forward visibility is reduced and it is much more difficult to spot and identify potential hazards in time. Overdriving headlights can also be a serious problem so slow down when snowmobiling after dark. Becoming disoriented or lost is much more likely at night. Ride with individuals familiar with the area.
Always wear outer clothing with reflective trim on the arms, back and helmet. Never ride alone at night. Always dress in your full snowmobiling outfit even if your intended destination is just next door.
Be certain that all lights are operational and keep in mind that hand signals become increasingly more difficult to see as darkness sets in.
Ice RidingDrowning is one of the leading causes of snowmobile fatalities. Wherever possible, avoid riding on frozen lakes and rivers because ice conditions are never guaranteed. Ice conditions can change in a period of
46

several hours. If you must cross ice, ask first, then stay on packed or marked trail. Don’t stop until you reach shore. If you hit slush, don’t let off the throttle. If you are following someone who hits slush, veer off to make your own path. If you must travel over lakes and rivers then consider using a buoyant snowmobile suit which will assist you too reach the closest ice surface. Also consider carrying a set of picks which will help you grip the edge of the ice more easily. As a rule of thumb, “if you don’t know, don’t go.”
If you break through the ice, don’t panic. Follow these self rescue tips.
Kick vigorously into a horizontal position and swim to the nearest ice edge. Place hands/arms on unbroken ice while kicking to propel your body onto the ice, like a seal.
Once clear, stay flat and roll away to stronger ice.
Stand, keep moving and find shelter.
HypothermiaThis is lowering of the body’s core temperature. It can happen in water or on land. Hypothermia does not require extreme cold and accelerate with wind and wetness. Dressing warmly in water resistant layers helps, but if immersed, quickly replace wet clothes, keep moving to generate body heat, and find immediate shelter and warmth.
Snow BlindnessThis occurs when directed and reflecting sun glare are too bright for the eyes. Riding without good quality, UV protected sunglasses, goggles or visor can cause permanent damage.
Frostbite
Frostbite results from freezing temperatures and poor circulation. Most common on extremities and exposed skin, it can be identified by unnaturally white and numb skin surrounded by harsh red coloring. Cover up and layer well, making sure that socks fit loosely within your boots. And remember mitts with liners are warmer than gloves.
Wind ChillWind chill is lower temperature caused by wind and/or the forward momentum of a fast moving sled. Wind chill exposes you to severe cold which in turn can cause hypothermia. Wind-proof outer garments, extra layers and a balaclava will offer some protection, but keep your face shield down to prevent wind burn and to protect your skin and eyes.
Dressing ProperlyWith high tech winter and proper layering, winter comfort is easy. Start with polypropylene and thermal under layers that release moisture while retaining heat. Also consider the fact that your forward motion will add to the wind chill factor. Avoid cottons and sweat shirts which retain moisture, making you cold and clammy which may lead to hypothermia.
Good snowmobile wear contains materials that retain heat, release moisture and resist both water and wind. Even better, try to find suits that are water and wind proof. Consider wearing a buoyant snowmobile suit if you plan on traveling across ice as it will assist in keeping you afloat but most of all help to protect you against hypothermia. Snowmobile suits should have reflective trim for increased visibility during night riding. Carry extra clothing, socks and mitts for layering.
47

The holiday season, a time spent with and with family and friends. It can also be a period of overindulgence which can have dire consequences. The tips below are offered with the hope of making the season an enjoyable and safe time for you and yours.
Tips for responsible drinking
Limit your consumption. It’s recommended that you space your drinks at least an hour apart.
Eat something beforehand. Eating after you’ve started to drink won’t help.
Try alternating alcohol and non-alcoholic beverages, or switch to non-alcoholic beverages at least an hour before you plan to go home.
Drink only if you want to. Don’t feel obliged to accept a drink just because it’s offered.
Leave the driving to a designated driver, or take a cab home
If you throw a party, remember that you may be held legally responsible for injuries or damages that may result from alcohol you serve. Here are 10 tips to make you the “host with the most responsibility”:
Limit how much you drink yourself. You’ll be better able to keep things under control
Before the party, ask someone reliable to help you if problems crop up
Provide alcohol-free drinks, such as coffee, tea, pop, fruit punch, juice and water. Serve non-alcoholic wines and cocktails.
Mix and serve drinks yourself or designate a bartender. Guests usually drink more when they serve themselves.
Serve food. Best bets are meats, vegetables, cheeses, and breads. Avoid salty, sweet or greasy foods, because they make people thirstier.
Don’t plan physical activities. People are more prone to injury or mishap after drinking.
Stop serving alcohol at least an hour before the party ends.
Don’t rely on coffee to sober guests up. The liver processes about 14 milliliters of alcohol per hour, coffee or no coffee.
Encourage guests to name designated drivers, leave their cars at home, take public transportation or cabs, or walk. Have cash and taxi company phone numbers ready.
Be prepared for overnight guests by having blankets and sleeping bags available.
48

Food Safety
Remember the “2-hour rule” when entertaining a large meal or buffet. Don’t let perishable foods linger for longer than two hours in the danger zone.
Prepare foods quickly, cook them thoroughly and serve them promptly. Keep hot foods hot with warming trays, chafing dishes or crock pots. Keep cold foods cold by placing serving dishes on crushed ice.
Keep replacement dishes of food hot in the oven or cold in the refrigerator prior to serving.
Do not add new food to a serving dish that has been sitting at room temperature for more than two hours.
Traveling with food
Wrap hot food in foil and heavy towels, or carry in insulated containers with hot packs to maintain a temperature of at least 60o C (140o F).
Store cold foods in a cooler with ice or freezer packs so the food remains at 4o C (40o F) or lower. Full coolers keep their temperature better than partially full ones.
Cleanliness in the kitchen
Plastic cutting boards are best because they’re easier to sanitize.
To sanitize kitchen materials (dishes, cutting boards and utensils) put them in the dishwasher, or wash them with hot water and detergent
Use a solution of 1 tsp of bleach in 3 cups of water to disinfect them and rinse them again with fresh water, and dry them.
Bacteria can thrive in dish clothes, so change them every day if you can. Keep them clean by washing with detergent as part of your regular laundry load, or by hand-washing then soaking them in diluted bleach.
Don’t hang dish cloths near the kitchen garbage pail. For greater protection against the spread of germs, choose a kitchen garbage pail with a self-closing lid.
By following these suggestions, you can protect you family from food poisoning. It’s your health, and it’s up to you.
Christmas Tree/Toy Safety
49

Never use candles to decorate trees
- Unsafe practice of the past, but still done for tradition’s sake - If you do it…..never leave unattended
Water cut trees daily
- Rule of thumb: 1 qt water per 1” diameter per day (initially)
- Dispose of tree immediately after season ends before the needles dry out
NEVER place near heat source
- Space heater, fire place, radiators, etc. - Don’t block exits
Artificial Trees
- Look for “Fire Resistant” label
May still catch fire, but will resist burning and extinguish quickly
- NEVER use electric lights on metallic trees
Faulty lights may charge the metal
Electrocution may result
Use “Non-tip style tree stands
Avoid lead-based decorations - Hazardous to children if ingested
Toy Safety
Toy safety should be an important part of the decision-making when it comes to purchasing toys for children. Consider the following guidelines when choosing a toy.
Children under three years of age tend to put things in their mouths. Small toys, balls or toy parts pose chocking hazards to young children.
Toys with long or stretchy cords that can become wrapped around a child’s neck present a strangulation hazard.
Loud toys can damage a child’s sensitive hearing.
50

Sharp edges or points on a toy can cut a child.
Toy packaging such as plastic bags and plastic wrap, foam, tape or ties can suffocate or choke a child.
Ride-on toys can tip and children on ride-on toys can move very quickly, running into objects or falling down stairs.
Latex balloons have caused a number of deaths. The balloon or a piece of broken balloon can be inhaled and can block a child’s airway.
Buying Toys
Read and follow the age label on the toy. Toys for older children may not be safe for younger children.
Look for choking hazards on toys for children less than three years of age.
Check squeeze toys for loose removable squeakers, toy cars and trucks for loose or removable wheels or other small parts and the eyes, nose and other small items on stuffed and plush toys to make sure that they cannot be pulled off.
Read and follow the warnings and other safety messages no toy packaging.
Look for sturdy, well made toys.
Make sure that infant toys like rattles and tethers are large enough that they won’t get stuck in an infant’s throat.
Avoid toys with long or highly stretchable cords.
Avoid loud toys. A toy that is loud for an adult is likely too loud for a child.
Check that the toy doesn’t have sharp points or edges.
Choose ride-on toys that suit the child’s age, size and abilities. Check that the toy will not tip when the child is using it, and that it is stable when weight is placed on any riding point.
Examine home-made toys for all of the same hazards listed above
After buying toys
Always supervise your children when they are playing and teach them how to use toys safely.
Promptly remove and discard all toy packaging.
Read and follow all safety and assembly instructions.
Use ride-on toys far away from stairs, traffic, swimming pools and other dangerous areas. Remove hazards such as furniture, lamps, cords or appliances before play begins.
Teach older children to keep their toys and games out of reach of younger children.
Store toys for older children separately from those of younger children.
51

Check toys often for hazards like loose parts, broken pieces or sharp edges. Repair or discard any weak or broken toys.
Use a toy box without a lid, or one with a lightweight lid that will not fall on a child. Make sure the box has large air holes for breathing, in case a child climbs inside.
General safety
Only adults should install batteries in toys. Improper installation, or mixing different battery types, can cause batteries to leak or overheat and could injure a child. Check that young children cannot open a toy’s battery compartment. Do not let a child sleep with a battery-operated toy.
Always keep un-inflated latex balloons or broken balloon pieces out of reach of children. Latex balloons are best used for decoration, never play.
52

Shopping Safety/Home Security
The holidays, a time for cheer, hope and joy, are here, but unfortunately, it can be a time when crime becomes more prevalent. Crooks love the holidays as much as anyone else, but chiefly it is an opportunity for crime.
These holiday safety tips are offered to help make you holiday season a safe and happy one. Please take some time to read them and share them with you family and friends.
If you are shopping
Stay alert and be aware of your surroundings.
Deter pickpockets and purse-snatchers. Do not overburden yourself with packages. Dress comfortable and casually. Be extra careful with purses and wallets. Carry a purse close to your body, not dangling by the straps. Put a wallet in an inside coat or front pant pocket.
Never leave your purse in a shopping cart or on a counter while you pay for your purchase. When using public restrooms, use extreme
caution or try to avoid putting your purse on hooks or door handles.
Park in a well-lighted space. Be sure to lock the car, close the windows plus hide shopping bags and gifts in the trunk.
Never carry large amounts of money. Whenever possible, use credit cards or checks instead of cash. Make sure that only one credit slip is printed with your charge card and be sure to tear up any carbons.
When returning to your auto or home, have your keys in your hand and ready to open the door.
Before entering your vehicle, carefully check the front and rear seats and floors for anyone that may be hiding there. Lock your doors immediately after entering the vehicle.
Try to shop with friends or relatives. There is safety in numbers.
Shopping with kid? Teach them to go to a store clerk or security guard if you get separated.
If you are shopping with children
When in a public facility always supervise your children, and ALWAYS accompany young children to the restroom. Make certain your children know to stay with you at all times while shopping and always CHECK FIRST with you or the person in charge before they go anywhere. It is important to know where your children are and whom they are with at all times.
53

If older children become separated from you while holiday shopping, have them meet you in a pre-designated spot such as the sales counter of the store you were in or the mall’s information booth. For younger children teach them to look for people who can be sources of help within the store or mall such as a uniformed security officer, salesperson with a nametag, the person in the information booth, or a uniformed law enforcement officer. They should NEVER leave the store/mall or go to the parking lot to look for you or your car.
Make trips to the mall opportunities for children to practice these “safe shopping” skills. Teach them how to use a public telephone; locate adult sources of help within the mall or store; and for older children, go to the restroom with a friend. Practice having them CHECK FIRST with you before going anywhere within a mall or store. Leave clothing with you children’s name displayed at home, as it can bring about unwelcome attention from inappropriate people who may be looking for an opportunity to start a conversation with your children.
Parents should not leave children alone at public facilities such as video arcades, movies theaters, or playgrounds as a convenient “babysitter” while they are holiday shopping. Never leave children in toy or specialty stores expecting store personnel to supervise and care for your children. They are not trained in this role, and it is not a function of their employment.
If you allow your older children to go to the mall or other activities without you, they need to take a friend. It is more fun and much safer. Older children should check in with you on a regular basis while they are out. Make certain a clear plan is in place to pick them up including where, what time and what to do in case of a change in plans.
Nothing takes the place of your supervision when you are in a public place with you children. If you are going holiday shopping and feel that you will be distracted, make other arrangements for the care of children. It is easy for you and your children to get distracted with sights, sounds and crowds of holiday shopping, so make certain they stay with you at all times.
Secure your car
Cars can be an easy target for criminals. Park your car as close to your destination as possible and in a well-lighted area.
When you do your shopping, remember to store your packages in the trunk of the car and not on the back seat. Also, if you take packages to the car but plan to return to the store or mall, drive your car to a new location within the parking lot.
Criminals can be on the lookout for unsuspecting shoppers who simply drop their purchases into the trunk and then return to keep shopping.
54

If a stranger comes to your door – beware
Criminals sometimes pose as couriers delivering gifts. And it is not uncommon for people to try to take advantage of other’s generosity during the holidays by going door-to-door for charitable donations when there is no charity involved. Ask for identification, and find out how the funds will be used. If you are not satisfied, do not give. Help a charitable organization you know and like instead.
If you are out for the evening
Turn on lights and a radio or TV so it looks like someone is home.
Be extra cautious about locking doors and windows when you leave, even if it is just for a few minutes.
Do not display gifts where they can be seen from the outside.
If you are traveling
Get an automatic timer for your lights.
Ask a neighbor to watch your home, shovel snow and park in the driveway from time to time.
Do not forget to have mail and newspaper delivery stopped. If it piles up, it is a sure sign that you are gone.
Take a holiday inventory
The holidays are a good time to update or create your home inventory. Take photos or make videos of items and list descriptions along with serial numbers. If your home is burglarized, having a detailed inventory can identify stolen items and make insurance claims easier to file.
55

References:
AR 385-10 (Army Safety Program)AR 385-40 (Accident Investigation and Reporting)AR 40-5 (Preventive Medicine)DA Pam 385-5 (Fundamentals of Safety in Army Sports and Recreation)FM 21-20 (Physical Fitness Training)TB MED 507FM 10-67-1 Concepts and Equipment of Petroleum OperationsHeadquarters, United States Army, Europe and Seventh Army Winter Safety CampaignCAM Regulation 40-4 (Prevention, Recognition, and Treatment of Heat and Cold Injuries)http://www.hc-sc.gc.ca/english/feature/magazine/2000_12/alcohol.htmhttp://www.inspection.gc.ca/english/corpaffr/foodfacts/holidaye.shhtmlhttp://www.inspection.gc.ca/english/corpaffr/foodfacts/leftove.shtmlhttp://www.hc-sc.gc.ca/english/iyh/food/turkey.htmlhttp://www.erh.noaa.gov/bgm/news/jan04.htmhttp://www.web-street.com/thingsarelookinup/Health/CarbonMonoxidePoisoning.shtmlhttp://www.snowman.mb.ca/safety.htmhttp://www.town.scituate.ma.us/police/december.htmlhttp://www.smithfieldfire.com/fire/heating/htmhttp://www.fema.gov/hazards/winterstorms/winterweatherf.shtmhttp://www.uaex.edu/Other_Areas/publications/HTML/FSA-1009.asp
56